


PERCEUSE/VISSEUSE À PERCUSSION 2 VITESSES
SANS FIL PSBSA 20-Li A1
PERCEUSE/VISSEUSE À
PERCUSSION 2 VITESSES SANS FIL
Traduction des instructions d’origine
2 SPEED CORDLESS IMPACT DRILL
Translation of the original instructions
IAN 281992
2-GANG-AKKU-SCHLAGBOHRSCHRAUBER
Originalbetriebsanleitung

Avant de lire le mode d'emploi, ouvrez la page contenant les illustrations et familiarisez-vous ensuite avec
toutes les fonctions de l'appareil.
Klappen Sie vor dem Lesen die Seite mit den Abbildungen aus und machen Sie sich anschließend mit allen
Funktionen des Gerätes vertraut.
Before reading, unfold the page containing the illustrations and familiarise yourself with all functions of
the device.
FR / BE Traduction des instructions d’origine Page 1
DE / AT / CH Originalbetriebsanleitung Seite 13
GB Translation of the original instructions Page 25

A

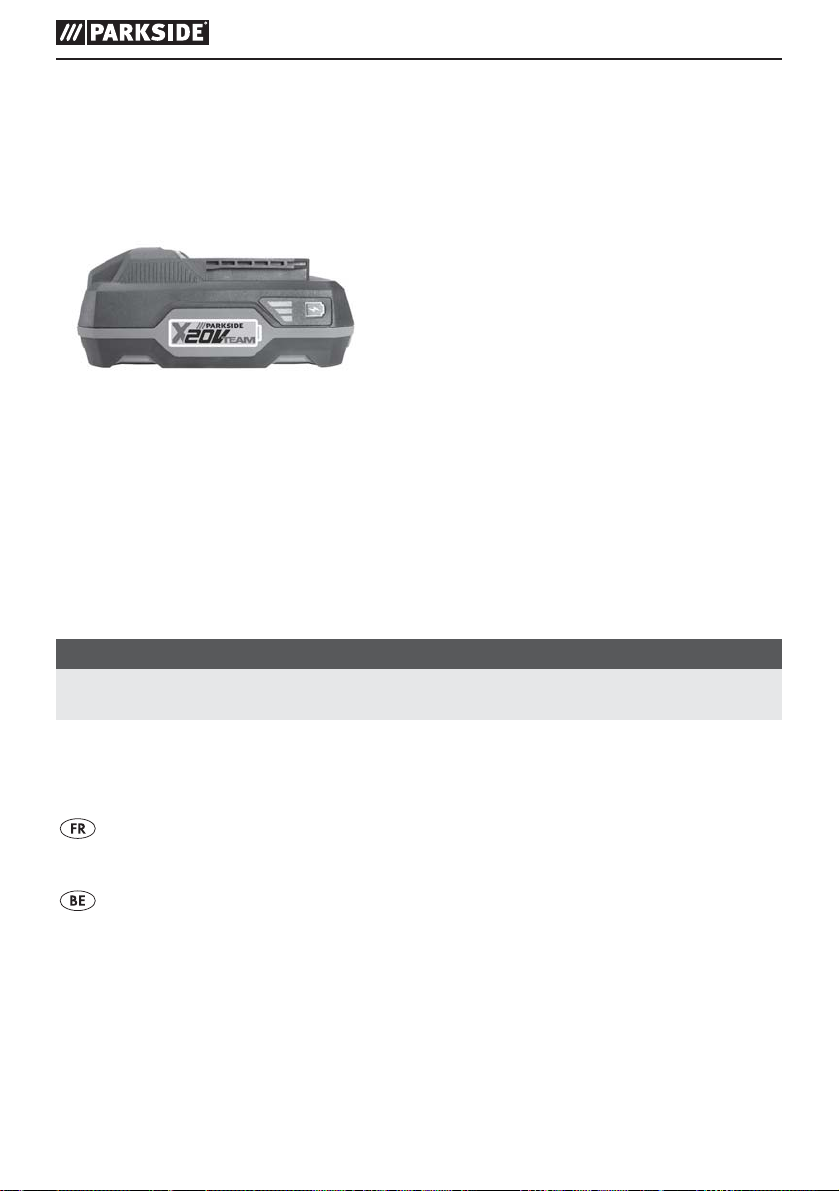
BATTERIE COMPATIBLE AVEC TOUS LES APPAREILS DE LA SÉRIE « PARKSIDE X 20 V TEAM »
· PERCEUSE/VISSEUSE À PERCUSSION 2 VITESSES SANS FIL PSBSA 20-Li A1
· MARTEAU PERFORATEUR SANS FIL PABH 20-Li B2
· PERCEUSE-VISSEUSE SANS FIL PABS 20-Li C3
· VISSEUSE À CHOCS SANS FIL PDSSA 20-Li A1
· SCIE CIRCULAIRE SANS FIL PHKSA 20-Li A1
· SCIE SAUTEUSE PENDULAIRE SANS FIL PSTDA 20-Li A1
· SCIE SABRE SANS FIL PSSA 20-Li A1
· MEULEUSE D’ANGLE SANS FIL PWSA 20-Li A1
· OUTIL MULTIFONCTIONS SANS FIL PAMFW 20-Li A1
20V max.
18V

Table des matières
Introduction ......................................................2
Utilisation conforme à l'usage prévu ............................................. 2
Équipement ................................................................. 2
Matériel livré ............................................................... 2
Caractéristiques techniques .................................................... 2
Avertissements de sécurité généraux pour l'outil .......................3
1. Sécurité de la zone de travail ................................................ 3
2. Sécurité électrique ......................................................... 4
3. Sécurité des personnes ..................................................... 4
4. Utilisation et entretien de l'outil ............................................... 5
5. Utilisation et manipulation d'un outil à accu. . . . . . . . . . . . . . . . . . . . . . . . . . . . . . . . . . . . . . 5
6. Service après-vente ........................................................ 5
Consignes de sécurité spécifiques pour perceuses à percussion ........................ 6
Consignes de sécurité relatives aux chargeurs ...................................... 6
Avant la mise en service ...........................................6
Recharger le pack d'accus (voir fig. A) ........................................... 6
Mettre le pack d'accus dans l'appareil / l'en retirer .................................. 7
Contrôler l'état de l'accu. . . . . . . . . . . . . . . . . . . . . . . . . . . . . . . . . . . . . . . . . . . . . . . . . . . . . . . 7
Monter la poignée supplémentaire .............................................. 7
Changer les outils ............................................................ 7
Sélection du couple / Choisir le mode de fonctionnement ............................ 7
Transmission à 2 vitesses ...................................................... 7
Mise en service ...................................................8
Mise en marche / mise hors service .............................................. 8
Réglage de la vitesse de rotation ................................................ 8
Inverser le sens de rotation ..................................................... 8
Conseils et astuces ........................................................... 8
Entretien et nettoyage .............................................9
Garantie de Kompernass Handels GmbH .............................9
Service après-vente ..............................................10
Importateur ................................................................ 10
Mise au rebut ...................................................11
Traduction de la déclaration de conformité originale ...................11
Commande d'accu de rechange ....................................12
Commande en ligne ......................................................... 12
Commande téléphonique .....................................................12
PSBSA 20-Li A1
FR│BE│ 1 ■

PERCEUSE/VISSEUSE À
PERCUSSION 2 VITESSES SANS
FIL PSBSA 20-Li A1
Introduction
Nous vous félicitons pour l'achat de votre nouvel
appareil. Vous venez ainsi d'opter pour un produit
de grande qualité. Le mode d'emploi fait partie de
ce produit. Il contient des remarques importantes
concernant la sécurité, l'usage et la mise au rebut.
Avant d'utiliser le produit, veuillez vous familiariser
avec toutes les consignes d'utilisation et de sécurité.
N'utilisez le produit que conformément aux consignes et pour les domaines d'utilisation prévus.
Si vous cédez le produit à un tiers, remettez-lui
également tous les documents.
Utilisation conforme à l'usage prévu
Cet appareil est destiné au vissage et dévissage
de vis ainsi qu'au perçage dans le bois, le métal,
la céramique et le plastique, ainsi qu'au perçage
à percussion dans la brique et la maçonnerie. Cet
appareil ne convient pas au perçage à percussion
dans de la pierre naturelle, comme le granite par
exemple. La lumière de cet appareil sert à éclairer
la zone de travail immédiate de l'appareil.
N'utilisez l'appareil que conformément aux consignes
et pour les domaines d'utilisation prévus. L'appareil n'est pas conçu pour un usage professionnel.
Toute utilisation autre ou modification de l'appareil
est considérée comme non conforme et s'accompagne de risques d'accident non négligeables. Le
fabricant n'assume aucune responsabilité pour les
dommages résultant d'une utilisation non conforme
à l'usage prévu.
Équipement
Sélecteur de vitesse
Sélecteur du sens de rotation / blocage
Interrupteur MARCHE / ARRÊT / réglage de
la vitesse
Support d'embout (magnétique)
Touche d'état accu
LED d'affichage d'état de l'accu
Pack d'accus*
Touche de déverrouillage du pack d'accus
Lampe de travail LED
Poignée supplémentaire
Mandrin porte-foret
Sélection du couple
Chargeur rapide*
LED rouge de contrôle de charge
LED verte de contrôle de charge
Matériel livré
1 PERCEUSE/VISSEUSE À PERCUSSION 2
VITESSES SANS FIL PSBSA 20-Li A1
1 poignée supplémentaire
1 mode d'emploi
Caractéristiques techniques
PERCEUSE/VISSEUSE À PERCUSSION 2
VITESSES SANS FIL: PSBSA 20-Li A1
Tension nominale : 20 V (courant
continu)
Transmission : transmission à 2 vitesses
Vitesse nominale à vide : 1ère vitesse :
n0 0 - 400 min
2e vitesse :
n0 0 - 1650 min
Fréquence de percussion: 0 - 26400 min
Couple max.: 40 Nm
Étages de couple : 1 - 20 + 1 étage de
perçage / + 1 étage
de percussion
Capacité du mandrin de serrage:
: Ø max. 13 mm
Diamètre de perçage
max.30 mm pour le bois
max. 15 mm pour la brique
max. 13 mm pour l'acier
Pour utiliser l'outil sans fil, utilisez uniquement
l'accu suivant : PAP 20 A1*
Type: LITHIUM-IONS
Tension nominale : 20 V (courant continu)
Capacité: 2 Ah
Cellules: 5
Pour charger l'outil sans fil, utilisez uniquement le chargeur rapide pour accu suivant :
PLG 20 A1*
ENTRÉE / Input:
Tension nominale: 230 - 240 V ~, 50 Hz
(courant alternatif)
Puissance nominale
absorbée : 65 W
Fusible (interne): 3,15 A
T3.15A
-1
-1
-1
■ 2 │ FR│BE
PSBSA 20-Li A1

SORTIE / Output:
Tension nominale : 21,5 V
(courant
continu)
Courant nominal: 2,4 A
Temps de charge: env. 60 min
Classe de protection: II/
(double isolation)
* BATTERIE ET CHARGEUR NE SONT PAS INCLUS
DANS FOURNI
Valeurs d'émissions sonores:
Valeur de mesure du bruit déterminée conformément à la norme EN60745. Le niveau de bruit A
pondéré typique de l'outil électrique est de:
Niveau de pression acoustique: L
Imprécision K: K
Niveau de puissance acoustique: L
Imprécision K: K
= 86,7 dB (A)
PA
= 3 dB
PA
= 97,7 dB (A)
WA
= 3 dB
WA
Valeur d'émission des vibrations:
Valeurs totales des vibrations (somme vectorielle
triaxiale) déterminées selon la norme EN60745:
Perçage à percussion dans le béton:
a
9,875 m/s
H,ID
2
Perçage dans le métal:
a
3,475 m/s
h,D
Imprécision K = 1,5 m/s
2
2
Vissage:
<2,5 m/s
Imprécision K = 1,5 m/s
2
2
Portez une protection auditive!
REMARQUE
► Le niveau de vibrations indiqué dans les
présentes instructions a été mesuré conformément à une méthode de mesure normée et
peut être utilisé pour comparer des appareils.
La valeur d'émission des vibrations déclarée
peut également être utilisée pour une évaluation préliminaire de l'exposition.
AVERTISSEMENT!
► Le niveau des vibrations varie en fonction
de l'usage de l'outil électrique et peut, dans
certains cas, excéder la valeur indiquée dans
ces instructions. La sollicitation vibratoire
pourrait être sous-estimée si l'outil électrique
est utilisé régulièrement de cette manière.
Essayez de garder la sollicitation par vibrations aussi faible que possible. Des mesures
d‘exemple de réduction de la sollicitation
des vibrations sont le port de gants lors de
l‘utilisation de l‘outil et la limitation du temps
de travail. Pour cela, toutes les parts du cycle
de travail doivent être prises en compte (par
exemple les durées pendant lesquelles l'outil
est éteint et celles pendant lesquelles il est
allumé mais fonctionne sans charge).
Avertissements de
sécurité généraux
pour l'outil
AVERTISSEMENT!
► Lire tous les avertissements de sécurité et toutes
les instructions. Ne pas suivre les avertissements et instructions peut donner lieu à un
choc électrique, un incendie et/ou une blessure sérieuse.
Conserver tous les avertissements et toutes
les instructions pour pouvoir s'y reporter
ultérieurement.
Le terme "outil" dans les consignes de sécurité fait
référence à votre outil électrique alimenté par le
secteur (avec cordon d'alimentation) ou à votre outil
fonctionnant sur batterie (sans cordon d'alimentation).
1. Sécurité de la zone de travail
a) Conserver la zone de travail propre et bien
éclairée. Les zones en désordre ou sombres
sont propices aux accidents.
PSBSA 20-Li A1
FR│BE│ 3 ■

b) Ne pas faire fonctionner les outils électriques
en atmosphère explosive, par exemple en
présence de liquides inflammables, de gaz ou
de poussières. Les outils électriques produisent
des étincelles qui peuvent enflammer les poussières ou les fumées.
c) Maintenir les enfants et les personnes pré-
sentes à l'écart pendant l'utilisation de l'outil.
Les distractions peuvent vous faire perdre le
contrôle de l'outil.
2. Sécurité électrique
a) La fiche de l'outil doit être adaptée à la prise
secteur. Ne jamais modifier la fiche de quelque
façon que ce soit.
Ne pas utiliser d'adaptateurs avec des outils
à branchement de terre.Des fiches non modi-
fiées et des socles adaptés réduiront le risque
de choc électrique.
b) Eviter tout contact du corps avec des surfaces
reliées à la terre telles que les tuyaux, les
radiateurs, les cuisinières et les réfrigérateurs.
Il existe un risque accru de choc électrique si
votre corps est relié à la terre.
c) Ne pas exposer les outils à la pluie ou à des
conditions humides. La pénétration d'eau à
l'intérieur d'un outil augmentera le risque de
choc électrique.
d) Ne pas maltraiter le cordon. Ne jamais utiliser
le cordon pour porter, tirer ou débrancher
l'outil. Maintenir le cordon à l'écart de la chaleur, du lubrifiant, des arêtes ou des parties
en mouvement. Des cordons endommagés ou
emmêlés augmentent le risque de choc électrique.
e) En cas d'utilisation d'un outil électrique à
l'extérieur, utiliser une rallonge adaptée à
l'utilisation extérieure. L'utilisation d'un cordon
adapté à l'utilisation extérieure réduit le risque
de choc électrique.
f) Si l'usage d'un outil dans un emplacement
humide est inévitable, utiliser une alimentation
protégée par un dispositif à courant différentiel résiduel (RCD). L'usage d'un RCD réduit le
risque de choc électrique.
3. Sécurité des personnes
a) Rester vigilant, regarder ce que vous êtes en
train de faire et faire preuve de bon sens
dans votre utilisation de l'outil. Ne pas utiliser
un outil lorsque vous êtes fatigué ou sous
l'emprise de drogues, d'alcool ou de médicaments. Un moment d'inattention en cours d'uti-
lisation d'un outil peut entraîner des blessures
graves des personnes.
b) Utiliser un équipement de sécurité. Toujours
porter une protection pour les yeux. Les
équipements de sécurité tels que les masques
contre les poussières, les chaussures de sécurité
antidérapantes, les casques ou les protections
acoustiques utilisés pour les conditions appropriées réduiront les blessures de personnes.
c) Eviter tout démarrage intempestif. S'assurer
que l'interrupteur est en position arrêt avant
de brancher l'outil au secteur et/ou au bloc
de batteries, de le ramasser ou de le porter.
Porter les outils en ayant le doigt sur l'interrupteur ou brancher des outils dont l'interrupteur
est en position marche est source d'accidents.
d) Retirer toute clé de réglage avant de mettre
l'outil en marche. Une clé laissée fixée sur une
partie tournante de l'outil peut donner lieu à
des blessures de personnes.
e) Ne pas se précipiter. Garder une position
et un équilibre adaptés à tout moment. Cela
permet un meilleur contrôle de l'outil dans des
situations inattendues.
f) S'habiller de manière adaptée. Ne pas porter
de vêtements amples ou de bijoux. Garder les
cheveux, les vêtements et les gants à distance
des parties en mouvement. Des vêtements
amples, des bijoux ou les cheveux longs peuvent
être pris dans des parties en mouvement.
g) Si des dispositifs sont fournis pour le raccor-
dement d'équipements pour l'extraction et la
récupération des poussières, s'assurer qu'ils
sont connectés et correctement utilisés. Utiliser
des collecteurs de poussière peut réduire les
risques dus aux poussières.
■ 4 │ FR│BE
PSBSA 20-Li A1

4. Utilisation et entretien de l'outil
a) Ne pas forcer l'outil. Utiliser l'outil adapté
à votre application. L'outil adapté réalisera
mieux le travail et de manière plus sûre au
régime pour lequel il a été construit.
b) Ne pas utiliser l'outil si l'interrupteur ne permet
pas de passer de l'état de marche à arrêt et
vice versa. Tout outil qui ne peut pas être com-
mandé par l'interrupteur est dangereux et il faut
le réparer.
c) Débrancher la fiche de la source d'alimen-
tation en courant et/ou le bloc de batteries
de l'outil avant tout réglage, changement
d'accessoires ou avant de ranger l'outil. De
telles mesures de sécurité préventives réduisent
le risque de démarrage accidentel de l'outil.
d) Conserver les outils à l'arrêt hors de la portée
des enfants et ne pas permettre à des personnes ne connaissant pas l'outil ou les présentes instructions de le faire fonctionner. Les
outils sont dangereux entre les mains d'utilisateurs novices.
e) Observer la maintenance de l'outil. Vérifier
qu'il n'y a pas de mauvais alignement ou de
blocage des parties mobiles, des pièces cassées ou toute autre condition pouvant affecter
le fonctionnement de l'outil. En cas de dommages, faire réparer l'outil avant de l'utiliser.
De nombreux accidents sont dus à des outils
mal entretenus.
f) Garder affûtés et propres les outils permet-
tant de couper. Des outils destinés à couper
correctement entretenus, avec des pièces coupantes tranchantes, sont moins susceptibles de
bloquer et sont plus faciles à contrôler.
g) Utiliser l'outil, les accessoires et les lames etc.,
conformément à ces instructions. En tenant
compte des conditions de travail et du travail
à réaliser. L'utilisation de l'outil pour des opé-
rations différentes de celles prévues pourrait
donner lieu à des situations dangereuses.
5. Utilisation et manipulation d'un
outil à accu
a) Uniquement recharger les accus dans les
chargeurs recommandés par le fabricant.
Un chargeur compatible pour certains types
d'accus peut provoquer un incendie s'il est utilisé avec d'autres accus.
b) N'utiliser les outils qu'avec des blocs de bat-
teries spécifiquement désignés. L'utilisation de
tout autre bloc de batteries peut créer un risque
de blessure et de feu.
c) Tenir les accus inutilisés à l'abri des agrafes,
pièces de monnaie, clés, clous, vis et autres
objets en métal susceptibles de court-circuiter
les contacts. Un court-circuit entre les contacts
des accus peut provoquer des brûlures ou un
incendie.
d) L'accu peut couler en cas d'usage incorrect.
Éviter tout contact avec ce liquide. Laver à
l'eau en cas de contact involontaire. En cas
de contact du liquide avec les yeux, il faut
en plus consulter un médecin. Le liquide qui
s'écoule des accus peut causer des irritations de
la peau ou des brûlures.
ATTENTION! RISQUE D'EXPLOSION!
Ne rechargez jamais des piles non
rechargeables.
Protégez l'accu de la chaleur, par ex.
aussi du rayonnement solaire continu,
du feu, de l'eau et de l'humidité.
Il y a risque d'explosion.
6. Service après-vente
a) Faire entretenir l'outil par un réparateur
qualifié utilisant uniquement des pièces de
rechange identiques. Cela assurera que la
sécurité de l'outil est maintenue.
PSBSA 20-Li A1
FR│BE│ 5 ■

Consignes de sécurité spécifiques
pour perceuses à percussion
■ Pendant le perçage avec percussion, portez
une protection auditive. L'exposition au bruit
peut provoquer une perte d'acuité auditive.
■ Utilisez la poignée supplémentaire fournie
avec l'appareil. La perte de contrôle de la
machine peut entraîner des blessures..
■ Tenez l'outil par les surfaces de préhension
isolées, lors de la réalisation d'une opération
au cours de laquelle la vis ou l'outil d'intervention peut entrer en contact avec des lignes
électriques invisibles. Le contact de la vis ou
de l'outil d'intervention avec une ligne "sous
tension" peut également mettre "sous tension"
les parties métalliques exposées de l'outil
électrique et provoquer un choc électrique sur
l'opérateur.
Consignes de sécurité relatives aux
chargeurs
■ Cet appareil peut être utilisé par
des enfants à partir de 8 ans et par
des personnes ayant des capacités
physiques, sensorielles ou mentales
réduites ou disposant de peu d'expérience et/ou de connaissances, à
condition qu'ils soient surveillés ou
qu'ils aient été initiés à l'utilisation
sécurisée de l'appareil et qu'ils aient
compris les dangers en résultant.
Les enfants ne doivent pas jouer
avec l'appareil. Le nettoyage et la
maintenance utilisateur ne doivent
pas être réalisés par des enfants
s'ils ne sont pas surveillés.
■ Si le cordon d'alimentation de
l'appareil est endommagé, il doit
être remplacé par le fabricant, son
service après-vente ou une per-
sonne de qualification similaire afin
d'éviter tout risque.
Le chargeur convient uniquement à une
exploitation en intérieur.
AVERTISSEMENT!
■ Si le cordon d'alimentation de l'appareil est
endommagé, il doit être remplacé par le
fabricant, son service après-vente ou une personne de qualification similaire afin d'éviter
tout risque.
Avant la mise en service
Recharger le pack d'accus (voir fig. A)
ATTENTION!
► Débranchez toujours la fiche secteur avant
de retirer le pack d'accus du chargeur ou de
le mettre en place.
■ Ne chargez jamais le pack d'accus lorsque la
température environnante est inférieure à 10°C
ou supérieure à 40°C.
♦ Placez le pack d'accus
rapide (voir fig. A).
♦ Insérez la fiche secteur dans la prise secteur.
La LED de contrôle
♦ La LED verte de contrôle
l'opération de charge est terminée et que le
pack d'accus est prêt à être utilisé.
ATTENTION!
♦ Si la LED de contrôle rouge
clignoter, cela signifie que le pack d'accus
surchauffe et qu'il ne peut pas être rechargé.
♦ Si les LED de contrôle rouge et verte
clignotent ensemble, cela signifie que le pack
d'accus est défectueux.
♦ Introduisez le pack d'accus
■ Ne chargez jamais un pack d'accus une
seconde fois immédiatement après un processus
de chargement rapide. Il y a un risque que le
pack d'accus soit surchargé et que la durée de
vie de l'accu et du chargeur s'en voit raccourcie.
dans le chargeur
s'allume en rouge.
vous signale que
se met à
dans l'appareil.
■ 6 │ FR│BE
PSBSA 20-Li A1

♦ Éteignez le chargeur pendant au moins
15 minutes entre deux opérations de charge
consécutives. Débranchez pour cela la fiche
secteur.
Mettre le pack d'accus dans l'appareil / l'en retirer
Mettre en place le pack d'accus:
♦ Placez l'inverseur de sens de rotation
position centrale (verrouillage). Faites s'enclencher le pack d'accus dans la poignée.
Retirer le pack d'accus:
♦ appuyez sur la touche de déverrouillage et
retirez le bloc accu.
en
Contrôler l'état de l'accu
♦ Pour vérifier l'état de l'accu, appuyez sur la
touche d'état de l'accu (voir aussi la figure
principale).
L'état et la puissance restante s'affichent comme
suit dans la LED d'affichage de l'accu
ROUGE / ORANGE / VERT = charge maximale
ROUGE / ORANGE = charge moyenne
ROUGE = charge faible – charger l'accu
:
Monter la poignée supplémentaire
♦ Vissez la poignée supplémentaire indépen-
damment de votre mode de travail à droite ou
à gauche de l'appareil.
Changer les outils
Votre perceuse à percussion sans fil est équipée
d'un blocage de la broche entièrement automatique .
Lorsque le moteur est immobile, la transmission
est verrouillée pour vous permettre d'ouvrir le
mandrin porte-foret en tournant. Une fois que
vous avez inséré l'outil désiré et avez resserré en
tournant le mandrin porte-foret , vous pouvez
immédiatement poursuivre votre travail. Le blocage
de la broche se libère automatiquement au démarrage du moteur (actionnement de l'interrupteur
MARCHE / ARRÊT ).
Sélection du couple / Choisir le mode
de fonctionnement
La sélection du couple vous permet de régler la
force de rotation et de choisir entre l'étage de per-
et l'étage de perçage à percussion .
çage
♦ Choisissez une puissance plus basse pour les
petites vis ou pour les matériaux mous.
♦ Choisissez une puissance plus élevée pour les
grandes vis, les matériaux durs ou pour dévisser
des vis.
♦ Pour les travaux de perçage, sélectionnez la
puissance de perçage en réglant la sélection
de couple sur la position
♦ Pour les travaux de perçage à percussion, sélec-
tionnez la puissance de perçage à percussion
en réglant la sélection de couple sur la position
.
.
Transmission à 2 vitesses
ATTENTION!
► Actionnez le sélecteur de vitesse
ment lorsque l'appareil est à l'arrêt. Sinon
l'appareil risque d'être endommagé.
En première vitesse (sélecteur de vitesse
en position: 1)
vous atteignez une vitesse de rotation d'env.
440 min-1 et un couple élevé. Ce réglage convient
à tous les travaux de vissage, mais également à
l'utilisation d'accessoires.
En seconde vitesse (sélecteur de vitesse
en position: 2)
vous atteignez une vitesse de rotation d'env.
1650 min
-1
pour réaliser des travaux de perçage.
unique-
PSBSA 20-Li A1
FR│BE│ 7 ■

Mise en service
Mise en marche / mise hors service
Mise en marche:
♦ Pour la mise en service de l'appareil, appuyez
sur l'interrupteur MARCHE/ARRÊT
nez-le enfoncé.
La lampe de travail LED
l'interrupteur MARCHE / ARRÊT est légèrement ou entièrement enfoncé. Elle permet ainsi
d'éclairer la zone de travail si la luminosité n'est
pas suffisante.
Éteindre :
♦ Pour éteindre l'appareil, relâchez l'interrupteur
MARCHE/ARRÊT
s'allume lorsque
.
et mainte-
♦ Les petites vis / bits peuvent être endommagés
si vous réglez un couple trop élevé ou une
vitesse de rotation trop haute.
Vissage à couple élevé (dans le métal):
♦ Des couples particulièrement élevés se pro-
duisent par ex. avec les raccords métalliques
nécessitant l'emploi de douilles. Choisissez dans
ce cas une vitesse de rotation basse.
Vissage à couple réduit (par ex. dans du bois
tendre):
♦ Vissez ici aussi avec une vitesse de rotation
basse pour par ex. ne pas endommager la
surface en bois lors du contact avec la tête de
vis en métal. Utilisez un foret aléseur.
Réglage de la vitesse de rotation
Une légère pression sur l'interrupteur MARCHE/
ARRÊT fait démarrer l'appareil à une vitesse de
rotation réduite. La vitesse de rotation augmente
avec la pression.
REMARQUE
► Le frein moteur intégré veille à une immobili-
sation rapide.
Inverser le sens de rotation
♦ Inversez le sens de rotation en tournant le sélec-
teur du sens de rotation vers la droite ou vers
la gauche.
Conseils et astuces
Conseil! Voici le bon comportement
recommandé.
♦ Avant le fonctionnement, contrôlez si l'embout
de vissage ou de perçage est correctement
monté, c'est-à-dire s'il est centré dans le mandrin
porte-foret.
♦ Les bits de vissage sont signalés par leurs
dimensions et leur forme. Si vous n'êtes pas sûr,
commencez toujours par vérifier si le bit est en
assise sans jeu dans la tête de vis.
Couple:
Lors du perçage dans le bois, le métal et
d'autres matériaux, il est impératif de respecter ce qui suit:
♦ Pour un petit diamètre de foret, utilisez une vitesse
de rotation élevée et pour un diamètre de foret
plus grand, une vitesse de rotation basse.
♦ Pour les matériaux durs, choisissez une vitesse
de rotation basse, pour les matériaux mous, une
vitesse de rotation élevée.
♦ Marquez l'endroit qui doit être percé avec un
pointeau ou un clou. Choisissez une vitesse de
rotation basse pour le pré-perçage.
♦ Retirez plusieurs fois le foret en rotation du trou
de perçage pour évacuer les copeaux ou la
poussière de forage et pour l'aérer.
Perçage dans le métal:
♦ Utilisez des forets à métaux (HSS). Pour de
meilleurs résultats, nous vous recommandons
de refroidir le foret à l'huile.
Vous pouvez également utiliser des forets à
métaux pour percer le plastique. Percez d'abord
avec un foret d'un Ø de 3 mm, et rapprochezvous ensuite du diamètre de perçage souhaité.
Percer dans de la brique:
♦ Utilisez un foret à pierre à plaquette(s) en métal
dur
(Diamètre de perçage max. recommandé:
Ø 15 mm)
■ 8 │ FR│BE
PSBSA 20-Li A1

Perçage dans le bois:
♦ Utilisez un foret à bois avec pointe de cen-
trage; pour les perçages profonds, utilisez
une mèche à simple spirale, pour les grands
diamètres de perçage, un foret Forstner. Vous
pouvez aussi visser directement les petites vis
dans le bois mou sans pré-perçage.
Entretien et nettoyage
AVERTISSEMENT! RISQUE DE BLES-
SURES! Avant de travailler sur l'appareil, éteignez-le et retirez l'accu.
La visseuse à percussion sans fil ne nécessite aucun
entretien.
■ L'appareil doit toujours être propre, sec et
exempt d'huile ou de graisse.
■ Aucun liquide ne doit pénétrer à l'intérieur de
l'appareil.
■ Pour le nettoyage du boîtier, utilisez un chiffon
sec. N'utilisez jamais d'essence, de solvant ou
de nettoyant qui attaquent le plastique.
■ Si un accu lithium-ions doit rester stocké pen-
dant une période prolongée, il faut contrôler
régulièrement son état de charge. L'état de
charge optimal se situe entre 50% et 80%. Le
climat de stockage idéal est frais et sec.
REMARQUE
► Vous pouvez commander des pièces
détachées non listées (comme les balais de
charbon, les interrupteurs par ex.) auprès de
notre hotline du service après-vente.
Garantie de
Kompernass Handels GmbH
Chère cliente, cher client,
Cet appareil est garanti 3 ans à partir de la date
d’achat. Si ce produit venait à présenter des vices,
vous disposez de droits légaux face au vendeur de
ce produit. Vos droits légaux ne sont pas restreints
par notre garantie présentée ci-dessous.
Conditions de garantie
La période de garantie débute à la date de l’achat.
Veuillez bien conserver le ticket de caisse d’origine.
Ce document servira de preuve d’achat.
Si dans un délai de trois ans suivant la date d’achat
de ce produit, un vice de matériel ou de fabrication
venait à apparaître, le produit sera réparé ou
remplacé gratuitement par nos soins, selon notre
choix. Cette prestation de garantie nécessite dans
un délai de trois ans la présentation de l’appareil
défectueux et du justificatif d’achat (ticket de caisse)
ainsi que la description brève du vice et du moment
de son apparition.
Si le vice est couvert par notre garantie, vous
recevrez le produit réparé ou un nouveau produit
en retour. Aucune nouvelle période de garantie ne
débute avec la réparation ou l’échange du produit.
Période de garantie et réclamation légale
pour vices cachés
L’exercice de la garantie ne prolonge pas la
période de garantie. Cette disposition s’applique
également aux pièces remplacées ou réparées. Les
dommages et vices éventuellement déjà présents à
l’achat doivent être signalés immédiatement après
le déballage. Toute réparation survenant après la
période sous garantie fera l’objet d’une facturation.
PSBSA 20-Li A1
FR│BE│ 9 ■

Étendue de la garantie
L’appareil a été fabriqué avec soin conformément
à des directives de qualité strictes et consciencieusement contrôlé avant sa livraison.
La prestation de garantie est valable pour des
vices de matériel et de fabrication. Cette garantie
ne s’étend pas aux pièces du produit qui sont
exposées à une usure normale et peuvent de ce
fait être considérées comme pièces d’usure, ni aux
détériorations de pièces fragiles, par ex. connecteur,
accu, moules ou pièces en verre.
Cette garantie devient caduque si le produit est
détérioré, utilisé ou entretenu de manière non
conforme. Toutes les instructions listées dans le
manuel d’utilisation doivent être exactement respectées pour une utilisation conforme du produit. Des
buts d’utilisation et actions qui sont déconseillés
dans le manuel d’utilisation, ou dont vous êtes
avertis doivent également être évités.
Le produit est uniquement destiné à un usage privé
et ne convient pas à un usage professionnel.
La garantie est annulée en cas d’entretien incorrect
et inapproprié, d’usage de la force et en cas
d’intervention non réalisée par notre centre de
service après-vente agréé.
Procédure en cas de garantie
Afin de garantir un traitement rapide de votre
demande, veuillez suivre les indications suivantes :
■ Veuillez avoir à portée de main pour toutes
questions le ticket de caisse et la référence article
(par ex. IAN 12345) en tant que justificatif de
votre achat.
■ Vous trouverez la référence sur la plaque
signalétique, une gravure, sur la page de garde
de votre manuel d’utilisation (en bas à gauche)
ou sous forme d’autocollant au dos ou sur le
dessous.
■ Si des erreurs de fonctionnement ou d’autres
vices venaient à apparaître, veuillez d’abord
contacter le département service clientèle cité
ci-dessous par téléphone ou par e-mail.
■ Vous pouvez ensuite retourner un produit enre-
gistré comme étant défectueux en joignant le
ticket de caisse et en indiquant en quoi consiste
le vice et quand il est survenu, sans devoir
l’affranchir à l’adresse de service après-vente
communiquée.
Sur www.lidl-service.com, vous pouvez
télécharger ce manuel ainsi que beaucoup
d’autres, des vidéos produit et logiciels.
Service après-vente
AVERTISSEMENT!
► Faites réparer vos appareils par le service
après-vente ou un électricien et uniquement
avec des pièces de rechange d'origine.
Cela assure le maintien de la sécurité de
l'appareil.
► Confiez toujours le remplacement de la
fiche ou du cordon d'alimentation au
fabricant de l'appareil ou à son service
après-vente. Cela assure le maintien de la
sécurité de l'appareil.
Service France
Tel.: 0800 919270
E-Mail: kompernass@lidl.fr
Service Belgique
Tel.: 070 270 171 (0,15 EUR/Min.)
E-Mail: kompernass@lidl.be
IAN 281992
Importateur
Veuillez tenir compte du fait que l’adresse suivante
n’est pas une adresse de service après-vente.
Veuillez d’abord contacter le service après-vente
mentionné.
KOMPERNASS HANDELS GMBH
BURGSTRASSE 21
44867 BOCHUM
GERMANY
www.kompernass.com
■ 10 │ FR│BE
PSBSA 20-Li A1

Mise au rebut
L'emballage est constitué de matériaux
écologiques que vous pouvez recycler
par le biais des postes de recyclage
locaux.
Le produit récyclable doit être trié ou
rapporté dans un point de collecte pour
être recycle.
Ne jetez pas les outils électriques
dans les ordures ménagères!
Conformément à la directive européenne
2012/19/EU, les outils électriques usagés doivent
faire l'objet d'un tri et d'un recyclage respectueux
de l'environnement.
Ne jetez pas les accus dans les
ordures ménagères!
Retirez les accus avant la mise au rebut de l'appareil.
Les accus défectueux ou usagés doivent être recyclés
conformément à la directive 2006/66/EC.
Déposez le pack d'accus et / ou l'appareil auprès
des points de collecte existants.
Informez-vous auprès des services administratifs
communaux ou municipaux quant aux possibilités
de mise au rebut des outils électriques / packs
d'accus.
Traduction de la déclaration de
conformité originale
Nous soussignés, KOMPERNASS HANDELS GMBH,
responsable du document: M. Semi Uguzlu,
BURGSTR. 21, 44867 BOCHUM, ALLEMAGNE,
déclarons par la présente que ce produit est en
conformité avec les normes, documents normatifs
et directives CE suivants:
Directive relative aux machines
(2006 / 42 / CE)
Directive européenne sur les basses tensions
(2014 / 35 / EU)
Compatibilité électromagnétique
(2014 / 30 / EU)
Directive RoHS
(2011 / 65 / EU)*
*La seule responsabilité pour l'établissement de cette
déclaration de conformité incombe au fabricant.
L'objet de la déclaration décrit ci-dessus répond
aux prescriptions de la directive 2011/65/EU
du Parlement européen et du Conseil en date du
8juin 2011 visant la restriction de l'utilisation de
certaines substances dangereuses dans les appareils électriques et électroniques.
Normes harmonisées appliquées:
EN 60745-1:2009/A11:2010
EN 60745-2-1:2010
EN 60745-2-2:2010
EN 55014-1:2006/A2:2011
EN 55014-2:2015
EN 60335-2-29:2004/A2:2010
EN 60335-1:2012/A11:2014
EN 62233:2008
EN 61000-3-2:2014
EN 61000-3-3:2013
Type / désignation de l'appareil:
PERCEUSE/VISSEUSE À PERCUSSION 2
VITESSES SANS FIL PSBSA 20-Li A1
Année de fabrication: 10 - 2016
Numéro de série: IAN 281992
Bochum, le 29/09/2016
PSBSA 20-Li A1
Semi Uguzlu
-Responsable qualitéSous réserve de modifications techniques à des fins
de perfectionnement.
FR│BE│ 11 ■
Commande d'accu de rechange
Si vous souhaitez commander un accu de rechange pour votre appareil, vous pouvez le faire très
aisément soit sur le site www.kompernass.com ou bien par téléphone.
Le prix de l'accu de rechange est de 20 €, TVA et transport inclus. En raison d'un stock limité, il est
possible que cet article soit épuisé en l'espace de peu de temps.
Commande en ligne
Pour commander un accu de rechange en ligne dans la boutique d'accessoires:
■ Rendez-vous sur le site www.kompernass.com dans votre navigateur Internet.
■ Cliquez en bas à droite sur le drapeau correspondant pour sélectionner le pays et la langue souhaités.
■ Cliquez maintenant sur l'onglet "Boutique accessoires" et sélectionnez ensuite sous la rubrique "Topseller"
l'accu de rechange correspondant à votre appareil.
■ Après avoir mis l'accu de rechange dans la corbeille, cliquez sur le bouton "Caisse" et suivez les
instructions affichées à l'écran pour terminer l'opération de commande.
REMARQUE
► Dans certains pays, la commande de pièces détachées ne peut pas être réalisée en ligne. Dans ce
cas, veuillez contacter la hotline du service après-vente.
■ Cette promotion est limitée à un accu par client / appareil, ainsi qu'à une durée de deux mois après la
période promotionnelle. L'accu de rechange peut ensuite être commandé à d'autres conditions.
Commande téléphonique
Service France
Tel.: 0800 919270
E-Mail: kompernass@lidl.fr
Service Belgique
Tel.: 070 270 171 (0,15 EUR/Min.)
E-Mail: kompernass@lidl.be
Pour que votre commande soit traitée plus rapidement, veuillez s.v.p. tenir prêt le numéro de référence de
l'appareil (par ex. IAN 281992) pour répondre à toute demande de renseignements. Vous trouverez le
numéro de référence sur la plaque signalétique ou sur la page de garde de ce mode d'emploi.
■ 12 │ FR│BE
PSBSA 20-Li A1

Inhaltsverzeichnis
Einleitung .......................................................14
Bestimmungsgemäßer Gebrauch ............................................... 14
Ausstattung ................................................................ 14
Lieferumfang ............................................................... 14
Technische Daten ...........................................................14
Allgemeine Sicherheitshinweise für Elektrowerkzeuge ..................15
1. Arbeitsplatz-Sicherheit ..................................................... 15
2. Elektrische Sicherheit ...................................................... 16
3. Sicherheit von Personen .................................................... 16
4. Verwendung und Behandlung des Elektrowerkzeugs ............................. 16
5. Verwendung und Behandlung des Akkuwerkzeugs ............................... 17
6. Service .................................................................17
Gerätespezifische Sicherheitshinweise für Schlagbohrer .............................. 17
Sicherheitshinweise für Ladegeräte ............................................. 18
Vor der Inbetriebnahme ..........................................18
Akku-Pack laden (siehe Abb. A) ................................................ 18
Akku-Pack ins Gerät einsetzen / entnehmen ......................................19
Akkuzustand prüfen ......................................................... 19
Zusatzhandgriff montieren ....................................................19
Werkzeuge wechseln ........................................................ 19
Drehmomentvorwahl / Betriebsart wählen .......................................19
2-Gang Getriebe ........................................................... 19
Inbetriebnahme .................................................20
Ein- / ausschalten ...........................................................20
Drehzahl einstellen .......................................................... 20
Drehrichtung umschalten ..................................................... 20
Tipps und Tricks ............................................................ 20
Wartung und Reinigung ...........................................21
Garantie der Kompernaß Handels GmbH ............................21
Service .........................................................22
Importeur .................................................................22
Entsorgung .....................................................23
Original-Konformitätserklärung ....................................23
Ersatz-Akku Bestellung ...........................................24
Online-Bestellung ...........................................................24
Telefonische Bestellung .......................................................24
PSBSA 20-Li A1
DE│AT│CH
│
13 ■

2-GANG-AKKU-SCHLAGBOHRSCHRAUBER
PSBSA 20-Li A1
Einleitung
Wir beglückwünschen Sie zum Kauf Ihres neuen
Gerätes. Sie haben sich damit für ein hochwertiges
Produkt entschieden. Die Bedienungsanleitung ist
Teil dieses Produkts. Sie enthält wichtige Hinweise für
Sicherheit, Gebrauch und Entsorgung. Machen Sie
sich vor der Benutzung des Produkts mit allen Bedienund Sicherheitshinweisen vertraut. Benutzen Sie das
Produkt nur wie beschrieben und für die angegebenen Einsatzbereiche. Händigen Sie alle Unterlagen
bei Weitergabe des Produkts an Dritte mit aus.
Bestimmungsgemäßer Gebrauch
Dieses Gerät ist bestimmt zum Eindrehen und Lösen
von Schrauben sowie zum Bohren in Holz, Metall,
Keramik und Kunststoff und zum Schlagbohren in
Ziegel, Mauerwerk. Zum Schlagbohren in Naturstein wie z.B. Granit ist das Gerät nicht geeignet.
Das Licht dieses Gerätes ist dazu bestimmt, den
direkten Arbeitsbereich des Gerätes zu beleuchten.
Benutzen Sie das Gerät nur wie beschrieben und
für die angegebenen Einsatzbereiche. Das Gerät
ist nicht für den gewerblichen Einsatz bestimmt.
Jede andere Verwendung oder Veränderung des
Gerätes gilt als nicht bestimmungsgemäß und
birgt erhebliche Unfallgefahren. Für aus bestimmungswidriger Verwendung entstandene Schäden
übernimmt der Hersteller keine Haftung.
Ausstattung
Gangwahlschalter
Drehrichtungsumschalter / Sperre
EIN- / AUS-Schalter / Drehzahlregulierung
Bit-Halterung (Magnetisch)
Taste Akkuzustand
Akku-Display-LED
Akku-Pack*
Taste zur Entriegelung des Akku-Packs
LED-Arbeitsleuchte
Zusatz-Handgriff
Bohrfutter
Drehmomentvorwahl
Schnell-Ladegerät*
Rote Ladekontroll-LED
Grüne Ladekontroll-LED
Lieferumfang
1 2-Gang-Akku-Schlagbohrschrauber PSBSA 20-Li A1
1 Zusatz-Handgriff
1 Bedienungsanleitung
Technische Daten
2-Gang-Akku-Schlagbohrschrauber:
PSBSA 20-Li A1
Bemessungsspannung: 20 V
Getriebe: 2 Gang - Getriebe
BemessungsLeerlaufdrehzahl: 1. Gang: n0 0 - 440 min
Schlagfrequenz: 0 - 26400 min
Max. Drehmoment: 40 Nm
Drehmomentstufen: 1 - 20 + 1 Bohrstufe /
Bohrfutterkapazität:
: Ø max. 13 mm
Max.
Bohrdurchmesser: 30 mm für Holz
Verwenden Sie zum Betrieb des Akku-Werkzeugs nur folgenden Akku: PAP 20 A1*
Typ: LITHIUM-IONEN
Bemessungsspannung: 20 V
Kapazität: 2 Ah
Zellen: 5
Verwenden Sie zum Laden des Akku-Werkzeugs nur folgendes Akku-Schnellladegerät:
PLG 20 A1*
EINGANG / Input:
Bemessungsspannung: 230 - 240 V ~, 50 Hz
Bemessungsaufnahme: 65 W
Sicherung (innen): 3,15 A
AUSGANG / Output:
Bemessungsspannung: 21,5 V
Bemessungsstrom: 2,4 A
Ladedauer: ca. 60 min
Schutzklasse: II /
* AKKU UND LADEGERÄT SIND NICHT IM
LIEFERUMFANG ENTHALTEN
(Gleichstrom)
2. Gang: n0 0 - 1650 min
-1
+ 1 Hammerstufe
15 mm für Ziegel
13 mm für Stahl
(Gleichstrom)
(Wechselstrom)
T3.15A
(Gleichstrom)
(Doppelisolierung)
-1
-1
■ 14 │ DE
│AT│
CH
PSBSA 20-Li A1
Geräuschemissionswert:
Messwert für Geräusch ermittelt entsprechend
EN 60745. Der A-bewertete Geräuschpegel des
Elektrowerkzeugs beträgt typischerweise:
Schalldruckpegel: L
Unsicherheit K: K
= 86,7 dB (A)
PA
= 3 dB
PA
Schallleistungspegel: LWA = 97,7 dB (A)
Unsicherheit K: KWA = 3 dB
Schwingungsemissionswert:
Schwingungsgesamtwerte (Vektorsumme dreier
Richtungen) ermittelt entsprechend EN 60745:
Schlagbohren in Beton:
9,875 m/s
a
H,ID
2
Bohren in Metall:
a
3,475 m/s2
h,D
Unsicherheit K = 1,5 m/s
2
Schrauben:
<2,5 m/s2
Unsicherheit K = 1,5 m/s
2
Gehörschutz tragen!
HINWEIS
► Der in diesen Anweisungen angegebene
Schwingungspegel ist entsprechend einem
genormten Messverfahren gemessen worden
und kann für den Gerätevergleich verwendet
werden. Der angegebene Schwingungsemissionswert kann auch zu einer einleitenden Einschätzung der Aussetzung verwendet werden.
WARNUNG!
► Der Schwingungspegel wird sich entsprechend
dem Einsatz des Elektrowerkzeugs verändern
und kann in manchen Fällen über dem in
diesen Anweisungen angegebenen Wert
liegen. Die Schwingungsbelastung könnte
unterschätzt werden, wenn das Elektrowerkzeug regelmäßig in solcher Weise verwendet
wird. Versuchen Sie, die Belastung durch
Vibrationen so gering wie möglich zu halten.
Beispielhafte Maßnahmen zur Verringerung
der Vibrationsbelastung sind das Tragen von
Handschuhen beim Gebrauch des Werkzeugs und die Begrenzung der Arbeitszeit.
Dabei sind alle Anteile des Betriebszyklus
zu berücksichtigen (beispielweise Zeiten, in
denen das Elektrowerkzeug abgeschaltet ist,
und solche, in denen es zwar eingeschaltet
ist, aber ohne Belastung läuft).
Allgemeine
Sicherheitshinweise
für Elektrowerkzeuge
WARNUNG!
► Lesen Sie alle Sicherheitshinweise und Anwei-
sungen. Versäumnisse bei der Einhaltung der
Sicherheitshinweise und Anweisungen können
elektrischen Schlag, Brand und/oder schwere
Verletzungen verursachen.
Bewahren Sie alle Sicherheitshinweise und
Anweisungen für die Zukunft auf.
Der in den Sicherheitshinweisen verwendete Begriff
„Elektrowerkzeug“ bezieht sich auf netzbetriebene
Elektrowerkzeuge (mit Netzkabel) und auf akkubetriebene Elektrowerkzeuge (ohne Netzkabel).
1. Arbeitsplatz-Sicherheit
a) Halten Sie Ihren Arbeitsbereich sauber und
gut beleuchtet. Unordnung und unbeleuchtete
Arbeitsbereiche können zu Unfällen führen.
b) Arbeiten Sie mit dem Elektrowerkzeug nicht in
explosionsgefährdeter Umgebung, in der sich
brennbare Flüssigkeiten, Gase oder Stäube
befinden. Elektrowerkzeuge erzeugen Funken, die
den Staub oder die Dämpfe entzünden können.
PSBSA 20-Li A1
DE│AT│CH
│
15 ■

c) Halten Sie Kinder und andere Personen wäh-
rend der Benutzung des Elektrowerkzeugs
fern. Bei Ablenkung können Sie die Kontrolle
über das Gerät verlieren.
2. Elektrische Sicherheit
a) Der Anschlussstecker des Elektrowerkzeuges
muss in die Steckdose passen. Der Stecker
darf in keiner Weise verändert werden.
Verwenden Sie keine Adapterstecker gemeinsam mit schutzgeerdeten Elektrowerkzeugen.
Unveränderte Stecker und passende Steckdosen
verringern das Risiko eines elektrischen Schlages.
b) Vermeiden Sie Körperkontakt mit geerdeten
Oberflächen, wie von Rohren, Heizungen,
Herden und Kühlschränken. Es besteht ein
erhöhtes Risiko durch elektrischen Schlag, wenn
Ihr Körper geerdet ist.
c) Halten Sie Elektrowerkzeuge von Regen oder
Nässe fern. Das Eindringen von Wasser in ein
Elektrogerät erhöht das Risiko eines elektrischen
Schlages.
d) Zweckentfremden Sie das Kabel nicht, um
das Elektrowerkzeug zu tragen, aufzuhängen
oder um den Stecker aus der Steckdose zu
ziehen. Halten Sie das Kabel fern von Hitze,
Öl, scharfen Kanten oder sich bewegenden
Geräteteilen. Beschädigte oder verwickelte Kabel
erhöhen das Risiko eines elektrischen Schlages.
e) Wenn Sie mit einem Elektrowerkzeug im
Freien arbeiten, verwenden Sie nur Verlängerungskabel, die auch für den Außenbereich
zugelassen sind. Die Anwendung eines für den
Außenbereich geeigneten Verlängerungskabels
verringert das Risiko eines elektrischen Schlages.
f) Wenn der Betrieb des Elektrowerkzeuges in
feuchter Umgebung nicht vermeidbar ist, verwenden Sie einen Fehlerstromschutzschalter.
Der Einsatz eines Fehlerstromschutzschalters vermindert das Risiko eines elektrischen Schlages.
3. Sicherheit von Personen
a) Seien Sie stets aufmerksam, achten Sie darauf,
was Sie tun und gehen Sie mit Vernunft an die
Arbeit mit einem Elektrowerkzeug. Benutzen
Sie kein Elektrowerkzeug, wenn Sie müde sind
oder unter dem Einfluss von Drogen, Alkohol
oder Medikamenten stehen. Ein Moment der
Unachtsamkeit beim Gebrauch des Elektrowerkzeuges kann zu ernsthaften Verletzungen führen.
b) Tragen Sie persönliche Schutzausrüstung und
immer eine Schutzbrille. Das Tragen persönlicher
Schutzausrüstung wie Staubmaske, rutschfeste
Sicherheitsschuhe, Schutzhelm oder Gehörschutz,
je nach Art und Einsatz des Elektrowerkzeuges,
verringert das Risiko von Verletzungen.
c) Vermeiden Sie eine unbeabsichtigte Inbetrieb-
nahme. Vergewissern Sie sich, dass das
Elektrowerkzeug ausgeschaltet ist, bevor Sie
es an die Stromversorgung und / oder den
Akku anschließen, es aufnehmen oder tragen.
Wenn Sie beim Tragen des Elektrowerkzeuges den
Finger am Schalter haben oder das Gerät bereits
eingeschaltet an die Stromversorgung anschließen,
kann dies zu Unfällen führen.
d) Entfernen Sie Einstellwerkzeuge oder Schrau-
benschlüssel, bevor Sie das Elektrowerkzeug
einschalten. Ein Werkzeug oder Schlüssel, der
sich in einem drehenden Geräteteil befindet,
kann zu Verletzungen führen.
e) Vermeiden Sie eine abnormale Körperhaltung.
Sorgen Sie für einen sicheren Stand und halten
Sie jederzeit das Gleichgewicht. Dadurch kön-
nen Sie das Elektrowerkzeug in unerwarteten
Situationen besser kontrollieren.
f) Tragen Sie geeignete Kleidung. Tragen Sie
keine weite Kleidung oder Schmuck. Halten
Sie Haare, Kleidung und Handschuhe fern
von sich bewegenden Teilen. Lockere Kleidung,
Schmuck oder lange Haare können von sich
bewegenden Teilen erfasst werden.
g) Wenn Staubabsaug- und -auffangeinrichtun-
gen montiert werden können, vergewissern
Sie sich, dass diese angeschlossen sind und
richtig verwendet werden. Die Verwendung
einer Staubabsaugung kann Gefährdungen
durch Staub verringern.
4. Verwendung und Behandlung des
Elektrowerkzeugs
a) Überlasten Sie das Gerät nicht. Verwenden
Sie für Ihre Arbeit das dafür bestimmte
Elektrowerkzeug. Mit dem passenden Elektro-
werkzeug arbeiten Sie besser und sicherer im
angegebenen Leistungsbereich.
■ 16 │ DE
│AT│
CH
PSBSA 20-Li A1

b) Benutzen Sie kein Elektrowerkzeug, dessen
Schalter defekt ist. Ein Elektrowerkzeug, das
sich nicht mehr ein- oder ausschalten lässt, ist
gefährlich und muss repariert werden.
c) Ziehen Sie den Stecker aus der Steckdose
und / oder entfernen Sie den Akku, bevor Sie
Geräteeinstellungen vornehmen, Zubehörteile wechseln oder das Gerät weglegen. Diese
Vorsichtsmaßnahme verhindert den unbeabsichtigten Start des Elektrowerkzeuges.
d) Bewahren Sie unbenutzte Elektrowerkzeuge
außerhalb der Reichweite von Kindern auf.
Lassen Sie Personen das Gerät nicht benutzen,
die mit diesem nicht vertraut sind oder diese
Anweisungen nicht gelesen haben. Elektro-
werkzeuge sind gefährlich, wenn sie von
unerfahrenen Personen benutzt werden.
e) Pflegen Sie Elektrowerkzeuge mit Sorgfalt.
Kontrollieren Sie, ob bewegliche Teile einwandfrei funktionieren und nicht klemmen, ob Teile
gebrochen oder so beschädigt sind, dass die
Funktion des Elektrowerkzeuges beeinträchtigt
ist. Lassen Sie beschädigte Teile vor dem Einsatz
des Gerätes reparieren. Viele Unfälle haben ihre
Ursache in schlecht gewarteten Elektrowerkzeugen.
f) Halten Sie Schneidwerkzeuge scharf und
sauber. Sorgfältig gepflegte Schneidwerkzeuge
mit scharfen Schneidkanten verklemmen sich
weniger und sind leichter zu führen.
g) Verwenden Sie Elektrowerkzeug, Zubehör,
Einsatzwerkzeuge usw. entsprechend diesen
Anweisungen. Berücksichtigen Sie dabei die
Arbeitsbedingungen und die auszuführende
Tätigkeit. Der Gebrauch von Elektrowerkzeugen
für andere als die vorgesehenen Anwendungen
kann zu gefährlichen Situationen führen.
5. Verwendung und Behandlung des
Akkuwerkzeugs
a) Laden Sie die Akkus nur in Ladegeräten auf,
die vom Hersteller empfohlen werden. Für
ein Ladegerät, das für eine bestimmte Art von
Akkus geeignet ist, besteht Brandgefahr, wenn
es mit anderen Akkus verwendet wird.
b) Verwenden Sie nur die dafür vorgesehenen
Akkus in den Elektrowerkzeugen. Der Gebrauch
von anderen Akkus kann zu Verletzungen und
Brandgefahr führen.
c) Halten Sie den nicht benutzten Akku fern von Büro-
klammern, Münzen, Schlüsseln, Nägeln, Schrauben
oder anderen kleinen Metallgegenständen, die
eine Überbrückung der Kontakte verursachen
könnten. Ein Kurzschluss zwischen den Akkukontakten
kann Verbrennungen oder Feuer zur Folge haben.
d) Bei falscher Anwendung kann Flüssigkeit aus
dem Akku austreten. Vermeiden Sie den Kontakt damit. Bei zufälligem Kontakt mit Wasser
abspülen. Wenn die Flüssigkeit in die Augen
kommt, nehmen Sie zusätzlich ärztliche Hilfe
in Anspruch. Austretende Akkuflüssigkeit kann
zu Hautreizungen oder Verbrennungen führen.
VORSICHT! EXPLOSIONSGEFAHR!
Laden Sie nicht aufladbare Batterien
niemals auf.
Schützen Sie den Akku vor Hitze, z. B.
auch vor dauernder Sonneneinstrahlung, Feuer, Wasser und Feuchtigkeit.
Es Besteht Explosionsgefahr.
6. Service
a) Lassen Sie Ihr Elektrowerkzeug nur von quali-
fiziertem Fachpersonal und nur mit OriginalErsatzteilen reparieren. Damit wird sicherge-
stellt, dass die Sicherheit des Elektrowerkzeugs
erhalten bleibt.
Gerätespezifische Sicherheitshinweise
für Schlagbohrer
■ Tragen Sie Gehörschutz beim Schlagbohren.
Die Einwirkung von Lärm kann Gehörverlust
bewirken.
■ Benutzen Sie den mit dem Gerät gelieferten
Zusatzhandgriff. Der Verlust der Kontrolle über
die Maschine kann zu Verletzungen führen.
■ Halten Sie das Gerät an den isolierten Griffflä-
chen, wenn Sie Arbeiten ausführen, bei denen
die Schraube oder das Einsatzwerkzeug
verborgene Stromleitungen treffen kann. Der
Kontakt der Schraube oder des Einsatzwerkzeugs mit einer spannungsführenden Leitung
kann auch metallene Geräteteile unter Spannung
setzen und zu einem elektrischen Schlag führen.
PSBSA 20-Li A1
DE│AT│CH
│
17 ■

Sicherheitshinweise für Ladegeräte
■ Dieses Gerät kann von Kindern ab
8 Jahren und darüber sowie von
Personen mit verringerten physischen, sensorischen oder mentalen
Fähigkeiten oder Mangel an Erfahrung und Wissen benutzt werden,
wenn sie beaufsichtigt oder bezüglich des sicheren Gebrauchs des
Gerätes unterwiesen wurden und
die daraus resultierenden Gefahren verstehen. Kinder dürfen nicht
mit dem Gerät spielen. Reinigung
und Benutzer-Wartung dürfen nicht
von Kindern ohne Beaufsichtigung
durchgeführt werden.
■ Wenn die Netzanschlussleitung die-
ses Gerätes beschädigt wird, muss
sie durch den Hersteller oder seinen
Kundendienst oder eine ähnlich
qualifizierte Person ersetzt werden,
um Gefährdungen zu vermeiden.
Das Ladegerät ist nur für den Betrieb im
Innenbereich geeignet.
WARNUNG!
■ Wenn die Netzanschlussleitung dieses
Gerätes beschädigt wird, muss sie durch den
Hersteller oder seinen Kundendienst oder
eine ähnlich qualifizierte Person ersetzt werden, um Gefährdungen zu vermeiden.
Vor der Inbetriebnahme
Akku-Pack laden (siehe Abb. A)
VORSICHT!
► Ziehen Sie immer den Netzstecker, bevor Sie
den Akku-Pack aus dem Ladegerät nehmen
bzw. einsetzen.
■ Laden Sie den Akku-Pack nie, wenn die
Umgebungstemperatur unterhalb 10 °C oder
oberhalb 40 °C liegt.
♦ Stecken Sie den Akku-Pack
Ladegerät (siehe Abb. A).
♦ Stecken Sie den Netzstecker in die Steckdose.
Die Kontroll-LED
♦ Die grüne Kontroll-LED
dass der Ladevorgang abgeschlossen und der
Akku-Pack einsatzbereit ist.
ACHTUNG!
♦ Sollte die rote Kontroll-LED
ist der Akku-Pack überhitzt und kann nicht
aufgeladen werden.
♦ Sollte die rote und grüne Kontroll-LED
gemeinsam blinken, dann ist der Akku-Pack
defekt.
♦ Schieben Sie den Akku-Pack
■ Laden Sie einen Akku-Pack niemals unmittelbar
nach dem Schnell-Ladevorgang ein zweites Mal
auf. Es besteht die Gefahr, dass der Akku-Pack
überhitzt und dadurch die Lebensdauer des
Akkus verringert wird.
♦ Schalten Sie das Ladegerät zwischen aufeinan-
derfolgenden Ladevorgängen für mindestens 15
Minuten ab. Ziehen Sie dazu den Netzstecker.
leuchtet rot.
in das Schnell-
signalisiert Ihnen,
blinken, dann
in das Gerät ein.
■ 18 │ DE
│AT│
CH
PSBSA 20-Li A1

Akku-Pack ins Gerät
einsetzen / entnehmen
Akku-Pack einsetzen:
♦ Bringen Sie den Drehrichtungsumschalter
Mittelstellung (Sperre). Lassen Sie den Akku-
in den Griff einrasten.
Pack
Akku-Pack entnehmen:
♦ Drücken Sie die Taste zur Entriegelung
entnehmen Sie den Akku-Pack.
in
und
Akkuzustand prüfen
♦ Drücken Sie zum Prüfen des Akkuzustands die Tas-
te Akkuzustand
Der Zustand bzw. die Restleistung wird in der
Akku-Display-LED
♦ ROT / ORANGE / GRÜN = maximale Ladung
ROT / ORANGE = mittlere Ladung
ROT = schwache Ladung – Akku aufladen
(siehe auch Hauptabbildung).
wie folgt angezeigt:
Zusatzhandgriff montieren
♦ Schrauben Sie den Zusatzhandgriff abhängig
von Ihrer Arbeitsweise rechts oder links am Gerät ein.
Werkzeuge wechseln
Ihr Akku-Schlagbohrschrauber hat eine vollautomatische Spindelarretierung
Beim Stillstand des Motors wird der Antriebsstrang
verriegelt, so dass Sie das Bohrfutter
Drehen
wünschte Werkzeug eingesetzt und durch Drehen
des Bohrfutters
sofort weiter arbeiten. Die Spindelarretierung löst
sich automatisch mit Starten des Motors (Betätigung des EIN- / AUS-Schalters
öffnen können. Nachdem Sie das ge-
festgespannt haben, können Sie
.
durch
).
Drehmomentvorwahl /
Betriebsart wählen
Sie können über die Drehmomentvorwahl die
Drehkraft einstellen oder zwischen der Bohrstufe
und der Schlagbohrstufe
♦ Wählen Sie eine niedrige Stufe für kleine
Schrauben, bzw. weiche Werkstoffe.
♦ Wählen Sie eine hohe Stufe für große Schrau-
ben, harte Werkstoffe, bzw. beim Herausdrehen
von Schrauben.
♦ Wählen Sie für Bohrarbeiten die Bohrstufe,
indem Sie die Drehmomentvorwahl in die
Position einstellen.
♦ Wählen Sie für Schlagbohrarbeiten die Schlag-
bohrstufe, indem Sie die Drehmomentvorwahl in
Position einstellen.
die
auswählen.
2-Gang Getriebe
VORSICHT!
in
nur
-1
und
in
► Betätigen Sie den Gangwahlschalter
bei Stillstand des Gerätes. Ansonsten droht
Beschädigung des Gerätes.
Im ersten Gang (Gangwahlschalter
Position: 1)
erreichen Sie eine Drehzahl von ca. 440 min
ein hohes Drehmoment. Diese Einstellung eignet
sich für alle Schraubarbeiten, aber auch zur Verwendung von Zubehör.
Im zweiten Gang (Gangwahlschalter
Position: 2)
erreichen Sie eine Drehzahl von ca. 1650 min-1 zur
Durchführung von Bohrarbeiten.
PSBSA 20-Li A1
DE│AT│CH
│
19 ■

Inbetriebnahme
Ein- / ausschalten
Einschalten:
♦ Drücken Sie zur Inbetriebnahme des Gerätes
den EIN- / AUS-Schalter
gedrückt.
Die LED-Arbeitsleuchte leuchtet bei leicht oder
vollständig gedrücktem EIN- / AUS-Schalter .
Sie ermöglicht so das Ausleuchten des Arbeitsbereiches bei ungünstigen Lichtverhältnissen.
Ausschalten:
♦ Lassen Sie zum Ausschalten des Gerätes den
EIN- / AUS-Schalter
Drehzahl einstellen
Leichter Druck auf den EIN- / AUS-Schalter
bewirkt eine niedrige Drehzahl. Mit zunehmendem
Druck erhöht sich die Drehzahl.
HINWEIS
► Die integrierte Motorbremse sorgt für einen
schnellen Stillstand.
Drehrichtung umschalten
♦ Wechseln Sie die Drehrichtung, indem Sie den
Drehrichtungsumschalter nach rechts bzw.
links durchdrücken.
Tipps und Tricks
Tipp! So verhalten Sie sich richtig.
♦ Überprüfen Sie vor dem Betrieb, ob der
Schraub bzw. Bohreinsatz korrekt angebracht
ist, d.h. zentriert im Bohrfutter sitzt.
♦ Schraub-Bits sind mit ihren Maßen und der Form
gekennzeichnet. Falls Sie sich unsicher sind
probieren Sie immer zuerst aus, ob das Bit ohne
Spiel im Schraubenkopf sitzt.
Drehmoment:
♦ Kleinere Schrauben / Bits können beschädigt
werden, wenn Sie ein zu hohes Drehmoment
bzw. eine zu hohe Drehzahl einstellen.
und halten Sie ihn
los.
Harter Schraubfall (in Metall):
♦ Besonders hohe Drehmomente entstehen z.B.
bei Metallverschraubungen unter Verwendung
von Steckschlüsseleinsätzen. Wählen Sie eine
niedrige Drehzahl.
Weicher Schraubfall (z.B. in Weichholz):
♦ Schrauben Sie auch hier mit geringer Drehzahl,
um z.B. die Holzoberfläche beim Kontakt mit
dem Schraubenkopf aus Metall nicht zu beschädigen. Verwenden Sie einen Senker.
Beim Bohren in Holz, Metall und anderen
Materialien unbedingt berücksichtigen:
♦ Benutzen Sie bei kleinem Bohrer-Durchmesser
eine hohe Drehzahl und bei großem BohrerDurchmesser eine niedrige Drehzahl.
♦ Wählen Sie bei harten Materialien eine niedri-
ge Drehzahl, bei weichem Material eine hohe
Drehzahl.
♦ Markieren Sie die Stelle, an der gebohrt werden
soll mit einem Körner oder einem Nagel. Wählen
Sie zum Anbohren eine niedrige Drehzahl.
♦ Ziehen Sie den drehenden Bohrer mehrmals
aus dem Bohrloch, um Späne oder Bohrmehl zu
entfernen und es zu lüften.
Bohren in Metall:
♦ Verwenden Sie Metallbohrer (HSS). Für beste
Ergebnisse sollten Sie den Bohrer mit Öl kühlen.
Metallbohrer können Sie auch zum Bohren in
Kunststoff verwenden. Bohren Sie zunächst mit
einem Ø 3 mm Bohrer vor und nähern Sie sich
dem gewünschten Bohrdurchmesser.
Bohren in Ziegel:
♦ Verwenden Sie einen Hartmetallbestückten
Steinbohrer.
(Max. empfohlener Bohrdurchmesser: Ø 15 mm)
Bohren in Holz:
♦ Verwenden Sie einen Holzbohrer mit Zentrier-
spitze, für tiefe Bohrungen verwenden Sie einen
„Schlangenbohrer”, für große Bohr-Durchmesser einen Forstner-Bohrer. Kleine Schrauben in
weichem Holz können Sie auch ohne Vorbohren direkt eindrehen.
■ 20 │ DE
│AT│
CH
PSBSA 20-Li A1

Wartung und Reinigung
WARNUNG! VERLETZUNGSGEFAHR!
Schalten Sie vor allen Arbeiten am
Gerät das Gerät aus und entnehmen
Sie den Akku.
Der Akku-Schlagbohrschrauber ist wartungsfrei.
■ Das Gerät muss stets sauber, trocken und frei
von Öl oder Schmierfetten sein.
■ Es dürfen keine Flüssigkeiten in das Innere der
Geräte gelangen.
■ Verwenden Sie zum Reinigen des Gehäuses ein
trockenes Tuch. Verwenden Sie niemals Benzin, Lösungsmittel oder Reiniger, die Kunststoff angreifen.
■ Soll ein Lithium-Ionen-Akku längere Zeit gela-
gert werden, muss regelmäßig der Ladezustand
kontrolliert werden. Der optimale Ladezustand
liegt zwischen 50 % und 80 %. Das optimale
Lagerungsklima ist kühl und trocken.
HINWEIS
► Nicht aufgeführte Ersatzteile (wie z. B.
Kohlebürsten, Schalter) können Sie über
unsere Service - Hotline bestellen.
Garantie der
Kompernaß Handels GmbH
Sehr geehrte Kundin, sehr geehrter Kunde,
Sie erhalten auf dieses Gerät 3 Jahre Garantie ab
Kaufdatum. Im Falle von Mängeln dieses Produkts
stehen Ihnen gegen den Verkäufer des Produkts
gesetzliche Rechte zu. Diese gesetzlichen Rechte
werden durch unsere im Folgenden dargestellte
Garantie nicht eingeschränkt.
Garantiebedingungen
Die Garantiefrist beginnt mit dem Kaufdatum. Bitte
bewahren Sie den Original-Kassenbon gut auf.
Diese Unterlage wird als Nachweis für den Kauf
benötigt.
Tritt innerhalb von drei Jahren ab dem Kaufdatum
dieses Produkts ein Material- oder Fabrikationsfehler auf, wird das Produkt von uns – nach unserer
Wahl – für Sie kostenlos repariert oder ersetzt.
Diese Garantieleistung setzt voraus, dass innerhalb
der Drei-Jahres-Frist das defekte Gerät und der
Kaufbeleg (Kassenbon) vorgelegt und schriftlich
kurz beschrieben wird, worin der Mangel besteht
und wann er aufgetreten ist.
Wenn der Defekt von unserer Garantie gedeckt ist,
erhalten Sie das reparierte oder ein neues Produkt
zurück. Mit Reparatur oder Austausch des Produkts
beginnt kein neuer Garantiezeitraum.
Garantiezeit und gesetzliche
Mängelansprüche
Die Garantiezeit wird durch die Gewährleistung
nicht verlängert. Dies gilt auch für ersetzte und
reparierte Teile. Eventuell schon beim Kauf vorhandene Schäden und Mängel müssen sofort nach
dem Auspacken gemeldet werden. Nach Ablauf
der Garantiezeit anfallende Reparaturen sind
kostenpflichtig.
Garantieumfang
Das Gerät wurde nach strengen Qualitätsrichtlinien
sorgfältig produziert und vor Auslieferung gewissenhaft geprüft.
Die Garantieleistung gilt für Material- oder Fabrikationsfehler. Diese Garantie erstreckt sich nicht auf
Produktteile, die normaler Abnutzung ausgesetzt
sind und daher als Verschleißteile angesehen werden
können oder für Beschädigungen an zerbrechlichen
Teilen, z. B. Schalter, Akkus, Backformen oder Teile
die aus Glas gefertigt sind.
Diese Garantie verfällt, wenn das Produkt beschädigt, nicht sachgemäß benutzt oder gewartet wurde.
Für eine sachgemäße Benutzung des Produkts sind
alle in der Bedienungsanleitung aufgeführten Anweisungen genau einzuhalten. Verwendungszwecke
und Handlungen, von denen in der Bedienungsanleitung abgeraten oder vor denen gewarnt wird,
sind unbedingt zu vermeiden.
Das Produkt ist nur für den privaten und nicht für den
gewerblichen Gebrauch bestimmt. Bei missbräuchlicher und unsachgemäßer Behandlung, Gewaltanwendung und bei Eingriffen, die nicht von unserer
autorisierten Service-Niederlassung vorgenommen
wurden, erlischt die Garantie.
PSBSA 20-Li A1
DE│AT│CH
│
21 ■

Abwicklung im Garantiefall
Um eine schnelle Bearbeitung ihres Anliegens
zu gewährleisten, folgen Sie bitte den folgenden
Hinweisen:
■ Bitte halten Sie für alle Anfragen den Kassenbon
und die Artikelnummer (z. B. IAN 12345) als
Nachweis für den Kauf bereit.
■ Die Artikelnummer entnehmen Sie bitte dem
Typenschild, einer Gravur, auf dem Titelblatt
ihrer Anleitung (unten links) oder als Aufkleber
auf der Rück- oder Unterseite.
■ Sollten Funktionsfehler oder sonstige Mängel
auftreten, kontaktieren Sie zunächst die nachfolgend benannte Serviceabteilung telefonisch
oder per E-Mail.
■ Ein als defekt erfasstes Produkt können Sie dann
unter Beifügung des Kaufbelegs (Kassenbon)
und der Angabe, worin der Mangel besteht und
wann er aufgetreten ist, für Sie portofrei an die
Ihnen mitgeteilte Service-Anschrift übersenden.
Auf www.lidl-service.com können Sie
diese und viele weitere Handbücher,
Produktvideos und Software herunterladen.
Service
WARNUNG!
► Lassen Sie Ihre Geräte von der Servicestelle
oder einer Elektrofachkraft und nur mit
Original-Ersatzteilen reparieren. Damit wird
sichergestellt, dass die Sicherheit des Gerätes
erhalten bleibt.
► Lassen Sie den Austausch des Steckers
oder der Netzleitung immer vom Hersteller
des Gerätes oder seinem Kundendienst
ausführen. Damit wird sichergestellt, dass die
Sicherheit des Gerätes erhalten bleibt.
Service Deutschland
Tel.: 0800 5435 111 (Kostenfrei aus dem
dt. Festnetz/Mobilfunknetz)
E-Mail: kompernass@lidl.de
Service Österreich
Tel.: 0820 201 222 (0,15 EUR/Min.)
E-Mail: kompernass@lidl.at
Service Schweiz
Tel.: 0842 665566 (0,08 CHF/Min.,
Mobilfunk max. 0,40 CHF/Min.)
E-Mail: kompernass@lidl.ch
IAN 281992
■ 22 │ DE
│AT│
CH
Importeur
Bitte beachten Sie, dass die folgende Anschrift
keine Serviceanschrift ist. Kontaktieren Sie zunächst
die benannte Servicestelle.
KOMPERNASS HANDELS GMBH
BURGSTRASSE 21
44867 BOCHUM
GERMANY
www.kompernass.com
PSBSA 20-Li A1

Entsorgung
Die Verpackung besteht aus umweltfreund-
lichen Materialien, die Sie über die örtlichen
Recyclingstellen entsorgen können.
Werfen Sie Elektrowerkzeuge nicht
in den Hausmüll!
Gemäß Europäischer Richtlinie 2012/19/EU
müssen verbrauchte Elektrowerkzeuge getrennt
gesammelt und einer umweltgerechten Wiederverwertung zugeführt werden.
Werfen Sie Akkus nicht in den
Hausmüll!
Entfernen Sie die Akkus vor der Entsorgung aus
dem Gerät.
Defekte oder verbrauchte Akkus müssen gemäß
Richtlinie 2006/66/EC recycelt werden. Geben
Sie Akku-Pack und / oder das Gerät über die angebotenen Sammeleinrichtungen zurück.
Über Entsorgungsmöglichkeiten für ausgediente
Elektrowerkzeuge / Akku-Pack informieren Sie sich
bitte bei Ihrer Gemeinde- oder Stadtverwaltung.
Original-Konformitätserklärung
Wir, KOMPERNASS HANDELS GMBH, Dokumentenverantwortlicher: Herr Semi Uguzlu,
BURGSTR. 21, 44867 BOCHUM, DEUTSCHLAND, erklären hiermit, dass dieses Produkt mit
den folgenden Normen, normativen Dokumenten
und EG-Richtlinien übereinstimmt:
Maschinenrichtlinie
(2006 / 42 / EG)
EG-Niederspannungsrichtlinie
(2014 / 35 / EU)
Elektromagnetische Verträglichkeit
(2014 / 30 / EU)
RoHS Richtlinie
(2011 / 65 / EU)*
*Die alleinige Verantwortung für die Ausstellung
dieser Konformitätserklärung trägt der Hersteller.
Der oben beschriebene Gegenstand der Erklärung
erfüllt die Vorschriften der Richtlinie 2011/65/EU
des Europäischen Parlaments und des Rates vom
8. Juni 2011 zur Beschränkung der Verwendung
bestimmter gefährlicher Stoffe in Elektro- und
Elektronikgeräten.
Angewandte harmonisierte Normen:
EN 60745-1:2009/A11:2010
EN 60745-2-1:2010
EN 60745-2-2:2010
EN 55014-1:2006/A2:2011
EN 55014-2:2015
EN 60335-2-29:2004/A2:2010
EN 60335-1:2012/A11:2014
EN 62233:2008
EN 61000-3-2:2014
EN 61000-3-3:2013
Typ / Gerätebezeichnung:
2-Gang-Akku-Schlagbohrschrauber PSBSA 20-Li A1
Herstellungsjahr: 10 - 2016
Seriennummer: IAN 281992
Bochum, 29.09.2016
PSBSA 20-Li A1
Semi Uguzlu
- Qualitätsmanager Technische Änderungen im Sinne der Weiterent-
wicklung sind vorbehalten.
DE│AT│CH
│
23 ■

Ersatz-Akku Bestellung
Wenn Sie einen Ersatz-Akku für Ihr Gerät bestellen möchten, so können Sie dies entweder bequem im
Internet unter www.kompernass.com oder telefonisch abwickeln.
Der Preis des Ersatz-Akkus beträgt 20 € inkl. MwSt. und Versand. Dieser Artikel kann aufgrund begrenzter
Vorratsmenge nach kurzer Zeit ausverkauft sein.
Online-Bestellung
Um einen Ersatz-Akku über den Zubehör-Shop zu bestellen:
■ Rufen Sie mit Ihrem Internetbrowser die Seite www.kompernass.com auf.
■ Klicken Sie rechts unten auf die entsprechende Flagge, um das gewünschte Land und die Sprache
auszuwählen.
■ Klicken Sie jetzt auf den Reiter „Zubehör-Shop“ und wählen anschließend unter der Rubrik „Topseller“
den passenden Ersatz-Akku zu Ihrem Gerät aus.
■ Nachdem Sie den Ersatz-Akku in den Warenkorb gelegt haben, klicken Sie auf die Schaltfläche
„Kasse“ und befolgen die auf dem Bildschirm angezeigten Anweisungen, um den Bestellvorgang
abzuschließen.
HINWEIS
► Die Bestellung von Ersatzteilen kann in einigen Ländern nicht online vorgenommen werden. Kontak-
tieren Sie in diesem Fall bitte die Service-Hotline.
■ Die Aktion ist begrenzt auf einen Akku pro Kunde / Gerät, sowie auf eine Laufzeit von zwei Monaten
nach dem Aktionszeitraum. Danach kann der Ersatzakku als Ersatzteil zu anderen Konditionen weiterhin bestellt werden.
Telefonische Bestellung
Service Deutschland
Tel.: 0800 5435 111 (Kostenfrei aus dem dt. Festnetz/Mobilfunknetz)
Service Österreich
Tel.: 0820 201 222 (0,15 EUR/Min.)
E-Mail: kompernass@lidl.at
Service Schweiz
Tel.: 0842 665566 (0,08 CHF/Min., Mobilfunk max. 0,40 CHF/Min.)
E-Mail: kompernass@lidl.ch
Um eine schnelle Bearbeitung Ihrer Bestellung zu gewährleisten, halten Sie bitte für alle Anfragen die
Artikelnummer (z.B. IAN 281992) des Gerätes bereit. Die Artikelnummer entnehmen Sie bitte dem
Typenschild oder dem Titelblatt dieser Anleitung.
■ 24 │ DE
│AT│
CH
PSBSA 20-Li A1

Contents
Introduction .....................................................26
Intended use ............................................................... 26
Features .................................................................. 26
Package contents ...........................................................26
Technical data ............................................................. 26
General Power Tool Safety Warnings ...............................27
1. Work area safety ......................................................... 27
2. Electrical safety .......................................................... 28
3. Personal safety ........................................................... 28
4. Power tool use and care ................................................... 28
5. Use and handling of the cordless electrical power tool ............................ 29
6. Service .................................................................29
Appliance-specific safety instructions for hammer drills .............................. 29
Safety guidelines for battery chargers ...........................................30
Before use ......................................................30
Charging the battery pack (see fig. A) ........................................... 30
Attaching/disconnecting the battery pack to/from the appliance ...................... 31
Checking the battery charge level ..............................................31
Fitting the additional handle ................................................... 31
Changing tools ............................................................. 31
Torque preselection/selecting the operating mode .................................31
2-speed gearbox ........................................................... 31
Use ............................................................32
Switching on and off ........................................................32
Adjusting the rotational speed ................................................. 32
Changing the direction of rotation ..............................................32
Tips and tricks .............................................................. 32
Maintenance and cleaning .........................................33
Kompernass Handels GmbH warranty ..............................33
Service .........................................................34
Importer .................................................................. 34
Disposal ........................................................34
Translation of the original Conformity Declaration .....................35
Ordering a replacement battery ....................................36
Online ordering ............................................................ 36
Telephone ordering .........................................................36
PSBSA 20-Li A1
GB│IE│ 25■

2 SPEED CORDLESS IMPACT DRILL
PSBSA 20-Li A1
Introduction
Congratulations on the purchase of your new appliance. You have chosen a high-quality product. The
operating instructions are part of this product. They
contain important information about safety, usage
and disposal. Before using the product, please
familiarise yourself with all operating and safety
instructions. Use the product only as described and
for the range of applications specified. Please also
pass these operating instructions on to any future
owner.
Intended use
This appliance is intended for screwing in and
removing screws as well as drilling in wood, metal,
ceramic and plastic and impact drilling in bricks
and masonry. It is not suitable for impact drilling
in natural stone such as granite. The light on this
appliance is intended to illuminate the immediate
work area of the appliance.
Use this product only as described and for the
areas of applications specified. The appliance is
not intended for commercial use. Any other usage
or modification of the appliance is deemed to be
improper and carries a significant risk of accidents.
The manufacturer accepts no responsibility for
damage(s) attributable to misuse.
Features
Speed selector
Rotation direction switch/lock
ON/OFF switch / Speed control
Bit holder (magnetic)
Battery charge level button
Battery display LED
Battery pack*
Release button for the battery pack
LED work light
Additional handle
Chuck
Torque preselection ring
High-speed charger*
Red charge control LED
Green charge control LED
Package contents
1 2 speed cordless impact drill PSBSA 20-Li A1
1 additional handle
1 set of operating instructions
Technical data
2 speed cordless impact drill: PSBSA 20-Li A1
Rated voltage: 20 V
Gearbox: 2 speed gearbox
Rated idle speed: 1st gear: n0 0–440 rpm
Hammer frequency: 0–26400 bpm
Max. torque: 40 Nm
Torque levels: 1–20 + 1 drill level /
Chuck capacity:
: Ø max. 13 mm
Max. drill diameter: 30 mm for wood
15 mm for tiles
13 mm for steel
Use only the following battery to operate
the cordless tool: PAP 20 A1*
Type: LITHIUM ION
Rated voltage: 20 V
Capacity: 2 Ah
Cells: 5
Use only the following high-speed battery
charger to charge the cordless tool:
PLG 20 A1*
INPUT:
Rated voltage: 230–240 V ~, 50 Hz
Rated power
consumption: 65 W
Fuse (internal): 3.15 A
OUTPUT:
Rated voltage: 21.5 V (DC)
Rated current: 2.4 A
Charging time: approx. 60 min
Protection class: II / (double insulation)
*BATTERY AND CHARGER ARE NOT INCLUDED
(DC)
2nd gear: n0 0–1650 rpm
+ 1 hammer level
(DC)
(AC)
T3.15A
■ 26 │ GB
│
IE
PSBSA 20-Li A1

Noise emission value:
Noise measurement value determined in accordance
with EN 60745. The A-rated noise level of the
power tool is typically as follows:
Sound pressure level: L
Uncertainty K: K
= 86.7dB (A)
PA
= 3 dB
PA
Sound power level: LWA = 97.7 dB (A)
Uncertainty K: KWA = 3 dB
Vibration emission value:
Total vibration values (vector total of three directions) determined in accordance with EN 60745:
Hammer drilling in concrete:
= 9.875 m/s
a
H,ID
Drilling in metal:
a
= 3.475 m/s
h,D
Uncertainty K = 1.5 m/s
2
2
2
WARNING!
► The vibration level will vary according to the
use of the power tool and may sometimes
be higher than the value specified in these
instructions. Regular use of the power tool in
this way may cause the user to underestimate
the vibration. Try to keep the vibration loads
as low as possible. Measures to reduce the
vibration load are, e.g. wearing gloves and
limiting the working time. Wherein all states
of operation must be included (e.g. times
when the power tool is switched off and times
where the power tool is switched on but
running without load).
General Power Tool
Safety Warnings
Screws:
<2.5 m/s
Uncertainty K = 1.5 m/s
2
2
Wear hearing protection!
NOTE
► The vibration level specified in these instruc-
tions has been measured in accordance with
a standardised measuring procedure and
can be used for equipment comparisons. The
specified vibration emission value can also
be used to make an initial exposure estimate.
WARNING!
► Read all safety warnings and all instructions.
Failure to follow the warnings and instructions
may result in electric shock, fire and/or serious
injury.
Save all warnings and instructions for future
reference.
The term "power tool" in the warnings refers to your
mains-operated (corded) power tool or batteryoperated (cordless) power tool.
1. Work area safety
a) Keep work area clean and well lit.
Cluttered or dark areas invite accidents.
b) Do not operate power tools in explosive atmos-
pheres, such as in the presence of flammable
liquids, gases or dust. Power tools create sparks
which may ignite the dust or fumes.
c) Keep children and bystanders away while
operating a power tool. Distractions can cause
you to lose control.
PSBSA 20-Li A1
GB│IE│ 27■

2. Electrical safety
a) Power tool plugs must match the outlet.
Never modify the plug in any way.
Do not use any adapter plugs with earthed
(grounded) power tools. Unmodified plugs and
matching outlets will reduce risk of electric shock.
b) Avoid body contact with earthed or grounded
surfaces, such as pipes, radiators, ranges and
refrigerators. There is an increased risk of elec-
tric shock if your body is earthed or grounded.
c) Do not expose power tools to rain or wet
conditions. Water entering a power tool will
increase the risk of electric shock.
d) Do not abuse the cord. Never use the cord
for carrying, pulling or unplugging the power
tool. Keep cord away from heat, oil, sharp
edges or moving parts. Damaged or entangled
cords increase the risk of electric shock.
e) When operating a power tool outdoors, use
an extension cord suitable for outdoor use.
Use of a cord suitable for outdoor use reduces
the risk of electric shock.
f) If operating a power tool in a damp location
is unavoidable, use a residual current device
(RCD) protected supply. Use of an RCD re-
duces the risk of electric shock.
3. Personal safety
a) Stay alert, watch what you are doing and
use common sense when operating a power
tool. Do not use a power tool while you are
tired or under the influence of drugs, alcohol
or medication. A moment of inattention while
operating power tools may result in serious
personal injury.
b) Use personal protective equipment. Always
wear eye protection. Protective equipment
such as dust mask, non-skid safety shoes, hard
hat, or hearing protection used for appropriate
conditions will reduce personal injuries.
c) Prevent unintentional starting. Ensure the
switch is in the off-position before connecting
to power source and/or battery pack, picking
up or carrying the tool. Carrying power tools
with your finger on the switch or energising
power tools that have the switch on invites accidents.
d) Remove any adjusting key or wrench before
turning the power tool on. A wrench or a key
left attached to a rotating part of the power tool
may result in personal injury.
e) Do not overreach. Keep proper footing and
balance at all times. This enables better control
of the power tool in unexpected situations.
f) Dress properly. Do not wear loose clothing or
jewellery. Keep your hair, clothing and gloves
away from moving parts. Loose clothes, jewel-
lery or long hair can be caught in moving parts.
g) If devices are provided for the connection of
dust extraction and collection facilities, ensure
these are connected and properly used. Use of
dust collection can reduce dust-related hazards.
4. Power tool use and care
a) Do not force the power tool. Use the correct
power tool for your application. The correct
power tool will do the job better and safer at
the rate for which it was designed.
b) Do not use the power tool if the switch does
not turn it on and off. Any power tool that cannot be controlled with the switch is dangerous
and must be repaired.
c) Disconnect the plug from the power source
and/or the battery pack from the power tool
before making any adjustments, changing accessories or storing power tools. Such preven-
tive safety measures reduce the risk of starting
the power tool accidentally.
d) Store idle power tools out of the reach of
children. Do not allow persons unfamiliar
with the power tool or these instructions to
operate the power tool. Power tools are dan-
gerous in the hands of untrained users.
e) Maintain power tools. Check for misalignment
or binding of moving parts, breakage of parts
and any other condition that may affect the
power tools operation. If damaged, have the
power tool repaired before use. Many ac-
cidents are caused by poorly maintained power
tools.
■ 28 │ GB
│
IE
PSBSA 20-Li A1

f) Keep cutting tools sharp and clean. Properly
maintained cutting tools with sharp cutting
edges are less likely to bind and are easier to
control.
g) Use the power tool, accessories and tool bits,
etc. in accordance with these instructions,
taking into account the working conditions
and the work to be performed. Use of the
power tool for operations different from those
intended could result in a hazardous situation.
CAUTION! RISK OF EXPLOSION!
Never charge non-rechargeable
batteries!
Protect the rechargeable battery from
heat, for example from continuous
exposure to sunlight, fire, water and
moisture. There is a risk of explosion.
5. Use and handling of the cordless
electrical power tool
a) Charge a rechargeable battery unit using only
the charger recommended by the manufacturer. Chargers are often designed for a particular
type of rechargeable battery unit. There is the
danger of fire if other types of rechargeable
battery units are used.
b) Only the rechargeable battery units supplied
are to be used with an electrical power tool.
The use of other rechargeable battery units may
lead to the danger of injury or fire.
c) When they are not being used, store re-
chargeable battery units away from paperclips, coins, keys, nails, screws or other small
metal objects that could cause the contacts
to be bridged. Short-circuiting the contacts of
a rechargeable battery unit may result in heat
damage or fire.
d) Fluids may leak out of rechargeable battery
units if they are misused. If this happens,
avoid contact with the fluid. If contact occurs,
flush the affected area with water. Seek additional medical help if any of the fluid gets into
your eyes. Escaping battery fluid may cause
skin irritation or burns.
6. Service
a) Have your power tool serviced by a qualified
repair person using only identical replacement parts. This will ensure that the safety of
the power tool is maintained.
Appliance-specific safety instructions
for hammer drills
■ Wear hearing protection. Exposure to loud
noise can lead to hearing loss.
■ Use the additional handle supplied with the
appliance. Loss of control of the machine can
lead to injuries.
■ Hold the power tool by the insulated gripping
surfaces when performing an operation in
which the screw or attached tool could come
into contact with hidden wiring. Contact
between the screw or attached tool and a live
wire may cause exposed metal parts of the
power tool to become live and give the operator an electric shock.
PSBSA 20-Li A1
GB│IE│ 29■

Safety guidelines for battery chargers
■ This appliance may be used by chil-
dren aged 8 years and above and
by persons with limited physical,
sensory or mental capabilities or
lack of experience and knowledge,
provided that they are under supervision or have been told how to use
the appliance safely and are aware
of the potential risks. Do not allow
children to use the appliance as a
toy. Cleaning and user maintenance
tasks may not be carried out by
children unless they are supervised.
■ To avoid potential risks, damaged
mains cables should be replaced
by the manufacturer, their customer
service department or a similarly
qualified person.
The charger is suitable for indoor use
only.
WARNING!
■ To avoid potential risks, damaged mains ca-
bles should be replaced by the manufacturer,
their customer service department or
a similarly qualified person.
Before use
Charging the battery pack (see fig. A)
CAUTION!
► Always unplug the appliance before you
remove the battery pack from or connect the
battery pack to the charger.
■ Never charge the battery pack if the ambient
temperature is below 10°C or above 40°C.
♦ Connect the battery pack
battery charger (see fig. A).
♦ Insert the power plug into the socket. The control
LED
lights up red.
♦ The green LED
process is complete and the battery pack is
ready.
CAUTION!
♦ If the red control LED
that the battery pack has overheated and
cannot be charged.
♦ If the red and green control LEDs
flash, this means that the battery pack is
broken.
♦ Push the battery pack
■ Never recharge a battery pack again immedi-
ately after rapid charging. There is a risk that
the battery pack will overheat and this will
reduce the lifespan of the battery.
♦ Switch off the charger for at least 15 minutes
between successive charging sessions. Also
disconnect the power plug from the mains
power socket.
indicates that the charging
to the high-speed
flashes, this means
both
back into the appliance.
■ 30 │ GB
│
IE
PSBSA 20-Li A1

Attaching/disconnecting the battery
pack to/from the appliance
Inserting the battery pack:
♦ Push the rotation direction switch
middle position (lock). Allow the battery pack
to click into the handle.
Removing the battery pack:
♦ Press the release button
battery pack.
and remove the
into the
Checking the battery charge level
♦ Press the battery charge level button to
check the status of the battery (see also main
diagram).
The status/remaining charge will be shown on
the battery display LED
RED/ORANGE/GREEN = maximum charge
RED/ORANGE = medium charge
RED = low charge – charge the battery
as follows:
Fitting the additional handle
♦ Screw the additional handle onto the left or
right of the appliance depending on how you
work.
Changing tools
Your cordless screwdriver has a fully automatic
spindle lock .
When the motor is stopped, the power train locks
so that the chuck
it . Once you have attached the desired tool
and tightened it by turning the chuck , you can
continue working. The spindle lock is automatically
released when the motor starts (ON/OFF switch
pressed).
can be opened by turning
Torque preselection/selecting the
operating mode
You can adjust the torque on the torque preselector
and select between the drill setting and the
hammer drill setting
♦ Select a low level for small screws or soft
materials.
♦ Select a high level for large screws, hard
materials or removing screws.
♦ Select the drill setting for drilling work by adjusting
the torque selection ring to the position
♦ Select the hammer drill setting for hammer
drilling work by adjusting the torque selection
ring to the position
.
.
.
2-speed gearbox
CAUTION!
► Operate the speed selection switch
when the appliance is at a standstill. Otherwise the appliance can be damaged.
In first gear (speed selector switch
position: 1)
you can reach a speed of approx. 440 rpm and a
high torque. This setting is suitable for all screwing
work but also for the use of accessories.
In second gear (speed selector switch
position: 2)
you can reach a speed of approx. 1650 rpm for
carrying out drilling work.
only
in
in
PSBSA 20-Li A1
GB│IE│ 31■
Use
Switching on and off
Switching on:
♦ To start the appliance, press the ON/OFF
switch
The LED work light
OFF switch is depressed lightly or fully. This
allows for illumination of the work area in low
lighting.
Switching off:
♦ Release the ON/OFF switch
appliance.
Adjusting the rotational speed
Press the ON/OFF switch lightly for a low
speed. Increasing the pressure increases the speed.
NOTE
► The integrated motor brake ensures rapid
Changing the direction of rotation
♦ Change the direction of rotation by pressing the
rotational direction switch towards the left
or right.
Tips and tricks
♦ Before operating the appliance, check whether
the screw or drill bit is correctly positioned, i.e.
centred in the drill chuck.
♦ Screw bits are labelled according to their di-
mensions and their shape. If you are uncertain,
always check whether the bit fits tightly in the
screw head without any free play.
Torque:
♦ Smaller screws/bits can be damaged if you set
the torque or rotational speed too high.
and keep it pressed in.
lights up when the ON/
to switch off the
stoppage.
Tip! This symbol indicates proper
behaviour.
Hard screw joints (in metal):
♦ Particularly high torques occur, for example, in
metal screw joints made using drive sockets.
Select a low rotational speed.
Soft screw joints (e.g. in soft wood):
♦ Again, use a low rotational speed, for example
to avoid damaging the surface of the wood on
contact with the screw head. Use a countersink.
When drilling in wood, metal and other
materials, observe the following:
♦ Use a high speed for drill bits with small dia-
meter and a low speed for drill bits with large
diameter.
♦ Select a low speed for hard materials and a
high speed for soft materials.
♦ Mark the spot where you want to drill using a
centre punch or nail. Select a low rotational
speed when starting.
♦ Pull the rotating drill bit from the hole repeatedly
to remove dust and chips and clear the hole.
Drilling in metal:
♦ Use a metal drill (HSS). For optimum results,
you should cool the drill bit with oil.
Metal drill bits can also be used to drill into
plastics. Start with a 3 mm diameter drill bit
and then increase the size until the desired hole
diameter is achieved.
Drilling in brick:
♦ Use a carbide-tipped masonry drill.
(max. recommended hole diameter: Ø 15 mm)
Drilling in wood:
♦ Use a wood drill with a lathe centre; for deep
holes, use an auger bit; for large-diameter
holes, use a Forstner bit. Small screws can be
screwed directly into soft wood.
■ 32 │ GB
│
IE
PSBSA 20-Li A1

Maintenance and cleaning
WARNING! RISK OF INJURY! Always
switch the appliance off and remove
the battery before carrying out any
work on the appliance.
The cordless combi drill is maintenance-free.
■ The appliance must always be kept clean, dry
and free from oil or grease.
■ Never allow liquids to get into the appliance.
■ Use a soft, dry cloth to clean the housing.
Never use petrol, solvents or cleansers which
can damage plastic.
■ If a lithium-ion battery is to be stored for an
extended period, the charge level should be
checked regularly. The optimum charge level is
between 50% and 80%. The optimum storage
environment is cool and dry.
NOTE
► Replacement parts not listed (such as carbon
brushes, switch) can be ordered via our
service hotline.
Kompernass Handels GmbH
warranty
Dear Customer,
This appliance has a 3-year warranty valid from
the date of purchase. If this product has any faults,
you, the buyer, have certain statutory rights. Your
statutory rights are not restricted in any way by the
warranty described below.
Warranty conditions
The validity period of the warranty starts from the
date of purchase. Please keep your original receipt
in a safe place. This document will be required as
proof of purchase.
If any material or production fault occurs within
three years of the date of purchase of the product,
we will either repair or replace the product for you
at our discretion. This warranty service is dependent on you presenting the defective appliance and
the proof of purchase (receipt) and a short written
description of the fault and its time of occurrence.
If the defect is covered by the warranty, your product
will either be repaired or replaced by us. The repair
or replacement of a product does not signify the
beginning of a new warranty period.
Warranty period and statutory claims for
defects
The warranty period is not prolonged by repairs
effected under the warranty. This also applies to
replaced and repaired components. Any damage
and defects present at the time of purchase must
be reported immediately after unpacking. Repairs
carried out after expiry of the warranty period shall
be subject to a fee.
Scope of the warranty
This appliance has been manufactured in accordance
with strict quality guidelines and inspected meticulously prior to delivery.
The warranty covers material faults or production
faults. The warranty does not extend to product parts
subject to normal wear and tear or fragile parts such
as switches, batteries, baking moulds or parts made
of glass.
The warranty does not apply if the product has been
damaged, improperly used or improperly maintained.
The directions in the operating instructions for the
product regarding proper use of the product are
to be strictly followed. Uses and actions that are
discouraged in the operating instructions or which
are warned against must be avoided.
This product is intended solely for private use and
not for commercial purposes. The warranty shall be
deemed void in cases of misuse or improper handling,
use of force and modifications/repairs which have
not been carried out by one of our authorised
Service centres.
Warranty claim procedure
To ensure quick processing of your case, please
observe the following instructions:
■ Please have the till receipt and the item number
(e.g. IAN 12345) available as proof of purchase.
■ You will find the item number on the type plate,
an engraving on the front page of the instructions
(bottom left), or as a sticker on the rear or bottom of the appliance.
PSBSA 20-Li A1
GB│IE│ 33■

■ If functional or other defects occur, please
contact the service department listed either by
telephone or by e-mail.
■ You can return a defective product to us free of
charge to the service address that will be provided
to you. Ensure that you enclose the proof of
purchase (till receipt) and information about
what the defect is and when it occurred.
You can download these instructions
along with many other manuals,
product videos and software on
www.lidl-service.com.
Service
WARNING!
► Have the power tool repaired by the service
centre or a qualified electrician and only
using genuine replacement parts. This will
ensure that the safety of the appliance is
maintained.
► Always ensure that the power plug or
the mains cable is replaced only by the
manufacturer of the appliance or by an
approved customer service provider. This
will ensure that the safety of the appliance is
maintained.
Importer
Please note that the following address is not the
service address. Please contact the service
address provided.
KOMPERNASS HANDELS GMBH
BURGSTRASSE 21
44867 BOCHUM
GERMANY
www.kompernass.com
Disposal
The packaging is made from environmen-
tally friendly material and can be disposed of at your local recycling plant.
Do not dispose of power tools in
your normal domestic waste!
European Directive 2012/19/EU requires that
worn-out power tools be collected separately and
recycled in an environmentally compatible manner.
Do not dispose of batteries in your
normal household waste!
Service Great Britain
Tel.: 0871 5000 720 (£ 0.10/Min.)
E-Mail: kompernass@lidl.co.uk
Service Ireland
Tel.: 1890 930 034
(0,08 EUR/Min., (peak))
(0,06 EUR/Min., (off peak))
E-Mail: kompernass@lidl.ie
IAN 281992
■ 34 │ GB
│
IE
Remove the batteries from the appliance before
disposal.
Defective or worn-out rechargeable batteries must be
recycled according to Directive 2006/66/EC. Take
the battery pack and/or appliance to a nearby collection facility.
Please consult your local authorities regarding
suitable disposal of worn out power tools/battery
packs.
PSBSA 20-Li A1

Translation of the original Conformity Declaration
We, KOMPERNASS HANDELS GMBH, document officer: Mr. Semi Uguzlu, BURGSTR. 21,
44867 BOCHUM, GERMANY, hereby declare that this product complies with the following standards,
normative documents and EC directives:
Machinery Directive
(2006/42/EC)
EC Low Voltage Directive
(2014/35/EU)
EMC (Electromagnetic Compatibility)
(2014/30/EU)
RoHS Directive
(2011/65/EU)*
*The manufacturer bears the full responsibility for compliance with this conformity declaration. The object
of the declaration described above complies with the requirements of the Directive 2011/65/EU
of the European Parliament and Council of 8 June 2011 on the limitations of use of certain dangerous
substances in electrical and electronic appliances.
Applied harmonised standards:
EN 60745-1:2009/A11:2010
EN 60745-2-1:2010
EN 60745-2-2:2010
EN 55014-1:2006/A2:2011
EN 55014-2:2015
EN 60335-2-29:2004/A2:2010
EN 60335-1:2012/A11:2014
EN 62233:2008
EN 61000-3-2:2014
EN 61000-3-3:2013
Type/appliance designation:
2 speed cordless impact drill PSBSA 20-Li A1
Year of manufacture: 10 - 2016
Serial number: IAN 281992
Bochum, 29/09/2016
Semi Uguzlu
- Quality Manager We reserve the right to make technical changes in the context of further product development.
PSBSA 20-Li A1
GB│IE│ 35■

Ordering a replacement battery
If you want to order a replacement battery for your appliance, you can do so easily via the Internet on
www.kompernass.com or by telephone.
The price of the replacement battery is €20, including VAT and shipping. Due to limited stocks, this item
may sell out in a relatively short time.
Online ordering
To order a replacement battery from the Accessories Shop:
■ Use your Internet browser to visit www.kompernass.com.
■ Click on the corresponding flag on the right hand side at the bottom of the page to select the desired
country and language.
■ Click on the tab "Accessory Shop" and then select the appropriate replacement battery under the
heading "Topseller".
■ After you have placed the rechargeable battery in the shopping basket, click the "Checkout" button
and follow the on-screen instructions to complete the ordering process.
NOTE
► Online ordering of replacement parts is not possible in all countries. In this case, please contact the
Service hotline.
■ The promotion is limited to one battery per customer/appliance and also to a timeline of two months
after the promotion period. Thereafter, the replacement battery can be ordered as a replacement part
under other conditions.
Telephone ordering
Service Great Britain
Tel.: 0871 5000 720 (£ 0.10/Min.)
E-Mail: kompernass@lidl.co.uk
Service Ireland
Tel.: 1890 930 034
(0,08 EUR/Min., (peak))
(0,06 EUR/Min., (off peak))
E-Mail: kompernass@lidl.ie
To ensure a fast processing of your order, have the article number of you appliance to hand (e.g. IAN
281992) in case of questions. The article number can be found on the type plate or the title page of these
instructions.
■ 36 │ GB
│
IE
PSBSA 20-Li A1

KOMPERNASS HANDELS GMBH
BURGSTRASSE 21
44867 BOCHUM
DEUTSCHLAND / GERMANY
www.kompernass.com
Version des informations · Stand der Informationen
Last Information Update:
09 / 2016 · Ident.-No.: PSBSA20-LiA1-092016-1
IAN 281992
2
 Loading...