

Page 1
GRAPADORA ELÉCTRICA
PISTOLA SPARAPUNTI
ELET TRICA
Antes de empezar a leer abra la página que contiene las imágenes y, en seguida, familiarícese con
todas las funciones del dispositivo.
Prima di leggere aprire la pagina con le immagini e prendere confidenza con le diverse funzioni
dell’apparecchio.
Before reading, unfold the page containing the illustrations and familiarise yourself with all functions of
the device.
Klappen Sie vor dem Lesen die Seite mit den Abbildungen aus und machen Sie sich anschließend mit
allen Funktionen des Gerätes vertraut.
Kompernaß GmbH
Burgstraße 21
44867 Bochum
(Germany)
Estado de las informaciones · Versione delle informazioni
Last Information Update · Stand der Informationen:
04 / 2008 · Ident.-No.: PET23042008-5
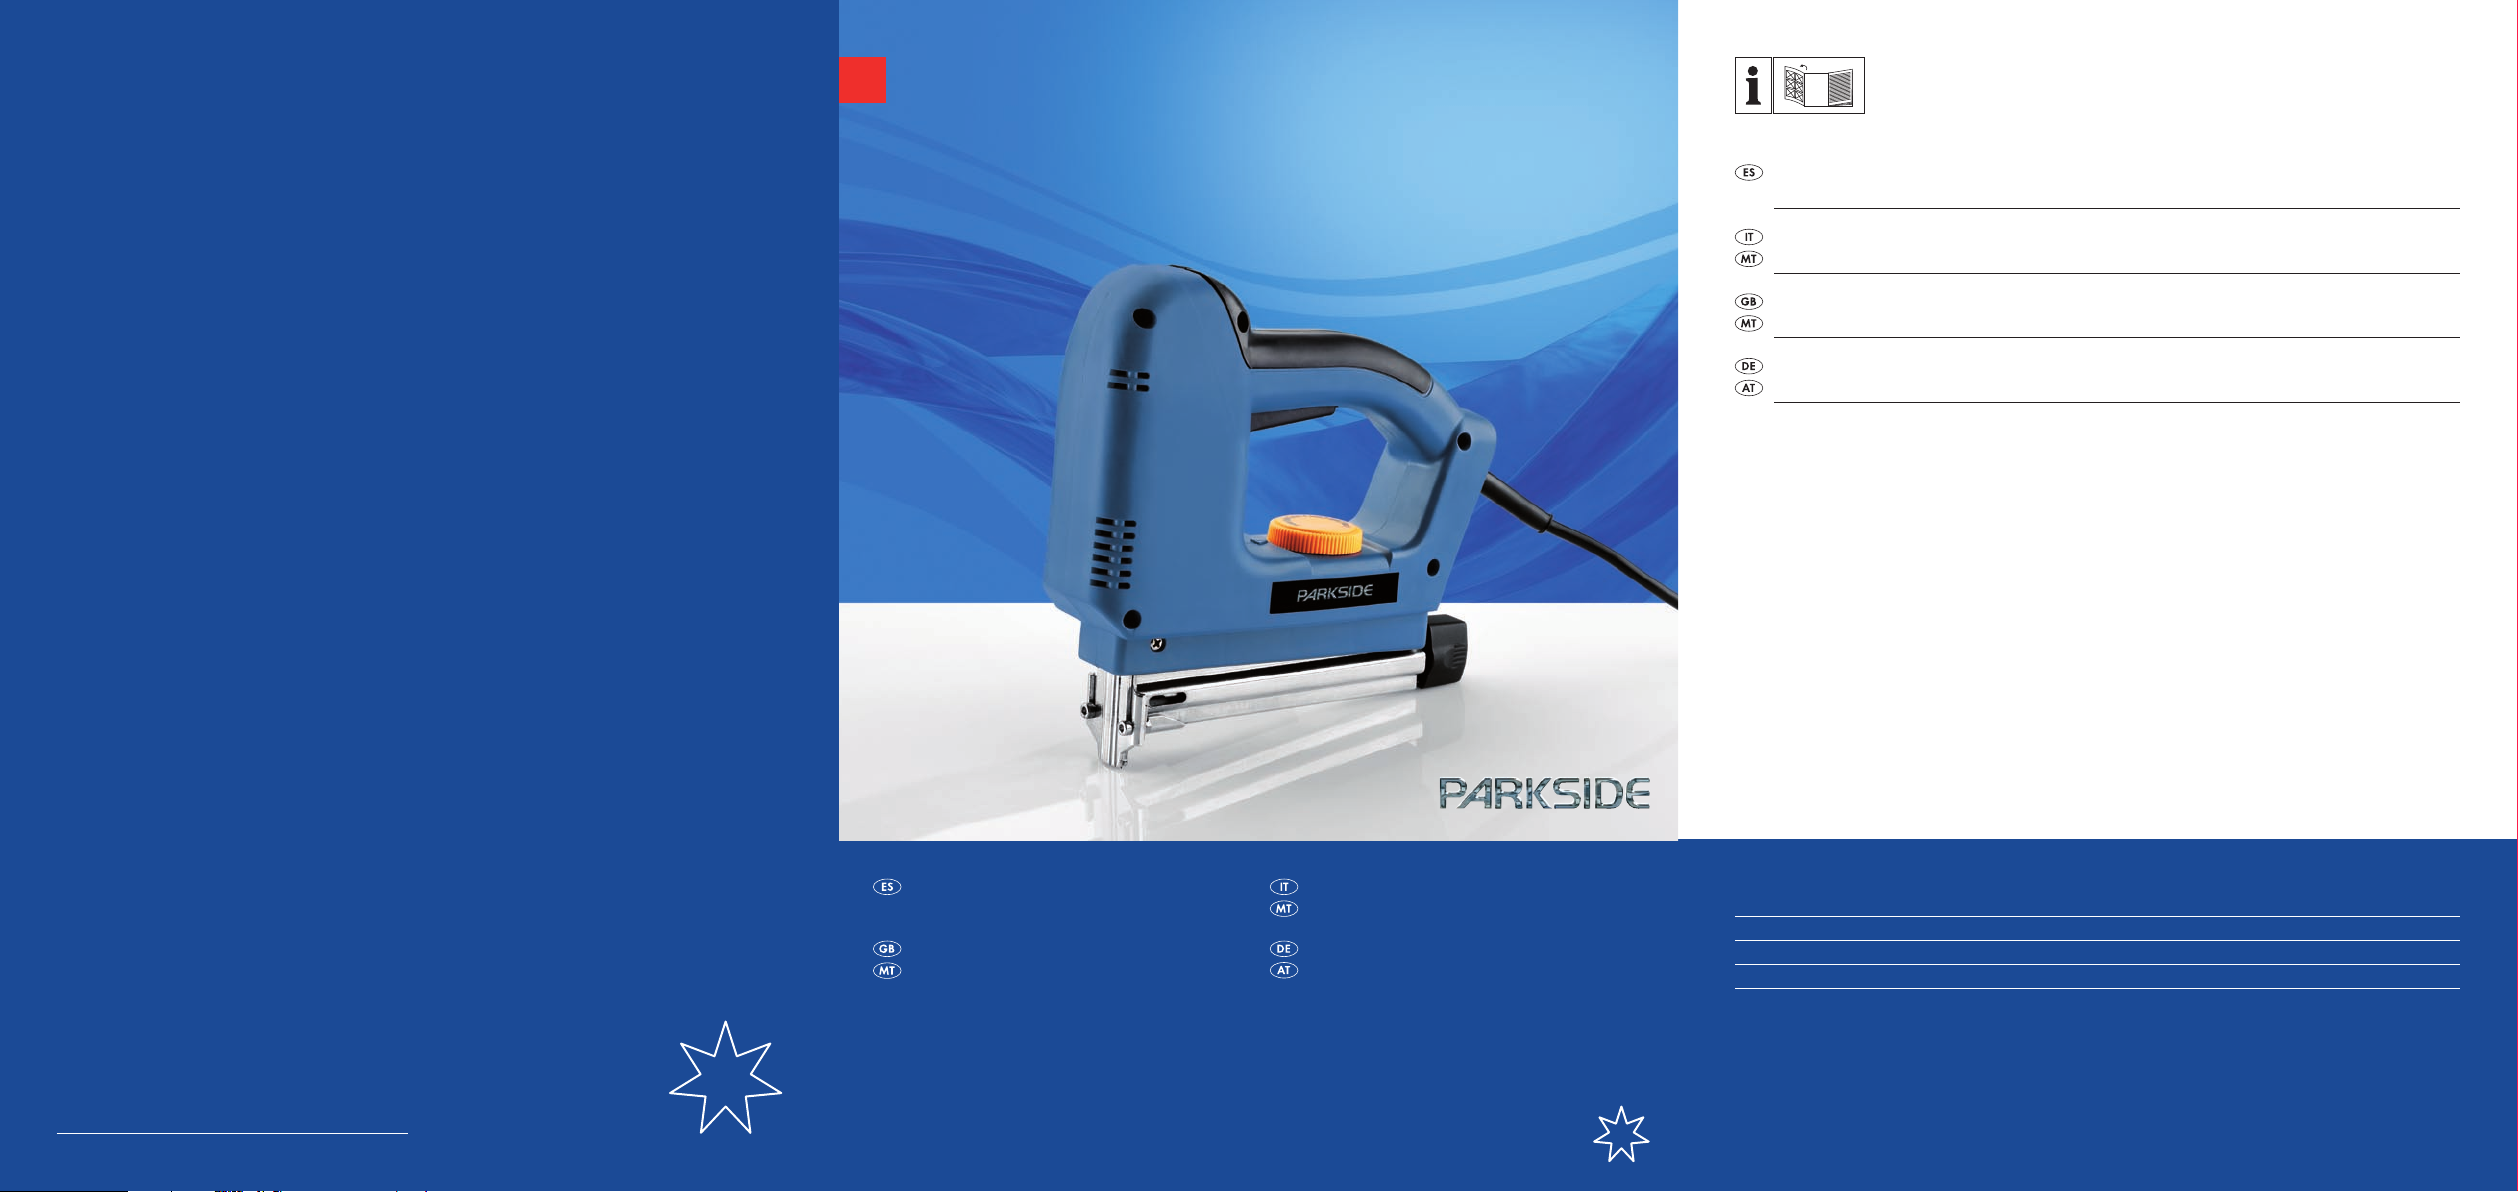
PET 23 VARIO
GRAPADORA ELÉCTRICA
Instrucciones de utilización y de seguridad
ELECTRIC STAPLE GUN
Operation and Safety Notes
PISTOLA SPARAPUNTI ELETTRICA
Indicazioni per l’uso e per la sicurezza
ELEKTROTACKER
Bedienungs- und Sicherheitshinweise
ES Instrucciones de utilización y de seguridad Página 5
IT / MT Indicazioni per l’uso e per la sicurezza Pagina 15
GB / MT Operation and Safety Notes Page 25
DE / AT Bedienungs- und Sicherheitshinweise Seite 35
Page 2
A
1
2
9
8
3
4
67 5
B
C
D
GE F
10
Page 3

Introducción
Uso correcto ..................................................................................................................Página 6
Equipamiento ................................................................................................................Página 6
Volumen del envío ........................................................................................................Página 6
Datos técnicos ...............................................................................................................Página 7
Indicaciones generales de seguridad para
herramientas eléctricas
1. Seguridad en el lugar de trabajo ............................................................................Página 7
2. Seguridad eléctrica ..................................................................................................Página 8
3. Seguridad de las personas ......................................................................................Página 8
4. Manejo y uso cuidadoso de las herramientas eléctricas ......................................Página 9
Indicaciones de seguridad de la grapadora eléctrica ...............................................Página 9
Puesta en funcionamiento
Grapas / clavos ............................................................................................................Página 10
Cargar el cargador ......................................................................................................Página 11
Conexión y desconexión .............................................................................................Página 11
Ajustar la fuerza de impacto .......................................................................................Página 11
Engrapar........................................................................................................................Página 11
Índice
Solucionar errores ............................................................................................Página 12
Mantenimiento y limpieza .........................................................................Página 12
Eliminación ..............................................................................................................Página 12
Informaciones
Asistencia ......................................................................................................................Página 12
Declaración de conformidad / Fabricante .................................................................Página 13
5 ES
Page 4
En estas instrucciones de uso / en el aparato se utilizan los siguientes pictogramas:
¡Lea las instrucciones de uso!
¡Siga las indicaciones de prevención
y seguridad!
¡Tenga cuidado con las descargas
eléctricas! ¡Peligro de vida!
¡Peligro de explosión!
Clase de protección II
V
Voltios (Tensión alterna)
~
Grapadora eléctrica PET 23 VARIO
Q
Introducción
Familiarícese con el funcionamiento del
dispositivo antes de ponerlo en marcha
e infórmese sobre cómo trabajar adecuadamente con herramientas eléctricas. Para ello, lea
las siguientes instrucciones. Guarde estas instrucciones
en un lugar seguro. En caso de transferir el dispositivo a terceros entrégueles toda la documentación.
Use gafas de protección, protección
auditiva, mascarilla y guantes de
protección.
¡Mantener fuera del alcance de los
niños!
¡Proteger el aparato de la humedad!
¡Controle regularmente el buen estado
del aparato, el cable de alimentación
y la clavija!
¡Evacue el embalaje y el aparato
de forma respetuosa con el medio
ambiente!
Q
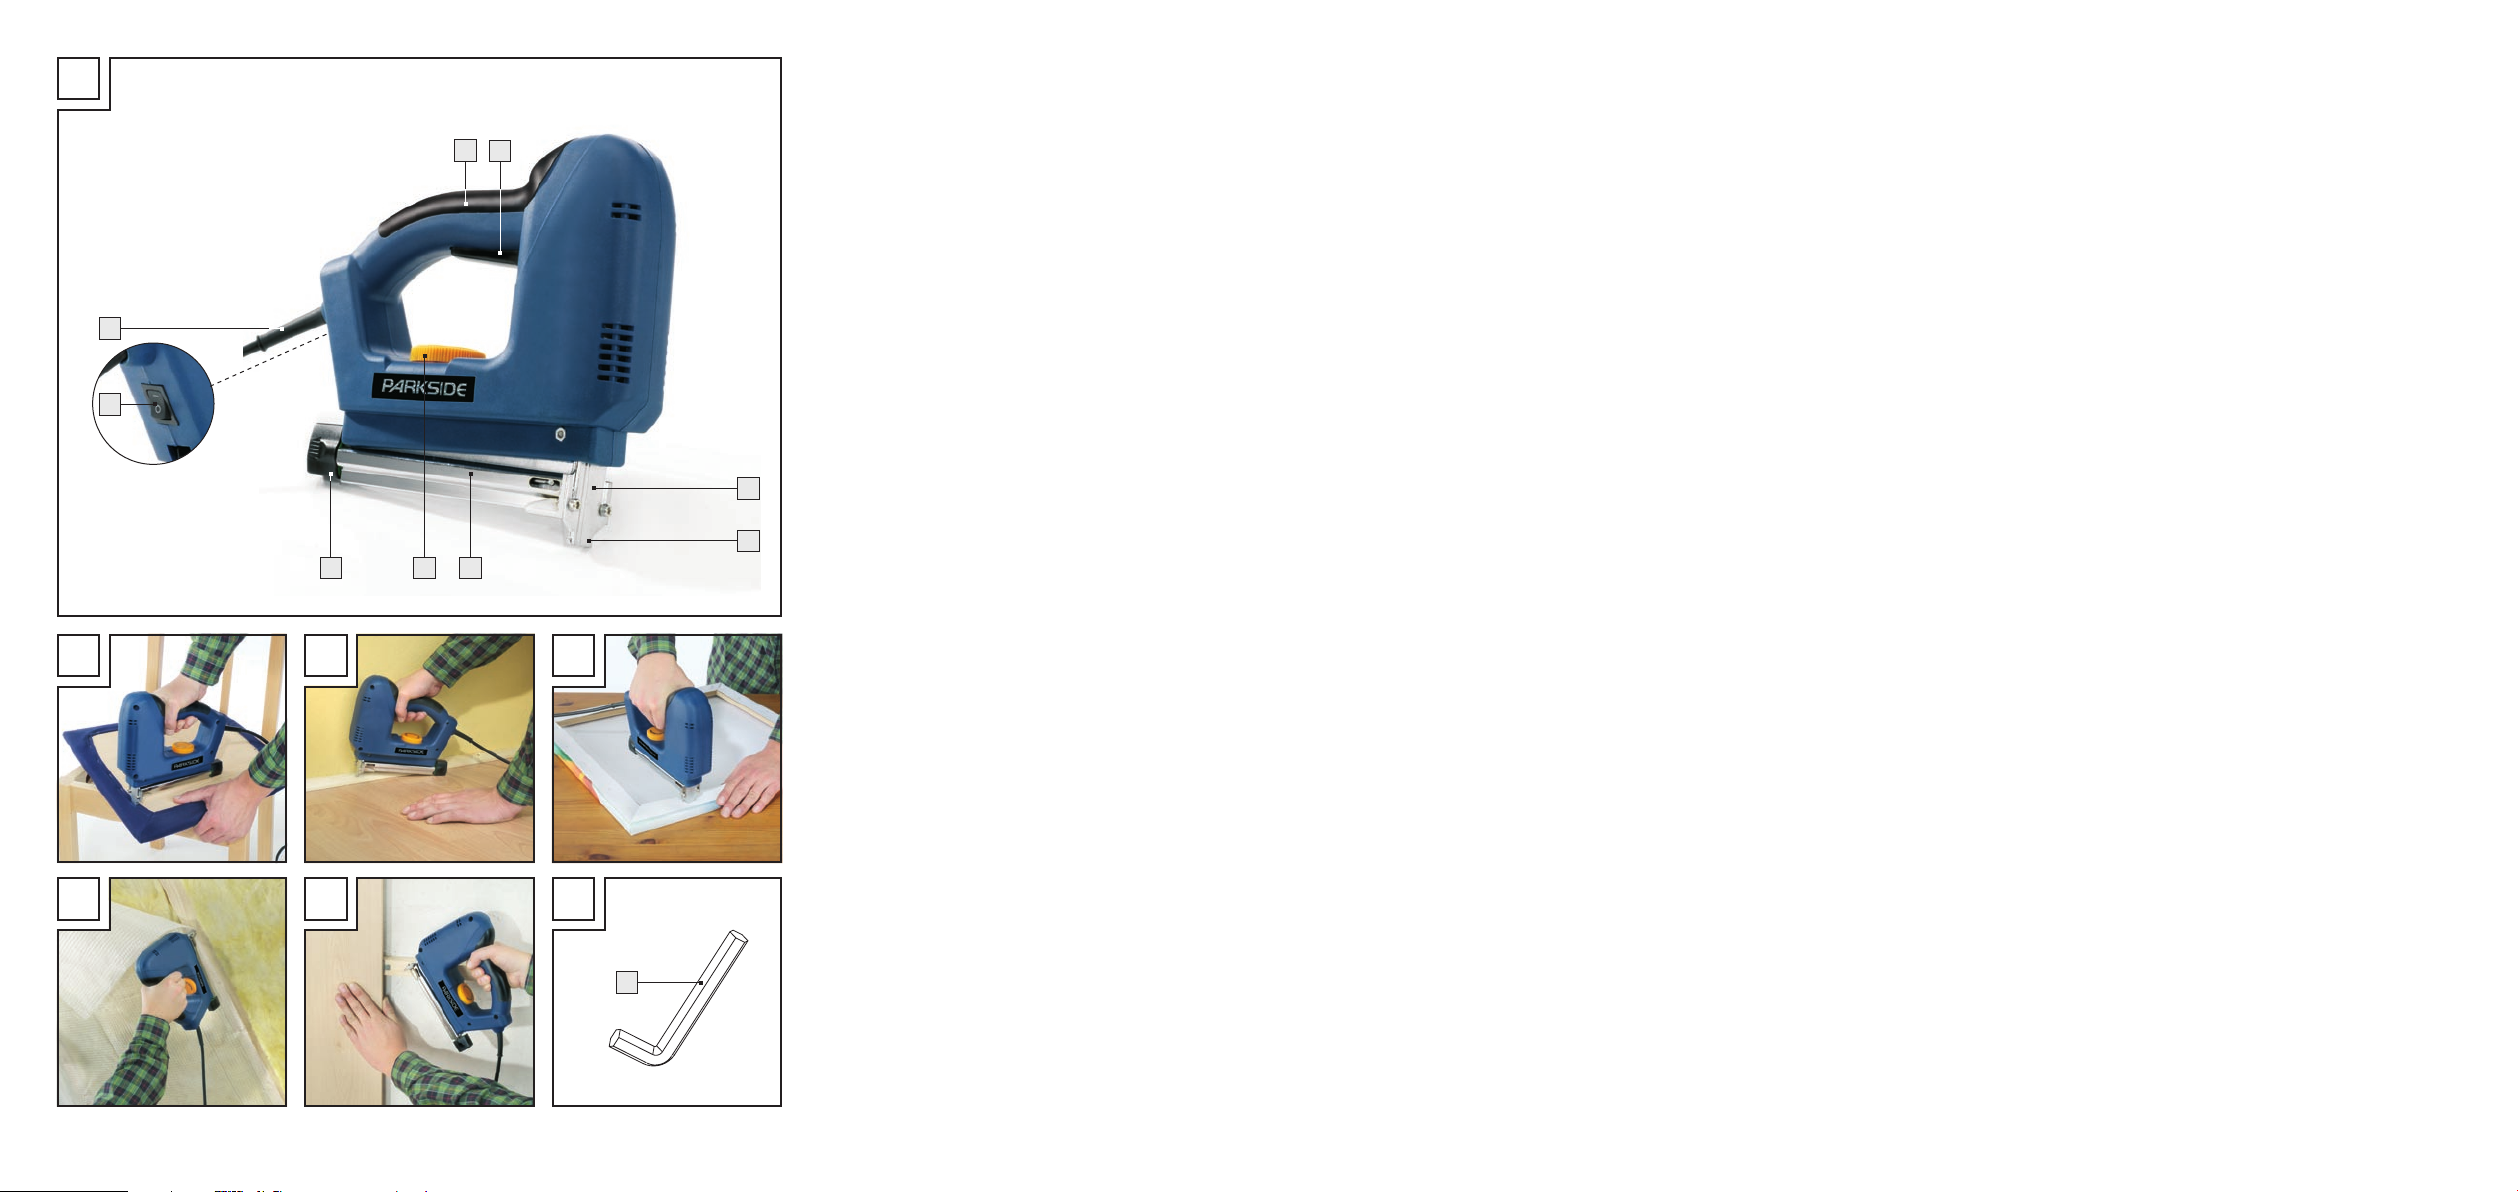
Equipamiento
1
Mango
2
Disparador
3
Placa frontal
4
Cabezal de apoyo
5
Cargador
6
Regulador de fuerza de impacto
7
Pasador del cargador
8
Interruptor de CONEXIÓN / DESCONEXIÓN
9
Cable de alimentación
10
Llave macho hexagonal
Q
Uso correcto
La grapadora eléctrica está indicada únicamente
para el uso privado, para engrapar cartón, material
aislante, cuero, tejidos (fibras textiles y naturales)
y materiales similares como madera dura y blanda,
tablones de madera aglomerada o material similar
a la madera contrachapada.
Sólo debe usarse la grapadora en espacios secos.
Todo uso contrario a lo estipulado conlleva considerables peligros de accidente así como la pérdida
de la garantía.
6 ES
Q
Volumen del envío
1 Grapadora eléctrica PET 23 VARIO
150 Grapas finas 12 mm: modelo 53
150 Grapas finas 18 mm: modelo 53
150 Grapas de puente estrecho 19 mm: modelo 55
150 Clavos 23 mm: modelo 47
1 Llave macho hexagonal
1 Instrucciones de uso
1 Cuaderno „Garantía y asistencia“
Page 5
7 ES
Introducció / Indicaciones generales de seguridad para herramientas eléctricas
Q
Datos técnicos
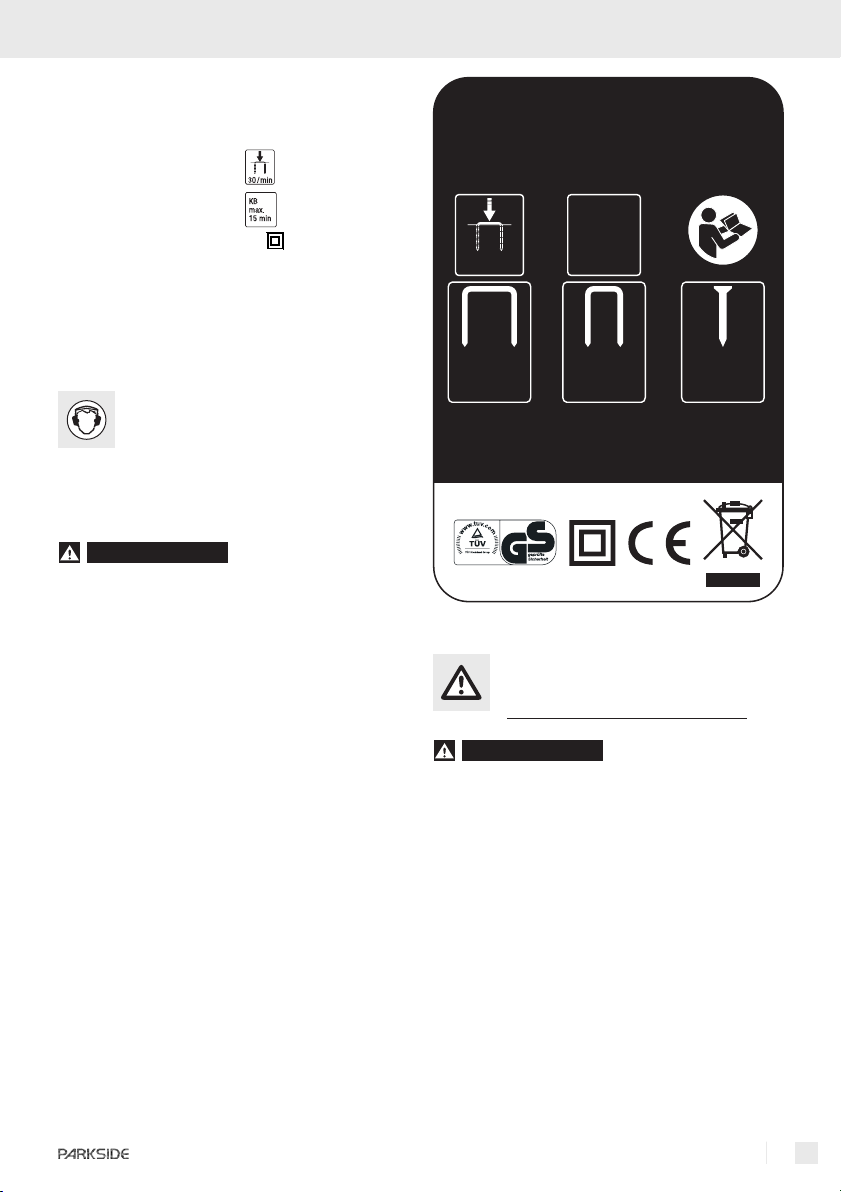
PET 23 VARIO
Tensión nominal: 230 V ~ 50 Hz
Frecuencia de percusión:
30 / min
KH 3145
230 V ˜ 50 Hz
Servicio temporal (KB):
máx. 15 min
Clase de protección: II /
Información sobre ruido y vibración:
El nivel de presión acústica A evaluado del
aparato es normalmente de 95,0 dB (A). El nivel de
ruido al trabajar puede superar los 108,0 dB (A).
¡Debe llevarse protección auditiva!
Aceleración evaluada, empírica:
Vibración mano-brazo a
¡ADVERTENCIA!
= 5,54 m / s
h
El nivel de vibración indi-
2
cado en estas instrucciones se ha determinado según
un procedimiento de medición normalizado y puede usarse como base para la comparación con
otros aparatos.
El nivel de vibración variará dependiendo del uso de
la herramienta eléctrica y en muchos casos puede
superar el valor indicado en estas instrucciones. Si
la herramienta eléctrica se usa con regularidad de
este modo, podría subestimarse la carga de vibración.
Advertencia: Para un cálculo exacto de la carga
de oscilación durante un determinado intervalo de
trabajo se deben tener en cuenta los tiempos en
los que la máquina está desconectada o está conectada pero no está funcionando. Esto podría
reducir considerablemente la carga de oscilación
en el intervalo total de trabajo.
KB
max.
30 /min
Type 53
12 - 18 mm
Date of manufacture: 04-2008
Kompernaß GmbH · 44867 Bochum (Germany)
www.kompernass.com
I
D
2
3
:
0
2
0
2
0
2
0
0
15 min
Type 55
12 - 19 mm
Type 47
23 mm
Indicaciones generales
de seguridad para
herramientas eléctricas
¡ADVERTENCIA!
cias e indicaciones de seguridad!
El incumplimiento de las advertencias e indicaciones de seguridad puede provocar descargas
eléctricas, incendios y / o lesiones graves.
¡GUARDAR TODAS LAS ADVERTENCIAS E
INDICACIONES DE SEGURIDAD POR SI LAS
NECESITA EN UN FUTURO!
¡Lea las adverten-
1.Seguridad en el lugar de
trabajo
a) Mantenga el lugar de trabajo limpio
y bien iluminado. El desorden y los lugares
de trabajo mal iluminados pueden provocar
accidentes.
Page 6
Indicaciones generales de seguridad para herramientas eléctricas
b) No utilice el aparato en
áreas potencialmente explosivas en las que haya líqui
dos, gases o polvos inflamables. Las
herramientas eléctricas producen chispas que
podrían encender el polvo o los vapores.
c)
cuando la esté utilizando. Las distracciones
Mantenga a los niños y a
otras personas alejados de
la herramienta eléctrica
pueden hacerle perder el control del aparato.
2. Seguridad eléctrica
Evite el peligro de muerte
por descarga eléctrica:
a) El enchufe debe ser el adecuado
para la toma de corriente. No se
debe modificar de ningún modo el
enchufe del aparato. No utilice nunca
adaptadores con los aparatos que
están provistos de derivación a tierra.
Los conectores sin modificar y las tomas adecuadas reducen el riesgo de descarga eléctrica.
b) Evite el contacto físico con superficies
conectadas a tierra, como tubos metálicos, radiadores, cocinas o frigoríficos. Existe un riesgo muy elevado de des-
carga eléctrica si su cuerpo deriva a tierra.
c)
aumenta el riesgo de descarga eléctrica.
d)
tirar de la clavija de red al desenchu-
e) Al trabajar con herramientas eléctricas
Mantenga el aparato protegido
de la lluvia y la humedad. Si
penetra agua en un aparato eléctrico
No utilice el cable para otros
fines, como para transportar
o colgar el aparato o para
farlo. Mantenga el cable al resguardo del calor, del aceite, de los bordes
afilados o de las piezas móviles del
aparato. Los cables dañados o retorcidos au-
mentan el riesgo de descarga eléctrica.
al aire libre, utilice sólo cables de extensión que también estén autorizados
para su uso en exteriores. El uso de una
extensión adecuada para su empleo en exteriores disminuye el riesgo de descarga eléctrica.
f) Si es inevitable usar esta herramienta
eléctrica en un entorno húmedo, utilice un interruptor de corriente de defecto. El uso de un interruptor de corriente de
defecto reduce el riesgo de descarga eléctrica.
3. Seguridad de las personas
a) Sea cuidadoso en todo momento,
preste atención a lo que hace y
proceda con prudencia al trabajar
con una herramienta eléctrica. No
utilice el aparato si está cansado o si
se encuentra bajo el efecto de drogas,
alcohol o medicamentos. Un simple mo-
mento de descuido durante el uso del aparato
podría causar lesiones graves.
b)
equipo de protección personal, como mascari-
c)
d) Extraiga las herramientas de ajuste
e) Evite posturas inadecuadas. Procure
Lleve equipo de protección
individual y siempre unas
gafas de protección. Si lleva
lla antipolvo, zapatos de seguridad antideslizantes, casco de seguridad o protección auditiva,
en función del tipo y la utilización de la herramienta eléctrica, reducirá el riesgo de daños.
Evite una conexión accidental del aparato.
Asegúrese de que la herramienta
eléctrica esté desconectada antes de
conectarla al suministro eléctrico,
antes de sostenerla o moverla. Si al
mover el aparato ha puesto el dedo sobre el
interruptor de CONEXIÓN / DESCONEXIÓN
o si ha conectado el aparato, podrían producirse accidentes.
o llaves antes de encender el aparato.
Cualquier herramienta o llave que se encuentre
en una pieza giratoria del aparato puede
provocar lesiones.
estar en una posición segura y mantenga en todo momento el equilibrio.
De este modo podrá controlar mejor el apara-
8 ES
Page 7
9 ES
Indicaciones generales de seguridad para herramientas eléctricas
to, especialmente en situaciones inesperadas.
f) Utilice ropa adecuada. No use joyas
ni ropas flojas. Mantenga su cabello,
ropa y guantes alejados de las partes móviles. La ropa floja, las joyas o el
pelo largo pueden engancharse en las piezas
móviles.
g) Si los dispositivos de aspiración y re-
colección de polvo están montados,
asegúrese de que estén conectados y
sean correctamente utilizados. El uso
de estos dispositivos disminuye los peligros
causados por el polvo.
4.Manejo y uso cuidadoso de
las herramientas eléctricas
a) No sobrecargue el aparato. Emplee
en su trabajo la herramienta eléctrica
adecuada para el mismo. Si usa la
herramienta adecuada dentro de la potencia
indicada trabajará mejor y de forma más segura.
b) No utilice una herramienta eléctrica
cuyo interruptor tenga algún defecto.
Una herramienta eléctrica que no se puede
encender o apagar es un peligro y debe repararse.
c) Retire la clavija del enchufe antes de
realizar ajustes en el aparato, cambiar accesorios o depositar el aparato
sobre una superficie. Esta medida de
precaución evita que se ponga en marcha el
aparato por accidente.
d) Conserve las herramientas eléctricas
que no use fuera del alcance de los
niños. No permita utilizar el aparato
a personas que no estén familiarizadas con él o que no hayan leído estas
indicaciones. Las herramientas eléctricas
son peligrosas si las usan personas sin experiencia.
e) Cuide el aparato. Compruebe que las
piezas móviles funcionen correctamente y no se atasquen, y que no
haya piezas rotas o tan dañadas que
perjudiquen al funcionamiento del
aparato. Haga reparar las piezas
dañadas antes de usar el equipo. La
causa de muchos accidentes es el uso de he
rramientas eléctricas que no han recibido el
mantenimiento adecuado.
f) Mantenga las herramientas de corte
afiladas y limpias. Las herramientas de
corte con filos cortantes conservadas cuidadosamente se enganchan menos y son más fáciles de manejar.
g) Utilice la herramienta eléctrica, los
accesorios, las herramientas adicionales, etc. de acuerdo con estas indicaciones y del modo que se describe
para este tipo de aparato en concreto.
Tenga en cuenta las condiciones de
trabajo y la actividad que se va a
realizar. El uso de herramientas eléctricas
para fines diferentes de los previstos puede
provocar situaciones peligrosas.
Indicaciones de seguridad
de la grapadora eléctrica
J Asegúrese de que bajo ningún concepto se
corre el riesgo de disparar las grapas o clavos
contra personas o animales.
J
sujeción o apoyo.
J ¡Cargue el cargador
J No utilice el aparato para sujetar conductores
J Sujete la pieza de trabajo. Para ello,
J Mantenga apartado el cable de red siempre
¡Proteja sus ojos! Utilice gafas protec-
toras. Esto también se aplica a la
persona que realiza los trabajos de
5
sólo con el aparato
desconectado! Ponga el interruptor de
CONEXIÓN / DESCONEXIÓN
posición „0“.
eléctricos.
utilice dispositivos de sujeción o un tornillo de
banco para asegurar la pieza. De este modo
estás mas sujeto con la mano.
por detrás del aparato.
8
en la
Page 8
Puesta en funcionamiento
Q
Puesta en funcionamiento
La tensión de la toma de corriente debe coincidir
con las especificaciones de la placa de características del aparato. Los aparatos indicados con
230 V ~ también pueden operarse con 220 V ~.
Q
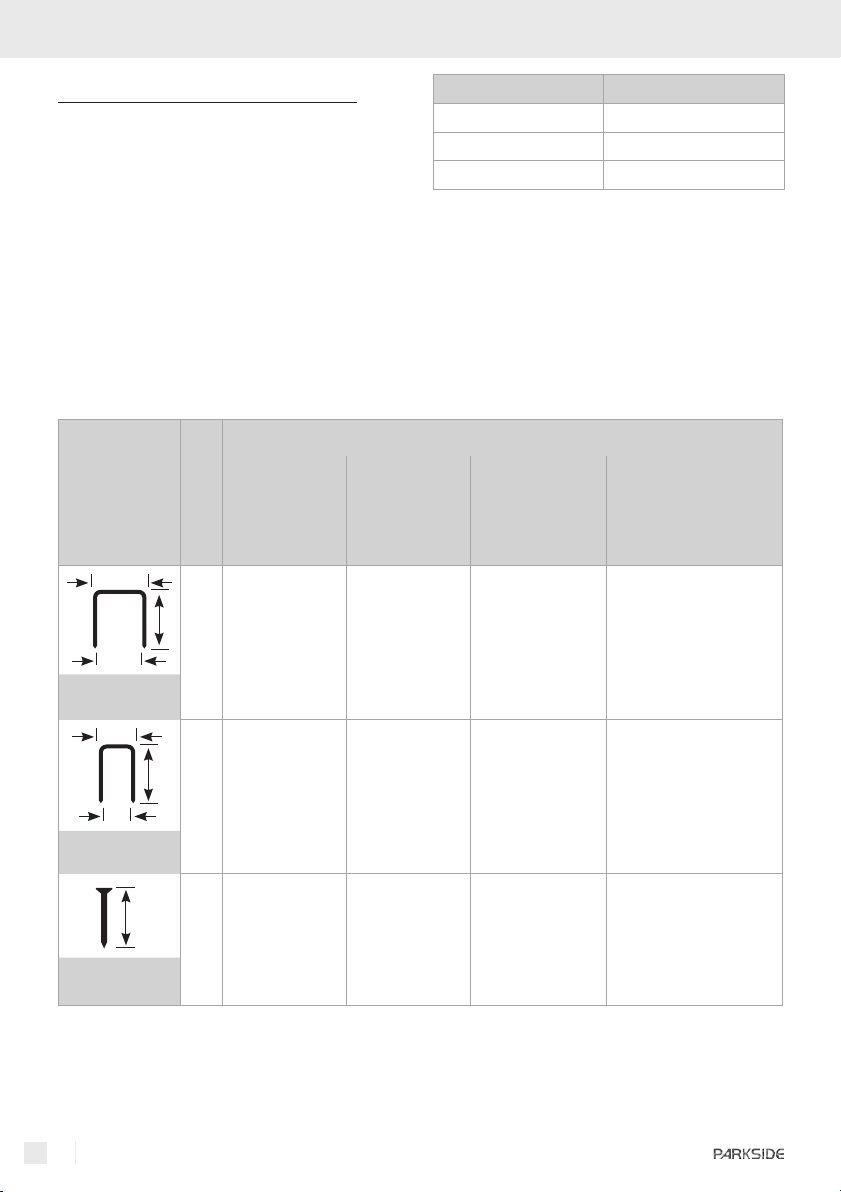
Grapas / clavos
Advertencia: La herramienta está diseñada
para los siguientes tipos de grapas y clavos disponibles en comercios:
Ajuste recomendado de la fuerza de impacto para:
Modelo mm
55
53
47
12, 14, 16, 18, 19
12, 14, 18
23
Advertencia: Puede solicitar un accesorio adecuado al centro de asistencia competente de su país.
Las siguientes indicaciones son recomendaciones
orientativas. Compruebe Ud. mismo al trabajar qué
tipo de grapas / clavos y qué ajuste de la fuerza de
impacto es la mejor dependiendo de la pieza de
trabajo.
Tipo de
grapas /
clavos
11,4 mm
10 mm
Tipo 53
6 mm
4 mm
Tipo 55
Tipo 47
Madera dura
(p. ej. roble o haya)
Longitud (mm)
L
12
5 - 6
14
6
18
6 - 7
12
5 - 6
L
14
5 - 6
16
6 - 7
18
7
19
7
L
23 7 6 6 - 7 6 - 7
Madera
blanda
(p. ej. abeto o pino)
1 - 4
2 - 5
4 - 6
3 - 5
3 - 5
5
5
6
Tablones de
madera
aglomerada /
MDF
4 - 6
5 - 6
6 - 7
2 - 5
3 - 5
4 - 5
4 - 6
5 - 7
Tablón de madera
contrachapada
(p. ej. tableros de ebanistería)
5 - 6
6
6 - 7
2 - 5
3 - 5
4 - 5
4 - 6
5 - 7
10 ES
Page 9
11 ES
Puesta en funcionamiento
Q
Cargar el cargador
Utilice únicamente grapas de alambre fino (tipo 53),
grapas finas (tipo 55) o clavos (tipo 47).
j Presione el pasador del cargador
dirección del cargador
5
7
en la
y desplácelo hacia
arriba.
j Extraiga completamente del cargador
pasador del cargador
7
.
j Dado el caso extraiga del cargador
5
el
5
las
grapas o clavos no utilizados.
j Introduzca en el cargador
5
las grapas o
clavos necesarios.
j Encontrará la información sobre la correcta
introducción de las grapas o clavos en la inscripción que se encuentra en el pasador del
cargador
j Desplace el pasador del cargador
tope en el cargador
j Por último presione el pasador del cargador
7
.
7
hasta el
5
.
7
hacia abajo y deje que éste engatille claramente.
Q
Conexión y desconexión
m ¡PRECAUCIÓN! Conecte el aparato a la
corriente cuando éste esté apagado. Ponga el
interruptor de CONEXIÓN / DESCONEXIÓN
8
en la posición „0“.
Q
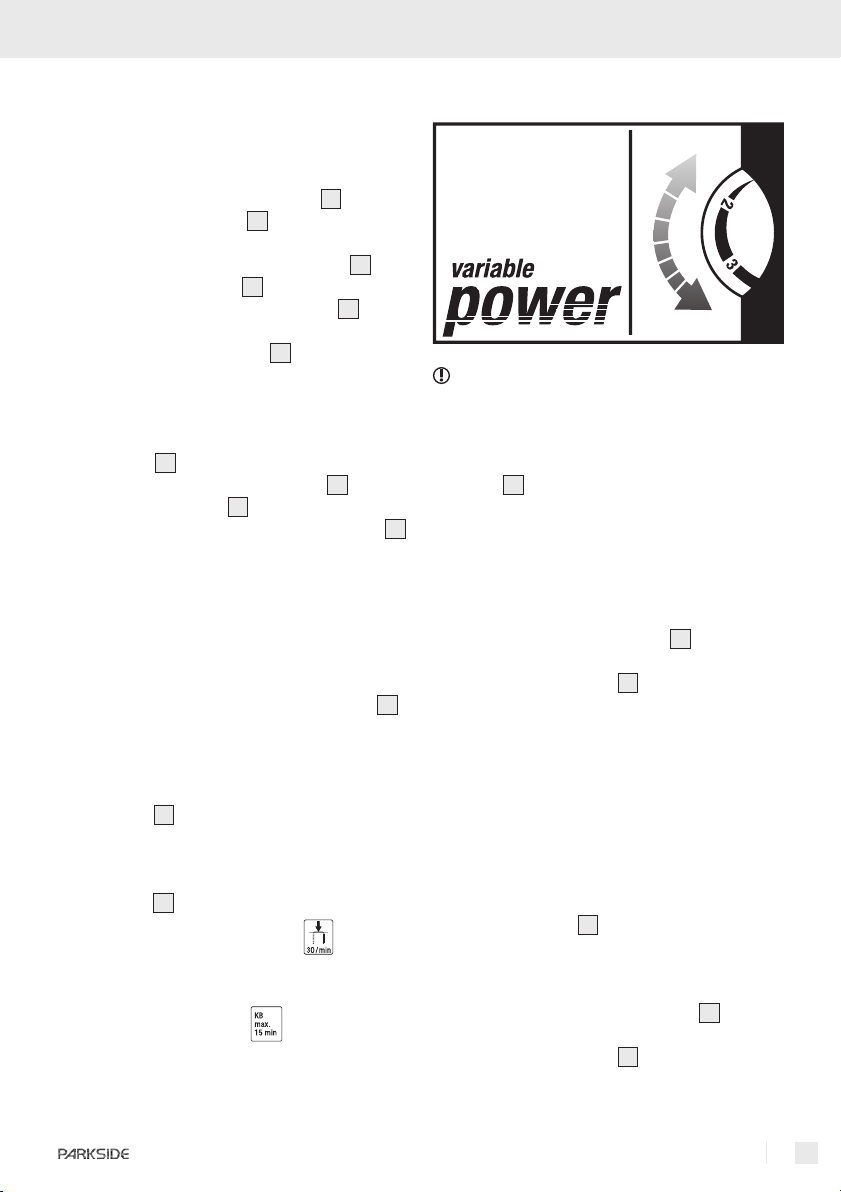
Ajustar la fuerza de impacto
¡Consejo!
j Seleccione la menor fuerza de impacto nece-
saria para el engrapado.
j La fuerza de impacto se puede ajustar progre-
sivamente con el regulador de la fuerza de im-
6
pacto
desde “1“ (mínima fuerza de impacto)
hasta “7“ (máxima fuerza de impacto).
Q
Engrapar
j Conecte el aparato.
j Presione el cabezal de apoyo
4
contra el
punto que desea engrapar.
j Accione el disparador
j Dado el caso, adecue la fuerza de impacto a
2
.
los materiales, las grapas o los clavos.
Conexión:
j Ponga el interruptor de CONEXIÓN / DESCO-
NEXIÓN
8
en la posición „I“ (ver fig. A).
Desconexión:
j Ponga el interruptor de CONEXIÓN / DESCO-
NEXIÓN
8
en la posición „0“.
m Frecuencia de percusión:
La grapadora eléctrica PET 23 VARIO está diseñada
para 30 percusiones por minuto.
m Servicio temporal:
La grapadora eléctrica PET 23 VARIO está diseñada
para trabajar durante 15 minutos a la frecuencia
de percusión máxima. Una vez transcurrido este
tiempo, déjela enfriar suficientemente.
Función de impacto posterior:
Advertencia: Utilice esta función si detecta que
las grapas o clavos ya introducidos en la grapadora
no están bien clavados en el material. Tenga en
cuenta que sólo es posible utilizar la función de
impacto posterior directamente después de cada
uno de los engrapados. Para ello, mientras no levante
el cabezal de apoyo
4
, no se descargará ninguna
otra grapa / clavo para un nuevo engrapado.
j Engrape las grapas / clavos necesarios y siga
presionando el cabezal de apoyo
4
sobre el
punto de fijación.
j Accione el disparador
2
tantas veces como
sea necesario hasta que el engrapado quede
fijo en el material base.
Page 10
Puesta... / Solucionar... / Mantenimiento y limpieza / Eliminación / Informaciones
Ejemplos de aplicación:
j Ujete material para forrar a la superficie para
sentarse de una silla (ver fig. B).
j Sujete barras de para los extremos en la junta
entre la pared y el revestimiento (ver fig. C).
j Tense y engrape una tela en un bastidor (ver
fig. D).
j Sujete película protectora para material de ais-
lamiento en el aislamiento térmico (ver fig. E).
j Sujete soportes para los elementos de un
revestimiento mural (ver fig. F).
Q
Solucionar errores
¡ADVERTENCIA!
Antes de proceder a la
limpieza del aparato y a los trabajos de mantenimiento desenchufe el aparato de la toma de
corriente.
= Error
= Causa
= Solución
El aparato no funciona correctamente.
Una grapa o clavo está bloqueando el aparato.
Abra el pasador del cargador 7. Con ello eli-
minará la pretensión. Con la llave macho hexago-
10
nal
suelte la placa frontal 3.
Extraiga la grapa o el clavo.
Durante el engrapado una grapa o clavo se
ha introducido mal en el material.
Extraiga la grapa / clavo mal engrapado con
unos tenazas / alicates de pico plano.
Utilice grapas o clavos apropiados.
Ajuste la fuerza de impacto necesaria para
engrapar sin problemas la grapa o clavo.
Q
Mantenimiento y limpieza
m¡PRECAUCIÓN! Desconecte el aparato y des-
enchúfelo de la toma de corriente antes de realizar
en él cualquier tipo de trabajo.
La grapadora eléctrica no necesita mantenimiento.
j El aparato debe mantenerse siempre limpio,
seco y libre de aceite o grasas lubricantes.
j Limpie regularmente el dispositivo inmediata-
mente después de finalizar el trabajo.
j No deben entrar líquidos en el interior del dis-
positivo. Utilice un paño para limpiar la carcasa
del aparato. Nunca utilice gasolina, disolventes
o detergentes que puedan dañar el plástico.
Q
Eliminación
El embalaje se compone de materiales
reciclables que puede desechar en los
puntos locales de recogida selectiva.
¡No tire las herramientas eléc-
tricas en la basura doméstica!
Según la Directiva europea 2002/96/CE sobre
residuos de aparatos eléctricos y electrónicos y en
cumplimiento con el derecho nacional, las herramientas eléctricas usadas se tienen que separar y
reciclar sin dañar el medioambiente.
Para deshacerse de un aparato que ya no sirva
pregunte a las autoridades locales o municipales.
Q
Informaciones
Q
Asistencia
Consulte los puntos de atención al cliente de su
país en la documentación de la garantía.
¡ADVERTENCIA!
Haga reparar los
aparatos únicamente por personal
técnico cualificado y con repuestos
originales. Así se garantiza que el aparato
seguirá siendo seguro.
¡ADVERTENCIA!
Si es necesario cam-
biar el enchufe o el cable de alimen-
tación, encargue este trabajo al fabricante del aparato o a su servicio de
atención al cliente. Así se garantiza que el
aparato seguirá siendo seguro.
12 ES
Page 11

13 ES
InformacionesPuesta... / Solucionar... / Mantenimiento y limpieza / Eliminación / Informaciones
Advertencia: Al poner en marcha (Iniciar)
estos equipos puede surgir una breve caída de
tensión, especialmente si la calidad de la red
es mala. Estas caídas pueden influenciar a otros
aparatos (p. ej. el centelleo de una lámpara).
Con una impedancia de Z max < 0.381 ohmios
no suelen aparecer estas averías. (Póngase en
contacto con su empresa de suministro de
energía local para obtener más información).
Q
Declaración de conformidad /
Fabricante
Nosotros, Kompernaß GmbH, Burgstr. 21,
44867 Bochum, Alemania, declaramos
por el presente documento que este producto
cumple las siguientes directivas europeas:
Directiva de máquinas (98 / 37 / EG)
Directiva europea de baja tensión
(2006 / 95 / EG)
Compatibilidad electromagnética
(2004 / 108 / EG)
Normas armonizadas aplicadas
EN 50144 - 1 : 1998 + A1 + A2
EN 50144 - 2 - 16 : 2003
EN 55014 - 1 : 2000 + A1 + A2
EN 55014 - 2 : 1997 + A1
EN 61000 - 3 - 2 : 2000 + A2
EN 61000 - 3 - 11 : 2000
ROHS Directive (2002 / 95 / EEC)
Denominación del producto:
Parkside Grapadora eléctrica PET 23 VARIO
Bochum, 30.04.2008
Hans Kompernaß
- Gerente -
Queda reservado el derecho a realizar modificaciones técnicas
para el perfeccionamiento del dispositivo.
Page 12

14
Page 13

15 IT/MT
Introduzione
Uso corretto ..................................................................................................................Pagina 16
Equipaggiamento .........................................................................................................Pagina 16
Fornitura ........................................................................................................................Pagina 16
Dati tecnici ....................................................................................................................Pagina 17
Istruzioni di sicurezza generali per utensili elettrici
1. Sicurezza dell’area di lavoro ..................................................................................Pagina 17
2. Sicurezza elettrica ....................................................................................................Pagina 18
3. Sicurezza delle persone...........................................................................................Pagina 18
4. Utilizzo attento di dispositivi elettrici .......................................................................Pagina 19
Indicazioni di sicurezza per sparachiodi elettrico ......................................................Pagina 19
Messa in funzione
Gaffette / Chiodi ...........................................................................................................Pagina 20
Riempire il magazzino .................................................................................................Pagina 21
Accensione e spegnimento ..........................................................................................Pagina 21
Regolazione della forza del colpo .............................................................................Pagina 21
Cucire ............................................................................................................................Pagina 21
Indice
Eliminare errori ...................................................................................................Pagina 22
Manutenzione e Pulizia ................................................................................Pagina 22
Smaltimento ...........................................................................................................Pagina 22
Informazioni
Assistenza......................................................................................................................Pagina 22
Dichiarazione di conformità / Produttore ...................................................................Pagina 23
Page 14

Introduzione
In queste istruzioni d'uso / sull'apparecchio sono riportati i seguenti pittogrammi:
Leggere il manuale di istruzioni
per l’uso!
Rispettare le avvertenze e le
indicazioni per la sicurezza!
Attenzione, rischio di scossa elettrica!
Pericolo di morte!
Pericolo di esplosione!
Classe di protezione II
V
Volt (tensione alternata)
~
Tacker elettrico PET 23 VARIO
Q
Introduzione
Prima della prima messa in funzione
dovete sempre studiare bene le funzioni
dell’apparecchio e vi dovete informare
sull‘uso corretto delle attrezzature elettriche. Leggete
bene il seguente manuale d’uso. Conservate bene
questo manuale. In caso di cessione a terzi dell’apparecchio, dovete consegnare anche tutta la documentazione.
Indossare occhiali protettivi, protezioni
per l’udito, mascherina antipolvere e
guanti protettivi.
Tenere lontano i bambini
dall’apparecchio elettrico!
Proteggere l’apparecchio elettrico
dall’umidità!
Fare attenzione a che l’apparecchio,
il cavo di alimentazione e la spina
non siano danneggiati!
Smaltire l’imballaggio dell’apparecchio
in modo ecocompatibile!
Q
Equipaggiamento
1
Maniglia
2
Pulsante di scatto
3
Piastra frontale
4
Naso del Tacker
5
Magazzino
6
Regolatore della forza dei colpi
7
Avanzatore magazzino
8
l’interruttore ON / OFF
9
Cavo di collegamento
10
Chiave con esagono incassato
Q
Uso corretto
Il tacker elettrico è destinato al solo uso privato per
la cucitura di cartone, materiale di isolamento, pelle,
stoffa (stoffe tessili e / o stoffe in fibre naturali) e
materiali simili su legno duro, legno morbido, trucciolare e panelli in compensato.
L’utilizzo deve avvenire solamente in luoghi asciutti.
Ogni uso non corretto provoca seri pericoli di incidenti e fa decadere la garanzia.
16 IT/MT
Q
Fornitura
1 Tacker elettrico PET 23 VARIO
150 Graffette a filo fine 12 mm: Tipo 53
150 Graffette a filo fine 18 mm: Tipo 53
150 Graffette strette 19 mm: Tipo 55
150 Chiodi 23 mm: Tipo 47
1 Chiave con esagono incassato
1 Manuale d’uso
1 Fascicolo “Garanzia e Assistenza”
Page 15

17 IT/MT
Introduzione / Istruzioni di sicurezza generali per utensili elettrici
Q
Dati tecnici
Tensione nominale: 230 V ~ 50 Hz
Numero di colpi:
30 / min
PET 23 VARIO
KH 3145
230 V ˜ 50 Hz
Esercizio breve (KB):
max. 15 Min.
Classe di protezione: II /
Informazioni per il rumore e le vibrazioni:
Generalmente il valore di livello sonoro ponderato
A generato dall’apparecchio è di 95,0 dB (A).
Il valore di livello sonoro nel corso di esecuzione di
una lavorazione può superare gli 108,0 dB (A).
Indossare un idoneo dispositivo
di protezione auricolare!
Accelerazione valutata, tipica:
Vibrazione mano / braccio a
ATTENZIONE!
= 5,54 m / s
h
Dal momento che Il valore
2
relativo al livello di vibrazioni indicato nelle presenti
istruzioni d’uso è stato misurato in conformità alla
procedura esplicata nella normativa attualmente in
vigore, essa può essere utilizzata per un confronto
tra apparecchi.
Il livello di vibrazioni si modifica a seconda del tipo
di utilizzo dell’apparecchio elettrico, ed in alcuni casi
può essere superiore al valore indicato nelle presenti
istruzioni d’uso. Il carico di vibrazione potrebbe
essere sottostimato qualora l’apparecchio elettrico
fosse regolarmente utilizzato in tale modo.
KB
max.
30 /min
Type 53
12 - 18 mm
Date of manufacture: 04-2008
Kompernaß GmbH · 44867 Bochum (Germany)
www.kompernass.com
I
D
2
3
:
0
2
0
2
0
2
0
0
15 min
Type 55
12 - 19 mm
Type 47
23 mm
Istruzioni di sicurezza
generali per utensili elettrici
ATTENZIONE!
cazioni e gli avvisi di sicurezza!
Eventuali mancanze nell’osservanza delle indicazioni
e degli avvisi di sicurezza possono provocare una
scossa elettrica, un incendio e / o gravi lesioni.
Leggere tutte le indi-
Nota: Per una corretta valutazione dell’affaticamento
da vibrazioni durante un determinato periodo di
lavorazione devono essere considerati anche i tempi
in cui l’apparecchio è disinserito o è funzionante,
senza però essere utilizzato. Ciò può ridurre in
misura notevole l’affaticamento da vibrazioni lungo
il periodo di lavorazione complessivo.
CONSERVARE TUTTE LE INDICAZIONI E GLI
AVVISI DI SICUREZZA PER EVENTUALI NECESSITA’
FUTURE!
1. Sicurezza dell’area di lavoro
a) Mantenere l’area di lavoro pulita e
ben illuminata. Il disordine ed aree di lavoro
poco illuminate possono determinare incidenti.
Page 16

Istruzioni di sicurezza generali per utensili elettrici
b) Non lavorare con l’apparec-
chio in un’atmosfera dove si
trovino liquidi infiammabili,
esplosiva, gas e polveri. Gli utensili elettrici
generano scintille che possono infiammare la
polvere o i gas.
c)
In caso di distrazione potreste perdere il con-
Durante l’utilizzo del disposi-
tivo elettrico tenere lontani
bambini e persone estranee.
trollo dell’apparecchio.
2. Sicurezza elettrica
Evitare il pericolo di morte
a seguito di scossa elettrica:
a) La spina di connessione dell’apparec-
chio deve essere adatta alla presa elettrica nella quale essa viene inserita.
In nessun caso l’adattatore deve
essere modificato. Non utilizzare
spine con apparecchi messi a terra.
Spine non modificate e prese adatte riducono
il rischio di una scossa elettrica.
b)
Evitare il contatto del corpo con superfici
messe a terra, quali ad esempio quelle
di tubi, caloriferi, cucine economiche
e frigoriferi. Sussiste un elevato rischio di
scossa elettrica, qualora il Vostro corpo fosse
messo a terra.
c)
apparecchio elettrico accresce il rischio di
d)
o per estrarre la spina dalla presa elet-
e) In caso di lavori all’aperto utilizzare
Mantenere l’apparecchio lon-
tano da pioggia o umidità. La
penetrazione di acqua in un
scossa elettrica.
Non utilizzare il cavo in modo
non conforme, cioè per tirare
l’apparecchio, per appenderlo
trica. Tenere il cavo lontano da calore,
olio, spigoli acuti o di parti in movimento
dell’apparecchio. Cavi danneggiati o attor-
cigliati accrescono il rischio di scossa elettrica.
solamente prolunghe ammesse anche
per un loro utilizzo all‘aperto. L’utilizzo
di una tale prolunga riduce il rischio di scossa
elettrica.
f) Qualora non si possa evitare l‘eserci-
zio dell’elettroutensile in un ambiente
umido, fare uso di un interruttore
differenziale, circostanza che riduce il
rischio di una scossa elettrica.
3. Sicurezza delle persone
a) Fare sempre estrema attenzione a
ciò che si fa e accostarsi al lavoro con
il dispositivo elettrico sempre in modo
cosciente. Non utilizzare l’apparecchio quando si è stanchi o sotto l’influsso di droghe, alcol o medicinali.
Un solo attimo di disattenzione nell’utilizzo
dell’apparecchio può provocare serie lesioni.
b)
Indossando l’equipaggiamento di protezione
c) Evitare qualsiasi avvio involontario
d) Prima di avviare l’apparecchio,
e) Mantenere una postura del corpo
Indossare sempre l’equipag-
giamento di protezione personale e gli occhiali protettivi.
personale, quale una mascherina antipolvere,
scarpe di sicurezza antisdrucciolevoli, un casco di protezione o una protezione auricolare,
a seconda del tipo e dell’utilizzo dell’apparecchiatura elettrica, riduce il rischio di lesioni.
dell’utensile. Assicurarsi che l’utensile
sia disinserito prima di collegarlo
alla rete di alimentazione elettrica,
di sollevarlo o di trasportarlo. Se
durante il trasporto dell’apparecchio il dito
dell’utilizzatore si trova sull’interruttore
ON / OFF oppure l’apparecchio è inserito,
possono determinarsi incidenti.
rimuovere il dispositivo di regolazione
o la chiave per dadi. Un utensile o una
chiave che si trovi in una parte di apparecchio
in rotazione può provocare lesioni.
normale. Assicurarsi di avere un sostegno
sicuro e mantenere sempre l’equilibrio. In questo
modo è possibile controllare meglio l’apparec-
18 IT/MT
Page 17

19 IT/MT
Istruzioni di sicurezza generali per utensili elettrici
chio, in modo particolare in caso di situazioni
impreviste.
f) Indossare un abbigliamento appro-
priato. Non indossare un abbigliamento largo o bigiotteria. Mantenere
capelli, abbigliamento e guanti lontano da parti in movimento. Abbiglia-
mento sciolto, gioielli o capelli lunghi possono
essere trascinati da parti in movimento.
g) Quando vengono montati dispositivi
di aspirazione e di cattura della polvere, assicurarsi che questi siano stati
montati ed utilizzati correttamente.
L’utilizzo di questi dispositivi riduce i pericoli
provocati dalla polvere.
4. Utilizzo attento
di dispositivi elettrici
a) Non sovraccaricare l’apparecchio. Per
un determinato lavoro utilizzare sempre il dispositivo elettrico a ciò appropriato. Con il dispositivo elettrico appropriato
si lavora meglio e con maggiore sicurezza nello
specifico ambito di utilizzo.
b) Non utilizzare dispositivi elettrici il cui
interruttore sia difettoso. Un dispositivo
elettrico che non si può più accendere e spegnere
rappresenta un pericolo, e deve essere riparato.
c) Estrarre la spina dalla presa elettrica
prima di eseguire regolazioni all‘apparecchio, di sostituire di accessori o di
riporre l’apparecchio. Queste misure di
prudenza impediscono l’avvio involontario
dell’apparecchio.
d) Mantenere dispositivi elettrici non uti-
lizzati fuori dalla portata di bambini.
Non fare utilizzare l’apparecchio da
persone che non lo conoscano o del
quale non abbiano letto le istruzioni
d’uso. I dispositivi elettrici sono pericolosi se
utilizzati da persone inesperte.
e) Avere cura dell’apparecchio. Control-
lare se parti mobili dell’apparecchio
funzionano perfettamente e non si
bloccano, se parti di esso sono rotte o
danneggiate, che la funzionalità
dell’apparecchio non sia messa a
rischio. Fare riparare le parti danneggiate prima di utilizzare di nuovo l’apparecchio. Molti incidenti sono provocati
dal fatto che i dispositivi elettrici non vengono
sottoposti ad una corretta manutenzione.
f) Mantenere gli utensili di taglio affila-
ti e puliti. Utensili di taglio curati con attenzione e fornitidi bordi taglienti si incastrano meno
frequentemente e sono semplici da guidare
durante il lavoro.
g) Utilizzare dispositivi elettrici, acces-
sori, i dispositivi da inserire ecc, in
conformità alle presenti istruzioni e
nel modo descritto per questo particolare tipologia di apparecchio. In
questo senso, tenere presente le
condizioni di lavoro e l’attività da
eseguire. L’utilizzo di dispositivi elettrici per
scopi diversi da quelli previsti può provocare
situazioni di pericolo.
Indicazioni di sicurezza
per sparachiodi elettrico
J Fate sempre attenzione che non vengano colpiti
persone o animali dalle graffette oppure dai
chiodi!
J
lavori di supporto durante il lavori.
J Riempite il magazzino
J Non usate l’apparecchio per fissare cavi elettrici.
J Bloccare il pezzo da lavorare. A questo
J Portare il cavo sempre verso la parte posteriore
Proteggete i vostri occhi! Portate sem-
pre occhiali protettivi. Questo vale
anche per la persona che esegue
5
solamente ad appa-
recchio spento! Impostate l’interruttore ON /
8
OFF
sulla posizione „0“.
scopo utilizzare dispositivi di bloccaggio / una
morsa a vite attorno al pezzo. Esso viene in
questo modo
non con la mano.
dell’apparecchio.
trattenuto in modo più sicuro che
Page 18

Messa in funzione
Q
Messa in funzione
Tipo
mm
La tensione della presa di rete deve corrispondere
con quella indicata sulla targhetta dell‘apparecchio.
Apparecchi contrassegnati con 230 V ~ possono
essere fatti funzionare anche con 220 V ~.
Q
Gaffette / Chiodi
Nota: L‘apparecchio è destinato per le seguenti
tipologie di graffette e di chiodi comunemente
reperibili in commercio:
Regolazione della forza di colpo consigliata per:
Legno duro
Tipo di
graffetta /
chiodo
11,4 mm
L
10 mm
Tipo 53
6 mm
L
4 mm
Tipo 55
(p.es. quercia o faggio)
Lunghezza (mm)
12
5 - 6
14
6
18
6 - 7
12
5 - 6
14
5 - 6
16
6 - 7
18
7
19
7
55
53
47
12, 14, 16, 18, 19
12, 14, 18
23
Nota: L‘accessorio seguente può essere acquistato
anche presso il punto di assistenza competente del
Paese di vendita dell‘apparecchio.
Le seguenti indicazioni si intendono come raccomandazioni non vincolanti. Provate voi stessi durante
l lavoro, quale tipo di graffetta / chiodo e quale
regolazione della forza del colpo è adatta alla
base da utilizzare!
Legno morbido
(p.es. abete o pino)
1 - 4
2 - 5
4 - 6
3 - 5
3 - 5
5
5
6
Panello
trucciolare /
panello MDF
4 - 6
5 - 6
6 - 7
2 - 5
3 - 5
4 - 5
4 - 6
5 - 7
Panello in
compensato
(p.es. panello da
falegname)
5 - 6
6
6 - 7
2 - 5
3 - 5
4 - 5
4 - 6
5 - 7
20 IT/MT
L
Tipo 47
23
7 6 6 - 7 6 - 7
Page 19

21 IT/MT
Messa in funzione
Q
Riempire il magazzino
Usate solamente graffette a filo fino (tipo 53), graffette
a dorso fino (tipo 55) oppure chiodi (tipo 47)!
7
7
dal
in dire-
j Spingete il cursore del magazzino
zione magazzino
5
e portatelo verso l’alto.
j Estraete completamente il cursore
magazzino
5
.
j Togliete eventualmente le graffette oppure i
chiodi non necessarie dal magazzino
5
.
j Inserite le graffette oppure i chiodi necessari
nel magazzino
5
.
j Rilevate le informazioni sul corretto inserimento
delle graffette o dei chiodi dal testo sul cursore
del magazzino
j Inserite il cursore
magazzino
j Premete poi il cursore
7
.
7
fino al fine corsa nel
5
.
7
verso il basso e fatelo
incastrare.
Q
Accensione e spegnimento
m ATTENZIONE! Collegate l’apparecchio alla
corrente solamente, quando l’apparecchio è spento!
Impostate l’interruttore ON / OFF
8
sulla
posizione „0“.
Accensione:
j Impostate l’interruttore ON / OFF
8
sulla
posizione „I“ (Vedi Fig. A).
Spegnimento:
j Impostate l’interruttore ON / OFF
8
sulla
posizione „0“.
m Numero di colpi:
La pinzatrice elettronica PET 23 VARIO è predisposta
per 30 colpi al minuto.
Q
Regolazione della forza
del colpo
Consiglio!
j Selezionare la minima forza del colpo che vi
serve per la cucitura.
j Potete regolare la forza del colpo con il rego-
6
latore
colpo minima) fino a “7” (forza del colpo
massima).
Q
Cucire
j Accendete l’apparecchio.
j Spingete il naso del tacker
vuole cucire.
j Azionate il pulsante di scatto
j Adattate eventualmente la forza del colpo ai
materiali, le graffette oppure ai chiodi.
Possibilità di ripetizione del colpo:
Nota: Utilizzare questa funzione quando si nota
che le graffette / i chiodi precedentemente utilizzati
non si sono conficcati correttamente nel materiale.
Fate attenzione che la possibilità di ripetizione del
colpo si crea solamente durante la singola cucitura.
Fino a quando non sollevate il naso del tacker
non vengono ricaricati altre graffette o chiodi.
in modo continuo da “1” (forza del
4
sul punto che si
2
.
4
,
m Funzionamento di durata breve:
La pinzatrice elettronica PET 23 VARIO è predisposta
per un funzionamento di 15 minuti in caso di lavori
in cui viene utilizzato il massimo numero di colpi.
Trascorso questo periodo lasciate che l’apparecchio
si raffreddi sufficientemente.
j Cucite la graffetta / il chiodo necessaria e pre-
mete il naso del tacker
4
sempre sul punto di
fissaggio.
j Premete il pulsante di scatto
2
fino a quando
la cucitura nel materiale di base è perfetta.
Page 20

Messa... / Eliminare errori / Manutenzione e Pulizia / Smaltimento / Informazioni
Esempi di utilizzo:
j Fissate la stoffa di rivestimento sulla seduta di
una sedia (vedi Fig. B).
j Fissate batticalcagni da nella zona di passaggio
al pavimento e alla parete (vedi Fig. C).
j Fissate e cucite una tela in una cornice (vedi
Fig. D).
j Fissate la pellicola protettiva per materiale di
isolamento per il calore (vedi Fig. E).
j Fissate i fissaggi per gli elementi di un rivesti-
mento da parete (vedi Fig. F).
Q
Eliminare errori
ATTENZIONE!
Prima di ogni intervento di
pulizia e di manutenzione estrarre la spina dalla
presa.
= Errore
= Causa
= Eliminazione
L’apparecchio non lavora corretta-
mente.
Una graffetta o un chiodo blocca l’apparecchio.
Aprite il cursore del magazzino 7. In questo
modo allentate la precompressione. Staccate
con la chiave ad esagono incassato
stra frontale
3
(vedi Fig. G).
10
la pia-
Togliete la graffetta o il chiodo.
Una graffetta o un chiodo si è inserito in modo
errato durante la cucitura.
Togliete la graffetta / il chiodo con una tenaglia /
pinza a punta.
Scegliete le graffette oppure i chiodi adatti.
Impostate la forza del colpo adatta, per fissare
correttamente la graffetta oppure il chiodo.
Q
Manutenzione e Pulizia
m ATTENZIONE! Prima di eseguire la pulizia o
interventi di manutenzione all‘apparecchio estrarre
la spina dalla presa di rete.
22 IT/MT
Il tacker elettrico non necessità di manutenzione.
j L´apparecchio deve essere sempre pulito,
asciutto e privo di tracce di olio e di grasso.
j Pulire regolarmente l’apparecchio subito dopo
la conclusione del ciclo di lavorazione.
j Nessun liquido deve penetrare nell‘interno
dell‘apparecchio. Per la pulizia dell‘alloggiamento utilizzare un panno.
Q
Smaltimento
L’imballaggio è composto da materiali
ecologici, che possono essere smaltiti
presso i siti di riciclaggio locali.
Non gettare gli utensili elettrici
nei rifiuti domestici!
In conformità alla direttiva europea 2002 / 96 / EG sui
rifiuti di apparecchiature elettriche ed elettroniche e
relativa trasposizione nel diritto nazionale, gli utensili elettrici usati devono essere raccolti separatamente
e riciclati in maniera compatibile con l’ambiente.
Informazioni sulle possibilità di smaltimento di apparecchi giunti al termine della loro vita utile sono
disponibili presso le amministrazioni comunali.
Q
Informazioni
Q
Assistenza
Il centro di assistenza competente per ciascun
paese è indicato nei documenti di garanzia.
ATTENZIONE!
Affidare la riparazione
dell’apparecchio esclusivamente a
personale specializzato e qualificato e
con pezzi di ricambio originali, a garanzia della
sicurezza dell’apparecchio.
ATTENZIONE!
La sostituzione della
spina o del cavo di alimentazione
deve essere eseguita esclusivamente
dal fabbricante dell’apparecchio o
dal relativo servizio clienti, a garanzia della
sicurezza dell’apparecchio.
Page 21

23 IT/MT
Informazioni
N o t a : All’avvio di queste apparecchiature, può
avere luogo un breve vuoto di tensione, in modo
particolare in caso di cattiva qualità di rete. Tali
vuoti possono influenzare anche altri apparecchi
(provocando, ad esempio, lo sfarfallio di una
lampada). In presenza di una impedenza
Zmax<0.381 OHM tali disturbi non dovrebbero
accadere. (Si prega di contattare la società
locale di fornitura elettrica per ulteriori informa-
zioni).
Q
Dichiarazione di conformità /
Produttore
L’azienda Kompernaß GmbH, Burgstr. 21,
44867 Bochum, Germania, dichiara la conformità
del presente prodotto alle seguenti direttive UE:
Direttiva macchine (98 / 37 / EG)
Direttiva CE sulla bassa tensione
(2006 / 95 / EG)
Compatibilità elettromagnetica
(2004 / 108 / EG)
Norme utilizzate ed armonizzate
EN 50144 - 1 : 1998 + A1 + A2
EN 50144 - 2 - 16 : 2003
EN 55014 - 1 : 2000 + A1 + A2
EN 55014 - 2 : 1997 + A1
EN 61000 - 3 - 2 : 2000 + A2
EN 61000 - 3 - 11 : 2000
ROHS Directive (2002 / 95 / EEC)
Descrizione del prodotto:
Parkside Tacker elettrico PET 23 VARIO
Bochum, 30.04.2008
Hans Kompernaß
- Amministratore -
Modifiche tecniche nel senso dello sviluppo rimangono riservati.
Page 22

24
Page 23

25 GB/MT
Introduction
Proper use .....................................................................................................................Page 26
Features and equipment ...............................................................................................Page 26
Included items ...............................................................................................................Page 26
Technical information ...................................................................................................Page 27
General safety advice for electrical power tools
1. Workplace safety .....................................................................................................Page 27
2. Electrical safety .........................................................................................................Page 28
3. Personal safety ..........................................................................................................Page 28
4. Careful handling and use of electrical power tools ...............................................Page 29
Safety advice for electric tackers .................................................................................Page 29
Commissioning
Staples / nails ................................................................................................................Page 29
Loading the magazine .................................................................................................Page 30
Switching ON and OFF ...............................................................................................Page 30
Setting the impact force ...............................................................................................Page 31
Stapling .........................................................................................................................Page 31
Rectifying faults ..................................................................................................Page 31
Maintenance and cleaning ........................................................................Page 32
Disposal ......................................................................................................................Page 32
Information
Service centre ...............................................................................................................Page 32
Declaration of Conformity / Manufacturer ................................................................Page 33
Page 24

Introduction
The following pictograms are used in these operating instructions / on the device:
Read instruction manual!
Observe caution and safety notes!
Caution – electric shock!
Danger to life!
Explosive material!
Safety class II
V
Voltage
~
Electric tacker PET 23 VARIO
Q
Introduction
Please make sure you familiarise yourself
fully with the way the device works before
you use it for the first time and that you
understand how to handle electrical power tools correctly. Further details can be found in the operating
instructions. Keep these instructions in a safe place.
If you pass the device on to anyone else, please
ensure that you also pass on all the documentation.
Wear hearing protection, dust
protection mask, protective glasses
and protective gloves.
Keep children away from electrical
power tools!
Protect electrical power tools from
moisture!
Check that the device, mains lead
and plug are in good condition!
Dispose packaging and appliance in
an environmentally-friendly way!
Q
Features and equipment
1
Hand grip
2
Trigger
3
Front plate
4
Nose
5
Magazine
6
Impact force controller
7
Magazine slider
8
ON / OFF switch
9
Mains lead
10
Hexagonal socket screw key
Q
Proper use
The electric tacker is suitable for domestic use only
and is intended exclusively for stapling cardboard,
insulation, leather, cloth (textile or natural fibres) or
similar materials on to hardwood, softwood, chipboard or similar plywood-type materials.
The device is suitable for use in dry rooms only. Any
improper use gives rise to serious danger of accident
and invalidates the guarantee.
26 GB/MT
Q
Included items
1 Electric tacker PET 23 Vario
150 No. fine wire staples 12 mm: Type 53
150 No. fine wire staples 18 mm: Type 53
150 No. narrow-backed staples 19 mm: Type 55
150 No. nails 23 mm: Type 47
1 Hexagonal socket screw key
1 Operating instructions
1 Booklet “Guarantee and service”
Page 25

27 GB/MT
Introduction / General safety advice for electrical power tools
Q
Technical information
Nominal voltage: 230 V ~ 50 Hz
Impact cycles:
Short-term
operation time (KB):
Protection class: II /
Noise and vibration data:
The sound pressure level (A-weighted) of the
device is typically 95,0 dB(A). The sound level while
working can exceed 108,0 dB (A).
Wear ear protection!
Evaluated acceleration, typical:
Hand / arm vibration a
30 / min
max. 15 min
= 5,54 m / s
h
2
PET 23 VARIO
KH 3145
230 V ˜ 50 Hz
KB
max.
30 /min
Type 53
12 - 18 mm
Date of manufacture: 04-2008
Kompernaß GmbH · 44867 Bochum (Germany)
www.kompernass.com
15 min
Type 55
12 - 19 mm
Type 47
23 mm
WARNING!
The vibration level given in these
instructions has been measured in accordance with
a standardised measurement procedure and can
be used to compare devices.
Different uses of the device give rise to different
vibration levels and in many cases they may exceed
the values given in these instructions. In some circumstances it is easy to underestimate the vibration
load if the electrical power tool is used regularly.
Note: If you wish to make an accurate assessment
of the vibration loads experienced during a particular
period of working, you should also take into account
the intervening periods of time when the device is
switched off or is running but is not actually in use.
This can result in a much lower vibration load over
the whole of the period of working.
I
D
2
3
:
0
2
0
2
0
2
0
0
General safety advice for
electrical power tools
WARNING!
and instructions!
Failure to observe the safety advice and instructions
may result in electric shock, fire and / or serious injury.
KEEP ALL THE SAFETY ADVICE AND INSTRUCTIONS
IN A SAFE PLACE FOR FUTURE REFERENCE!
Read all the safety advice
1. Workplace safety
a) Keep your working area clean and
well lit. Untidy or poorly lit working areas
can lead to accidents.
b)
inflammable liquids, gases or dusts.
Do not work with the device
in potentially explosive environments in which there are
Page 26

General safety advice for electrical power tools
Electrical power tools create sparks, which can
ignite dusts or fumes.
c)
Distractions can cause you to lose control of
Keep children and other
people away while you are
operating the electrical tool.
the device.
2. Electrical safety
To avoid danger to life from
electric shock:
a)
The mains plug on the device must match
the mains socket. The plug must not
be modified in any way. Do not use
an adapter plug with devices fitted
with a protective earth. Unmodified
plugs and matching sockets reduce the risk of
electric shock.
b) Avoid touching earthed surfaces such
as pipes, radiators, ovens and refrigerators with any part of your body.
There is an increased risk of electric shock if
your body is earthed
c) Keep the device away from
rain or moisture. Water entering
an electrical device increases the
risk of electric shock.
d)
device, to hang up the device or to pull
e) When working outdoors with an electri-
f) Use a residual current device (RCD)
Do not use the mains lead for
any purpose for which it was
not intended, e.g. to carry the
the mains plug out of the mains socket.
Keep the mains lead away from heat,
oil, sharp edges or moving parts of the
device. Damaged or tangled mains leads
increase the risk of electric shock.
cal power tool always use extension cables that are also approved for use outdoors. The use of an extension cable suitable for
outdoor use reduces the risk of electric shock.
for protection if operating the electrical power tool in a moist environment
.
is unavoidable. The use of an RCD reduces
the risk of electric shock.
3. Personal safety
a) Remain alert at all times, watch what
you are doing and always proceed
with caution. Do not use the device if
you are tired or under the influence
of drugs, alcohol or medication. One
moment of carelessness when using the device
can lead to serious injury.
b)
personal protective equipment such as dust
c) Avoid unintentional operation of the
d) Remove any setting tools or spanners
e) Avoid placing your body in an unnat-
f) Wear suitable clothing. Do not wear
g) If vacuum dust extraction and collec-
Wear personal protective
equipment and always wear
safety glasses. The wearing of
masks, non-slip safety shoes, safety helmets or
ear protectors, appropriate to the type of electrical power tool used and work undertaken,
reduces the risk of injury.
device. Check that the electrical power
tool is switched off before you connect
it to the mains, pick it up or carry it.
Accidents can happen if you carry the device
with your finger on the ON / OFF switch or with
the device switched on.
before you switch the device on. A
tool or spanner left attached to a rotating part
of a device can lead to injury.
ural position. Keep proper footing
and balance at all times. By doing this
you will be in a better position to control the
device in unforeseen circumstances.
loose clothing or jewellery. Keep your
hair, clothing and gloves clear of moving parts. Loose clothing, jewellery or long
hair can become trapped in moving parts.
tion devices are fitted do not forget to
check that they are properly connected
and correctly used. The use of these de-
vices reduces the hazard presented by dust.
28 GB/MT
Page 27

29 GB/MT
General safety advice for electrical power tools / Commissioning
4.Careful handling and use of
electrical power tools
a)Do not overload the device. Always
use an electrical power tool that is
intended for the task you are undertaking. By using the right electrical power
tool for the job you will work more safely and
achieve a better result.
b)Do not use an electrical power tool if
its switch is defective. An electrical power
tool that can no longer be switched on and off
is dangerous and must be repaired.
c)Pull the mains plug out of the socket
before you make any adjustments to
the device, change accessories or
when the device is put away. This pre-
caution is intended to prevent you from unintentionally starting the device.
d)When not in use always ensure that
electrical power tools are kept out of
reach of children. Do not let anyone
use the device if he or she is not familiar with it or has not read the
instructions and advice. Electrical power
tools are dangerous when they are used by
inexperienced people.
e)Look after the device carefully. Check
that moving parts are working properly and move freely. Check for any
parts that are broken or damaged
enough to detrimentally affect the
functioning of the device. Have damaged parts repaired before you use
the device. Many accidents have their ori-
gins in poorly maintained electrical power tools.
f) Keep cutting tools clean and sharp.
Carefully maintained cutting tools with sharp
cutting edges are less likely to jam and are
easier to control.
g) Use the electrical power tool, acces-
sories, inserted tools etc. in accordance with these instructions and
advice, and the stipulations drawn
up for this particular type of device.
In doing this, take into account the
working conditions and the task in
hand. The use of electrical power tools for
purposes other than those intended can lead to
dangerous situations.
Safety advice
for electric tackers
J Ensure that staples and nails cannot strike
people or animals.
J
by supporting or holding the workpiece.
J Make sure the tool is switched off before you
J Do not use the tool to fix electrical cabling in
J Securely support the workpiece. Use
J Always work with the mains lead leading
Q
Commissioning
The mains voltage at the mains socket must match
that shown on the rating plate on the device. Devices
marked with 230 V ~ can also be operated at
220 V ~.
Q
Staples / nails
Note: The device is designed to use the following
standard, widely available staples and nails:
Type mm
55
53
47
Note: Suitable accessories can also be obtained
from the Service Centre for your country.
Protect your eyes. Wear protective
glasses. This also applies to people
who may be helping with the work
load the magazine
OFF switch
place.
clamps or a vice to grip the workpiece firmly.
This is much safer than holding it in your hand.
away from the rear of the device.
5
. To do this set the ON /
8
to position “0”.
12, 14, 16, 18, 19
12, 14, 18
23
Page 28

Commissioning
The following information shall be considered as
recommendatory only. Determine for yourself by
practical tests the best staple or nail type and the
optimum impact force setting for your substrate.
Recommended impact force setting for:
Staple /
nail type
11,4 mm
L
10 mm
Type 53
6 mm
L
4 mm
Type 55
L
Type 47
Q
Loading the magazine
Hardwood
Length
(mm)
(e.g. oak or beech)
12
5 - 6
14
6
18
6 - 7
12
5 - 6
14
5 - 6
16
6 - 7
18
7
19
7
23
7 6 6 - 7 6 - 7
Softwood
(e.g. spruce or pine)
1 - 4
2 - 5
4 - 6
3 - 5
3 - 5
5
5
6
Use only fine wire staples (type 53), narrow-backed
staples (type 55) or nails (type 47)!
j Press the magazine slider
the magazine
5
and guide it upwards.
j Pull the magazine slider
the magazine
5
.
7
in the direction of
7
completely out of
j If necessary remove any staples or nails of the
wrong type from the magazine
5
.
j Slide the correct staples or nails into the maga-
5
zine
.
j Look at the depiction on the magazine slider
7
for how to insert the staples or nails correctly.
j Push the magazine slider
5
until it meets the stop.
7
into the magazine
Chipboard /
MDF board
4 - 6
5 - 6
6 - 7
2 - 5
3 - 5
4 - 5
4 - 6
5 - 7
j Then press the magazine slider
Plywood
(e.g. wood core plywood)
5 - 6
6
6 - 7
2 - 5
3 - 5
4 - 5
4 - 6
5 - 7
7
downwards
until it has definitely engaged.
Q
Switching ON and OFF
m CAUTION! Connect the tool to the mains
only when it is switched off. To do this set the ON /
OFF switch
8
to position “0”.
To switch ON:
j Set the ON / OFF switch
8
to position “I”
(see Fig. A).
30 GB/MT
Page 29

31 GB/MT
Commissioning / Rectifying faultsCommissioning
To switch OFF:
j Set the ON / OFF switch
8
to position “0”.
m Blow count:
The Electric Tacker PET 23 VARIO is designed for
30 blows per minute.
m Continuous Operating Time:
The Electric Tacker PET 23 VARIO is designed for
15 minutes of continuous operation at the maximum
blow count. Allow the appliance to cool down sufficiently after such a tasking.
Q
Setting the impact force
A tip!
j Select the lowest impact force required for
stapling.
j You can set the impact force at any value between
“1” (lowest impact force) and “7” (highest impact force) using the impact force controller
6
flush in the material. Redriving must be carried out
directly at each staple or nail. If you do not lift the
4
nose
when doing this then no further staple or
nail will be loaded into the driving position.
j Drive the required staple or nail and press the
nose piece
4
once more on to the next redriv-
ing position.
j Press the trigger
2
as often as necessary until
the staple or nail is flush with the substrate.
Examples of use:
j Fastening a covering to the seat of a chair
(see Fig. B).
j Fixing a skirting at the joint between the wall
and floor covering (see Fig. C).
j Stretching and stapling a canvas to a frame
(see Fig. D).
j Attaching a protective film to insulation material
when installing thermal insulation (see Fig. E).
j Attaching fixings for components in a wall
cladding system (see Fig. F).
Q
Rectifying faults
WARNING!
Before you clean or maintain
the device always pull the mains plug out of the
mains socket.
= Fault
= Cause
.
= Remedy
Q
Stapling
j Switch on the tool.
j Press the nose
4
on the spot where you wish
to staple.
j Press the trigger
2
.
j Adjust the impact force to suit the materials,
staples or nails.
Redriving:
Note: Use this function if you discover that some
already-driven staples or nails have not ended up
The tool does not work properly.
A staple or nail is blocking the tool.
Open the magazine slider 7. This should re-
10
3
.
lease the pretension. Take off the front plate
with the hexagonal socket screw key
Remove the staple or nail.
A staple or nail has been incorrectly driven into
the material.
Remove the incorrectly driven staple or nail
with pincers or pointed pliers.
Select suitable staples or nails.
Set the required impact force that will correctly
drive the staples or nails.
Page 30

Maintenance and cleaning / Disposal / Information
Q
Maintenance and cleaning
CAUTION! Always pull the plug out of the mains
socket before cleaning or maintaining the device.
The electric tacker is designed to be maintenance-free.
j Always keep the device clean, dry and free of
oil or grease.
j Clean the device frequently. This should be done
immediately after you have finished using it.
j Do not allow any liquids to enter the device.
Use a cloth to clean the housing. Never use
petrol, solvents or cleaning agents that might
attack plastic.
Q
Disposal
The packaging is wholly composed of
environmentally-friendly materials that can
be disposed of at a local recycling centre.
Do not dispose of electrical power
tools with the household rubbish!
In accordance with European Directive 2002 / 96 / EC
(covering waste electrical and electronic equipment)
and its transposition into national legislation, worn
out electrical power tools must be collected separately
and taken for environmentally compatible recycling.
WARNING!
needs to be replaced, always have
the replacement carried out by the
manufacturer or its service centre. This
will ensure that your device remains safe to use.
Note: Through poor conditions of the electrical
mains, shortly voltage drops can appear when
starting the equipment. This can influence other
equipment (eg. Blinking of a lamp). If the mainsimpedance z max < 0.381 OHM, such disturbances are not expected. (In case of need, you
may contact you local supply authority for further information.)
If the plug or mains lead
Contact your local refuse disposal authority for
more details of how to dispose of your worn out
electrical devices.
Q
Information
Q
Service centre
The service centre for your country is shown in the
warranty documentation.
WARNING!
repaired only by qualified specialist
personnel using original manufacturer
parts only. This will ensure that your device
remains safe to use.
32 GB/MT
Have your device
Page 31

33 GB/MT
Q
Declaration of Conformity /
Manufacturer
We, Kompernaß GmbH, Burgstr. 21,
44867 Bochum, Germany, declare that this
product complies with the following EU directives:
Machinery Directive (98 / 37 / EG)
EU Low Voltage Directive (2006 / 95 / EG)
Electromagnetic Compatibility
(2004 / 108 / EG)
Applicable harmonized standards
EN 50144 - 1 : 1998 + A1 + A2
EN 50144 - 2 - 16 : 2003
EN 55014 - 1 : 2000 + A1 + A2
EN 55014 - 2 : 1997 + A1
EN 61000 - 3 - 2 : 2000 + A2
EN 61000 - 3 - 11 : 2000
ROHS Directive (2002 / 95 / EEC)
Description of the product:
Parkside Electric tacker PET 23
InformationMaintenance and cleaning / Disposal / Information
Bochum, 30.04.2008
Hans Kompernaß
- Managing Director -
We reserve the right to make technical modifications in the course
of product development.
Page 32

34
Page 33

35 DE/AT
Inhaltsverzeichnis
Einleitung
Bestimmungsgemäßer Gebrauch ................................................................................Seite 36
Ausstattung ....................................................................................................................Seite 36
Lieferumfang .................................................................................................................Seite 36
Technische Daten ..........................................................................................................Seite 37
Allgemeine Sicherheitshinweise für Elektrowerkzeuge
1. Arbeitsplatz-Sicherheit ..............................................................................................Seite 37
2. Elektrische Sicherheit ................................................................................................Seite 38
3. Sicherheit von Personen ...........................................................................................Seite 38
4. Verwendung und Behandlung des Elektrowerkzeugs ............................................Seite 39
Gerätespezifische Sicherheitshinweise für Elektrotacker ............................................Seite 39
Inbetriebnahme
Klammern / Nägel ........................................................................................................Seite 40
Magazin bestücken ......................................................................................................Seite 41
Ein- und Ausschalten .....................................................................................................Seite 41
Schlagkraft einstellen ...................................................................................................Seite 41
Heften ............................................................................................................................Seite 41
Fehler beheben ....................................................................................................Seite 42
Wartung und Reinigung ...............................................................................Seite 42
Entsorgung...............................................................................................................Seite 42
Informationen
Service ...........................................................................................................................Seite 43
Konformitätserklärung / Hersteller
...............................................................................Seite 43
Page 34

Einleitung
In dieser Bedienungsanleitung / am Gerät werden folgende Piktogramme
verwendet:
Tragen Sie einen Gehörschutz, eine
Bedienungsanleitung lesen!
Atem- / Staubschutzmaske, eine
Schutzbrille und Schutzhandschuhe.
Warn- und Sicherheitshinweise
beachten!
Vorsicht vor elektrischem Schlag!
Lebensgefahr!
Explosionsgefahr!
Schutzklasse II
V
Volt (Wechselspannung)
~
Elektrotacker PET 23 VARIO
Q
Einleitung
Machen Sie sich vor der ersten Inbetrieb-
nahme mit den Funktionen des Gerätes
vertraut und informieren Sie sich über den
richtigen Umgang mit Elektrowerkzeugen. Lesen
Sie hierzu die nachfolgende Bedienungsanleitung.
Bewahren Sie diese Anleitung gut auf. Händigen
Sie alle Unterlagen bei Weitergabe des Gerätes
an Dritte ebenfalls mit aus.
Kinder vom Elektrowerkzeug
fernhalten!
Elektrowerkzeug vor Nässe schützen!
Lebensgefahr durch elektrischen
Schlag bei beschädigtem Netzkabel
oder -stecker
Verpackung und Gerät umweltgerecht
entsorgen!
Q
Ausstattung
1
Handgriff
2
Auslöser
3
Stirnplatte
4
Tackernase
5
Magazin
6
Schlagkraftregler
7
Magazinschieber
8
EIN- / AUS-Schalter
9
Netzanschlussleitung
10
Innensechskantschlüssel
Q
Bestimmungsgemäßer
Gebrauch
Der Elektrotacker ist für den privaten Gebrauch zum
Heften von Pappe, Isoliermaterial, Leder, Stoff
(Textil- bzw. Naturfaser) und vergleichbaren Materialien auf Hartholz, Weichholz, Spanplatten oder
sperrholzähnlichem Material geeignet.
Der Gebrauch ist nur in trockenen Räumen zugelassen.
Jeder nicht bestimmungsgemäße Gebrauch birgt erhebliche Unfallgefahren und führt zum Garantieverlust.
36 DE/AT
Q
Lieferumfang
1 Elektrotacker PET 23 VARIO
150 Stück Feindrahtklammern 12 mm: Typ 53
150 Stück Feindrahtklammern 18 mm: Typ 53
150 Stück Schmalrückenklammern 19 mm: Typ 55
150 Stück Nägel 23 mm: Typ 47
1 Innensechskantschlüssel
1 Bedienungsanleitung
1 Heft „Garantie und Service“
Page 35

37 DE/AT
Einleitung / Allgemeine Sicherheitshinweise für Elektrowerkzeuge
Q
Technische Daten
Nennspannung: 230 V ~ 50 Hz
Schlagzahl:
30 / min
PET 23 VARIO
KH 3145
230 V ˜ 50 Hz
Kurzzeitbetrieb (KB):
max. 15 min
Schutzklasse: II /
Geräusch und Vibrationsinformationen:
Der A-bewertete Schalldruckpegel des Gerätes
beträgt typischerweise 95,0 dB(A). Der Geräuschpegel beim Arbeiten kann 108,0 dB(A) überschreiten.
Gehörschutz tragen!
Bewertete Beschleunigung, typischerweise:
Hand-/ Armvibration a
WARNUNG!
= 5,54 m / s
h
Der in diesen Anweisungen
2
angegebene Schwingungspegel ist in einem
genormten Messverfahren gemessen worden und
kann für den Gerätevergleich verwendet werden.
Der Schwingungspegel wird sich entsprechend dem
Einsatz des Elektrowerkzeugs verändern und kann
in manchen Fällen über dem in diesen Anweisungen
angegebenen Wert liegen. Die Schwingungsbelastung
könnte unterschätzt werden, wenn das Elektrowerkzeug regelmäßig in solcher Weise verwendet wird.
Hinweis: Für eine genaue Abschätzung der
Schwingungsbelastung während eines bestimmten
Arbeitszeitraumes sollten auch die Zeiten berücksichtigt werden, in denen das Gerät abgeschaltet
ist oder zwar läuft, aber nicht tatsächlich im Einsatz
ist. Dies kann die Schwingungsbelastung über den
gesamten Arbeitszeitraum deutlich reduzieren.
KB
max.
30 /min
Type 53
12 - 18 mm
Date of manufacture: 04-2008
Kompernaß GmbH · 44867 Bochum (Germany)
www.kompernass.com
I
D
2
3
:
0
2
0
2
0
2
0
0
15 min
Type 55
12 - 19 mm
Type 47
23 mm
Allgemeine
Sicherheitshinweise
für Elektrowerkzeuge
WARNUNG!
Lesen Sie alle Sicherheits-
hinweise und Anweisungen.
Versäumnisse bei der Einhaltung der Sicherheitshinweise und Anweisungen können elektrischen Schlag,
Brand und / oder schwere Verletzungen verursachen.
BEWAHREN SIE ALLE SICHERHEITSHINWEISE
UND ANWEISUNGEN FÜR DIE ZUKUNFT AUF!
1. Arbeitsplatz-Sicherheit
a) Halten Sie Ihren Arbeitsbereich sauber
und gut beleuchtet. Unordnung und unbe-
leuchtete Arbeitsbereiche können zu Unfällen
führen.
Page 36

Allgemeine Sicherheitshinweise für Elektrowerkzeuge
b) Arbeiten Sie mit dem Elektro-
werkzeug nicht in explosionsgefährdeter Umgebung, in
der sich brennbare Flüssigkeiten, Gase
oder Stäube befinden. Elektrowerkzeuge
erzeugen Funken, die den Staub oder die
Dämpfe entzünden können.
c)
fern. Bei Ablenkung können Sie die Kontrolle
Halten Sie Kinder und andere
Personen während der Benutzung des Elektrowerkzeugs
über das Gerät verlieren.
2. Elektrische Sicherheit
Vermeiden Sie Lebensgefahr
durch elektrischen Schlag:
a) Der Anschlussstecker des Elektrowerk-
zeuges muss in die Steckdose passen.
Der Stecker darf in keiner Weise verändert werden. Verwenden Sie keine
Adapterstecker gemeinsam mit
schutzgeerdeten Elektrowerkzeugen.
Unveränderte Stecker und passende Steckdosen
verringern das Risiko eines elektrischen Schlages.
b) Vermeiden Sie Körperkontakt mit ge-
erdeten Oberflächen, wie von Rohren,
Heizungen, Herden und Kühlschränken.
Es besteht ein erhöhtes Risiko durch elektrischen
Schlag, wenn Ihr Körper geerdet ist.
c)
Elektrogerät erhöht das Risiko eines elektrischen
d)
hängen oder um den Stecker aus der
e) Wenn Sie mit einem Elektrowerkzeug
Halten Sie Elektrowerkzeuge
von Regen oder Nässe fern.
Das Eindringen von Wasser in ein
Schlages.
Zweckentfremden Sie das
Kabel nicht, um das Elektrowerkzeug zu tragen, aufzu-
Steckdose zu ziehen. Halten Sie das
Kabel fern von Hitze, Öl, scharfen
Kanten oder sich bewegenden Geräteteilen. Beschädigte oder verwickelte Kabel
erhöhen das Risiko eines elektrischen Schlages.
im Freien arbeiten, verwenden Sie nur
Verlängerungskabel, die auch für den
Außenbereich geeignet sind. Die
Anwendung eines für den Außenbereich
geeigneten Verlängerungskabels verringert
das Risiko eines elektrischen Schlages.
f) Wenn der Betrieb des Elektrowerk-
zeuges in feuchter Umgebung nicht
vermeidbar ist, verwenden Sie einen
Fehlerstromschutzschalter. Der Einsatz
eines Fehlerstromschutzschalters vermindert
das Risiko eines elektrischen Schlages.
3. Sicherheit von Personen
a) Seien Sie stets aufmerksam, achten
Sie darauf, was Sie tun und gehen Sie
mit Vernunft an die Arbeit mit einem
Elektrowerkzeug. Benutzen Sie kein
Elektrowerkzeug, wenn Sie müde sind
oder unter dem Einfluss von Drogen,
Alkohol oder Medikamenten stehen.
Ein Moment der Unachtsamkeit beim Gebrauch
des Elektrowerkzeuges kann zu ernsthaften
Verletzungen führen.
b)
licher Schutzausrüstung wie Staubmaske,
c) Vermeiden Sie eine unbeabsichtigte
d) Entfernen Sie Einstellwerkzeuge oder
Tragen Sie persönliche Schutz-
ausrüstung und immer eine
Schutzbrille. Das Tragen persön-
rutschfeste Sicherheitsschuhe, Schutzhelm oder
Gehörschutz, je nach Art und Einsatz des
Elektrowerkzeuges, verringert das Risiko von
Verletzungen.
Inbetriebnahme. Vergewissern Sie
sich, dass das Elektrowerkzeug ausgeschaltet ist, bevor Sie es an die
Stromversorgung anschließen, es aufnehmen oder tragen. Wenn Sie beim Tra-
gen des Elektrowerkzeuges den Finger am
Schalter haben oder das Gerät bereits eingeschaltet an die Stromversorgung anschließen,
kann dies zu Unfällen führen.
Schraubenschlüssel, bevor Sie das
Elektrowerkzeug einschalten. Ein Werk-
38 DE/AT
Page 37

39 DE/AT
Allgemeine Sicherheitshinweise für Elektrowerkzeuge
zeug oder Schlüssel, der sich in einem drehenden
Geräteteil befindet, kann zu Verletzungen führen.
e) Vermeiden Sie eine abnormale Körper-
haltung. Sorgen Sie für einen sicheren
Stand und halten Sie jederzeit das
Gleichgewicht. Dadurch können Sie das
Elektrowerkzeug in unerwarteten Situationen
besser kontrollieren.
f) Tragen Sie geeignete Kleidung. Tragen
Sie keine weite Kleidung oder Schmuck.
Halten Sie Haare, Kleidung und Handschuhe fern von sich bewegenden
Teilen. Lockere Kleidung, Schmuck oder lange
Haare können von sich bewegenden Teilen
erfasst werden.
g) Wenn Staubabsaug- und -auffangein-
richtungen montiert werden können,
vergewissern Sie sich, dass diese
angeschlossen sind und richtig verwendet werden. Die Verwendung einer
Staubabsaugung kann Gefährdungen durch
Staub verringern.
4. Verwendung und Behandlung
des Elektrowerkzeugs
sungen nicht gelesen haben. Elektrowerk-
zeuge sind gefährlich, wenn sie von unerfahrenen
Personen benutzt werden.
e) Pflegen Sie Elektrowerkzeuge mit
Sorgfalt. Kontrollieren Sie, ob bewegliche Teile einwandfrei funktionieren
und nicht klemmen, ob Teile gebrochen
oder so beschädigt sind, dass die Funktion des Elektrowerkzeuges beeinträchtigt ist. Lassen Sie beschädigte Teile vor
dem Einsatz des Gerätes reparieren.
Viele Unfälle haben ihre Ursache in schlecht
gewarteten Elektrowerkzeugen.
f) Halten Sie Schneidwerkzeuge
scharf und sauber. Sorgfältig gepflegte
Schneidwerkzeuge mit scharfen Schneidkanten
verklemmen sich weniger und sind leichter
zu führen.
g) Verwenden Sie Elektrowerkzeug,
Zubehör, Einsatzwerkzeuge usw.
entsprechend diesen Anweisungen.
Berücksichtigen Sie dabei die Arbeitsbedingungen und die auszuführende
Tätigkeit. Der Gebrauch von Elektrowerkzeu-
gen für andere als die vorgesehenen Anwendungen kann zu gefährlichen Situationen führen.
a) Überlasten Sie das Gerät nicht. Ver-
wenden Sie für Ihre Arbeit das dafür
bestimmte Elektrowerkzeug. Mit dem
passenden Elektrowerkzeug arbeiten Sie besser
und sicherer im angegebenen Leistungsbereich.
b) Benutzen Sie kein Elektrowerkzeug,
dessen Schalter defekt ist. Ein Elektrowerkzeug, das sich nicht mehr ein- oder ausschalten
lässt, ist gefährlich und muss repariert werden.
c) Ziehen Sie den Stecker aus der Steck-
dose bevor Sie Geräteeinstellungen
vornehmen, Zubehörteile wechseln
oder das Gerät weglegen. Diese Vorsichts-
maßnahme verhindert den unbeabsichtigten
Start des Elektrowerkzeuges.
d) Bewahren Sie unbenutzte Elektrowerk-
zeuge außerhalb der Reichweite von
Kindern auf. Lassen Sie Personen das
Gerät nicht benutzen, die mit diesem
nicht vertraut sind oder diese Anwei
Sicherheitshinweise
für Elektrotacker
J Sorgen Sie dafür, dass keinesfalls Menschen
oder Tiere von den Klammern oder Nägeln
getroffen werden!
J
Haltearbeiten verrichtet.
J Bestücken Sie das Magazin
J Verwenden Sie das Gerät nicht zum Befestigen
J Sichern Sie das Werkstück. Ein mit Spann-
J Führen Sie das Kabel immer nach hinten vom
Schützen Sie Ihre Augen! Tragen Sie
eine Schutzbrille. Dies gilt ebenso für
die Person, die beim Betrieb Stütz- und
5
nur bei ausgeschaltetem Gerät! Stellen Sie den EIN- / AUSSchalter
von elektrischen Leitungen.
vorrichtungen oder Schraubstock festgehaltenes
Werkstück ist sicherer gehalten als mit Ihrer Hand.
Gerät weg.
8
auf die Position „0“!
Page 38

Inbetriebnahme
Q
Inbetriebnahme
Die Spannung der Stromquelle muss mit den Angaben auf dem Typenschild des Gerätes übereinstimmen. Mit 230 V ~gekennzeichnete Geräte können
auch mit 220 V ~betrieben werden.
Q
Klammern / Nägel
Hinweis: Das Gerät ist für folgende, handelsübliche Klammer- und Nageltypen bestimmt:
Empfohlene Schlagkraft-Einstellung für:
Typ mm
55
53
47
12, 14, 16, 18, 19
12, 14, 18
23
Hinweis: Passendes Zubehör kann auch über die
zuständige Servicestelle Ihres Landes bezogen werden.
Die nachfolgenden Angaben sind unverbindliche
Empfehlungen. Testen Sie beim praktischen Arbeiten
selbst, welcher Klammer- bzw. Nageltyp und welche
Schlagkraft-Einstellung für den Untergrund optimal
geeignet ist!
Klammer- /
Nagel-Typ
11,4 mm
10 mm
Typ 53
6 mm
4 mm
Typ 55
L
Typ 47
Hartholz
Länge
(mm)
(z.B. Eiche oder Buche)
12
L
L
5 - 6
14
6
18
6 - 7
12
5 - 6
14
5 - 6
16
6 - 7
18
7
19
7
23
7 6 6 - 7 6 - 7
Weichholz
(z.B. Fichte oder Kiefer)
1 - 4
2 - 5
4 - 6
3 - 5
3 - 5
5
5
6
Spanplatte /
MDF-Platte
4 - 6
5 - 6
6 - 7
2 - 5
3 - 5
4 - 5
4 - 6
5 - 7
Sperrholzplatte
(z.B. Tischlerplatte)
5 - 6
6
6 - 7
2 - 5
3 - 5
4 - 5
4 - 6
5 - 7
40 DE/AT
Page 39

41 DE/AT
Inbetriebnahme
Q
Magazin bestücken
Verwenden Sie ausschließlich Feindrahtklammern
(Typ 53), Schmalrückenklammern (Typ 55) oder
Nägel (Typ 47)!
j Drücken Sie den Magazinschieber
tung des Magazins
5
und führen Sie diesen
7
in Rich-
nach oben.
j Ziehen Sie den Magazinschieber
aus dem Magazin
5
.
7
vollständig
j Entnehmen Sie ggf. nicht benötigte Klammern
oder Nägel aus dem Magazin
5
.
j Schieben Sie die erforderlichen Klammern oder
Nägel in das Magazin
5
ein.
j Entnehmen Sie Informationen für das korrekte
Einlegen der Klammern oder Nägel der Beschriftung am Magazinschieber
j Schieben Sie den Magazinschieber
Anschlag in das Magazin
j Drücken Sie den Magazinschieber
7
.
7
bis zum
5
.
7
nach
unten und lassen diesen einrasten.
Q
Ein- und Ausschalten
m VORSICHT! Schließen Sie das Gerät nur aus-
geschaltet an den Netzstrom an! Stellen Sie den
EIN- / AUS-Schalter
8
auf die Position „0“.
Einschalten:
j Stellen Sie den EIN- / AUS-Schalter
8
auf die
Position „I“ (siehe Abb. A).
Ausschalten:
j Stellen Sie den EIN- / AUS-Schalter
8
auf die
Position „0“.
m Schlagzahl:
Der Elektrotacker PET 23 VARIO ist für 30 Schläge
pro Minute ausgelegt.
m Kurzzeitbetrieb:
Der Elektrotacker PET 23 VARIO ist für 15 Minuten Betrieb bei Arbeiten mit maximaler Schlagzahl ausgelegt.
Lassen Sie das Gerät danach ausreichend abkühlen.
Q
Schlagkraft einstellen
Tipp!
j Wählen Sie die geringste Schlagkraft aus, die
Sie zum Heften benötigen.
j Sie können die Schlagkraft mit dem Schlag-
kraftregler
6
von „1“ (geringste Schlagkraft)
bis „7“ (maximale Schlagkraft) stufenlos
einstellen.
Q
Heften
j Schalten Sie das Gerät ein.
j Pressen Sie die Tackernase
4
an die Stelle,
die Sie heften wollen.
j Betätigen Sie den Auslöser
2
.
j Passen Sie die Schlagkraft den Materialien,
Klammern oder Nägeln an.
Nachschlagmöglichkeit:
Hinweis: Verwenden Sie diese Funktion, wenn
Sie feststellen das zuvor eingetriebene Klammern /
Nägel nicht bündig in das Material eingeschlagen
sind. Beachten Sie, dass die Nachschlagmöglichkeit ausschließlich direkt beim einzelnen Heften besteht. Solange Sie dabei die Tackernase
4
nicht
anheben, wird keine weitere Klammer / kein Nagel
zum Heften nachgeladen.
j Heften Sie die erforderliche Klammer / den
Nagel. Pressen Sie die Tackernase
4
weiter-
hin auf die Befestigungsstelle.
j Betätigen Sie den Auslöser
2
so oft, bis das
Heften am Untergrundmaterial bündig gelingt.
Page 40

Inbetriebnahme / Fehler beheben / Wartung und Reinigung / Entsorgung
Anwendungsbeispiele:
j Befestigen Sie Bezugstoff an der Sitzfläche
eines Stuhles (siehe Abb. B).
j Befestigen Sie Randleisten am Übergangsbe-
reich von Wand und Bodenbelag (siehe Abb. C).
j Spannen und heften Sie eine Leinwand an
einem Bilderrahmen fest (siehe Abb. D).
j Befestigen Sie Schutzfolie für Isolationsmaterial
bei der Wärmedämmung (siehe Abb. E).
j Befestigen Sie Halterungen für die Elemente
einer Wandverkleidung (siehe Abb. F).
Q
Fehler beheben
WARNUNG!
Ziehen Sie vor allen Reinigungsund Wartungsarbeiten den Netzstecker aus der
Steckdose.
= Fehler
= Ursache
= Beheben
Das Gerät arbeitet nicht korrekt.
Eine Klammer oder ein Nagel blockiert das
Gerät.
Öffnen Sie den Magazinschieber 7. Sie lösen
dadurch die Vorspannung. Lösen Sie mit dem
Innensechskantschlüssel
3
platte
.
10
(Abb. G) die Stirn-
Entfernen Sie die Klammer oder den Nagel.
Eine Klammer oder ein Nagel ist beim Heften
fehlerhaft am Material eingeschlagen.
Entfernen Sie die fehlerhaft geheftete Klammer /
Nagel mit einer Kneifzange / Spitzzange.
Wählen Sie geeigneten Klammern oder Nägel
aus.
Stellen Sie die erforderliche Schlagkraft ein,
um die Klammer oder den Nagel einwandfrei
zu heften.
Q
Wartung und Reinigung
VORSICHT! Ziehen Sie vor allen Reinigungs-
und Wartungsarbeiten den Netzstecker aus der
Steckdose.
Der Elektrotacker ist wartungsfrei.
j Das Gerät muss stets sauber, trocken und frei
von Öl oder Schmierfetten sein.
j Reinigen Sie das Gerät direkt nach Abschluss
der Arbeit.
j Es dürfen keine Flüssigkeiten in das Innere des
Gerätes gelangen. Verwenden Sie zum Reinigen
des Gehäuses ein Tuch. Verwenden Sie niemals
Benzin, Lösungsmittel oder Reiniger, die Kunststoff angreifen.
Q
Entsorgung
Die Verpackung besteht aus umweltfreund-
lichen Materialien, die Sie über die örtlichen Recyclingstellen entsorgen können.
Werfen Sie Elektrowerkzeuge
nicht in den Hausmüll!
Gemäß Europäischer Richtlinie 2002 / 96 / EG
über Elektro- und Elektronik-Altgeräte und Umsetzung
in nationales Recht müssen verbrauchte Elektrowerkzeuge getrennt gesammelt und einer umweltgerechten Wiederverwertung zugeführt werden.
Möglichkeiten zur Entsorgung des ausgedienten
Gerätes erfahren Sie bei Ihrer Gemeinde- oder
Stadtverwaltung.
42 DE/AT
Page 41

43 DE/AT
Informationen
Q
Informationen
Q
Service
Die zuständige Servicestelle Ihres Landes entnehmen
Sie bitte den Garantieunterlagen.
WARNUNG!
Lassen Sie Ihre Geräte
nur von qualifiziertem Fachpersonal
und nur mit Originalersatzteilen reparieren. Damit wird sichergestellt, dass die
Sicherheit des Gerätes erhalten bleibt.
WARNUNG!
Lassen Sie den Austausch
des Steckers oder der Anschlussleitung
immer vom Hersteller des Elektrowerkzeugs oder seinem Kundendienst
ausführen. Damit wird sichergestellt, dass
die Sicherheit des Gerätes erhalten bleibt.
Hinweis: Beim Anlaufen (Starten) dieser Ausrü-
stungen kann ein kurzzeitiger Spannungseinbruch
auftreten, insbesondere bei schlechter Netzqualität. Diese Einbrüche können andere Geräte
beeinflussen (z.B. Flimmern einer Lampe). Bei
einer Netzimpedanz Z max < 0.381 OHM sind
solche Störungen nicht zu erwarten. (Bitte kontaktieren Sie Ihr lokales Energieversorgungsunternehmen für weitere Informationen).
Q
Konformitätserklärung /
Hersteller
Wir, Kompernaß GmbH, Burgstr. 21,
44867 Bochum, Deutschland, erklären hiermit für
dieses Produkt die Übereinstimmung mit folgenden
EU-Richtlinien:
Maschinenrichtlinie (98 / 37 / EC)
EG-Niederspannungsrichtlinie
(2006 / 95 / EG)
Elektromagnetische Verträglichkeit
(2004 / 108 / EG)
Angewandte harmonisierte Normen
EN 50144 - 1 : 1998 + A1 + A2
EN 50144 - 2 - 16 : 2003
EN 55014 - 1 : 2000 + A1 + A2
EN 55014 - 2 : 1997 + A1
EN 61000 - 3 - 2 : 2000 + A2
EN 61000 - 3 - 11 : 2000
ROHS Directive (2002 / 95 / EEC)
Bezeichnung des Produktes:
Parkside Elektrotacker PET 23 VARIO
Bochum, 30.04.2008
Hans Kompernaß
- Geschäftsführer -
Technische Änderungen im Sinne der Weiterentwicklung
sind vorbehalten.
 Loading...