

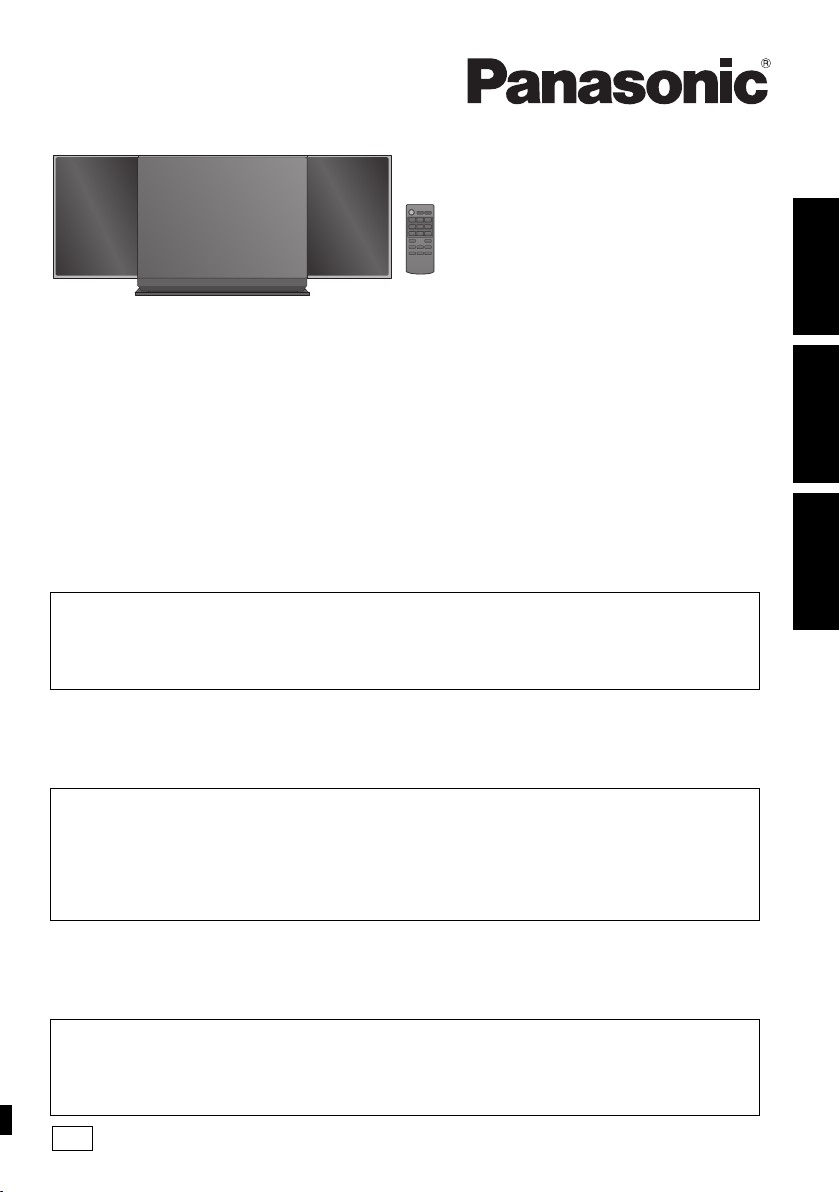
Panasonic SCHC37EC User Manual [en, cs, pl]
Operating Instructions
EC
Instrukcja obsługi
Návod k obsluze
Compact Stereo System
Kompaktowy zestaw stereo
Kompaktní stereo systém
Model No. SC-HC37
Thank you for purchasing this product.
For optimum performance and safety, please read these instructions carefully.
Please keep this manual for future reference.
Included Installation Instructions (> 2, 6)
The installation should never be done by any other than a qualified installation specialist.
Before commencing work, carefully read these installation instructions and the operating instructions to ensure
that installation is performed correctly.
(Please keep these instructions. You may need them when maintaining or moving this unit.)
Dziękujemy za zakupienie tego produktu.
Przed podłączeniem, obsługą lub regulacją sprzętu prosimy o dokładne zapoznanie się z treścią niniejszej
instrukcji.
Prosimy o zachowanie niniejszej instrukcji obsługi.
Załączone instrukcje instalacji (> 16, 20)
Instalacja może być przeprowadzana wyłącznie przez wykwalifikowanych specjalistów
zajmujących się instalacją.
Przed rozpoczęciem pracy należy się dokładnie zapoznać z instrukcją instalacji oraz z instrukcją obsługi, aby się
upewnić, że instalacja została przeprowadzona prawidłowo.
(Proszę zachować niniejszą instrukcję. Będzie ona potrzebna podczas serwisowania lub przenoszenia
urządzenia.)
Děkujeme, že jste si zakoupil tento výrobek.
Dříve, než se pustíte do zapojování a začnete výrobek používat či provádět nastavování, prostudujte si prosím celý
tento návod.
Uschovejte si prosím tento návod k obsluze.
Přiložené pokyny k instalaci (> 30, 34)
Instalaci by měl provést kvalifikovaný odborník.
Před zahájením instalace si pečlivě pročtěte tyto pokyny k instalaci a návod k obsluze, abyste instalaci provedli
opravdu správně.
(Tyto pokyny si uschovejte. Můžete je potřebovat při údržbě nebo přesouvání tohoto zařízení.)
POLSKI ENGLISH
ČESKY
RQT9685-1R

Safety precautions
WARNING
Unit
≥ To reduce the risk of fire, electric shock or product damage,
– Do not expose this unit to rain, moisture, dripping or
splashing.
– Do not place objects filled with liquids, such as vases, on
this unit.
– Use only the recommended accessories.
– Do not remove covers.
– Do not repair this unit by yourself. Refer servicing to
qualified service personnel.
– Do not let metal objects fall inside this unit.
– Do not place heavy items on this unit.
AC mains lead
≥ To reduce the risk of fire, electric shock or product damage,
– Ensure that the power supply voltage corresponds to the
voltage printed on this unit.
– Insert the mains plug fully into the socket outlet.
– Do not pull, bend, or place heavy items on the lead.
– Do not handle the plug with wet hands.
– Hold onto the mains plug body when disconnecting the
plug.
– Do not use a damaged mains plug or socket outlet.
≥ Install this unit so that the AC mains lead can be unplugged
from the socket outlet immediately if any problem occurs.
Button-type battery (Lithium battery)
≥ Risk of fire, explosion and burns. Do not recharge,
disassemble, heat above 60
≥ Keep the Button-Type battery out of the reach of children.
Never put Button-Type battery in mouth. If swallowed call
your doctor.
CAUTION
Unit
≥ This unit utilizes a laser. Use of controls or adjustments or
performance of procedures other than those specified herein
may result in hazardous radiation exposure.
≥ Do not place sources of naked flames, such as lighted
candles, on this unit.
≥ This unit may receive radio interference caused by mobile
telephones during use. If such interference occurs, please
increase separation between this unit and the mobile
telephone.
≥ This unit is intended for use in moderate climates.
Placement
≥ Place this unit on an even surface.
≥ To reduce the risk of fire, electric shock or product damage,
– Do not install or place this unit in a bookcase, built-in
cabinet or in another confined space. Ensure this unit is
well ventilated.
– Do not obstruct this unit’s ventilation openings with
newspapers, tablecloths, curtains, and similar items.
– Do not expose this unit to direct sunlight, high
temperatures, high humidity, and excessive vibration.
o
C or incinerate.
Button-type battery (Lithium battery)
≥ Danger of explosion if battery is incorrectly replaced.
Replace only with the type recommended by the
manufacturer.
≥ When disposing the batteries, please contact your local
authorities or dealer and ask for the correct method of
disposal.
≥ Insert with poles aligned.
≥ Mishandling of batteries can cause electrolyte leakage and
may cause a fire.
– Remove the battery if you do not intend to use the remote
control for a long period of time. Store in a cool, dark
place.
– Do not heat or expose to flame.
– Do not leave the battery(ies) in a car exposed to direct
sunlight for a long period of time with doors and windows
closed.
NORSK
ADVARSEL
Produkt
≥ For å redusere faren for brann, elektrisk støt eller skade på
apparatet:
– Utsett ikke produktet for regn, fukt, drypping eller sprut.
– Ikke plasser objekter som er fylt med væske, som vaser,
på apparatet.
– Bruk kun anbefalt tilbehør.
– Fjern ikke deksler.
– Reparer ikke denne enheten selv, overlat service til
kvalifisert servicepersonell.
Vekselstrømnett
≥ Strømuttaket må befinne seg i nærheten slik at den lett kan
kobles fra uttaketumiddelbart om det oppstår problemer.
FORSIKTIG
Produkt
≥ Dette produktet anvender en laser. Betjening av kontroller
eller justering eller andre inngrep enn de beskrevet i denne
bruksanvisning kan føre til farlig bestråling.
≥ Plasser ikke åpen ild, slik som levende lys, oppå apparatet.
≥ Dette apparatet er beregnet for bruk under moderate
klimaforhold.
Plassering
≥ For å redusere faren for brann, elektrisk støt eller skade på
apparatet:
– Ikke plasser apparatet i en bokhylle, et innebygget
kabinett eller et annet lukket sted. Pass på at produktet er
godt ventilert.
– Apparatets ventilasjonsåpninger må ikke dekkes til med
aviser, duker, gardiner eller lignende.
2
RQT9685
Product Identification Marking is located on the bottom of
the unit.
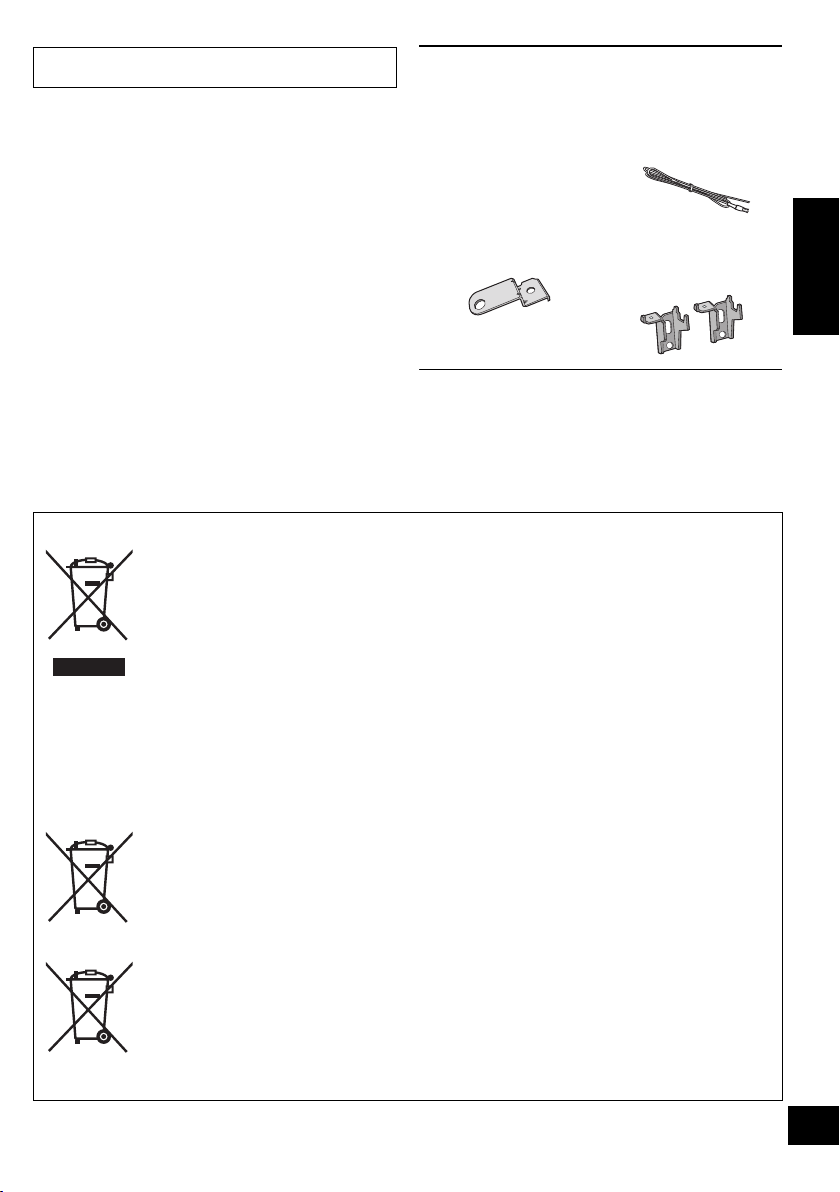
Accessories
Check the supplied accessories before using this unit.
∏ 1 Remote control
(with a battery)
(N2QAYC000057)
∏ 1 AC mains lead
Wall mounting accessories
∏ 1 Safety holder
∏ 1 Screw
∏ 1 FM indoor
antenna
∏ 2 Wall mount
brackets
≥ Do not use AC mains lead with other equipment.
≥ Product numbers provided in this operating instructions are
correct as of January 2012. These may be subject to change.
Information for Users on Collection and Disposal of Old Equipment and used Batteries
These symbols on the products, packaging, and/or accompanying documents mean that
used electrical and electronic products and batteries should not be mixed with general
household waste.
For proper treatment, recovery and recycling of old products and used batteries, please
take them to applicable collection points, in accordance with your national legislation and
the Directives 2002/96/EC and 2006/66/EC.
By disposing of these products and batteries correctly, you will help to save valuable
resources and prevent any potential negative effects on human health and the
environment which could otherwise arise from inappropriate waste handling.
For more information about collection and recycling of old products and batteries, please
contact your local municipality, your waste disposal service or the point of sale where
you purchased the items.
Penalties may be applicable for incorrect disposal of this waste, in accordance with
national legislation.
For business users in the European Union
If you wish to discard electrical and electronic equipment, please contact your dealer or
supplier for further information.
[Information on Disposal in other Countries outside the European Union]
These symbols are only valid in the European Union. If you wish to discard these items,
please contact your local authorities or dealer and ask for the correct method of disposal.
Note for the battery symbol (bottom two symbol examples):
This symbol might be used in combination with a chemical symbol. In this case it
complies with the requirement set by the Directive for the chemical involved.
ENGLISH
Cd
3
RQT9685
Table of contents
Safety precautions............................................ 2
Accessories....................................................... 3
Playable media.................................................. 4
Control reference guide ................................... 5
Attaching the unit to a wall (optional)............. 6
Connections ...................................................... 8
Inserting or removing media ........................... 8
Media playback operations.............................. 9
Listening to the radio ..................................... 10
Internet Radio.................................................. 10
Sound adjustment ...........................................11
Clock and Timer...............................................11
Others .............................................................. 12
Troubleshooting.............................................. 12
Specifications ................................................. 14
Unit and media care........................................ 15
Licenses .......................................................... 15
Operations in these instructions are described
using the remote control, but you can do the
operations with the main unit if the operations
are the same.
Playable media
≥ Please be aware that Panasonic accepts no responsibility for
the loss of data and/or information.
Compatible iPod/iPhone for
docking
iPod touch
1st, 2nd, 3rd, and 4th generation
iPod nano
2nd, 3rd, 4th, 5th, and 6th generation
iPod classic
iPhone 4S / iPhone 4 / iPhone 3GS / iPhone 3G /
iPhone
(as of January 2012)
≥ Compatibility depends on the software version. Update your
iPod/iPhone to the latest software before using it with this
unit.
≥ Depending on the model, it may be necessary to remove the
iPod/iPhone and select the album, artist, etc. on the iPod/
iPhone.
≥ Be sure to use a dock adapter that is compatible with your
iPod/iPhone. To purchase a dock adapter, consult your iPod/
iPhone dealer. If a dock adapter is not available, insert and
remove the iPod/iPhone with care.
Charging the iPod/iPhone
The iPod/iPhone will start being charged once connected
to this unit.
≥ In standby mode, “IPOD CHARGING” is shown on the main
unit’s display.
≥ Check the iPod/iPhone to see if the battery is fully charged.
(Once fully recharged, additional recharging will not occur.)
Compatible CD
≥ A disc with the CD Logo.
≥ This unit can play back discs that conform to the CD-DA
format.
≥ The unit may not be able to play some discs due to the
condition of the recording.
Compatible USB devices
≥ This unit does not guarantee connection with all USB
devices.
≥ FAT12, FAT16 and FAT32 file systems are supported.
≥ This unit supports USB 2.0 full speed.
≥ This unit can support USB devices of up to 32 GB.
Compatible MP3 files
≥ Supported format: Files with the extension “.mp3” or “.MP3”.
≥ Compatible compression rate: Between 64 kbps and
320 kbps (stereo).
≥ Depending on how you create the MP3 files, they may not
play in the order you numbered them or may not play at all.
Creating MP3 files on a CD-R/RW
≥ Maximum number of tracks and albums: 999 tracks and 254
albums (Excluding Root folder).
≥ Disc formats: ISO9660 level 1 and level 2 (except for
extended formats).
≥ If the disc includes both MP3 and normal audio data
(CD-DA), the unit plays the type recorded in the inner part of
the disc.
≥ This unit cannot play files recorded using packet write.
Creating MP3 files on a USB device
≥ Maximum number of tracks and albums: 2500 tracks and 254
albums (Excluding Root folder).
≥ Only one memory card will be selected when connecting a
multiport USB card reader, typically the first memory card
inserted.
4
RQT9685

Control reference guide
89
10
11 12
13
Top view
Remote control
Keep the button-type battery out of
reach of children to prevent
swallowing.
Main unit
1 Turn this unit on or off
2 Select the audio source
3 Basic playback control buttons
4 Enter setup menu
5 Enter the iPod/iPhone menu /
Change displayed information
6 Open/close the sliding door
7 Adjust the volume
∫ Preparation
Remove the insulation sheet A before using.
8 Mute the sound
Mutes the sound. Press again to
cancel. “MUTE” is also cancelled
when the volume is adjusted or the
unit is turned off.
9 Enter playback menu
10 Enter sound menu
11 Selection/OK
∫ To replace a button-type battery
1 While pressing the stopper B,
pull out the battery holder.
Battery type: CR2025 (Lithium battery)
≥ The battery should normally last about 1 year, however this depends on how
frequently the unit is used.
1 Standby/on switch (Í/I)
Press to switch the unit from on to standby mode or vice
versa.
In standby mode, the unit is still consuming a small
amount of power.
2 Open/close the sliding door (for iPod/iPhone)
3 Select the audio source
4 Basic playback control buttons
5 Adjust the volume (0 (min) to 50 (max))
6 Open/close the sliding door (for discs)
7 Dynamic Bass sound effect selector
8 Headphone jack
Plug type: ‰3.5 mm stereo
Recommended plug type: Straight Plug
≥ Listening at full volume for long periods may damage
the user’s ears.
≥ Excessive sound pressure from earphones and
headphones can cause hearing loss.
9 USB port
10 Standby indicator
11 Display
12 Sliding door
13 Remote control signal sensor
Distance:
Within approx. 7 m directly in front.
≥ To avoid interference, please do not put any objects in
front of signal sensor.
2 Set the button-type battery with
its (i) mark facing upward and
then put the battery holder back
in place.
ENGLISH
5
RQT9685
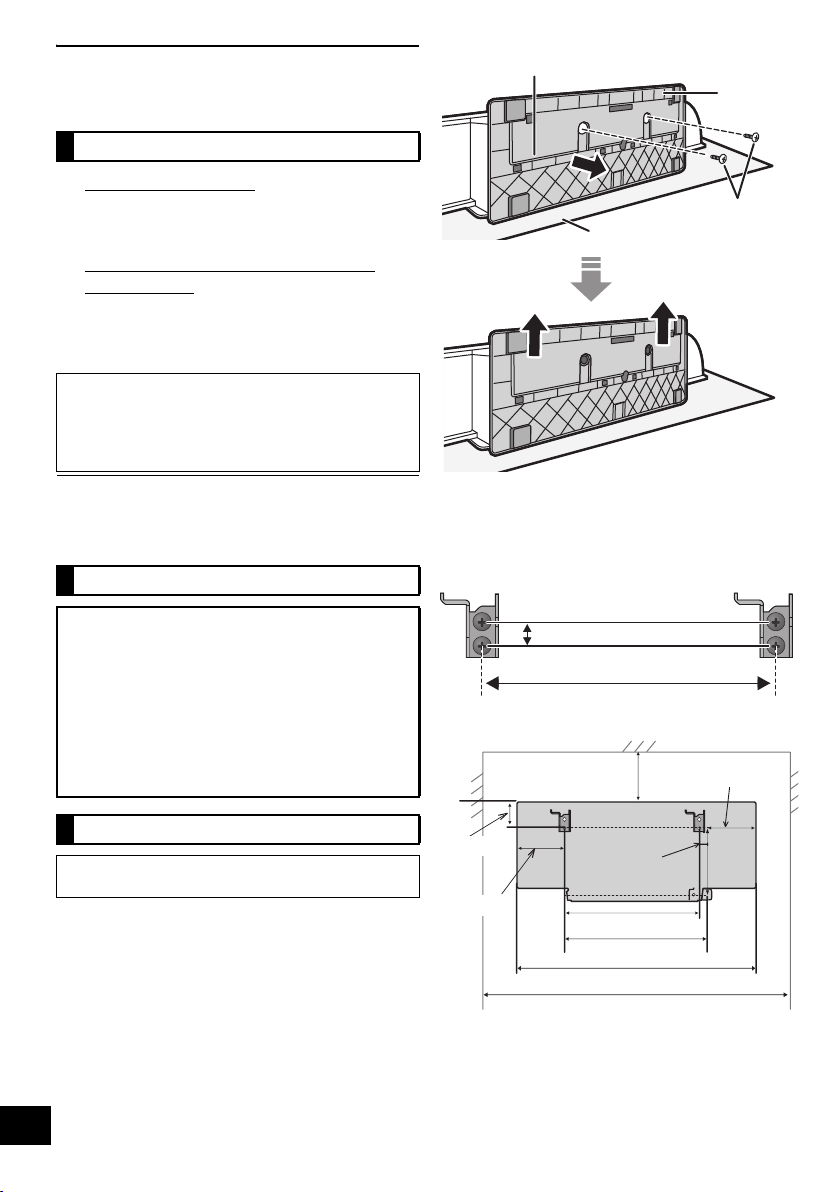
Attaching the unit to a wall
Bottom of main unit
Stand
Soft blanket or cloth
Fixing screw
232 mm
12.5 mm
300 mm
247 mm
680 mm
65 mm
232 mm
116 m m
118 m m
480 mm
113 m m
15 mm
(optional)
Installation accessories
∫ Supplied accessories
≥ 1 Safety holder
≥ 1 Screw
≥ 2 Wall mount brackets
∫ Commercially available accessories
(not supplied)
≥ 4 Wall mount bracket fixing screws
≥ 1 Safety holder fixing screw
≥ 1 Fall prevention cord
≥ 1 Screw eye
≥ Keep the safety holder out of reach of children to
prevent swallowing.
≥ Keep the screws out of reach of children to prevent
swallowing.
≥ Keep the wall mount brackets out of reach of children
to prevent swallowing.
Use screws with a nominal diameter of ‰4 mm, which are
suitable to the material of the wall (e.g., wood, steel, concrete,
etc.)
Safety precautions
Professional installation is required.
The installation should never be done by any
other than a qualified installation specialist.
PANASONIC DISCLAIMS ANY PROPERTY
DAMAGE AND/OR SERIOUS INJURY,
INCLUDING DEATH RESULTING FROM
IMPROPER INSTALLATION OR INCORRECT
HANDLING.
≥ Be sure to install this unit as indicated within
this operating instructions.
Wall mount instructions
2 Measure and mark the position of the wall mount
brackets (Both sides).
{. Use figures below to identify the screwing positions.
The position to attach the wall mount brackets
Space required
Before installation, turn the unit off and disconnect the
AC mains lead from the mains socket.
1 Detach the stand from the unit.
{. Unscrew the fixing screw (2 pieces) at the bottom of the
{. Gently pull the stand off the unit as illustrated.
≥ Keep the removed screws and stand in a safe place.
6
RQT9685
unit.

3 Attach the wall mount bracket to the wall with 2
At least 30 mm
‰7.5 mm to
‰9.4 mm
‰4 mm
Wall mount bracket
Screw
(supplied)
Cord (not supplied)
Wall
Safety holder fixing screw
(not supplied)
Safety holder
Fixed to the
wall
Cord (not supplied)
Screw eye (not supplied)
Wall
screws (not supplied). (Both sides)
≥ Use a spirit level to ensure both wall mount brackets are
level.
≥ Make sure that the screw used and the wall are strong
enough to support the weight of at least 33 kg.
4 Fix the safety holder onto the unit with the screw
(supplied).
{. Screw tightening torque: 50 N0cm to 70 N0cm.
5 Attach the fall prevention cord (not supplied) to this
unit.
≥ Use a cord that is capable of supporting over 33 kg
(with a diameter of about 1.5 mm).
6 Hook the unit securely onto the wall mount
brackets with both hands.
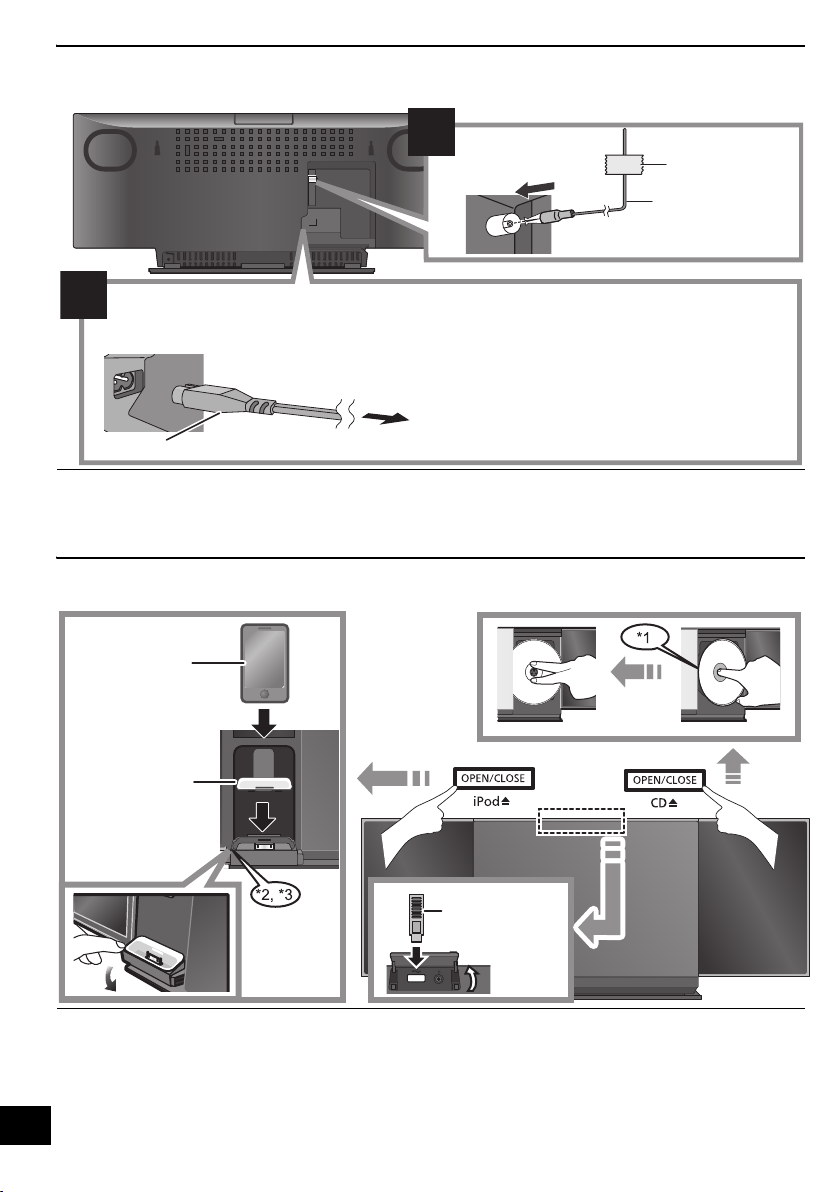
≥ Connect the FM antenna and the AC mains lead to the
unit before hanging the unit onto the wall. (> 8)
≥ After hanging the unit, release your hand carefully to
confirm the unit sits securely on the wall.
7 Drive the safety holder fixing screw
(not supplied) to secure the safety holder onto the
wall.
≥ Make sure that the screw used and the wall are strong
enough to support the weight of at least 33 kg.
≥ Refer to step 3 for requirements before screwing.
ENGLISH
8 Attach the fall prevention cord (not supplied) to the
wall.
≥ Make sure that the screw used and the wall are strong
enough to support the weight of at least 33 kg.
≥ Make sure that the slack of the cord is minimal.
RQT9685
7
Connections
ョヮチモワヵ
ヘブ
モヤチリワ」
1
2
Adhesive tape
(not supplied)
FM indoor antenna
(supplied)
Connect the AC mains lead after all other connections are complete.
This unit consumes a small amount of AC power (> 14) even when turned off.
To household mains socket
AC mains lead (supplied)
≥ In the interest of power conservation, if you will not be using this unit for an extended period of
time, it can be disconnected.
Compatible
iPod/iPhone
(not supplied)
Dock adaptor
(not supplied)
USB device
(not supplied)
≥ These speakers do not have magnetic shielding. Do not
place them near a television, personal computer or other
devices easily influenced by magnetism.
Inserting or removing media
≥ Tape the antenna to a wall or column in a position with the
least amount of interference. (Use an FM outdoor antenna if
radio reception is poor.)
*1: Make sure to tilt the disc so as not to touch the sliding door.
*2: Do not push or pull the dock manually.
*3: When inserting or removing the iPod/iPhone, tilt the dock
slightly by holding the corner of the dock.
≥ Make sure that the unit does not fall when inserting or
removing media.
8
≥ Be sure to remove the iPod/iPhone from its case.
RQT9685
≥ When moving this unit, be sure to remove all media and turn
this unit to standby mode.
≥ Insert the USB device directly into the USB port. Do not use
any USB extension cable.
≥ Before removing the USB device, select a source other than
“USB”.
Media playback operations
The following marks indicate the availability of the
feature.
[CD]: CD audio in CD-DA format and a CD that
contains MP3 files (> 4)
[iPod]: Compatible iPod/iPhone (> 4)
[USB]: USB devices containing MP3 files (> 4)
Preparation
≥ Turn the unit on.
≥ Insert the media. (> 8)
≥ Press [CD], [iPod] or [USB] to select the audio
source.
Basic play ([CD], [iPod], [USB])
Play Press [1/;].
Stop Press [∫].
Pause Press [1/;].
Skip Press [:/6] or [5/9] to
Search During playback
Vol ume Press [VOL s] or [VOL r] to adjust
Mute Press [MUTE] to mute the sound.
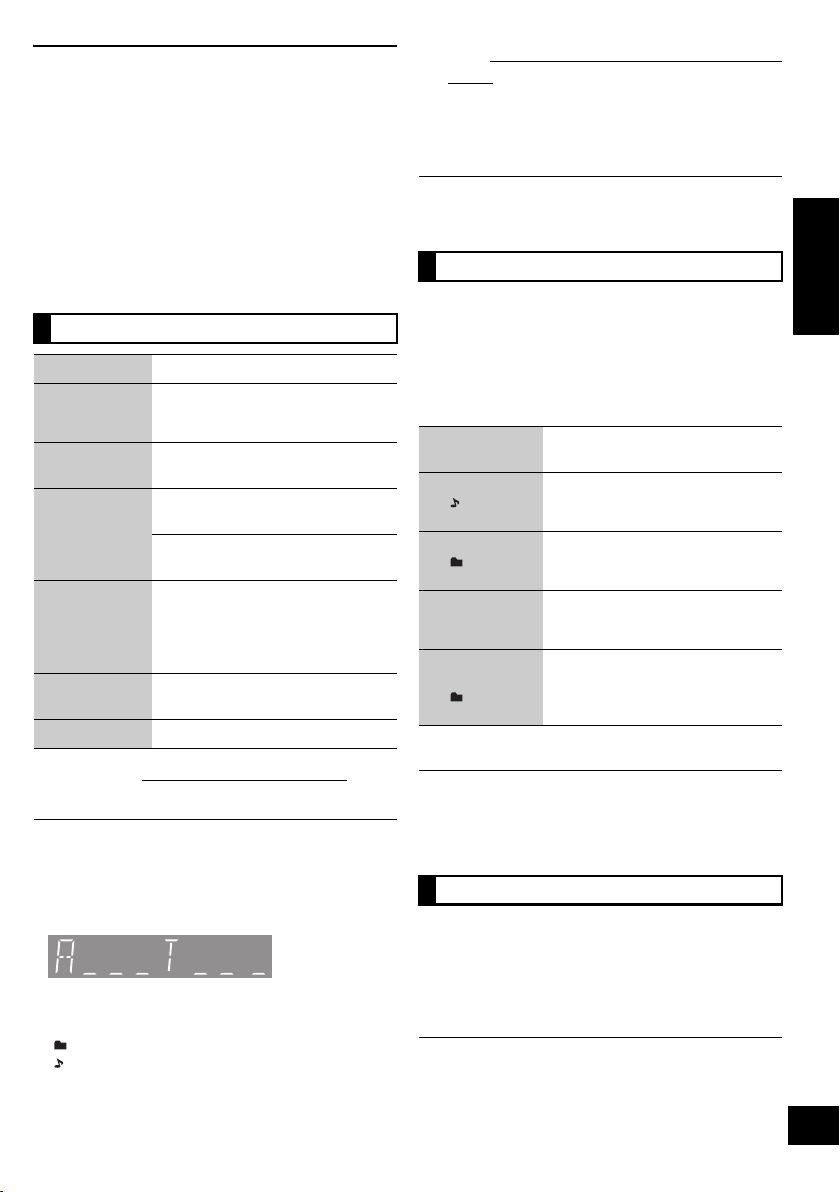
∫ [CD], [USB] View contents information
Press [DISPLAY] repeatedly during play or pause.
≥ Maximum number of displayable characters: approx. 30
≥ This unit supports ver. 1.0, 1.1 and 2.3 ID3 tags. Text data
that is not supported will not be displayed or shown
differently.
≥ Album and track indication for MP3 files.
-
“A _ _ _”: MP3 album number.
“T _ _ _”: MP3 track number.
≥ “ _ ” stands for the album or track number.
“”:
“”:
≥ [USB]: The track is memorises and
“RESUME” is displayed.
Press again to restart play.
skip track.
[CD], [USB] Press [3] or [4] to skip
the MP3 album.
Press and hold [:/6] or
[5/9].
≥ [iPod]: Backwards search is only
within the current track.
the volume.
This indication is also used to refer to an album.
This indication is also used to refer to a track.
∫ [iPod] To navigate through the iPod/iPhone
menu
≥ Open the Music App to use this feature with iPod touch/
iPhone models.
–[3, 4]: To navigate menu items.
– [OK]: To go to the next menu.
– [iPod MENU]: To return to the previous menu.
≥ To view the operation, open the sliding door.
≥ The operation may vary among iPod/iPhone models.
Play modes ([CD], [USB])
Select the playback mode.
≥ These modes can be combined with the repeat play feature.
1 Press [PLAY MENU] repeatedly to select
“PLAYMODE”.
2 Press [3, 4] to select the following mode and
press [OK].
OFF
PLAYMODE
1-TRACK
(“1, ” is
displayed.)
1-ALBUM
(“1, ” is
displayed.)
RANDOM
(“RND” is
displayed.)
1-ALBUM
RANDOM
(“1, , RND” is
displayed.)
Select to cancel the play mode
setting.
Only plays the selected track.
(Skip to the desired track (> left))
Only plays the selected MP3
album.
Plays the contents randomly.
Plays the tracks in the selected
MP3 album randomly.
≥ Press [3] or [4] to select the MP3
album.
3 Press [1/;] to start play.
≥ When using iPod/iPhone, use the setting on the iPod/iPhone.
≥ During random play, you cannot skip to the previous track.
≥ The current play mode is cleared when you open the sliding
door for discs.
Repeat play ([CD], [USB])
1 Press [PLAY MENU] repeatedly to select
“REPEAT”.
2 Press [3, 4] to select “ON REPEAT” and press
[OK].
≥ “`” is displayed.
≥ When using iPod/iPhone, use the setting on the iPod/iPhone.
≥ To cancel repeat play, select “OFF REPEAT” in step 2.
(The mode is also cancelled when you open the sliding door
for discs.)
RQT9685
ENGLISH
9

Listening to the radio
You can preset up to 30 channels.
Preparation
Make sure that the FM antenna is connected. (> 8)
A station previously stored is overwritten when another station
is stored in the same channel preset.
Presetting stations
automatically
1 Press [RADIO] to select “FM”.
2 Press [PLAY MENU] repeatedly to select
“A.PRESET” and then press [OK].
3 Press [3, 4] to select “LOWEST” or “CURRENT”
and then press [OK].
LOWEST:
To begin auto preset with the lowest frequency
(FM 87.50).
CURRENT:
To begin auto preset with the current frequency.*
* To change the frequency, refer to “Manual tuning and
presetting”.
The tuner starts to preset all the stations it can receive
into the channels in ascending order.
Listening to a preset channel
Preparation
1 Press [RADIO] to select “FM”.
2 Press [PLAY MENU] repeatedly to select
“TUNEMODE” and then press [OK].
3 Press [3, 4] to select “PRESET” and then press
[OK].
1 Press [RADIO] to select “FM”.
2 Press [:/6] or [5/9] to select the
channel.
∫ Manual tuning and presetting
Select a radio broadcast.
1 Press [RADIO] to select “FM”.
2 Press [PLAY MENU] repeatedly to select
“TUNEMODE” and then press [OK].
3 Press [3, 4] to select “MANUAL” and then press
[OK].
4 Press [:/6] or [5/9] to tune to the
required station.
≥ To start automatic tuning, press and hold [:/6],
[5/9] until the frequency starts scrolling. Tuning
10
RQT9685
stops when a station is found.
To preset the channel
5 While listening to the radio broadcast
Press [OK].
6 Press [3, 4] to select the channel and then press
[OK].
∫ To improve FM sound quality
1 While receiving FM broadcasts, press
[PLAY MENU] repeatedly to select “FM MODE”
and then press [OK].
2 Press [3, 4] to select “MONO” and then press
[OK].
≥ This setting can be preset and memorised. To do so,
continue to step 5 of “Manual tuning and presetting”.
≥ Select “STEREO” in step 2 to return to stereo broadcasts.
≥ “MONO” is cancelled if the frequency is changed.
≥ If “MONO” is selected, regardless of the type of signal this
unit is receiving, “FM MONO” is displayed. (> below)
∫ To display the current signal status
Press [PLAY MENU] to display “FM STATUS” and
then press [OK].
“FM ST”: The FM signal is in stereo.
“FM”: The FM signal is in monaural.
≥ “FM” is also displayed even if this unit is not tuned to a
station.
∫ To display RDS text data
Press [DISPLAY] to display the text data.
≥ Each time you press the button:
PS: Programme service
PTY: Programme type
FREQ: Frequency display
≥ “STEREO” is displayed when this unit tunes to a stereo
broadcast.
≥ The unit can display the text data transmitted by the radio
data system (RDS) available in some areas. (RDS displays
may not be available if reception is poor.)
Internet Radio
This unit can output Internet radio if “vTuner for
Panasonic” is installed on your iPhone/iPod touch.
Preparation
≥ Install “vTuner for Panasonic” to your iPhone/iPod
touch.
≥ Install iOS 5.0 or later.
1 Insert the iPhone/iPod touch to this unit.
2 Press [iPod] repeatedly to select “VTUNER”.
{. “vTuner for Panasonic” starts.
≥ Visit the below website for the following information about
“vTuner for Panasonic”:
http://radio.vtuner.com/panasonic/en/
(Compatible iPhone/iPod touch models and software
versions, purchasing, installation and operation details.)
≥ A pop-up screen may appear on your iPhone/iPod touch.
Follow the indicated instructions.
Sound adjustment
The following sound effects can be added to the audio
output.
1 Press [SOUND] repeatedly to select the effect and
then press [OK].
2 Press [3, 4] to select the setting and then press
[OK].
Direct-Vocal
Surround
(
D.SURROUND
Preset EQ
(PRESET EQ)
Bass (BASS) or
Treble (TREBLE)
Dynamic Bass*
(D.BASS)
*1: This function can also be selected with the [D.BASS] button
on the unit.
≥ You may experience a reduction in sound quality when these
effects are used with some sources. If this occurs, turn the
sound effects off.
“LEVEL 1”, “LEVEL 2” or “OFF”.
≥ The factory preset is “OFF”.
)
“HEAVY” (heavy), “SOFT” (soft),
“CLEAR” (clear), “VOCAL”
(vocal) or “FLAT” (flat/off).
≥ The factory preset is “HEAVY”.
Adjust the level (j4 to i4).
1
“ON D.BASS” or
“OFF D.BASS”.
≥ The factory preset is
“ON D.BASS”.
Clock and Timer
Setting the clock
This is a 24-hour clock.
1 Press [SETUP] repeatedly to select “CLOCK” and
then press [OK].
2 Press [3, 4] to set the time and then press [OK].
≥ To display the clock, press [SETUP] repeatedly to select
“CLOCK” and then press [OK] once. The time is displayed for
10 seconds.
(During standby, press [iPod MENU, DISPLAY] once.)
≥ The clock is reset when there is a power failure or when the
AC mains lead is removed.
≥ Reset the clock regularly to maintain accuracy.
Play timer
You can set the timer so this unit turns on at a certain
time every day.
Preparation
Set the clock (> left).
∫ Setting the timer
1 Press [SETUP] repeatedly to select
“TIMER ADJ” and then press [OK].
2 Press [3, 4] to set the starting time
(“ON TIME”) and then press [OK].
3 Press [3, 4] to set the finishing time
(“OFF TIME”) and then press [OK].
≥ To display the timer settings, press [SETUP] repeatedly to
select “TIMER ADJ” and then press [OK] once.
(During standby, press [iPod MENU, DISPLAY] twice.)
≥ The music source and volume will also be displayed if the
timer is turned on. (> below)
∫ Turn the timer on
1 Select the music source*
volume.
2
and set the desired
2 Press [SETUP] repeatedly to select
“TIMER SET” and then press [OK].
3 Press [3, 4] to select “SET” and then press [OK].
≥ “F” is displayed.
4 Press [Í] to turn the unit off.
*2: “CD”, “USB”, “IPOD” and “FM” can be set as the music
source.
≥ This unit can be used as normal after the timer is set,
however:
≥ Turn the unit to standby mode before the timer start time.
≥ Even if the audio source or the volume is changed, the
timer will still use the audio source and volume that was
set when the timer was turned on.
≥ To turn the timer off, select “OFF” in step 3.
≥ The unit will turn on at the preset time, with the volume
increasing gradually to the preset level.
Sleep timer
The sleep timer can turn the unit off after a set time.
1 Press [SETUP] repeatedly to select “SLEEP” and
then press [OK].
2 Press [3, 4] to set the time (in minutes) and then
press [OK].
“SLEEP 30” ,. “SLEEP 60” ,. “SLEEP 90” ,. “SLEEP 120”
^------------------------. OFF (Cancel) (------------------------J
≥ The remaining time is indicated on the unit’s display except
when other operations are performed.
≥ The play timer and sleep timer can be used together. The
sleep timer always has priority.
RQT9685
ENGLISH
11
Others
Automatic standby
As a factory preset, this unit will always turn off
automatically if there is no sound output and no
operation for 30 minutes.
To cancel this function
1 Press [SETUP] repeatedly to select “AUTO OFF”
and then press [OK].
2 Press [3, 4] to select “OFF” and then press [OK].
≥ To turn automatic standby on, select “ON” in step 2.
≥ This setting cannot be selected when “FM” is the source.
Display brightness
The brightness of this unit’s display can be changed.
1 Press [SETUP] repeatedly to select “DIMMER”
and then press [OK].
2 Press [3, 4] to select “ON” and then press [OK].
To cancel the dimmer, select “OFF” in step 2.
Changing the main unit and
remote control code
When other Panasonic equipment responds to the
supplied remote control, change the remote control
code.
1 Press [CD] to select “CD”.
2 Press and hold [CD] on the main unit and [3] on
the remote control until the main unit’s display
shows “REMOTE 2”.
3 Press and hold [OK] and [3] on the remote control
for at least 4 seconds.
To change the mode back to “REMOTE 1”, repeat the steps
above by replacing [3] with [4].
Troubleshooting
Before requesting service, make the following checks.
If you are in doubt about some of the check points, or if
the solutions indicated in the following guide do not
solve the problem, consult your dealer for instructions.
To return all settings to the factory preset
When the following situations occur, reset the
memory:
≥ There is no response when buttons are pressed.
≥ You want to clear and reset the memory contents.
1 Disconnect the AC mains lead. (Wait for at least
3 minutes before proceeding to step 2.)
2 While pressing and holding down [Í/I] on the
main unit, reconnect the AC mains lead.
≥ “--------” appears on the display.
3 Release [Í/I].
All the settings are returned to the factory preset. You will
need to reset the memory items.
Common problems
Humming heard during play.
≥ An AC mains lead or fluorescent light is near the cords. Keep
other appliances and cords away from this unit’s cables.
MP3 cannot be read.
≥ You may not be able to play MP3 if you have copied a
multi-session disc that has no data between sessions.
≥ When creating a multi-session disc, it is necessary to close the
session.
≥ The amount of data on the disc is too small. Set the amount of
data to above 5 MB.
Disc operations
Incorrect display or play will not start.
≥ Make sure that the disc is compatible with this unit.(> 4)
≥ There is moisture on the lens. Wait for about an hour and then try
again.
USB operations
No response when [1/;] is pressed.
≥ Disconnect the USB device and then reconnect it. Alternatively,
turn the unit off and on again.
12
RQT9685
The USB drive or its contents cannot be read.
≥ The USB drive format or its contents is/are not compatible with the
unit. (> 4)
≥ The USB host function of this product may not work with some
USB devices.

Slow operation of the USB flash drive.
≥ Large file size or high memory USB flash drive takes longer time
to read.
The elapsed time displayed is different from the
actual play time.
≥ Copy the data to another USB device or backup the data and
reformat the USB device.
Radio
“ERROR”
≥ Incorrect operation is performed. Read the instructions and try
again.
“F61”
≥ There is a power supply problem. Consult the dealer.
“ILLEGAL OPEN”
≥ Sliding door is not in correct position. Turn the unit off and on
again. If this display appears again, consult the dealer.
A beat sound or noise is heard while receiving
radio broadcast.
≥ Confirm the FM antenna is properly connected. (> 8)
≥ Adjust the position of the antenna.
≥ Try to keep a certain amount of distance between the antenna and
AC mains lead.
≥ Try to use outdoor antenna if there are buildings or mountains
nearby.
≥ Switch the television or other audio player off or separate it from
the unit.
≥ Keep this unit away from mobile phones if the interference is
apparent.
iPod/iPhone operations
Cannot charge or operate.
≥ Check that the iPod/iPhone is connected firmly. (> 8)
≥ The battery of the iPod/iPhone is depleted. Charge the iPod/
iPhone, and then operate again.
≥ When unexpected operation occurs while using the iPod/iPhone,
connect the iPod/iPhone again or try to restart the iPod/iPhone.
Remote control
The remote control doesn't work properly.
≥ The remote control and this unit are using a different code.
(> right, “REMOTE ”)
Messages
The following messages or service numbers may
appear on the unit's display.
“--:--”
≥ You plugged the AC mains lead in for the first time or there was a
power failure recently. Set the time (> 11) .
“ADJUST CLOCK”
≥ Clock is not set. Adjust the clock accordingly.
“ADJUST TIMER”
≥ Play timer is not set. Adjust the play timer accordingly.
“AUTO OFF”
≥ The unit has been left unused for about 30 minutes and will shut
down in a minute. Press any button to cancel it.
“IPOD OVER CURRENT ERROR”
≥ The iPod/iPhone is drawing too much power. Remove the iPod/
iPhone and turn the unit off and on again.
“NODEVICE”
≥ The iPod/iPhone device is not inserted correctly. Read the
instructions and try again (> 8).
≥ The USB device is not inserted. Check the connection.
“NO DISC”
≥ Insert the disc to be played (> 8).
“NO PLAY”
≥ A CD disc that is not in CD-DA or MP3 format is inserted. It cannot
be played.
≥ If there are more than 255 albums or folders (audio and
non-audio), some of the MP3 files in these albums may not be
read and played. Transfer these music albums to another USB.
Alternatively, reformat the USB device and save these music
albums prior to saving the other non-audio folders.
“NOT SUPPORTED”
≥ You have inserted an iPod/iPhone that cannot be played (> 4).
Insert correctly and try again if iPod/iPhone is compatible.
≥ If the iPod/iPhone is compatible, turn it on before inserting it to this
unit.
“READING”
≥ The unit is checking the CD information. After this display has
disappeared, start operating.
“START ERROR”
≥ Check the iPhone/iPod touch.
Visit the below website for more information:
http://radio.vtuner.com/panasonic/en/
“REMOTE ” (“ ” stands for a number.)
≥ The remote control and this unit are using different codes. Change
the code on the remote control.
– When “REMOTE 1” is displayed, press and hold [OK] and
[4] for more than 4 seconds.
– When “REMOTE 2” is displayed, press and hold [OK] and
[3] for more than 4 seconds.
“USB OVER CURRENT ERROR”
≥ The USB device is drawing too much power. Switch to “CD”
mode, remove the USB and turn the unit off.
ENGLISH
“CANNOT SET”
≥ Select an audio source other than “VTUNER”.
“CHECKING CONNECTION”
≥ The unit is checking the connected iPod/iPhone. If this display
keeps appearing, make sure that iPod/iPhone is inserted correctly
and try again (> 8).
13
RQT9685

Specifications
∫ GENERAL
Power consumption 25 W
Power consumption in standby mode
Approx. 0.2 W
Power supply AC220Vto240V,50Hz
Dimensions (WkHkD)
480 mmk197 mmk84 mm
(Depth without stand 75 mm)
Mass Approx. 2.5 kg
Operating temperature range 0 oC to r40 oC
Operating humidity range
35 % to 80 % RH (no condensation)
∫ AMPLIFIER SECTION
Output power
RMS Output Power Stereo mode
Front Ch (both ch driven)
20 W per channel (6 ≠), 1 kHz, 10 % THD
Total RMS Stereo mode power 40 W
∫ TUNER SECTION
Preset Memory FM 30 stations
Frequency Modulation (FM)
Frequency range
Antenna terminals 75 ≠ (unbalanced)
∫ TERMINAL SECTION
USB Port
USB Standard USB 2.0 full speed
Media file format
support
USB device file system FAT12, FAT16, FAT32
USB port power DC OUT 5 V 500 mA MAX
87.50 MHz to 108.00 MHz (50 kHz step)
MP3 (¢.mp3)
∫ DISC SECTION
Disc played (8 cm or 12 cm)
* MPEG-1 Layer 3, MPEG-2 Layer 3
Pick up
Wavelength 790 nm (CD)
Laser power CLASS 1
[NORSK]
Bølgelengde 790 nm (CD)
Laserstyrke Klasse 1
Audio output (Disc)
Number of channels 2 ch (FL, FR)
CD, CD-R/RW (CD-DA, MP3*)
Ingen farlig stråling sendes ut
(med sikkerhets-beskyttelse)
∫ SPEAKER SYSTEM SECTION
Typ e
1 way, 1 speaker system (Passive Radiator)
Speaker unit(s)
Full range
6.5 cm Cone typek1 per channel
Passive Radiator 8cmk2 per channel
Impedance 6 ≠
≥ Specifications are subject to change without notice.
Mass and dimensions are approximate.
≥ Total harmonic distortion is measured by a digital spectrum
analyzer.
iPod Connector DC OUT 5 V 1.0 A MAX
Phone jack
Ter min al Stereo, ‰3.5 mm jack
14
RQT9685
 Loading...