

Panasonic KX-TS600EXB, KX-TS600EXW User Manual

TS600EX.book Page 1 Wednesday, April 5, 2006 12:25 PM
Integrated Telephone System
Operating Instructions
Model No. KX-TS600EX
KX-TS600EXW
This unit is compatible with Caller ID. To use this feature, you must
subscribe to the appropriate service offered by your service provider.
Please read these Operating Instructions before using the unit and save
for future reference.
Useful InformationBasic OperationPreparation Advanced Operation
TS600EX.book Page 2 Wednesday, April 5, 2006 12:25 PM
Before Initial Use
Thank you for purchasing your new Panasonic integrated
telephone.
For your future reference
Serial No. Date of purchase
(found on the bottom of the unit)
Name and address of dealer
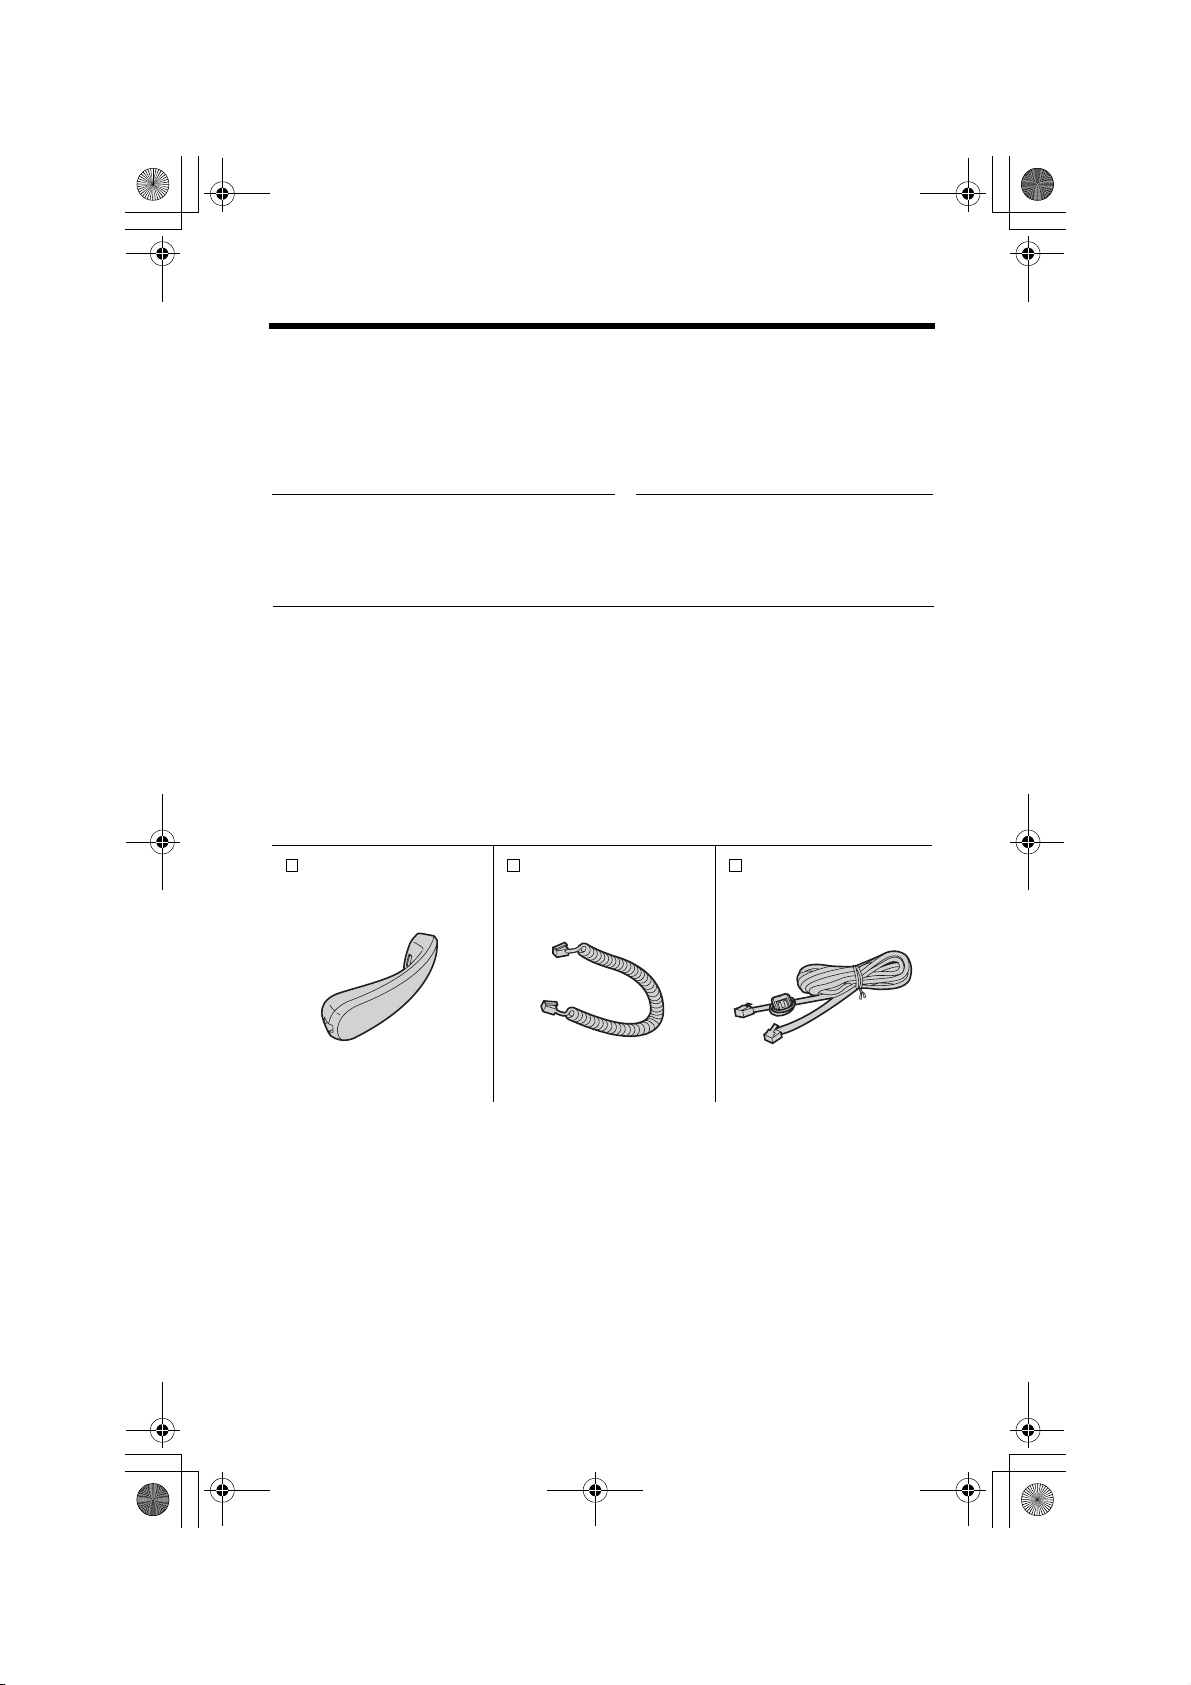
Accessories (included)
Handset (p. 6)
one
Handset Cord (p. 6)
one
Telephone Line
Cord (p. 6)
one
2

TS600EX.book Page 3 Wednesday, April 5, 2006 12:25 PM
Contents
Preparation
Location of Controls. . . . . . . . . . 4
Display . . . . . . . . . . . . . . . . . . . . . 5
Settings . . . . . . . . . . . . . . . . . . . . 6
Installing the Batteries . . . . . . . . 6
Connecting the Handset/
Telephone Line Cord . . . . . . . . 6
Connecting a Communication
Device . . . . . . . . . . . . . . . . . . . 7
Programming Summary . . . . . . . 8
Time and Date . . . . . . . . . . . . . . 9
Display Language. . . . . . . . . . . 11
Dialing Mode. . . . . . . . . . . . . . . 12
LCD Contrast . . . . . . . . . . . . . . 13
Ringer Volume . . . . . . . . . . . . . 13
Time Adjustment
(Caller ID subscribers only) . . 14
Basic Operation
Making Calls . . . . . . . . . . . . . . . 15
Answering Calls . . . . . . . . . . . . 17
Caller ID Service . . . . . . . . . . . . 18
Private Name Display . . . . . . . . 18
Using the Caller List . . . . . . . . . 19
Viewing the Caller List . . . . . . . 19
Calling Back from the Caller
List . . . . . . . . . . . . . . . . . . . . . 20
Editing the Caller’s Phone
Number. . . . . . . . . . . . . . . . . . 21
Storing Caller List Information in
the Phonebook . . . . . . . . . . . . 22
Storing Caller List Information in
the Direct Dial Memory . . . . . . 23
Erasing Caller List Information . 25
Advanced Operation
Phonebook. . . . . . . . . . . . . . . . 26
Storing Names and Phone
Numbers in Phonebook . . . . . 26
Dialing from the Phonebook . . . 28
Chain Dial . . . . . . . . . . . . . . . . . 29
Editing . . . . . . . . . . . . . . . . . . . . 30
Erasing . . . . . . . . . . . . . . . . . . . 31
Direct Dial (M1, M2, M3) . . . . . 32
Storing Names and Phone
Numbers in Memory . . . . . . . . 32
Dialing . . . . . . . . . . . . . . . . . . . . 34
Special Features . . . . . . . . . . . 35
How to Use the PAUSE Button
(For PBX Line/Long Distance
Calls). . . . . . . . . . . . . . . . . . . . 35
For Call Waiting Service
Users . . . . . . . . . . . . . . . . . . . 35
Muting Your Conversation . . . . 36
Setting Hold Music
to ON/OFF . . . . . . . . . . . . . . . 36
RECALL Button. . . . . . . . . . . . . 37
Setting the Password . . . . . . . . 38
Dial Lock . . . . . . . . . . . . . . . . . . 39
Call Restriction . . . . . . . . . . . . . 40
Useful Information
Optional Headset. . . . . . . . . . . 41
Wall Mounting . . . . . . . . . . . . . . 42
Battery Replacement . . . . . . . 43
Troubleshooting . . . . . . . . . . . 44
Safety Instructions . . . . . . . . . 46
Specifications . . . . . . Back cover
Useful InformationBasic OperationPreparation Advanced Operation
3
TS600EX.book Page 4 Wednesday, April 5, 2006 12:25 PM
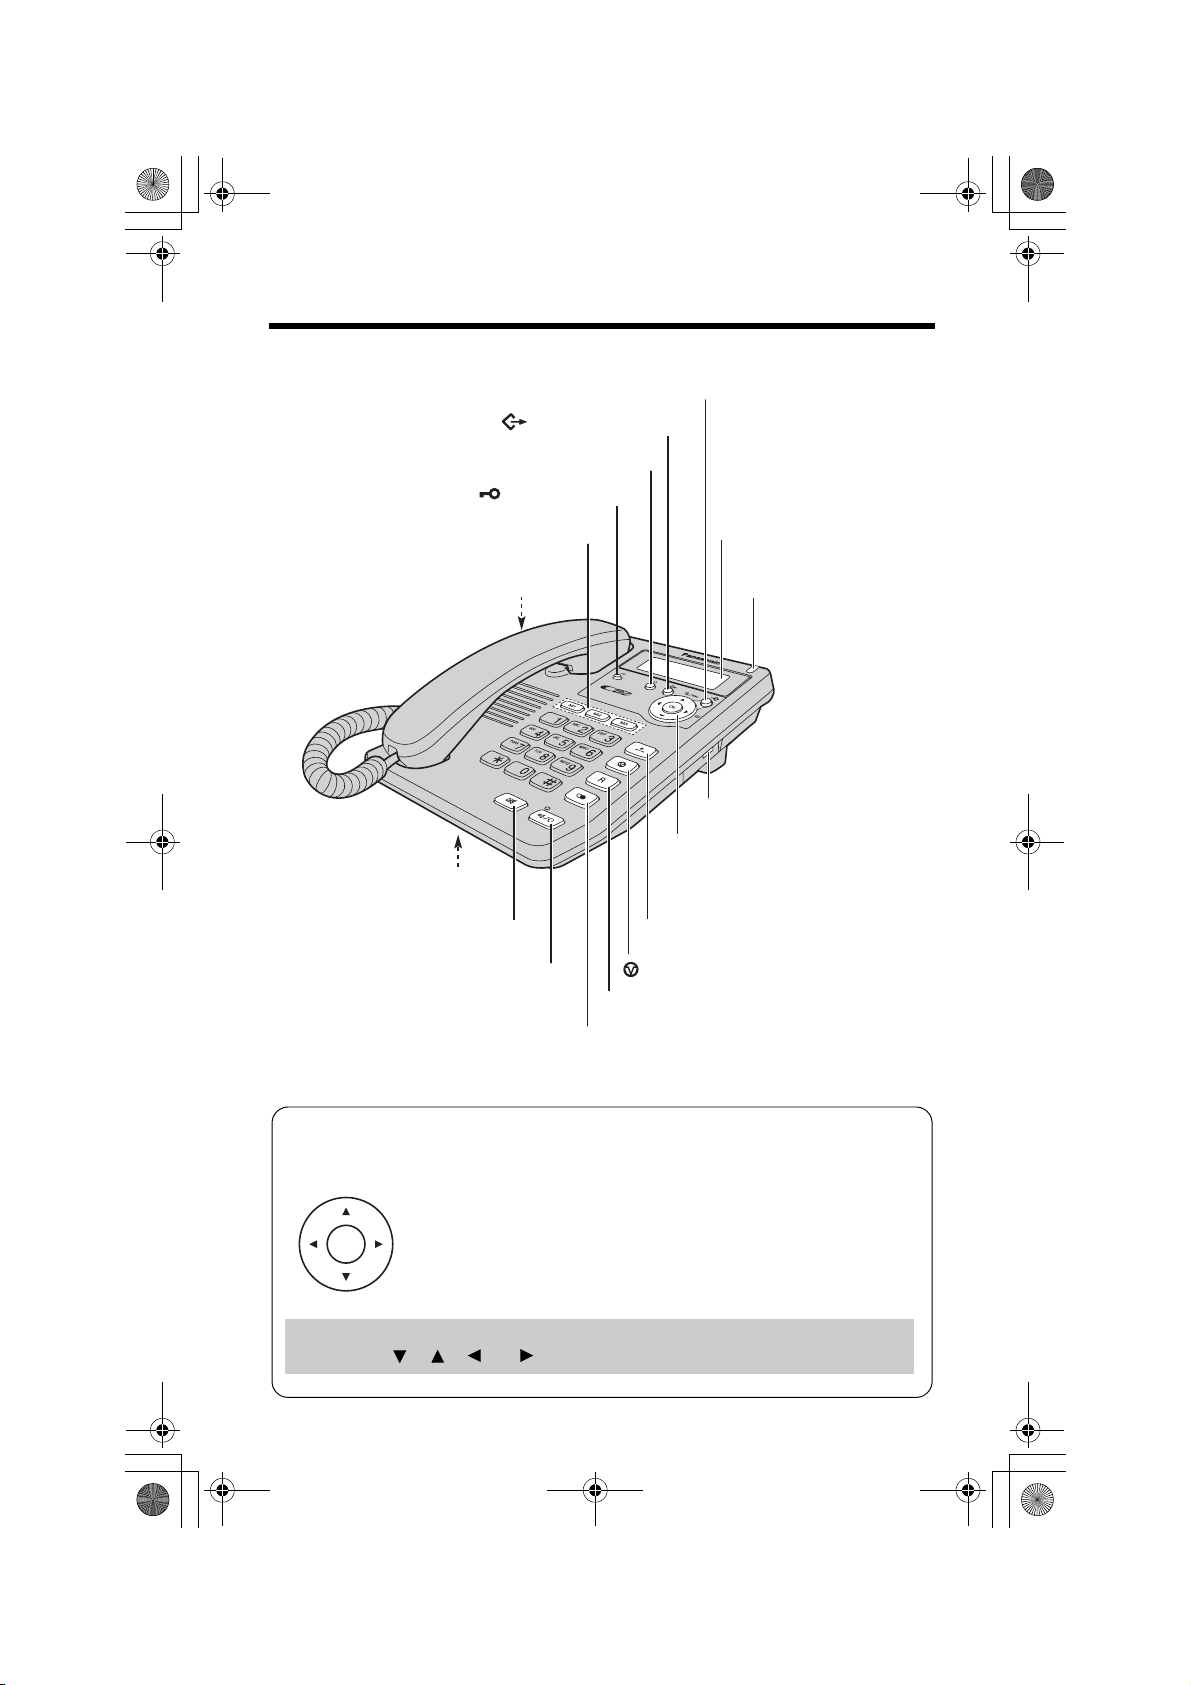
Location of Controls
[l] Button (p. 8, 21)
[] Button (p. 8, 19)
[C] Button (p. 21, 25, 31)
[] Button (p. 39)
Direct Dial Buttons
(p. 23, 32)
Headset Jack (p. 41)
Display (p. 5)
RINGER Indicator
(p. 17, 18)
RINGER Selector (p. 13)
Navigator Key
3], [4], [2], [1], [OK])
Microphone
(p. 15, 17)
[T] Button (p. 36)
[s/W] (Speakerphone/Headset
Button and Indicator)
[R] Button (p. 35, 37)
([
(p. 8, 19, 28)
[a] Button (p. 17)
[] Button (p. 35)
(p. 15, 17, 41)
[R] Button (p. 16)
How to use the Navigator key and [OK] button
This key has five active areas that are indicated by arrows and [OK].
• Pressing the up and down arrows allows you to enter the
Caller List and scroll through the function menu.
OK
Throughout these Operating Instructions, the navigator key is indicated by
the arrows [], [], [] or [] and [OK].
• Pressing the right and left arrows allows you to enter the
Phonebook and move the cursor when entering items. The
right arrow is also used to select the desired item.
•The [OK] button is used to select and confirm desired item.
4
P
TS600EX.book Page 5 Wednesday, April 5, 2006 12:25 PM
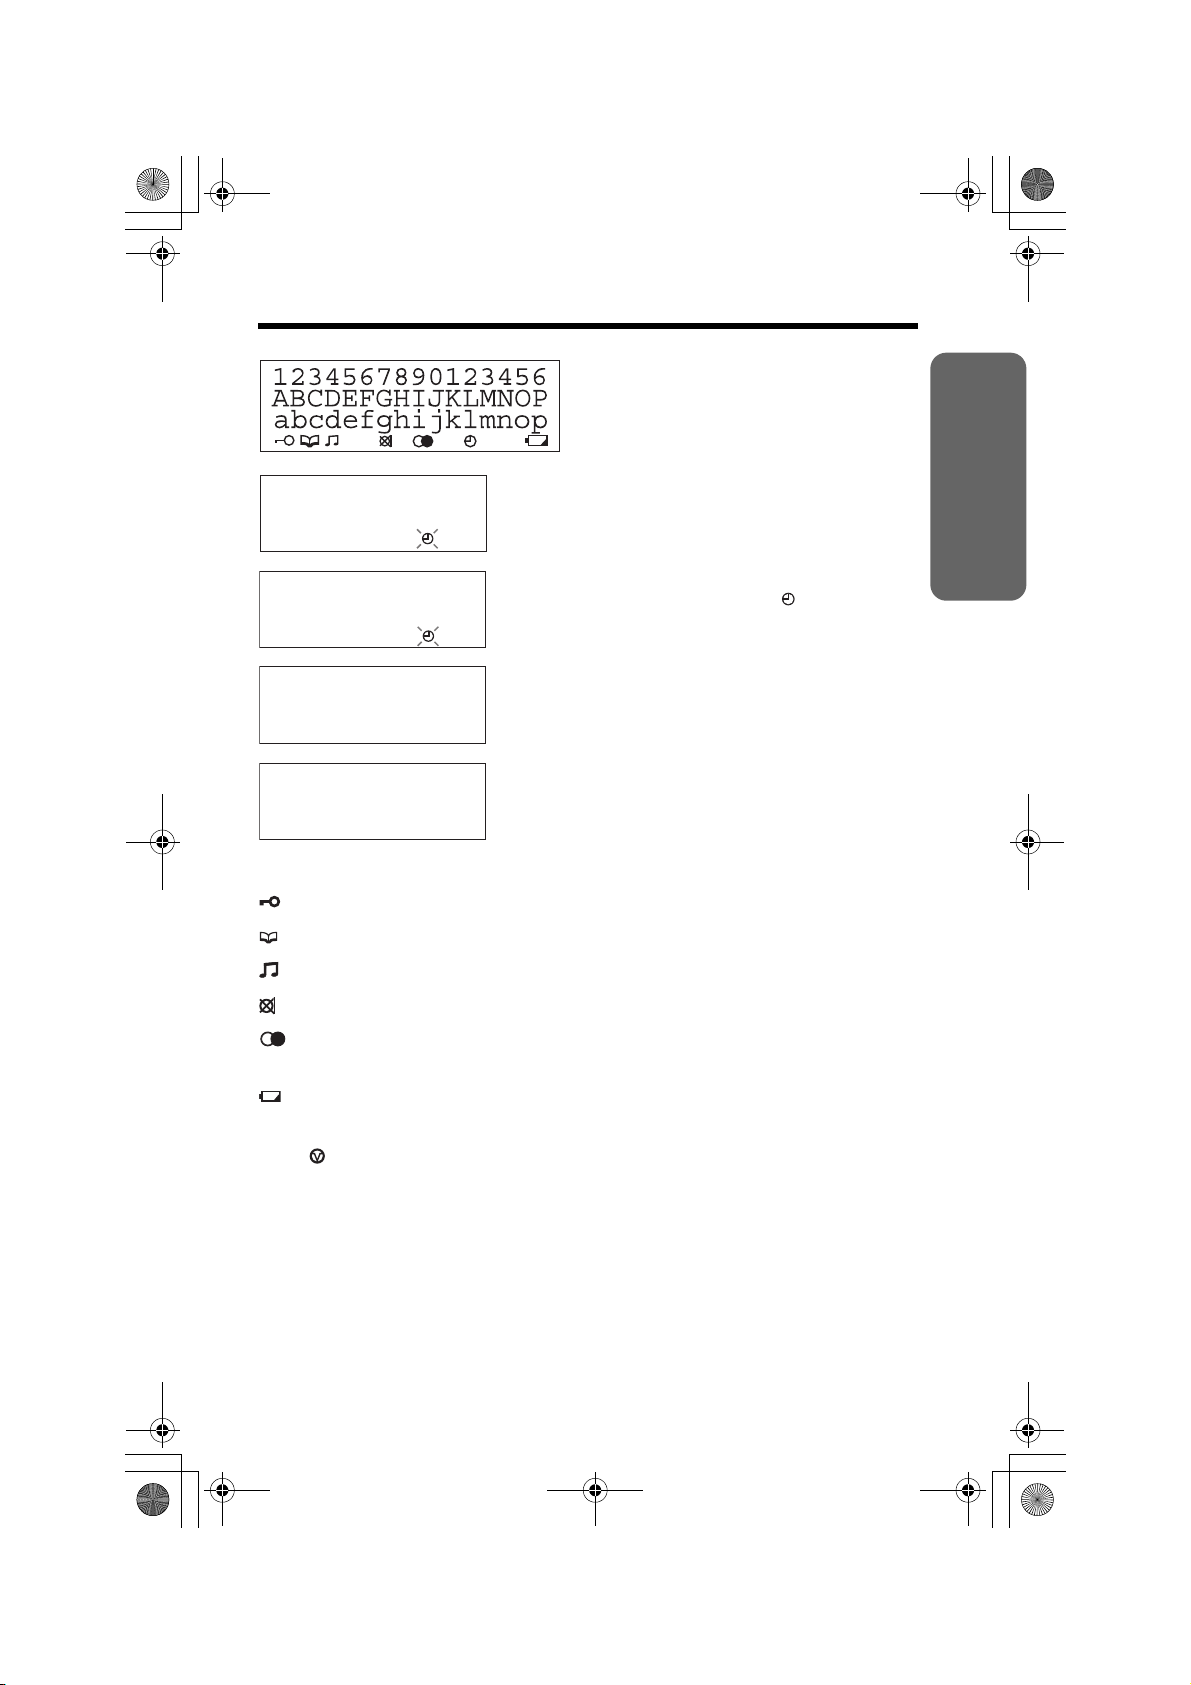
Display
(This display shows all of the possible
configurations.)
12:00AM 31.12
10 missed calls
12:00AM 31.12
12:34AM 21.5
01-06-35
1114447777
11:50AM 24.11
(Example: Nov. 24, 11:50 AM).
:The dial lock mode is set. To cancel the mode, see page 39.
:The unit enters in the Phonebook.
:The unit plays music during the hold for a caller.
:[T] was pressed during a conversation (p. 36).
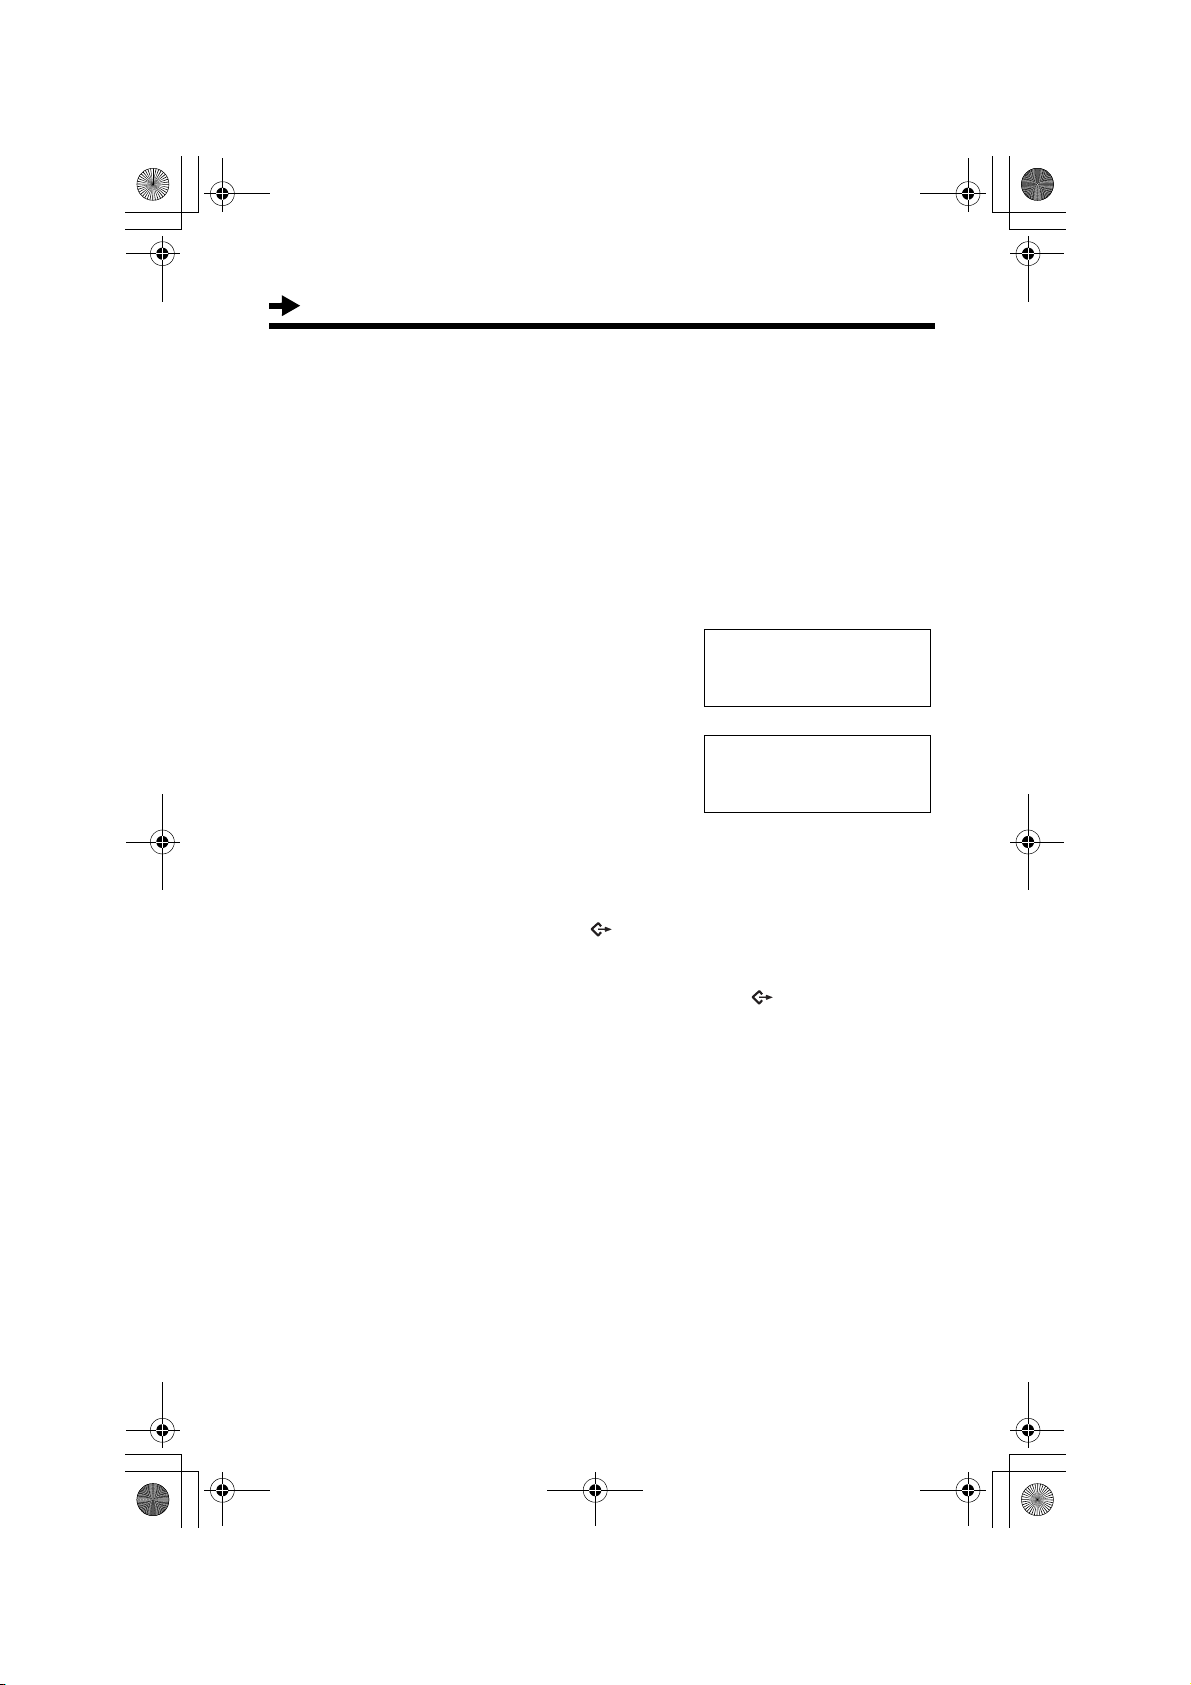
While the unit is not in use, the display shows
the current time and date, and the number of
missed calls.
If the display continuously shows “12:00AM
31.12” or “0:00 31.12” and “ ” flashes, the
clock needs adjustment (p. 9, 10).
During a conversation, the display shows the
length of the call (Example: 1 hour, 6 minutes
and 35 seconds).
This is a display from the Caller List. The
display shows:
— the caller’s number,
— the time and date of the call
Preparation
:[R] was pressed while the handset is on the cradle and
Speakerphone/headset [s/W] indicator is off (p. 16).
:This display flashes, when the battery power is low. To replace the
batteries, see page 43.
:[] was pressed while dialing or storing phone numbers.
R
:[R] was pressed while storing phone numbers.
5
TS600EX.book Page 6 Wednesday, April 5, 2006 12:25 PM
Settings
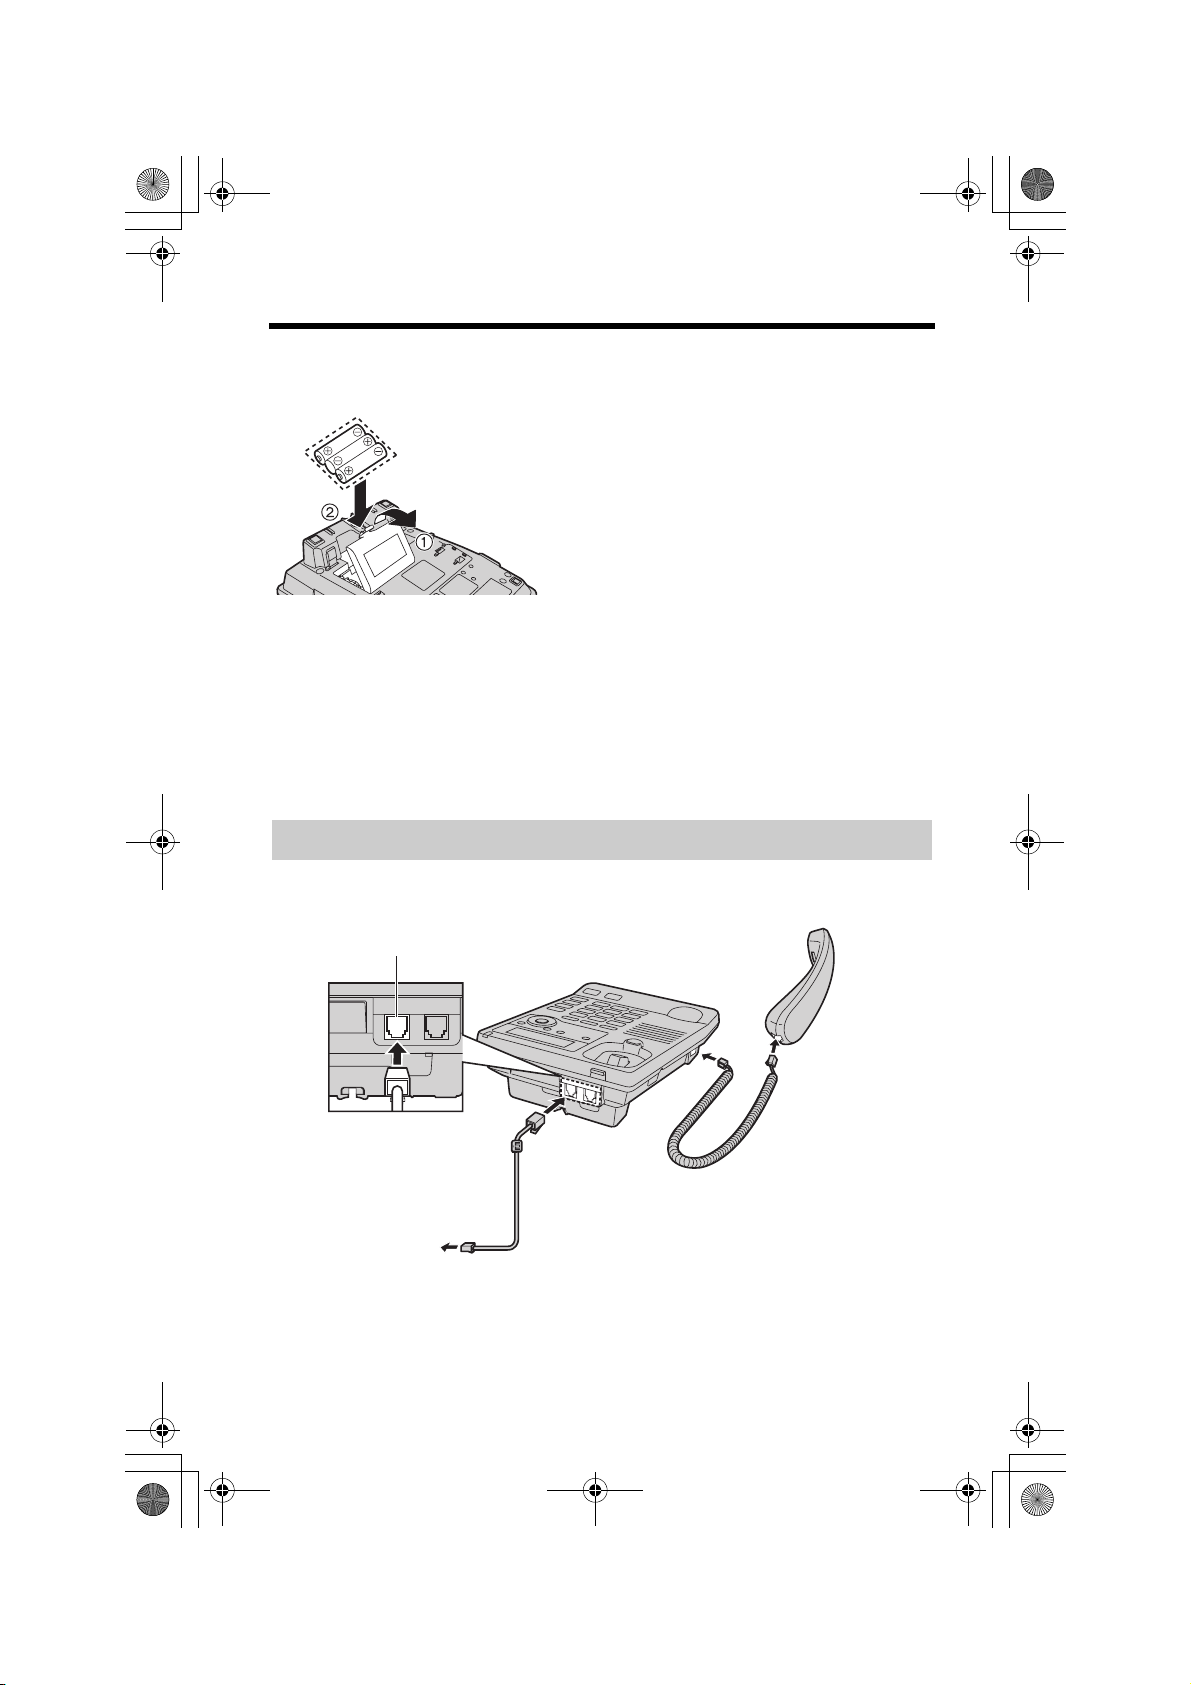
Installing the Batteries
Press down in the direction of the arrow
1
and open the cover (1).
Install the batteries in the proper order
2
as shown (2), matching the correct
polarity.
Close the battery cover.
3
• Batteries are not included with the unit.
• Install three high quality “AA” size Alkaline (LR6) or Manganese (R6, UM-3)
batteries. We recommend to use Panasonic batteries.
Battery life: —about six months when using Alkaline batteries.
—about three months when using Manganese batteries.
Battery life may depend on usage conditions and ambient temperature.
• Make sure batteries were inserted properly inphase to ensure the functionality of
this unit.
• Please refer to page 43 for battery replacement and precautions.
THE UNIT MAY NOT WORK PROPERLY WITHOUT BATTERIES.
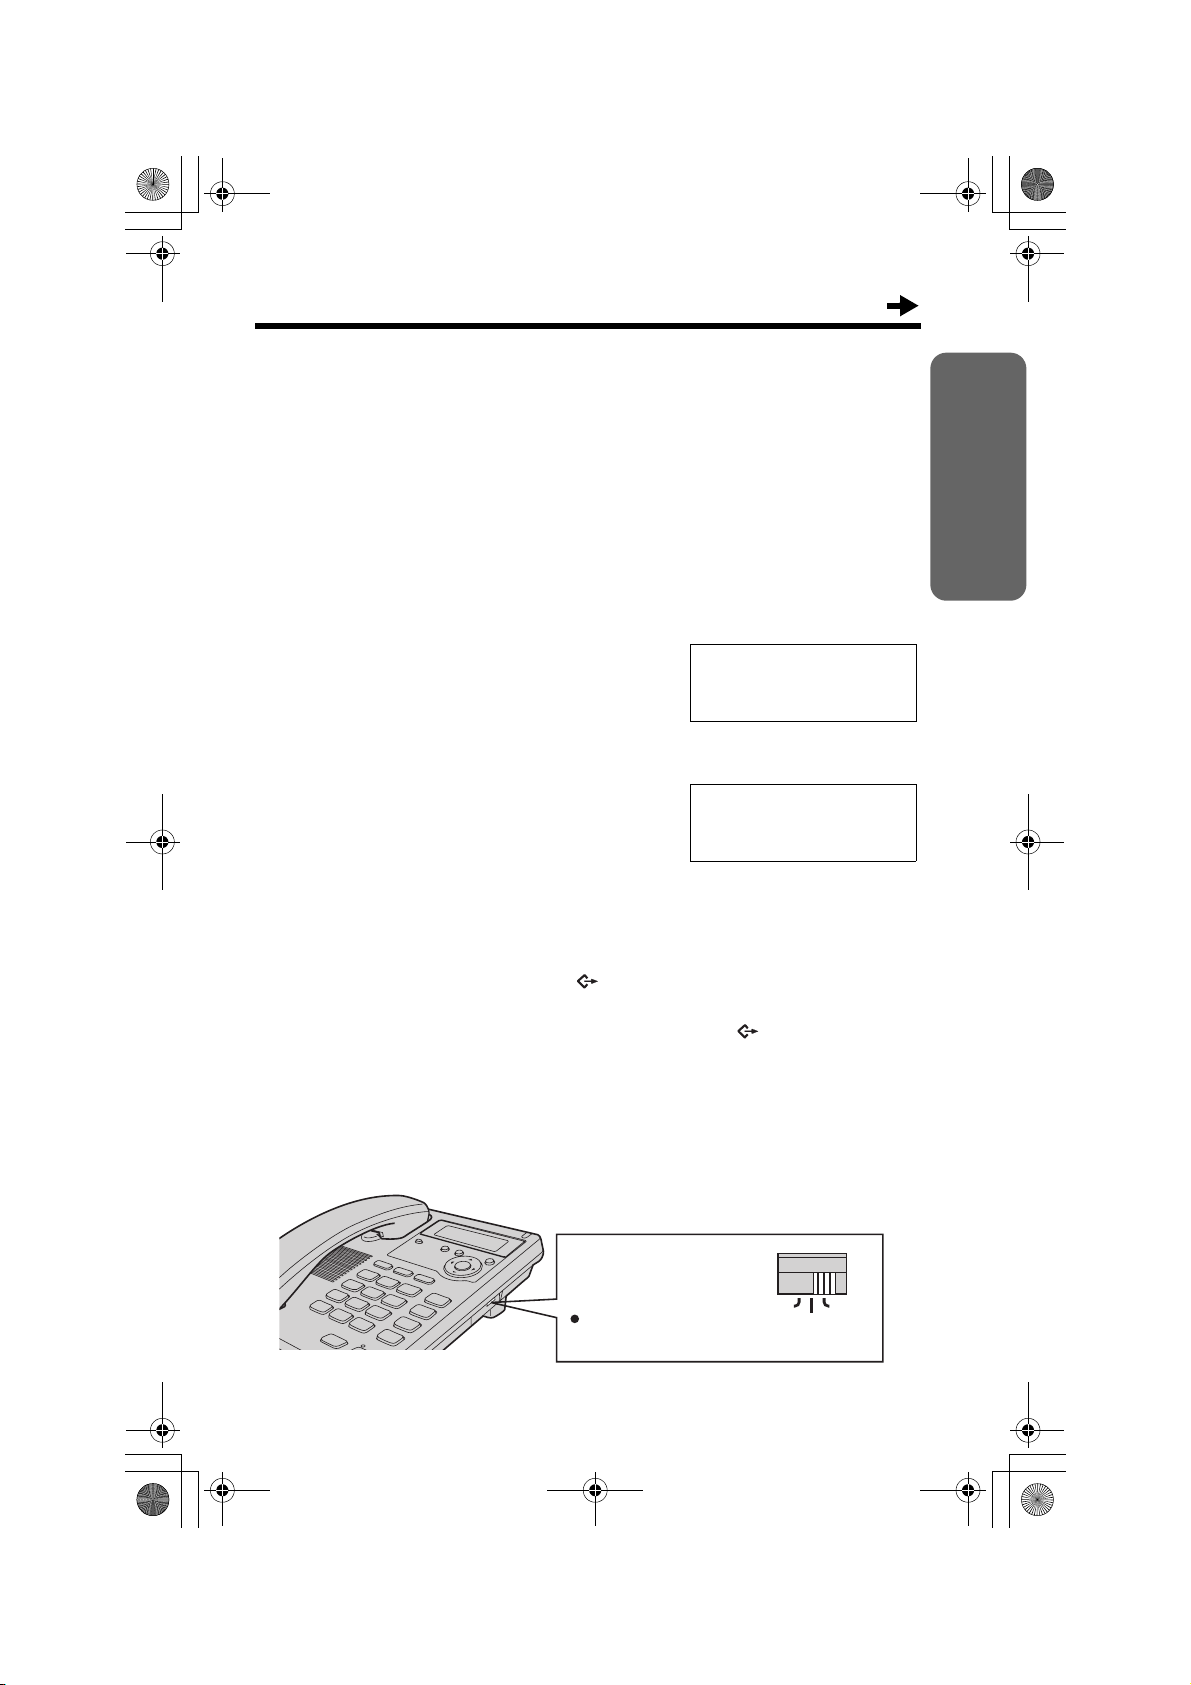
Connecting the Handset/Telephone Line Cord
After line connection, lift the handset to check for a dial tone.
LINE
Handset
Handset Cord
Telephone Line
Cord
To Single-Line
Telephone Jack
• Use only a Panasonic Handset for the KX-TS600EXW or KX-TS600EXB.
• Use only the telephone line cord included with the unit.
• If your unit is connected to a PBX which does not support Caller ID services, you
cannot access those services.
• KX-TS600EXW or KX-TS600EXB is not designed to be used with rotary
(pulse dialing) services.
6
TS600EX.book Page 7 Wednesday, April 5, 2006 12:25 PM
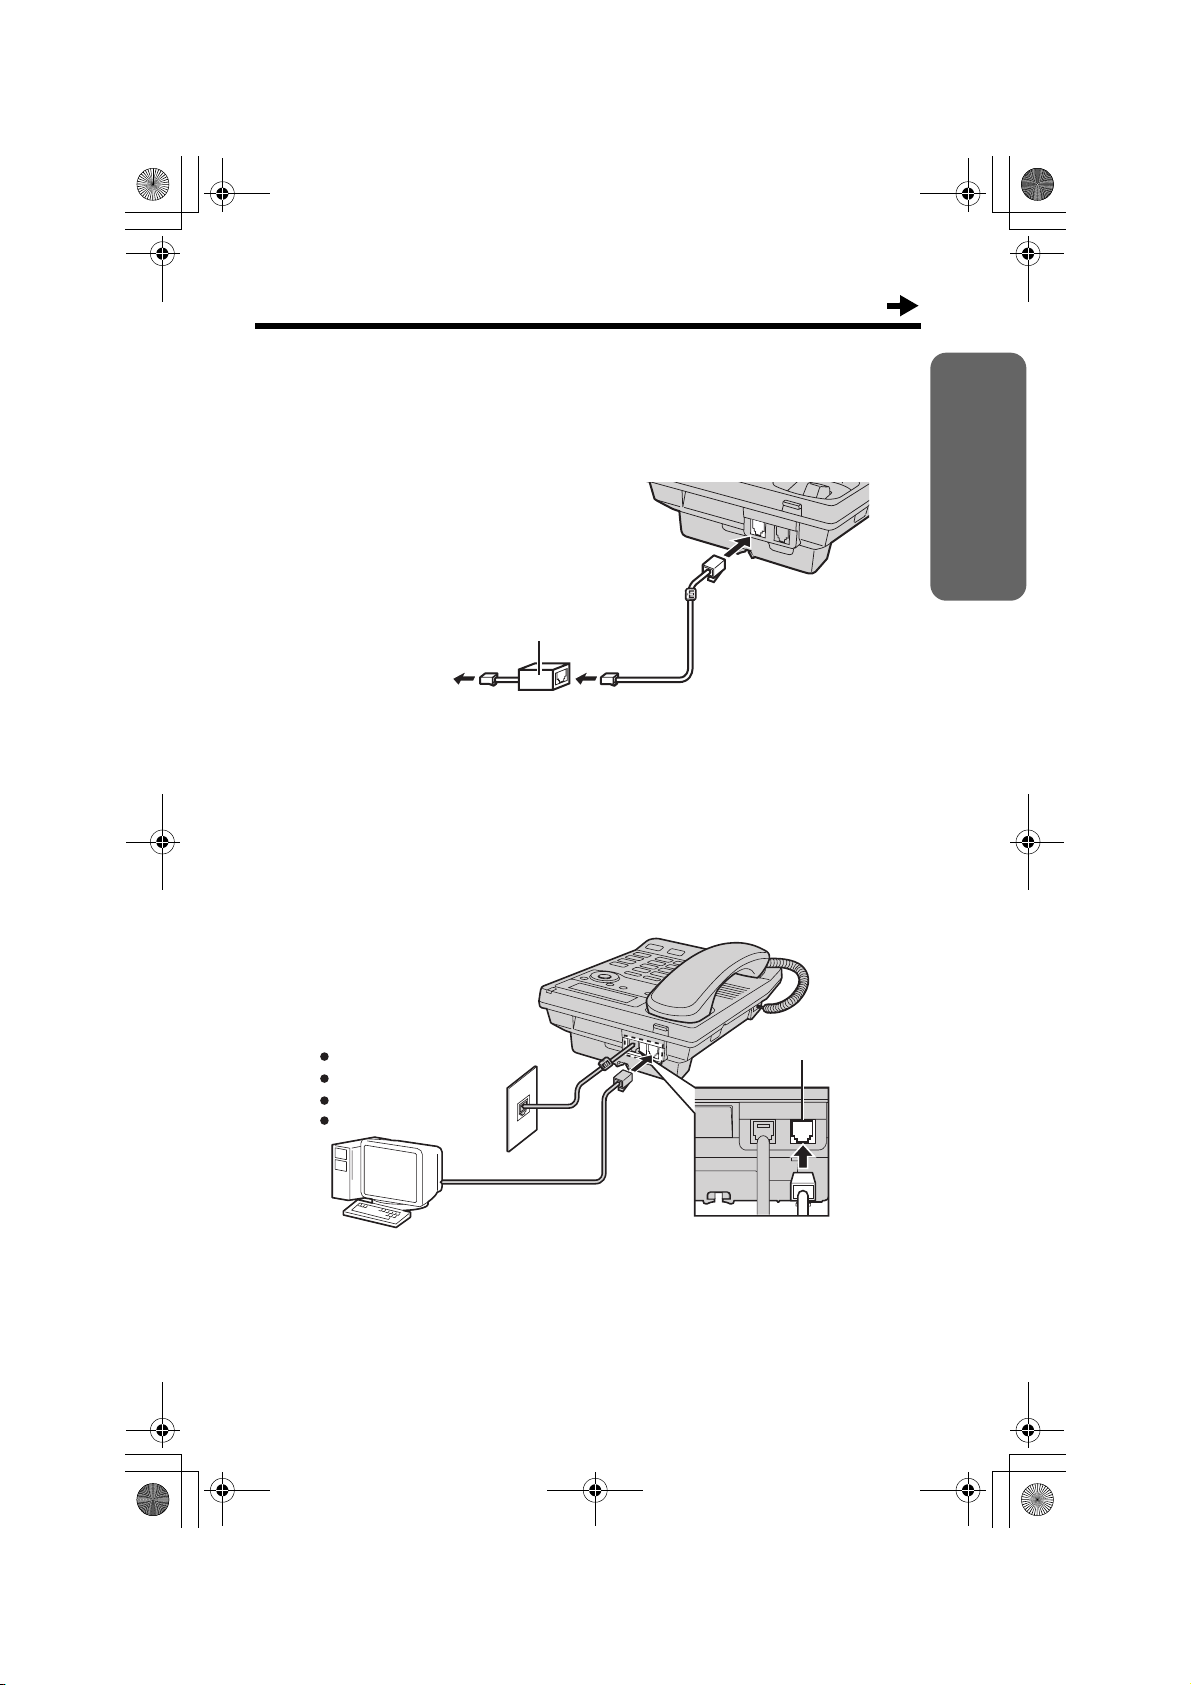
If you subscribe to a DSL service
• Please attach a noise filter (contact your DSL provider) to the telephone line
between the base unit and the telephone line jack in the event of the following:
jNoise is heard during conversations.
jCaller ID feature (p. 18) does not function properly.
Noise filter
(For DSL users)
To Single-Line
Telephone
Line Cord
Telephone Jack
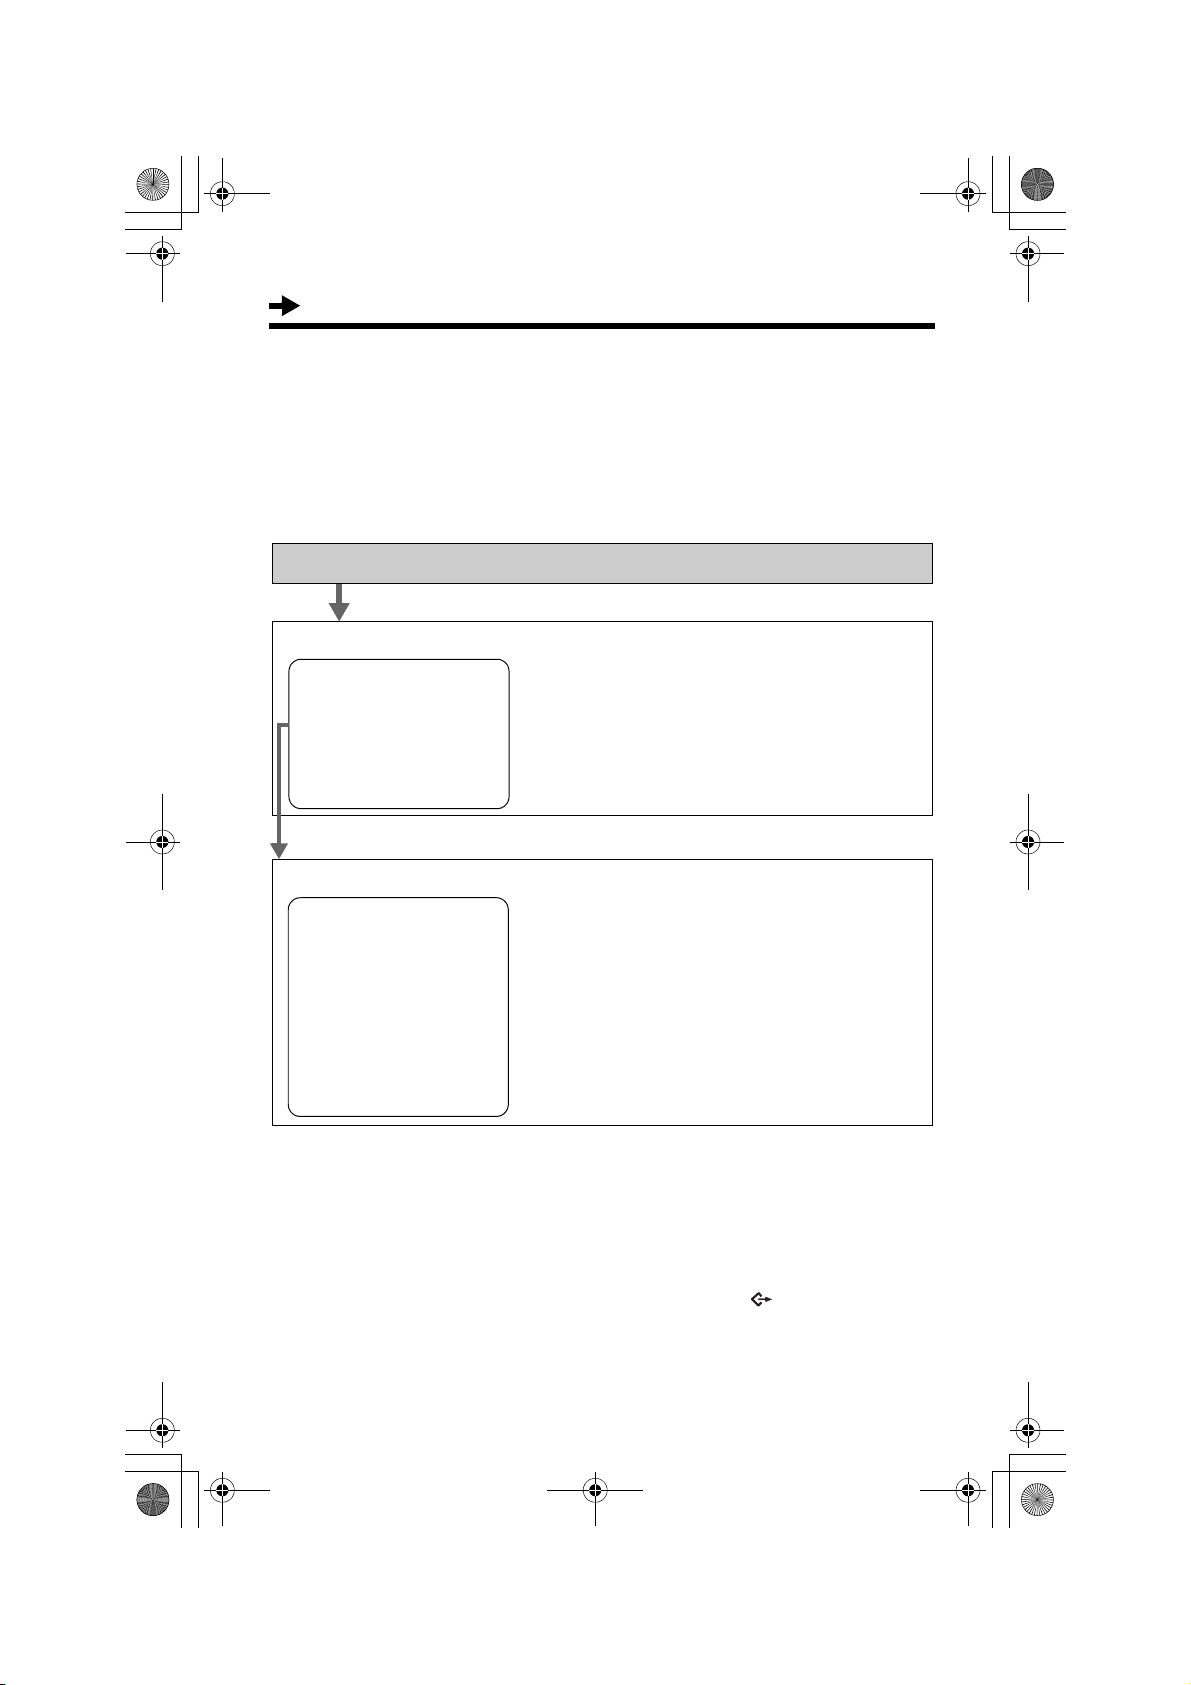
Connecting a Communication Device
Preparation
If you want to connect a communication device (computer, modem, fax,
answering machine, etc.) to the telephone line, you can connect it through
this unit using the DATA jack.
After connecting the handset and telephone line cord (p. 6), connect the
communication device telephone line cord to the DATA jack.
Computer
Modem
Fax
Answering Machine
• Make sure the communication device is not in use before using this unit (making
calls, storing phone numbers in memory etc.) or the communication device may
not operate properly.
DATA
7
TS600EX.book Page 8 Wednesday, April 5, 2006 12:25 PM
Settings
Programming Summary
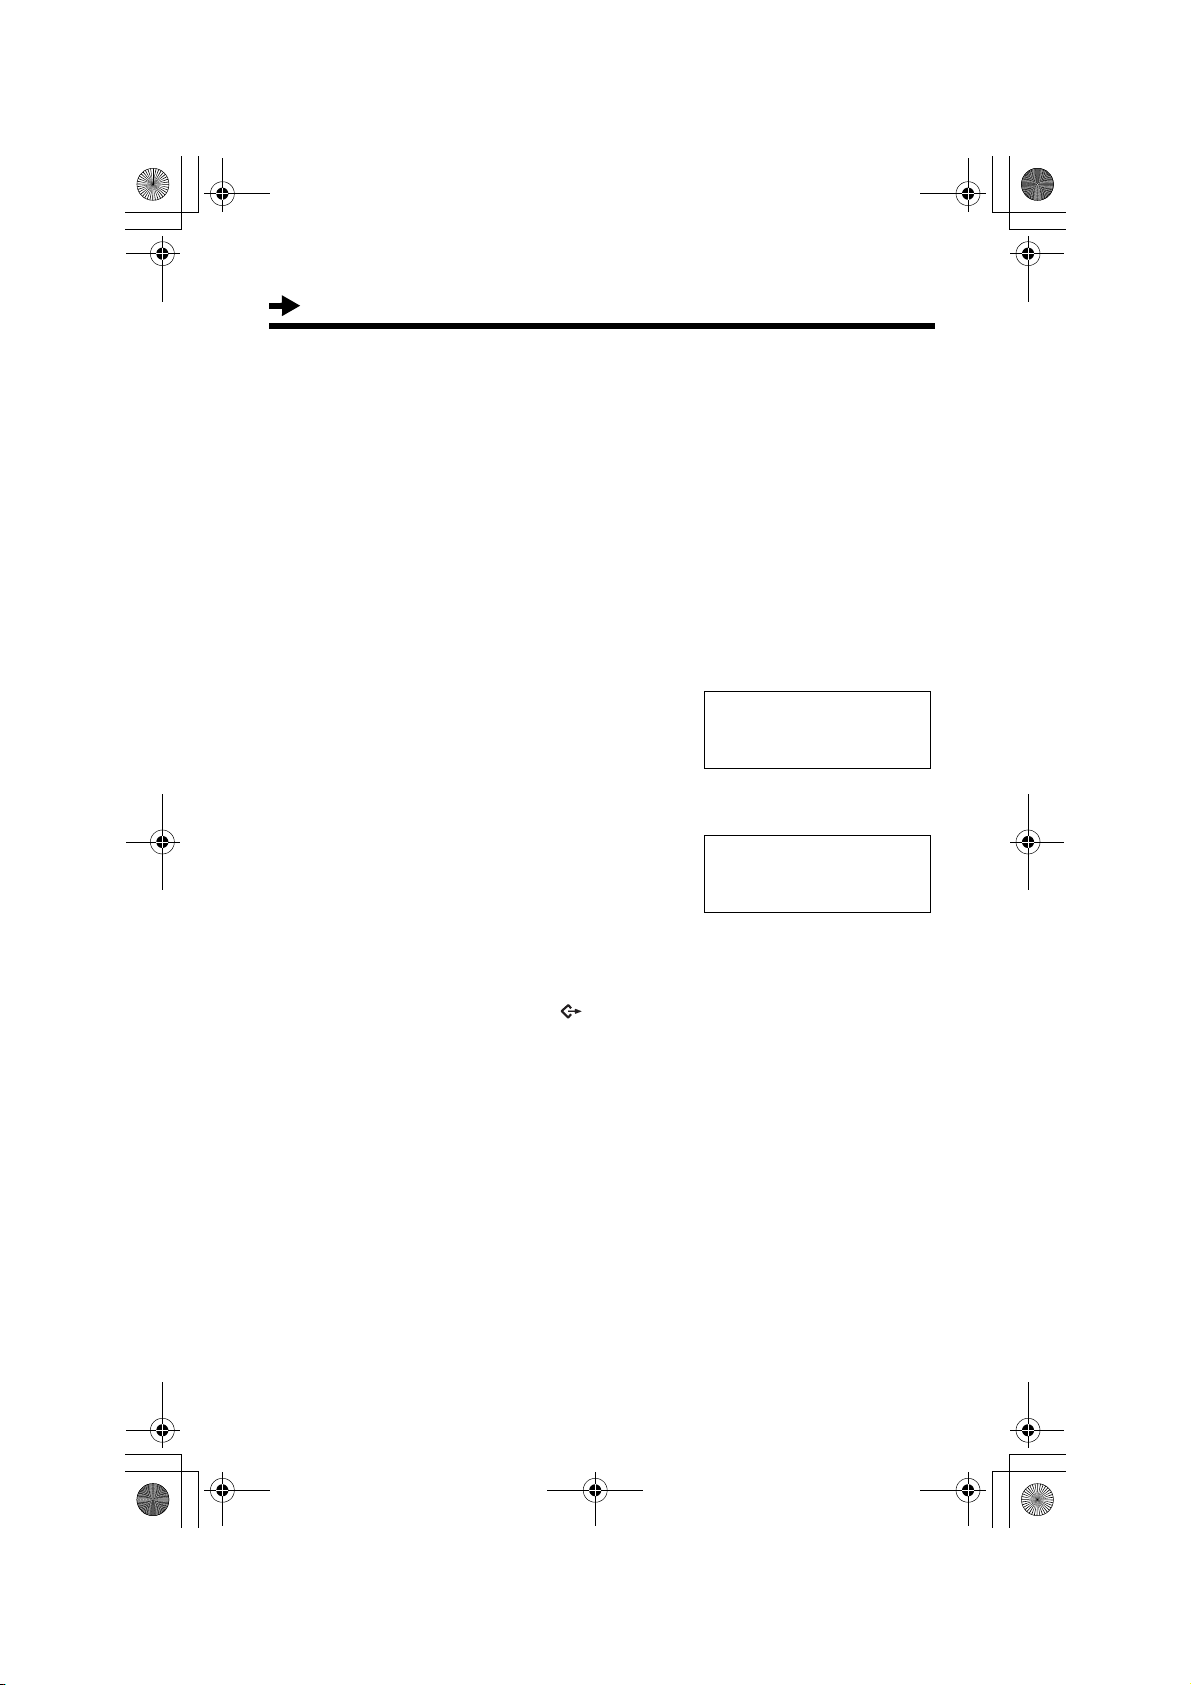
You can program the following functions. The display shows the
programming instructions. See the corresponding pages for function
details.
Make sure that the handset is on the cradle and the Speakerphone/
headset [s/W] indicator light is off.
Press [l].
<Function menu>*
Save phonebook ? To store names and phone numbers in
. . . .
Save M1,M2,M3 ? memory (p. 26, 32).
Program ?
Set clock ? . . . . . . . . . To set the time and date (p. 9).
Change language? . . . . To select the display language (p. 11)
––––––––––––––––
Scroll to “Program ?” by pressing [4] or [3], and press [OK] (Yes key).
<Function menu>*
Change password? . . . . To change the password for the dial lock
and call restriction (p. 38).
Call restrict ? . . . . . To set the call restriction (p. 40).
Set recall time? . . . . To select the recall time (p. 37).
Set dial mode ? . . . . .To select the dialing mode (p. 12).
LCD contrast ? . . . . . . To select the LCD contrast (p. 13).
Set hold music ? . . . . To set the music during hold (p. 36).
Time adjustment? . . . . To set the auto time adjustment (p. 14).
––––––––––––––––
During programming
* To select a desired function item, scroll through the items by pressing [
or [
3]. Then press [OK] to go to the next step.
The right arrow [
•“––––––––––––––––” indicates the end of the function menu.
• You can exit the programming mode any time by pressing [].
• If you do not press any valid buttons for 60 seconds, the unit will exit the
programming mode.
1] is also used to select or confirm the desired item.
4]
8

TS600EX.book Page 9 Wednesday, April 5, 2006 12:25 PM
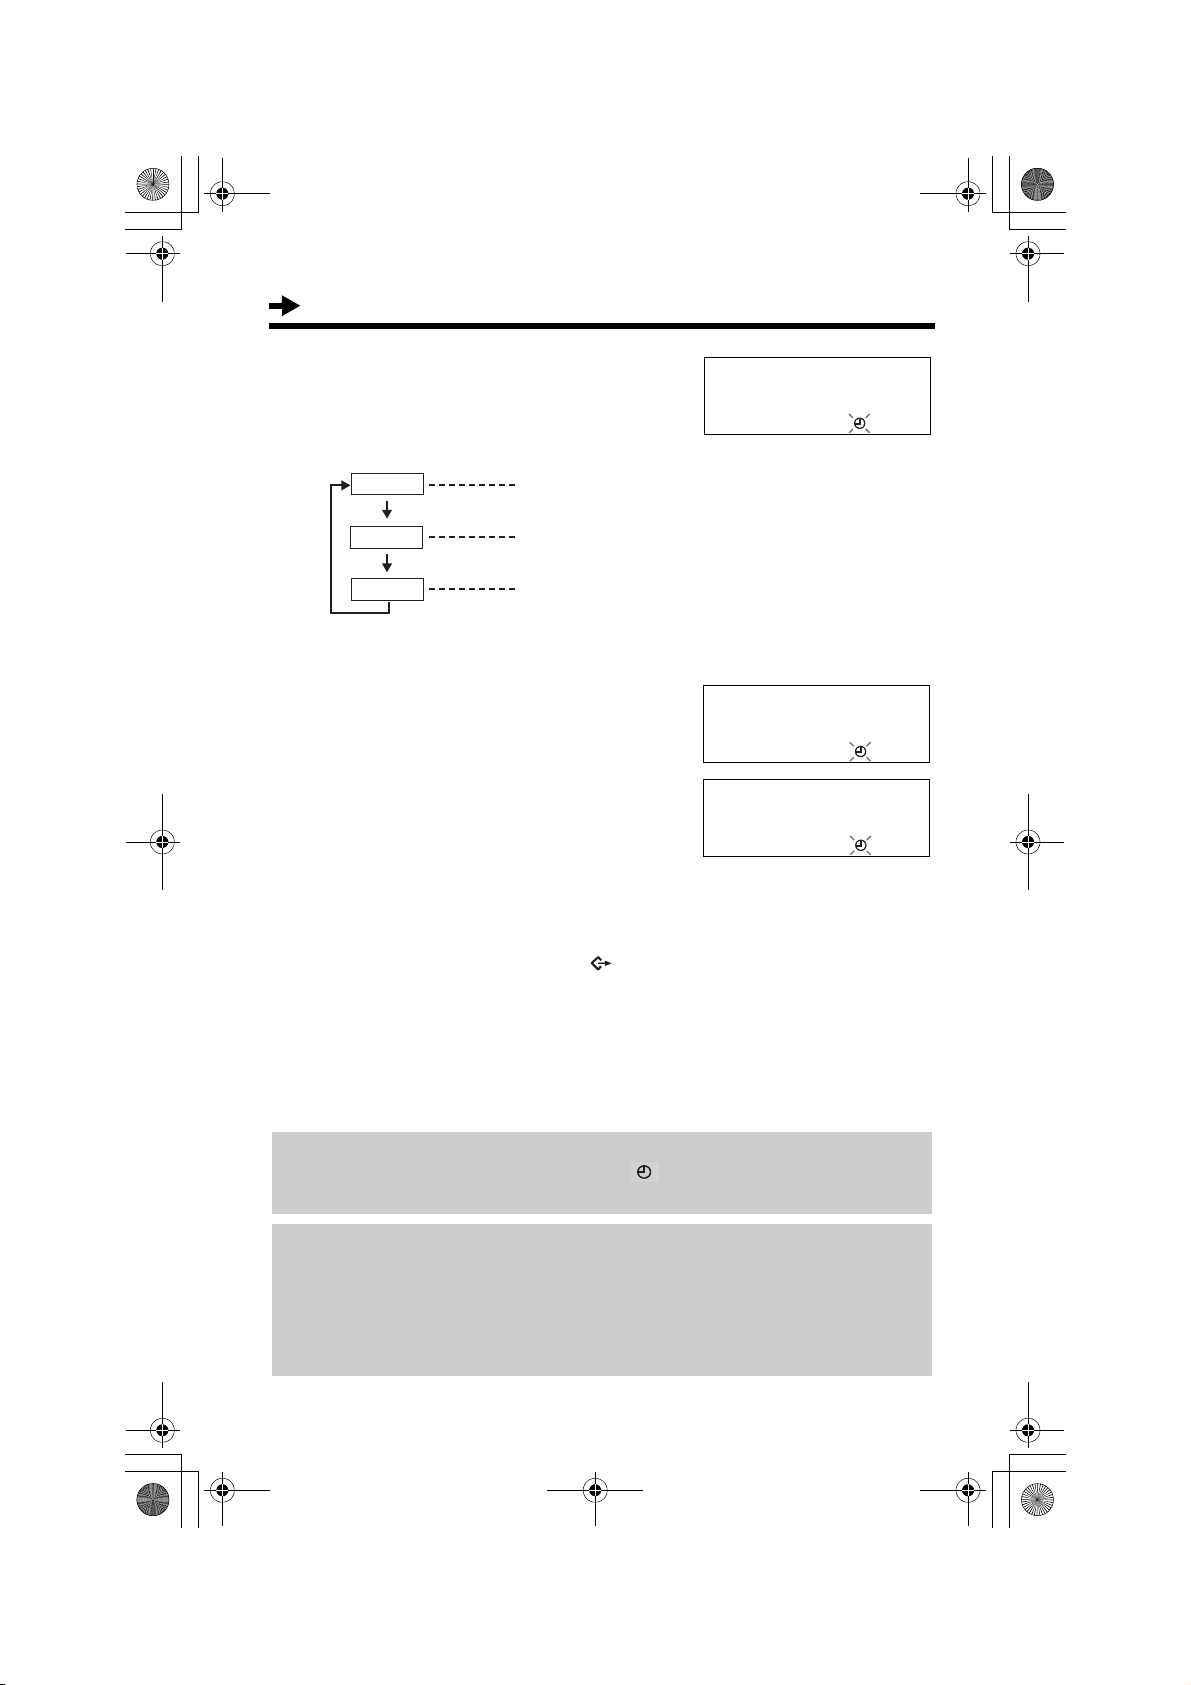
Time and Date
You can select AM/PM or 24-hour clock through programming.
Make sure that the handset is on the cradle and the Speakerphone/
headset [s/W] indicator light is off.
Press [l].
1
Scroll to “Set clock ?” by pressing [4]
2
or [
3].
Set clock ?
34
[OK]=Yes
Preparation
Press [OK] (Yes key).
3
Press [OK] (Next key).
4
Enter the current year.
(Example: To set 2006, enter “06”.)
• You can set the year 2000 to 2099.
Press [OK] (Next key).
5
Enter the current time (hour and minute)
6
using a 4-digit number.
(Example: To set 9:30, enter “0930”.)
• For AM/PM setting: Enter numbers
between 0100 and 1259.
• For 24-hour clock: Enter numbers
between 0000 and 2359.
Press [OK] (Next key).
7
• If numbers between 0000 and 0059, or
1300 and 2359 are entered, the time will
automatically be set using the
24-hour clock. Skip steps 8 and 9,
and go to step 10.
12:00AM 31.12
2005
[O K ] = N e x t
Enter year
2006
34
[OK]=Next
Enter time
12:00
[OK]= Next
Enter time
09:30
[OK]= Next
#=AM/PM/24H
AM
34
[OK]=Next
(Continued )
9
TS600EX.book Page 10 Wednesday, April 5, 2006 12:25 PM
Settings
Press [#] to select “AM”, “PM” or 24-hour
8
clock.
(Example: You select “PM”.)
Display
AM
PM
24H
• Each time you press [#], the selection will
change on the display.
Press [OK] (Next key).
9
Enter the current day and month using
10
a 4-digit number.
(Example: To set Dec. 27, enter “2712”.)
Press [OK] (Save key).
11
• A long beep sounds.
• The clock starts working.
• The display will return to step 2. To exit
the programming mode, press [] or
wait for 60 seconds.
• You can go back to the previous screen by pressing [
and date (steps 4 through 10).
• If 3 beeps sound when entering the time and date, the time and date entered are
not correct. Enter the correct time and date.
• If the selected LCD language is Dutch (p. 11), the day and month will display as
“day/month”.
Option
AM
PM
24-Hour clock
#=AM/PM/24H
PM
34
[OK]=Next
Enter day.month
31.12
3
[OK]=Save
Enter day.month
27.12
3
[OK]=Save
3], when setting the time
If the batteries installed in the unit expired, the time and date will be shown as
“12:00AM 31.12” or “0:00 31.12”, and “ ” will flash. Replace the batteries
then adjust the time and date.
For Caller ID service users (p. 18)
If a time display service is available with the Caller ID service:
• The Caller ID information will re-set the clock after the ring if the adjusted time
and/or date is incorrect and when the Time Adjustment is set to ON (p. 14). If
the time/date has not previously been set, the Caller ID information will not
adjust the clock.
10
TS600EX.book Page 11 Wednesday, April 5, 2006 12:25 PM
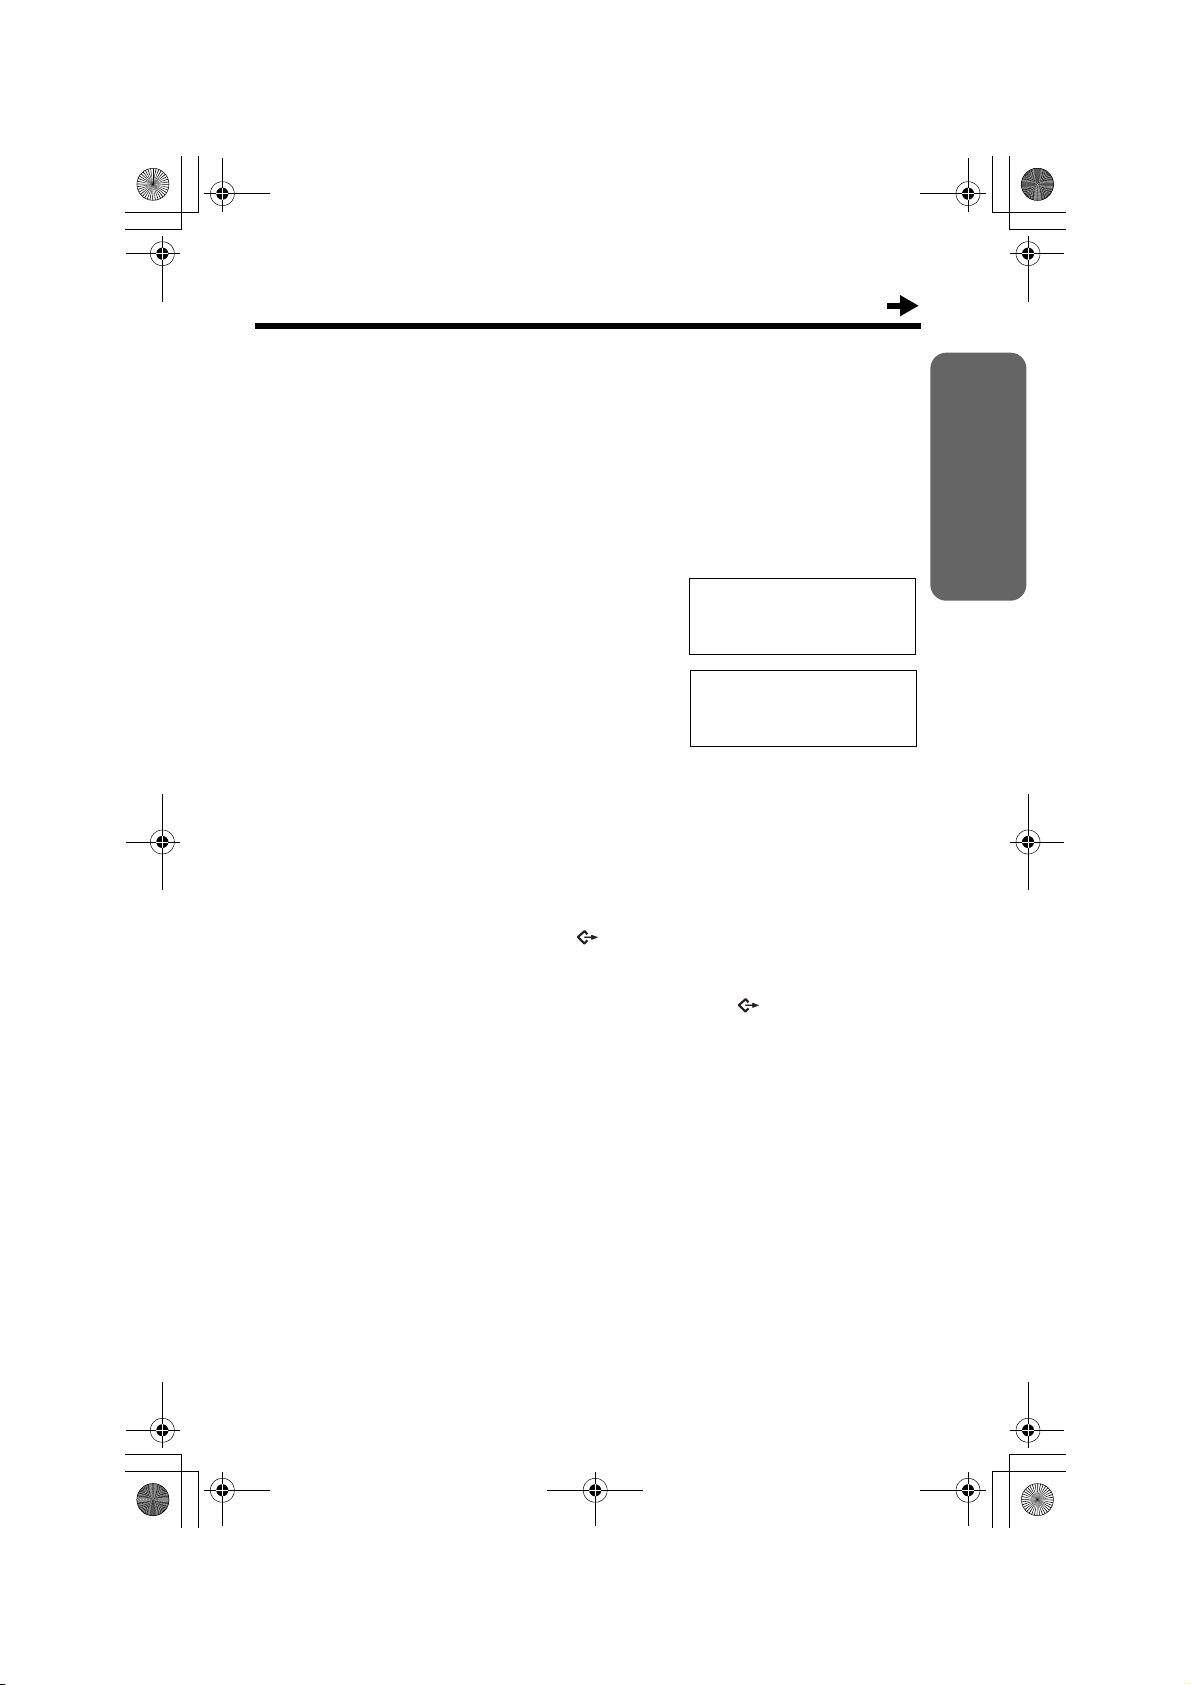
Display Language
You can select either “English”, “French”, “Spanish”, “Italian”, “Greek” or
“
Dutch” as the display language. Your phone default setting is “English”.
Make sure that the handset is on the cradle and the Speakerphone/
headset [s/W] indicator light is off.
Press [l].
1
Scroll to “Change language?” by
2
pressing [
4] or [3].
Change language?
34
[ OK ]
=Yes
Preparation
Press [OK] (Yes key).
3
Select “English”, “Français”,
4
“Español”, “Italiano”, “E
or “Nederlands” by pressing [
Press [OK] (Save key).
5
• A long beep sounds.
• The display will return to step 2. To exit
the programming mode, press [] or
wait for 60 seconds.
• You can exit the programming mode any time by pressing [].
• If Dutch is selected, the day and month display will shows as “day/month”.
ΛΛ
HNIKA”
4] or [3].
Language
:English
34
[OK]=Save
11
TS600EX.book Page 12 Wednesday, April 5, 2006 12:25 PM
Settings
Dialing Mode
The dialing mode is fixed to “Tone”.
Make sure that the handset is on the cradle and the Speakerphone/
headset [s/W] indicator light is off.
Press [l].
1
Scroll to “Program ?” by pressing [4] or
2
[
3]. Press [OK] (Yes key).
Scroll to “Set dial mode ?” by
3
pressing [
4] or [3].
Set dial mode ?
34
[ OK ]
=Yes
Press [OK] (Yes key).
4
• KX-TS600EXW or KX-TS600EXB is not
designed to be used with rotary
(pulse dialing) services.
Press [OK] (Save key).
5
• A long beep sounds.
• The display will return to step 3. To exit
the programming mode, press [] or
wait for 60 seconds.
• You can exit the programming mode any time by pressing
Dial mode
:Tone
[].
[OK]=Save
12
TS600EX.book Page 13 Wednesday, April 5, 2006 12:25 PM
LCD Contrast
You can select the LCD contrast level from 1 to 4 by programming. Your
phone default setting is 2.
Make sure that the handset is on the cradle and the Speakerphone/
headset [s/W] indicator light is off.
Press [l].
1
Scroll to “Program ?” by pressing [4] or
2
[
3]. Press [OK] (Yes key).
Scroll to “LCD contrast ?” by pressing
3
[
4] or [3].
Press [OK] (Yes key).
4
• The current setting is displayed.
LCD contrast ?
34
[ O K]=Yes
Preparation
Select the desired contrast by pressing
5
[
4] or [3].
• Each time you press [4] or [3], the LCD
contrast will change.
Press [OK] (Save key).
6
• A long beep sounds.
• The display will return to step 3. To exit
the programming mode, press [] or
wait for 60 seconds.
• You can exit the programming mode any time by pressing [].
LCD contrast
Low
????
34
[OK]=Save
High
Ringer Volume
You can select the ringer volume to HIGH, LOW or OFF. Your phone default
setting is HIGH.
RINGER Selector:
Set to HIGH, LOW or
OFF.
When set to OFF,
the unit will not ring.
OFF HIGH
LOW
RINGER
13
TS600EX.book Page 14 Wednesday, April 5, 2006 12:25 PM
Settings
Time Adjustment (Caller ID subscribers only)
Using this feature, the unit’s date and time setting will be automatically
adjusted when caller information is received. You can set the auto time
adjustment by programming. Your phone default setting is ON.
Make sure that the handset is on the cradle and the Speakerphone/
headset [s/W] indicator light is off.
Press [l].
1
Scroll to “Program ?” by pressing [4] or
2
[
3]. Press [OK] (Yes key).
Scroll to “Time adjustment?” by
3
pressing [
4] or [3].
Time adjustment?
34
[OK]=Yes
Press [OK] (Yes key).
4
Select “On” or “Off” by pressing [4] or
5
[
3].
(Example: “Off” is selected.)
Press [OK] (Save key).
6
• A long beep sounds.
• The display will return to step 3. To exit the
programming mode, press [] or wait
for 60 seconds.
• To use this feature, set the date and time in advance
9).
(p.
Time adjustment
:Off
34
[OK]=Save
14

TS600EX.book Page 15 Wednesday, April 5, 2006 12:25 PM
Making Calls
You can make a call by simply lifting the handset and dial a phone number.
To hang up, place the handset on the cradle.
Using the speakerphone
Press [s/W], then dial a phone number.
1
OR
Dial a phone number, then press [s/W].
• The indicator lights.
• The dialed number is displayed.
• After a few seconds, the display will show
the length of the call.
• If you have misdialed, hang up and start
again from step 1.
When the other party answers, talk into
2
the microphone.
12:34AM 21.5
1234567890
12:34AM 21.5
00-00-02
Basic Operation
To hang up, press [s/W].
3
• The indicator light goes out.
During speakerphone operation
For best performance, please note the following:
• Talk alternately with the other party in a quiet room.
• If the other party has difficulty hearing you, press X/Y [] to decrease the
speaker volume.
• You can switch to the handset by lifting it up. To switch back to the
speakerphone, press [s/W].
15
 Loading...