

Page 1
Human
Equalizer
CQ-VX2000
561234
SOURCE
POWER
REPSCANRANDOM
CLOCK
DISP
REVERSE
S
•
ANALYZER DISPLAY MTL B NR TPS SKIP REPEAT
S•A
SPACE
SPC
D·M
LIVE
HALL
JAZZ
STADIUM
DISCO
VOCAL
CINEMA
M
U
T
E
VOL
AUTO
·
P
SENSOR
INTEGRATED CD/CASSETTE RECEIVER WITH DSP
OPEN
FM
DISC
AM
DISC
SEL
TUNE
TRACK
564
SOURCE
OPEN
DISP
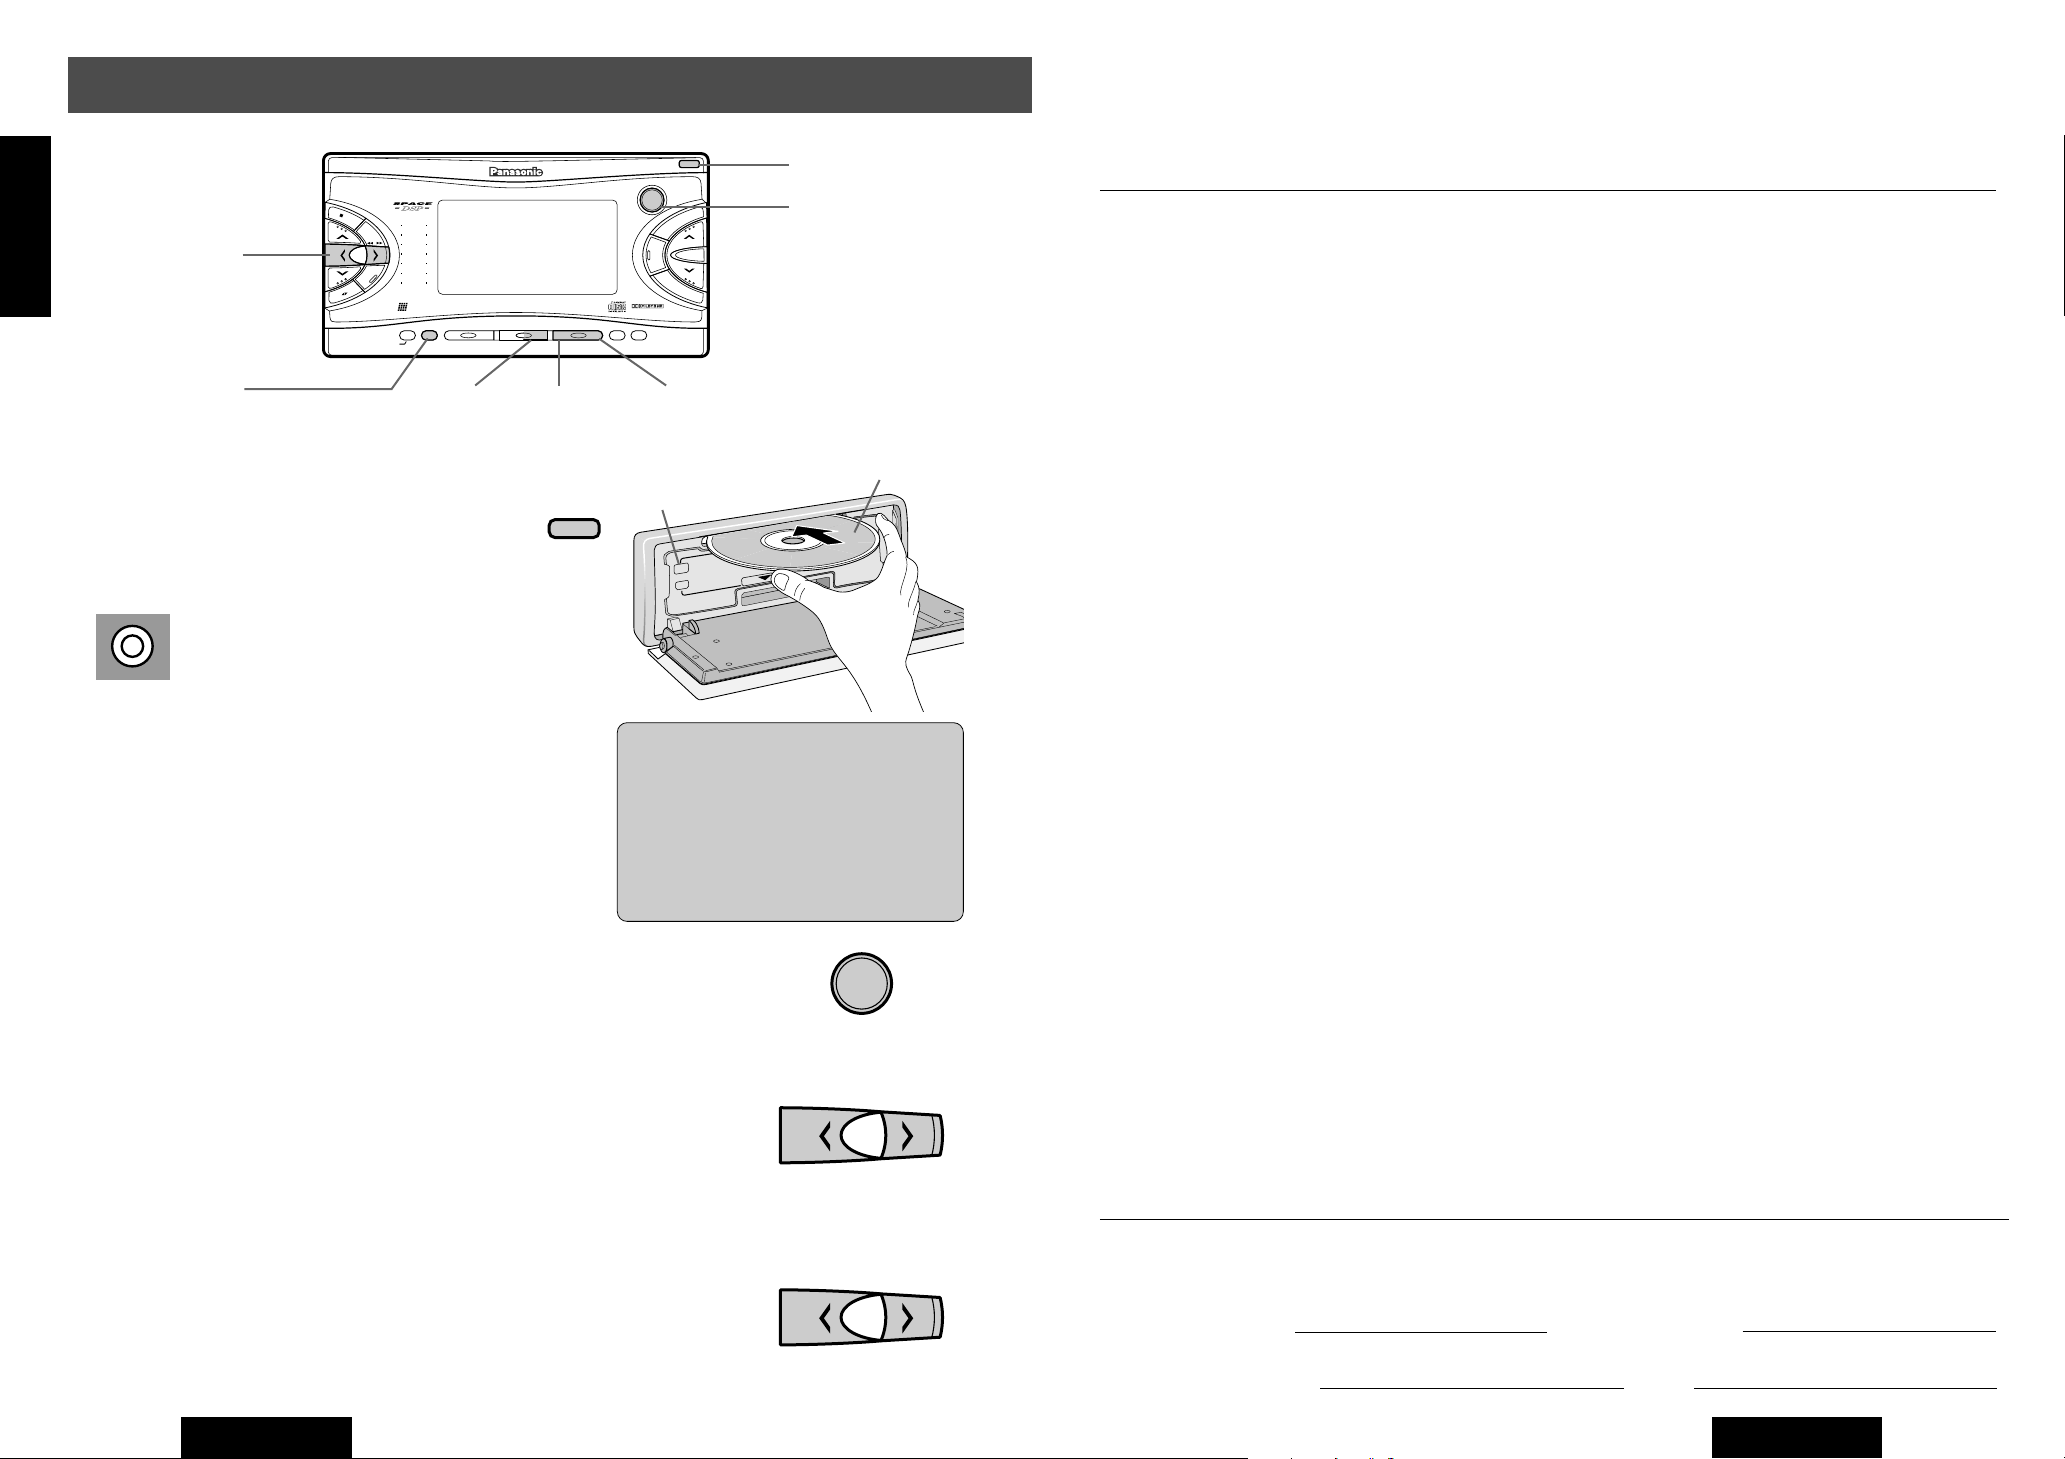
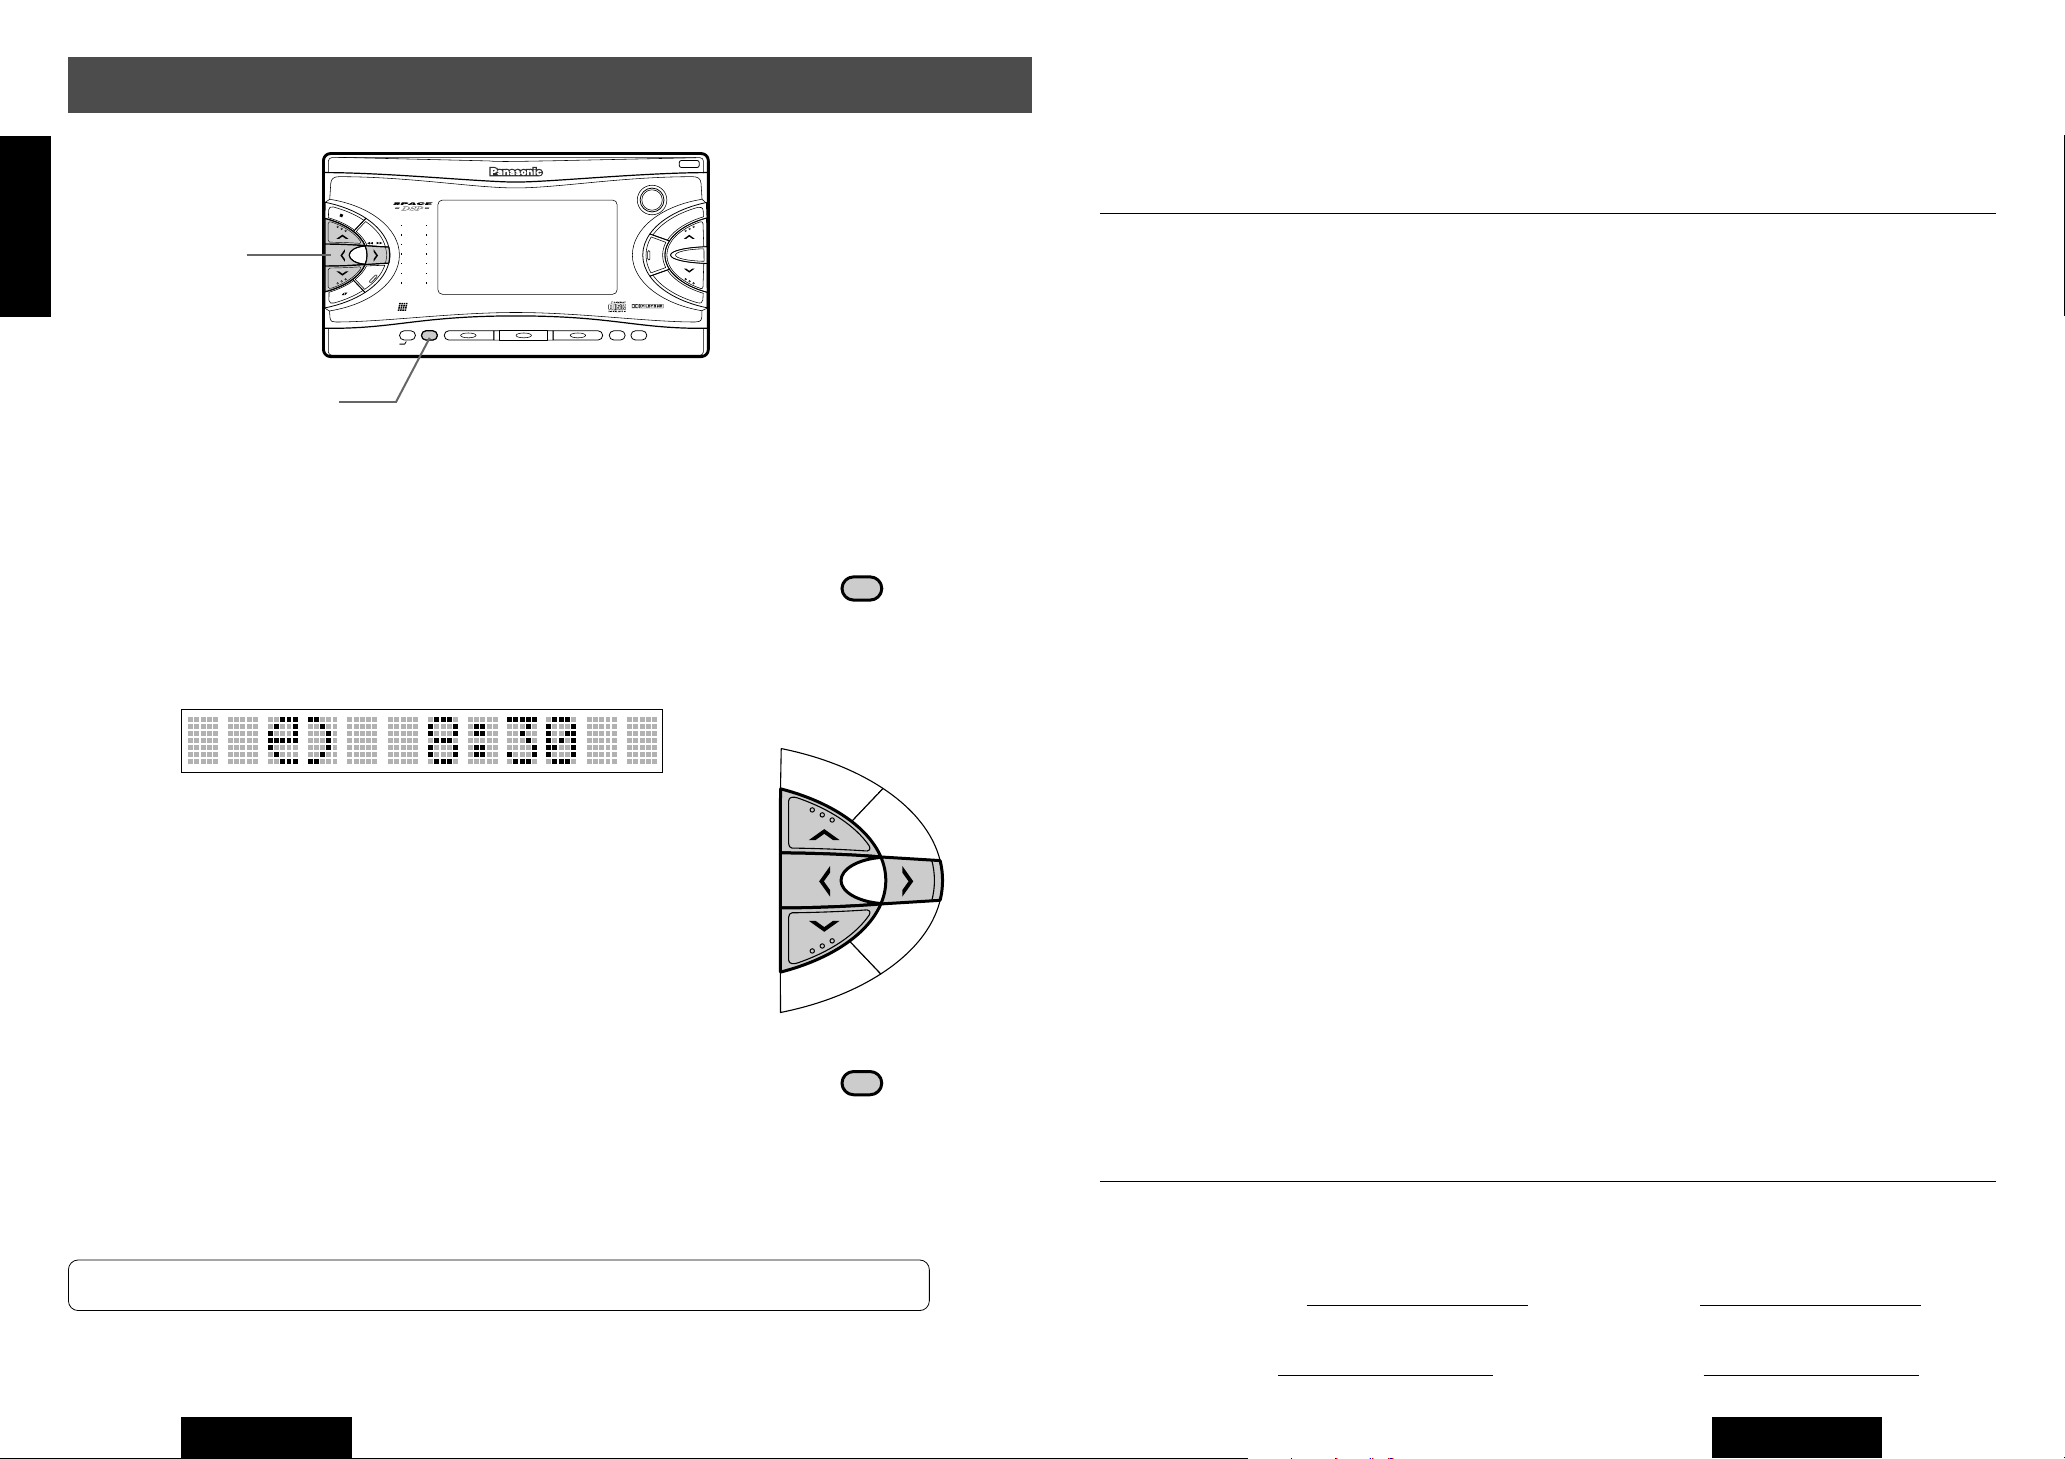
CD Player Basics
E
N
G
L
I
S
H
10
klButtons
DISP Button
CD Insertion
q Press [OPEN] button in the main unit to
open the front panel.
w Load a CD with labeled face up into the
slot to start CD playing.
(Disc indicator)
RANDOM
Button
SCAN
Button
OPEN
REP Button
CD u(Eject) Button
u
T
C
E
J
E
D
C
T
C
E
J
E
D
M
u
VX303
INTEGRATED CD/CASSETTE RECEIVER WITH DSP
MD IN
OPEN Button
SOURCE Button
Label Side
Panasonic welcomes you to our ever growing family of electronic product owners. We know that this product
will bring you many hours of enjoyment. Our reputation is built on precise electronic and mechanical engineering, manufactured with carefully selected components and assembled by people who take pride in their work.
Once you discover the quality, reliability, and value we have built into this product, you too will be proud to be
a member of our family.
❏ Use This Product Safel y
When Driving
Keep the volume level low enough to be aware of road and traffic conditions.
When Car Washing
To avoid electrical shorts which may cause fire, or other damage, do not expose this product (including the
speakers and CDs/cassette tape) to water or excessive moisture.
When Parked
Parking in direct sunlight can produce very high temperatures inside your vehicle. Give the interior a
chance to cool down before switching the unit on.
Use the Proper Power Supply
This product is designed to operate with a 12 volt, negative ground battery system (the normal system in a
North American car.)
Disc Mechanism
Do not insert coins or any small objects. Keep screwdrivers and other metallic objects away from the disc
mechanism and disc.
e Raise the front panel to close it.
CD Ejection
q Press [OPEN] button in the main unit to open
the front panel.
w Press [
When a CD is ejected while the CD mode is activated,
the power is turned off.
u] button to eject the CD.
CD Mode
Press [SOURCE] button.
Track Selection
Press [k] or [l] button.
[k](TUNE k ) : Goes back to the beginning of the current program, then
goes back to the beginning of a previous program correspondent to how many times you press this button.
[l](TUNE l ) : Goes to the beginning of the next program.
Track Sear ch
Release [k] or [l] button when your favorite part comes after
pressing and holding it for more than 0.5 seconds.
[k](TRACK k) : Fast backward
[l](TRACK l) : Fast forward
18
CQ-VX2000U
Cautions:
Do not load a MD into the CD slot.
¡
¡Do not disturb the front panel
opening.
¡Do not force down the front panel
and do not put anything on it.
¡Do not insert a CD when the disc
indicator lights.
PWR
SOURCE
TUNE
TRACK
TUNE
TRACK
Press and hold for more
than 0.5 seconds.
Tape Mechanism
Keep magnets, screwdrivers and other metallic objects away from the tape mechanism and tape head.
Use Authorized Servicenters
Do not attempt to disassemble or adjust this precision product. Please refer to the Servicenter list included
with this product for service assistance.
For Installation
The product should be installed in a horizontal position with the front end up at a convenient angle, but not
more than 30˚.
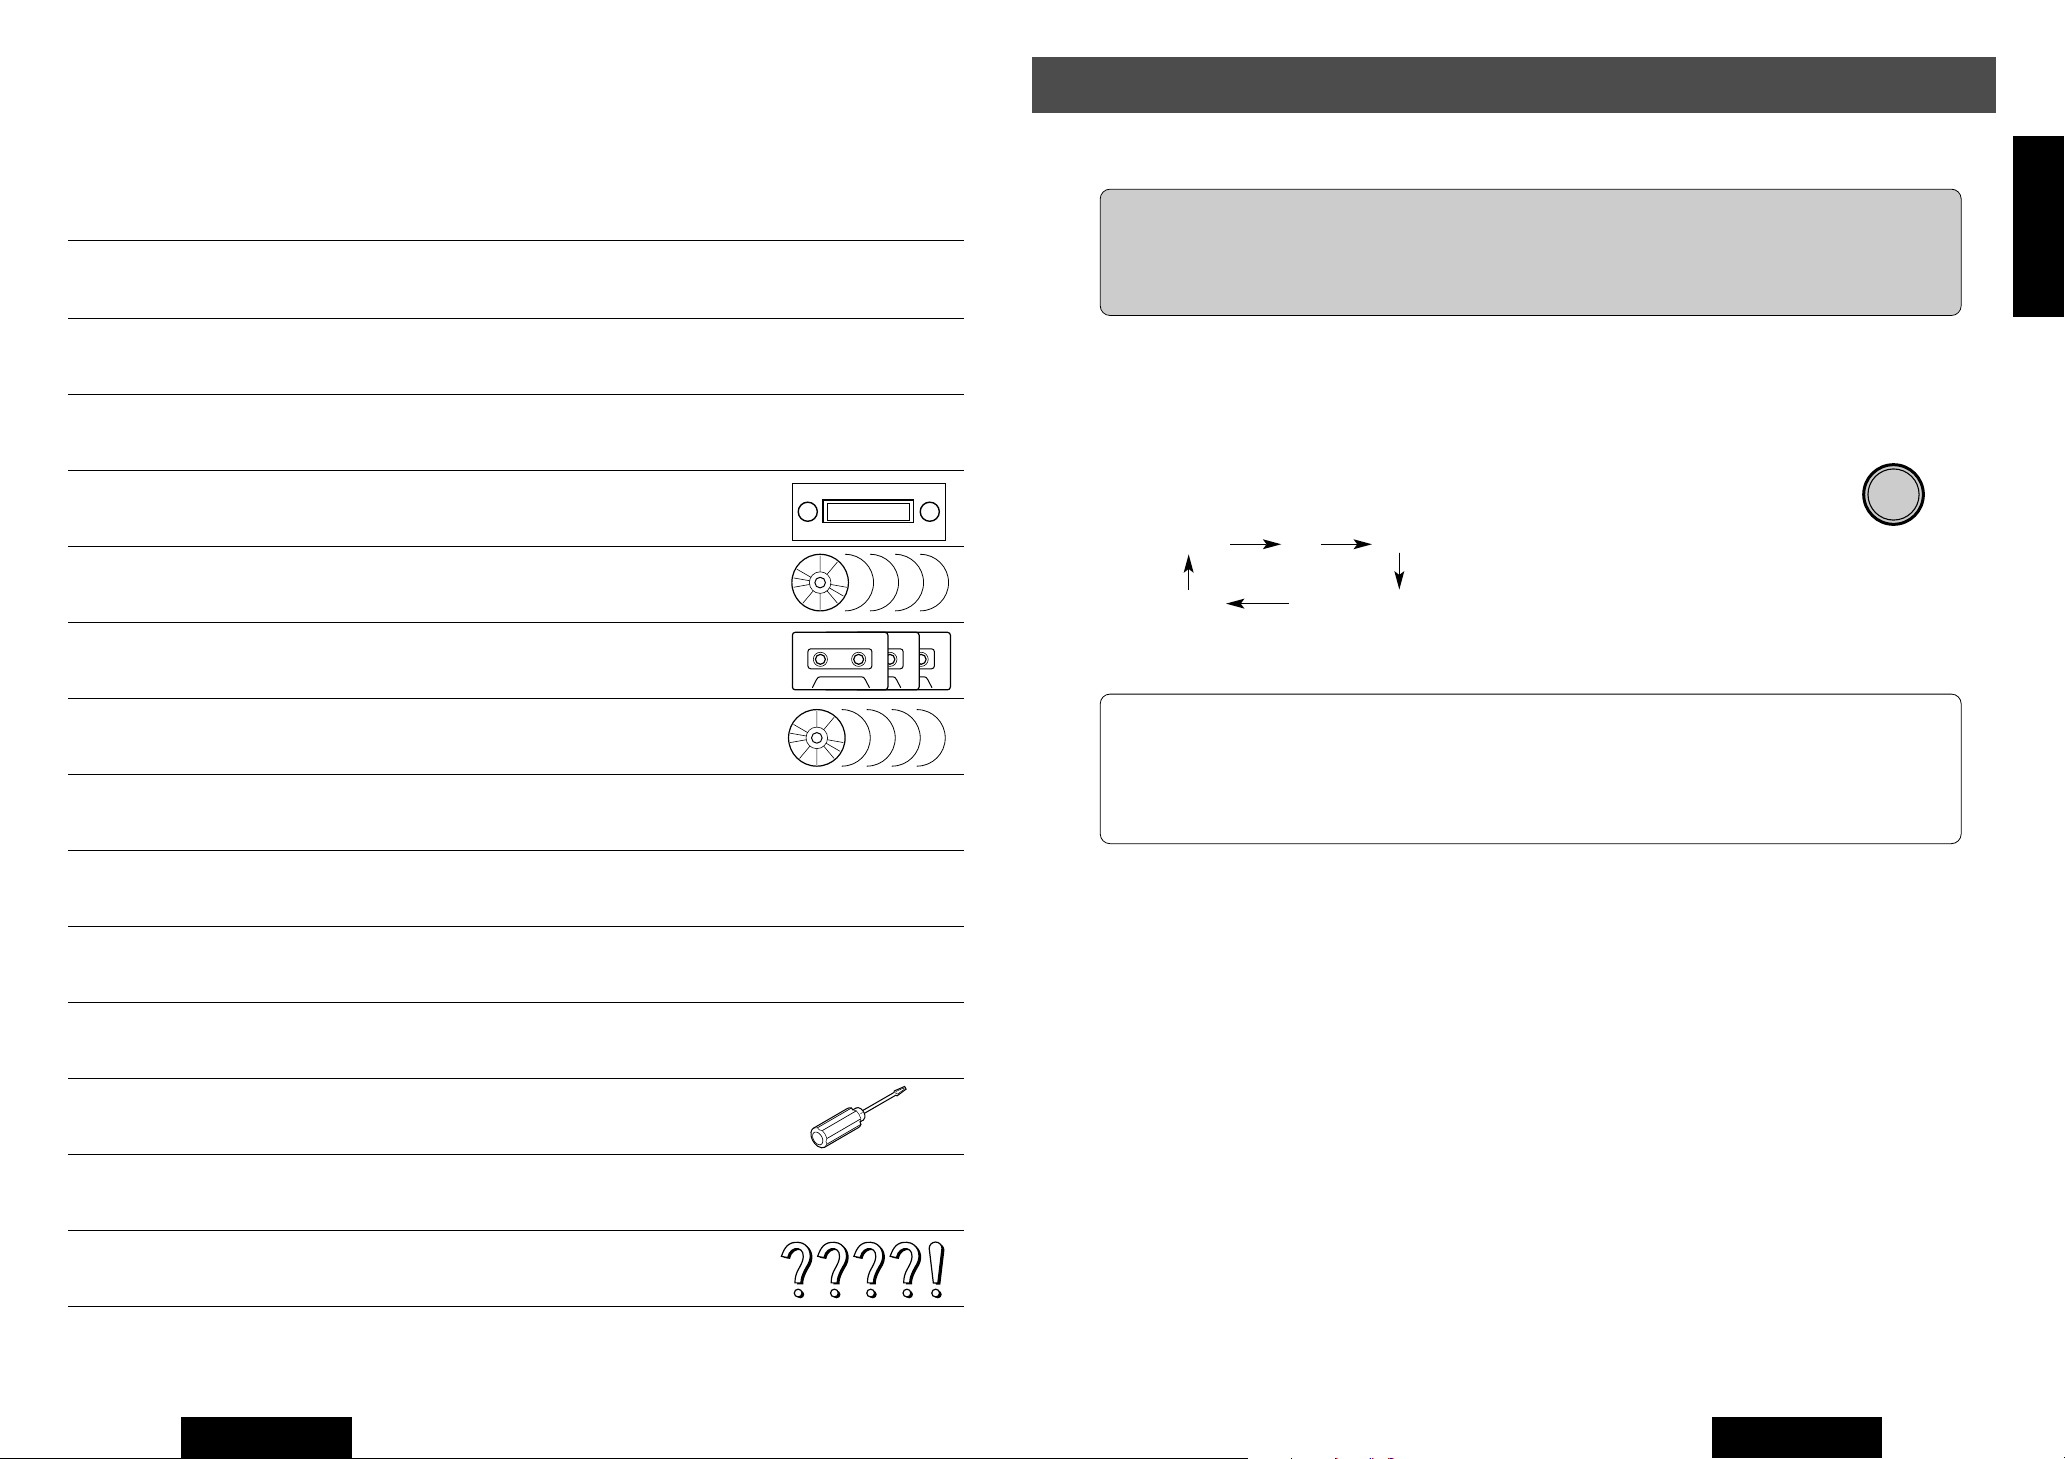
❏ Components
1. Operating Instructions ............................................................................................................................ 1
2. Installation Hardware.................................................................................................... 1set (a page.41)
3. Power Connector.................................................................................................................................... 1
4. Remote Control Unit............................................................................................................................... 1
Find the model number and serial number on either the back or bottom of the unit. Please record them in the
space below and retain this booklet as a permanent record of your purchase to help with identification in case of
theft.
MODEL NUMBER SERIAL NUMBER
DATE PURCHASED FROM
CQ-VX2000U
CQ-VX2000U
3
Page 2
Contents
Label Indication and Location............................................................ Page 2
Radio frequency interference Statement (Part 15 of the FCC Rules) ........ 2
Use This Product Safely / Components...................................................... 3
❏ Remote Control Preparation ............................................................. 9
❏ Names of Controls ........................................................................... 10
❏ General ............................................................................................. 12
❏ Radio Basics .................................................................................... 16
❏ CD Player Basics ............................................................................. 18
❏ Cassette Tape Player Basics .......................................................... 20
❏ CD Changer Basics (Option) .......................................................... 24
❏ Sound Settings and Sound Space ................................................. 27
❏ Other Settings .................................................................................. 32
❏ Useful Functions ............................................................................. 36
❏ Maintenance ..................................................................................... 40
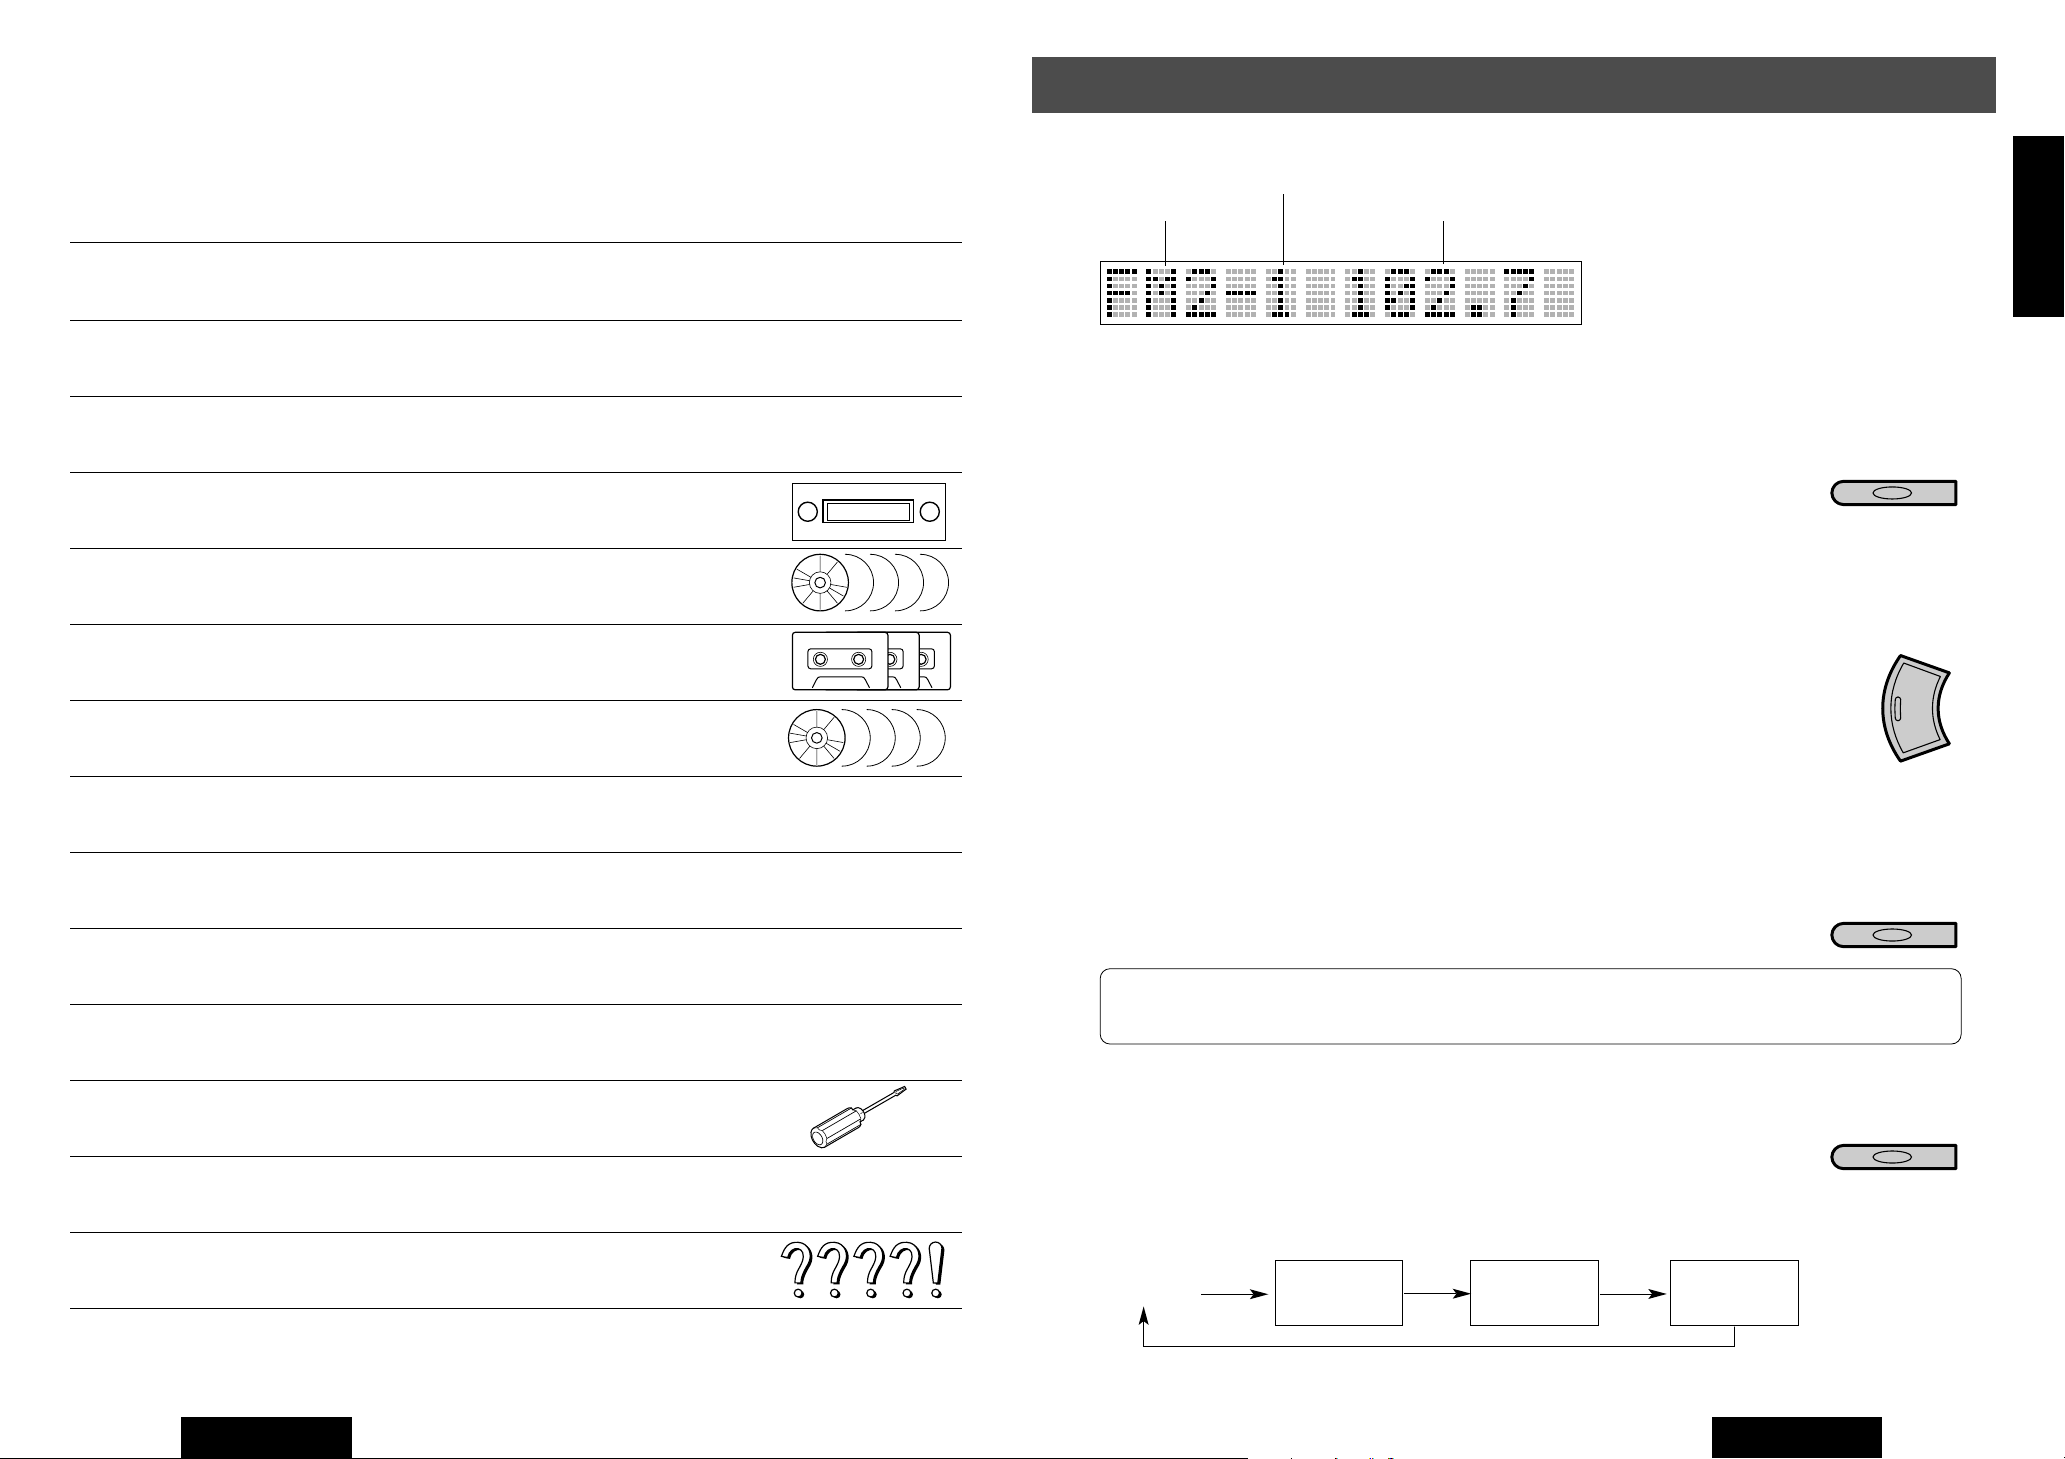
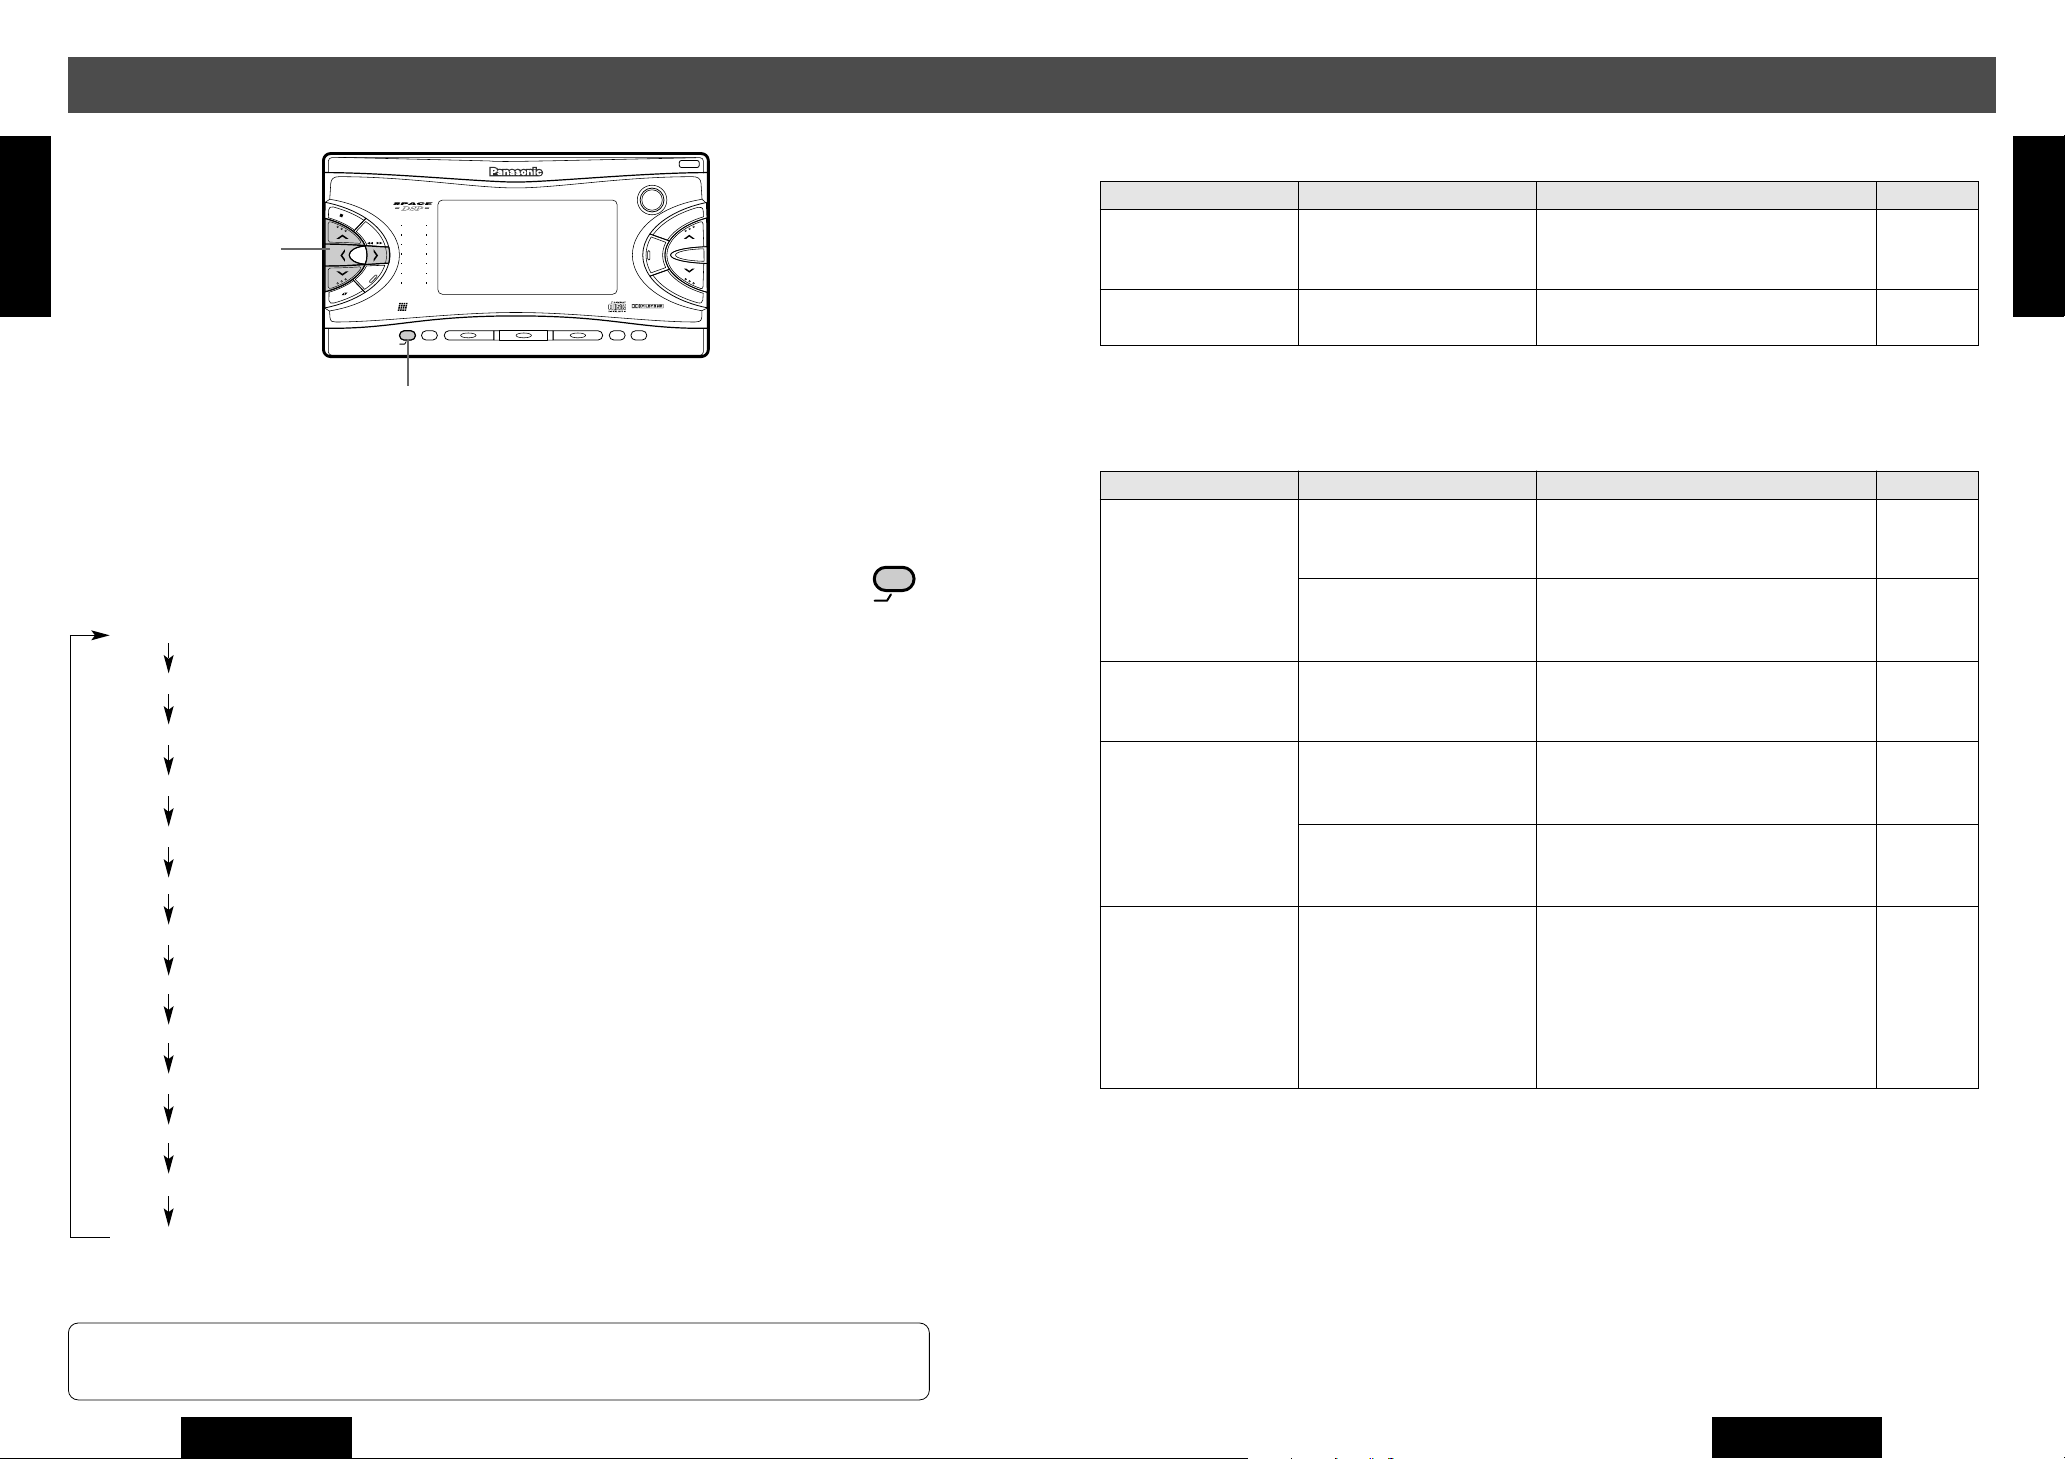
Preset Memory Number
Band
(Example) Regular Display
Frequency
To change the display, press [DISP]
button. (B Page 15)
Manual Preset Memory
Select a station, and press and hold one of the preset buttons
[1] – [6] for more than 2 seconds.
¡The current station is memorized in the pressed button. (Up to 6 stations
can be memorized for each band.)
¡The frequency display blinks once after the memorization is completed.
(example)
1 2
Press and hold for more
than 2 seconds.
Auto Preset Memory
Press and hold [AUTO•P] button for more than 2 seconds.
P
¡The tuning starts from the lowest frequency in the current band. 6 stations
that are received most clearly are memorized in the preset button, The
more clearly a station is received, the smaller from 1 to 6 the preset number
is assigned to the station. (Up to 6 stations can be memorized for each
band.)
¡Once set, the preset stations are sequentially scanned for 5 seconds each.
(Scan)
CTo cancel the scanning, press one of the preset buttons
[1] – [6], and select your favorite station.
Note: In the preset memory operation or the auto preset memory operation, new stations can
be memorized on the preset buttons by overwriting the previous ones.
·
AUTO
Press and hold for more
than 2 seconds.
(example)
1 2
E
N
G
L
I
S
H
9
E
T
U
M
❏ Installation Guide ............................................................................ 41
❏ Electrical Connections .................................................................... 46
❏ Troubleshooting .............................................................................. 48
❏ Specifications .................................................................................. 53
4
CQ-VX2000U
Preset Station Tune
Press one of the preset buttons [1] – [6].
A preset station in the current band is tuned in.
Stereo/Mono Local selection
Press and hold [SEL] for more than 2 seconds to switch the following modes.
STEREO
MONO: Reduce noise during a weak FM broadcast.
LOCAL: Searching stops at a strong signal only.
MONO ON
LOCAL OFF
MONO ON
LOCAL ON
MONO OFF
LOCAL ON
CQ-VX2000U
(example)
1 2
17
Page 3
Human
Equalizer
CQ-VX2000
561234
SOURCE
POWER
REPSCANRANDOM
CLOCK
DISP
REVERSE
S
•
ANALYZER DISPLAY MTL B NR TPS SKIP REPEAT
S•A
SPACE
SPC
D·M
LIVE
HALL
JAZZ
STADIUM
DISCO
VOCAL
CINEMA
M
U
T
E
VOL
AUTO
·
P
SENSOR
INTEGRATED CD/CASSETTE RECEIVER WITH DSP
OPEN
FM
DISC
AM
DISC
SEL
TUNE
TRACK
561234
SOURCE
DISP
M
U
T
E
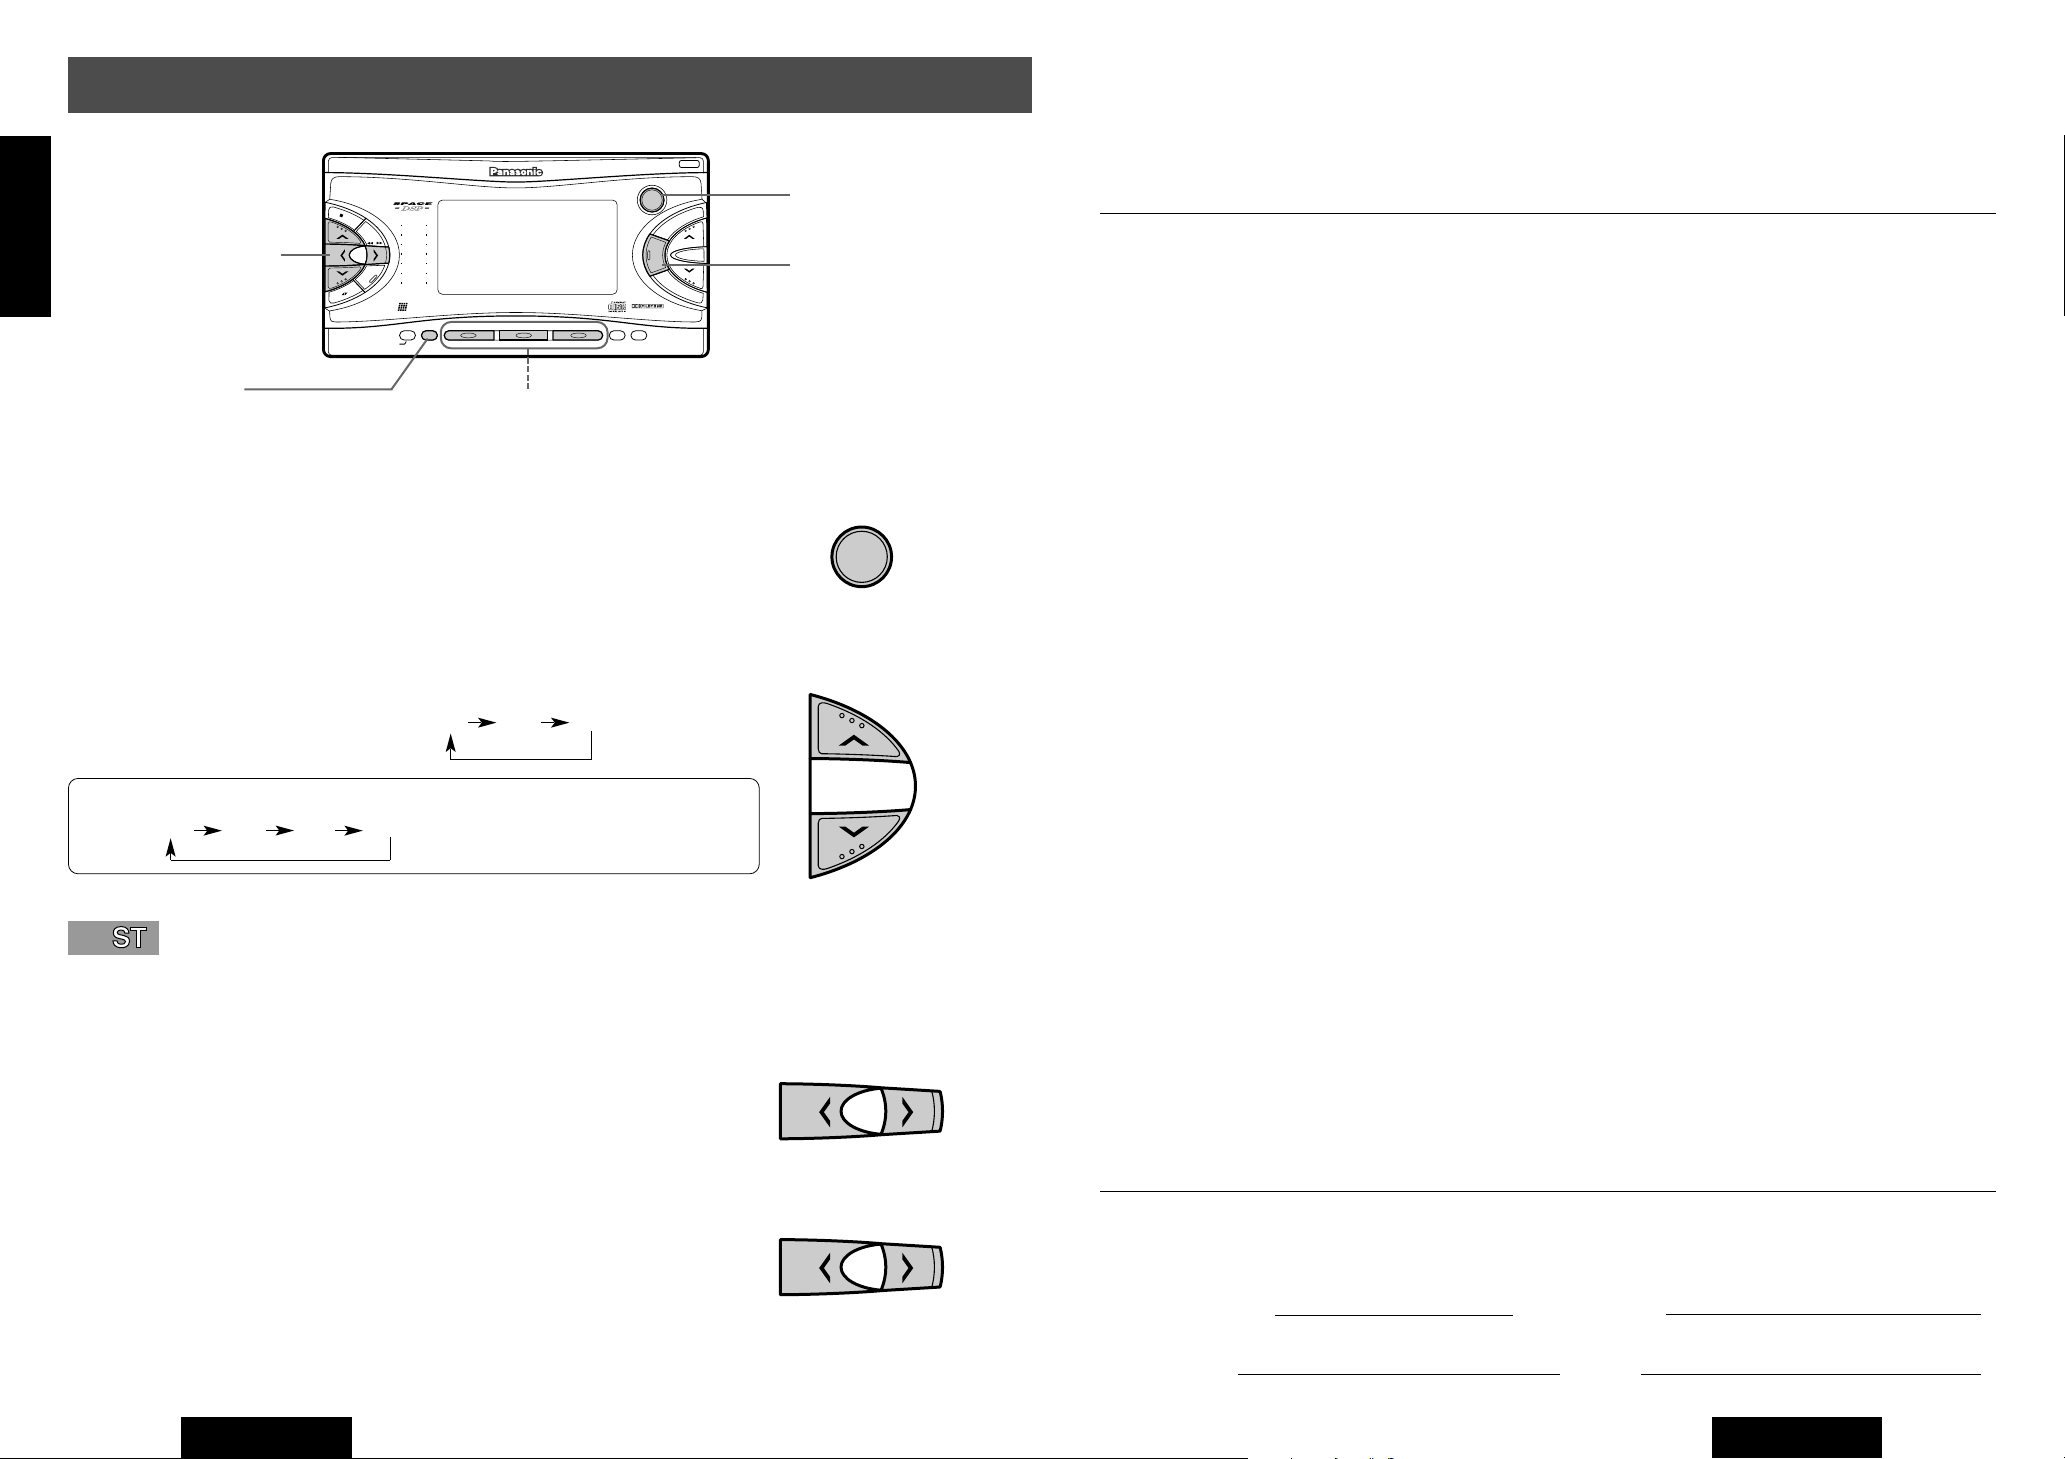
Radio Basics
vous assurer que cet appareil vous procurera de longues heures d’agrément. Notre réputationest fondée sur
une ingénierie électronique et mécanique de haute précision laquelle préside à la fabricationd’appareils ne
Panasonic est heureuse de vous compter parmi les utilisateurs de ses appareils électroniques.Nous pouvons
E
N
G
L
SOURCE Button
I
S
H
jiklbuttons
AUTO•P Button
8
comportant que des composants de choix assemblés par un personnel soucieux de la bonneréputation
acquise par la qualité de son travail. Après avoir découvert la qualité, la valeur et la fiabilité de cetappareil,
vous aussi serez fier d’être un client Panasonic.
❏ Précautions à prendre
Au volant
Régler le volume à un niveau qui ne risque pas de masquer les bruits ambiants.
Lavage de la v oiture
DISP Button
Preset, 1 – 6 Buttons
L’appareil (ainsi que les haut-parleurs et les disques compacts/cassettes) doit être mis à l’abri de toute
aspersion d’eau ou de l’humidité de manière à éviter tout risque de courts-circuits car ceux-ci peuvent
provoquer un incendie ou d’autres dégâts.
Radio Mode
Press [SOURCE] button to select the radio mode.
Band
Changes FM band.
Press [j] or [i] button.
[j](FM) : Changes FM band. FM1 FM2 FM3
[
i
](AM) : Changes AM band.
Note: Press [BAND] button when using the remote control.
FM1 FM2 FM3 AM
The ST indicator lights while FM stereo broadcast is received.
Manual Tuning
PWR
SOURCE
FM
DISC
DISC
AM
SEL
Voiture stationnée
L’habitacle d’une voiture immobile exposée au soleil toutes vitres fermées devient rapidement très chaud.
Laisser rafraîchir l’intérieur du véhicule avant d’utiliser l’appareil.
Source d’alimentation
Cet appareil est conçu pour fonctionner sur un système d’alimentation avec batterie de 12V avec négatif à
la masse (système standard sur les voitures de construction nord-américaine).
Méchanisme d’entrainement du disque
Ne pas introduire de pièce de monnaie ou tout autre petit object. Eloigner les aimants, tournevis et autres
objets métalliques du mécanisme d’entraînement et du disque.
Mécanisme d’entrainement de la bande
Éloigner les aimants, tournevis et autres objets métalliques du mécanisme d’entrainement et de la tête
magnétique.
Réparation
Ne pas tenter de démonter ou d’ajuster l’appareil soi-même. Confier toute réparation à un centre de service agréé.
Installation
L’appareil doit être installé en position horizontale avec son extrémité avant inclinée vers le haut à un
angle conventionnel et jamais supérieur à 30°.
❏ Éléments constitutifs
Press [k] or [l] button.
[k](TUNE k ) : Lower frequency
[l](TUNE
l ) : Higher frequency
Seek Tuning
Press and hold [k] or [l] button for more than 0.5 seconds.
Then, release it.
[k](TUNE k ) : Auto tuning in lower frequency
[l](TUNE
Tuning starts when releasing the button, and stops when finding a station.
16
l ) : Auto tuning in higher frequency
CQ-VX2000U
TUNE
TRACK
TUNE
TRACK
Press and hold for more
than 0.5 seconds.
then, release.
1. Manuel d’instructions ...............................................................................................................................1
2. Pièces de montage..............................................................................................1 ensemble(a page 87)
3. Connecteur d'alimentation........................................................................................................................1
4. Télécommande ........................................................................................................................................1
Il est recommandé de noter, dans l’espace prévu ci-dessous, les numéros de modèle et de série inscrits soit à
l’arrière soit sous le fond de l’appareil, et de conserver ce manuel comme mémorandum de l’achat afin de
permettre l’identification de l’appareil en cas de vol.
Numéro de modèle: Numéro de série:
CQ-VX2000U
Date de l’achat: Vendeur:
CQ-VX2000U
5
Page 4
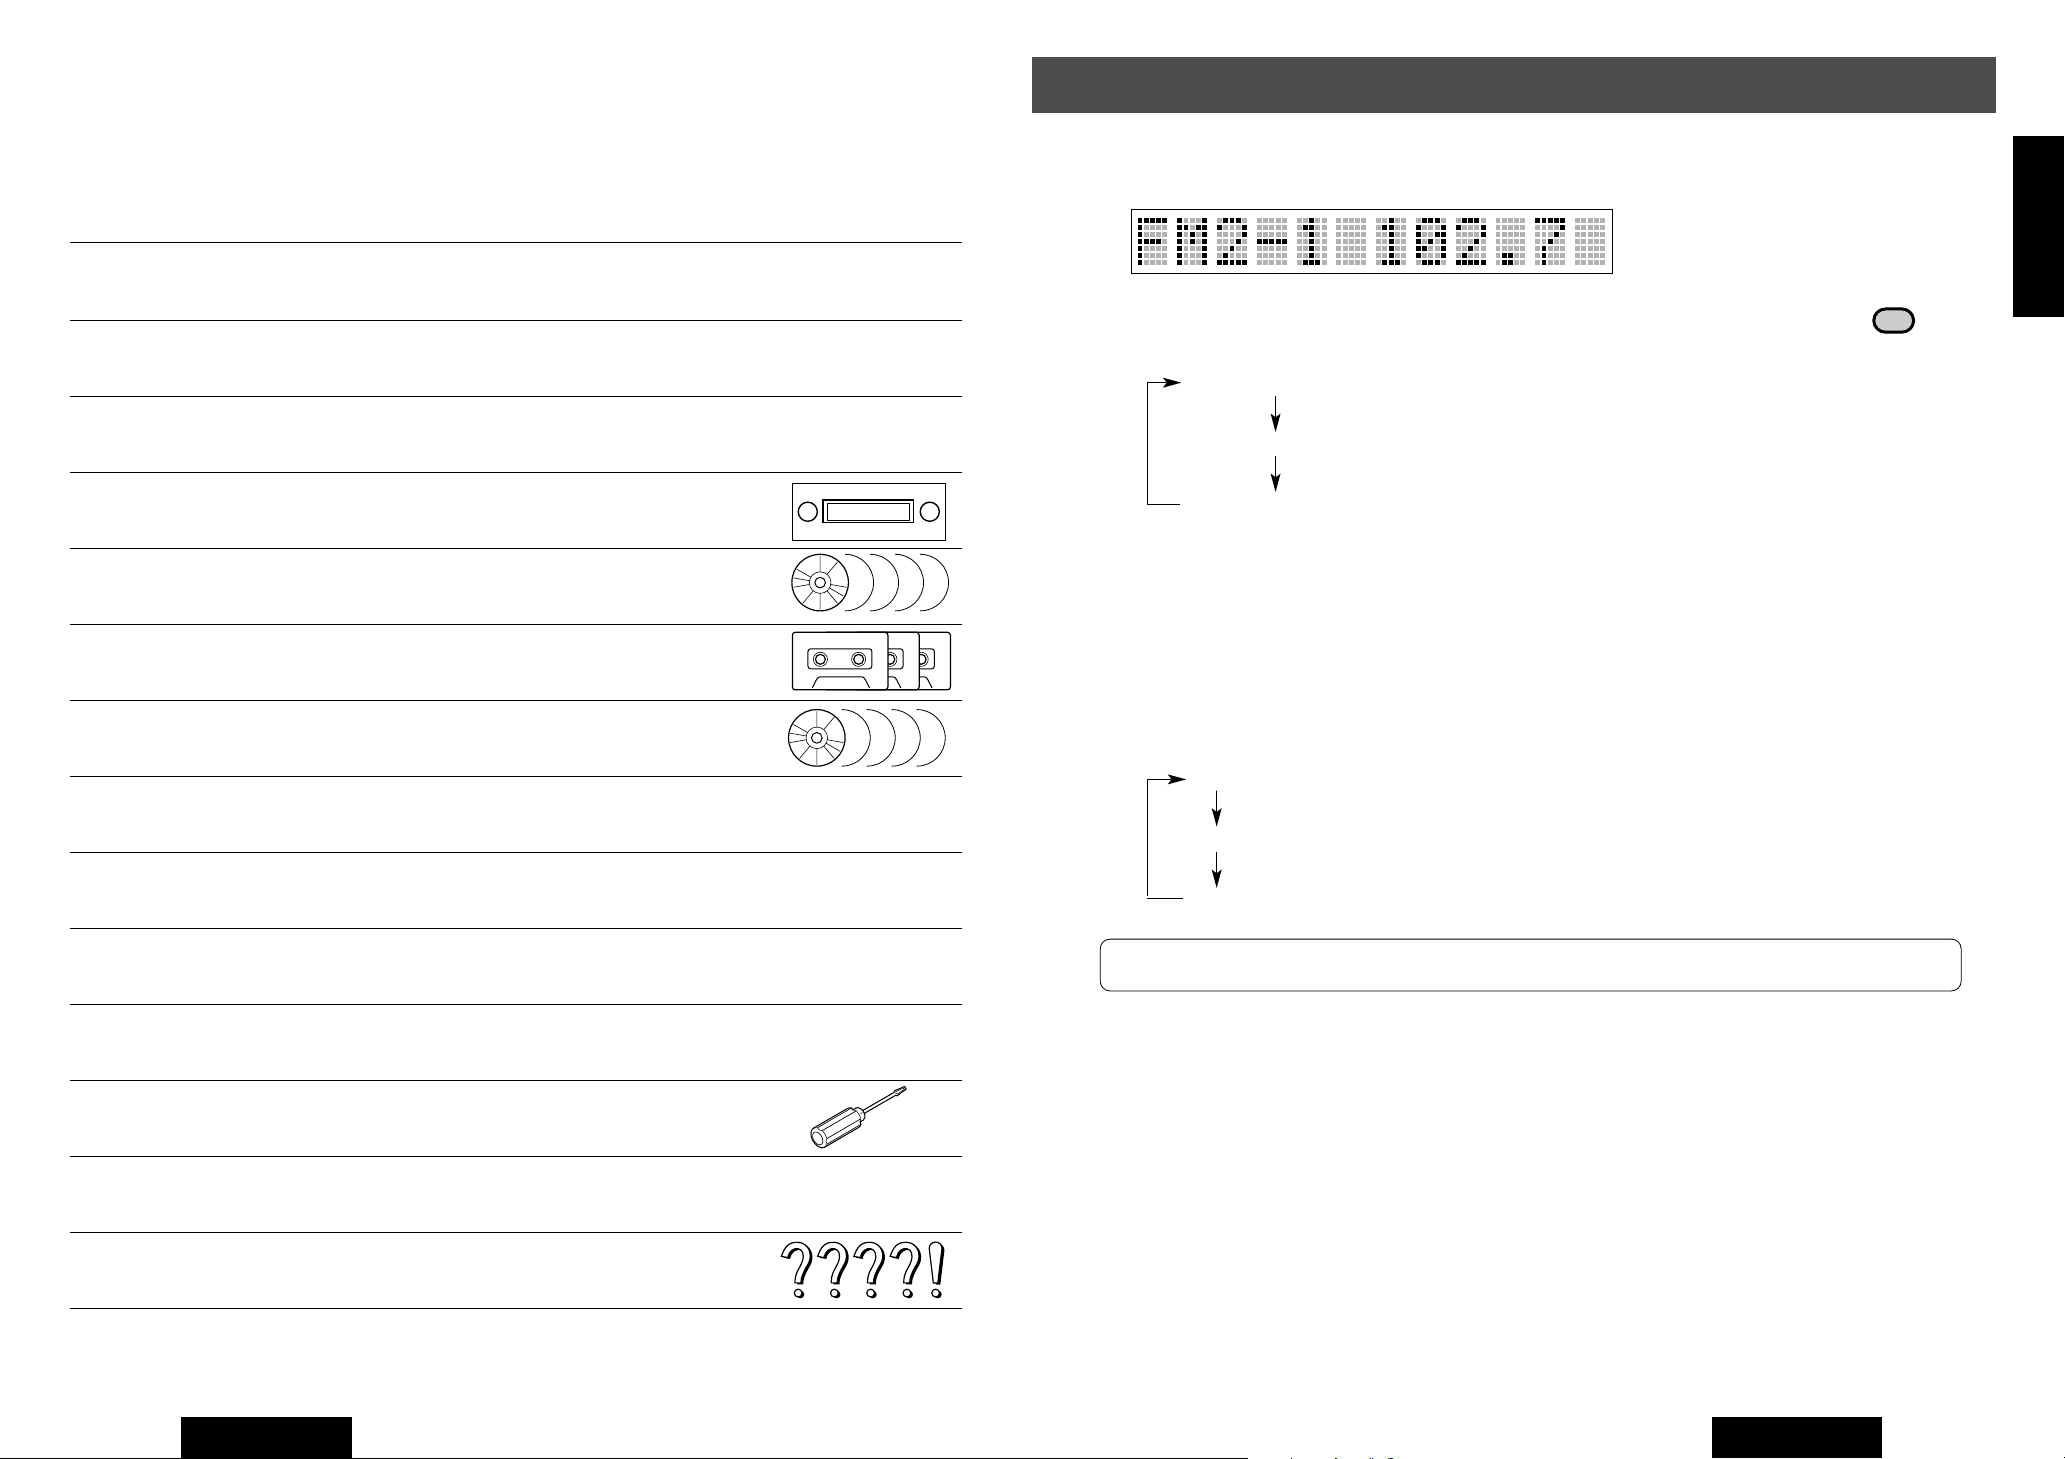
Table des matières
❏ Préparatif de la télécommande ...................................................... 55
❏ Nomenclature ................................................................................... 56
❏ Généralités ....................................................................................... 58
❏ Utilisation de base de l'autoradio .................................................. 62
❏ Utilisation de base de lecteur de CD ............................................. 64
❏ Utilisation de base du lecteur cassettes ....................................... 66
❏ Utilisation de base de changeur de disque CD (Option) .............. 70
❏ Réglages acoustiques et d'ambiophonie ...................................... 73
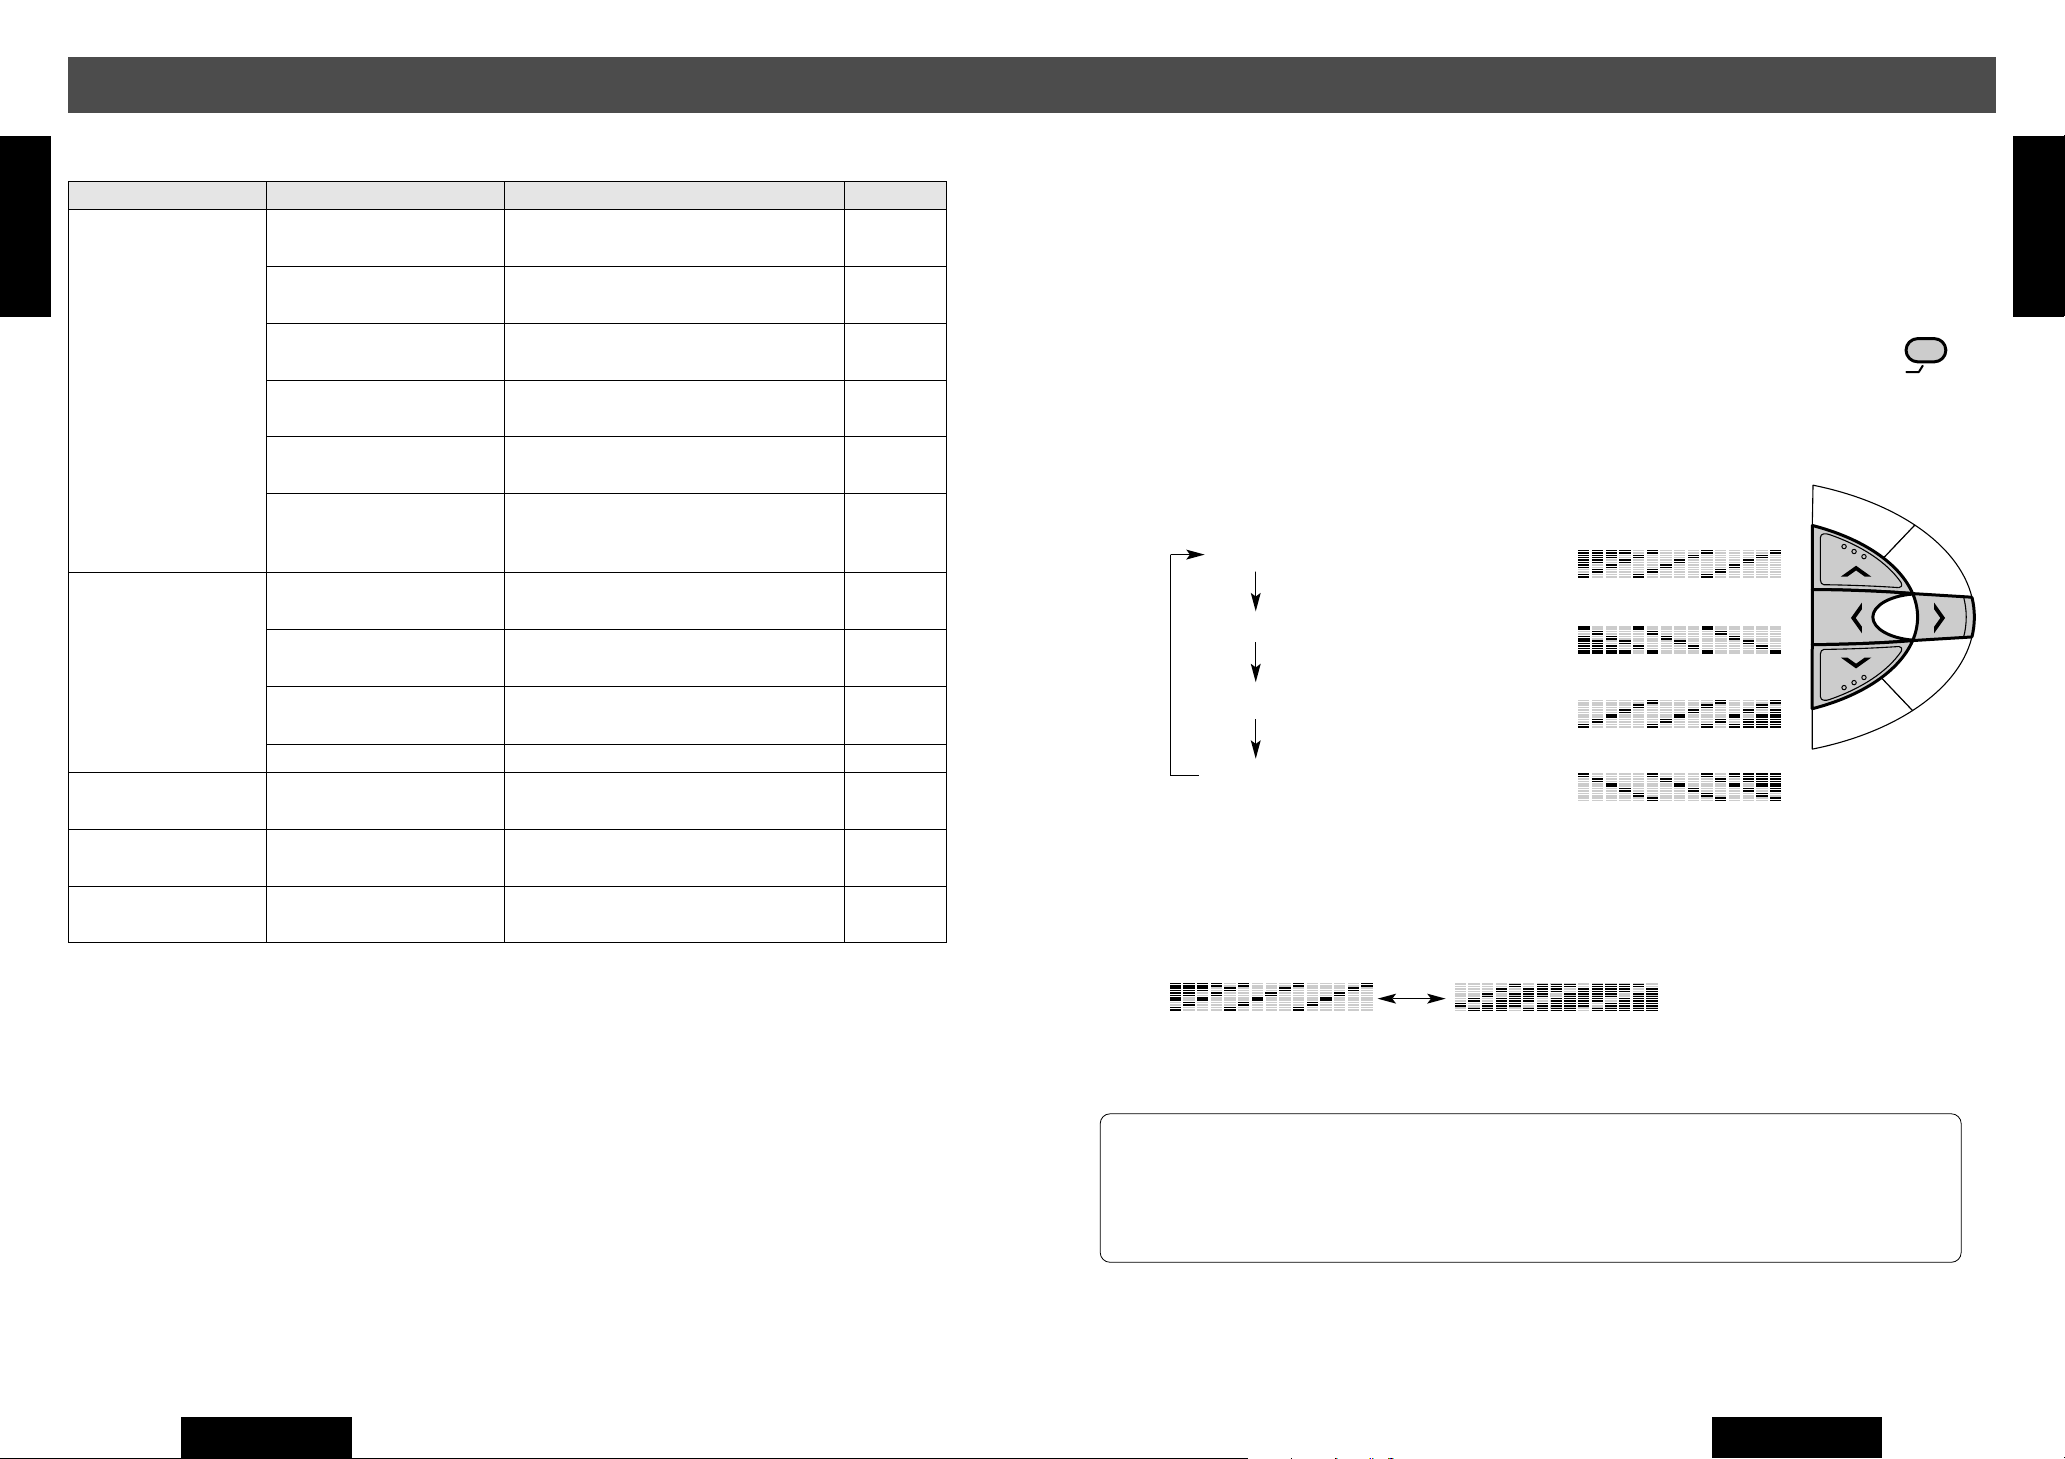
Display Change
Press [DISP] button to change the display as follows.
Regular Display in Each Sound Source
Clock Time Display
Dot Spectrum Analyzer Display
(Light moves respondent to a sound like the spectrum analyzer.)
When [DISP] button is pressed while the power is off, the display
changes as follows.
Clock / Standby
Clock
CLOCK
DISP
DISPLAY
E
N
G
L
I
S
H
7
❏ Autres types de configurations ...................................................... 78
❏ Fonctions utiles ............................................................................... 82
❏ Entretien ........................................................................................... 86
❏ Guide d'installation ......................................................................... 87
❏ Branchements électriques .............................................................. 92
❏ En cas de difficulté .......................................................................... 94
❏ Données techniques ....................................................................... 99
6
CQ-VX2000U
No Display
Note: "ADJUST" is displayed when a time is supposed to be displayed until the clock is set.
CQ-VX2000U
15
Page 5
Human
Equalizer
CQ-VX2000
561234
SOURCE
POWER
REPSCANRANDOM
CLOCK
DISP
REVERSE
S
•
ANALYZER DISPLAY MTL B NR TPS SKIP REPEAT
S•A
SPACE
SPC
D·M
LIVE
HALL
JAZZ
STADIUM
DISCO
VOCAL
CINEMA
M
U
T
E
VOL
AUTO
·
P
SENSOR
INTEGRATED CD/CASSETTE RECEIVER WITH DSP
OPEN
FM
DISC
AM
DISC
SEL
TUNE
TRACK
DISP
General
E
N
G
L
I
S
jiklButtons
H
(Continued)
Panasonic le da la bienvenida a la familia constantemente en aumento de poseedores de productos
electrónicos. Nos esforzamos en proporcionarle las ventajas de la ingeniería mecánica y electrónica de precisión, de una fabricación con componentes cuidadosamente seleccionados, y de un montaje realizado por
personas orgullosas de la reputación que su trabajo ha cimentado para nuestra empresa. Estamos seguros
de que este producto le proporcionará muchas horas de distracción y, una vez comprobada la calidad, el
valor y la fiabilidad incorporados, usted también se sentirá orgulloso de pertenecer a nuestra familia.
❏ Use este equipo de manera segura
6
DISP / CLOCK Button
Clock Set
This is a 12-number clock.
q Press and hold [CLOCK] button for more than 2 seconds to
change to the clock setting mode.
The clock display blinks. (When setting the clock for the first time, the display, "12 : 00" blinks.)
w Set a time using [j], [i], [k] or [l] buttons.
[k] : Hour adjusting. ¡The hour display blinks.
[l] : Minute adjusting. ¡The minute display blinks.
[
j
] : Hour/minute advanced.
[
i
] : Hour/minute set back.
CLOCK
DISP
DISPLAY
Press and hold for more
than 2 seconds
FM
DISC
SEL
DISC
AM
Cuando esté conduciendo
Mantenga el nivel del volumen suficiente bajo para poder darse cuenta de las condiciones de tráfico de la
carretera.
Cuando esté lavando el auto
Para evitar cortocircuitos, que pueden ser causa de un incendio, y otros daños, no exponga este producto
(incluyendo los altavoces y los discos CD/cintas de casete) al agua ni a la humedad excesiva.
Cuando haya estacionado
El estacionar bajo la luz solar directa produce temperaturas muy altas dentro de su vehículo. Asegúrese
de enfriar el interior del vehículo antes de encender la unidad.
Use la fuente de alimentación apropiada
Este equipo está diseñado para funcionar con un sistema de 12 voltios, de polo negativo puesto a tierra (el
sistema normal en los autos norteamericanos).
Mecanismo de disco
No inserte monedas ni otros objetos pequeños. Evite acercar imanes, destornilladores u otros objetos
metálicos al mecanismo de disco y al disco mismo.
Mecanismo de la cinta
Mantenga alejados del mecanismo de la cinta y de su cabezal imanes, destornilladores y otros objetos
metálicos.
Use los centros de servicio autorizados
No intente desmontar o ajustar este equipo de precisión. Para solicitar ayuda relativa a los servicios de
mantenimiento, refiérase a la lista de los centros de servicio.
Para la instalación
El producto deberá instalarse en una posición horizontal con el extremo frontal levantado a un ángulo conveniente, pero que no sea de más de 30°.
❏ Componentes
e Press [CLOCK] button to settle a time.
The regular mode resumes and the clock starts.
To watch the clock, press [DISP] button to select the clock
display. ( B Page 15)
14
Note: Clock can not be set when the power is off.
CQ-VX2000U
CLOCK
DISP
DISPLAY
1. Manual de instrucciones...........................................................................................................................1
2. Accesorios para la instalación ..............................................................................1 juego (a página 133)
3. Conector de la alimentación.....................................................................................................................1
4. Controlador remoto...................................................................................................................................1
Busque el número del modelo y el número de serie ya sea en la parte trasera o en el fondo de la unidad.
Sírvase anotar dichos números en el espacio siguiente, y mantenga este librete como una anotación
permanente de su compra para ayudar en la identificación en el caso de robo.
NÚMERO DEL MODELO NÚMERO DE SERIE
CQ-VX2000U
FECHA DE COMPRA NOMBRE DE LA TIENDA
CQ-VX2000U
7
Page 6
Índice
Cláusula sobre interferencias de radiofrecuencia (Parte 15 de las normas de FCC) .................. 2
❏ Operación de control remoto ....................................................... 101
❏ Nomenclatura de los controles .................................................... 102
Warning: DO NOT OPERATE THE SYSTEM WHILE DRIVING.
Operating the system will distract the driver from looking ahead of the car and cause
accidents. Always stop the car in a safe location before operating the system.
E
N
G
L
I
S
H
5
❏ Generalidades ................................................................................ 104
❏ Operación básica de la radio ........................................................ 108
❏ Operación básica del reproductor de CD .................................... 110
❏ Operación básica del reproductor de cintas de casete ............. 112
❏ Operación básica del cambiador de CD (Optional) .................... 116
❏ Ajustes del sonido y espacio sonoro .......................................... 119
❏ Otros ajustes .................................................................................. 124
❏ Funciones útiles ............................................................................ 128
Sound Source Selection
Press [SOURCE] button to change the mode as follows.
TUNER CD TAPE
AUX IN CD CHANGER
Notes:
¡When a disc or a cassette tape is not loaded, when a changer is not connected or when
there is no magazine in a CD changer, a corresponding sound source can not be selected.
¡Skipping “AUX IN” can be set If “AUX IN” (the external input) is not used. (B Page 34)
PWR
SOURCE
❏ Mantenimiento ............................................................................... 132
❏ Guía de instalación ........................................................................ 133
❏ Conexiones eléctricas ................................................................... 138
❏ Solución de problemas ................................................................. 140
❏ Especificaciones ........................................................................... 145
8
CQ-VX2000U
CQ-VX2000U
13
Page 7
Human
Equalizer
CQ-VX2000
561234
SOURCE
POWER
REPSCANRANDOM
CLOCK
DISP
REVERSE
S
•
ANALYZER DISPLAY MTL B NR TPS SKIP REPEAT
S•A
SPACE
SPC
D·M
LIVE
HALL
JAZZ
STADIUM
DISCO
VOCAL
CINEMA
M
U
T
E
VOL
AUTO
·
P
SENSOR
INTEGRATED CD/CASSETTE RECEIVER WITH DSP
OPEN
FM
DISC
AM
DISC
SEL
TUNE
TRACK
SOURCE
VOL
DISP
General
(Back side)
Lithium
battery
Position B
Battery holder
Position A
E
N
G
L
I
S
H
4
DISP Button
CBefore operate this unit, turn the ignition key on.
P ower
Press [POWER] button to turn on the power.
When turning on the power, a demonstration message is displayed.
(Demonstration Mode)While the demonstration mode is activated, pressingbutton-operations can not be performed.Press [DISP] button to cancel the
Demonstration mode before operation.
To activate the Demonstration mode, turn off the power once, and press
and hold [POWER] button on the main unit for more than 1 second.
SOURCE / POWER
Button
VOL jiButtons
POWER
SOURCE
CLOCK
DISP
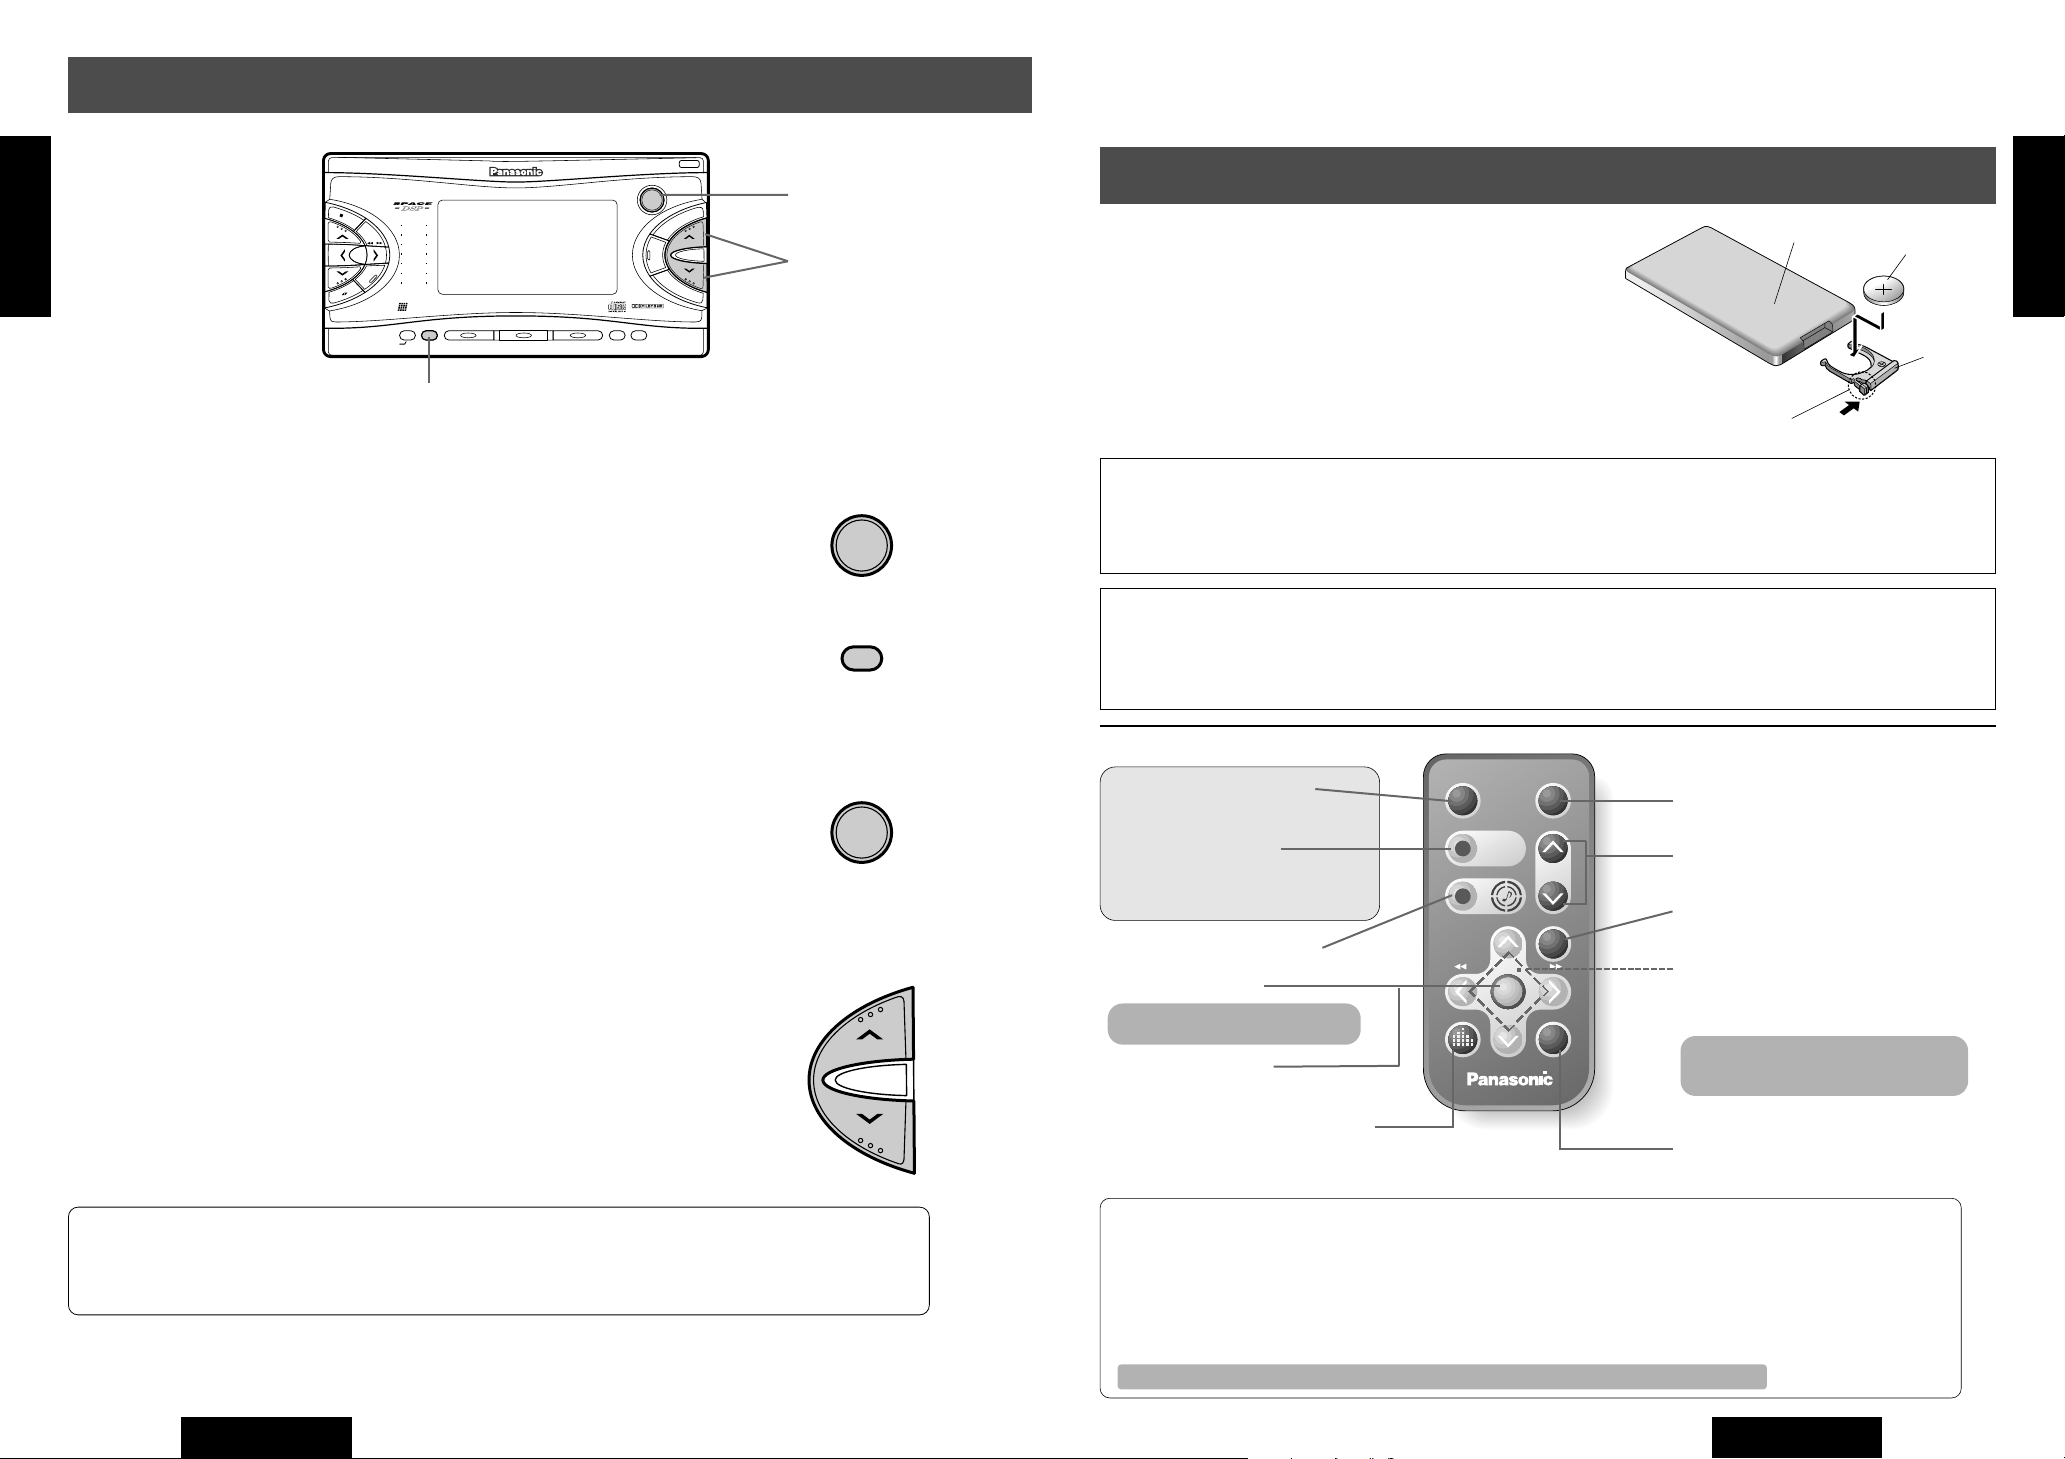
Remote Control Preparation
Battery Installation
1. Remove the battery holder.
Take hold of the holder at position B and pull it out to remove
the battery by pushing position A in the direction shown by
the arrow.
2. Install the battery on the battery holder.
Set a new battery properly with its (+) side facing up as
shown in the figure.
3. Insert the battery holder.
Push in the battery holder back into its original position.
Notes:
Remove and dispose of an old battery immediately.
Battery Information:
¡Battery type: Panasonic lithium battery (CR2025)
¡Battery Life: Approximately 6 months under normal use (at room temperature)
Caution: Improper use of batteries may cause overheating, an explosion or ignition, resulting in injury or a
fire. Battery leakage may damage the unit.
¡Do not disassemble or short the battery. Do not throw a battery into a fire.
¡Keep batteries away from children to avoid the risk of accidents.
¡Be careful to the disposal rules when you dispose of batteries.
E
E
E
N
N
N
G
G
G
L
L
L
I
I
I
S
S
S
H
H
H
1
1
1
Press and hold [POWER] button for more than one second to turn
off the power.
Volume
Press [VOL j] or [VOL i] button to adjust the volume.
12
Note: Because the volume can be set for each sound source (respective volumes for even FM
and AM), the volume level changes when the sound source changes. <Intelligent Volume
Function>.
CQ-VX2000U
POWER
SOURCE
Press and hold
VOL
PRG/■
PRG/
BAND
(ATT)
MUTE
VOL
SEL
DISP
MUTE (ATT) Button
VOL(Volume) ji
Buttons
SEL(Select) Button
ji (DISC ji) Buttons
kl (TUNE kl,
TRACK a f) Buttons
Tape Fast Forward /
Rewind Button
DISP (Display) Button
CLOCK Button
PWR(Power) Button
SOURCE Button
These buttons are the same
button in the main unit.
SPC (Space) Button
BAND Button
PRG (A B) / F Button
AUTO•P (Auto
preset) Button
S
•A (Spectrum•Analyzer)
Button
DIMMER Button
PWR
SOURCE
DIMMER
Car Audio
Notes:
¡There are some buttons names that are not concerned with this unit because the remote
control is designed to be used together with other models.
¡Because the following buttons are not equipped on the remote control, operate those
buttons on the main unit.
OPEN Button, CD u Button, D*M Button, 1 - 6 Buttons, RANDOM Button, SCAN Button,
REP (REPEAT) Button and REVERSE Button
CST u Button, MTL Button, B NR Button, TPS Button and SKIP Button
CQ-VX2000U
9
Page 8
CD EJECT
CST EJECT
CD IN
CST IN
LARGE FLUORESCENT DISPLAY ■
37W×4CH AMPLIFIER ■
15 BAND SPECTRUM ANALIZER ■
FLIP DOWN PANEL ■
INTEGRATED CD/CASSETTE RECEIVER WITH DSP
u
u
VX2000
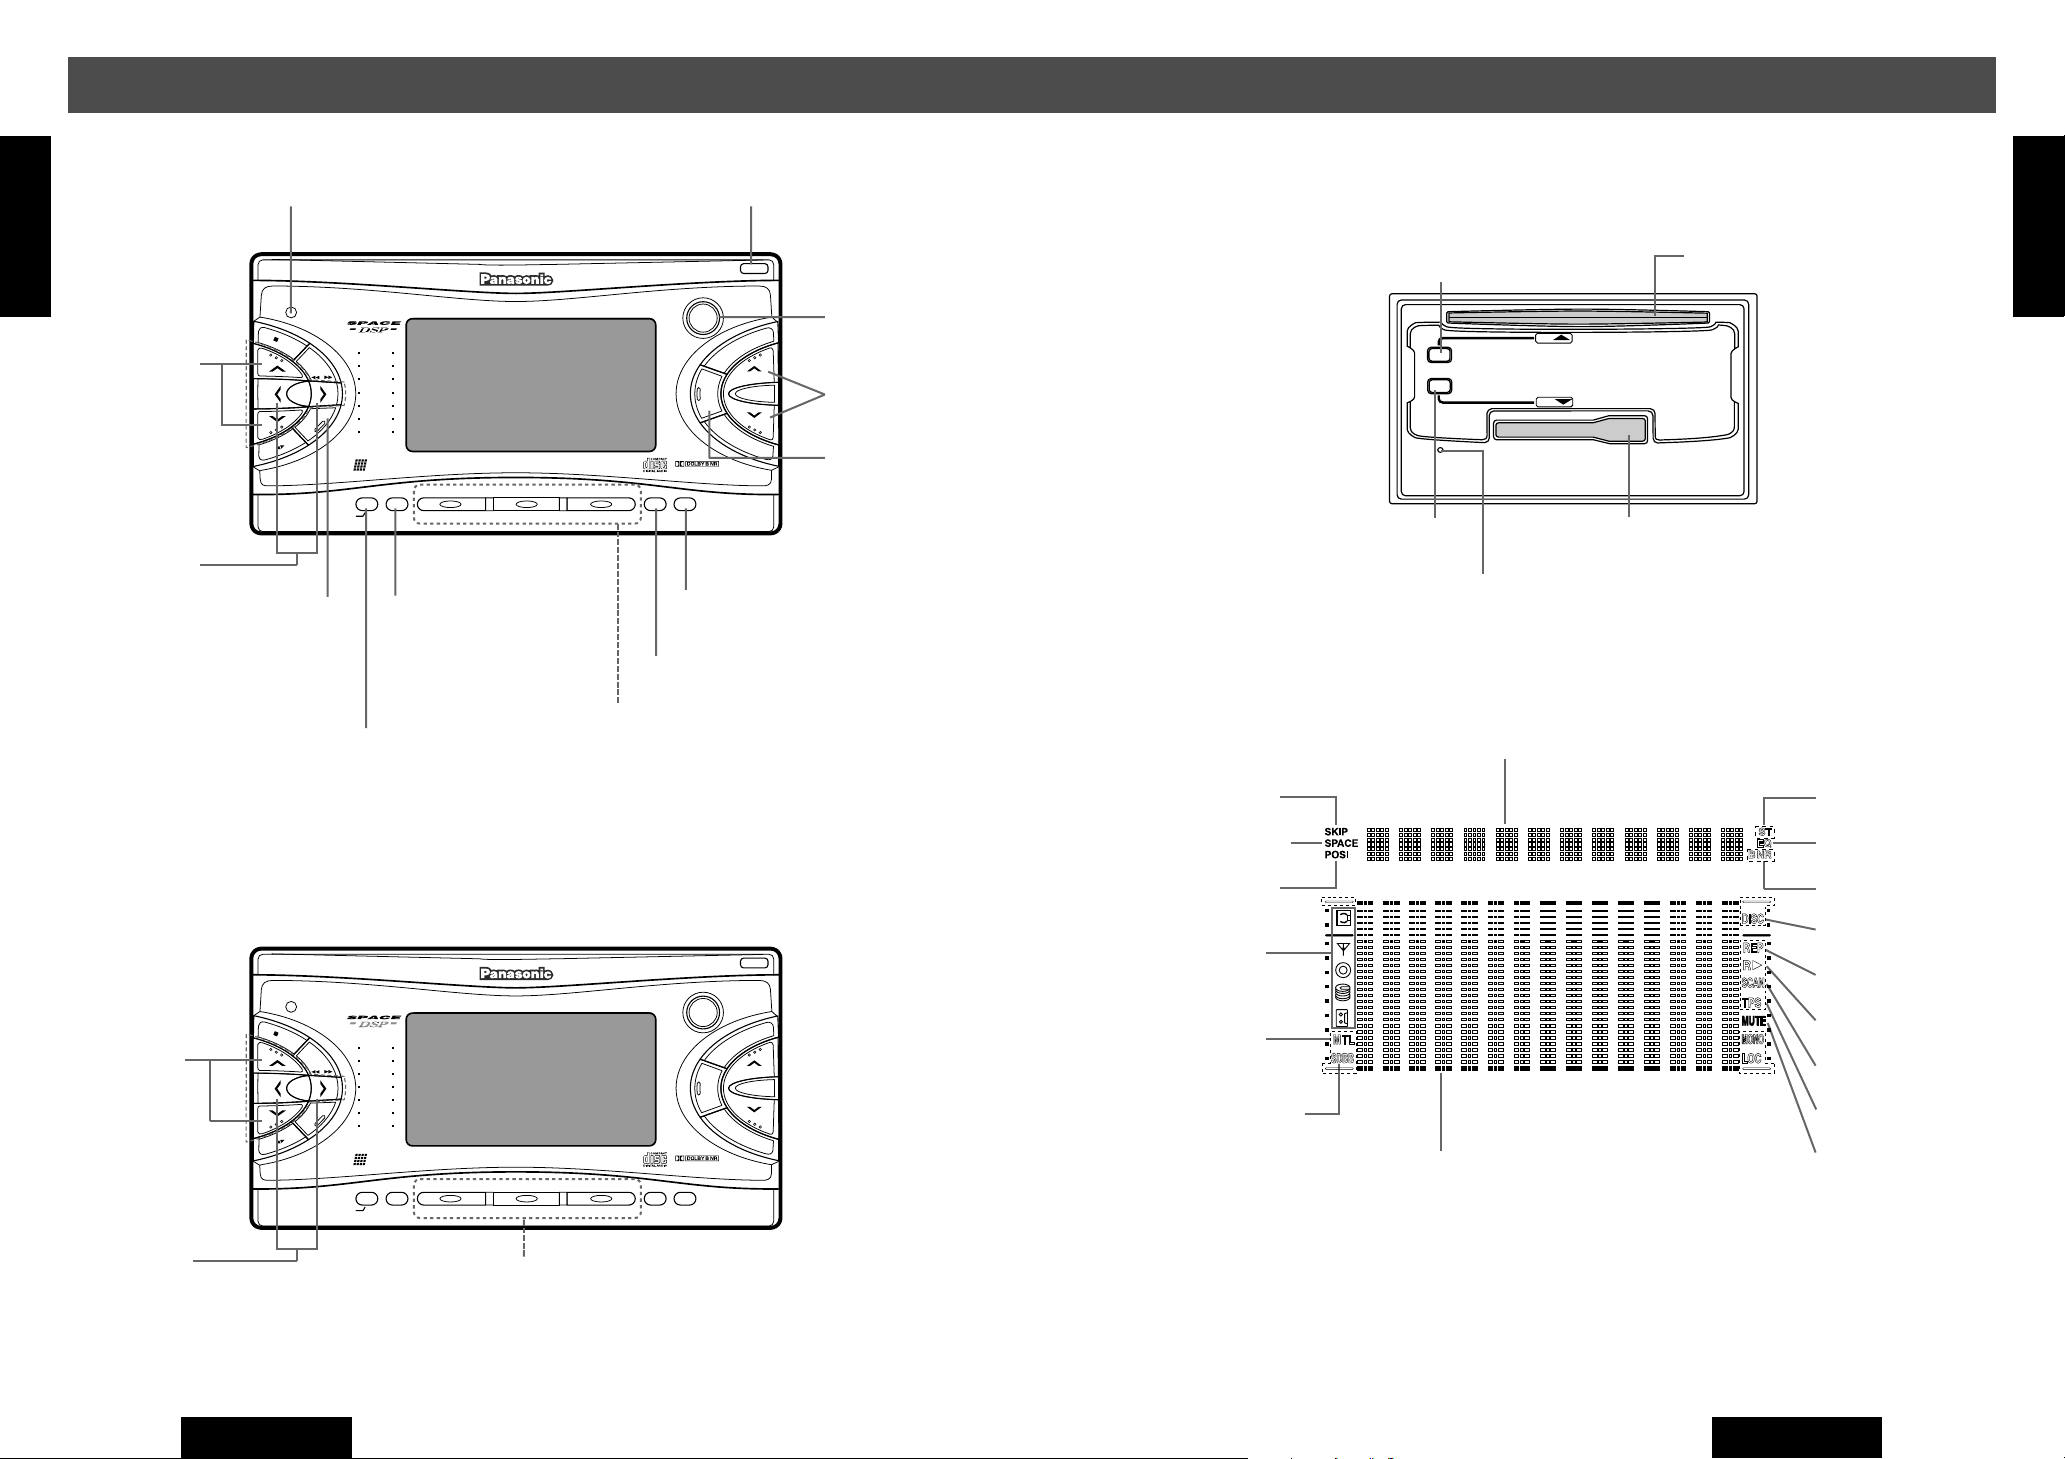
Name of Controls
E
E
E
Main Unit
N
N
N
G
G
G
L
L
L
I
I
I
S
S
S
H
H
H
1
1
2
jiButtons
¡BAND
¡DISC
klButtons
¡TUNE
¡TRACK
jiButtons
¡
3 / 4 5
(Stop)(Program)
Sensor (Remote Control Receiver)
SENSOR
FM
DISC
TUNE
TRACK
DISC
AM
SEL(Select)
Button
LIVE
HALL
JAZZ
STADIUM
DISCO
VOCAL
SEL
CINEMA
Human
INTEGRATED CD/CASSETTE RECEIVER WITH DSP
Equalizer
REVERSE
CLOCK
DISP
S•A
•
S
ANALYZER DISPLAY MTL B NR TPS SKIP REPEAT
DISP (Display) Button
CLOCK Button
S•A (Spectrum•Analyzer)
Button
REVERSE Button
<Cassette Tape>
SENSOR
FM
DISC
TUNE
TRACK
DISC
AM
LIVE
HALL
JAZZ
STADIUM
DISCO
VOCAL
SEL
CINEMA
Human
INTEGRATED CD/CASSETTE RECEIVER WITH DSP
Equalizer
REVERSE
CLOCK
DISP
S•A
•
S
ANALYZER DISPLAY MTL B NR TPS SKIP REPEAT
CQ-VX2000
CQ-VX2000
REPSCANRANDOM
561234
SPACE
SPC
SPC (Space) Button
1- 6 Buttons
¡Preset [1- 6]
¡RANDOM [4]
¡SCAN [5]
¡REP [6]
REPSCANRANDOM
561234
SPACE
SPC
OPEN Button
OPEN
POWER
SOURCE
SOURCE Button
POWER Button
P
·
AUTO
VOL
E
T
U
M
VOL(Volume) ji
Buttons
MUTE (ATT) Button
AUTO•P(Auto Preset)
D·M
Button
D•M(Direct Memory) Button
OPEN
POWER
SOURCE
P
·
AUTO
D·M
VOL
E
T
U
M
Behind the Front P anel
CD u(Eject) Button
RESET
CST u(Eject)
Button
Reset Switch
Display Unit
Other Operation Indicator
SKIP Indicator
SPACE Indicator
POSI(Position)
Indicator
Standby Indicator
MTL Indicator
SDBB (Super Dynamic
Bass Boost) Indicator
Spectrum Analyzer Indicator
CD Slot
Cassette Tape Slot
ST (Stereo) Indicator
EQ (Equalizer)
Indicator
B NR (Dolby B NR)
Indicator
DISC Indicator
REP(Repeat) Indicator
R 5(Random)Indicator
SCAN Indicator
TPS (Tape Program
Search) Indicator
MUTE Indicator
E
E
E
N
N
N
G
G
G
L
L
L
I
I
I
S
S
S
H
H
H
1
1
3
k lButtons
¡
10
1 / 2
CQ-VX2000U
1- 6 Buttons
¡MTL [1]
¡B NR [2]
¡TPS [4]
¡SKIP [5]
¡REPEAT [6]
CQ-VX2000U
11
Page 9
Other Settings
Human
Equalizer
CQ-VX2000
561234
SOURCE
POWER
REPSCANRANDOM
CLOCK
DISP
REVERSE
S
•
ANALYZER DISPLAY MTL B NR TPS SKIP REPEAT
S•A
SPACE
SPC
D·M
LIVE
HALL
JAZZ
STADIUM
DISCO
VOCAL
CINEMA
M
U
T
E
VOL
AUTO
·
P
SENSOR
INTEGRATED CD/CASSETTE RECEIVER WITH DSP
OPEN
FM
DISC
AM
DISC
SEL
TUNE
TRACK
SEL
(continued)
E
N
G
L
I
S
H
26
klButtons
SEL Button
Dimmer
Default: DIMMER MID When side-maker lamp on
DIMMER HIGH When side-maker lamp off
Display brightness with the side-marker lamps on or off can be set.
q Press [SEL] button to select <DIMMER SEL>. ( B Page 32)
Press [l] button to change as follows. ([k] : opposite direction)
w
DIMMER HIGH : Light grows brighter.
DIMMER MID : medium brightness
DIMMER LOW : Lower brightness
Note: When using the remote control, the dimmer selection can be changed by pressing
[DIMMER] button for more than 2 seconds.
FM
DISC
SEL
DISC
AM
Press and hold for more than 2
seconds.
<
Press again
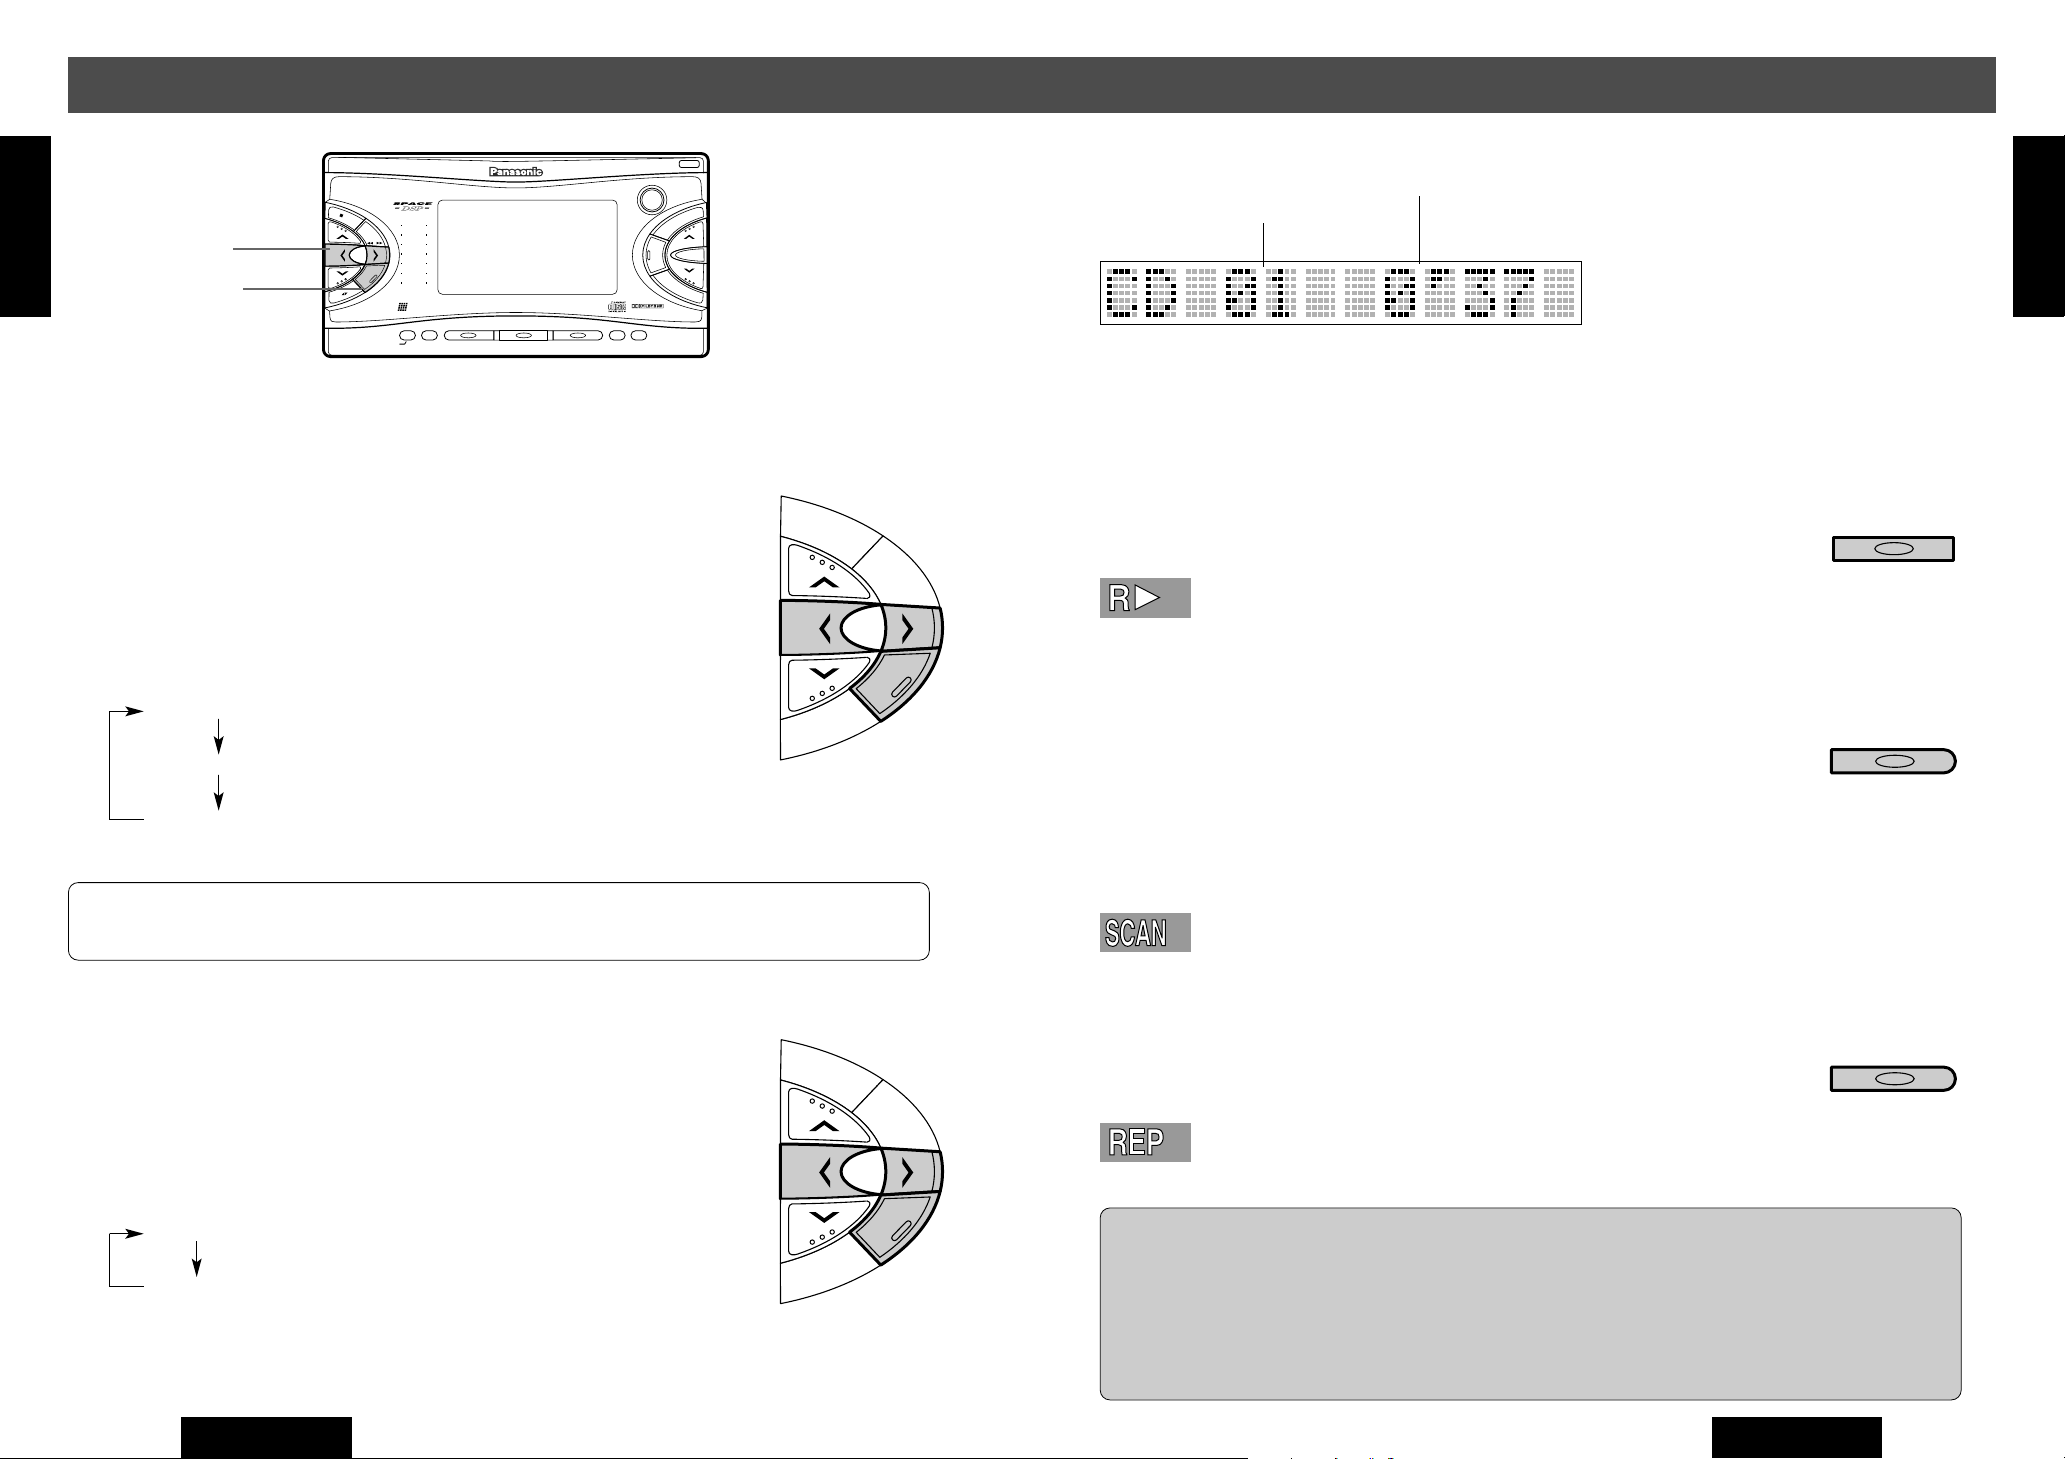
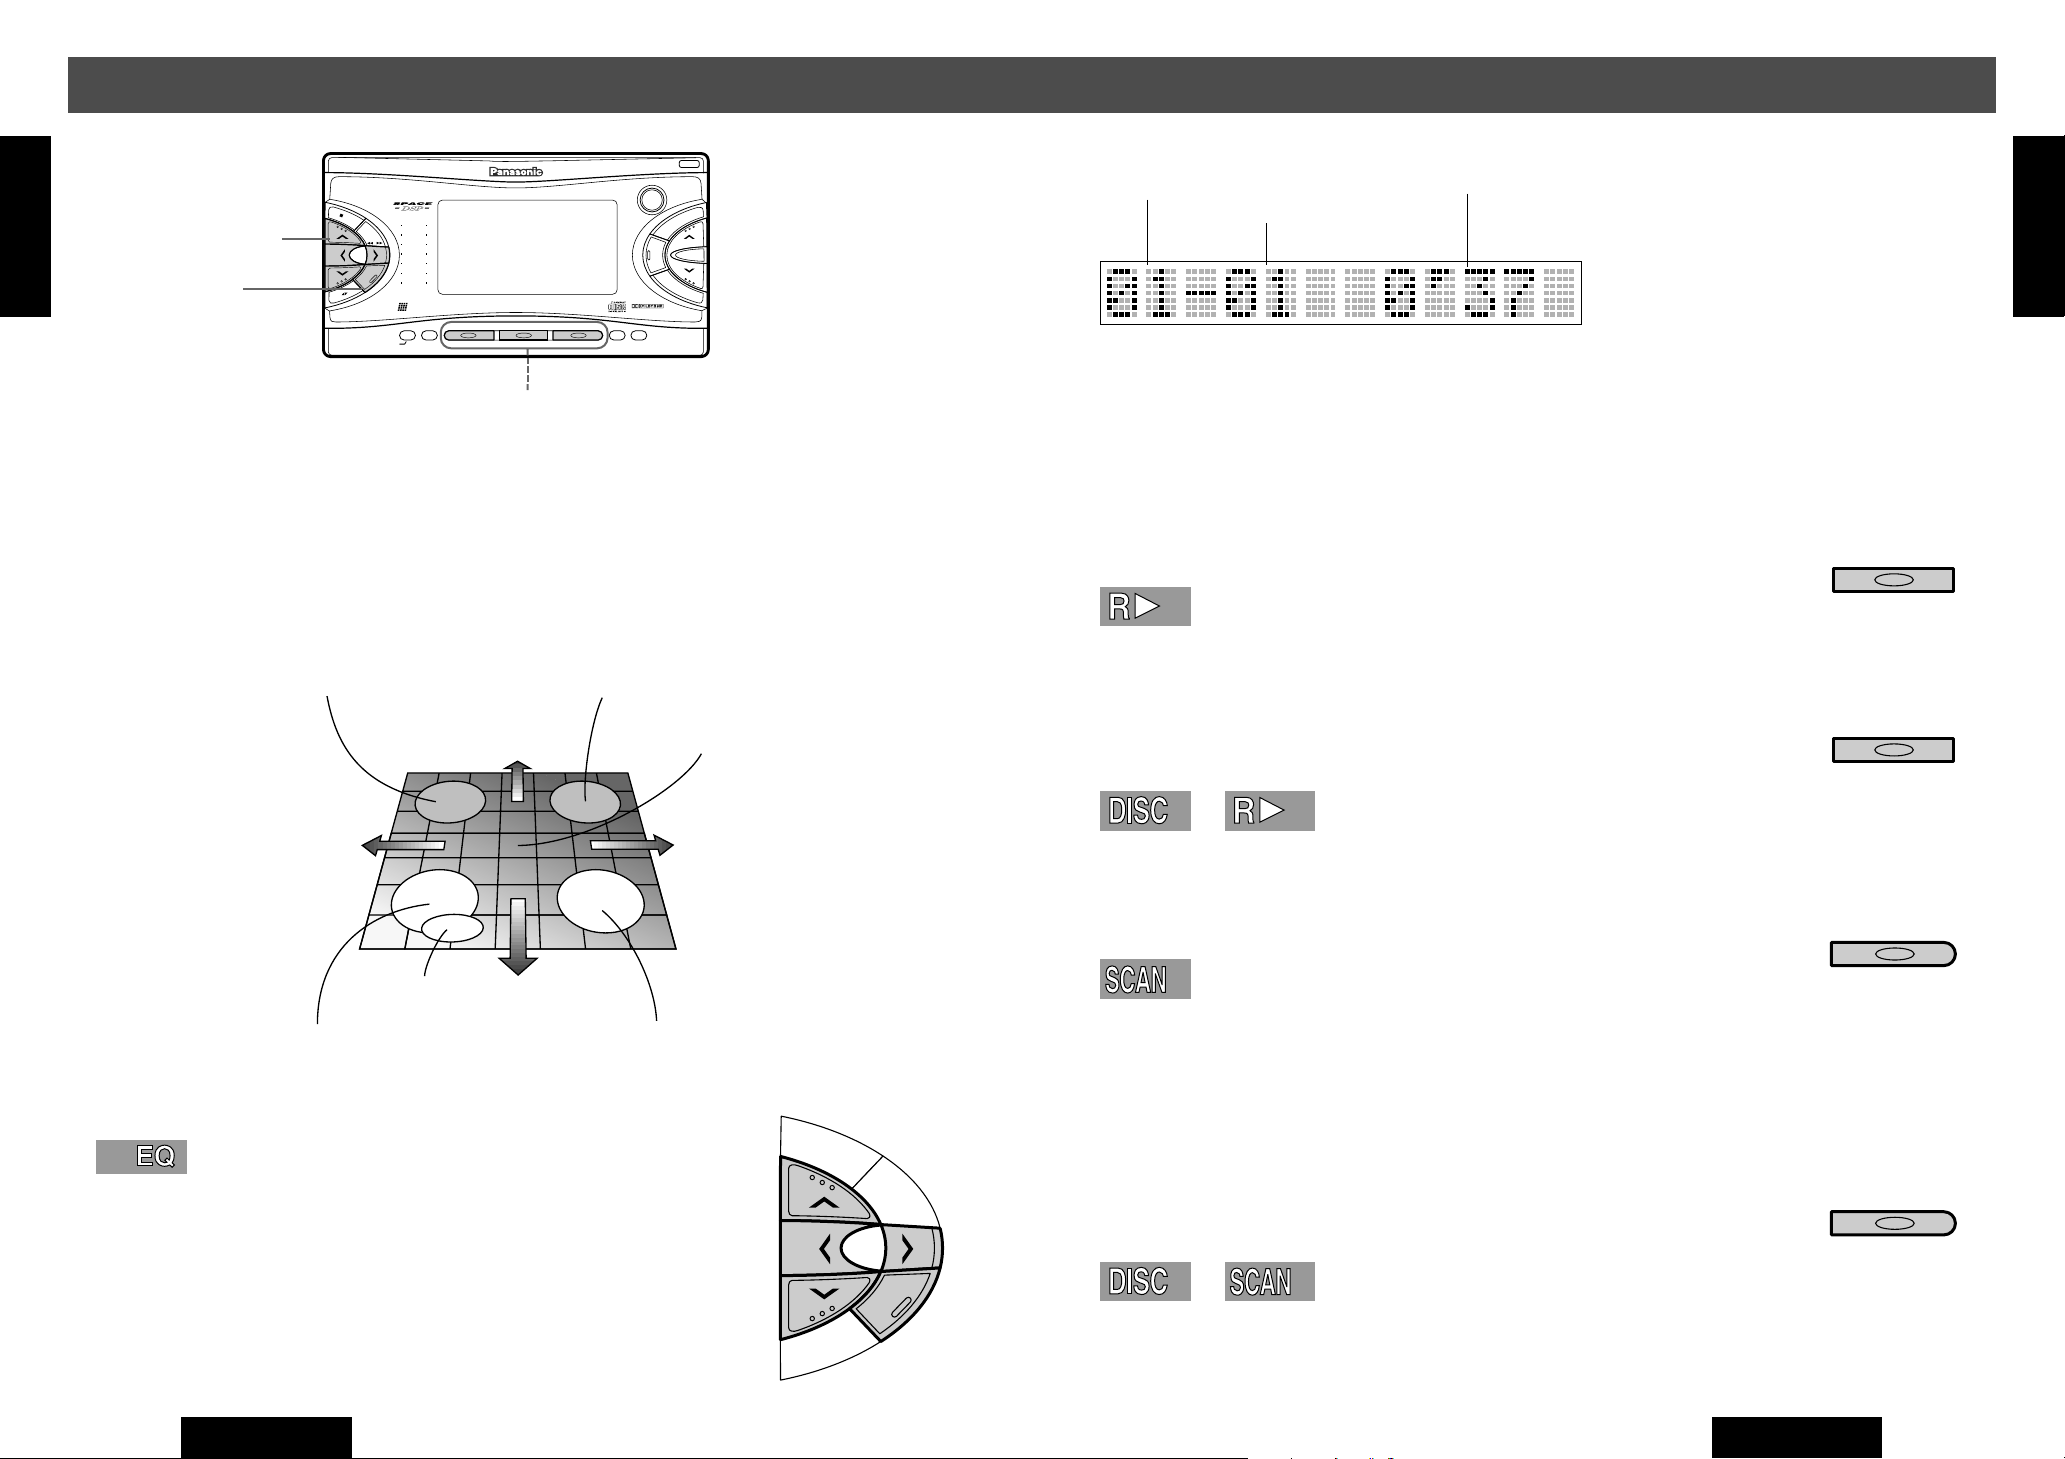
Track Play Time
Track Number
To change the display, press [DISP]
button. (B Page 15)
(Example) Regular Display
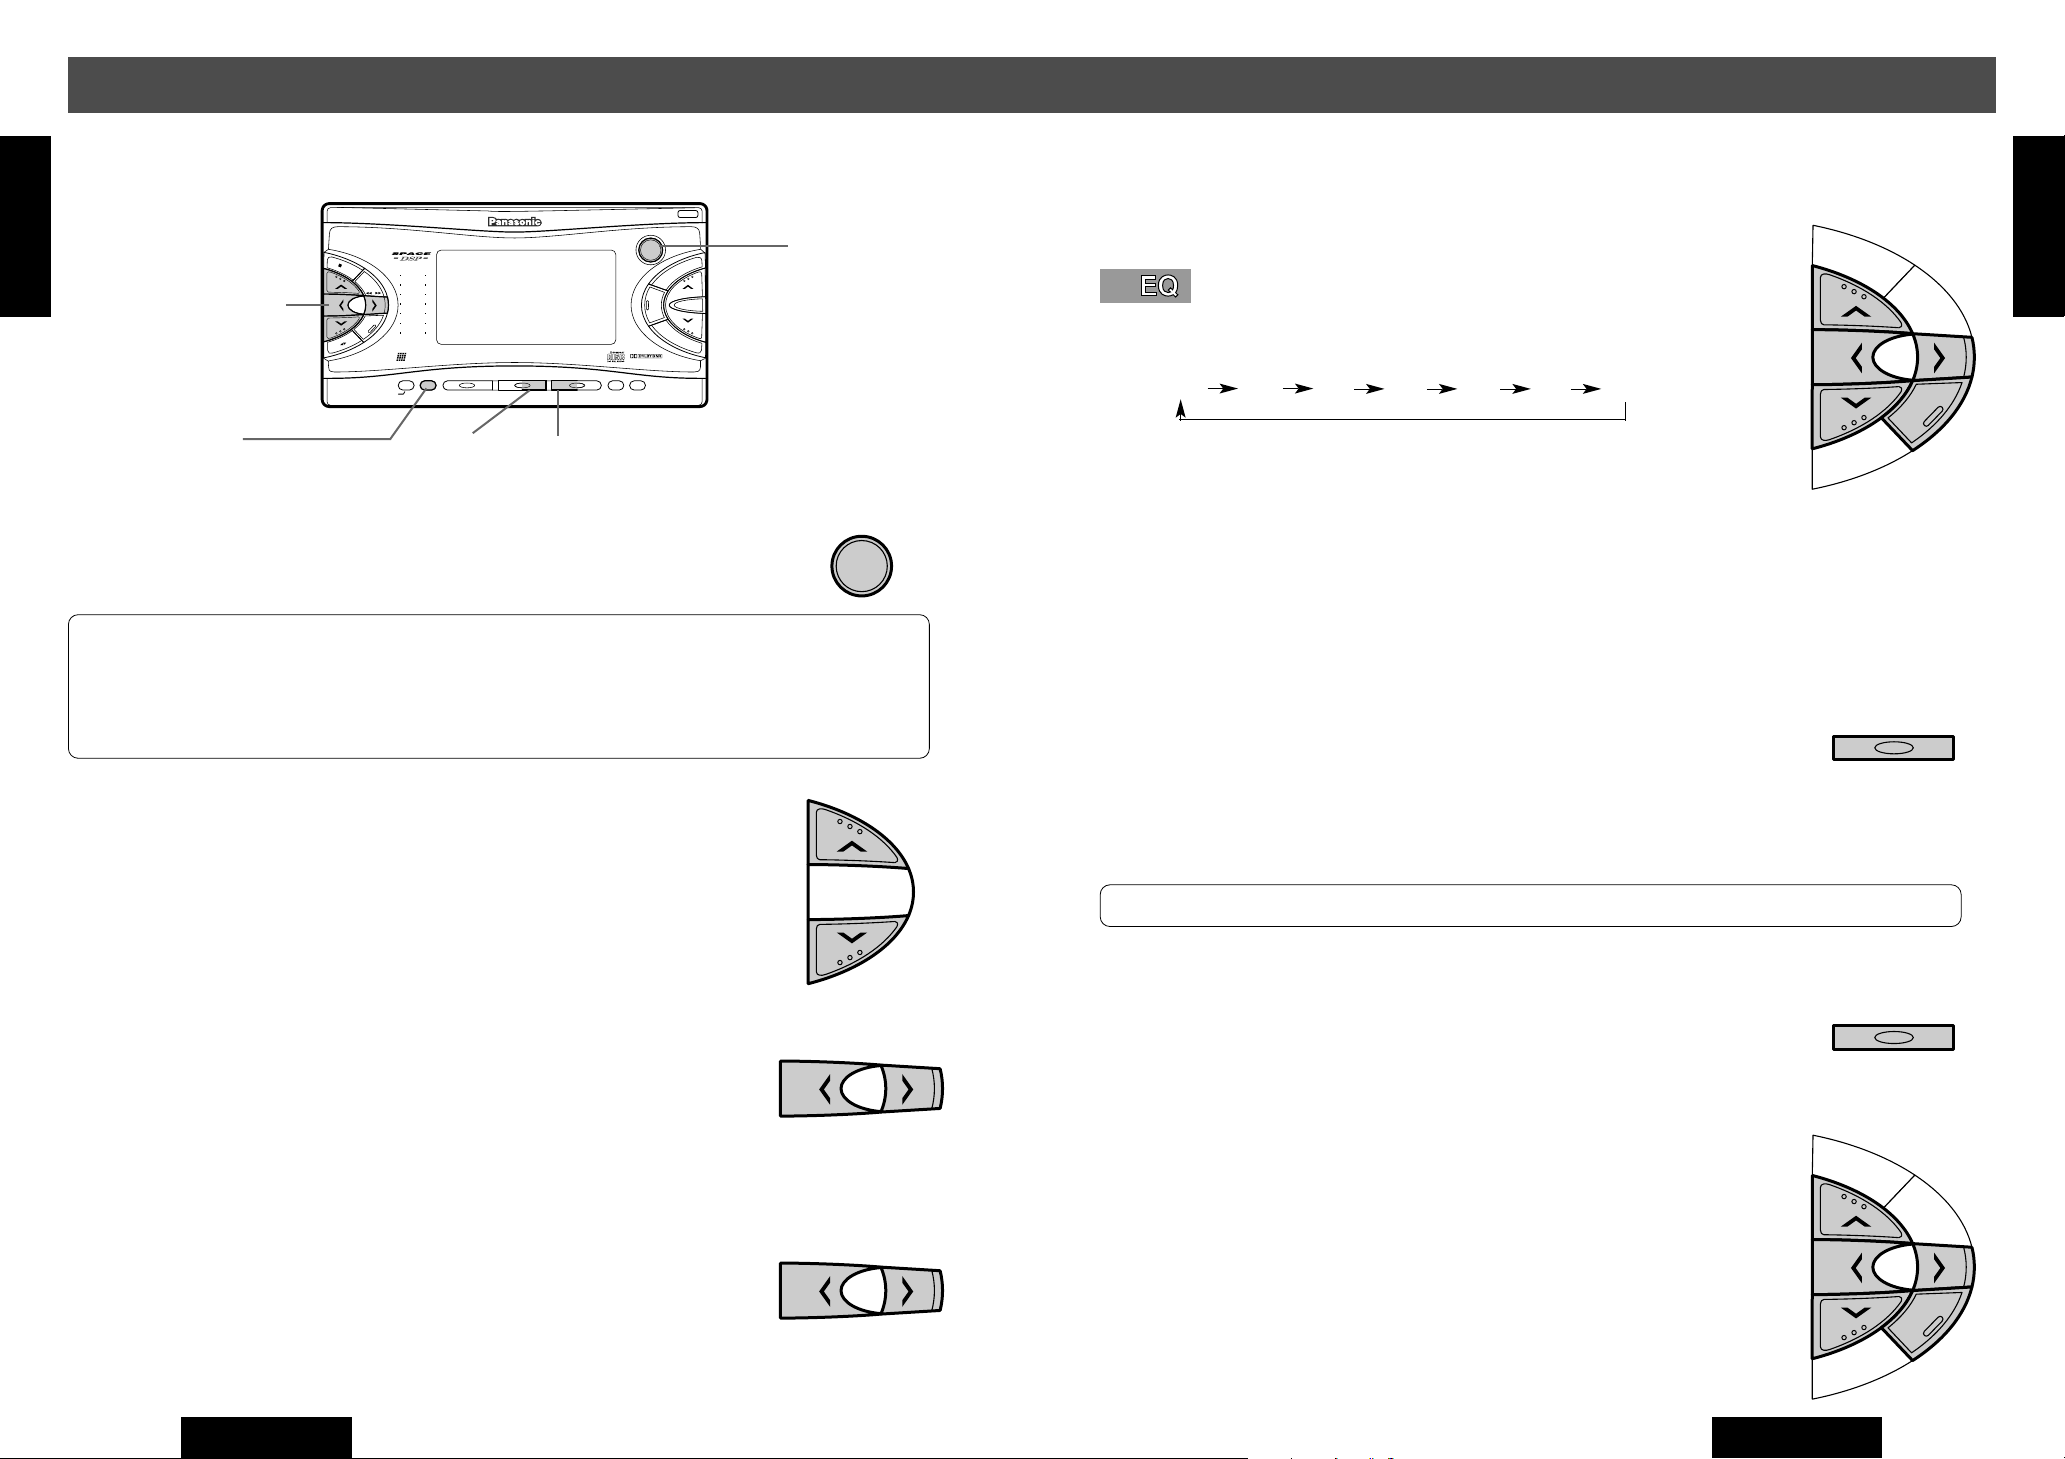
Random Play
Press [RANDOM] button in the main unit to play tracks in the current
disc in random order. (Press [RANDOM] button again to cancel.)
Scan Play
Press [SCAN] button in the main unit to play the first 10 seconds
of all tracks in the current disc. The first played track is the current track. (Press [SCAN] button again to cancel.)
¡After playing 10 seconds of all tracks, the scan play is finished and the
starting position goes to the beginning of the first played track.
¡Cancel the scan play when finding your favorite track.
E
N
G
L
I
S
H
11
RANDOM
3 4
REPSCAN
5 6
A UX IN Setting
Default : AUX IN ON
AUX will be excluded not to be selected.
q Press [SEL] button to select <AUX IN SET>. ( B Page 32)
Press [l] button to change as follows. ([k] : opposite direction)
w
34
AUX IN ON : External input (AUX-IN) is an object of source selection
AUX IN OFF: External input (AUX-IN) is not an object of source selection.
CQ-VX2000U
FM
DISC
SEL
DISC
AM
Press and hold for more than 2
seconds.
<
Press again
Repeat Play
Press [REPEAT] button in the main unit to repeat the current
5 6
track. (Press [REPEAT] button again to cancel.)
Caution: Keep your fingers or hands off from moving parts. Do
not put your fingers or hands into the disc slot or
cassette tape slot.
Failure to do so may result in injury or malfunction.
Watch your child or baby not to do so.
CQ-VX2000U
REPSCAN
19
Page 10
Human
Equalizer
CQ-VX2000
561234
SOURCE
POWER
REPSCANRANDOM
CLOCK
DISP
REVERSE
S
•
ANALYZER DISPLAY MTL B NR TPS SKIP REPEAT
S•A
SPACE
SPC
D·M
LIVE
HALL
JAZZ
STADIUM
DISCO
VOCAL
CINEMA
M
U
T
E
VOL
AUTO
·
P
SENSOR
INTEGRATED CD/CASSETTE RECEIVER WITH DSP
OPEN
FM
DISC
AM
DISC
SEL
TUNE
TRACK
SOURCE
DISP
OPEN
Cassette Tape Player Basics
C
D
E
J
E
C
T
C
S
T
E
J
E
C
T
u
u
CST IN
INTEGRATED CD/CASSETTE RECEIVER WITH DSP
VX2000
CD IN
E
N
G
L
I
S
H
jiklButtons
12
DISP Button
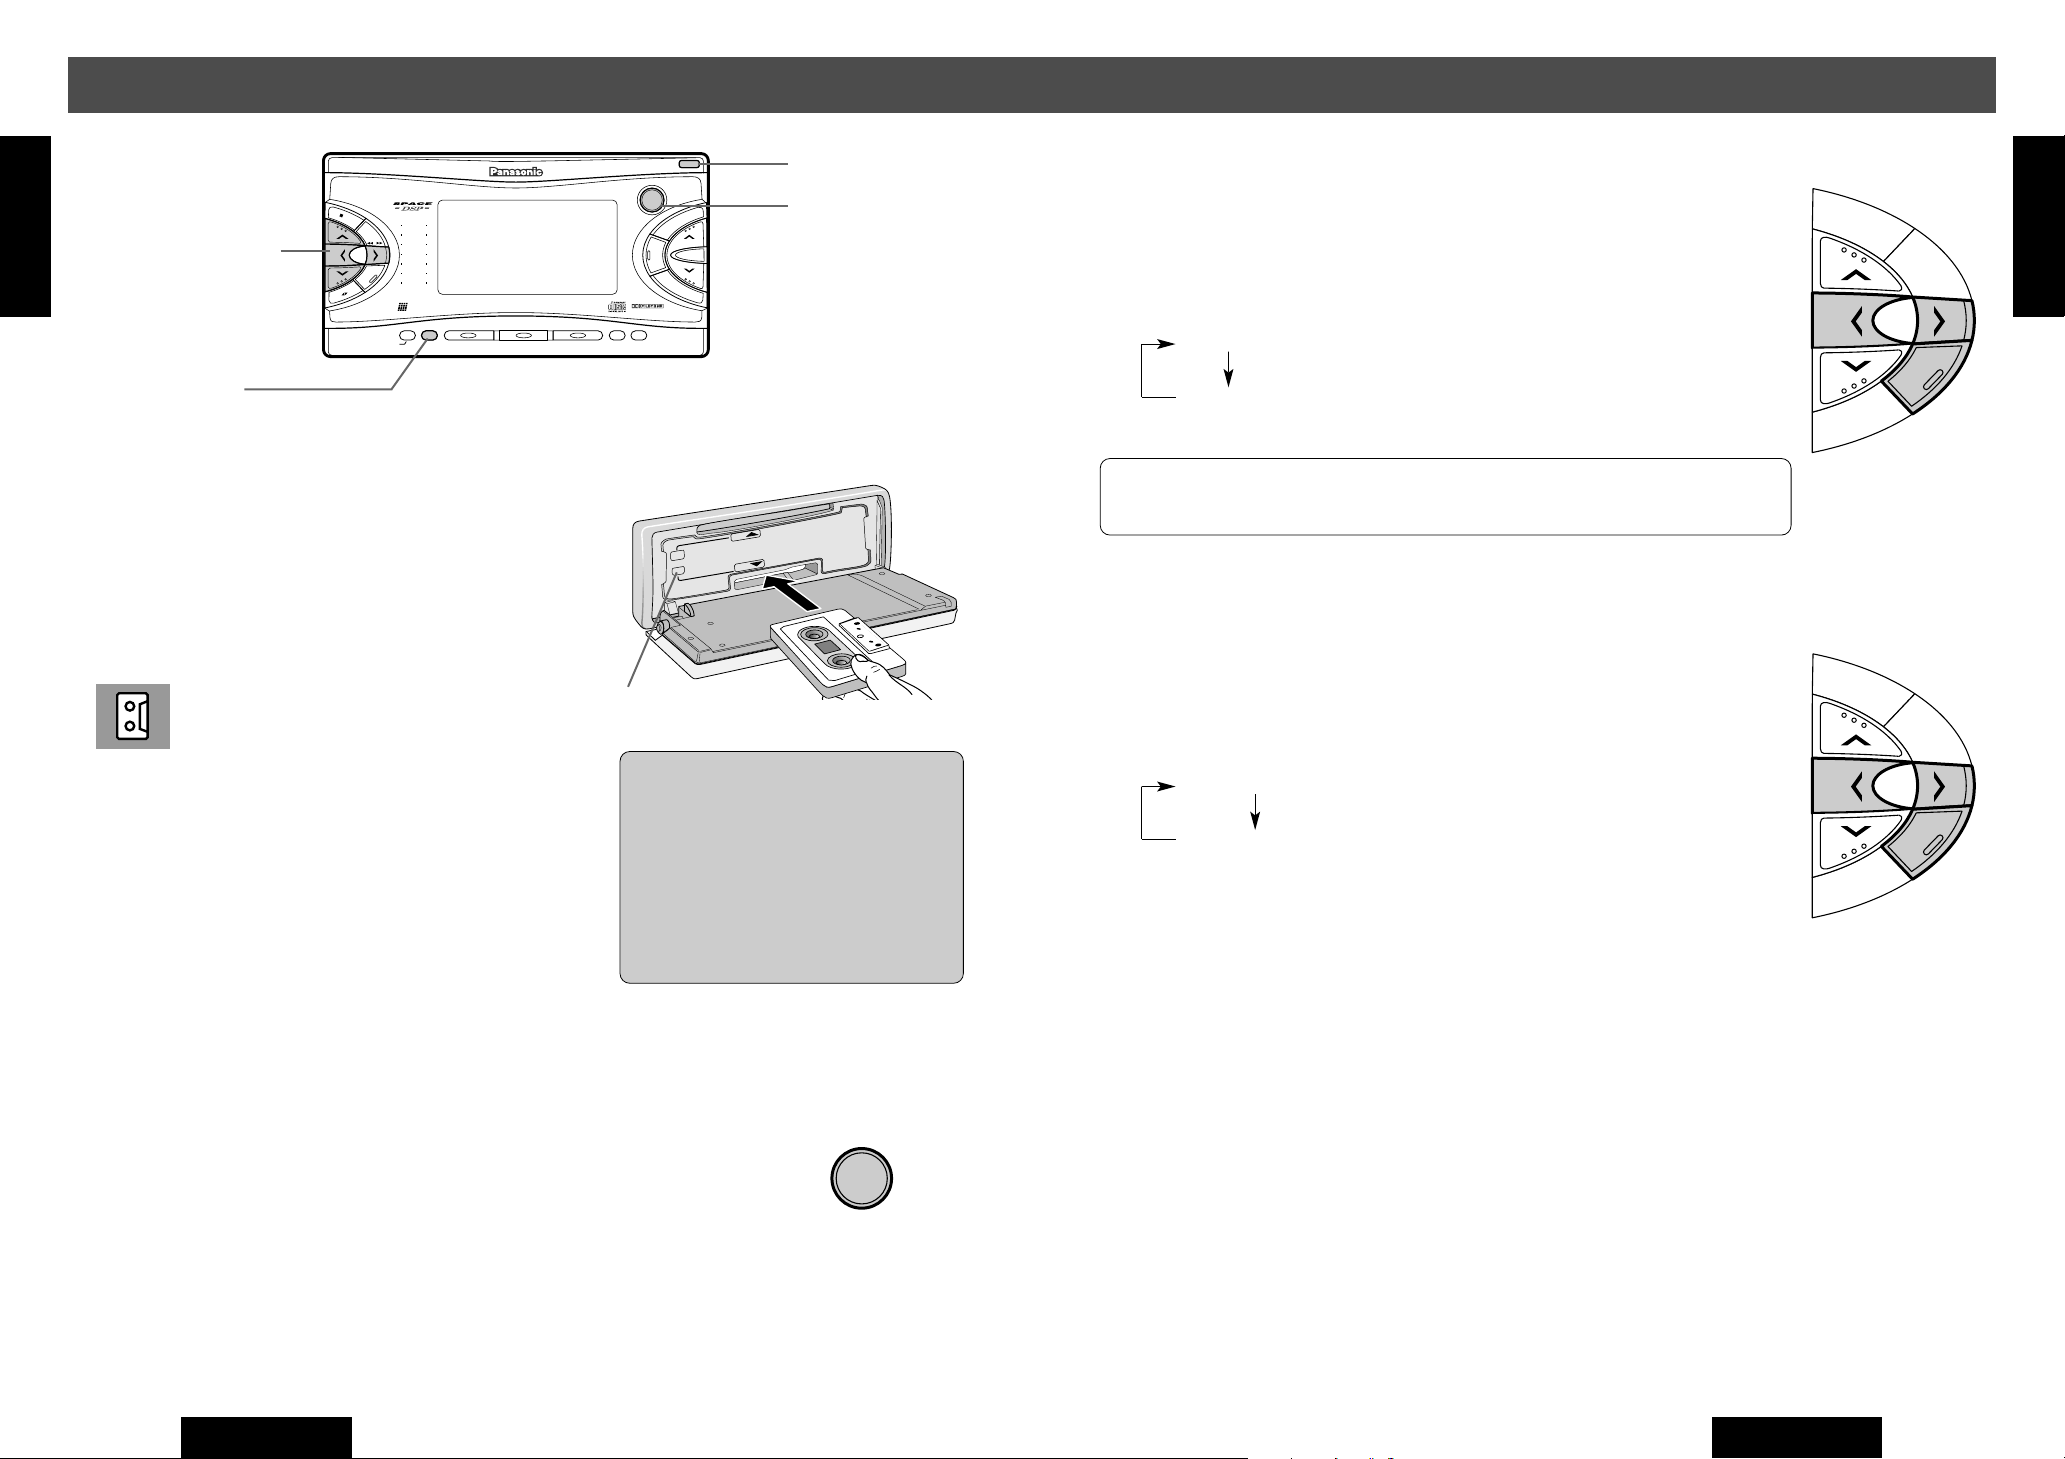
Tape Insert
q Press [OPEN] button to open the front panel.
w Insert a cassette with the exposed tape side
facing to the right.
Close the front panel manually. Play will start
automatically.
(Tape indicator)
CST u(Eject) Button
OPEN Button
SOURCE Button
MD Title Scroll (When a MD changer is connected)
Default : SCROLL ON
q Press [SEL] button to select <TITLE SCROLL>. ( B Page 32)
Press [l] button to change as follows. ([k] : opposite direction)
w
SCROLL ON : The display continuously scrolls.
SCROLL OFF : The display scrolls one round and stops.
Note: If you press and hold [DISP] button for more than 2 seconds when
the setting of MD title scroll is OFF, one round scroll is performed.
Spectrum Analyzer Speed
Default : SPEANA FAST
q Press [SEL] button to select <SPEANA SPEED>. ( B Page 32)
Press [l] button to change as follows. ([k] : opposite direction)
w
FM
DISC
25
SEL
DISC
AM
Press and hold for more than 2
seconds.
<
Press again
FM
DISC
E
N
G
L
I
S
H
e Raise the front panel to close it.
Tape Eject
q Press [OPEN] button to open the front panel.
w Press [CST
When a cassette tape is ejected while the tape mode is
activated, the power is turned off.
u] button to eject the tape.
Cassette Tape Mode
Press [SOURCE] button to change to the cassette tape mode.
20
CQ-VX2000U
Cautions:
¡Do not disturb the front panel
opening.
¡Do not apply a strong downward
force onto the face plate and do
not put anything on it while it is
open, or it might be damaged.
PWR
SOURCE
SPEANA FAST : The spectrum Analyzer changes in Fast speed
SPEANA SLOW
: The spectrum Analyzer changes in Slow speed
DISC
AM
Press and hold for more than 2
seconds.
<
Press again
CQ-VX2000U
SEL
33
Page 11
Other Settings
Human
Equalizer
CQ-VX2000
561234
SOURCE
POWER
REPSCANRANDOM
CLOCK
DISP
REVERSE
S
•
ANALYZER DISPLAY MTL B NR TPS SKIP REPEAT
S•A
SPACE
SPC
D·M
LIVE
HALL
JAZZ
STADIUM
DISCO
VOCAL
CINEMA
M
U
T
E
VOL
AUTO
·
P
SENSOR
INTEGRATED CD/CASSETTE RECEIVER WITH DSP
OPEN
FM
DISC
AM
DISC
SEL
TUNE
TRACK
SEL
E
N
G
L
I
S
H
24
klButtons
SEL Button
Function Controls
Press and hold [SEL] button for more than 2 seconds to be ready to
select other functions. Then, press [SEL] button again to select a
function.
When [SEL] button is pressed, the selected function changes as follows.
Regular Mode
SEL
Press and hold for more than 2
seconds.
<
Press again
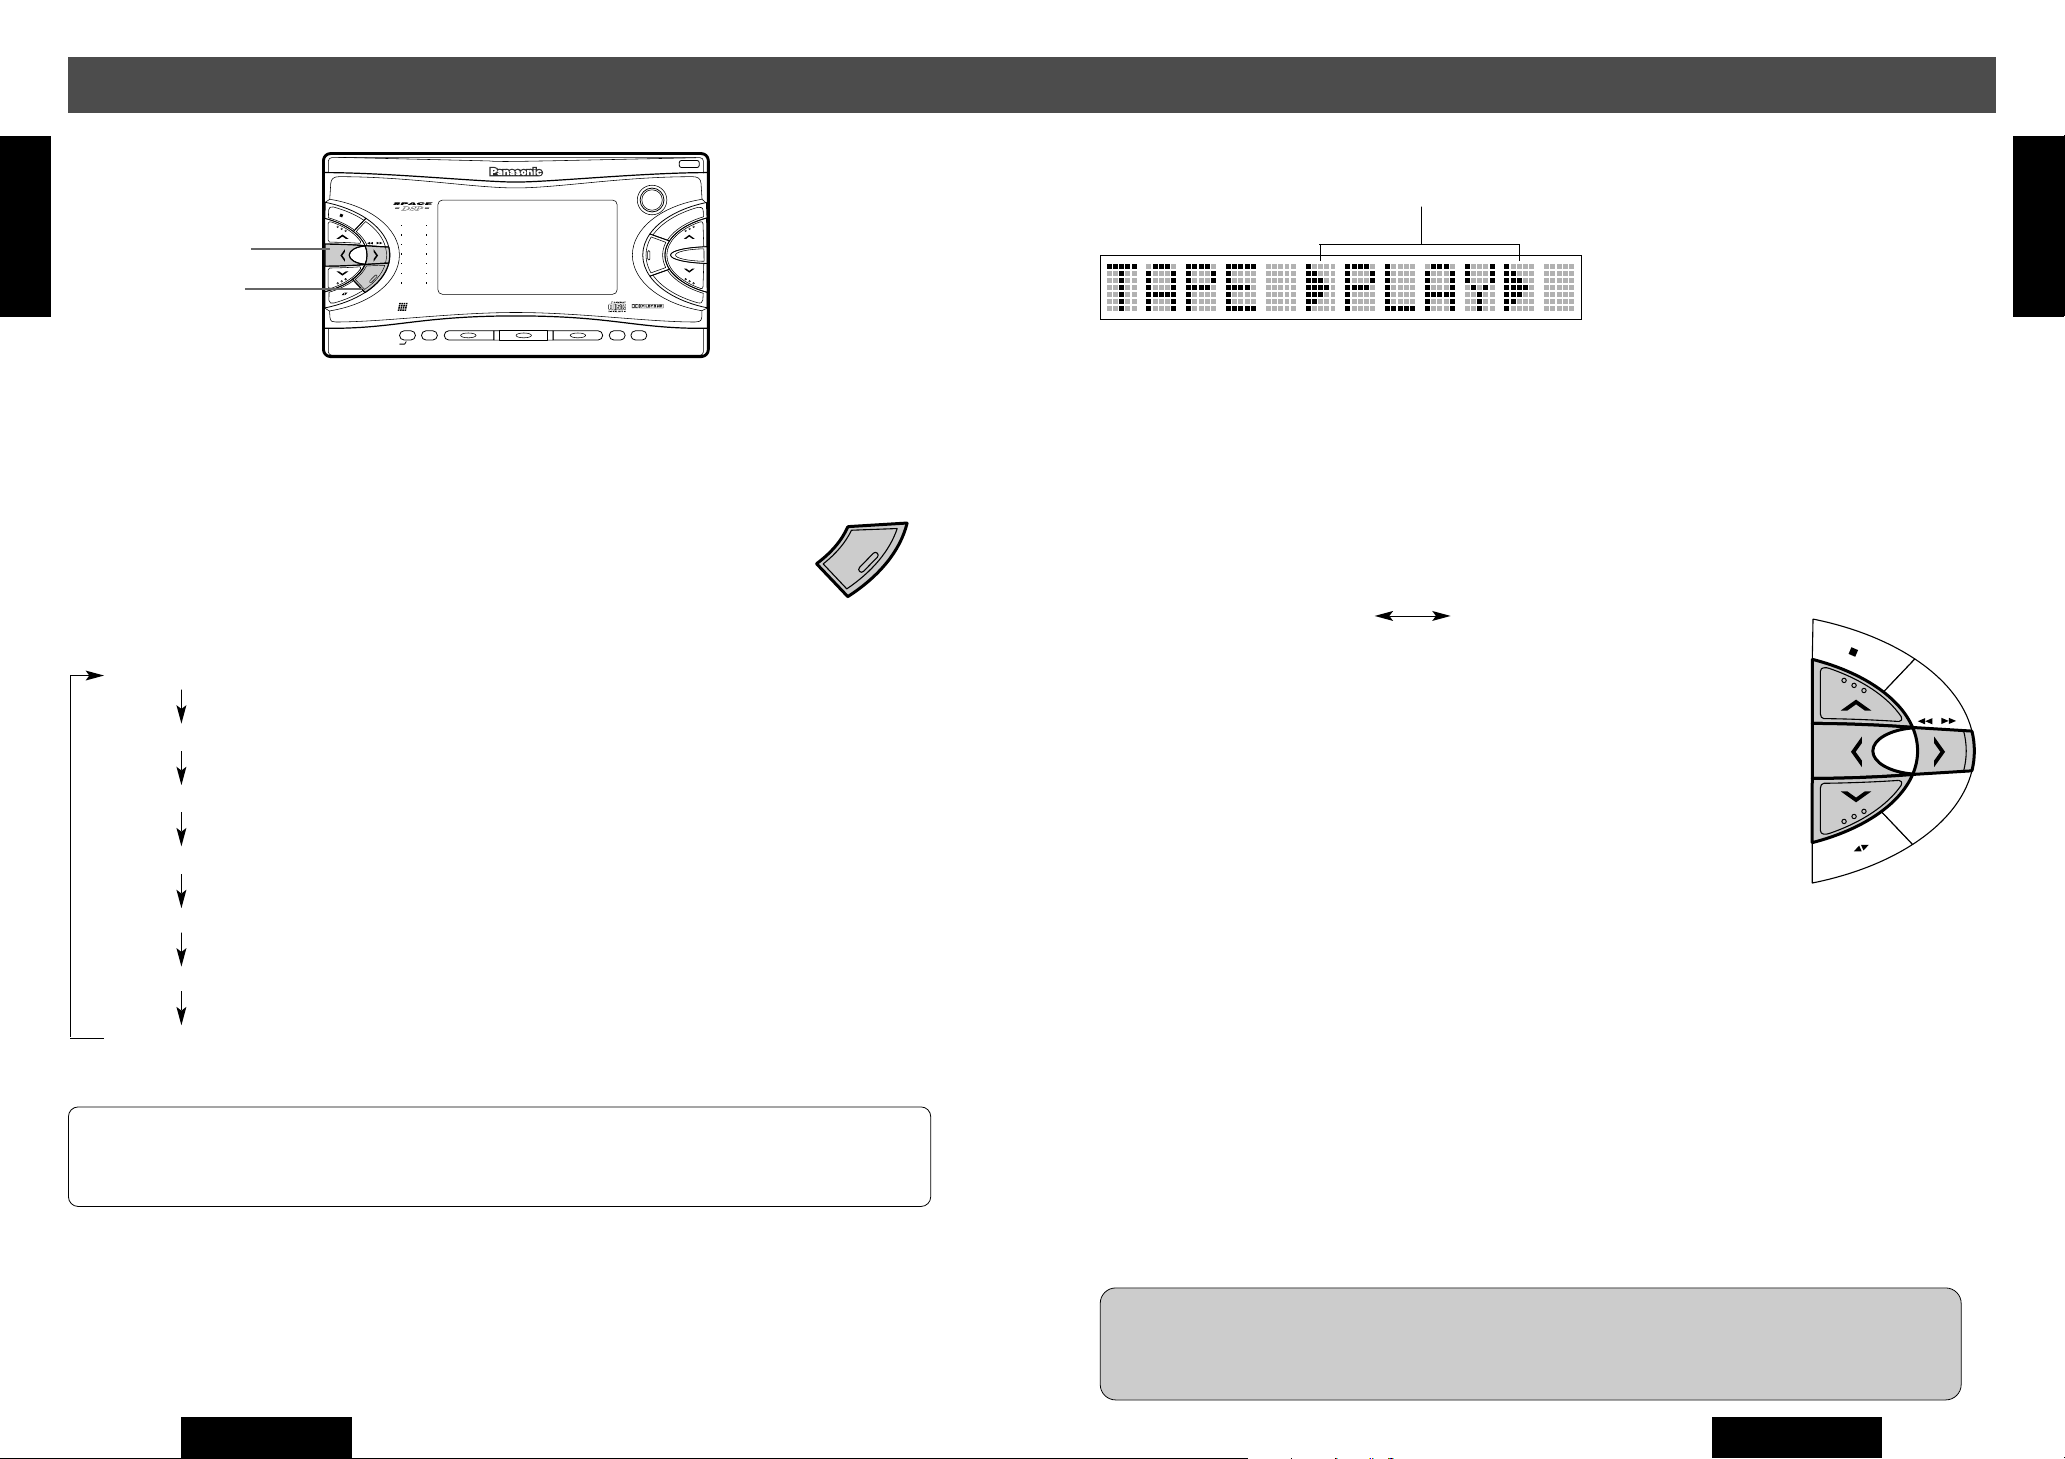
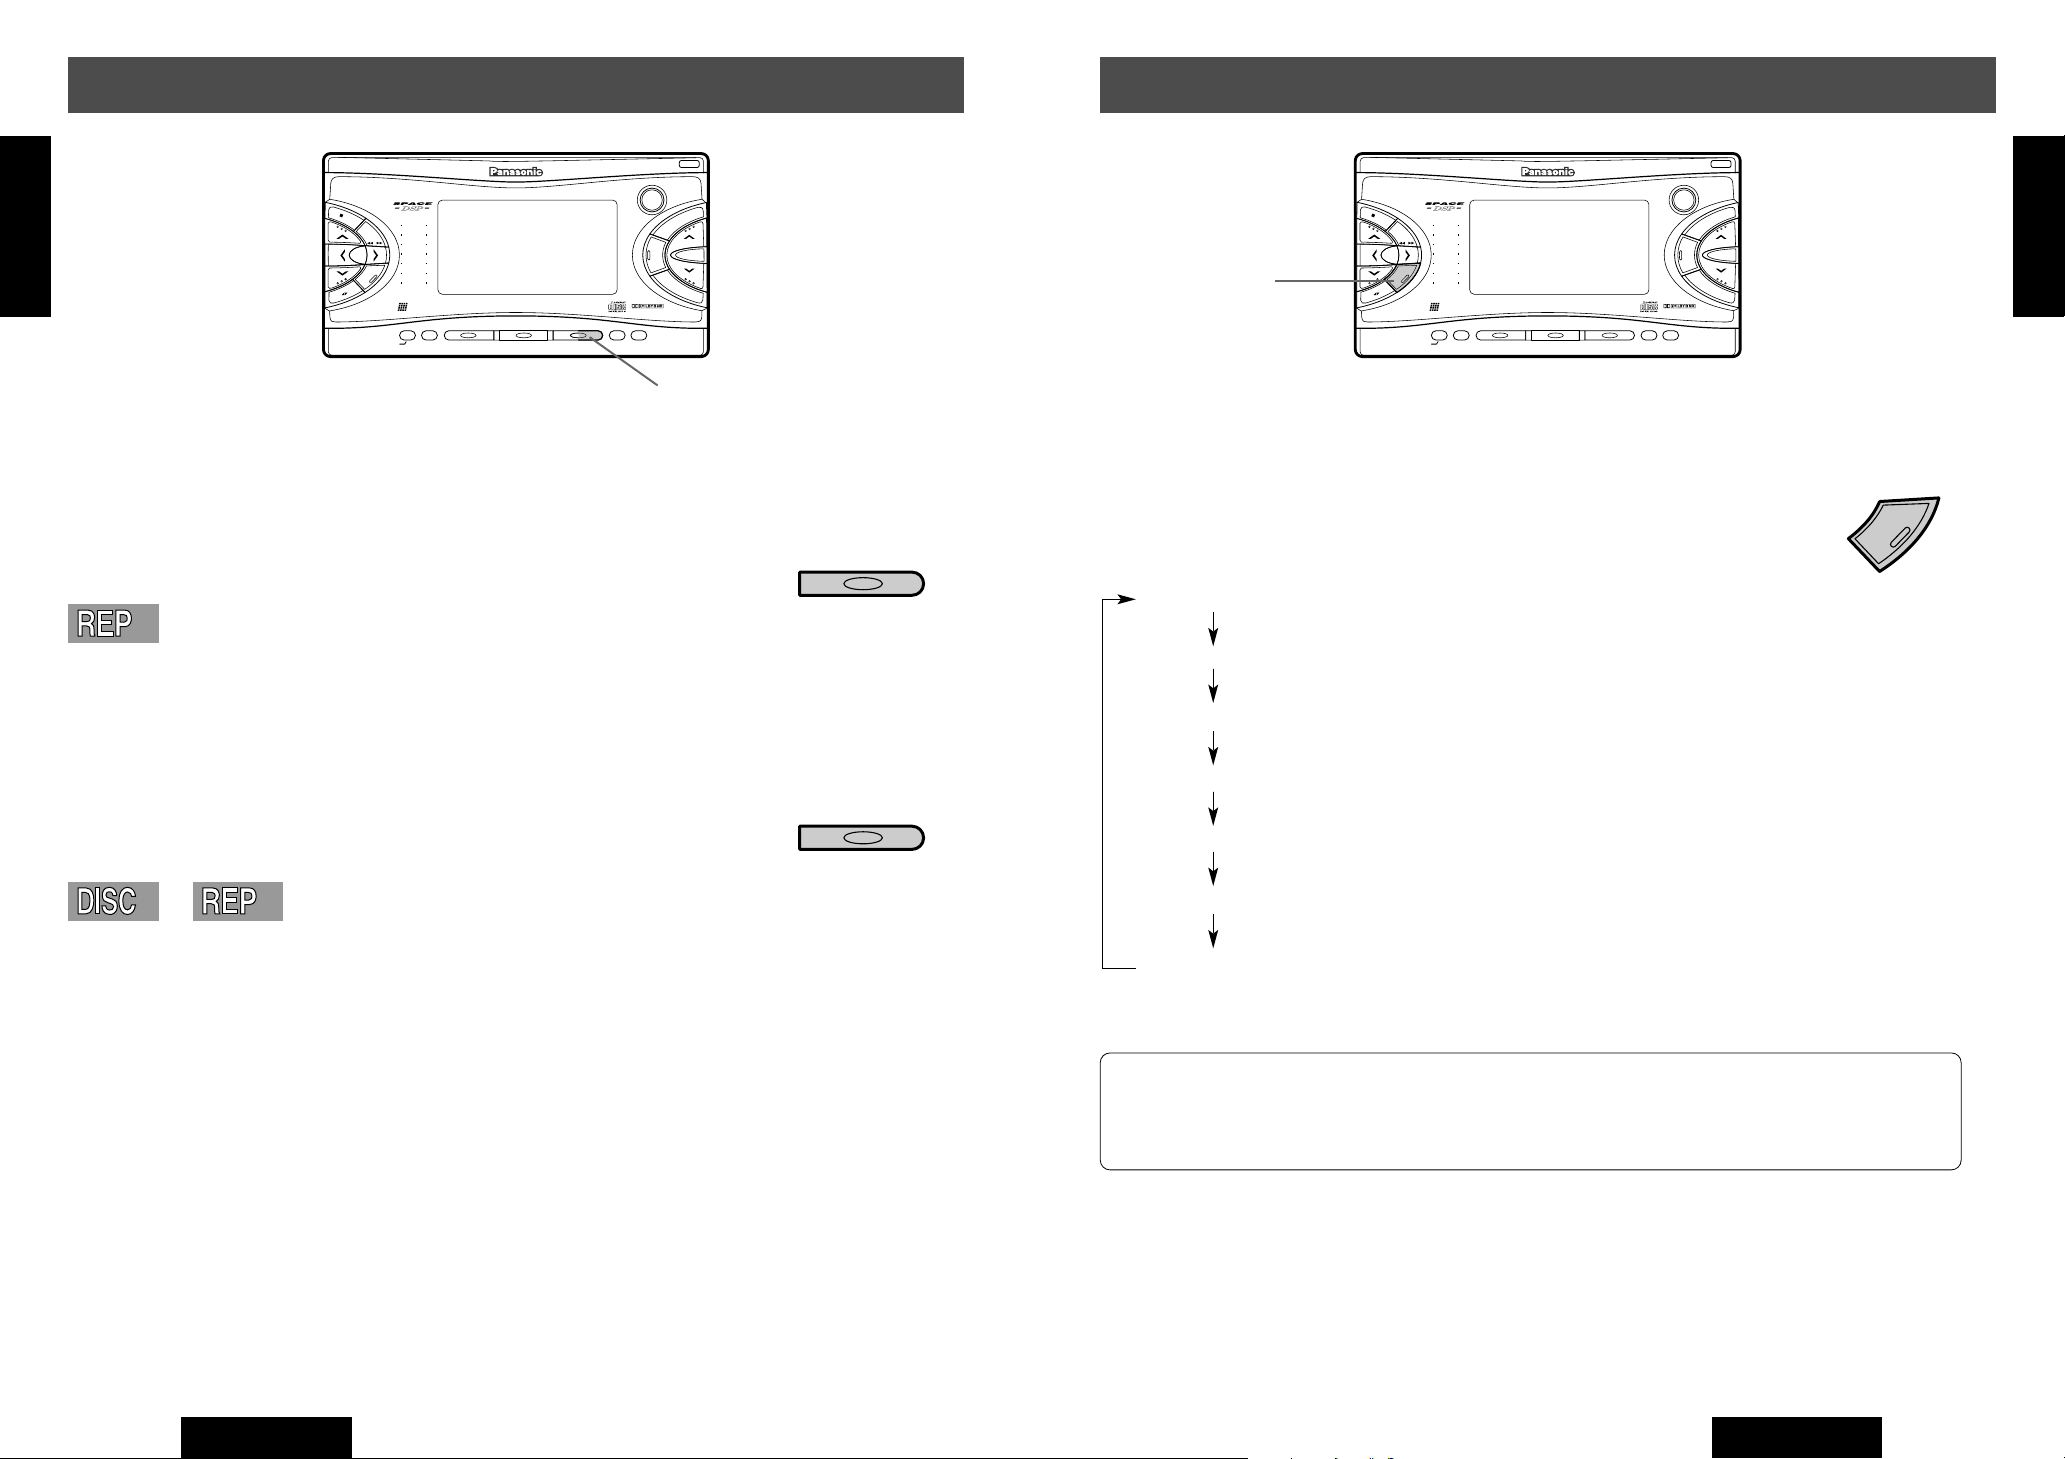
Playing side
5 PLAY 5 : Top side
4 PLAY 4 : Bottom side
To change the display, press [DISP]
button. (B Page 15)
Play Side Change
Press [i] (4 5PRG(Program)) button to reverse.
(Press [PRG/3] button to reverse when using the remote control.)
¡Playing side switches as follows when pressing [i] button.
5 PLAY 5 (Top side)
¡When a tape comes to an end, the playing side changes automatically.
<Auto Reverse System>.
4 PLAY 4 (Bottom side)
E
N
G
L
I
S
H
13
FM
DISC
32
TITLE SCROLL: You can decide whether the display of MD title should be scrolled.
( B Page 33)
SPEANA SPEED
: You can adjust the motion speed of the spectrum analyzer. ( B Page 33)
DIMMER SEL : You can select the display brightness. ( B Page 34)
MONO LOCAL : MONO / LOCAL ON / OFF ( B Page 17)
AUX IN SET : You can decide whether an external input (AUX IN) should be activated.
( B Page 34)
MUTE KEY SEL
: You can select between MUTE and ATT. ( B Page 35)
Notes:
¡If no operation is performed for 10 seconds, the display will return to the regular mode.
¡If you would like to stop your current operation, press [DISP] button.
CQ-VX2000U
Rewind and F ast Forward
Press[k] (1) button or [l] (2) button to activate rewind or fast
forward for the tape.
CPress [j](3) button to stop rewind or fast forward.
Press [PRG/3] button to stop rewind or fast forward when using the remote
control.
Caution: Keep your fingers or hands off from moving parts.
Do not put your fingers or hands into the disc slot or cassette tape slot.
CQ-VX2000U
AM
DISC
TUNE
TRACK
SEL
21
Page 12

dB
12
8
0
300Hz
OFF
Frequency
TYPE1(Variable:low)
TYPE2(Variable:high)
TYPE3(Fixed:low)
TYPE4(Fixed:high)
Boostpressure
Human
Equalizer
CQ-VX2000
561234
SOURCE
POWER
REPSCANRANDOM
CLOCK
DISP
REVERSE
S
•
ANALYZER DISPLAY MTL B NR TPS SKIP REPEAT
S•A
SPACE
SPC
D·M
LIVE
HALL
JAZZ
STADIUM
DISCO
VOCAL
CINEMA
M
U
T
E
VOL
AUTO
·
P
SENSOR
INTEGRATED CD/CASSETTE RECEIVER WITH DSP
OPEN
FM
DISC
AM
DISC
SEL
TUNE
TRACK
5612 4
Cassette Tape Player Basics
(continued)
E
N
G
L
I
S
H
jiklButtons
14
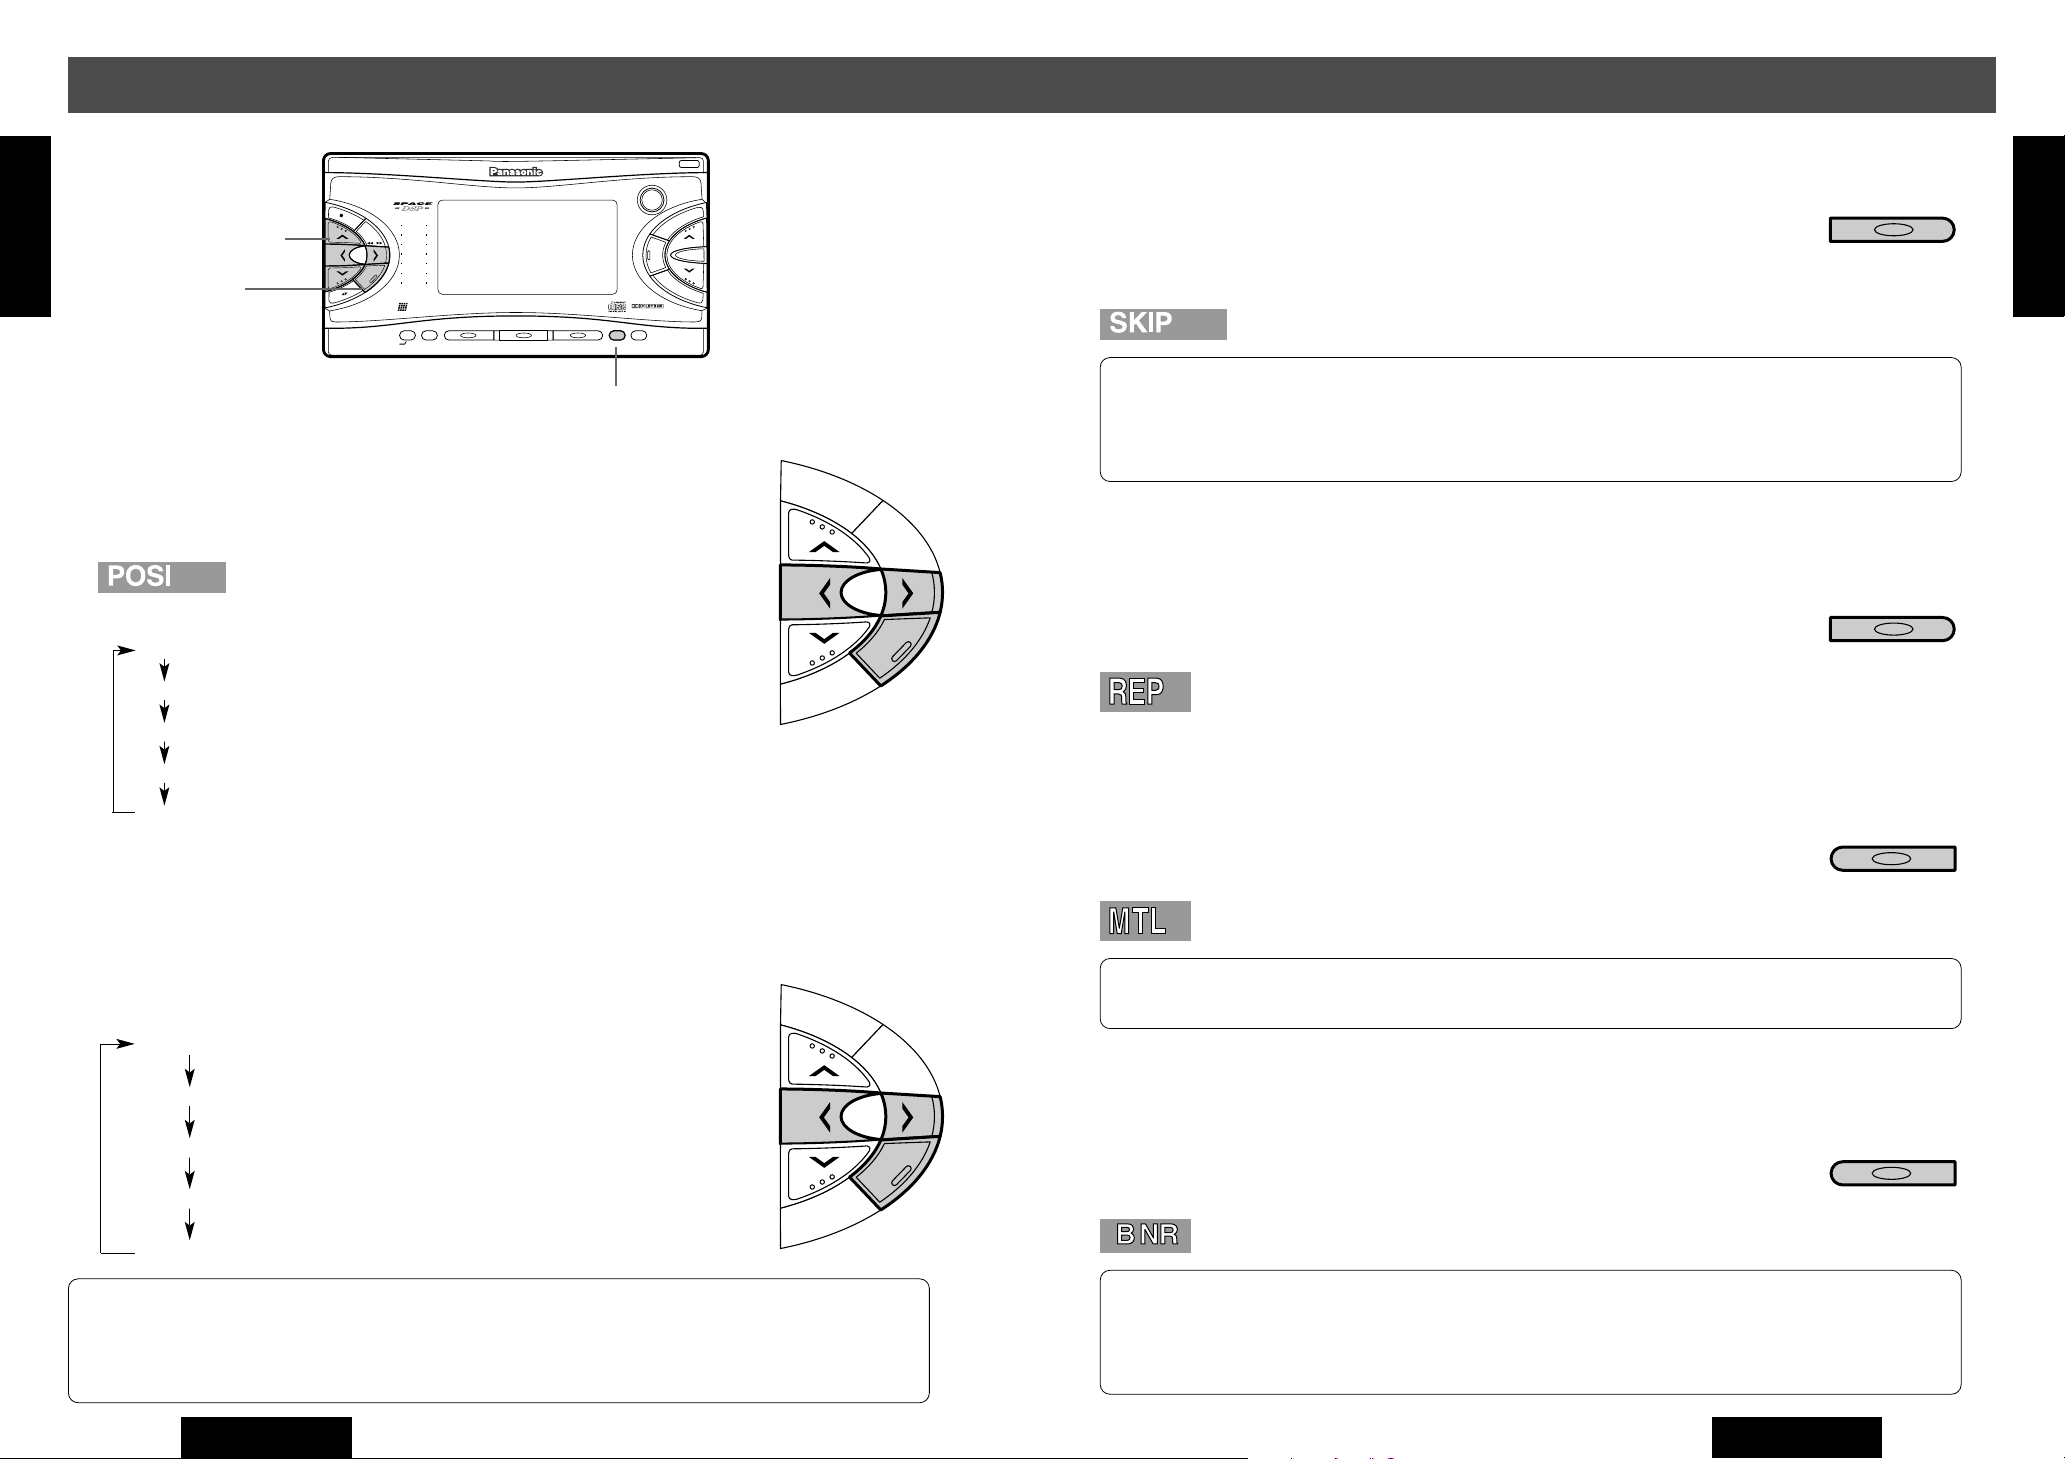
TPS (Tape Program Sear ch) Operation
TPS (Tape Program Search) is function that detects an unrecorded part of a
cassette tape. This function allows the unit to play music from its beginning.
q Press [TPS] button to activate the TPS mode. (Press [TPS]
again to cancel.)
w Press [k] or [l] button to select a program.
[k](TRACK 1) : Activates the tape rewind and goes back to the begin-
ning of the current program. The TPS finds the beginning of following program correspondent to how many
times you press this button. (Up to 9 programs)
[l](TRACK 2) : Activates the tape fast forward and goes to the begin-
ning of the next program. The TPS finds the beginning
of a following program correspondent to how many
times you press this button. (Up to 8 programs)
CTo cancel rewind or fast forward, press [j](3) button.
(Press [PRG/3] button to cancel when using the remote control.)
Bass Enhancement (Super Dynamic Bass Boost/SDBB)
Default : OFF
Enhanced bass comes out from the 4 speakers connected to the built-in
amplifier, so that you can enjoy heavy bass sound.
q Press [SEL] button to select <SDBB SELECT>. ( B Page 27)
w
REPEAT ButtonSKIP ButtonTPS ButtonB NR ButtonMTL Button
Press [l] button to change as follows. ([k] : opposite direction)
FM
DISC
N
G
L
I
S
H
23
OFF : Normal output
E
TYPE 1: Variable, low
TYPE 2: Variable, high
AM
DISC
SEL
TYPE 3: Fixed, low
4
TPS
FM
DISC
TUNE
TRACK
SEL
DISC
AM
TYPE 4: Fixed, high
¡Variable :
Bass enhancement along with the volume
¡Fixed : Bass enhancement with fixed range
Sound Space Reproduction (Space)
Default : OFF
This function creates following presence in your car
Note: The TPS mode may not work correctly in the following cases. This, however, does not
mean that the unit is defective.
22
¡There is an interval less than 4 seconds.
¡There is particularly low-level passage during the program.
CQ-VX2000U
Press [SPACE] button to change space as follows.
SPACE OFF LIVE HOUSE CONCERT HALL
CINEMA JAZZ CLUB
VOCAL DISCO STADIUM
CQ-VX2000U
SPC
SPACE
31
Page 13
Sound Settings and Sound Space
Human
Equalizer
CQ-VX2000
561234
SOURCE
POWER
REPSCANRANDOM
CLOCK
DISP
REVERSE
S
•
ANALYZER DISPLAY MTL B NR TPS SKIP REPEAT
S•A
SPACE
SPC
D·M
LIVE
HALL
JAZZ
STADIUM
DISCO
VOCAL
CINEMA
M
U
T
E
VOL
AUTO
·
P
SENSOR
INTEGRATED CD/CASSETTE RECEIVER WITH DSP
OPEN
FM
DISC
AM
DISC
SEL
TUNE
TRACK
SPC
SEL
(continued)
E
N
G
L
I
S
jiklButtons
H
22
SEL Button
SPACE Button
Sound Image (Listening Position)
Default : POSI OFF
q Press [SEL] button to select <POSITION SEL>. ( B Page 27)
w
Press [l] button to change as follows. ([k] : opposite direction)
OFF (All seats)
RIGHT(Front right)
LEFT (Front left)
FRONT
REAR
Rear Speakers f or Sub-Woofer
(Super base Control Sub-Woofer/SBC-SW)
Blank Skip
Blank skip is a function that activates fast forward at an unrecorded part,
detects the beginning of the next music and starts playing. These operations
are performed automatically.
Press [SKIP] button to skip an unrecorded portion.
5
SKIP
N
G
L
I
S
H
15
Notes:
¡When repeat is on, the blank skip does not work because the repeat has priority over the
blank skip.
¡The blank skip does not work when an unrecorded portion of a tape is less than 15 seconds.
E
FM
DISC
Repeat Play
Repeat play is a function that activates rewind after finishing the current program and plays it repeatedly.
AM
DISC
SEL
Press [REPEAT] button to repeat the current program. (Press
[REPEAT] button again to cancel.)
6
REPEAT
Metal Tape Mode
Metal tape mode allows a metal tape or a chromium dioxide tape to be played
with a high quality sound.
Press [MTL] button to repeat the current program. (Press [MTL]
button again to cancel.)
1
MTL
Default : OFF
q Press [SEL] button to select <SUPER BASS>. ( B Page 27)
Press [l] button to change as follows. ([k] : opposite direction)
w
SBC-SW OFF : Stereo output
SBC-SW FLAT : Does not cut the treble (Monaural output)
SBC-SW 100Hz : Cut the sound range of 100 Hz or more (Monaural output)
SBC-SW 150Hz : Cut the sound range of 150 Hz or more (Monaural output)
SBC-SW 200Hz : Cut the sound range of 200 Hz or more (Monaural output)
Notes :
¡
¡Set SBC-SW in the main unit to FLAT when using the cutoff frequency adjustment function
Adjust the Sub-Woofer output level. It is also interlocked with the preout (rear speaker output).
built in an optional external amplifier.
30
CQ-VX2000U
Note: Playing non-metal tapes in MTL mode causes high frequency imbalance, which affects
FM
DISC
tone quality.
Dolby Noise Reduction
Dolby noise reduction allows a tape that is recorded with Dolby B NR activated to be played with reduced hiss noise in the treble.
AM
DISC
SEL
Press [B NR] button to repeat the current program. (Press [B NR]
button again to cancel.)
Notes:
¡Dolby B NR is not available under the radio mode.
¡If a tape that is not recorded in Dolby B NR mode is played in Dolby B NR mode, tone quali-
ty will be adversely affected by an imbalance in the high frequency range.
CQ-VX2000U
2
B NR
23
Page 14
FM
DISC
AM
DISC
SEL
CD Changer Basics (option)
E
Connect an optional CD changer (CX-DP88U, etc.)
N
G
L
H
16
I
S
jiklButtons
DISP Button
SENSOR
FM
DISC
DISC
AM
LIVE
HALL
JAZZ
TUNE
STADIUM
TRACK
DISCO
VOCAL
SEL
CINEMA
Human
Equalizer
REVERSE
CLOCK
DISP
S•A
DISP
•
ANALYZER DISPLAY MTL B NR TPS SKIP REPEAT
S
CQ-VX2000
INTEGRATED CD/CASSETTE RECEIVER WITH DSP
RANDOM
Button
CD Changer Mode
Press [SOURCE] button to change to CD changer mode.
Notes:
¡“NO DISC” appears on the display if there is no disc in the magazine.
¡When a magazine is loaded into a changer, the power is turned on automatically. (Then,
sound source is changed to CHANGER.)
Disc Selection
Press [j] or [i] button.
[j](DISC j) : Next disc
[
i
](DISC i) : Previous disc
POWER
SOURCE
SOURCE
P
·
AUTO
REPSCANRANDOM
SPC
561234
54
D·M
SPACE
SCAN Button
Registering Your Desired Tone Quality
(Graphic Equalizer=GEQ)
N
G
E
OPEN
SOURCE Button
VOL
E
T
U
M
q Press [SEL] button to select <GRAPHIC EQ>. ( B Page 27)
Default : 0 dB for each frequency Setting range : –12 to +12 by 2 dB step
FM
DISC
L
I
S
H
21
w Adjust the level for each frequency. Press [l] to change the
frequency.
80 160 320 640 1.6k 4k 10k (Hz)
SEL
A cursor moves horizontally and blinks at the selected frequency.
AM
DISC
e Press [j] or [i] button to adjust the level.
PWR
SOURCE
[j] : Upper level
[i] : Lower level
A cursor moves vertically and blinks at the adjusted level.
CRepeat the steps w and e to set the level for each frequency.
Registration of Adjusted Sound Quality
Press one of the preset buttons, [1] to [6], on the main unit for
more than 2 seconds to save the current GEQ characteristic in the
FM
DISC
pressed button.
The display of the preset memory number blinks once after completion of the
registration.
Note:
New GEQ characteristic can be saved on the preset buttons by overwriting the previous one.
3 4
Press and hold for more
than 2 seconds.
RANDOM
Track Selection
Press [k] or [l] button.
[k](TRACK k) : Beginning of the current track.
Previous track. (Press twice)
[l](TRACK l) : Next track
Track Sear ch
Release [k] or [l] button when your favorite part comes after
pressing and holding it for more than 0.5 seconds.
[k](TRACK k) : Fast backward
[l](TRACK l) : Fast forward
24
CQ-VX2000U
SEL
DISC
AM
TUNE
TRACK
TUNE
TRACK
Press and hold for more
than 0.5 seconds.
Calling Back the Recommended Setting
q Press [SEL] button to select <GRAPHIC EQ>. ( B Page 27)
w Press one of the preset buttons, [1] to [6], on the main unit
to recall the saved GEQ characteristic.
Balance and Fader
Default : CNT(Center) Setting range: 15 levels for each
q Press [SEL] button to select <BAL//FAD>. ( B Page 27)
w Press [j], [i], [k] or [l] button to adjust the level.
[j] : Front enhanced
[i] : Rear enhanced
[l] : Right enhanced
[k] : Left enhanced
CQ-VX2000U
RANDOM
3 4
29
Page 15
Human
Equalizer
CQ-VX2000
561234
SOURCE
POWER
REPSCANRANDOM
CLOCK
DISP
REVERSE
S
•
ANALYZER DISPLAY MTL B NR TPS SKIP REPEAT
S•A
SPACE
SPC
D·M
LIVE
HALL
JAZZ
STADIUM
DISCO
VOCAL
CINEMA
M
U
T
E
VOL
AUTO
·
P
SENSOR
INTEGRATED CD/CASSETTE RECEIVER WITH DSP
OPEN
FM
DISC
AM
DISC
SEL
TUNE
TRACK
561234
SEL
Sound Settings and Sound Space
・Recreation
・Enjoyable drive
・Calm down
・Concentration
・Safe drive
・Untie stress
・Refresh
・Listen to the music
・Rhythmical
・Awakening
Heavy
Light
Sharp
Soft
(continued)
E
N
G
L
I
S
jiklButtons
H
20
SEL Button
Preset 1 - 6 Buttons
Tone Quality (Human Equalizer=HEQ)
49 patterns are already prepared, so that you can make complicated adjustment easily.
Default : FLAT(0)
Setting range : 1 - 3 for each patterns (49 patterns)
Disc Number
Track Play Time
Track Number
Press [DISP] button to change the display.
( B Page 15)
(Example) Regular Display
Track Random
All the available tracks on all discs in the magazine are played in a random
sequence.
Press [RANDOM] button. (Press [RANDOM] button again to cancel.)
Disc Random
All the available tracks on current disc are played in a random sequence.
Press and hold [RANDOM] button for more than 2 seconds.
(Press and hold [RANDOM] button again to cancel.)
E
N
G
L
I
S
H
17
RANDOM
3 4
RANDOM
3 4
Press and hold for more
than 2 seconds.
q Press [SEL] button to select <HUMAN EQ>. ( B Page 27)
w Press [j], [i], [k] or [l] button to adjust the level.
j
] : Heavy bass
[
[
[l] : Sharp treble
[k] : Soft treble
A cursor moves in the HEQ display and blinks at the adjusted point.
28
i
] : Light bass
CQ-VX2000U
Track Scan
The first 10 seconds of each track on the discs plays in sequence.
Press [SCAN] button. (Press [SCAN] button again to cancel.)
5 6
¡With the scanning of all tracks over, the original program starts playing from
the beginning.
¡Release [SCAN] button when you find your favorite track.
FM
DISC
Disc Scan
The first track of all the discs in the magazine is played for 10 seconds each.
Press and hold [SCAN] button for more than 2 seconds.
5 6
(Press and hold [SCAN] button again to cancel.)
Press and hold for more
than 2 seconds.
AM
DISC
SEL
¡With the scanning of all tracks over, the original disc starts playing from the
beginning.
¡Release [SCAN] button when you find your favorite disc.
CQ-VX2000U
REPSCAN
REPSCAN
25
Page 16
Human
Equalizer
CQ-VX2000
561234
SOURCE
POWER
REPSCANRANDOM
CLOCK
DISP
REVERSE
S
•
ANALYZER DISPLAY MTL B NR TPS SKIP REPEAT
S•A
SPACE
SPC
D·M
LIVE
HALL
JAZZ
STADIUM
DISCO
VOCAL
CINEMA
M
U
T
E
VOL
AUTO
·
P
SENSOR
INTEGRATED CD/CASSETTE RECEIVER WITH DSP
OPEN
FM
DISC
AM
DISC
SEL
TUNE
TRACK
SEL
Human
Equalizer
CQ-VX2000
561234
SOURCE
POWER
REPSCANRANDOM
CLOCK
DISP
REVERSE
S
•
ANALYZER DISPLAY MTL B NR TPS SKIP REPEAT
S•A
SPACE
SPC
D·M
LIVE
HALL
JAZZ
STADIUM
DISCO
VOCAL
CINEMA
M
U
T
E
VOL
AUTO
·
P
SENSOR
INTEGRATED CD/CASSETTE RECEIVER WITH DSP
OPEN
FM
DISC
AM
DISC
SEL
TUNE
TRACK
6
CD Changer Basics (option)
(continued)
Sound Settings and Sound Space
E
N
G
L
I
S
H
18
Track Repeat
Repeat the current selection.
Press [REP] button. (Press [REP] button again to cancel.)
Disc Repeat
Repeat the current disc selection.
Press and hold [REP] button for more than 2 seconds.
(Press and hold [REP] button again to cancel.)
REP Button
REPSCAN
5 6
REPSCAN
5 6
Press and hold for more
than 2 seconds.
SEL Button
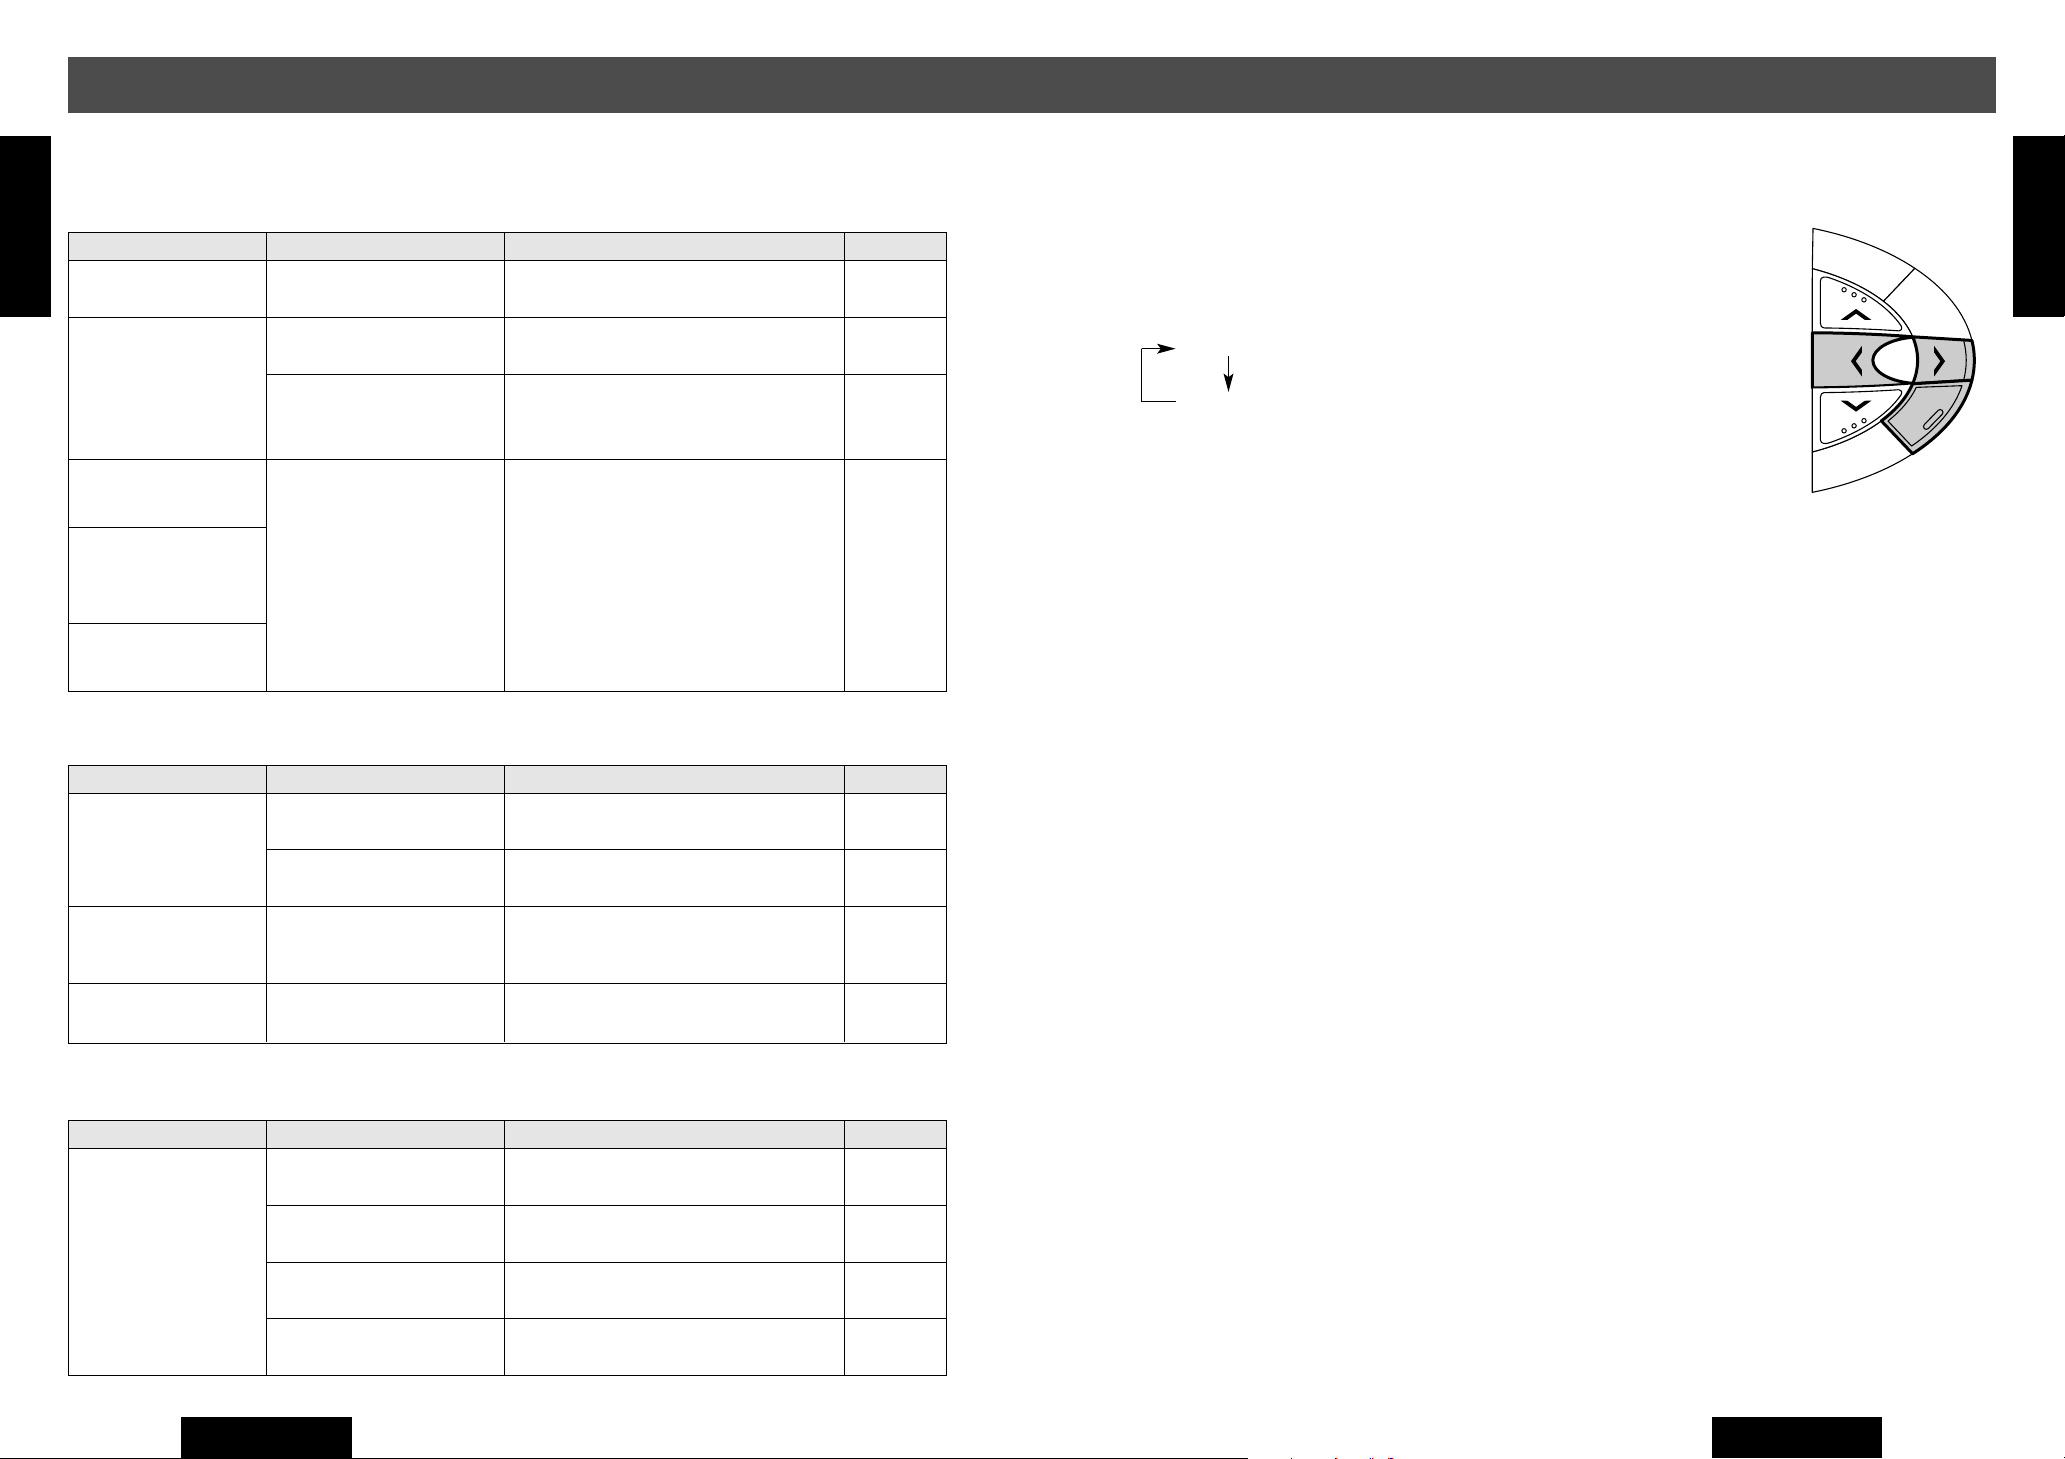
Sound Control
Press [SEL] button to change the mode as follows.
Regular Mode
HUMAN EQ : You can adjust sound quality to suit the music or your feeling. (Human
Equalizer) ( B Page 28)
GRAPHIC EQ : You can adjust sound quality by adjusting the level for each frequency.
(Graphic Equalizer) ( B Page 29)
BAL//FAD : You can adjust the sound balance among the front, rear, right and left
speakers. ( B Page 29)
POSITION SEL: You can adust the sound image in accordance with a listener position.
( B Page 30)
SUPER BASS : You can utilize the rear speaker connected to the built-in amplifier as sub-
woofer that outputs only bass. ( B Page 30)
SDBB SELECT: You can enjoy enhanced bass. ( B Page 31)
E
N
G
L
I
S
H
19
SEL
26
CQ-VX2000U
Notes:
¡If you would like to stop your current operation, press [DISP] button.
¡If no operation is performed for 10 seconds, the display will return to the regular mode.
CQ-VX2000U
27
Page 17
Troubleshooting
E
E
N
N
G
G
L
L
Cassette Tape
I
I
S
S
H
H
TPS unavailable
1
42
(continued)
An interval between programs is
too short.
Confirm that TPS works by using a different
cassette tape.
Mute/ATT(Attenuator)
Default : MUTE KEY
StepCauseTrouble
Page
–
q Press [SEL] button to select <MUTE KEY SEL>. ( B Page 32)
Press [l] button to change as follows. ([k] : opposite direction)
w
FM
DISC
E
N
G
L
I
S
H
27
Poor quality tape
Poor sound quality
The head is dirty.
A cassette tape is not
ejected.
Soon after loading a tape,
playing side switches
repeatedly.
Playing does not stop.
¡
¡
Sound Setting
Left and right balance, or front and
No sound from left, right,
front, or rear speaker
Left and right sounds are
reversed in stereo listening.
Only bass or monaural
sound from rear speaker
rear balance is off on one side.
Cables are not correctly con-
nected.
The right speaker wire is connected
to the left speaker and the left
speaker wire to the right speaker.
SBC-SW is set to ON. Set SBC-SW to OFF.
Use a different cassette tape.
Clean the head.(Ask a service representative
for advice.)
Press the eject button.
Check whether the mechanism works well by
The cassette tape is defective.
Mechanism trouble
using a different cassette tape.
If the mechanism does not work well, press
the reset switch.
If the mechanism does not work well yet, con-
tact a dealer or a servicenter.
Adjust BAL/FAD as appropriate.
Connect the cables correctly.
Connect the speaker wires to the correct ones.
–
–
20
MUTE KEY : No sound
ATT KEY : Decrease to 1/10
SEL
DISC
AM
Press and hold for more than 2
seconds.
<
Press again
52
StepCauseTrouble
Page
29
46-47
46-47
30
Remote Control
Trouble
Buttons are invalid for
operation.
50
Battery polarities (+) (–) are
reversed.
Wrong batteries Check the batteries.
Batteries have run down.
Remote control is in the wrong
direction.
CQ-VX2000U
StepCause
Insert the batteries correctly.
Page
9
9
Replace the batteries.
Direct the remote controller at SENSOR on the
panel.
9
–
CQ-VX2000U
35
Page 18
Useful Functions
E
N
G
L
I
S
H
jiklButtons
28
Spectrum Analyzer Display
SENSOR
FM
DISC
DISC
AM
LIVE
HALL
JAZZ
TUNE
STADIUM
TRACK
DISCO
VOCAL
SEL
CINEMA
Human
Equalizer
REVERSE
CLOCK
DISP
S•A
S•A
•
ANALYZER DISPLAY MTL B NR TPS SKIP REPEAT
S
S•A / REVERSE Button
CQ-VX2000
INTEGRATED CD/CASSETTE RECEIVER WITH DSP
561234
E
41
E
N
N
G
G
L
L
I
I
S
S
H
H
1
OPEN
POWER
SOURCE
VOL
P
·
E
T
U
M
AUTO
REPSCANRANDOM
SPC
D·M
SPACE
Radio
Much noise in FM stereo
and monaural broadcasts
Preset station is reset.
Battery cable is not correctly
connected.
Station is too far, or signals
are too weak.
StepCauseTrouble
Select other stations of higher signal level.
Connect the battery cable to the terminal that
is always live.
Page
16
46
CD
StepCauseTrouble
Page
Default : WAVE
Press [S•A] button to change to the spectrum analyzer display in
•
S
the 13 patterns .
q WAVE : This is an image that is simply but implies the opening of space fantasy.
w AURORA : This is an image that implies an aurora across the sky.
e MILKY WAY : This is an image that implies the Milky Way majestically flowing in the
space.
r TWINKLE STAR: This is an image that implies twinkling of innumerable stars.
t SUN : This is an image that implies the brilliant rays of warmth.
y
SPC SARGASSO
u BIG BANG : This is an image that implies the creation of the universe and stars.
i FLARE : This is an image that implies energy radiation from the sun to the space.
o PROMINENCE : This is an image that implies flames on the surface of the sun.
!0 METEOR : This is an image that implies a meteor stream in the infinitely expanding
!1 SPACE FEVER : This is an image that implies a slot machine rolling when the unit receives
!2 BLANK SPEANA: In this display, the spectrum analyzer is switched off.
: This is an image that implies an eternal journey of a drifting piece of broken
star.
space.
a certain frequency.
ANALYZER
REVERSE
S•A
CD is upside down.
CD is inside but no sound
CD is dirty.
CD sound skips, tone
quality is low.
CD is dirty.
Mounting angle is over 30
Sound skips due to vibra-
degrees.
tion.
Instable mounting
CD is not ejected.
¡
¡
CD is defective.
Mechanical trouble
Place CD in the correction direction, the label
side up.
Clean CD, referring to the section on Care of
Discs.
Clean CD, referring to the section on Care of
Discs.
Adjust mounting angle to less than 30
degrees.
Mount the unit securely with the mounting
parts, referring to the section on Installation.
18
40
40
–
41
Open the panel and press [u] button. If failure
persists, press the reset switch. If normal oper-
18
ation is not restored yet, call the store where
you purchased the unit or the nearest servi-
52
center to ask for repairs.
36
!3 ALL DISP OFF : The whole display, including the lights, goes out if ALL DISP OFF is select-
ed. (It lights when this operation is performed, and goes out again in about
5 seconds after the operation.)
Note: The indication pattern can not be changed at letter indicating part of the spectrum analyzer indication.
CQ-VX2000U
CQ-VX2000U
49
Page 19
Troubleshooting
E
E
Common
N
N
G
G
L
L
I
I
S
S
H
H
1
40
No power
No sound
Buttons unusable
Clock unadjustable
Noise Detach the cellular phone from the main unit.
Trouble
StepCause
’
s engine switch is not on.
Car
Cables are not correctly con-
nected.
Battery cable is not correctly
connected.
Accessory cable is not correctly
connected.
Grounding wire is not correctly
connected.
Turn your car’s ignition switch to ACC or ON.
Connect cables correctly.
Connect the battery cable to the terminal that
is always live.
Connect the accessory cable to your car's
ACC source.
Connect the grounding wire to a metal part of
the car.
Call the store where you purchased the unit, or
Fuse is burnt.
your nearest servicenter (see the attached
sheet) and ask for fuse replacement.
Excessive low volume Increase the volume
Cables are not correctly con-
nected.
Connect cables correctly.
Mute is set to ON Set it to OFF.
Condensation (dew)
Spectrum analyzer is in demo
mode.
The power has not been turned
on yet.
Wait for a while before use.
Press [DISP] to cancel demo mode.
Press [POWER] button to turn on the power,
then adjust the clock.
There is a cellular phone close
to the main unit.
Page
12
46-47
46
46
46
–
12
46-47
39
–
12
12
–
Spectrum Analyzer Arrangement
Default : NORMAL/SPEANA POSI
Each spectrum analyzer indication has 8 patterns that are different in the tone of color and the
motion. (Spectrum analyzer indication q - !1)
q Press and hold [REVERSE] button for more than 2 seconds.
w Press [j], [i], [k] or [l] button to select a pattern.
Direction Change
Press [l] button to change as follows. ([k] : opposite direction)
NORMAL :
REVERSE 1 : Regular display is
REVERSE 2 : Reversed 1 display is
REVERSE 3 : Reversed 2 display is
Regular spectrum analyzer display
reversed vertically.
reversed horizontally.
reversed vertically.
Positive - Negative Switc h
Press [j] or [i] button.
S
Press and hold for more
than 2 seconds.
FM
AM
•
ANALYZER
DISC
DISC
REVERSE
E
N
G
L
I
S
H
29
S•A
SEL
48
CQ-VX2000U
SPEANA POSI
(Positive)
Notes:
SPEANA NEGA
(Negative)
¡When a setting mode is selected but no operation is made within 10 seconds, the display
will return to the normal operation mode.
¡The indication pattern can not be changed at letter indicating part of the spectrum analyzer
indication.
CQ-VX2000U
37
Page 20
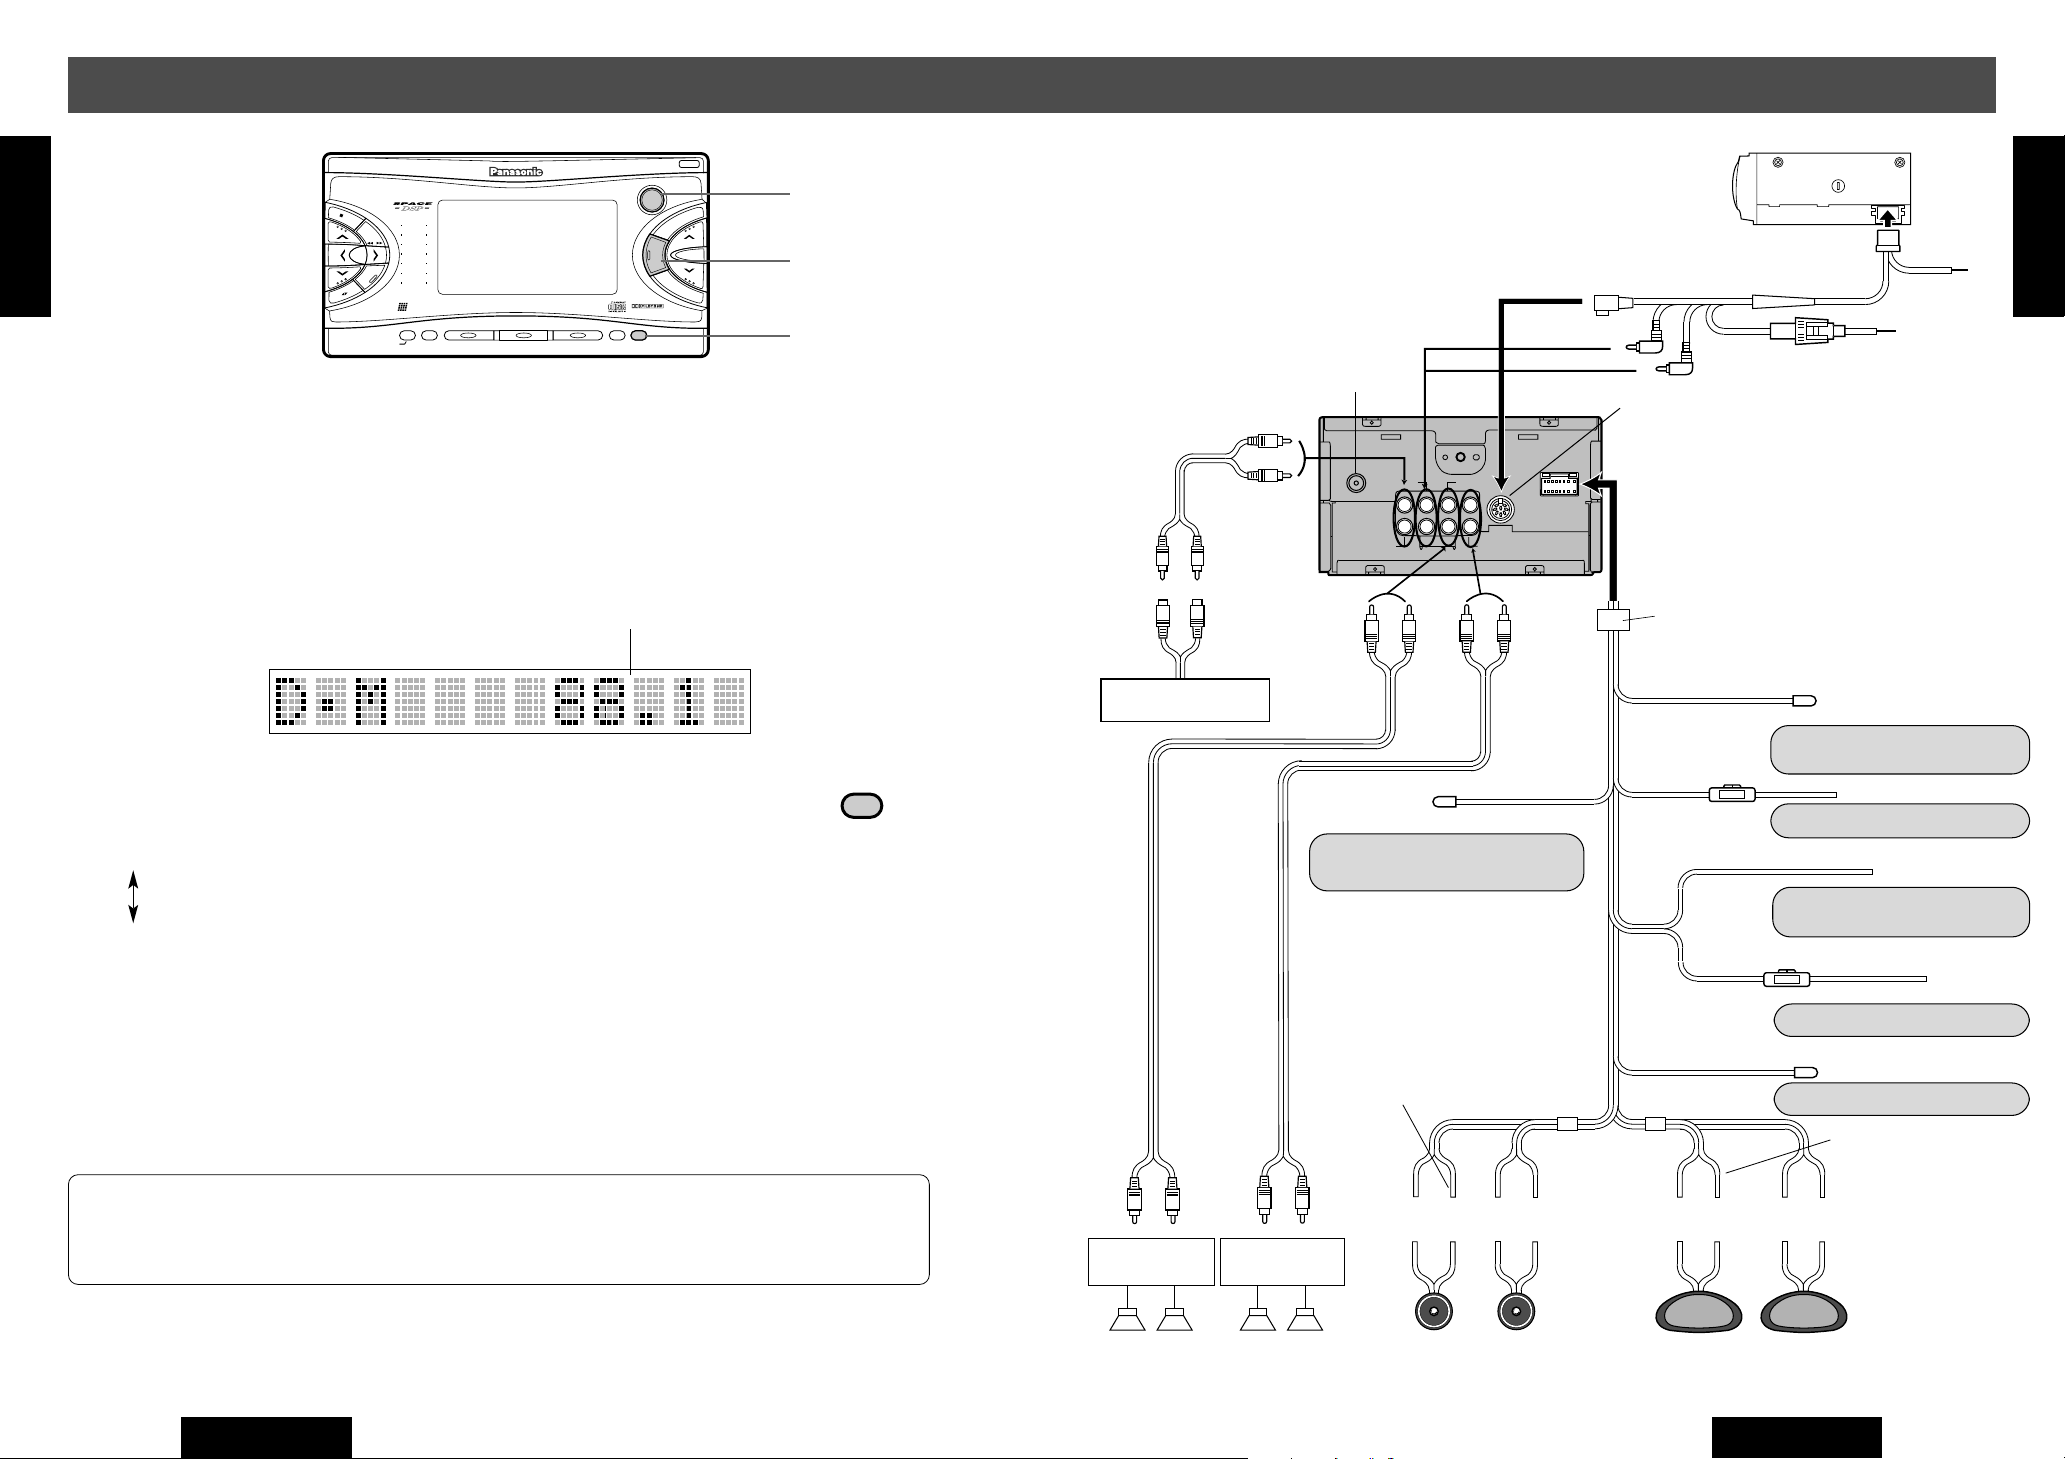
CD Changer
CX-DP88U
PRE-OUT (F)
CD/MD•CH IN
R
L
AUX-IN PRE-OUT (R)
CD Changer Connector
CQ-VX2000U (Rear)
(White) (L)
(Red) (R)
Extension Cord
(DIN/RCA/BATT/GND)
RCA Cord
(Optional)
RCA Cord
(Optional)
Power
Amplifer
Power
Amplifer
Speakers for system up grade
Fuse (3A)
(Yellow)
REAR
FRONT
to AUX
(Red)
(R)
(Red) (R)
(Red)
(R)
(White)
(L)
(Red)
(R)
(White)
(L)
(Red)
(R)
(White)
(L)
(White)
(Red)
(R)
(White)
(L)
(Red)
(R)
(White)
(L)
(White)
(L)
(White)(L)
Car TV etc.
CD•C IN
Power Connector
(Orange w/white stripe)
Illumination Lead
(AMP-CONT MAX 0.1A)
External Amplifier Control
Power Lead
(Blue w/white stripe)
(ACC 3A)
(Black)
Ground Lead
(White w/black stripe)
(Green w/black stripe)
(Gray)
(Gray w/black stripe)
(Green)
(Violet w/bladk stripe)
(Violet)
Front
Speaker
(Left)
Front
Speaker
(Right)
Rear
Speaker
(Left)
Rear
Speaker
(Right)
(+) (–)(+) (–)(+) (–)(+) (–)
Battery Lead
(BATTERY 10A)
(Yellow)
ACC Power Lead
(Red)
(ILLUMINATION)
(ANT-CONT MAX0.1A)
(Blue)
Ground lead
Battery Lead
Fuse (3A)
Fuse (10A)
Antenna
To the power line connected to
the clearance lights of the car
To ACC power, +12V DC
To a clean, bare metallic part of
the car chassis
To the car battery, continuous +12V
To an external amplifier+12V DC
To the auto antenna control power
cord of the car
Antenna Control Cord
N
Human
Equalizer
CQ-VX2000
561234
SOURCE
POWER
REPSCANRANDOM
CLOCK
DISP
REVERSE
S
•
ANALYZER DISPLAY MTL B NR TPS SKIP REPEAT
S•A
SPACE
SPC
D·M
LIVE
HALL
JAZZ
STADIUM
DISCO
VOCAL
CINEMA
M
U
T
E
VOL
AUTO
·
P
SENSOR
INTEGRATED CD/CASSETTE RECEIVER WITH DSP
OPEN
FM
DISC
AM
DISC
SEL
TUNE
TRACK
SOURCE
D·M
M
U
T
E
G
H
30
Useful Functions
E
L
I
S
(continued)
SOURCE Button
MUTE (ATT) Button
D•M Button
System Upgrade Example
Combination
¡ CD changer (CX-DP88U)
¡ A car TV
¡ 8 Speakers
39
E
E
N
N
G
G
L
L
I
I
S
S
H
H
1
Direct Memory
Even if the power is off or source of sound is not radio, a memorized channel can be received at a
touch of button.
When [D•M] button is pressed, the selected mode changes as follows.
D•M : The direct memoried station is received.
Regular mode : Returns to previous source of sound. (or turned off)
D•M Registration
q Select the station you like ( B Page 16)
w Press [D•M] for more than 2 seconds to register the station into memory.
Frequency
D·M
Notes:
¡Default of D•M is FM 88.1 MHz.
¡Setting of sound space or others can not be performed during D•M mode.
38
CQ-VX2000U
CQ-VX2000U
47
Page 21
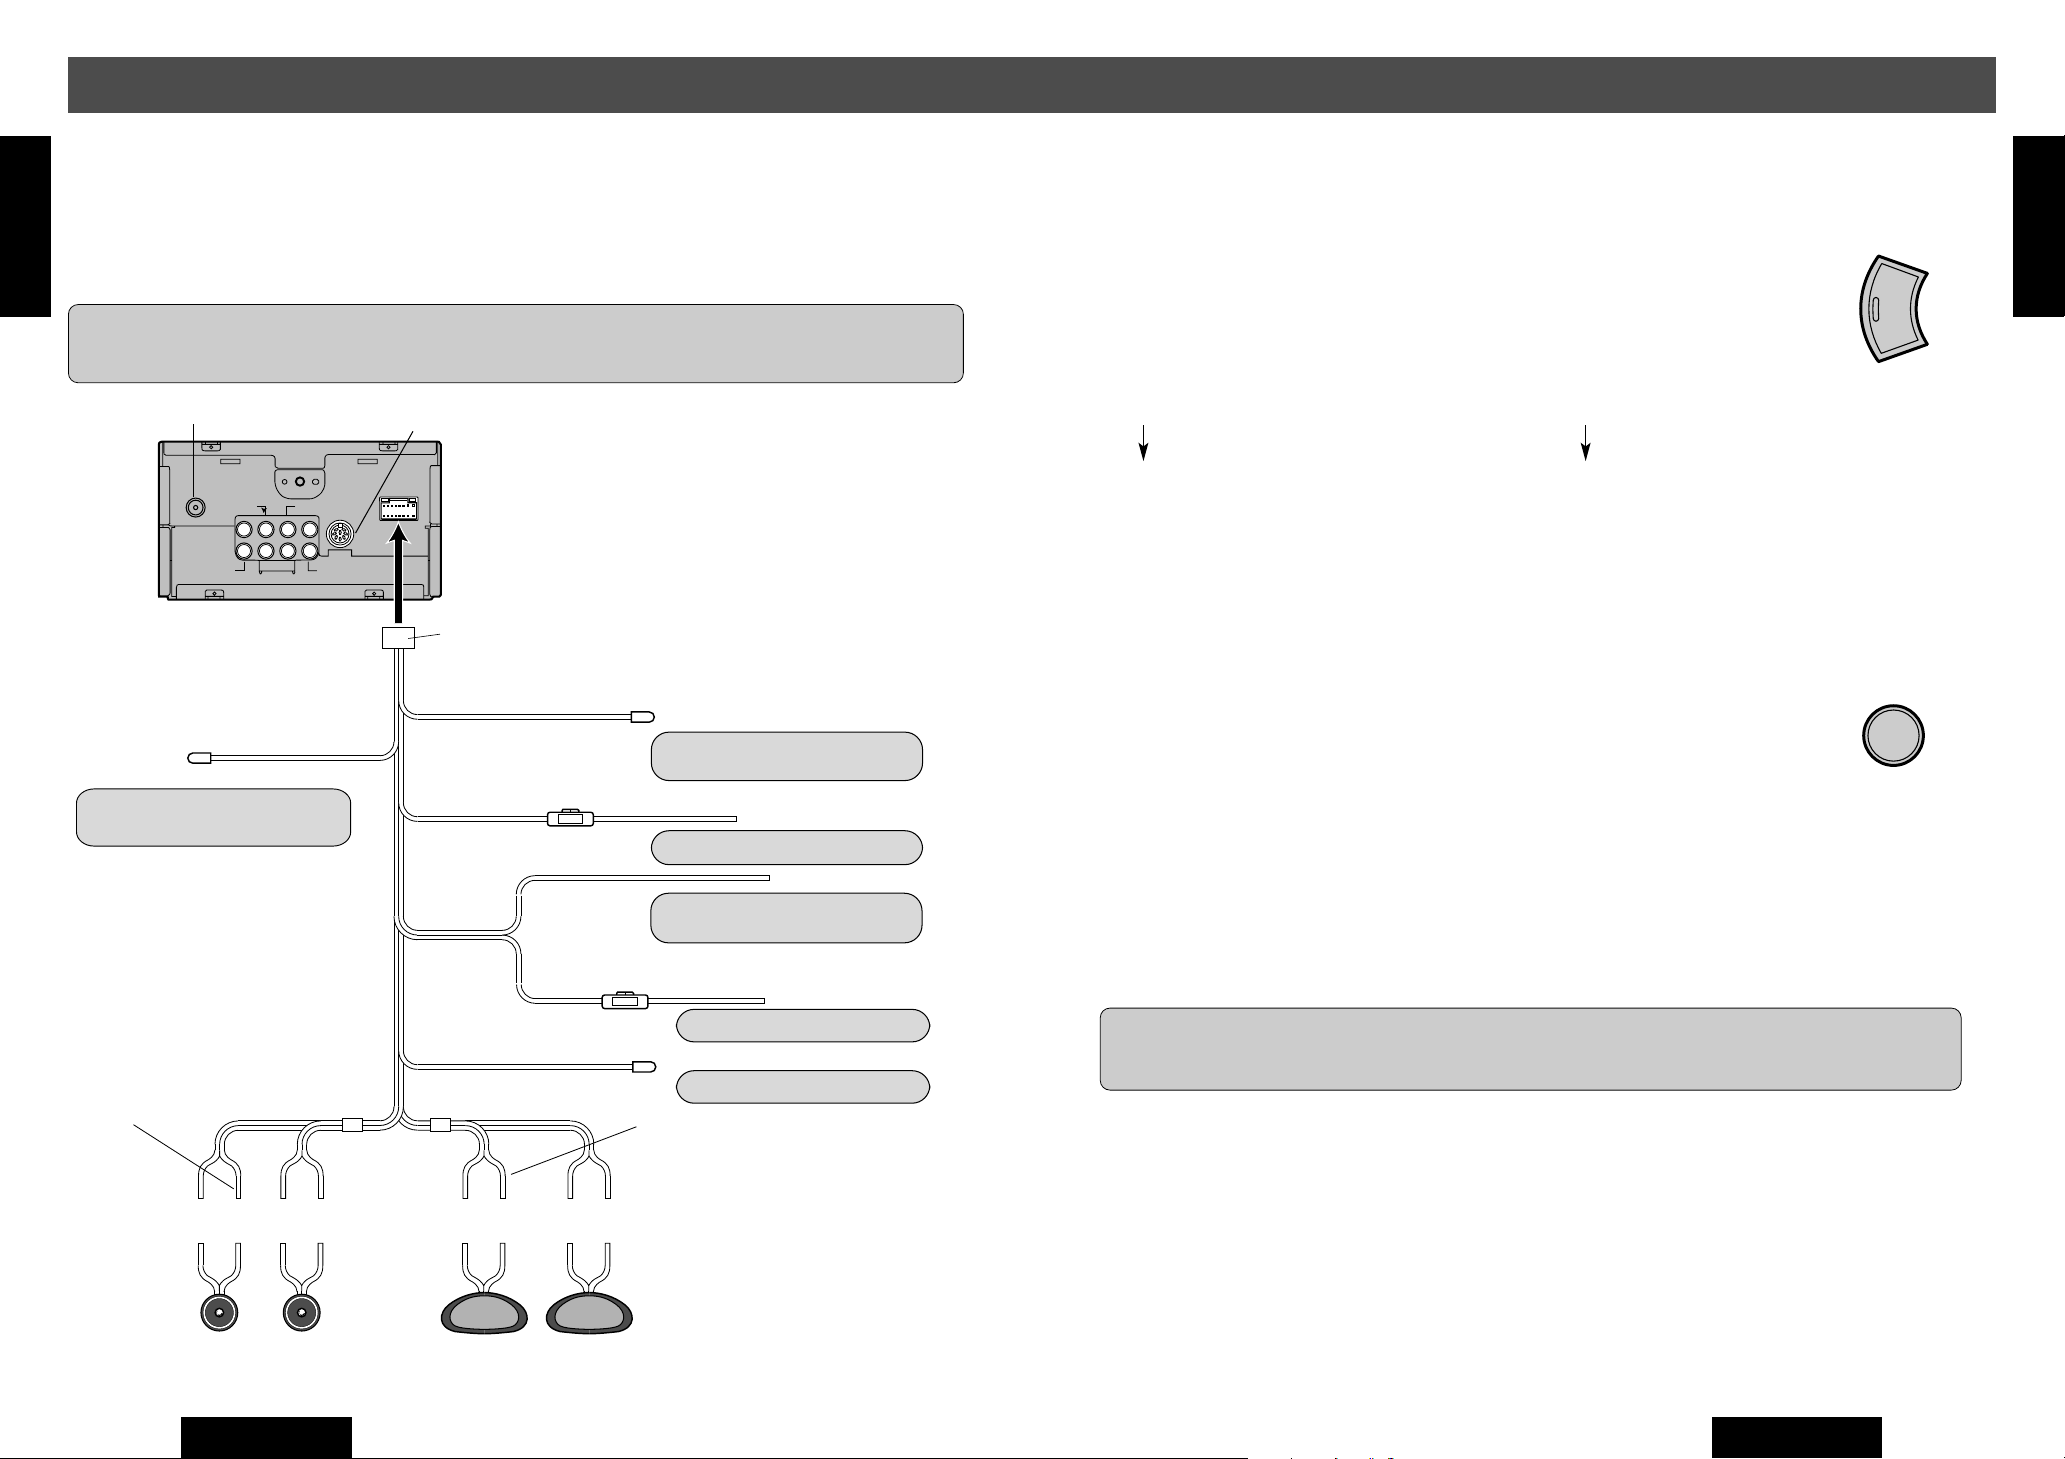
Electrical Connections
PRE-OUT (F)
CD/MD•CH IN
R
L
AUX-IN PRE-OUT (R)
CD Changer
Connector
Power Connector
Orange w/white stripe
Illumination Lead
(AMP-CONT MAX 0.1A)
External Amplifier Control Power Lead
Blue w/white stripe
(ACC 3A)
Black
Ground Lead
White w/black stripe
Green w/black stripe
White
Gray
Gray w/black stripe
Green
Violet w/black stripe
Violet
Front
Speaker
(Left)
Front
Speaker
Right
Rear
Speaker
(Left)
Rear
Speaker
(Right)
To the power line connected to
the clearance lights of the car
To ACC power, +12V DC
to a clean, bare metallic part of the
car chassis
To the car battery, continuous +12V
To the auto antenna control power
cord of the car
(+) (–)(+) (–)(+) (–)(+) (–)
Battery Lead
(BATTERY 10A)
Yellow
ACC Power Lead
Red
(ILLUMINATION)
CQ-VX2000U (Rear)
(ANT-CONT MAX0.1A)
Antenna Control Cord
Blue
Fuse (3A)
Fuse (10A)
Antenna
To an external amplifier
E
E
Precautions
N
N
G
G
L
L
¡This unit only operates in a 12-volt DC negative ground system.
I
I
¡Prevent short-circuits, remove the negative(–) terminal of the battery.
S
S
H
H
¡Please carefully read the operating instructions of any equipment connected to this unit.
1
38
Caution: For installation to cars with trip or navigational computers, all electronic memory settings
previously registered in the computer will be lost when the battery terminal is disconnected.
Volume Down (Mute/Attenuator)
Default : MUTE OFF
The volume decreases depending on which setting you selected Mute or ATT.
( B Page 35)
Press [MUTE] (ATT) to switch the MUTE mode (ATT mode)
between on and off.
When MUTE is set When ATT is set
E
N
G
L
I
S
H
E
T
U
M
31
MUTE OFF : Regular volume level
MUTE ON : No sound
ATT OFF : Regular volume level
ATT ON : Decrease to 1/10 volume level
The mute indicator blinks while the MUTE or ATT is on.
External Sound Source (AUX-IN)
Connect an external device to AUX IN (AUX input terminal) on the rear of the main
unit. ( B Page 47)
Press [SOURCE] button to change to <AUX IN>.
PWR
Refer to respective operating instructions of external devices for details.
SOURCE
Black Light
The black light is optional and requires additional installation.
The whole panel lights deep blue and shows up when the black light is activated.
46
CQ-VX2000U
Caution: Install the black light more than 20 cm apart from the main unit. Failure to do so
might cause malfunction or noise.
CQ-VX2000U
39
Page 22
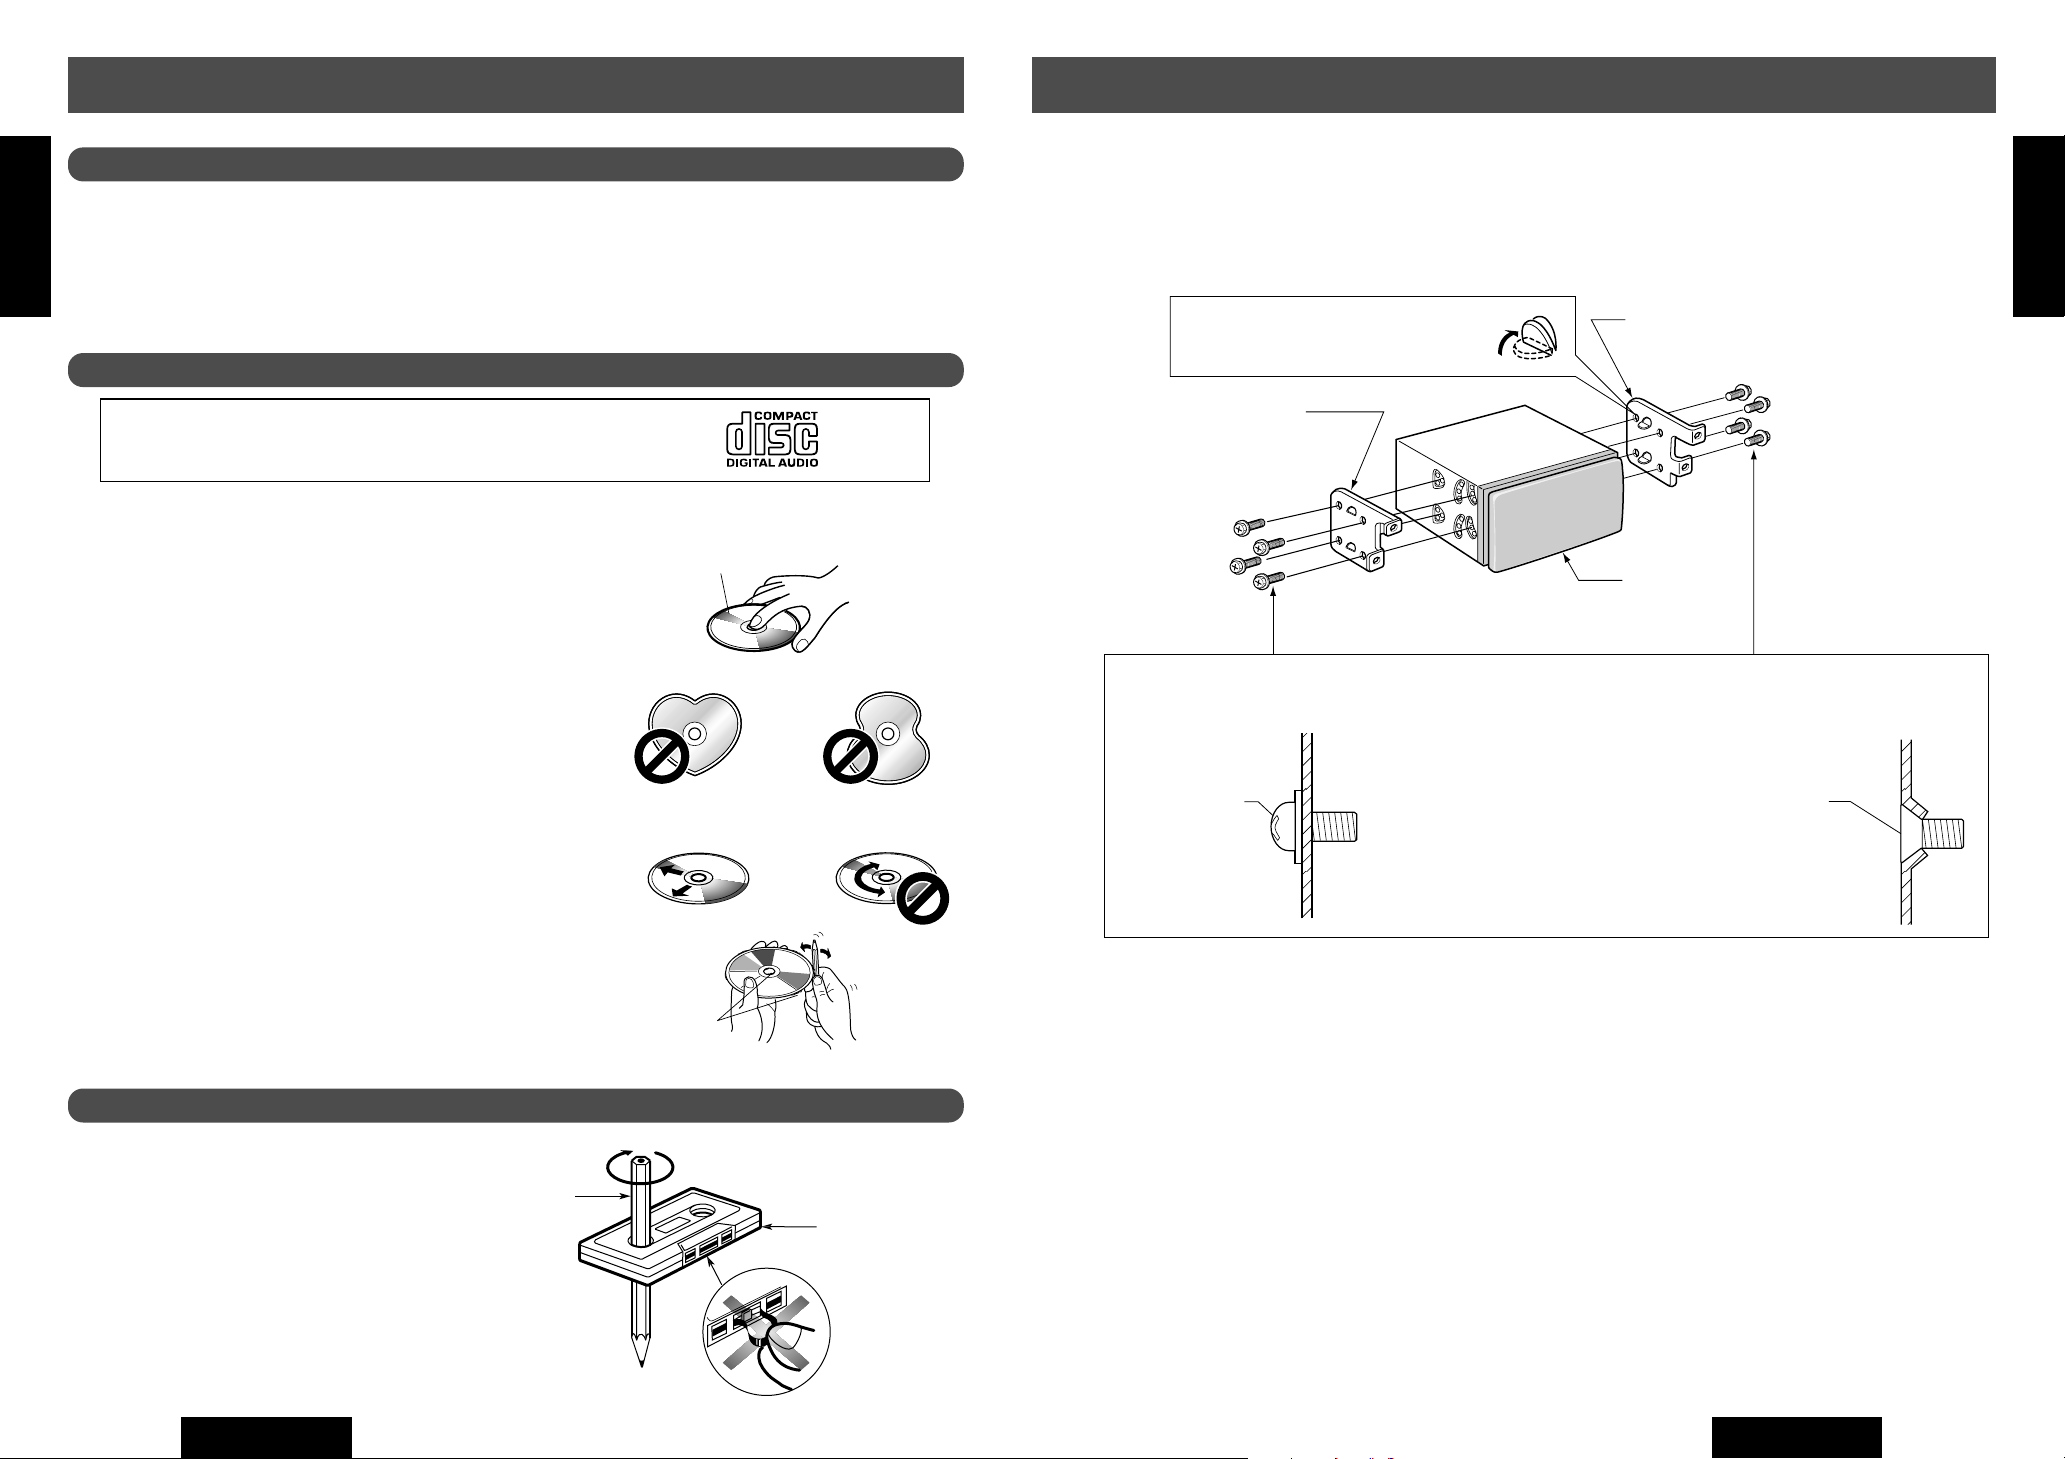
Note:
Use a pench to bend the fingers
on the bracket vertically.
Bracket (L)
Bracket (R)
CQ-VX2000U
Appended Screws (q or w)... Select appropriate ones matching the hole shape of the
bracket.
w Flat-Head
Screw x 8
(5 mmφ x 8 mm)
Note: Binding-Head screws (5 mmφ x 8 )
q are appended four pieces, the
other four pieces are fixed on the
transportation bracket. [Screw
with washer (5 mmφ x 8 mm)]
q Binding-Head
Sdrew x 8
(5 mmφ x 8 mm)
N
Exposed end
(Open end)
Pencil
Do not touch or
pull out the tape.
N
G
G
H
H
32
Maintenance
E
E
37
E
N
N
N
G
G
G
L
L
L
I
I
I
S
S
S
H
H
H
1
1
E
E
L
L
I
I
S
S
1
Cleaning this unit
Use a dry, soft cloth to wipe.
Care of the Unit
Caution on cleaning
Never use solvents such as benzine, thinner
as they may mar the surface of the unit.
❏ Typical Installation (For vehicle with double-DIN size)
1. Remove Car radio or little object box from the vehicle and the stopping brackets.
2. Use the appended screws q or w to install the brackets on this unit.
3. Install this unit into the vehicle.
Notes on CD
ONLY USE DISCS CARRYING THE LABEL
How to hold the CD
¡Do not touch the underside of the disc.
¡Do not make scratches on the disc.
¡Do not bend disc.
¡When not in use, keep CD in the case.
Do not use irregularly shaped CDs
Label side
Do not leave discs in the following places:
¡Direct sunlight
¡Near car heaters
¡Dirty, dusty and damp areas
¡Seats and dashboards
Disc Cleaning
Use a dry, soft cloth to wipe from the center
outward.
<Right>
Caution on New Discs
A new disc may have rough edges on its inner and
outer perimeter. These may cause malfunction.
Remove the rough edges using a pencil, etc.
Rough edge
Notes on Cassette Tape
Tape Slack:
Use a pencil or similar object to take up the
slack as shown. If a loose tape is used, this
may result in the tape becoming tangled in the
rotating parts of the unit.
<Wrong>
¡If a special kit (Sold separately) is necessary for a certain year’s, model or grade of vehicle,
please consult your dealer.
¡For electrical connecting simply to your vehicle, you can buy a prepared power connector from
your dealer.
❏ Installation for except for the above motors
For general use kit (Sold separately) or motor’s special kit (Sold Separately), Please consult your
dealer.
40
CQ-VX2000U
CQ-VX2000U
45
Page 23

Installation Guide
THICKNESS
MIN. 3/16" (4.75 mm)
MAX. 7/32" (5.56 mm)
7-5/32" (182mm)
4-1/16" (103 mm)
E
E
E
❏ Precautions
N
N
N
G
G
G
We strongly recommend that you wear gloves for installation work to protect yourself from
L
L
L
I
I
I
injuries.
S
S
S
H
H
H
1
1
36
Transportation bracket remov al
Be sure to remove the bracket for transportation before use (installation).
CUse screws (5 mm φ x 8 mm) with washers for installation.
Be careful not to lose any of these parts.
(continued)
Installation Guide
W ARNING
This installation information is designed for experienced installers
and is not intended for non-technical individuals. It does not contain
warnings or cautions of potential dangers involved in attempting to
install this product.
Any attempt to install this product in a motor car by anyone other
than qualified installer could cause damage to the electrical system
and could result in serious personal injury or death.
E
N
G
L
I
S
H
33
CQ-VX2000U
Transportation Bracket x 2
Screw with washer
(5 mm
φ ×
8 mm) x 4
Note:
¡The screw holes on the right side are not tapped. Please only use screws provided to mount
the unit.
¡To tighten the screws, press its head down straight forward.
❏ Overview
This product should be installed by a professional.
However, if you plan to install this product yourself,
your first step is to decide where to install it. The
instructions in these pages will guide you through
the remaining steps: (Please refer to the “WARN-
ING” statement above).
¡Identify and label the car wires.
¡Connect the car wires to the wires of the power
connector.
¡Install the unit in the dashbord.
¡Check the operation of the unit.
If you encounter problems, please consult your
nearest professional installer.
Caution: This unit operates with a 12 volt DC negative ground auto battery system only. Do not attempt
to use it in any other system. Doing so could cause
serious damage.
Before you begin installation, look for the items on
the right which are packed with your unit.
❏ Installation Hardware
No. Item Q'ty
mm
φ ×
φ ×
8 mm)
8 mm)
4
8
Binding-Head Screws (5 mm
q
Flat-Head Screws (5
w
❏ Required Tools
You’ll need a screwdriver, a 1.5 volt AA battery, and
the following:
12 V DC
Test Bulb
Electrical
Tape
Side-Cut
Pliers
❏ Dashboard Specifications
44
CQ-VX2000U
¡Warranty Card …… Fill this out promptly.
¡Panasonic Servicenter for Service Directory
…… Keep for future reference in case the product
needs servicing.
¡Installation Hardware …… Needed for in-dash
installation
CQ-VX2000U
41
Page 24

Installation Guide
(continued)
E
N
❏ Identify All Leads
G
The first step in installation is to identify all the car
L
I
wires you’ll use when hooking up your sound sys-
S
tem.
H
As you identify each wire, we suggest that you label
it using masking tape and a permanent marker. This
34
will help avoid confusion when making connections
later.
Note: Do not connect the power connector to the
stereo unit until you have made all connections. If
there are no plastic caps on the stereo hooking
wires, insulate all exposed leads with electrical tape
until you are ready to use them. Identify the leads in
the following order.
Power Lead
If your car has a radio or is pre-wired for one :
Cut the connector wires one at a time from the plug
(leaving the leads as long as possible) so that you
can work with individual leads.
Turn the ignition on to the accessory position, and
ground one lead of the test bulb to the chassis.
Touch the other lead of the test bulb to each of the
exposed wires from the cut radio connector plug.
Touch one wire at a time until you find the outlet that
causes the test bulb to light.
Now turn the ignition off and then on. If the bulb also
turns off and on, that outlet is the car power lead.
If your car is not wired for an audio unit :
Go to the fuse block and find the fuse port for radio
(RADIO), accessory (ACC), or ignition (IGN).
Battery Lead
If your stereo unit has a yellow lead, you will need to
locate the car's battery lead. Otherwise you may
ignore this procedure. (The yellow battery lead provides continuous power to maintain a clock, memory
storage, or other function.)
If your car has a radio or is pre-wired for one:
With the ignition and headlights off, identify the car
battery lead by grounding one lead of the test bulb
to the chassis and checking the remaining exposed
wires from the cut radio connector plug.
If your car is not wired for an audio unit :
Go to the fuse block and find the fuse port for the
battery, usually marked BAT.
Speakers
Identify the car speaker leads. There will be two
leads for each speaker, usually color coded.
A handy way to identify the speaker leads and the
speaker they connect with is to test the leads using
a 1.5 volt AA battery as follows.
Hold one lead against one pole of the battery and
stroke the other lead across the other pole. You will
hear a scraping sound in a speaker if you are holding a speaker lead.
If not, keep testing different lead combinations until
you have located all the speaker leads. When you
label them, include the speaker location for each.
Antenna Motor
If your car is equipped with an automatic power
antenna, identify the car motor antenna lead by connecting one bulb tester lead to the car battery lead
and touching the remaining exposed wires from the
cut radio connector plug one at a time. You will hear
the antenna motor activate when you touch the correct wire.
Antenna
The antenna lead is a thick, black wire with a metal
plug at the end.
❏ Connect All Leads
Now that you have identified all the wires in the car,
you're ready to begin connecting them to the stereo
unit wires. The connection diagram (B Page 46,
47) shows the proper connections and color coding
of the leads.
We strongly recommend that you test the unit
before making a final installation.
You can set the unit on the floor and make temporary connections to test the unit. Use electrical tape
to cover all exposed wires.
Important: Connect the red power lead last, after
you have made and insulated all other connections.
Ground
Connect the black ground lead of the power connector to the metal car chassis.
Speakers
Connect the speaker wires. See the wiring diagram
below for the proper hookups. Follow the diagram
carefully to avoid damaging the speakers and the
stereo unit.
The speaker used must be able to handle more than
37 watts of audio power. If using an optional audio
power, the speakers should be able to handle the
maximum amplifier output power. Speakers with
low input ratings can be damaged.
Speaker impedance should measure 4 - 8 ohms,
which is typically marked on most speakers. Lower
or higher impedance speakers will affect output and
can cause both speaker and stereo unit damage.
CAUTION : Never ground the speaker cords. For
example, do not use a chassis ground system or a
three-wire speaker common system. Each speaker
must be connected separately using parallel insulated wires. If in doubt about how your car's speakers
are wired, please consult with your nearest professional installer.
Motor Antenna
Connect the car motor antenna lead to the blue
motor antenna relay control lead.
Antenna
Connect the antenna by plugging the antenna lead
into the antenna receptacle.
Equipment
Connect any optional equipment such as an amplifier, according to the instructions furnished with the
equipment. Leave about 12 inches (30 cm) of distance between the speaker cords/amplifier unit and
the antenna/antenna extension cord. Read the operating and installation instructions of any equipment
you will connect to this unit.
Power
Connect the red power lead to the correct car radio
wire or to the appropriate fuse port on the fuse
block.
If the stereo unit functions properly with all these
connections made, disconnect the wires and proceed to the final installation.
Illumination
1.Connect to light switch, the control button are illuminated.
2.Can not find the light switch, connect the illumination lead (orange with white stripe) to accessory
(ACC).
❏ Final Installation
Lead Connections
Connect all wires, making sure that each connection
is insulated and secure. Bundle all loose wires and
fasten them with tape so they won't fall down later.
Congratulations! After making a few final checks,
you’re ready to enjoy your new auto stereo system.
❏ Final Checks
1. Make sure that all wires are properly connected and insulated.
2. Tur n on the ignition to check the unit for proper operation.
If you have difficulties, consult your nearest authorized professional installer for assistance.
E
N
G
L
I
S
H
35
42
CQ-VX2000U
Battery
Connect the yellow battery lead to the correct radio
wire or to the battery fuse port on the fuse block.
CQ-VX2000U
43
Page 25

Human
Equalizer
CQ-VX2000
561234
SOURCE
POWER
REPSCANRANDOM
CLOCK
DISP
REVERSE
S
•
ANALYZER DISPLAY MTL B NR TPS SKIP REPEAT
S•A
SPACE
SPC
D·M
LIVE
HALL
JAZZ
STADIUM
DISCO
VOCAL
CINEMA
M
U
T
E
VOL
AUTO
·
P
SENSOR
INTEGRATED CD/CASSETTE RECEIVER WITH DSP
OPEN
FM
DISC
AM
DISC
SEL
TUNE
TRACK
SOURCE
DISP
OPEN
Utilisation de base du lecteur cassettes
C
D
E
J
E
C
T
C
S
T
E
J
E
C
T
u
u
CST IN
INTEGRATED CD/CASSETTE RECEIVER WITH DSP
VX2000
CD IN
Boutons jikl
F
R
A
N
Ç
A
I
S
12
Bouton DISP
Introduction d’une cassette
q Appuyer sur la touche [OPEN] pour ouvrir la façade.
w Introduire la cassette en dirigeant le côté où la bande
est exposée vers la droite. Fermer la façade à la main.
La lecture commence alors automatiquement.
Bouton OPEN
Bouton SOURCE
Error Display Messages
CD
CD – E1 –
CD – E2 –
CD – E3
Disc is dirty, or is upside
down.
Disc has scars.
No operation by some cause
May be automatically ejected.
Check/StepOperationCauseExample of Display
Check the disc.
Open the panel and press [u] button. If
failure persists, press the reset switch. If
normal operation is not restored yet, call
and ask for repairs.
43
E
E
N
N
G
G
L
L
I
I
S
S
H
H
1
Indicateur de cassette
e Fermer la façade en la soulevant.
Éjection de la bande
q Appuyer sur le bouton [OPEN] pour ouvrir le panneau
avant.
w Appuyer sur le bouton [CST
Quand une cassette est éjectée alors que le mode de bande est
activé, l'alimentation est coupée.
u] pour éjecter la bande.
Mode de lecture de cassette
Appuyer sur le bouton [SOURCE] pour passer en mode de bande.
66
CQ-VX2000U
Bouton CST u
(éjection)
Attention:
¡Ne pas gêner l'ouverture du panneau
avant.
¡Lorsque la façade est ouverte, ne pas
l’abaisser de force et ne rien mettre
dessus, autrement l’appareil sera
endommagé.
PWR
SOURCE
PLS EJECT
Action was taken to start playing before disc is fully ejected.
Open the panel and press [ u] button.
Changer
Check/StepOperationCauseExample of Display
CD CH – E1 –
M
D CH – E1 –
CD CH – E2 –
M
D CH – E2 –
CD CH – E3 –
M
D CH – E3 –
NO DISC
Notes:
¡
There may be cases where the disc numbers affected by an error are displayed before E1 and E2.
¡Displays and the steps to be taken for errors vary in part from changer to changer. For details,
refer to the Operating Instructions for the changer used.
Disc is dirty, or is upside
down.
May be automatically ejected.
Disc has scars.
No operation by some cause
No disc in the changer (magazine)
Check the disc.
Open the panel and press [u] button. If
failure persists, press the reset switch. If
normal operation is not restored yet, call
the store where you purchased the unit or
the nearest servicenter to ask for repairs.
Insert discs into the changer (magazine).
CQ-VX2000U
51
Page 26

Troubleshooting
MD IN
INTEGRATED C
u
E
E
N
N
G
G
L
L
Cassette Tape
I
I
S
S
H
H
1
44
PLS EJECT
(continued)
No operation by some cause
Check/StepOperationCauseExample of Display
Press the eject button.
Durée de lecture de plage
Numéro de plage
Pour changer l'affichage, appuyer sur le
bouton [DISP]. (B page 61)
RESET
Reset switch
Important
Push the switch only when the unit
fails to operate with any buttons.
If the panel cannot be opened, or if
the unit fails to return to normal condition, call the nearest servicenter and
ask for repairs.
Reset switch
Insert a hard slender stick into the hole
and push the switch.
The unit returns to the default state
when the trouble is reset. Remember,
the data and settings stored in the
memory are deleted.
(Exemple) Affichage régulier
Lecture en mode de sélection aléatoire
Appuyer sur le bouton [RANDOM] de l'unité principale pour lire des plages du
disque actuel en mode de sélection aléatoire. (Appuyer sur le bouton [RANDOM]
pour annuler le mode.)
Lecture par exploration
Appuyer sur le bouton [SCAN] de l'unité principale pour lire les 10 premières
secondes de toutes les plages du disque actuel. La première plage lue est la
plage actuelle. (Appuyer une seconde fois sur le bouton [SCAN] pour annuler
le mode.)
¡Après la lecture de 10 secondes de toutes les plages, la lecture par exploration se
termine et la position de départ est ramenée au début de la première plage lue.
¡Annuler le mode de lecture par exploration dès que votre plage préférée est trouvée.
F
R
A
N
Ç
A
I
S
11
RANDOM
3 4
REPSCAN
5 6
Replace the Fuse
Use fuses of the same specified rating (10 amps, 3 amps). Using different substitutes or fuses
with higher ratings, or connecting the product directly without a fuse, could cause fire or damage
to the stereo unit.
If the replacement fuse fails, contact your nearest Panasonic Servicenter for service.
52
CQ-VX2000U
Relecture
Appuyer sur le bouton [ REPEAT ] de l'unité principale pour répéter la lecture
de la plage actuelle. (Appuyer une seconde fois sur le bouton [ REPEAT ]
pour annuler le mode.)
Attention : Éloigner les doigts ou les mains des pièces mobiles. Ne pas
mettre les doigts ou les mains dans la fente de chargement de disque ou
la fente de chargement de cassette.
Le manquement à cette règle de sécurité peut avoir comme conséquence de blesser ou faire tomber
l'appareil en panne.
Observer l’enfant ou le bébé pour qu’il ne le fasse pas.
CQ-VX2000U
5 6
REPSCAN
65
Page 27

Human
Equalizer
CQ-VX2000
561234
SOURCE
POWER
REPSCANRANDOM
CLOCK
DISP
REVERSE
S
•
ANALYZER DISPLAY MTL B NR TPS SKIP REPEAT
S•A
SPACE
SPC
D·M
LIVE
HALL
JAZZ
STADIUM
DISCO
VOCAL
CINEMA
M
U
T
E
VOL
AUTO
·
P
SENSOR
INTEGRATED CD/CASSETTE RECEIVER WITH DSP
OPEN
FM
DISC
AM
DISC
SEL
TUNE
TRACK
564
SOURCE
OPEN
DISP
Utilisation de base de lecteur de CD
Boutons kl
F
R
A
N
Ç
A
I
S
Mise en place de CD
10
q Appuyer sur le bouton [OPEN] de l'unité
w
Bouton DISP
principale pour ouvrir le panneau avant.
Charger un CD en dirigeant la face étiquetée dans la
fente de chargement pour que la lecture du CD commence.
Indicateur de disque
Bouton
RANDOM
Bouton
SCAN
OPEN
Bouton REP
Bouton CD u
(éjection)
u
T
C
E
J
E
D
C
T
C
E
J
E
D
M
u
Bouton OPEN
Bouton SOURCE
VX303
INTEGRATED CD/CASSETTE RECEIVER WITH DSP
MD IN
Face étiquetée
Specification
General
Power Supply : 12 V DC(11V-16V) Test Voltage, 14.4 V; negative ground
Current Consumption : Less than 8.5 A (CD mode)
Rated output : 16 W x 4 channels (1,000 Hz, 1 %, 4 Ω)
Maximum output : 37 W x 4 channels
Suitable speaker impedance : 4 Ω
Audio input impedance : 10 kΩ
Audio input sensitivity : 700 mV (AUX IN)
PRE-OUT output voltage : 600 mV
PRE-OUT output impedance : 600 Ω
External dimensions : 7” x 4” x 6-5/6” (178 x 100 x 160 mm)
Weight : 5 lbs. 5 oz. (2.4 kg)
DSP
Channel : 2 channels for Input; 4 channels for output
DSP patterns : 7 patterns
Equalizer center frequency : 80, 160, 320, 640, 1.6k, 4k, 10k (Hz)
Equalizer range : –12 dB to +12 dB (13 step)
45
E
E
N
N
G
G
L
L
I
I
S
S
H
H
1
e Fermer la façade en la soulevant.
Attention:
Éjection de CD
¡Ne pas charger de MD dans la fente de
chargement de CD.
q Appuyer sur le bouton [OPEN] de l'unité principale
pour ouvrir le panneau avant.
w Appuyer sur le bouton [
Quand un CD est éjecté et que le mode CD est activé,
l'alimentation est coupée.
u] pour éjecter le CD.
¡Ne pas gêner l'ouverture du panneau avant.
¡Lorsque la façade est ouverte, ne pas
l’abaisser de force et ne rien mettre dessus,
autrement l’appareil sera endommagé.
¡Ne pas insérer un CD lorsque cet indicateur
est allumé.
Mode CD
Appuyer sur le bouton [SOURCE].
Sélection de plage
Appuyer sur le bouton [k] ou [l]
[k](TUNE k ) : Retourne au début du programme en cours, puis retourne au
début d'un précédent programme en correspondance au nombre
de fois que le bouton est pressé.
[l](TUNE l ) : Retourne au début du programme suivant.
Recherche de plage
Relâcher le bouton [k] ou [l] dès que votre passage favori est joué après
avoir appuyé et immobilisé le bouton pendant plus de 0,5 seconde.
[k](TRACK k) : Retour rapide
[l](TRACK l) : Avance rapide
64
CQ-VX2000U
PWR
SOURCE
TUNE
TRACK
TUNE
TRACK
Appuyer et immobiliser pendant
plus de 0,5 seconde
Radio
FM Stereo Radio
Frequency range : 87.9 - 107.9 MHz
Usable sensitivity : 12 dBf
Total harmonic distortion (mono) : 0.3% (1 kHz)
Weighted S/N ratio (mono) : 70 dB
Frequency response : 20 to 15,000 Hz ±3 dB
Stereo separation : 42 dB (1 kHz)
Image Response ratio : 75 dB
AM Radio
Frequency Range : 530 - 1,710 kHz
Useable Sensitivity (S/N 20dB) : 27 dB/µV
Image Response ratio : 65 dB
CD Player
Channel : 2 channels
Quantization : 16-bit linear
Frequency response : 5 to 20,000 Hz
Dynamic range : 90 dB (IHF, A)
Wow and flutter : Below measurable
CQ-VX2000U
53
Page 28

Specification
E
Cassette Tape Player
N
G
L
Reproduction system : 4-track, 2-program stereo
I
Tape speed : 4.76 cm/sec
S
H
Fast forward time : 100 sec (C-60)
Rewind time : 100 sec (C-60)
46
Wow and flutter : 0.07 % (WRMS)
Signal/Noise ratio : Dolby NR OFF 56 dB (IHF, A)
Frequency response : 30 to 18,000 Hz (normal tape)
(continued)
Dolby NR ON 66 dB (IHF, A)
30 to 20,000 Hz (metal tape)
Numéro de mémoire de présyntonisation
Bande
(Exemple) Affichage régulier
Fréquence
Pour changer l'affichage, appuyer sur le
bouton [DISP]. (B page 61)
Mémoire présyntonisation manuelle
Sélectionner une station et appuyer et immobiliser un des boutons de
présyntonisations [ 1 ] - [ 6 ] pendant plus de 2 secondes.
¡La station actuelle est mémorisée dans le bouton pressé. (Un nombre maximum de 6
stations peut être mémorisé pour chaque bande.)
¡L'affichage de fréquence clignote une fois que la mémorisation est terminée.
Mémorisé de présyntonisation automatique
Appuyer et immobiliser le bouton [ AUTO•P ] pendant plus de 2 secondes.
¡L'accord commence à partir de la fréquence la plus basse dans la bande
sélectionnée. Les 6 stations qui sont reçues de façon optimum sont mémorisées par
le bouton de présyntonisations. Plus la réception d'une station reçue est bonne et
plus le numéro affecté à la station de présyntonisation 1 à 6 est petit. (Un nombre
maximum de 6 stations peut être mémorisé pour chaque bande.)
¡Une fois réglé, les stations présyntonisées sont séquentiellement explorées pendant
5 secondes chacune. (Exploration)
CPour annuler l'exploration, appuyer sur un des boutons de
présyntonisations [ 1 ] - [ 6 ] et choisir votre station préférée.
(exemple)
1 2
Appuyer et immobiliser pendant
plus de 2 secondes.
P
·
AUTO
Appuyer et immobiliser pendant
plus de 2 secondes.
(exemple)
1 2
E
T
U
M
F
R
A
N
Ç
A
I
S
9
Above specifications comply with EIA standards.
Note:
Specifications and design are subject to modification without notice due to improvements in technology.
Dolby noise reduction manufactured under license from Dolby Laboratories Licensing Corporation.
“DOLBY” and the double-D symbol B are trademarks of Dolby Laboratories Licensing Corporation.
54
CQ-VX2000U
Remarque : Pendant les opérations de présyntonisation et mise en mémoire ou de présyntonisation et de
mise en mémoire automatique, de nouvelles stations peuvent être mémorisées par les boutons de
présyntonisation par réécriture sur les données précédentes.
Accord de station présyntonisée
Appuyer sur un des boutons de présyntonisation [ 1 ] - [ 6 ].
Une station présyntonisée dans la bande actuelle est accordée.
(exemple)
1 2
Sélection stéréo / mono local
Appuyer et immobiliser le bouton [SEL] pendant plus de 2 secondes pour commuter
l'appareil dans les modes suivants.
STEREO
MONO : Le bruit est réduit durant une faible émission FM.
LOCAL : La recherche ne s’arrête qu’en détectant un signal puissant.
MONO ON
LOCAL OFF
MONO ON
LOCAL ON
MONO OFF
LOCAL ON
CQ-VX2000U
63
Page 29

Human
Equalizer
CQ-VX2000
561234
SOURCE
POWER
REPSCANRANDOM
CLOCK
DISP
REVERSE
S
•
ANALYZER DISPLAY MTL B NR TPS SKIP REPEAT
S•A
SPACE
SPC
D·M
LIVE
HALL
JAZZ
STADIUM
DISCO
VOCAL
CINEMA
M
U
T
E
VOL
AUTO
·
P
SENSOR
INTEGRATED CD/CASSETTE RECEIVER WITH DSP
OPEN
FM
DISC
AM
DISC
SEL
TUNE
TRACK
561234
SOURCE
DISP
M
U
T
E
Utilisation de base de l'autoradio
(Back side)
Lithium
battery
Position B
Battery holder
Position A
Boutons jikl
F
R
A
N
Ç
Bouton DISP
Boutons de présyntonisation 1 - 6
A
I
S
Mode radio
8
Appuyer sur le bouton [SOURCE] pour choisir le mode radio.
Bande
Change en bande FM.
Appuyer sur le bouton [j] ou le bouton [i].
[j](FM) : Change en bande FM. FM1 FM2 FM3
i
](AM) : Change en bande AM.
[
Remarque : Appuyer sur le bouton [ BAND ] en utilisant la télécommande.
FM1 FM2 FM3 AM
L'indicateur ST s'allume tandis que l'émission stéréo FM est reçue.
Accord manuel
Appuyer sur le bouton [k] ou le bouton [l].
[k](TUNE k ) : Une fréquence inférieure
[l](TUNE l ) : Une fréquence plus élevée
Bouton SOURCE
Bouton AUTO•P
PWR
SOURCE
FM
DISC
DISC
AM
TUNE
TRACK
SEL
Préparatif de la télécommande
Mise en place de la pile
1. Retirer le porte-pile.
Saisir le porte-pile par la partie B et le dégager tout en repoussant
la partie A dans le sens indiqué par la flèche.
2. Placer une pile dans le porte-pile.
Placer une pile neuve avec son côté marqué (+) dirigé vers le haut comme
illustré.
3. Introduire le porte-pile.
Faire glisser le porte-pile pour le remettre en place.
Remarque sur les piles
Retirer immédiatement la pile lorsqu’elle est usée et la jeter.
Informations sur les piles:
¡Pile recommandée : Pile au lithium Panasonic (CR2025)
¡Durée de service de la pile: 6 mois environ dans les conditions d’utilisation normales (à la température ambiante).
Précaution: Lorsque la pile n’est pas utilisée correctement, l’appareil risque de s’échauffer, d’exploser, ou de s’enflammer,
ce qui peut provoquer des blessures ou un incendie. La fuite du liquide de batterie peut endommager
l’appareil.
¡Ne pas essayer de démonter, ni de court-circuiter l’appareil. Ne pas mettre la pile dans le feu.
¡Maintenir les piles hors de la portée des enfants afin d’éviter le risque d’accidents.
¡Lors du rejet des piles, observer les règlements y afférents.
PRG/■
PRG/
BAND
(ATT)
MUTE
VOL
SEL
DISP
Bouton MUTE (ATT)
Boutons VOL (volume) ji
Bouton SEL (sélection)
Boutons ji (DISC ji)
Boutons kl (TUNE kl,
Boutons TRACK a f)
Bouton d'avance rapide de
bande / de rebobinage
Bouton DISP (affichage)
Bouton CLOCK
Bouton PWR
(alimentation)
Bouton SOURCE
Ces boutons sont les même que ceux
installés sur l'unité principale.
Bouton SPC (ambiance)
Bouton BAND
Bouton PRG (A B) / F
Bouton AUTO·P (présyntonisation
automatique)
Bouton S•A (analyseur de spectre)
Bouton DIMMER
PWR
SOURCE
DIMMER
Car Audio
(Face arrière de la
télécommande)
Partie A
Pile au lithium
Partie B
Porte-pile
F
R
A
N
Ç
A
I
S
1
Accord par recherche
Appuyer et immobiliser le bouton [k] ou [l] pendant plus de 0,5 seconde.
Puis, le libérer.
[k](TUNE k ) : Accord automatique dans une fréquence inférieure
[l](TUNE l ) : Accord automatique dans une fréquence plus élevée
L'accord démarre quand le bouton est relâché et s'arrête dès qu'une station est
détectée.
62
CQ-VX2000U
TUNE
TRACK
Appuyer et immobiliser pendant
plus de 0,5 seconde alors.
Ensuite, libérer
Remarques :
¡Certains noms de quelques boutons ne sont pas concernés par cet appareil parce que la
télécommande est conçue pour être utilisée en commun avec d'autres modèles.
¡Étant donné que les boutons suivants n'équipent pas la télécommande, actionner ces boutons à
partir de l'unité principale.
Bouton OPEN, bouton CD u, bouton D•M, boutons 1 - 6, bouton RANDOM, bouton SCAN, bouton REP
(REPEAT) (répétition) et bouton REVERSE.
Bouton CST u, bouton MTL, bouton B NR, bouton TPS et bouton SKIP
CQ-VX2000U
55
Page 30

Nomenclature
Unité principale
F
R
Boutons ji
A
¡BAND
N
Ç
¡DISC
A
I
S
2
Boutons kl
¡TUNE
¡TRACK
Capteur (récepteur de télécommande)
SENSOR
FM
DISC
TUNE
TRACK
DISC
AM
Bouton SEL
(Sélection)
LIVE
HALL
JAZZ
STADIUM
DISCO
VOCAL
SEL
CINEMA
Human
INTEGRATED CD/CASSETTE RECEIVER WITH DSP
Equalizer
REVERSE
CLOCK
DISP
S•A
•
S
ANALYZER DISPLAY MTL B NR TPS SKIP REPEAT
Bouton DISP (DISPLAY)
(affichage)
Bouton CLOCK
Bouton S•A (analyseur de spectre)
Bouton REVERSE
CQ-VX2000
POWER
SOURCE
P
·
E
T
U
M
AUTO
REPSCANRANDOM
SPC
561234
SPACE
D·M
Bouton D•M (mémoire directe)
Bouton SPC (espace)
Boutons 1 6
¡Présyntonisation [ 1 - 6 ]
¡RANDOM [4]
¡SCAN [5]
¡REP [6]
Bouton OPEN
OPEN
Bouton SOURCE
Bouton POWER
VOL
Boutons VOL
(volume) ji
Bouton MUTE (ATT)
Bouton AUTO•P
Changement d'affichage
Appuyer sur le bouton [DISP] pour changer l'affichage comme suit.
Affichage normal dans chaque source sonore
Affichage de l'heure d'horloge
Affichage de récepteur panoramique à points
(la lumière d'affichage réagit au son comme un récepteur panoramique)
Quand le bouton [DISP] est pressé alors que le courant est coupé, l'affichage
change comme suit.
Horloge / veille
Horloge
Aucun affichage
CLOCK
DISP
DISPLAY
F
R
A
N
Ç
A
I
S
7
Boutons ji
¡
3 / 4 5
(arrêt)
(programme)
Boutons k l
1 / 2
¡
56
<Cassette>
SENSOR
FM
DISC
TUNE
TRACK
DISC
AM
CQ-VX2000U
CQ-VX2000
LIVE
HALL
JAZZ
STADIUM
DISCO
VOCAL
SEL
CINEMA
Human
INTEGRATED CD/CASSETTE RECEIVER WITH DSP
Equalizer
REVERSE
CLOCK
DISP
S•A
•
S
ANALYZER DISPLAY MTL B NR TPS SKIP REPEAT
561234
Boutons 1 – 6
¡MTL [1]
¡B NR [2]
¡TPS [4]
¡SKIP [5]
¡REP [6]
Remarque: " ADJUST " est affiché quand une durée est supposée être affichée jusqu'à ce que l'horloge
soit réglée.
OPEN
POWER
SOURCE
P
·
AUTO
REPSCANRANDOM
SPC
D·M
SPACE
VOL
E
T
U
M
CQ-VX2000U
61
Page 31

Human
Equalizer
CQ-VX2000
561234
SOURCE
POWER
REPSCANRANDOM
CLOCK
DISP
REVERSE
S
•
ANALYZER DISPLAY MTL B NR TPS SKIP REPEAT
S•A
SPACE
SPC
D·M
LIVE
HALL
JAZZ
STADIUM
DISCO
VOCAL
CINEMA
M
U
T
E
VOL
AUTO
·
P
SENSOR
INTEGRATED CD/CASSETTE RECEIVER WITH DSP
OPEN
FM
DISC
AM
DISC
SEL
TUNE
TRACK
DISP
Généralités
CD EJECT
CST EJECT
CD IN
CST IN
LARGE FLUORESCENT DISPLAY ■
37W×4CH AMPLIFIER ■
15 BAND SPECTRUM ANALIZER ■
FLIP DOWN PANEL ■
INTEGRATED CD/CASSETTE RECEIVER WITH DSP
u
u
VX2000
(suite)
Derrière le panneau avant
Boutons jikl
F
R
A
N
Ç
Bouton DISP / CLOCK
A
I
S
Réglage de l'horloge
6
Il s'agit d'une horloge à affichage à 12 chiffres.
q Appuyer et immobiliser le bouton [ CLOCK ] pendant plus de 2 secondes
pour changer de mode de réglage de l'horloge.
L'affichage de l'horloge clignote. (Quand l'horloge est réglée pour la première fois,
l'affichage "12:00" clignote.)
w Faire un réglage de l'heure en utilisant les boutons [j], [i], [k] ou
[l].
[k] : Réglage de l'heure. ¡L'affichage de l'heure clignote.
[l] : Réglage des minutes. ¡L'affichage des minutes clignote.
[
j
] : Avance de l'heure / des minutes.
[i] : Réglage arrière de l'heure / des minutes.
CLOCK
DISP
DISPLAY
Appuyer et immobiliser pendant
plus de 2 secondes.
FM
DISC
SEL
DISC
AM
Unité d'affichage
Indicateur SKIP
Indicateur SPACE
Indicateur POSI
Indicateur de veille
Bouton CD u (éjection)
RESET
Bouton CST u
(éjection)
Bouton de remise à l'état initial
Autre Indicateur de commande
Fente de chargement de CD
F
R
A
N
Ç
A
I
S
3
Fente de chargement de cassette
Indicateur ST (Stéréo)
Indicateur EQ (Égaliseur)
Indicateur B NR (Dolby B NR)
Indicateur DISC
Indicateur REP
e Appuyer sur le bouton [ CLOCK ] pour valider un réglage.
Le mode normal est rétabli et l'horloge entre en fonction.
Pour observer l'horloge, appuyer sur le bouton [DISP] pour choisir
l'affichage de l'horloge. ( B page 61)
60
Remarque: L'horloge ne peut pas être réglée quand le courant est coupé.
CQ-VX2000U
Indicateur MTL
CLOCK
DISP
DISPLAY
Indicateur SDBB
(amplification des basses
super dynamique)
Indicateur de récepteur panoramique
CQ-VX2000U
Indicateur R 5
Indicateur SCAN
Indicateur TPS (recherche
de programme sur bande)
Indicateur MUTE
57
Page 32

Human
Equalizer
CQ-VX2000
561234
SOURCE
POWER
REPSCANRANDOM
CLOCK
DISP
REVERSE
S
•
ANALYZER DISPLAY MTL B NR TPS SKIP REPEAT
S•A
SPACE
SPC
D·M
LIVE
HALL
JAZZ
STADIUM
DISCO
VOCAL
CINEMA
M
U
T
E
VOL
AUTO
·
P
SENSOR
INTEGRATED CD/CASSETTE RECEIVER WITH DSP
OPEN
FM
DISC
AM
DISC
SEL
TUNE
TRACK
SOURCE
VOL
DISP
Généralités
Bouton SOURCE /
POWER
Boutons VOL ji
F
R
A
N
Ç
A
I
C
S
Avant de mettre cet appareil en fonction, tourner la clé de contact en position ON.
Bouton DISP
Avertissement : NE PAS COMMANDER LE SYSTÈME TOUT EN
CONDUISANT
Les commandes du système ont pour effet de distraire le conducteur et de l'empêcher de regarder droit
devant lui de la voiture et ceci peut être à l'origine d'un accident. Prendre l'habitude de toujours arrêter la
voiture dans un lieu sûr avant de commander le système.
Sélection de la source sonore
PWR
F
R
A
N
Ç
A
I
S
4
Mise sous tension
Appuyer sur le bouton [ POWER ] pour mettre sous tension.
Dès la mise sous tension de l'appareil, un message de démonstration est
affiché. (Mode de démonstration) Alors que le mode de démonstration est
lancé, les commandes effectuées avec les boutons ne peuvent pas être
exécutées. Appuyer sur le bouton [DISP] pour annuler le mode de
démonstration avant d'utiliser les fonctions de l'appareil.
Pour activer le mode de démonstration, couper d'abord l'alimentation et appuyer et
immobiliser le bouton [ POWER ] de l'unité principale pendant plus d'une seconde.
Appuyer et immobiliser le bouton [ POWER ] pendant plus d'une seconde
pour couper le courant.
Volume
Appuyer sur le bouton [ VOL j] ou [ VOL i] pour ajuster le volume.
POWER
SOURCE
CLOCK
DISP
POWER
SOURCE
Appuyer et immobiliser
VOL
Appuyer sur le bouton [SOURCE] pour changer de mode comme suit.
SOURCE
TUNER CD TAPE
AUX IN CD CHANGER
Remarques :
¡Quand aucun disque ou aucune cassette n'est chargée dans l'appareil, quand aucun changeur n'est
raccordé ou quand il n'y a aucun magasin dans le changeur de CD, aucune source sonore
correspondante ne peut être choisie.
¡La fonction " AUX IN " peut être dépassée si " AUX IN " (entrée de source externe) n'est pas utilisé.
(B page 80)
5
58
Remarque : Étant donné que le volume peut être ajusté pour chaque source sonore (volumes respectifs
même en réception FM et AM), le niveau du volume change quand la source sonore change.
< Fonction de contrôle intelligent de volume >.
CQ-VX2000U
CQ-VX2000U
59
Page 33

Fonctions utiles
SENSOR
FM
DISC
Boutons jikl
DISC
AM
F
LIVE
HALL
JAZZ
TUNE
STADIUM
TRACK
DISCO
VOCAL
SEL
CINEMA
Human
Equalizer
REVERSE
CLOCK
DISP
S•A
S•A
•
ANALYZER DISPLAY MTL B NR TPS SKIP REPEAT
S
R
A
N
Ç
Bouton S•A / REVERSE
A
I
S
Affichage de récepteur panoramique
28
Réglage par défaut: WAVE
Appuyer sur le bouton [ S•A ] pour changer l'affichage en affichage de
récepteur panoramique suivant 13 formes différentes.
q WAVE : C'est une image qui est simple mais implique l'ouverture sur l'imagination de
l'espace.
w AURORA : C'est une image qui implique une aurore boréale dans le ciel.
e MILKY WAY : C'est une image qui implique la voie lactée défilant majestueusement dans l'espace.
r TWINKLE STAR : C'est une image qui implique le scintillement d'innombrables étoiles.
t SUN : C'est une image qui implique les rayons brillants avec une sensation de chaleur.
y SPC SARGASSO: C'est une image qui implique un voyage éternel d'un morceau d'étoile cassée
dérivant.
u BIG BANG : C'est une image qui implique la création de l'univers et des étoiles.
CQ-VX2000
INTEGRATED CD/CASSETTE RECEIVER WITH DSP
561234
OPEN
POWER
SOURCE
Face de lecture
5 PLAY 5 : Face supérieure
4 PLAY 4 : Face inférieure
VOL
P
·
E
T
U
M
AUTO
Pour changer l'affichage, appuyer sur le
bouton [DISP]. (B page 61)
REPSCANRANDOM
SPC
D·M
SPACE
F
R
A
N
Ç
A
I
S
Changement de face de lecture
13
Appuyer sur le bouton [i] (4 5PRG (programme)) pour commander la
lecture en sens inverse.
(Appuyer sur le bouton [PRG/3] pour commander la lecture en sens inverse quand la
télécommande est utilisée.)
¡La commutation de face lue change comme suit en appuyant sur le bouton [i].
5 PLAY 5 (face supérieure) 4 PLAY 4 (face inférieure)
¡Quand la lecture d'une bande se termine, la face de lecture change automatiquement.
< Système d'inversion automatique >
FM
DISC
TUNE
TRACK
•
S
ANALYZER
REVERSE
S•A
Rebobinage et avance rapide
SEL
Appuyer sur le bouton [k] (1) ou [l] (2) pour activer le mode de
rebobinage ou d'avance rapide de la bande.
CAppuyer sur le bouton [j](3) pour arrêter le rebobinage ou l'avance rapide.
Appuyer sur le bouton [PRG/3] pour arrêter le rebobinage ou l'avance rapide quand
la télécommande est utilisée.
AM
DISC
82
i FLARE : C'est une image qui implique le rayonnement de l'énergie du soleil s'étendant dans
l'espace.
o PROMINENCE : C'est une image qui implique des flammes à la surface du soleil.
!0 METEOR : C'est une image qui implique la queue d'un météore qui se prolonge indéfiniment
dans l'espace.
!1 SPACE FEVER : C'est une image qui implique le roulement d'une machine à sous quand l'appareil
reçoit une certaine fréquence.
!2 BLANK SPEANA : Avec cet affichage, le récepteur panoramique est arrêté.
!3 ALL DISP OFF : Tous les affichages, y compris l'éclairage de l'affichage, s'éteint quand ALL DISP
OFF est choisi. (Il s'allume quand cette opération est exécutée et s'éteint à nouveau
5 secondes après l'exécution de l'opération.)
Remarque : La forme d'affichage ne peut pas être changée dans à la partie de l'indication des lettres du
récepteur panoramique.
CQ-VX2000U
Attention : Éloigner les doigts ou les mains des pièces mobiles.
Ne pas mettre les doigts ou les mains dans la fente de chargement de disque ou la fente de chargement
de cassette.
CQ-VX2000U
67
Page 34

Human
Equalizer
CQ-VX2000
561234
SOURCE
POWER
REPSCANRANDOM
CLOCK
DISP
REVERSE
S
•
ANALYZER DISPLAY MTL B NR TPS SKIP REPEAT
S•A
SPACE
SPC
D·M
LIVE
HALL
JAZZ
STADIUM
DISCO
VOCAL
CINEMA
M
U
T
E
VOL
AUTO
·
P
SENSOR
INTEGRATED CD/CASSETTE RECEIVER WITH DSP
OPEN
FM
DISC
AM
DISC
SEL
TUNE
TRACK
5612 4
Utilisation de base du lecteur de cassette
(suite)
Sourdine/A TT (atténuateur)
Valeur par défaut : MUTE KEY
Boutons jikl
F
R
A
N
Ç
Bouton REPEATBouton SKIPBouton TPSBouton B NRBouton MTL
A
I
S
Utilisation de la fonction TPS (Recherche de programme sur bande)
14
TPS (recherche de programme sur bande) est une fonction qui consiste à détecter une
partie non enregistrée d'une cassette. Cette fonction permet à l'appareil de lire les
passages musicaux depuis le début.
q Appuyer sur le bouton [ TPS ] pour activer le mode TPS. (Appuyer une
seconde fois sur le bouton [ TPS ] pour annuler le mode.)
w Appuyer sur le bouton [k] ou [l] pour choisir un programme.
FM
DISC
4
TPS
[k](TRACK 1) : Active le rebobinage de la bande et permet de retourner au
début du programme en cours. La fonction TPS retrouve le
début du programme suivant en correspondance au nombre de
TUNE
TRACK
fois que le bouton est pressé. (Jusqu'à 9 programmes)
[l](TRACK 2) : Active l'avance rapide de la bande et va au début du programme
suivant. La fonction TPS retrouve le début du programme
suivant en correspondance au nombre de fois que le bouton est
AM
DISC
SEL
pressé. (Jusqu'à 8 programmes)
CAppuyer encore une fois sur le bouton [j](3) pour annuler le rebobinage ou
l'avance rapide.
(Appuyer sur le bouton [PRG/3] pour annuler la fonction quand la télécommande
est utilisée).
q Appuyer sur le bouton [SEL] pour choisir le < MUTE KEY SEL >.
( B page 78)
Appuyer sur le bouton [l] pour changer comme suit. ([k]: direction
w
opposée)
MUTE KEY : Aucun son
ATT KEY : Diminue de 1/10e
FM
DISC
SEL
DISC
AM
27
Appuyer sur le bouton pendant plus
de 2 secondes.
<
Appuyer encore une fois
F
R
A
N
Ç
A
I
S
68
Remarques: Le mode TPS ne peut pas fonctionner correctement dans les cas suivants. Cependant, ceci
ne signifie pas que l’appareil est défectueux.
¡Présence d'un intervalle de moins de 4 secondes.
¡Il y a un passage de niveau particulièrement bas durant le programme.
CQ-VX2000U
CQ-VX2000U
81
Page 35

Autres types de configurations
Human
Equalizer
CQ-VX2000
561234
SOURCE
POWER
REPSCANRANDOM
CLOCK
DISP
REVERSE
S
•
ANALYZER DISPLAY MTL B NR TPS SKIP REPEAT
S•A
SPACE
SPC
D·M
LIVE
HALL
JAZZ
STADIUM
DISCO
VOCAL
CINEMA
M
U
T
E
VOL
AUTO
·
P
SENSOR
INTEGRATED CD/CASSETTE RECEIVER WITH DSP
OPEN
FM
DISC
AM
DISC
SEL
TUNE
TRACK
SEL
Boutons kl
Bouton SEL
(suite)
Sant des espaces vierges
Le saut de passage vierge est une fonction qui active l'avance rapide quand un passage
non enregistré est détecté, détecte le début du passage musical suivant et commence la
lecture. Ces opérations sont exécutées automatiquement.
Appuyer sur le bouton [ SKIP ] pour sauter un passage non enregistré.
5
SKIP
F
R
A
N
Ç
A
Gradateur
I
S
Valeur par défaut : DIMMER MID: Quand le voyant indicateur latéral s'allume
26
DIMMER HIGH: Quand le voyant indicateur latéral est éteint
Luminosité de l'affichage quand les voyants indicateurs latéraux peuvent être allumés ou
éteints.
q Appuyer sur le bouton [SEL] pour choisir le <DIMMER SEL>. ( B page 78)
Appuyer sur le bouton [l] pour changer comme suit. ([k]: direction
w
opposée)
DIMMER HIGH : L'intensité lumineuse augmente.
DIMMER MID : Luminosité moyenne.
DIMMER LOW : Luminosité plus faible.
Remarque : Quand la télécommande est utilisée, la sélection de gradateur peut être changée en
appuyant sur le bouton [ DIMMER ] pendant plus de 2 secondes.
FM
DISC
SEL
DISC
AM
Appuyer sur le bouton pendant plus
de 2 secondes.
<
Appuyer encore une fois
Remarques:
¡Lorsque le mode REP est activé, la fonction de saut des espaces vierges est inopérationnelle, du fait que
le mode REP a la priorité sur la fonction de saut des espaces vierges.
¡La fonction de saut des espaces vierges est également inopérationnelle lorsque les portions non
enregistrées de la bande sont d’une durée inférieure à 15 secondes.
Relecture
La relecture est une fonction qui active le rebobinage après avoir terminé la lecture du
programme en cours et le lit à plusieurs reprises.
Appuyer sur le bouton [ REPEAT ] pour répéter la lecture du programme en
cours. (Appuyer encore une fois sur le bouton [ REPEAT ] pour annuler la
fonction.)
Mode de bande métal
Le mode de bande en métal permet à une bande métal ou une bande à bioxyde de
chrome d'être lue et de produire une excellente qualité acoustique.
Appuyer sur le bouton [ MTL ] pour répéter la lecture du programme en
cours. (Appuyer encore une fois sur le bouton [ MTL ] pour annuler la
fonction).
1
MTL
F
R
A
N
Ç
A
I
S
15
6
REPEAT
Réglage AUX IN
Réglage par défaut: AUX IN ON
AUX sera exclus de la sélection.
q Appuyer sur le bouton [SEL] pour choisir le <AUX IN SET>. ( B page 78)
Appuyer sur le bouton [l] pour changer comme suit. ([k]: direction
w
opposée)
80
AUX IN ON : Entrée externe (AUX-IN) est un sujet de sélection de source.
AUX IN OFF: Entrée externe (AUX-IN) n'est pas un sujet de sélection de source.
CQ-VX2000U
FM
DISC
SEL
DISC
AM
Appuyer sur le bouton pendant plus
de 2 secondes.
<
Appuyer encore une fois
Remarque: La lecture de bandes non métalliques en mode MTL provoque un déséquilibre des hautes
fréquences, ce qui affecte la qualité sonore.
Réduction de bruit Dolby
La réduction de bruit Dolby permet à une bande qui a été enregistrée avec le système
Dolby B NR d'être lue en atténuant le bruit de sifflement dans les aigus.
Appuyer sur le bouton [ B NR ] pour répéter la lecture du programme en
cours. (Appuyer encore une fois sur le bouton [ B NR ] pour annuler la
fonction.)
Remarques :
¡La fonction Dolby B NR n'est pas disponible en mode autradio.
¡Si une bande qui n'a pas enregistrée en mode Dolby B NR est lue en mode Dolby B NR, la qualité
acoustique sera compromise par un déséquilibre dans la gamme des hautes fréquences.
CQ-VX2000U
2
B NR
69
Page 36

Human
Equalizer
CQ-VX2000
561234
SOURCE
POWER
REPSCANRANDOM
CLOCK
DISP
REVERSE
S
•
ANALYZER DISPLAY MTL B NR TPS SKIP REPEAT
S•A
SPACE
SPC
D·M
LIVE
HALL
JAZZ
STADIUM
DISCO
VOCAL
CINEMA
M
U
T
E
VOL
AUTO
·
P
SENSOR
INTEGRATED CD/CASSETTE RECEIVER WITH DSP
OPEN
FM
DISC
AM
DISC
SEL
TUNE
TRACK
54
SOURCE
DISP
Utilisation de base de changeur de disque CD (option)
Raccorder un changeur de disque CD (CX-DP88U, etc.)
Boutons jikl
F
R
A
N
Ç
A
I
S
Bouton DISP
Bouton
Bouton SCAN
RANDOM
16
Mode de changeur de CD
Appuyer sur la touche [SOURCE] pour passer en mode de changeur de CD.
Remarques :
¡" NO DISC " apparaît dans l'affichage s'il n'y a aucun disque dans le magasin.
¡Quand un magasin est chargé dans le changeur de disque, l'alimentation est automatiquement
appliquée. (Ensuite, la source sonore passe en mode CHANGER).
Sélection d'un disque
Bouton SOURCE
PWR
SOURCE
FM
DISC
Défilement de titre MD (lorsqu’un changeur de MD est raccordé)
Réglage par défaut: SCROLL ON
q Appuyer sur le bouton [SEL] pour choisir <TITLE SCROLL>. ( B page 78)
Appuyer sur le bouton [l] pour changer comme suit. ([k] : direction
w
opposée)
SCROLL ON : L'affichage défile sans interruption.
SCROLL OFF : L'affichage défile en un cycle, puis s'arrête.
Remarque : Si vous appuyer et immobiliser le bouton [DISP] pendant plus de 2
secondes alors que le réglage de défilement de titre de MD est sur OFF, un cycle de
défilement rond est exécuté.
FM
DISC
DISC
AM
Appuyer sur le bouton pendant plus
de 2 secondes.
<
Appuyer encore une fois
Vitesse d'affichage du spectre des fréquences
Sélectionner : SPEANA FAST
FM
q Appuyer sur le bouton [SEL] pour choisir <SPEANA SPEED>. ( B page 78)
Appuyer sur le bouton [l] pour changer comme suit. ([k] : direction
w
opposée)
SPEANA FAST : L’analyseur de spectre change rapidement.
DISC
SEL
F
R
A
N
Ç
A
I
S
25
Appuyer sur le bouton [j] ou [i].
[j](DISC j) : Disque précédent.
[i](DISC i) : Disque suivant.
Sélection de plage
Appuyer sur le bouton [k] ou [l].
[k](TRACK k) : Revient au début de la plage sélectionnée. Retourne à la page
précédente. (Appuyer deux fois)
[l](TRACK l) : Passe à la plage suivante.
Recherche de plage
Relâcher le bouton [k] ou [l] dès que votre passage favori est joué après
avoir appuyé et immobilisé le bouton pendant plus de 0,5 seconde.
[k](TRACK k) : Retour rapide
[l](TRACK l) : Avance rapide
70
CQ-VX2000U
SEL
DISC
AM
TUNE
TRACK
TUNE
TRACK
Appuyer et immobiliser pendant
plus de 0,5 seconde.
SPEANA SLOW
: L’analyseur de spectre change lentement.
SEL
DISC
AM
Appuyer sur le bouton pendant plus
de 2 secondes.
<
Appuyer encore une fois
CQ-VX2000U
79
Page 37

Autres types de configurations
Human
Equalizer
CQ-VX2000
561234
SOURCE
POWER
REPSCANRANDOM
CLOCK
DISP
REVERSE
S
•
ANALYZER DISPLAY MTL B NR TPS SKIP REPEAT
S•A
SPACE
SPC
D·M
LIVE
HALL
JAZZ
STADIUM
DISCO
VOCAL
CINEMA
M
U
T
E
VOL
AUTO
·
P
SENSOR
INTEGRATED CD/CASSETTE RECEIVER WITH DSP
OPEN
FM
DISC
AM
DISC
SEL
TUNE
TRACK
SEL
Boutons kl
Bouton SEL
F
R
A
N
Ç
A
I
S
Commandes de fonction
24
Appuyer sur le bouton [SEL] pendant plus de 2 secondes pour être prêt à choisir
d'autres fonctions. Appuyer encore une fois sur le bouton [SEL] pour choisir une
fonction.
Quand le bouton [SEL] est pressé, la fonction choisie change comme suit.
Mode régulier
TITLE SCROLL : Vous pouvez décider si l'affichage du titre de MD doit défiler. ( B page 79)
SPEANA SPEED
DIMMER SEL : Vous pouvez choisir la luminosité de l'affichage. ( B page 80)
MONO LOCAL : MONO / LOCAL activé / désactivé ( B page 63)
AUX IN SET : Vous pouvez décider si une entrée externe (AUX IN) doit être activée. ( B page 80)
: Vous pouvez ajuster la vitesse de réaction du récepteur panoramique. ( B page 79)
SEL
Appuyer sur le bouton pendant plus
de 2 secondes.
<
Appuyer encore une fois
Numéro de disque
Durée de lecture de plage
Numéro de plage
Pour changer l'affichage, appuyer sur le bouton
[DISP].
(Exemple) Affichage régulier
Lecture aléatoire de plage
Un morceau sélectionné au hasard parmi toutes les pistes disponibles de tous les
disques dans le magasin est reproduit.
Appuyer sur le bouton [RANDOM]. (Appuyer encore une fois sur le bouton
[RANDOM] pour annuler.)
Lecture aléatoire de disque
Un morceau sélectionné parmi toutes les pistes disponibles du disque en cours de lecture
est reproduit.
Appuyer et immobiliser la touche [RANDOM] pendant plus de 2 secondes.(Appuyer
encore une fois sur la touche [RANDOM] et la maintenir enfoncée pour annuler.)
Appuyer et immobiliser le
bouton pendant plus de
Balayage des pistes
Les dix premières secondes de chaque plage des disques sont lues en séquence.
Appuyer sur le bouton [SCAN]. (Appuyer encore une fois sur la touche [SCAN]
pour annuler.)
F
R
A
N
Ç
A
I
S
17
RANDOM
3 4
RANDOM
3 4
2 secondes.
REPSCAN
5 6
78
MUTE KEY SEL
: Vous pouvez choisir entre le MUTE et ATT. ( B page 81)
Remarques :
¡Si aucune opération n'est exécutée pendant 10 secondes, l'affichage reviendra en mode régulier.
¡Si vous voulez interrompre l'opération actuelle, appuyer sur le bouton [DISP].
CQ-VX2000U
¡Lorsque l'exploration de toutes les plages est terminée, la lecture du programme
d'origine reprend depuis le début.
¡Libérer le bouton [SCAN] dès vous trouvez votre plage préférée.
Balayage de disques
Les 10 premières secondes de la première plage de chacun des disques qui se trouvent
dans le magasin sont lues.
Appuyer et immobiliser la touche [SCAN] pendant plus de 2 secondes.
(Appuyer encore une fois sur la touche [SCAN] et la maintenir enfoncée pour annuler.)
¡Lorsque l'exploration de toutes les plages est terminée, la lecture du disque d'origine
reprend depuis le début.
¡Libérer le bouton [SCAN] dès vous trouvez votre disque préféré.
CQ-VX2000U
REPSCAN
5 6
Appuyer et immobiliser
le bouton pendant plus
de 2 secondes.
71
Page 38

dB
12
8
0
300Hz
Débrayé
Fréquence
TYPE 1 (Variable : faible)
TYPE 2 (Variable : élevé)
TYPE 3 (Fixe : faible)
TYPE 4 (Fixe : élevé)
Pression poussée
Utilisation de base de changeur de disque CD (option)
(suite)
SENSOR
FM
DISC
DISC
AM
F
LIVE
HALL
JAZZ
TUNE
STADIUM
TRACK
DISCO
VOCAL
SEL
CINEMA
Human
Equalizer
REVERSE
CLOCK
DISP
S•A
•
ANALYZER DISPLAY MTL B NR TPS SKIP REPEAT
S
CQ-VX2000
INTEGRATED CD/CASSETTE RECEIVER WITH DSP
561234
REPSCANRANDOM
SPC
6
SPACE
R
A
N
Ç
A
I
S
Répétition d’une piste
18
Ceci a pour effet de répéter la lecture de la plage actuellement sélectionnée.
Appuyer sur le bouton [REP]. (Appuyer encore une fois sur la touche [REP]
pour annuler.)
Répétition d’un disque
OPEN
POWER
SOURCE
VOL
P
·
E
T
U
M
AUTO
D·M
Bouton REP
5 6
Accentuation des graves (Super graves dynamiques poussés/ SDBB)
Valeur par défaut : désactivé
Rehausse les graves délivrés par les 4 haut-parleurs raccordés à l'amplificateur
incorporé de manière à obtenir une sonorité grave renforcée.
q Appuyer sur le bouton [SEL] pour choisir <SDBB SELECT>. ( B page 73)
FM
DISC
Appuyer sur la touche [[] pour modifier comme suit. ([]]: Action dans le
w
sens opposé)
OFF : Sortie normale
TYPE 1 : Variable, basse
REPSCAN
TYPE 2 : Variable, haute
AM
DISC
TYPE 3 : Fixe, bas
TYPE 4 : Fixe, haut
SEL
F
R
A
N
Ç
A
I
S
23
72
Répète la sélection du disque en cours de lecture.
Appuyer et immobiliser la touche [REP] pendant plus de 2 secondes.
(Appuyer encore une fois sur la touche [REP] et la maintenir enfoncée pour
annuler.)
CQ-VX2000U
REPSCAN
5 6
Appuyer et immobiliser pendant
plus de 2 secondes.
¡Variable : Les graves sont rehaussés avec le volume.
¡Fixe : Les graves sont rehaussés suivant la
profondeur définie.
Représentation ambiophonique (Ambiophonie)
Valeur par défaut : désactivé
Cette fonction crée l’ambiance suivante dans votre voiture.
Appuyer sur la touche [SPACE] pour modifier comme suit.
SPACE OFF LIVE HOUSE CONCERT HALL
CINEMA JAZZ CLUB
VOCAL DISCO STADIUM
CQ-VX2000U
SPC
SPACE
77
Page 39

Réglages acoustiques et d'ambiophonie
Human
Equalizer
CQ-VX2000
561234
SOURCE
POWER
REPSCANRANDOM
CLOCK
DISP
REVERSE
S
•
ANALYZER DISPLAY MTL B NR TPS SKIP REPEAT
S•A
SPACE
SPC
D·M
LIVE
HALL
JAZZ
STADIUM
DISCO
VOCAL
CINEMA
M
U
T
E
VOL
AUTO
·
P
SENSOR
INTEGRATED CD/CASSETTE RECEIVER WITH DSP
OPEN
FM
DISC
AM
DISC
SEL
TUNE
TRACK
SPC
SEL
Human
Equalizer
CQ-VX2000
561234
SOURCE
POWER
REPSCANRANDOM
CLOCK
DISP
REVERSE
S
•
ANALYZER DISPLAY MTL B NR TPS SKIP REPEAT
S•A
SPACE
SPC
D·M
LIVE
HALL
JAZZ
STADIUM
DISCO
VOCAL
CINEMA
M
U
T
E
VOL
AUTO
·
P
SENSOR
INTEGRATED CD/CASSETTE RECEIVER WITH DSP
OPEN
FM
DISC
AM
DISC
SEL
TUNE
TRACK
SEL
Boutons jikl
(suite)
Réglages acoustiques et d'ambiophonie
Bouton SEL
F
R
A
N
Ç
Bouton SPACE
A
I
S
lmage sonore
22
(position d’écoute)
Valeur par défaut : POSI OFF
q Appuyer sur le bouton [SEL] pour choisir la <POSITION SEL>. ( B page 73)
w
Appuyer sur la touche [[] pour modifier comme suit. ([]]: Action dans le sens
opposé)
OFF (tous les sièges)
RIGHT (avant droit)
LEFT (avant gauche)
FRONT
REAR
Haut-parleurs arrière comme woofer secondaire
(Woofer secondaire à contrôle de super graves/ SBC-SW)
Réglage par défaut : OFF
q Appuyer sur le bouton [SEL] pour choisir < SUPER BASS >. ( B page 73)
Appuyer sur la touche [[] pour modifier comme suit. ([]]: Action dans le sens opposé)
w
Bouton SEL
F
R
A
N
Ç
A
I
S
Contrôle acoustique
FM
DISC
Appuyer sur le bouton [SEL] pour changer le mode comme suit.
SEL
19
Mode régulier
HUMAN EQ : Vous pouvez ajuster la qualité acoustique pour l'adapter à la musique à votre
disposition d'esprit. (Égaliseur humain) ( B page 74)
AM
SEL
DISC
GRAPHIC EQ : Vous pouvez ajuster la qualité acoustique en ajustant le niveau de chaque
fréquence. (Égaliseur graphique) ( B page 75)
BAL//FAD : Vous pouvez ajuster l'équilibrage sonore du niveau de sortie des haut-parleurs
avant, arrière, gauche et droit. ( B page 75)
POSITION SEL : Vous pouvez ajuster l'image sonore dans l'espace suivant votre goût en fonction de
la position de l'auditeur. ( B page 76)
SUPER BASS : Vous pouvez utiliser le haut-parleur arrière raccordé à un amplificateur incorporé
comme un woofer secondaire pour délivrer uniquement les graves. ( B page 76)
SDBB SELECT : Vous pouvez profiter d'une sonorité grave renforcée. ( B page 77)
SBC-SW OFF : Sortie stéréo
SBC-SW FLAT : Ne coupe pas les aigus (sortie monaurale)
SBC-SW 100Hz :
SBC-SW 150Hz :
SBC-SW 200Hz :
Notes :
¡
Ajuste le niveau de sortie du woofer secondaire. Le réglage est également interconnecté à la sortie préampli
(sortie haut-parleur arrière)
¡Placer SBC-SW de l'unité principale sur FLAT quand la fonction de réglage de fréquence de coupure
incorporée d'un amplificateur externe optionnel est utilisée.
76
CQ-VX2000U
Coupe les sons dans la gamme de 100 Hz ou plus haut (sortie monaurale)
Coupe les sons dans la gamme de 150 Hz ou plus haut (sortie monaurale)
Coupe les sons dans la gamme de 200 Hz ou plus haut (sortie monaurale)
FM
DISC
Remarques :
¡Si l'opération en cours doit être interrompue, il suffit d'appuyer sur le bouton [DISP].
¡Si aucune opération n'est exécutée pendant 10 secondes, l'affichage retournera en mode régulier.
SEL
DISC
AM
CQ-VX2000U
73
Page 40

FM
DISC
AM
DISC
SEL
Human
Equalizer
CQ-VX2000
561234
SOURCE
POWER
REPSCANRANDOM
CLOCK
DISP
REVERSE
S
•
ANALYZER DISPLAY MTL B NR TPS SKIP REPEAT
S•A
SPACE
SPC
D·M
LIVE
HALL
JAZZ
STADIUM
DISCO
VOCAL
CINEMA
M
U
T
E
VOL
AUTO
·
P
SENSOR
INTEGRATED CD/CASSETTE RECEIVER WITH DSP
OPEN
FM
DISC
AM
DISC
SEL
TUNE
TRACK
561234
SEL
Réglages acoustiques et d'ambiophonie
・Détente
・Conduite agréable
・Calme
・Concentration
・Conduite
en toute
sécurité
・Libère le stress
・Rafraîchit
・Écouter la musique
・Rythmique
・Réveille
Renforcé
Très clair
Accentué
Enveloppé
Boutons jikl
Bouton SEL
F
R
A
N
Ç
A
I
S
Qualité acoustique
20
(Human Equalizer – Correcteur sensitif humain/ HEQ)
49 styles sont prémémorisés de sorte que vous pouvez faire aisément les réglages les plus complexes.
Valeur par défaut : FLAT (0)
Limites de réglage : 1 - 3 pour chaque style (49 styles)
Boutons de présyntonisation 1 - 6
(suite)
Mise en mémoire de la qualité acoustique de votre choix
(Graphic Equalizer – Correcteur graphique/ GEQ)
q Appuyer sur le bouton [SEL] pour choisir <GRAPHIC EQ>.
( B page 73)
Valeur par défaut : 0 dB pour chaque fréquence
Limites de réglage : -12 à + 12 dB par paliers de 2 dB
w Ajuster le niveau de chaque fréquence. Appuyer sur la touche [[]
pour changer la fréquence.
80 160 320 640 1.6k 4k 10k (Hz)
Un curseur se déplace horizontalement et clignote sur la fréquence choisie.
e Appuyer sur le bouton [j] ou [i] pour ajuster le niveau.
[j] : Niveau supérieur
[i] : Niveau inférieur
Un curseur se déplace verticalement et clignote sur le niveau ajusté.
CRefaire les étapes w et e pour caler le niveau de chaque fréquence.
FM
DISC
SEL
DISC
AM
F
R
A
N
Ç
A
I
S
21
q Appuyer sur le bouton [SEL] pour choisir<HUMAN EQ>.
( B page 73)
w Appuyer sur le bouton [j], [i], [k] ou le bouton [l] pour ajuster le
niveau.
[
j
] : Graves renforcés
[
[l] : Aigus accentués
[k] : Aigus atténués
Un curseur se déplace dans l'affichage HEQ et clignote au point ajusté.
74
i
] : Graves modérés
CQ-VX2000U
Enregistrement de la qualité acoustique ajustée
Appuyer sur un des boutons de présyntonisation, [ 1 ] à [ 6 ], de l'unité
principale pendant plus de 2 secondes pour sauvegarder les caractéristiques
GEQ actuelles dans le bouton pressé.
L'affichage du numéro de mémoire présyntonisée clignote une fois après que
l'enregistrement ait été fait.
Remarque :
réécriture de la mémorisation précédente.
La nouvelle caractéristique GEQ peut être sauvegardée aux boutons de présyntonisation par
3 4
Appuyer et immobiliser pendant
plus de 2 secondes.
RANDOM
Rappel d'un réglage spécifique
q Appuyer sur le bouton [SEL] pour choisir <GRAPHIC EQ>. ( B page 73)
3 4
w Appuyer sur un des boutons de présyntonisation, [ 1 ] à [ 6 ], de l'unité
FM
DISC
principale pour rappeler les caractéristiques GEQ sauvegardées.
RANDOM
Réglage d'équilibrage et d'équilibre avant – arrière
Valeur par défaut : CNT (centre) Limites de réglage : 15 niveaux de chaque
q Appuyer sur le bouton [SEL] pour choisir <BAL//FAD>. ( B page 73)
AM
SEL
DISC
w Appuyer sur le bouton [j], [i], [k] ou le bouton [l] pour ajuster le
niveau.
[j] : Avant rehaussé
[i] : Arrière rehaussé
[l] : Droit rehaussé
[k] : Gauche rehaussé
CQ-VX2000U
75
Page 41

En cas de difficulté
MD IN
INTEGRATED C
u
Cassette
PLS EJECT
Aucune opération n'est possible
pour une certaine cause
(suite)
Vérification/Disposition à prendreOpérationOrigineExemple d'affichage
Appuyer sur le bouton d'éjection.
Agencement du récepteur panoramique
Réglage par défaut: NORMAL/SPEANA POSI
Chaque indication du récepteur panoramique possède 8 configurations qui sont différentes en termes de ton
de la couleur et de mouvement. (Indication du récepteur panoramique q - !1)
F
R
A
N
Ç
A
S
44
q Appuyer et immobiliser le bouton [ REVERSE ] pendant plus de 2
secondes.
w Appuyer sur le bouton [j], [i], [k] ou le bouton [l] pour choisir une
forme.
I
Commutateur de remise à l'état initial
Important
Ce commutateur ne doit être pressé que si
l'appareil ne fonctionne pas à partir de tous les
boutons.
Si le panneau ne peut pas être ouvert ou si le
Changement de direction
Appuyer sur le bouton [l] pour changer comme suit. ([k] : direction
opposée)
NORMAL :
Affichage régulier du
récepteur panoramique
S
Appuyer et immobiliser pendant
plus de 2 secondes.
FM
•
ANALYZER
DISC
REVERSE
S•A
F
R
A
N
Ç
A
I
S
29
fonctionnement normal de l'appareil n'est pas
rétabli, faire appel aux services du centre de
service après-vente le plus proche et faire
réparer l'appareil.
RESET
REVERSE 1 : Affichage régulier
inversé verticalement.
REVERSE 2 : L'affichage inversé 1 est
inversé horizontalement.
AM
SEL
DISC
Commutateur de remise à l'état initial
Introduire une mince tige dure dans le trou et
presser le commutateur.
REVERSE 3 : L'affichage inversé 2 est
inversé verticalement.
L'appareil revient en état de fonctionnement avec
ses réglages par défaut quand la panne est
remise à l'état initial. Noter cependant que les
Sélecteur positif – négatif
données et les réglages enregistrés dans la
mémoire sont effacés.
Appuyer sur le bouton [j] ou le bouton [i].
Remplacement de fusible
Utilisez des fusibles de même puissance comme indiqué (10 ampères, 3 ampères). L'utilisation d'éléments
différents pour le remplacement ou des fusibles dont la puissance est plus élevée ou encore si l'appareil est
directement raccordé sans passer par l'intermédiaire d'un fusible, il y a risque d'incendie ou cela peut
endommager à l'appareil stéréo.
Si le remplacement du fusible ne permet pas d'obtenir une amélioration, prendre contact
avec le service de dépannage Panasonic le plus proche pour dépanner l'appareil.
98
CQ-VX2000U
SPEANA POSI
(Positif)
Remarques :
SPEANA NEGA
(Négatif)
¡Quand un mode de réglage est choisi mais qu'aucune opération n'est exécutée pendant 10 secondes,
l'affichage reviendra en mode de fonctionnement normal.
¡La forme d'affichage ne peut pas être changée dans à la partie de l'indication des lettres du récepteur
panoramique.
CQ-VX2000U
83
Page 42

Fonctions utiles
Human
Equalizer
CQ-VX2000
561234
SOURCE
POWER
REPSCANRANDOM
CLOCK
DISP
REVERSE
S
•
ANALYZER DISPLAY MTL B NR TPS SKIP REPEAT
S•A
SPACE
SPC
D·M
LIVE
HALL
JAZZ
STADIUM
DISCO
VOCAL
CINEMA
M
U
T
E
VOL
AUTO
·
P
SENSOR
INTEGRATED CD/CASSETTE RECEIVER WITH DSP
OPEN
FM
DISC
AM
DISC
SEL
TUNE
TRACK
SOURCE
D·M
M
U
T
E
(suite)
Bouton SOURCE
Bouton MUTE (ATT)
F
R
A
N
Ç
A
I
S
Mémoire Directe
30
Bouton D•M
Même si l'alimentation est coupée ou que la source n'est pas un programme radio, un canal mémorisé peut être
reçu sur le simple contact du bouton.
Fréquence
Messages d’erreur affichés
Disque CD
CD – E1 –
CD – E2 –
CD – E3
PLS EJECT
Le disque CD est sale ou à
l'envers.
Le disque est rayé.
Aucun fonctionnement pour une
raison quelconque
Une action a été entreprise pour
commander la lecture avant que le
disque n'ait été éjecté
complètement.
Est
éventuellement
éjecté
Vérifier le disque
automatiquement
.
Ouvrir le panneau de façade et appuyer sur la
touche [u]. Si la panne persiste, appuyer sur
l'interrupteur de remise à zéro.
Si cela ne permet toujours pas de rétablir le
fonctionnement normal, demander une
assistance et faire réparer l'appareil.
Ouvrir le panneau de façade et appuyer sur la
touche [u].
Vérification/Disposition à prendreOpérationOrigineExemple d'affichage
F
R
A
N
Ç
A
I
S
43
Quand le bouton [ D•M ] est pressé, le mode sélectionné change comme suit.
D•M : La station mémorisé directement est reçu.
Mode régulier : Retourne à la source sonore précédente. (ou s'éteint)
Mise en mémoire directe
q Sélectionner la station désirée. ( B Page 62)
w Appuyer sur [D•M] pendant plus de 2 secondes pour enregistrer la station dans
la mémoire.
Remarques :
¡Le réglage par défaut de D•M est fait sur FM 88,1 MHz.
¡Les réglages d'espace ambiophonique et autres ne peuvent pas être exécutés pendant le mode D•M.
84
CQ-VX2000U
D·M
Changeur de CD
Vérification/Disposition à prendreOpérationOrigineExemple d'affichage
CD CH – E1 –
M
D CH – E1 –
CD CH – E2 –
M
D CH – E2 –
CD CH – E3 –
M
D CH – E3 –
NO DISC
Remarques:
Il peut arriver que les numéros de disque affectés par une erreur soient affichés avant E1 et E2.
¡
¡Les indications affichées et les dispositions à prendre pour les cas d'erreur peuvent être partiellement
différentes d'un modèle de changeur de CD à l'autre. Se reporter à la notice d'instructions du changeur de
CD utilisé pour obtenir des explications plus détaillées à ce sujet.
Le disque CD est sale ou à
l'envers.
Est
éventuellement
éjecté
automatiquement
Le disque est rayé.
.
Aucun fonctionnement pour une
raison quelconque
Absence de disque dans le
changeur de CD (magasin de
disques)
Vérifier le disque
Ouvrir le panneau de façade et appuyer sur la
touche [u]. Si la panne persiste, appuyer sur
l'interrupteur de remise à zéro. Si cela ne
permet toujours pas de rétablir le
fonctionnement normal de l'appareil,
demander l'assistance du magasin qui vous a
vendu l'appareil ou du centre de service après-
vente le plus proche pour qu'il effectue les
Introduire des disques dans le magasin.
CQ-VX2000U
97
Page 43

En cas de difficulté
Cassette
TPS non disponible
F
R
Qualité du son médiocre
A
N
Ç
A
I
S
La cassette n'est pas éjectée.
42
Peu après le chargement de la
bande, la face de lecture se
commute alternativement de
l'une à l'autre à plusieurs
La lecture ne s'arrête pas.
Réglage du son
Aucun son n'est délivré par le
haut-parleur gauche, droit,
avant ou arrière
Le son délivré à gauche et à droite
est inversé pendant l'écoute d'un
programme stéréo.
Seuls les graves ou un son monaural
est délivré par le haut-parleur arrière.
Boîtier de télécommande
Panne
Les commandes par touche
ne sont pas validées.
(suite)
L'intervalle entre les programmes
est trop court.
Bande de qualité médiocre
La tête de lecture est sale.
La cassette est défectueuse.
¡
Panne mécanique
¡
L'équilibrage gauche et droit ou avant
et arrière est coupé d'un côté.
Les fils ne sont pas branchés
correctement
Les fils du haut-parleur droit sont raccordés au
haut-parleur gauche et les fils du haut-parleur
gauche sont raccordés au haut-parleur droit.
La fonction SBC-SW est réglée sur
ON.
Les polarités (+) (–) des piles sont
inversées.
Les piles utilisées ne sont pas
adaptées.
Les piles sont épuisées.
Confirmez que la fonction TPS est opérationnelle en
utilisant une cassette différente.
Utiliser une cassette différente.
Nettoyer la tête.(Demander les conseils nécessaires
à un technicien.)
Appuyer sur le bouton d'éjection.
Vérifiez si le mécanisme fonctionne normalement en
utilisant une cassette différente.
Si le mécanisme ne fonctionne pas normalement,
appuyer sur le commutateur de remise à l'état initial.
Si le mécanisme ne fonctionne toujours pas
normalement, prendre contact avec un distributeur
de la marque ou un centre de service après-vente.
Régler BAL/FAD de la façon appropriée.
Brancher les fils correctement.
Brancher les fils de haut-parleur aux haut-parleurs
correspondants.
Régler la fonction SBC-SW sur OFF.
Introduire les piles correctement.
Vérifier les piles.
Remplacer les piles.
Réduction du son (Coupure du son ou atténuateur)
Réglage par défaut: MUTE OFF
Disposition à prendreOriginePanne
Page
Le volume diminue en fonction du réglage choisi, Mute ou ATT. ( B page 81)
–
E
T
U
M
F
R
A
N
Ç
A
I
S
31
–
–
66
98
Appuyer sur la touche MUTE (ATT) pour activer ou désactiver le mode MUTE
(mode ATT).
Lorsque le mode MUTE est sélectionné
MUTE OFF : Niveau de sortie son normal
MUTE ON : Absence de son
L'indicateur de sourdine clignote tandis que MUTE ou ATT est en service.
Lorsque le mode ATT est sélectionné
ATT OFF : Niveau de sortie son normal
ATT ON : Niveau de volume réduit à 1/10e.
Source sonore extérieure (AUX-IN)
Raccorder un appareil externe à AUX IN (borne d'entrée AUX) qui se trouve à l'arrière de l'unité
principale. ( B page 93)
Appuyer sur le bouton [SOURCE] pour passer en mode < AUX IN>.
PWR
Disposition à prendreOriginePanne
Page
Référez-vous aux consignes d'utilisation respectives des appareils externes pour
obtenir de plus amples détails à ce sujet.
SOURCE
75
92-93
Lumière noire
92-93
76
Disposition à prendreOrigine
Page
55
55
55
La lumière noire est optionnelle et implique une installation supplémentaire.
La totalité du panneau s'allume en bleu foncé et apparaît quand la lumière noire est activée.
Attention: Installer la lumière noire à plus de 20 centimètres de l'unité principale. Le manquement à
cette précaution de sécurité peut favoriser un défaut de fonctionnement voire provoquer des parasites.
96
Le boîtier de télécommande n'est
pas orienté correctement.
CQ-VX2000U
Diriger la télécommande vers SENSOR (capteur) du
panneau de façade.
–
CQ-VX2000U
85
Page 44

Entretien
Partie visible de la bande
(côté ouvert de la cassette)
Crayon
Ne pas toucher
directement ni
tirer la bande
avec les doigts.
F
R
A
N
Ç
A
S
32
Entretien de l'appareil
Nettoy a ge de l'appareil
Se servir d'un chiffon sec et souple pour
essuyer l'appareil.
Précautions à prendre lors
du nettoy a ge de l'appareil
Ne pas utiliser de benzine, de diluant ou
d’autres solvants.
Remarques relatives aux disques CD
I
UTILISER UNIQUEMENT DES DISQUES PORTANT UNE ÉTIQUETTE
TELLE QUE REPRÉSENTÉE SUR LA FIGURE CI-CONTRE
Autoradio
Les programmes FM stéréo et
mono sont fortement
parasités.
Remise à zéro de station
présyntonisée
Disque CD
La station émettrice est trop
éloignée ou si les signaux
reçus sont trop faible.
Le câble de la batterie n'est pas
branché correctement.
Disposition à prendreOriginePanne
Accorder d'autres stations dont le niveau des
signaux est plus élevé.
Raccorder le câble de la batterie à la borne délivrant
le courant.
Disposition à prendreOriginePanne
Page
62
92
Page
F
R
A
N
Ç
A
I
S
41
Comment saisir un disque CD
¡Ne jamais toucher la surface inférieure du disque.
¡Veiller à ne pas rayer la surface du disque.
¡Ne pas plier le disque.
¡Remettre le disque CD dans son boîtier après utilisa-
tion.
Ne pas se servir de disques CD dont les formes ne
sont pas normalisées
Ne pas laisser les disques dans les endroits suivants:
¡En plein soleil
¡Dans des endroits sales, poussiéreux et humides
¡En plein soleil
¡Dans des endroits sales, poussiéreux et humides
Nettoyage des disques
Se servir d'un morceau d'étoffe sèche et souple pour
nettoyer en partant du centre du disque.
Précautions à prendre avec les disques neufs
Le bord d'un disque neuf risque de présenter de minuscules imperfections autant à la périphérie que sur le
bord du trou intérieur. Ceci peut être à l'origine d'un
fonctionnement anormal.
Abattre les imperfections avec un crayon, etc.
Face étiquetée
<Procédé correct>
Bord présentant
des
imperfections
<Procédé incorrect>
Le disque CD est à l'envers.
Un disque CD est chargé mais
aucun son n'est délivré.
Le disque CD utilisé est sale.
Des passages du disque CD
sont sautés, la qualité
acoustique est médiocre.
Des passages du son sont
sautés en présence de
vibrations.
Le disque CD n'est pas éjecté
Le disque CD utilisé est sale.
L'angle d'installation de l'appareil
est supérieur à 30 degrés.
Installation instable
¡
¡
Le disque CD utilisé est
défectueux
Panne d'ordre mécanique
Introduire le disque CD en l'orientant dans le bon
sens, étiquette vers le haut.
Nettoyer le disque CD conformément aux
instructions de la section traitant de l'entretien des
disques CD.
Nettoyer le disque CD conformément aux
instructions de la section traitant de l'entretien des
disques CD.
Faire en sorte que l'angle d'installation de l'appareil
ne dépasse pas 30 degrés.
Installer fermement l'appareil en utilisant les
accessoires d'installation tout en se référant à la
section traitant des travaux d'installation.
Ouvrir le panneau de façade et appuyer sur la touche
[u]. Si la panne persiste, appuyer sur l'interrupteur
de remise à zéro. Si cela ne permet toujours pas de
rétablir le fonctionnement normal de l'appareil,
demander l'assistance du magasin qui vous a vendu
l'appareil ou du centre de service après-vente le plus
proche pour qu'il effectue les réparations
nécessaires.
64
86
86
–
87
64
98
86
Remarques relatives aux cassettes
Flottement de la bande :
Se servir d'un crayon ou d'un objet
similaire de la façon représenté sur
la figure ci-contre. Si une cassette
dont la bande n'est pas tendue normalement est utilisée, celleci risque
de se prendre dans les pièces rotatives de l'appareil.
CQ-VX2000U
CQ-VX2000U
95
Page 45

En cas de difficulté
Épaisseur
Minimum : 4,75 mm (3/16 po)
Maximum : 5,56 mm (7/32 po)
182mm (7-5/32 po)
103 mm (4-1/16 po)
Problèmes communs
Panne
La clé de contact de la voiture n'est pas
tournée en position ON.
Les fils ne sont pas branchés
correctement
F
R
A
N
Absence d'alimentation
Ç
A
I
S
40
Absence de son
Les touches sont inutilisables
Impossibilité de régler
l'horloge
Parasite Séparer le téléphone cellulaire de l'unité principale.
Le câble de la batterie n'est pas
branché correctement.
Le câble de l'accessoire n'est pas
branché correctement.
Le fil de mise à la masse n'est pas
branché correctement.
Fusible détruit.
Volume excessivement faible Augmenter le volume
Les fils ne sont pas branchés
correctement
La fonction de coupure du son est
appliquée.
Condensation (buée)
L'affichage de spectre des fréquences est
réglé en mode de démonstration
Le courant n'a pas encore été
appliqué.
Un téléphone cellulaire se trouve
près de l'unité principale.
Tourner la clé de contact de la voiture sur ACC ou
sur ON.
Brancher les fils correctement.
Raccorder le câble de la batterie à la borne délivrant
le courant.
Raccorder le câble de l'accessoire à la source ACC
de la voiture.
Raccorder le fil de mise la masse à une partie
métallique de la voiture.
Demander l'assistance du magasin qui vous a vendu
l'appareil ou du centre de service après-vente le plus proche
(voir la fiche fournie) pour que le fusible soit remplacé.
Brancher les fils correctement.
Arrêter la fonction de coupure du son.
Attendre un moment avant d'utiliser l'appareil.
Appuyez sur la touche [DISP] pour annuler le mode
de démonstration.
Appuyer sur le bouton [ POWER ] pour mettre sous
tension, puis régler l'horloge.
Disposition à prendreOrigine
Page
58
92-93
92
92
92
–
58
93
85
–
58
58
–
Guide d'installation
VERTISSEMENT
Les informations relatives à l’installation sont prévues uniquement
pour des techniciens qualifiés et ne concernent pas les personnes
sans connaissance technique. Elles ne contiennent pas de mises en
garde ou d’avis quant aux dangers potentiels pouvant être encourus
lors de l’installation de cet appareil.
Toute tentative d’installation de cet appareil dans un véhicule
motorisé par une personne sans qualification technique peut causer
des dommages importants au système électrique du véhicule voire
provoquer des blessures graves ou même mortelles.
❏ Généralités
Cet appareil devrait installé par un technicien
qualifié. Si l’utilisateur décide de le faire par ses
propres moyens, la première étape consiste au
choix de l’emplacement. Les instructions données
dans ce manuel décrivent les étapes suivantes. (Se
référer à la notice intitulé “AVERTISSEMENT” cidessus.)
¡Identifier et étiqueter les fils du véhicule.
¡Raccorder les fils du véhicule à ceux du
connecteur d’alimentation.
¡Installer l’appareil dans le tableau de bord.
¡Vérifier le fonctionnement de l’appareil.
En cas de difficultés, ne pas hésiter à communiquer
avec un installateur professionnel.
Précaution: Cet appareil ne peut fonctionner qu’à
partir d’une source d’alimentation à courant continu
de 12 volts et système de batterie automobile avec
négatif à la masse. Ne pas essayer de l’utiliser avec
tout autre type de système. En effet, cela pourrait
occasionner de graves dommages.
❏ Pièces de montage
N° Pièces
Vis á tête bonbée ( ø 5 X 8 mm )
q
Vis á tête plate ( ø 5 X 8 mm )
w
❏ Outils nécessaires
Un tournevis, une pile AA de 1,5 V et les accessoires ci-dessous sont nécessaires:
Vérificateurde
continuité 12 V c.c.
❏
Spécifications du tableau de bord
Ruban
d’électricien
Pinces
à sectionner
F
R
A
N
Ç
A
I
S
33
Quantité
4
8
94
CQ-VX2000U
Avant de procéder à l’installation de l’appareil,
vérifier si les éléments mentionnés ci-dessous se
trouvent bien dans l’emballage de votre appareil.
¡Carte de garantie …… La remplir sans délai.
¡Liste des centres de service agréés Panasonic
…… La conserver à des fins de consultation
ultérieure si l'appareil doit être réparé.
¡Matériel d’installation …… Indispensable pour
effectuer l’installation dans le tableau de bord.
CQ-VX2000U
87
Page 46

C
s
Guide d'installation
(suite)
❏ Identification des fils de
connexion
La toute première étape consiste à identifier tous les
fils de connexion du véhicule qui seront utilisés pour
effectuer le raccordement de votre équipement
audio.
Après avoir identifié chacun des fils de connexion,
nous vous conseillons de les étiqueter avec du
F
chatterton et un marqueur indélébile. Cela évitera
R
tout risque de confusion et d’erreur si des
A
branchements sont effectués ultérieurement.
N
Ç
Remarque: Ne pas raccorder le connecteur
A
I
d’alimentation à l’appareil stéréo avant effectué tous
S
les raccordements. Si les fils de raccordement
stéréo ne sont pas équipés de capuchons en
34
plastique, isoler provisoirement tous les fils de
connexion dont les conducteurs sont exposés avec
du ruban d’électricien jusqu'à ce que leur
raccordement soit effectué. Identifier les fils de
connexion dans l’ordre suivant.
Fils d’alimentation
Si votre voiture est équipée d’une autoradio ou si le
câblage permettant son raccordement a été fait à
l’avance:
Sectionner l’un après l’autre les fils de connexion du
connecteur près de la prise (en prenant soin de
laisser les fils les plus longs possibles) de manière à
pouvoir faire aisément le branchement de chacun
des fils de connexion.
tation continue nécessaire au circuit d’alimentation
de l’horloge, de la mémoire ou à d’autres circuits.)
Si votre véhicule est équipé d’une autoradio ou si le
câblage permettant son raccordement a été fait à
l’avance:
Alors que la clé de contact est en position OFF et
que les phares sont éteints, repérer le fil de la
batterie du véhicule en reliant un fil de la lampe de
contrôle au châssis et en vérifiant les autres fils de
connexion exposés provenant de la prise dont les
fils ont été sectionnés au moyen de l’autre fil.
Si le câblage pour recevoir une autoradio n’a pas
été fait à l’avance dans votre véhicule :
Vérifier dans la boîte de servitude et chercher le
réceptacle du fusible de la batterie habituellement
identifié par BAT.
Haut-parleurs
Identifier les fils de haut-parleur. Il devrait
normalement y avoir deux fils pour chaque hautparleur, codées en couleurs.
Une façon simple d’identifier les fils de haut-parleur
et le haut-parleur qui leur correspond consiste à
vérifier les fils avec une pile AA de 1,5 V de la
manière suivante.
Tenir un fil contre l’un des pôles de la batterie et
frôler l’autre pôle avec l’autre fil. Un son de
grattement sera entendu dans le haut-parleur si le fil
en main est un fil de haut-parleur. Identifier tous les
fils de haut-parleur et les étiqueter en indiquant à
quel haut-parleur ils doivent être raccordés.
Moteur d'antenne
Si le véhicule est équipé d'une antenne à
commande électrique, identifier le fil d'alimentation
du moteur d'antenne en reliant un fil du contrôleur à
ampoule au fil de la batterie du véhicule et en
touchant un à un les fils exposés du connecteur
Tourner la clé de contact sur la position
accessoires, puis relier l’un des fils de la lampe de
radio sectionné. Le fil recherché est celui qui
actionne le moteur d'antenne quand il est touché.
contrôle au châssis du véhicule.
Relier l’autre fil de la lampe de contrôle à chacun
des fils de connexion exposés de la prise de
raccordement de l’autoradio qui a été coupée.
Antenne
Le fil d'antenne est le fil noir épais à capuchon
métallique fixé à son extrémité.
Toucher un fil à la fois jusqu'à ce que le fil qui fait
allumer la lampe de contrôle ait été repéré.
Tourner maintenant la clé de contact sur la position
OFF, puis sur la position ON. Si l’ampoule s'éteint et
s'allume en même temps, le fil identifié est bien le fil
d’alimentation du véhicule.
Si le câblage pour recevoir une autoradio n’a pas
été fait à l’avance dans votre véhicule:
Vérifier dans la boîte de servitude et chercher le
réceptacle du fusible de l’autoradio (RADIO), des
accessoires (ACC) ou de l’allumage (IGN).
Exemple de système
amélioré
Combinaison
¡ Changeur de CD (CX-DP88U)
¡ Téléviseur d'automobile
¡ 8 haut-parleurs
ordon RCA
(option)
(Blanc)
(L)
(Blanc)
(L)
(Rouge)
(Rouge)
TV pour automobiles, etc.
Cordon RCA
(option)
(Blanc)
(L)
Amplificateur
de puissance
(Rouge)
(R)
(Blanc)
(L)
Antenne
(Rouge) (R)
(Blanc) (L)
à AUX
(R)
FRONT
(R)
(Blanc)
(L)
Câble d'alimentation de
l'antenne électrique
Raccorder au câble d’alimentation
pour la commande de l’antenne
automatique du véhicule.
(Blanc avec rayures noires)
(Rouge)
(R)
Amplificateur
de puissance
CD
•
C IN
•
CH IN
CD/MD
R
L
AUX-IN PRE-OUT (R)
(Blanc)
(L)
(Rouge)
(R)
(ANT-CONT MAX 0.1A)
(Blanc)
(+) (–) (+) (–) (+) (–) (+) (–)
PRE-OUT (F)
(Gris)
Changeur de CD
CX-DP88U
(Rouge) (R)
REAR
(Rouge)
(R)
(Bleu
)
(Gris avec rayures
noires)
Cordon prolongateur
(DIN/RCA/BATT/GND)
(Jaune)
(Blanc) (L)
Connecteur de commande
de changeur
Fusible (3A)
CQ-VX2000U (arrière)
Connecteur d'alimentation
(ILLUMINATION)
(Orange avec rayures
blanches)
(ACC 3A)
(Rouge)
(AMP-CONT MAX 0.1A)
Fusible (3A)
(Noir)
(Jaune)
Fusible
(10A)
(Bleu avec rayures
blanches)
(Vert)
Connecter le câble d’éclairage au
câble d’alimentation connecté aux
feux de position de la voiture
À raccorder à l'alimentation ACC,
+12 V c.c.
Relier à une partie métallique propre et à nue du châssis du
véhicule
(BATTERY 10A)
À raccorder à la batterie automobile, +12 V c.c.
(Violet)
Fil de mise
à la masse
Câble de
connexion
de batterie
Câble de l’éclairage
Fil de connexion
d'alimentation ACC
Fil de mise à la masse
Câble de connexion
de batterie
Câble d’alimentation de
l’amplificateur externe
À raccorder à un
amplificateur externe
(Vert avec rayures noire
(Violet avec rayures noires
F
R
A
N
Ç
A
I
S
39
)
Fil de la batterie
Si votre appareil stéréo possède un fil jaune, il sera
nécessaire de repérer le câble de la batterie du
véhicule. Sinon, il est possible d’omettre cette
étape. (Le fil jaune de la batterie procure l’alimen-
Haut-parleurs pour une
extension future
Haut-parleur
avant
(gauche)
Haut-parleur
avant
(droit)
Haut-parleur
arrière
(gauche)
Haut-parleur
arrière
(droit)
88
CQ-VX2000U
CQ-VX2000U
93
Page 47

PRE-OUT (F)
CD/MD
•
CH IN
R
L
AUX-IN PRE-OUT (R)
Connecteur de commande
de changeur
Connecteur d'alimentation
(Orange avec rayures blanches)
Câble de l’éclairage
(AMP-CONT MAX 0.1A)
Câble d’alimentation de
l’amplificateur externe
(Bleu avec rayures blanches)
(ACC 3A)
(Noir)
Fil de mise à la masse
(Blanc avec rayures noires)
(Vert avec rayures noires)
(Blanc)
(Gris)
(Gris avec rayures
noires)
(Vert)
(Violet avec rayures noires)
(Violet)
Haut-parleur
avant
(gauche)
Haut-parleur
avant
(droit)
Haut-parleur
arrière
(gauche)
Haut-parleur
arrière
(droit)
Connecter le câble d’éclairage au
câble d’alimentation connecté aux
feux de position de la voiture
Relier à une partie métallique propre et à nue du châssis du véhicule
À raccorder à la batterie automobile,
+12 V c.c.
(+) (–) (+) (–) (+) (–) (+) (–)
Câble de connexion de batterie
(BATTERY 10A)
(Jaune)
Fil de connexion
d'alimentation ACC
(Rouge)
(ILLUMINATION)
(ANT-CONT MAX 0.1A)
Câble d'alimentation de
l'antenne électrique
(Bleu)
Fusible (3A)
Fusible (10A)
Antenne
À raccorder à l'alimentation ACC,
+12 V c.c.
À raccorder à un amplificateur
externe
Raccorder au câble d’alimentation
pour la commande de l’antenne
automatique du véhicule.
CQ-VX2000U (arrière)
Branchements électriques
Précautions
¡Cet appareil fonctionne seulement à 12 volts CC avec borne negative à la masse.
¡Empêcher les courts-circuits de se produire, débrancher la borne négative (–) de la batterie.
¡Veuillez lire attentivement les consignes d'utilisation de tout appareil raccordé à cet appareil.
Attention: Pour une installation dans des voitures équipées de totalisateur partiel électronique ou
d’ordinateur de navigation, tous les réglages enregistrés antérieurement dans la mémoire électronique de
F
R
A
N
Ç
A
38
l'ordinateur seront effacés avec le débranchement de la borne de la batterie.
I
S
❏ Raccorder tous les fils
Après avoir identifié tous les fils de connexion du
véhicule, il est possible de les raccorder aux fils de
connexion de l’appareil stéréo. Le schéma de
câblage électrique (B page 92, 93) représente les
branchements appropriés et le code de couleur
utilisés pour les fils.
Il est vivement recommandé de vérifier le
fonctionnement de l’appareil avant de procéder à
son installation définitive.
Pour ce faire, poser l’appareil dans le véhicule et
faire des raccordements provisoires afin de vérifier
le fonctionnement de l’appareil. Se servir de ruban
d’électricien pour protéger tous les fils exposés.
Important: Raccorder le fil d’alimentation de
couleur rouge en dernier après avoir réalisé tous les
raccordements et isolés tous les fils.
Mise à la terre
Raccorder le fil de mise à la terre de couleur noire
de la prise d’alimentation à une partie métallique du
châssis du véhicule.
Haut-parleurs
Raccorder les fils des haut-parleurs. Se reporter au
schéma de la page 106 afin d’assurer que les
raccordements soient conformes et de prévenir tout
risque de dommage aux haut-parleurs et à
l’appareil.
Les haut-parleurs doivent avoir une puissance
admissible minimale de 37 W. Si un amplificateur
externe est utilisé, s’assurer que la puissance
admissible nominale des haut-parleurs corresponde
à la puissance maximale de l’ampli, afin de ne pas
endommager les haut-parleurs.
L’impédance des haut-parleurs doit être de 4
à 8 ohms, ce qui est le niveau standard. (L’impédance est généralement inscrite sur les hautparleurs). L’utilisation de haut-parleurs d’une impédance plus faible ou plus élevée affectera la qualité
du rendu sonore et risque d’endommager tant
l’appareil que les haut-parleurs eux-mêmes.
ATTENTION : Ne jamais mettre une fil de haut-
parleur à la masse. Par exemple, ne pas utiliser un
système de mise à la masse au châssis ou système
commun trifilaire.
Chaque haut-parleur doit être raccordé séparément
au moyen de fils parallèles isolés.
En cas de doute sur ce câblage, communiquer avec
un installateur professionnel.
Moteur d'antenne
Raccorder le fil d’antenne électrique du véhicule au
fil d’amenée bleu de l’antenne électrique.
Batterie
Raccorder le fil jaune de la batterie du véhicule au
bon fil d’amenée de l’autoradio ou au réceptacle de
fusible de batterie du véhicule.
Antenne
Raccorder l’antenne en branchant le fil d’antenne
dans la prise d’antenne.
Équipement auxiliaire
Raccorder tout équipement auxiliaire tel qu’un
amplificateur conformément aux instructions de la
notice de l’équipement. Séparer les fils de hautparleur/d’amplificateur de l’antenne/du fil d’antenne
d’au moins 30 cm. (12 po). Relire les instructions
d’utilisation et d’installation de tout équipement
supplémentaire à raccorder à cet appareil.
Alimentation
Raccorder le fil d’alimentation rouge au bon fil
d’autoradio du véhicule ou au réceptacle de fusible
approprié de la boîte de servitude du véhicule.
Si l’appareil stéréo fonctionne normalement après
avoir effectué tous ces raccordements, débrancher
les fils et procéder à l’installation finale.
Cordon de lumière
1. Connecter le cordon de lumiére au contacteur
d’éclairage. Les boutons de commande sont
alors éclairés.
2. S’il est impossible de localiser le contacteur
d’éclairage, connecter le cordon de lumière
(orange avec rayures blanches) au cordon
prévu en accessoire (ACC).
❏ Installation finale
Raccordement des fils de connexion
Raccorder tous les fils en prenant soin de vérifier
que tous les fils sont parfaitement isolés et
solidement retenus. Attacher tous les fils ensemble
et les retenir au chatterton pour qu’ils ne se
détachent pas par la suite.
Félicitations ! Après avoir pris soin de faire quelques
vérifications finales d’usage, vous allez pouvoir profiter de votre nouveau système stéréo automobile.
❏ Vérifications finales
1. Vérifier que tous les fils de connexion sont
branchés et isolés correctement.
2. Mettre le contact et vérifier que l’appareil
fonctionne normalement.
En cas de difficulté, faire appel aux services de
l’installateur professionnel agréé le plus proche.
F
R
A
N
Ç
A
I
S
35
92
CQ-VX2000U
CQ-VX2000U
89
Page 48

Remarque :
Employer une paire de pinces
pour redresser les doigts de la
platine de fixation verticalement.
Platine de fixation (G)
Platine de fixation (D)
CQ-VX2000U
Les vis ajoutées ( q ou w) ... Choisir les vis appropriées et adaptées à la forme du trou
de la platine de fixation.
w
Vis à tête plate :
8 ( ø 5 X 8 mm )
Note: q Remarque : Les vis à
tête
bombée
q ( ø 5 X 8 mm )
sont quatre éléments ajoutés,
les quatre autres éléments
sont montés sur la platine de
fixation de transport [ vis avec
rondelle ( ø 5 X 8 mm ) ]
q Vis avec
rondelle : 8
( ø 5 X 8 mm )
Guide d'installation
(suite)
❏ Précautions à prendre
Il est vivement recommandé de porter des gants lors des travaux d’installation pour la protection contre les blessures.
F
R
A
N
Ç
A
S
36
Dépose de la platine de fixation de transport
Ne pas oublier de retirer la platine de fixation de transport avant usage (installation) de l'appareil.
CUtiliser des vis ( ø 5 X 8 mm ) avec des rondelles pour effectuer l'installation.
Faire attention de ne perdre aucune de ces pièces.
I
CQ-VX2000U
Platine de fixation de transport : 2
Vis avec rondelle
(ø5 x 8 mm)
❏ Installation typique (pour l’appareil de double hauteur DIN)
1. Retirer l'autoradio de la voiture ou le petit cadre à objet du véhicule ainsi que les platines de
fixation d'arrêt.
2. Utiliser les vis ajoutées q ou w pour installer les platines de fixation sur cet appareil.
3. Installer l'appareil dans le véhicule.
F
R
A
N
Ç
A
I
S
37
Remarque :
¡Les trous de vis du coté droit ne sont pas taraudés. N’utiliser que les vis fouries pour monter
l’appareil.
¡Pour serrer les vis, presser directement sur la tête de vis et tout droit.
90
CQ-VX2000U
¡Si un kit spécial (vendu séparément) est nécessaire pour un véhicule d'année, de modèle ou de
catégorie spécifique, veuiller consulter le distributeur.
¡Pour effectuer les branchements électriques à votre véhicule, vous pouvez vous procurer un
connecteur spécial d'alimentation que votre distributeur tient à votre disposition.
❏ Installation pour les autres appareils
En ce qui concerne le kit d'utilisation générale (vendu séparément) ou le kit spécial (vendu
séparément), veuillez consulter votre distributeur.
CQ-VX2000U
91
Page 49

Human
Equalizer
CQ-VX2000
561234
SOURCE
POWER
REPSCANRANDOM
CLOCK
DISP
REVERSE
S
•
ANALYZER DISPLAY MTL B NR TPS SKIP REPEAT
S•A
SPACE
SPC
D·M
LIVE
HALL
JAZZ
STADIUM
DISCO
VOCAL
CINEMA
M
U
T
E
VOL
AUTO
·
P
SENSOR
INTEGRATED CD/CASSETTE RECEIVER WITH DSP
OPEN
FM
DISC
AM
DISC
SEL
TUNE
TRACK
5612 4
Operación básica del reproductor de cintas de casete
Botones jikl
Botón de cintas de
metal (MTL)
Botón del sistema
Dolby tipo B (B NR)
Botón de búsqueda de
programas en la cinta (TPS)
Operación de TPS (búsqueda de programas en la cinta)
La TPS (búsqueda de programas en la cinta) es una función que detecta las partes sin
E
grabar en una cinta de casete. Esta función permite a la unidad reproducir las canciones
S
P
desde el principio.
A
Ñ
q Presione el botón [TPS] para activar el modo TPS. (Presione de nuevo
O
L
14
[TPS] para cancelarla.)
Botón de saltos
(SKIP)
(continuación)
Botón de repetición
(REPEAT)
4
TPS
Données techniques
Généralités
Alimentation : 12 V c.c. (11 V - 16 V) tension d'essai 14,4 V; masse négative
Consommation du courant : Moins de 8,5 A (mode d'écoute CD)
Puissance nominale : 16 W x 4 canaux (1 000 Hz, 1 %, 4 Ω)
Puissance de sortie maximum : 37 W x 4 canaux
Impédance de haut-parleur appropriée : 4 Ω
Impédance d’entrée audio : 10 kΩ
Sensibilité d'entrée audio : 700 mV (AUX IN)
Tension de sortie préamp : 600 mV
mpédance de sortie préamp : 600 Ω
Dimensions ( L x H x P ) : 7 po x 4 po x 6-5/6 po (178 x 100 x 160 mm)
Poids : 5 lb. 5 oz (2,4 kg)
DSP
Canaux : 2 canaux pour entrée, 4 canaux pour sortie
Configurations sonores du processeur
audionumérique (DSP) : 7 configurations sonores
Fréquences centrales de l’égalisateur : 80, 160, 320, 640, 1,6k, 4k, 10k (Hz)
Gamme d’égalisation : –12 dB à +12 dB (13 paliers)
F
R
A
N
Ç
A
I
S
45
w Presione el botón [k] o [l] para seleccionar un programa.
[k](TRACK 1) : Activa el rebobinado de la cinta y retrocede al principio del
programa actual. La TPS busca el principio de los programas
anteriores en la misma medida que las veces que presione este
botón. (Hasta 9 programas)
[l](TRACK 2) : Activa el avance rápido de la cinta y avanza al principio del
programa siguiente. La TPS busca el principio de los programas
siguientes en la misma medida que las veces que presione este
botón. (Hasta 8 programas)
CPara cancelar el rebobinado o el avance rápido, presione el botón [j](3).
(Presione el botón [PRG/3] para la cancelación cuando emplee el controlador
remoto.)
Nota: El modo TPS puede no funcionar correctamente en los siguientes casos. Sin embargo, eso no
significa que el aparato esté defectuoso.
¡Hay un intervalo de menos de 4 segundos.
114
¡Hay una parte especialmente silenciosa durante el programa.
CQ-VX2000U
FM
DISC
Radio
Radio FM stéréo
TUNE
TRACK
Gamme de fréquence : 87,9 - 107,9 MHz
Sensibilité utilisable : 12 dBf
Distorsion harmonique totale (mono) : 0,3 % (1 kHz)
AM
SEL
DISC
Rapport signal sur bruit pondéré (mono): 70 dB
Réponse de fréquence : 20 à 15 000 Hz ±3 dB
Séparation stéréo : 42 dB (1 kHz)
Réponse-image : 75 dB
Radio PO (AM)
Gamme de fréquence : 531 - 1 710 kHz
Sensibilité utilisable
(rapport signal-sur-bruit de 20 dB) : 27 dB/µV
Réponse-image : 65 dB
Lecteur CD
Canaux : 2 canaux
Quantification : linéaire 16 bits
Réponse de fréquence : 5 à 20 000 Hz
Gamme dynamique : 90 dB (IHF, A)
Pleurage et scintillement : En-dessous de la limite mesurable
CQ-VX2000U
99
Page 50

Données techniques
(suite)
Lecteur de cassette
Système de reproduction : 4 pistes, 2 programmes stéréo
Vitesse de bande : 4,76 cm/sec.
Durée d'avance rapide : 100 sec (C-60)
Durée de rembobinage : 100 sec (C-60)
Pleurage et scintillement : 0,07 % (WRMS)
Rapport signal sur bruit : Dolby NR OFF 56 dB (IHF, A)
F
R
A
N
Réponse de fréquence : 30 à 18 000 Hz (bande normale)
Ç
A
I
S
46
Dolby NR ON 66 dB (IHF, A)
30 à 20 000 Hz (bande métallique)
Cara de reproducción
5 PLAY 5 : Cara superior
4 PLAY 4 : Cara inferior
Para cambiar la visualización, presione el
botón [DISP]. (B Página 107)
Cambio de la cara de reproducción
Presione el botón [i] (4 5PRG) para invertir la dirección.
(Presione el botón [PRG/3] para la inversión cuando emplee el controlador remoto.)
¡La cara de reproducción cambia de la forma siguiente cuando se presiona el botón
[i].
5 PLAY 5 (cara superior)
¡Cuando se termina la cinta, la cara de reproducción cambia automáticamente.
<Sistema de inversión automática de la cinta>.
4 PLAY 4 (cara inferior)
E
S
P
A
Ñ
O
FM
DISC
L
13
Les spécifications données ci-dessus sont conformes aux normes EIA.
Remarque:
Aux fins d’améliorations, les caractéristiques et la conception sont susceptibles de modification sans
préavis.
Réduction de bruit Dolby fabriquée sous licence de Dolby Laboratories Licensing Corporation.
“DOLBY” et le symbole double-D B sont des marques de Dolby Laboratories Licensing Corporation.
TUNE
TRACK
Rebobinado y avance rápido
Presione el botón [k] (1) o el botón [l] (2) para activar el rebobinado
o el avance rápido de la cinta.
CPresione el botón [j](3) para detener el rebobinado o el avance rápido.
Presione el botón [PRG/3] para detener el rebobinado o el avance rápido
cuando emplee el controlador remoto.
Precaución: Mantenga los dedos y las manos apartados de las partes en
movimiento.
No ponga los dedos ni las manos en la ranura del disco ni en la ranura de la cinta de casete.
AM
DISC
SEL
100
CQ-VX2000U
CQ-VX2000U
113
Page 51

Human
Equalizer
CQ-VX2000
561234
SOURCE
POWER
REPSCANRANDOM
CLOCK
DISP
REVERSE
S
•
ANALYZER DISPLAY MTL B NR TPS SKIP REPEAT
S•A
SPACE
SPC
D·M
LIVE
HALL
JAZZ
STADIUM
DISCO
VOCAL
CINEMA
M
U
T
E
VOL
AUTO
·
P
SENSOR
INTEGRATED CD/CASSETTE RECEIVER WITH DSP
OPEN
FM
DISC
AM
DISC
SEL
TUNE
TRACK
SOURCE
DISP
OPEN
Operación básica del reproductor de cintas de casete
C
D
E
J
E
C
T
C
S
T
E
J
E
C
T
u
u
CST IN
INTEGRATED CD/CASSETTE RECEIVER WITH DSP
VX2000
CD IN
(Lado posterior)
Pila de litio
Posición B
Soporte de pila
Posición A
Botones jikl
Botón de visualización (DISP)
Inserción de la cinta
q Presione [OPEN] para abrir el panel delantero.
E
S
w Inserte el casete con la parte expuesta de la cinta
P
A
Ñ
O
L
12
mirando hacia la derecha. Cierre el panel delantero
con las manos. La reproducción se iniciará
automáticamente.
(Indicador de cinta)
e Levante el panel frontal para cerrarlo.
Expulsión de la cinta
q Presione el botón [OPEN] para abrir el panel frontal.
w Presione el botón [CST
Cuando se expulsa la cinta de casete mientras el modo de
cintas está activado, se desconecta la alimentación.
u] para expulsar la cinta.
Botón de abertura
(OPEN)
Botón de la fuente
(SOURCE)
Botón de expulsión de la
cinta (CST u)
Precauciones:
¡No obstruya la abertura del panel
frontal.
¡Cuando se abre el panel frontal, no
debe forzarse hacia abajo y no debe
ponerse nada encima porque podría
dañarse la unidad.
Operación de control remoto
Instalación de la pila
1. Quite el soporte de pila
Retenga el soporte en la posición B y tire del mismo hacia fuera
empujando la parte A en la dirección indicada por la flecha.
2. Instale la pila en el soporte de la pila.
Inserte la pila de manera correcta, con el lado (+) hacia arriba, como
se muestra en la ilustración.
3. Inserción del soporte de pila
Empujar el soporte de pila a la posición original.
Nota sobre las pilas
Las pilas viejas deben ser quitadas y desechadas inmediatamente.
Informaciones sobre las pilas:
¡Pila recomendada: Pila de litio Panasonic (CR2025)
¡Vida útil de la pila: Aproximadamente 6 meses en utilización normal (a temperatura ambiental)
Precaución:
¡No desmonte ni ponga en cortocircuito las pilas. No deseche las pilas en el fuego.
¡Mantenga las pilas apartadas de los niños para evitar el peligro de accidentes.
¡Respete las normas vigentes para tirar las pilas.
Botón de la alimentación
(PWR)
Botón de la fuente (SOURCE)
Estos botones son los mismos
que los de la unidad principal.
Botón de separación (SPC (SPACE))
Botón de la banda (BAND)
Botón de programación
(PRG (A B)/F)
Botón de preajuste automático
(AUTO•P)
El uso incorrecto de las pilas puede causar el sobrecalentamiento, explosión o ignición, resultando
en heridas o incendios. La fuga del electrólito de la pila puede causar daños en el aparato.
(ATT)
PWR
SOURCE
MUTE
VOL
Botón de silenciamiento (MUTE (ATT))
Botones del volumen (VOL) ji
Botón de selección (SEL)
PRG/■
PRG/
BAND
SEL
Botones de incremento/reducción
ji (DISCji)
Botones kl de sintonización y
canciones (TUNE kl, TRACK a
DISP
DIMMER
Car Audio
f)
Botón de avance
rápido/rebobinado de la cinta
E
S
P
A
Ñ
O
L
1
Modo de cintas de casete
Presione el botón [SOURCE] para cambiar al modo de cintas de casete.
112
CQ-VX2000U
PWR
SOURCE
Botón del analizador (de espectro (S•A))
Botón del regulador de intensidad
Botón de visualización (DISP)
Botón del reloj (CLOCK)
luminosa (DIMMER)
Notas:
¡Hay algunos nombres de botón que no están relacionados con esta unidad porque el
controlador remoto está diseñado para su utilización conjunta con otros modelos.
¡Puesto que los botones siguientes no están provistos en el controlador remoto, opere
tales botones en la unidad principal.
Botón OPEN, Botón CD u, Botón D•M, Botones 1-6, Botón RANDOM, Botón SCAN, Botón
REP (REPEAT), y Botón REVERSE
Botón CST u, Botón MTL, Botón B NR, Botón TPS y Botón SKIP
CQ-VX2000U
101
Page 52

Nomenclatura de los controles
Unidad principal
Botones ji
¡BAND (banda)
¡DISC (disco)
E
S
Botones kl
P
A
¡TUNE (sintonización)
Ñ
¡TRACK (canción)
O
L
2
Botón S•A (S•ANALYZER)(analizador de espectro)
Botón REVERSE (inversión)
Botones ji
¡
3 / 4 5
(
parada)(programa
Botones k l
1 / 2
¡
Sensor (Receptor de control remote)
SENSOR
FM
DISC
TUNE
TRACK
DISC
AM
STADIUM
SEL
CINEMA
REVERSE
S•A
•
S
ANALYZER DISPLAY MTL B NR TPS SKIP REPEAT
Botón SEL
(selección)
<Cintas de casete>
SENSOR
FM
DISC
TUNE
)
TRACK
DISC
AM
STADIUM
SEL
CINEMA
REVERSE
S•A
•
S
ANALYZER DISPLAY MTL B NR TPS SKIP REPEAT
CQ-VX2000
LIVE
HALL
JAZZ
DISCO
VOCAL
Human
INTEGRATED CD/CASSETTE RECEIVER WITH DSP
Equalizer
CLOCK
DISP
Botón DISP (DISPLAY)
(visualización)
Botón CLOCK (reloj)
CQ-VX2000
LIVE
HALL
JAZZ
DISCO
VOCAL
Human
INTEGRATED CD/CASSETTE RECEIVER WITH DSP
Equalizer
CLOCK
DISP
Botones 1-6
¡MTL [1]
¡B NR [2]
¡TPS [4]
¡SKIP [5]
¡REPEAT [6]
Botón OPEN (abertura)
OPEN
POWER
SOURCE
Botón SOURCE
(fuente)
Botón POWER
(alimentación)
P
·
AUTO
VOL
E
T
U
M
Botones VOLji
(volumen)
Botón MUTE (ATT)
(silenciamiento
561234
REPSCANRANDOM
SPC
D·M
SPACE
Botón AUTO•P
(automático)
Botón D•M (memoria directa)
Botón SPC (SPACE) (separación)
Botones 1-6
¡Preajuste [1-6]
¡RANDOM [4] (reproducción aleatoria)
¡SCAN [5] (exploración)
¡REP [6] (repetición)
OPEN
POWER
SOURCE
VOL
E
T
U
M
561234
P
·
AUTO
REPSCANRANDOM
SPC
D·M
SPACE
Tiempo de reproducción de la canción
Número de canción
Para cambiar la visualización, presione el
botón [DISP]. (B Página 107)
(Ejemplo) Visualización normal
Reproducción aleatoria
Presione el botón [RANDOM] de la unidad principal para reproducir las
canciones del disco actual en orden aleatorio. (Presione de nuevo el botón
3 4
[RANDOM] para cancelarla.)
Reproducción por exploración
Presione el botón [SCAN] de la unidad principal para reproducir los primeros 10
segundos de todas las canciones del disco actual. La primera canción
5 6
reproducida es la canción actual. (Presione de nuevo el botón [SCAN] para
cancelarla.)
¡Después de haber reproducido 10 segundos de todas las canciones, la reproducción
por exploración se termina y la posición inicial pasa al principio de la primera
canción reproducida.
¡Cancele la reproducción por exploración cuando encuentre la canción que desee
Repetición de la reproducción
Presione el botón [REPEAT] de la unidad principal para repetir la canción
actual. (Presione de nuevo el botón [REPEAT] para cancelarla.)
Precaución: Mantenga los dedos y las manos apartados de las partes en
movimiento. No ponga los dedos ni las manos en la ranura
del disco ni en la ranura de la cinta de casete.
Si no lo hace así, podrían producirse heridas o mal funcionamiento.
Evite que tampoco puedan hacerlo los niños.
5 6
RANDOM
REPSCAN
REPSCAN
E
S
P
A
Ñ
O
L
11
102
CQ-VX2000U
CQ-VX2000U
111
Page 53

Human
Equalizer
CQ-VX2000
561234
SOURCE
POWER
REPSCANRANDOM
CLOCK
DISP
REVERSE
S
•
ANALYZER DISPLAY MTL B NR TPS SKIP REPEAT
S•A
SPACE
SPC
D·M
LIVE
HALL
JAZZ
STADIUM
DISCO
VOCAL
CINEMA
M
U
T
E
VOL
AUTO
·
P
SENSOR
INTEGRATED CD/CASSETTE RECEIVER WITH DSP
OPEN
FM
DISC
AM
DISC
SEL
TUNE
TRACK
564
SOURCE
OPEN
DISP
Operación básica del reproductor de CD
CD EJECT
CST EJECT
CD IN
CST IN
LARGE FLUORESCENT DISPLAY ■
37W×4CH AMPLIFIER ■
15 BAND SPECTRUM ANALIZER ■
FLIP DOWN PANEL ■
INTEGRATED CD/CASSETTE RECEIVER WITH DSP
u
u
VX2000
Botones kl
Botón de visualización (DISP)
Botón de reproducción
aleatoria (RANDOM)
Inserción del CD
q Presione el botón [OPEN] de la unidad principal
E
S
P
A
Ñ
O
L
10
para abrir el panel frontal.
w Inserte en la ranura un disco CD con la etiqueta
arriba para iniciar la reproducción del disco CD.
(Indicador de disco)
e Levante el panel frontal para cerrarlo.
OPEN
Botón de
exploración
(SCAN)
Botón de expulsión
del CD (CD u)
u
INTEGRATED CD/CASSETTE RECEIVER WITH DSP
T
C
E
J
E
D
C
T
C
E
J
E
D
M
u
Botón de abertura
(OPEN)
Botón de la fuente
(SOURCE)
Botón de repetición
(REP)
Lado de la etiqueta
VX303
MD IN
Detrás del panel frontal
Botón de expulsión del CD (CDu)
RESET
Botón de expulsión de la cinta (CST u)
Interruptor de reposición
Unidad del visualizador
Ranura del CD
Ranura de la cinta de casete
E
S
P
A
Ñ
O
L
3
Expulsión del disco CD
q Presione el botón [OPEN] de la unidad principal
para abrir el panel frontal.
w Presione el botón [
Cuando se expulsa un CD mientras el modo de CD está
activado, la alimentación se desconecta.
u] para expulsar el CD.
¡
No inserte un MD en la ranura para CD.
¡No obstruya la abertura del panel frontal.
¡Cuando se abre el panel frontal, no debe
forzarse hacia abajo y no debe ponerse nada
encima porque podría dañarse la unidad.
¡No introduzca un disco cuando esté encendido
el indicador de disco.
Modo de CD
Precauciones:
Presione el botón [SOURCE].
Selección de canciones
Presione el botón [k] o [l].
[k](TUNE k ) : Retrocede al principio de la canción actual, y luego sigue
retrocediendo al principio de las canciones anteriores en la
misma medida que las veces que presione este botón.
[l](TUNE l ) : Va al principio de la canción siguiente.
Búsqueda de canciones
Suelte el botón [k] o [l] cuando llegue la parte que usted prefiera después
de presionarlo y haberlo retenido durante más de 0,5 segundos.
[k](TRACK k) : Inversión rápida
[l](TRACK l) : Avance rápido
110
CQ-VX2000U
PWR
SOURCE
TUNE
TRACK
TUNE
TRACK
Presione y mantenga
presionado durante más de
0,5 segundos
Indicador de salto
(SKIP)
Indicador de espacio
(SPACE)
Indicación de
posición (POSI)
Indicador de reserva
Indicador de cintas de
metal (MTL)
Indicador de refuerzo de
graves súper dinámico
(SDBB)
Indicador de otra operación
Indicador del analizador de espectro
Indicador de estéreo (ST)
Indicador del ecualizador
(EQ)
Indicador del sistema
Dolby B (B NR)
Indicador de disco (DISC)
Indicador de repetición
(REP)
Indicador de reproducción
aleatoria (R 5)
Indicador de exploración
(SCAN)
Indicador de búsqueda de
programas en la cinta (TPS)
Indicador de silencamiento
(MUTE)
CQ-VX2000U
103
Page 54

Human
Equalizer
CQ-VX2000
561234
SOURCE
POWER
REPSCANRANDOM
CLOCK
DISP
REVERSE
S
•
ANALYZER DISPLAY MTL B NR TPS SKIP REPEAT
S•A
SPACE
SPC
D·M
LIVE
HALL
JAZZ
STADIUM
DISCO
VOCAL
CINEMA
M
U
T
E
VOL
AUTO
·
P
SENSOR
INTEGRATED CD/CASSETTE RECEIVER WITH DSP
OPEN
FM
DISC
AM
DISC
SEL
TUNE
TRACK
SOURCE
VOL
DISP
Generalidades
Botón de la
fuente/alimentación
(SOURCE/POWER)
Botones del volumen
(VOL ji)
Número de memoria de preajuste
Banda
(Ejemplo) Visualización normal
Frecuencia
Para cambiar la visualización, presione el
botón [DISP]. (B Página 107)
Botón del visualizador (DISP)
CAntes de poner en funcionamiento esta unidad, conecte la llave de
encendido.
E
S
Alimentación
P
A
Presione el botón [POWER] para conectar la alimentación.
Ñ
O
Cuando conecte la alimentación, se visualizará un mensaje de demostración. (Modo de
L
demostración) Mientras el modo de demostración está activado, no pueden realizarse
operaciones presionando los botones. Presione el botón [DISP] para cancelar el modo
4
de demostración antes de la operación.
Para activar el modo de demostración, desconecte una vez la alimentación,
y presione y mantenga presionado el botón [POWER] de la unidad principal
durante más de 1 segundo.
Presione y mantenga presionado el botón [POWER] durante más de un
segundo para desconectar la alimentación.
Volumen
Presione el botón [VOL j] o [VOL i] para ajustar el volumen.
POWER
SOURCE
CLOCK
DISP
POWER
SOURCE
Presione y mantenga
presionad
VOL
Memoria de preajustes manual
Seleccione una emisora, y presione y retenga presionado uno de los botones
de preajuste [1]-[6] durante más de 2 segundos.
¡La emisora actual se memoriza en el botón presionado. (Pueden memorizarse hasta
6 emisoras para cada banda.)
¡La visualización de la frecuencia parpadea una vez después de haberse completado la
memorización.
(Ejemplo)
1 2
Presione y mantenga
presionado durante más de
2 segundos
Memoria de preajustes automática
Presione y mantenga presionado el botón [AUTO•P] durante más de 2
P
segundos.
¡La sintonización se inicia desde la frecuencia más baja de la banda actual. Las 6
emisoras que se reciben con mayor claridad se memorizan en los botones de
preajuste. Cuanto mayor es la claridad con la que se recibe la emisora, menor es el
número de preajuste 1 a 6 asignado a la emisora. (Pueden memorizarse hasta 6
emisoras para cada banda.)
¡Una vez ajustadas, las emisoras preajustadas se exploran secuencialmente durante 5
segundos cada una. (Exploración)
CPara cancelar la exploración, presione uno de los botones de preajuste
[1]-[6], y seleccione su emisora preferida.
Nota:
En la operación de la memoria de preajuste o en la operación de la memoria de preajustes automática,
las nuevas emisoras pueden memorizarse en los botones de preajuste sobrescribiendo las anteriores.
·
AUTO
Presione y mantenga
presionado durante más de
2 segundos
(Ejemplo)
1 2
Sintonización de emisoras preajustadas
Presione uno de los botones de preajuste [1]-[6].
La sintoniza una emisora preajustada en la banda actual.
(Ejemplo)
1 2
E
S
P
A
Ñ
O
L
E
T
U
M
9
104
Nota: Puesto que puede ajustarse el volumen para cada fuente de sonido (volúmenes independientes
incluso para FM y AM), el nivel del volumen cambia cuando se cambia la fuente de sonido. <Función de
volumen inteligente>.
CQ-VX2000U
Selección de estéreo/monofónico local
Presione y mantenga presionado [SEL] durante más de 2 segundos para cambiar los
modos siguientes.
STEREO
MONO ON
LOCAL OFF
MONO: Reduce el ruido durante la recepción de una difusión de FM con señal débil.
LOCAL: La búsqueda se detiene sólo con señales potentes.
MONO ON
LOCAL ON
MONO OFF
LOCAL ON
CQ-VX2000U
109
Page 55

Human
Equalizer
CQ-VX2000
561234
SOURCE
POWER
REPSCANRANDOM
CLOCK
DISP
REVERSE
S
•
ANALYZER DISPLAY MTL B NR TPS SKIP REPEAT
S•A
SPACE
SPC
D·M
LIVE
HALL
JAZZ
STADIUM
DISCO
VOCAL
CINEMA
M
U
T
E
VOL
AUTO
·
P
SENSOR
INTEGRATED CD/CASSETTE RECEIVER WITH DSP
OPEN
FM
DISC
AM
DISC
SEL
TUNE
TRACK
561234
SOURCE
DISP
M
U
T
E
Operación básica de la radio
Botones jikl
Botón de
visualización
(DISP)
Botones 1 - 6 de preajuste
Modo de la radio
Presione el botón [SOURCE] para seleccionar el modo de la radio.
E
S
P
A
Banda
Ñ
O
Cambia la banda de FM.
L
Presione el botón [j] o [i].
8
[j](FM) : Cambia la banda de FM. FM1 FM2 FM3
[i](AM) : Cambia la banda de AM.
Nota: Presione el botón [BAND] cuando emplee el controlador remoto.
FM1 FM2 FM3 AM
El indicador ST se enciende mientras se está recibiendo la difusión de FM en estéreo.
Botón de la fuente
(SOURCE)
Botón de función
automática (AUTO•P)
PWR
SOURCE
FM
DISC
SEL
DISC
AM
Advertencia: NO OPERE EL SISTEMA MIENTRAS CONDUCE.
La operación del sistema le distraerá al no mirar delante del vehículo y puede ser causa de
accidentes. Detenga siempre el vehículo en un lugar seguro antes de operar el sistema.
Selección de la fuente de sonido
Presione el botón [SOURCE] para cambiar el modo de la forma siguiente.
TUNER CD TAPE
AUX IN CD CHANGER
Notas:
¡Cuando no hay un disco ni una cinta de casete insertados, cuando no se ha conectado un cambiador de
discos o cuando no hay cartuchos en el cambiador de CD, no podrá seleccionarse la fuente de sonido
correspondiente.
¡El salto de "AUX IN" podrá ajustarse si no se emplea "AUX IN" (la entrada exterior). (B Página 126)
PWR
SOURCE
E
S
P
A
Ñ
O
L
5
Sintonización manual
Presione el botón [k] o [l].
[k](TUNE k ) : Frecuencia más baja
[l](TUNE
l ) : Frecuencia más alta
Sintonización por búsqueda
Presione y mantenga presionado el botón [k] o [l] durante más de 0,5
segundos. Luego, suéltelo.
[k](TUNE k ) : Sintonización automática en una frecuencia más baja
[l](TUNE
La sintonización se inicia cuando se suelta el botón, y se detiene cuando se encuentra
una emisora.
108
l ) : Sintonización automática en una frecuencia más alta
CQ-VX2000U
TUNE
TRACK
TUNE
TRACK
Presione y mantenga
presionado durante más de
0,5 segundos, y luego
suéltelo.
CQ-VX2000U
105
Page 56

Generalidades
(continuación)
Botones jikl
SENSOR
FM
DISC
DISC
AM
LIVE
HALL
JAZZ
TUNE
STADIUM
TRACK
DISCO
VOCAL
SEL
CINEMA
Human
Equalizer
REVERSE
CLOCK
DISP
S•A
DISP
•
ANALYZER DISPLAY MTL B NR TPS SKIP REPEAT
S
CQ-VX2000
INTEGRATED CD/CASSETTE RECEIVER WITH DSP
561234
REPSCANRANDOM
Botón de visualización/reloj
(DISP/CLOCK)
Ajuste del reloj
Este reloj es del sistema de 12 horas.
E
S
P
q Presione y mantenga presionado el botón [CLOCK] durante más de 2
A
Ñ
O
L
6
segundos para cambiar el modo de ajuste del reloj.
La visualización del reloj parpadea. (Cuando ajuste el reloj por primera vez,
parpadeará la visualización de "12:00".)
OPEN
POWER
SOURCE
VOL
P
·
E
T
U
M
AUTO
SPC
D·M
SPACE
Cambio de la visualización
Presione el botón [DISP] para cambiar la visualización de la forma siguiente.
CLOCK
DISP
DISPLAY
Visualización normal en cada fuente de sonido
Visualización del reloj
Visualización del analizador de espectro de puntos
(La luz se mueve en respuesta al sonido como el analizador de espectro.)
CLOCK
DISP
DISPLAY
Presione y mantenga
presionado durante más de
2 segundos
E
S
P
A
Ñ
O
L
7
Cuando se presiona el botón [DISP] mientras la alimentación está
desconectada, la visualización cambia de la forma siguiente.
FM
DISC
Reloj/Reserva
w Ajuste la hora empleando los botones [j], [i], [k] o [l].
[k] : Ajuste de las horas. ¡Parpadea la visualización de las horas.
[l] : Ajuste de los minutos. ¡Parpadea la visualización de los minutos.
[
j
] : Avance de horas/minutos.
[
i
] : Retroceso de horas/minutos.
e Presione el botón [CLOCK] para establecer la hora.
Se reanuda el modo normal y se inicia el reloj.
Para ver el reloj, presione el botón [DISP] para seleccionar la
visualización del reloj. ( B Página 107)
Nota: El reloj no puede ajustarse cuando la alimentación está desconectada.
AM
DISC
Reloj
Sin visualización
SEL
Nota: Se visualiza "ADJUST" cuando debe visualizarse una hora hasta que se ajusta el reloj.
CLOCK
DISP
DISPLAY
106
CQ-VX2000U
CQ-VX2000U
107
Page 57

Funciones útiles
Human
Equalizer
CQ-VX2000
561234
SOURCE
POWER
REPSCANRANDOM
CLOCK
DISP
REVERSE
S
•
ANALYZER DISPLAY MTL B NR TPS SKIP REPEAT
S•A
SPACE
SPC
D·M
LIVE
HALL
JAZZ
STADIUM
DISCO
VOCAL
CINEMA
M
U
T
E
VOL
AUTO
·
P
SENSOR
INTEGRATED CD/CASSETTE RECEIVER WITH DSP
OPEN
FM
DISC
AM
DISC
SEL
TUNE
TRACK
SOURCE
D·M
M
U
T
E
(continuación)
Botón de la fuente
(SOURCE)
Botón de silenciamiento
(MUTE (ATT))
Botón de la memoria
directa (D•M)
Memoria directa
Aunque la alimentación esté desconectada o la fuente de sonido no se la radio, podrá recibirse la información de
E
S
tráfico y un canal memorizado pulsando un botón.
P
A
Ñ
O
L
30
Frecuencia
Cómo omitir espacios en blanco
El salto de espacios en blanco es una función que activa el avance rápido a una parte
sin grabar, detecta el principio de la canción siguiente e inicia la reproducción. Estas
operaciones se efectúan automáticamente.
5
SKIP
Presione el botón [SKIP] para saltar una parte sin grabar.
Notas:
¡Cuando REP está activado, la función de omisión de espacios en blanco no funcionará porque REP tiene
prioridad sobre la omisión de espacios en blanco.
¡La operación de omisión de espacios en blanco tampoco funcionará cuando las partes grabadas de la
cinta son de menos de 15 segundos.
Repetición de la reproducción
La repetición de la reproducción es una función que activa el rebobinado después de
terminar el programa actual y lo reproduce repetidamente.
Presione el botón [REPEAT] para repetir el programa actual. (Presione de
nuevo el botón [REPEAT] para cancelarla.)
6
REPEAT
E
S
P
A
Ñ
O
L
15
Cuando se presiona el botón [D•M], el modo seleccionado cambia de la
forma siguiente.
D•M : Se recibe la emisora memorizada directamente.
Modo normal : Retorna a la fuente de sonido anterior. (o desconecta)
Registro de D•M
q Seleccione la emisora que desee ( B página 108)
w Presione [D•M] durante más de 2 segundos para registrar la emisora en la
memoria.
Notas:
130
¡El ajuste inicial de D•M es de 88,1 MHz FM.
¡No puede realizarse el ajuste del espacio sonoro ni otros durante el modo D•M.
CQ-VX2000U
D·M
Modo de cintas de metal
El modo de cintas de metal permite reproducir cintas de metal o de dióxido de cromo
con alta calidad de sonido.
Presione el botón [MTL] para repetir el programa actual. (Presione de nuevo
el botón [MTL] para cancelarla.)
1
MTL
Nota: Las cintas no metálicas en el modo MTL causan desequilibrio de altas frecuencias, y eso afecta la
calidad del tono.
Reducción de ruido Dolby
La reducción de ruido Dolby permite reproducir con reducción de ruido de siseo de los
agudos las cintas grabadas con el sistema Dolby del tipo B activado.
Presione el botón [B NR] para repetir el programa actual. (Presione de
nuevo el botón [B NR] para cancelarla.)
Notas:
¡El sistema Dolby B NR no está disponible en el modo de radio.
¡Si una cinta que no está grabada con el sistema Dolby B NR se reproduce con el modo Dolby B NR
activado, la calidad del tono se verá adversamente afectada por desequilibrio en el margen de altas
frecuencias.
CQ-VX2000U
2
B NR
115
Page 58

Human
Equalizer
CQ-VX2000
561234
SOURCE
POWER
REPSCANRANDOM
CLOCK
DISP
REVERSE
S
•
ANALYZER DISPLAY MTL B NR TPS SKIP REPEAT
S•A
SPACE
SPC
D·M
LIVE
HALL
JAZZ
STADIUM
DISCO
VOCAL
CINEMA
M
U
T
E
VOL
AUTO
·
P
SENSOR
INTEGRATED CD/CASSETTE RECEIVER WITH DSP
OPEN
FM
DISC
AM
DISC
SEL
TUNE
TRACK
54
SOURCE
DISP
Operación básica del cambiador de CD (opcional)
Conecte un cambiador de CD opcional (CX-DP88U, etc.)
Botones jikl
Botón de visualización (DISP)
E
Modo del cambiador de CD
S
P
Presione [SOURCE] para cambiar al modo del cambiador de CD.
A
Ñ
O
16
Notas:
L
¡"NO DISC" aparecerá en el visualizador si no hay discos en el cartucho.
¡Cuando se inserta un cartucho en el cambiador, la alimentación se conecta automáticamente.
(Entonces, la fuente de sonido se cambia a la del cambiador (CHANGER).)
Botón de reproducción
aleatoria (RANDOM)
Botón de la fuente
(SOURCE)
Botón de exploración
(SCAN)
PWR
SOURCE
Disposición del analizador de espectro
Ajuste inicial: NORMAL/SPEANA POSI
Cada indicación del analizador de espectro tiene 8 patrones con tono de color y movimiento
distintos. (Indicación del analizador de espectro q - !1)
q Presione y mantenga presionado el botón [REVERSE] durante más de 2
segundos.
w Presione el botón [j], [i], [k] o [l] para seleccionar un patrón.
Cambio de dirección
Presione el botón [l] para cambiar de la forma siguiente. ([k]: Dirección
opuesta)
NORMAL : Visualización normal del
analizador de espectro.
REVERSE 1 : La visualización normal se
invierte verticalmente.
REVERSE 2 : La visualización invertida 1
se invierte horizontalmente.
•
S
ANALYZER
Presione y mantenga
presionado durante más de
2 segundos.
FM
DISC
DISC
AM
REVERSE
S•A
SEL
E
S
P
A
Ñ
O
L
29
Selección de discos
Presione el botón [j] o [i].
[j](DISC j) : Disco anterior.
i
](DISC i) : Disco siguiente.
[
Selección de canciones
Presione el botón [k] o [l].
[k](TRACK k) : Retrocede al principio de la canción actual. (Presiónelo dos veces)
[l](TRACK l) : Avanza a la canción siguiente.
Búsqueda de canciones
Suelte el botón [k] o [l] cuando llegue la parte que usted prefiera después
de presionarlo y haberlo retenido durante más de 0,5 segundos.
[k](TRACK k) : Inversión rápida
[l](TRACK l) : Avance rápido
116
CQ-VX2000U
FM
DISC
SEL
DISC
AM
TUNE
TRACK
TUNE
TRACK
Presione y mantenga
presionado durante más de
0,5 segundos
REVERSE 3 : La visualización invertida 2
se invierte verticalmente.
Cambio de positivo - Negativo
Presione el botón [j] o [i].
SPEANA POSI
(Positivo)
Notas:
¡Cuando se selecciona un modo de ajuste pero no se efectúa ninguna operación en 10 segundos, la
visualización retorna al modo de operación normal.
¡El patrón de indicación no puede cambiarse en la parte de indicación de letras de la indicación del ana-
lizador de espectro.
SPEANA NEGA
(Negativo)
CQ-VX2000U
129
Page 59

Funciones útiles
SENSOR
FM
Botones jikl
DISC
DISC
AM
LIVE
HALL
JAZZ
TUNE
STADIUM
TRACK
DISCO
VOCAL
SEL
CINEMA
Human
Equalizer
REVERSE
CLOCK
DISP
S•A
S•A
•
ANALYZER DISPLAY MTL B NR TPS SKIP REPEAT
S
Botón del analizador de espectro/inversión (S•A/REVERSE)
Visualizador del analizador de espectro
Ajuste inicial: WAVE
E
S
Presione el botón [S•A] para cambiar la visualización del analizador de
P
A
espectro en los 13 patrones.
Ñ
O
L
28
q WAVE : Es una imagen que es simple pero que implica la abertura de la fantasía espacial.
w AURORA : Es una imagen que implica una aurora en el cielo.
e MILKY WAY :Es una imagen que implica la Vía Láctea de forma majestuosa en el espacio.
r TWINKLE STAR : Es una imagen que implica el destello de innumerables estrellas.
t SUN : Es una imagen que implica los rayos brillantes del calor.
CQ-VX2000
INTEGRATED CD/CASSETTE RECEIVER WITH DSP
561234
REPSCANRANDOM
OPEN
POWER
SOURCE
VOL
P
·
E
T
U
M
AUTO
Número de disco
Número de canción
Tiempo de reproducción de la canción
Para cambiar la visualización, presione el botón
[DISP]. ( B Página 107)
SPC
D·M
SPACE
(Ejemplo) Visualización normal
Reproducción aleatoria de canciones
Se reproducirá una selección aleatoria de música de todas las canciones disponibles de
todos los discos que hay en el cartucho.
•
S
ANALYZER
REVERSE
S•A
Presione el botón [RANDOM]. (Presione de nuevo el botón [RANDOM] para
cancelarla.)
Reproducción aleatoria del disco
Se reproducirá una selección aleatoria de música de todas las canciones disponibles en
el disco actual.
Presione y mantenga presionado [RANDOM] durante más de 2 segundos.
(Presione y mantenga presionado [RANDOM] otra vez para cancelarlo.)
3 4
3 4
Presione y mantenga
presionado durante más de
RANDOM
E
S
P
A
Ñ
O
L
17
RANDOM
2 segundos
128
y SPC SARGASSO : Es una imagen que implica un viaje eterno de una pieza perdida de una estrella
despedazada.
u BIG BANG : Es una imagen que implica la creación del universo y las estrellas.
i FLARE : Es una imagen que implica la radiación de energía del sol al espacio.
o PROMINENCE : Es una imagen que implica las llamas en la superficie del sol.
!0 METEOR : Es una imagen que implica el paso de un meteoro en el espacio en constante
expansión.
!1 SPACE FEVER : Es una imagen que implica una máquina tragaperras funcionando cuando la unidad
recibe cierta frecuencia.
!2 BLANK SPEANA :En esta visualización, el analizador de espectro está desactivado.
!3 ALL DISP OFF : Toda la visualización, incluyendo las luces, se apaga si se selecciona ALL DISP
OFF. (Se enciende cuando se efectúa esta operación y se apaga de nuevo después
de la operación en unos 5 segundos.)
Nota: El patrón de indicación no puede cambiarse en la parte de indicación de letras de la indicación del
analizador de espectro.
CQ-VX2000U
Exploración de cancións
Se reproducen los primeros 10 segundos de cada canción del disco en secuencia.
Presione el botón [SCAN]
. (Presione de nuevo [SCAN] para cancelarlo.)
¡Cuando termine la exploración de todas las canciones, el programa original
empezará a reproducirse desde el principio.
¡Suelte el botón [SCAN] cuando haya encontrado el disco que buscaba.
Exploración de discos
Se reproduce la primera canción de todos los discos de los cartuchos durante 10
segundos cada una.
Presione y mantenga presionado [SCAN] durante más de 2 segundos.
(Presione y mantenga presionado [SCAN] otra vez para cancelarlo.)
¡Cuando termine la exploración de todas las canciones, el disco original empezará a
reproducirse desde el principio.
¡Suelte el botón [SCAN] cuando haya encontrado el disco que buscaba.
CQ-VX2000U
REPSCAN
5 6
REPSCAN
5 6
Presione y mantenga
presionado durante más de
2 segundos
117
Page 60

Human
Equalizer
CQ-VX2000
561234
SOURCE
POWER
REPSCANRANDOM
CLOCK
DISP
REVERSE
S
•
ANALYZER DISPLAY MTL B NR TPS SKIP REPEAT
S•A
SPACE
SPC
D·M
LIVE
HALL
JAZZ
STADIUM
DISCO
VOCAL
CINEMA
M
U
T
E
VOL
AUTO
·
P
SENSOR
INTEGRATED CD/CASSETTE RECEIVER WITH DSP
OPEN
FM
DISC
AM
DISC
SEL
TUNE
TRACK
6
Operación básica del cambiador de CD (opcional)
(continuación)
Silenciamiento/atenuador (Mute/A TT)
Ajuste inicial: MUTE KEY
Cómo repetir una canción
Se repite la canción actual.
E
S
P
Presione el botón [REP]. (Presione de nuevo [REP] para cancelarlo.)
A
Ñ
O
L
18
Repetición de un disco
Repita la selección del disco actual.
Presione y mantenga presionado [REP] durante más de 2 segundos.
(Presione y mantenga presionado [REP] otra vez para cancelarlo.)
Botón de repetición (REP)
5 6
5 6
Presione y mantenga
presionado durante más de
2 segundos
q Presione el botón [SEL] para seleccionar <MUTE KEY SEL>. ( B Página 124)
Presione el botón [l] para cambiar de la forma siguiente. ([k]: Dirección
w
FM
DISC
opuesta)
MUTE KEY : Sin sonido
ATT KEY : Reducción a 1/10
DISC
AM
Presione y mantenga
presionado durante más de 2
segundos.
REPSCAN
REPSCAN
Presione otra vez
SEL
E
<
S
P
A
Ñ
O
L
27
118
CQ-VX2000U
CQ-VX2000U
127
Page 61

Otros ajustes
Human
Equalizer
CQ-VX2000
561234
SOURCE
POWER
REPSCANRANDOM
CLOCK
DISP
REVERSE
S
•
ANALYZER DISPLAY MTL B NR TPS SKIP REPEAT
S•A
SPACE
SPC
D·M
LIVE
HALL
JAZZ
STADIUM
DISCO
VOCAL
CINEMA
M
U
T
E
VOL
AUTO
·
P
SENSOR
INTEGRATED CD/CASSETTE RECEIVER WITH DSP
OPEN
FM
DISC
AM
DISC
SEL
TUNE
TRACK
SEL
Human
Equalizer
CQ-VX2000
561234
SOURCE
POWER
REPSCANRANDOM
CLOCK
DISP
REVERSE
S
•
ANALYZER DISPLAY MTL B NR TPS SKIP REPEAT
S•A
SPACE
SPC
D·M
LIVE
HALL
JAZZ
STADIUM
DISCO
VOCAL
CINEMA
M
U
T
E
VOL
AUTO
·
P
SENSOR
INTEGRATED CD/CASSETTE RECEIVER WITH DSP
OPEN
FM
DISC
AM
DISC
SEL
TUNE
TRACK
SEL
Botones kl
Botón de selección
(SEL)
(continuación)
Ajustes del sonido y espacio sonoro
Botón de selección
(SEL)
Dimmer
Ajuste inicial: DIMMER MID: Cuando las luces laterales de posición están encendidas
E
S
El brillo de la visualización puede ajustarse cuando las luces laterales de posición están
P
A
encendidas o apagadas)
Ñ
q Presione el botón [SEL] para seleccionar <DIMMER SEL>. ( B Página 124)
O
L
26
Presione el botón [l] para cambiar de la forma siguiente. ([k]: Dirección
w
opuesta)
DIMMER HIGH: Cuando las luces laterales de posición están apagadas
DIMMER HIGH : La luz se enciende con más intensidad.
DIMMER MID : Intensidad media
DIMMER LOW : Intensidad baja
Nota: Cuando emplee el controlador remoto, la selección de la intensidad luminosa puede cambiarse
presionando el botón [DIMMER] durante más de 2 segundos.
Ajuste de la entada auxiliar (AUX IN)
Ajuste inicial: AUX IN ON
AUX se excluirá para no poder ser seleccionado.
q Presione el botón [SEL] para seleccionar <AUX IN SET>. ( B Página 124)
Presione el botón [l] para cambiar de la forma siguiente. ([k]: Dirección
w
opuesta)
126
AUX-IN activado : La entrada externa (AUX-IN) es objeto de selección de
AUX-IN desactivado: La entrada externa (AUX-IN) no es objeto de selección de
fuente.
fuente.
CQ-VX2000U
FM
DISC
SEL
DISC
AM
Presione y mantenga
presionado durante más de 2
segundos.
<
Presione otra vez
FM
DISC
SEL
DISC
AM
Presione y mantenga
presionado durante más de 2
segundos.
<
Presione otra vez
Control del sonido
Presione el botón [SEL] para cambiar el modo de la forma siguiente.
Modo normal
HUMAN EQ : Podrá ajustar la calidad del sonido para adaptarla a la música o a sus preferencias.
(Ecualizador humano) ( B Página 120)
GRAPHIC EQ : Podrá ajustar la calidad del sonido mediante el ajuste del nivel de cada gama de
frecuencias. (Ecualizador gráfico) ( B Página 121)
BAL//FAD : Podrá ajustar el balance del sonido entre los altavoces delanteros, traseros,
derechos e izquierdos. ( B Página 121)
POSITION SEL : Podrá ajustar la imagen sonora de acuerdo con la posición de audición.
(B Página 122)
SUPER BASS : Podrá utilizar el altavoz trasero conectado al amplificador incorporado como
altavoz de graves secundario que emite sólo graves. ( B Página 122)
SDBB SELECT : Podrá reforzar los graves. ( B Página 123)
Notas:
¡Si desea detener la operación actual, presione el botón [DISP].
¡Si no se efectúa ninguna operación durante 10 segundos, la visualización retornará a la del modo
normal.
CQ-VX2000U
SEL
E
S
P
A
Ñ
O
L
19
119
Page 62

FM
DISC
AM
DISC
SEL
Human
Equalizer
CQ-VX2000
561234
SOURCE
POWER
REPSCANRANDOM
CLOCK
DISP
REVERSE
S
•
ANALYZER DISPLAY MTL B NR TPS SKIP REPEAT
S•A
SPACE
SPC
D·M
LIVE
HALL
JAZZ
STADIUM
DISCO
VOCAL
CINEMA
M
U
T
E
VOL
AUTO
·
P
SENSOR
INTEGRATED CD/CASSETTE RECEIVER WITH DSP
OPEN
FM
DISC
AM
DISC
SEL
TUNE
TRACK
561234
SEL
Ajustes del sonido y espacio sonoro
・Recreación
・Conducción agradable
・Tranquilizarse
・Concentrarse
・Conducir
con seguridad
・Para relajarse
・Para renovarse
・Escuchar música
・Rítmico
・Despertarse
Fuerte
Ligero
Nítido
Suave
Botones jikl
Botón de selección (SEL)
Botones de preajustes 1-6
Calidad del tono
(ecualizador humano/HEQ)
(continuación)
Desplazamiento del título del MD
(Cuando se ha conectado un cambiador de discos MD)
Ajuste inicial: SCROLL ON
q Presione el botón [SEL] para seleccionar <TITLE SCROLL>. ( B Página 124)
Presione el botón [l] para cambiar de la forma siguiente. ([k]: Dirección
w
opuesta)
SCROLL ON : La visualización se desplaza continuamente.
SCROLL OFF: La visualización se desplaza una vez y se para.
FM
DISC
SEL
DISC
AM
Ya hay preparados 49 patrones, por lo que podrá realizar con facilidad ajustes complicados.
E
Ajuste inicial: FLAT(0)
S
P
Margen de ajuste: 1 - 3 para cada patrón (49 patrones)
A
Ñ
O
L
20
q Presione el botón [SEL] para seleccionar <HUMAN EQ>. ( B Página 119)
w Presione el botón [j], [i], [k] o [l] para ajustar el nivel.
Nota: Si presiona y mantiene presionado el botón [DISP] durante más de 2
segundos cuando el ajuste de desplazamiento del título de MD está en OFF, se
efectúa un desplazamiento.
Presione y mantenga
presionado durante más de 2
segundos.
<
Presione otra vez
E
S
P
A
Ñ
O
L
25
Velocidad del analizador de espectro
Ajuste inicial: SPEANA FAST
q Presione el botón [SEL] para seleccionar <SPEANA SPEED>. ( B Página 124)
Presione el botón [l] para cambiar de la forma siguiente. ([k]: Dirección
w
opuesta)
SPEANA FAST : El analizador de espectro cambia en velocidad rápida
SPEANA SLOW : El analizador de espectro cambia en velocidad lenta
Presione y mantenga
presionado durante más de 2
FM
DISC
segundos.
<
Presione otra vez
[
j
120
] : Graves fuertes
[i] : Graves ligeros
[l] : Agudos suaves
[k] : Agudos nítidos
Se mueve un cursor en la visualización de GEQ y parpadea en el punto ajustado.
CQ-VX2000U
AM
DISC
SEL
CQ-VX2000U
125
Page 63

Otros ajustes
Human
Equalizer
CQ-VX2000
561234
SOURCE
POWER
REPSCANRANDOM
CLOCK
DISP
REVERSE
S
•
ANALYZER DISPLAY MTL B NR TPS SKIP REPEAT
S•A
SPACE
SPC
D·M
LIVE
HALL
JAZZ
STADIUM
DISCO
VOCAL
CINEMA
M
U
T
E
VOL
AUTO
·
P
SENSOR
INTEGRATED CD/CASSETTE RECEIVER WITH DSP
OPEN
FM
DISC
AM
DISC
SEL
TUNE
TRACK
SEL
FM
DISC
AM
DISC
SEL
Botones kl
Botón de selección
(SEL)
Controles de función
Presione y mantenga presionado [SEL] durante más de 2 segundos para
E
estar preparado para seleccionar otras funciones. Luego, presione de nuevo
S
P
el botón [SEL] para seleccionar una función.
A
Ñ
Cuando se presiona el botón [SEL], la función seleccionada cambia de la forma
O
siguiente.
L
24
Modo normal
TITLE SCROLL : Podrá decidir si debe desplazarse la visualización del título del MD. ( B Página 125)
SPEANA SPEED
: Podrá ajustar la velocidad de movimiento del analizador de espectro. ( B Página 125)
DIMMER SEL : Podrá seleccionar el brillo de la visualización. ( B Página 126)
MONO LOCAL : MONO / LOCAL ON / OFF ( B Página 109)
SEL
Presione y mantenga
presionado durante más de 2
segundos.
<
Presione otra vez
Registro de su calidad de tono deseada
q
Presione el botón [SEL] para seleccionar <GRAPHIC EQ>. ( B Página 119)
(ecualizador gráfico/GEQ)
Ajuste inicial: 0 dB para cada frecuencia
Margen de ajuste: -12 a +12 dB en pasos de 2 dB
w Ajuste el nivel para cada frecuencia. Presione [[] para cambiar la
frecuencia.
80 160 320 640 1,6k 4k 10k (Hz)
Se mueve un cursor horizontalmente y parpadea en la gama de frecuencias seleccionada.
e Presione el botón [j] o [i] para ajustar el nivel.
[j] : Nivel superior
[i] : Nivel inferior
Se mueve un cursor verticalmente y parpadea en el nivel ajustado.
CRepita los pasos w y e para ajustar el nivel de cada gama de frecuencias.
Registro de la calidad de sonido ajustada
Presione uno de los botones de preajuste, [1] a [6], de la unidad principal
durante más de 2 segundos para almacenar las características GEQ actuales
en el botón presionado.
La visualización del número de la memoria de preajustes parpadea una vez después de
terminare el registro.
Nota:
Las nuevas características GEQ pueden almacenarse en los botones de preajuste sobrescribiendo las
anteriores.
presionado durante más de
FM
DISC
SEL
DISC
AM
RANDOM
3 4
Presione y mantenga
2 segundos.
E
S
P
A
Ñ
O
L
21
124
AUX IN SET : Podrá decidir si debe activarse la entrada exterior (AUX IN). ( B Página 126)
MUTE KEY SEL
: Podrá seleccionar entre MUTE y ATT. ( B Página 127)
Notas:
¡Si no se efectúa ninguna operación durante 10 segundos, la visualización retornará a la del modo
normal.
¡Si desea detener la operación actual, presione el botón [DISP].
CQ-VX2000U
Llamada del ajuste recomendado
q Presione el botón [SEL] para seleccionar <GRAPHIC EQ>. ( B Página 119)
w Presione uno de los botones de preajuste, [1] a [6], de la unidad
principal durante más de 2 segundos para activar las características GEQ
almacenadas.
Balance izquierdo/derecho y delantero/trasero
Ajuste inicial: CNT (Centro) Margen de ajuste: 15 niveles para cada uno
q Presione el botón [SEL] para seleccionar <BAL/FAD>. ( B Página 119)
w Presione el botón [j], [i], [k] o [l] para ajustar el nivel.
[j] : Acentuación frontal
[i] : Acentuación trasera
[l] : Acentuación derecha
[k] : Acentuación izquierda
CQ-VX2000U
RANDOM
3 4
121
Page 64

dB
12
8
0
300Hz
Desactivación
Frecuencia
Tipo 1 (Variable: bajo)
Tipo 2 (Variable: alto)
Tipo 3 (Fijo: bajo)
Tipo 4 (Fijo: alto)
Presión de refuerzo
Ajustes del sonido y espacio sonoro
Human
Equalizer
CQ-VX2000
561234
SOURCE
POWER
REPSCANRANDOM
CLOCK
DISP
REVERSE
S
•
ANALYZER DISPLAY MTL B NR TPS SKIP REPEAT
S•A
SPACE
SPC
D·M
LIVE
HALL
JAZZ
STADIUM
DISCO
VOCAL
CINEMA
M
U
T
E
VOL
AUTO
·
P
SENSOR
INTEGRATED CD/CASSETTE RECEIVER WITH DSP
OPEN
FM
DISC
AM
DISC
SEL
TUNE
TRACK
SPC
SEL
Botones jikl
Botón de selección (SEL)
Botón de separación (SPACE)
(continuación)
Acentuación de graves (Graves súper dinámicos/SDBB)
Ajuste inicial: Desactivado
Los graves acentuados salen por los 4 altavoces conectados al amplificador
incorporado, para poder disfrutar de un sonido con graves fuertes.
q Presione el botón [SEL] para seleccionar <SDBB SELECT>. ( B Página 119)
w
Presione [[] para cambiar de la forma siguiente. ([]] Dirección opuesta)
OFF : Salida normal
FM
DISC
Imagen sonora
(posición de audición)
Ajuste inicial: POSI OFF
E
q Presione el botón [SEL] para seleccionar <POSITION SEL>. ( B Página 119)
S
P
A
Ñ
O
L
22
Presione [[] para cambiar de la forma siguiente. ([]] Dirección opuesta)
w
OFF (todos los asientos)
RIGHT (delantero derecho)
LEFT (delantero izquierdo)
FRONT (delanteros)
REAR (traseros)
Altavoces traseros para el altavoz de graves secundario
(altavoz de control de súper graves/SBC-SW)
Ajuste inicial: OFF
q Presione el botón [SEL] para seleccionar <SUPER BASS>. ( B Página 119)
w
Presione [[] para cambiar de la forma siguiente. ([]] Dirección opuesta)
SBC-SW OFF : Salida estéreo
SBC-SW FLAT : No corta los agudos (salida monofónica)
SBC-SW 100 Hz : Corta la gama sonora de 100 Hz o más (salida monofónica)
SBC-SW 150 Hz : Corta la gama sonora de 150 Hz o más (salida monofónica)
122
Notes :
¡
Ajuste el nivel de salida del altavoz de graves secundario. Está también interconectado con la salida de
preamplificador (salida de altavoz trasero).
¡Ajuste SBC-SW en la unidad principal a FLAT cuando emplee la función de ajuste de la frecuencia de
corte incorporada en un amplificador externo opcional.
CQ-VX2000U
SBC-SW 200 Hz : Corta la gama sonora de 200 Hz o más (salida monofónica)
FM
DISC
TYPE 1 : Variable, baja
TYPE 2 : Variable, alta
AM
DISC
SEL
E
S
P
TYPE 3 : Fija, baja
A
Ñ
O
L
23
AM
DISC
SEL
TYPE 4 : Fija, alta
¡Variable : Acentuación de graves junto con el volumen
¡Fijo : Acentuación de graves con margen fijo
FM
DISC
Reproducción de espacio sonoro (Space)
Ajuste inicial: Desactivado
Esta función crea los ambientes sonoros siguientes en su automóvil.
AM
DISC
Presione [SPACE] para cambiar el espacio de la forma siguiente.
SEL
SPACE OFF LIVE HOUSE CONCERT HALL
SPC
SPACE
CINEMA JAZZ CLUB
VOCAL DISCO STADIUM
CQ-VX2000U
123
Page 65

Especificaciones
(continuación)
Reproductor de casetes
Sistema de reproducción : 4 pistas, 2 lados, estéreo
Velocidad de la cinta : 4,76 cm/sec.
Tiempo de avance rápido : 100 sec (C-60)
Tiempo de rebobinado : 100 sec (C-60)
Fluctuación y trémolo : 0,07 % (WRMS)
Relación de señal/ruido : Dolby NR OFF 56 dB (IHF, A)
Dolby NR ON 66 dB (IHF, A)
Respuesta en frecuencia : 30 a 18.000 Hz (normal)
30 a 20.000 Hz (metal)
E
S
P
A
Ñ
O
L
46
Reducción del volumen (silenciamiento/atenuador)
Ajuste inicial: MUTE OFF
El volumen se reduce dependiendo de si usted ha ajustado MUTE (silenciamiento) o
ATT (atenuador). ( B Página 127)
E
Presione [MUTE] (ATT) para activar y desactivar el modo MUTE (modo ATT).
Cuando MUTE está ajustado Cuando ATT está ajustado
MUTE desactivado : Nivel de volumen normal
MUTE activado : Sin sonido
El indicador de silenciamiento parpadea mientras MUTE o ATT está activado.
ATT desactivado : Nivel de volumen normal
ATT activado : Reducción del nivel de volumen a
1/10 parte
T
U
M
Fuente de sonido exterior (AUX-IN)
Conecte un dispositivo exterior a AUX IN (terminal de entrada AUX) del panel posterior de la
unidad principal. ( B Página 139)
Presione el botón [SOURCE] par cambiar a <AUX IN>.
Consulte el manual de instrucciones respectivo de los dispositivos exteriores para
encontrar más detalles al respecto.
PWR
SOURCE
E
S
P
A
Ñ
O
L
31
Las especificaciones de arriba satisfacen las normas EIA.
Nota: Las especificaciones y el diseño están sujetos a cambios sin previo aviso con el propósito de introducir
mejoras.
Reduccion de ruido Dolby fabricado bajo licencia de Dolby Laboratories Licensing Corporation.
DOLBY y el símbolo de la D doble B son marcas de Dolby Laboratories Licensing Corporation.
146
CQ-VX2000U
Luz posterior
La luz posterior es opcional y requiere una instalación adicional.
Todo el panel se enciende en azul oscuro y se ve cuando se activa la luz posterior.
Precaución: Instale la luz posterior a más de 20 cm de la unidad principal. De lo contrario, podría
causar mal funcionamiento o ruido.
CQ-VX2000U
131
Page 66

Mantenimiento
Lado expuesto
(lado abierto)
Lápiz
No toque ni
extraiga la cinta.
Especificaciones
E
S
P
A
Ñ
O
L
32
Cuidado del aparato
Limpieza del aparato
Emplee un paño seco y suave para frotar el
aparato.
Precaución para la
limpieza
No use bencina, disolventes, ni cualquier
otro tipo de solvente.
Notas sobre los discos compactos
EMPLEE SÓLO DISCOS QUE TENGAN LA
ETIQUETA MOSTRADA A LA DERECHA
Cómo tomar los discos CD
¡No toque la parte inferior del disco.
¡No haga rayadas en el disco.
¡No combe el disco.
¡Cuando no lo utilice, guarde el disco CD en su caja.
No emplee discos CD con formas irregulares
No deje los discos en los lugares siguientes:
¡Bajo la luz directa del sol
¡Lugares polvorientos, sucios o húmedos
¡Cerca de aparatos de calefacción
¡Sobre los asientos o sobre el tablero de instrumentos
Limpieza de los discos
Emplee un paño seco y suave para frotar desde el
centro del disco hacia fuera.
Precaución para los discos nuevos
Un disco nuevo puede tenerlos bordes toscos en su
perímetro interior y exterior. Esta tosquedad puede
causar mal funcionamiento.
Saque la tosquedad de los bordes empleando un
lápiz, etc.
Notas sobre las cintas de casete
Lado de la etiqueta
<Correcto>
Borde tosco
<Incorrecto>
General
Alimentación : 12 V CC (11 V - 16 V) tensión de prueba, 14,4 V; tierra negativa
Consumo de corriente : Menos de 8,5 A (modo de reprodución CD)
Salida nominal : 16 W x 4 canales (1.000 Hz, 1 %, 4 Ω)
Salida máxima de potencia : 37 W x 4 canales
Impedancia adecuada de altavoces : 4 Ω
Impedancia de entrada de audio : 10 kΩ
Sensibilidad de entrada de audio : 700 mV (AUX IN)
Tensión de salida del preamplificador : 600 mV
Impedancia de salida de PRE-OUT : 600 Ω
Dimensiones exteriores : 7" x 4" x 6-5/6" (178 x 100 x 160 mm)
Peso : 5 lb. 5 oz. (2,4 kg)
DSP
Canal : 2 canales para entrada; 4 canales para salida
Patrones de DSP : 7 patrones
Frecuencia central del ecualizador : 80, 160, 320, 640, 1,6k, 4k, 10k (Hz)
Margen del ecualizador : –12 dB a +12 dB (13 pasos)
Radio
Radio FM estéreo
Gama de frecuencias : 87,9 - 107,9 MHz
Sensibilidad usable : 12 dBf
Distorsión armónica total
(monofónico) : 0,3 % (1 kHz)
Relación de señal/ruido ponderada
(monofónico) : 70 dB
Respuesta en frecuencia : 20 a 15.000 Hz ±3 dB
Separación de estéreo : 42 dB (1 kHz)
Relación de respuesta de imagen : 75 dB
Radio AM
Gama de frecuencias : 530 - 1.710 kHz
Sensibilidad usable (señal/ruido 20 dB) : 27 dB/µV
Relación de respuesta de imagen : 65 dB
E
S
P
A
Ñ
O
L
45
132
Cinta aflojada
Emplee un lápiz u objeto similar para tensar la
cinta como se muestra. Si se emplea la cinta
estando aflojada, puede enredarse en las
partes de rotación del aparato.
CQ-VX2000U
Reproductor de CD
Canal : 2 cauales
Cuantificación : 16 bitios lineal
Respuesta en frecuencia : 5 a 20.000 Hz
Alcance dinámico : 90 dB (IHF, A)
Flectuación y trémolo : mensurable
CQ-VX2000U
145
Page 67

Solución de problemas
MD IN
INTEGRATED C
u
Espesor
Mínimo:3/16” (4,75 mm)
Máximo:7/32” (5,56 mm)
7-5/32" (182mm)
4-1/16" (103 mm)
(continuación)
Guía de instalación
Cintas de casete
Interruptor de reposición
E
S
P
A
Ñ
O
L
44
PLS EJECT
RESET
No funciona por alguna razón
Comprobación/PasoOperaciónCausaEjemplo de visualización
Presione el botón de expulsión.
Importante
Presione el interruptor sólo cuando el
aparato no funcione con ningún botón.
Si no puede abrirse el panel, o si el
aparato no retorna al estado normal, llame
al centro de servicio que le quede más
cercano para solicitar que se lo reparen.
Interruptor de reposición
Inserte una varilla fina y dura en el orificio y
presione el interruptor.
El aparato vuelve al estado inicial cuando se
soluciona el problema. Recuerde que los
datos y los ajustes almacenados en la
memoria quedan borrados.
AD VERTENCIA
Estas informaciones de instalación están destinadas a técnicos
instaladores expertos, y no a personas sin conocimientos técnicos.
Ellas no contienen las advertencias ni los avisos sobre los posibles
peligros al intentar instalar este producto.
Cualquier intento para instalar este producto en un auto por cualquier
persona que no sea un técnico instalador puede casar daños en el
sistema eléctrico y puede resultar en serias heridas o hasta en la
muerte.
❏ Instrucciones generales
Si posible, este equipo deberá ser instalado por un
profesional. Sin embargo, si Ud. piensa instalar este
aparato Ud. mismo, el primer paso es decidir donde
instalarlo. Las instrucciones contenidas en estas
páginas guiará a Ud. en los pasos siguientes: (Por
favor, refiérase a la ADVERTENCIA arriba).
¡Identifique y pegue rótulos a los alambres del
vehículo.
¡Conecte los alambres del vehículo con los
alambres del conector de alimentación.
¡Instale la unidad en el tablero de instrumentos.
¡Verifique el funcionamiento de la unidad.
Cuando tenga cualquier problema, sírvase consultar
su instalador profesional más cercano.
Precaución: Esta unidad funcionará solamente con
un sistema de batería de auto de 12 voltios de CC
con el polo negativo puesto a tierra. No intente
usarlo con cualquier otro sistema. Si no, podrá
causar serios daños.
❏ Herrajes Suministradas
N.° Ítem Cant.
q Tornillo con arandela (5 mmø x 8 mm) 4
Tornillos de cabeza plana (5 mmø x 8 mm)
w
❏ Herramientas necesarias
Ud. necesitará un destornillador, una pila AA de 1,5
voltio, y lo siguiente:
Bombilla de
prueba de
12 V CC
Cinta adhesiva
eléctrica
Cortaalambres
❏ Especificaciones del tablero
de instrumentos
E
S
P
A
8
Ñ
O
L
33
Cómo sustituir el fusible
Use fusibles con la misma clasificación (10 amperios, 3 amperios). El usar diferentes substitutos o fusibles
de clasificación más alta, o conectando la unidad directamente sin fusible, podrá causar incendio o daños en
la unidad estereofónica.
Si la sustitución del fusible falla, póngase en contacto con su Centro de Servicio
Panasonic autorizado más cercano.
144
CQ-VX2000U
Antes de comenzar la instalación, mire que los artículos de la derecha estén embalados con el aparato.
¡Tarjeta de garantía …… Rellénela con rapidez.
¡Directorio de centros de servicio técnico
Panasonic …… Guárdelo para consultarlo en el
futuro en caso de que el aparato requiera el
servicio técnico.
¡Accesorios de instalación …… Se requieren
para la instalación en el tablero de instrumentos.
CQ-VX2000U
133
Page 68

Guía de instalación
(continuación)
❏ Identificar todos los alambres
El primer paso en la instalación es el identificar
todos los alambres del vehículo que serán usados
cuando Ud. vaya a instalar su sistema de sonido.
Cuando vaya identificando cada alambre,
sugerimos que pegue rótulos usando una cinta de
identificación y un marcador permanente. Eso
ayudará a evitar confusiones cuando vaya a hacer
las conexiones más tarde.
Nota: No conecte el conector de alimentación a la
unidad estereofónica hasta que haya realizado
todas las conexiones. Si no hay protectores de
plástico en los alambres de conexión del aparato
estereofónico, asegúrese de aislar todos los
conductores expuestos con cinta eléctrica hasta
que Ud. esté listo para usarlos. Identifique los
alambres en la siguiente orden.
E
S
Alambre de alimentación
P
Si su vehículo tiene un radio o está alambrado de
A
antemano para uno:
Ñ
Corte los conductores del conector uno por uno de
O
la clavija (dejando los cables lo más largos que sea
L
posible) para poder trabajar con los cables
individuales.
34
Gire la llave de encendido a la posición ACC, y
conecte uno de los conductores de la bombilla de
prueba al chasis
Ponga en contacto el otro cable de la bombilla de
prueba con cada uno de los cables expuestos de la
clavija cortada del conector de la radio. Ponga en
contacto un cable cada vez hasta encontrar la
salida que causa que se encienda la bombilla de
prueba.
Después, desconecte el encendido del automóvil y
luego vuélvalo a conectar. Si la bombilla también se
apaga y enciende, significa que la salida es el cable
de alimentación del automóvil.
Si su automóvil no tiene hechas las conexiones
para una unidad de audio:
Vaya al bloque de fusibles y busque el receptáculo
del fusible de la radio (RADIO), accesorios (ACC), o
encendido (IGN).
Conductor de la batería
Si su unidad estereofónica tiene un conductor
amarillo, Ud. necesitará localizar el conductor de la
batería del auto. Si no, Ud. podrá ignorar este procedimiento. (El conductor amarillo de la batería
suministra una alimentación continua para mantener el reloj, la memoria de almacenaje y otras funciones).
Si su automóvil tiene una radio o tiene hechas las
conexiones para una:
Con el encendido desconectado y los faros
apagados, identifique el cable de la batería del
automóvil poniendo a tierra un cable de la bombilla
de prueba en el chasis y probando los otros cables
expuestos de la clavija cortada del conector de la
radio.
Si su automóvil no tiene hechas las conexiones
para una unidad de audio:
Vaya al bloque de fusibles y busque el receptáculo
del fusible para la batería, normalmente marcado
con BAT.
Altavoces
Identifique los conductores de los altavoces del
auto. Hay dos conductores para cada altavoz,
normalmente con códigos de colores.
Una manera simples de identificar los conductores
de los altavoces y los altavoces conectados con
ellos es probar los conductores usando una
batería de 1,5 voltio AA como sigue.
Apriete un conductor contra un polo de la batería y
toque instantáneamente el polo opuesto de la
batería con el otro conductor. Ud. podrá oír un
sonido de arañazo en el altavoz si está asiendo
los conductores del altavoz.
Si no, continúe probando diferentes combinaciones de conductores hasta identificar todos los
conductores de los altavoces. Cuando vaya a
pegar rótulos, incluya los rótulos para identificar la
ubicación de cada altavoz.
Motor de la antena
Si su vehículo está dotado de una antena motorizada automática, identifique el conductor de la
antena motorizada del vehículo conectando un
conductor de la bombilla de prueba con el conductor de la batería del vehículo y tocando, uno a uno,
los alambres restantes expuestos del tapón conector cortado. Ud. podrá oír el sonido de activación del
motor de la antena cuando Ud. toca el alambre
correcto.
Antena
El conductor de la antena es un alambre negro
grueso con un tapón metálico en la punta.
Mensajes de visualización de error
CD
Comprobación/PasoOperaciónCausaEjemplo de visualización
CD – E1 –
CD – E2 –
CD – E3
PLS EJECT
Cambiador
CD CH – E1 –
M
D CH – E1 –
CD CH – E2 –
M
D CH – E2 –
CD CH – E3 –
M
D CH – E3 –
NO DISC
Notas:
¡
Hay ocasiones en las que los números de los discos afectados por un error se visualizan antes de E1 y E2.
¡
Las visualizaciones y los pasos a realizar para los errores varían un poco según el cambiador utilizado. Para más
detalles, consulte el manual de instrucciones del cambiador utilizado.
El disco está sucio o al revés.
Puede
expulsarse
automáticamen
te.
El disco está rayado.
No funciona por alguna causa
Se tomó la acción para iniciar
la reproducción antes de
haberse expulsado por
completo el disco.
El disco está sucio o al revés.
Puede
expulsarse
automáticamen
te.
El disco está rayado.
No funciona por alguna causa
No hay discos en el cambiador
(cartucho)
Compruebe el disco.
Abra el panel y presione [u]. Si persiste
el problema, presione el interruptor de
reposición. Si todavía no se repone la
operación, solicite la reparación del
aparato.
Abra el panel y presione [ u].
Comprobación/PasoOperaciónCausaEjemplo de visualización
Compruebe el disco.
Abra el panel y presione [u]. Si persiste
el problema, presione el interruptor de
reposición. Si todavía no se repone la
operación, solicite la reparación del
aparato a la tienda donde lo compró o al
centro de servicio que le quede más
cercano.
Inserte discos en el cambiador (cartucho).
E
S
P
A
Ñ
O
L
43
134
CQ-VX2000U
CQ-VX2000U
143
Page 69

Solución de problemas
(continuación)
Cintas de casete
La TPS no está disponible
Mala calidad de sonido
No se expulsa la cinta de
casete.
E
Poco después de insertar
S
una cinta de casete, la
P
A
cara de reproducción
Ñ
cambia repetidamente.
O
L
La reproducción no se
detiene.
42
Ajuste del sonido
No sale sonido por el
altavoz izquierdo,
derecho, frontal o trasero.
Al escuchar el estéreo, se
invierten los sonidos de la
derecha y de la izquierda.
Sólo salen graves o sonido monofónico
por el altavoz trasero
Control remoto
Problema
Los botones no funcionan.
CausaProblema
La función TPS no está
disponible
Cinta de mala calidad
La cabeza está sucia.
Confirme el funcionamiento de la TPS
empleando otra cinta de casete.
Confirme el funcionamiento de la TPS
empleando otra cinta de casete.
Limpie la cabeza. (Solicite consejo a un
representante de servicio.)
Paso
Presione el botón de expulsión.
Compruebe si funciona bien el mecanismo
La cinta de casete está
¡
defectuosa.
Problemas en el mecanismo
¡
empleando otra cinta de casete.
Si el mecanismo no funciona bien, presione el
interruptor de reposición.
Si el mecanismo todavía no funciona bien,
póngase en contacto con un concesionario o
centro de servicio.
CausaProblema
El balance izquierdo/derecho o el delantero/trasero
está ajustado completamente a un lado.
Los cables no están
correctamente conectados.
El cable del altavoz derecho está conectado
al altavoz izquierdo y el cable del altavoz
izquierdo está conectado al altavoz derecho.
Se ha ajustado SBC-SW a la
posición ON.
Ajuste BAL/FAD como sea apropiado.
Conecte correctamente los cables.
Conecte los cables de los altavoces a los
correctos.
Ajuste SBC-SW a OFF.
Causa
Se han invertido las polaridades
de las pilas (+) (–) .
Inserte correctamente las pilas.
Paso
Paso
Pilas incorrectas Compruebe las pilas.
Las pilas están gastadas.
El controlador remoto está en
una dirección incorrecta.
Reemplace las pilas.
Dirija el controlador remoto al SENSOR del
panel.
Página
–
–
–
112
144
Página
121
138-139
138-139
122
Página
101
101
101
–
❏ Conecte todos los alambres
Ahora que Ud. ha identificado todos los alambres
del vehículo, estará listo para comenzar a
conectarlos con los alambres de la unidad
estereofónica.
página 138, 139) muestra las conexiones correctas
y las codificaciones de colores de los cables.
Recomendamos fuertemente que Ud. pruebe la
unidad antes de hacer la instalación final.
Ud. puede instalar la unidad sobre el suelo y hacer
conexiones temporales para probar la Unidad. Use
cinta eléctrica para cubrir los alambres expuestos.
Importante: Conecte el alambre rojo de alimentación por último, después de haber hecho y aislado
todas las demás conexiones.
Puesta a tierra
Conecte los conductores negros de puesta a tierra
del conector de alimentación al chasis metálico del
vehículo.
Altavoces
Conecte los alambres de los altavoces. Vea el
diagrama de alambrado abajo para hacer las
conexiones correctas. Siga el diagrama cuidadosamente para evitar estropear los altavoces y la
unidad estereofónica.
Los altavoces usados deberán ser capaces de
manejar más de 37 vatios de potencia de audio.
Cuando esté usando un amplificador de audio
opcional, los altavoces deberán ser capaces de
manejar la potencia máxima de salida del
amplificador. Los altavoces con bajas
capacidades de entrada podrán sufrir daños.
La impedancia del altavoz deberá ser de 4 a 8
ohmios, que está típicamente marcado en la
mayoría de los altavoces. Los altavoces con
impedancia más grande o más pequeña podrán
afectar la salida y causar daños tanto en los
altavoces como en la unidad estereofónica.
Precaución: Nunca ponga a tierra los cordones
de los altavoces. Por ejemplo, no use el sistema
de puesta a tierra del chasis o un sistema de
altavoces de 3 alambres. Cada altavoz deberá ser
conectado separadamente usando alambres
paralelos aislados. Cuando tenga cualquier duda
sobre cómo los altavoces de su auto están
alambrados, sírvase consultar con su instalador
profesional más cercano.
Antena motorizada
Conecte el conductor de la antena motorizada del
vehículo con el conductor del relé de controle de la
antena motorizada.
El diagrama de conexiones (
B
Batería
Conecte el conductor amarillo de la batería con el
alambre del radio o con la boca del fusible de la
batería en el bloque de fusibles.
Antena
Conecte la antena enchufando el conductor de la
antena el receptáculo de la antena.
Equipos
Conecte cualesquier equipos opcionales tales como
el amplificador, según las instrucciones suministradas juntamente con el equipo. Mantenga una
distancia de aproximadamente 12 pulgadas (30
cm.) entre los cordones de los altavoces y la unidad
amplificadora, y la antena y el cordón de extensión
de la antena. Sírvase leer las instrucciones de operación y de instalación de cualquier equipo que
vaya a conectar con esta unidad.
Alimentación
Conecte el conductor rojo de alimentación con el
alambre correcto de radio del vehículo o con la
boca de fusible apropiada en el bloque de fusibles.
Si una unidad estereofónica funciona correctamente
con todas estas conexiones hechas, desconecte los
alambres y pase a hacer la instalación final.
Iluminación
1.Conecte al interruptor de las luces, se iluminan los
botones de control.
2.No puede encontrarse el interruptor de las luces,
conecte el cable de iluminación (Naranja con
franja blanca) a accesorios (ACC).
❏ Instalación final
Conexión de los alambres
Conecte todos los alambres, verificando que cada
conexión está aislada y segura. Ate todos los
alambres sueltos y sujételos con una cinta para que
no se suelten posteriormente.
Congratulaciones! Después de hacer algunas
verificaciones finales, Ud. estará listo para disfrutar
de su nuevo sistema estereofónico para autos.
❏ Verificaciones finales
1. Asegúrese de que todos los alambres están
correctamente conectados y aislados.
2. Gire la llave de encendido para verificar que la
unidad funciona correctamente.
Cuando tenga cualquier problema, consulte con su
instalador profesional autorizado más cercano para
solicitar su ayuda.
E
S
P
A
Ñ
O
L
35
142
CQ-VX2000U
CQ-VX2000U
135
Page 70

Guía de instalación
(continuación)
❏ Precauciones
Le recomendamos encarecidamente que se ponga guantes para realizar el trabajo de instalación
para protegerse contra heridas.
Extracción de la ménsula para el transporte
Asegúrese de extraer la ménsula para el transporte antes de la utilización (instalación).
CEmplee tornillos (5 mmø x 8 mm) con arandelas para la instalación.
Tenga cuidado de no perder ninguna de estas partes.
E
S
P
A
Ñ
O
L
36
CQ-VX2000U
Ménsulas para el transporte x 2
q Tornillo con
arandela x 4
(5 mmø x 8 mm)
Radio
Hay demasiado ruido en
las difusiones de FM
estéreo y monofónicas
Se reponen las emisoras
preajustadas.
La emisora es demasiado
lejana, o la señal es
demasiado débil.
El cable de la batería no está
correctamente conectado.
CD
El CD está colocado al revés.
El CD está dentro pero no
suena
El CD está sucio.
El sonido del CD salta, el
tono es muy bajo.
El CD está sucio.
CausaProblema
Seleccione otras emisoras con mejor nivel de
señal.
Conecte el cable de la batería al terminal que
siempre está activo.
CausaProblema
Coloque correctamente el CD, con la etiqueta
arriba.
Limpie el CD, consultando la sección de
cuidado de los discos.
Limpie el CD, consultando la sección de
cuidado de los discos.
Paso
Paso
Página
108
138
Página
110
132
132
E
S
P
A
Ñ
O
L
41
Nota:
¡Los orificios de tornillo del lado derecho no son de autoenrosque. Emplee sólo los tornillos
suministrados para el montaje de la unidad.
¡Para apretar los tornillos, presione sus cabezas recto abajo.
El sonido salta debido a
vibraciones.
El CD no se expulsa
El ángulo de montaje es de más
de 30 grados.
Montaje inestable
El CD está defectuoso.
¡
Avería mecánica.
¡
Ajuste el ángulo de montaje a menos de 30
grados.
Monte la unidad con seguridad con las partes
de montaje, consultando la sección de
instalación.
Abra el panel y presione [u]. Si el problema
persiste, presione el interruptor de reposición.
Si no se repone la operación normal, llame a
la tienda donde compró el aparato o a la
estación de servicio que le quede más
cercana para solicitar que se lo reparen.
–
133
110
144
136
CQ-VX2000U
CQ-VX2000U
141
Page 71

Solución de problemas
Nota:
Emplee una llave para doblar
verticalmente los apéndices de
la ménsula.
Ménsula (izq.)
Ménsula (der.)
CQ-VX2000U
Tornillos incluidos q ó w... Seleccione los adecuados que correspondan a la forma de los
orificios de la ménsula.
wTornillos de
cabeza
plana x 8
(5 mmø
x 8 mm)
Nota: Los tornillos de cabeza
redondeada q (5 mmø x 8 mm)
son cuatro piezas incluidas, las
otras cuatro piezas están fijas en
la ménsula del transporte [tornillos
con arandela (5 mmø x 8 mm)].
q T ornillo con
arandela x 8
(5 mmø
x 8 mm)
Común
No se conecta la
alimentación
E
S
P
A
Ñ
O
L
No hay sonido
40
Problema
Causa
El interruptor del motor del
vehículo no está conectado.
Los cables no están
correctamente conectados.
El cable de la batería no está
correctamente conectado.
El cable de accesorios no está
correctamente conectado.
El cable de masa no está
correctamente conectado.
El fusible se ha quemado.
Volumen demasiado bajo Suba el volumen
Los cables no están
correctamente conectados.
El silenciamiento está activado. Ajústelo a OFF.
Gire el interruptor de encendido del vehículo a
la posición ACC o ON.
Conecte correctamente los cables.
Conecte el cable de la batería al terminal que
está siempre activo.
Conecte el cable de accesorios a la fuente
ACC del vehículo.
Conecte el cable de masa a una parte
metálica del vehículo.
Llamé a la tienda donde compró el aparato, o al centro de
servicio que le quede más cercano (vea la hoja adjunta) y
solicite que le reemplacen el fusible.
Conecte correctamente los cables.
Paso
Página
104
138-139
138
138
138
–
104
138-139
131
❏ Instalación típica (para vehículos con tamaño DIN doble)
1.
Extraiga la radio de automóvil o la caja de objetos pequeña del vehículo y las ménsulas de sujeción.
2. Emplee los tornillos incluidos q ó w para instalar las ménsulas en esta unidad.
3. Instale esta unidad en el vehículo.
E
S
P
A
Ñ
O
L
37
Condensación (humedad)
Los botones no funcionan
No puede ajustarse el reloj
Ruido
140
CQ-VX2000U
El analizador de espectro está
en el modo de demostración.
Todavía no se ha conectado la
alimentación.
Hay un teléfono celular cerca de
la unidad principal.
Espere un poco antes de utilizarlo.
Presione [DISP] para cancelar el modo de
demostración.
Presione el botón [POWER] para conectar la
alimentación, y ajuste entonces el reloj.
Separe el teléfono celular de la unidad
principal.
–
104
104
–
¡Si se requiere una juego especial (que se vende por separado) para un vehículo de cierto año,
modelo o grado, consulte a su concesionario.
¡Para simplificar las conexiones eléctricas en su vehículo, podrá comprar un conector de ali-
mentación preparado en el establecimiento de su concesionario.
❏ Instalación excepto para los vehículos de arriba
Para el juego de utilización general (que se vende por separado) o juego especial para automóvil
(que se vende por separado), consulte a su concesionario.
CQ-VX2000U
137
Page 72

PRE-OUT (F)
CD/MD
•
CH IN
R
L
AUX-IN PRE-OUT (R)
Conector de control del
cambiador de CD
Conector de alimentación
(Naranja con franja blanca)
Cable de iluminación
(AMP-CONT MAX 0.1A)
Cable de alimentación de control
del amplificador externo
(Azul con franja blanca)
(ACC 3A)
(Negro)
Cable de masa
(Blanco con franja negra)
(Verde con franja negra)
(Blanco)
(Gris)
(Gris con franja
negra)
(Verde)
(Violeta con franja negra)
(Violeta)
Altavoz
delantero
(izquierdo)
Altavoz
delantero
(derecho)
Altavoz
trasero
(izquierdo)
Altavoz
trasero
(derecho)
A la línea de alimentación conectada
a las luces de paso del vehículo
A la alimentación de ACC,
+12 V CC
A una parte metálica limpia y
desnuda del chasis del vehículo
A la batería del vehículo, +12 V CC
continuos
Al cable de alimentación de control
de la antena automática del
vehículo
(+) (–) (+) (–) (+) (–) (+) (–)
Cable de la batería
(BATTERY 10A)
(Amarillo)
Cable de la alimentación de ACC
(Rojo)
(ILLUMINATION)
(ANT-CONT MAX 0.1A)
Cable de control de la antena
(Azul)
Fusible (3A)
Fusible
(10A)
Antena
A un amplificador externo
CQ-VX2000U (trasero)
Conexiones eléctricas
Precauciones
¡Este aparato sólo funciona en un sistema de 12 voltios CC con negativo a tierra.
¡Para evitar cortocircuitos, extraiga el terminal negativo (–) de la batería.
¡Lea con atención el manual de instrucciones de los equipos conectados a este aparato.
Precaución: Para la instalación en automóviles con computadoras de viajes o de navegación, todos los
ajustes de la memoria electrónica previamente registrados en la computadora se perderán cuando se
desconecte el terminal de la batería.
E
S
P
A
Ñ
O
L
38
Ejemplo 1 de mejora
del sistema
Combinación
¡Cambiador de CD (CX-DP88U)
¡ TV de automóvil
¡ 8 altavoces
(
Cable RCA
(opcional)
(Blanco)
(L)
(Blanco)
(L)
(Blanco) (L)
(
Rojo
(R)
(
Rojo
(R)
TV de automóvil,
etc.
Cable RCA
(opcional)
(Blanco)
(L)
Amplificador
de potencia
(Blanco)
(L)
(Rojo)
(R)
Amplificador
de potencia
Rojo
a AUX
)
)
Antena
) (R)
FRONT
(Blanco)
(L)
Cable de control de la antena
Al cable de alimentación de control
de la antena automática del
vehículo
(Blanco con franja negra)
(Blanco)
(Rojo)
(R)
CD
•
CH IN
CD/MD
R
L
AUX-IN PRE-OUT (R)
(Blanco)
(
Rojo
(ANT-CONT MAX 0.1A)
(+) (–) (+) (–) (+) (–) (+) (–)
(L)
(R)
•
C IN
PRE-OUT (F)
)
(Gris)
Cambiador de CD
CX-DP88U
(Rojo) (R)
CQ-VX2000U (trasero)
REAR
(
Rojo
)
(R)
(
Azul
)
(Gris con franja
negra)
(Verde)
Cable de extensión
(DIN/RCA/BATT/GND)
(Amarillo)
(Blanco) (L)
Conector de control del
cambiador de CD
Conector de alimentación
(ILLUMINATION)
(
Naranja con franja
blanca
)
(ACC 3A)
(
Rojo
)
Fusible (3A)
(Negro)
(Amarillo)
Fusible (10A)
(AMP-CONT MAX 0.1A)
(Azul con franja blanca
Fusible (3A)
A la línea de alimentación conectada a las luces de paso del
vehículo
A la alimentación de ACC,
+12 V CC
(BATTERY 10A)
(Violeta)
Cable
de masa
Cable de la
batería
Cable de iluminación
Cable de la alimentación
de ACC
Cable de masa
A una parte metálica limpia y
desnuda del chasis del vehículo
Cable de la batería
A la batería del vehículo, +12 V CC
continuos
Cable de alimentación de
control del amplificador
)
externo
A un amplificador externo
(Verde con franja negra)
(Violeta con franja negra)
E
S
P
A
Ñ
O
L
39
138
CQ-VX2000U
Altavoces para actualización
del sistema
Altavoz
delantero
(izquierdo)
Altavoz
delantero
(derecho)
Altavoz
trasero
(izquierdo)
Altavoz
trasero
(derecho)
CQ-VX2000U
139
 Loading...