

Panasonic AG-HPX600 installation

AG-HPX600
Proxy Streaming
Quick Setup Guide
Version 1

Hardware and Activation
Please be sure that the hardware is installed and software is activated be for proceeding.
If this is a sales demo camera provided by HQ, all options ar e inst alled and you are all set to proceed.
Proxy Check List
AG-SFU601G Network Upgrade Software Key
AG-YDX600G Proxy Encoder Board
AJ-WM30 Wi-Fi Module
Note: Installed options can be verified under MAIN MENU>DIAGNOSTIC>OPTION STATUS
The AJ-WM30 Wi-Fi Module is located on the right side of the camera body behind the small door.
Camera Settings
Camera Setup
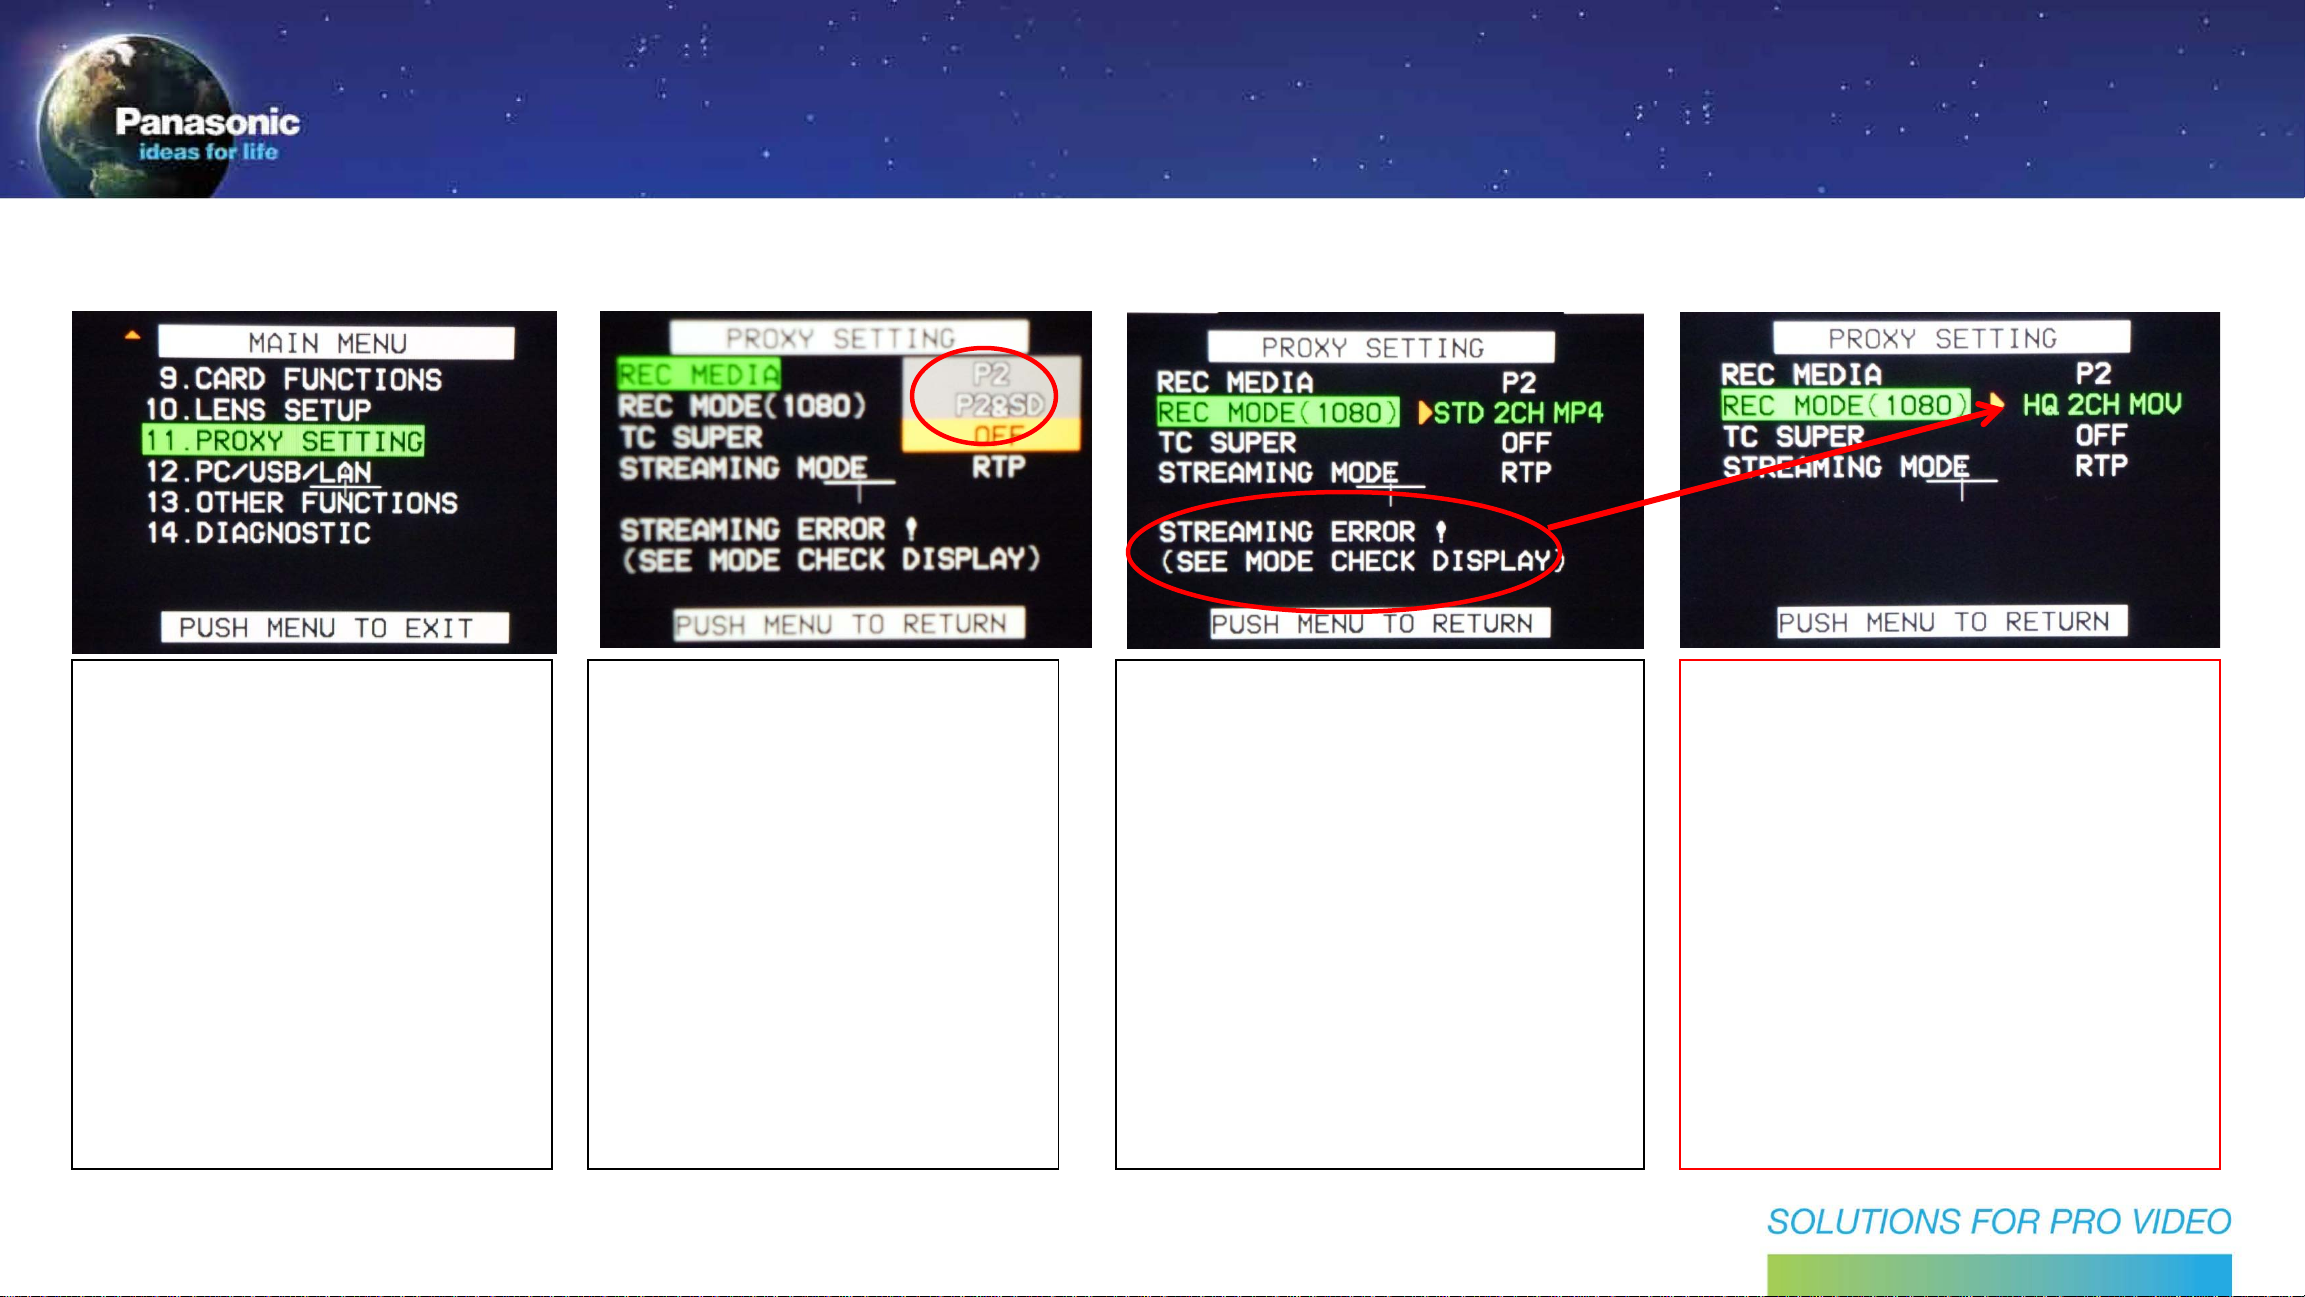
1:Select
PROXY SETTINGS
2: Select
REC MEDIA
Choices are P2,
P2&SD or OFF
If you want to record
and playback proxy,
select P2 or P2&SD
3: Select
REC MODE
Note: if you want to
Stream and get a
STREAMING ERROR!
Reduce REC MODE
and steaming will then
be possible.
NOTE!
STREAMING ERROR
will disappear when
supported REC MODE
is selected.
Camera Settings
Camera Setup
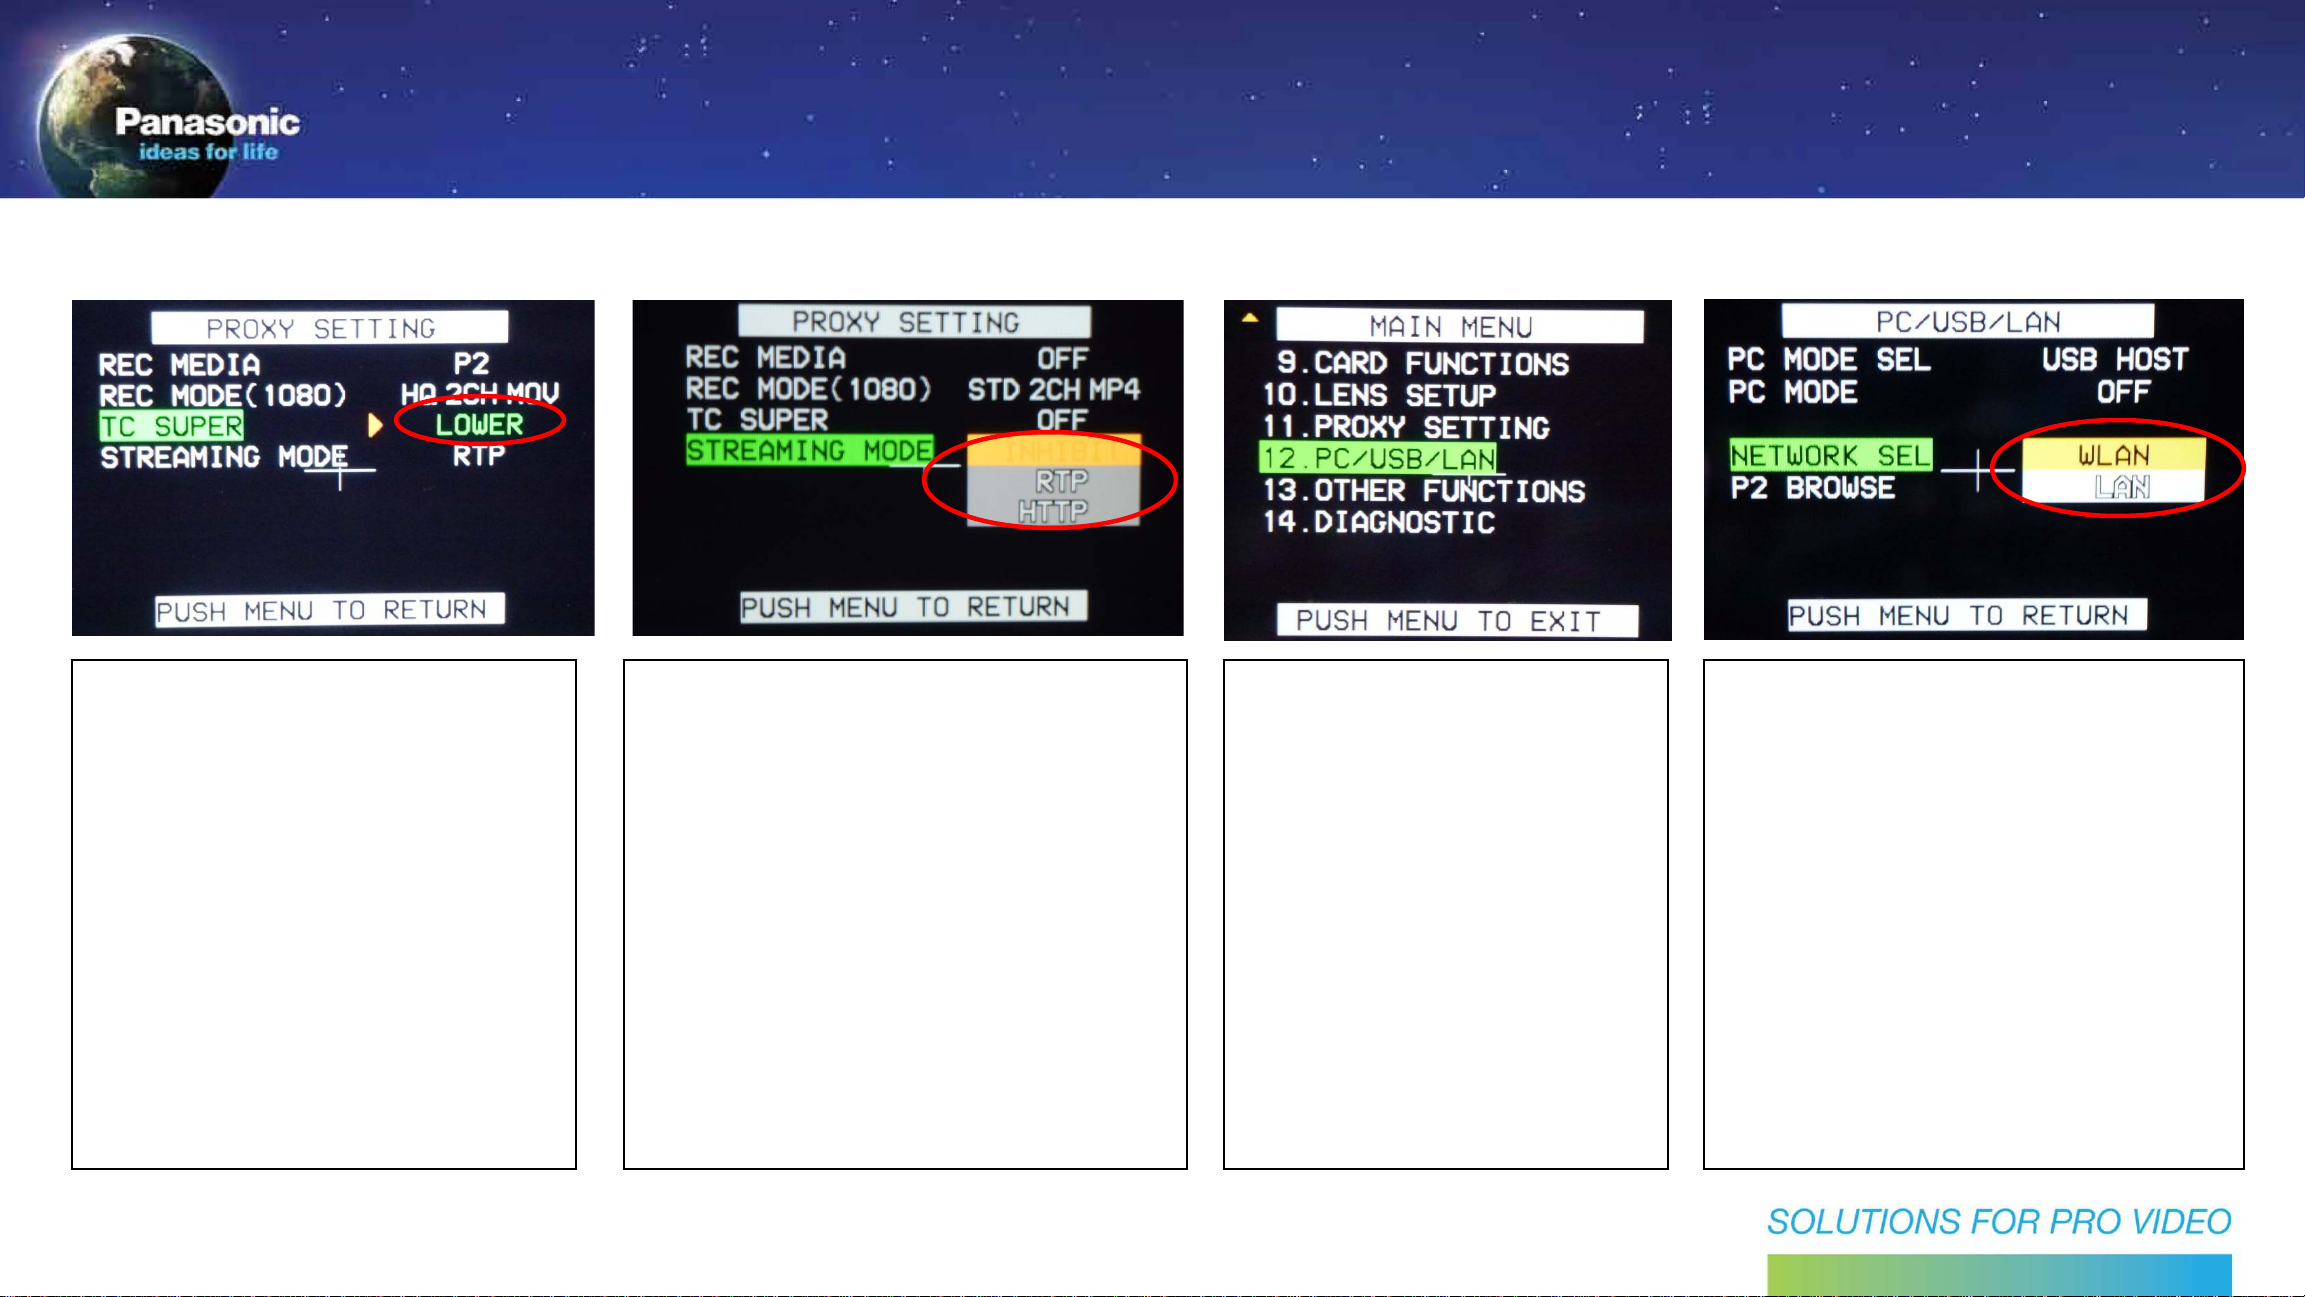
4:Select
TC SUPER
To BURN IN TC
(super impose) on
the proxy video,
select Upper, Lower
or OFF.
5: Select
STREAMING MODE
Select as follows:
INHIBIT = OFF
RTP = Computers
HTTP = I-Pads 2 or 3
I-Phone 4S
I-Touch (G4)
6: Return to the
MAIN MENU and
then select
PC/USB/LAN
7: Select
NETWORK SEL
Select as follows:
WLAN = Wireless
LAN = Wired
Camera Settings
Camera Setup
NOTE:
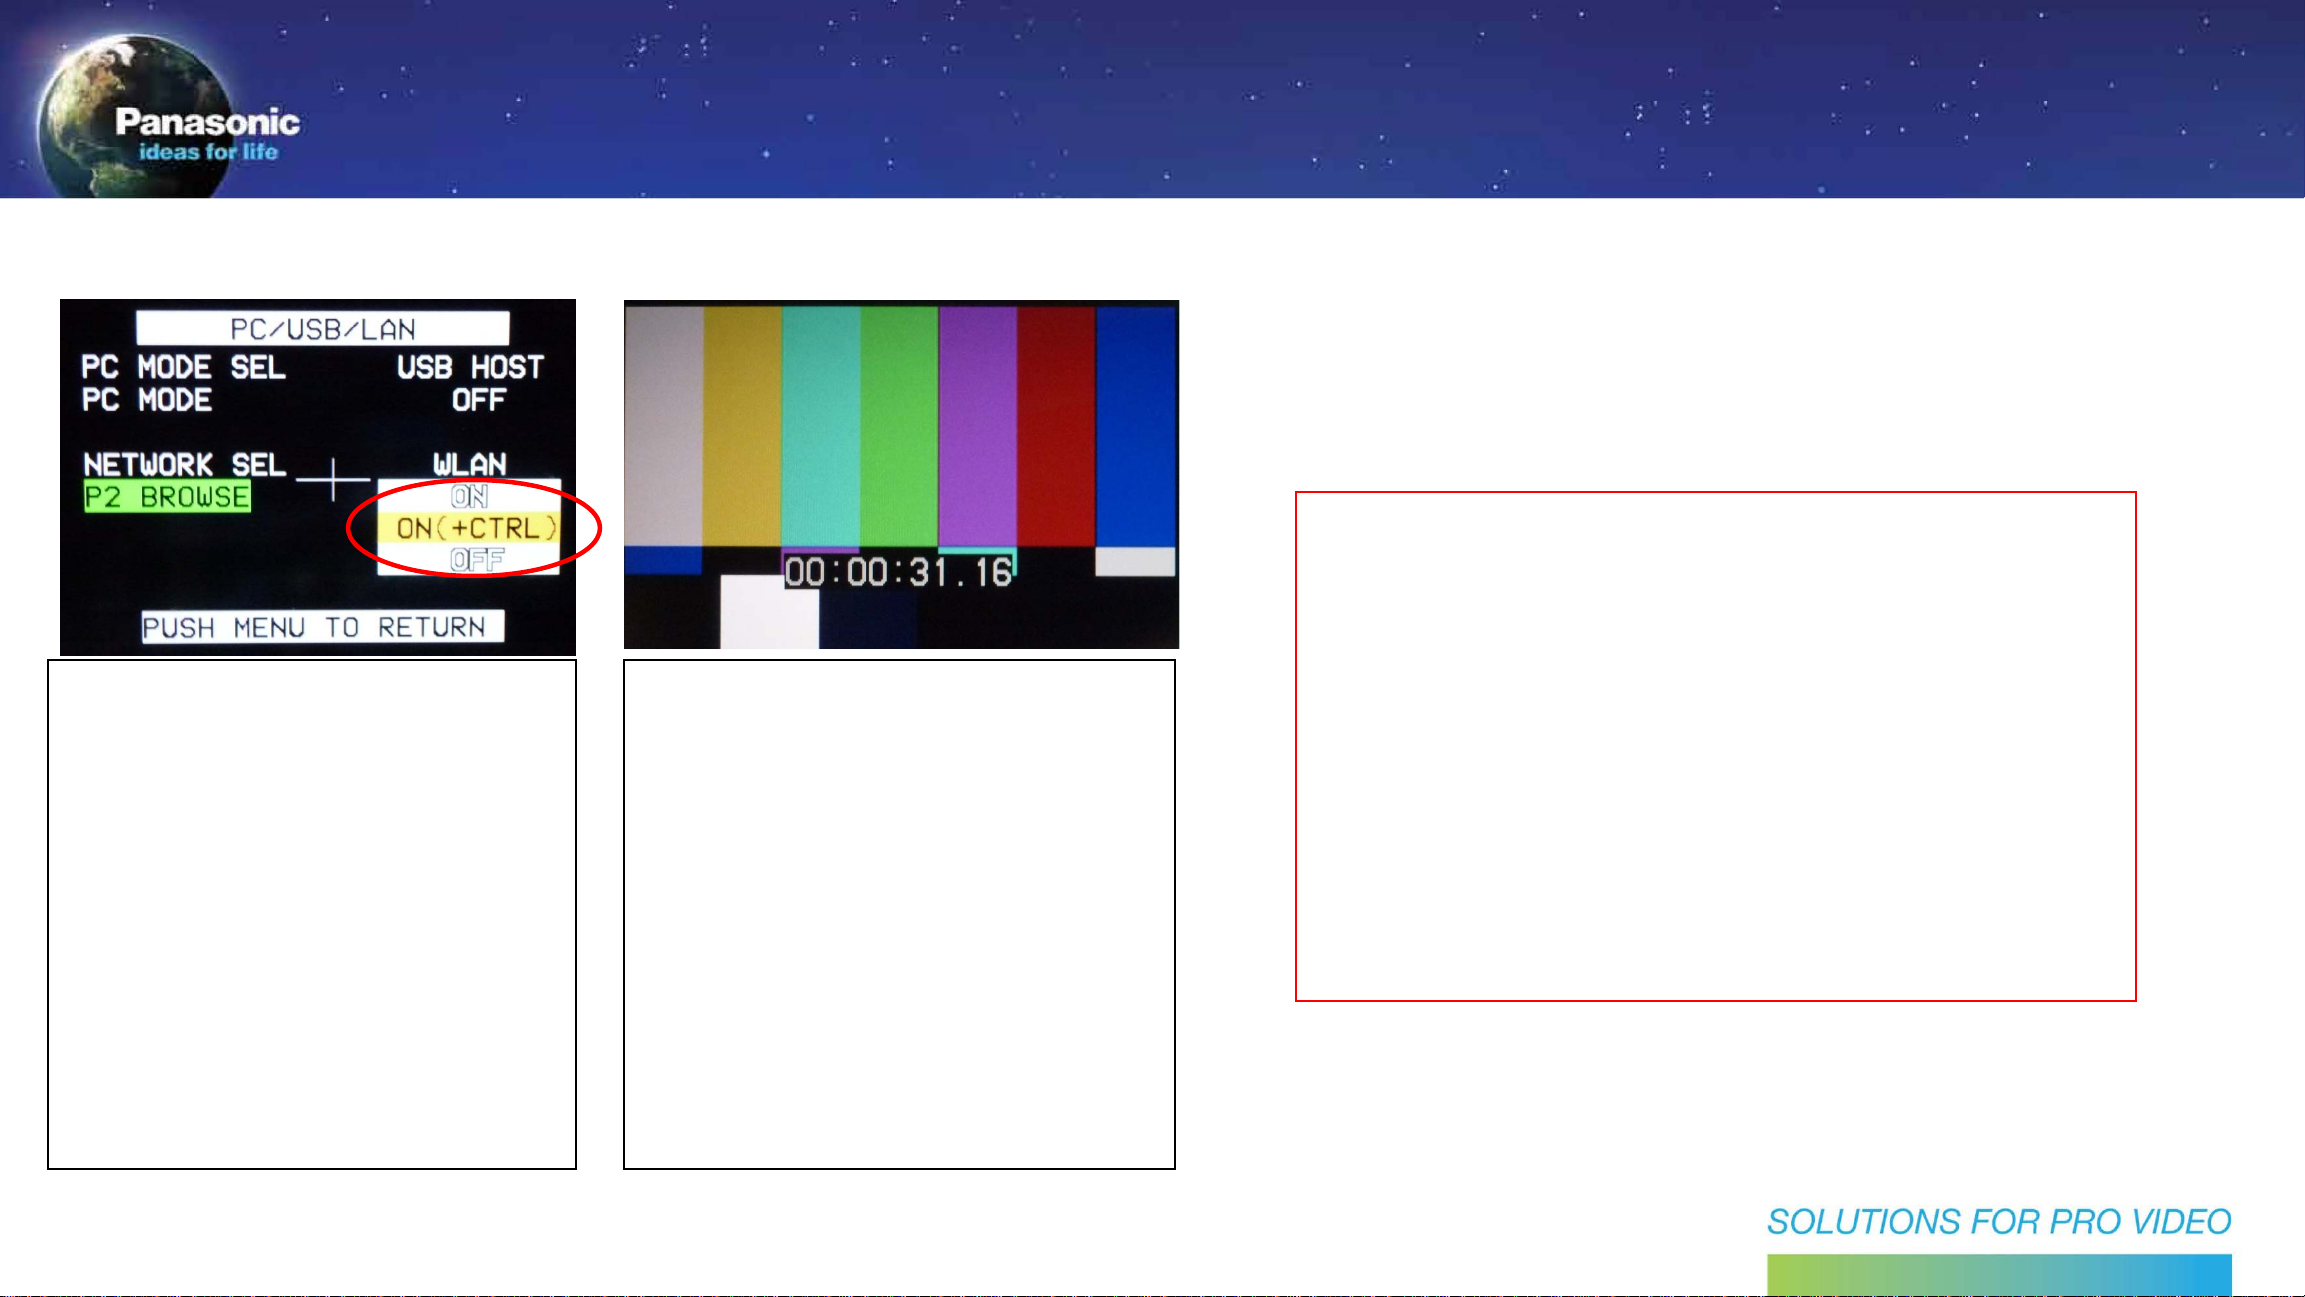
8:Select
P2 BROWSE
Select as follows:
ON = Browser ONLY
ON (+CTRL) =
Browser plus Camera
Control
OFF = Browser is OFF
9:EXIT Camera Menu
Additional detail setting for network
configuration can be found on the
next slide. You shouldn’t have to
change anything there unless you
want to customize network settings,
passwords, etc.
Camera Settings
Camera Setup
NOTE:
Please refer to the
operations manual
before making any
network configuration
changes.
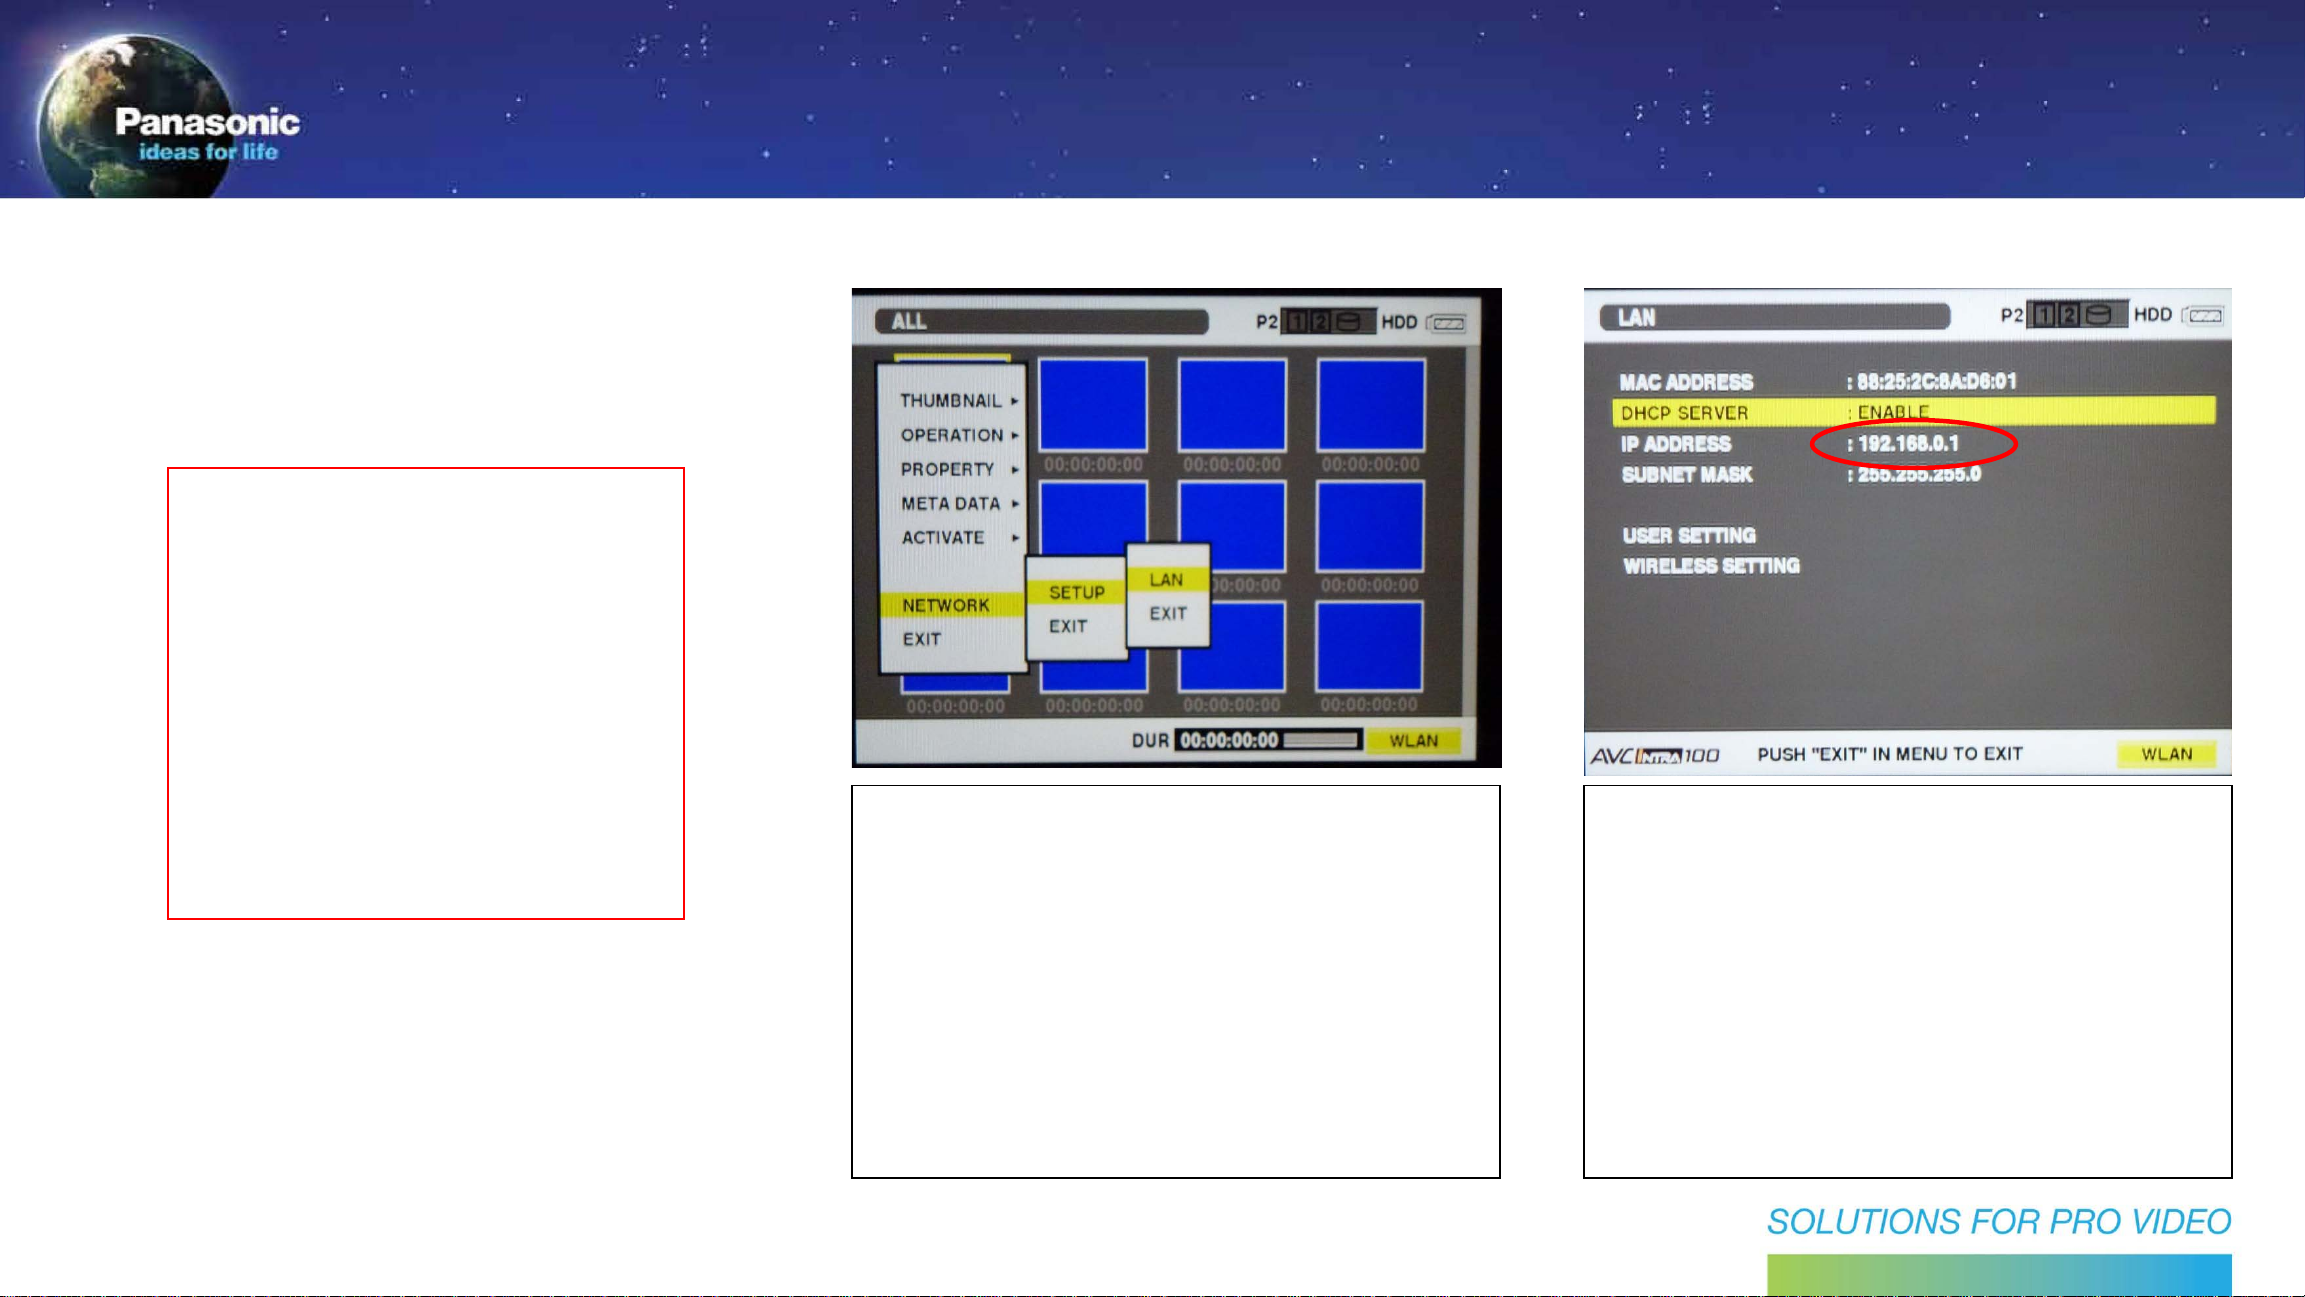
10: Confirm Settings
ENTER Playback Mode
Open Menu
Select NETWORK
Select SETUP
11: IP ADDRESS
This is where a custom
IP address can be edited
for a multi cam shoot
that will use wireless
Select LAN
for each camera.
Camera Settings
Camera Setup
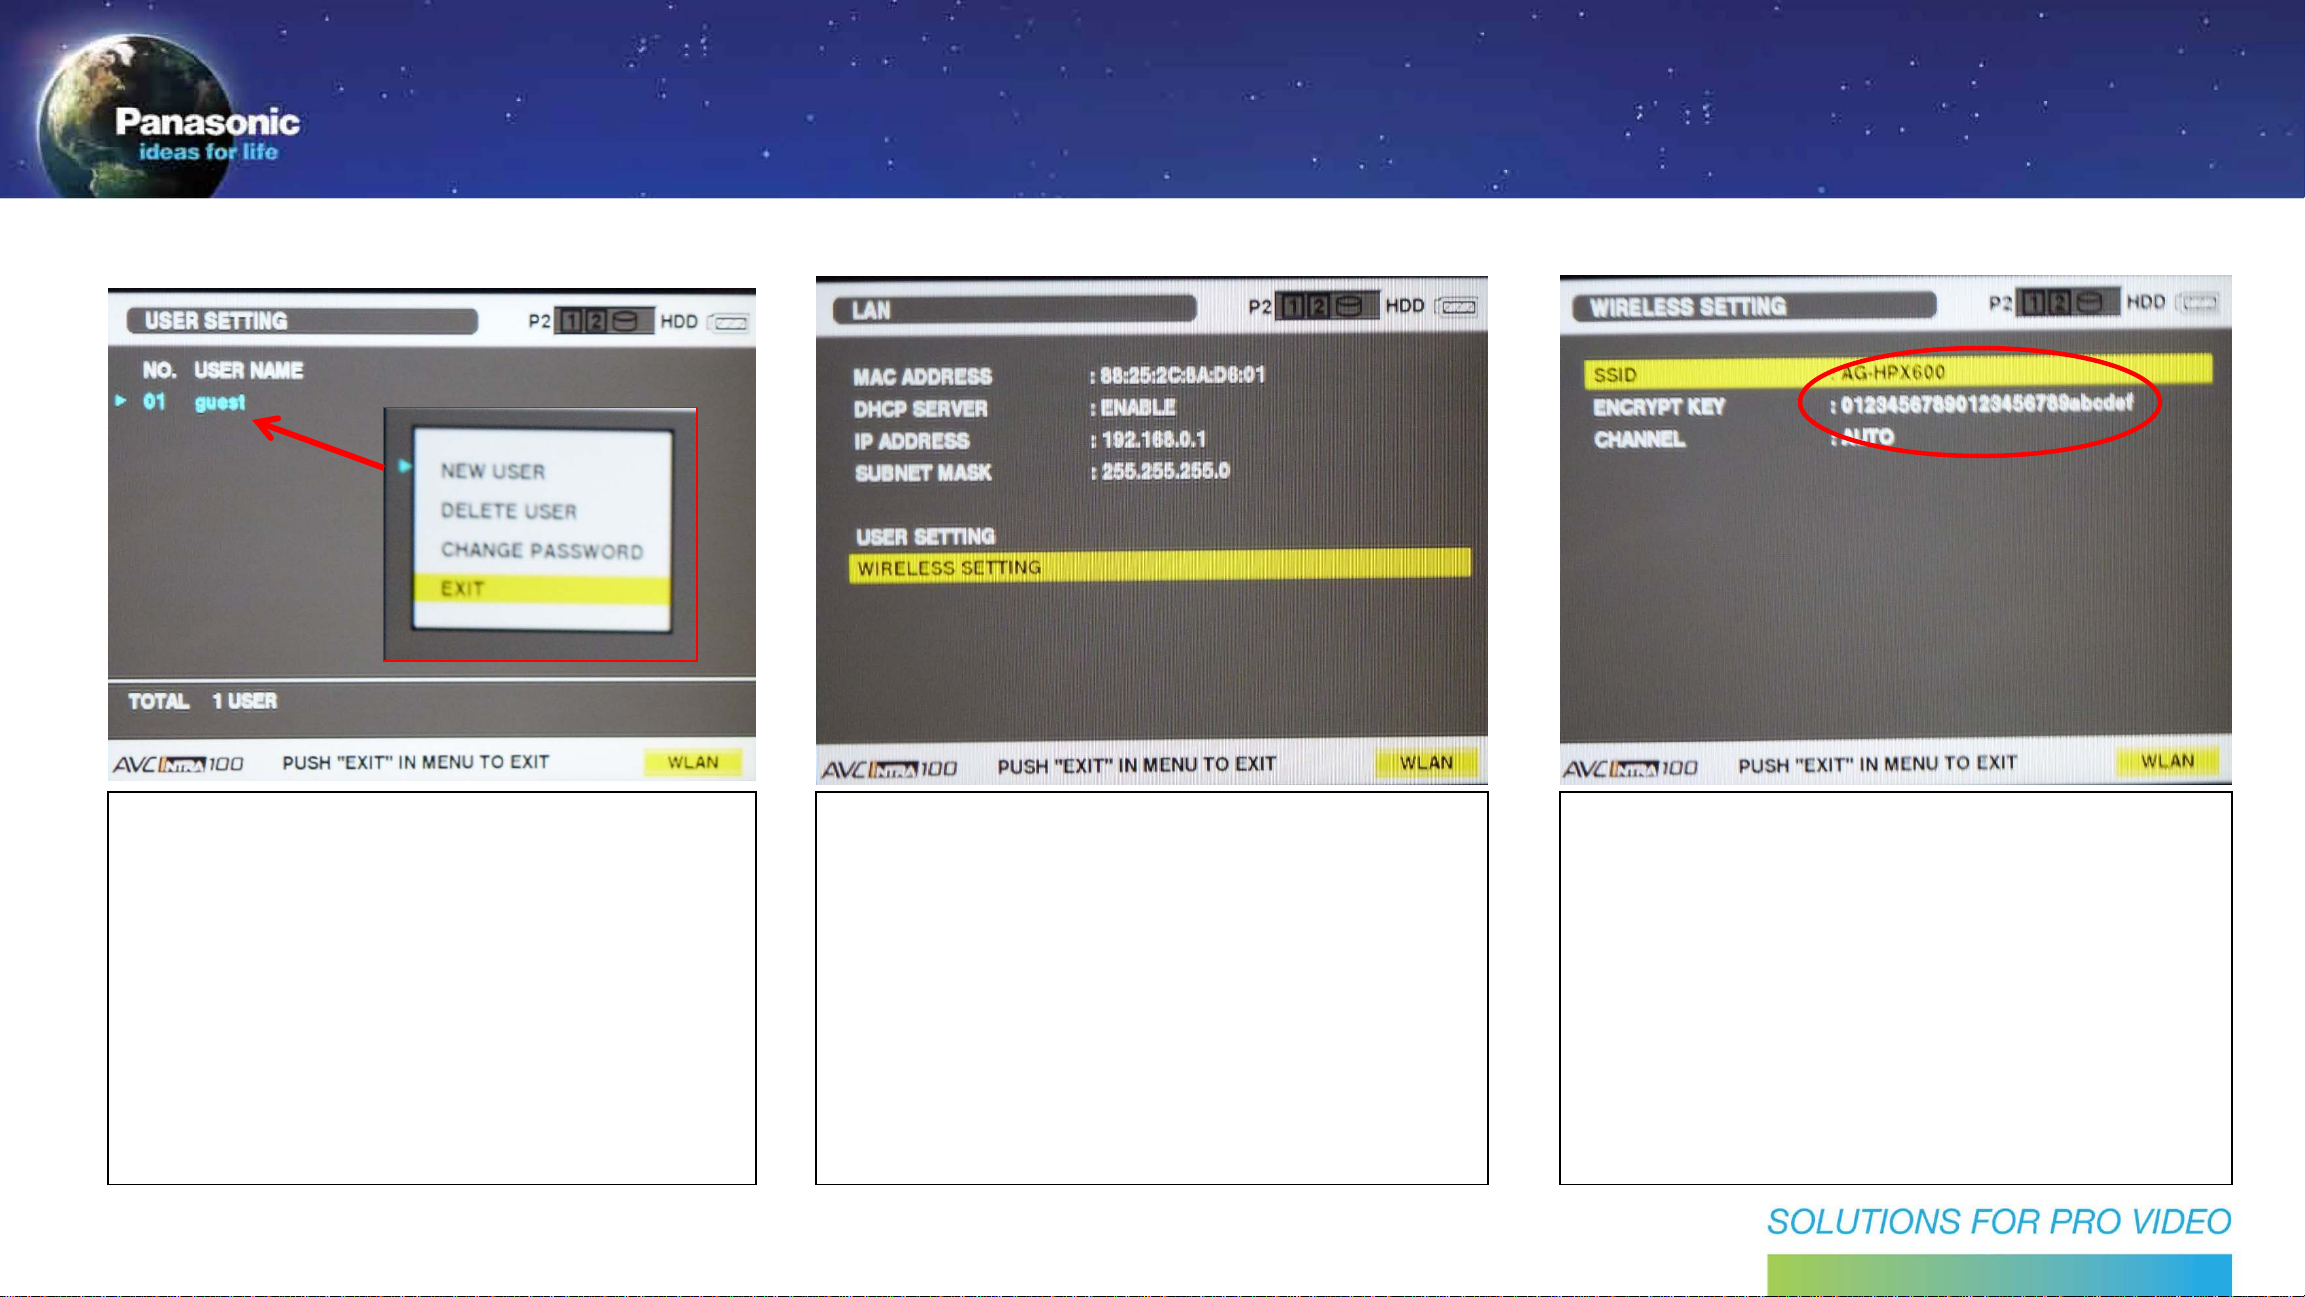
12: USER SETTINGS
This is where a custom
user name and password
can be edited.
13: WIRELESS SETTINGS
Enter this menu for additional
wireless settings as shown on
next instruction.
14: SSID + ENCRYPTKEY
This is were you can see the
SSID and encryption key. It
can also be edited. Like the IP
address, changing SSID is
needed for multi cam shoots.
 Loading...