

Page 1
®
MT2
Media Tuner
ENGLISHPORTUGUÊS FRANÇAISESPAÑOLITALIANODEUTSCHNEDERLANDSSVENSKAРУССКИЙ
Owner’s Manual
Page 2
IMPORTANT SAFETY INSTRUCTIONS
ENGLISH PORTUGUÊSFRANÇAIS ESPAÑOL ITALIANO DEUTSCH NEDERLANDS SVENSKA РУССКИЙ
SAVE THESE INSTRUCTIONS FOR LATER USE.
FOLLOW ALL WARNINGS AND INSTRUCTIONS MARKED ON THE AUDIO
EQUIPMENT.
1 Read instructions - All the safety and operating instructions should be read
before the product is operated.
2 Retain instructions - The safety and operating instructions should be retained
for future reference.
3 Heed Warnings - All warnings on the product and in the operating instructions
should be adhered to.
4 Follow Instructions - All operating and use instructions should be followed.
5 Cleaning - Unplug this product from the wall outlet before cleaning. Do not use
liquid cleaners or aerosol cleaners. Clean only with a dry cloth.
6 Attachments - Do not use attachments not recommended by the product
manufacturer as they may cause hazards.
7 Water and Moisture - Do not use this product near water-for example, near a
bath tub, wash bowl, kitchen sink, or laundry tub; in a wet basement; or near a
swimming pool; and the like.
8 Accessories - Do not place this product on an unstable cart, stand, tripod,
bracket, or table. The product may fall, causing serious injury to a child or adult,
and serious damage to the product. Use only with a cart, stand, tripod, bracket,
or table recommended by the manufacturer, or sold with the product. Any
mounting of the product should follow the manufacturer’s instructions, and
should use a mounting accessory recommended by the manufacturer.
9 A product and cart combination should be moved with care. Quick
stops, excessive force, and uneven surfaces may cause the product
and cart combination to overturn.
10 Ventilation - Slots and openings in the cabinet are provided for ventilation and
to ensure reliable operation of the product and to protect it from overheating,
and these openings must not be blocked or covered. The openings should never
be blocked by placing the product on a bed, sofa, rug, or other similar surface.
This product should not be placed in a built-in installation such as a bookcase or
rack unless proper ventilation is provided or the manufacturer’s instructions have
been adhered to.
11 Power Sources - This product should be operated only from the type of power
source indicated on the marking label. If you are not sure of the type of power
supply to your home, consult your product dealer or local power company. The
primary method of isolating the amplier from the mains supply is to disconnect
the mains plug. Ensure that the mains plug remains accessible at all times. Unplug
the AC power cord from the AC outlet if the unit will not be used for several
months or more.
12 Grounding or Polarization - This product may be equipped with a polarized
alternating current line plug (a plug having one blade wider than the other). This
plug will t into the power outlet only one way. This is a safety feature. If you are
unable to insert the plug fully into the outlet, try reversing the plug. If the plug
should still fail to t, contact your electrician to replace your obsolete outlet. Do
not defeat the safety purpose of the polarized plug.
13 Power Cord Protection - Power supply cords should be routed so that they
are not likely to be walked on or pinched by items placed upon or against them,
paying particular attention to cords at plugs, convenience receptacles, and the
point where they exit from the product.
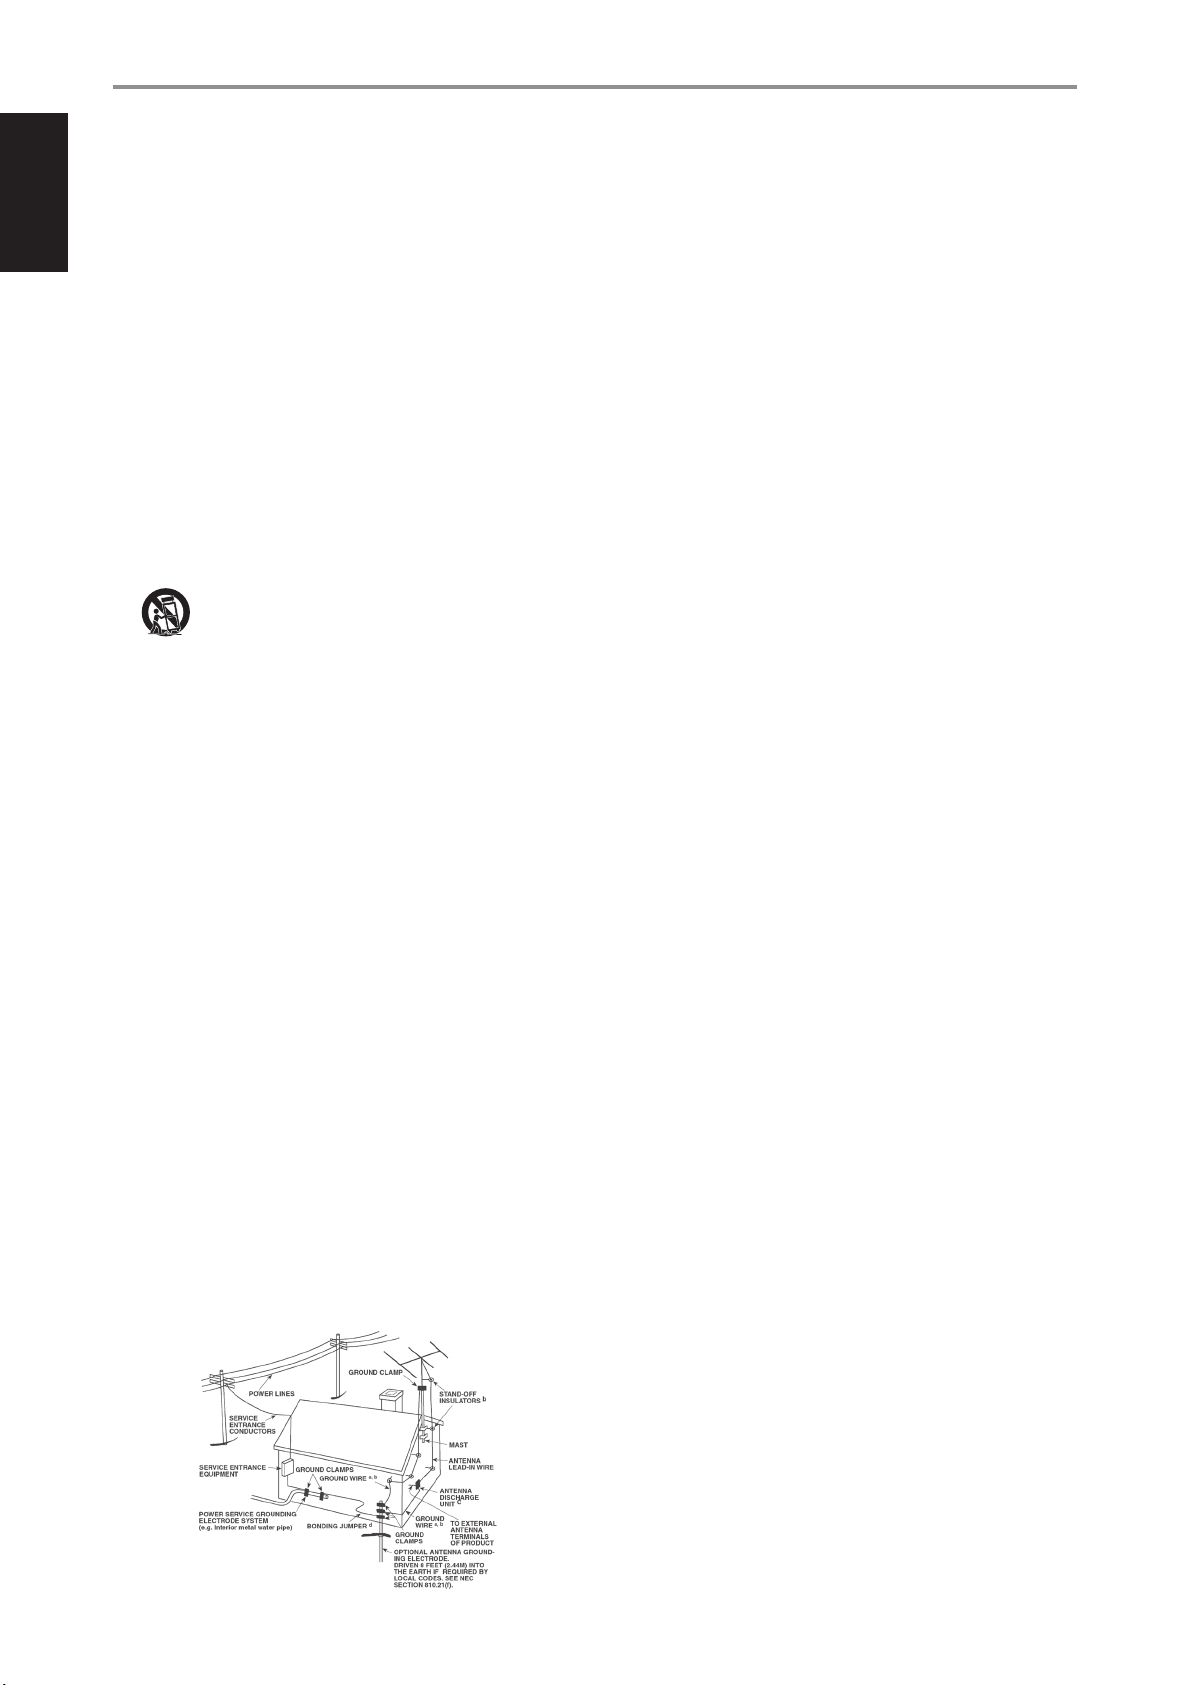
14 Outdoor Antenna Grounding - If an outside antenna or cable system is
connected to the product, be sure the antenna or cable system is grounded so
as to provide some protection against voltage surges and built-up static charges.
Article 810 of the National Electrical Code, ANSI/NFPA 70, provides information
with regard to proper grounding of the mast and supporting structure, grounding
of the lead-in wire to an antenna discharge unit, size of grounding conductors,
location of antenna discharge unit, connection to grounding electrodes, and
requirements for the grounding electrode.
NOTE TO CATV SYSTEM INSTALLER
This reminder is provided to call the CATV system installer’s attention to Section
820-40 of the NEC which provides guidelines for proper grounding and, in particular,
species that the cable ground shall be connected to the grounding system of the
building, as close to the point of cable entry as practical.
15 Lightning - For added protection for this product during a lightning storm, or
when it is left unattended and unused for long periods of time, unplug it from the
wall outlet and disconnect the antenna or cable system. This will prevent damage
to the product due to lightning and power line surges.
16 Power Lines - An outside antenna system should not be located in the vicinity
of overhead power lines or other electric light or power circuits, or where it can
fall into such power lines or circuits. When installing an outside antenna system,
extreme care should be taken to keep from touching such power lines or circuits
as contact with them might be fatal.
17 Overloading - Do not overload wall outlets, extension cords, or integral
convenience receptacles as this can result in a risk of re or electric shock.
18 Object and Liquid Entry - Never push objects of any kind into this product
through openings as they may touch dangerous voltage points or short-out parts
that could result in a re or electric shock. Never spill liquid of any kind on the
product.
WARNING: THE APPARATUS SHOULD NOT BE EXPOSED TO DRIPPING
OR SPLASHING, AND OBJECTS FILLED WITH LIQUIDS, SUCH AS VASES,
SHOULD NOT BE PLACED ON THE APPARATUS. AS WITH ANY ELECTRONIC
PRODUCTS, USE CARE NOT TO SPILL LIQUIDS INTO ANY PART OF THE
SYSTEM. LIQUIDS CAN CAUSE A FAILURE AND/OR A FIRE HAZARD.
19 Damage Requiring Service - Unplug this product from the wall outlet and refer
servicing to qualied service personnel under the following conditions:
a) When the power supply cord or plug is damaged.
b) If liquid has been spilled, or objects have fallen into the product.
c) If the product has been exposed to rain or water.
d) If the product does not operate normally by following the operating
instructions. Adjust only those controls that are covered by the operating
instructions as an improper adjustment of other controls may result in
damage and will often require extensive work by a qualied technician to
restore the product to its normal operation.
e) If the product has been dropped or damaged in any way.
f) when the product exhibits a distinct change in performance-this indicates a
need for service.
20 Replacement Parts - When replacement parts are required, be sure
the service technician has used replacement parts specified by the
manufacturer or have the same characteristics as the original part.
Unauthorized substitutions may result in fire, electric shock, or other
hazards.
21 Safety Check - Upon completion of any service or repairs to this product, ask the
service technician to perform safety checks to determine that the product is in
proper operating condition.
22 Wall or Ceiling Mounting - The product should be mounted to a wall or ceiling
only as recommended by the manufacturer.
23 Heat - The product should be situated away from heat sources such as radiators,
heat registers, stoves or other products (including ampliers) that produce heat.
24 Headphones - Excessive sound pressure form earphones and headphones can
cause hearing loss.
25 Battery Disposal - When disposing of used batteries, please comply with
governmental regulations or environmental public instruction’s rules that apply
in your country or area. Batteries (battery pack or batteries installed) must not be
exposed to excessive heat such as sunshine, re or the like.
FCC STATEMENT
This device complies with Part 15 of the FCC Rules. Its operation is subject to the
following two conditions:
(1) This device may not cause harmful interference, and
(2) This device must accept any interference received, including interference that may
cause undesired operation.
DÉCLARATION DE LA FCC
Cet appareil est conforme à la section 15 des réglementations de la FCC. Le
fonctionnement de l’appareil est sujet aux deux conditions suivantes :
(1) cet appareil ne doit pas provoquer d’interférences néfastes, et
(2) cet appareil doit tolérer les interférences reçues, y compris celles qui risquent de
provoquer un fonctionnement indésirable.
IC STATEMENT
This device complies with Industry Canada license-exempt RSS standard(s). Operation
is subject to the following two conditions:
(1) This device may not cause interference, and
(2) This device must accept any interference, including interference that may cause
undesired operation of the device.
2
Page 3
IMPORTANT SAFETY INSTRUCTIONS
DECLARATION DE L’IC
Cet appareil s’accorde avec Industrie Canada licence-exempte RSS standard. Le
fonctionnement de l’appareil est sujet aux deux conditions suivantes :
(1) cet appareil ne doit pas provoquer d’interférences néfastes, et
(2) cet appareil doit tolérer les interférences reçues, y compris celles qui risquent de
provoquer un fonctionnement indésirable.
This equipment should be installed and operated with a minimum distance of 20cm
between the radiator and your body.
Under Industry Canada regulations, this radio transmitter may only operate using
an antenna of a type and maximum (or lesser) gain approved for the transmitter by
Industry Canada. To reduce potential radio interference to other users, the antenna
type and its gain should be so chosen that the equivalent isotropically radiated power
(e.i.r.p.) is not more than that necessary for successful communication.
Conformément à la réglementation d’Industrie Canada, le présent émetteur radio
peut fonctionner avec une antenne d’un type et d’un gain maximal (ou inférieur)
approuvé pour l’émetteur par Industrie Canada. Dans le but de réduire les risques
de brouillage radioélectrique à l’intention des autres utilisateurs, il faut choisir le
type d’antenne et son gain de sorte que la puissance isotrope rayonnée équivalente
(p.i.r.e.) ne dépasse pas l’intensité nécessaire à l’établissement d’une communication
satisfaisante.
FCC NOTICE
This product has been tested and found to comply with the limits for a Class B digital
device, pursuant to Part 15 of the FCC Rules. These limits are designed to provide
reasonable protection against harmful interference in a residential installation.
This product generates, uses, and can radiate radio frequency energy and, if
not installed and used in accordance with the instructions, may cause harmful
interference to radio communications. However, there is no guarantee that
interference will not occur in a particular installation. If this product does cause
harmful interference to radio or television reception, which can be determined
by turning the equipment o and on, the user is encouraged to try to correct the
interference by one or more of the following measures:
• Reorient or relocate the receiving antenna.
• Increase the separation between the equipment and receiver.
• Connect the equipment into an outlet on a circuit dierent from that to which
the receiver is connected.
• Consult the dealer or an experienced radio/TV technician for help.
CAUTION
Changes or modications to this equipment not expressly approved by NAD
Electronics for compliance could void the user’s authority to operate this equipment.
CAUTION REGARDING PLACEMENT
To maintain proper ventilation, be sure to leave a space around the unit (from the
largest outer dimensions including projections) that is equal to or greater than shown
below.
Left and Right Panels: 10 cm
Rear Panel: 10 cm
Top Panel: 10 cm
NOTES ON ENVIRONMENTAL PROTECTION
At the end of its useful life, this product must not be disposed of with
regular household waste but must be returned to a collection point for
the recycling of electrical and electronic equipment. The symbol on the
product, user’s manual and packaging, point this out.
The materials can be reused in accordance with their markings.
Through re-use, recycling of raw materials or other forms of recycling
of old products, you are making an important contribution to the protection of our
environment. Your local administrative oce can advise you of the responsible waste
disposal point.
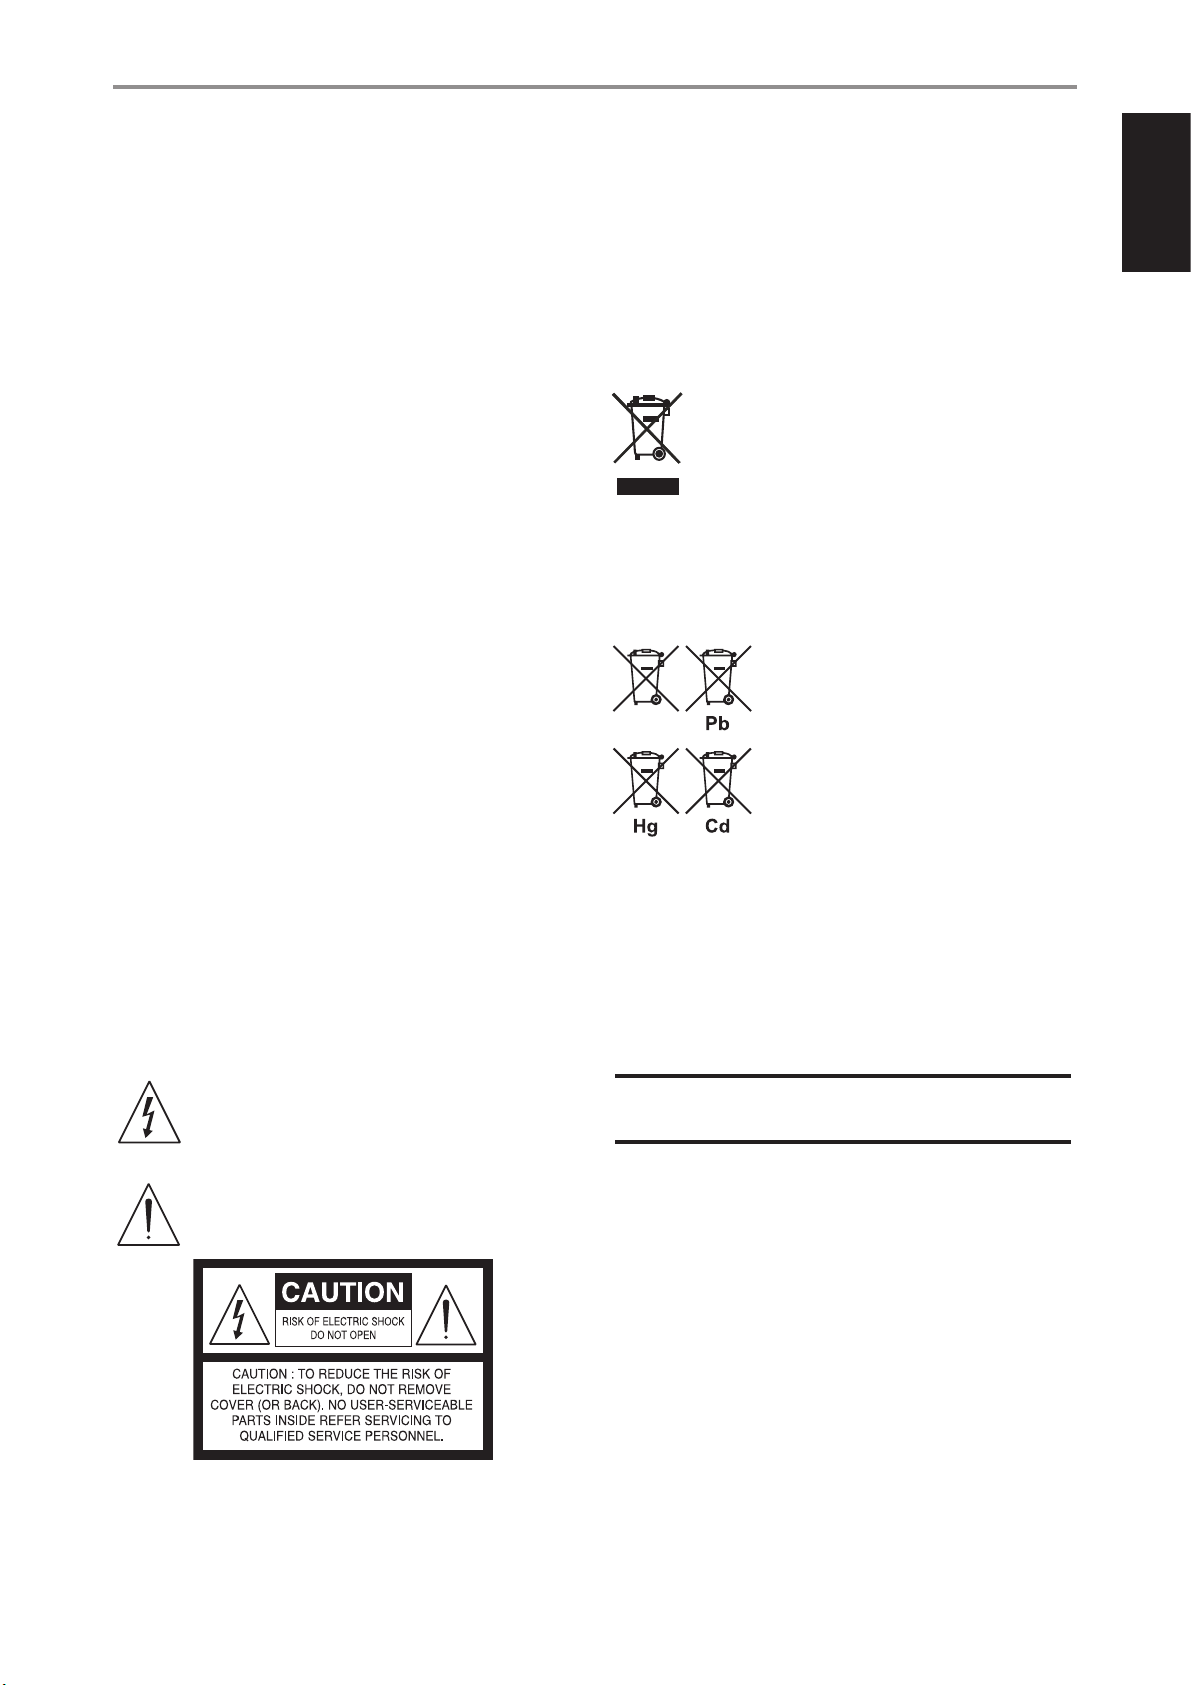
INFORMATION ABOUT COLLECTION AND DISPOSAL OF WASTE BATTERIES
(DIRECTIVE 2006/66/EC OF THE EUROPEAN PARLIAMENT AND THE COUNCIL
OF EUROPEAN UNION) (FOR EUROPEAN CUSTOMERS ONLY)
Batteries bearing any of these symbols indicate that
they should be treated as “separate collection” and not
as municipal waste. It is encouraged that necessary
measures are implemented to maximize the separate
collection of waste batteries and to minimize the disposal
of batteries as mixed municipal waste.
End-users are exhorted not to dispose waste batteries
as unsorted municipal waste. In order to achieve a high
level of recycling waste batteries, discard waste batteries
separately and properly through an accessible collection
point in your vicinity. For more information about
collection and recycling of waste batteries, please contact your local municipality,
your waste disposal service or the point of sale where you purchased the items.
ENGLISHPORTUGUÊS FRANÇAISESPAÑOLITALIANODEUTSCHNEDERLANDSSVENSKAРУССКИЙ
WARNING
TO REDUCE THE RISK OF FIRE OR ELECTRIC SHOCK, DO NOT EXPOSE THIS PRODUCT
TO RAIN OR MOISTURE.
CAUTION
TO PREVENT ELECTRIC SHOCK, MATCH WIDE BLADE OF PLUG TO WIDE SLOT, FULLY
INSERT.
THE LIGHTNING FLASH WITH ARROWHEAD SYMBOL, WITHIN AN
EQUILATERAL TRIANGLE, IS INTENDED TO ALERT THE USER TO THE
PRESENCE OF UNINSULATED “DANGEROUS VOLTAGE” WITHIN THE
PRODUCT’S ENCLOSURE THAT MAYBE OF SUFFICIENT MAGNITUDE TO
CONSTITUTE A RISK OF ELECTRIC SHOCK TO PERSONS.
THE EXCLAMATION POINT WITHIN AN EQUILATERAL TRIANGLE IS
INTENDED TO ALERT THE USER TO THE PRESENCE OF IMPORTANT
OPERATING AND MAINTENANCE (SERVICING) INSTRUCTIONS IN THE
LITERATURE ACCOMPANYING THE APPLIANCE.
By ensuring compliance and conformance to proper disposal of waste batteries,
potential hazardous eects on human health is prevented and the negative impact of
batteries and waste batteries on the environment is minimized, thus contributing to
the protection, preservation and quality improvement of the environment.
RECORD YOUR MODEL NUMBER (NOW, WHILE YOU CAN SEE IT)
The model and serial number of your new MT2 are located on the back of the cabinet.
For your future convenience, we suggest that you record these numbers here:
Model no: ......................................
Serial no.: . . . . . . . . . . . . . . . . . . . . . . . . . . . . . . . . . . . . . .
NAD is a trademark of NAD Electronics International, a division of Lenbrook Industries Limited
Copyright 2015, NAD Electronics International, a division of Lenbrook Industries Limited
3
Page 4

ENGLISH PORTUGUÊSFRANÇAIS ESPAÑOL ITALIANO DEUTSCH NEDERLANDS SVENSKA РУССКИЙ
IDENTIFICATION OF CONTROLS
1 32 4 5 6 7
ATTENTION
Please make sure all ancillary equipment is turned o and that the MT2
is not yet connected to its dedicated power supply.
1 LED INDICATOR
• This LED indicates the status of the MT2. Below is a description of
the LED indicator colors.
LED COLOR DESCRIPTION
Fast ashing blue
Slow ashing blue No WiFi connection
Alternately ashing blue and pink Hot spot mode
Flashing red Reset mode
Solid blue WiFi connected
Powering up
Boot up/reboot
2 RESET
• The RESET button restores the MT2 to its factory default settings.
• Use a paper clip or similar to poke the RESET button – the front LED
ashes red. Release paper clip. MT2 will reset and reboot itself.
3 SETUP
• The SETUP button initiates wireless conguration.
• Press and hold SETUP button until the front LED indicator
alternately ashes blue and pink. The MT2 is now at Hotspot mode.
• Refer also to the section below about WIRELES CONNECTION
CONFIGURATION.
4 ANALOG OUT
• Plug-in the 3.5mm mini-stereo end of the supplied analog audio
adaptor to this port. Then, connect the two RCA male ends of the
adaptor to applicable analog audio input of a receiver, amplier or
any compatible device.
5 OPTICAL OUT
• Using a TOSLINK optical cable (not supplied), connect OPTICAL OUT
to corresponding optical digital audio input of compatible devices
such as receivers, computer soundcard or other digital processors.
6 SERVICE
• For servicing purposes only. Not for consumer use. Only authorized
NAD service personnel can access this SERVICE port.
7 5V DC IN
• Before connecting the supplied Plug-in Power Supply to the wall
outlet, connect rmly rst the other end to MT2’s 5V DC IN.
• Always disconnect the Plug-in Power Supply from the wall outlet
rst, before disconnecting the cable from MT2’s 5V DC IN.
4
Page 5

OPERATION
WIRELESS CONNECTION CONFIGURATION
Wireless (WIFI) broadband router with broadband internet connection is
required for wireless connection to be established.
1 Power up MT2 by connecting corresponding end of the supplied Plug-
in Power Supply to MT2’s 5V DC IN and then plug in to the wall outlet.
Wait until MT2 fully boots up.
Mains AC Power
• Front LED fast ashing blue and then settles at slow ashes of blue
– this indicates that there is no WiFi connection.
• Front LED turns solid blue if WiFi is connected.
2 Press and hold SETUP button at the rear panel until the slow ashing
blue front LED turns alternately ashing blue and pink. MT2 is now at
Hotspot mode.
4 Upon connection, launch web browser and enter http://192.168.1.1
ENGLISHPORTUGUÊS FRANÇAISESPAÑOLITALIANODEUTSCHNEDERLANDSSVENSKAРУССКИЙ
5 Go to WiFi Settings section and choose Select Option. Select your local
network from the drop down list - NADLAB in this example.
3 Using your iOS or Android device (iPad is used here for reference), select
among the list of available network connections the unique network ID
(“NAD_SETUP501A0C” in this example) of your MT2.
^
6 Type the Password (if it is password protected) of your local network in
the eld provided and then select Apply to join in.
7 “Saving network settings…” will appear briey and then disappear.
• If the network password entered is correct, the front LED will turn to
Fast ashing blue $ slow ashing blue $ solid blue (This indicates
that the password is correct and wireless connection is successful).
• If the network password entered is incorrect, the front LED will turn to
Fast ashing blue $ slow ashing blue $ remains slow ashing blue
(This indicates that the password entered is not correct).
With front LED remaining at slow ashing blue due to incorrect password,
set the MT2 to hotspot mode again. Press and hold “SETUP” button at the
rear panel until the slow ashing blue front LED turns alternately ashing
blue and pink. MT2 is now at Hotspot mode. Repeat again the process
beginning from Step3 above. Ensure that the correct network password is
entered this time.
5
Page 6

ENGLISH PORTUGUÊSFRANÇAIS ESPAÑOL ITALIANO DEUTSCH NEDERLANDS SVENSKA РУССКИЙ
OPERATION
MUSIC STREAMING
NAD MT2 is a UPnP Client capable of streaming music files up to sampling
rates of 44.1kHz and 48kHz from your computer straight to your Hi-Fi.
UPnP-compatible devices can easily connect to your network. With a stable
network connection, you can browse selected folders and listen to your
music as streamed through the MT2 and into your amplifier, receiver or
other compatible devices.
Below is a sample method of sharing and streaming music content using
the “Play To” feature of Windows Media Player (WMA) with Windows 7. For
other operating systems, check corresponding streaming media options.
1 Check network connection and setting. Ensure that MT2 is connected
to the same network as those of the PC, MAC, NAS or other media
server you want to access their contents.
3 After turning on media streaming, select desired song from the library.
Right click the desired song, select “Play to” and then assign to “NAD
Wireless MT2 501A0C”.
2 Open WMA. Check if media streaming is turned on. Click “Stream” from
the menu bar and then click “Turn on (home) media streaming”. “Turn
on (home) media streaming” won’t be available on the Stream menu if
^
4 MT2 will automatically switch to “Play To” dialog box and initiate
playback of selected song.
streaming is already turned on.
6
^
Page 7

OPERATION
LISTENING TO SPOTIFY
Spotify gives you access to millions of songs by the artists you love as well
as enjoy the latest hits and new discoveries. Add Spotify Connect to any
Hi-Fi or AV system with the NAD MT2. Spotify™ from the cloud via either
WiFi or Ethernet is sent to your amplier or receiver through NAD MT2.
HOW TO GET STARTED WITH SPOTIFY CONNECT
1 Ensure that your iOS device, tablet or computer is connected to the
same network as the MT2.
Internet
Modem Wireless Router
MT2
Device
5 From the “CONNECT ” list, select MT2 (“MT2 @ my desk” in this example).
Current song is now streamed through “MT2 @ my desk”.
ENGLISHPORTUGUÊS FRANÇAISESPAÑOLITALIANODEUTSCHNEDERLANDSSVENSKAРУССКИЙ
NOTE
There may be a slight delay in volume level response using the Spotify
Connect app as this command is routed to MT2 via internet connection.
2 Download the Spotify app from your platform’s app store. A Spotify
premium subscription is required.
For Spotify availability in your area, registration procedures and other
Spotify services, visit http://www.spotify.com.
3 Open Spotify in your device (Android device is used in this example).
Log-in to your Spotify account. After successful log-in, select a song to
playback.
4 Select the play bar at the bottom to bring up the Now Playing page.
Select .
The Spotify software is subject to third party licenses found here: www.
spotify.com/connect/third-party-licenses
7
Page 8

ENGLISH PORTUGUÊSFRANÇAIS ESPAÑOL ITALIANO DEUTSCH NEDERLANDS SVENSKA РУССКИЙ
OPERATION
1
NAD MEDIA TUNER APP
A NAD Media Tuner app can be downloaded at the iTunes app Store or Google Play Store. Use the
app for Media Tuner playability control functions and conguration of other features.
IMPORTANT NOTE
Unless other wise specied, NAD Media Tuner app descriptions, screenshots or illustrations in this
manual are with reference to the use of an Android device. Similar NAD Media Tuner app features
are applicable for iOS devices.
MEDIA TUNER APP NAVIGATION
The following are sample screenshots of NAD Media Tuner app. Navigate through the app by selecting
corresponding icons or highlighted sections.
HOME SCREEN
2
3
4
5
6
1
2 Applicable only when the Source is an audio le. Not applicable for other sources like Spotify and
3 Tap to incrementally decrease volume level.
Tap to incrementally increase volume level.
Increase volume level by sweeping to the right and decrease by sweeping to the left.
4
Device Settings: Congure the settings of MT2 such as customizing the device’s name and
conguring WiFi connection.
Radio.
Slide to the left to scan back through current song.
Slide to the right to scan forward through current song.
00:05 Example of elapsed playback time of current song.
04:18 Example of total playback time of current song.
Skip forward to the next song, station or applicable media.
Skip back to the previous song, station or applicable media.
Pause playback.
Start or resume playback.
5
6
Random playback.
Repeat playback – song, album or folder.
Choose media source of device.
Show devices in the network.
Choose device to stream.
8
Page 9

OPERATION
CONFIGURING DEVICE SETTINGS
VIA NAD MEDIA TUNER APP
Select to initiate conguration of
device settings.
Return to previous page or
screen.
Return to Home screen or
default page.
^
MANAGING MEDIA TUNER DEVICES
Under the same network, NAD Media Tuner devices like the NAD MT1 and
NAD MT2 can be controlled separately by the NAD Media Tuner app even
if they are placed at dierent rooms. Music is streamed to every device at
their specic locations.
IMPORTANT NOTES
• Ensure that the NAD Media Tuner devices (MT1 or MT2) and the NAD
Media Tuner app are on the same network.
• Unless otherwise stated, the highlighted and numbered items below
are meant to be selected or pressed using one’s nger to initiate
corresponding action as described.
STREAMING A RADIO SOURCE TO NAD MT2
The following illustrates how to stream a radio source to NAD MT2.
1 Go to menu screen for “Choose
Device(s)” - select the media tuner
device you will stream music.
ENGLISHPORTUGUÊS FRANÇAISESPAÑOLITALIANODEUTSCHNEDERLANDSSVENSKAРУССКИЙ
CUSTOMIZE DEVICE NAME
Type in the space provided the
desired device name for your MT2 –
“MT2 @ my desk” in this example.
CONFIGURE WI-FI
Switch to a dierent Wi-Fi connection
by selecting from the “Choose your
Wi-Fi…” list the desired Wi-Fi network
(“NADLAB” in this example). Enter
accordingly the log-in information
required. Select to refresh Wi-Fi
network list.
^
2 Select and highlight the NAD MT2
device – “MT2 @ my desk” in this
example.
3 Go back to default home screen.
[ ]
9
Page 10

ENGLISH PORTUGUÊSFRANÇAIS ESPAÑOL ITALIANO DEUTSCH NEDERLANDS SVENSKA РУССКИЙ
OPERATION
4 Go to menu screen for “Choose
Source for …” - media source for
your selected media tuner device.
5 List of available media sources that
may include music stored in your
PC, MAC or NAS (network attached
storage), Radio and Spotify.
Select “Radio” as the selected media
source for “MT2 @ my desk”.
7 Upon selection of desired radio
station, display is reverted back
to default home screen with the
station ID of “CHUM FM 104.5” now
shown.
Note also that “MT2 @ my desk”
is indicated as the Media Tuner
streaming device for the selected
radio station.
STREAMING SPOTIFY OR MUSIC FILES TO SEVERAL
MEDIA TUNER DEVICES
If there is more than one NAD Media Tuner device in the network, each
device can be controlled separately by the NAD Media Tuner app. The
process of streaming music to each individual NAD Media Tuner device is
the same as above (streaming radio source to NAD MT2).
In addition to a radio source, music les and Spotify can be streamed to any
of the MT2 devices.
6 The “Browse Stations” menu screen
lists several options for selecting
desired radio station. Choose
appropriate menu option.
For this example, “CHUM FM 104.5”
is the selected radio station to be
streamed.
SPOTIFY AS A SOURCE
The following illustrates how to select Spotify as an audio source for NAD MT2.
1 Go to menu screen for “Choose
Device(s)” - select the media tuner
device you will stream music.
2 From the list of available Media
Tuner devices, select and highlight
desired Media Tuner device – “MT2
@ my desk” in this example.
3 Go back to default home screen.
[ ]
10
Page 11

OPERATION
4 Go to menu screen for “Choose
Source for …” - media source for
your selected media tuner device.
5 List of available media sources that
may include music stored in your
PC, MAC or NAS (network attached
storage), Radio and Spotify.
Select “Spotify“ as the selected media
source for “MT2 @ my desk”.
6 When Spotify is selected as a
media source, the “Now Playing”
window is displayed.
Select and then “MT2 @ my
desk” from the CONNECT list.
If you are not already logged
in, you will be redirected to the
Spotify log-in menu screen.
Refer also to the previous section
“LISTENING TO SPOTIFY” for
information on how to stream Spotify
to MT2.
ENGLISHPORTUGUÊS FRANÇAISESPAÑOLITALIANODEUTSCHNEDERLANDSSVENSKAРУССКИЙ
11
Page 12

ENGLISH PORTUGUÊSFRANÇAIS ESPAÑOL ITALIANO DEUTSCH NEDERLANDS SVENSKA РУССКИЙ
OPERATION
MUSIC FILE AS A SOURCE
Aside from Radio and Spotify as a Source, music stored from your PC, MAC
or NAS (network attached storage) can be stream through the MT2.
1 Go to menu screen for “Choose
Device(s)” - select the media tuner
device you will stream music.
5 List of available media sources that
may include music stored in your
PC, MAC or NAS (network attached
storage), Radio and Spotify.
Select “NAD-LAB-PC“ as the
selected media source for “MT2 @
my desk”.
6 Select desired song to be
streamed. The “Browse Music…”
menu screen lists several options
for selecting desired song. Select
the appropriate menu options.
2 From the list of available Media
Tuner devices, select and highlight
desired Media Tuner device – “MT2
@ my desk” in this example.
3 Go back to default home
screen .
4 Go to menu screen for “Choose
Source for…” - media source for
your selected media tuner device.
For this example, Michael Bolton’s
“Time, Love and Tenderness” is the
selected song to be streamed.
7 Upon selection of desired song,
display is reverted back to default
home screen with the album
cover of Michael Bolton and song
title “Time, Love and Tenderness”
now shown.
12
Page 13

ADJUSTING VOLUME LEVEL FOR MULTIPLE MT2 DEVICES
When there are several MT2 devices controlled by the same NAD Media
Tuner app, you can adjust their respective volume levels in one window.
• Use to adjust volume level
of the MT2 device in the active
window.
• Use to adjust volume level of
the other MT2 devices in the same
network.
OPERATION
ENGLISHPORTUGUÊS FRANÇAISESPAÑOLITALIANODEUTSCHNEDERLANDSSVENSKAРУССКИЙ
ADD RADIO STATION TO FAVORITES
From any browsing station menu, one can pick a radio station from the list
to be included in the “Favorites” folder. Add or remove a radio station in the
Favorites folder as shown below.
1 Tap to save and include “BOOM
97.3 FM” in the Favorites list.
Upon selection, “Station added
to Favorites” is briey shown.
changes to .
2 To remove “CHUM FM 104.5”
from the “Favorites” list, press and
hold until “Station removed from
Favorites” is briey shown.
changes to .
13
Page 14

www.NADelectronics.com
©2015 NAD ELECTRONICS INTERNATIONAL
A DIVISION OF LENBROOK INDUSTRIES LIMITED
All rights reserved. NAD and the NAD logo are trademarks of NAD Electronics International, a division of Lenbrook Industries Limited.
No part of this publication may be reproduced, stored or transmitted in any form without the written permission of NAD Electronics International.
While every effort has been made to ensure the contents are accurate at the time of publication, features and specifications may be subject to change without prior notice.
MT2_ENG_OM_V07 SEP 2015
 Loading...