


VS-800
Vital signs monitor
Service Manual


Copyright
Statement
SHENZHEN MINDRAY BIO-MEDICAL ELECTRONICS CO., LTD. (hereinafter called Mindray)
owns all rights to this unpublished work and intends to maintain this work as confidential.
Mindray may also seek to maintain this work as an unpublished copyright. This publication is
to be used solely for the purposes of reference, operation, maintenance, or repair of Mindray
equipment. No part of this can be disseminated for other purposes.
In the event of inadvertent or deliberate publication, Mindray intends to enforce its rights to
this work under copyright laws as a published work. Those having access to this work may
not copy, use, or disclose the information in this work unless expressly authorized by Mindray
to do so.
All information contained in this publication is believed to be correct. Mindray shall not be
liable for errors contained herein nor for incidental or consequential damages in connection
with the furnishing, performance, or use of this material. This publication may refer to
information and protected by copyrights or patents and does not convey any license under the
patent rights of Mindray, nor the rights of others. Mindray does not assume any liability arising
out of any infringements of patents or other rights of third parties.
Content of this manual is subject to changes without prior notice.
Content of this manual is maybe in defect of instructions ,If user has any problem ,Please
consult my company customerservice .
PROPERTY OF SHENZHEN MINDRAY BIO-MEDICAL ELECTRONICS CO., LTD.
ALL RIGHTS RESERVED
Responsibility on the manufacturer party
Mindray is responsible for safety, reliability and performance of this equipment only in the
condition that:
• all installation, expansion, change, modification and repair of this equipment are conducted
by Mindray qualified personnel;
• applied electrical appliance is in compliance with relevant National Standards;
• the monitor is operated under strict observance of this manual.
I

Warning
For continued safe use of this equipment, it is necessary that the listed instructions
are followed. However, instructions listed in this manual in no way supersede
established medical practices concerning patient care.
Do not rely only on audible alarm system to monitor patient. When monitoring
adjusting the volume to very low or completely muting the sound may result
in the disaster to the patient. The most reliable way of monitoring the patient
is at the same time of using monitoring equipment correctly, manual
monitoring should be carried out.
This vital signs monitor is intended for use only by medical professionals in
health care institutions.
To avoid electrical shock, you shall not open any cover by yourself. Service
must be carried out by qualified personnel.
Use of this device may affect ultrasonic imaging system in the presence of the
interfering signal on the screen of ultrasonic imaging system. Keep the
distance between the monitor and the ultrasonic imaging system as far as
possible.
It is dangerous to expose electrical contact or applicant coupler to normal
saline, other liquid or conductive adhesive. Electrical contact and coupler
such as cable connector, power supply and parameter module socket-inlet
and frame must be kept clean and dry. Once being polluted by liquid, they
must be thoroughly dried. If to further remove the pollution, please contact
your biomedical department or Mindray.
It is important for the hospital or organization that employs this equipment to carry out a
reasonable maintenance schedule. Neglect of this may result in machine breakdown or injury
of human health.
II

Warranty
THIS WARRANTY IS EXCLUSIVE AND IS IN LIEU OF ALL OTHER WARRANTIES,
EXPRESSED OR IMPLIED, INCLUDING WARRANTIES OF MERCHANT ABILITY OR
FITNESS FOR ANY PARTICULAR PURPOSE.
Exemptions
Mindray's obligation or liability under this warranty does not include any transportation or
other charges or liability for direct, indirect or consequential damages or delay resulting from
the improper use or application of the product or the substitution upon it of parts or
accessories not approved by Mindray or repaired by anyone other than a Mindray authorized
representative.
This warranty shall not extend to any instrument which has been subjected to misuse,
negligence or accident; any instrument from which Mindray's original serial number tag or
product identification markings have been altered or removed, or any product of any other
manufacturer.
Safety, Reliability and Performance
Mindray is not responsible for the effects on safety, reliability and performance of the
VS-800 vital signs Monitor if:
■ Assembly operations, extensions, re-adjusts, modifications or repairs are carried out
by persons other than those authorized by Mindray.
■ The VS-800 is not used in accordance with the instructions for use, or the electrical
installation of the relevant room does not comply with NFPA 70: National Electric
Code or NFPA 99: Standard for Health Care Facilities (Outside the United States, the
relevant room must comply with all electrical installation regulations mandated by the
local and regional bodies of government).
III

Return Policy
Return Procedure
In the event that it becomes necessary to return a unit to Mindray, the following procedure
should be followed:
1. Obtain return authorization. Contact the Mindray Service Department and obtain a
Customer Service Authorization (Mindray) number. The Mindray number must appear on
the outside of the shipping container. Return shipments will not be accepted if the
Mindray number is not clearly visible. Please provide the model number, serial number,
and a brief description of the reason for return.
2. Freight policy. The customer is responsible for freight charges when equipment is
shipped to Mindray for service (this includes customs charges).
Company Contact
Address: Mindray Building, 12th Keji Road South, Hi-tech
Phone: +86 755 26582479 +86 755 26582888
Fax: +86 755 26582934 +86 755 26582500
Industrial Park, Nanshan, Shenzhen, P.R.China
IV
Safety Precautions
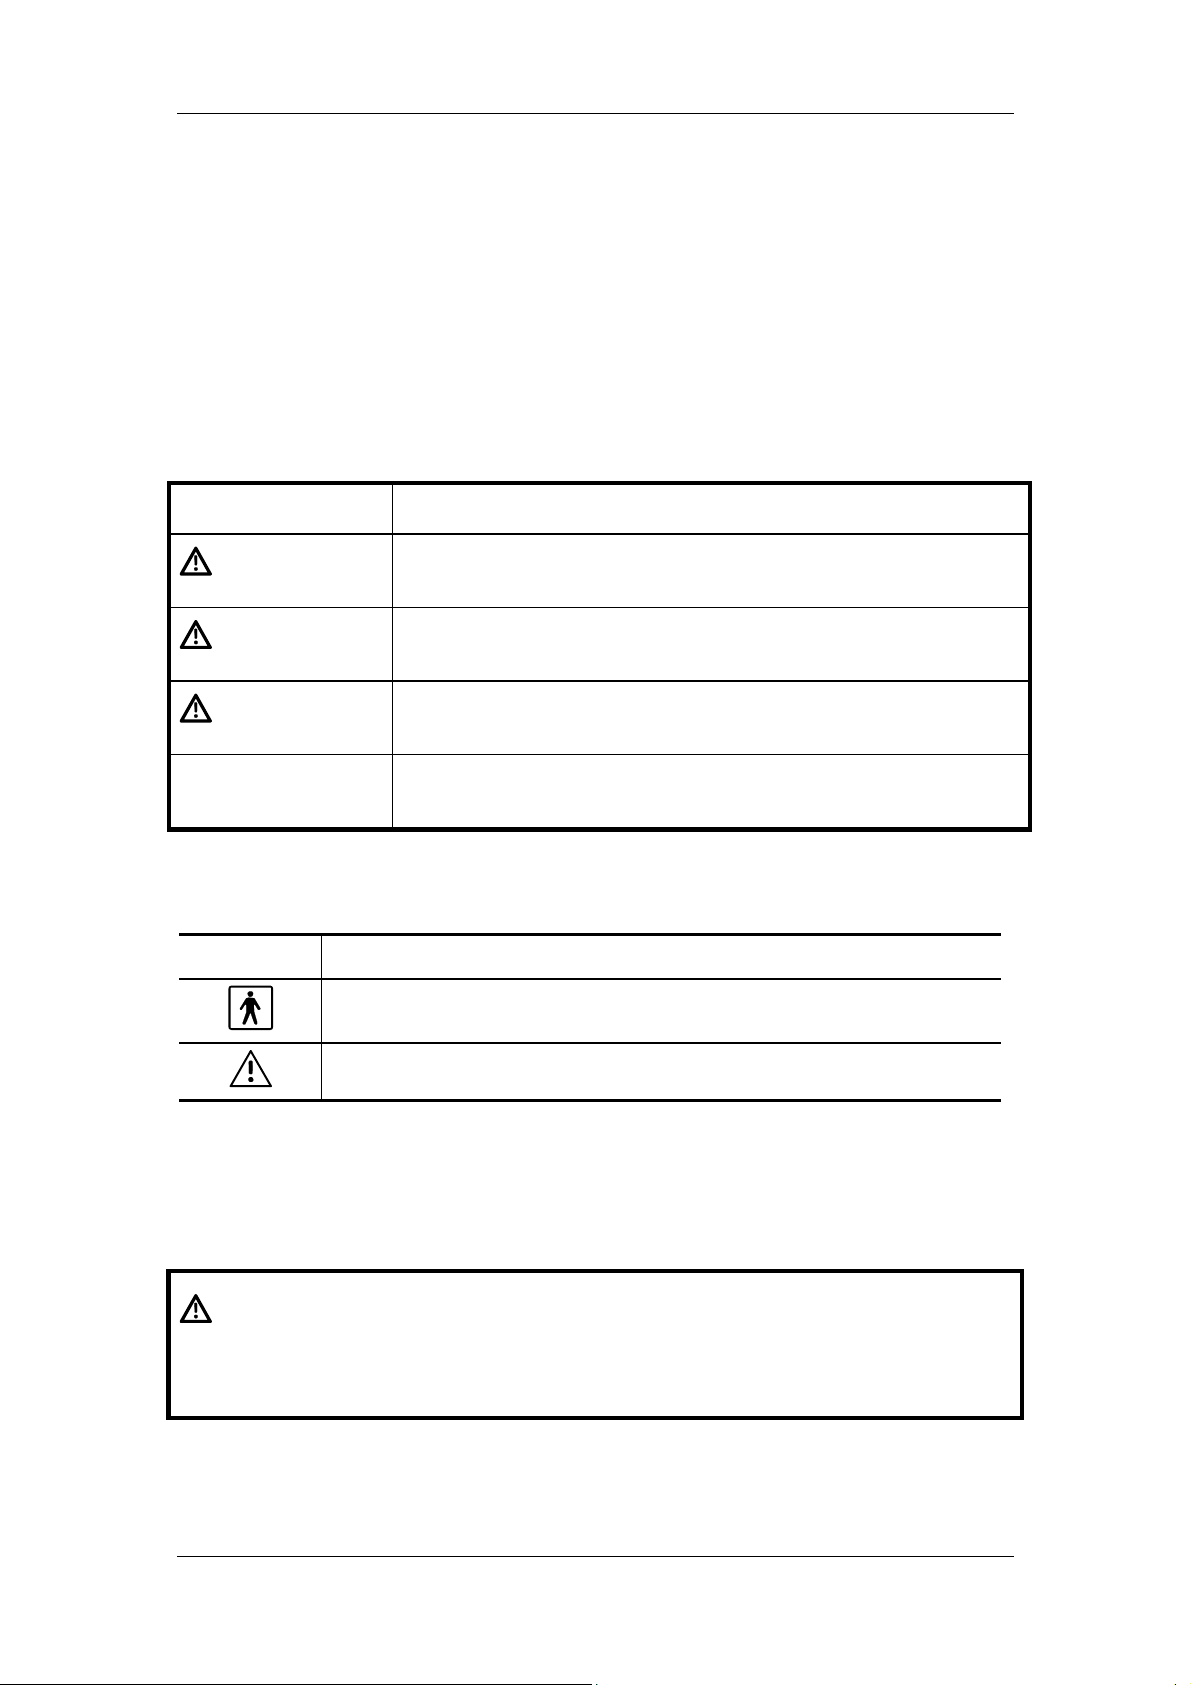
1 . Meaning of Signal Words
In this manual, the signal words DANGER, WARNING, and CAUTION are used
regarding safety and other important instructions. The signal words and their meanings are
defined as follows. Please understand their meanings clearly before reading this manual.
Signal word Meaning
DANGER
WARNING
CAUTION
CAUTION Indicates a potentially hazardous situation which, if not avoided,
Indicates an imminently hazardous situation which, if not
avoided, will result in death or serious injury .
Indicates a potentially hazardous situation which, if not avoided,
could result in death or serious injury.
Indicates a potentially hazardous situation which, if not avoided,
may result in minor or moderate injury.
may result in property damage.
2 . Meaning of Safety Symbols
Symbol Description
Type-BF applied part
"Attention" (Refer to the operation manual.)
3 . Safety Precautions
Please observe the following precautions to ensure the safety of service engineers as well as
operators when using this system.
DANGER: Do not use flammable gasses such as anesthetics, or flammable
liquids such as ethanol, near this product, because there is danger
of explosion.
V

WARNING: Do not connect this system to outlets with the same circuit
breakers and fuses that control current to devices such as
life-support systems. If this system malfunctions and
generates an overcurrent, or when there is an instantaneous
current at power ON, the circuit breakers and fuses of the
building’s supply circuit may be tripped.
CAUTION: 1. Malfunctions due to radio waves
(1) Use of radio-wave-emitting devices in the proximity of this
kind of medical electronic system may interfere with its
operation. Do not bring or use devices which generate radio
waves, such as cellular telephones, transceivers, and radio
controlled toys, in the room where the system is installed.
(2) If a user brings a device which generates radio waves near
the system, they must be instructed to immediately turn OFF
the device. This is necessary to ensure the proper operation
of the system.
2. Do not allow fluids such as water to contact the system or
peripheral devices. Electric shock may result.
VI

Content
Content
Chapter 1 Monitor Description..........................................................................................1-1
1.1 Intended Use..............................................................................................................1-1
1.2 Environmental Specifications.....................................................................................1-1
Chapter 2 Principles of Operation....................................................................................2-1
2.1 General ......................................................................................................................2-1
2.2 Hardware Description.................................................................................................2-2
2.3 Software Description................................................................................................2-13
2.4 System parameters..................................................................................................2-17
Chapter 3 Chapter Specifications.....................................................................................3-1
3.1 Type of Monitor ..........................................................................................................3-1
3.2 Specifications of Monitor............................................................................................3-1
Chapter 4 Machine Disassembly/assembly and troubleshooting.....................................4-1
4.1 Disassembly/assembly Figure....................................................................................4-1
4.2 Inter-board Connections...........................................................................................4-12
4.2 Troubleshooting........................................................................................................4-16
Chapter 5 Machine Test and Material List........................................................................ 5-1
5.1Test Procedure............................................................................................................5-1
5.2 Material List................................................................................................................5-3
5.3 NIBP Calibration Method............................................................................................5-7
Chapter 6 Maintenance and Cleaning ............................................................................6-1
6.1 Inspection...................................................................................................................6-1
6.2 General Cleaning .....................................................................................................6-2
6.3 Cleaning Solution.......................................................................................................6-2
6.4 Disinfection.................................................................................................................6-3
6.5 Contact Information for Maintenance and Technical Support.....................................6-3
I

Content
For your notes
II

Monitor Description
Chapter 1 Monitor Description
1.1 Intended Use
This Monitor is intended for monitoring the patient’s vital signs including Non-invasive Blood
Pressure (NIBP), Pulse Oxygen Saturation (SpO2), Pulse Rate (PR) and Temperature (TEMP) for
single adult, pediatric and neonatal patient.
This Monitor is intended for use in the health-care institutions such as Outpatient Clinics,
Emergency Departments, Medical Floors, Clinics and Nursing Departments. It, however, is not
intended for critical patient monitoring, hospital transport or home use.
This Monitor is to be operated by clinical physicians or appropriate medical staffs under the
direction of physicians. The operator of the monitor must be well tranined. Any operation by
unauthorized or non-tranined personnel is forbidden.
1.2 Environmental Specifications
1.2.1 Temperature Requirements
Operating ambient temperature
Storage temperature
1.2.2 Relative Humidity
Operating relative humidity 15%-95%(non-condensing)
Storage relative humidity 10%-95%(non-condensing)
ºC - 40 ºC
0
10 ºC~+40 ºC(50ºF -104ºF)(SmarTemp™ TEMP
module)
-20
ºC – 60 ºC
1.2.3 Altitude Requirements
atmospheric pressure at working conditon
(operating altitude)
atmospheric pressure in Storage
(Storage altitude)
70 to 106KPa
-500 to 4600m, -1640 to 15092ft
22 to 107.4KPa
-500 to 13100m, -1640 to 42979ft
1-1

Monitor Description
1.2.4 Power Requirements
Volt age:
Power:
AC 100-240 V, 50/60 Hz
70VA
1.2.5 Rechargeable Battery
Rechargeable lead-acid battery, 2.3 Ah, 12V
Minimum of 260min:
The monitor runs on power supplied by the new fully-charged battery in the following
conditions:
Ambient temperature:
Monitor configuration:
measurement per 15min)
Charge time:
Maximum of 8h
Lithium battery, 4.4Ah, 11.1V
Minimum of 620min
The monitor runs on power supplied by the new fully-charged battery in the following
conditions:
25ºC
SpO2 (Continuous measurement) and NIBP (one auto NIBP
Ambient temperature: 25ºC
Monitor configuration:
measurement per 15min)
SpO2 (Continuous measurement) and NIBP (one auto NIBP
Charge time: Maximum of 8h
Time to shutdown at low battery power: 5 to 15min after the first battery-low alarm (a
new fully-charged battery should be used)
1-2

Principles of Operation
Chapter2 Principles of Operation
2.1 General
The whole system consists of mechanical, hardware and software parts, as follows:
System
Mechanical
TEMP module
Host
Recorder
Battery
chamber
chamber
Hardware
Power board
Main board
Key&display
board
Parameter
board
Recorder board
Connection
cables
Figure 1 System structure
Software
System
software
Parameter
software
Upgrade
software
Printer
software
As shown in Figure 2-1, the VS-800 Vital Signs Monitor consists of
• 4 mechanical parts: host, recorder, TEMP module chamber and rechargeable battery
chamber;
• 6 hardware parts: main board, key&displays board, parameter boards, recorder board,
connection cables and power board;
• 4 software parts: System software, Parameter software, Upgrade software and printer
software.
2-1

Principles of Operation
2.2 Hardware Description
The hardware structure of the VS-800 is shown as Figure 2-2:
SpO2 module
NIBP module
Communication/p
LED &
KEY
Isolation power
board *
ower supply
Key&display
board
LCD
Power
supply
Speaker
Recorder
Main board
Fan
VS-800
* Mindray SpO2 module does not require the isolation power board.
TEMP module
Communication/p
Power board
ower supply
Ethernet
RS232
NurseCall
Battery
AC
Figure 2 Structure of hardware
Note1: The TEMP module mentioned in this manual is reserved for future use.
The hardware connections of the VS-800 Vital Sings Monitor are as shown in Figure 2-3:
2-2

Principles of Operation
Figure 3 Connections of VS-800 hardware
As shown in the figure above, the core of the system is the main board, from which the power
is adapted to all parameter modules; the parameter modules directly communicate with the
main board, and the measurement and status of all modules are controlled by the main board.
The functions and operation principles of the VS-800 hardware parts are detailed respectively
in the following sections.
2-3

2.2.1 Main Board
2.2.1.1 Principle diagram
Ethernet
PHY
RTL8201
Principles of Operation
Watchdog
RTC E2PROM
SPI
Nurse Call
Speaker
Audio process
circuit
1.5V
Linear power
3.3V
FlashSDRAM
5.0V
CPU
12V
Serial port 0
LCD
RS232 IC
FPGA
LED
KEY
RS232
Serial port 1: NIBP
Serial port 2: SpO2
Serial port 3: Temp
Serial port 4: Recorder
Figure 4 Operation principle of the main board
2.2.1.2 Principle
The main board communicates with all parameter modules and re corder module throug h serial
ports; the power of the parameter modules is adapted from the main board.
The main board supplies displaying information for the key&displays board detects the keys
and realizes the user’s interface.
The audio process circuit of the main board drives the speaker, thus to realize audible alarms,
key tones and PITCHTON.
The main board controls the alarm indicator through the signal wire is adapted from the
key&displays board.
In addition, the main board provides the nurse call connector, network connector and R232
connector.
The real-time clock is realized by the RTC chip to which the power is supplied from AC mains
or by the battery when available. When the AC power or battery is unavailable, the built-in
battery of the RTC chip supplies the power, thus guaranteeing the normal working status of the
clock.
SDRAM is responsible for storing data temporarily and running programs; FLASH serves as
2
the system program memory and trend data memory; E
PROM serves as the device
configuration memory.
2-4

Principles of Operation
2.2.1.3 Units of main board
2.2.1.3.1 FPGA
FPGA is used for:
Controlling STN-LCD
The PFGA drives the display of the monochromatic STN-LCD module, including the RAM and
displaying sequence; it communicates with the key&displays board CPLD.
The FPGA transmits data displayed by LEDs and receives key information by Means of
communicating with keypad CPLD through synchronous serial port.
Extending serial ports
The FPGA extends 3 serial ports for the communications with parameter modules.
Extending I/O port
The FPGA extends the I/O port for controlling the NURSE CALL circuit.
Generating frequency-adjustable signal
The FPGA generates the frequency-adjustable signal which is used by the audio process
circuit.
2.2.1.3.2 Audio process circuit
Following the common scheme regarding the key&displays board audio process circuit, the
audio process circuit generates envelope signals by using the PWM function of the CPU, and
generates audio frequency signals by using the FPGA.
2.2.1.3.3 ADC circuit
The ADC circuit detects ADV, +12V and battery voltages as well as the battery status voltage
by using the A/D converter. The A/D converter Provides a I
simulates the I
2
C bus signal with two I/O ports.
2
C bus interface. The CPU
2.2.1.3.4 Network connector
To guarantee that the earth wire of the network connector can pass the 1500V high-voltage
test, isolated components such as the network transformer must be placed near the RJ45
socket and kept a specific distance from other components.
2.2.1.3.5 RS232 connector
The RS232 connector is made of the UART module of the CPU and the RS232 chip. The
RS232 chip has the ESD protection function (±15KV).
2-5

Principles of Operation
2.2.1.3.6 NURSE CALL connector
2.2.1.3.7 The NURSE CALL connector controls the NURSE CALL signal by using an I/O
port extended by the FPGA.
2.2.2 Power Board
2.2.2.1 General
The power board converts the power input (from AC mains or battery) to different working
voltages for other boards; it also has the function of charging the battery.
2.2.2.2 Principle diagram
According to the design requirements, the power board can be divided into three parts: AC/DC
isolation converter, DC/DC converter and charging circuit, as shown in Figure 2-5.
AC
input
EMI filter Rectifer & filter
Start-up
circuit
PWM
controller
Current
detection
Flyback converter
Coupler feeckback
& isolation circuit
Rectifer
& filter
OVP&OPP
16.8
V
DC/DC
converter
LDO
circuit
Charging
circuit
DC/DC
converter
Switch circuit
OVP&OCP
12V
output
5V output
Battery
3.3V output
OVP&OCP
Figure 5 Operation principle of the power board
2.2.2.3 Principle
After the AC input reaches the power board through the connection board, it flows through the
EMI filter circuit and rectifier and filter circuit. Then it is converted to a DC voltage, which is
further converted to the 16.8V DC voltage by the Flyback converter. The 16.8V DC voltage is
the main input of the DC/DC converter and charging circuit; it is used to charge the lithium
battery or lead-acid battery, and also converted to 12V, 5V and 3.3V DC voltages by
corresponding DC/DC converters and LDO circuit. In case the AC input is unavailable, the
battery can supplies power for the DC/DC converters to get the 12V, 5V and 3.3V DC voltages.
Meanwhile, the 12V, 5V and 3.3V DC outputs are under the control of the switch signal.
2-6

Principles of Operation
The 16.8V DC output is protected against over-voltage and over-power; the 12V and 3.3V DC
outputs are protected against over-voltage, short-circuit and over-current; the 5V DC output is
protected against over-voltage and short-circuit.
2.2.3 Key&displays board
2.2.3.1 General
The key&displays board provides the user’s interface. The main board supplies the power for
the key&displays board. The LCD module, 7-segment digit display, LED indicators and keys
are integrated on this board.
Principle diagram
STN LCD
module
LED
LED&KEY
CPLD
Start-up
circuit
Start-up signal
OFF/STANDBY
detection
ADV
3.3V
VSB
Key
matrix
3.3V
disable
Switch
Figure 6 Operation principle of the key&displays board
2.2.3.2 Units
2.2.3.2.1 LCD module
This module has the function of adjusting the contrast and brightness in 10 levels,
Self-provided drive.
The FPGA controls the LCD. It transmits data signals and control signals to the LCD drive to
realize the display on the LCD.
The main board supplies the 3.3V power for the logic part of the LCD module, and the power
board supplies the 3.3V power for the backlight assembly.
This module displays menus, trend data and plethysmograms.
2-7

Principles of Operation
2.2.3.2.2 LED
There are Six groups of 7-segment digit display on the key&displays board. They are used for
displaying the systolic pressure, diastolic pressure, mean pressure/cuff pressure, SpO
, PR
2
and Temp; every group is of 3 digits.
The signal is transmitted from the main board FPGA to the CPLD, and is displayed by the
7-segment digit displays driven by the CPLD scanning.
The AC indicator is driven by the ADV voltage output from the power board.
The working status indicator (ON/STADNDBY indicator) is driven by the 3.3V voltage.
The battery indicator is controlled by the flash control signal, ADV signal and /BC signal
together. When the system is powered by the battery only, the CPLD outputs the flash control
signal and the battery indicator flashes; when the system is power by AC mains, the ADV
voltage drives the battery indicator to ON. The /BC signal is transmitted from the power board
to the cathode of the battery indicator. When there is no battery in the monitor, the resistance
of the /BC becomes high, so the battery indicator will never become ON.
The bichrome LED alarm indicator is driven by the 3.3V voltage and controlled by the flash
control signal output from the CPLD.
For other LED indicators, the anodes are co nnected t o 3.3V voltages and are controlled by the
CPLD I/O port.
The displaying and controling is signal of the indicators above is delivered from the main board
FPGA to the CPLD.
2.2.3.2.3 Keys
There are totally 12 keys.
ON/STANDBY key: In the OFF status, press this key to power on the monitor; in the working
status, press this key for less than 1s to enter the standby status. Press this key for more than
2s to power off the monitor.
The other 11 keys form a 3×4 matrix. The CPLD scans the key matrix, and performs the key
debouncing after detecting any key input signal. If the input signal is valid, the CPLD saves the
current key input code and transmits it to the main board.
2-8

Principles of Operation
2.2.4 SpO2 Module
2.2.4.1 General
The SpO2 module provides the function of measuring the Pulse Oxygen Saturation (SpO2).
2.2.4.2 Principle diagram
Figure 7 Operation principle of the SpO2 module
2.2.4.3 Principle
The SpO2 measurement principle:
1. Collecting the light signal of the red light and infrared transmitting through the
finger or toe which is pulsing;
2. Processing the collected signal to get the measured result.
The drive circuit of the LED and the gain of the amplifying circuit should be controlled
according to the different perfusions and transmittances of the tested object.
2.2.4.3.1 Led Drive Circuit
This circuit supplies the LED with the drive current, which can be regulated.
2.2.4.3.2 SPO2 Signal Process Network
The pre-amplifying circuit converts the photoelectric signal to the voltage signal and conducts
the primary amplification.
The gain adjusting and amplifying circuit conducts the secondary signal amplification and
adjusts the gain.
The biasing circuit adjusts the dynamic range of the signal, and sends it to the A/D conversion
part.
2-9

Principles of Operation
2.2.4.3.3 A/D
The A/D conversion part converts the analog signal to the digital signal, and then sends it to
CPU for further processing.
2.2.4.3.4 D/A
The D/A conversion part converts the digital signal received from CPU to the analog signal,
and provides the control signal for the Led Drive Circuit and SPO2 Signal Process Network.
2.2.4.3.5 CPU System
Implementing the logical control of all the circuits;
Implementing the data processing for the SpO
Implementing the communication with the main board.
parameter;
2
2.2.4.3.6 Power & Signal isolate Circuit
Isolating the external circuits to ensure the safety of human body;
Supplying power for all circuits;
Implementing the isolation communication between the CPU System and the main
board.
2.2.5 NIBP Module
2.2.5.1 General
This module provides the function of measuring the Non-Invasive Blood Pressure (NIBP).
2.2.5.2 Principle diagram
Figure 8 Operation principle of the NIBP module Principle
2-10

Principles of Operation
The NIBP is measured based on the pulse vibration principle. Inflate the cuff which is on the
forearm till the cuff pressure blocks the arterial blood, and then deflate the cuff according to a
specified algorithm. While the cuff pressure is decreasing, the arterial blood has pulses, which
are sensed by the pressure transducer in the cuff. Consequently, the pressure transducer,
connected with the windpipe of the cuff, generates a pulsation signal, which is then processed
by the NIBP module to get the NIBP value.
2.2.5.2.1 Valve Drive Circuit
This circuit controls the status (ON/OFF) of valves. It, together with the Motor Drive Circuit,
implements the inflation and deflation of the cuff.
2.2.5.2.2 Motor Drive Circuit
This circuit controls the action of the air pump. It, together with the Valve Drive Circuit,
implements the inflation and deflation of the cuff. Besides, it provides the status signal of the
motor for the A/D conversion part.
2.2.5.2.3 NIBP Signal Process Network
The NIBP signal is the differential input signal. The difference amplifying circuit amplifies the
dual-end difference signal and converts it to the single-end signal; meanwhile, this circuit
sends a channel of signal to the A/D conversion part, and the other to the DC isolating and
amplifying circuit.
The DC isolating and amplifying circuit removes DC components from the signal, amplifies the
signal, and then sends it to the A/D conversion part.
2.2.5.2.4 A/D
The A/D conversion part converts the analog signal to the digital signal, and sends it to the
CPU System for further processing.
2.2.5.2.5 Over Pressure Detect
The circuit detects the NIBP pressure signal. Once the pressure value exceeds the protected
pressure value, it will send a message to the CPU System, which asks the Valve Drive Circuit
to open the valve to deflate the cuff.
2.2.5.2.6 CPU System
Implementing the logical control of all the circuits;
Implementing the data processing for the NIBP parameter;
Implementing the communication with the main board.
2-11

Principles of Operation
2.2.6 TEMP Module
General
This module provide the function of measuring the temperature.
Schematic diagram
图 2-1 TEMP schematic diagram
Principle
Normally, the sensor used for measuring temperature is a thermistor. The resistance of a given
thermistor is nonlinearly relative to the temperature. Thus, the resistance of a thermistor can be
conversed into temperature. By applying given field current to the thermistor, its resistance can be
easily obtained by measuring the voltage on the thermistor.
Temperature Detection Circuit
The resistance of the thermistor ch anges as the temperature change. Temperature detection circuit
converts the change of resistance into voltage difference and amplifies the signals to certain range
and then sends the signals to the sampling circuit.
Probe Recognition Circuit
Probe recognition circuit recognize the oral/axillary and rectal temperature probe of the TEMP
module.
2-12

Principles of Operation
Probe Heating Circuit
Probe heating circuit warms up the probe to a constant temperature and keep it so as to shorten the
measuring time.
A/D
The A/D conversion part converts the analog signal to the digital signal, and then sends it to
CPU for further processing.
CPU System
CPU system implements the logical control of all the circuits, the data processing for the TEMP
parameter and the communication with the main control board.
Power & Signal Isolation Circuit
Power & signal isolation circuit implements the conversion of the power supply and the isolation
of the signals.
2.3 Software Description
2.3.1 General
2.3.1.1 Composition of software
The VS-800 software consists of the system software, module software, upgrade software and
printer software.
Besides the system software, all the other software components are universal. Therefore, the
following sections will emphasize on the requirements of the system software. For other
software, only references are provided.
表 2-1 VS-800 software components
Software component Description Material code of
universal
component
System software For different configurations (SpO2 only and
full configuration), the LED requires two
different kinds of software.
Bootstrap software Bootstrap upgrade software 0010-30-12196
2-13
(Non-universal)

Principles of Operation
Module
software
NIBP SIC33209 write software of 630D blood
pressure pump
MINDRAY
SpO
2
MASIMO
SpO
2
S1C33209 write software of the SpO
board
MASIMO M7 SpO
software
2
2
630D-30-09112
9006-30-33911
(See Note 1)
Nellcor SpO2 NELLCOR MP506 SpO2 software
TEMP
Predictive TEMP module software
G-M09A-30-62120
Recorder 33209 write software of the MCU TR6C-30-16656
Note 1: Those software components are external, namely, they are not developed by
Mindray.
2.3.2 System Software
2.3.2.1 General
The functions of the system software are shown in Figure 2-9:
System software
Parameter
module
Patient
Keypad
Nurse
Figure 9 Function of system software
The VS-800 software provides the following functions:
1 Transmitting/receiving data to/from modules;
2 Displaying parameters, plethysmograms and trend data;
3 Rising alarms;
4 Controlling the recorder;
5 Reviewing patient history data;
PC
LCD
LED
Thermal recorder
6 Network function;
7 NURSECALL function;
8 Power management;
2-14

Principles of Operation
9 Displaying measurement results with LEDs;
10 Outputting data to PC for permanent storage and data printing.
2.3.2.2 Functions of system software
2.3.2.2.1 Power management
A. The system detects the battery and battery volume automatically, and power LED
gives status of battery.
B. The system detects the voltage (12V) of the main board periodically. Once the
voltage exceeds 12V limit, stop the ongoing NIBP measurement.
2.3.2.2.2 Parameter measurement
The parameter measurements are performed respectively by parameter modules. The system
software is responsible for processing data and displaying the results.
2.3.2.2.3 Data output
Trend data can be recorded. The recorded data can be queried on the LCD, output by the
recorder or through the network. In addition, the monitor can be connected to the central
monitoring system, thus performing data output.
2.3.2.2.4 Alarm paused/silenced
The audible alarms are compliant with IEC60601-1-8.
The alarm pause period is 2 minutes; the system can also be silenced.
2.3.2.2.5 Network
Central Monitoring System (CMS)
Data output
Software upgrade
2.3.2.2.6 Pitch Tone
With the Pitch Tone function, the system can dynamically change the pulse tone.
Nurse Call
The Nurse Call function is used for outputting alarms.
2.3.2.2.7 Standby
When the monitor receives no physiological signals or gives a battery-low alarm,
In the monitoring status, press the ON/STANDBY key for less than 2s. The CONFIRM
STANDBY STATE dialog box appears, prompting “Enter the Standby State. Yes?” Select YES
2-15

Principles of Operation
to enter the standby status.
In the standby status, press any key on the front panel of the monitor or withdraw the
temperature probe from the probe sheath to exit the standby status. The EXIT STANDBY
dialog box appears, prompting “Enter monitoring state?” Select YES to exit the Standby status
and enter the monitoring status. If no operation is done within 30 seconds, the monitor will
automatically select NO, this dialog box will disappear, and the monitor will keep in the Standby
status.
The monitor exits the standby status and enters the monitoring status automatically when
The monitor receives SpO
physiological signal for 5 seconds or more;
2
The monitor is powered by the internal battery which is to be depleted.
2.3.2.2.8 Mode modification
A. Format of date: Chinese (-year-month-day); European: (day-month-year); American
(month -day- year). The review date of the trend data corresponds to the system time.
B. Precision of real-time clock: ±1 minute/month at 213± . ℃
Display resolution: 1s
Range: 2001 0: 0: 0 -2099 23: 59: 59
2.3.2.2.9 Alarm message
A. Alarms include physiological alarms and technical alarms,Alarms classed 3 gra de:high、
middle and low alarm.
a) Every parameter has an alarm switch. If the alarm function of a parameter is disabled, no
audible and visual alarm will be given in case exceptions occur.
b) The alarm function is compliant with relevant standards.
B. Alarm mode
a) The speaker and alarm indicator give the audible and visual alarms, the LED flashes, and
alarm messages are displayed on the LCD.
b) When alarms of the two alarm levels occur, the system gives the high-level alarm.
C. If the monitor is connected to the Nurse Call system properly, the alarm, if any, can be
given through the Nurse Call system. The reviewed trend data begin to be stored.
2.3.2.2.10 Non-volatile data storage
The monitor can store modified configurations. Besides the factory default configuration, the
2-16

Principles of Operation
monitor can store 1 group of user default configuration for each patient type.
Storage of trend data: In the full configuration, the non-volatile data include trend data of all
parameters: systolic pressure, mean pressure, diastolic pressure, PR, SpO
time and patient ID.
, measurement
2
2.3.3 Module Software
The module software implements the upper-level communication protocol through the
communication port.
2.3.4 Upgrade Software
The upgrade software implements, through the Ethernet and PC, the online upgrade of the
system software of the monitor and module software.
The upgrade software package includes the bootstrap and PC upgrade software. The
bootstrap, which takes the main board as the platform, provides the online upgrade functions
of system software and module software as well as the system function configuration. The PC
upgrade software, which takes the PC as the plat form, communicates with the monitor through
the Ethernet, and provides operators with the upgrade/configuration UI.
The FPGA upgrade software is controlled by the main board.
The upgrade software realizes the multi-language downloading and upgrade function.
2.3.5 Printer Software
The printer software, which takes the PC as the plat form, receives dat a output from the monitor,
and implements the data display, storage and printing.
2.4 System Parameters
2.4.1 NIBP
The NIBP is measured based on the pulse vibration principle. Inflate the cuff which is on the
forearm till the cuff pressure blocks the arterial blood, and then deflate the cuff according to a
specified algorithm. While the cuff pressure is decreasing, the arterial blood has pulses, which
are sensed by the pressure transducer in the cuff. Consequently, the pressure transducer,
connected with the windpipe of the cuff, generates a pulsation signal. Then, the pulsation
signal is filtered by a high-pass filter (about 1Hz), amplified, converted to the digital signal by
2-17

Principles of Operation
the A/D converte r, and finally processed by the MCU. After that, the systolic pressure, diastolic
pressure and mean pressure can be obtained. For neonates, pediatric and adults, it is
necessary to select the cuffs of a proper size to avoid possible measurement errors. In the
NIBP measurement, there is a protection circuit used to protect patient from over-high
pressure.
The NIBP measurement modes include:
1) Adult/pediatric/neonate mode: To be selected according to the build, weight and age of the
patient;
2) Manual/Auto/Continuous mode: The manual measurement is also called single
measurement; in this mode, only one measurement is done after being started. In the auto
measurement mode, the auto measurement be done according to the preset procedure. In the
continuous measurement mode, quick continuous measurement will be done within 5 minutes
after being started; it detects the changes in blood pressure effectively.
2.4.2 SpO2
The SpO2 value is obtained through the pulse waves of the finger tips based on specific
algorithm and clinical data. The SpO
LEDs and an inbuilt light receiver. The two LEDs include one red-light diode and one infrared
diode, which emit light in turns. When the capillaries in the finger tip are iteratively congested
with blood pumped by the heart, the light emitted by the LEDs, after absorbed by the
capillaries and tissue, casts on the light receiver, which can sense, in the form of electric signal,
the light strength changing with the pulsated blood. The DC/AC ratio of the two photoelectric
signals corresponds to the content of the oxygen in the blood. Therefore, the correct pulse
oxygen saturation can be obtained with specific algorithm. Moreover, the pulse rate can be
obtained according to the pulse waveform.
The circuit of the SpO
module is involved in four parts: SpO2 probe, signal processing unit,
2
LED-driven sequencing control part and the MCU.
probe is the measurement transducer. It has two inbuilt
2
2-18

Principles of Operation
2.4.3 TEMP
Body temperature can be taken with two different methods according to the temperature probe
used. One method is direct measurement with which the temperature is measured by thermal
equilibrium. Therefore, thermistor, platinum resistance or mercury can be used in the temperature
probe. Direct temperature measurement is the standard method for measuring body temperature
and it is commonly used for clinical diagnosis. With this method, we can obtain accurate
temperature reading, however, it takes longer time since we need time for reaching thermal
equilibrium. Another temperature measuring method is indirect, which uses thermal radiation of
human body to obtain body temperature. Thus, the probe can be an infrared sensor. Indirect
temperature measurement takes shorter time but the measurement error is greater
Direct temperature measurement can be classified as continuous monitoring and predictive
measurement. Continuous monitoring thermometer continuously monitors body temperature and
displays the temperature reading in real time by applying the temperature probe to the measured
site. Since it takes time for heat conduction between the human body and the thermometer,
continuous monitoring takes relatively longer time to reach the final temperature, normally 3
minutes in oral mode and 5 minutes in axillary mode. In predictive thermometer, a heating device
is connected with the temperature detector. Time for reaching the thermal equilibrium between the
temperature probe and the measured site is shortened with the heating device before temperature
measurement. Additionally, the temperature at which thermal equilibrium is reached is predicted
according to the temperature curve of the probe in given time. Since the final temperature of the
measured site can be obtained without taking time for reaching the thermal equilibrium, measuring
time can be shortened effectively.
The predictive TEMP mode provide both continuous monitoring (in MONITOR mode) and
predictive measurement (in PREDICT mode).
2-19

Principles of Operation
For your notes
2-20

Product Specifications
Chanpter3 Product Specifications
3.1 Type of Monitor
Type of protection against electrical shock Class I, internally powered equipment
EMC Class A
Degree of protection against electrical shock NIBP/SpO
Defibrillation-proof
Monitor: B
Degree of protection against harmful
ingress of water
Degree of protection against hazards of
ignition of flammable anesthetic mixtures
Methods of sterilization Refer to the operation manual for
Mode of operation Continuous operation
Not suitable (ordinary)
Not suitable (ordinary)
detailed information
/TEMP: CF,
2
3.2 Specifications of Monitor
3.2.1 Dimension and Weight
Dimension 177 x 240 x 170 mm
Weight < 3.5kg (Full configuration, battery
included)
3.2.2 Operating Environment
3.2.2.1 Temperature Requirements
Operating ambient temperature
Storage temperature
3.2.2.2 Relative Humidity
Operating relative humidity 15% - 95% (non-condensing)
Transportation and storage relative humidity 10% - 95% (non-condensing)
3-1
0℃ - 40℃
-20℃ - 60℃
100C - +400C(500F -1040F)
(Mindray TEMP module)

Product Specifications
3.2.2.3 Power Requirements
Voltage: AC 100 - 240 V, 50/60 Hz (± 3 Hz)
Power: 70VA
Switch : Standby
3.2.3 Specifications of Display
LCD display
Dot matrix: 320×160
Dot pitch: 0.24×0.24
Dot size: 0.225×0.225
LCD type: FSTN LCD
Polarity: Positive
Transmission mode: Transflective
Viewing angle: 12:00
Type of backlight: LED (4 white LEDs)
Displayed contents:
Startup screen
Trend data (including scroll bar)
SpO
waveform (can be switched)
2
Menu (pop up)
Time
Prompting messages
6 groups of LED digit displays:
Used to display the systolic pressure, diastolic pressure, mean pressure/cuff pressure,
SpO
, PR and TEMP.
2
8 groups of monochrome LED indicators
Used to display or indicate the pulse strength, power, ADULT-PEDIATRIC-NEO (patient
type), mmHg-Kpa (unit of pressure), silence function, NIBP measurement status,
(temperature unit) and indication lamps which indicate temperature type
.
ºC - ºF
3.2.4 Signal Interface
Nurse call output The nurse call function is designed for the
nurse call system in hospital
Type of nurse call signal Relay signal, always ON/OFF (optional)
Maximum voltage 12V DC (no greater than 13V DC)
3-2

Product Specifications
Maximum load current ≤2A
Connection resistance <1Ω
Isolation voltage >1500V AC
Network interface For connection to the Central Monitoring
Network, software upgrade and data export
3.2.5 Battery
No. of batteries: 1
Battery type: Sealed lead-acid battery or lithium ion battery
Time to shutdown at low battery power: 5-15min after the first low-battery alarm (a new
fully-charged battery should be used)
3.2.5.1 2.3 Ah 12V Sealed Lead-Acid Battery
Minimum of 260min
The monitor runs on power supplied by the new fully-charged battery in the following
conditions:
Ambient temperature: 25℃
Monitor configuration: SpO
(Continuous measurement) and NIBP (one auto NIBP
2
measurement per 15min)
Charge time: Maximum of 8h. Operating status.
3.2.5.2 4.4Ah 11.1V Lithium Ion Battery
Minimum of 620min
The monitor runs on power supplied by the new fully-charged battery in the following
conditions:
Ambient temperature: 25℃
Monitor configuration:
measurement per 15min)
Charge time: Maximum of 8h. Operating status.
SpO2 (Continuous measurement) and NIBP (one auto NIBP
3.2.6 Recorder
Method Thermal dot array
Horizontal resolution 160dots/cm (25 mm/s)
Vertical resolution 80dots/cm
No. of waveform channels 1
Paper width 50±0.1 mm
3-3

Product Specifications
Paper length 30m
Paper speed 25 mm/s, ±5%
Record mode The recorder should support 3 record modes:
1) Recording current trend data being displayed on the LCD
of the current patient
2) Recording all patient trend data
Recording waveform graphs continuously in real time
3.2.7 Review
Trend review
Storage of trend data:
Displayed contents of full configuration:
Data in trend tables of all working parameters, including systolic
pressure, mean pressure, diastolic pressure, pulse rate, SpO
,
2
measurement time and patient ID.
SpO
Display resolution:
configuration only: Once per minute
2
(mean measured value within 1min.)
Other configurations: Minimum interval is
1min.
Maximum storage: 1200 groups of data
Storage of data
Storage of monitor configurations: The monitor should be capable of storing changeable
configurations. Besides the factory default configuration, one
group of user default configuration for each patient type
should be stored.
The following data should be stored:
1. Patient information
2. Alarm limit settings
3. Volume settings
4. Recorder settings
5. Clock settings
6. Parameter settings
Storage of patient information: The current patient information is stored in the non-volatile
memory.
3-4

Product Specifications
3.2.8 NIBP
Measuring method Automatic oscillometry
Mode of operation Manual/Automatic/Continuous
Measuring interval for automatic
mode:
Measuring time for continuous
mode:
Maximum measurement cycle
Adult/pediatric:
Neonate:
PR:
Range
Accuracy
Resolution
1,2,3,4,5,10,15,30,60,90,120,180,240,480min
5min
180s
90s
40 - 240 bpm
±2 bpm or ±2%, whichever is the greater
1bpm
Measurement range in normal mode
Adult:
Systolic pressure:
Diastolic pressure:
40 - 270mmHg
10 - 210mmHg
Mean pressure:
Pediatric:
Systolic pressure:
Diastolic pressure:
Mean pressure:
Neonate :
Systolic pressure:
Diastolic pressure:
Mean pressure:
Resolution:
Pressure:
Accuracy:
Pressure
20 - 230mmHg
40 - 200mmHg
10 - 150mmHg
20 - 165mmHg
40 - 135mmHg
10 - 100mmHg
20 - 110mmHg
1mmHg
3-5

Product Specifications
Max. mean error
Max. standard error
Software over-pressure protection: The over-pressure detection is controlled by
software. Once the cuff pressure exceeds the threshold, the software enables the system
to deflate the cuff.
Adult 300 mmHg
Pediatric 243mmHg
Neonate 150 mmHg
±5mmHg
8mmHg
Hardware over-pressure protection: In single fault conditions, the hardware
controls the cuff deflation to prevent the cuff pressure from exceeding the following ranges.
Adult 330 mmHg
Pediatric 330mmHg
Neonate 165 mmHg
3.2.9 SpO2
3.2.9.1 MASIMO SpO2
Range
SpO2 (%) 1% - 100%
PR (bmp) 25 - 240
Accuracy
SpO2 (%) No motion conditions
Adult/pediatric 70% - 100%: ±2%
0% - 69%: Undefined
Neonate 70% -100%: ±3%
0% - 69%: Undefined
SpO
(%) During motion conditions
2
Adult/pediatric/neonate 70% -100%: ±3%
0% - 69%: Undefined
PR (bpm) No motion conditions
25 - 240 ± 3 BPM
PR (bpm) During motion conditions
25 - 240 ± 5 BPM
Resolution
3-6

Product Specifications
SpO2 (%) 1%
PR (bpm) 1
Response time
Under the condition that the PR is 75BPM and the mean time is 8s, the maximum
response time for the SpO
value to increase from 60% to 95% is 20s.
2
3.2.9.2 9006 SpO2
Range: 0 - 100%
Resolution: 1%
Accuracy
No motion conditions:
70% to 100% 0 - 69%
Adult (including pediatric) ± 2 digits Undefined
Neonate ± 3 digits Undefined
Updating cycle of SpO2 values: 1s
PR
Range: 20 - 254 BPM
Resolution: 1bpm
Accuracy
SpO2 range Patient Type
Patient Type PR range Accuracy( No motion conditions)
Adult/Pediatric/Neonate 20-254 bpm ± 3 digits
3.2.9.3 Nellcor SpO2
Range and accuracy for
SpO
measurement:
2
Sensor Accuracy
MAX-A, MAX-AL, MAX-N, MAX-P,
MAX-I and MAX-FAST
OxiCliq A, OxiCliq N, OxiCliq P and
OxiCliq I
D-YS, DS-100A, OXI-A/N and
OXI-P/I
70% - 100% ± 2 %
0% - 69% Undefined
70% - 100% ±2.5 %
0% - 69% Undefined
70% - 100% ± 3 %
0% - 69% Undefined
1
MAX-R, D-YSE and D-YSPD 70% - 100% ± 3.5 %
0% - 69% Undefined
3-7

Range and accuracy for
Product Specifications
PR
measurement:
Updating cycle of SpO2
values:
Range Accuracy
20 - 250 BPM ±3 BPM
251 - 300 BPM Undefined
1s
3.2.10 TEMP Specification
Parameter Specification
Displayed parameter TEMP
Measurement range 25 - 44 ºC(77 - 111.2 ºF)
Resolution In MONITOR mode: 0.1ºC (0.2 ºF)
Accuracy
Typical prediction time < 12 s
In MONITOR mode: 25 - 32 ºC (77 - 89.6 ºF): ±0.2 ºC (±0.3
ºF) including 32 ºC(89.6 ºF)
In MONITOR mode: 32 - 44 ºC (89.6 - 111.2 ºF): ±0.1ºC(±
0.2 ºF)excluding 32
ºC(89.6 ºF)
3-8

Machine Disassembly/Assembly and Troubleshooting
Chanpter4 Machine Disassembly/Assembly and
Troubleshooting
4.1 Disassembly/Assembly Figure
4.1.1 Host Assembly
Figure 1 Host assembly
No. Std. Code Name & Spec. Qty.
1 6006-30-39446 Front housing component 1
2 6006-30-39401 Master bracket component (lead-acid) 1
3 6006-30-39447 Rear housing component 1
4 M04-000505--- Cross pan head screwM3X20 4
5 M04-004012--- Cross pan head screw with washer
M3X6
4-1
5

Machine Disassembly/Assembly and Troubleshooting
4.1.2 Master bracket (lead-acid battery) assembly
Figure 2 Master bracket (lead-acid battery) assembly
No. Std. Code Name & Spec. Qty.
1 6006-20-39367 Main bracket (lead-acid battery) 1
2 6006-30-39448 Lead-acid battery assembly 1
3 M04-004015--- Gasketed cross-head screw M3*8 4
4 6006-20-39385 Speaker & connection cables 1
5 6006-20-39379 Washer of speaker 1
6 6006-20-39464 Insulating plate of power board 1
4-2

Machine Disassembly/Assembly and Troubleshooting
7 M04-004012--- Gasketed cross-head screw M3*6 16
8 6006-20-39478 Lead-acid battery power board 1
9 M04-000106--- Screw M3X7+8-6 2
10 M04-011002--- M3 nut with external-tooth spring washer 2
11 0000-10-10996 EMI finger-like beryllium-copper spring
plate92-047
12 6006-20-39387 Fan & connection cables 1
13 6006-20-39373 Fan support 1
14 M04-002005--- Cross-head sunk screw M3*12 4
15 6006-20-39434 Fan washer 1
16 0509-20-00098 Grounding connector 1
17 M04-000405--- Cross-head sunk screw M3*8 2
18 6006-21-39386 Power outlet 1
19 6006-20-39421 Overlay of external interface 1
20 6006-20-39486 Retaining screw for button battery 1
21 7000-20-24365 Battery baffle 1
22 6006-20-39485 Torsional spring for button battery 1
23 6006-20-39368 NIBP bracket 1
24 630D-30-09121 630D blood pressure pump 1
2
25 M04-021024--- Large flat washer GB96 3 4
26 6006-20-39352 Main board 1
27 6006-20-39451 Insulating plate for main board 1
28 6006-20-39450 Insulating plate for keypad 1
29 6006-20-39509 Overlay of NIBP bracket 1
30 M04-021003--- Flat washer GB97. 1 6 1
31 M04-004504--- Spring washer GB93 6 1
32 M04-004401--- Stainless steel nut GB6170 M6 1
4-3

Machine Disassembly/Assembly and Troubleshooting
4.1.3 Master bracket (lithium) assembly
Figure 3 Master bracket (lithium) assembly
No. Std. Code Name & Spec. Qty.
1 6006-20-39416 Master bracket (lithium) 1
2 6006-30-39449 Lithium battery component 1
3 M04-004012 Gasketed cross-head screw M3*6 17
4 6006-20-39385 Speaker and connection line 1
5 6006-30-39379 Speaker press plate 1
4-4

Machine Disassembly/Assembly and Troubleshooting
6 6006-30-39464 Insulating plate for power board 1
7 M04-011002--- M3 nut, with spring washer 1
8 6006-20-39393 Lithium power board 1
9 M04-000106--- Screw M3X7+8-6 2
10 0000-10-10996 EMI finger-shape beryllium-copper spring
2
plate92-047
11 6006-20-39387 Fan and connection line 1
12 6006-20-39373 Fan rack 1
13 M04-002005--- Cross flat countersunk screwM3X12 4
14 6006-20-39434 Fan washer 1
15 0509-20-00098 Grounding connector 1
16 M04-000405--- Cross flat countersunk screwM3X8 2
17 6006-20-39386 Power inlet 1
18 6006-20-39421 Overlay of external interface 1
19 6006-20-39485 Torsional spring for button battery 1
20 6006-20-39486 Fastening screw for button battery 1
21 7000-20-24365 Battery baffle 1
22 6006-20-39368 NIBP bracket 1
23 630D-30-09121 630D blood pressure pump 1
24 M04-021024--- Large flat washer GB 96 3 4
25 6006-20-39352 Master control board 1
26 6006-20-39451 Insulating plate for master control board 1
27 6006-20-39512 Insulating plate(lithium) for keypad 1
28 6006-20-39509 Overlay of NIBP bracket 1
29 M04-021003--- Flat washer GB97. 1 6 1
30 M04-004504--- Spring washer GB93 6 1
31 M04-004401--- Stainless steel nut GB6170 M6 1
4-5

Machine Disassembly/Assembly and Troubleshooting
4.1.4 Front shell assembly
Figure 4 Front shell assembly
No. Std. Code Name & Spec. Qty.
1 6006-20-39358 front cover 1
2 6006-20-39520 Waterproof bar 1
3 6006-20-39372 silicon button 1
4 6006-20-39431 silicon keypad press plate 1
5 M04-021000--- flat washer 5
6 6006-20-39488 dust panel1 2
7 6006-20-39482 LED shade 4
8 6006-20-39354 keypad 1
9 6006-20-39471 spo2 module 1
10 M04-004012--- cross pan head screw, with washer
M3X6
13
11 M04-011002-- M3 nut with spring washer 4
12 6006-20-39508 earthing washer 1
13 6006-20-39502 LCD backplate 2
4-6

Machine Disassembly/Assembly and Troubleshooting
14 0000-10-10997 LCD 1
15 6006-20-39487 dust panel2 2
16 M04-051003--- cross pan head screw, pointless, tail-cut,
self-tapping
17 6006-20-39415 silcon power button 1
18 6006-20-39376 battery door tape 1
19 6006-20-39359 battery door 1
20 M04-003905--- cross pan head screw, pointless,
self-tapping
21 M04-021024--- Large flat washer GB 96 3 1
22 0010-20-12194 pneumatic connector assembly 1
23
24 6006-20-39361 alarm light cover 1
6006-20-39587
Front housing overlay (with temperature
indication)
4.1.5 Back shell assembly
5
1
1
Figure 5Back shell assembly
4-7

Machine Disassembly/Assembly and Troubleshooting
No. Std. Code Name & Spec. Qty.
1 6006-20-39351 Back shell 1
2 6006-20-39374 Label (Chinese) 1
3 M04-002505--- Cross head screw M3x6 2
4
5 6006-20-39375 Foot cushion 2
6 6006-20-39418 Speaker cushion PT3X6n 1
7 6006-20-39369 Support for recorder 1
8 M04-003905---
9 M04-000603--- External teeth washer GB862.1 3 1
10 M04-003105--- Cross head tapping screw PT3X8 2
11 M04-021024--- Washer GB96 3 2
12 6006-20-39350 Handle cover 1
13 M04-004012--- Cross head washer screw M3X6 3
14 TR6C-30-16654 TR60-C Recorder 1
6006-30-39572 Predictive TEMP module
Tapping screw
PT3X6
4.1.6 Lithium battery assembly
1
3
Figure 6Lithium battery assembly
No. Std. Code Name & Spec. Qty.
1
6006-20-39417 Support for lithium battery
4-8
1

Machine Disassembly/Assembly and Troubleshooting
2
3
4
5
6
7
6006-30-39427 Lithium battery socket board
M04-030030--- Hexagon stud M3X12
9201-20-36038 Battery thrust spring
M04-000605--- Cross head screw M3X8
M04-051026--- Stainless socket head hexagon screw
M3X10
M90-000002-03 Insulated washer Φ3X0.5
4.1.7 Lead-acid battery assembly
1
1
1
2
1
1
Figure 7Lead-acid battery assembly
No. Std. Code Name & Spec. Qty.
1 6006-20-39419 battery fixed bracket 1
2 8002-20-36151
3 8002-20-36152 battery flexible bracket 1
4 8002-20-36154 battery contact 2
5 M07-00043S--- switch 1
6 M04-000605--- cross pan head screw M3X8 1
Adjustable spring
4-9
2

Machine Disassembly/Assembly and Troubleshooting
7 9000-20-07286 spring 1
8 M04-011002--- M3 nut, with spring washer 1
9 M04-051060--- cross pan head screw, pointless, tail-cut,
self-tapping M2X8
10 M04-021000--- Washer GB 97.2 2.5 2
4.1.8 MASIMO SpO2 board assembly
2
Figure 8MASIMO SpO2 board assembly
No. Std. Code Name & Spec. Qty.
1 DA8K-20-14524 Insulating plate of SpO2 isolation power
board
2 M90-000002--- Insulated washer Φ3X1 3
3 M04-000301--- NUT GB6170-M3 3
4 0010-30-12095 MASIMO M7 Isolation power board 1
5 0010-10-12275
MASIMO M7 BOARD(MASIMO KIT)
4-10
1
1

Machine Disassembly/Assembly and Troubleshooting
6 M04-000104--- Spring washer GB93 3 3
7 M04-000106--- Screw M3X7+8-6 3
8 6006-20-39366 SpO2 mount bracket 1
9 M04-002505--- Cross-head screw M3*6 4
4.1.9 TEMP assembly
No. Std. Code Name & Spec. Qty.
1 6006-20-39363 TEMP module housing 1 1
2 M04-003905--- Tapping screw PT3X6 3
3 6006-20-39364 TEMP module housing 1 1
4 M04-002505--- Cross head screw M3X6 2
5 6006-20-39569 TEMP module waterproof pad 1
6 M04-004012--- Cross head screw M3X6 4
7 M09A-30-62103 Main board assembly of the predictive
1
TEMP module
8 6006-20-39365 Temperature probe cover box 1
9 6006-20-39377 TEMP module water-resistant cap 1
4-11

Machine Disassembly/Assembly and Troubleshooting
4.2 Inter-board Connections
4.2.1 List of Connection Cables
4.2.1.1 Signal lines
Name Material number Graphic connection relations
MINDRAY 9006 SPO2 signal line 6006-21-39390 See the figure below.
NELLCORE SPO2 signal line 6006-21-39392 See the figure below.
MASIMO SPO2 signal line 6006-21-39391 See the figure below.
4.2.1.2 Internal Connection Cables
Name Material number Graphic connection relations
Main board power cord
Recorder signal line
SpO2 module connection cables
Keypad signal line
LCD signal line
Speaker and connection cables
Power board AC input cables
Fan and connection cables 6006-21-39387
Power board-to-battery backplate
connection cables (lithium)
6006-20-39380
6006-20-39381
6006-20-39382
6006-20-39383
6006-20-39384
6006-21-39385
6006-21-39386
6006-20-39388
See the figure below.
See the figure below.
See the figure below.
See the figure below.
See the figure below.
See the figure below.
See the figure below.
See the figure
below.
See the figure below.
Power board-to-battery backplate
connection cables (lead-acid)
Recorder power cord 6006-20-39492
Keypad power connection cables 6006-20-39493
NIBP module connection cables 6006-20-39494
TEMP module connection cables
6006-20-39389
M09A-20-62082
4-12
See the figure below.
See the figure below.
See the figure below.
See the figure below.
See the figure below.

Machine Disassembly/Assembly and Troubleshooting
4.2.1.3 Connection Cable Figure
Figure 9MINDRAY 9006 SPO2 Signal Line
Figure 10MASIMO SPO2 Signal Line
Figure 11NELLCORE SPO2 Signal Line
Figure 12Main Board Power Cord
Figure 13Recorder Signal Line
4-13

Machine Disassembly/Assembly and Troubleshooting
Figure 14SpO2 Module Connection Cables
Figure 15LCD Signal Line
Figure 16Keypad Signal Line
Figure 17Keypad Power Connection Cables
Figure 18Speaker and Connection Cables
4-14

Machine Disassembly/Assembly and Troubleshooting
Figure 19Power Board AC Input Connection Cables
Figure 20Fan and Connection Cables
Figure 21Power Board-to-Battery Backplate Connection Cables (Lithium)
Figure 22Power Board-to-Battery Backplate Connection Cables (Lead-acid)
4-15

Machine Disassembly/Assembly and Troubleshooting
Figure 23Recorder Power Cord
Figure 24NIBP Module Connection Cables
Figure 25 Isolation power board to the TEMP module connection cables
4.3 Troubleshooting
4.3.1 Cannot start
4-16

Machine Disassembly/Assembly and Troubleshooting
Cannot start
Y N
Check the keypad-to-main board signal line for fault;
Check the keypad-to-power board signal line for fault;
Check t he keyboard for fa ult
Check the main board for fault;
Ch eck t he po wer bo ard for fault;
above un its one by one
Check if the AC indicator
is lit
Check/replace the
so as to locate the
faul t;
end
Check if the power
supply is normal
Y
Check the AC power
cord is n orma
Check the k eypad-to-power board sign al
li ne for fault;
Check the keyboard for fault
Ch eck t he mai n boa rd for fau lt;
Check the power board for fault;
l
Y
N
Y
Check if battery is
installed;
Y
Check if the battery
has electricity;
N
N
N
Figure 25 Black Screen Troubleshooting Map
4.3.2 LCD Black, Backlight Off
1. Check if the LCD signal line is in good condition;
2. Check if the keypad power cord is in good condition;
3. If the problem still remains after the connection cables are replaced, replace the
LCD module:
4. If the problem still exists, check the keypad, power board or main board.
4.3.3 LED Displays Abnormally
1. Check if the LED signal line is in good condition;
2. Check if the keypad power cord is in good condition;
3. Check if the button signal line is in good condition;
4. If the problem still exists, check the keypad, power board or main board.
4.3.4 Alarms Soundless
1. Check if the sound is turned off in the software setup;
4-17

Machine Disassembly/Assembly and Troubleshooting
2. Check the speaker connection cables;
3. Replace the speaker;
4. Replace the main board.
4.3.5 Cannot Print
1. Check if the software has recorder-related alarms. If yes, eliminate them;
2. Check if the recorder indicator is lit;
3. If not, check the recorder signal input connection cables;
4. Check the recorder power input connection cables (including the recorder power
board);
5. Replace the recorder module.
4.3.6 Paper Travels Abnormally
1. Check if the recorder paper roller has got something;
2. Check if the recorder print head has got something;
3. Check if the recorder power voltage >7.8V.
4.3.7 NIBP cannot Work Correctly
1. Check if the NIBP hose is not obstructed;
2. Check if the NIBP signal line is in good condition;
3. Otherwise, replace the NIBP module.
4.3.8 SPO2 Works Abnormally
1. Check if the accessories are correct;
2. Check if the SpO2 signal line is in good condition;
3. Check if the SpO2 communication cable is in good condition;
4. Otherwise, replace the SpO2 module.
4-18

Machine Disassembly/Assembly and Troubleshooting
4.3.9 TEMP Module Works Abnormally
1. Check that the temperature probe is correct;
2. Check that the communication cable is in good condition;
3. Check that the TEMP module self-check properly;
4. Otherwise, replace the TEMP module.
4-19

Machine Disassembly/Assembly and Troubleshooting
For your notes
4-20

Machine test and Material List
Chanpter5 Machine test and Material List
5.1 Test Procedure
Connect the simulators, power and fixture to the VS-800 and power it on. The LED and LCD
modules should display correctly
5.1.1 Button Function Test
Press each button on the keypad. The VS-800 should give corresponding response and
perform corresponding function. Refer to the VS-800’s Operation Manual.
5.1.2 NIBP Test
After connecting the NIBP simulator, adult cuff and accessories properly, connect the cuff to
the CUFF connector on the monitor and tighten it by turning clockwise.
1. After self-tests pass, press ENT to enter the ADULT mode. Set the simulator to the
blood pressure 255/195/215 mmHg, SHIFT +15 and HR 80BPM, and the VS-800 to the
ADULT mode. Press START for around 30 seconds, and the results will be calculated.
The test results are 270±8mmHg, 210±8mmHg and 230±8mmHg.
2. Press ECS and↓ on the simulator to enter the NEONATE mode. Set the simulator to the
blood pressure 120/80/90 mmHg and HR 120 BPM, and the VS-800 to the NEONATE
mode. Press START for around 30 seconds, and the results will be calculated. The test
results will be 120±8mmHg, 80±8mmHg and 90±8mmHg respectively.
3. Press ESC and ↓ on the simulator to enter the NEONATE mode. Set the simulator to the
blood pressure 60/30/40 mmHg, SHIFT—20 and HR 120 BPM, and the VS-800 to the
NEONATE mode. Change the simulator accessory to a neonatal cuff. Press START for
around 30 seconds, and the result displayed should be 40±8mmHg, 10±8mmHg and
20±8mmHg.
5.1.3 SpO2 Test
Insert a finger into the SpO2 sensor. The screen should display the values of PR and SpO2
correctly. The normal SpO2 should be above 97%.
5-1

Machine test and Material List
5.1.4 TEMP Test
The monitor shall correctly measure normal body temperature. When monitoring ambient
temperature in MONITOR mode, the temperature reading displayed shall be in normal range and
continuously shown on the temperature display area.
5.1.5 Recorder Print Test
1. Print SpO2 graph. The recorder should print correctly and the printed results should
be clear and consistent. If set such faults such out of paper, etc., corresponding
prompts should be given. After the fault is removed, the VS-800 should be able to
work correctly.
2. Print trend data. The recorder should print in accordance with what described in the
Operation Manual.
5.1.6 Clock Test
Verify the accuracy of clock counting when conducting the system test, and then set the clock to the
current time.
5.1.7 Whole Parameter Test
Plug all monitoring parameters and monitor them one by one. During the simultaneous monitoring of all
parameters, the parameters should not interfere with each other.
5.1.8 Set Defaults at the time of loading Software
Perform such main menu operations as patient information management, trend data review,
system setup, etc. The system responds correctly and no obvious error occurs during
functioning. Each function meets the product requirements.
5-2

Machine test and Material List
5.2 Material List
1 6006-20-39350 Handle cap
2 6006-20-39351 Rear housing
3 6006-30-39352 Main board
4 6006-20-39353A PCB board for main board
5 6006-30-39354 Keypad
6 6006-20-39355A PCB board for keypad
7 6006-20-39358 Front housing
8 6006-20-39359 Battery door
9 6006-20-39360 NIBP parameter connector cap
10 6006-20-39361 Alarm light cover
Temperature module cap (No
11 6006-20-39362
12 6006-20-39366 SpO2 mount bracket
13 6006-20-39367 Master bracket (lead-acid)
14 6006-20-39368 NIBP bracket
15 6006-20-39369 Recorder bracket
16 6006-20-39370 Serial port bracket
17 6006-20-39372 Silicon button
18 6006-20-39373 Fan bracket
19 6006-20-39374 Machine label (Chinese)
20 6006-20-39375 Foot cushion
21 6006-20-39376 Battery door connection bond
22 6006-20-39378 SPO2 parameter connector cap
23 6006-20-39379 Speaker press plate
24 6006-20-39380 Main board power cord
25 6006-20-39381 Recorder signal line
26 6006-20-39382 SpO2 module connection cables
27 6006-20-39383 Keypad signal line
28 6006-20-39384 LCD signal line
29 6006-21-39385 Speaker and connection cables
30 6006-21-39386 Power board AC input connection cables
31 6006-20-39387 Fan and connection cables
6006-20-39388 Power board-to-battery back-plate
32
6006-20-39389 Power board-to-battery back-plate
33
34 6006-21-39390 SPO2 signal line (Mindray)
temperature)
connection cables (lithium)
connection cables (lead-acid)
5-3

Machine test and Material List
35 6006-21-39391 SPO2 signal line (MASIMO)
36 6006-21-39392 SPO2 signal line (NELLCOR)
37 6006-30-39393 Power board (lithium)
38 6006-20-39394A PCB board for power board
39 6006-30-39399 12V DC/DC board
40 6006-20-39400A PCB board for 12V DC/DC board
41 6006-30-39401 Master bracket assembly (lead-acid)
42 6006-30-39402 Master bracket assembly (lithium)
43 6006-30-39403 Main unit (lead-acid/SpO2 only)
44 6006-30-39404 Main unit (lithium/SpO2 only)
45 6006-30-39405 Main unit (lead-acid/NIBP)
46 6006-30-39406 Main unit (lithium/NIBP)
47 6006-30-39407 Main unit (lead-acid/ overpressure mode)
48 6006-30-39408 Main unit (lithium/overpressure mode)
49 6006-20-39413 Master transformer
50 6006-20-39414 3.3V DC/DC inductor
51 6006-20-39415 Silicon power button
52 6006-20-39416 Master bracket (lithium)
53 6006-20-39417 Lithium battery fixed bracket
54 6006-20-39418 Speaker press plate
55 6006-20-39419 Lead-acid battery fixed bracket
56 6006-20-39420 Overlay of front housing (English)
57 6006-20-39421 Overlay of external interface
58 6006-20-39422 Heat sink for switching tube
59 6006-20-39423 Heat sink for rectifier tube
60 6006-20-39424 Heat sink for charging switch tube
61 6006-30-39427 Lithium battery socket board
62 6006-20-39428A PCB board of lithium battery socket
63 6006-20-39429 Overly of front housing (Chinese)
64 6006-20-39431 Silicon keypad press plate
65 6006-20-39432 Bolster plate for middle LED (bottom)
66 6006-20-39433 Bolster plate for small LED (right)
67 6006-20-39434 Fan press plate
68 6006-20-39435 Recorder cap
69 6006-20-39436 VS-800 Operation Manual (Chinese)
70 6006-20-39437 VS-800 Operation Manual (English)
71 6006-20-39438 VS-800 Maintenance Manual (Chinese)
72 6006-20-39439 VS-800 Maintenance Manual (English)
73 6006-20-39440 VS-800 Operation Card (Chinese)
74 6006-20-39441 VS-800 Operation Card (English)
75 6006-20-39442 Operation Manual (Chinese/OEM)
76 6006-20-39443 Operation Manual (English/OEM)
5-4

Machine test and Material List
77 6006-20-39444 Maintenance Manual (Chinese/OEM)
78 6006-20-39445 Maintenance Manual (English/OEM)
79 6006-30-39446 Front housing assembly
80 6006-30-39447 Rear housing assembly
81 6006-30-39448 Lead-acid battery assembly
82 6006-30-39449 Lithium battery assembly
83 6006-20-39450 Insulating plate for keypad
84 6006-20-39451 Insulating plate for main board
85 6006-20-39453 Machine label (Chinese/bearing CE mark)
86 6006-20-39454 Machine label (European)
87 6006-20-39455 Machine label (FDA)
88 6006-20-39456 SN bar code label
89 6006-20-39457 Outside label (domestic)
90 6006-20-39458 Outside label (European)
91 6006-20-39459 Outside label (FDA)
92 6006-20-39460 VS-800 certificate
93 6006-20-39461 Upper foam
94 6006-20-39462 Lower foam
95 6006-20-39464 Insulating plate for power board
Overlay of front housing (Chinese /SpO2
96 6006-20-39465
only)
Overlay of front housing (English /SpO2
97 6006-20-39466
only)
98 6006-30-39467 Front housing assembly (SpO2 only)
99 6006-30-39468 Packaging material
100 6006-30-39469 NIBP module package
101 6006-30-39470 SPO2 module package (MINDRAY)
102 6006-30-39471 SPO2 module package (MASIMO)
103 6006-30-39472 SPO2 module package (NELLCOR)
104 6006-30-39473 Label package (domestic)
105 6006-30-39474 Label package (international)
106 6006-30-39475 Label package (FDA)
107 6006-30-39476 System software (online downloading)
108 6006-30-39477 Keypad (SpO2 only)
109 6006-30-39478 Power board (lead-acid)
110 6006-20-39480 12V DC/DC inductor
111 6006-20-39482 LED anti-dazzling screen
112 6006-20-39483 Washer of NIBP nozzle
113 6006-20-39484 Washer of grounding connector
114 6006-20-39485 Torsional spring for button battery
115 6006-20-39486 Fastening screw for button battery
116 6006-20-39487 Housing dust-proof bar 1
5-5

Machine test and Material List
117 6006-20-39488 Housing dust-proof bar 2
118 6006-30-39489 Main board test software
119 6006-30-39490 Guide software
120 6006-30-39491 PC browse software for data exporting
121 6006-20-39492 Recorder power cord
122 6006-20-39493 Keypad power connection cables
123 6006-20-39494 NIBP module connection cables
124 6006-30-39495 FPGA configuration code
125 6006-30-39496 CPLD configuration code
126 6006-20-39502 LCD backplate
127 6006-30-39503 Label package (for domestic bid)
128 6006-20-39504 Alarm Overlay
129 6006-20-39509 Overlay of NIBP bracket
130
131
132
133
134
135
136
137
138
139
140
141
142
143
144
6006-20-39510
6006-20-39511
6006-20-39512 Insulating plate(lithium) for keypad
6006-20-39513 external packing box
6006-30-39514
6006-30-39515
6006-30-39516
6006-30-39517
6006-30-39518
6006-20-39520 Waterproof bar
6006-30-39589
6006-30-39591
6006-30-39572 Predictive TEMP module assembly package
6006-30-39586
6006-30-39587
VS-800 CD label(english)
VS-800 CD label(english)
CD assembly(chinese)
CD assembly(English)
Front housing assembly(maintain)
Front housing assembly
(single SPO2/ maintain)
Rear housing assembly(maintain)
Predictive temperature probe assembly (rectal,
Chinese, MINDRAY)
Predictive temperature probe assembly (rectal,
English, MINDRAY)
Rear housing assembly (with TEMP
indication)
Front housing assembly (with TEMP
indication)
5-6

Machine test and Material List
5.3 NIBP Calibration Method
Figure 1 NIBP Static Pressure Calibration Method
Calibration method: Increase the pressure at intervals of 50mmHg(6.7kPa). The maximum
difference between the monitor and calibrator at any pressure point within the measurement
range does not exceed ±3mmHg (±0.4kPa). Similarly, when decreasing the pressure, the
difference between the monitor and calibrator at any pressure point within the measurement
range should not exceed±3mmHg (±0.4kPa).
5-7

Machine test and Material List
For your notes
5-8

Maintenance and Cleaning
Chanpter6 Maintenance and Cleaning
6.1 Inspection
6.1.1 Inspection before Using the Monitor
Before using the monitor, check:
1. The monitor for mechanical damages;
2. All exposed wires, male connectors and accessories;
3. All functions that may be used on patients, thus guaranteeing the good performance
of the monitor.
In case of any indication of functional damage, stop using the monitor, and contact bio-medical
engineers of the hospital or Mindray service engineers immediately.
6.1.2 Routine Inspection
An overall inspection, including the functional safety inspection, must be performed on the
monitor by qualified personnel for every 6-12 months or after maintenance each time. All
inspections must be performed by qualified service personnel when it is necessary to
disassemble the monitor.
Warning
Failure on the part of the responsible hospital or institution employing the
monitoring equipment to implement a satisfactory maintenance schedule may
cause undue equipment failure and possible health hazard.
6-1

Maintenance and Cleaning
6.2 General Cleaning
Warning
Be sure to shut down the system and disconnect all power cords from the
outlet before cleaning the equipment or accessories.
The VS-800 Vital Signs Monitor should be free from dust.
The exterior surface and LCD should be cleaned with non-corrosive cleaning solutions, such
as the diluted soap water and water.
• Warning
To avoid damages to the VS-800 Vital Signs Monitor:
ALWAYS dilute the solutions according to the manufacturer’s suggestions;
ALWAYS wipe of f all the excess cleaning solution with a dry cloth after cleaning;
NEVER submerge the equipment into water or any cleaning solution, or pour or
spray water or any cleaning solution on the equipment;
NEVER permit fluids run into the casing, switches, connectors, or any ventilation
openings in the equipment;
NEVER use abrasive or erosive cleaners of any kind as well as cleaners containing
acetone.
6.3 Disinfection
Disinfection may cause damage to the equipment; therefore, only the disinfection that is
considered necessary as per the hospital’s service plan is recommended. Before disinfecting
the equipment, clean it first.
For the disinfections of S p O
in VS-800 Operation Manual.
2
sensors, NIBP cuffs and TEMP probes, refer to relevant chapters
6-2

Maintenance and Cleaning
6.4 Cleaning/ Disinfection Solutions
Following are examples of cleaning/Disinfection solutions:
Alcohol based (Ethanol 70%, Isopropanol 70%)
aldehyde based
6.5 Contact Information for Maintenance and Technical
Support
Address Mindray Building, Keji 12th Road South, Hi-Tech
Industrial Park, Nanshan, Shenzhen 518057, P.R. China
Manufacturer Customer Service, Shenzhen Mindray Bio-Medical
Electronics Co., Ltd.
Post Code 518057
Tel +86 755 26582479 +86 755 26582888
Fax
+86 755 26582934 +86 755 26582500
Website http://www.mindray.com
E-mail E-mail:service@mindray.com
6-3

Maintenance and Cleaning
FOR YOUR NOTES
6-4


P/N: 6006-20-39439(2.0)
 Loading...