

Miele H 5081, H 5681, H 5688 User instructions
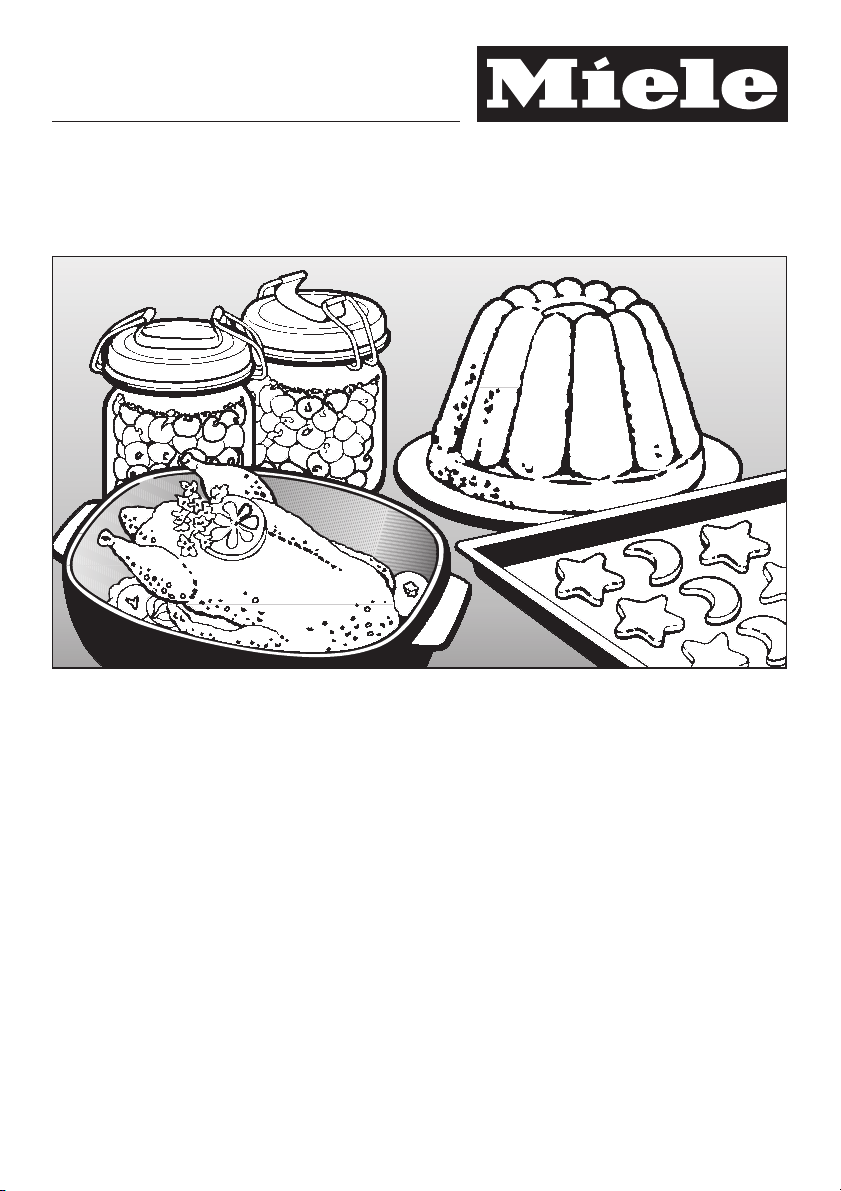
User instructions
Baking, Roasting, Grilling
Defrosting, Cooking
Automatic Programmes
To avoid the risk of accidents or
damage to the appliance it is
essential to read these instructions
before it is installed and used for the
first time.
en - AU, NZ
M.-Nr. 07 689 680

2

Contents
Automatic programmes.............................................6
To use an Automatic programme ......................................6
Notes on using these programmes ..................................7
Automatic programmes - overview ...................................8
Food probe ......................................................10
How the food probe works...........................................10
Applications ......................................................11
Important notes about using the food probe .............................11
To use the food probe ..............................................12
Time left display ................................................13
Using the residual heat, Energy save function .........................13
Baking tips ......................................................14
Bakeware ........................................................14
Baking parchment ..............................................14
Universal tray ..................................................14
Rectangular tins ................................................14
Notes about the charts .............................................15
Temperature, baking duration .....................................15
Shelf level .....................................................15
Frozen food ......................................................15
Baking chart .....................................................16
Fan Plus U ......................................................16
Conventional heat V ..............................................17
Intensive bake O .................................................18
Roasting tips ....................................................19
Browning......................................................20
Standing time ..................................................20
Frozen meat ...................................................20
Roasting chart ...................................................21
Slow cooking ....................................................22
Using the Slow cooking programme ...................................22
Slow cooking without an Automatic programme ..........................23
Grilling tips ......................................................24
Grill chart .......................................................27
Defrost .........................................................28
Bottling .........................................................29
Cooking ready meals..............................................30
3

Contents
Bakes/gratin .....................................................31
Cheese soufflé (from France) ........................................31
Potato gratin in a mustard sauce......................................32
Potato cheese bake ................................................33
Garlic soup (from Spain - Sopa Castellana) .............................34
Lasagne .........................................................35
Pasta bake .......................................................36
Jansson's bake (from Sweden) .......................................37
Eggplant moussaka ................................................38
Spinach parcels (Spanakopita) .......................................39
Quiche Lorraine ...................................................40
Ratatouille .......................................................41
Tuna pie (from Spain, Empanada gallega) ..............................42
Bread / Rolls / Bread mixtures ......................................43
Dessert .........................................................44
Chocolate sponge puddings (from Austria) .............................44
Caramel pudding (from Norway) ......................................45
Flan (from Spain) / Crème caramel ....................................46
Chocolate dessert (from France)......................................47
Reheating .......................................................48
Fish ............................................................49
Notes for cooking fish using the Automatic programmes ...................49
Fish ............................................................50
Hake in a herb sauce (from Spain - Merluza en salsa verde) ................50
Red mullet en Papillote .............................................51
Salt cod brandade ................................................52
Meat............................................................53
Notes for cooking meat using the Automatic programmes ..................53
Meat loaf (from Sweden) ............................................54
Christmas ham (from Sweden) .......................................55
Fillet of pork en croûte ..............................................56
Baked goods ....................................................57
Biscuits .........................................................57
Chocolate cherry muffins............................................58
Walnut muffins ....................................................59
Drop cookies .....................................................60
4

Contents
Vanilla biscuits ....................................................61
Choux buns ......................................................62
Poultry..........................................................63
Notes for cooking poultry using the Automatic programmes .................63
Duck à l'orange ...................................................64
Cakes ..........................................................65
Open apple tart ...................................................65
Apple cake.......................................................66
Apple pie ........................................................67
Apple hazelnut streusel .............................................68
Gateau ..........................................................69
Butter cake.......................................................71
Gugelhupf .......................................................72
Plaited loaf .......................................................73
Yeast dough......................................................74
Almond cake (from Spain - Tarta de Santiago) ...........................75
Marble cake ......................................................76
Fruit streusel .....................................................77
Swiss apple pie ...................................................78
Sponge cake .....................................................79
Streusel cake .....................................................80
Raisin loaf .......................................................81
Pizza ...........................................................82
Sabbath programme ..............................................83
5

Automatic programmes
Your appliance has a wide range of
Automatic programmes to enable you
to achieve excellent results with ease.
Temperatures, power levels and
cooking duration times for these
programmes are stored in the
electronics of your appliance which
have been tested by Miele.
All you have to do is select the Auto
matic programme and then the degree
of doneness required. For instance
under Beef you can select "Roast" and
then input whether you want it
"well-done", "medium" or "rare", or under
Baked goods you can select whether
you want your cake to be have a
"Normal" or "Darker" finish.
Sample recipes for different Automatic programmes are given at the
end of this booklet.
-
To use an Automatic
programme
Select "Automatic".
^
Select the relevant sub-menu for the
^
type of food you want to cook (e.g.
Cakes).
A list of different cake options will
appear in the display.
Select the relevant sub-menu for the
^
dish you want to cook (e.g. Apple
tart).
Next you need to enter your specific
^
cooking requirements, Follow the
instructions in the display.
The degree of doneness, browning
level etc. are shown by a seven
segment bar. The middle setting is
displayed by a filled-out segment in the
middle of the bar.
NH H H TTTTT H H HN
To change the setting, move the
filled-out segment to the left or right.
You can delay the start by selecting the
"Start later" option.
Entries made are shown in the display.
To finish an Automatic programme early
you have to switch the oven off.
If by the end of an Automatic
programme the food is not cooked
enough, select the "Continue cooking"
or "Continue baking" function.
6

Automatic programmes
Notes on using these programmes
When using the Automatic
–
programmes the recipes provided
are designed as a guide only.
You can use them for other similar
recipes, including those using
different quantities.
The oven interior should be at room
–
temperature before starting an Auto
matic programme.
The duration displayed at the
–
beginning of an Automatic
programme is an estimate.
Depending on the programme, the
duration can be shorter or longer.
Especially when using the food
probe, the duration will depend on
the time when the core temperature
is reached. Even the temperature of
the meat can make a difference to
the duration.
– Some programmes require the
addition of liquid or vegetables
during cooking. You will be
prompted by a message in the
display when this needs to be done
(e.g. "Add stock at ...").
Some programmes require a
–
pre-heating phase before food is
placed in the oven. A prompt will
appear to tell you when to add the
food.
The “Reheat” Automatic programme
–
is for reheating plated meals. Follow
the instructions in the display.
For frozen food follow the instructions
–
in the display.
Automatic programmes can also be
–
saved as "User Programmes" and be
saved into the Main menu. The
"Save as" option will appear in the
display at the end of the programme.
–
For sensor-controlled programmes, it
is important to keep the door shut
during the cooking process.
Otherwise the sensor can not work
properly and the cooking result will
be impaired.
To ensure the correct result please
follow the relevant messages in the
display.
7

Automatic programmes - overview
Cakes
ß
Apple tart
ß
Apple...
ß
tart
–
pie
–
with Streusel topping
–
Gateau
ß
Butter cake
ß
Guglhupf
ß
Yeast dough *
ß
prove for 15 minutes
–
prove for 30 minutes
–
prove for 45 minutes
–
Plaited loaf
ß
Almond cake
ß
ß Marble cake
ß Fruit streusel
– Yeast dough
– Quark dough
ß Swiss apple cake
ß Sponge cake
ß Streusel cake
ß Raisin loaf
ß Baked goods
ß Biscuits
ß
Muffins
–
With fruit
–
Without fruit
ß
Drop cookies
ß
Vanilla biscuits
ß
Choux buns
ß
Bread
ß
Baguettes *
ß
Flat bread*
ß
White bread in tin *
ß
Mixed grain bread *
ß
Olive bread *
ß
Rye bread **
ß
White bread on baking tray *
Bread mixes
ß
Farmhouse bread **
ß
Spelt bread *
ß
White bread in tin **
ß
Multigrain bread **
ß
Wholegrain bread *
ß
Bread rolls
ß
Croissants *
ß
Yeast rolls **
ß
Sesame cheese rolls **
ß
Pizza
ß
Fresh
ß
Yeast dough
–
Quark dough
–
ß Deep frozen
– not pre-baked
– Pre-baked
– American style
ß Meat
ß Veal
– Roast veal *
– Veal knuckle
ß Lamb
– Leg of lamb on the bone
–
Boned saddle lamb
ß
Beef
–
Fillet of beef *
–
Sirloin joint *
ß
Pork
–
Meat loaf
–
Fillet en croute
–
Boned gammon *
–
Bratwurst
–
Roast pork with crackling *
–
Ham roast
–
Christmas ham
8

Automatic programmes - overview
Game
ß
Haunch of hare
ß
Saddle of hare
ß
Venison saddle
ß
Rabbit
ß
Roebuck haunch
ß
Roebuck saddle *
ß
Poultry
ß
Duck
ß
Duck à l'orange
ß
Goose
ß
Chicken
ß
Turkey
ß
Turkey thighs *
ß
ß Fish
ß Trout
ß Carp
ß Salmon fillet
ß Salmon trout
ß Plaice
ß Red mullet en Papillote
ß Hake in a herb sauce
ß Sole
ß Salt cod brandade
Frozen food
ß
Baguettes with topping
ß
Fish fingers
ß
Potato parcels
ß
Croquettes
ß
Chips
ß
Fish pie
ß
Reheat
ß
Meat and vegetables *
ß
Meat and potatoes *
ß
Meat and dumplings *
ß
Meat and noodles *
ß
Fish and vegetables *
ß
Fish and potatoes *
ß
ß Vegetable bake *
ß Pasta bake *
ß Pasta in sauce *
ß Pizza *
ß Ragout/Frikassee *
ß Dessert
ß Crème caramel
ß Caramel pudding
ß Chocolate dessert
ß Chocolate sponge
ß
Bakes/gratins
ß
Jansson's Bake
ß
Potato gratin
–
Raw potatoes
–
Cooked potatoes
ß
Cheese soufflé
ß
Garlic soup
ß
Lasagne
–
5-7 sheets
–
8-19 sheets
–
20-29 sheets
ß
Moussaka
ß
Pasta bake
ß
Quiche Lorraine
ß
Ratatouille
ß
Spinach in puff pastry
ß
Tuna pie
ß
Slow cooking
ß
Fillet of veal
ß
Boned saddle of veal
ß
Boned gammon
ß
Boned saddle of lamb
ß
Fillet of beef
ß
Sirloin joint
ß
Pork fillet
ß
Sabbath programme
Footnotes:
* Programme with added moisture
** Programme with added moisture
+ can be cooked using "Night
baking"
9

Food probe
Using the wireless food probe enables
the temperature during the cooking
process to be monitored simply and
accurately.
How the food probe works
The metal tip of the food probe is
inserted into the food. There is a
temperature sensor in the metal tip
which measures the core temperature
of the food during cooking. The rise in
the core temperature reflects the extent
to which the food is cooked.
You can programme the core
temperature to be lower or higher,
depending on whether you want your
meat to be medium or well done.
The core temperature can be set within
a range of 30 to 99 °C. Refer to the
Roasting chart for the core temperature
range applicable for different types of
meat.
The rise in the core temperature can be
followed in the display once the core
temperature has risen above 20 °C.
The core temperature value is
transmitted by radio signal from the
food probe handle to a receiver in the
middle top heat element.
Accurate transmission is only possible
when the door is shut.
If the oven door is opened during the
cooking programme, e.g. to baste the
meat, then the radio signal is
interrupted. It will resume once the
door has been closed. It will take a few
seconds for the current core
temperature to show up in the display
again.
The food probe must not stay in the
oven if it is not in use. The
temperature sensor will be damaged
at temperatures over 100 °C.
Therefore, make sure that the food
probe is stored correctly in its holder
in the door when it is not in use.
The food probe won't be damaged
when it is inserted into the food, as it
is only possible to select core
temperatures between 30 °C and
99 °C.
The cooking programme will stop
automatically once the core
temperature you have set for the food
has been reached.
10

Food probe
Applications
Apart from Automatic programmes, the
food probe can be used with the
following functions:
Auto roast
ß
Fan Plus
ß
Moisture Plus
ß
Conventional heat
ß
Fan grill
ß
Slow cooking
ß
Important notes about using
the food probe
To ensure optimum results,
,
please observe the following
instructions.
Avoid:
– The wireless food probe can be
washed in the dishwasher.
Do not allow the handle of the food
–
probe to sit in any sauce or cooking
liquid, or to rest on the food or on the
edge of the cooking container.
Do not use the food probe to lift or
carry the food. Danger of breaking.
Note:
– The metal tip of the food probe must
be fully inserted into the centre of the
food. The handle should be angled
upwards towards the corners or the
door of the oven. Make sure it is not
horizontal.
–
Do not use deep, narrow, metal
cooking containers, as these will
disturb the radio signal.
–
Do not place any metal items above
the food probe, such as lids,
aluminium foil, racks or baking trays
on a shelf level above the food with
the food probe.
Glass lids may be used.
–
Do not use a second standard food
probe made of metal at the same
time.
–
When cooking poultry, insert the
metal tip into the thickest part of the
breast.
–
Do not let the metal tip touch any
bones or insert it into a particularly
fatty area of the meat. If fat or bone
come into contact with the probe,
this can lead to the oven being
switched off too early.
11

Food probe
If the meat is very heavily marbled
–
with fat, select the highest core
temperature given in the roasting
chart.
When using roasting bags, insert the
–
probe through the bag into the
centre of the meat. You can also
place the meat, with the food probe
inserted, inside the foil. Please follow
the manufacturer's instructions.
If wrapping the meat in aluminium
–
foil, the food probe must be inserted
through the foil to the centre of the
meat.
If an error message comes up in the
display to indicate that there is no
contact between the transmitter and
the receiver, reinsert the food probe
into a different part of the food.
To use the food probe
Follow the instructions in the display
when using an Automatic
programme. The temperature and
the core temperature are specified
by the programme.
Prepare the food in the usual way.
^
Remove the food probe from its
^
holder in the door.
The metal tip of the food probe is
^
inserted into the food. The handle
should be angled upwards.
^ Place the food in the oven and close
the door.
^ Select the oven function or Automatic
programme.
The recommended temperature will
appear highlighted.
^ Alter the recommended temperature
if necessary
12
^
Select "Core temperature - - °C".
The recommended core temperature of
60 °C will appear.
^
Alter the recommended core
temperature if necessary.
You can also delay the start of the
cooking programme to a later time.
Select the "Start time" option.

Food probe
When calculating the approx. end time,
bear in mind that the duration of a
cooking programme is approx. the
same, whether or not the food probe is
being used.
You can not enter "Duration" or "End"
because the total length of time
depends on the core temperature.
Time left display
After a certain time the estimated time
remaining (i.e. the time left to run),
appears in the oven display.
The actual core temperature is no
longer displayed and cannot be called
up.
The time remaining is calculated from
the oven temperature selected, the
required core temperature and the
pattern of the increasing core
temperature.
The time remaining first shown is an
estimate. As the cooking process
continues the time remaining is revised
continuously, and a more accurate
revised figure shown.
The time remaining will be deleted, if
–
the oven or core temperature is
changed.
–
or a different oven function is
chosen,
If the oven door was open for a longer
period of time, the time remaining will
be recalculated.
Using the residual heat, Energy save
function
Shortly before the end of the cooking
programme, the oven heating switches
off. The remaining heat in the oven is
enough to finish the cooking
programme.
Using the residual heat in the oven
saves energy.
"Energy save phase" will appear in the
display to show that the oven is in
energy save mode. The actual core
temperature is no longer visible in the
display.
The cooling fan continues to run, as do
the hot air fan if a "fan" setting has been
chosen.
When the core temperature selected
has been reached,
– the oven switches off automatically.
– the message "Programme finished"
and the
O symbol appear in the
display.
–
a buzzer will sound, if it is switched
on (see "Settings - Volume - Buzzer
tones").
If the food is not yet cooked sufficiently,
insert the food probe into another place
and repeat the programme.
13

Baking tips
Refer to the baking charts for
suggestions of temperatures, shelf
levels and cooking durations. These
take into account a range of different
baking tins, quantities and cooking
traditions.
Handling and preparing food
correctly is essential for maintaining
good health.
Only bake cakes, pizza, chips etc.
until they are golden. Do not
overcook them.
Bakeware
Please take into account the material of
your bakeware in your choice of oven
function:
Fan plus U, Intensive bake O
Any heat-resistant material can be
used.
Baking parchment
Because of their PerfectClean anti-stick
surface the baking tray and the
universal tray do not need to be
greased or lined with baking parchment
for baking.
Baked goods are easily removed when
done.
Baking parchment is only necessary
when baking:
Anything with a high salt content
–
(e. g. pretzels, bread sticks),
because sodium can damage the
PerfectClean surface.
– Meringues or biscuits with a high
egg-white content, because they
are more likely to stick.
Universal tray
When baking cakes with fresh fruit
toppings and deep sponge cakes
place the tin in the universal tray to
catch any spillages and keep the oven
cleaner.
Conventional heat V
Dark metal, enamel or aluminium
baking tins with a matt finish, as well as
heat-resistant glass and ceramic
dishes can be used.
14
Rectangular tins
Place cakes in rectangular tins with the
longer side across the width of the oven
for optimum heat distribution and even
results.

Notes about the charts
The information in brackets [ ] refer
to appliances with three shelf levels.
Temperature, baking duration
To achieve even results without
over-browning the food,
always select the lowest
–
temperature given in the chart.
Do not set a temperature higher than
that recommended. Increasing the
temperature may reduce the cooking
time, but will lead to an uneven
browning, and unsatisfactory
cooking result.
– Check if the food is cooked at the
end of the shortest time quoted.
To check if a cake is ready, insert a
wooden skewer into the centre.
It is ready if the skewer comes out
clean, without dough or crumbs
sticking to it.
Shelf level
The shelf levels are counted from the
bottom of the oven upwards.
A maximum of two trays can be baked
together in an oven with three shelf
levels.
The univsersal tray should be placed
underneath the baking tray, if you are
using a universal- and a baking tray on
several levels at the same time.
Baking tips
Number
of trays
U 12
2 1 and 3 [1 and 2]
3 1,3and5*
U 1 2 [1]
O 1 1 or 2
V 1 1 or 2
* When baking moist cakes, bread etc
do not use more than two baking tins
at the same time.
Frozen food
When baking frozen products such as
cakes, pizzas and baguettes, use the
lowest temperature quoted on the
manufacturer's packaging. Bake on a
layer of baking parchment placed on
the rack. Cooking large frozen items on
the baking tray or the universal tray can
cause the metal to distort. This
distortion would increase with
subsequent use.
Small items of frozen food such as
oven chips or potato croquettes can
be cooked on the universal tray. Place
them on parchment and select the
lowest temperature quoted on the
manufacturer's packaging. Turn several
times during cooking.
Shelf level
15

Baking chart
Fan Plus U
Cakes / biscuits
Temperature
in °C
Recommended
shelf level
1)
Creamed mixture
Sponge cake
Ring cake
Foam cake (tray)
Marble, nut cake (tin)
Fresh fruit cake with filling (tray)
Fresh fruit cake (tray)
Fresh fruit cake (tin)
Flan base
Small cakes/biscuits (tray)
150–170
150–170
150–170
150–170
150–170
150–170
150–170
150–170
150–170
2
2
2
2
2
2
2
2
1, 3 [1, 2]
4)
Sponge mix
Sponge cake (2 to 6 eggs)
Swiss roll
3)
160–180
160–180
2
2
Rubbed in mixture
Tart / flan base
Streusel cake
Small cakes/biscuits
3)
Cheese cake
Apple pie
Apricot tart with topping
Swiss apple pie
3)
(tray)
150–170
150–170
150–170
150–170
150–170
150–170
190–210
Yeast mixtures and quark dough
To prove dough
Guglhupf
Streusel cake
Fresh fruit cake (tray)
White bread
Wholegrain bread
3)
Pizza (tray)
Onion tart
Apple turnvovers
50
150–170
150–170
160–180
160–180
170–190
170–190
170–190
150–170
Choux pastry, Eclairs 160–180 1, 34)[2] 30–45
Puff pastry 170–190 1, 3
Meringues, Macaroons 120–140 1, 3 [1, 2]
2
2
1, 3 [1, 2]
2
2
2
2
Oven floor
2 [2]
2
2
2
2
2
2
4)
1, 3
[2]
4)
[2] 20–25
4)
5)
4)
1) The information in brackets [] refer to appliances with three shelf levels.
2) Unless otherwise stated, the times given are for an oven which has not been pre-heated.
With a pre-heated oven, shorten times by up to 10 minutes.
3) Pre-heat the oven if the cooking time is 20 minutes or less.
4) Take baking trays out of the oven early if the food is sufficiently browned before the specified time
has elapsed.
5) Place the rack on the floor of the oven, and stand the bowl containing the dough on the rack.
Time
in min.
60–70
65–80
25–40
60–80
45–50
35–55
55–65
25–35
20–25
20–35
15–25
20–25
45–55
15–25
70–95
50–70
55–75
30–45
15–30
50–60
35–45
35–50
50–60
50–60
35–45
35–45
25–30
25–50
2)
In general, if a range of temperatures/times is given, it is best to select a lower temperature and
to check the food after the shortest time.
16

Baking chart
Conventional heat V
Cakes / biscuits
Creamed mixture
Sponge cake
Ring cake
Foam cake (tray)
Marble, nut cake (tin)
Fresh fruit cake, with filling (tray)
Fresh fruit cake (tray)
Fresh fruit cake (tin)
Flan base
Small cakes (tray)
Sponge mix
Sponge cake (2 to 6 eggs)
Swiss roll
Rubbed in mixture
Tart / flan base
Streusel cake
Small cakes
Cheesecake
Apple pie
Apricot tart, with filling
Swiss apple pie
Yeast mixtures and quark dough
To prove dough
Gugelhupf
Streusel cake
Fresh fruit cake (tray)
White bread
Wholegrain bread
Pizza (tray)
Onion tart
Apple turnvovers
Choux pastry, Eclairs 180–200 3 [2] 35–45
Puff pastry 190–210 2 15–25
Meringues, Macaroons 120–140 2 25–50
1) The information in brackets refer to appliances with three shelf levels.
2) Unless otherwise stated, the times given are for an oven which has not been pre-heated.
With a pre-heated oven, shorten times by up to 10 minutes.
3) Pre-heat the oven.
4) Switch Rapid heat-up off during the heating-up phase (Heating-up - normal).
5) Place the rack on the floor of the oven, and stand the bowl containing the dough on the rack.
6) Shelf level for yeast dough.
3)
3) 4)
(tray)
Temperature
in °C
150–170
170–190
170–190
150–170
170–190
170–190
160–180
170–190
170–190
170–190
180–200
170–190
170–190
160–180
160–180
170–190
170–190
220–240
50
160–180
170–190
170–190
160–180
190–210
190–210
180–200
160–180
Recommended
shelf level
Oven floor
1[1 or 2]
2 [1]
2
2
2 [1]
2
2
2
2
3 [2]
3 [2]
2
2
2
3 [2]
2
2
2
1
2
2
1 [2]
2
2
2
2
1)
5)
6)
6)
Time
in min.
60–70
65–80
25–40
60–80
45–50
35–55
55–65
20–25
15–25
15–35
12–16
15–20
45–55
15–25
85–95
45–65
55–75
35–50
15–30
50–60
35–45
35–50
50–60
50–60
30–45
25–35
25–30
2)
In general, if a range of temperatures/times is given, it is best to select a lower temperature and
to check the food after the shortest time.
17

Baking chart
Intensive bake O
Particularly suitable for
dishes that require a moist topping and crisp base like pizza and quiche
–
lorraine.
Shortcrust pastry tarts (eliminates the need for blind baking). Put the raw filling
–
into the unbaked pastry base and cook as directed.
Cakes / biscuits
Creamed mixture
Fresh fruit cake, with filling (tray) 150–170 1 [2] 40–60
Rubbed in mixture
Cheesecake
Apple pie
Apricot tart, with filling
Swiss apple pie
Yeast mixtures
Pizza (tray)
Onion tart
1) The information in brackets refer to appliances with three shelf levels.
2) Unless otherwise stated, the times given are for an oven which has not been pre-heated.
With a pre-heated oven, shorten times by up to 10 minutes.
Temperature
in °C
150–170
150–170
150–170
190–210
170–190
170–190
Recommended
shelf level
1)
2
2 [1]
1 [2]
1 [2]
2
2
Time
in min.
65–75
50–60
50–60
30–40
40–50
25–35
2)
In general, if a range of temperatures/times is given, it is best to select a lower temperature and
to check the food after the shortest time.
18

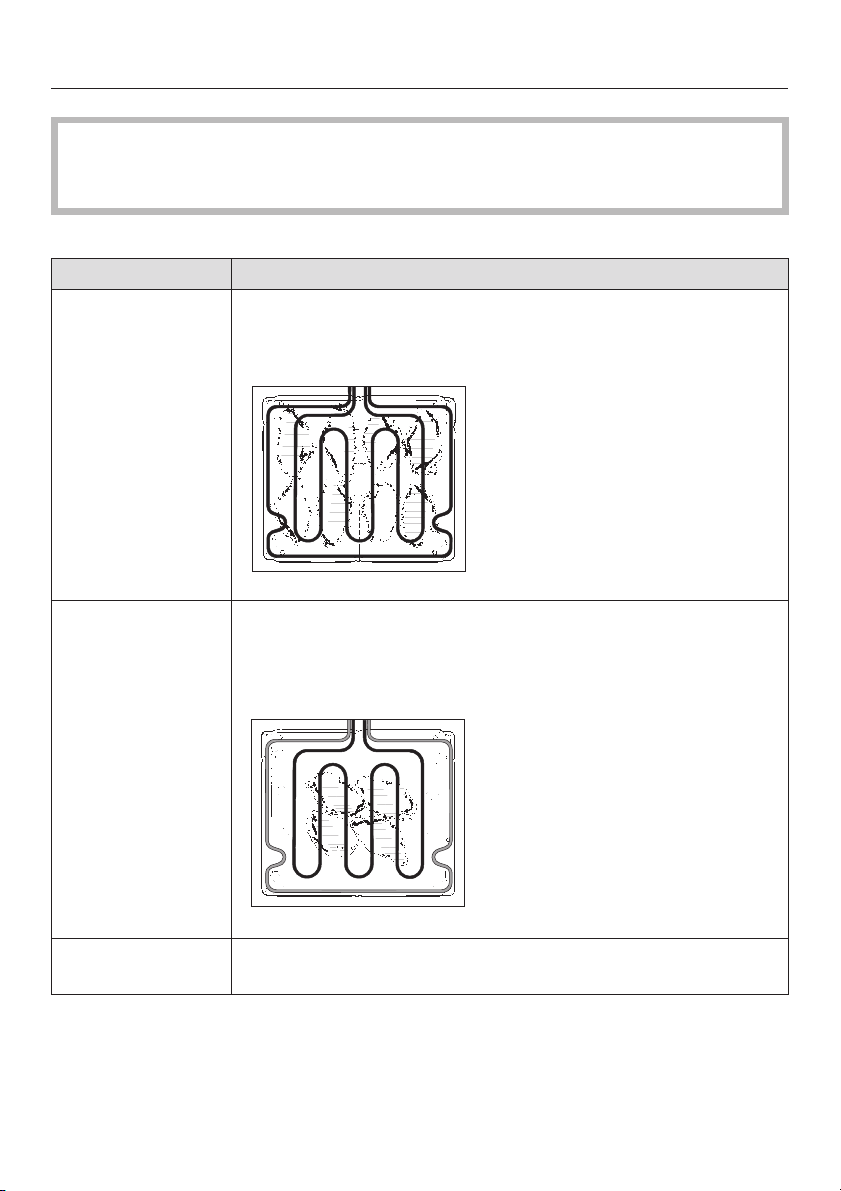
Subject Notes
Function
Auto roast [
Moisture plus d
Containers
Any heat-resistant
containers
Shelf level
1
Pre-heating
not required
Temperature
Please refer to the
Roasting chart.
Roasting times
Please refer to the
Roasting chart.
You can also use Fan Plus U.
The Miele Gourmet oven dish, roasting pans, ovenproof china
or glass, roasting bags, dishes made from earthenware or
cast iron, the universal tray, the rack on top of the universal
tray. If you have the anti-splash insert, use it in the universal
tray.
On ovens with 3 shelf levels, use shelf level 1.
Place the roasting pan on the rack into a cold oven.
– Do not select a higher temperature than that suggested.
The meat will become brown, but will not be cooked
properly.
– With Auto roast [, set the temperature 20°C less than for
Conventional heat V.
To calculate the roasting time: The traditional method is to
allow 15 to 20 minutes per lb/450 grams, according to type of
meat, plus approx. 20 minutes, adjusting the length of time as
roasting proceeds to obtain the required result.
Roasting tips
19

Roasting tips
Useful tips
Browning
Browning only occurs towards the end
of the roasting time.
Standing time
At the end of the programme, take the
roast out of the oven, wrap in aluminium
foil and leave to stand for about
10 minutes. This helps retain juices
when the meat is carved.
Frozen meat
Do not roast deep frozen meat. Meat
should be thoroughly defrosted before
roasting.
20

Roasting chart
Auto roast [/Moisture plus d
4)
Temperature
2)
in °C
150-170 30-45 60 – 85
150-170 35-45 70 – 75
Food
Topside of beef, approx. 1 kg 170-190 60-70 80 – 90
Beef fillet or roast beef, approx. 1 kg
Pork joint, approx. 1 kg 170-190 60-80 80 – 90
Pork joint with crackling, approx. 2 kg 150-170 100-120 80 – 90
Meat loaf, approx. 1 kg 140-160 60-75 75 – 80
Veal, approx. 1.5 kg 150-170 60-90 70 – 75
Leg of lamb, approx. 1.5 kg 150-170 75-90 80 – 85
Rack of lamb, approx. 1.5 kg
Poultry, 0.8–1kg 150-170 30-40 85 – 90
Poultry, approx. 2 kg 150-170 60-75 85 – 90
Poultry, stuffed, approx. 2 kg 150-170 75-90 85 – 90
Poultry, approx. 4 kg 160 150-180 85 – 90
Fish, whole, approx. 1.5 kg 160 35-45 75 – 85
1) When roasting with the food probe.
2) Temperature in a covered pot.
If open roasting, set the temperatures 20°C lower.
3) Unless otherwise stated, the times given are calculated on the basis of an oven which has not
been pre-heated.
4) Pre-heat the oven.
5) Rare: 60 – 65°C, medium: 70 – 75°C, well done: 80-85 °C
4)
Time
in min.
3)
Core temin
1)
°C
p.
5)
In general, if a range of temperatures and times is given, it is best to select a temperature in the
middle and to check the food after the shortest time.
21

Slow cooking
This Automatic programme
incorporates a cooking function,
temperature and core temperature and
is ideal for cooking beef, pork, veal or
lamb when a tender result is required.
Meat cooked at a low temperature over
a long period will be tender and
succulent.
First the meat needs to be seared all
over at a high temperature on the
cooktop in order to seal it.
The cooking process is then continued
in the oven on the Slow cooking
programme. The meat juices start to
circulate evenly throughout the meat to
reach the outer layers.
This gives very tender and succulent
results.
This Automatic programme has a
pre-set function, temperature and core
temperature.
Using the Slow cooking
programme
Select Slow cooking from the main
^
menu or from the list of Automatic
programmes.
Follow the messages given in the
^
display until the programme starts.
Whilst the oven is pre-heating, sear
^
the meat thoroughly on the cooktop.
Then place the meat on the rack and
^
insert the food probe into a fleshy
part of the joint.
Refer to the section "Food probe".
^ Cook on the shelf level specified.
The top heating element/grill
,
element is hot. Danger of burning.
At the end of the programme the
message "Programme finished" will
appear in the display and the buzzer
will sound.
22
If the meat is not cooked to your
satisfaction, you can extend the
cooking programme.
Food will be kept warm for a certain
period if it is not removed from the
appliance at the end of the programme.
"Keeping warm" will appear in the
display.

Slow cooking
Notes
For searing use a suitable cooking oil
that can withstand high temperatures.
Do not cover meat during cooking.
Pat meat dry before cooking to ensure
optimal browning.
Slow cooking without an
Automatic programme
Use a rack and the universal tray.
Select "Conventional heat".
^
Pre-heat the oven including the rack
^
and the the universal tray at 130 °C
for approximately 15 minutes.
Whilst the oven is pre-heating, sear
^
the meat thoroughly on the cooktop.
Insert the food probe right into the
^
meat until the tip of the probe
reaches the centre.
^ Place the meat on the rack.
^ Reduce the temperature to 100 °C.
^ Set the core-temperature.
Food Duration in
minutes
Roast beef
–
rare
–
medium
–
well done
Pork fillet 120–150 63
Gammon 150–210 68
Saddle of
veal
Saddle of
lamb
60–90
120–150
180–240
180–210 63
90–120 60
Core
temperat
ure in °C
48
57
69
The oven switches off automatically
after the core temperature is reached.
23
Grilling tips
Grill with the oven door closed.
,
If you grill with the door open, hot air will escape from the oven instead of being
cooled by the cooling fan. The controls will get hot. Danger of burning.
Functions Notes
Grill Y: For grilling thin cuts (less than 1.5 cm thick) in large
quantities and for browning large baked dishes.
The whole grill element will get hot and glow red.
Economy grill Z: For grilling thin cuts in small quantities and for browning
small baked dishes.
The inner part of the grill heating element will get hot and
glow red.
Fan grill \: For grilling thicker items (thicker than 1.5 cm), e.g. poultry
pieces.
24

Subject Notes
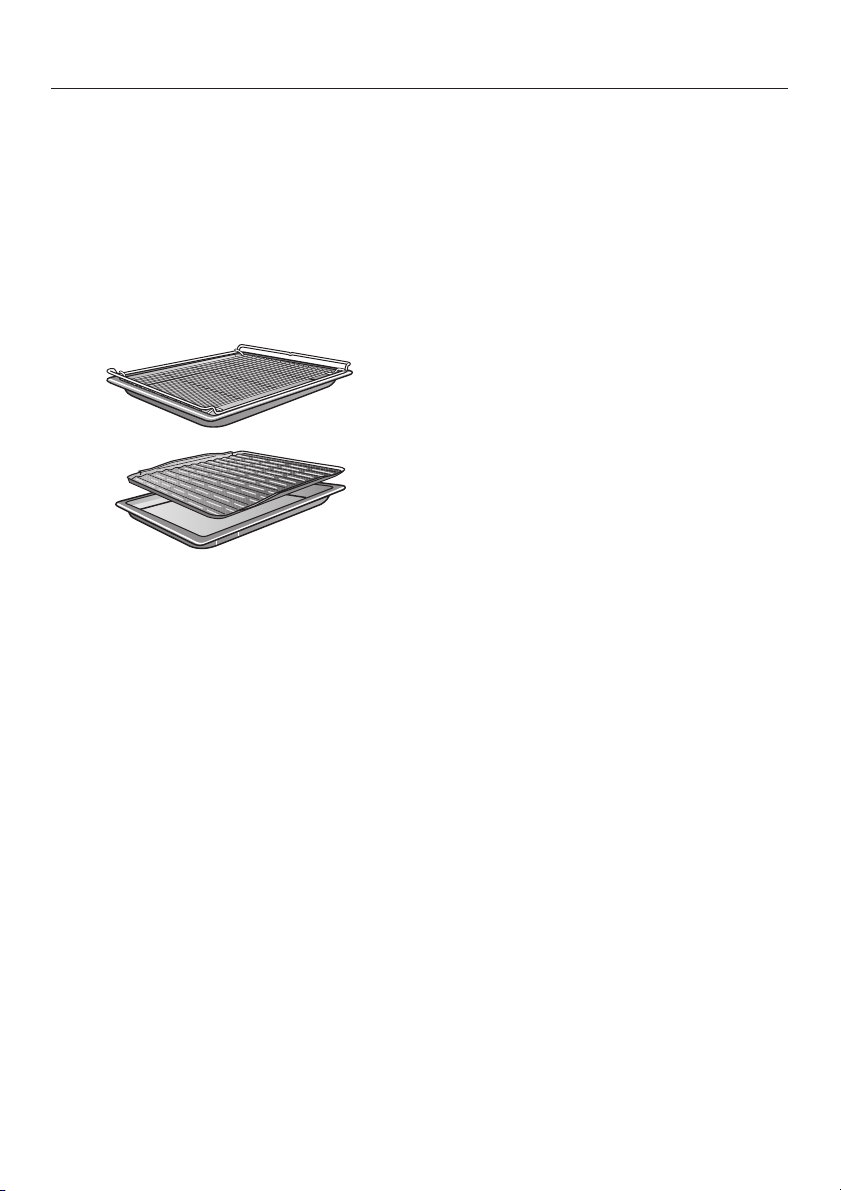
Containers
Rack on top of universal
tray. If you have the
anti-splash insert, use it
in the universal tray.
Recommended shelf
level, from the bottom
Please refer to the Grill
chart.
Pre-heating
is necessary
Temperature
Please refer to the Grill
chart.
Grilling duration
Please refer to the Grill
chart.
Do not use the baking tray.
Ovens with 5 shelf levels:
For thin cuts use shelf level 4 or 5
–
For thicker cuts use shelf level 3 or 4
–
Ovens with 3 shelf levels:
For thin cuts use shelf level 2 or 3
–
For thicker cuts use shelf level 1 or 2
–
Pre-heat the grill for approx. 5 minutes with the door
shut before grilling.
– For thin cuts of meat (e. g. chops or steak): 200°C
– For grilling thicker items 180°C
– Do not select a higher temperature than that
suggested. The meat will brown on the outside, but
will not be properly cooked through.
– Flat pieces of fish and meat usually take6–8
minutes per side. Thicker pieces take a little longer.
–
All grilled items must be turned half way through
cooking.
Grilling tips
25
Grilling tips
Preparing food for grilling
Rinse briefly under running cold water,
pat dry and season with pepper and
herbs. Do not season meat with salt
before grilling as this draws the juices
out.
Grilling
^ Place the rack or the anti-splash
insert (if you have one) on top of the
universal pan as illustrated.
^ Place the food on the rack.
^ Select the required function and set
the temperature.
Useful tips
It is best to grill food of a similar
thickness at the same time so that the
grilling time for each item does not vary
too greatly.
To cook thicker pieces of food select
Fan grill.
One way of finding out how far through
a piece of meat has been cooked is to
press down on it with a spoon.
If there is very little resistance to the
–
pressure of the spoon, it will still be
red on the inside ("rare").
– If there is some resistance the inside
will be pink ("medium").
– If there is great resistance, it is
throughly cooked through ("well
done").
^
Pre-heat the grill for approx.
5 minutes with the door shut.
^
Place the food under the grill and
shut the door.
^
Turn food half way through cooking.
26
 Loading...