

Page 1
Operating instructions
Built-in automatic coffee machine
CVA 640
for mains water connection
It is essential to read these
operating instructions before
installing or using the machine,
to avoid the risk of accident
or damage to the machine. M.-Nr. 05 557 170
Q}\
Page 2

Contents
Contents
Description of the appliance . . . . . . . . . . . . . . . . . . . . . . . . . . . . . . . . . . . . . . . . . 4
Caring for the environment. . . . . . . . . . . . . . . . . . . . . . . . . . . . . . . . . . . . . . . . . . 6
Warning and Safety instructions . . . . . . . . . . . . . . . . . . . . . . . . . . . . . . . . . . . . . 7
Brief description. . . . . . . . . . . . . . . . . . . . . . . . . . . . . . . . . . . . . . . . . . . . . . . . . . 11
Programming the appliance
Choosing a language. . . . . . . . . . . . . . . . . . . . . . . . . . . . . . . . . . . . . . . . . . . . . . . 15
Rinsing . . . . . . . . . . . . . . . . . . . . . . . . . . . . . . . . . . . . . . . . . . . . . . . . . . . . . . . . 16
Setting the water hardness . . . . . . . . . . . . . . . . . . . . . . . . . . . . . . . . . . . . . . . . . . 17
Selecting the temperature for drinks . . . . . . . . . . . . . . . . . . . . . . . . . . . . . . . . . . . 19
Switching the pre-brewing function on or off . . . . . . . . . . . . . . . . . . . . . . . . . . . . . 20
Switching the pre-grinding function on or off. . . . . . . . . . . . . . . . . . . . . . . . . . . . . 22
Switching the programmed quantity of hot water on or off . . . . . . . . . . . . . . . . . . 23
Displaying the number of cups of coffee already dispensed (Total coffee) . . . . . 24
Setting a standby time . . . . . . . . . . . . . . . . . . . . . . . . . . . . . . . . . . . . . . . . . . . . . . 24
Switching the direct water supply on or off . . . . . . . . . . . . . . . . . . . . . . . . . . . . . . 25
System lock . . . . . . . . . . . . . . . . . . . . . . . . . . . . . . . . . . . . . . . . . . . . . . . . . . . . . 27
Filling the water and coffee bean containers
Filling the coffe bean container . . . . . . . . . . . . . . . . . . . . . . . . . . . . . . . . . . . . . . . 28
Filling the water container (if applicable) . . . . . . . . . . . . . . . . . . . . . . . . . . . . . . . . 29
Setting the portion sizes
Coffee and espresso cups. . . . . . . . . . . . . . . . . . . . . . . . . . . . . . . . . . . . . . . . . . . 31
Tea cup . . . . . . . . . . . . . . . . . . . . . . . . . . . . . . . . . . . . . . . . . . . . . . . . . . . . . . . . . 32
Making coffee
Warming the system and the cups . . . . . . . . . . . . . . . . . . . . . . . . . . . . . . . . . . . . 34
Espresso, coffee, large (long) coffee. . . . . . . . . . . . . . . . . . . . . . . . . . . . . . . . . . . 36
Cancelling preparation . . . . . . . . . . . . . . . . . . . . . . . . . . . . . . . . . . . . . . . . . . . 38
To prepare two cups simultaneously. . . . . . . . . . . . . . . . . . . . . . . . . . . . . . . . . 38
Cappuccino . . . . . . . . . . . . . . . . . . . . . . . . . . . . . . . . . . . . . . . . . . . . . . . . . . . . . . 39
Hot water . . . . . . . . . . . . . . . . . . . . . . . . . . . . . . . . . . . . . . . . . . . . . . . . . . . . . . . . 41
After use. . . . . . . . . . . . . . . . . . . . . . . . . . . . . . . . . . . . . . . . . . . . . . . . . . . . . . . . . 42
Page 3

Contents
Programming the coffee grinder
Grinding the coffee . . . . . . . . . . . . . . . . . . . . . . . . . . . . . . . . . . . . . . . . . . . . . . . . 43
Setting the quantity . . . . . . . . . . . . . . . . . . . . . . . . . . . . . . . . . . . . . . . . . . . . . . . . 44
Cleaning and care
Rinse button . . . . . . . . . . . . . . . . . . . . . . . . . . . . . . . . . . . . . . . . . . . . . . . . . . . . . . 45
Water container . . . . . . . . . . . . . . . . . . . . . . . . . . . . . . . . . . . . . . . . . . . . . . . . . . . 45
The appliance front and interior. . . . . . . . . . . . . . . . . . . . . . . . . . . . . . . . . . . . . . . 46
Drip tray . . . . . . . . . . . . . . . . . . . . . . . . . . . . . . . . . . . . . . . . . . . . . . . . . . . . . . . . . 46
Waste unit. . . . . . . . . . . . . . . . . . . . . . . . . . . . . . . . . . . . . . . . . . . . . . . . . . . . . . . . 47
Brew unit . . . . . . . . . . . . . . . . . . . . . . . . . . . . . . . . . . . . . . . . . . . . . . . . . . . . . . . . 48
Rinsing cycle: Degreasing the brew unit . . . . . . . . . . . . . . . . . . . . . . . . . . . . . 49
Cleaning the steel filters . . . . . . . . . . . . . . . . . . . . . . . . . . . . . . . . . . . . . . . . . . 51
Lubricating the brew unit . . . . . . . . . . . . . . . . . . . . . . . . . . . . . . . . . . . . . . . . . 52
Milk frother . . . . . . . . . . . . . . . . . . . . . . . . . . . . . . . . . . . . . . . . . . . . . . . . . . . . . . . 53
Replacing the seals . . . . . . . . . . . . . . . . . . . . . . . . . . . . . . . . . . . . . . . . . . . . . . . . 53
Descaling the appliance . . . . . . . . . . . . . . . . . . . . . . . . . . . . . . . . . . . . . . . . . . . 54
Automatic descaling . . . . . . . . . . . . . . . . . . . . . . . . . . . . . . . . . . . . . . . . . . . . . . . 55
Display Messages . . . . . . . . . . . . . . . . . . . . . . . . . . . . . . . . . . . . . . . . . . . . . . . . 58
Problem solving . . . . . . . . . . . . . . . . . . . . . . . . . . . . . . . . . . . . . . . . . . . . . . . . . . 59
After sales service . . . . . . . . . . . . . . . . . . . . . . . . . . . . . . . . . . . . . . . . . . . . . . . . 65
Direct water connection. . . . . . . . . . . . . . . . . . . . . . . . . . . . . . . . . . . . . . . . . . . . 66
The Waterproof sytem . . . . . . . . . . . . . . . . . . . . . . . . . . . . . . . . . . . . . . . . . . . . . . 66
Fitting the Waterproof system . . . . . . . . . . . . . . . . . . . . . . . . . . . . . . . . . . . . . . . . 66
Maintenance and care . . . . . . . . . . . . . . . . . . . . . . . . . . . . . . . . . . . . . . . . . . . 67
Electrical connection U.K., ZA, IRL . . . . . . . . . . . . . . . . . . . . . . . . . . . . . . . . . . 69
Installation
Building-in options . . . . . . . . . . . . . . . . . . . . . . . . . . . . . . . . . . . . . . . . . . . . . . . . . 71
Installation . . . . . . . . . . . . . . . . . . . . . . . . . . . . . . . . . . . . . . . . . . . . . . . . . . . . . . . 72
Adjusting the hinges . . . . . . . . . . . . . . . . . . . . . . . . . . . . . . . . . . . . . . . . . . . . . 73
Glossary . . . . . . . . . . . . . . . . . . . . . . . . . . . . . . . . . . . . . . . . . . . . . . . . . . . . . . . . 74
Page 4
Description of the appliance
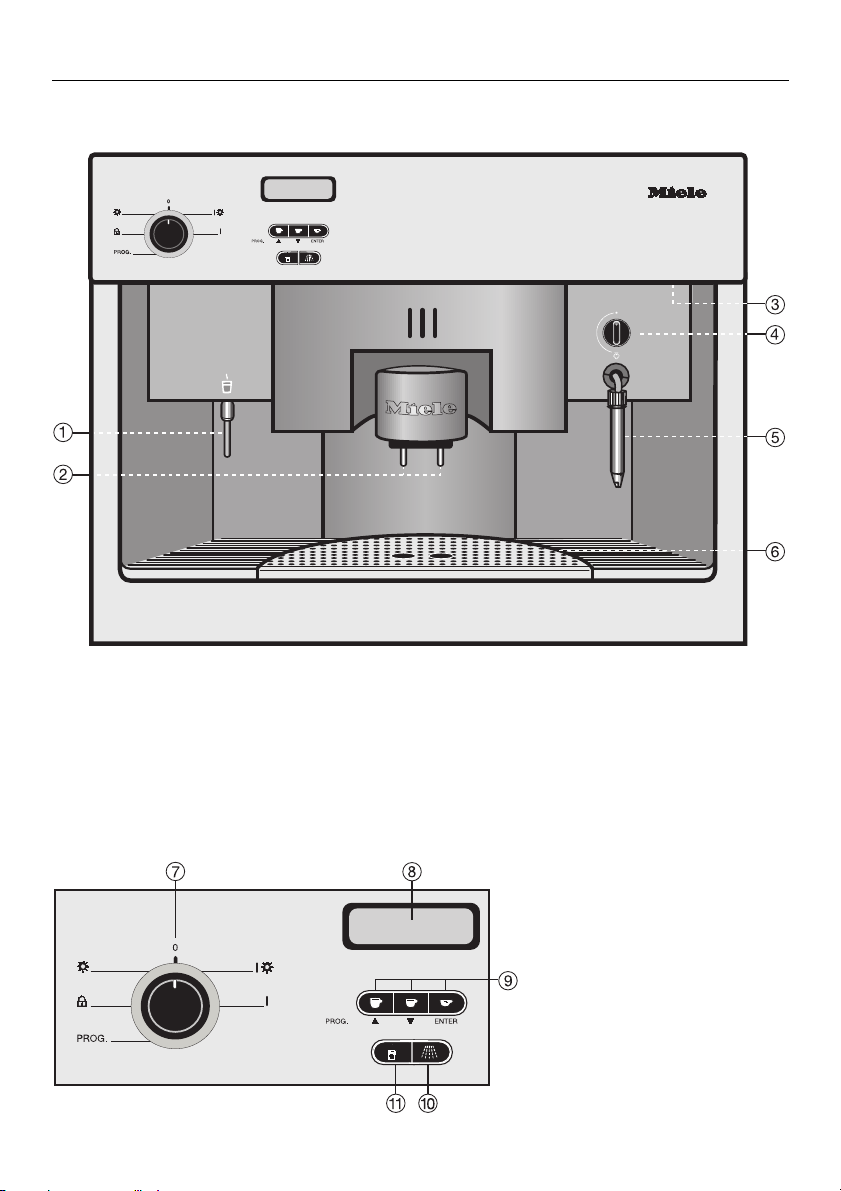
Description of the appliance
External view
b Hot water spout
c Coffee spouts, height-adjustable
d Handle to open appliance front
e Control dial for steam
f Steam spout
g Drip tray (with container below to
catch the drips)
4
h Selector switch
i Display
j Coffee portion buttons
k Rinse and
pre-warming button
l Hot water button
Page 5

Interior view
Description of the appliance
m Coffee bean container
n Slide control to select fineness
of ground coffee
o Slide control to select quantity
of ground coffee
p Water container
q Waste unit
r Brew unit
Coffee glossary
To help you understand the language of coffee, please read the glossary of coffee
terms at the end of this instruction book.
5
Page 6

Caring for the environment
Caring for the environment
Disposal of the packing
material
The transport and protective packing
has been selected from materials
which are environmentally friendly for
disposal and can normally be recycled.
Ensure that any plastic wrappings,
bags etc. are disposed safely and kept
out of the reach of babies and young
children. Danger of suffocation!
Rather than just throwing these materials away, please ensure they are offered for recycling.
Disposal of your old appliance
Old appliances may contain material
which can be reclaimed or recycled.
Please contact your dealer, your local
waste collection centre or scrap merchant about potential recycling
schemes.
See the appropriate section in the
Warning and safety instructions.
6
Page 7

Warning and Safety instructions
Warning and Safety instructions
This appliance conforms to current
safety requirements. Incorrect use
can lead to injury and damage to
the appliance.
Before installation and before using
for the first time, read the operating
instructions carefully. They contain
important notes on safety and the
operation and care of the appliance. This way you will avoid the
risk of accidents and damage to the
appliance.
Keep these instructions in a safe
place and pass them on to any future user.
Correct usage
The appliance is intended for do-
mestic use only for the preparation
of espresso, cappuccino, coffee and
hot water for tea and similar drinks. Any
other usage is not supported by the
manufacturer and could be dangerous.
The manufacturer cannot be held responsible for damage caused by improper use of the appliance.
Technical safety
Before connecting the appliance to
the mains supply make sure that
the rating on the data plate corresponds to the voltage and frequency of
the household supply.
This data must correspond in order to
avoid risk of damage to the appliance.
Consult a competent person if in doubt.
The electrical safety of this ap-
pliance can only be guaranteed
when continuity is complete between
the appliance and an effective earthing
system which complies with local and
national regulations. It is most important that this basic safety requirement is
tested by a qualified electrician.
The manufacturer cannot be held responsible for the consequences of an
inadequate earthing system (e.g. electric shock).
The appliance must be built in be-
fore operation to ensure that no
electrical components are accessible.
Ensure power is not supplied to the appliance while installation work, repairs
or maintenance is being carried out.
Do not connect the appliance to
the mains electricity supply by an
extension lead.
Extension leads do not guarantee the
required safety of the appliance, (e.g.
danger of overheating).
When installed in the mobile unit
(optional extra) the appliance is
not suitable for use in the open air.
7
Page 8

Warning and Safety instructions
This equipment is not designed for
maritime use or for use in mobile installations such as caravans, aircraft
etc. However it may be suitable for
such usage subject to a risk assessment of the installation being carried
out by a suitably qualified engineer.
Before the appliance is connected,
the steam control dial must be in
the off position. This is to prevent an uncontrolled escape of steam or hot water
from the steam spout. Danger of burning!
This appliance is not suitable for
connection to hot water.
The stopcock must be accessible
for servicing work after the appliance has been built-in.
The Waterproof system contains
electrical components and must
not be allowed to get wet.
Danger of electric shock!
The protective sleeve of the hose
must not be damaged. This will render it unsafe.
The Miele Waterproof System of-
fers protection from water damage,
provided the following conditions are
met:
– The appliance is correctly installed
and plumbed in.
– The appliance is properly maintained
and parts are replaced where it can
be seen that this is necessary.
– The stopcock has been turned off
when the appliance is not used for a
longer period of time (e.g. during
holidays).
Installation work and repairs may
only be carried out by suitably
qualified and competent persons to ensure safety. Repairs and other work by
unqualified persons could be dangerous and the manufacturer will not
be held responsible.
The appliance is only completely
isolated from the electricity supply
when:
– the mains fuse is withdrawn
– or the screw-out fuse is removed (in
countries where this is applicable)
– or it is switched off at the wall socket
and the plug is removed.
Do not pull on the cable, only on the
plug.
Never open the housing of the ap-
pliance. Tampering with electrical
connections or components and mechanical parts is highly dangerous to the
user and can cause operational faults
or electric shock.
If the coffee machine is to be built
in above another appliance, there
must be a full-width, closed shelf between the appliances (except when it is
combined with a built-in plate warming
drawer).
In countries where there are areas
which may be subject to infestation
by cockroaches or other vermin,
pay particular attention to keeping
the appliance and its surroundings
in a clean condition at all times. Any
damage which may be caused by
cockroaches or other vermin will not
be covered by the appliance guarantee.
8
Page 9

Warning and Safety instructions
Use
Warning. Danger of burning! The
spouts and the liquids dispensed
are very hot.
Children should not use the ap-
pliance unsupervised. Their skin is
very sensitive and reacts to hot temperatures. Danger of burning!
Remember that espresso is not a children’s drink.
The water piping must be rinsed
through and the machine cleaned
thoroughly before the first drink of coffee is prepared.
Only cold, fresh drinking water
should be used to fill the water container. Warm or hot water or other
liquids could damage the appliance.
Change the water every day to prevent
a build up of bacteria.
Never put anything other than es-
presso/coffee beans in the coffee
bean container. It must never be filled
with ground coffee as this would damage the grinder.
Sugar can damage the machine.
Only use pure coffee beans. Do
not use coffee beans which have been
treated with caramel, sugar or other
substances. Do not put drinks containing sugar, or instant coffee in the machine.
The hot water and steam could
cause scalding. These functions
must therefore be used carefully. Never
direct the steam spout towards the
body.
The machine must never be used to
clean objects.
Always ensure that the steam con-
trol dial is turned to the off position
when not needed. Otherwise there is a
danger of an uncontrolled escape of
steam.
Danger of burning!
Never use steam cleaning ap-
paratus to clean the appliance.
The steam could attack the electrical
components and cause a short circuit.
Clean the appliance every day to
prevent a build-up of bacteria.
All parts should all be hand washed.
Only the steam spout and the metal
grille are dishwasher proof.
The steam and hot water spouts
become very hot during use. Always grip the steam spout by the insulated part.
The appliance should be descaled
regularly, depending on the hardness of the water, with a solution of citric acid. The harder the water, the
more often the machine must be descaled. The manufacturer cannot be
held responsible for damage arising
from insufficient descaling.
Follow the instructions on the
packet of descaling agent carefully
and use the exact proportions recommended to avoid damage to the machine.
9
Page 10

Warning and Safety instructions
Depending on the fat content of
the coffee used, the brew unit
could become blocked. Clean it every
2 to 4 months with a cleaning tablet.
Used coffee grounds should be
put with the organic rubbish or on
the compost heap, but not emptied
down the sink, as they could block it.
Never hang anything on the front
when it is open. This could damage the appliance.
Disposal of your old appliance
Before discarding an old ap-
pliance, switch off and disconnect
it from the power supply . Cut off and
render any plug useless. Disconnect
the inlet hose from the stopcock.
This will prevent the appliance from
being misused.
The manufacturer cannot be held
liable for damage caused by noncompliance with these Warning and
Safety instructions.
10
Page 11

Brief description
Brief description
This appliance can be plumbed into a
mains drinking water supply, thus eliminating the need to refill the water container.
Unlike standard coffee machines, this
appliance has a container for coffee
beans so that they can be freshly
ground for every cup, to benefit fully
from the flavour.
First the ground coffee is moistened
with hot water (pre-brewing), to develop the aroma. Next hot water is
forced at high pressure through the
ground coffee. The pre-brewing process is optional.
The used coffee grounds are automatically emptied into the waste unit. There
is no need to remove the grounds manually after each cup.
The size of cup (max. 250 ml) can be
programmed in so that the correct
amount of coffee is dispensed. If the
cup being used has a smaller capacity
than the programmed cup size, prep-
aration can be halted at any time by
pressing one of the coffee portion buttons.
If two cups of coffee or espresso are
required at the same time, the appropriate coffee portion button must be
pressed twice. The machine will fill the
cups in two stages with a slight pause
in between.
The machine can be programmed to
grind from 6 to 9g of coffee, depending
on the type. The programmed-in quan-
tity will be the same for all sizes of cup
(small/espresso, medium coffee, large
coffee). Only the amount of water will
change.
The fineness to which the coffee is
ground can also be programmed in.
The hot water from the hot water spout
is at an ideal temperature for making
tea.
The light can be switched on independently of operation.
In the interests of safety, the electricity
supply is switched off as soon as the
front of the appliance is opened. There
is also a system lock to prevent children from operating the machine.
The easy to use programming facility
allows amongst other things the language in the display window to be altered, and the water hardness to be
programmed in.
To ensure that the flavour can develop
fully and be maintained for longer the
appliance has an additional function to
automatically rinse and pre-warm the
system.
11
Page 12

Brief description
Hot water from the hot water spout can
be used to pre-warm the cups.
The appliance can be programmed to
switch to standby mode so it is always
ready for operation but does not consume unnecessary electricity. This can
be programmed to happen between 15
minutes and 12 hours 45 minutes after
coffee was last dispensed.
To save time when preparing coffee for
a number of people, the pre-grind function can be selected, so there is always
a portion of ground coffee ready.
12
Page 13

Programming the appliance
Programming the appliance
The appliance can be programmed in easy stages
for setting to your exact requirements. The following
programming options are available:
Language German, Dutch, Portuguese,
Spanish, English, Italian, French
Rinse On / Off button
Water hardness hardness 1, hardness 2,
hardness 3, hardness 4
Temperature large coffee
minimum, low, medium, high, maximum
Temperature medium coffee
minimum, low, medium, high, maximum
Temperature small / espresso coffee
minimum, low, medium, high, maximum
Pre-brewing on, off, long
Pre-grinding off, on
Programme hot water off, on
Total coffee number of coffee portions
Descaling automatic descaling programme
Standby timer to switch off time, selectable in 15
minute stages
Direct water supply On / Off button
A more detailed explanation of the programme options is given in the individual sections.
13
Page 14

Programming the appliance
To programme the appliance,
turn the programme dial to the programming position:
The machine is now in programming mode. Follow the symbols under the buttons.
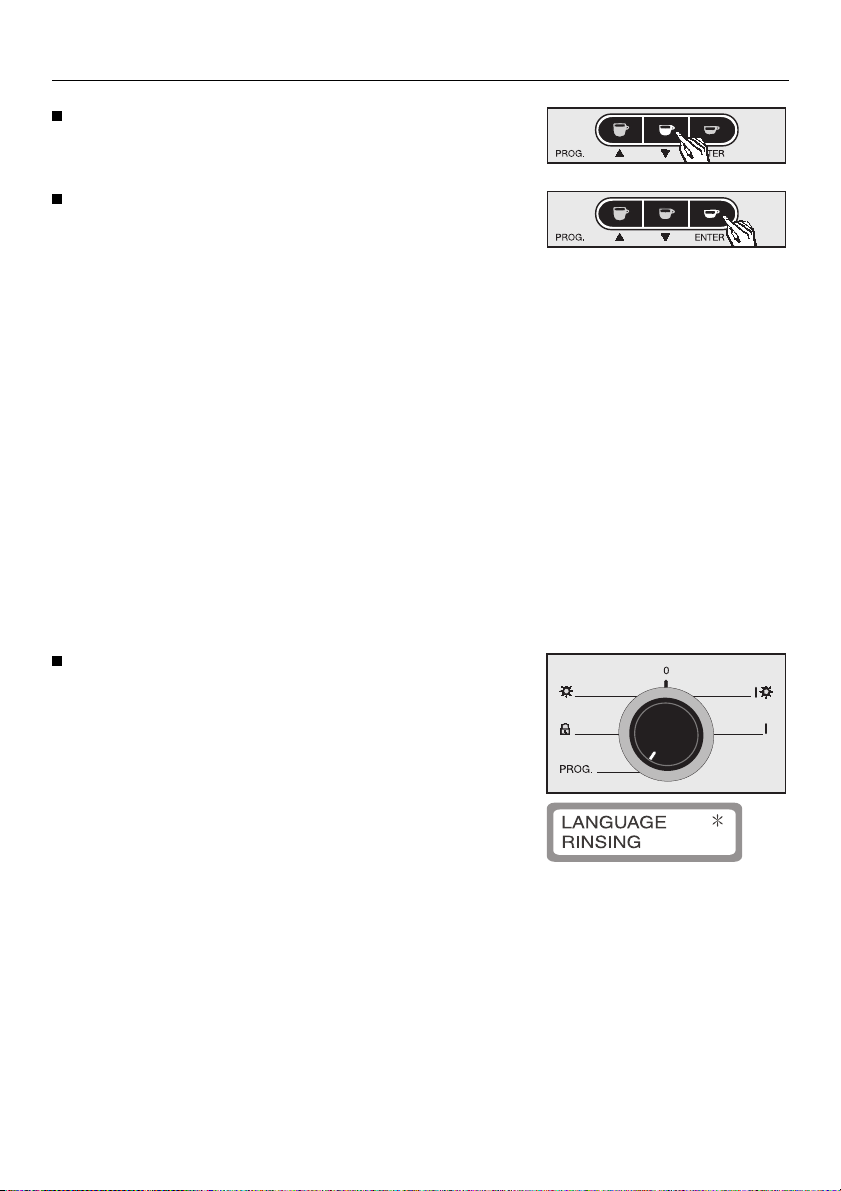
By pressing the - or e button
– the required programming option in the display
can be highlighted with an asterisk. Press ENTER
to select the required option.
– the settings of the various programming options
can be altered.
– a time can be entered for the Standby option.
By pressing ENTER
– a programming option highlighted with an aste-
risk can be selected.
– an alteration to the programmed settings can be
saved.
If a setting is altered by mistake, do not
press ENTER. Turn the programming dial
to position “0”. The altered setting will not
be saved and the original setting will be retained.
14
Page 15

Programming the appliance
Choosing a language
The language for the commands in the display can
be selected before the machine is used for the first
time.
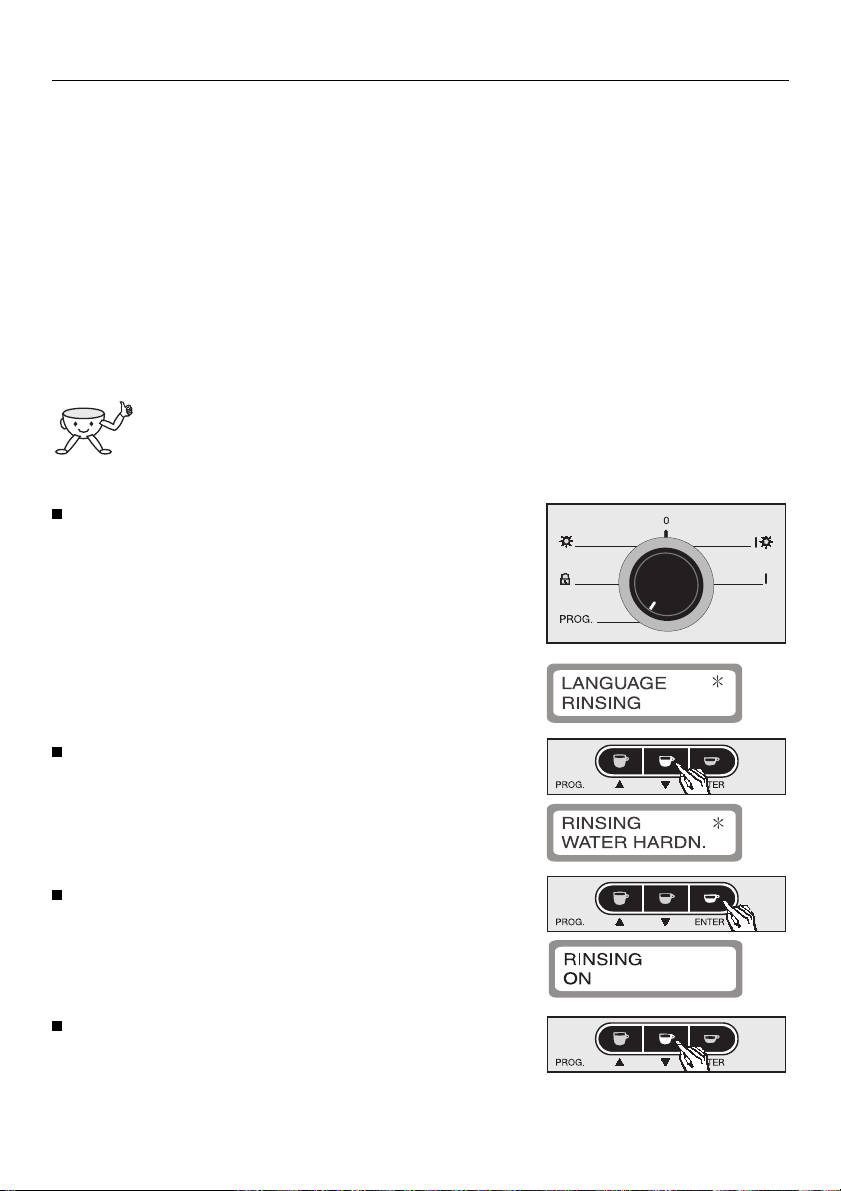
Turn the programme dial anti-clockwise to the programming position:
The machine is now in programming mode. Follow the symbols under the buttons.
The following will appear in the display:
Programming option “Language” will be highlighted with an asterisk.
Press ENTER to confirm this option.
The sub-menu will appear in the display as follows:
Press the e button until the required language appears (deutsch, nederlands, portugues, espanol,
english, italiano or francais)
Press ENTER to save this setting, or
turn the programming dial to “0” to undo the al-
terations if a mistake has been made.
This will bring you back from the sub-menu.
All commands in the display will now appear in the
selected language.
15
Page 16
Programming the appliance
Rinsing
To remove any coffee grounds from the system the
water piping must be rinsed through and the machine cleaned thoroughly before the first drink of coffee is prepared. If programme "Rinsing" is set to
"On" rinsing will start automatically when the appliance is cold and the selector switch is set to the
"On" position, with or without lighting. This will warm
the brew unit up at the same time because hot
water is used for the rinse process. A suitable message will appear in the display.
To prevent water from running into the drip
tray always place an empty cup under the
coffee spouts before making the first cup
of coffee.
Turn the programme dial anti-clockwise to the programming position:
The machine is now in programming mode. Follow the symbols under the buttons.
The following will appear in the display:
Press the e button to highlight programming option “Rinsing” with an asterisk.
Press ENTER to confirm this option.
The sub-menu will appear in the display as follows:
Press the e button to switch rinsing on or off.
It is a good idea to set this programme to "On" so
that the rinse process cannot be forgotten.
16
Page 17
Programming the appliance
Press ENTER to save this setting, or
turn the programming dial to “0” to undo the al-
terations if a mistake has been made.
This will bring you back from the sub-menu.
Setting the water hardness
For trouble-free operation of the coffee machine,
and to ensure that the descaling indicator comes on
at the appropriate time, it is important to programme
in the water hardness. The water hardness indicates
how much calcium is dissolved in the water. The
higher the calcium content, the harder the water is.
The machine monitors the volume of water passing
through it in conjunction with the hardness of the
water. Less hard water can be allowed to pass
through before descaling than soft water.
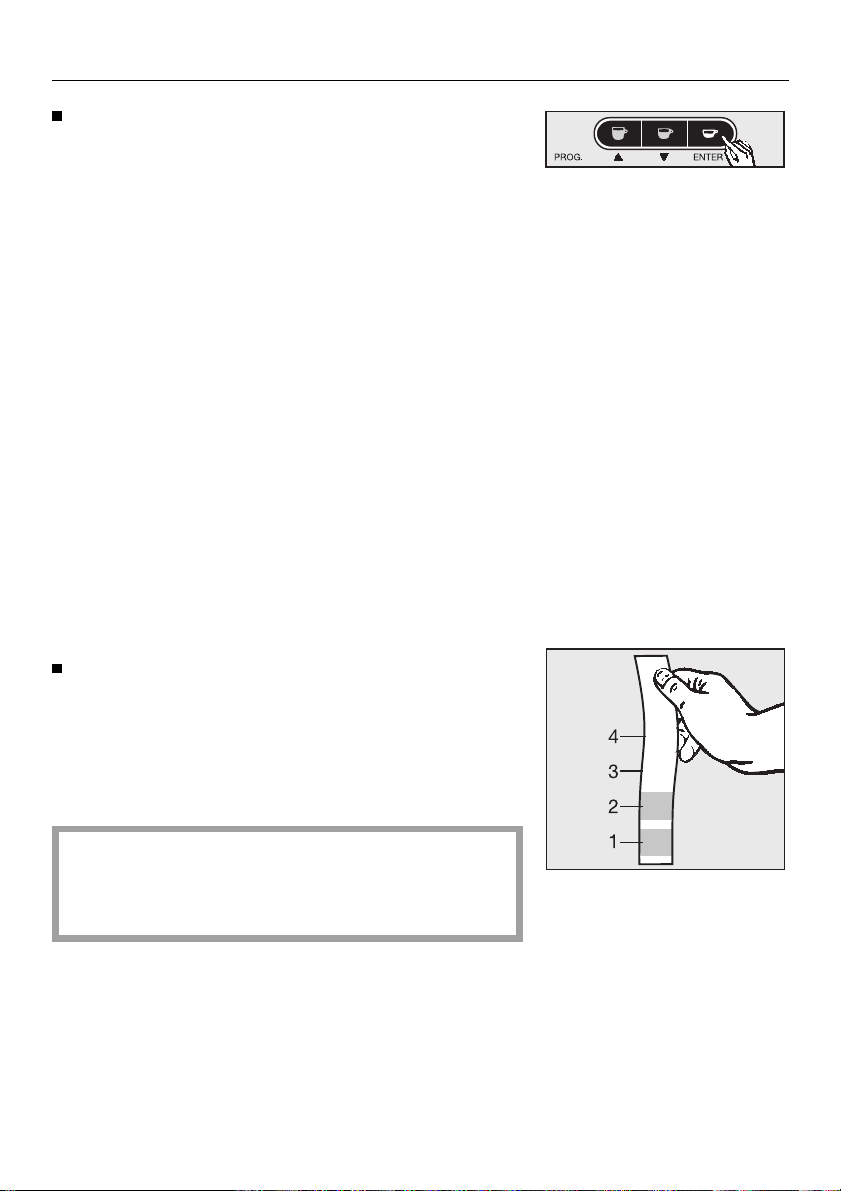
The local water authority will be able to tell you the
hardness of water in your area. Alternatively, you
can measure the hardness yourself using the enclosed test strip:
Dip the test strip in your drinking water for approximately a second, then shake off any excess
water.
The result will be evident after about a minute.
If the water is harder than 7.0 mmol/l or 700 mg/l
(40 °d), it should be mixed with an equal proportion of still mineral water to avoid damage to the
machine. Never use distilled water.
17
Page 18

Programming the appliance
Use programming option “Water hardness” to programme in the water hardness.
There are four programmable levels:
Level
(machine)
Hardness 1
Hardness 2
Hardness 3
Hardness 4
Hardness
(local water)
1 (soft) 0 -3 0 –1.3 approx. 500
1 (soft) 4 -7 1.3 –2.5 approx. 300
2 (medium) 7 - 14 2.5 - 3.8 approx. 150
3 (hard)
4 (very hard)
(German
scale)
14 - 21
over 21
mmol/l Water through-
°d
over 3.8 approx. 80
flow in litres
Turn the programme dial anti-clockwise to the programming position:
The machine is now in programming mode. Follow the symbols under the buttons.
The following will appear in the display:
Press the e button to highlight programming option “Water hardness” with an asterisk.
Press ENTER to confirm this option.
The sub-menu will appear in the display as follows:
Press the e button to set the water hardness level
(hardness 1 - hardness 4).
Press ENTER to save this setting, or
turn the programming dial to “0” to undo the al-
terations if a mistake has been made.
This will bring you back from the sub-menu.
18
Page 19

Programming the appliance
Selecting the temperature for drinks
The appliance can be set at different temperatures
to suit varying coffee drinking habits.
Five temperature levels are available for each drink
option. Maximum is the highest temperature, minimum the lowest.
Not all types of coffee can withstand a high
temperature. Certain types are too delicate and the froth on top would not be so
good.
Turn the programme dial anti-clockwise to the programming position:
The machine is now in programming mode. Follow the symbols under the buttons.
The following will appear in the display:
Press the e button to highlight programming option “Temp. L coffee” for large coffee, “Temp. coffee” for medium coffee or “Temp. S coffee” for
small / espresso coffee with an asterisk.
A different temperature can be programmed in for
each drink option.
Press ENTER to confirm this option.
Depending on the programming option selected,
the sub-menu appears in the display as follows:
19
Page 20
Programming the appliance
Press the e button to set the temperature to minimum, low, medium, high or maximum.
Press ENTER to save this setting, or
turn the programming dial to “0” to undo the al-
terations if a mistake has been made.
This will bring you back from the sub-menu.
Switching the pre-brewing function on
or off
When the pre-brewing function is switched on, the
freshly ground coffee is first moistened with a little
hot water. Then the remaining water is forced
through the moistened coffee at high pressure. This
pre-brewing process allows the aroma and froth of
the coffee to develop to the full.
When the pre-brewing function is switched off, the
hot water is forced through the coffee immediately.
Turn the programme dial anti-clockwise to the programming position:
The machine is now in programming mode. Follow the symbols under the buttons.
The following will appear in the display:
20
Page 21

Programming the appliance
Press the e button to highlight programming option “Pre-brewing” with an asterisk.
Press ENTER to confirm this option.
The sub-menu will appear in the display as follows:
Press the e button to switch the pre-brewing process on, off or to “long” (an extra long pre-brew).
Press ENTER to save this setting, or
turn the programming dial to “0” to undo the al-
terations if a mistake has been made.
This will bring you back from the sub-menu.
When making coffee with the pre-brewing function
switched on, the word “Pre-brewing” will appear in
the display after the coffee has been ground.
21
Page 22
Programming the appliance
Switching the pre-grinding function on
or off
When the pre-grinding function is switched on, a
new portion of beans will be ground immediately
each time a cup is prepared, so there is always a
portion of ground coffee in readiness. This saves
time and is particularly useful when making coffee
for a number of guests. To prevent loss of aroma,
however, the pre-grinding function should be
switched off when only preparing coffee occasionally.
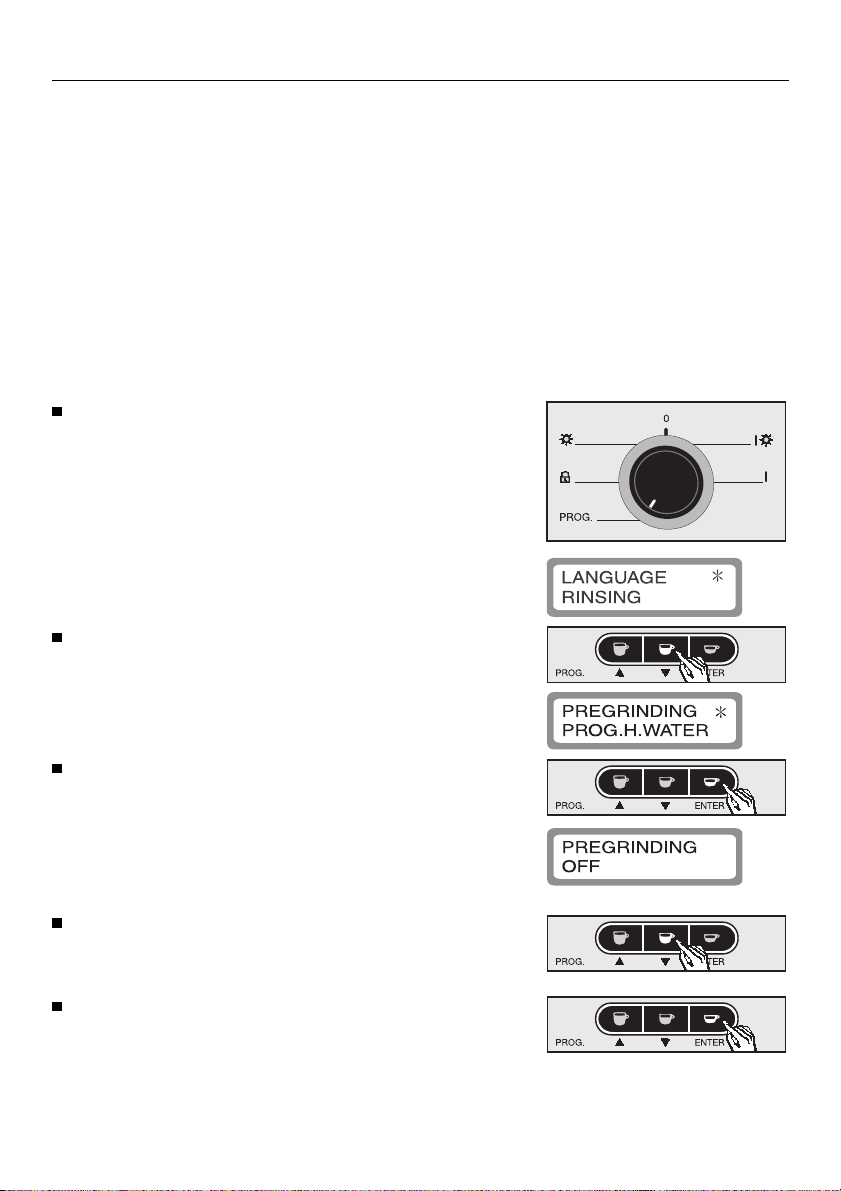
Turn the programme dial anti-clockwise to the programming position:
The machine is now in programming mode. Follow the symbols under the buttons.
The following will appear in the display:
Press the e button to highlight programming option “Pre-grinding” with an asterisk.
Press ENTER to confirm this option.
The sub-menu will appear in the display as follows:
Press the e button to switch the pre-grinding function to On or Off.
Press ENTER to save this setting, or
turn the programming dial to “0” to undo the al-
terations if a mistake has been made.
This will bring you back from the sub-menu.
22
Page 23
Programming the appliance
Switching the programmed quantity of
hot water on or off
If the function "Programmed hot water” is switched
on, the machine will dispense a precise, pre-programmed quantity of hot water when the hot water
button d is pressed. (See section below on programming in the quantity of hot water.) When the function is switched off, the machine will dispense hot
water freely if the hot water button d is pressed, and
continue to do so until the button d is pressed again.
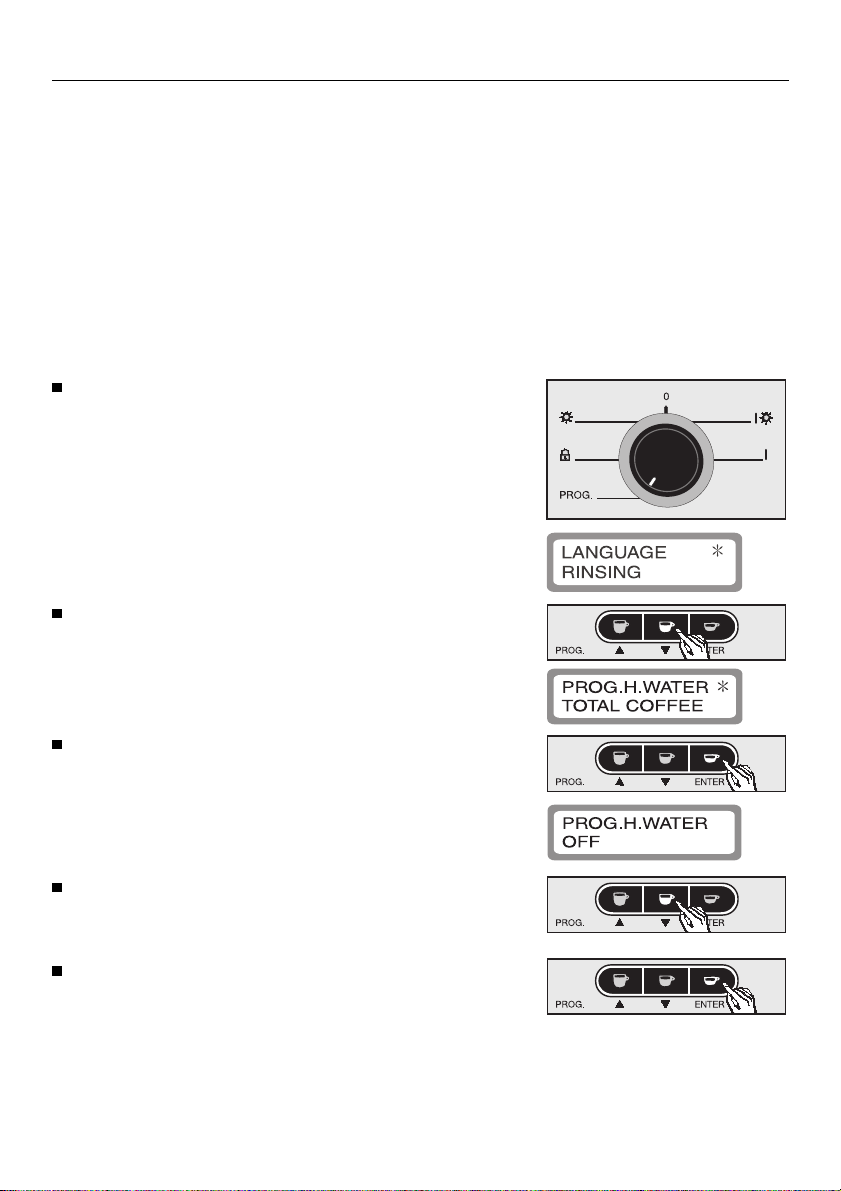
Turn the programme dial anti-clockwise to the programming position:
The machine is now in programming mode. Follow the symbols under the buttons.
The following will appear in the display:
Press the e button to highlight programming option “Prog. Hot water” with an asterisk.
Press ENTER to confirm this option.
The sub-menu will appear in the display as follows:
Press the e button to switch the function to On or
Off.
Press ENTER to save this setting, or
turn the programming dial to “0” to undo the al-
terations if a mistake has been made.
This will bring you back from the sub-menu.
23
Page 24

Programming the appliance
Displaying the number of cups of coffee
already dispensed (Total coffee)
Select function “Total coffee” and press ENTER to
display the number of cups of coffee (small / espresso, medium coffee, large coffee) that have been
dispensed to date. Press ENTER again to bring you
back from the sub-menu.
Setting a standby time
To ensure that the coffee machine does not consume unnecessary electricity and yet is always
ready for operation, it can be switched to energysaving mode via programming option “Timer”. The
lighting also switches off in energy-saving mode.
The length of time before it switches to this mode
can be programmed in. This can be between 15
minutes and 12 hours and 45 minutes. The time is
measured from the last time coffee/water was dispensed.
If the time is set at 0:00, the machine will not switch
to energy-saving mode.
Whenever the programming dial is turned
to “0” or the appliance front is opened, the
machine will begin to calculate the time
again.
Turn the programme dial anti-clockwise to the programming position:
The machine is now in programming mode. Follow the symbols under the buttons.
The following will appear in the display:
24
Page 25

Programming the appliance
Press the e button to highlight programming option “Timer” with an asterisk.
Press ENTER to confirm this option.
The sub-menu will appear in the display as follows:
Press the e or - button to select the required
length of time (
time can be set in 15 minute stages.
Press ENTER to save this setting, or
turn the programming dial to “0” to undo the al-
terations if a mistake has been made.
This will bring you back from the sub-menu.
e counts down, - counts up). The
Switching the direct water supply on or
off
The appliance is designed to be plumbed into the
mains drinking water supply. This mains water connection can however be switched on or off. When
this is set to "on" water is drawn off the mains supply
and when set to "off" water is taken from the appliance’s water container.
If the plumbing is set to "on" and there is
still a lot of water in the appliance’s water
container the following message will appear in the display:
This message is there to remind you to empty the
container, otherwise the water will no longer be
fresh. The appliance is barred from operation whilst
there is still water in the container.
25
Page 26

Programming the appliance
A small amount of water is always left in the container after use. It should be emptied even if the
"Empty Watertank" message does not appear!
Turn the programme dial anti-clockwise to the programming position:
The machine is now in programming mode. Follow the symbols under the buttons.
The following will appear in the display:
Press the e button to highlight programming option “Dir. Water supply” with an asterisk.
Press ENTER to confirm this option.
The sub-menu will appear in the display as follows:
Press the e button to switch the function to On or
Off.
Press ENTER to save this setting, or
turn the programming dial to “0” to undo the al-
terations if a mistake has been made.
This will bring you back from the sub-menu.
26
Page 27

System lock
The machine can be locked to ensure that it is not
operated by unsupervised children or persons who
are unacquainted with the operating instructions.
Activating the system lock
Turn the programme dial anti-clockwise to the
"Lock" position.
The following will appear in the display:
Press the - button until
the following appears in the display:
The appliance is now locked and cannot dispense.
The system will remain locked even if the programming dial is turned to other positions and the lighting
will remain switched off.
System lock
Deactivating the system lock
Turn the programme dial anti-clockwise to the
"Lock" position.
The following will appear in the display:
Press the - button until
the following appears in the display:
The machine is now unlocked and ready to dispense.
27
Page 28

Filling the water and coffee bean containers
Filling the water and coffee bean containers
Please clean the machine thoroughly before filling the water container (where applicable) and
the coffee bean container, (see the Section on
Cleaning and care).
Only put espresso or coffee beans in the container. Anything else, including ground coffee,
could damage the grinder. Only use pure coffee
beans.
Do not use coffee beans which have been treated
with caramel, sugar or other substances. Do not
put drinks containing sugar, or instant coffee in the
machine. Sugar will damage the machine.
For technical reasons, the coffee bean container
must not be removed from the appliance.
Filling the coffee bean container
Open the front of the machine.
Carefully pull the container out as far as it will go,
so that the lid is fully visible. Lift the lid.
Fill the container with coffee beans to within about
2 cm of the top.
Close the lid and push the container back into
place.
Close the front of the machine.
28
Page 29

Filling the water and coffee bean containers
Filling the water container (if applicable)
The quality of the water plays an important
part in the overall quality of the coffee. If
running the machine from a direct water
supply completely empty the water container and
dry it thoroughly. If running the machine from the
water container, fill it with cold fresh drinking water
just before you need it and make sure the machine
is switched to run from the water tank.
Hot water and other liquids could damage the
machine.
Lift the water container up and pull it forwards to
remove.
Open the lid and fill the container with cold, clean
drinking water to within about 2 cm of the top.
A valve in the base of the container will ensure
that no water can escape.
Close the lid and replace the container in the machine, pushing it right to the back.
The container should now be sitting flat on the
floor of the machine.
29
Page 30

Setting the portion sizes
Setting the portion sizes
Important: before preparing the very first cup
of coffee, the water piping must be rinsed
through several times to flush out any residues
remaining from the factory testing of the machine. (See Cleaning and care: Rinse button)
The flavour of the coffee produced depends on the
type of coffee, how finely the beans are ground and
the quantity of water used. Espresso, coffee and tea
cups vary in size. To ensure the machine uses
exactly the amount of water to suit your taste and
your cups, there is a choice of four different portion
sizes (max. 250 ml):
three portion sizes for espresso/coffee and one for
tea.
The coffee portion buttons are designed for the following types of coffee:
The small / espresso button a dispenses a standard size espresso to be served in a standard espresso cup.
The medium coffee button b dispenses coffee for
a standard size coffee cup. It uses the same quantity of ground coffee as an espresso, but adds more
water.
The large coffee button c dispenses a large coffee, suitable for a large coffee cup or mug. Again,
only the volume of water is increased, resulting in a
milder flavour.
The volume of water dispensed by each button can
be altered to suit your needs.
Have the correct size of cup available to carry out
the following steps.
30
Page 31

Setting the portion sizes
Coffee and espresso cups
Turn the programming dial clockwise to the In
Operation position with or without lighting:
The following messages will appear in succession in
the display:
"Rinsing" will only show in the display if the rinse programme is switched on and the appliance is cold,
and only then will the following appear in the display
after the appliance has warmed up:
Hot water will run out of both spouts into the drip
tray. The system is now rinsed out and pre-warmed.
Wait until the following appears in the display:
Place one cup under the two coffee spouts.
The coffee is always dispensed simultaneously
from both spouts.
Press the coffee portion button appropriate to the
size of cup until the cup is as full as required. Release the coffee portion button.
The grinding process appears in the display:
31
Page 32

Setting the portion sizes
Warning: Leave the cup under the spouts
for a few seconds after the coffee has
been dispensed to catch any remaining
drips.
The procedure is the same for the other two coffee portion buttons.
The volumes of water programmed in will now be
dispensed every time.
Tea cup
To programme in the volume of water for a
tea cup, function “Prog. hot water” must
be switched on. (See the section on
“Switching the programmed hot water on or off”).
Turn the programming dial clockwise to the In
Operation position with or without lighting:
The following messages will appear in succession in
the display:
"Rinsing" will only show in the display if the rinse programme is switched on and the appliance is cold,
and only then will the following appear in the display
after the appliance has warmed up:
Hot water will run out of both spouts into the drip
tray. The system is now rinsed out and pre-warmed.
Wait until the following appears in the display:
32
Page 33

Setting the portion sizes
Place a tea cup under the hot water spout.
Press the hot water button d until the cup is as
full as required. Then release the hot water button. d
There will be a few seconds delay before water
is dispensed.
The following will appear in the display during this
procedure:
The volume of hot water programmed in
will now be dispensed every time.
If the function “Prog. hot water” is switched "off",
the machine will dispense hot water freely until the
hot water button d is pressed again to stop it.
33
Page 34

Making coffee
Making coffee
Important: the water piping must be rinsed
through and the machine cleaned thoroughly before the first drink of coffee is prepared. This will
take place automatically if the Rinsing programme is set to "On" and the appliance is cold.
Hot water will run out of both spouts into the drip
tray once the appliance has heated up. The following two messages will appear in succession
in the display:
If the "Rinsing" programme was set to "Off" press
the Rinse button to rinse out the system (see
"Cleaning and care").
Before making the very first drink the system
should be rinsed through several time to remove
any residual water still in the appliance from the
quality control tests.
To prevent water from running into the drip
tray always place an empty cup under the
coffee spouts before making the first cup
of coffee. Otherwise the drip tray will need to be
emptied regularly.
Warming the system and the cups
The system and the cups should always be prewarmed to allow the flavour to develop and be retained. The aroma of espresso does not react well to
cold, so the appliance has a pre-warming function.
Turn the programming dial clockwise to the In
Operation position with or without lighting:
If the programming dial is already in this position
with the message “Standby. . .” shown in the dis-
play, the machine is in energy-saving mode. Press
ENTER to switch it into operation.
34
Page 35

The following will appear in the display:
Wait until the following appears in the display:
Pre-warming cups
The smaller the volume of coffee/espresso, the more
important it is to pre-warm the cup.
Place the cup under the hot water spout.
Press the hot water button d and half fill the cup.
Press the hot water button d again to stop.
Making coffee
Leave the cup for a few seconds to warm, then
pour the water away. In the meantime, pre-warm
the system.
Pre-warming the system
Place a cup or container under the two coffee
spouts.
The water for pre-warming will be dispensed simultaneously from both spouts.
35
Page 36

Making coffee
Press the rinsing and pre-warm button e.
The following will appear in the display:
Press ENTER again to confirm your selection.
Hot water will be dispensed from both spouts, warming the system. The following will appear in the display:
Place the empty, pre-warmed cup under the two
coffee spouts, and prepare the coffee.
Small / espresso, medium coffee, large
coffee
The size of portion dispensed by each of the coffee
portion buttons can be programmed in according to
individual and national tastes (see the section on
“Setting the portion sizes”).
The coffee spouts are height-adjustable to suit
different sizes of cup:
Gently pull the dispensers downwards.
This ensures that coffee is dispensed directly into
the cup, giving it less chance to cool down, and
ensuring that the froth is retained.
Small / espresso, medium and large coffees are
all dispensed in the same way:
Turn the programming dial clockwise to the In
Operation position with or without lighting:
36
Page 37

If the programming dial is already in this position
with the message “Standby. . .” shown in the dis-
play, the machine is in energy-saving mode. Press
ENTER to switch it into operation.
The following will appear in the display:
Wait until the following appears in the display:
Place a cup under both coffee spouts.
The coffee is always dispensed simultaneously
from both spouts.
Press the required coffee portion button once.
Making coffee
The coffee will be prepared.
Depending on the portion selected, the following will
appear in the display:
If “Pre-brewing” is switched on, the following will appear in the display:
Warning: Leave the cup under the spouts
for a few seconds after the coffee has
been dispensed to catch any remaining
drips.
37
Page 38

Making coffee
Cancelling preparation
To cancel the coffee making process, press one
of the coffee portion buttons and preparation will
be stopped immediately.
To prepare two cups simultaneously
Place a cup under each of the coffee spouts.
Press the required coffee portion button twice in
quick succession to bring up two cups g in the
display.
The machine will fill the cups in two stages with a
slight pause in between. Depending on the portion
selected, the following will appear in the display:
If “Pre-brewing” is switched on, the following will appear in the display after the grinding process:
Leave the cups under the spouts until the
two cups have disappeared from the dis-
play. The process is now finished.
38
Page 39

Cappuccino
To make cappuccino you need a china or porcelain
cup, a large container such as a milk jug and milk.
Cold, low-fat milk (1.5% fat) is best for cre-
ating froth and ideally it should be pre-
pared in a cold, stainless steel jug that narrows towards the top.
Fill the jug/container about one third full with cold
milk and dispense a portion of espresso into a
china cup.
The volume of the milk in the jug will double or
triple when frothed. If the jug is too full to start
with, the milk could overflow, leading to a risk of
scalding.
Direct the steam spout towards the drip tray and
slowly turn the steam control dial anti-clockwise.
Making coffee
Any condensed water in the spout will be expelled.
As soon as steam appears from the spout, switch
the steam off by turning the control dial clockwise
o
to the
position.
39
Page 40

Making coffee
Position the steam spout just below the surface of
the milk in the jug and slowly turn the steam control dial anti-clockwise.
Move the jug in circles until a thick froth has built
up, then lower the spout deeper into the milk to
heat the rest.
Do not let the milk boil! This would cause
the froth to collapse and a skin to form.
With a little practice, you will soon achieve
perfect results.
Switch the steam off. by turning the control dial
clockwise to the
o
position.
Take the jug away from the steam spout. Carefully
pour the milk into the coffee and spoon some
froth onto the surface.
The cappuccino is ready. As a finishing
touch, sprinkle a little cocoa powder over
the froth.
Always clean the steam spout immediately after
use, as it is harder to clean once milk has dried on.
(See section on “Cleaning and care”.)
40
Page 41

Hot water
When it is switched on, the machine will dispense
hot water at any time for tea or other drinks.
Turn the programming dial clockwise to the In
Operation position with or without lighting:
If the programming dial is already in this position
with the message “Standby. . .” shown in the dis-
play, the machine is in energy-saving mode. Press
ENTER to switch it into operation.
The following will appear in the display:
Wait until the following appears in the display:
Place a suitable container (e.g. a tea cup) under
the hot water spout.
Making coffee
Press the hot water button d.
Hot water will be dispensed from the hot water
spout.
As soon as the container is full, press the hot
water button d again.
The machine will stop automatically if a
volume has been programmed in for hot
water and function “Prog. hot water” is
switched on.
41
Page 42

Making coffee
After use
Before switching the machine off for any
length of time, place a cup under the cof-
fee spouts and press the e button.
This will rinse the system, brew unit and spouts of
any coffee remains. (The appliance must be operational and heated up, otherwise it will not react
when this button is pressed).
The following will appear in the display:
Press ENTER again to confirm your selection.
Hot water will be dispensed from both spouts, to
clean the water pipes, the brew unit and the coffee
spouts. The following will appear in the display:
42
Page 43

Programming the coffee grinder
Programming the coffee grinder
A good espresso with a thick, even froth depends
not only on the quality, pressure and temperature of
the water and the quality of the coffee beans, but
also on the quantity of beans and how finely they
are ground.
The froth should have an even colour with dark
stripes running through it.
Grinding the coffee
To avoid damage to the machine, the slide control for the coffee grinder setting should be
moved carefully and in small stages.
There are various ways to tell whether the coffee
grinder is set correctly:
– If espresso flows too quickly into the cup, it
means that the coffee has been ground too coarsely and the pressure is not sufficient. The grinder
should be set on a finer setting.
– If espresso only trickles into the cup, the coffee
has been ground too finely and the coffee will be
bitter. The grinder should be set on a coarser setting.
– If the froth is evenly coloured but pale, this is also
a sign that the coffee beans have been ground
too coarsely.
– If the froth is very dark brown on one side, grad-
uating almost to white on the other, it suggests
that coffee beans have been ground too finely.
43
Page 44

Programming the coffee grinder
To alter the grinder setting
push the upper slide control to the left (for finer
grinding) or to the right (for coarser grinding).
You should be able to feel the notches clearly
when moving the slide control.
If the slide refuses to move,
close the machine and dispense a cup of espresso coffee.
Then try the slide control again.
Setting the quantity
Both the flavour and the froth on the coffee depend
on the quantity of ground coffee used.
6 to 9 grammes of coffee beans are used per cup,
depending on the type of coffee. The greater the
quantity, the stronger the flavour will be.
The quality of the froth is also affected by the quantity:
– If the froth is evenly coloured but pale, it could
mean that too little coffee is being used.
– If the froth is very dark brown on one side, grad-
uating almost to white on the other, it could mean
that too much coffee is being used.
To alter the amount of coffee to be ground,
push the lower slide control to the left (to grind
less coffee) or to the right (to grind more coffee).
44
Page 45

Cleaning and care
Danger - always allow the machine to cool down
before cleaning. Danger of scalding!
Do not clean the appliance with a steam cleaner
to avoid damage to the machine.
Never use cleaners containing chlorides, sand,
soda or scouring agents. These would damage
the surface.
It is important to clean the machine regularly, as the
used coffee grounds will soon go mouldy.
Rinse button
Before switching the machine off for any length of
time, place a cup under the coffee spouts and press
the e button.
This will rinse the system, brew unit and spouts of
any coffee remains.
(The appliance must be operational and heated
up as otherwise it will not react when the button is
pressed.)
Cleaning and care
The following will appear in the display:
Press ENTER again to confirm your selection.
Hot water will be dispensed from both spouts, to
clean the water pipes, the brew unit and the coffee
spouts. The following will appear in the display:
Water container
If running the machine from a direct water supply
completely empty the water container and dry it thoroughly. If running the machine from the water container, fill it with cold fresh drinking water just before
you need it and make sure the machine is switched
to run from the water container. This way the water
will not stagnate and collect bacteria.
45
Page 46

Cleaning and care
The appliance front and interior
Clean the front and the interior of the machine with a
solution of hot water and washing up liquid. Dry with
a cloth.
On the inside of the front there is a funnel. Underneath the funnel is a small sponge to catch any
drips. Rinse the sponge out every day.
Drip tray
At the rear of the drip tray is a float which will protrude from the drip tray when it is full. Remove the
tray and empty and clean it.
To avoid a build-up of odour the drip tray should be
cleaned every day.
Remove the grille from the drip tray.
The metal grille can be washed in a dishwasher.
The plastic grille should be washed by hand with
a solution of hot water and washing up liquid
Open the appliance front.
Carefully remove the drip tray and wash it by
hand with a solution of hot water and washing up
liquid.
Dry all the pieces and replace them in reverse
order.
Close the front of the machine.
46
Page 47

Waste unit
Clean the waste unit daily to prevent coffee grounds
from turning mouldy.
There will probably also be water in the waste unit
left over from the rinsing process.
Grasp the waste unit and pull it forwards to
remove.
Clean the waste unit by hand with hot, mild soapy
water and dry with a cloth.
Push the unit back into the machine, positioning it
over the notches.
Ensure that the container is correctly in
place.
It must sit level and secure. Otherwise the
appliance will not work.
Cleaning and care
If the “Empty wasteunit” message appears in the
display window after you have just cleaned the
unit out you will need to take it out of the machine and push it back into position again and
then press the ENTER button. Otherwise the machine will get blocked. This is a safety feature to
prevent the waste unit from overflowing. The machine counts the number of times coffee
grounds are emptied into the waste unit. It automatically prompts you to empty it after a certain
number of times.
47
Page 48

Cleaning and care
Brew unit
As soon as the waste unit has been cleaned, the
brew unit must be cleaned as well.
The brew unit can only be removed when the
waste unit has been taken out.
The brew unit must be cleaned by hand because the moving parts are lubricated and the
rubber seals could become brittle in a dishwasher.
Lubricate parts of the brew unit as necessary
(approx. every 500 portions) with the silicone lubricant supplied, to keep the machine working
smoothly (see “Lubricating the brew unit”).
Grasp the brew unit by the handle and press the
part marked PRESS with the thumb.
Carefully pull the brew unit out.
If the brew unit is difficult to remove it is not correctly positioned, (see Problem solving guide).
Clean the brew unit thoroughly under hot running
water without washing-up liquid.
Wipe any remaining coffee off the steel filters.
There is one filter inside the funnel and a second
one to the left of it. The second one can be
removed for cleaning (see "Cleaning the filters").
Dry the funnel area to prevent ground coffee from
sticking to it.
Directly after cleaning, press the part marked
PRESS once.
48
Page 49

Slide the brew unit back into the machine along
the guiding runners, without pressing the part
marked PRESS, until you hear it click into place.
Rinsing cycle: Degreasing the brew unit
Depending on the fat content of the coffee
used, the brew unit could become
blocked and affect the taste of the coffee.
It should therefore be cleaned after approx. 500 portions have been prepared with a cleaning tablet,
which can be ordered via the request card.
Remove the brew unit and place a cleaning tablet
in the funnel.
Cleaning and care
Replace the brew unit in the appliance and close
the door.
Place a container, minimum capacity 0.75 litres,
under both coffee spouts.
Press the Rinsing and Pre-warming e button.
(The appliance must be operational and heated
up as otherwise it will not react when the button is
pressed.)
The following will appear in the display:
49
Page 50

Cleaning and care
Press the e button to highlight programming option “Rinsing cycle” with an asterisk.
Press ENTER.
The following will appear in the display:
A small amount of water will run out of the spouts,
then a small pause before requesting the next
amount of water. This procedure is carried out 4
times. On the last rinse about half a litre of water
runs out. The whole procedure takes approx. 5
minutes.
At the end of the cleaning cycle, the following will
appear in the display:
50
The brew unit has now been cleaned of all
residues and cleaning agents. It is ready
for use again.
Page 51

Cleaning the steel filters
Wipe any remaining coffee off the steel filter in
the funnel of the brew unit to keep the machine
in good working order.
The steel filter to the left of the funnel can be
removed for thorough cleaning. Check it from time
to time to see if it is dirty and clean it whenever
necessary.
Remove the brew unit.
Fit the hexagonal key supplied to the connection
point in the brew unit, turn anti-clockwise while
gripping the filter firmly.
Remove the filter with the screw.
Clean the filter with hot water and dry thoroughly.
Replace the fiter in the brew unit and secure it by
carefully turning the hexagonal key clockwise.
Press down lightly on the filter to make sure it engages correctly.
Cleaning and care
51
Page 52

Cleaning and care
Lubricating the brew unit
Remove the brew unit carefully.
While carrying out these operations ensure that the brew unit is correctly set up.
For this the funnel must be set a little
higher and the socket be standing vertically (see
the illustration, or the "Problem solving guide").
Smear a little silicone lubricant on the joints b, in
the axle
e.
c, on the runners d and on sealing ring
Clean bolt b and then smear a little silicone lubricant on it and on joints
Place the brew unit in the machine.
52
c.
Page 53

Milk frother
Always clean the steam spout immediately after
use, as it is harder to clean once milk has dried on.
Pull the steam spout cover downwards.
Clean the cover with a mild solution of hot water
and washing up liquid or in the dishwasher, then
dry it.
Push the cover back into position on the steam
spout.
Cleaning and care
Replacing the seals
The appliance has three seals. One in between the
steam spout and the steam spout cover, and two
more behind the brew unit on the outlet housing.
Replace the seals whenever they cease to be
watertight.
53
Page 54

Descaling the appliance
Descaling the appliance
The machine should be descaled regularly to ensure that it functions correctly. To remind you when
this needs to be carried out "Descaling" will appear
in the display.
The descaling process must be carried out when
this happens, if not sooner.
The appliance will still continue to operate when
this message appears. However the appliance
will suffer damage if this message is ignored.
Only use a proprietary descaling preparation
which is based on liquid citric acid and speciifed
as being suitable for use in coffee machines. Do
not use anything else, including powder, vinegar
essence or solution, or amino acids, as these
could damage the machine, cause an unpleasant odour and taste.
Follow the instructions on the packet of descaling agent carefully and use the exact proportions recommended
Allow the machine to cool down before descaling
and remove the steam spout cover of the milk
frother as this could be damaged by the descaling
agent.
Open the front of the machine.
Lift the water container up and pull it forwards to
remove.
54
Page 55

Descaling the appliance
Remove the water container and fill it at least half
full with the correct solution of descaling agent
and water. (When using the bio-intensive descaling agent supplied, fill the water container half full
with water max. 50 °C and empty the entire ampoule of descaling agent into the water.)
A valve in the base of the container will ensure
that no water can escape.
Close the lid and replace the container in the machine, pushing it right to the back.
The container should now be sitting flat on the
floor of the machine.
Close the front of the machine.
The descaling process can now be carried out automatically using the “Descaling” programme or manually.
Automatic descaling
Turn the programme dial anti-clockwise to the programming position:
Press the e button to highlight programming option “Descaling” with an asterisk.
Press ENTER to confirm this option.
The following will appear in the display:
55
Page 56

Descaling the appliance
Place a large container (approximately 1 litre)
under the hot water spout.
Place a large container (approximately 1 litre)
under the steam spout and turn the steam control
dial anti-clockwise.
The descaling process will commence automatically.
The following will appear in the display:
The descaling process will automatically stop if
the programming dial is turned to “0” or if the
front of the appliance is opened. It will resume
when the front is closed again or the dial turned
to another position.
If a smaller container is used, remember
to empty it at intervals.
The pump will introduce a small quantity of descaling agent into the system, then stop for a while to let
the solution take effect. The process will take 20 to
30 minutes, depending on how full the water container is.
When the programme is finished, the following will
appear in the display:
56
Page 57

Descaling the appliance
Turn the steam control dial clockwise to the o position.
Press ENTER.
The following will appear in the display:
The machine must now be rinsed out to remove all
traces of the descaling agent.
Three quarters fill the water container with fresh,
cold water and place it in the machine.
Place good sized empty containers under the hot
water spout and steam spout and turn the steam
control dial anti-clockwise.
Allow all the water to empty out of the machine
via the spouts.
The system is now rinsed, removing all traces of the
descaling agent.
When the water container is empty, the following will
appear in the display:
Turn the steam control dial clockwise back to the
o
position and press ENTER.
If the programming dial is in the programme position, the following will appear in the display:
The appliance has been descaled and
rinsed clean of any descaling agent.
When connected to a direct water supply
the water container must be cleaned and thoroughly
dried to prevent residual water stagnating and providing a breeding ground for bacteria.
It is ready for use again.
57
Page 58

Display Messages
Display Messages
The appliance has an electronic safety system that reports any problems in the
display. Most faults are easily recitifed.
Message Cause + Effect Solution
Fill coff. beans
Ready for use
Brewunit block. The brew unit is dirty. The appliance is
Brew unit miss. The brew unit is not correctly in place.
Descaling The appliance needs to be descaled. Descale the appliance.
Expel air Air has built up in the system. The
Waste unit miss. The waste unit is not correctly
Empty wasteunit
Press ENTER
Standby. . .
Press ENTER
Watersystem
fault
Fill water tank The water container is empty or
Empty Water tank The machine is set for a direct water
The coffee bean container is empty.
The appliance is only dispensing hot
water and steam.
blocked.
The appliance is only dispensing hot
water and steam.
appliance is blocked.
positioned or is missing. The appliance
is blocked.
The waste unit is full. Dispensing has
been halted, to prevent coffee grounds
from falling into the appliance.
The appliance is in energy-saving
mode. The lighting is switched off.
There is water in the base of the
appliance.
missing.
The float switch in the water container
is stuck.
supply, but there is still water in the
water container.
Fill the container with coffee beans.
Clean the brew unit.
Remove the brew unit and reposition it.
– Make sure that the water inlets and
stopcocks are in order, and that there is
water intake into the appliance (where
there is a direct water supply).
– If the water is supplied from the water
container, ensure that the water container
has water in it.
– Turn the programming dial to In
Operation with lighting and place a
container under the hot water spout and
another under the steam spout.
– Press the hot water button, turn the
steam selector dial anti-clockwise and
dispense hot water until it flows in a
quiet, continuous stream.
– Press the hot water button again. Turn
the steam dial clockwise to
the water.
Reposition the waste unit correctly.
Empty the waste unit and press ENTER.
Press ENTER.
Call the Service Department.
Fill the container with cold, fresh
drinking water and replace it in the
appliance.
Empty the water container, rinse out,
refill, and replace in the appliance.
Empty the water container to prevent
the water becoming stale.
o
to turn off
58
Page 59

Problem solving
Repairs to electrical appliances should only be
carried out by a suitably qualified and competent person in accordance with local and national safety regulations. Repairs and other work
by unqualified persons could be dangerous. The
manufacturer cannot be held responsible for unauthorised work.
Various messages will appear in the display to warn
of certain problems. The section “Display messages” explains how to respond to these.
The following problems will not be indicated in the
display, but can be dealt with as follows:
What to do if . . .
. . . no message appears in the display.
The machine is not connected to the electricity supply.
Is the appliance door closed properly?
Problem solving
Check the mains fuse. If it has tripped, consult
the Service department.
. . . the lighting does not come on when the programme dial is turned to “In Operation with lighting” or “Lighting”.
Is the front of the machine open?
Is the machine in standby mode?
Is the machine locked?
If not, the fluorescent lamp is faulty and should be
replaced as follows: Disconnect the appliance from
the mains.
Switch off at the wall and withdraw the plug from
the socket (pull by the plug not the cable), or disconnet the mains fuse or remove the screw-out
fuse in countries where this is applicable.
Open the front of the machine.
59
Page 60

Problem solving
Insert a small screwdriver in the opening and
carefully push it upwards
Flip the light cover forwards and downwards c.
Rotate the lamp forwards b and carefully pull it
out
c towards you.
Replace with a 4 Watt fluorescent tube.
Carefully push the tube into position until it clicks
into the holder
Close the lamp cover.
b and rotate it upwards c.
b.
. . . the coffee grinder makes a louder noise than
usual.
There could be stones in among the coffee beans.
Switch the machine off immediately.
Call the Service department.
. . . the coffee grinder makes less noise than
usual.
The coffee bean container is empty. A message will
soon appear in the display window:
Wait until the grinder makes no noise at all, then
refill the bean container with beans.
60
Page 61

. . . the machine suddenly switches itself off.
Is the appliance door closed properly?
The water temperature could be too high. The ma-
chine will remain switched off until the water has
cooled down sufficiently.
There could be stones in among the coffee
beans, in which case the machine will switch itself off automatically within 20 seconds to avoid
damage.
– Call the Service department.
. . . coffee is not dispensed, even though the
beans have been ground and the stopcock is
open or there is sufficient water in the water container.
Was the grinder set to the finest setting or the
quantity to the largest amount?
Because the process is time controlled it is possible
that the process has taken so long that there is no
time left for brewing.
Problem solving
Adjust the grinder or the amount being ground a
little.
. . . the espresso is dispensed too quickly.
The coffee is too coarsely ground.
Set the grinder on a finer setting.
. . . the espresso is dispensed too slowly.
The coffee is too finely ground.
Set the grinder on a coarser setting.
61
Page 62

Problem solving
. . . the espresso is not hot enough.
Have the cups and system been pre-warmed?
The smaller the cup, the more important it is to
pre-warm it.
Check the temperatures the different types of coffee have been set to.
Check the brew unit. Clean it if it is blocked.
. . . the descaling process was started by mistake.
Turn the steam control dial back to the o position
to turn off the water.
Press ENTER five times to cancel the programme.
If there is any descaling agent in the water container, carry out a full descaling programme to ensure that none remains in the system and the brew
unit.
. . . the froth produced is not as it should be.
Check that the grinder setting is not too coarse or
too fine.
The coffee is no longer fresh enough.
The coffee blend is unsuitable.
The spouts are set too high.
Check the temperatures the different types of cof-
fee have been set to. If the temperature is too
high, there will be dark patches in the froth.
. . . the heating-up time is getting longer, the
amount of water coming through is incorrect and
the machine is not performing properly.
The machine needs descaling.
62
Page 63

. . . no water comes out of the steam spout.
The steam spout is blocked
Carefully push a short, thin skewer into the opening.
. . . no water comes out of the coffee spouts.
The steel filters are dirty.
Clean the steel filters.
. . . the slide control for the grinder setting will
not move.
Close the machine and dispense a cup of espresso coffee.
The grinder setting can then be adjusted again.
. . . there is water in the waste unit.
This is not a fault. The water is left over from the
cleaning process.
Problem solving
. . . . . . the brew unit cannot be removed.
The brew unit can only be removed when the waste
unit has been taken out.
If the brew unit is still not removable, then it is not in
the right position.
Close the door and switch the appliance on.
The brew unit will position itself correctly.
63
Page 64

Problem solving
. . . the brew unit cannot be pushed into place in
the machine.
The brew unit is not in the right position. For this the
funnel must be set a little higher and the socket
standing vertically.
To position the brew unit correctly:
With your finger press on the snap lock b and
push the funnel downwards
Push the socket over to the left as far as possible
d.
c.
Press once on PRESS.
The correct position as shown above is reinstated,
and the brew unit can be pushed into place in the
machine.
64
Page 65

After sales service
In the event of a fault that you cannot easily remedy,
please contact
– your Miele dealer
or
– the nearest Miele Service Department.
See address on the back page.
When contacting the Service Department, please
quote the model and serial number of your appliance given on the data plate inside the appliance.
Please note that telephone calls may be monitored and recorded to improve our service.
After sales service
65
Page 66

Direct water connection
Direct water connection
The Waterproof system
Features
The core feature of the Waterproof system is an electrical safety valve. It works like an automatic stopcock to protect from water damage in the following
situations:
– Protection in the event of a leaking appliance.
Any leaking water is collected in a sump in the
base of the appliance. A float switch switches off
the safety valve electrically. This prevents any
more water getting into the machine.
– Protection in the event of a leaking water inlet
hose.
Leaking water is fed into the sump through the
protective covering which surrounds the inlet
hose as a “second skin”. The float switch switches off the water supply.
Fitting the Waterproof system
This appliance is not suitable for connection to
hot water.
The stopcock must be accessible for servicing
work after the appliance has been built-in.
The water inlet housing must not be dipped in
water.
The inlet hose should not be lengthened because this would lead to too much water remaining in the hose. The quality of the coffee would
be diminished.
66
Page 67

Direct water connection
The machine should be connected to a mains water
supply in accordance with standard regulations.
The German authorities do not require it to have a
non-return valve as it has been designed to comply
with the relevant German DIN regulations.
The machine is designed to operate with a minimum
flow pressure of 1 bar. There is a minimum flow
pressure of 1 bar if 5 litres of water flow into a suitable container in 15 seconds.
The static water pressure must not exceed 10 bar. If
it is higher than 10 bar it is essential to fit a reducer
valve.
Connection to the mains water supply should incorporate a mains stopcock with 3/4” thread. The stopcock should be fitted by a qualified plumber.
The connection point is subject to mains water
pressure. Turn on the stopcock slowly and check
for leaks. Correct the position of the washer and
union if appropriate.
The protective sleeve of the hose must not be
damaged or kinked. The water inlet hose must
not be shortened or damaged in any way.
Maintenance and care
Only use a Miele Waterproof system should you
ever need a replacement or extension. These are
tested to withstand pressure of at least 70 bar.
In order to protect the water inlet valves the dirt filter
in the solenoid safety valve connection must not be
removed.
67
Page 68

Electrical connection U.K., ZA, IRL
Electrical connection U.K., ZA, IRL
All electrical work should be carried out only by a
suitably qualified and competent person, in strict accordance with national and local safety regulations.
Installation, repairs and other work by unqualified
persons could be dangerous. The manufacturer cannot be held responsible for unauthorised work.
Ensure power is not supplied to the appliance while
installation work is being carried out.
The voltage, rated load and fuse rating are given on
the data plate. Please ensure these match the
household mains supply.
Connection should be made via a fused plug and
suitable switched socket which is easily accessible
after installation.
Do not connect via an extension lead.
For extra safety it is advisable to install a residual
current device (RCD), with a trip current of 30 mA
(in accordance with DIN VDE 0664, VDE 0100, Section 739).
If the socket is not accessible after installation (depending on country) an additional means of disconnection must be provided for all poles.
When switched off there must be an all-pole contact
gap of 3 mm in the isolator switch (including switch,
fuses and relays according to EN 60 335).
68
Page 69

Electrical connection U.K., ZA, IRL
Important
The appliance is supplied with a mains cable with
moulded plug for connection to a 230 - 240 V mains
supply.
The wires in the mains lead are coloured in accordance with the following code:
Green/yellow = earth
Blue = neutral
Brown = live
Where it is necessary to change plugs, if the colours
of the wires in the mains lead of this appliance do
not correspond with the coloured markings identifying the terminals of your plug, proceed as follows:
The wire which is coloured green and yellow must
be connected to the terminal in the plug which is
marked with the letter E or by the earth symbol z or
coloured green, or green and yellow.
The wire which is coloured blue must be connected
to the terminal in the plug which is marked with the
letter N or coloured black.
The wire which is coloured brown must be connected to the terminal in the plug which is marked
with the letter L or coloured red.
WARNING: THIS APPLIANCE
MUST BE EARTHED
69
Page 70

Electrical connection U.K., ZA, IRL
Non-rewireable plugs BS 1363
If this machine is fitted with a non-rewireable plug,
the following information applies:
If the socket outlets are not suitable for the plug supplied with the product, it must be cut off and an appropriate plug fitted.
The fuse carrier and fuse should be removed from
the old plug and disposed of. The plug cut from the
flexible cord should then be disposed of and on no
account be inserted into any socket elsewhere in
the house (electric shock hazard).
The fuse cover must be refitted when changing the
fuse, and if the fuse cover is lost, the plug must not
be used until a suitable replacement is obtained.
The colour of the correct replacement cover is that
of the coloured insert in the base of the plug, or the
colour that is embossed in words on the base of the
plug (as applicable to the design of plug fitted).
Replacement fuses should be ASTA approved to BS
1362 and have the correct rating. Replacement fuse
covers may be purchased from your local electrical
supplier or Service agent.
70
Page 71

Installation
Building-in options
The coffee machine is designed to be built into a
Miele tall unit.
It can also be combined with other Miele built-in appliances. If the coffee machine is to be built in
above another appliance, there must be a full-width,
closed shelf between the appliances (except when
it is combined with a built-in plate warming drawer).
Installation
71
Page 72

Installation
Installation
Ensure power is not supplied to the appliance
while installation work is being carried out. The
same applies should the appliance ever be
taken out of the housing unit.
The coffee machine must be built in to be operated.
Connect the appliance to the water supply.
Connect the appliance to the electricity supply.
Push it all the way back into the niche, until there
is a resistance.
Carefully turn the lower screws b to centre the
machine in the niche.
Adjust the upper screws c by hand to fix the machine into the unit.
72
Page 73

Adjusting the hinges
When fitting a door to the machine, or fitting it into a
tall unit, the hinges on the machine and the housing
unit (optional extra) can be adjusted for alignment.
To adjust the door in direction b, turn screw b.
Note for the housing unit: To adjust the height of
the door (direction
To adjust the door forwards or backwards, (direc-
d), turn screw d.
tion
c), turn screw c.
Installation
73
Page 74

Glossary
Glossary
Arabica is a high quality coffee bean.
It is long and flat with a groove running
around it. The caffeine content is approximately 0.8 - 1.3%. It is strong and
aromatic, but less bitter than the Robusta bean.
We recommend this type of coffee
bean.
Blending is the secret of the coffee
roaster. The blend determines the flavour and quality of the coffee and
varies according to how the coffee is to
be used. The only way to decide on
the blend to suit your taste is trial and
error.
Caffè is the Italian term for a standard
espresso. Its full name is caffè es-
presso. It can be taken after a meal
and throughout the day.
Caffè americano is a thin espresso
with lots of water.
Caffè corretto is espresso with a dash
of something stronger such as Grappa,
brandy or a liqueur.
Caffè freddo is otherwise known as
iced coffee. An extended version of espresso, it is served in summer with ice
cubes and liquid sugar.
Caffè latte is a double espresso in a
large cup filled with hot milk, topped
with little or no froth, for people who
enjoy milk.
Caffè moca consists of one third espresso, one third hot milk and one third
cocoa. Often served in a tall glass.
Caffè ristretto is the strongest, most
concentrated espresso. The water is
reduced to 30 ml per portion.
Caffeine - the caffeine content of espresso is only a third or half the caffeine found in coffee. The darker the
roast, the less caffeine the espresso
will contain.
Cappuccino is espresso with frothed
milk. It is served in a ceramic cup with
one third espresso, one third hot milk
and one third froth. To obtain a good
froth, the milk should be well cooled
and frothed in a cold container.
Cappuccino chiaro is a “light” cappuccino with less espresso and more hot
milk.
Cappuccino scuro is a “dark” cappucino with more espresso and less milk.
Cappuccino senza schiuma is cappucino with hot milk but without the froth.
Crema is the sign of the perfect cup of
espresso - a fine, nut or cinnamon
brown froth on the surface of the espresso, which is only created when the
pressure is sufficiently high. The
Crema contains the frothed oils which
are rich in flavour and aroma and, quite
simply, it helps to keep the espresso
warm.
Espresso, see Caffè
Espresso corto is a small, strong es-
presso.
Espresso doppio is quite simply a
double portion of normal espresso.
Espresso lungo is the larger, less con-
centrated version served in a standard
coffee cup.
74
Page 75

Glossary
Espresso ristretto is a double
strength, bitter tasting espresso.
Grinding - the success of the es-
presso depends on how coarse or fine
the coffee beans are ground. If the
grounds are too coarse, the water flows
through too quickly and does not create sufficient pressure to release the
aroma. If the grounds are too fine, it
hinders the flow of water, so the preparation time is too long and the espresso will taste bitter. In a humid atmosphere the beans swell more, so
they should be ground more finely.
However, there are no hard and fast
rules about grinding the coffee.
Macchiato is espresso with a tiny shot
of hot milk and some froth which gives
it a dappled (macchiato) appearance.
Pressure is important as it releases the
suspended particles in the coffee
which give it its aroma. If the pressure
is too low, the aroma cannot develop
fully. If it is too high, it releases tannin
and a bitter flavour. Pressure is also important for creating the Crema.
Robusta is a cheaper coffee bean. It
is round and convex with an almost
straight groove. The caffeine content is
around 2 to 2.5%. It is more bitter than
the Arabica bean.
Roasting is very important for the flavour and caffeine content of the espresso. Roasting releases the ethereal
oils which create the aroma and flavour.
Roasting concentrates the flavour but
burns off the caffeine, so the darker the
roast, the lower the caffeine content.
Lightly roasted beans have an acid flavour, dark roasted beans taste more bitter.
Storage - coffee is best kept in the
fridge to preserve the aroma.
Water hardness can affect the flavour
of the espresso. If the water is harder
than 7.0 mmol/l or 700 mg/l (40 °d), it
should be mixed with an equal proportion of still mineral water.
Pre-warming the cups is to be recommended to prevent the espresso from
cooling too quickly.
Quantity - the quantity of ground coffee used for each cup can be set between 6 and 9g per cup, depending on
taste. Generally 6 to 7g are used for a
cup of espresso, but there are no absolute rules.
75
Page 76

Alteration rights reserved / 44 / 000 GB, ZA, IRL - 4600
This paper consists of cellulose which has been bleached without the use of chlorine.
 Loading...