

Logitech
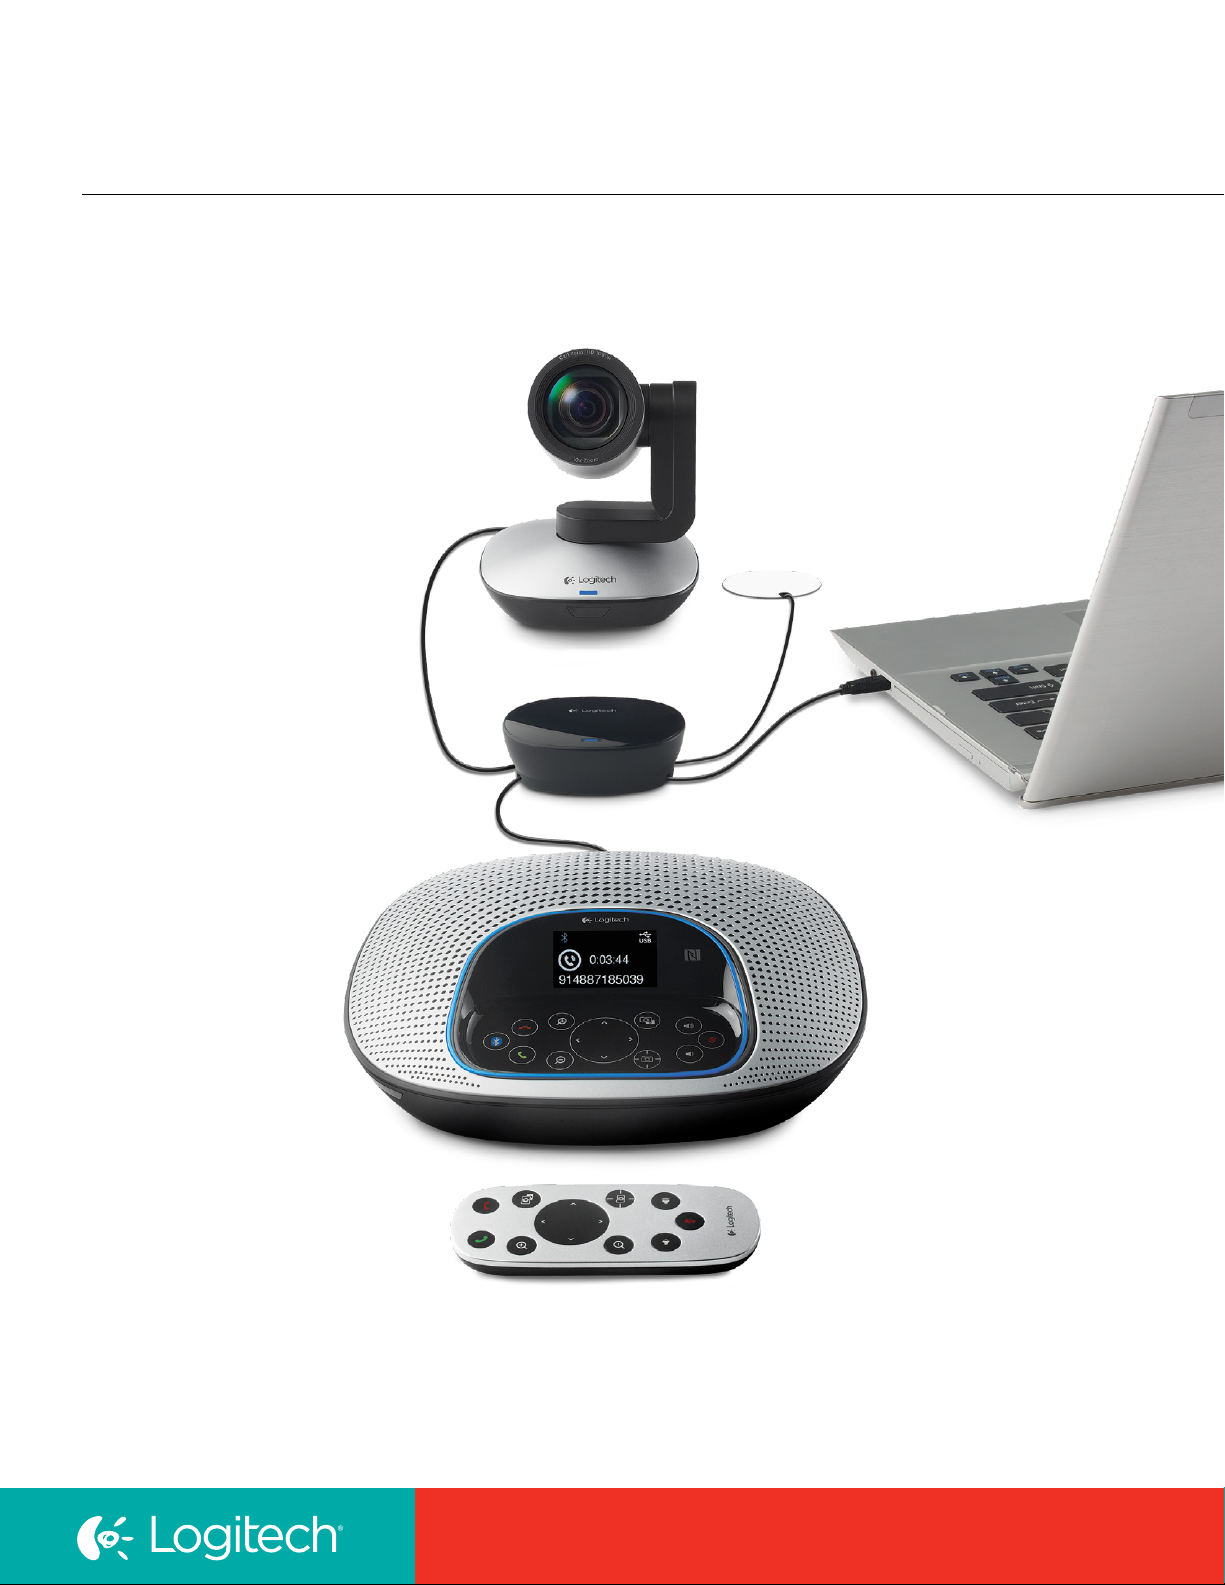
ConferenceCam CC3000e
Best Practices for use with Software Clients
UC for Real People

Product Functionality Check 1
Skype™ 2
Cisco Jabber™ 3
Cisco WebEx® 4
Microsoft® Lync™ 5
Google Hangouts™ 6
Simple Web-based Demo: 7
Appendix A 8
Appendix B 9
Known Issues: 10
Product Functionality Check
As a first step for this product right out of the box, it is recommended to use the Logitech
Diagnostic tool. This tool can provide a quick check that all the components are connected
and are working as designed.
Go to the support page to download the Logitech Diagnostic Tool:
www.logitech.com/support/cc3000e.
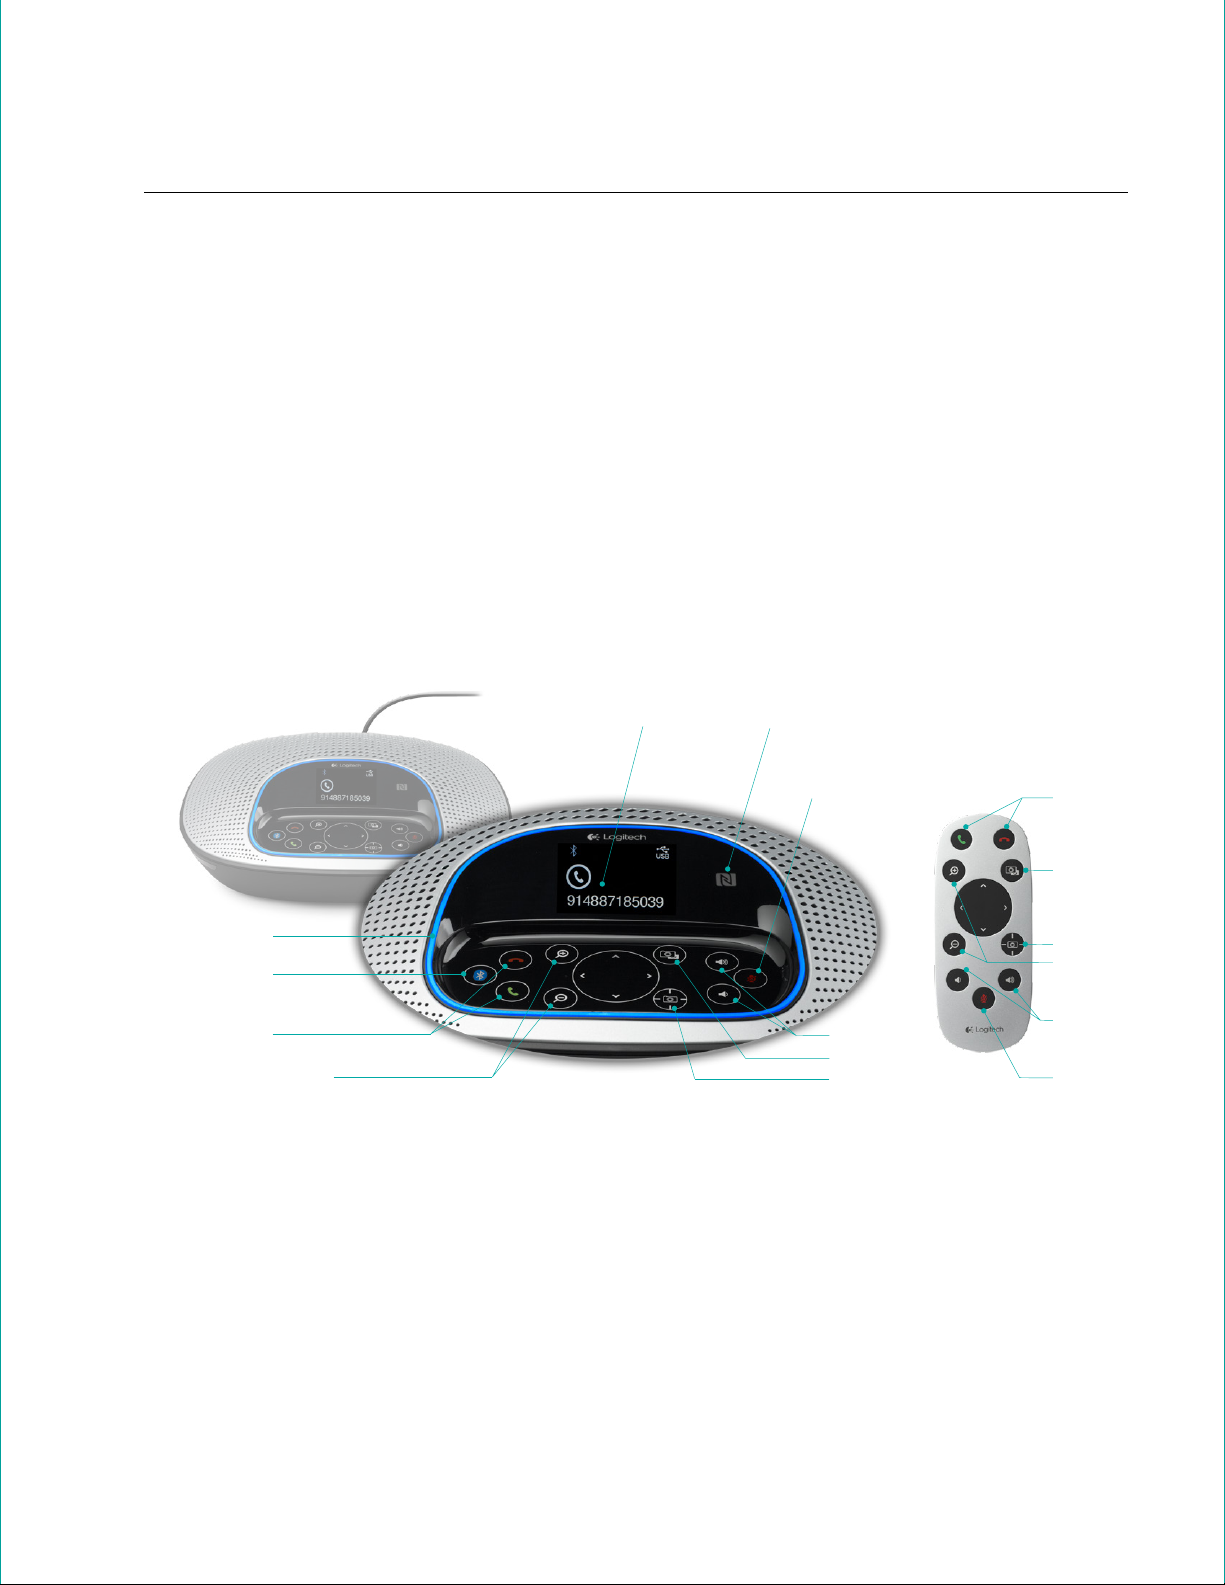
LED Call Activity
Bluetooth pairing
Call Answer/End
buttons
Camera Zoom
LCD Display
NFC indicator
Mute button
Volume controls
Far End control
Camera Preset control
Call
Answer/End
buttons
Far End
control
Camera
Preset
control
Zoom
buttons
Volume
controls
Mute
button
Best Practices for Use with Software Clients | 1

Skype
System requirements:
CPU >= Intel Core2Duo
https://support.skype.com/faq/FA10328
Network requirements:
Network >= 650Kbps upload and download
https://support.skype.com/en/faq/FA1417/how-much-bandwidth-does-skype-need
Configuration:
• The latest version of Skype should be installed from http://www.skype.com and user should create or
login into Skype.
• Connection of the device to the system will generate a notification from Skype of a new camera and audio
device being connected. The user should click to accept for use in Skype.
• It is recommended that the user prepare for a call by going to Tools \ Options \ Audio Device or Video
device. Skype should automatically select the device for use in the call, but small adjustments can be made
here to improve the call.
™
• The speaker and microphone can be tested by calling Skype testing service by clicking on Tools \ Options \
Audio -> Make a Free Test Call link.
Calling / Call Controls:
• User should be able to start a call by double-clicking their contact, and selecting Call or Start a Video Call.
Video can be started while in a call at any time.
• The Skype application provides detailed information on a Video call or Audio call. To understand the current
status and/or quality factors while on a call, the user can click on the Call option in the Skype call window
and then select the Call Technical Info option.
• As a video call begins in Skype you should see a small local preview from your camera. The other party on
the call will receive a VGA image that might be grainy at first. The image should improve within a few
seconds after connection. Once the call has been established for 1-2 minutes, the CPU consumption and
network usage will have settled. At this point Skype will dynamically begin to increase the image resolution
and audio quality to the best calling experience based on a number of factors.
• Skype needs to have our plug-in installed to activate the call control buttons on the device. This plug-in
enables the Call Answer/End button: you will now be able to answer or end calls by pressing the button
on the device. It also enables the in-call LED: the LED indicates the user is on an active call. Note: the
microphone and speakers, volume control, and mute button will work without installing the plug-in.
2 | Best Practices for Use with Software Clients

Cisco Jabber
System requirements:
CPU >= Intel Core2Duo
Network requirements:
LAN >= 2Mbps
Configuration:
• The latest version of Jabber® should be installed and user should create or log into Jabber.
• It is recommended that the user prepare for a call by going to File \ Options \ Audio or Video. Jabber should
automatically select the device for use on the call, but small adjustments and device organization can be
made here to improve the call.
Calling / Call Controls:
• User should be able to start a call by double-clicking their contact, and selecting call or start a video call.
Video can be started while in a call at any time.
• The Jabber application provides status information on a Video call or Audio call. To understand the
current status while on a call, the user can click on the Help option in the menu bar, and then select Show
Connection Status.
™
• As a video call begins in Jabber, the other party on the call will receive a VGA image that might be grainy at
first. The image should improve within a few seconds after connection. Once the call has been established for
1-2 minutes, the CPU consumption and network usage will have settled. At this point Jabber will dynamically
begin to increase the image resolution and audio quality to the best calling experience based on a number
of factors.
• Jabber v9.2 or later needs to have our plug-in installed to activate the Call Control buttons on the device.
This plug-in enables the Call Answer/End button: you will now be able to answer or end calls by pressing
the button on the device. It also enables the in-call LED: the LED indicates the user is on an active call.
Note: the microphone and speakers, volume control, and mute button will work without installing the plug-in.
• Jabber v9.6 or later no longer requires the plug-in to activate the call control buttons on the device. The
buttons should function in Jabber after connection.
• If a call is already in progress and another contact tries to call the user of the ConferenceCam CC3000e,
the user can choose to accept by pressing call answer or reject by hitting call end.
Best Practices for Use with Software Clients | 3

Cisco WebEx
System requirements:
CPU > Intel Core2Duo
Network requirements:
LAN >1.5Mbps
Configuration:
• To prepare for a call, users should have the latest version of Java installed.
• On first connection the user should be able to start a call by logging in at http://meetings.webex.com and
clicking Meet Now.
• Calls are also initiated when an invite email arrives for a WebEx call. The email contains the meeting
number, Join button and audio call in number. Users can just click on the Join button, log in to WebEx or
join as guest. If prompted download the add-in and install it. When starting a call for the first time in WebEx,
the user is presented with an Audio Conference window. Select Use Computer for Audio, which includes a
link to configure and test the speaker and microphone.
• User can prepare for a call by going to the Gear icon. The Participants section opens the Video options
window.
®
• Selecting the camera icon in the Participants section next to the Host’s name will start a local video
preview for the host.
Calling / Call Controls:
• Call status can be obtained during an audio or video call by going to the menu bar and selecting
Meeting \ Audio & Video Statistics.
• WebEx doesn’t support call controls; only local control for volume, mute, PTZ, and pairing. There will be
limited display functionality from ConferenceCam CC3000e.
• As a video call begins in WebEx, the other party on the call will receive a VGA image that might be grainy
at first. The image should improve within a few seconds after connection. Once the call has been established
for 1-2 minutes, the CPU consumption and network usage will have settled. At this point WebEx will
dynamically begin to increase the image resolution and audio quality to the best calling experience based
on a number of factors.
4 | Best Practices for Use with Software Clients

Microsoft® Lync
System requirements:
http://technet.microsoft.com/en-us/library/gg412781.aspx
http://technet.microsoft.com/en-us/library/jj688134.aspx
http://technet.microsoft.com/en-us/library/jj688132.aspx
Network requirements:
LAN 1080p >= 1.5Mbps, 720p >= 700Kbps
Configuration:
• The user should create or log into Lync 2010 or Lync 2013 on their system.
• It is recommended that the user prepare for a call by going to Tools \ Options \ Audio or Video.
ConferenceCam CC3000e provides a unique descriptor when the device is first connected that informs
Lync that it is a combination speakerphone/camera. Lync should automatically select the device for use in
the call, but small adjustments can be made here to improve the call.
• In Lync 2010, the speaker and microphone can be tested by calling Lync Testing Service by clicking on the
Make a Free Test Call link on the Audio settings page.
™
Calling / Call Controls:
• On first connection, the user should be able to start a call by double-clicking the contact and selecting
Call or Start a Video Call.
• As a video call begins in Lync, the other party on the call will receive a VGA image that might be grainy at
first. The image should improve within a few seconds after connection. Once the call has been established
for 1-2 minutes, the CPU consumption and network usage will have settled. At this point Lync will
dynamically begin to increase the image resolution and audio quality to the best calling experience based
on a number of factors.
• To experience full HD in Lync, the user should have a verified configuration and the Lync video call
window should be set to full-screen view. There are video preview controls available in the calling window
in the upper right corner of the calling window.
• The call control buttons on the device will be enabled for Call Answer/End: you will now be able to answer
or end calls by pressing the button on the device. It also enables the in-call LED: the LED indicates the user is
on an active call. The microphone and speakers, volume control, and mute button will work also.
• To determine the status of calls and other call statistics, there is a Monitoring and Reporting server
configuration that can be implemented to provide per call data. If a call is already in progress and another
contact tries to call the user of the ConferenceCam CC3000e, the user can choose to accept by pressing
call answer or reject the call by pressing call end.
Best Practices for Use with Software Clients | 5

Google Hangouts
System requirements:
CPU > Intel Core2Duo
Network requirements:
LAN >1:1 connections 1.0Mbps; Group connections 1.0Mbps/2.0Mbps (up/down)
Configuration:
• Users must have the latest version of Google Hangouts installed and/or logged into Google +.
• Users can prepare by starting a call and then clicking on the Gear icon for Settings to verify the audio
device or video device to be used.
Calling / Call Controls:
• On first connection the user should be able to start a call by double-clicking the contact and selecting the
video camera icon in the menu bar.
• As a video call begins in Google Hangouts, the other party on the call will receive a VGA image that might
be grainy at first. The image should improve within a few seconds after connection. Once the call has been
established for 1-2 minutes, the CPU consumption and network usage will have settled At this point Google
Hangouts will dynamically begin to increase the image resolution and audio quality to the best calling
experience based on a number of factors.
™
• Google Hangouts does not support call controls only local control for volume, mute, PTZ, pairing are
supported and there will be limited display functionality from ConferenceCam CC3000e.
6 | Best Practices for Use with Software Clients

Simple Web-based Demo
Configuration:
• Users can prepare by connecting the devices to a PC.
Calling / Call Controls:
• Click on this link -> https://apprtc.appspot.com/
• On first connection the user will be presented with a full screen local video preview.
• Copy and paste the new link at the bottom of the browser page into an email and send to someone to
create a call.
• User on receiving side of the new link, clicks on the link in the email and is will be automatically connected
to a video call.
Best Practices for Use with Software Clients | 7

Appendix A
Microsoft Lync 2013 1080p verified configuration
Workstation: A
Operating System OS Name Microsoft Windows 8 Pro
CPU Cores
Graphics Chipset Encoding
System memory Installed Physical Memory (RAM) 8.00 GB
Graphics Chipset Encoding [Display] NVIDIA GeForce GTX 680
Disply memory Display Memory 4042 MB
DirectX support DirectX Version: DirectX 11
DXVA Decoding DXVA2 Modes: DXVA2_ModeMPEG2_IDCT
Video Capabilities Lync Lync 2013 client
USB Camera Encoding WDM Streaming Capture Devices: Logitech Webcam C930e,
Windows Experience Index WinSAT <SystemScore>5.9</SystemScore>
Network Adapter Product Type Intel® 82579V Gigabit Network Connection
Display Resolution minimum 1920x1200
Processor Intel® Core™ i7-3770K CPU @ 3.50GHz, 3501 Mhz,
4 Core(s), 8 Logical Processor(s)
DXVA2_ModeMPEG2_VLD
DXVA2_ModeVC1_VLD
DXVA2_ModeVC1_IDCT
DXVA2_ModeWMV9_IDC
DXVA2_ModeH264_VLD_NoFGT
Windows System Assessment Tool <MemoryScore>8</MemoryScore>
<CpuScore>8</CpuScore>
Software-based video encoding
capability
Hardware accelerated encoding
capability
<VideoEncodeScore>8.4</VideoEncodeScore>
<GraphicsScore>8.1</GraphicsScore>
8 | Best Practices for Use with Software Clients

Appendix B
Microsoft Lync 2013 720p verified configuration
Workstation: B
Operating System OS Name Microsoft Windows 8 Pro
CPU Cores
Graphics Chipset Encoding
System memory Installed Physical Memory (RAM) 6.00 GB
Graphics Chipset Encoding [Display] NVIDIA GeForce 8800 Ultra
Disply memory Display Memory 3546 MB
DirectX support DirectX Version: DirectX 11
DXVA Decoding DXVA2 Modes: DXVA2_ModeMPEG2_IDCT
Video Capabilities Lync Lync 2013 client
USB Camera Encoding WDM Streaming Capture Devices: Logitech Webcam C930e,
Windows Experience Index WinSAT <SystemScore>5.9</SystemScore>
Network Adapter Product Type Marvell Yukon 88E8056 PCI-E Gigabit
Display Resolution minimum 1920x1200
Processor Intel® Core™ i7 CPU 940@ 2.93GHz (8 CPUs),
~2.9GHz
DXVA2_ModeVC1_MoComp
DXVA2_ModeWMV9_MoComp
DXVA2_ModeVC1_PostProc
DXVA2_ModeWMV9_PostProc
DXVA2_ModeH264_MoComp_NoFGT
Windows System Assessment Tool <MemoryScore>7.5</MemoryScore>
<CpuScore>7.5</CpuScore>
Software-based video encoding
capability
Hardware accelerated encoding
capability
<VideoEncodeScore>7.7</VideoEncodeScore>
<GraphicsScore>6.9</GraphicsScore>
Ethernet Controller
Best Practices for Use with Software Clients | 9

Known Issues:
Logitech Webcam C930e cameras do not stream
Updating to Skype v6.10 corrects the issue.
video in Skype v6.8
Jabber v9.2 – H.264 from camera on thin clients. Jabber v10.0 will get H.264 from camera on Windows
or Mac.
Jabber 9.6 If video mute is enabled for the local preview in Jabber
client, the camera LED will remain on but the video
will be muted on far end.
Jabber 10.x It is planned to support generic USB HID controls, but
it should be transparent with no impact to the user.
WebEx supports all USB audio devices, but does not
certify them.
© 2014 Logitech. Logitech, the Logitech logo and other Logitech marks are owned by Logitech and may be registered. All other trademarks are the
properties of their respective owners. Logitech assumes no responsibility for any errors that may appear in this publication. Product, pricing and feature
information contained herein is subject to change
without notice.
10 | Best Practices for Use with Software Clients
 Loading...