

Page 1

®
POD X3 Family
Pilot’s Handbook
Manuel de pilotage
Pilotenhandbuch
Pilotenhandboek
Manual del Piloto
An in-depth exploration of the advanced technologies and
pulsing tonal pleasures of POD X3, POD X3 Live & POD X3 Pro.
40-00-0120 Electrophonic Limited Edition available @ www.line6.com/manuals Rev F
Page 2

Important Safety Instructions
CAUTION
RISK OF ELECTRIC
SHOCK DO NOT OPEN
WARNING : TO REDUCE THE RISK OF ELECTRIC SHOCK, DO NOT REMOVE COVER (OR BACK). NO
USER-SERVICEABLE PARTS INSIDE. REFER SERVICING TO QUALIFIED SERVICE PERSONNEL.
WARNING : TO REDUCE THE RISK OF FIRE OR ELECTRIC SHOCK,
DO NOT EXPOSE THE APPLIANCE TO RAIN OR MOISTURE.
NOTICE: This equipment has been tested and found to comply with the limits for a Class B digital device pursuant to Part 15
of FCC Rules. Operation is subject to the following two conditions: (1) This device may not cause harmful interference, and (2)
this device must accept any interference received, including interference that may cause undesired operation.
The lightning flash with arrowhead symbol, within an equilateral triangle,
is intended to alert the user to presence of uninsulated “dangerous voltage” within the product’s enclosure that may be of sufficient magnitude to
constitute a risk of electric to persons.
The exclamation point, within an equilateral triangle, is intended to alert
the user to the presence of important operation maintenance (servicing)
instruction in literature accompanying the appliance.
The serial number can be found on the bottom or back of your POD X3, POD X3 Live or POD X3 Pro.
It’s the number that begins with “(21)”. Please note it here for future reference:
SERIAL NO:
Page 3

You should read these Important Safety Instructions
Keep these instructions in a safe place
• Read these instructions.
• Keep these instructions.
• Heed all warnings.
• Follow all instructions.
• Do not use this apparatus near water.
• Clean only with dry cloth.
• Do not block any ventilation openings. Install in accordance with the manufacturer’s instructions.
• Do not install near any heat sources such as radiators, heat registers, stoves, or other apparatus (including ampliers
that produce heat.
• Connect only to AC power outlets rated 100-120V or 230V 47-63Hz (depending on the voltage range of the
included power supply).
• Do not defeat the safety purpose of the polarized or grounding-type plug. A polarized plug has two blades with one
and the other. A grounding type plug has two blades and a third grounding prong. The wide blade or the third prong
are provided for your safety. If the provided plug does not fit into your outlet, consult an electrician for replacement
of the obsolete outlet.
• Protect the power cord from being walked on or pinched particularly at plugs, convenience receptacles, and the
point where they exit from the apparatus.
• Only use attachments/accessories specied by the manufacturer.
• Use only with the cart, stand, tripod, bracket, or table specied by the manufacturer, or sold with the apparatus.
When a cart is used, use caution when moving the cart/apparatus combination to avoid injury from tip-over.
• Unplug this apparatus during lightning storms or when unused for long periods of time.
• Refer all servicing to qualied service personnel. Servicing is required when the apparatus has been damaged in any
way, such as power-supply cord or plug is damaged, liquid has been spilled or objects have fallen into the apparatus,
the apparatus has been exposed to rain or moisture, does not operate normally, or has been dropped.
• The apparatus shall not be exposed to dripping or splashing and that no objects lled with liquids, such as vases,
shall be placed on the apparatus.
• WARNING: To reduce the risk of re or electric shock do not expose this apparatus to rain or moisture.
• The appliance coupler is used as the disconnect device, the disconnect device shall remain readily operable.
• Prolonged listening at high volume levels may cause irreparable hearing loss and/or damage. Always be sure to
practice “safe listening.”
• Service is required when the apparatus has been damaged in any way, such as:
• power-supply cord or plug is damaged.
• liquid has been spilled or objects have fallen into the apparatus.
• the unit has been exposed to rain or moisture.
• the unit is dropped or the enclosure is damaged.
• the unit does not operate normally or changes in performance in a signicant way.
POD X3, POD X3 Live and POD X3 Pro Pilot’s Handbook © 2009 Line 6, Inc.
Page 4

Please Note:
Line 6, POD, POD X3, POD X3 Live, POD X3 Pro.
PODxt, Vetta, FBV, FBV Shortboard, FBV Express,
and FBV4 are trademarks of Line 6, Inc. All other
product names, trademarks, and artists’ names are
the property of their respective owners, which are in
no way associated or affiliated with Line 6. Product
names, images, and artists’ names are used solely to
identify the products whose tones and sounds were
studied during Line 6’s sound model development for
this product. The use of these products, trademarks,
images, and artists’ names does not imply any
cooperation or endorsement.
Page 5

Co n t r o l s & Co n n e C t i o n s
Tone Path Home Page Big User Home Page
(available for User Presets only)
Edit Page
POD X3
Controls & Connections
1•1
1. Display – the LCD (liquid crystal display) is your window into the power of POD X3. You’ll see (2)
types of “pages” in the display:
Home Page – the “Tone Path” Home Page shows you all the digital processing “blocks” that are
working to deliver your great tone. For User Presets, you can also switch to a “Big User” Home Page,
which shows you the bank and channel number where the preset is stored. The tone names that are
loaded in the current preset, and the bank and channel number where the preset is stored are also
displayed. You can get to the Home Page at any time by pressing the Home button. You can toggle
between the two Home Pages by repeatedly pressing the Home button.
Edit Page
– shows you all parameters available to tweak for a processing block or setup page.
Page 6

Controls & Connections
2. Select Knob – turning this knob will do different things depending on what page you’re on.
Home Page – turn to select presets.
Edit Page – turn to pick a different Model. This works for the Amp, Stomp, Mod, Delay, Reverb, and
Wah edit pages.
You can also press this knob to store your own tweaked-up sounds in POD X3. Just press, choose what to
store and where to store it, and press the button again to complete the Save.
3. Home / Hold for Commands – press to return to the Home Page. For User Presets, press
repeatedly to toggle between the Tone Path Home Page and the Big User Home Page. Press and hold for
1•2
2 seconds to enter the Commands page.
4. Inputs – press to enter the Inputs setup page to configure which inputs you’re using.
5. 4-way Nav – pressing this will do different things depending on what page you’re on.
Home Page – press Up, Down, Left, and Right to navigate to a processing block.
Edit Page – press Up and Down to move through each row of parameters available. You can also press
Left and Right to move to the previous or next edit page.
6. On/Off – press to turn the selected processing block on or off (the blocks are on when the buttons
are lit and the block on the Home Page is solid). Double-press to enter the processing block’s Edit page,
where you can fine-tune the parameters for that block. Press the
return to the Home Page.
7. Outputs / Hold for System – press to enter the Outputs setup page, where you can set up POD
X3 for whatever you’re connecting it to. This is a very important step for getting the best sound out of
your POD X3. Press and hold for 2 seconds to enter the System setup page.
8. Multi-function Knobs – turn any one of these knobs to adjust the corresponding parameter in the
display.
Home button to leave the Edit page and
Page 7

Controls & Connections
9. Keypad – these buttons allow you to do the following:
Tone 2 / Hold for Dual – press to toggle between Tone 1 and Tone 2 (you’re editing Tone 2 when the
button is lit). Press and hold to turn Dual Tone on or off.
Amp, Stomp, Mod, Delay, Verb – press to turn the Amp, Stomp, Mod, Delay, and Reverb processing
blocks on or off (the blocks are on when the buttons are lit). Double-press one of these buttons to
tweak the block. For example, just press the
taken to the Stomp Box Edit Page. Press the
Home Page.
Tap / Hold for Tuner – POD X3 allows you to control the time and speed of your Delay and/or Mod
effects by simply tapping on this button. Just tap a few times here and the effects that are set to “lock”
to that tempo will change to match what you tapped. There’s also a Tempo parameter in the effects’
Edit Pages, so you’ll see exactly what Tempo you’ve tapped. This is especially useful if you are trying to
nudge your Tap setting to just the right value.
Press and hold the
activation with an optional FBV foot controller.
Ta p button for 2 seconds to activate the tuner. You can also add footswitch tuner
Stomp button two times quickly and you’re instantly
Home button to leave the Edit Page and return to the
10. Drive – controls how hard you’re driving the input of the chosen Amp Model. Like the input volume
control on a non-master volume guitar amp, higher settings give you more “dirt.”
This knob, along with the
currently selected – Tone 1 or Tone 2.
Tone Controls, Reverb, and Tone Volume knobs, adjusts the Tone that is
11. Tone Controls – Bass, Middle, Treble, Presence. Just like any guitar amp. And when you change
Amp Models, the response and interactivity of these controls change, too – so they act like the tone
controls of the original amp that inspired the Amp Model you’ve selected.
12. Reverb – spin this knob to set the Reverb level of the Tone that is currently selected.
13. Tone Volume – this knob controls the relative volume level of the current Tone.
14. Master Volume – this controls the overall output level of POD X3 and also sets the headphone
level. Changing the
at any volume level. This setting is not saved when you store settings into one of the POD X3’s memory
locations.
When running into line level gear (like recorders, mixers and PA’s), POD X3 will generally give the best
signal-to-noise performance when you have the
control turned down low, you may get extra hiss – which obviously isn’t what you want – if you turn up
your mixer or recorder’s output to compensate. In order to allow you to set the
as possible when connecting to recording, mixing, and other studio gear,
X3’s outputs into line level, not microphone or guitar level inputs. Line level inputs should allow you
to turn POD X3’s
If your gear has inputs that function as mic/line level inputs, try to set the trim for those inputs to the
minimum level, and POD X3’s
Master Volume level does not change your tone, so you can get the tone you want
Master Volume control at max. With the Master Volume
Master Volume as high
be sure you are plugging POD
Master Volume up all the way (or close to it) and thereby get the best sound possible.
Master Volume to maximum, when setting levels.
15. Clip Light – this lights when clipping is detected, which generally means unpleasantly distorted,
bad sound. Try reducing the output level of the device that’s feeding your POD X3, or reducing the Tone
Volume for Tone 1 or Tone 2, or the volume of Tone 1 + Tone 2 that can be adjusted from the right knob
1•3
Page 8

Controls & Connections
below the Home Page.
16. Input 1/Guitar In – plug your guitar or bass in here. You techies will want to know this is a mono,
unbalanced connection. The
both.
17. Phones – plug your headphones in here to avoid noise complaints from the neighbors (or the rest of
your family). The volume is set by the
to be sure they’re not set for ridiculous volume before your slap them on your ears. Try a
knob setting of about 10 o’clock to start, then turn up from there if you need more volume.
To give you great sound through the headphones, your POD X3 automatically switches to Studio Mode
1•4
whenever headphones are connected.
Inputs page is where you assign whether this input feeds Tone 1, Tone 2 or
Master Volume knob. Any time you use headphones, it important
Master Volume
18. Power – connect the included PX-2 power pack and flip the switch here to bring your POD X3 to
life.
19. Input 2/Microphone In and Trim – plug in your microphone here and use the Trim control
to get a nice, healthy level. The
or both.
Inputs page is where you assign whether this input feeds Tone 1, Tone 2
20. S/PDIF Out – this jack sends out 24-bit digital versions of the Left & Right Outputs. The System
setup page lets you choose the sample rate and adjust the level.
21. USB 2.0 – POD X3’s USB 2.0 jack lets you connect directly to a USB 2.0-equipped computer, and
take advantage of many computer-powered features:
Line 6 Monkey software makes it easy to install software and get updates. Install driver software with •
Line 6 Monkey, and POD X3 provides 8 audio inputs to your computer via USB:
1-2 is the main signal, configured on POD X3’s Outputs page for Digital Outs.•
3-4 is Tone 1 separately in stereo.•
5-6 is Tone 2 separately in stereo.•
7 is the sum of the inputs you’ve chosen for Tone 1.•
8 is the sum of the inputs you’ve chosen for Tone 2.•
Page 9

Controls & Connections
You can also connect your headphones or powered speakers
directly to POD X3 to hear your computer-generated audio, along with POD X3’s real-time processing.
22. FBV Pedal – connect an optional foot controller here, including the FBV, FBV Shortboard, and FBV
Express. The System page lets you set it all up.
23. Left & Right Outputs – these balanced, 1/4-inch TRS (tip/ring/sleeve) connectors are ready
to rock with pro +4 dBu balanced equipment. They will also work happily with unbalanced –10 dBV
equipment and standard guitar cables. If you need mono output, you can use either one.
Join the Club!
Visit www.line6.com/club to register online and join the All Access club, the place to get:
Free iTunes and MP3 Jam Tracks.•
Free loops for GarageBand, Acid, Reason and more.•
Free guitar lessons from LA session pros.•
Free chord and scale practice tools.•
Stay informed of contest and special offers.•
Access to discussion forums, software updates and more.•
1•5
Page 10

Controls & Connections
HOLD FOR COMMANDS
INPUTS
HOME
DOUBLE-CLICK TO EDIT
OUTPUTS
ON/OFF
HOLD FOR SYSTEM
PRESS TO
SAVE
Tone Path Home Page Big User Home Page
(available for User Presets only)
Edit Page
POD X3 Live
1•6
1. Display – the LCD (liquid crystal display) is your window into the power of POD X3 Live. You’ll
see (2) types of “pages” in the display:
Home Page – the “Tone Path” Home Page shows you all the digital processing “blocks” that are
working to deliver your great tone. For User Presets, you can also switch to a “Big User” Home Page,
which shows you the bank and channel number where the preset is stored. The tone names that are
loaded in the current preset, and the bank and channel number where the preset is stored are also
displayed. You can get to the Home Page at any time by pressing the Home button. You can toggle
between the two Home Pages by repeatedly pressing the Home button.
Edit Page
– shows you all parameters available to tweak for a processing block or setup page.
2. Select Knob – turning this knob will do different things depending on what page you’re on.
Home Page – turn to select presets.
Page 11

Controls & Connections
Edit Page – turn to pick a different Model. This works for the Amp, Stomp, Mod, Delay, Reverb, and
Wah edit pages.
You can also press this knob to store your own tweaked-up sounds in POD X3 Live. Just press, choose
what to store and where to store it, and press the button again to complete the Save.
3. Home / Hold for Commands – press to return to the Home Page. For User Presets, press
repeatedly to toggle between the Tone Path Home Page and the Big Number Home Page. Press and hold
for 2 seconds to enter the Commands page.
4. Inputs – press to enter the Inputs setup page to configure which inputs you’re using.
5. 4-way Nav – pressing these buttons will also do different things depending on what page you’re on.
Home Page – press Up, Down, Left, and Right to navigate to a processing block.
Edit Page – press Up and Down to move through each row of parameters available. You can also press
the
Left and Right to move to the previous or next processing block in the Tone path.
6. On/Off – press to turn the selected processing block on or off (the blocks are on when the buttons
are lit and the block on the Home Page is solid). Double-press to enter the processing block’s Edit page,
where you can fine-tune the parameters for that block. Double-press the same button again (or press the
Home button) to leave the Edit page and return to the Home Page.
7. Outputs / Hold for System – press to enter the Outputs setup page, where you can set up POD
X3 Live for whatever you’re connecting it to. This is a very important step for getting the best sound out
of your POD X3 Live. Press and hold for 2 seconds to enter the System setup page.
8. Multi-function Knobs – turn any one of these knobs to adjust the corresponding parameter in the
display.
1•7
9. Footswitches – these allow you to do the following:
Tone 2 / Hold for Dual – press to toggle between Tone 1 and Tone 2 (you’re editing Tone 2 when the
footswitch is lit). Press and hold to turn Dual Tone on or off.
Stomp, Mod, Delay – turns the Stomp, Mod, and Delay processing blocks on or off (the blocks are on
when the footswitches are lit). Double-press one of these footswitches to tweak the block. For example,
just press the
Page. Double-press the same footswitch again (or press the
return to the Home page.
Stomp footswitch two times quickly and you’re instantly taken to the Stomp Box Edit
Home button) to leave the Edit Page and
Page 12

Controls & Connections
Comp/Boost – turns the Compressor processing block on or off. Double-press to tweak the block. This
footswitch can also be assigned to the Amp Model or Reverb processing block.
Bank Up, Down – these choose amongst POD X3 Live’s 32 banks of User presets. Once you’ve
footswitched your way to a new bank, you’ll then also need to step on the
to actually load a preset from that bank. (We set things up this way so your audience won’t hear you
switching through presets as you make your way to your next bank of sounds.)
A, B, C, D – the lights on these footswitches show you which of the Presets in the current User Bank is
running. You can step on any of them to choose a different preset.
Tap / Hold for Tuner – POD X3 Live allows you to control the time and speed of your Delay and/or Mod
1•8
effects by simply tapping on this footswitch. Tap a few times here, and the effects that are set to “lock”
to that tempo will change to match what you tapped. There’s also a Tempo parameter in the effects’
Edit Pages, so you’ll see exactly what Tempo you’ve tapped. This is especially useful if you are trying to
nudge your Tap setting to just the right value.
Press and hold the
10. Drive – controls how hard you’re driving the input of the chosen Amp Model. Like the input volume
control on a non-master volume guitar amp, higher settings give you more “dirt.”
This knob, along with the
currently selected – Tone 1 or Tone 2.
11. Tone Controls – Bass, Mid, Treb, Pres. Just like any guitar amp. And when you change Amp
Models, the response and interactivity of these controls change, too – so they act like the tone controls
of the original amp that inspired the Amp Model you’ve selected.
12. Reverb – spin this knob to set the Reverb level of the Tone that is currently selected.
13. Tone Volume – this knob controls the relative volume level of the current Tone.
14. Master Volume – this controls the overall output level of POD X3 Live and also sets the headphone
level. Changing the
at any volume level. This setting is not saved when you store settings into one of the POD X3 Live’s
memory locations.
POD X3 Live will generally give the best signal-to-noise performance when you have the Master Volume
control at max. With the
obviously isn’t what you want – if you turn up your mixer or recorder’s output to compensate. In order to
allow you to set the
studio gear,
guitar level inputs. Line level inputs should allow you to turn POD X3 Live’s
way (or close to it) and thereby get the best sound possible. If your gear has inputs that function as mic/
line level inputs, try to set the trim for those inputs to the minimum level, and POD X3 Live’s
Volume to maximum, when setting levels.
15. Clip Light – this lights when clipping is detected, which generally means unpleasantly distorted,
bad sound. Try reducing the output level of the device that’s feeding your POD X3, or reducing the Tone
Volume for Tone 1 or Tone 2, or the volume of Tone 1 + Tone 2 that can be adjusted from the right knob
below the Home Page.
A, B, C or D footswitch
Ta p footswitch for 2 seconds to activate the tuner.
Tone Controls, Verb, and Tone Volume knobs, adjusts the Tone that is
Master Volume level does not change your tone, so you can get the tone you want
Master Volume control turned down low, you may get extra hiss – which
Master Volume as high as possible when connecting to recording, mixing, and other
be sure you are plugging POD X3 Live’s 1/4-inch outputs into line level, not microphone or
Master Volume up all the
Master
Page 13

Controls & Connections
16. Direct Out Ground Lift – this switch lets you lift the grounds of POD X3 Live’s XLR Direct
Outs. This can be handy if you get an audible hum caused by a ground loop when connecting to other
grounded equipment.
17. Live Out Level – this switch sets the level for the Live Outputs. When set to Amp, the Live
Outputs are ready for connection to an on-stage amp. When set to Line, they’re ready to plug into a
mixer or recorder with line level inputs.
18. Guitar In Pad – the Off setting of this switch is appropriate for most guitars. If you see the Clip light
coming on, that means you’re overloading POD X3 Live’s input. If that happens frequently, try the
setting here. This switches in input circuitry that’s appropriate for hotter signals output by some guitars
with active pickups, or from keyboards and other sources.
On
19. Onboard Pedal – the lights to the left of this pedal show whether the pedal will operate the Wah
effect, Volume Pedal, or (when both lights are lit) Tweak. When operating the Wah, you can press hard
with your toe at the top of the pedal, and the wah – as well as the wah light to the left of the pedal – will
turn on and off.
20. Pedal 2 – connect a standard expression pedal, such as the Line 6 EX-1, and you’ll be able to assign it
to control the Volume Pedal or Effect Tweak functions.
21. Guitar In – plug your guitar or bass in here. You techies will want to know this is a mono, unbalanced
connection. The
whether this input feeds Tone 1, Tone 2 or both.
Guitar In Pad switch sets the sensitivity of this jack. The Inputs page is where you assign
22. CD/MP3 In – connect a CD player, MP3 player, drum machine or other device here, and you’ll hear
it at POD X3 Live’s
Phones, Direct Out, and Live Out.
23. Live Out – the unbalanced 1/4-inch connectors here get your POD X3 Live’s sound to a guitar
amplifier, recorder, mixer or PA system.
Output display pages congure these outputs for Studio or Live use. In Studio Mode, they’re ready to
The
plug into a recorder with unbalanced –10 dBV inputs. In Live Mode, they don’t have speaker simulation,
and are ready for connection to an on-stage power amp. Whichever you choose, the front panel
Volume knob determines how much signal you’ll get at these jacks. You can use either jack as a mono
output, by the way.
Master
24. Direct Out – these balanced XLR connectors always provide studio-quality sound with speaker/
microphone/room simulation ideal for direct recording and as a direct send to the house mixer or PA
when playing live.
The System page lets you disable Master Volume control for these outputs, so you can make on-stage
adjustments to the 1/4-inch outputs feeding an amp without affecting the levels sent to the house sound
1•9
Page 14

Controls & Connections
mixer or PA.
25. Phones – plug your headphones in here to avoid noise complaints from the neighbors (or the rest of
your family). The volume is set by the
to be sure they’re not set for ridiculous volume before your slap them on your ears. Try a
knob setting of about 10 o’clock to start, then turn up from there if you need more volume.
26. Aux Input – this mono, unbalanced 1/4-inch input can be used for a second guitar or just about any
other instrument. The
27. Microphone Input and Trim – plug in your microphone here and use the Trim control to get
a nice, healthy level. The
1•10
both.
28. Effects Loop – the Effects Loop provides a mono FX Send and a stereo FX Return, operating at
approximately 19.5 Volts peak-to-peak, making it optimal for line level devices. The loop can also be
used with most stomp boxes by adjusting the send and return levels. Use the
return. The loop can run pre or post Amp Model, and if nothing is connected to it, POD X3 Pro is smart
enough to disable the loop so you still get sound.
29. Variax – this input provides power and a direct digital audio connection between a Line 6 Variax
guitar or bass and the POD X3 Live. The
1, Tone 2 or both.
Be sure to keep the protective plastic cap on this connection when it’s not connected to a Variax, so you
won’t damage it by mistakenly inserting a 1/4-inch guitar cable or other connection. When you are ready
to connect a Variax, use only Line 6 supplied Variax-compatible cables – not standard Ethernet or other
cables – to avoid damage to the jack.
You can learn more about the Variax family of guitars, each one giving you the sound of an entire guitar
collection in one instrument, at www.line6.com.
30. S/PDIF Out – this jack sends out 24-bit digital versions of the Direct Out signals. The System setup
screen lets you choose the sample rate and adjust the level.
31. MIDI – connect POD X3 Live to your MIDI equipment to send and receive Program Change Messages
for selecting Presets. POD X3 Live’s MIDI Out connects to another device’s MIDI In; its MIDI In
goes to another device’s MIDI Out. Visit www.line6.com/manuals for more comprehensive MIDI CC
information.
32. USB 2.0 – POD X3 Live’s USB 2.0 jack lets you connect directly to a USB 2.0-equipped computer,
and take advantage of many computer-powered features:
Line 6 Monkey software makes it easy to install software and get updates. Install driver software with •
Line 6 Monkey, and POD X3 provides 8 audio inputs to your computer via USB:
1-2 is the main signal, configured on POD X3’s Outputs page for Digital Outs.•
3-4 is Tone 1 separately in stereo.•
5-6 is Tone 2 separately in stereo.•
7 is the sum of the inputs you’ve chosen for Tone 1.•
8 is the sum of the inputs you’ve chosen for Tone 2.•
You can also connect your headphones or powered speakers directly to POD X3 to hear your computer-
Master Volume knob. Any time you use headphones, it important
Master Volume
Inputs page is where you assign whether this input feeds Tone 1, Tone 2 or both.
Inputs page is where you assign whether this input feeds Tone 1, Tone 2 or
Left Return jack for mono
Inputs page is where you assign whether this input feeds Tone
Page 15

Controls & Connections
generated audio, along with POD X3’s real-time processing.
32. Power – connect the included PX-2 power pack and flip the switch here to bring your POD X3 Live
to life.
Join the Club!
Visit www.line6.com/club to register online and join the All Access club, the place to get:
Free iTunes and MP3 Jam Tracks.•
Free loops for GarageBand, Acid, Reason and more.•
Free guitar lessons from LA session pros.•
Free chord and scale practice tools.•
Stay informed of contest and special offers.•
Access to discussion forums, software updates and more.•
1•11
Page 16

Controls & Connections
Tone Path Home Page Big User Home Page
(available for User Presets only)
Edit Page
®
POD X3 Pro
1•12
1. Display – the LCD (liquid crystal display) is your window into the power of POD X3 Pro. You’ll see
(2) types of “pages” in the display:
Home Page – the “Tone Path” Home Page shows you all the digital processing “blocks” that are
working to deliver your great tone. For User Presets, you can also switch to a “Big User” Home Page,
which shows you the bank and channel number where the preset is stored. The tone names that are
loaded in the current preset, and the bank and channel number where the preset is stored are also
displayed. You can get to the Home Page at any time by pressing the Home button. You can toggle
between the two Home Pages by repeatedly pressing the Home button.
Edit Page
– shows you all parameters available to tweak for a processing block or setup page.
2. Select Knob – turning this knob will do different things depending on what page you’re on.
Select Knob
Edit Page – turn to pick a different Model. This works for the Amp, Stomp, Mod, Delay, Reverb, and
Wah edit pages.
You can also press this knob to store your own tweaked-up sounds in POD X3 Pro. Just press, choose what
to store and where to store it, and press the button again to complete the Save.
Home Page – turn to select presets.
3. Home / Hold for Commands – press to return to the Home Page. For User Presets, press
repeatedly to toggle between the Tone Path Home Page and the Big User Home Page. Press and hold for
2 seconds to enter the Commands page.
Page 17

Controls & Connections
4. Inputs – press to enter the Inputs setup page to configure which inputs you’re using.
5. 4-way Nav – pressing this will do different things depending on what page you’re on.
Home Page – press Up, Down, Left, and Right to navigate to a processing block.
Edit Page – press Up and Down to move through each row of parameters available. You can also press
Left and Right to move to the previous or next edit page.
6. On/Off – press to turn the selected processing block on or off (the blocks are on when the buttons
are lit and the block on the Home Page is solid). Double-press to enter the processing block’s Edit page,
where you can fine-tune the parameters for that block. Press the
return to the Home Page.
Home button to leave the Edit page and
7. Outputs / Hold for System – press to enter the Outputs setup page, where you can set up POD
X3 Pro for whatever you’re connecting it to. This is a very important step for getting the best sound out
of your POD X3 Pro. Press and hold for 2 seconds to enter the System setup page.
8. Multi-function Knobs – turn any one of these knobs to adjust the corresponding parameter in the
display.
1•13
9. Keypad – these buttons allow you to do the following:
Tone 2 / Hold for Dual – press to toggle between Tone 1 and Tone 2 (you’re editing Tone 2 when the
button is lit). Press and hold to turn Dual Tone on or off.
Amp, Stomp, Mod, Delay, Verb – press to turn the Amp, Stomp, Mod, Delay, and Reverb processing
blocks on or off (the blocks are on when the buttons are lit). Double-press one of these buttons to
tweak the block. For example, just press the
taken to the Stomp Box Edit Page. Press the
Home Page.
Tap / Hold for Tuner – POD X3 Pro allows you to control the time and speed of your Delay and/or Mod
effects by simply tapping on this button. Just tap it a few times and the effects that are set to “lock”
to that tempo will change to match what you tapped. There’s also a Tempo parameter in the effects’
Edit Pages, so you’ll see exactly what Tempo you’ve tapped. This is especially useful if you are trying to
nudge your Tap, setting to just the right value.
Press and hold the
activation with an optional FBV foot controller.
Ta p button for 2 seconds to activate the tuner. You can also add footswitch tuner
Stomp button two times quickly and you’re instantly
Home button to leave the Edit Page and return to the
10. Drive – controls how hard you’re driving the input of the chosen Amp Model. Like the input volume
Page 18

Controls & Connections
control on a non-master volume guitar amp, higher settings give you more “dirt.”
This knob, along with the
currently selected – Tone 1 or Tone 2.
11. Tone Controls – Bass, Middle, Treble, Presence. Just like any guitar amp. And when you change
Amp Models, the response and interactivity of these controls change, too—so they act like the tone
controls of the original amp that inspired the Amp Model you’ve selected.
12. Reverb – spin this knob to set the Reverb level of the Tone that is currently selected.
13. Tone Volume – this knob controls the current Tone’s relative volume level.
1•14
14. Master Volume – this controls the overall output level of POD X3 Pro and also sets the headphone
level. Changing the
any volume level. This setting is not saved when you store settings into one of the POD X3 Pro’s memory
locations.
When running into line level gear (like recorders, mixers and PA’s), POD X3 Pro will generally give the
best signal-to-noise performance when you have the
Volume control turned down low, you may get extra hiss – which obviously isn’t what you want – if you
turn up your mixer or recorder’s output to compensate. In order to allow you to set the
high as possible when connecting to recording, mixing, and other studio gear,
POD X3 Pro’s outputs into line level, not microphone or guitar level inputs. Line level inputs should
allow you to turn POD X3 Pro’s
sound possible. If your gear has inputs that function as mic/line level inputs, try to set the trim for those
inputs to the minimum level, and POD X3 Pro’s
15. Microphone Input – plug in your microphone here. The Inputs page is where you assign whether
this input feeds Tone 1, Tone 2 or both.
16. Trim Control – use the Trim Control to get a nice, healthy level.
17. Guitar In – plug your guitar or bass in here. It’s a mono, unbalanced connection. The Inputs page is
where you assign whether this input feeds Tone 1, Tone 2 or both.
17a. Guitar In Pad – engage this Pad to tame hotter signals at the Guitar In jack when you use guitars
with active pickups or other high output sources.
18. Low Cut Filter – push this button in to engage the Low Cut Filter for the Mic Input. It cuts 75Hz
and below, which is useful for eliminating rumble from mic sources.
18a. Mic Pad – for hot mics, engage this pad to attenuate the Mic Input by -20dB.
19. Phantom Power – pushing in this button activates 48V Phantom Power for both Channel Strip
Mic Inputs. An LED will light when Phantom Power is activated.
20. Clip Light – this lights when input clipping is detected at the Channel Strip Mic or Guitar Inputs. To
avoid clipping, engage the Mic Pad or Guitar Pad or reduce the output level of the device that’s feeding
your POD X3 Pro. Another Clip Light for Tone Volume clipping is located under the Outputs button,
as described on Page 3•5, item 15.
21. Signal Present LED – this LED will light when an input signal is present.
Tone Controls, Reverb, and Tone Volume knobs, adjusts the Tone that is
Master Volume level does not change your tone, so you can get the tone you want at
Master Volume control at max. With the Master
Master Volume as
be sure you are plugging
Master Volume up all the way (or close to it) and thereby get the best
Master Volume to maximum, when setting levels.
Page 19

Controls & Connections
22. Power Switch – flip the switch here to bring your POD X3 Pro to life.
23. Phones – plug your headphones in here to avoid noise complaints from the neighbors (or the rest of
your family). The volume is set by the
to be sure they’re not set for ridiculous volume before your slap them on your ears. Try a
knob setting of about 10 o’clock to start, then turn up from there if you need more volume.
Master Volume knob. Any time you use headphones, it important
Master Volume
24. AES/EBU I/O – the AES/EBU Out jack sends 24-bit digital versions of the Direct Out signals. The
System setup screen lets you choose the sample rate and adjust the level. The AES/EBU In jack receives
24-bit digital audio.
25. S/PDIF I/O – the S/PDIF Out jack sends out 24-bit digital versions of the Direct Out signals. The
System setup screen lets you choose the sample rate and adjust the level. The S/PDIF In jack receives
24-bit digital audio.
26. Studio/Direct Out – these balanced XLR connectors provide speaker/microphone/room
simulation, perfect in the studio for pro-quality sound or as a direct send to a house mixer or PA when
playing live.
27. Output Level – use this switch to set the output level of POD X3 Pro’s XLR Direct Outs to Mic or
Line level.
28. Direct Out Ground Lift – this switch lets you lift the grounds of POD X3 Pro’s XLR Direct
Outs. This can be handy if you get an audible hum caused by a ground loop when connecting to other
grounded equipment.
29. Unprocessed Out – these unbalanced 1/4-inch connectors give you an unprocessed guitar signal,
tapped off of your POD X3 Pro’s guitar input. This is perfect for recording when you want to re-amp or
use plugins to process your guitar track.
30. FBV Pedal – connect an optional foot controller here, including the FBV, FBV Shortboard, and FBV
Express. The System page lets you set it all up.
31. MIDI – connect your POD X3 Pro to your MIDI equipment to send and receive Program Change
Messages for selecting Presets. POD X3 Pro’s MIDI Out connects to another device’s MIDI In; its MIDI
In goes to another device’s MIDI Out.
32. Variax – this input provides power and a direct digital audio connection between a Line 6 Variax
1•15
Page 20

Controls & Connections
guitar or bass and the POD X3 Pro. The Inputs page is where you assign whether this input feeds Tone 1,
Tone 2 or both.
Be sure to keep the protective plastic cap on this connection when it’s not connected to a Variax, so you
won’t damage it by mistakenly inserting a 1/4-inch guitar cable or other connection. When you are ready
to connect a Variax, use only Line 6 supplied Variax-compatible cables – not standard Ethernet or other
cables – to avoid damage to the jack.
You can learn more about the Variax family of guitars, each one giving you the sound of an entire guitar
collection in one instrument, at www.line6.com.
33. USB 2.0 – POD X3 Pro’s USB 2.0 jack lets you connect directly to a USB 2.0-equipped computer,
1•16
and take advantage of many computer-powered features:
Line 6 Monkey software makes it easy to install software and get updates. Install driver software with •
Line 6 Monkey, and POD X3 Pro provides 8 audio inputs to your computer via USB:
1-2 is the main signal, configured on POD X3 Pro’s • Outputs page for Digital Outs.
3-4 is Tone 1 separately in stereo.•
5-6 is Tone 2 separately in stereo.•
7 is the sum of the inputs you’ve chosen for Tone 1.•
8 is the sum of the inputs you’ve chosen for Tone 2.•
You can also connect your headphones or powered speakers directly to POD X3 Pro to hear your computer-
generated audio, along with POD X3 Pro’s real-time processing.
34. Effects Loop – the Effects Loop provides two jacks for stereo FX Send and two for stereo FX
Return, operating at approximately 19.5 Volts peak-to-peak, making it optimal for line level devices.
The loop can also be used with most stomp boxes by adjusting the send and return levels. Use the
Return jack for mono return. The loop can run pre or post Amp Model, and if nothing is connected to
it, POD X3 Pro is smart enough to disable the loop so you still get sound.
35. 1/4” (Live) Outputs – these unbalanced jacks get your POD X3 Pro’s sound to a guitar amp,
recorder, mixer or PA. You can select Amp or Line output level via the switch to the right of the 1/4”
jacks.
The Output display pages congure these outputs for Studio or Live use. In Studio Mode, they’re ready to
plug into a recorder with unbalanced –10 dBV inputs. In Live Mode, they don’t have speaker simulation,
and are ready for connection to an on-stage power amp. Whichever you choose, the front panel
Volume knob determines how much signal you’ll get at these jacks. You can use either jack as a mono
output, by the way.
The
adjustments to the 1/4-inch outputs feeding an amp without affecting the levels sent to the house sound
mixer or PA.
36. Line Inputs – these two unbalanced 1/4-inch inputs can be used for a second guitar or just about any
other instrument or line inputs. The
Tone 2 or both.
Left
Master
System page lets you disable Master Volume control for these outputs, so you can make on-stage
Inputs page is where you assign whether these inputs feed Tone 1,
Page 21

Join the Club!
Visit www.line6.com/club to register online and join the All Access club, the place to get:
Free iTunes and MP3 Jam Tracks.•
Free loops for GarageBand, Acid, Reason and more.•
Free guitar lessons from LA session pros.•
Free chord and scale practice tools.•
Stay informed of contest and special offers.•
Access to discussion forums, software updates and more.•
Controls & Connections
1•17
Page 22

Page 23

Getting Around, Tones & Tuner
Tone Path Home Page Big User Home Page
(available for User Presets only)
Ge t t i n G Ar o u n d , to n e s & tu n e r
POD X3, POD X3 Live and POD X3 Pro allow you to completely tweak your tone, giving you the ability to
dial-in just about any sound you can imagine. More importantly, we’ve come up with an amazingly straightforward way for you to take total control of your sound. It all starts at the Home Page.
Home Page
You can get to POD X3, POD X3 Live and POD X3 Pro’s Home Page at any time by pressing the Home
button. There are actually two versions of the Home Page, the “Tone Path” Home Page and the “Big User”
Home Page:
If the currently-loaded preset is from the User folder, you can toggle between these two Home Page displays by
repeatedly pressing the Home button. Otherwise, the Tone Path Home Page will be the only one available.
The Big User Home Page is handy when you’re on stage – you’ll be able to clearly see which User preset is
loaded.
2•1
To the left of the Tone names is the bank and channel number (“32D”, for example) if this is a User preset, or
just a number if it’s from one of the other preset folders.
The Tone Path Home Page also shows the Tone Path, which includes all the digital processing “blocks” that
are working to deliver you great tone. The blocks include:
Amp+Cab• Loop (POD X3 Live & Pro)•
Gate• Mod•
Wah• Dly•
Stomp• Rev•
EQ• Vol (always on)•
Comp•
Page 24
Getting Around, Tones & Tuner
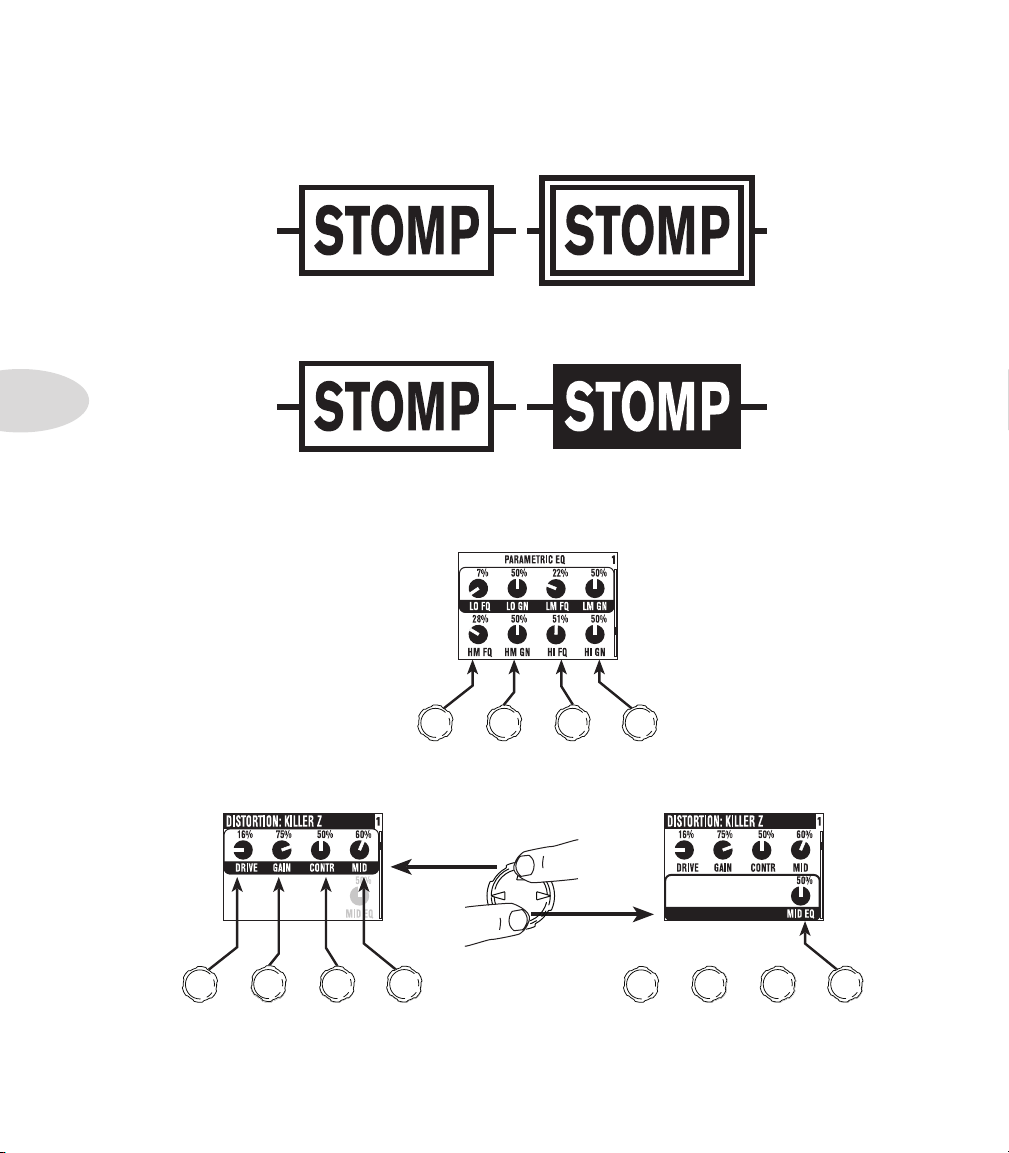
Block selectedBlock not selected
Block onBlock off
Turn to tweak upper row settings. Turn to tweak lower row settings.
Press up/down to
select upper/lower
row for tweaking.
Each block in the path can be selected, turned on or off (except Volume), and tweaked to your liking. To
select a block from the Home Page, use the 4-way Nav button to get to the one you want. When a block is
selected, you’ll see that it gets a frame around it:
Once you select a block, you can press the On/Off button to turn that block on and off. The color of the block
tells you whether it’s off (inactive) or on (active):
2•2
To tweak a block, select it and double-press the On/Off button. This will open up its Edit Page, where you
can use the Select knob to pick Models (where available) and the Multi-function knobs to change the
corresponding parameters as desired:
If there are multiple rows or multiple pages of parameters in an Edit Page, you can use the Up and Down
buttons to get to them all.
Page 25

Getting Around, Tones & Tuner
From any Edit page, you can also use the Left and Right buttons to step through the other Edit Pages, in this
order:
AMP > STOMP > MOD > DLY > VERB > GATE > COMP >EQ >WAH > VOL > LOOP (POD X3
Live & POD X3 Pro only)
To return to the Home Page from an Edit Page, you can either press the Home button or double-press the
On/Off button.
By the way, you can also directly edit and turn blocks on or off using the POD X3 and POD X3 Pro Keypad or
POD X3 Live Footswitches. You know the drill—press to turn blocks on or off, and double-press to tweak.
Many of these blocks can be congured to be Pre or Post, so their location in the Home Page can visually
change depending on how they’re assigned.
The Dual Tone Concept
One of the most powerful features of POD X3, POD X3 Live and POD X3 Pro is Dual Tone capability. What
is Dual Tone, you ask? There are actually two (2) completely independent Tone paths available in POD X3,
POD X3 Live and POD X3 Pro! This allows you to:
Process two (2) completely independent Tones for two separate inputs at the same time, such as your
guitar plus a microphone. We like to refer to these as tone “Pairs”.
or
Use two (2) completely independent Tones on a single input. This is like running through (2) amps at
once! We call these tone “Blends”.
or
Set up one sound on Tone 1, and a different sound on Tone 2, and switch between them instantly, with
seamless transitions including delay and reverb trails. We like to refer to this as “Alternating” tones.
There are essentially (3) steps to getting Dual Tone going on POD X3, POD X3 Live and POD X3 Pro:
1. Assign inputs. To assign inputs to each Tone, press the Inputs button and select the input or
combination of inputs to feed Tone 1 and Tone 2.
2•3
Page 26

Getting Around, Tones & Tuner
Dual tone on Dual tone off
HOLD
Edit Tone 1 (Home Page) Edit Tone 2 (Home Page)
Edit Tone 1 (Edit Page) Edit Tone 2 (Edit Page)
2. Choose whether you want both Tones on at the same time, or just one Tone, by holding the Tone 2
button (POD X3 & POD X3 Pro) or the Tone 2 footswitch (POD X3 Live) for two seconds.
3. Tweak your Tones. From the Home Page, briey pressing the Tone 2 button (POD X3 & POD X3 Pro)
or stepping on the Tone 2 footswitch (POD X3 Live) will toggle between controlling Tone 1 and Tone
2•4
2. When you’re on the one you want, you can select blocks, turn them on/off, tweak, and turn knobs as
described earlier.
Tone 1 name is inverted if Tone 1 is selected. Tone 2 name is inverted if Tone 2 is selected:
From a block’s Edit Page, you can also press the Tone 2 button (POD X3 & POD X3 Pro) or step on
the Tone 2 footswitch (POD X3 Live) to toggle between that block for each Tone.
Note: You can also use an optional FBV or FBV Shortboard to control Dual Tone functions, as referenced in
Steps 2 and 3 above. For details on setting this up, see Page 6•6.
Page 27

Getting Around, Tones & Tuner
Tone Volume adjusts the volume
of the currently selected Tone.
Multifunction Knob 4 adjusts the
volume of both Tones at once.
Tone Volume Controls
The • Tone Volume knob adjusts the volume of the Tone that is currently selected. Use this control to
set the correct balance between Tone 1 and Tone 2.
From the Home Page, the rightmost •
2. Back off on this control if you’re seeing the
each preset.
You probably want all of your favorite sounds as loud as possible, while also having the right difference in
volume between your lead and rhythm sounds, clean and dirty sounds, etc. Right? OK, then, to get this happy
balance, start with your favorite ‘clean’ sounds.
Multi-function
Clip
knob lets you adjust the volume of Tone 1 + Tone
light turn on. This level is saved and recalled with
2•5
Turn up their volume as high as you can without getting the
and save them that way. Then switch amongst them to see if some are too loud, and turn them down a bit to
match well with the others.
Next, move on to select your ‘dirtier’ crunch and lead tones, comparing them to the clean sounds and saving
them with lower volume settings to match well with those clean sounds.
Now, each time you use your POD X3, POD X3 Live or POD X3 Pro, you just have to set a
level you like, and you can switch amongst your various sounds without unhappy volume differences.
Preset Folders
POD X3, POD X3 Live and POD X3 Pro include over 350 presets to cover a wide range of styles. These presets
store complete amp-and-effect selections and settings that you can call up at the touch of a button. Of these
presets, there are 128 User locations that you can use to store your own custom tones.
The following folders of presets are available:
USER: any presets you save go here (128 total)•
LO GAIN: for electric guitar (30)•
HI GAIN: for electric guitar (30)•
FX HVY: for electric guitar (20)•
Clip
indicator to light when you strum hard,
Master Volume
Page 28

Getting Around, Tones & Tuner
Press to show
the Home Page.
Turn the Select knob to
choose a preset from that
folder
Turn to select
.
Turn to choose
a folder.
Press to show
the Home Page.
Turn to select
.
Turn to choose
a folder.
Turn the Select Knob
to choose a preset
from that folder.
SONGS: for electric guitar (40)•
BLENDS: Dual Tone Blends for electric guitar (30)•
PAIRS: Dual Tone Pairs for independent inputs (30)•
ACOUST: for acoustic guitar (15)•
BASS: for bass guitar (40)•
VOCAL: for vocals (15)•
It’s important to remember that since POD X3, POD X3 Live and POD X3 Pro have Dual Tone functionality,
each preset actually stores settings for both Tone 1 and Tone 2. In fact, separate names for Tone 1 and Tone 2
are stored in each preset. This comes in very handy when recalling presets.
Recalling Presets
2•6
There are a couple of ways to recall presets from the Preset Library. To recall a “complete” preset (both Tone
1 and Tone 2) at once, do the following:
You can also choose to recall only Tone 1:
Page 29

Or only Tone 2:
Press to show
the Home Page.
Turn to select
.
Turn to choose
a folder.
Turn the Select Knob
to choose a preset
from that folder.
Getting Around, Tones & Tuner
Note: You can also recall User Presets on POD X3 and POD X3 Pro using an optional Line 6 FBV, FBV
Shortboard or FBV Express.
Recalling User Presets on POD X3 Live
Using POD X3 Live’s footswitches, you can recall the 128 User presets with your feet. It’s easy. Just step on
the Bank Up or Bank Down footswitch to get to the bank you want (1-32), then use the A, B, C, or D
footswitch to recall a preset from that bank (A-D). The preset will load as soon as you step on A, B, C, or D.
2•7
Page 30

Getting Around, Tones & Tuner
Tone 2 unlocked Tone 2 locked
Choose to
edit name for
Tone 1 or Tone 2.
Move
cursor.
Change
character.
Press to
finish save.
Choose a User
location to save to.
PRESS
Locking Tone 2
From the Home Page, you can lock Tone 2 to prevent it from getting overwritten when loading new presets.
This is handy when you’re using Tone 2 for vocals and you want to make sure it doesn’t change when you recall
guitar presets on Tone 1.
2•8
Saving Tones
You can edit any of the POD X3, POD X3 Live or POD X3 Pro’s presets or create one of your own and store it
to one of the 128 User preset locations.
To save a preset, follow these steps:
Page 31

Getting Around, Tones & Tuner
TUNER
REFAUDIO
BYPASS
50 50
E
440HZ
Tuner
Press and hold the Ta p button or footswitch for 2 seconds to enter tuner mode — shazam! Instant digital
chromatic tuner for Tone 1. The display will change to the following:
All Amp Model and effects processing are bypassed so you can hear those questionably-tuned strings clearly,
should you choose to do so.
2•9
Play a note on your guitar and you’ll see what note it is on that handy display; all half-step notes are displayed
as flats, so you’ll see A
key so the note goes sharp and then flat, and the little diamond will move to the right when it’s sharp and
back down to the left when it’s flat. When you’ve got it tuned just right, the little diamond will sit right in
the middle.
Ref – Want a different reference than A=440Hz? Turn the “Ref” knob to set the reference frequency
anywhere from 425-455 Hz. This setting is stored so you don’t have to reset it every time you turn on your
POD X3, POD X3 Live or POD X3 Pro.
Audio – Normally, the audio will be muted while you’re tuning, but if you prefer to hear yourself tune,
turn the Audio knob to toggle between Mute and Bypass.
Press the Ta p button or footswitch and the tuner disappears just as swiftly as it came.
b
instead of G#, for example. Play that string you’re trying to tune again, turn its tuning
Page 32

Page 33

Reference: Tweaking Tones
re f e r e n C e : tw e A k i n G to n e s
Amp + Cab
Type – turn this knob to select Guitar Amp Models, Bass Amp Models or Pre-Amp type Models.
Select Knob – once the Type has been selected, turn the Select Knob to pick an Amp Model. The Model
names will appear at the top of the display.
Cab – spins through the available Cabinet Models. The available cabs will change depending on the Amp
Model that is chosen.
Mic – changes the microphone selection.
Room - adjusts the amount of “room tone” in your sound. Low settings give you the sound of moving the
virtual microphone closer to the virtual cabinet (you’ll hear only a small amount of the early reflections caused
by the sound echoing in the room). Higher settings increase the early reections, as if you moved the mic
farther from the cabinet.
Byp Vol - sets the Bypass Volume, the volume that this tone will be set to when the Amp+Cab block is off. It
doesn’t affect the volume you hear with the Amp+Cab block on.
3•1
Tone Controls
Tone Controls adjust the overall tone of the currently-loaded Amp Model. You should know that these controls
are individually crafted for each Amp Model, so their response and interactivity will change depending on
the Amp Model that is selected. For Guitar and Bass Amp Models, these correspond to the dedicated Tone
Control knobs on the front panel of your POD X3, POD X3 Live or POD X3 Pro.
Momentary Display: When any of the physical Tone Control knobs are adjusted on the front panel, this
edit page will be displayed, allowing you to see your settings as you tweak the controls. After 2 seconds of
Page 34

Reference: Tweaking Tones
inactivity, the display will return to its previous state.
Guitar Amp Model Tone Controls:
Bass – bass tone control.
Mid – mid tone control.
Treble – treble tone control.
Pres – presence control, which brightens your tone.
Drive – controls how hard you’re driving the input of the chosen Amp Model, and just like the input
volume control on a non-master volume guitar amp, higher settings give you more “dirt”.
Vol – controls the relative volume level of the current Tone; you can use this to balance levels between
various tones, but in general, you should set this as high as possible for the best signal-to-noise ratio.
Bass Amp Model Tone Controls:
Bass – bass tone control.
3•2
Lo Mid – low-mid tone control.
Hi Mid – high-mid tone control.
Treble – treble tone control.
Drive – controls how hard you’re driving the input of the chosen Amp Model, and just like the input
volume control on a non-master volume guitar amp, higher settings give you more “dirt”.
Vol – controls the relative volume level of the current Tone; you can use this to balance levels between
various tones, but in general, you should set this as high as possible for the best signal-to-noise ratio.
Pre-Amp Model Tone Controls
Bass & Freq – bass tone control; level and frequency.
Lo Mid & Freq – low-mid tone control; level and frequency.
LMid – turn to choose 1x or 10x the low-mid frequency.
Hi Mid & Freq – High-mid tone control; level and frequency.
HMid – turn to choose 1x or 10x the high-mid frequency.
Hi Pass – high-pass filter frequency.
Lo Gn & Fq – low-frequency shelving tone control; level and frequency.
Lm Gn & Fq – low-mid peaking tone control; level and frequency.
Mid Gn & Fq – mid peaking tone control; level and frequency.
Hm Gn & Fq – high-mid peaking tone control; level and frequency.
Hi Gn & Fq – high-frequency shelving control; level and frequency.
Page 35

Reference: Tweaking Tones
Stomp Boxes
What guitarist doesn’t like Stompboxes? POD X3, POD X3 Live and POD X3 Pro include an arsenal of
amazing-sounding Distortion, Dynamics, and Filter Stomp Box Models, lovingly crafted after a whole carpetfull of the greatest effects of guitar history. Quick descriptions for the various parameters that appear for
different Models are listed below.
Select Knob – turn to pick a Stomp Box model.
Distortion Stomp Boxes
Drive/Gain – amount of distortion/overdrive/grind/gain.
Tone – overall effect tone control.
Contr – on Killer Z, adjusts the contour of the tone.
Mid – mid tone control.
Treble – treble tone control.
Bass – bass tone control.
Blend – on the Bronze Master, adjusts the blend of tonal elements.
Mid Fq – selects middle frequency for tone adjustment.
Dynamics Stomp Boxes
Sust – varies the compression threshold.
Level – adjusts the overall level.
Sens – varies the effect’s response to your playing.
Amount – on Vetta Juice, varies the ratio of compression.
Ramp – for Swell effects, sets the time it takes for your sound to “ramp” from quiet to loud.
Depth – for Swell effects, sets how much the volume of your attacks is reduced.
Frequency – on De-Essers, chooses the frequency that’s targeted for reduction.
3•3
Amount – on De-Essers, the amount of reduction applied to Frequency.
Page 36

Reference: Tweaking Tones
Filter Stomp Boxes
Sens – varies the filter’s response to your playing.
Q – adjusts the filter’s width.
Decay – sets how fast (or slow) the effect trails off.
Wave – allows you to choose from among the effect’s available waveforms.
Mix – controls the ratio of wet (effected) to dry (non-effected) sound that is heard.
-1 Oct – controls how loud you want the “one octave down” waveform.
-2 Oct – controls how loud you want the “two octaves down” waveform.
Filter – sets the corner frequency of the filter’s low-pass filter; frequencies above this frequency are cut.
INTVL1 – chooses the first pitch interval of your original note played.
INTVL2 – chooses the second pitch interval of your original note played.
3•4
Attack – controls how long it takes for the effect to happen.
Pos – represents the current angle of that pedal, with 0% meaning the pedal is fully heel down, and 100%
meaning it’s fully toe down. If you don’t have a pedal connected, you can still adjust Pos to get a “parked
wah” sound.
Heel – sets how much effect you’ll hear when the pedal is at its minimum (heel down) setting. Set it to
0% to have no effect in the heel down position.
Toe – sets how much effect you’ll hear when the pedal is at its maximum (toe down) setting.
Modulation Effects
Modulation effects are things that swoosh, pulse and warble—from phase shifters to flangers to choruses.
Why are they called modulation effects? Well, if we consult a dictionary, we discover that ‘modulate’ in the
electronic world means to “alter the amplitude or frequency of (a wave) by (using) a wave of a lower frequency
to carry a signal” (denition courtesy of The Oxford Encyclopedic English Dictionary, Third Edition, thank
you very much). That modulating wave is what causes all that swooshing, pulsing, and warbling.
Select Knob – turn to load a Modulation effect Model.
Speed – directly controls how fast (or slow) the modulating waveform sweeps.
Page 37

Reference: Tweaking Tones
Tap – set this to OFF to have this effect ignore tempo, or pick a note value that you’d like your speed to
match; works with the Ta p button/footswitch and the Tempo knob.
Tempo – Shows the tempo that’s been set by Ta p , and lets you fine tune it.
Mix – controls the ratio of wet (effected) to dry (non-effected) sound that is heard.
Depth – controls the overall amplitude of the modulating wave, which usually determines just how
intense the effect will be.
Bass – bass tone control.
Treble – treble tone control.
Config – allows you to choose the position of the Mod pedal in your signal flow: Pre (before the amp
model), or Post (after the amp model).
Fdbk – adjusts how much of the effected signal is fed back to the input of the effect.
Manual – on Jet Flanger, controls the length of the very short delay that’s applied to the sweep to make
the flanging effect happen.
Wave – adjusts shape of the waves that drive the Tremolos and Auto Pan.
Tone – overall tone control.
Predly – adjusts how long it takes for the effect to kick in.
Q – adjusts tone focus from sharp to broad.
Freq – changes the frequency that the effect is focused on.
Flut – adjusts the amount of tape-style utter for Tape Eater.
Dist – distortion, baby!
3•5
Page 38

Reference: Tweaking Tones
Delay
Select Knob – turn to pick a Delay model.
Time – for mono delays, sets the time for the delay line; for stereo delays, sets the time for the left side
delay line.
Tap – set this to OFF to have this effect ignore tempo, or pick a note value that you’d like your speed to
match; works with the Ta p button/footswitch and the Tempo knob.
3•6
Tempo – Shows the tempo that’s been set by Ta p , and lets you fine tune it.
Mix – controls the ratio of wet (effected) to dry (non-effected) sound that is heard.
Bass – bass tone control.
Treble – treble tone control.
Fdbk – adjusts how much of the delayed signal is fed back to the input of the delay.
Config – allows you to choose the position of the Delay pedal in your signal flow: Pre (before the amp
model), or Post (after the amp model).
ModSpd – for delays with modulation, controls how fast (or slow) the modulating waveform sweeps.
Depth – for delays with modulation, controls the overall amplitude of the modulating wave.
Drive – for Tape Delay models, adds some tube warmth.
Flut – for Tape Delay models, adjusts wow-and-flutter, that unique sound of a slipping, dirty capstan.
Heads – for some Tape Delays, enables you to choose from the available combinations of the model’s
virtual tape heads.
Speed – is the speed of the modulation for a modulated Delay Model.
L-Fdbk – for Stereo Delays, controls the left-channel feedback.
R-Fdbk – for Stereo Delays, controls the right-channel feedback.
Offset – for Stereo Delays, sets the time for the right side delay line, as a percentage of the left delay’s
Time setting.
Spread – for Stereo Delays, sets the stereo spread of the delays from mono to hard-panned left and
right.
Page 39

Reference: Tweaking Tones
Tone – overall tone control.
Bits – for Low Rez Delay, lets you adjust the delay anywhere from 12 bit resolution down to as few as 4
truly nasty bits. Bear in mind that as you turn the knob clockwise, you’re reducing the bit resolution, so
maximum bit reduction is achieved when the knob is all the way up (think of it as a more control for how
many less bits you want). Your direct sound, of course, stays full resolution.
Reverb
When we set out to create POD X3, POD X3 Live and POD X3 Pro, we devoted our fanatical modeling
technology and energy for innovation to developing no-compromise reverb effects. The collection of reverb
models emulate physical environments (rooms and halls), plate reverbs (which traditionally feature a big steel
plate with some sort of speaker driving it, and usually multiple pickups to pick up the vibrations of the plate),
spring reverbs (the kind guitar players know best), and even a couple of unique new models that you’ll have
to hear to appreciate.
Select Knob – turn to pick a Reverb model.
Dwell – for Spring reverbs, determines how hard the virtual springs are driven; the harder you drive them,
the longer the delay time.
Tone – overall tone control.
Mix – controls the ratio of wet (effected) to dry (non-effected) sound that is heard.
Predly – adjusts how long it takes for the reverb to kick in.
Decay – adjusts how long it takes for the reverb to trail off.
Config – allows you to choose the position of the Reverb in your signal flow: Pre (before the Amp
Model), or Post (after the Amp Model).
Momentary Display: When you adjust the physical Reverb knob on the front panel, this edit page will
be displayed, allowing you to see all your Reverb settings as you tweak the Mix level. After 2 seconds of
inactivity, the display will return to its previous state.
3•7
Page 40

Reference: Tweaking Tones
COMPRESSOR
1
TYPE BYP VOL
75%75% 75%
TYPE
THRESH
-20dB 3dB
GAIN
Gate
The Gate effect helps eliminate unwanted noise when you’re not playing, and can be especially valuable when
using high gain sounds. Like a security gate, it’s supposed to quickly open to pass the things that you want, and
then swing closed to keep out the things that you don’t want.
Thresh – determines how loud your playing has to be to open the gate. More negative numbers (where
the knob is near its fully-counterclockwise setting) mean that the gate will open and allow sound through
even when you are playing quietly, and less negative numbers (where the knob is near its fully-clockwise
setting) mean that the gate will only allow sound to pass when you are playing pretty hard. Turn the
3•8
Thresh all the way down to minimum to disable the Gate (Thresh’s value will then be “Off”).
Decay – determines how fast the gate will swing closed. Like a gate in the real world, a fast decay means
the gate might catch your trailing foot as you pass through – in this case, that means the gate will chop
off the decay of your notes. And a slow decay means that as the gate swings slowly closed behind you,
someone might have time to slip through – in this case, that would be the unwanted noise that you hear
as your notes decay. You’ll have to experiment with the Decay to get just the right happy medium for your
particular guitar, playing style, and sound settings.
Compressor
The Compressor effect is just the thing when you want to smooth out your levels the way that you would
typically do in a recording studio.
Thresh – determines how aggressive you want the Compressor to be in smoothing things out. More
negative numbers make the Compressor more active in taming your levels, so -32dB is a more aggressive
setting than -16dB, say. Some makeup gain is also added as you turn the knob to the left, making for a
much easier tweaking experience.
Gain – controls (what else?) gain, so that even when you’re really squashing your signal with an aggressive
threshold setting, you’ll be able to get good volume levels out of your POD X3, POD X3 Live or POD X3
Pro.
Page 41

Reference: Tweaking Tones
EQ
Here’s some good, old-fashioned EQ to make your tone sparkle, rattle the neighbor’s windows, and everything
in-between. You’ve got (2) bands of shelving EQ and (2) bands of semi-parametric “peaking” EQ to choose
from.
Lo Fq – sets the corner frequency of the low-shelf filter, affecting all sound at and below the frequency
you select.
Lo Gn – adjusts the gain or cut amount of the low-shelf filter.
Lm Fq – sets the corner frequency of the low-mid peaking filter, affecting all sound at and around the
frequency you select.
Lm Gn – adjusts the gain or cut of the low-mid peaking filter.
Hm Fq – sets the corner frequency of the high-mid peaking filter, affecting all sound at and around the
frequency you select.
Hm Gn – adjusts the gain or cut of the high-mid peaking filter.
Hi Fq – sets the corner frequency of the high shelf filter, affecting all sound at and above the frequency
you select.
Hi Gn – adjusts the gain or cut of the high-shelf filter.
3•9
Page 42

Reference: Tweaking Tones
Wah
The Wah effect is generally expected to be controlled by the pedal built into POD X3 Live or an optional Line
6 FBV foot controller or third-party MIDI controller.
Select Knob – turn to pick a Wah pedal. Your choices are Vetta Wah, Fassel, Weeper, Chrome, Chrome
Custom, Throaty, Conductor and Colorful.
Pos – represents the current angle of that pedal, with 0% meaning the pedal is fully heel down, and 100%
meaning it’s fully toe down. If you don’t have a pedal connected, you can still adjust Pos to get a “parked
3•10
wah” sound.
Volume Pedal
The Volume effect is generally expected to be controlled by the pedal built into POD X3 Live or an optional
Line 6 FBV foot controller or third-party MIDI controller.
Min – determines how much volume you’ll hear when the volume pedal is at its minimum (heel down)
setting. Set it to 0% to have silence in the heel down position.
Max – determines how much volume you’ll hear when the volume pedal is at its maximum (toe down)
setting.
Config – allows you to choose the position of the volume pedal in your signal flow: Pre (before the amp
model), or Post (after the amp model).
Page 43

Reference: Tweaking Tones
EFFECT LOOP
1
TYPE BYP VOL
75%75% 75%
TYPE
-58dB 100%
SEND MIXRETURN CONFIG
+24dB
POST
Effects Loop (POD X3 Live & POD X3 Pro only)
This lets you tweak the settings related to the Effects Loop. Note that the Loop can only be on for one Tone
at a time, and turning the Loop on for one Tone automatically forces it off for the other.
Send – adjusts the gain of the send output from -80 to 0 dB.
Return – adjusts the gain of the return inputs from 0 to +24 dB.
Mix – 0-100%: set this to 100% for parallel-style operation.
Config – allows you to place the Effect Loop in two different locations in the POD X3 Live and POD X3
Pro’s signal chain:
• after the Stomp block, before the Mod and Delay blocks.
Pre –
Post – • before the Mod, Delay and Reverb blocks.
If nothing is connected to the loop, POD X3 Live and POD X3 Pro are smart enough to disable the loop so
you still get sound.
3•11
Page 44

Page 45

re f e r e n C e : Co n f i G u r A t i o n & se t u p
INPUTS
TONE 1TONE 2
GUITAR SAME
DIGITAL VARIAX
S/PDIF
DISABLE
GLOBAL
CONTROL
Inputs
Press the Inputs button to get to the Inputs page:
Here, you can route your hardware inputs to Tone 1 and Tone 2.
Tone1 – pick an input to get routed to Tone 1.
For POD X3, you can choose Guitar or Microphone. •
For POD X3 Live, you can also choose Aux, Variax, Guitar + Aux, Guitar + Variax, or Guitar + Variax •
+ Aux.
For POD X3 Pro, your choices are Gtr 1, Mic 1, Line 1, Variax, Gtr 1+Gtr 2, Gtr 1+Variax, Gtr 1+Gtr •
2+Variax, Gtr 2, Line 2, Mic 2, Guitar Stereo, Mic Stereo, Line Stereo, Digital Left, Digital Right and
Digital Stereo.
Reference: Configuration & Setup
4•1
Tone 2 – pick an input to get routed to Tone 2.
For POD X3, you can choose Same as Tone 1, Guitar, or Microphone. •
For POD X3 Live, you can also choose Aux, Variax, Guitar + Aux, Guitar + Variax, or Guitar + Variax •
+ Aux.
For POD X3 Pro, your choices include all of the Tone 1 input assignment choices listed above, plus •
Same as Tone 1. Your Tone 2 input choices are restricted, however, depending on the input you’ve
selected for Tone 1. For example, when a Stereo setting is selected for Tone 1 input, Tone 2 will
automatically be set to Locked For Stereo. In this mode, no other input selection will be available for
Tone 2.
Analog Input Restriction• : POD X3 Pro does not allow simultaneous input from more than one analog
input per Channel Strip. For example, if Gtr 1 is selected as input for Tone 1, no combination of a Tone
1 analog input such as Gtr 1, Mic 1, Line 1, Gtr 1+Gtr 2, Gtr 1+Variax or Gtr 1+Gtr 2+Variax will
be available for Tone 2.
Digital (POD X3 Pro only) – select either S/PDIF or AES/EBU for digital input.
Digital Input Restriction• : Only one digital input can be active at once. For example, if Variax is
selected as an input, AES/EBU and S/PDIF will not be available.
Page 46

Reference: Configuration & Setup
Variax (POD X3 Live and POD X3 Pro only) – you have two choices here:
Enable Global Control – the X3 Live or Pro will control your Variax, and the lower half of the LCD •
will display its currently selected Model and other parameters.
Disable Global Control – when global control is disabled, your Variax will be heard but it won’t respond •
to patch changes. The lower half of the LCD will be blank.
Outputs
Pressing the Outputs button gets you to the first of two Outputs pages:
Press the 4-way Nav Left and Right to move between page 1 and page 2.
4•2
Outputs Page 1: 1/4-inch Outputs – this is where you set up the 1/4-inch outputs on POD X3, POD X3
Live and POD X3 Pro. Turn the Mode knob to select an Output Mode. Your choices are:
“Studio” Modes (for direct connections to a mixer, recorder, PA, or headphones)
Match Studio/Direct – the 1/4-inch jacks output the Studio/Direct Mode mix set on the second •
Outputs page.
Studio/Direct Tone 1 – the 1/4-inch jacks output Tone 1 only, panned center, with Studio Mode •
processing.
Studio/Direct Tone 2 – the 1/4-inch jacks output Tone 2 only, panned center, with Studio Mode •
processing.
“Live” Modes (for feeding a guitar amp, without speaker/mic/room simulation, and with a set of controls
for On/Mute and Pan for Tone 1 and Tone 2 that is independent from the Studio/Direct Mix settings)
Combo Front – use this to jack into the instrument input of a combo guitar amp.•
Combo Pwramp – use this to jack into the power amp input of a combo guitar amp.•
Stack Front – use this to jack into the instrument input of a guitar amp head with separate cab.•
Stck PwrAmp – use this to jack into the power amp input of a guitar amp head with separate cab.•
Lows – when Combo Front or Stack Front are chosen for Mode, this control appears to let you lower the
overall bass output of POD X3, POD X3 Live or POD X3 Pro. This helps to counteract any bass boost you
may have built into your guitar amp.
Focus – when Combo Front or Stack Front are chosen for Mode, this control appears to let you increase
the overall midrange output of POD X3, POD X3 Live or POD X3 Pro. This helps to counteract any mid
cut that may be built into your guitar amp.
Page 47

Outputs Page 2: Studio/Direct Mix
DIGITAL
STUDIO/DIRECT MIX
TONE 1TONE 2PANPAN
ON ON
MATCH
STUDIO/
DIRECT
48kHz+12dB
RA TE LE VEL
FORMAT
S/PDIF
Reference: Configuration & Setup
Highs – when Combo Front or Stack Front are chosen for Mode, this control appears to let you lower
the overall treble output of POD X3, POD X3 Live or POD X3 Pro.
Tone 1 – allows you to either turn On or Mute Tone 1, independent of the settings of the Studio/Direct
Mix that drive the XLR and other outputs.
Pan – sets the location of Tone 1 in the stereo eld, independent of the settings of the Studio/Direct Mix
that drive the XLR and other outputs.
Tone 2 – allows you to turn On or Mute Tone 2, independent of the settings of the Studio/Direct Mix
that drive the XLR and other outputs.
Pan – sets the location of Tone 2 in the stereo eld, independent of the settings of the Studio/Direct Mix
that drive the XLR and other outputs.
4•3
This mix provides POD’s legendary direct recording sound, ideal for connecting direct to a mixer, •
recorder, PA, or headphones for “Studio Mode” sound.
The headphone and USB 1-2 outputs always get this mix.•
For POD X3 Live and POD X3 Pro, this also always feeds the XLR Direct Outs.•
The 1/4-inch outputs can get this mix, too, when desired. (See next page.)•
Tone 1 – allows you to either turn On or Mute Tone 1.
Pan – sets the location of Tone 1 in the stereo field.
Tone 2 – allows you to turn On or Mute Tone 2.
Pan – sets the location of Tone 2 in the stereo field.
Digital – sets the signal for the digital output. There are four options:
Match Studio/Direct – Digital outputs the Tone and Pan settings as shown.•
Studio/Direct Tone 1 – Digital outputs Tone 1 only, panned center.•
Studio/Direct Tone 2 – Digital outputs Tone 2 only, panned center.•
Dry Inputs – Digital Left outputs the unprocessed input(s) to Tone 1, and Digital Right outputs the •
unprocessed input(s) to Tone 2.
Rate – affects the digital output only, setting the S/PDIF or AES/EBU signal’s sample rate to 44.1, 48,
88.2, 96 kHz or Match Digital In.
Page 48

Reference: Configuration & Setup
DIG LVLMODE
SYSTEM
PEDAL
TWK
CNTRL
BOTH
TONES
TWKLP SW
TONE1:
COMP
1-W/V
(2-VOL)
PEDAL
LP SW
TONE:1
DELAY
MIX
TONE:2
DELAY
MIX
TONE2:
COMP
PEDAL
TONE:1 TO E:2N
1-W/V
(2-VOL)
MSTVOL
OUTS
SETS
ALL
Level – affects the digital output only, adding up to 12 dB of gain. This can be useful to increase the digital
output level of sounds that don’t have a lot of Amp Model or stompbox distortion or other settings that
are driving their levels up.
Format – selects the digital output’s format, either S/PDIF or AES/EBU for POD X3 Pro, S/PDIF for
POD X3 and POD X3 Live.
System
Press and hold the Outputs / Hold for System button for 2 seconds to get to the System page:
Press the 4-way Nav Up and Down to move between this and page 2.
4•4
System Page 1: Pedal and other settings
The Pedal-related settings here are for the wah/voume/tweak pedal built-in to POD X3 Live, and the
pedal on some FBV foot controllers that can be used with POD X3 and POD X3 Pro.
Pedal – use this to have the pedal affect either Tone 1, Tone 2 or Both.
Pedal Tone:1 & Pedal Tone:2 – The built-in pedal on a POD X3 Live and some FBV foot controllers
is pedal “1” and the optional external pedal you can connect to it is pedal “2”. Here you can select what
those pedals control, with these choices:
1-W/off 2-Vol – Pedal 1 controls Wah with the toe switch controlling Wah on/off. Pedal 2, if present, •
controls Volume.
1-Twk 2-Vol – Pedal 1 controls whatever is assigned to Tweak in the lower half of the LCD display. •
Pedal 2, if present, controls Volume.
1-Wah/Vol 2-Tweak – Pedal 1 controls Wah and Volume with the toe switch toggling between the two. •
Pedal 2, if present, controls whatever is assigned to Tweak.
Mstvol (POD X3 Live & POD X3 Pro only) – choose whether the Master Volume knob will control
1/4-inch Live Outputs only, XLR Direct Outputs only, or both (All Outputs). When playing on stage
with a POD X3 Live, you may nd it valuable to have the Master Volume affect your 1/4-inch outs only,
so you can tweak on-stage levels as needed without altering the levels that you’re sending to the house
sound system.
Twk – if you’ve assigned a pedal to control Tweak, this is where you pick the setting that you want to
control. The list of available settings is too long to list here—turn the knob and see what you find!
Compsw (POD X3 Live only) – pick which processing block will be controlled by the Comp (Boost)
footswitch. Your choices are COMP, AMP, LOOP or VERB.
Page 49

Reference: Configuration & Setup
Loopsw (POD X3 & POD X3 Pro only) – pick which function will be controlled by the FX Loop
footswitch of the optional FBV or FBV Shortboard foot controller. Your choices are COMP, AMP or
DUAL for X3 Bean, and COMP, AMP, LOOP or DUAL for X3 Pro. DUAL will perform the same
toggling between Tone 1 and Tone 2 as the TONE 2 (Hold For Dual) button, including the Hold For
Dual function to enable/disable Dual Tone via footswitch.
System Page 2: Pedal and other settings
From the rst System page, pressing down on the 4-way Nav takes you to page 2 where the rmware
version and USB version of your unit are displayed, along with:
Cntrst – set the contrast of the POD X3, POD X3 Live & POD X3 Pro’s display.
MIDI Ch (POD X3 Live & POD X3 Pro only) – choose from MIDI Channel 1-16, or select Omni
to have POD X3 Live & Pro respond to all MIDI channels, while transmitting on Channel 1. The MIDI
channel chosen from the display user interface will be used as the Channel for Tone 1. Tone 2 will use
the next MIDI Channel.
When program change messages 0-127 are received, POD X3 Live & Pro will recall User Presets 01A-32D,
and will transmit those same program changes as presets are selected from the POD X3 Live & Pro
hardware. It also echoes all program change messages it receives, so it can be connected “thru” to another
MIDI device.
Visit www.line6.com/manuals for more comprehensive MIDI CC information.
Commands
Press and hold the Home / Hold for Commands button for 2 seconds to get to the Commands page:
Turn the Select knob to choose a Command, then press the Save button to execute the Command. Press the
Home button to exit without executing a command.
Swap Tone 1 / Tone 2 – just like the name says, your current Tone 1 and Tone 2 settings will be
swapped.
Reset User Presets – this command will reset all 128 User presets to their factory-standard settings.
WARNING: this will destroy any customized settings you may have saved.
4•5
Page 50

Page 51

ex A m p l e se t u p s
Need quick instructions for a particular setup? Just follow these easy steps. And like any good recipe, once
you’ve got the hang of things, feel free to add your own tweaks on these recommended settings to spice it
up...
Mono or Stereo Recording or Direct to Mixer/PA
1. Connect output(s) to your recorder, mixer or PA:
POD X3:• connect the 1/4-inch outs.
POD X3 Live & POD X3 Pro:• the XLR outputs are recommended for live sound systems, to provide
a level that approximately matches a mic’ed up amp. You can also use them for recording into mic
preamps, or use the 1/4-inch outputs to get hotter, line level outputs.
2. Set the second OUTPUTS page (Studio/Direct Mix):
Tone 1: as desired•
Tone 1 Pan: as desired•
Tone 2: as desired•
Tone 2 Pan: as desired•
3. When using the 1/4-inch jacks, also set the 1/4-inch OUTPUTS page:
Mode: MATCH STUDIO/DIRECT•
4. Check your Master Volume.
Select the loudest preset/settings you intend to use. •
Play your instrument and turn Master Volume as high as you can without clipping the system you’re •
feeding.
Example Setups
5•1
Recording Tone 1 & 2 to Separate Mono Tracks
1. Connect outputs to your recorder:
POD X3:• connect the 1/4-inch outs.
POD X3 Live & POD X3 Pro:• the XLR outputs are recommended for live sound systems, to provide
a level that approximately matches a mic’ed up amp. You can also use them for recording into mic
preamps, or use the 1/4-inch outputs to get hotter, line level outputs.
2. Set the second OUTPUTS page (Studio/Direct Mix):
Tone 1: On•
Tone 1 Pan: pan left•
Tone 2: On•
Tone 2 Pan: pan right•
3. When using the 1/4-inch jacks, also set the rst OUTPUTS page (1/4-inch):
Mode: MATCH STUDIO/DIRECT•
4. In your recording system, assign those outputs to separate recording tracks.
Page 52

Example Setups
Recording Tone 1 & 2 to Separate Stereo Tracks (POD X3 Live
& POD X3 Pro only)
1. Connect the 1/4-inch left/right outputs to your recorder as the source for the rst track, and the XLR left/
2. Set the second OUTPUTS page (Studio/Direct Mixer):
3. Set the rst OUTPUTS page (1/4-inch jacks Outputs):
Feed One Guitar Amp
1. Connect 1/4-inch output(s) to your amp or speaker system.
2. Set the rst OUTPUTS page (1/4-inch Outputs):
5•2
3. Check your Master Volume.
right outputs as the source for the second track.
Mode: Studio/Direct•
Tone 1: Off•
Tone 2: On (the XLRs will output Tone 2 only)•
Tone 2 Pan: Center•
Mode: Studio/Direct Tone 1•
Mode: Combo Front, Combo Pwramp, Stack Front, or Stack PwrAmp.•
Lows, Focus, Highs: as desired•
Tone 1: On•
Tone 1 Pan: Center•
Tone 2: On•
Tone 2 Pan: Center•
Select the loudest preset/settings you intend to use. •
Play your instrument and turn Master Volume as high as you can without clipping the amp/speakers •
you’re feeding.
Feed Two Guitar Amps, One for Tone 1 and One for Tone 2
1. Connect the left 1/4-inch output to one amp, and the right 1/4-inch output to the other.
2. Set the rst OUTPUTS page (1/4-inch Outputs):
Mode: Combo Front, Combo Pwramp, Stack Front, or Stck PwrAmp.•
Lows, Focus, Highs: as desired•
Tone 1: On•
Tone 1 Pan: Full Left•
Tone 2: On•
Tone 2 Pan: Full Right•
3. Check your Master Volume.
Select the loudest preset/settings you intend to use. •
Play your instrument and turn Master Volume as high as you can without clipping the amp/speakers •
you’re feeding.
Page 53

Feed Two Guitar Amps, One “Wet” and One “Dry”
1. Connect the left 1/4-inch output to one amp, and the right 1/4-inch output to the other.
2. Set the rst OUTPUTS page, (1/4-inch Outputs):
Mode: Combo Front, Combo Pwramp, Stack Front, or Stck PwrAmp.•
Lows, Focus, Highs: as desired•
Tone 1: On•
Tone 1 Pan: Full Left•
Tone 2: On•
Tone 2 Pan: Full Right•
3. Check your Master Volume.
Select the loudest preset/settings you intend to use for your “dry” sound. •
Play your instrument and turn Master Volume as high as you can without clipping the amp/speakers •
that you’re using as your dry amp.
4. Set up your “dry” tone.
Dial in your dry sound on Tone 1, with little or no “wet” effects,•
Save your preset.•
5. Set up your “wet” tone.
From the Home Page, turn the second knob below the display, and begin loading Tone 2 settings.•
Selecting Tone 1 from the preset you just saved (you’ve copied Tone 1 to Tone 2).•
Set Tone 2’s Tone Volume low.•
Add more effects to Tone 2, cranking up the effect mixes, so you hear all or nearly all “wet” signal from •
Tone 2.
6. Save your preset, using WET in the name of Tone 2, so you’ll remember what it’s for.
Example Setups
5•3
Feed a Guitar Amp and Send Separate XLR Direct Outs (POD
X3 Live & POD X3 Pro only)
1. Connect 1/4-inch output(s) to your amp or speaker system.
2. Connect XLR output(s) to your recorder, mixer or PA.
3. On the rst OUTPUTS page (1/4-inch Outputs):
Mode: Combo Front, Combo Pwramp, Stack Front, or Stck PwrAmp.•
Lows, Focus, Highs: as desired•
Tone 1: On•
Tone 1 Pan: as desired•
Tone 2: On•
4. On second OUTPUTS page (Studio/Direct Mix) set the XLR output signals:
Mode: Studio/Direct•
Tone 1: On•
Tone 1 Pan: as desired•
Tone 2: On•
Tone 2 Pan: as desired•
Tone 2 Pan: as desired•
Page 54

Example Setups
5. Check your Master Volume.
Electric Guitar to On-Stage Amp and Direct Out + Vocals/
Acoustic/etc. to Direct Out Only
1. Connect your electric guitar to Guitar In.
2. Connect your microphone to the Mic In, or your acoustic, etc. to the Aux or Line In.
3. On the INPUTS page:
4. Connect 1/4-inch output(s) to your amp or speaker system.
5. Connect XLR output(s) to your recorder, mixer or PA.
6. On rst OUTPUTS page (1/4-inch outputs):
7. On second OUTPUTS page (Studio/Direct Mix):
5•4
8. Check your Master Volume.
Select the loudest preset/settings you intend to use. •
Play your instrument and turn Master Volume as high as you can without clipping the amp/speakers •
you’re feeding.
Tone 1: Guitar•
Tone 2: select the (inputs) you’re using for your Mic, acoustic, etc.•
Mode: Combo Front, Combo Pwramp, Stack Front, or Stck PwrAmp.•
Lows, Focus, Highs: as desired•
Tone 1: On•
Tone 1 Pan: center•
Tone 2: Mute (so your vocal/acoustic/etc. doesn’t go to your on-stage amp)•
Mode: Studio/Direct•
Tone 1: On•
Tone 1 Pan: Left•
Tone 2: On•
Tone 2 Pan: Right•
Select the loudest preset/settings you intend to use. •
Play your instrument and turn Master Volume as high as you can without clipping the amp/speakers •
you’re feeding.
Page 55

USB & Computer Software
usB & Co m p u t e r so f t w A r e
Updating POD X3, POD X3 Live or POD X3 Pro’s Firmware
Here are step-by-step instructions for making sure your POD X3, POD X3 Live or POD X3 Pro has the latest
firmware installed.
1. From
2. Run Monkey.
3. On the Updates tab, look to see if Line 6 Monkey itself is up to date.
4. Once Monkey’s up to date, install the latest Line 6 drivers.
5. Once the driver installation completes, run Monkey again.
6. On the Updates tab, look to see if your USB Firmware and Flash Memory are up to date.
7. With your Driver and Device Firmware now up to date, you’re ready to rock.
www.line6.com/monkey, download and install the latest version of Line 6 Monkey.
If this is the first time you run Monkey, you don’t yet have driver software installed, so Monkey won’t •
be able to communicate with your POD X3, POD X3 Live or POD X3 Pro. (And if you have an older
version of Monkey, it also may not show your POD X3, POD X3 Live or POD X3 Pro in its list of
products when it asks you to select your product manually.)
If POD X3, POD X3 Live or POD X3 Pro is not shown as a product selection, •
from the product select menu that Monkey will show as it starts up.
Once Monkey nishes start up, login with the user name and password that you use for line6.com, or •
click the New User button near the top of Monkey’s window, create a user name and password for line6.
com, and then use it to log in to Monkey.
Monkey is listed under Applications on the Updates tab. A green circle with a checkmark is shown •
next to its listing if it’s up to date. If not, highlight its line in the list of Items, and click the Update
button on the right. (Of course, this shouldn’t be necessary if you just downloaded the latest!)
In the Updates tab, highlight the Driver item, and click the Update button on the right. Monkey will •
lead you through the process, which requires you to quit Monkey and possibly restart your machine.
Make sure your POD X3, POD X3 Live or POD X3 Pro is powered on, and connected to your computer •
via USB. Monkey should automatically recognize your POD X3, POD X3 Live or POD X3 Pro and
complete its startup.
If either one doesn’t show a green circle with a checkmark, highlight Device Firmware and click the •
Update button to the right. Monkey will lead you through the process.
select any TonePort
6•1
Setting Up For USB Recording
1. After getting the latest versions and installing your driver as described above...
2. Start your recording application.
3. Follow its instructions to select POD X3, POD X3 Live or POD X3 Pro as your audio device.
4. On Windows, you’ll probably want to congure POD X3, POD X3 Live or POD X3 Pro for ASIO
operation.
For Windows, the POD X3, POD X3 Live and POD X3 Pro driver control panel is at Programs > Line •
Page 56

USB & Computer Software
6 > Tools > Line 6 Audio-MIDI Devices.
For Mac, it’s available from the Apple menu, System Preferences > Other > Line 6 Audio-MIDI •
Devices.
5. With ASIO on Windows, or Core Audio on Mac, POD X3, POD X3 Live and POD X3 Pro provide 8
audio inputs to your computer:
1-2 is the main signal, congured on POD X3, POD X3 Live or POD X3 Pro’s Outputs page for Digital/•
XLR Outs.
3-4 is Tone 1 separately in stereo.•
5-6 is Tone 2 separately in stereo.•
7 is the sum of the inputs you’ve chosen for Tone 1.•
8 is the sum of the inputs you’ve chosen for Tone 2.•
5. The 7 and 8 inputs are perfect as raw sources for plug-in processing.
See •
www.line6.com/gearbox_plugin for info on our POD X3-equivalent plug-in.
6. Connect your headphones or powered speakers directly to your POD X3, POD X3 Live or POD X3 Pro
to hear your computer-generated audio, as well as the POD X3, POD X3 Live or POD X3 Pro’s real-time
processing.
The Monitor level adjustment slider in the control panel lets you turn down the volume of POD X3, •
POD X3 Live or POD X3 Pro versus your computer-generated sound.
The Master Volume knob on POD X3, POD X3 Live or POD X3 Pro does NOT affect the USB, S/•
PDIF or AES/EBU output levels.
Sample rate and other settings can be made from your recording program, the Line 6 Audio-MIDI •
Devices control panel, the Windows control panels, and/or Mac OS X’s Applications > Utilities >
Audio-MIDI Setup. (The Rate and Level parameters on the rst Outputs page of POD X3 and POD
6•2
X3 Live apply to the S/PDIF output only. On the POD X3 Pro they apply to S/PDIF or AES/EBU
output only.)
USB Sends When Operating In Stereo Tone Mode
When operating in Stereo Tone mode, the USB Sends of your POD X3, POD X3 Live
or POD X3 Pro will provide the following 8 outputs to your computer:
1 is the Stereo Tone with balance and mute Left.•
2 is the Stereo Tone with balance and mute Right.•
3 is the Stereo Tone without balance or mute Left.•
4 is the Stereo Tone without balance or mute Right.•
5 is the Stereo Tone without balance or mute Left.•
6 is the Stereo Tone without balance or mute Right.•
7 is the Stereo Input Left dry.•
8 is the Stereo Input Right dry.•
Page 57

POD X3
PRE/POST
TONE 1
GATE
VOL (PRE)
WAH STOMP
AMP + CAB
EQ
VOL (POST)
MOD (POST)
DLY (POST)
VERB (POST)
TONE 2
MOD
(PRE)
PRE/POST
DLY
(PRE)
PRE/POST
VERB
(PRE)
PRE/POST
PRE/POST
GATE
VOL (PRE)
WAH STOMP
AMP + CAB
EQ
VOL (POST)
MOD (POST)
DLY (POST)
VERB (POST)
MOD
(PRE)
PRE/POST
DLY
(PRE)
PRE/POST
VERB
(PRE)
PRE/POST
Phones,
S/PDIF,
USB 1-2
PRESS TO
SAVE
COMP
COMP
TONE 1
TONE 2
STUDIO/DIRECT
MIC/ROOM/SPEAKER
SIMULAT ION
1/4-INCH OUTPUTS
MODE
1/4-inch
TONE 1TONE 2PANPAN
ON ON
1/4-INCH OUTPUTS
MODE
COMBO OR STACK
FRONT OR PWRAMP
1/4-INCH OUTPUTS
MODE
MATCH
STUDIO/
DIRECT
OR
OR
TONE 1TONE 2PANPAN
ON ON
STUDIO/DIRECT MIX
STUDIO/
DIRECT
TONE 1
1/4-INCH OUTPUTS
MODE
OR
STUDIO/
DIRECT
TONE 2
DOUBLE-CLICK TO EDIT
OUTPUTS
ON/OFF
HOLD FOR SYSTEM
DOUBLE-CLICK TO EDIT
OUTPUTS
ON/OFF
HOLD FOR SYSTEM
Ap p e n d i x : si G n A l fl o w
Appendix: Signal Flow
A•1
Page 58

Appendix: Signal Flow
POD X3 Live
PRE/POST
TONE 1
GATE
VOL (PRE)
WAH STOMP
AMP + CAB
EQ
VOL (POST)
MOD (POST)
DLY (POST)
VERB (POST)
LOOP (POST)
TONE 2
MOD
(PRE)
LOOP (PRE)
PRE/POST
PRE/POST
DLY
(PRE)
PRE/POST
VERB
(PRE)
PRE/POST
PRE/POST
GATE
VOL (PRE)
WAH STOMP
AMP + CAB
EQ
VOL (POST)
MOD (POST)
DLY (POST)
VERB (POST)
LOOP (POST)
MOD
(PRE)
LOOP (PRE)
PRE/POST
PRE/POST
DLY
(PRE)
PRE/POST
VERB
(PRE)
PRE/POST
LOOP:
TONE 1 OR TO NE 2
(NOT BOTH)
LOOP:
TONE 1 OR TO NE 2
(NOT BOTH)
TONE 1
TONE 2
XLR,
Phones,
S/PDIF,
USB 1-2
STUDIO/DIRECT
MIC/ROOM/SPEAKER
SIMULATION
1/4-INCH OUTPUTS
MODE
1/4-inch
TONE 1TONE 2PANPAN
ON ON
1/4-INCH OUTPUTS
MODE
COMBO OR STACK
FRONT OR PWRAMP
1/4-INCH OUTPUTS
MODE
MATCH
STUDIO/
DIRECT
OR
OR
TONE 1TONE 2PANPAN
ON ON
STUDIO/DIRECT MIX
STUDIO/
DIRECT
TONE 1
1/4-INCH OUTPUTS
MODE
OR
STUDIO/
DIRECT
TONE 2
PRESS TO
SAVE
COMP
COMP
DOUBLE-CLICK TO EDIT
OUTPUTS
ON/OFF
HOLD FOR SYSTEM
DOUBLE-CLICK TO EDIT
OUTPUTS
ON/OFF
HOLD FOR SYSTEM
A•2A•2
Page 59

Appendix: Signal Flow
POD X3 Pro
PRE/POST
TONE 1
GATE
VOL (PRE)
WA H STOMP
AMP + CAB
EQ
VOL (POST)
MOD (POST)
DLY (POST)
VERB (POST)
LOOP (POST)
TONE 2
MOD
(PRE)
LOOP (PRE)
PRE/POST
PRE/POST
DLY
(PRE)
PRE/POST
VERB
(PRE)
PRE/POST
PRE/POST
GATE
VOL (PRE)
WA H STOMP
AMP + CAB
EQ
VOL (POST)
MOD (POST)
DLY (POST)
VERB (POST)
LOOP (POST)
MOD
(PRE)
LOOP (PRE)
PRE/POST
PRE/POST
DLY
(PRE)
PRE/POST
VERB
(PRE)
PRE/POST
LOOP:
TONE 1 OR TO NE 2
(NOT BOTH)
LOOP:
TONE 1 OR TO NE 2
(NOT BOTH)
TONE 1
TONE 2
XLR,
Phones,
S/PDIF,
AES/EBU,
USB 1-2
STUDIO/DIRECT
MIC/ROOM/SPEAKER
SIMULATION
1/4-INCH OUTPUTS
MODE
1/4-inch
TONE 1TONE 2PANPAN
1/4-INCH OUTPUTS
MODE
COMBO OR STACK
FRONT OR PWRAMP
1/4-INCH OUTPUTS
MODE
MATCH
STUDIO/
DIRECT
OR
OR
TONE 1TONE 2PANPAN
STUDIO/DIRECT MIX
STUDIO/
DIRECT
TONE 1
1/4-INCH OUTPUTS
MODE
OR
STUDIO/
DIRECT
TONE 2
Unprocessed
TA PPED FROM
CHANNEL STRIP
INPUTS
PRESS TO
SAVE
COMP
COMP
DOUBLE-CLICK TO EDIT
OUTPUTS
ON/OFF
HOLD FOR SYSTEM
DOUBLE-CLICK TO EDIT
OUTPUTS
ON/OFF
HOLD FOR SYSTEM
A•1A•3
Page 60

 Loading...