

Page 1

POD
®
®
HD Edit
Installer Guide
A user guide to installing the POD HD Edit application
on Mac® & Windows® computers
Page 2

Table of Contents
Table of Contents
Preparing to Install ..................................................................................1•1
Get the POD HD Edit Application ............................................................................... 1•1
System Requirements ..................................................................................................... 1•1
Installation on Mac OS® X ......................................................................2•1
Installing POD HD Edit ................................................................................................. 2•1
Uninstalling POD HD Edit ............................................................................................ 2•6
Installation on Windows
Installing POD HD Edit ................................................................................................. 3•1
Uninstalling POD HD Edit ............................................................................................ 3•7
® ................................................................................................................................3•1
Line 6 Monkey & Additional Resources .................................................4•1
Updating with Line 6 Monkey™ ................................................................................... 4•1
Online Documentation .................................................................................................. 4•2
Line 6, POD, CustomTone, FBV and Line 6 Monkey are trademarks of Line 6, Inc. All other product names,
trademarks, and artists’ names are the property of their respective owners, which are in no way associated or affiliated with Line 6.
Copyright © 2011 Line 6, Inc.
ii
Page 3

Page 4
Preparing to Install
Preparing to Install
This guide will walk you through the installation process for Line 6 POD® HD Edit, the free Preset
editor/librarian application for Line 6 POD HD devices, for Mac® or Windows®. Here are a few
pointers before you install the software.
Get the POD HD Edit Application
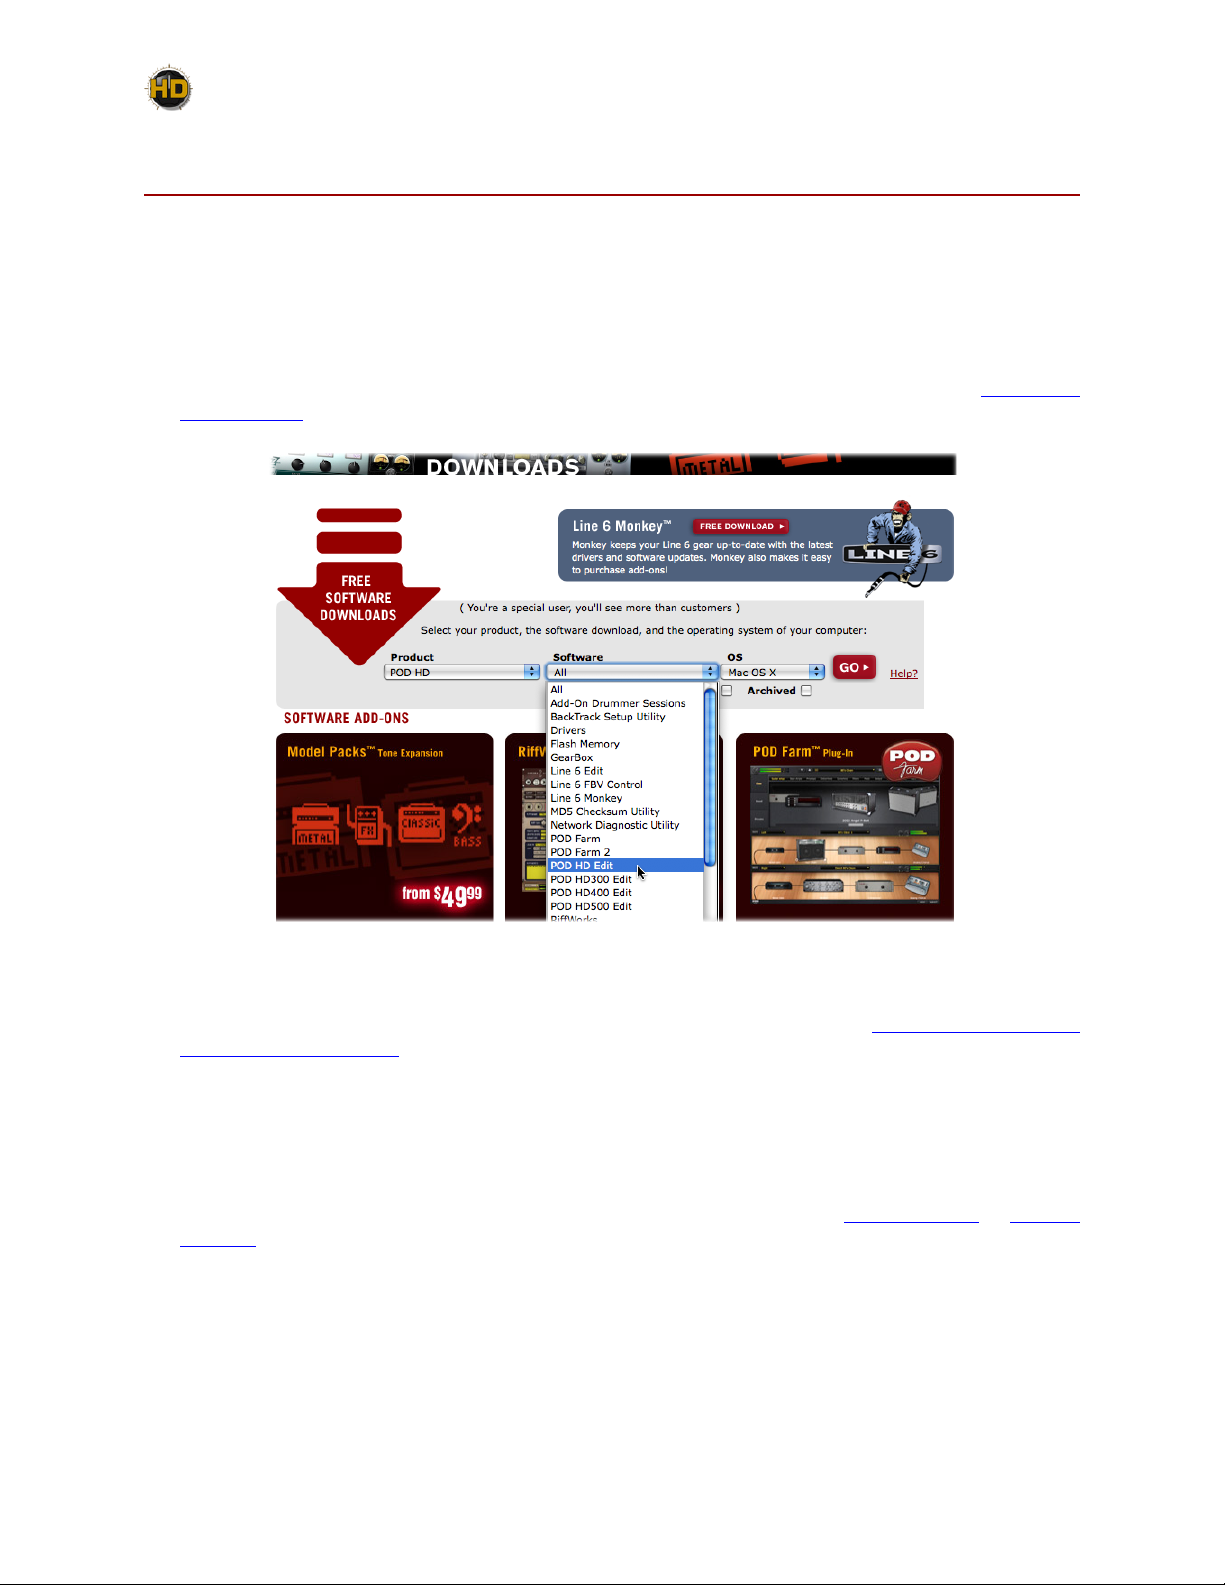
The latest POD HD Edit application installer is always available for free download from www.line6.
com/software/.
The Line 6 Software Downloads page
Or, if you already have the Line 6 Monkey application installed on your computer, you can use it
to grab POD HD Edit, as well as any available product updates (please see “Updating with Line 6
Monkey™” on page 4•1).
System Requirements
We recommend that you read the separate POD HD Edit Release Notes documentation for the
full, detailed System Requirements, as well as up to date info on compatibility with other hardware,
software and operating systems. This documentation is available from the Line 6 Support or Product
Manuals pages.
POD HD Edit supports the following computer operating systems:
• Mac OS® X
• 10.4.11(Tiger®)
• 10.5(Leopard®)
• 10.6(SnowLeopard®)
1•1
Page 5

Preparing to Install
• Windows
®
• Windows® XP Service Pack 3
• Windows Vista® Service Pack 2
• Windows® 7
• POD HD Edit is a 32 bit application, but is compatible with both 32 bit and 64 bit Windows®
& Mac® versions.
Please proceed to the Mac® or Windows® chapter for step-by-step installation instructions:
“Installation on Mac OS® X” on page 2•1
“Installation on Windows®” on page 3•1
1•2
Page 6

Page 7
Installation on Mac OS X
Installation on Mac OS® X
To follow are illustrated steps for installing POD® HD Edit on Mac OS® X 10.5 (Leopard®). The
installation process is the same if installing on Mac OS® X 10.4 (Tiger®) or 10.6 (Snow Leopard®)
versions. Exit all other applications, and then proceed with the following steps.
Installing POD HD Edit
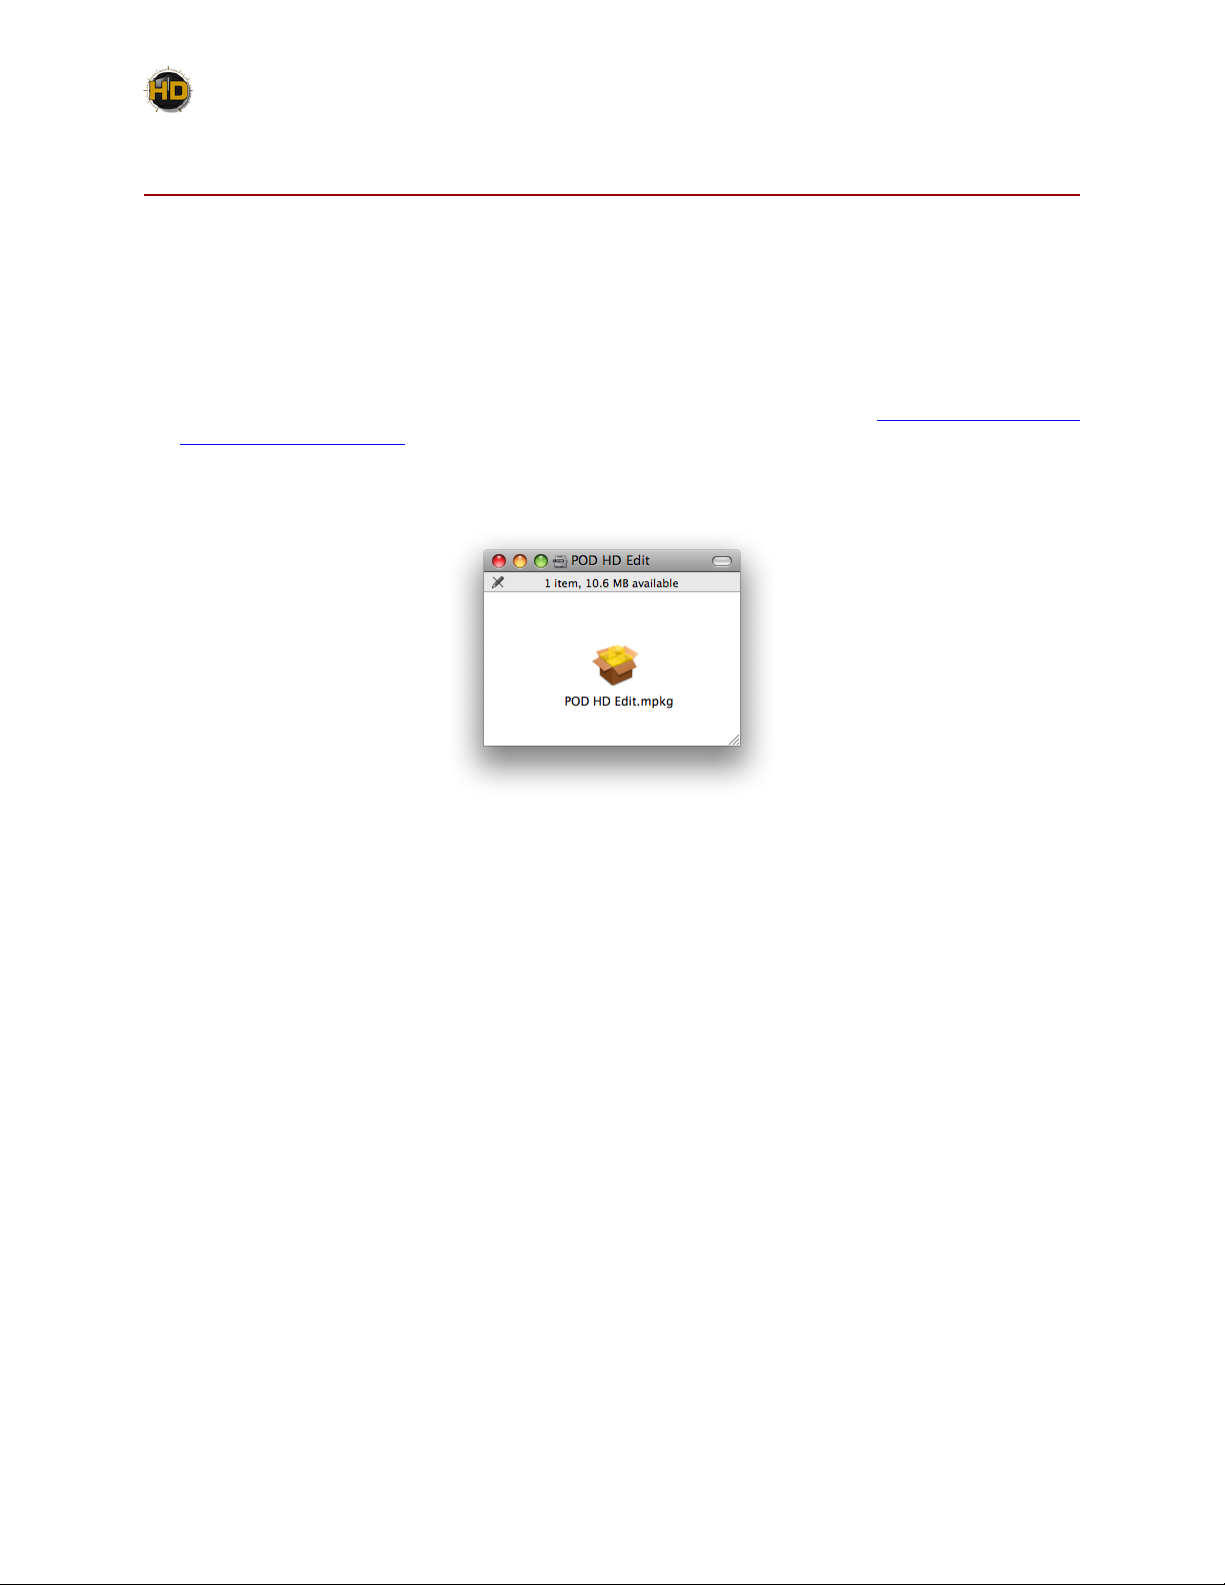
If you obtained the POD HD Edit installer by running Line 6 Monkey™ (see “Updating with Line 6
Monkey™” on page 4•1), then you’ll see the following initial screen. If you downloaded the POD
HD Edit installer from the Line 6 Software Downloads site, then you’ll need to double-click on the
downloaded POD HD Edit (“.dmg”) file to open the following screen.
Double-click on POD HD Edit.mpkg as instructed to launch the installer.
2•1
Page 8
Installation on Mac OS X
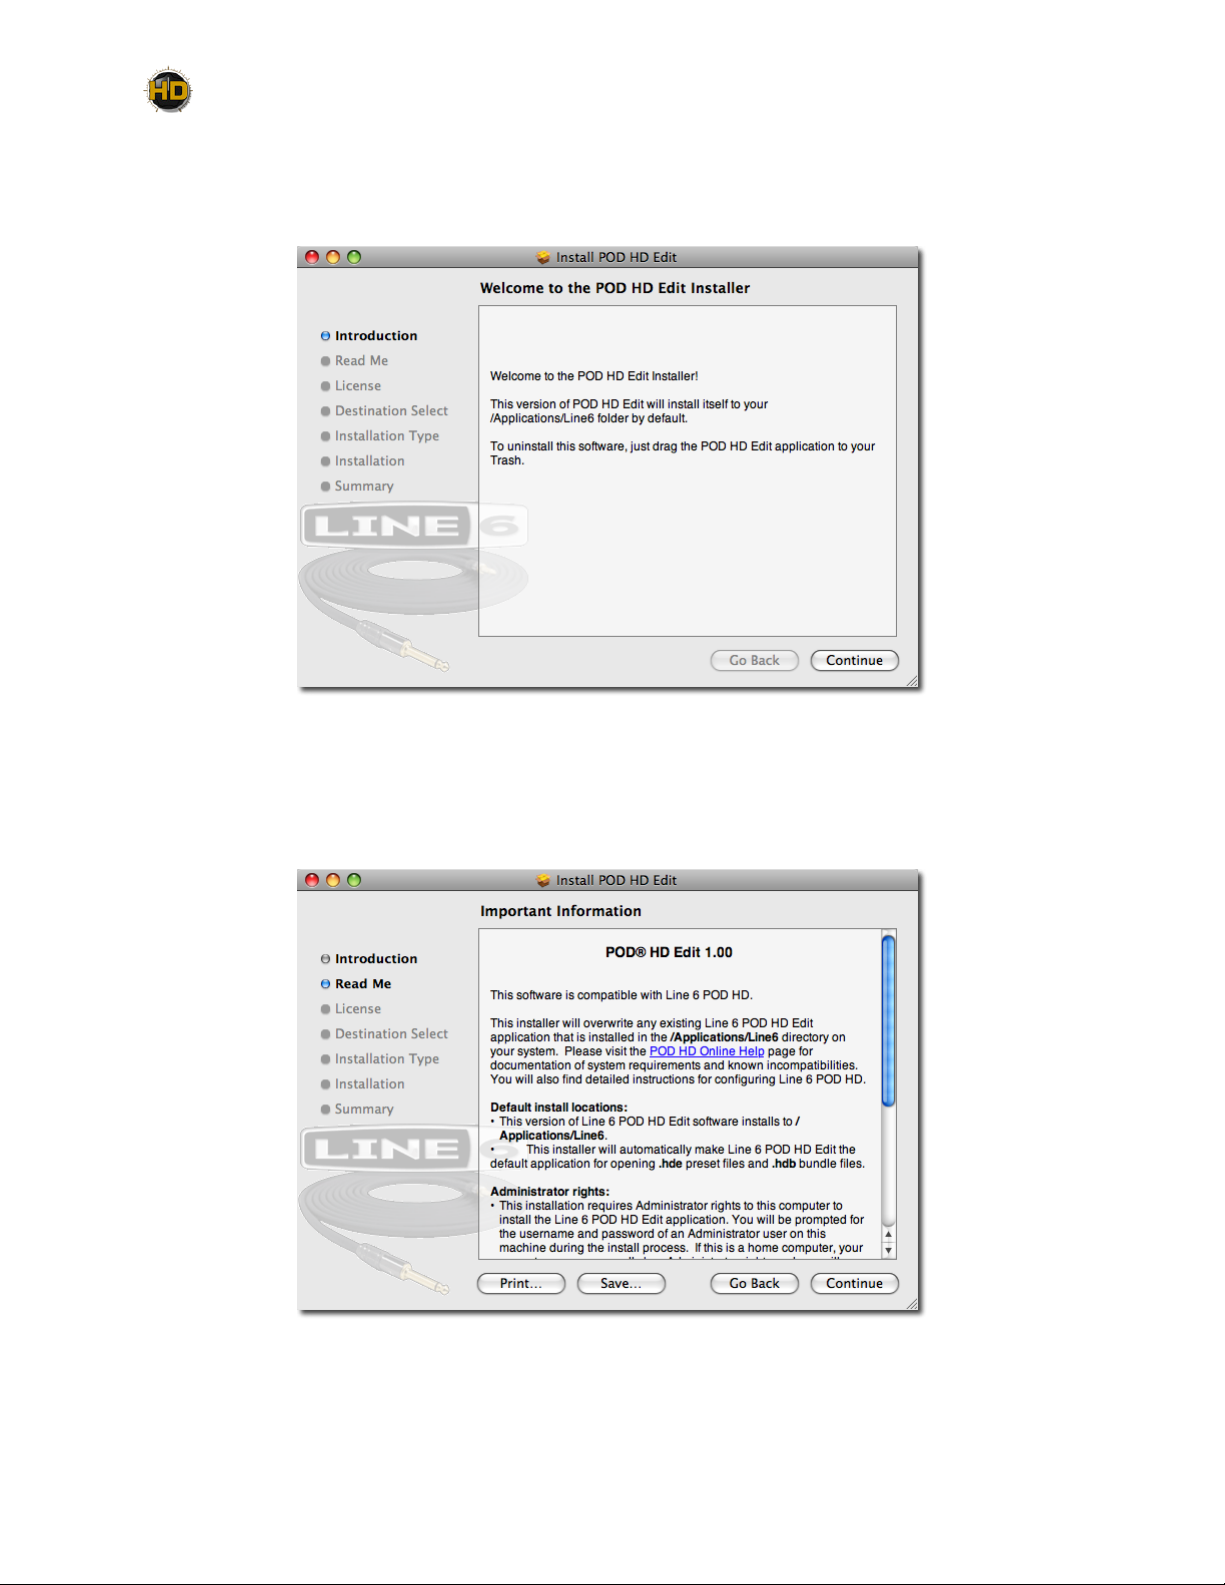
Welcome
When the installer starts, you will see the Welcome screen - read the text and click Continue.
Read Me
The POD HD Edit “Read Me” screen is presented next. It’s called “Read Me” for a good reason! Please
review the information carefully, and click Continue when ready to proceed.
2•2
Page 9

Installation on Mac OS X
License Agreement
The installer presents you with the License Agreement. Read through the entire Agreement carefully,
then click Continue.
You’ll then be prompted to accept this License Agreement. Select Agree if you consent to the terms
and the Installer will allow you to proceed. If you disagree, you cannot install POD HD Edit.
2•3
Page 10

Installation on Mac OS X
Installation Type
Here you have the choice to proceed with the “standard” installation, which essentially installs all
necessary components (recommended for most users). Just click on Install to proceed with the standard
installation. Or, click on the Customize button to select the specific components you want installed
(for more advanced users).
If you clicked the Customize button, you’ll see the following screen:
There are three main items available here. To “customize” your installation, check the desired
components:
• The POD HD Edit application.
2•4
Page 11

Installation on Mac OS X
• The Line 6 Monkey application. If you already have the same (or newer) version of Line 6
Monkey installed, then the box for it will remain unchecked. (Please see page 2•1 for more about
Line 6 Monkey.)
• The Line 6 Drivers. It required to install all these driver components to allow the POD HD Edit
application to communicate with your device. The drivers also provide the benefit of allowing
you to utilize your POD HD device as a high performance USB audio and MIDI device with any
popular Mac® DAW or audio playback applications!
Click Install once you’ve made your selections.
Restart Prompt
If you chose the standard installation, or checked the Line 6 Drivers components within the custom
installation screen, you may be alerted that restarting your Mac® is necessary at the end of the
installation process.
If you really don’t want to restart, the Cancel button will abort the installation. Otherwise, just click
Continue Installation to finish the job!
Install - Authenticate
You will be prompted to authenticate your Mac® account name and password. Enter the credentials
then click OK. The installation process will then run until completed.
2•5
Page 12

Finish
And…tada! You’re done. Click Close to exit the installer.
Installation on Mac OS X
It is recommended that you next run Line 6 Monkey to allow it to check your system and see if
there are any other available updates for your system.
Please see “Updating with Line 6 Monkey™” on page 4•1 for more information.
Uninstalling POD HD Edit
To remove the application from your computer, simply drag the POD HD Edit file from the Applications/
Line 6 folder into the Trash. This will not remove your POD HD Edit Preset, Set List or Bundle files.
By default, POD HD Edit saves all its Preset, Set List & Bundle files within the /Documents/Line 6/
Tones/POD HD Edit folder. If you want to permanently remove all these files, drag this folder to the
Trash. However, we highly recommend you keep these around if you plan on installing POD HD Edit
again. Or, copy the folder to a disk if you want to back them up or move them to another computer!
2•6
Page 13

Page 14

Installation on Windows
Installation on Windows
To follow are illustrated steps for installing POD HD Edit on Windows® 7. The installation process is
the same if installing on Windows Vista® or Windows® X P.
®
Installing POD HD Edit
When the installer starts, you will see the Welcome screen - Click Next to continue.
Release Notes
A dialog with detailed Release Notes is presented. Read it through carefully and click Next to proceed.
3•1
Page 15

Installation on Windows
License Agreement
The installer presents you with a License Agreement that is required in order to install and use the
Line 6 POD HD Edit application. After carefully reading the license, select the I Agree option if
you consent to the terms of this license, then click Next. If you do not agree with the license, the
installation will be cancelled.
Disconnect your Device
If you have not already done so, disconnect your USB cable from your POD HD device, then click
Next.
3•2
Page 16

Choose Components to Install
There are three items available here:
Installation on Windows
• The POD HD Edit application.
• The POD HD Drivers. It required to install all these driver components to allow the POD
HD Edit application to communicate with your device. The drivers also provide the benefit of
allowing you to utilize your POD HD device as a high performance USB audio device with any
popular Windows® DAW or audio playback applications!
• The Line 6 Monkey application. If you already have the same (or newer) version of Line 6
Monkey installed, then the box for it will remain unchecked. (Please see page 4•1 for more about
Line 6 Monkey.)
Click Install once you’ve made your selections.
3•3
Page 17

Installation on Windows
Choose Install Location
If you’d like to install the POD HD Edit application into the default, recommended location, just click
the Install button.* If you’d like to choose another location, click Browse:
*Note: On Windows® 64-bit systems, the POD HD Edit application is installed within the ...\Program
Files (x86)\... directory path.
Security Alert
On Windows Vista® or Windows® 7, you may see this alert as the Driver files are being installed. This
is a normal Windows® security feature, and it is perfectly safe for you to click the Install button and
allow the installation to continue - we promise! You can optionally check the box for “Always trust
software from Line 6” to avoid similar alerts on future Line 6 driver installs.
3•4
Page 18

Installation on Windows
Allow Installation to Complete
Allow the POD HD Edit installation process to do its thing – it will inform you once the installation
has completed successfully. Click Next to continue.
Desktop Shortcut and File Associations
Next you are prompted if you would like a Shortcut icon for POD HD Edit to be added to your
Windows® Desktop. You can also choose if you would like the POD HD Edit “.h5e” Preset, “.h3b”
Bundle, and “.h5s” Set List file types to be “associated” with the POD HD Edit application. (That
is - if you double-click one of these types of files within Windows® , it launches the POD HD Edit
application automatically and loads the Preset/Bundle/Set List). It is recommend to check all boxes
here. Choose your options and click Next.
3•5
Page 19

Installation on Windows
Finish
Done! The components you selected have been installed. Click the Finish button to exit the installer.
It is highly recommended that you next run Line 6 Monkey to allow it to check your system and
see if there are any other available updates for your system.
Please see “Updating with Line 6 Monkey™” on page 4•1 for more information.
3•6
Page 20

Installation on Windows
Uninstalling POD HD Edit
The POD HD Edit installation also adds the Line 6 Uninstaller utility on your system. You can find it
by going to the Windows® Start button>Programs>Line 6>Tools. The Line 6 Uninstaller allows you
to remove POD HD Edit, and/or any other installed Line 6 applications or device drivers individually.
The following examples show the process for uninstalling POD HD Edit application on Windows® 7
- The process is the same for Windows Vista® or Windows® XP. Be sure to first exit POD HD Edit and
all other applications, disconnect all connected Line 6 devices from your computer, then launch the
Uninstaller and follow these steps.
Welcome
The first screen welcomes you politely - click Next to continue, or Cancel if you’ve changed you mind
and decided you cannot live without this cool Line 6 software.
Disconnect Your Hardware
Another friendly reminder - If you have not already done so, please unplug the USB cable from any
connected Line 6 hardware now. Click OK once items are disconnected, then Next to proceed.
3•7
Page 21

Installation on Windows
Choose Components to Uninstall
Here you can check any Line 6 items you want to remove. You’ll see individual options for all Line 6
applications and device drivers installed on your computer (POD HD Edit, POD HD Device Drivers,
Line 6 Monkey, etc.). For this example, we’ll select only the POD HD Edit application and its Drivers.
Note that Line 6 Monkey is unchecked by default. It is usually a good idea to keep Monkey hanging
around since he’ll still be able to show you what Line 6 items are available for your system, and guide
you through downloads and installations (see “Updating with Line 6 Monkey™” on page 4•1 for
more info). Once you’ve selected the desired components, click Uninstall.
Uninstall
The uninstallation process will now run its course. Click Next once it has completed.
3•8
Page 22

Installation on Windows
Done!
This completes the process and the selected components are now removed from your system. Click
Finish to close the dialog.
Removing POD HD Edit Presets. Bundles & Set Lists
The Line 6 Uninstaller does not remove any of your POD HD Edit Preset, Bundle or Set List files
from your computer. By default, POD HD Edit saves all its Preset, Bundle & Set List files to the My
Documents\Line 6\Tones\POD HD Edit folder.
If you want to permanently remove all these files, drag the above folder to the Recycle Bin. However,
we highly recommend you keep them around if you plan on installing POD HD Edit again. Or, copy
the folder to a disk if you want to move them to another computer!
3•9
Page 23

Page 24

Additional Resources
Line 6 Monkey & Additional Resources
This chapter provides helpful information on obtaining Line 6 product updates and more online
documentation.
Updating with Line 6 Monkey™
Line 6 Monkey is the intelligent update software utility, available free from Line 6. It is highly
recommended that you use Line 6 Monkey to be sure you have the latest hardware updates & software
versions for your POD HD device. If you already installed POD HD Edit, then you’ll likely find Line
6 Monkey on your computer here:
• OnMac®, go to /Applications/Line 6 and double-click Line 6 Monkey.
• OnWindows®, go to Start Menu\Programs\Line 6\Tools and double-click Line 6 Monkey.
If you don’t already have Line 6 Monkey installed, you can download it from www.line6.com/monkey.
TofollowarethestepsforupdatingyourdeviceusingLine6MonkeyonMacOS®X,however,thesteps
arethesameforWindows®aswell,exceptwherenoted.
With your device connected to your computer’s USB port, be sure your device is powered on, then
launch Line 6 Monkey. If Monkey prompts you to register your device, then do so now - it may be
required to register to obtain some product updates. Just follow the prompts and Monkey will walk
you right through a quick online registration! Return to Line 6 Monkey once you’ve completed the
registration.
Monkey will then display your device’s current firmware version and any available updates.
4•1
Page 25

Additional Resources
The Line 6 Monkey Updates screen, with POD HD connected
In the above example, Monkey has detected that a newer Firmware - Flash Memory version is available.
To update the firmware, select the Flash Memory item and click UpdateSelection. Be sure to read the
prompts carefully and Monkey will walk you through the steps to perform the update. It is especially
important not to disturb your devices’ controls and USB connection during the update! Exit Line 6
Monkey once the firmware update completes successfully.
Online Documentation
Hungryformoreinfo?We’vegotplentyofhelpfulresourcesjustaclickaway.
• Several additional Manuals & Help documents covering POD HD Edit and related products:
Line 6 Product Manuals
• For technical support, choose from the many options listed on the Line 6 Support page, including
the searchable Knowledge Base:
Line 6 Support
• Can’t get enough of that Line 6 gear, or want to check out the latest Add-Ons and accessories?
Head on over to the Line 6 Store!
Line 6 Online Store
• Join the Community! Line 6 users are welcome to join the Line 6 Online Community - The
place to get FREE jam track, loops, lessons & tips from session pros, breaking new, special offers,
and the User Discussion Forums:
Line 6 Community
4•2
 Loading...