


UV24 NBD

OWNER’S MANUAL
ENGLISH
ITALIANO
ESPAÑOL
FRANCAIS
DEUTSCH
ΕΛΛΗΝΙXΆ
AIR CONDITIONER
Please read this manual carefully before operating
your set and retain it for future reference.
TYPE : CEILING SUSPENDED
P/NO : MFL62085009
PORTUGUESE
DUTCH
www.lg.com

2 Convertible & Ceiling suspended Air Conditioner
Room Air Conditioner Owner’s Manual
TABLE OF CONTENTS
FOR YOUR RECORDS
Write the model and serial numbers here:
Model #
Serial #
You can find them on a label on the side of each unit.
Dealer's Name
Date Purchased
■ Staple your receipt to this page in the event you need
it to prove date of purchase or for warranty issues.
READ THIS MANUAL
Inside you will find many helpful hints on how to use
and maintain your air conditioner properly. Just a little
preventive care on your part can save you a great deal
of time and money over the life of your air conditioner.
You'll find many answers to common problems in the
chart of troubleshooting tips. If you review our chart of
Troubleshooting Tips first, you may not need to call
for service at all.
PRECAUTION
• Contact the authorized service technician for
repair or maintenance of this unit.
• Contact the installer for installation of this unit.
• The air conditioner is not intended for use by
young children or invalids without supervision.
• Young children should be supervised to ensure
that they do not play with the air conditioner.
• When the power cord is to be replaced,
replacement work shall be performed by
authorized personnel only using only genuine
replacement parts.
A. Safety Precautions..............................3
B. Product Introduction...........................6
Name and function of part.....................6
What to do before operation..................6
Operation indication lamps....................6
C. Operating Instructions........................7
How to insert the Batteries ....................7
Wireless Remote Controller
Maintenance..........................................7
Operating Method..................................7
Wireless Remote Controller...................8
Operation Mode.....................................9
Healthy Dehumidification Operation....10
Auto Operation
(Cooling type, Multi system)................10
Auto Changeover Operation
(Heat Pump type) ................................10
Jet Cool/Heat Operation......................11
Forced operation .................................11
Sleep Mode .........................................12
Setting the Current Time .....................12
Timer Setting.......................................12
Vertical / Horizontal Airflow Direction
Control.................................................13
Air Circulation Mode............................13
Auto Restart Function..........................13
D. Maintenance and Service .................14
Indoor Unit...........................................14
Operation Tips!....................................15
When the air conditioner is not going
to be used for a long time....................15
Troubleshooting...................................16
Call the service immediately in the
following situations ..............................16
Owner's Manual 3
Safety Precautions
ENGLISH
Safety Precautions
To prevent injury to the user or other people and property damage, the following instructions must be followed.
■ Incorrect operation due to ignoring instruction will cause harm or damage. The seriousness is classified by
the following indications.
This symbol indicates the possibility of death or serious injury.
This symbol indicates the possibility of injury or damage.
Do not use a defective or underrated
circuit breaker. Use this appliance on a
dedicated circuit.
• There is risk of fire or electric shock.
For electrical work, contact the dealer,
seller, a qualified electrician, or an
Authorized Service Center.
• Do not disassemble or repair the product.
There is risk of fire or electric shock.
Always ground the product.
• There is risk of fire or electric shock.
Install the panel and the cover of control
box securely.
• There is risk of fire or electric shock.
Always install a dedicated circuit and
breaker.
• Improper wiring or installation may cause fire
or electric shock.
Use the correctly rated breaker or fuse.
• There is risk of fire or electric shock.
Do not modify or extend the power cable.
• There is risk of fire or electric shock.
Do not install, remove, or re-install the
unit by yourself (customer).
• There is risk of fire, electric shock, explosion,
or injury.
Be cautious when unpacking and
installing the product.
• Sharp edges could cause injury. Be
especially careful of the case edges and the
fins on the condenser and evaporator.
For installation, always contact the dealer
or an Authorized Service Center.
• There is risk of fire, electric shock, explosion,
or injury.
Do not install the product on a defective
installation stand.
• It may cause injury, accident, or damage to
the product.
Be sure the installation area does not
deteriorate with age.
• If the base collapses, the air conditioner could
fall with it, causing property damage, product
failure, and personal injury.
Do not let the air conditioner run for a
long time when the humidity is very high
and a door or a window is left open.
• Moisture may condense and wet or damage
furniture.
Take care to ensure that power cable
could not be pulled out or damaged
during operation.
• There is risk of fire or electric shock.
Do not place anything on the power
cable.
• There is risk of fire or electric shock.
Do not plug or unplug the power supply
plug during operation.
• There is risk of fire or electric shock.
Do not touch(operate) the product with
wet hands.
• There is risk of fire or electrical shock.
Do not place a heater or other appliances
near the power cable.
• There is risk of fire and electric shock.
Do not allow water to run into electric
parts.
• It may cause There is risk of fire, failure of
the product, or electric shock.
Do not store or use flammable gas or
combustibles near the product.
• There is risk of fire or failure of product.
Do not use the product in a tightly closed
space for a long time.
• Oxygen deficiency could occur.

4 Convertible & Ceiling suspended Air Conditioner
Safety Precautions
When flammable gas leaks, turn off the
gas and open a window for ventilation
before turn the product on.
• Do not use the telephone or turn switches on
or off.
There is risk of explosion or fire.
If strange sounds, or small or smoke
comes from product. Turn the breaker
off or disconnect the power supply
cable.
• There is risk of electric shock or fire.
Stop operation and close the window in
storm or hurricane. If possible, remove
the product from the window before the
hurricane arrives.
• There is risk of property damage, failure of
product, or electric shock.
Do not open the inlet grill of the product
during operation. (Do not touch the
electrostatic filter, if the unit is so
equipped.)
• There is risk of physical injury, electric shock,
or product failure.
When the product is soaked (flooded or
submerged), contact an Authorized
Service Center.
• There is risk of fire or electric shock.
Be cautious that water could not enter
the product.
• There is risk of fire, electric shock, or product
damage.
Ventilate the product from time to time when operating it
together with a stove, etc.
• There is risk of fire or electric shock.
Turn the main power off when cleaning or maintaining the
product.
• There is risk of electric shock.
When the product is not be used for a long time, disconnect the
power supply plug or turn off the breaker.
• There is risk of product damage or failure, or unintended operation.
Take care to ensure that nobody could step on or fall onto the
outdoor unit.
• This could result in personal injury and product damage.
Always check for gas (refrigerant)
leakage after installation or repair of
product.
• Low refrigerant levels may cause failure of
product.
Install the drain hose to ensure that water
is drained away properly.
• A bad connection may cause water leakage.
Keep level even when installing the
product.
• To avoid vibration or water leakage.
Do not install the product where the
noise or hot air from the outdoor unit
could damage the neighborhoods.
• It may cause a problem for your neighbors.
Use two or more people to lift and
transport the product.
• Avoid personal injury.
Do not install the product where it will be
exposed to sea wind (salt spray) directly.
• It may cause corrosion on the product.
Corrosion, particularly on the condenser and
evaporator fins, could cause product
malfunction or inefficient operation.
Do not expose the skin directly to cool air
for long periods of time. (Don't sit in the
draft.)
• This could harm to your health.
Do not use the product for special
purposes, such as preserving foods, works
of art, etc. It is a consumer air conditioner,
not a precision refrigeration system.
• There is risk of damage or loss of property.
Do not block the inlet or outlet of air flow.
• It may cause product failure.
Use a soft cloth to clean. Do not use
harsh detergents, solvents, etc.
• There is risk of fire, electric shock, or damage
to the plastic parts of the product.
Do not touch the metal parts of the
product when removing the air filter.
They are very sharp!
• There is risk of personal injury.
Do not step on or put anyting on the
product. (outdoor units)
• There is risk of personal injury and failure of
product.

Owner's Manual 5
Safety Precautions
ENGLISH
Always insert the filter securely. Clean
the filter every two weeks or more often if
necessary.
• A dirty filter reduces the efficiency of the air
conditioner and could cause product
malfunction or damage.
Do not insert hands or other objects
through the air inlet or outlet while the
product is operated.
• There are sharp and moving parts that could
cause personal injury.
Do not drink the water drained from the
product.
• It is not sanitary and could cause serious
health issues.
Use a firm stool or ladder when cleaning or maintaining the
product.
• Be careful and avoid personal injury.
Replace the all batteries in the remote control with new ones of
the same type. Do not mix old and new batteries or different
types of batteries.
• There is risk of fire or explosion
Do not recharge or disassemble the batteries. Do not dispose of
batteries in a fire.
• They may burn or explode.
If the liquid from the batteries gets onto your skin or clothes,
wash it well with clean water. Do not use the remote if the
batteries have leaked.
• The chemicals in batteries could cause burns or other health hazards.
If you eat the liquid from the batteries, brush your teeth and see
doctor. Do not use the remote if the batteries have leaked.
• The chemicals in batteries could cause burns or other health hazard.

6 Convertible & Ceiling suspended Air Conditioner
Operation Indication Lamps
1: Indoor unit
2: Outdoor unit
3: Remote controller
4: Inlet air
5: Discharge air
6: Refrigerant piping, connection
electric wire
7: Drain pipe
8: Ground wire
wire to ground outdoor unit to
prevent electrical shocks.
If your installation has a customized
control system, ask your LG dealer for
the operation that corresponds to your
system.
A: Pair system or simultaneous
operation system
B: Multi system
1: Unit with remote controller
2: Unit without remote controller (when
used as simultaneous operation)
Product Introduction
Product Introduction
1
3
4
6
5
4
7
2
8
A
B
1 1
1
2
: Lights up during the system operation.
Filter Sign : Lights up after 2400 hours from the time of first operating unit.
Sleep Mode : Lights up during Sleep Mode Auto operation.(Option)
Timer : Lights up during Timer operation.
Defrost Mode : Lights up during Defrost Mode or Hot Start operation.(Heat pump type)
Outdoor unit
operation
: Lights up during outdoor unit operation.
(Cooling type)
On/Off
Name and function of parts
What to do before operation
ENGLISH
Owner's Manual 7
Operating Instructions
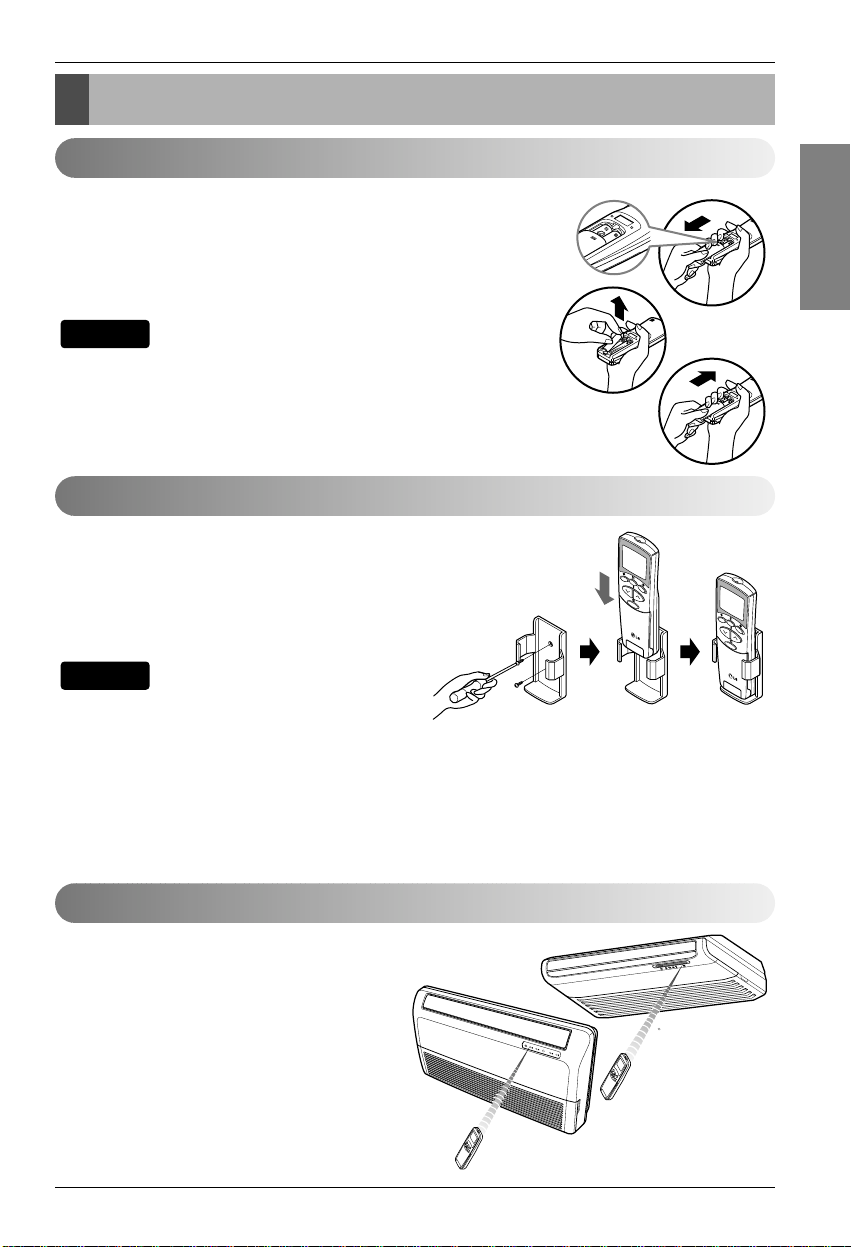
How to insert the Batteries
Wireless Remote Controller Maintenance
1. Remove the battery cover by pulling it according to the arrow
direction.
2. Insert new batteries making sure that the (+) and (-) of battery are
installed correctly.
3. Reattach the cover by sliding it back into position.
1. Always use/replace both batteries of same type.
2. If the system is not to be used for a long time, remove the
batteries to save their working life.
3. If the display screen of remote controller starts, fading replace
both of the batteries.
NOTE
1. Choose a suitable place where its safe & easy
to reach.
2. Fix the holder to wall etc with the supplied
screws firmly.
3. Slide the remote controller inside the holder.
1. Remote controller should never be exposed to
direct sunlight.
2. Signal transmitter & receiver should always be
clean for proper communication. Use a soft
cloth to clean them.
3. In case some other appliances also get
operated with remote control, change their
position or consult your serviceman.
1. The signal receiver is inside the unit.
2.
Aim the remote controller towards the unit to operate it.
There should not be any blockage in between.
NOTE
Operating Instructions
R
Operating Method

8 Convertible & Ceiling suspended Air Conditioner
AUTO CLEAN
ON
OFF
CANCEL
SET
1
3
5
4
9
10
12
15
7
2
8
13
14
11
6
Cooling Operation
Auto Operation
Soft dry Operation
Flip-up door
(opened)
Heating Operation
Signal transmitter
•
Cooling Model( ), Heat Pump Model( )
Operation Mode
Operating Instructions
The controls will look like the following.
Wireless Remote Controller
1. ON/OFF BUTTON
Used to turn off/on the unit.
2. OPERATION MODE SELECTION BUTTON
Used to select the operation mode.
3. ROOM TEMPERATURE SETTING BUTTONS
Used to select the room temperature.
4. INDOOR FAN SPEED SELECTOR BUTTON
Used to select fan speed in four steps
low, medium, high and CHAOS.
5. JET COOL BUTTON
Used to start or stop the speed cooling.
(It operates fan in super high speed in cooling mode)
6. CHAOS SWING BUTTON
Used to stop or start louver movement and set the
desired up/down airflow direction.
7. ON/OFF TIMER BUTTONS
Used to set the time of starting and stopping
operation.
8. TIME SETTING BUTTONS
Used to adjust the time.
9. TIMER SET/CANCEL BUTTON
Used to set and to cancel the timer operation.
10. SLEEP MODE AUTO BUTTON
Used to set sleep mode auto operation.
11. AIR CIRCULATION BUTTON
Used to circulate the room air without cooling or
heating.
12. ROOM TEMPERATURE CHECKING BUTTON
Used to check the room temperature.
13. PLASMA BUTTON(OPTIONAL)
Used to start or stop the plasma-purification
function.
14. RESET BUTTON
Used prior to resetting time.
15. 2nd F BUTTON
Used prior to using modes printed in blue at the
bottom of buttons.
To use the functions printed in blue at the bottom of the buttons press 2
nd
F button first and then the required function
button. Pressing the 2
nd
F button activates the blue printed function of the respective button. To cancel the function
press the 2nd F button again else it will automatically cancel if remains idle after 10 seconds.
❈ The actual product can be different from above contents depending upon model type.
NOTE

Owner's Manual 9
ENGLISH
ON
Cooling Auto Soft Dry
Heating
(Heat pump model only)
1
2
3
4
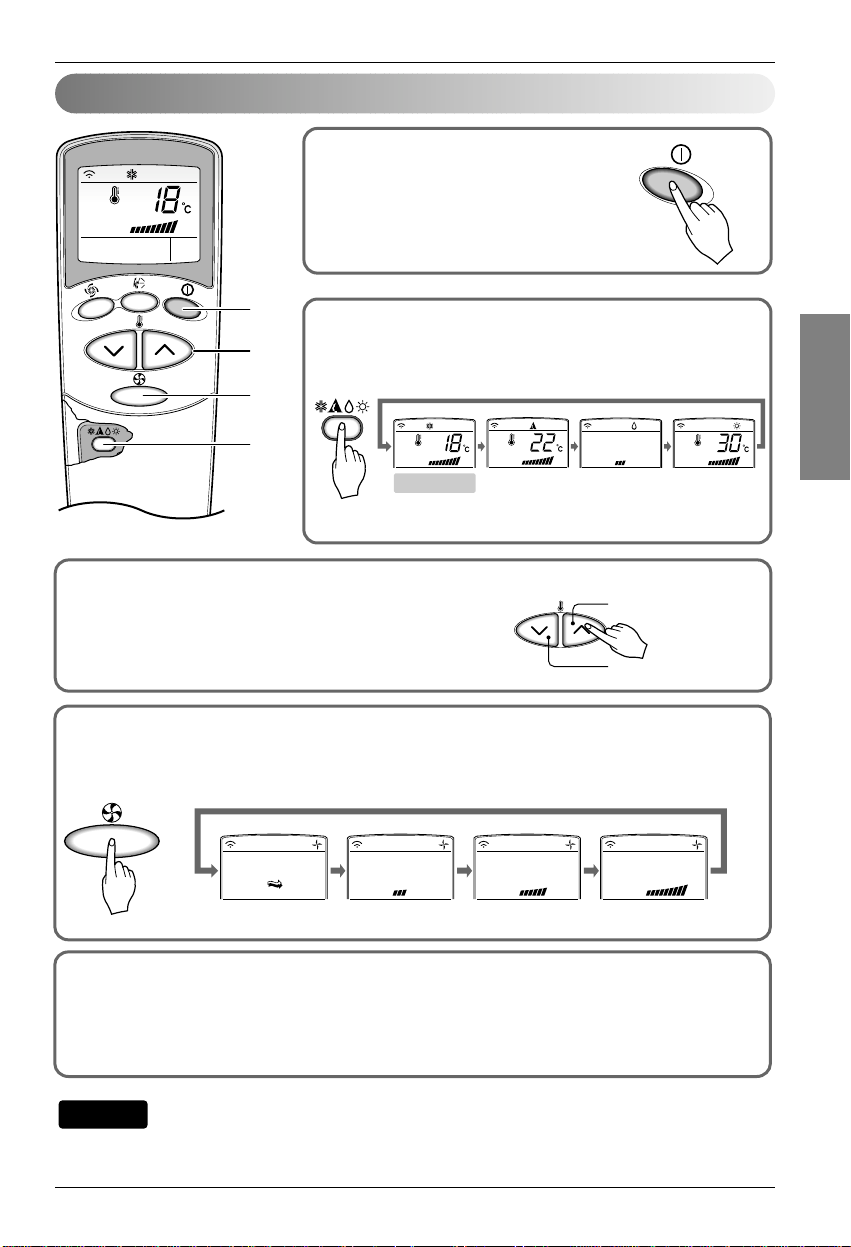
Fan speed is on low. Fan speed is on medium. Fan speed is on high.CHAOS Air
To lower the temperature
To raise the temperature
Operating Instructions
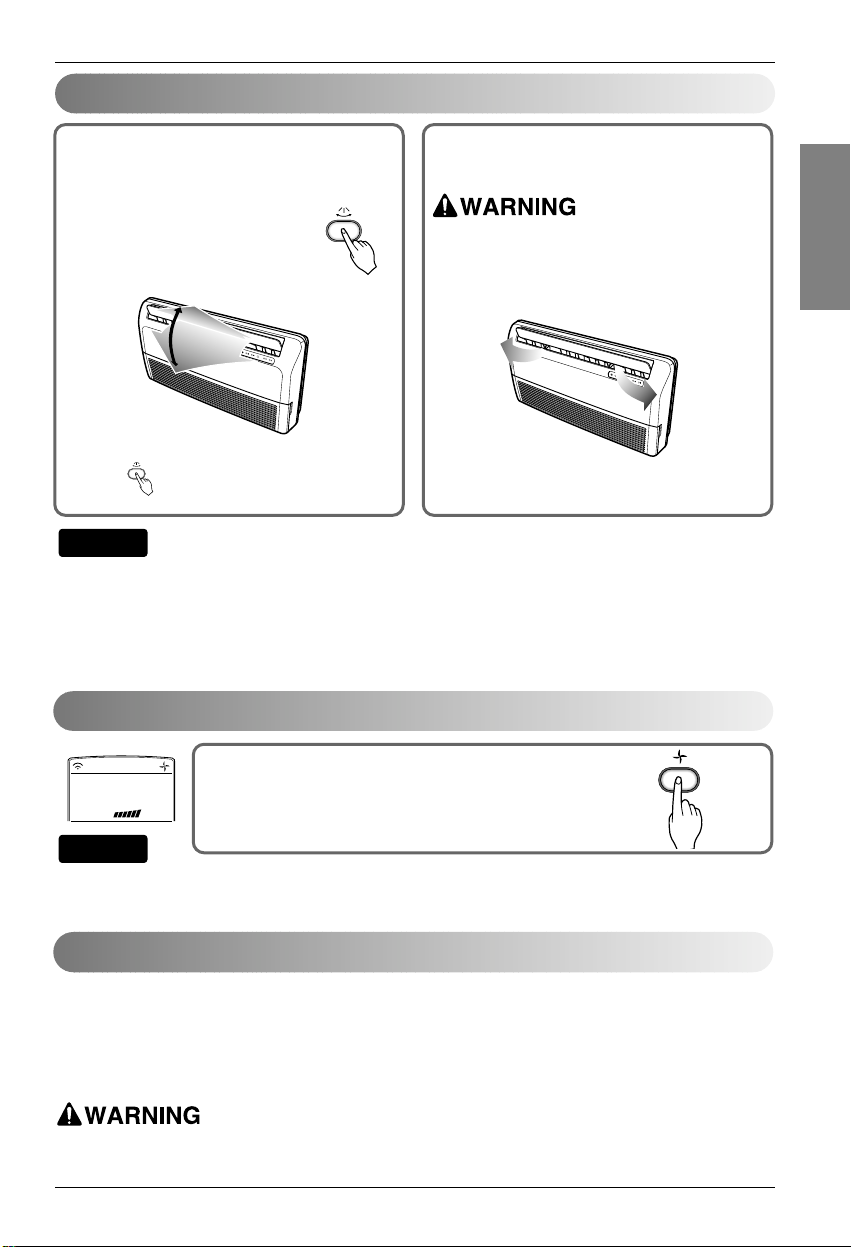
Press the ON/OFF BUTTON to turn
the unit on.
The unit will respond with a beep.
Open the door of the remote controller and press the
operation mode button. Each time the button is pressed, the
operation mode is shifted in the direction of the arrow.
For cooling or heating operation set the desired indoor
temperature by pressing the ROOM TEMPERATURE
SETTING BUTTONS.
Set the fan speed with the remote controller. You can select the fan speed in four steps-low,
medium, high and CHAOS by pressing the INDOOR FAN SPEED SELECTOR BUTTON.
Each time the button is pressed, the fan speed mode is shifted.
1
2
3
4
Natural wind by the CHAOS logic
❏
For fresher feeling, press the INDOOR FAN SPEED SELECTOR BUTTON selector and set to CHAOS mode.
In this mode, the wind blows like a natural breeze by automatically changing fan speed according to the CHAOS logic.
Operation Mode
Auto changeover function is not available for multi system.
NOTE

10 Convertible & Ceiling suspended Air Conditioner
Soft dry
Operation
Auto
Auto
Operating Instructions
Auto Operation (Cooling type)
Auto Operation (Heat pump type)
Soft dry Operation Mode
During Soft dry Operation
❏ If you select the soft dry mode on the OPERATION MODE SELECTION BUTTON,
the product starts to run the soft dry function. It automatically sets the room
temperature and airflow volume to the best condition for dehumidification, based on
the sensed current room temperature.
In this case, however, the setting temperature is not displayed on the remote controller
and you are not able to control the room temperature either.
❏ During the soft dry function, the airflow volume is automatically set according to the
optimization algorithm responding to the current room temperature status, so that the
room condition is kept healthy and comfortable even in the very humid season.
In this operation mode the actual setting temperature and the fan speed are
automatically set by the electronic control logic based on the current room
temperature. If you feel hot or cold press the temperature setting buttons
respectively for more cooling or heating effect.
NOTE : You cannot set the actual setting temperature and the indoor fan
speed in this operation mode. But you can use the Chaos swing
in this operation.
If the system is not operating as desired, switch manually to another mode.
Auto operation basically is heating or cooling function of the air conditioner.
But during this operation the controller changes the operation mode
automatically to keep the temperature within ±2°C with respect to the
setting temperature.
To run the soft dry mode follow steps 1, and 2 and 4
(See operation mode)
To run the auto operation follow steps 1, and 2. (See operation mode)
To run this operation follow steps 1, 2, 3, and 4. (See operation mode)
Auto Changeover Operation (Pair system) :
❏ You can switch the indoor fan speed.
❏ The system will automatically switch from the cooling mode to the heating mode, or from heating to cooling,
when you select Auto Opration mode.
Auto Operation (Multi system or Simultaneous system) :
❏ You can switch the indoor fan speed.
❏ If the system is not operating as desired, manually switch to another mode. The system will not
automatically switch from the cooling mode to the heating mode, or from heating to cooling, then you must
set the mode and the desired temperature again.

Owner's Manual 11
ENGLISH
Operating Instructions
Jet Cool Operation
Jet cool function can be used to cool the room quickly in hot summer. When this
function is turned on, the air conditioner runs in cooling operation mode with super
high fan speed and 18°C setting temperature for 30 minutes for fast and effective
cooling. However for some models Jet cool function continuous till the operation mode
is changed.
You can activate this operation by pressing the JET COOL BUTTON.
To change from jet cool mode to high fan speed cooling mode, press the JET COOL BUTTON or
INIDOOR FAN SPEED SELECTOR BUTTON or the ROOM TERPERATURE SETTING BUTTON again.
• Jet cool function cannot be activated during heating or auto changeover operations.
NOTE
Forced operation
Operation procedures when the remote control can't be used.
The operation will be started if the ON/OFF button is pressed.
If you want to stop operation, re-press the button.
Test operation
During the TEST OPERATION, the unit operates in cooling mode at high speed fan, regardless of room
temperature and resets in 18 minutes.
During test operation, if remote controller signal is received, the unit operates as remote controller sets.
If you want to use this operation, Press and hold the ON/OFF button for 3~5 seconds.
If you want to stop the operation, re-press the button.
Type 1 Type 2 Type 3

12 Convertible & Ceiling suspended Air Conditioner
Operating Instructions
Delay off timer Delay on timer Delay off and on timer Delay on and off timer
1. Time can be set only when you press the RESET BUTTON. Having replacing the batteries,
you should press the RESET BUTTON to reset the time. Press the Start/Stop button.
2. Press 2nd F button and check if icon is on.
3. Press the TIME SETTING BUTTONS until the desired time is set.
4. Press the TIME SET/CANCEL BUTTON.
Check the indicator for A.M. and P.M.
NOTE
1. Make sure to set current time correctly on the display of the remote controller.
2. Press 2nd F button.
3. Press the ON/OFF TIMER BUTTONS to turn timer on or off.
4. Press the TIME SETTING BUTTONS until the desired time is set.
5. To set the selected time, press the TIMER SETTING BUTTONS aiming the remote controller at the
signal receptor.
To cancel the timer setting
Check if icon is off.
Press the TIMER CANCEL BUTTON aiming the remote controller at the signal receptor.
(The timer lamp on the air conditioner and the display will go off.)
Select one of the following four types of operation.
NOTE
ON
OFF
CANCEL
SET
CANCEL
SET
CANCEL
SET
Setting the Current Time
Timer Setting
1. Press the Sleep Mode Auto button to set the time you want the unit to turn off automatically.
2. The Timer is programmed in one-hour increments by pressing the Sleep Mode Auto button 1 to 7 times.
The sleep mode is available for 1 to 7 times.
To alter the time period in steps of 1 hour, press the Sleep Mode Button while aiming at air conditioner.
3. Make sure the Sleep Mode Auto LED lights up.
To cancel the Sleep Mode, press the sleep Mode Auto button several times until the star ( ) disappears from the
operation display.
: The Sleep Mode will be operated at low fan speed (cooling) or medium fan speed (heat pump only) for quiet sleeping.
IN COOLING MODE: The temperature will automatically rise by 1°C over the next 30 minutes and by 2°C in 1 hour for
comfortable sleeping.
❈
The actual function can be different from above contents depending upon model type.
NOTE
Sleep Mode
ENGLISH
Owner's Manual 13
This operation circulates the air without cooling or heating. It can
be activated by pressing the AIR CIRCULATION BUTTON. Once
the air circulation is activated you can select the air speed by
pressing the INDOOR FAN SPEED SELECTOR BUTTON.
The up/down airflow (Vertical airflow) can be
adjusted by using the remote controller.
1. Press the START/STOP BUTTON to start the
unit.
2. Press CHAOS SWING BUTTON.
3. The louvers will swing up & down
automatically.
4. To stop the louver at a desired angle,
press again
To adjust left/right (Horizontal Airflow) direction
Adjust the left/right airflow direction by hand.
: While adjusting vertical airflow direction
louvers, be careful not to touch the evaporator.
Operating Instructions
Vertical / Horizontal Airflow Direction Control
• By pressing the CHAOS SWING BUTTON the horizontal air flow direction is changed automatically based on the chaos
algorithm to distribute the air in the room evenly and at the same time to make the human body feel most comfortable as if
enjoying natural breeze.
• Always use the remote controller to adjust the up and down air flow direction. Manually moving the vertical air flow
direction louver by hand could damage the mechanism.When the unit is shut off, the up/down airflow direction louver will
close the air outlet vent of the system.
NOTE
CHAOS Air economizes power consumption and prevents overcooling. The fan speed is automatically
changed from high to low or vice versa, depending on the ambient temperature.
NOTE
In case the power comes on again after a power failure, the unit operates automatically to the previous operating
conditions.
So there is no need of activating this function by pressing any key or button.
In the initial mode, the fan operates at a low speed and the compressor starts about 3 minutes later.
As the compressor starts, the fan speed also resumes its previous setting mode.
: In case of absence for a long time while power failure, turn off main power to avoid undesired Auto
restart.
Air Circulation Mode
Auto Restart Function

14 Convertible & Ceiling suspended Air Conditioner
Maintenance and Service
Indoor Unit
Before performing any maintenance, turn off the main power to the system.
Clean the unit with a soft dry cloth. Do not use bleach or abrasives.
Never use any of these
• Water hotter than 40°C. It may cause deformation and discoloration.
• Volatile substances. They may damage the surface of the air conditioner.
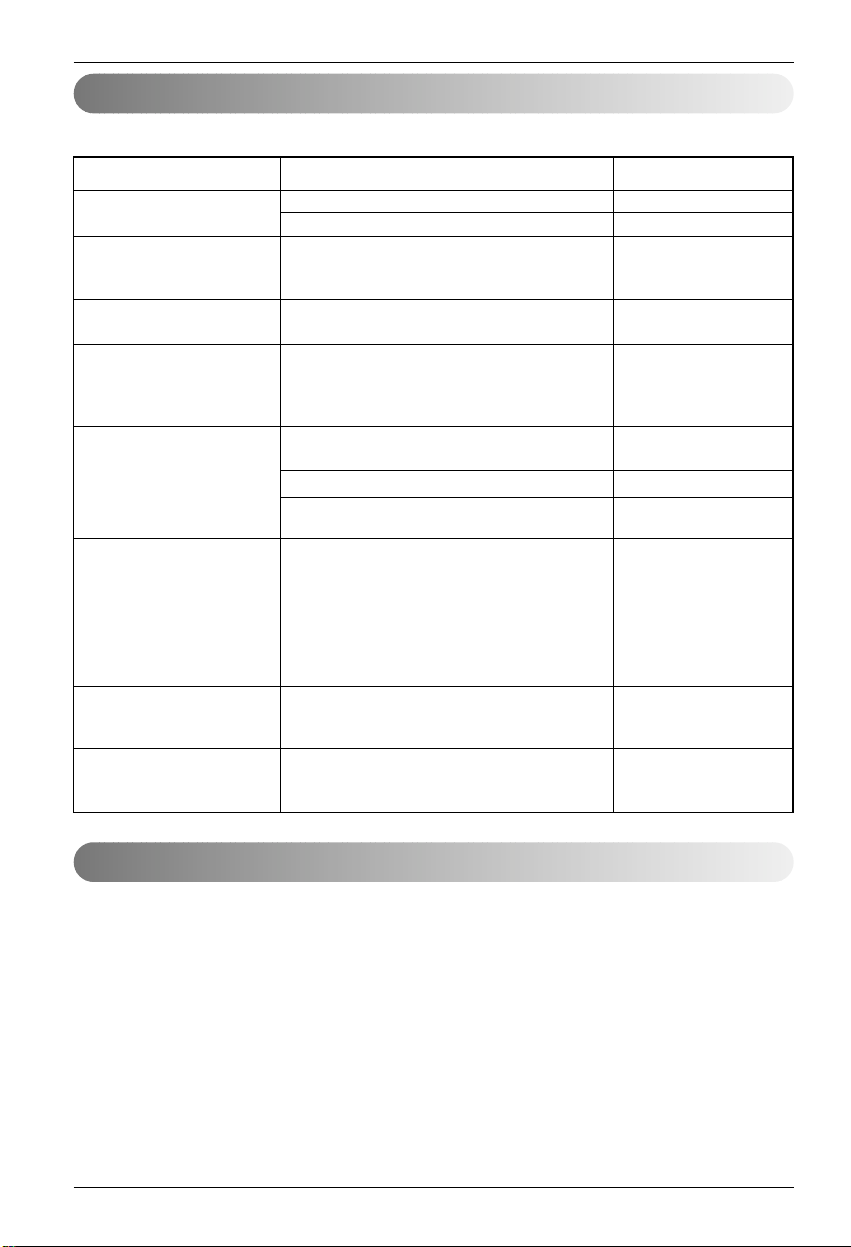
Air Filters
The air filters behind the front grille should be checked and cleaned once in every 2 weeks or more often if
neccessary.
1. Lift the front access panel and pull the filter tab slightly forward to remove the filter.
(Pull the filter hook to take the filter out. - ceiling suspended)
2. Clean the filter with a vacuum cleaner or warm, soapy water.
• If dirt is conspicuous, wash with a solution of detergent in lukewarm water.
• If hot water (40°C or more) is used, it may be deformed.
3. After washing with water, dry well in the shade.
4. Re-install the air filter.
Maintenance and Service
G
a
s
o
l
i
n
e
P
o
w
d
e
r
Air filters
(behind front panel)
Air outlet vent
Vertical louver Horizontal louver
Air inlet vent
Horizontal louver
Vertical louver
Air outlet vent
Air inlet vent
(Inlet grille)
Air filters
(Behind inlet grille)

ENGLISH
Owner's Manual 15
Maintenance and Service
Operation Tips!
When the air conditioner is not going ...
Do not overcool the room.
This is not good for the health and
wastes electricity.
Keep blinds or curtains
closed.
Do not let direct sunshine enter
the room when the air conditioner
is in operation.
Keep the room temperature
uniform.
Adjust the vertical and horizontal
airflow direction to ensure a
uniform temperature in the room.
Make sure that the
doors and windows
are shut thight.
Avoid opening doors and
windows as much as
possible to keep the cool
air in the room.
Clean the air filter
regularly.
Blockages in the air filter
reduce the airflow and
lower cooling and
dehumidifying effects.
Clean at least once every
two weeks.
Ventilate the room
occasionally.
Since windows are kept
closed, it is a good idea
to open them and
ventilate the room now
and ten.
Use high fan speed
for effective and fast
cooling.
The unit gives its rated
cooling capacity when the
fan speed is high.
When air conditioner is not going to be used for a long time.
1. Operate the air conditioner on Air circulation mode for 2 to 3 hours.
• This will dry out the internal mechanisms.
2. Turn off the circuit breaker, and disconnect the power cable.
Turn off the circuit breaker when the air conditioner is not going to be used for a long time.
Dirt may collect and may cause a fire.
3. Remove the batteries from the Remote Controller.
When the air conditioner is to be used again.
1. Clean the air filter and install it in the indoor unit.
2. Check that the air inlet and outlet of the indoor/outdoor unit are not blocked.
16 Convertible & Ceiling suspended Air Conditioner
Troubleshooting
1. Anything abnormal such as burning smell, loud noise etc. happen. Stop the unit and
turn the breaker off. Never try to repair by yourself or restart the system in such cases.
2. Main power cord is too hot or damaged.
3. Error code is generated by self diagnosis.
4. Water leaks from indoor unit even if the humidity is low.
5. Any switch, breaker (safety, earth) or fuse fails to work properly
User must carry routine checkup & cleaning to avoid unit’s poor performance.
In case of special situation, the job must be carried out by service person only.
Call the service immediately in the following situations
Maintenance and Service
Check the following points before requesting repairs or service.... If the fault persists, please contact your dealer or service center.
The air conditioner does not
operate.
The room has a peculiar odor.
It seems that condensation is
leaking from the air conditioner.
Air conditioner does not
operate for about 3 minutes
after turning on.
Does not cool or heat
effectively.
The air conditioner operation is
noisy.
Remote Controller display is
faint, or no display at all.
Crack sound is heard.
• Check room temperature setting?
• Check if circuit breaker is on?
• Check that this is not a damp smell exuded by
the walls, carpet, furniture, or cloth items in the
room.
• Check the drain hose is connected tight or if
indoor unit is installed even.
• This is the protector of the mechanism.
• Wait about 3 minutes and operation will begin.
• About 3 minutes delay is applied to protect
compressor from frequenty on/off.
• Is the air filter dirty? See air filter cleaning
instructions.
• Has the temperature been set correctly?
• Are the indoor unit's air inlet or outlet vents
obstructed?
• For a noise that sounds like water flowing.
-This is the sound of refrigerant flowing inside the
air conditioner unit.
• For a noise that sounds like the compressed air
releasing into atmosphere.
-This is the sound of the dehumidifying water
being processed inside the air conditioning unit.
• Are the batteries depleted?
• Are the batteries inserted in the opposite (+) and
(-) directions?
• This sound is generated by the
expansion/constriction of the front panel, etc. due
to changes of temperature.
Case Explanation See page
14
9
7

MANUALE DEL’UTENTE
CLIMATIZZATORE
Leggere con attenzione questo manuale prima di usare
l’unità e conservare per uso futuro.
TIPO: UNITÀ INTERNA PARETE STANDARD
www.lg.com
2 Condizionatore d'aria Convertibile e Sospeso soffitto
Manuale dell'utente per condizionatori d'aria per ambienti
INDICE
PER I PROPRI ARCHIVI
Annotare qui modello e numero di serie:
Modello
N. di serie
Si potrà trovare la targhetta indicativa sul lato di ciascuna unità
Nome del rivenditore
Data Acquisto
■ Pinzare la propria ricevuta su questa pagina nel caso
sia necessario dimostrare la data di acquisto o ai fini
della garanzia.
LEGGERE QUESTO
MANUALE
All'interno del manuale si troveranno molti consigli utili
su come usare il condizionatore d'aria ed eseguire una
manutenzione corretta. Con solo una minima
manutenzione regolare e preventiva da parte
dell'utente sarà possibile risparmiare tempo e denaro
nell'arco della vita di esercizio del condizionatore.
Nella sezione relativa ai consigli per la risoluzione dei
problemi si potranno trovare molte risposte ai problemi
più comuni. Una consultazione preventiva dei Consigli
per la risoluzione dei problemi potranno evitare in molti
casi la necessità di rivolgersi all'assistenza.
PRECAUZIONE
• Per la manutenzione e riparazione di questa unità
• Per l'installazione del condizionatore d'aria, rivolgersi
ad un installatore.
• Il condizionatore d'aria non è stato progettato per l'uso
da parte di bambini o invalidi senza supervisione.
• I bambini devono essere tenuti sotto controllo per
evitare che giochino con il condizionatore d'aria.
• Quando è necessario sostituire il cavo di alimentazione,
l'intervento di sostituzione deve essere effettuato da
personale autorizzato usando solo ricambi originali.
A. Precauzioni di sicurezza.....................3
B. Introduzione al prodotto.....................6
Nome e funzione del componente.........6
Cosa fare prima dell'uso........................6
Spie luminose di funzionamento ...........6
C. Istruzioni per l'uso...............................7
Come inserire le batterie .......................7
Telecomando senza fili Manutenzione..7
Modalità operativa.................................7
Telecomando senza fili..........................8
Modalità di funzionamento ....................9
Uso per una deumidificazione sana ....10
Funzionamento automatico (Tipo di
raffreddamento, multisistema).............10
Modalità di cambio operatività automatico
(Tipo pompa di calore).........................10
Funzionamento Raffreddamento/
Riscaldamento a getto.........................11
Funzionamento forzato........................11
Modalità Sleep.....................................12
Impostazione dell'ora corrente ............12
Impostazione del timer ........................12
Direzione flusso aria verticale/
orizzontale Controllo............................13
Modalità di circolazione aria................13
Funzionamento di riavviamento
automatico...........................................13
D. Assistenza e manutenzione .............14
Unità interna........................................14
Suggerimenti di utilizzo! ......................15
Quando il condizionatore non funziona da
usare per un lungo periodo di tempo...15
Risoluzione dei problemi .....................16
Chiamare immediatamente l'assistenza
seguire le situazioni.............................16
Manuale dell'utente 3
Precauzioni di sicurezza
ITALIANO
Precauzioni di sicurezza
È necessario seguire le seguenti istruzioni per prevenire lesioni alle persone o danni alla proprietà.
■ L'uso scorretto dovuto ad ignoranza delle istruzioni può provocare lesioni o danni. La gravità viene
classificata sulla base delle indicazioni seguenti.
Questo simbolo indica la possibilità di morte o infortuni gravi.
Questo simbolo indica la possibilità di infortuni o danni alle proprietà.
AVVERTENZA
Non usare un interruttore automatico difettoso o
di potenza nominale insufficiente. Usare questo
dispositivo su un circuito dedicato.
• C'è il rischio di scossa elettrica o incendio.
Per tutti gli interventi elettrici, rivolgersi al
rivenditore, venditore elettricista qualificato
o centro di assistenza autorizzato.
• Non smontare o riparare il prodotto.
C'è il rischio di scossa elettrica o incendio.
Mettere sempre il prodotto a terra.
• C'è il rischio di scossa elettrica o incendio.
Montare saldamento il pannello e
coperchio della scatola di controllo.
• C'è il rischio di scossa elettrica o incendio.
Installare sempre su un circuito dedicato
con interruttore automatico.
• Un cablaggio o installazione errati può
provocare incendio o scossa elettrica.
Usare fusibili o interruttore automatico
della potenza nominale corretta.
• C'è il rischio di scossa elettrica o incendio.
Non modificare o prolungare il cavo.
• C'è il rischio di scossa elettrica o incendio.
Non installare, rimuovere o reinstallare
da soli l'unità (cliente).
• C'è il rischio di scossa elettrica o incendio,
esplosione o lesioni.
Esercitare sempre la massima attenzione
quando si disimballa e installa il prodotto.
•
I bordi taglienti potrebbero provocare lesioni.
Esercitare particolare attenzione nel caso dei
bordi e alette del condensatore ed evaporatore.
Per l'installazione, rivolgersi sempre al
rivenditore o a un centro servizi autorizzato.
• C'è il rischio di scossa elettrica o incendio,
esplosione o lesioni.
Non montare il prodotto su un supporto
difettoso.
• Può provocare lesioni, incidenti o danni al
prodotto.
Verificare che la zona di installazione non
si deteriori con l'età.
•
Se la base cede, il condizionatore d'aria potrebbe
cedere con essa, provocando danni alla
proprietà, guasto del prodotto e lesioni personali.
Non tenere il condizionatore d'aria in
funzione per un periodo prolungato
quando l'umidità è elevata e una porta o
finestra è lasciata aperta.
• Si può formare condensa che potrebbe
danneggiare o bagnare i mobili.
Assicurarsi che il cavo elettrico non
possa essere estratto o danneggiato
durante l'operazione.
• C'è il rischio di scossa elettrica o incendio.
Non posizionare alcun oggetto sul cavo
di alimentazione.
• C'è il rischio di scossa elettrica o incendio.
Non staccare o inserire l'alimentazione
quando l'apparecchio è in funzione.
• C'è il rischio di scossa elettrica o incendio.
Non toccare (usare) il prodotto con mani
bagnate.
• C'è il rischio di scossa elettrica o incendio.
Non posizionare un riscaldatore o altre
apparecchiature nelle vicinanza del cavo
di alimentazione.
• C'è il rischio di scossa elettrica o incendio.
Non lasciare che acqua entri in contatto
con componenti elettrici.
•
Può provocare il rischio di incendio, mancato
funzionamento del prodotto, o scossa elettrica.
Non conservare o usare gas infiammabili
o combustibili vicino al prodotto.
• C'è il rischio di scossa elettrica o difetto del
prodotto.
Non usare il prodotto in un ambiente
ermeticamente chiuso per un periodo di tempo.
• Si potrebbe verificare una deficienza di
ossigeno.
AVVERTENZA
PERICOLO

4 Condizionatore d'aria Convertibile e Sospeso soffitto
Precauzioni di sicurezza
Quando si verificano perdite di gas,
spegnere il gas ed aprire una finestra
per la ventilazione prima di accendere
il prodotto.
• Non usare il telefono o accendere o spegnere
interruttori. C'è il pericolo di esplosione o
incendio.
Se rumori anomali o fumo provengono
dal prodotto. Spegnere l'interruttore
automatico o staccare l'alimentazione.
• C'è il rischio di prendere la scossa o incendio.
Arrestare il funzionamento e chiudere la
finestra nel caso di tempesta o uragano.
Se possibile, rimuovere il prodotto dalla
finestra prima dell'arrivo dell'uragano.
• C'è il rischio di danni alla proprietà, guasto
del prodotto o scossa elettrica.
Non aprire la griglia di aspirazione del
prodotto durante il funzionamento. (Non
toccare il filtro elettrostatico, nel caso
l'unità ne fosse provvista.)
• C'è il rischio di lesioni fisiche, scossa elettrica
o guasto del prodotto.
Quando il prodotto è bagnato (immerso
nell'acqua o coperto d'acqua) , rivolgersi
ad un centro di assistenza autorizzato.
• C'è il rischio di scossa elettrica o incendio.
Fare attenzione che acqua non penetri
nel prodotto.
• C'è il rischio di scossa elettrica o incendio, o
danni al prodotto.
Ventilare occasionalmente il prodotto quando questo viene
utilizzato insieme ad una stufa ecc.
• C'è il rischio di scossa elettrica o incendio.
Spegnere l'alimentazione quando si effettua la manutenzione o
pulizia del prodotto.
• C'è il rischio di scossa elettrica.
Quando non si intende utilizzare il prodotto per un periodo
prolungato, staccare l'alimentazione o spegnere l'interruttore
automatico.
• C'è il rischio di danni al prodotto o guasto o utilizzo non intenzionale.
Assicurarsi che nessuno possa inciampare o cadere sull'unità
esterna.
• Questo potrebbe avere come risultato lesioni personali o danni al
prodotto.
PERICOLO
Controllare sempre che non vi siano
perdite del gas (refrigerante)
successivamente all'installazione o
riparazione del prodotto.
• Livelli di refrigerante insufficienti possono
provocare guasti al prodotto.
Montare il tubo flessibile di scarico per
garantire il corretto drenaggio dell'acqua.
• Un collegamento malfatto potrebbe provocare
perdite d'acqua.
Mantenere il prodotto in livello durante
l'installazione.
• Per evitare vibrazioni o perdite d'acqua.
Non installare il prodotto in posizioni in cui il
rumore o aria calda proveniente dall'unità
esterna possano recare disturbo al vicinato.
• Potrebbe creare problemi con i vicini.
Usare due o più persone per il
sollevamento e trasporto del prodotto.
• Evitare lesioni personali.
Non installare il prodotto dove possa
essere esposto direttamente al vento del
mare (spruzzi di sale).
•
Può provocare corrosione del prodotto.
Corrosione, particolarmente sulle alette del
condensatore e evaporatore può provocare
guasti del prodotto o funzionamento inefficiente.
Non esporre la pelle direttamente all'aria
fresca del condizionatore per periodi
prolungati. (Non sostare nella corrente
d'aria.)
• Questo potrebbe creare problemi di salute.
Non usare il prodotto per scopi speciali,
come per la conservazione del cibo, opere
d'arte, ecc. Si tratta di un condizionatore
d'aria per consumatori, non un sistema di
refrigerazione di precisione.
• C'è il rischio di danni o perdita di proprietà.
Non bloccare il flusso di ingresso o
uscita aria.
• Può provocare il guasto del prodotto.
Usare un panno morbido per la pulizia.
Non usare detergente aggressivi, diluenti
ecc.
• Esiste il rischio di incendio, scossa elettrica o
danni ai componenti di plastica del prodotto.
Quando si rimuove il filtro non toccare
mai gli elementi metallici del filtro d'aria.
Sono affilatissimi!
• C'è il rischio di lesioni personali..
Non calpestare o appoggiare oggetti sul
prodotto. (unità esterne)
• C'è il rischio di lesioni personali guasto del
prodotto.

Manuale dell'utente 5
Precauzioni di sicurezza
ITALIANO
Inserire sempre saldamente il filtro. Pulire
il filtro ogni due settimane o più spesso
se necessario.
• Un filtro dell'aria sporco riduce l'efficienza del
condizionatore e può provocare un cattivo
funzionamento del prodotto.
Non inserire le mani o altri oggetti
attraverso le feritoie dell'aria di ingresso
o scarico dell'aria quando il prodotto è in
funzione.
• Ci sono componenti taglienti o in movimento
che possono provocare lesioni personali.
Non bere l'acqua scaricata dal prodotto.
• Non è igienica e potrebbe provocare malattie
gravissime.
Usare uno sgabello ben saldo o una scala per la pulizia o
manutenzione del prodotto.
• Fare attenzione a non procurarsi lesioni personali.
Sostituire le batterie del telecomando con batterie nuove dello
stesso tipo. Non mischiare batterie nuove con batterie vecchie o
tipi di diversi di batterie.
• C'è il rischio di incendio o esplosione
Non ricaricare o smontare le batterie. Non smaltire le batterie
bruciandole.
• Possono bruciare o esplodere.
Se il liquido delle batterie si versa sui vestiti o pelle, lavare bene
con acqua pulita. Non usare il telecomando se le batterie hanno
avuto perdite.
• I prodotti chimici all'interno delle batterie possono provocare incendi o
pericoli per la salute.
In caso di ingestione di liquido della batteria, lavarsi i denti e
consultare subito un medico.
In caso di perdita dalle batterie, non utilizzare il telecomando.
• Le sostanze chimiche contenute nelle batterie potrebbero causare
scottature o altri pericoli per la salute.

6 Condizionatore d'aria Convertibile e Sospeso soffitto
Indicatori luminosi di funzionamento
1: Unità interna
2: Unità esterna
3: Telecomando
4: Aria di aspirazione
5: Aria di scarica
6: Tubazioni del refrigerante, filo
elettrico di connessione
7: Linea di drenaggio
8: Filo di terra per la messa a terra
dell'unità esterna per prevenire
scosse elettriche.
Se il vostro impianto dispone di un
sistema di controllo personalizzato,
chiedere al rivenditore LG quale sia la
procedura che corrisponde al proprio
impianto.
R: Sistema combinato o sistema con
funzionamento simultaneo
B: Multi sistema
1: Unità con telecomando
2: Unità senza telecomando (quando
utilizzato come funzionamento
simultaneo)
Introduzione del prodotto
Introduzione del prodotto
1
3
4
6
5
4
7
2
8
A
B
1 1
1
2
: Si accende durante il funzionamento del sistema
Indicatore filtro : Si accende dopo 2400 dal primo funzionamento dell'unità.
Modalità Sleep : Si accende con l'unità in modalità Sleep automatica.(Opzione)
Timer : Si accende durante il funzionamento con il timer.
Modalità
sbrinamento
: Si accende durante la modalità sbrinamento o nella modalità
di accensione a caldo.(Tipo con pompa di calore)
Funzionamento
dell'unità esterna
: Si accende con il funzionamento dell'unità esterna.
(Tipo raffreddamento)
On/Off
Nome e funzione dei componenti
Cosa fare prima dell'uso

ITALIANO
Manuale dell'utente 7
Istruzioni operative
Come inserire le batterie
Manutenzione del telecomando di controllo
1. Rimuovere il coperchio delle batterie tirandolo in direzione delle
frecce.
2. Installare le nuove batterie verificando che la polarità (+) e (-) delle
batterie sia corretta.
3. Rimontare il coperchio facendolo scorrere in posizione.
1. Usare/sostituire sempre le batterie con batterie dello stesso tipo.
2. Se il sistema non verrà usato per un periodo prolungato,
rimuovere le batterie per risparmiarne la carica.
3. Se la schermata del display del telecomando inizia a sbiadirsi,
sostituire entrambe le batterie
NOTA
1. Selezionare un posto sicuro e facile da
raggiungere.
2. Fissare il supporto saldamente al muro con le
viti fornite in dotazione.
3. Scorrere il telecomando all'interno del supporto.
1. Il ricevitore del segnale si trova all'interno dell'unità.
2. Puntare il telecomando verso l'unità per usarla.
Non vi devono essere ostruzioni tra telecomando e
unità.
Istruzioni operative
R
Modalità operativa
1. Il telecomando non dovrebbe mai essere esposto alla luce diretta del sole.
2. Il trasmettitore di segnali e il ricevitore devono essere sempre puliti per garantire una comunicazione
sicura. Usare un panno morbido per la pulizia.
3. Nel caso vi siano altre apparecchiature che utilizzano un telecomando spostarle oppure consultarsi
con il proprio tecnico dell'assistenza.
NOTA

8 Condizionatore d'aria Convertibile e Sospeso soffitto
AUTO CLEAN
ON
OFF
CANCEL
SET
1
3
5
4
9
10
12
15
7
2
8
13
14
11
6
Raffreddamento
Funzionamento automatico
Funzionamento Soft dry
Portello ribaltabile
(aperto)
Riscaldamento
Trasmettitore del segnale
• Modello raffreddamento ( ), modello pompa di calore ( )
Modo operativo
Istruzioni operative
I controlli avranno uno dei seguenti aspetti.
Telecomando senza fili
1. PULSANTE ON/OFF
Serve per l'accensione/spegnimento dell'unità.
2. PULSANTE PER LA SELEZIONE DEL MODO
OPERATIVO
Serve per selezionare il modo operativo.
3. PULSANTI DI IMPOSTAZIONE DELLA
TEMPERATURA DELLA STANZA
Servono per selezionare la temperatura della stanza.
4. SELETTORE PER L'IMPOSTAZIONE DELLA
VELOCITA DEL VENTILATORE INTERNO
Serve a selezionare una delle quattro velocità basso,
medio, alto e CAOS.
5.
PULSANTE RAFFREDDAMENTO A GETTO (JET COOL)
Serve per avviare o arrestare il raffreddamento
rapido.(Il ventilatore funziona ad altissima velocità
nella modalità di raffreddamento rapido)
6. PULSANTE CAOS
Serve per avviare o arrestare il movimento delle alette
e impostare il flusso di direzione dell'aria alto/basso.
7. PULSANTI PER L'AVVIO/ARRESTO DEL TIMER
Serve a impostare il tempo di avvio ed arresto di
funzionamento.
8. PULSANTI PER L'IMPOSTAZIONE DELL'ORA
Servono per impostare l'ora
9.
PULSANTE PER IMPOSTARE/REIMPOSTARE IL TIMER
Serve per impostare e annullare l'operazione con il
timer.
10.
PULSANTE PER L'ATTIVAZIONE DEL MODO SLEEP
Serve per impostare la modalità automatica del
modo Sleep.
11. PULSANTE PER L'ATTIVAZIONE DELLA
CIRCOLAZIONE ARIA
Serve per attivare la circolazione dell'aria nella
stanza senza raffreddarla o riscaldarla.
12. PULSANTE PER IL CONTROLLO DELLA
TEMPERATURA DELLA STANZA
Serve per controllare la temperatura della stanza.
13. PULSANTE PLASMA (OPZIONALE)
Serve per avviare o arrestare la funzione di
depurazione al plasma.
14. PULSANTE REIMPOSTAZIONE
Usato per la impostazione dell'ora.
15. PULSANTE PER L'ATTIVAZIONE DELLE
FUNZIONI SECONDARIE
Serve per selezionare i modi evidenziati in blu alla
base dei pulsanti.
Per usare le funzioni stampante i blu alla base dei pulsanti, premere il 2° pulsante F e poi il pulsante della funzione
richiesta. La pressione del 2° pulsante F attiva la funzione stampata in blu del pulsante corrispondente. Per cancellare
la funzione premere nuovamente il 2° pulsante F, oppure la funzione verrà annullata automaticamente se rimane
inattivo per 10 secondi.
❈ Il prodotto può essere diverso da quanto descritto in precedenza dipendendo dal tipo di modello.
NOTA
Manuale dell'utente 9
ITALIANO
ON
Raffreddamento
Auto Soft Dry
Riscaldamento
(per modelli con
pompa calore)
1
2
3
4
Ventilatore aria CHAOS
è impostato su basso.
Velocità del ventilatore
su impostazione media
Velocità del ventilatore
su impostazione alta
La velocità del
Per aumentare la temperatura
Per diminuire la temperatura
Istruzioni operative
Premere il pulsante ON/OFF per
accendere il sistema.
Il condizionatore d'aria emette un
segnale acustico.
Aprire lo sportello del telecomando e premere il pulsante
della modalità operativa. Ad ogni pressione del pulsante, il
modo operativo cambia in direzione della freccia.
Per il riscaldamento o raffreddamento impostare la
temperatura interna desiderata premendo i PULSANTI DI
IMPOSTAZIONE DELLA TEMPERATURA AMBIENTE.
Impostare nuovamente la velocità del ventilatore con il telecomando. La velocità del ventilatore può
essere impostata in quattro stadi, bassa, media, alta e CHAOS premendo il SELETTORE PER
L'IMPOSTAZIONE DELLA VELOCITÀ DEL VENTILATORE INTERNO.
La velocità del ventilatore varia ad ogni pressione del pulsante.
1
2
3
4
Ventilazione naturale grazie alla logica CAOS
❏
Per un ambiente più fresco, premere IL SELETTORE PER L'IMPOSTAZIONE DELLA VELOCITÀ DEL VENTILATORE
INTERNO e impostare sulla modalità CAOS.
In questo modo, il flusso aria prodotto dal condizionatore d'aria ha le stesse caratteristiche della ventilazione naturale,
poiché la velocità della ventola cambia secondo la logica CAOS.
Modo operativo
La funzione di cambiamento automatico non è disponibile sul multisistema.
NOTA

10 Condizionatore d'aria Convertibile e Sospeso soffitto
Durante il funzionamento
Soft dry
Auto
Auto
Istruzioni operative
Funzionamento automatico (Tipo di raffreddamento)
Funzionamento automatico (Tipo pompa d calore)
Modo funzionamento Soft Dry
Modo funzionamento Soft Dry
❏ Se selezionate la modalità soft dry con il PULSANTE DI SELEZIONE DELLA
MODALITÀ OPERATIVA, il prodotto attiva la modalità di funzionamento soft dry.
impostando automaticamente la temperatura della stanza e il flusso d'aria richiesti
per ottenere una deumidificazione ottimale in base alla temperatura della stanza
misurata.
In questo modo, la temperatura impostata non viene visualizzata sul display del
telecomando e non è possibile modificare nemmeno la temperatura della stanza.
❏ Durante l'operazione soft dry, il volume del flusso d'aria viene impostato
automaticamente in base all'algoritmo di ottimizzazione rispondente allo corrente
della temperatura dell'ambiente, in modo che le condizioni dell'ambiente vengano
mantenute sane e confortevoli anche quando la stagione è molto umida.
Con questa modalità operativa l'impostazione vera e propria della temperatura e
della velocità del ventilatore viene impostata automaticamente tramite la logica di
controllo elettronico basata sulla temperatura corrente dell'ambiente. Se si sente
caldo o freddo, premere i pulsanti di impostazione della temperatura rispettivamente
per aumentare o diminuire il raffreddamento o riscaldamento.
NOTE : Non è possibile, con questa modalità operativa, impostare la temperatura
attuale e velocità del ventilatore. ma, con questa modalità operativa, è
possibile usare la funzione di oscillazione Caos.
Se il sistema non funziona in modo corretto, selezionare manualmente un
altro modo operativo.
Il funzionamento automatico è la funzione di base di riscaldamento o raffreddamento del
condizionatore d'aria.
Ma durante questo funzionamento la scheda di comando modifica la modalità operativa
automaticamente per mantenere la temperatura entro ±2°C rispetto alla temperatura impostata.
Per lanciare la modalità soft dry seguire i punti 1, e 2 e 4 (Vedere la modalità
operativa)
Per lanciare la modalità automatica seguire i punti 1, e 2. (vedere la modalità
operativa)
Per lanciare la modalità automatica seguire i punti 1, 2, 3 3 4. (Vedere la modalità operativa)
Funzionamento di cambio automatico (Sistema combinato) :
❏ Potete modificare la velocità del ventilatore interno.
❏ Quando si seleziona la modalità di funzionamento automatico, il sistema passerà automaticamente dalla
modalità di raffreddamento e alla modalità di riscaldamento, o dal riscaldamento al raffreddamento.
Funzionamento automatico (Multisistema o Sistema simultaneo) :
❏ Potete modificare la velocità del ventilatore interno.
❏
Se il sistema non funziona in modo corretto, selezionare manualmente un altro modo operativo. Il sistema non
passerà automaticamente dalla modalità di raffreddamento e alla modalità di riscaldamento, o dal riscaldamento al
raffreddamento allo bisogna impostare nuovamente la modalità sulla temperatura desiderata.

Manuale dell'utente 11
ITALIANO
Istruzioni operative
Raffreddamento rapido
La funzione di raffreddamento rapido può essere utilizzato per raffreddare velocemente
la stanza nel periodo estivo. Quando la funzione viene attivata, il condizionatore d'aria
funziona in modalità di raffreddamento con il ventilatore ad altissima velocità con la
temperatura impostata su 18°C per 30 minuti per un raffreddamento veloce ed efficace.
Tuttavia, alcuni modelli hanno la funzione di raffreddamento rapido in continuo fino a
quando non viene modificata la modalità operativa.
Questa operazione può essere attivata premendo il PULSANTE_JET COOL.
Per passare dalla modalità di raffreddamento rapido alla modalità di raffreddamento con
ventilatore ad alta velocità, premere nuovamente il PULSANTE JET COOL o IL SELETTORE
PER L'IMPOSTAZIONE DELLA VELOCITÀ DEL VENTILATORE INTERNO o il PULSANTE DI
IMPOSTAZIONE TEMPERATURA AMBIENTE.
• La funzione di Raffreddamento rapido non può essere attivata durante la fase di riscaldamento o nella
modalità di cambiamento automatico di modalità operativa.
NOTA
Funzionamento indotto
Procedure operative da seguire nei casi in cui non può essere usato il telecomando.
Questo modo viene avviato alla pressione del pulsante ON/OFF.
Per interrompere questo modo di funzionamento, premere nuovamente il pulsante.
Funzionamento di prova
Durante il FUNZIONAMENTO DI PROVA, il condizionatore d'aria si attiva ad alta velocità a prescindere dalla
temperatura della stanza e si reimposta in 18 minuti.
Durante il funzionamento in questo modo, il condizionatore d'aria si attiva appena viene impostato il
telecomando se il segnale del telecomando viene ricevuto.
Se si desidera usare questa modalità di funzionamento, premere e tenere premuto il pulsante ON/OFF per 3~5
secondi.
Per interrompere il funzionamento in questo modo, premere nuovamente il pulsante.
Tipo 1 Tipo 2 Tipo 3

12 Condizionatore d'aria Convertibile e Sospeso soffitto
Istruzioni operative
Disattiva ritardo timer
Attiva ritardo timer
Disattiva e attiva ritardo timer Attiva e disattiva ritardo timer
1. L'ora può essere impostata solo premendo il PULSANTE RESET. Dopo la sostituzione delle batterie, è
necessario premere il PULSANTE RESET per reimpostare l'ora. Premere il tasto Avvio/Arresto.
2. Premere il pulsante e verificare che l'icona sia accesa.
3. Premere i pulsanti per l'impostazione dell'ora fino ad impostare l'ora desiderata.
4. Premere il PULSANTE TIME SET/CANCEL.
Controllare se l'indicatore è A.M. o P.M.
NOTA
1. Accertarsi che l'ora venga impostata in modo corretto sul display del telecomando.
2. Premere il pulsante per l'attivazione delle funzioni secondarie.
3. Premere i pulsanti per l'AVVIO/ARRESTO del timer per accenderlo o spegnerlo.
4. Premere i pulsanti per l'impostazione dell'ora fino ad impostare l'ora desiderata.
5. Per impostare l'ora selezionata, premere i PULSANTI TIMER SETTING puntando
il telecomando al ricevente del segnale.
Per annullare l'impostazione del timer
Verificare che l'icona sia spenta.
Premere il PULSANTE TIMER CANCEL puntando il telecomando al ricevente del segnale.
(L'indicatore luminoso del timer sul condizionatore d'aria e il display si spengono).
Selezionare una delle seguenti quattro modalità di funzionamento.
NOTA
ON
OFF
CANCEL
SET
CANCEL
SET
CANCEL
SET
Impostazione dell'ora corrente
Impostazione del timer
1. Premere il pulsante per l'attivazione del modo Sleep per impostare l'ora per lo spegnimento automatico
del condizionatore d'aria.
2. Il timer può essere programmato in incrementi di 1 ora, premendo i pulsante per l'attivazione del modo Sleep da 1 a 7 volte.
Il modo Sleep può essere attivato da 1 a 7 volte.
Per modificare l'intervallo impostato in incrementi di 1 ora, premere il pulsante Sleep puntando il telecomando in direzione
del condizionatore d'aria.
3. Accertarsi che si accenda il LED corrispondente al modo Sleep.
Per disattivare il modo Sleep, premere il pulsante della modalità Sleep più volte fino a quando il simbolo a forma di stella
non scompare dal display.
: Il modo Sleep, il ventilatore viene attivato a bassa (raffreddamento) o media velocità (solo pompa di calore) per garantire
silenziosità durante il riposo.
NEL MODO RAFFREDDAMENTO : La temperatura si innalza automaticamente di 1°C nei 30 minuti successivi e di 2°C in
un'ora per rendere il riposo ancora più confortevole.
❈
Il prodotto può essere diverso da quanto descritto in precedenza dipendendo dal tipo di modello.
NOTA
Modo Sleep

ITALIANO
Manuale dell'utente 13
Questa operazione mette i circolo l'aria senza raffreddare o riscaldare.
Può essere attivata premendo il pulsante di circolazione dell'aria AIR
CIRCULATION. Una volta attivata la circolazione dell'aria potete
selezionare la velocità premendo SELETTORE PER L'IMPOSTAZIONE
DELLA VELOCITÀ DEL VENTILATORE INTERNO.
Il flusso alto/basso (flusso aria verticale) può
essere regolato usando il telecomando.
1. Premere il pulsante START/STAP
(Avvio/Arresto) per avviare l'unità.
2. Premere il pulsante CHAOS SWING.
3. Le alette iniziano a oscillare verso l'alto e il
basso automaticamente.
4. Per arrestare le alette sull'inclinazione
desiderata, premere nuovamente
Per regolare manualmente la direzione
sinistra/destra (flusso aria orizzontale).
: Mentre si regolano le alette per il flusso d'aria
verticale, fare attenzione a non toccare
l'evaporatore.
AVVERTENZA
Istruzioni operative
Controllo direzione flusso aria verticale/orizzontale
• Con la pressione del pulsante CHAOS SWING la direzione del flusso d'aria orizzontale viene modificata automaticamente
basata sull'algoritmo caos per distribuire l'aria in modo uniforme in ogni ambiente per rendere più confortevole il corpo
umano grazie alla brezza naturale.
• Usare sempre il telecomando per regolare la direzione alto/basso del flusso dell'aria. Lo spostamento manuale della
direzione verticale di flusso delle alette potrebbe danneggiare il meccanismo. Quando l'unità è spenta, le alette di
direzione verticale alto/basso dell'aria chiudono l'uscita aria del sistema.
NOTA
Il modo CAOS limita il consumo di energia elettrica e previene un raffreddamento eccessivo, poiché il
ventilatore passa automaticamente dalla velocità alta a quella bassa o viceversa, dipendendo dalla
temperatura dell'ambiente.
NOTA
Nel caso di riattivazione dell'a'alimentazione dopo un'interruzione della corrente, l'unità entra i funzione
automaticamente nelle condizioni operative in atto prima dell'interruzione.
Pertanto, l'attivazione di questa funzione non richiede la pressione di tasti o pulsanti.
Nella fase iniziale, il ventilatore si attiva a velocità bassa e il compressore si avvia circa 3 minuti dopo.
Dopo l'avvio del compressore, viene ripristinata anche la velocità del ventilatore nella modalità impostata in
precedenza.
: In caso di assenza prolungata durante un'interruzione della corrente, disattivare l'alimentazione
generale per evitare un riavvio automatico indesiderato.
AVVERTENZA
Modalità di circolazione dell'aria
Pulsante nuovo avviamento automatico

14 Condizionatore d'aria Convertibile e Sospeso soffitto
Assistenza e manutenzione
Unità interna
Prima di eseguire qualsiasi intervento di manutenzione, scollegare il condizionatore d'aria dalla rete elettrica.
PERICOLO
Strofinare l'apparecchio con un panno morbido ed asciutto. Non usare candeggina o abrasivi.
Non usare mai nessuno di questi prodotti
• Acqua ad una temperatura superiore a 40°C. Può provocare scolorimento e
deformazione.
• Sostanze volatili Possono danneggiare la superficie del condizionatore d'aria
Filtri Aria
I filtri dell'aria che si trovano dietro alla griglia principale devono essere controllati e puliti una volta ogni 2
settimane o più spesso se necessario
1. Sollevare il pannello anteriore e tirare verso l'esterno la linguetta del filtro per rimuovere il filtro. (Tirare il
gancio del filtro per estrarre il filtro. - appeso al soffitto)
2. Pulire il filtro con un aspirapolvere o con acqua calda e sapone.
• Se la quantità di sporcizia è notevole, lavare con una soluzione di detergente acqua tiepida.
• Non usare acqua ad una temperatura superiore a 40°C per evitare di deformare il rivestimento del
condizionatore d'aria.
3. Dopo avere lavato il condizionatore d'aria con acqua, lasciarlo asciugare bene all'ombra.
4. Rimontare il filtro aria.
PERICOLO
Assistenza e manutenzione
Filtri dell'aria
(dietro il pannello anteriore)
Griglie Espulsione Aria
Aletta verticale Aletta orizzontale
Griglie Aspirazione Aria
Aletta orizzontale
Aletta verticale
Griglie Espulsione Aria
Filtri dell'aria
(Dietro la griglia di aspirazione)
Griglie Aspirazione Aria
(Griglia di aspirazione)
G
a
s
o
l
i
n
e
P
o
w
d
e
r
 Loading...