


F14A8QW2
LG F14A8QW2, F10A8Q/TD Series, F14A8QW3, F14A8QW4, F14A8QW5 Owner's Manual
...
SUFFIX
ENGLISH
LANGUAGE
EXTERIER INTERIER
1 1
MATERIAL AND PRINTING DESCRIPTION
PRINTING DEGREE
ABWQEUK
40
PAGE
Prime Touch
REMARK
RELEASING THIS DRAWING
WITHOUT PERMISSION LG
Electronics SHOULD BE
ACCUSED ACCORDING TO THE
LAWS AND COMPANY RULES.
150 150
210
MFL67794605
MANUAL,OWNER’S
DRUM-EXPORT1/1
MFL67794605
<< NOTES >>
1. Material, printing and exterier size are refer to work tables.
2. Printing, text size and line are based on LG design film.
3. Exterier size on the drawing is cutting line.
4. Before product controlled by criteria sa mple.
P/NO.
<FRONT> <BACK>
WORK
BRAND
LG
05
F10A8Q/TD(W)(A)(1~9)
F12A8Q/TD(W)(A)(1~9)
F14A8Q/TD(W)(A)(1~9)
MODEL
MFL67794605
ver.20052013.00
P/NO.
SEC.
5. The part should not contain prohibited substances(Pb,Cd,Hg,Cr+6,PBB,PBDE) and details
should comply with LG standard of LG(63)-A-5501-34
Cover pages: 120g/m
2
DWG.
No.
TRIG.
LG WR
LG Electronics Inc.
UNIT SCALE
N
S
mm
REVIEWEDDESIGNED
RELATED DWG.
CHECKED APPROVED
J.Olejarz
MODELING
I
T
L
E
T
APPROVEDPREPAREDDATEREF. NO.REV. NO. REVISION DESCRIPTION
BRAND
MODEL
S.Kozłowski
MFL67463272
M.Kawka N
amchul Kim
1
2
3
4
5
6
7
Content: 70g/m
2

OWNER’S MANUAL
WASHING MACHINE
www.lg.com
Before beginning installation, read these instructions carefully.
This will simplify installation and ensure that the washer is installed
correctly and safely. Leave these instructions near the washer
after installation for future reference.
F14A8Q/TD(W)(A)(1~9)
F12A8Q/TD(W)(A)(1~9)
F10A8Q/TD(W)(A)(1~9)
ver. 20052013.00
P/No.:MFL67794605

Contents
2
Contents....................................2
Product Features......................3
Important safety instructions
Important safety instructions .................4
Basic safety precautions .......................5
Save these instructions.........................6
Specifications...........................7
Installation
Removing packing ................................8
Removing transit bolts ..........................8
Installation place requirements .............9
Connecting water supply hose............11
Installation of drain hose .....................13
Leveling...............................................14
How to use washer
Operating washing machine ...............16
Care before washing...........................17
Washing program table.......................18
Extra options .......................................19
Operating data ....................................20
Control panel.......................................21
Additional program..............................22
- Time Delay........................................22
- Crease Care .....................................22
- Favorite.............................................22
- Pre Wash ..........................................22
Options................................................23
- Medic Rinse ......................................23
- Wash.................................................23
- Temp. ...............................................23
- Rinse.................................................23
- Spin...................................................23
- Rinse+Spin .......................................23
Other functions....................................23
- Spin Only .........................................23
Child Lock ...........................................24
Beep On/Off ........................................24
Tub Clean ...........................................25
Door Lock & Detecting ........................25
Thank you for buying a LG Fully
Automatic Washing Machine.
Please read your owner’s manual
carefully, it provides instruction on safe
installation, use and maintenance.
Retain it for future reference.
Record the model and serial number of
your washing machine.
Model No.
Serial No.
Date of Purchase
Adding detergent
Adding detergent and fabric softener..26
Maintenance
The water inlet filter.............................28
The drain pump filter ...........................29
Dispenser drawer................................30
The washing drum ..............................31
Cleaning your washer .........................31
Cold conditions ...................................31
Troubleshooting guide
Diagnosing problems ..........................32
Error messages...................................34
Using SMARTDIAGNOSIS™..............35
Terms of warranty ..................36
Product Features
3
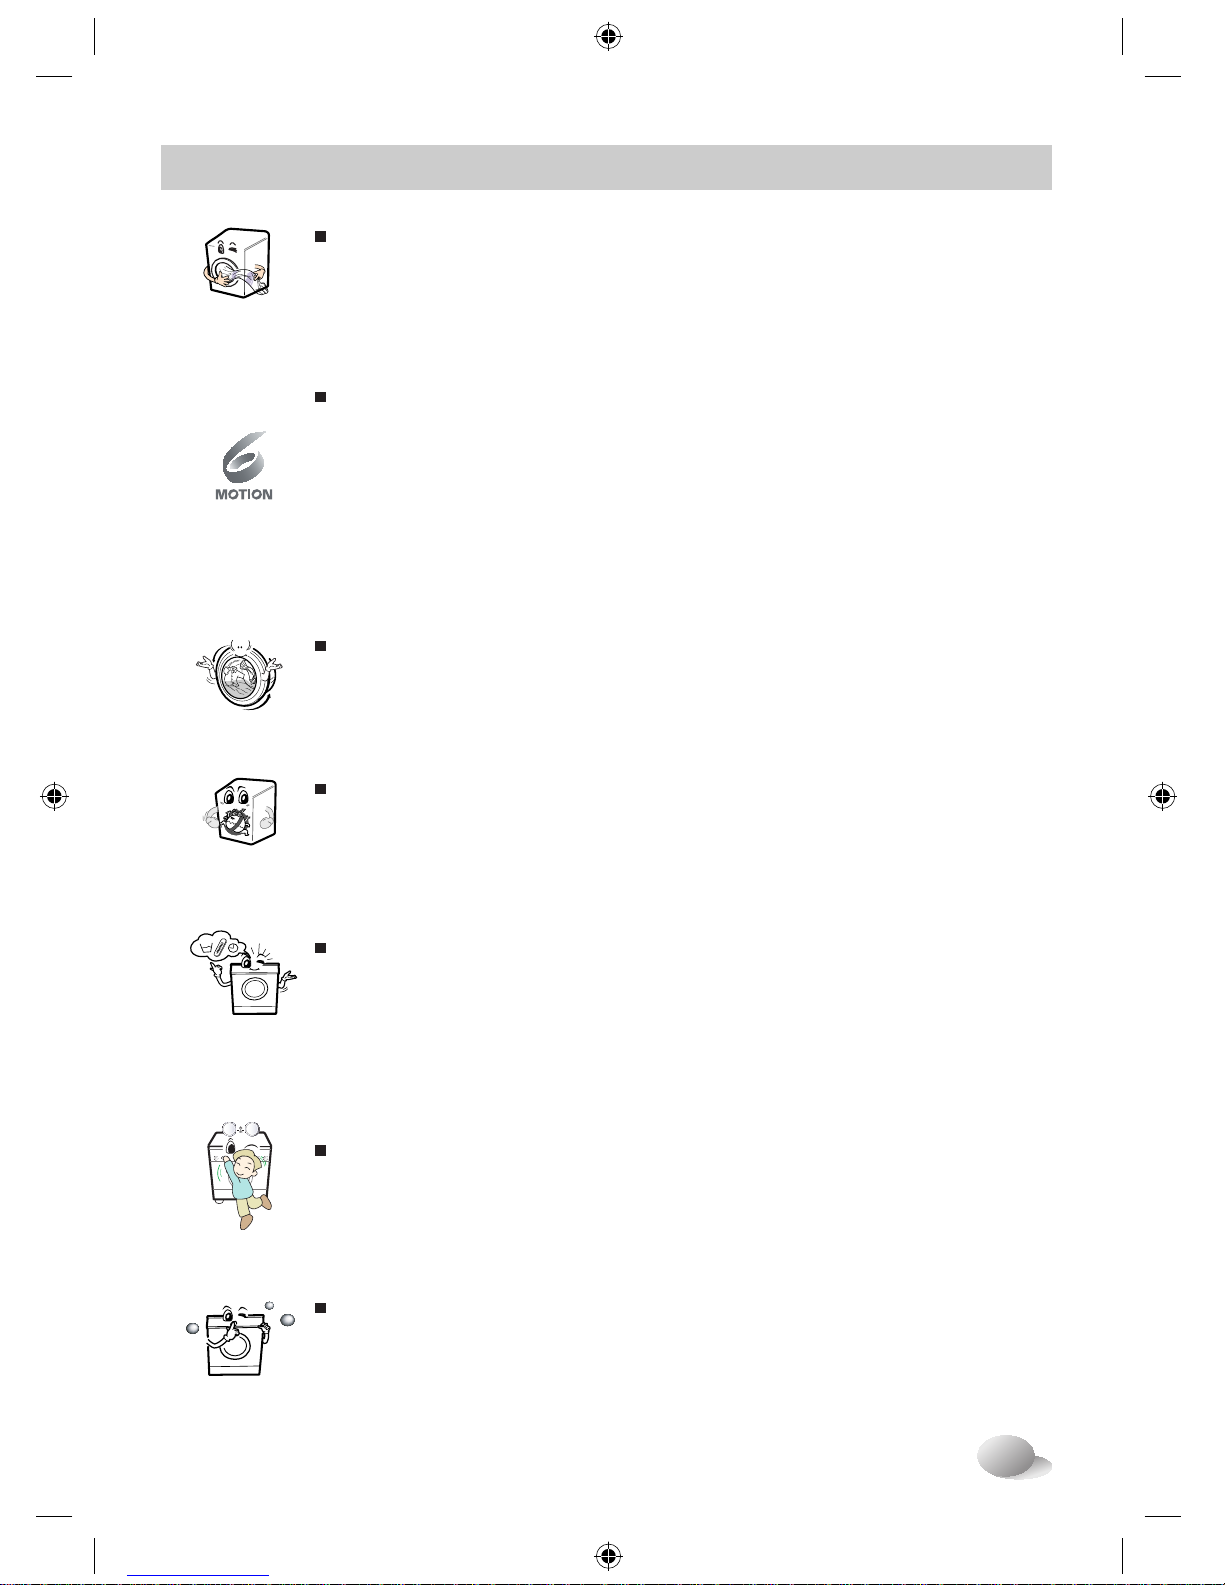
Inverter Direct Drive system
The advanced Brushless DC motor directly drives the drum without
belt and pulley.
More economical with Intelligent Wash system
Intelligent Wash System detects the size of load and water temperature,
and then determines the optimum water level and washing time to
minimize energy and water consumption.
Built-in heater
Internal heater automatically heats the water to the best temperature
on selected cycles.
Protection against creases
With the alternating rotation of the drum, creasing is minimized.
6 Motion
Washer is able to perform various drum actions or a combination of
different actions depending on the wash program selected.
Combined with a controlled spin speed and the ability of the drum to
rotate both left and right, the wash performance of the machine is greatly
improved, giving you perfect results every time.
추가선택 예약
Low noise speed control system
By sensing the amount of load and balance, it evenly distributes load
to minimize the spinning noise level.
Child Lock
The Child Lock prevents children from pressing any button to change
the settings during operation.

4
Important safety instructions
For your safety, the information in this manual must be followed to minimize the risk of fire or
explosion, electric shock, or to prevent property damage, injury to persons, or death.
READ ALL INSTRUCTIONS AND EXPLANATION OF THE INSTALLATION
BEFORE USE.
WARNING
You can be killed or seriously injured if you don’t follow instructions.
Your Safety and the safety of others are very important.
We have provided many important safety messages in this manual and on your appliance.
Always read and obey all safety messages.
This is the safety alert symbol.
This symbol alerts you to potential hazards that can kill or hurt you and others.
All safety messages will follow the safety alert symbol and either the word DANGER,
WARNING or CAUTION.
These words mean:
WARNING
You may be slightly injured or cause damage to the product if you do not follow instructions.
All safety messages will tell you what the potential hazard is, tell you how to reduce the chance
of injury, and tell you what can happen if the instructions are not followed.
CAUTION
You will be killed or seriously injured if you don’t immediately follow instructions.
DANGER

5
Important safety instructions
To reduce the risk of fire, electric shock, or injury to persons when using the washer, follow basic
precautions, including the following:
WARNING
• Before installation, check exterior
damages. If it has, do not install.
• Do not install or store the washer
where it will be exposed to the
weather.
• Do not tamper with controls.
• Do not repair or replace any part of
the washer or attempt any servicing
unless specifically recommended in
the user-maintenance instructions or
published user-repair instructions
that you understand and have the
skills to carry out.
• Keep the area underneath and around
your appliances free of combustible
materials such as lint, paper, rags,
chemicals, etc.
• The appliance is not intended for use
by young children or infirm persons
without supervision. Do not allow
children to play on, with, or inside this
or any other appliance.
• Keep small animals away from the
appliance.
• Do not leave the washer door open.
An open door could entice children to hang
on the door or crawl inside the washer.
• Never reach into washer while it is
moving. Wait until the drum has
completely stopped.
• The laundry process can reduce the flame
retardant of fabrics.
To avoid such a
result, carefully follow the garment
manufacturer’s wash and care
instructions.
• Do not wash or dry articles that have
been cleaned in, washed in, soaked
in, or spotted with combustible or
explosive substances (such as wax,
oil, paint, gasoline, degreasers, drycleaning solvents, kerosene, etc.)
which may ignite or explode. Oil may
remain in the tub after a whole cycle resulting
in fire during drying.
So, do not load oiled clothes.
• Do not slam the washer door closed
or try to force the door open when
locked. This could result in damage to the
washer.
• When the machine runs high
temperature, the front door may be
very hot. Don’t touch it.
• To minimize the possibility of electric
shock, unplug this appliance from the
power supply or disconnect the
washer at the household distribution
panel by removing the fuse or
switching off the circuit breaker
before attempting any maintenance or
cleaning.
• When unplugging power cord, do not
pull out by grasping the cord.
Otherwise, the power cord may be damaged.
• Never attempt to operate this
appliance if it is damaged,
malfunctioning, partially
disassembled, or has missing or
broken parts, including a damaged
cord or plug.
■ Basic safety precautions

6
Important safety instructions
■ Basic safety precautions
■ Save these instructions
To reduce the risk of fire, electric shock, or injury to persons when using the washer, follow basic
precautions, including the following:
WARNING
Improper connection of the equipment-grounding conductor can result in electric shock.
Check with a qualified electrician or serviceman if you are in doubt as to whether the appliance is
properly grounded. Do not modify the plug provided with the appliance - if it does not fit the
outlet, have a proper outlet installed by a qualified electrician.
GROUNDING INSTRUCTIONS
This appliance must be grounded. In the event of malfunction or breakdown, grounding will
reduce the risk of electric shock by providing a path of least resistance for electric current.
This appliance is equipped with a cord having an equipment-grounding conductor and
grounding plug. The plug must be plugged into an appropriate outlet that is properly installed
and grounded in accordance with all local codes and ordinance.
• Do not use an adapter this will defeat the grounding plug.
• If you don’t have the proper outlet, consult an electrician.
WARNING
• Before discarding an old machine
unplug it. Render the plug useless.
Cut off the cable directly behind the
appliance to prevent misuse.
• When a product was under water,
Please call service center. There is a
risk of electric shock and fire.
• Appliance connected to the water
mains using new hose-sets. Old hosesets should not be reused.
• To reduce the risk of personal injury,
adhere to all industry recommended
safety procedures including the use
of long sleeved gloves and safety
glasses. Failure to follow all of the safety
warnings in this manual could result in
property, personal injury or death.
• Do not push down the door
excessively, when washer door open.
This could topple over the washer.
enihca m gnihsaw gnidaol tnorF : ema N
Power supply
)W(m m 006 : ez iS 590 mm(D) 850 mm(H)
gk 56 :t h g i eW
Max.Watt
Wash capacity
Permissible water pressure : 100 - 1000 kPa (1.0 - 10.0 kgf /cm
2
)
Information for customer Noise regarding EN:
norm EN 60704
Declared value of acoustical noise of this product is like below table.
That comply with the requirements level A of acoustical power considering of reference
acoustical power 1pW.
Noise Level:
: 2100W
: 7 kg [F14/12/10A8QD(W)(A)(1~9)]
: 8 kg [F14/12/10A8TD(W)(A)(1~9)]
: 220 - 240 V~, 50 Hz
Wash
54 dB(A)
54 dB(A)
F14A8QD(W)(A)(1~9)
F12/10A8QD(W)(A)(1~9)
Spin
73 dB(A)
72 dB(A)
7
Specifications
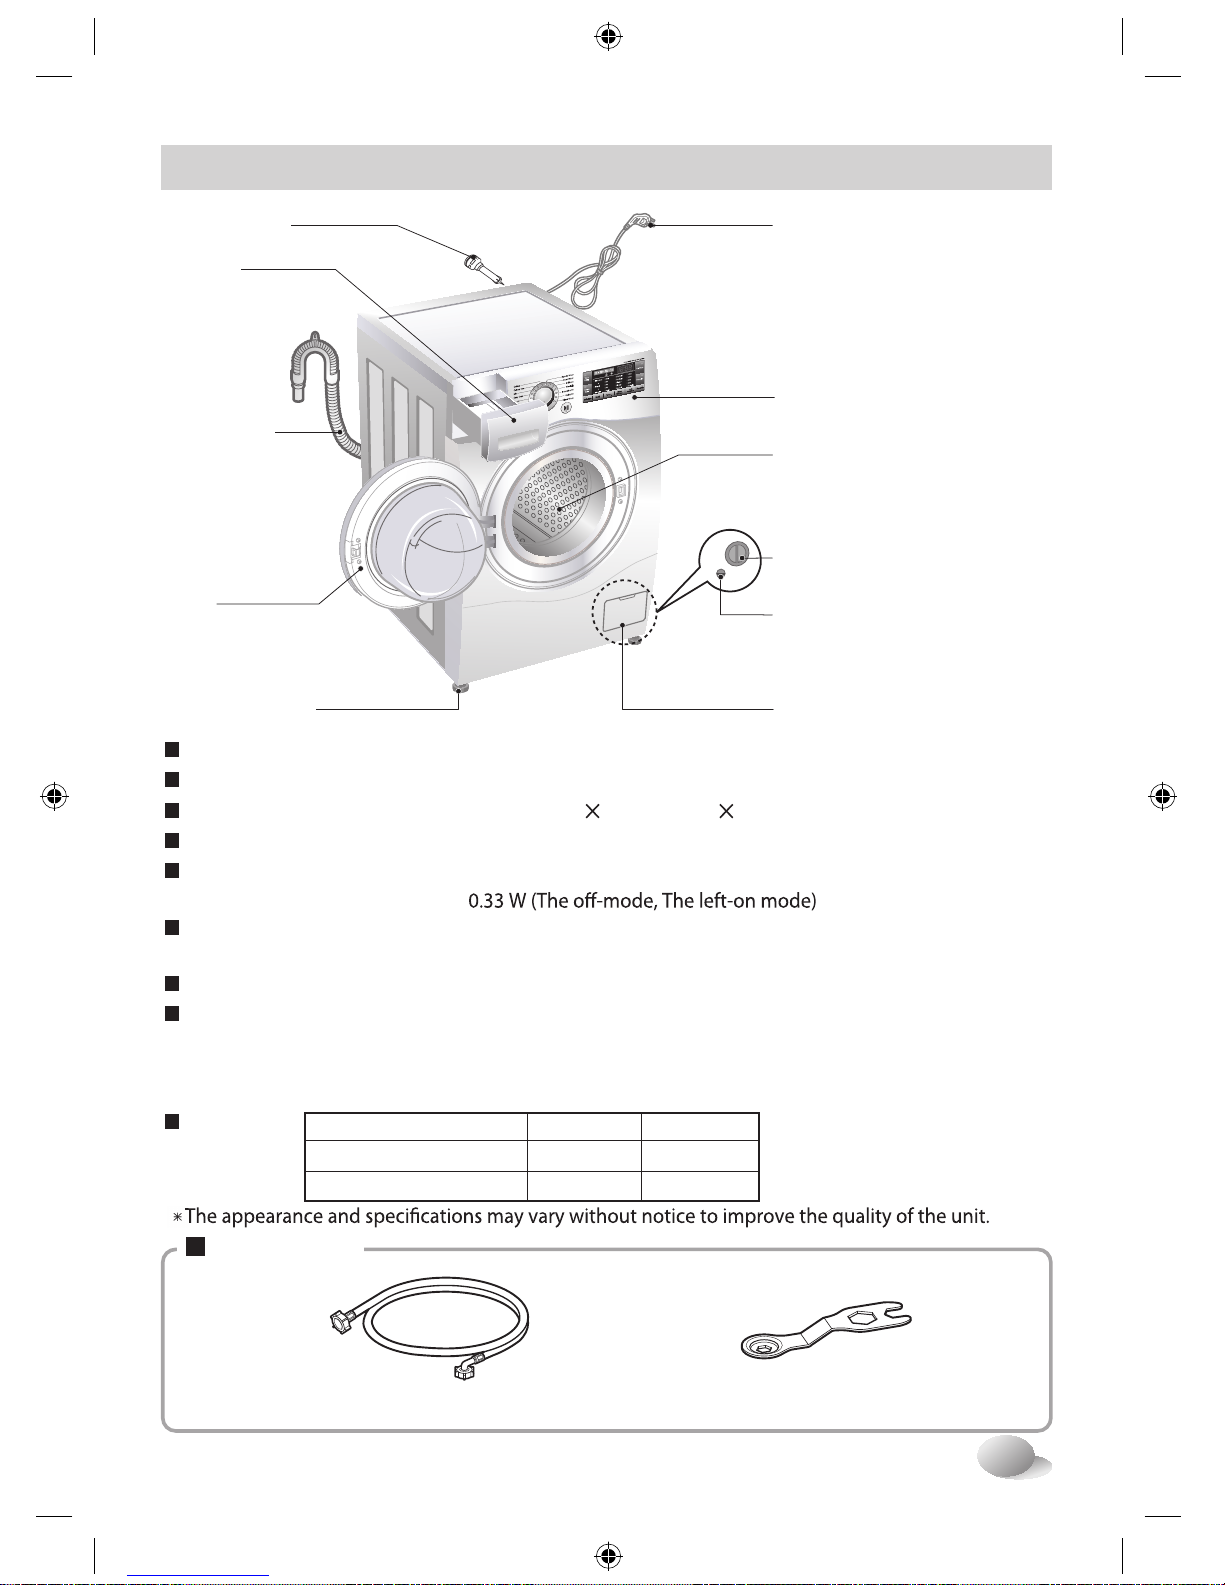
Accessories
(For detergent and
fabric softener)
Drawer
Drain hose
Transit bolts
Power plug
Control panel
Drain pump lter
Lower cover cap
• If the supply cord is damaged,
it must be replaced by the
manufacturer or its service agents
or a similarly qualied person in
order to avoid a hazard.
Drum
Door
Drain plug
Adjustable feet
Inlet hose (1EA) Spanner
8
Installation
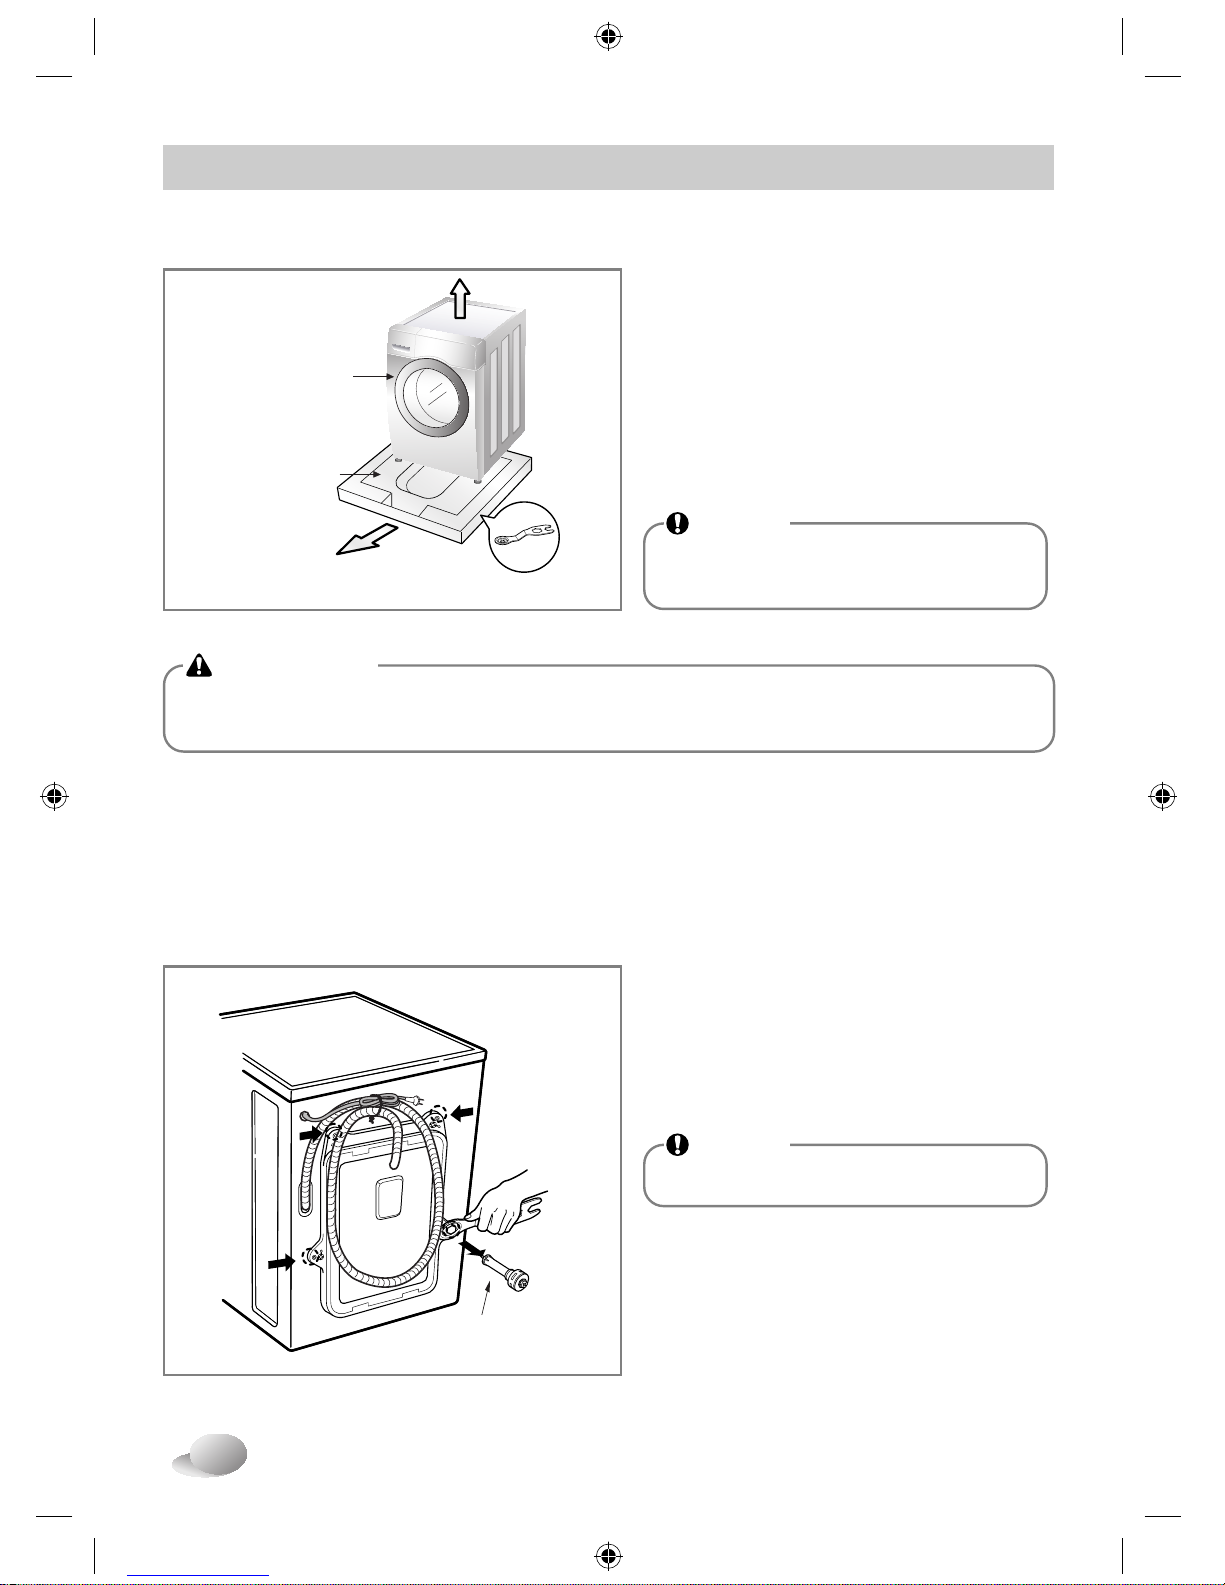
■ Removing packing
1. Remove the cardboard box and
styrofoam packing.
2. Lift the washing machine and remove
the base packing.
3. Remove the tape securing the power
supply cord and drain hose.
4. Remove the inlet hose from the drum.
WARNING
• Packaging material (e.g. Films, Styrofoam) can be dangerous for children.
There is a risk of suffocation ! Keep all packaging well away from children.
NOTE
• Keep the spanner provided for
future use.
Spanner
Washer
Base Packing
1. Unscrew the 4 bolts with
the spanner supplied.
2. Take out the 4 bolts along with the
rubber bungs by slightly twisting the
bung.
3. Close the holes with the caps supplied.
To prevent internal damage during transport, the 4 special bolts are locked.
Before operating the washer, remove the bolts along with the rubber bungs.
If they are not removed, it may cause heavy vibration, noise and malfunction.
■ Removing transit bolts
Transit bolt
NOTE
• Keep the transit bolts for future use.
9
• Level floor :
Allowable slope under entire washer is 1˚
• Power outlet :
Must be within 1.5 meters of either side of location of washer.
Do not overload the outlet with more than one appliance.
• Additional Clearance :
For Wall, 10cm:rear / 2cm : right & left side
Do not place or store laundry products on top of washer at
any times.
They can damage the finish or controls.
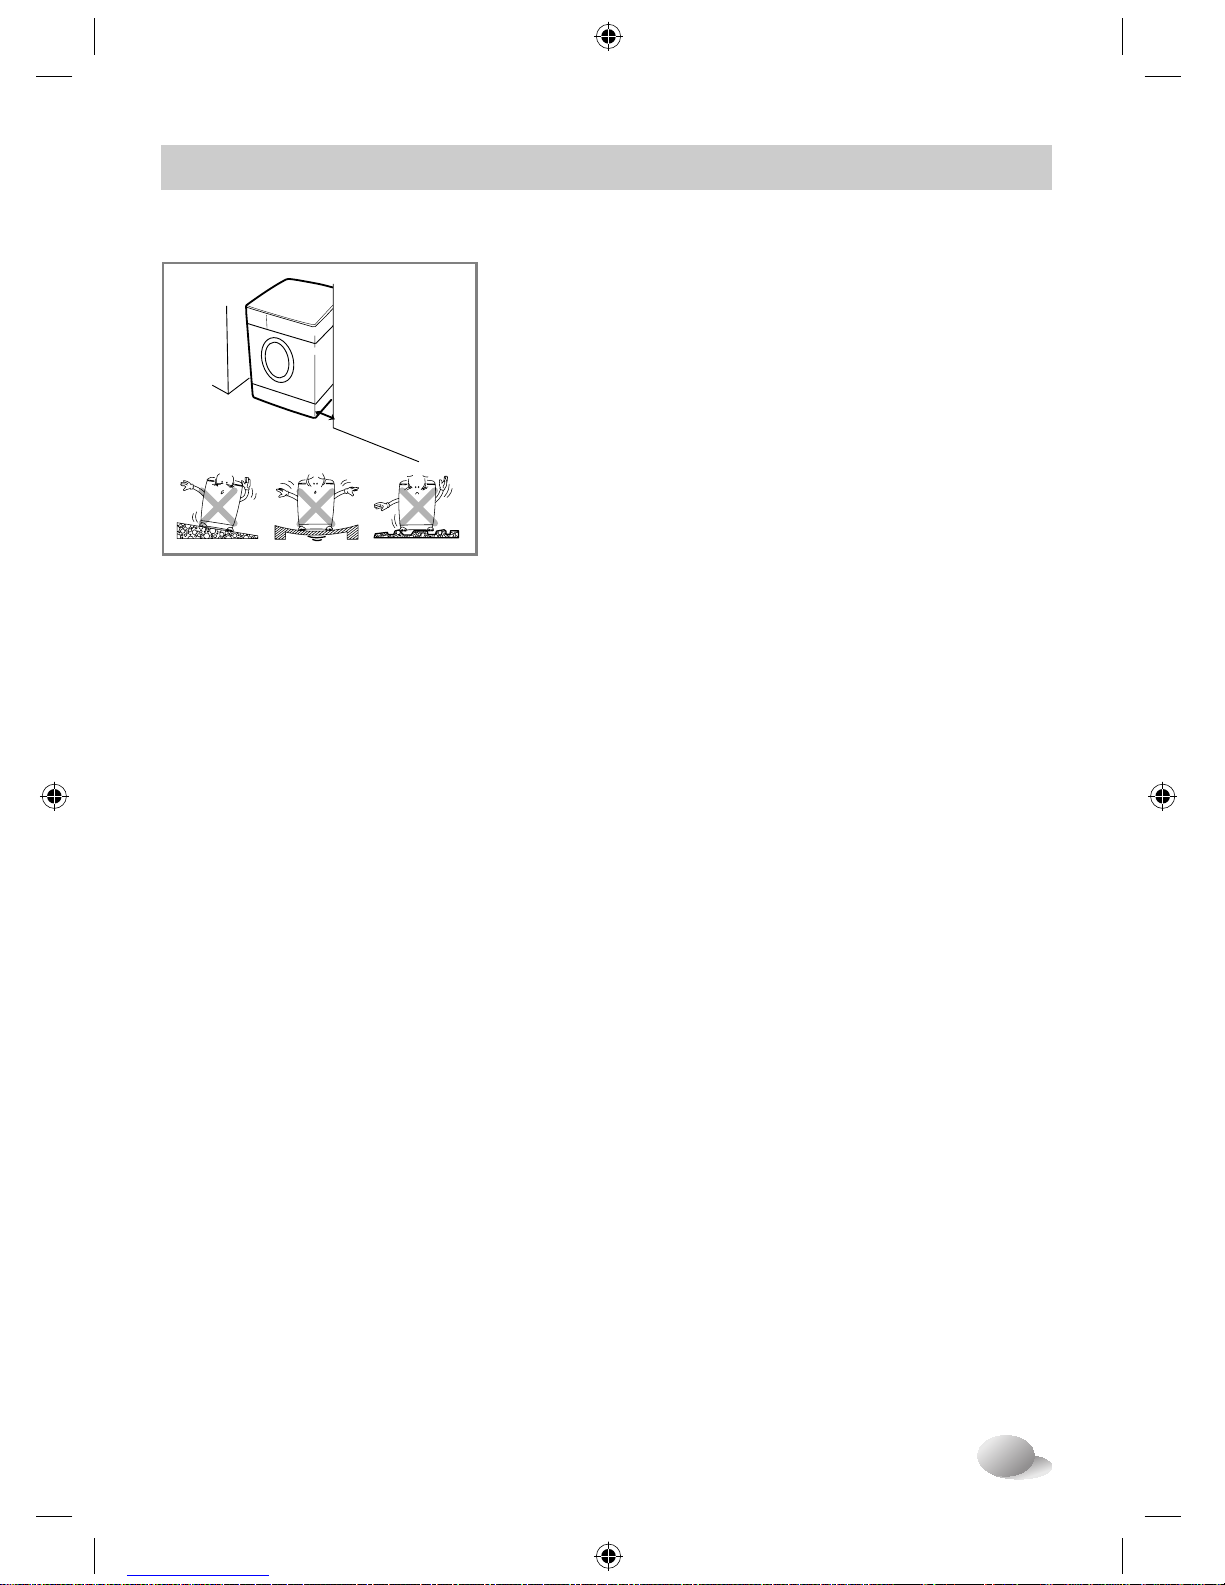
■ Installation place requirements
Positioning
Location
• Install the washer on a flat hard floor.
• Make sure that air circulation around the washer is not impeded by carpets, rugs, etc.
• Never try to correct any unevenness in the floor with pieces of wood, cardboard or similar
materials under the washer.
• If it is impossible to avoid positioning the washer next to a gas cooker or coal burning stove,an
insulating(85x60cm) covered with aluminum foil on the side facing the cooker or stove,must be
inserted between the two appliance.
• The washer must not be installed in rooms where the temperature can drop below 0°C.
• Please ensure that when the washer is installed, it is easily accessible for the engineer in the
event of a breakdown.
• With the washer installed, adjust all four feet using the transit bolt spanner provided ensuring
the appliance is stable, and a clearance of approximately 20mm is left between the top of the
washer and the underside of any work-top.
• This equipment is not designed for maritime use or for use in a mobile installations such as
caravans, aircraft etc.
Installation
Washer
approx.
2cm
• Do not use an extension cord or double adapter.
• If the supply cord is damaged, it must be replaced by the manufacturer or its service agents or
similarly qualified person in order to avoid a hazard.
• Always unplug the machine and turn off the water supply after use.
• Connect the machine to an earthed socket in accordance with current wiring regulations.
• The appliance must be positioned so that the plug is easily accessible.
• Repairs to the washing machine must only be carried out by qualified personnel.
Repairs carried out by inexperienced persons may cause injury or serious malfunctioning.
Contact your local service center
• Do not install your washing machine in rooms where temperature below freezing may occur.
Frozen hoses may burst under pressure. The reliability of the electronic control unit may be
impaired at temperatures below freezing point.
• If the appliance is delivered in the winter months and temperatures are below freezing : Place
the washing machine at room temperature for a few hours before putting it into operation.
Electrical connection

10
Installation
CAUTION
CAUTION concerning the Power cord
• Most appliances recommend they be placed upon a dedicated circuit; that is, a single
outlet circuit which powers only that appliance and has no additional outlets or branch
circuits. Check the specification page of this owner's manual to be certain.
• Do not overload wall outlets. Overloaded wall outlets, loose or damaged wall outlets,
extension cords, frayed power cords, or damaged or cracked wire insulation are
dangerous. Any of these conditions could result in an electric shock or fire.
• Periodically examine the cord of your appliance, and if its appearance indicates
damage or deterioration, unplug it, discontinue use of the appliance, and have the cord
replaced with an exact replacement part by an authorized servicer.
• Protect the power cord from physical or mechanical abuse, such as being twisted,
kinked, pinched, closed in a door, or walked upon. Pay particular attention to plugs,
wall outlets, and the point where the cord exits the appliance.
If the appliance is supplied from a cord extension set or an electrical portable outlet
device, the cord extension set on electrical portable outlet device must be positioned
so that it is not subject to splashing or ingress of moisture.
CAUTION
• The appliance is not intended for use by young children or infirm persons without
supervision.
• Young children should be supervised to ensure that they do not play with appliance.

11
1. Unscrew the adapter ring plate and the 4
adapter retaining screws.
2. Push the adapter onto the end of the tap
so that the rubber seal forms a watertight
connection. Tighten the adapter ring plate
and the 4 screws.
3. Push the water supply hose vertically
upwards so that the rubber packing within
the hose can adhere completely to the
tap and then tighten it by screwing it to
the right.
• Water supply pressure must be between 100 kPa and 1000 kPa (1.0 - 10.0 kgf / cm2).
• Do not strip or crossthread when connecting inlet hose to the valve.
• If the water supply pressure is more than 1000 kPa, a decompression device should be installed.
• Periodically check the condition of the hose and replace the hose if necessary.
Type-A : Connecting Screw-type hose to tap with thread
• Screw the hose connector onto water
supply tap.
■ Connecting water supply hose
Step1 : Check rubber seal inlet hose
Step2 : Connect hose to water tap
• Two rubber seals are supplied with the
water inlet hoses.
They are used for preventing water leaks.
Make sure the connection to taps is
sufficiently tight.
Upper
connector
Rubber
packing
Plate
Water supply
hose
Fixing screw
Hose
connector
Rubber
seal
Type-B : Connecting Screw-type hose to tap without thread
Installation

12
1. Unscrew the adapter ring plate and
the 4 adapter retaining screws.
2. Remove the guide plate if the tap is
too large to fit the adapter.
3. Push the adapter onto the end of
the tap so that the rubber seal forms
a watertight connection.
Tighten the adapter ring plate and
the 4 screws.
4. Pull the connector latch plate down,
push the inlet hose onto the adapter,
and release the connector latch plate.
Make sure the adapter locks into place.
Please use the horizontal tap
Horizontal tap Extension tap Square tap
Ring plate
Guide plate
Latch plate
Type-C : Connecting one touch type hose to tap without thread
Step3: Connect hose to washer
• Make sure that there are no kinks in the
hose and that they are not crushed.
When your washer has two valves.
• The Inlet hose which has red connector is
for the hot water tap.
• If the washer has two valves, the energy is
saved by using hot valve.
Installation
NOTE
•
After completing connection, if water leaks from the hose, repeat the same steps.
Use the most conventional type of faucet for water supply. In case the faucet is square or
too big, remove the spacing ring before inserting the faucet into the adaptor.
NOTE
• After connecting inlet hose to water
tap, turn on the water tap to flush
out foreign substances (dirt, sand or
sawdust) in the water lines. Let
water drain into a bucket, and
check the water temperature.
 Loading...