

Page 1
&RJQLWLYH&[L²Label Printer
The Leica Universal Label is suitable for most labelling applications including specimen
containers, request forms and microscope slides for routine, special and IHC/ISH staining.
Please be aware that only in combination with the Cognitive Cxi label printer (with a firmware
modification carried out for Leica Microsystems) the Leica Universal Label ensures high-quality
text imprints and high-resolution linear and two-dimensional bar code markings that withstand almost all chemical and
mechanical treatments of slide labels.
For optimum performance with the Leica Universal Label (and the corresponding ink ribbon) the firmware of the Cognitive
Cxi label printer has been adapted. Therefore please note that the settings in the Setup Menu of the Cognitive Cxi label
printer for usage with the Leica Universal Label has to be set to Speed = Low and Darkness = 300. For video instructions
of label and ink ribbon insertion please have a look at the Leica Microsystems homepage on the instrument product
page:
http://www.leica-microsystems.com/products/histology-systems/specimen-identification/
Instructions for installing the ink ribbon
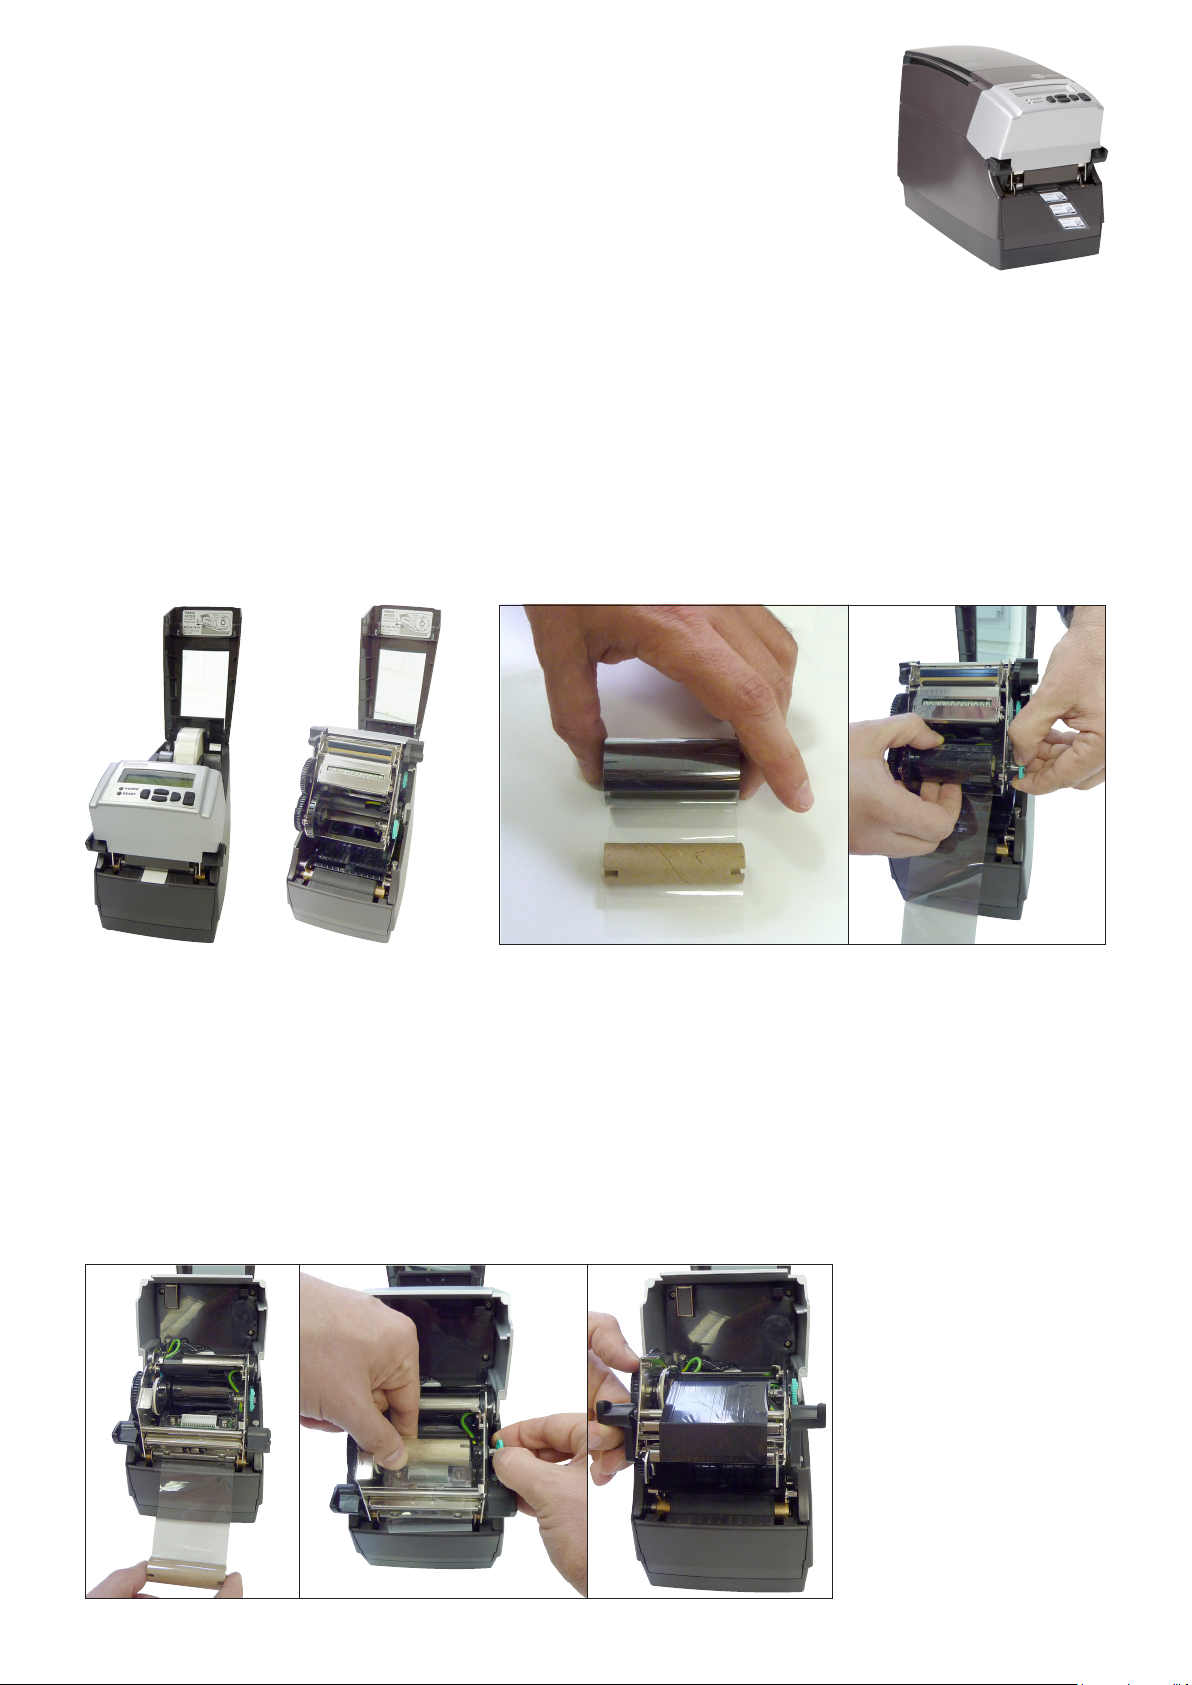
1. Fold the housing upwards and press the black locking mechanism upwards (see Fig. 1) towards the gray housing and
push up the entire unit (past the resistance!).
2. Unpack the ink ribbon - unroll the transparent part of the ink ribbon approx. 20 cm. Carefully adhere the separate roll
core to the self-adhesive area of the transparent part (see Fig. 3).
3. Insert the ink ribbon into the label printer. To do so, insert it on the left and pull out the right knurled screw (as shown
in Fig. 4) and allow it to engage in the notch.
4. Detach the transport mechanism from the housing cover by pressing the lever (see Fig. 5) - fold up the lid and insert
the roll core as described in Item 3. Once you have done so, turn the right knurled screw (Fig. 6) clockwise until the
black ink ribbon is wound far enough so that it is completely visible (the shiny side of the ink ribbon is facing the user!)
Fig. 1 Fig. 2
Fig. 3
Notch
Fig. 4
5. You can now fold down the
grey housing cover again and
insert the label roll.
Fig. 5
Fig. 6
Fig. 7
Page 2
Instructions for installing the label roll
1
2
Fig. 8
Fig. 9
6. First place the label roll
(1) into the housing
cover, then guide the
label strip that hangs
down (the label side is
up) below the silver
crossbar. (Fig. 8)
7. In order to ensure that
the label roll is guided
correctly, it is
necessary to adjust the
guides (2) accurately!
However, to ensure
that the tape is not
pinched, do not push
the guides too close to
the tape. (Fig. 9)
Fig. 10
8. Now insert the label roll
(1) with the transparent
unwinding spindle into
the holder provided.
(Fig. 10)
1
The roll is
inserted correctly
2
when the Leica
logo is legible
(see cutout)!
9. Close the lid over the
print head. Likewise,
fold down the housing
cover. The printer is
now ready for printing.
Fig. 11
(Fig. 11)
14 0605 80009, 1v0-08/2010
 Loading...