


 Loading...
Leica CM1520
Cryostat
Instructions for Use
Leica CM1520, V1.3 – 10/2012, English
Order No.: 14 0491 81101 RevD
Always keep this manual with the instrument.
Read carefully before working with the instrument.

NOTE
The information, numerical data, notes and value judgments contained in this manual represent the current state of scientific knowledge and state-of-the-art technology as we understand it following thorough investigation in this field. We are under no obligation to update the present manual periodically and on an ongoing basis according to the latest technical developments, nor to provide our customers with additional copies, updates etc. of this manual.
To the extent permitted in accordance with the national legal system as applicable in each individual case, we shall not be held liable for erroneous statements, drawings, technical illustrations etc. contained in this manual. In particular, no liability whatsoever is accepted for any financial loss or consequential damage caused by or related to compliance with statements or other information in this manual.
Statements, drawings, illustrations and other information regarding the contents or technical details of the present Instructions for Use are not to be considered warranted characteristics of our products. These are determined only by the
contract provisions agreed between ourselves and our customers.
Leica reserves the right to change technical specifications as well as manufacturing processes without prior notice. Only in this way is it possible to continuously improve the technology and manufacturing techniques used in our products. This document is protected under copyright laws. All copyrights to this documentation are held by Leica Biosystems Nussloch GmbH.
Any reproduction of text and illustrations (or of any parts thereof) by means of print, photocopy, microfiche, web cam or other methods – including any electronic systems and media – requires express prior permission in writing by Leica Biosystems Nussloch GmbH.
For the instrument serial number and year of manufacture, please refer to the nameplate on the back of the instrument.
© Leica Biosystems Nussloch GmbH
Published by:
Leica Biosystems Nussloch GmbH
Heidelberger Str. 17 - 19
D-69226 Nussloch
Germany
Phone: +49 62 24 143-0
Fax: +49 6224 143-268
Internet: http://www.LeicaBiosystems.com
Leica CM1520 – Cryostat |
3 |

Table of Contents
Table of Contents................................................................................................................................................. |
5 |
||
1. |
Important Information.............................................................................................................................. |
6 |
|
|
1.1 |
Symbols in the text and their meanings .................................................................................................... |
6 |
|
1.2 |
Qualification of personnel ........................................................................................................................... |
8 |
|
1.3 |
Intended use of instrument ........................................................................................................................ |
8 |
|
1.4 |
Instrument type ............................................................................................................................................. |
8 |
2. |
Safety |
.......................................................................................................................................................... |
9 |
|
2.1 |
Safety notes ................................................................................................................................................... |
9 |
|
2.2 ........................................................................................................................................................ |
Warnings |
9 |
|
2.3 ............................................................................................................................................. |
Safety devices |
10 |
|
2.3.1 ........................................................................................................... |
Locking/unlocking the handwheel |
10 |
|
2.3.2 ................................................................................................................................................... |
Knife guard |
10 |
|
2.4 .................................................................................................................................. |
Operating conditions |
11 |
|
2.5 ........................................................................................................................... |
Operating the instrument |
12 |
|
2.6 .......................................................................................................................... |
Cleaning and disinfection |
12 |
|
2.7 ........................................................................................................................... |
Removing the microtome |
13 |
|
2.8 ................................................................................................................................................ |
Maintenance |
13 |
3. |
Technical ........................................................................................................................................Data |
14 |
|
4. |
Setting ......................................................................................................................up the Instrument |
16 |
|
|
4.1 ................................................................................................................... |
Installation site requirements |
16 |
|
4.2 .................................................................................. |
Unpacking instructions for the CM1520 cryostat |
17 |
|
4.3 ........................................................................................................................................ |
Standard delivery |
20 |
|
4.4 ....................................................................................................................... |
Assembling the handwheel |
21 |
5. |
Instrument .....................................................................................................................................Setup |
22 |
|
|
5.1 ................................................................................................................................. |
Electrical connection |
22 |
|
5.2 ........................................................................................................................................ |
Prior to operation |
22 |
|
5.3 ................................................................................................................. |
Overview of the Leica CM1520 |
24 |
|
5.4 ............................................................................................................ |
Power switch and circuit breaker |
26 |
|
5.5 ..................................................................................................................... |
Switching on the instrument |
26 |
6. |
Operating ......................................................................................................................the Instrument |
27 |
|
|
6.1 ............................................................................................................................................. |
Control panel 1 |
27 |
|
6.2 ............................................................................................................. |
Programming the desired values |
27 |
|
6.2.1 ........................................................................................................................................... |
Setting the time |
27 |
|
6.2.2 ............................................................................... |
Setting the automatic defrost time (cryochamber) |
28 |
|
6.2.3 ................................................................................................ |
Selecting the cryochamber temperature |
28 |
|
6.2.4 ........................................................................................... |
Manual defrosting of the quick freeze shelf |
28 |
|
6.2.5 .................................................................................................. |
Manual defrosting of the cryochamber |
29 |
|
6.2.6 .................................................................................................................... |
Setting the section thickness |
29 |
|
6.3 .................................................................................................................................................. |
Display lock |
30 |
|
6.4 ..................................................................................................... |
Control panel 2 - Electric coarse feed |
30 |
|
|
|
|
4 |
|
|
Instructions for Use V 1.3 – 10/2012 |

|
|
|
Table of Contents |
|
|
|
|
7. |
Daily Use of the Instrument.................................................................................................................. |
31 |
|
|
7.1 |
Specimen freezing...................................................................................................................................... |
31 |
|
7.1.1 |
Quick freeze shelf....................................................................................................................................... |
31 |
|
7.1.2 |
Stationary heat extractor (optional)............................................................................................. |
32 |
|
7.2 |
Specimen discs........................................................................................................................................... |
32 |
|
7.2.1 |
Inserting the specimen discs into the specimen head......................................................................... |
32 |
|
7.2.2 |
Specimen orientation................................................................................................................................. |
32 |
|
7.3 |
Sectioning.................................................................................................................................................... |
33 |
|
7.3.1 |
Blade holder CE........................................................................................................................................... |
33 |
|
7.3.2 |
Blade holder CE-TC..................................................................................................................................... |
39 |
|
7.3.3 |
Knife holder CN........................................................................................................................................... |
40 |
|
7.3.4 |
Knife holder CN-Z with anti-roll guide..................................................................................................... |
44 |
|
7.3.5 Cleaning the blade and knife holders..................................................................................................... |
44 |
|
|
7.3.6 |
Installing the shelf (movable) (optional).................................................................................................. |
46 |
|
7.4 |
Temperature selection chart (in minus °C)............................................................................................. |
47 |
|
7.5 |
Defrosting..................................................................................................................................................... |
48 |
|
7.5.1 |
Automatic defrosting of the cryochamber.............................................................................................. |
48 |
|
7.5.2 |
Manual defrosting of the cryochamber.................................................................................................. |
48 |
|
7.5.3 |
Manual defrosting of the quick freeze shelf........................................................................................... |
49 |
|
7.6 |
Terminating work........................................................................................................................................ |
49 |
|
7.6.1 |
Terminating daily work............................................................................................................................... |
49 |
|
7.6.2 |
Shutdown for a longer period................................................................................................................... |
50 |
8. |
Troubleshooting...................................................................................................................................... |
51 |
|
|
8.1 |
Error messages in the display................................................................................................................... |
51 |
|
8.2 |
Temperature control button...................................................................................................................... |
52 |
|
8.3 |
Possible sources of error, causes and remedies.................................................................................. |
53 |
|
8.3.1 |
Changing the battery.................................................................................................................................. |
57 |
9. |
Cleaning, Disinfection, Maintenance................................................................................................. |
58 |
|
|
9.1 |
Cleaning........................................................................................................................................................ |
58 |
|
9.2 |
Spray disinfection with Leica Cryofect................................................................................................... |
59 |
|
9.3 |
Maintenance................................................................................................................................................ |
60 |
|
9.3.1 |
General maintenance instructions........................................................................................................... |
60 |
|
9.3.2 |
Replacing the fuses.................................................................................................................................... |
62 |
|
9.3.3 |
Replacing the fluorescent lamp................................................................................................................ |
63 |
10. |
Ordering Information, Components and Consumables.................................................................... |
64 |
|
|
10.1 |
Ordering information.................................................................................................................................. |
64 |
|
10.2 |
Mobile heat extractor – application............................................................................................ |
89 |
|
10.3 |
Cold extractor – application........................................................................................................ |
89 |
11. |
Warranty and Service............................................................................................................................ |
90 |
|
12. |
Decontamination Certificate (master)................................................................................................ |
91 |
|
Leica CM1520 – Cryostat |
5 |
1.Important Information
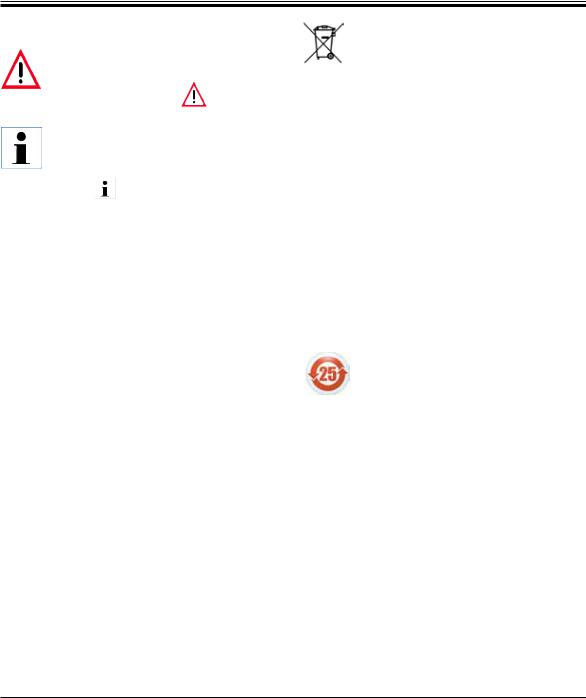
1.1Symbols in the text and their meanings
|
Warnings |
|
|
|
|
appear in a gray box and are marked |
|||
|
by a warning triangle |
. |
||
|
|
|
||
|
|
|
|
|
|
Useful tips, |
|
||
|
i.e. important information for the user, |
|||
|
appear in gray boxes and are marked |
|||
|
by an |
. |
|
|
|
|
|||
(5) |
Numbers in parentheses refer to item |
|||
numbers in illustrations or to the illus- |
||||
(Fig.5) |
||||
trations themselves. |
|
|||
|
|
|||
|
Manufacturer |
|
||
|
This product fulfills the requirements |
|||
|
of the Council's Directive 98/79/EC |
|||
|
concerning in vitro diagnostics (IVD) |
|||
|
medical devices. |
|
||
|
In vitro diagnostics (IVD) medical device |
|||
|
Observe the Instructions for Use |
|||
REF |
Order No. |
|
|
|
SN |
Serial number |
|
||
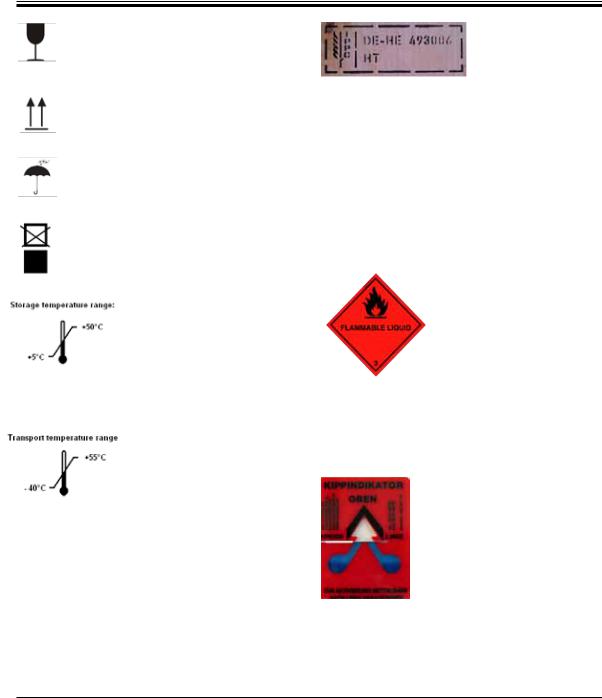
Symbolforlabelingelectricalandelectronic equipment in accordance with Section 7 of the German Electrical and Electronic Equipment Act (ElektroG). ElektroG is the law regarding the sale, return and environmentally sound disposal of electrical and electronic equipment.
The CSA test mark means that a product has been tested and fulfills the applicable safety and/or performance standards, including the relevant standards defined or administered by the American National Standards Institute (ANSI), Underwriters Laboratories (UL), the Canadian Standards Association (CSA), the National Sanitation Foundation International (NSF) and others.
Environmental protection symbol of the China RoHS directive. The number in the symbol indicates the "Environmentfriendly Use Period" of the product. The symbol is used if a substance restricted in China is used in excess of the maximum permitted limit.
6 |
Instructions for Use V 1.3 – 10/2012 |
1. Important Information
The package contents are fragile and must be handled with care.
Indicates the correct upright position of the package.
The package must be kept in a dry environment.
It is not permitted to stack packages, and no loads may be placed on top of the package.
Indicates the temperature range permitted for storing and handling the package.
Minimum +5 °C Maximum +50 °C
Indicates the temperature range permitted for transporting the package.
Minimum -40 °C Maximum +55 °C
Example of labeling in accordance with IPPC
•IPPC symbol
•Country code in accordance with
ISO 3166, e.g. DE for Germany
•Regionalidentifier,e.g.HEforHessen
•Producer/treatment provider code, unique assigned number starting with 49
•Treatment code, e.g. HT (heat treatment), MB (methyl bromide), and possibly DB (debarked)
Package labeling in accordance withGerman Hazardous Freight Ordinance Road and Rail (GGVSE)/European Agreement concerning the International Carriage of Dangerous Goods by Road (ADR) for transporting hazardous goods.
Class 3: "FLAMMABLE LIQUID"
Tip-n-Tell indicator to monitor whether the shipment has been transported and stored in upright position according to your requirements. With a pitch of 60 ° or more, the blue quartz sand flows into the ar- row-shaped indicator window and sticks there permanently. Improper handling of the shipment is immediately detectable and can be proven definitively.
Leica CM1520 – Cryostat |
7 |
1.Important Information
1.2Qualification of personnel
Only trained laboratory personnel may operate the Leica CM1520. Prior to operating the instrument, the operator must thoroughly read and understand these Instructions for Use and must familiarize him/ herself with all technical details of the instrument.
In no case does chemical disinfection replace the manual protection as per the applicable laboratory regulations (i.e. safety goggles, gloves, laboratory coat and mask must be worn).
1.3Intended use of instrument
The Leica CM1520 is a high-performance cryostat with disinfection system for routine and research applications in biology, medicine and industry. The instrument is used to freeze and section specimen material quickly. The instrument is not designed for unsupervised storage of specimen material. The instrument may only be operated within the scope of its designated use as described above and as per the instructions given in these Instructions for Use. The Leica CM1520 is also suitable for IVD (in vitro diagnostics).
Any other use of the instrument is considered improper.
1.4Instrument type
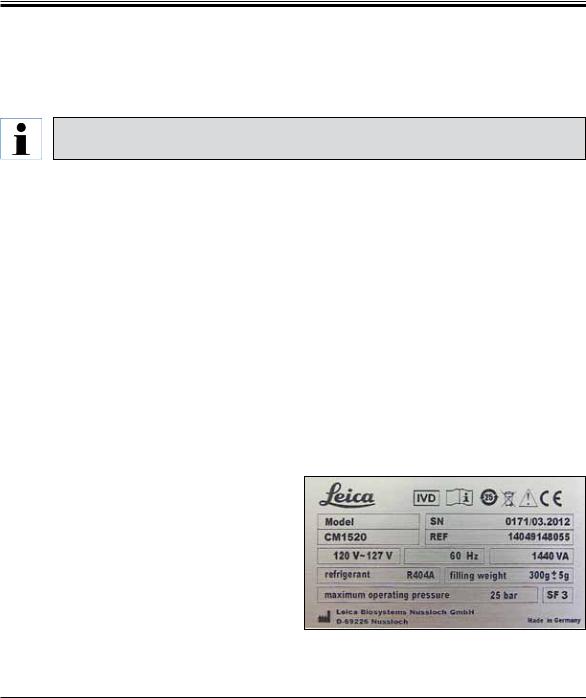
All information contained in these Instructions for Use applies exclusively to the instrument type indicated on the title page. A nameplate bearing the instrument serial number (SN) is attached to the back of the instrument.
These Instructions for Use include important instructions and information related to the operating safety and maintenance of the instrument. The Instructions for Use are an important part of the product, and must be read carefully prior to startup and use and must always be kept near the instrument.
If additional requirements on accident prevention and environmental protection apply in the country of operation, these Instructions for Use must be
supplemented by appropriate instructions to ensure compliance with such requirements. Proper and intended use includes the observance of all instructions in the Instructions for Use and compliance with all inspection and maintenance instructions.
Fig. 1
The nameplate shown here is intended as an example only!
8 |
Instructions for Use V 1.3 – 10/2012 |
2. Safety
The safety and caution notes in this chapter must be observed at all times.
Be sure to read these notes even if you are already familiar with the operation and use of other Leica products.
2.1Safety notes
These Instructions for Use include important instructions and information related to the operating safety and maintenance of the instrument.
The Instructions for Use are an important part of the product, and must be read carefully prior to startup and use and must always be kept near the instrument.
This instrument has been built and tested in accordance with the safety requirements for electrical equipment for measurement, control, and laboratory use.
Residual risks
The instrument has been designed and constructed with the latest state-of-the-art technology and according to recognized standards and
regulations with regard to safety technology. Operating or handling the instrument incorrectly can place the user or other personnel at risk of injury or can cause damage to the instrument or other property. The machine may be used only as intended and only if all of its safety features are in proper working condition. Malfunctions that impede safety must be remedied immediately.
To maintain this condition and ensure safe operation, the user must observe all notes and warnings contained in these Instructions for Use.
Only original spare parts and permitted original accessories may be used.
The CE certificate can be found on the
Internet at this website:
www.LeicaBiosystems.com
These Instructions for Use must be appropriately supplemented as required by the existing regulations on accident prevention and environmental safety in the operator's country.
The protective devices on both instrument and components must neither be removed nor modified. Only service personnel qualified by Leica may repair the instrument and access the instrument's internal components.
2.2Warnings
The safety devices installed in this instrument by the manufacturer only constitute the basis for accident prevention. Operating the instrument safely is, above all, the responsibility of the owner, as well as the designated personnel who operate, service or repair the instrument.
To ensure trouble-free operation of the instrument, make sure to comply with the following instructions and warnings.
Leica CM1520 – Cryostat |
9 |
2.Safety
2.3Safety devices
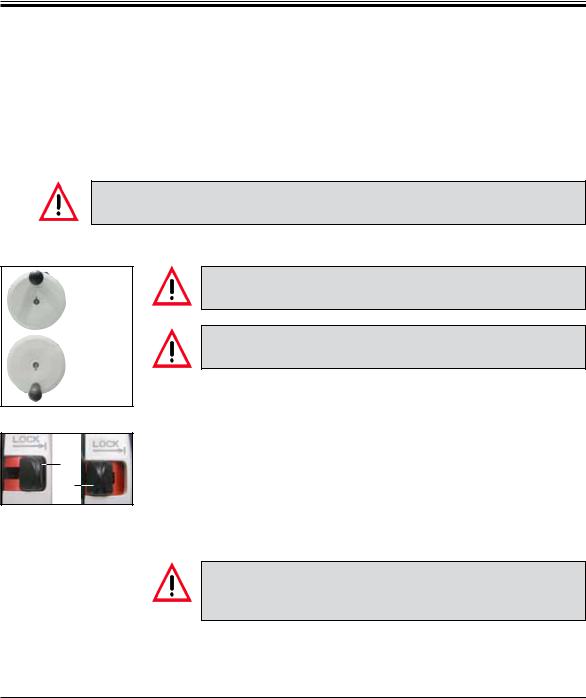
The instrument is equipped with the following safety devices: Handwheel lock and knife guard on the knife holder.
The consistent use of these safety features and strict observation of the warnings and cautions in these Instructions for Use will safeguard the operator from accidents and/or personal injury to a great extent.
Personal safety precautions
When working with cryostats, personal safety precautions must always be taken. It is mandatory to wear work safety shoes, safety gloves, a mask and safety goggles.
2.3.1 Locking/unlocking the handwheel
12 o'clock position
6 o'clock position
Fig. 2
1
2
Fig. 3
Rotate the handwheel only if the refrigeration system is on and the cryochamber is cold.
Always lock the handwheel prior to making modifications to the knife or specimen, changing the specimen, or taking a break.
To lock the handwheel, move its handle to the 12 or 6 o'clock position. Press the lever (1) fully outward; gently rock the handwheel back and forth until the locking mechanism clicks into place noticeably.
To release the handwheel, press the lever (2) on the handwheel toward the cryostat housing.
2.3.2 Knife guard
Prior to manipulating the knife and specimen, changing the specimen or knife, or taking a break, always lock the handwheel and cover the cutting edge with the knife guard!
The CN and CN-Z knife holders feature knife guards; the glass anti-roll plate of the CE and CE-TC blade holders also serves as a knife guard.
10 |
Instructions for Use V 1.3 – 10/2012 |
2. Safety
2.4Operating conditions
Transport and installation
•Aftertransporting,donotturntheinstrumentonforaminimumof4hours.
•Do not operate the instrument in rooms with explosion hazard.
•To ensure proper function, the instrument must be set up with
the following minimum clearance to walls and fixtures on all sides:
- rear: |
15 cm |
- right: |
30 cm |
- left: |
15 cm |
Electrical connection
•Before connecting the instrument to an AC power outlet, ensure that the
AC power of your laboratory matches the values on the nameplate of the instrument.
•During the start-up of the refrigeration system, the minimum nominal voltage must not drop below the values specified in Chapter 3, "Technical Data".
The compressor draws a starting current between 45 and 50 A. Therefore, the electric circuit at the place of installation must be inspected by an electrical engineer to ensure that it meets the requirements for a smooth operation of the instrument.
A stable power supply in accordance with the instrument's specifications is essential to its proper functioning.
Failure to comply with the above can damage the instrument.
•This waiting period is necessary to allow the compressor oil, which may have been displaced during transport, to return to its original position. Failure to comply with this may cause damage to the instrument.
•No additional extension cable may be used.
Defrosting
•Thequickfreezeshelfcanbecomeveryhotduringthedefrostingprocess.
Therefore, do not touch it!
Leica CM1520 – Cryostat |
11 |

2. Safety
2.5Operating the instrument
•Take care when handling microtome knives and disposable blades. The cutting edge is extremely sharp and can cause serious injuries!
We strongly recommend using the safety gloves included with the standard delivery!
•Never leave knives and knife holders with an exposed knife/blade mounted lying around!
•Never place a knife on a table with the cutting edge facing upward!
•Never try to catch a falling knife!
•Always clamp the specimen first, then the knife.
•Before handling the specimen or the knife, changing the specimen or taking a break, lock the handwheel and ensure that the knife is covered by the knife guard.
•Extended skin contact with the cold parts of the instrument may cause frostbite.
•Toensurereliabledrainageofcondensateandtopreventapotentialcontaminationrisk,the drain tube (on the side of the instrument, Fig. 52) must be inserted in a suitable catch tank.
2.6Cleaning and disinfection
We strongly recommend defrosting the CM1520 cryostat completely for 24 hours, 1-2x annually or as needed.
•It is not necessary to remove the microtome for routine disinfection. Spray disinfection with
Leica Cryofect is possible, thanks to the special insulation of the microtome.
Remove section waste after EVERY change of specimen. Do not start disinfection until you have done this! Each new specimen is a potential source of contamination.
The use of flammable sprays within the cryostat chamber is permitted only with the Leica Cryofect tested by us.
At cryochamber temperatures of 0 °C to -30 °C. Spray a MAXIMUM of 10 sprays into the middle of the cryostat chamber and close the window. After each disinfection, the chamber must be wiped carefully with a cloth and briefly ventilated!
12 |
Instructions for Use V 1.3 – 10/2012 |
2. Safety
•Donotuseorganicsolventsorotheraggressivesubstancesforcleaning.
Use only disinfectants listed in these Instructions for Use, such as Leica Cryofect (alcohol or other common alcohol-based disinfectants).
For additional detailed information about disinfection, contact
Leica Biosystems.
2.7Removing the microtome
•The microtome is encapsulated and therefore does not require removal by the user.
2.8Maintenance
Replacing the fuses
•Turn the instrument off and disconnect the power plug before replacing the fuses.
•Use only the fuse types specified in Chapter 3, "Technical Data". Failure to comply with this can cause severe damage to the instrument and its surroundings!
Replacing the fluorescent lamp
•Turn the instrument off and disconnect the power plug before replacing the lamps. (More details are in Chapter 9, "Cleaning, Disinfection, Maintenance.)
Leica CM1520 – Cryostat |
13 |
3. |
Technical Data |
|
|
|
|
|
|
|
|
|
|
|
|
Type |
|
CM1520 |
CM1520 |
CM1520 |
CM1520 |
CM1520 |
test symbol |
- |
c_CSA_us |
- |
- |
- |
|
Nominal voltage |
100 VAC |
120-127 VAC |
220-230 VAC |
220-230 VAC |
240 VAC |
|
|
|
±10 % |
±10 % |
±10 % |
±10 % |
±10 % |
Nominal frequency |
50/60 Hz |
60 Hz |
60 Hz |
50 Hz |
50 Hz |
|
Power input |
1440 VA |
1440 VA |
1440 VA |
1440 VA |
1440 VA |
|
Max. start-up current for 5 sec |
45 A eff. |
45 A eff. |
45 A eff. |
45 A eff. |
45 A eff. |
|
Protective class |
I |
I |
I |
I |
I |
|
Pollution degree |
2 |
2 |
2 |
2 |
2 |
|
Overvoltage inst. category |
II |
II |
II |
II |
II |
|
Heat emission (max.) |
1600 J/s |
1600 J/s |
1600 J/s |
1600 J/s |
1600 J/s |
|
according to IEC-1010, UL 3101
Operating temperature range (ambient temperature): 18 °C to 35 °C. All specifications related to temperature of the cooling unit are valid only for an ambient temperature of 22 °C and a relative humidity of no more than 60 %!
Refrigeration system |
50 Hz/60 Hz |
Cryochamber |
|
Temperature range |
0 °C to -30 °C (+ 3 K/- 3 K) |
Cooling time down to -30 °C |
max. 6 hrs., at 22 °C ambient temperature |
Defrost |
Automatic hot gas defrost |
|
1 automatic defrost cycle/24 hours, time-controlled (duration 12 min.) |
Refrigeration capacity |
690 W |
Safety factor |
3 |
Refrigerant |
300g ±5g refrigerant R 404A * |
Compressor oil |
0.6 l EMKARATE RL-22S, ICI * |
Quick-freeze shelf |
|
Maximum temperature |
- 35 °C (+ 3 K/- 5 K) |
Number of freezing stations |
10 |
Defrost |
Manual hot gas defrost, time-controlled (duration 12 min.) |
according to CECOMAF Liquid temperature 45 °C, evaporation temperature -25 °C
14 |
Instructions for Use V 1.3 – 10/2012 |
3. Technical Data
*) Refrigerant and compressor oil must be replaced by qualified, authorized service personnel only.
Microtome |
|
Lamp |
|
Rotary microtome |
|
|
|
Section thickness adjustment: |
2 - 60 µm |
50 Hz version: |
Osram Dulux S 11 W/21 |
Total specimen feed |
25 mm |
|
Color: LUMILUX light white |
Vertical stroke |
59 mm |
60 Hz version: |
Osram Dulux S 13 W/21 |
Maximum specimen size |
55 x 55 mm |
|
Color: LUMILUX light white |
|
or 50 x 80 mm |
|
|
Specimen orientation |
8° (x, y, z-axis) |
|
|
Electric coarse feed |
|
|
|
Slow |
600 µm/s |
|
|
Rapid |
900 µm/s |
|
|
|
|
||
Cryocabinet |
|
|
|
Dimensions
Width (w/o handwheel) |
600 mm |
Width (with handwheel) |
730 mm |
Depth |
730 mm |
Height |
1140 mm |
Weight
(incl. microtome, without specimen cooling) approx. 135 kg
Storage conditions
Temperature: |
5 - 50 °C |
Humidity: |
<80 %, non-condensing |
Transport temperature: -40 °C to +55 °C
Observe item 4.1, "Installation site requirements".
All CM1520 instrument variants need the following secondary fuses:
F1: |
T0.25A |
L250V |
Type FST 6.3x32 |
Brand: SCHURTER |
F2: |
T1.6A |
L250V |
Type FST 6.3x32 |
Brand: SCHURTER |
F3: |
T1.0A |
L250V |
Type FST 6.3x32 |
Brand: SCHURTER |
F4: |
T6.25A |
L250V |
Type FST 6.3x32 |
Brand: SCHURTER |
Leica CM1520 – Cryostat |
15 |

4.Setting up the Instrument
4.1Installation site requirements
Do not operate in rooms with explosion hazard! To ensure proper function of the instrument, it must be set up with a minimum distance on all sides from walls and furniture (see "Transport and installation").
The place of installation must meet the following requirements:
-The instrument requires an installation area of approx. 600 x 730 mm.
-Room volume must be at least 8 m3.
-Room temperature consistently 18 °C - 35 °C,
-Temperature range during storage: 5 °C - 50 °C
-Relative humidity, maximum 60 % (non-condensing),
-Elevation: up to a max. of 2000 m above sea level
Condensation water may form in the instrument if there is an extreme difference in temperature between the storage location and the installation site and if air humidity is high at the same time. If this is the case, wait at least two hours before switching on the instrument.
Failure to comply with this may cause damage to the instrument.
•The instrument is designed for indoor use only.
•The power plug/circuit breaker must be freely and easily accessible. The power socket may not be located further than 2.5 m from the instrument.
•Power supply at a distance no greater than the length of the power cable – an extension cable must NOT be used.
•The substrate must be largely vibration-free and have sufficient load capacity and rigidity for the weight of the instrument.
•Avoid impacts, direct sunlight, and excessive temperature fluctuations.
•TheinstrumentMUSTbeconnectedtoaproperlygroundedsocket.Useonlythepowercable provided, which is intended for the local power supply.
•The chemicals to be used are easily inflammable and hazardous to health. Therefore the installation location must be well ventilated, and must contain no sources of ignition of any kind.
•Furthermore, this instrument must NOT be operated directly under the outlet of an airconditioning system, since the increased air circulation accelerates icing of the chamber.
•The installation location must be protected against electrostatic charge.
Noise information: A-weighted noise level: <= 70 dB (A)
Room temperatures and humidity levels in excess of the recommendations above will affect the cryostat's cooling capacity and the lowest stated temperatures will not be reached.
16 |
Instructions for Use V 1.3 – 10/2012 |
4. Setting up the Instrument
4.2Unpacking instructions for the CM1520 cryostat
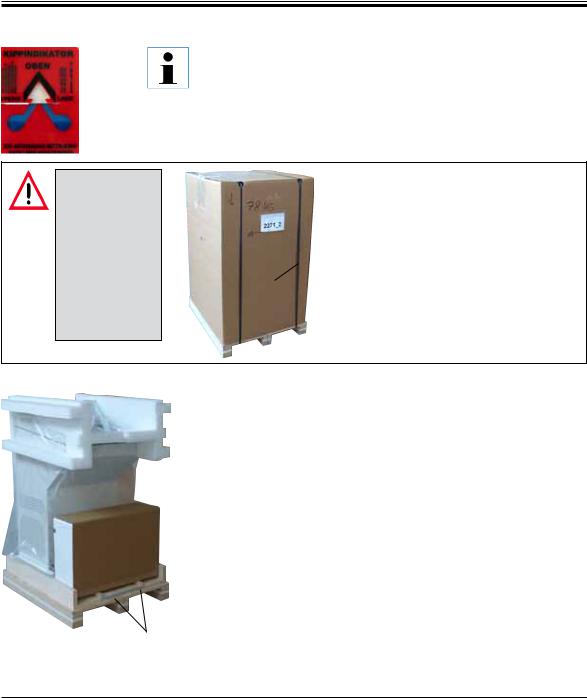
|
When the instrument is delivered, check the tilt indicators on the |
|
packaging. |
|
If the arrowhead is blue, the shipment was transported laying flat, |
|
was tilted at too great an angle or fell over during transport. |
|
Note this on the shipping documents and check the shipment for pos- |
Fig. 4 |
sible damage. |
|
Caution when removing the metal strips! There is a risk of injury when opening them (the strip has s h a r p e d g e s and is under tension)!
2
 1
1
Fig. 5
To remove the metal strips (1), you need metal shears and suitable
gloves. Stand next to the crate and cut the strips at the location shown (see Fig. 5 "").
3 3
4
5
•Lift the outer carton ring (2) upwards and out.
•Remove the foam transport anchors (3), and then pull the dust cover from the instrument.
•Remove the accessory crate (4).
Fig. 6
Leica CM1520 – Cryostat |
17 |
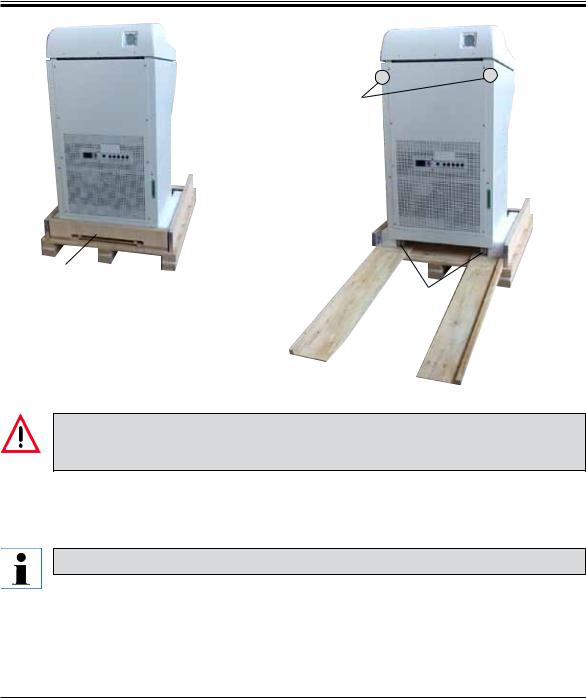
4.Setting up the instrument
8
Transport grip points
|
|
|
|
|
Fig. 7 |
|
Fig. 8 |
6 |
|
|
|
|
5 |
7 |
5 |
• Lift and remove the wooden edge (6). |
|
|
|
•Remove the ramp (5) on the front side of the pallet (see Fig. 6) and correctly attach it to the back (see Fig. 8).
Do not push the device by its hood (8)! Use the transport grip points ( , Fig. 8).
The rollers (7) must run over the ramp (5) at the front and rear. Danger of tipping!
•Carefully roll the instrument backwards over the ramp from the pallet.
•Push the instrument to the installation location on the castors (7).
The instrument must be transported in an upright position.
18 |
Instructions for Use V 1.3 – 10/2012 |
4. Setting up the Instrument
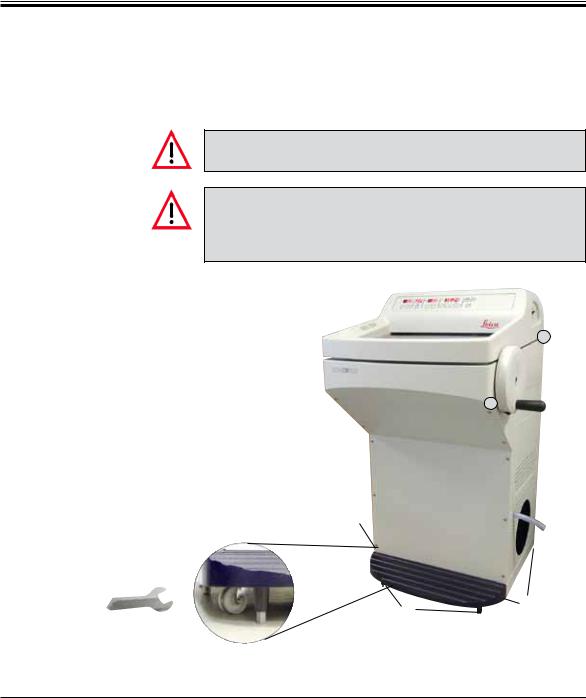
Transport to the site
•First, check if the location meets the conditions specified in 'Installation site requirements'.
•Transport the instrument to the desired location.
•Observe the following:
The instrument must be transported in an upright position or slightly tilted (max. 30°)!
When tilting the instrument 2 people must counterbalance from the front side to prevent the instrument from falling down and causing severe injury, as well as possible severe damage to the instrument and the surrounding area!
•When transporting the instrument on wheels,
(2) grip the cabinet only at the marked loca-
tions ( ).
).
•To ensure a secure upright position at its in-
tendedlocation,theinstrument mustbe adjusted.
To do so, unscrew both adjusting feet (1) using 
 the provided open-end wrench (No. 13).
When subsequently transporting the instrument any further on wheels, screw them back in all the way.
2 (not visible)
2 |
1 |
2 |
|
Fig. 9 |
|
|
1 |
Leica CM1520 – Cryostat |
19 |

4.Setting up the instrument
4.3Standard delivery
Basic instrument in the respective voltage variant:
1 |
knob with marking, antibacterial............................................. |
14 0491 42558 |
1 |
Set of specimen discs............................................................... |
14 0470 43550 |
|
- 4 specimen discs, 25 mm........................................................ |
14 0416 19275 |
|
- 4 specimen discs, 30 mm........................................................ |
14 0370 08587 |
1 |
section waste tray ..................................................................... |
14 0471 30787 |
1 |
storage shelf, right .................................................................... |
14 0491 46599 |
1 |
storage shelf, left ....................................................................... |
14 0491 46598 |
1 |
brush shelf .................................................................................. |
14 0491 46984 |
1 |
cover for freeze shelf................................................................. |
14 0491 46873 |
1 |
rubber plug.................................................................................. |
14 3000 00148 |
1 |
toolset:.......................................................................................... |
14 0436 43463 |
|
- 1 brush, fine.............................................................................. |
14 0183 28642 |
|
- 1 "Leica" brush with magnet................................................... |
14 0183 40426 |
|
- 1 Allen key, no. 1.5................................................................... |
14 0222 10050 |
|
- 1 Allen key, no. 2.5................................................................... |
14 0222 04137 |
|
- 1 Allen key, no. 3.0................................................................... |
14 0222 04138 |
|
- 1 Allen key, no. 4.0................................................................... |
14 0222 04139 |
|
- 1 Allen key with spherical head, no. 4.0............................... |
14 0222 32131 |
|
- 1 Allen key, no. 5.0................................................................... |
14 0222 04140 |
|
- 1 Allen key with handle, no. 5 ............................................... |
14 0194 04760 |
|
- 1 Allen key, no. 6.0................................................................... |
14 0022 04141 |
|
- 1 Single-head wrench, No. 13................................................ |
14 0330 33149 |
|
- 1 Single-head wrench, No. 16................................................ |
14 0330 18595 |
1 |
bottle of cryostat oil, type 407, 50 ml ....................................... |
14 0336 06098 |
1 |
bottle of cryocompound |
|
|
(Jung tissue freezing medium) 125 ml........................................ |
14 0201 08926 |
1 |
cut-resistant safety gloves, size M......................................... |
14 0340 29011 |
1 |
Instructions for Use, D/E (+ language CD) ............................ |
14 0491 81001 |
Compare the delivered components with the parts list and your order. Should you find any discrepancies, please contact your Leica sales office without delay.
A choice of different knife holders is available for the CM1520.
20 |
Instructions for Use V 1.3 – 10/2012 |
4. Setting up the Instrument
4.4Assembling the handwheel
The handwheel and all parts for installation are included in the carton with the accessories. The handwheel can be dismounted f o r transporting (e.g. narrow doors).
1 |
2 |
4 |
|
||
|
|
3
4
Fig. 10
To install the handwheel, follow these steps:
•Insert the pin (1) of the handwheel shaft into the hole (2) of the handwheel.
•Attach the spring washer (3) to the screw (4) as shown in Fig. 10.
•Tighten the screw (4) using an Allen key (6 mm).
•Attach the cover disk (self-adhesive - not pictured).
To dismount, proceed in reverse order.
Rotate the handwheel only if the refrigeration system is on and the cryochamber is cold.
Leica CM1520 – Cryostat |
21 |
5.Instrument Setup
5.1Electrical connection
During the start-up of the refrigeration system, the minimum nominal voltage must not drop below the values specified in Chapter 3, "Technical Data".
The compressor draws a starting current between 45 and 50 A.
Therefore, the electric circuit at the installation site must be inspected by an electrical engineer to ensure that it meets the requirements for a smooth operation of the instrument.
A stable power supply in accordance with the instrument's specifications is essential to its proper functioning. Failure to comply with the above can damage the instrument.
•Have separate fuse protection provided for the electric circuit.
•Do not connect any other appliances to this electric circuit.
•The instrument is de-energized when the power cable is separated from the power supply
(power supply circuit breaker).
5.2Prior to operation
•Check that the power supply voltage and power frequency in your laboratory match the values on the nameplate of the instrument (Fig. 1).
Use only the power cable provided by Leica. Failure to observe this causes an imminently hazardous situation that may result in death or serious injury to the operator or other personnel.
•Check that the drain plug is tight (in the drain hole below the left storage shelf), and press it tightly into the drain if necessary.
The drain plug must be tight in the instrument while work is being carried out in the cryostat. Remove the plug only during the defrost procedure. Make sure that the drain tube was inserted in the external container.
22 |
Instructions for Use V 1.3 – 10/2012 |

5. Instrument Setup
•Place the storage shelves in the cryochamber.
•Place the section waste tray and brush shelf in the cryochamber.
•Place the knife holder base on the microtome base plate.
•Set and clamp the blade/knife and knife holders in place (see Chap. 7.3).
•Open the knife box with the knife and place it in the cryochamber for precooling.
•Place all tools needed for specimen preparation in the cryochamber.
•Close the sliding window.
•Plug the power plug into the power socket.
Leica CM1520 – Cryostat |
23 |

5.Instrument Setup
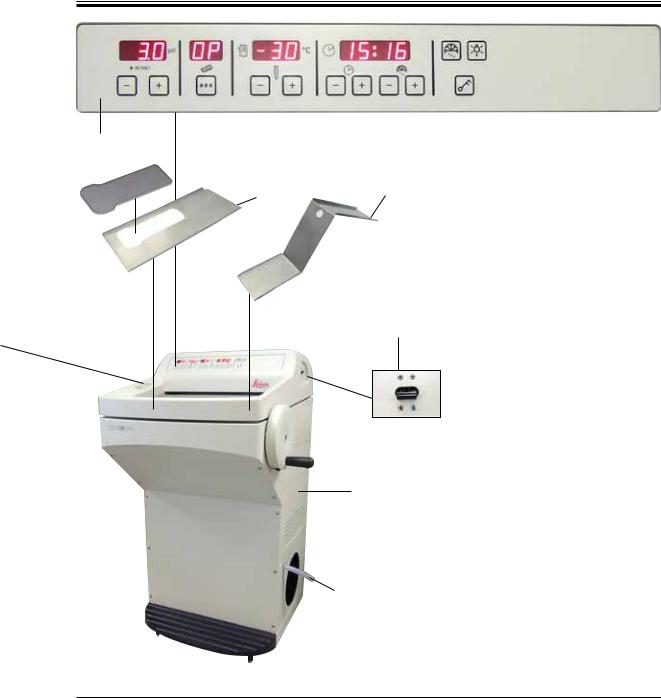
5.3Overview of the Leica CM1520
4
16 |
14 |
12
15
20
|
|
19 |
11 |
|
|
|
||||
|
|
|
|
|||||||
|
|
|
|
|
|
|||||
|
|
|
|
|
|
|
12 |
|||
|
|
|
12 |
|
|
|
|
|
||
|
|
|
|
|
|
|
|
|||
|
|
|
|
|
|
|
|
|||
|
|
|
|
10 |
|
|
|
|
|
|
|
|
|
|
|
|
|
|
|||
|
|
|
18 |
|
|
|
|
|
|
|
|
|
|
|
|
|
|
|
|
|
|
|
|
|
|
|
|
|
|
|
|
|
|
|
|
|
|
|
|||||
17 |
9 |
|
|
|||||||
|
|
|
13 |
|
|
|
|
|
||
Fig. 11 |
8 |
|
|
|
|
|
||||
|
|
|
|
|
|
|
|
|||
|
|
|
|
|
|
|
|
|
|
|
24 |
|
|
|
|
Instructions for Use V 1.3 – 10/2012 |
|||||
5.Instrument Setup
3
21
5 |
6 |
|
7
1
2
Fig. 12
1CM1520 cryostat
2Drain tube
3Control panel 1
4Control panel field 2
5Storage shelf, left
6Storage shelf, right
7Circuit breaker
8Quick freeze shelf
9Parking station (optional)
10Stationary heat extractor (optional)
11Holder for heat extractor (optional)
12Specimen disc
13Cold extractor (optional)
14Section waste tray
15Brush shelf
16Orientable specimen head
17Blade/knife holder base (optional)
18Blade holder CE (optional)
19Knife holder CN (optional)
20Blade holder CE-TC (optional)
21Cover freezing shelf
Leica CM1520 – Cryostat |
25 |
5.Instrument Setup
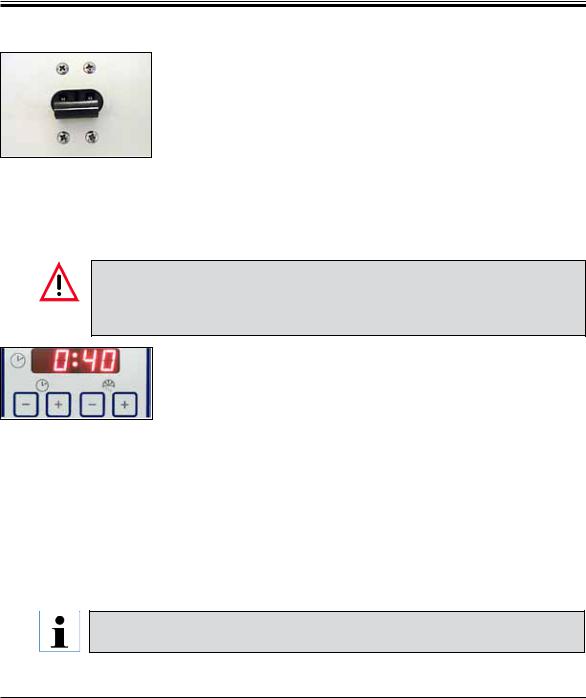
5.4Power switch and circuit breaker
The switch must be in the top position (switch position 1) for switching on the circuit breaker.
The switch must be in the bottom position (switch position 0) for switching off the circuit breaker.
Fig. 13
Automatic cutout
5.5Switching on the instrument
After transporting, wait at least 4 hours before turning the instrument on. This waiting period is necessary to allow the compressor oil, which may have been displaced during transport, to return to its original position. Failure to comply with this may cause damage to the instrument.
The software version "0.40" (shown here only as an example) is displayed in the 4-digit display for the time. This display disappears after 2 seconds and switches to the display of the instrument type "1520". The standard time is then displayed.
•Switch the instrument on at the circuit breaker. The instrument is now initialized.
•The instrument is factory-configured as follows:
Time: |
00:00 |
Defrost time: |
23:45 |
Chamber cooling: |
On |
|
(Indication of the temperature) |
• Program the desired values as described under 6.2.1 to 6.2.3.
In normal operation, a pressure compensation shortly before the compressor starts up might lead to a hissing sound.
26 |
Instructions for Use V 1.3 – 10/2012 |
6. Operating the Instrument
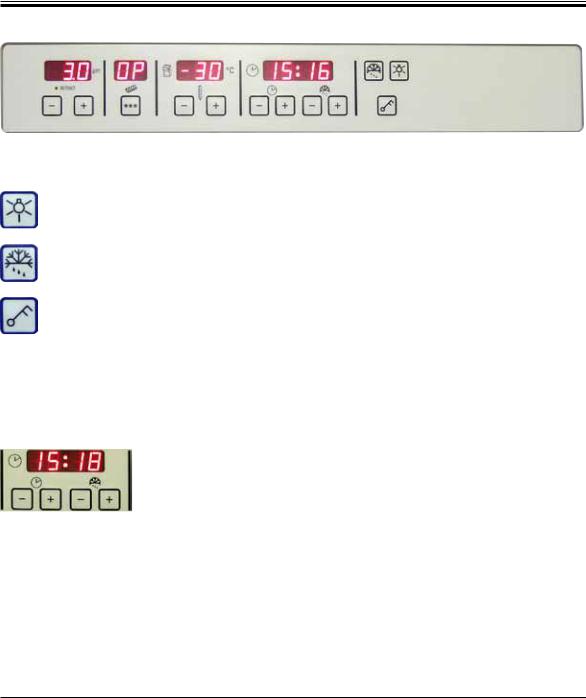
6.1Control panel 1
Fig. 14
Function keys
Lamp button
ON/OFF switch for cryochamber illumination
Manual defrost button
To activate and deactivate manual defrosting.
Key button
To lock and unlock the control panel to protect the entered parameters from unintended modifications. To lock or unlock, hold down for approximately 5 seconds.
6.2 Programming the desired values 6.2.1 Setting the time
|
|
|
Use the function button labeled with a clock symbol to set the time of day. |
||
|
|
|
|||
|
|
|
To do so, set the current time using the |
and |
keys. |
|
|
|
Pushing the or button for more than 1 sec. increases or decreases the |
||
|
|
|
time continuously (auto-repeat function). |
|
|
|
|
Fig. 15 |
|
|
|
Leica CM1520 – Cryostat |
27 |

6.Operating the Instrument
6.2.2 Setting the automatic defrost time (cryochamber)
The automatic defrost cycle takes place once every 24 hours.
Briefly touch the  or
or  button to display the beginning of the defrost cycle which has currently been set. At the same time, the LEDs between the indication of hours and minutes are flashing.
Fig. 16 To change the beginning of the defrost cycle in 15-minute increments, press the  or
or  button. The defrost time is 12 minutes.
6.2.3 Selecting the cryochamber temperature
|
The temperature of the cryochamber is set and indicated on the panel marked |
|||
|
with the cryostat symbol. |
|
||
|
|
|||
|
The actual temperature is the standard indication. Briefly touching the |
|
||
|
or the |
button displays the target temperature. |
|
|
|
You can now set the desired value using these buttons. Pressing the |
or |
||
|
button for more than 1 sec. increases or decreases the chamber tem- |
|||
|
perature continuously. |
|
||
Fig. 17 |
|
|||
The actual value will be indicated 5 seconds after finishing the programming. |
||||
|
||||
6.2.4 Manual defrosting of the quick freeze shelf
The quick freeze shelf can become hot during the defrosting process.
Therefore, do not touch it!
You can activate the manual defrost of the quick freeze shelf by pressing the  key (continuous tone sounds), followed immediately by the
  key (continuous tone stops).
To shut off the manual defrost early, press the  key, followed immediately by the
  key. The quick freeze shelf can become hot during the defrosting process. The defrost time is 12 minutes.
Fig. 18 |
The quick freeze shelf and cryochamber cannot be defrosted at the |
|
same time. |
|
|
28 |
Instructions for Use V 1.3 – 10/2012 |
Loading...