

Page 1
QUICKSTART
BR 35/12 C BP Pack
Warning
These are only brief instructions! Please read and comply with these instructions prior to using or servicing your
appliance.
The non-compliance of the operating and safety instructions may lead to damage of the appliance and to risks for
the operator and other persons.
Start up
A B A Check battery charge indicator.
1
Green Battery charged
Orange: Battery almost empty
Red Appliance swithces off: Load battery
Charge the battery if required.
B Insert the mains plug into the socket.
2
A B
몇 Warning
Risk of damage. Only use the recommended detergents. With respect to different detergents the
operator bears the increased risk regarding the
operational safety and danger of accident. Only
use detergents that are free from solvents,
hydrochloric acid and hydrofluoric acid.
Follow the safety instructions for using detergents.
Note
Do not use highly foaming detergents.
Observe the dosing notes.
A Swivel up the carrying handle of the
wastewater tank.
Lift out the waste water reservoir and put it
aside.
B Open the cover of the fresh water reservoir.
Pour in water/detergent mixture. Maximum
temperature of the liquid 50 °C.
Close the cover of the fresh water reservoir.
Place the wastewater tank on the appliance.
3
A
D
B C A Release the star knob for the height adjust-
ment of the steering wheel.
Adjust the steering wheel to the desired
height.
Tighten the star handle.
B Adjust the dosing of the cleaning solution in
accordance with the soiling and the type of
the flooring material.
C A djust the rotary handle of the brush contact
pressure to the desired value.
Only adjust the brush contact pressure when
the cleaning head is raised.
Note
If the appliance pulls forwards too strongly during
operation, reduce the contact pressure.
D Bring the Eco mode switch into the desired
position.
Normal operation: The appliance works at the
maximum brush speed and the highest suction performance.
Eco: The appliance works at reduced brush
speed and suction performance. This also reduces the energy consumption. The possible
action time with one charging cycle increases.
5.966-232.0 06/13
Page 2
QUICKSTART
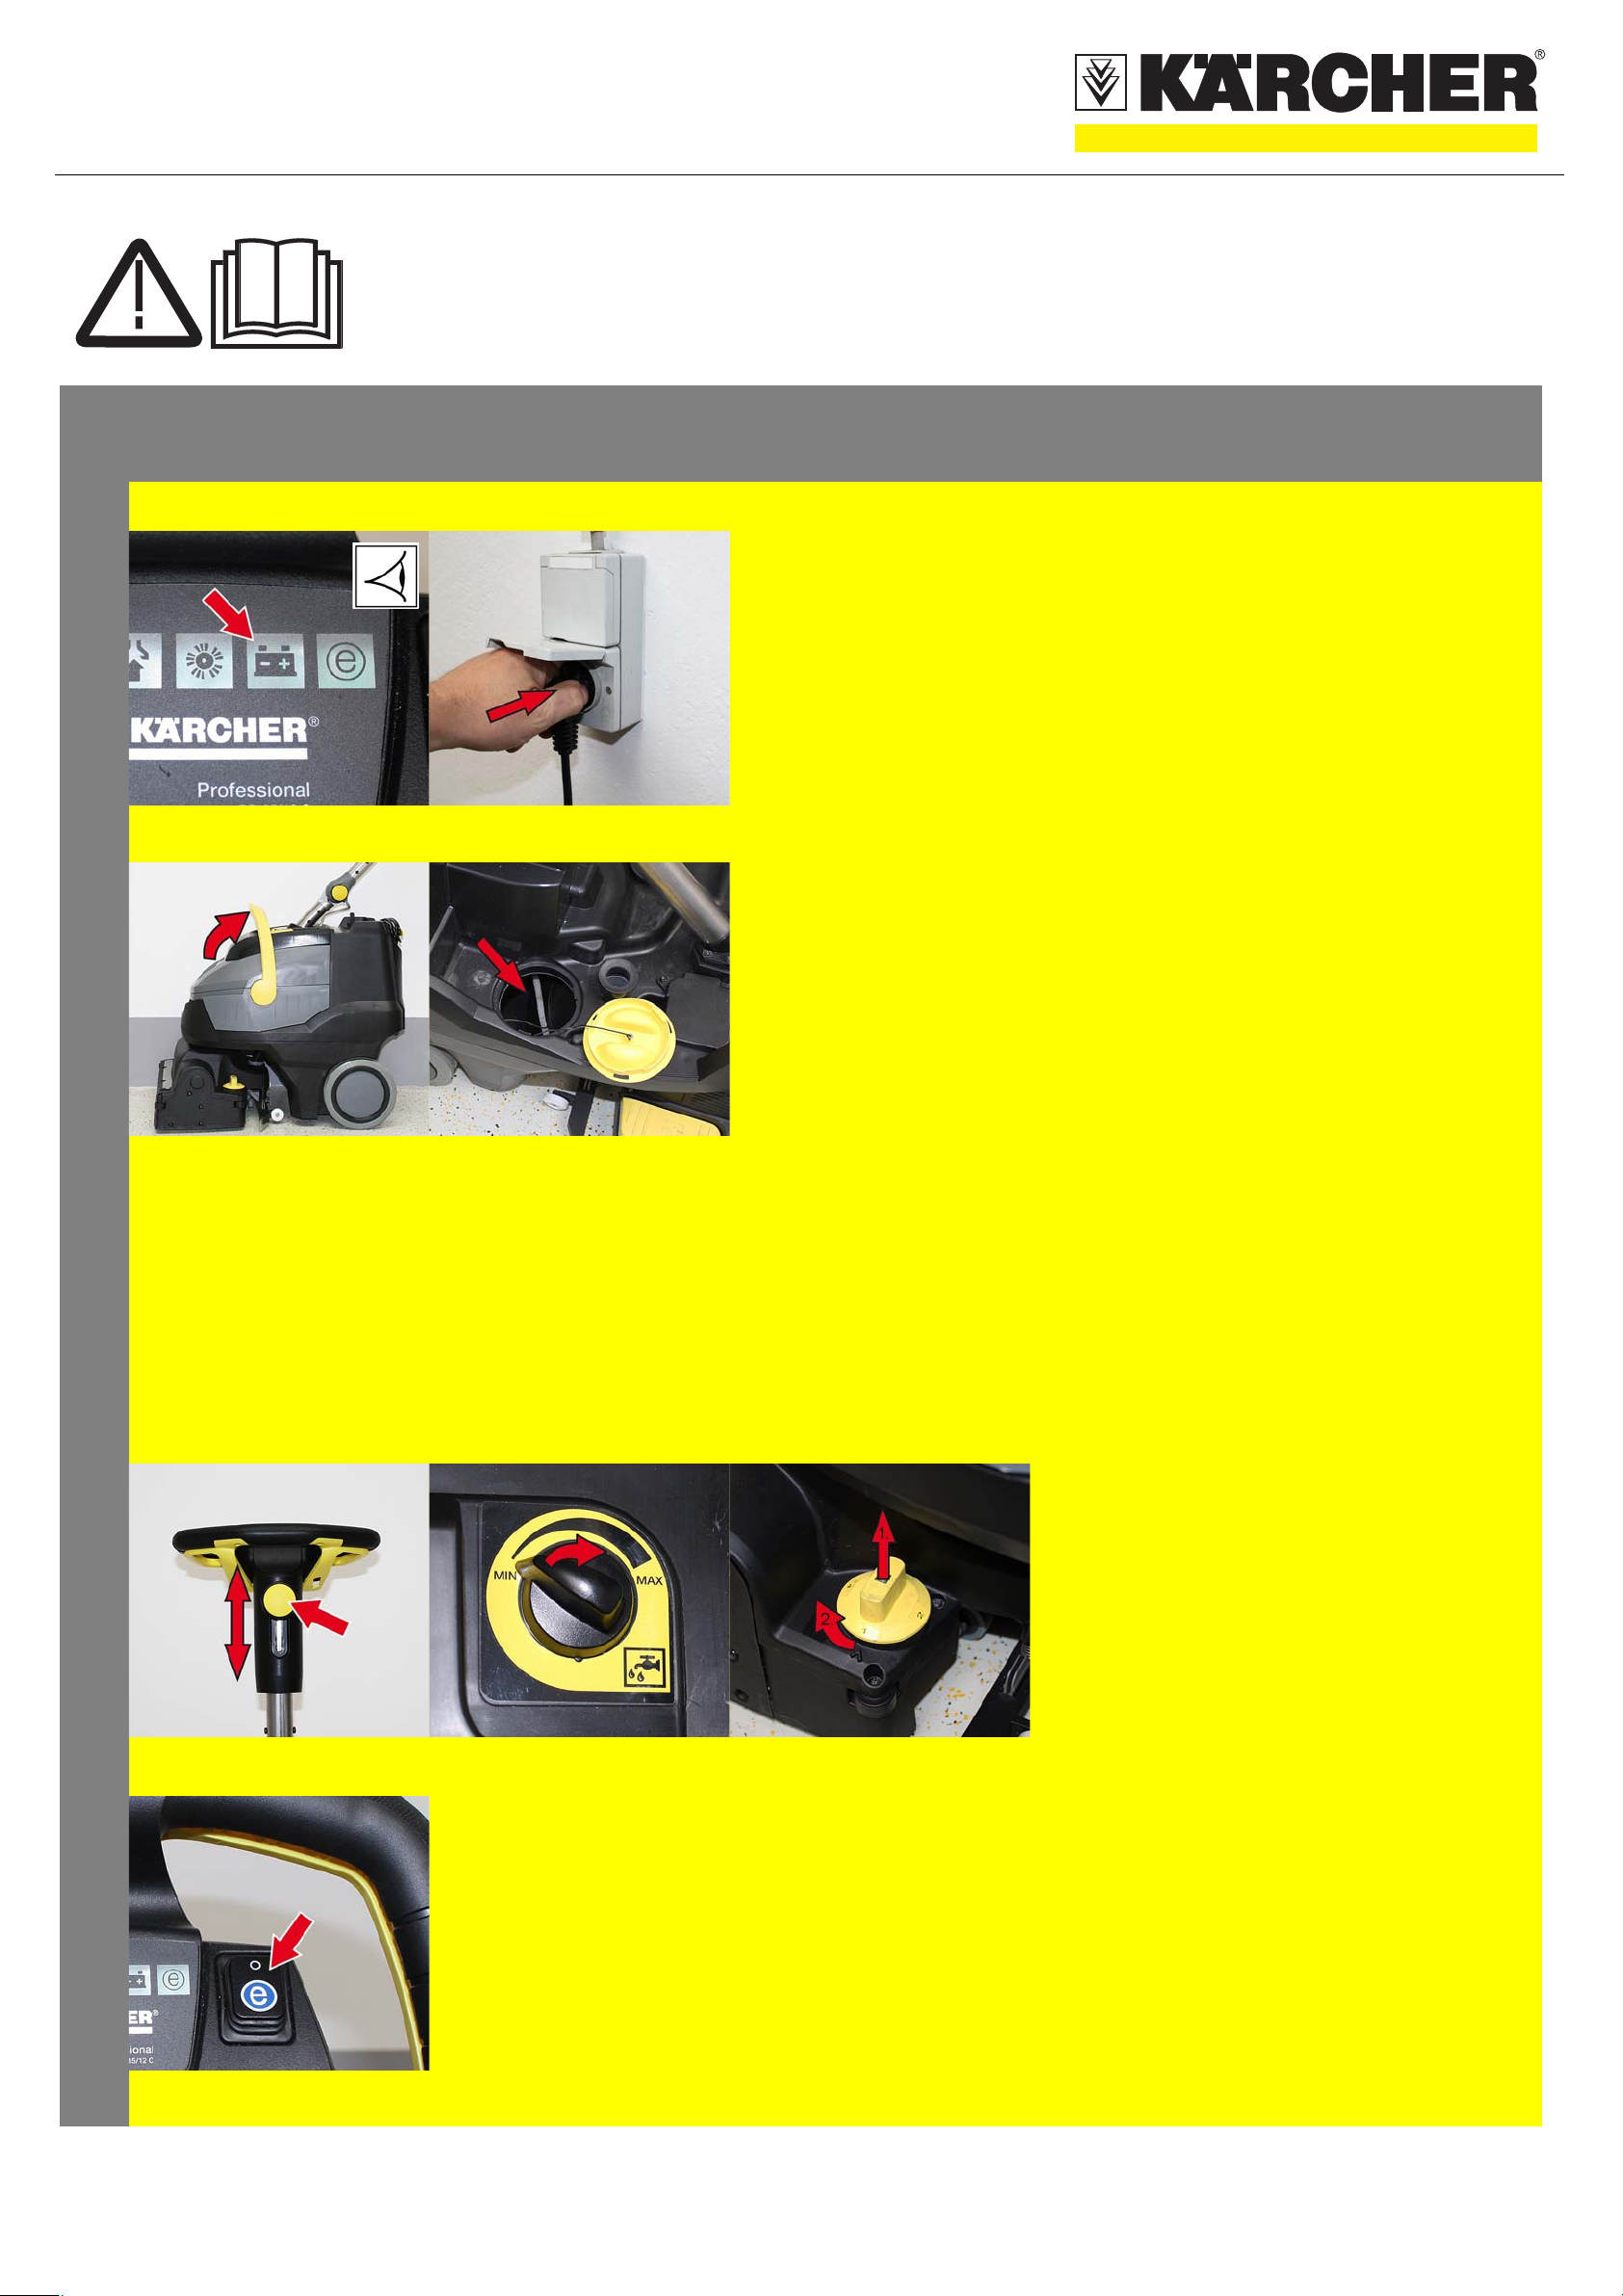
Operation
1
A
D
B
E
C Cleaning
Caution
Risk of damage to the floor covering.
Do not operate the appliance on the spot.
Risk of damage. Lift the vacuum bar before pulling the appliance backwards over a longer distance.
A Set the appliance switch to "I".
B Push the appliance forward until the parking
stand folds up and the cleaning head touches
the ground.
C S witch on "Detergent" button.
D P ush down the pedal of the vacuum bar lifting
device at the back to lower the vacuum bar.
E Pull the safety switch towards the steering
wheel, the brush drive and the application of
the cleaning solution are switched on
(if preset).
Move the appliance over the surface to be
cleaned.
Note
If the steering wheel is turned by 180°,
the appliance also reverses.
1
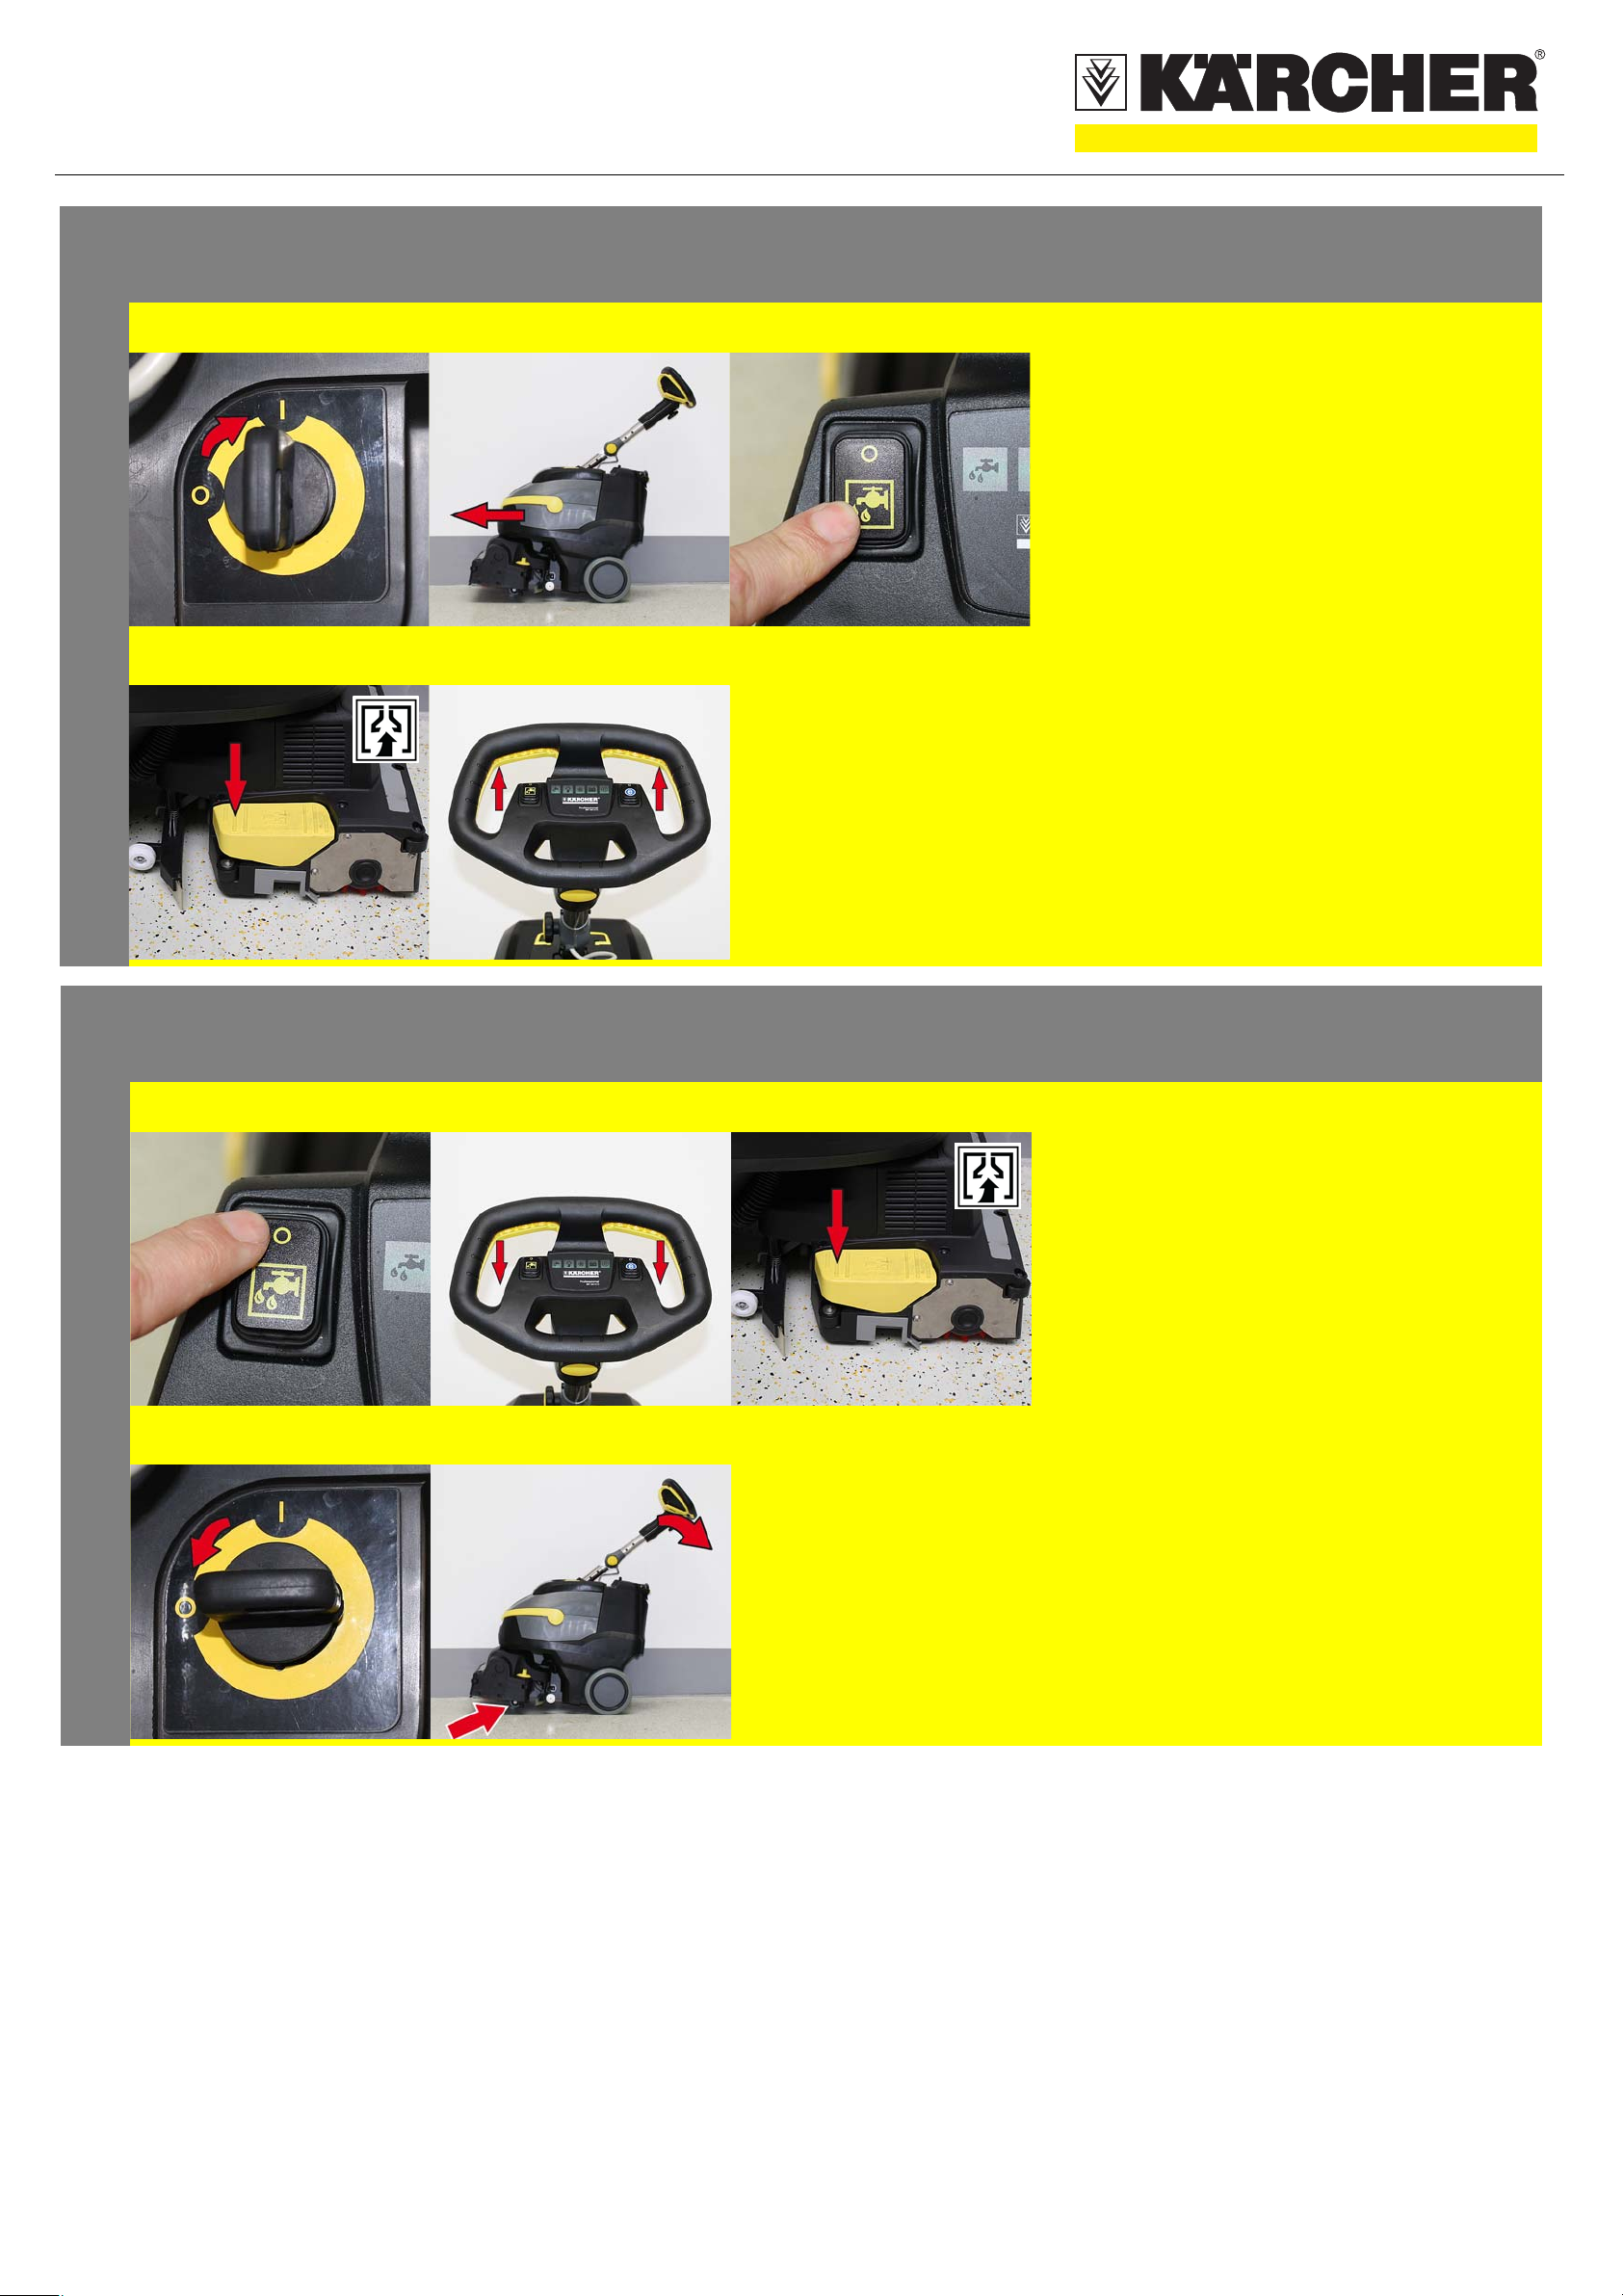
Finish operation
A
D
B
E
C Shutting Down the Appliance
A Switch off the cleaning solution switch.
Drive the appliance forward for another 1-2 m
to draw off residual water.
B Release the safety switch.
C Push down the pedal of the vacuum bar lifting
device at the front to raise the vacuum bar.
D Set the appliance switch to "0".
Caution
Vacuum lips and brush can be deformed permanently. Always park the appliance with the parking stand folded out.
E Push the appliance down on the steering
wheel until the parking stand folds out.
5.966-232.0 06/13
Page 3

QUICKSTART
Finish operation
2
A
D
B C Emptying the Dirt Water Reservoir
몇 Warning
Please observe the local provisions regarding the
wastewater treatment.
A Swivel the handle of the wastewater tank up
and let it snap into place.
Remove the dirt water reservoir.
B Remove the cover of the wastewater tank.
C Empty the wastewater tank.
Swivel the wastewater tank sideways during
emptying so that the tank is completely
drained.
Rinse the dirt water reservoir with clear wa-
ter.
or
D Open closure and drain the wastewater tank.
3
4
A B Emptying the Fresh Water Tank
몇 Warning
Please observe the local provisions regarding the
wastewater treatment.
A Slide the coupling down.
B Remove the hose of the level indicator and
swivel it downwards.
A Folding down the steering column
To reduce the space requirements for transport
and storage, the steering column can be folded
down.
A Release the star knob for the transport posi-
tion.
Swivel the steering wheel forwards.
Tighten the star handle.
5.966-232.0 06/13
Page 4

QUICKSTART
Maintenance and care
1
A
C
E
B
D
F
몇 Warning
Risk of damage. Do not wash down the
appliance with water and do not use
aggressive detergents.
A Drain off dirt water.
Remove the lid of the wastewater
reservoir and wash the inside of the
lid and the float with water.
Rinse the dirt water tank with clear
water.
B Clean the vacuum bar.
Clean the vacuum lips, check for
wear and replace them if required.
C Remove bulk waste container and
empty it.
D C lean the fresh water filter.
E Clean brush.
Check the brushes for wear, re-
place if required.
F Remove the water distribution bar
on the cleaning head and clean the
water channel.
G Clean the outside of the appliance
with a damp cloth which has been
soaked in mild detergent.
daily
monthly
Kärcher Customer Service
2
3
A A Check the condition of the seals
between the appliance and the
wastewater reservoir; replace if re-
quired.
Have annual customer service work
performed.
5.966-232.0 06/13
 Loading...