

Page 1
QUICKSTART
BD 40/12 C
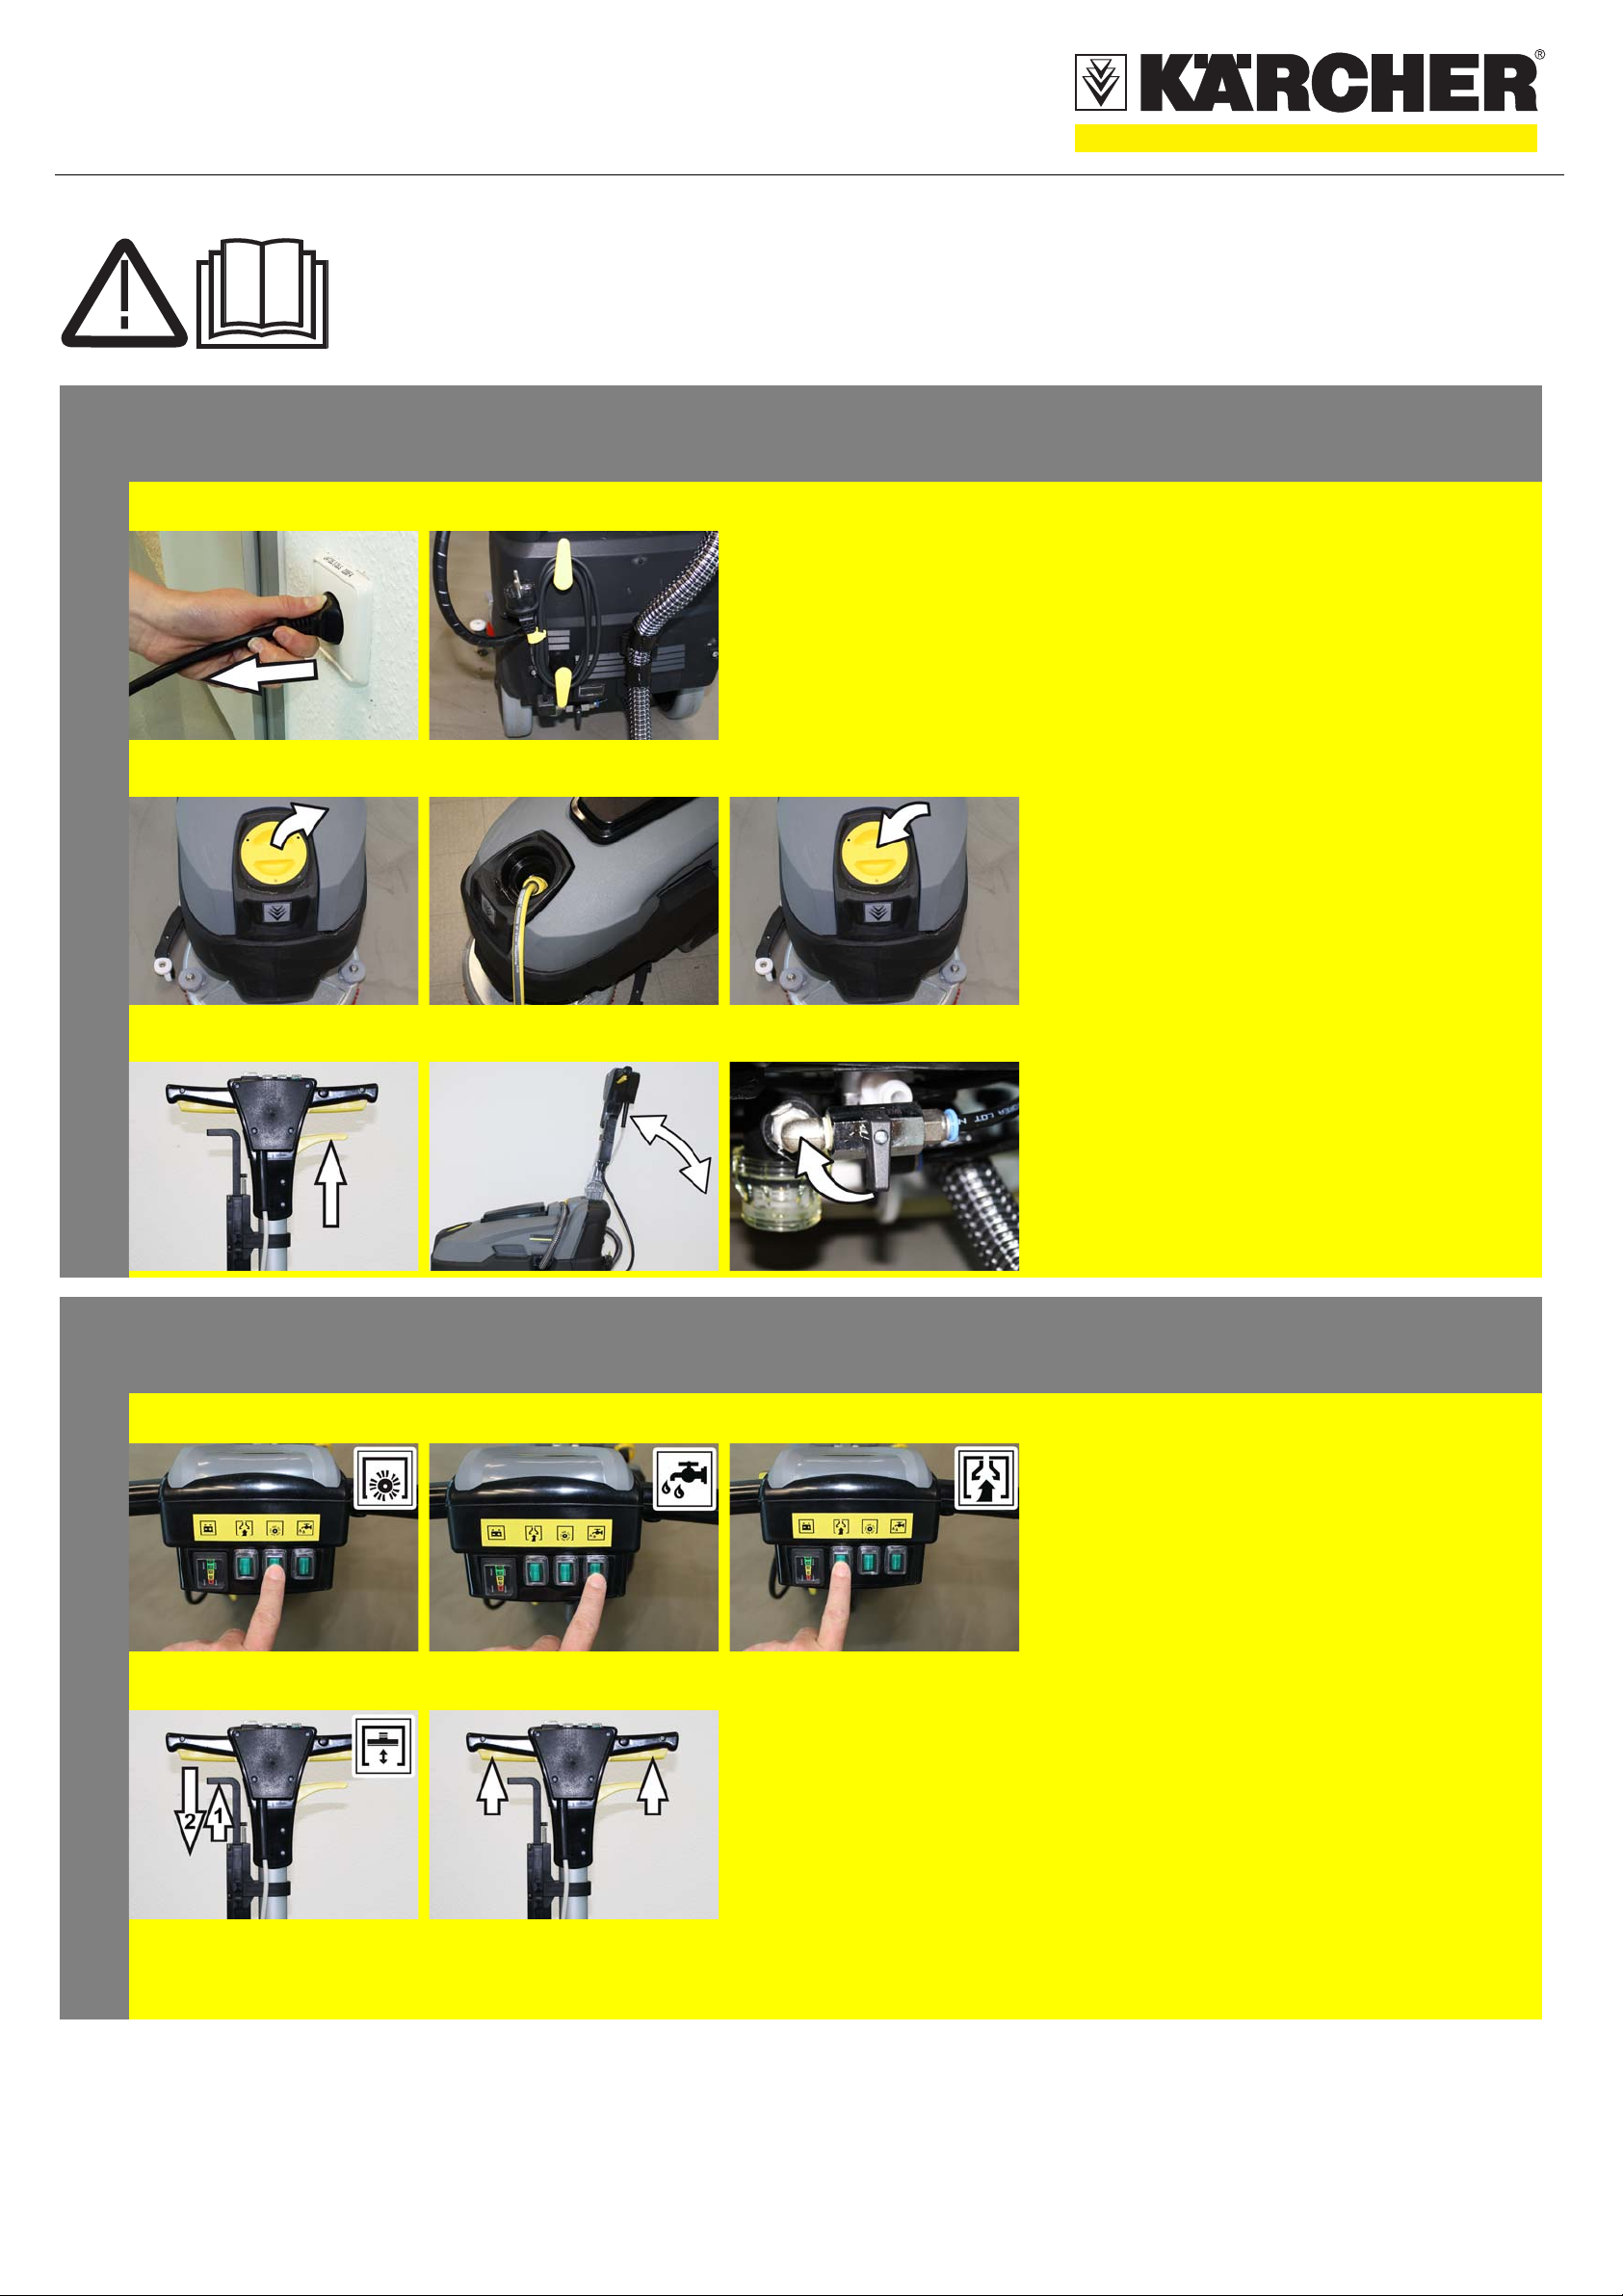
Start up
A b A Unplug the charger from the mains.
1
Warning
These are only brief instructions! Please read and comply with these instructions prior to using or servicing your
appliance.
The non-compliance of the operating and safety instructions may lead to damages of the appliance and to dangers
for the operator and other persons.
B Wind the mains cable around the cable hold-
ers.
2
3
A b C A Open the cover of the fresh water reservoir.
B Insert the filling hose into the fill opening and
connect the other end to a water faucet.
Fill in fresh water (maximum 50 °C).
Add detergent. Follow dosing instructions for
detergent.
C Close the cover of the fresh water reservoir.
A b C A Pull the lever for level adjustment.
B Adjust the handle to the desired height.
Release the lever for level adjustment.
C Set the water quantity at the regulating valve
according to the dirt level and the type of
flooring.
1
Operation
A
GB
b
E
C Starting the machine
A Switch on the button for brush operations.
B Switch on "Detergent" button.
C Press the switch of the suction turbine; the
vacuum process will start.
Note
Depending on the cleaning task, individual functions can remained switched off.
Activated switches light up.
D Pull the lever of the vacuum bar lowering up
and then press it down; the vacuum bar is
lowered.
Caution
Risk of damage to the floor covering. Do not operate the appliance on the spot.
Risk of damage. Raise the suction bar before
backing up for extended periods of time.
E Operate the handle switch - the brush drive
and the detergent applicator are switched on
(if set up).
Move the appliance forward over the surface
to be cleaned.
5.964-384.0 09/11
Page 2
QUICKSTART
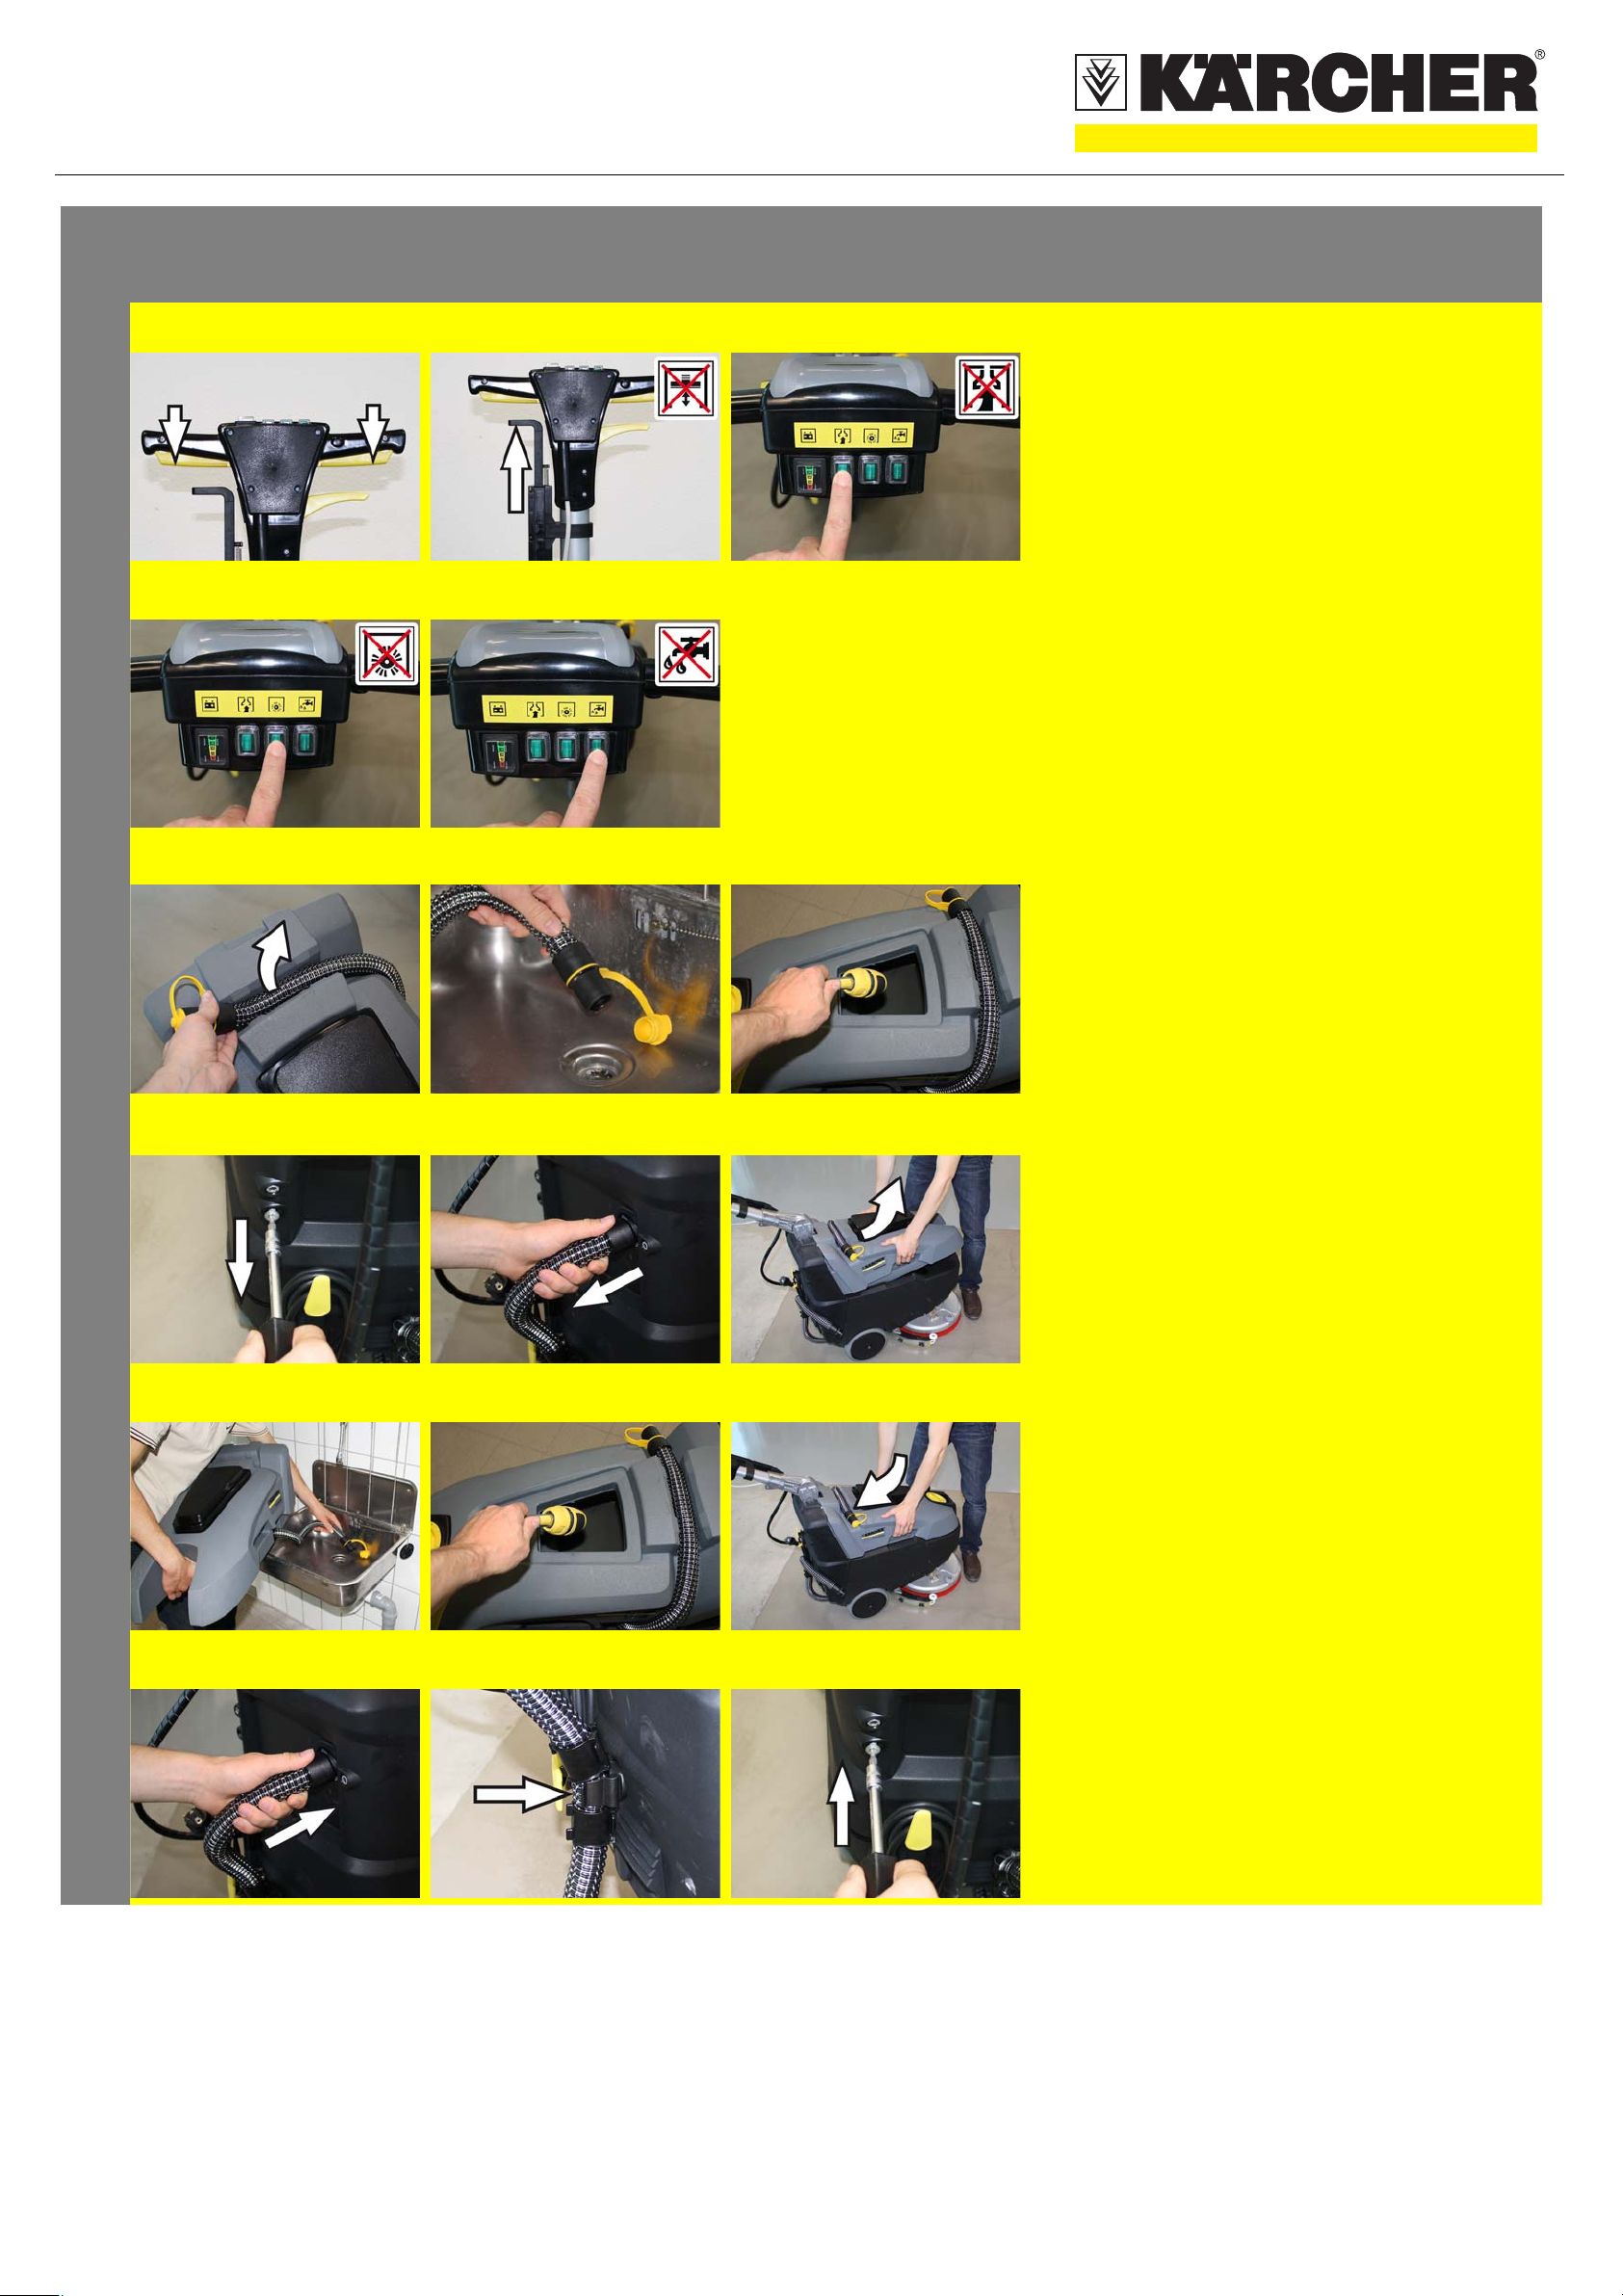
Finish operation
1
2
A
GB
A b Emptying the Dirt Water Reservoir
b
E
C Turn off the appliance
A Release the handle switch.
Drive the appliance forward for another 1-2 m
to draw off residual water.
B Pull suction bar lowering lever upwards.
C Switch off suction turbine switch.
D Switch off the button for brush operations.
E Switch off "Detergent application" button.
몇 Warning
Please observe the local provisions regarding the
wastewater treatment.
A Take the wastewater drain hose from the
support, open the lid and lower the hose
above a suitable collection unit.
B Rinse the dirt water reservoir with clear wa-
ter.
3
A
GB
G
b
E
H
C
F
I
Remove the wastewater reservoir and
empty it
Option, if there is no water drain available.
몇 Warning
Please observe the local provisions regarding the
wastewater treatment.
A Unscrew the wastewater reservoir screw.
B Pull off the suction hose from the wastewater
reservoir.
C Remove the wastewater reservoir and carry it
to the disposal site.
D Take the wastewater drain hose from the
support, open the lid and lower the hose
above a suitable collection unit.
E Rinse the dirt water reservoir with clear wa-
ter.
F Reattach the wastewater tank to the appli-
ance.
G Attach the suction hose to the wastewater
reservoir.
H Insert the suction hose of the wastewater res-
ervoir between the hose clamps into the hold-
er.
I Screw in the wastewater reservoir screw.
5.964-384.0 09/11
Page 3

QUICKSTART
Finish operation
4
5
A
GB
A Charging battery
b C Emptying the Fresh Water Tank
몇 Warning
Please observe the local provisions regarding the
wastewater treatment.
A Swivel the drain hubs outwards.
B Push back the ring.
C Pull off the plug.
Let the fresh water reservoir drain complete-
ly.
D Rinse the fresh water tank with clear water.
Push the plugs into the drain hub.
A Charge battery, if required.
Insert the plug of the connecting cable into
the socket.
5.964-384.0 09/11
Page 4

QUICKSTART
Maintenance and care
1
2
A A Remove the lid of the wastewater
reservoir and wash the inside of the
lid and the float with water.
A b A Clean the vacuum lips on the
vacuum bar, turn or replace if
required.
B Clean the suction channel.
daily
monthly
Kärcher Customer Service
3
4
b A Check brush for wear and tear and
clean it.
Check the brushes for wear (bristle
length at least 10 mm), replace if
required.
A A Clean the fresh water filter.
A A Clean the seals between dirt water
5
A Have annual customer service work
6
reservoir and cover and check for
tightness, replace if required.
performed.
5.964-384.0 09/11
Page 5

QUICKSTART
1
Troubleshooting
A Faults with display
The battery status indicator shows faults.
See "Faults with display" in the Operating Instructions.
Appliance cannot be started
A Check charging status of battery.
Charge the battery if required.
2
3
A
GB
A Insufficient cleaning result
b
E
C Insufficient vacuum performance
A Switch on "suction turbine" button.
B Drain off dirt water.
See section on "Ending operation", items 2
and 3.
C Clean the seals between dirt water reservoir
and cover and check for tightness, replace if
required.
D Adjustment of the vacuum bar, adjust if nec-
essary.
Clean the vacuum lips on the
vacuum bar, turn or replace if
required.
E Clean the suction channel.
A Check brush for wear and tear and clean it.
Check the brushes for wear and replace if
necessary; replace the brush if the bristles
are shorter than 10mm.
4
5
A
GB
A Brushes do not turn
b C Insufficient water quantity
A Check fresh water level, refill tank if neces-
sary.
B Switch on "Detergent" button.
C Open the water volume regulating valve.
D Clean the fresh water filter.
A Switch on the button for brush operations.
Check the brushes for blockage due to foreign
particles, remove them if found.
Turn off the switch for the brush operation; wait
briefly and switch it back on.
5.964-384.0 09/11
 Loading...