

Page 1

®
SR
Phonares
Expressive esthetic denture teeth
II
Instructions
for Use
Page 2

IntroductIon
The demands of patients with removable dentures continue to rise:
more esthetics, more functionality.
Patients expect and require more than
just having their basic oral functions
(e.g. chewing efficiency) restored.
Individualized esthetics plays an
increasingly important role.
SR Phonares has been developed to fulfil
these requirements.
Based on Nano-Hybrid Composite
(NHC), SR Phonares denture teeth are
particularly suitable for the demanding
applications in removable dental
prosthetics. The tooth moulds are
shaped according to age-specific
characteristics, allowing the fabrication
of highly individualized dentures.
SR Phonares offers dental technicians,
prosthodontists and dentists a new
generation of denture teeth that
are designed to optimally meet the
requirements of today's patients.
This documentation offers guidelines for
the application of the SR Phonares II
tooth lines, assisting users to achieve an
optimum level of function and esthetics.
2
Page 3

Anterior Tooth Moulds 4
Posterior Tooth Moulds 5
Layering Diagram 6
Composition 7
Indications 8
Processing Steps 9
Mould and Shade Selection 10
table of contents
Model Orientation 12
Model Analysis 13
Anterior Tooth Setup 14
Posterior Tooth Setup 18
Completion 26
Implant Prosthetics 32
General Information 38
3
Page 4
VERS
ATU
YO
anterIor teeth
Impressive esthetic qualities
• Unparalleled surface texture
User-friendly and convenient
• Easy setup of anterior teeth due to proximal
“Set & Fit” design
• Enhanced “white esthetics” due to especially
designed interdental closures
A range of tooth moulds designed to match the age and characteristics
of the individual patient
• Two basic types
• Three different categories according to age-related characteristics
SOFT
YOUTHFUL
4
UNIVERSAL MATURE
BOLD
Page 5
Lingual Typ
PosterIor teeth
SR Phonares II Lingual moulds offer the option of
lingualized occlusion. This setup technique is particularly
suitable for enhancing stability in removable denture
prosthetics (e.g. implant prosthetics).
The SR Phonares II Typ moulds are the classic teeth
suitable for universal application in partial, complete
and hybrid dentures.
Lingualized occlusion Classic occlusion
5
Page 6
layerIng dIagram
The SR Phonares II tooth line has set new standards in
the esthetics of removable dental prosthetics.
The Nano-Hybrid Composite (NHC) is a distinguishing
feature of SR Phonares II.
This new composite has been especially developed for
use in removable dental prosthetics. The NHC material
offers the following advantages:
• high resistance to wear
• high resistance to plaque build-up
• natural opalescence
• highly homogeneous nano structure
The lifelike shade effect and structure of the anterior
and posterior teeth is achieved with 4 individually
shaded layers. The dentin core and facial incisal consist
of NHC material, which imparts both high wear
resistance and natural looking esthetics to the teeth.
The back incisal and neck are built up of PMMA layers
to ensure an optimal and stress-free bond with conventional denture base materials.
6
Facial incisal Nano-Hybrid Composite
Dentin core Nano-Hybrid Composite
Neck PMMA
Back incisal PMMA
Page 7
nhc comPosItIon
UDMA matrix
High-density silanized SiO
Inorganically filled UDMA polymer
Silanized SiO2 nanoparticles
PMMA clusters
2
NHC component Function Main advantage
UDMA
(urethane dimethacrylate)
Matrix The UDMA matrix features a high degree of cross-
linking. The material structure offers high stability and
high resistance to chemical attacks.
High-density silanized SiO
2
Filler 1 Inorganic fillers stiffen the matrix and increase the
material's hardness and resistance to abrasion. They
also optimize the material's refractive index and
therefore enhance the natural shade effect and
opalescence.
Silanized SiO
nanoparticles Filler 2 Nanoscale surface-modified inorganic particles
2
re inforce the composite structure. The nanoscale
pro perties arising from these particles are responsible
for the formation of homogeneous contact surfaces.
The result is a material that is very kind to opposing
tooth structure.
Inorganically filled UDMA
polymer
Filler 3
(iso filler)
Matrix-based pre-polymer particles help reduce polymerization shrinkage.
PMMA clusters Inclusions The inclusion of PMMA clusters in the composite struc-
ture reduces the affinity for plaque and discolouration.
7
Page 8
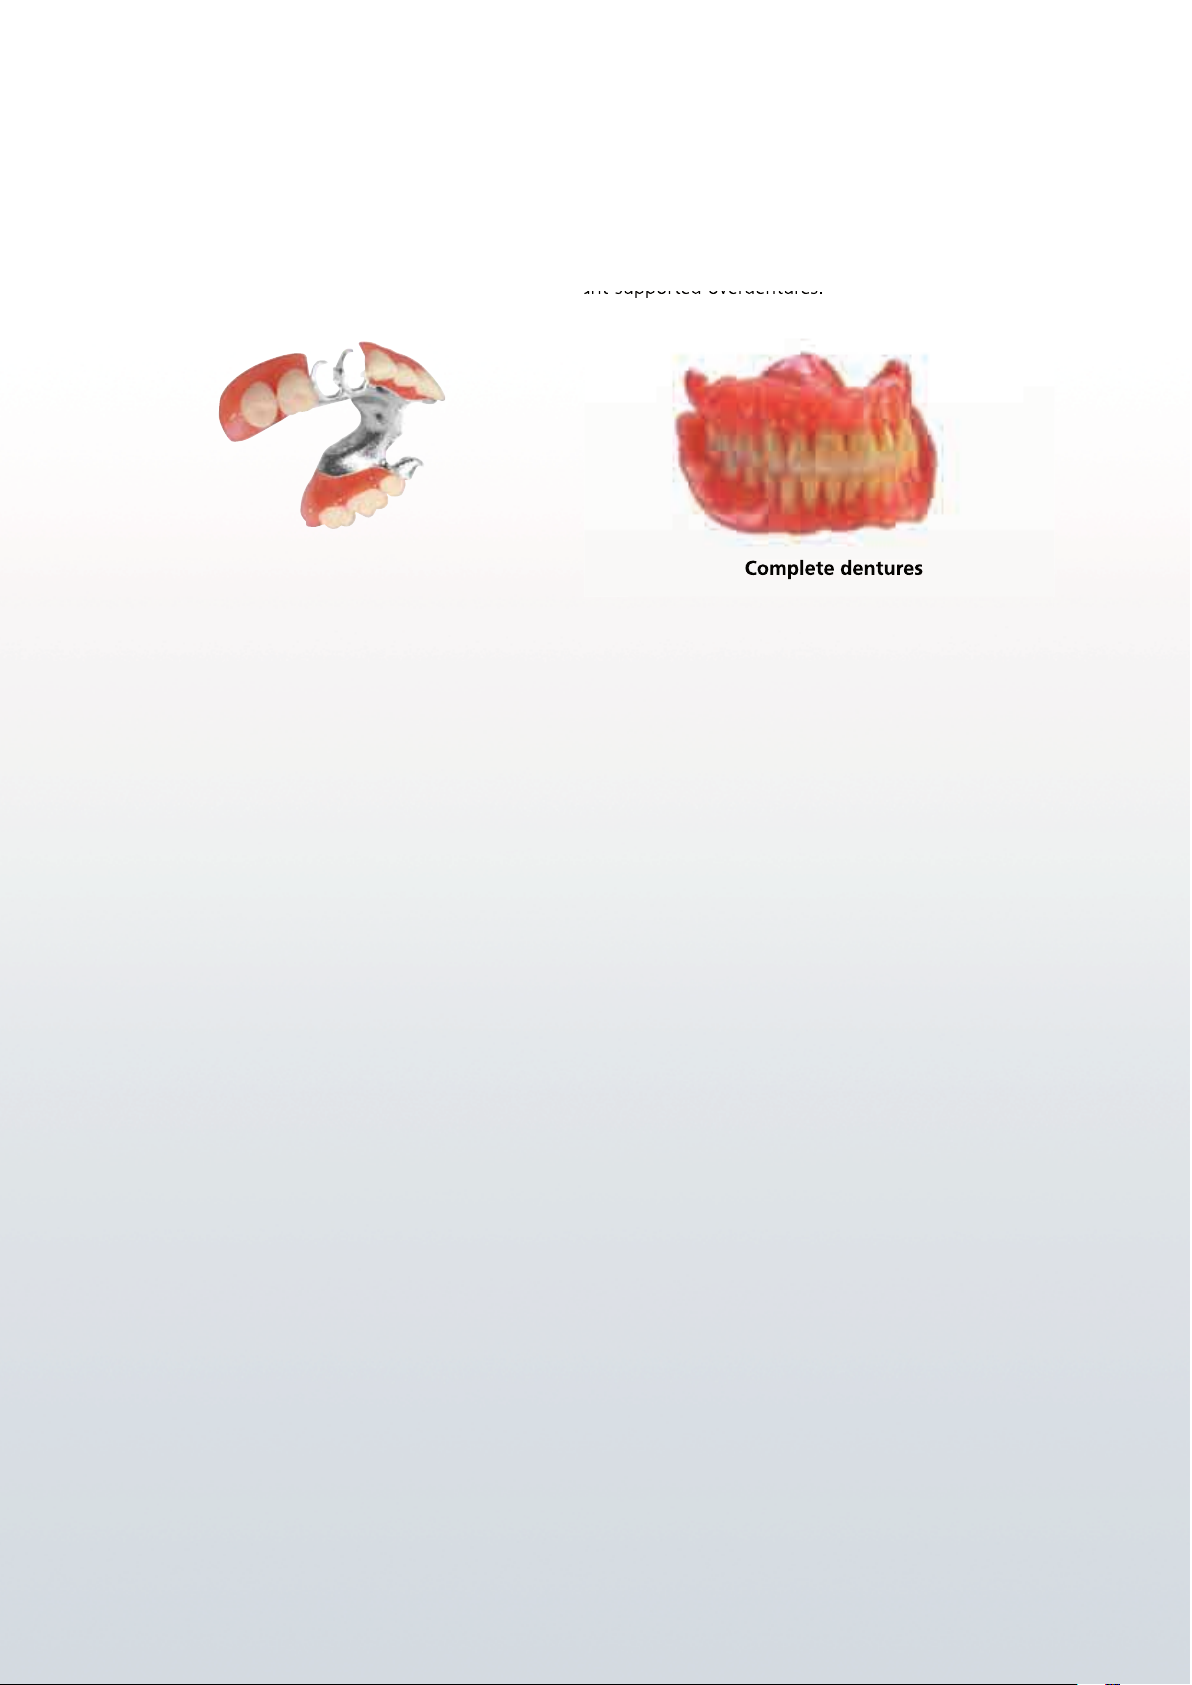
IndIcatIons
Given their properties the SR Phonares II teeth are suitable for esthetically and functionally
demanding restorations. The range of indications includes partial dentures, combination dentures,
complete dentures, hybrid overdentures and implant-supported overdentures.
Complete dentures Partial dentures
Important notes
The following requirements should be met to ensure that the dentures function appropriately in
the oral cavity in the long term:
– Fabrication in the dental laboratory according to the principles of best practice
– Application of dental materials according to the manufacturer's instructions. In particular,
denture teeth should not be excessively weakened as a result of adjustments by grinding.
– Planning and fabrication of the dentures should be performed in close collaboration with the
dentist.
– Dental technician and dentist should ensure a balanced occlusion and articulation.
The dentist should check the following points before beginning the treatment:
1. Does the patient belong to a risk group that generally may jeopardize the success of the treatment?
a. Are there signs of bruxism (patient's statements, tooth wear, masseter hypertrophy)?
b. Are there signs of significantly increased masticatory forces?
2. What type of removable or partially removable restoration should be implemented?
All PMMA/composite-based denture teeth are suitable for tissue-supported and partial dentures
in patients that do not belong to any of the above risk groups.
Patients restored with implant-supported restorations have been shown to exert higher mastica-
tory forces than patients with tissue-supported dentures. The increase in these forces is related to
the fact that implant-supported restorations are anchored in the bone and therefore lack the
sensory receptive feedback necessary to control these forces. The heightened forces may lead to
an increase in chipping in composite teeth.
It may therefore be indicated to use PMMA-based denture teeth for these patients. PMMA teeth
are less prone to chipping but show a significantly higher wear than composite teeth.
8
Page 9
Prosthetics workflow
ProcessIng stePs
1st appointment
• Preliminary bite registration
• Initial impression-taking
2nd appointment
• Functional impression
• Registration
• Mould selection
• Shade selection
SR Phonares II:
• Shade selection
• Mould selection
3rd appointment
• Wax try-in
Dental practice
Dental laboratory
1st processing step
• Study model
• 1st model orientation
• Bite registration
• Customized impression tray
2nd processing step
• Model fabrication
• 2nd model orientation
• Model analysis
• Wax-up
SR Phonares II:
• Model orientation
• 2nd model analysis
• Anterior tooth setup
• Posterior tooth setup
4th appointment
• Placement
5th appointment
• Recall
The Biofunctional Prosthetic System (BPS®)
stands for success in the field of removable
dental prosthetics. This success is based on
a systematic approach to the working
procedures in the dental p ractice and
laboratory. In addition to a processoriented workflow, the materials used
in the fabrication of dentures are also
decisive for success.
3rd processing step
• Completion
SR Phonares II:
• Bonding denture teeth to
denture base
• Surface conditioning
• Polishing / Finishing
Specific guidance on the use of the
SR Phonares II teeth should be followed
during application. These instructions
are explained on the following pages
and are complementary to the basic BPS
working procedures.
The basic BPS procedures are described
in more detail in the BPS handbook.
9
Page 10
mould and shade selectIon
FormSelector
Phonares
®
II
SR
TO OT H M OU LD AR TI ST R Y
Anterior mould selection
In addition to the shade, the shape (form) and size of anterior teeth should in particular be
matched to the individual characteristics of the patient. If possible, the anterior teeth should be
selected directly on the patient according to the patient's anatomical and facial characteristics.
The following methods are recommended to facilitate the tooth selection procedure:
CHAIRSIDE
FormSelector
Step 1 Determine the interalar width of the
nose using the FacialMeter. Select an
appropriately sized tooth mould from
the INTER-ALA table.
Step 2 Select the desired tooth form, soft or bold,
in line with the patient's face.
LABSIDE
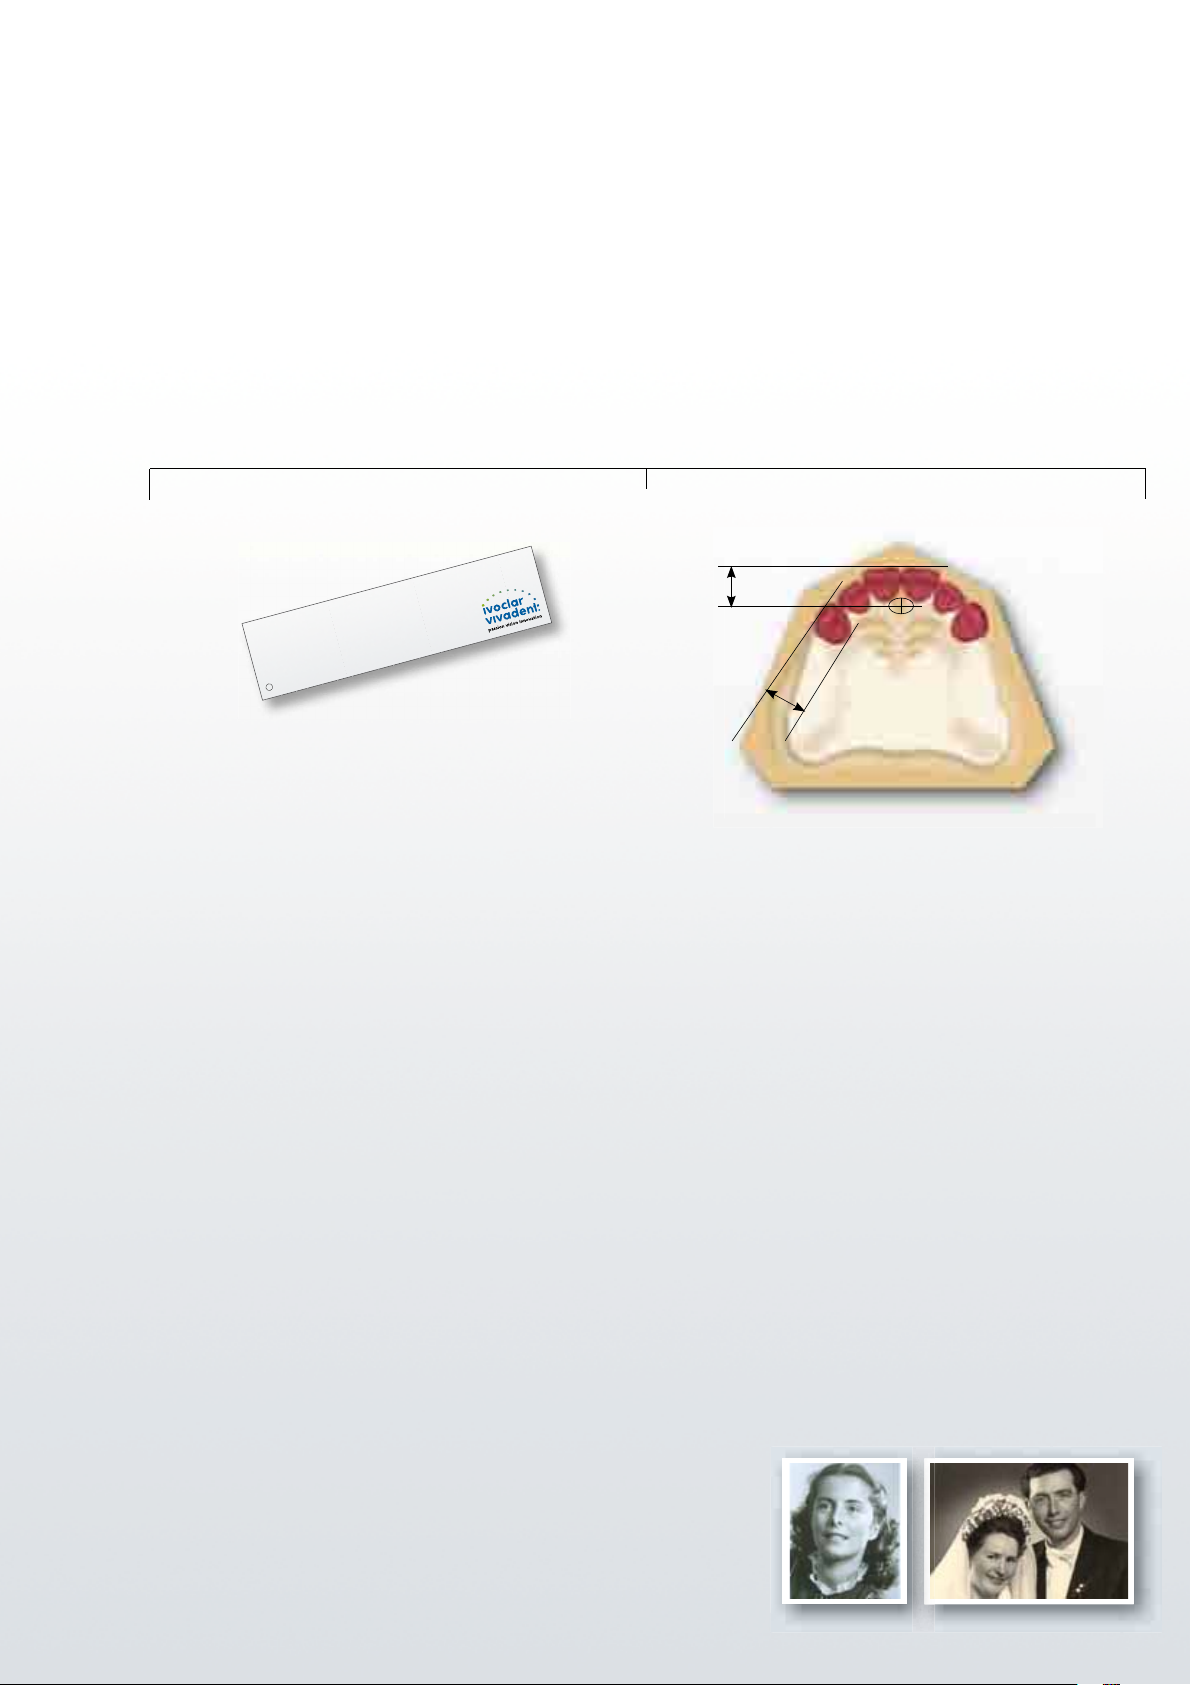
Model analysis
approx.
7 mm
approx. 9 mm
Determine the following reference points by means of
analysing the model:
1] Position of the canines:
Determine the first large pair of rugae; the centre
of the labial surface of the maxillary canine is
positioned at a distance of 9 mm.
10
Step 3 Select the appropriate age group of the
teeth according to the incisal wear and
facial curvature characteristics of the anterior teeth.
2] Contact point of the two central incisors:
The labial surface of the central incisors is located
at a distance of approx. 7 mm from the centre of
the incisive papilla.
Based on the length of the curve passing through
these three reference points, you can select an anterior
set of appropriate width by means of the tooth mould
chart.
As guides for designing the prosthetic reconstruction it is
advisable to use previous models or photographs of the patient. In
addition to the position of the teeth, the tooth shape can be adapted
to the original appearance of the patient.
Page 11

mould and shade selectIon
Anterior teeth – Mould selection
The maxillary anterior moulds offer a special advantage: They are grouped according to age-specific
characteristics. To facilitate mould selection, the moulds are arranged in a logical order and
labelled with an easily identifiable code.
– The first character (letter) represents shape: S = Soft B = Bold
– The second character represents age group: 6 = youthful; 7 = universal; 8 = mature
– The third character represents size: 1 = small; 2 = medium; 3 = large
S OFT
small
medium
large
Please refer to the SR Phonares II tooth mould chart for an accurately dimensioned representation of the moulds.
S61
S62
S63
YOUTHFUL UNIVERSAL MATURE
S71
S72
S73
S81
S82
S83
small
medium
large
B61
B62
B63
YOUTHFUL UNIVERSAL MATURE
BOLD
B71
B72
B73
Posterior mould selection
The size of the posterior teeth is selected in line with the anterior tooth moulds determined during
the preceding stage. A variety of posterior tooth moulds are available to meet the specific requirements of individual indications and to provide patients with dentures that best satisfy their needs.
SR Phonares II Typ SR Phonares II Lingual
B81
B82
B83
The Typ moulds are the classic denture teeth for:
• Complete dentures
• Partial dentures
• Hybrid dentures
The Lingual moulds are designed for lingualized
occlusion. They are suitable for universal application in
dental prosthetics and offer particular advantages in
implant-supported removable dentures where the lingualized occlusion scheme provides enhanced stability.
Shade selection
Shade selection should be performed on the patient under defined light
conditions (5500K colour temperature) or in daylight. An accompanying shade
guide is available to enable consistent shade selection in compliance with the
A–D shade system. The tooth samples of the SR Phonares II shade guide feature
the same layer structure and material as the original teeth. Shade deviations are therefore
minimized. Shade selection may also be performed with an Ivoclar Vivadent A–D shade guide.
11
Page 12
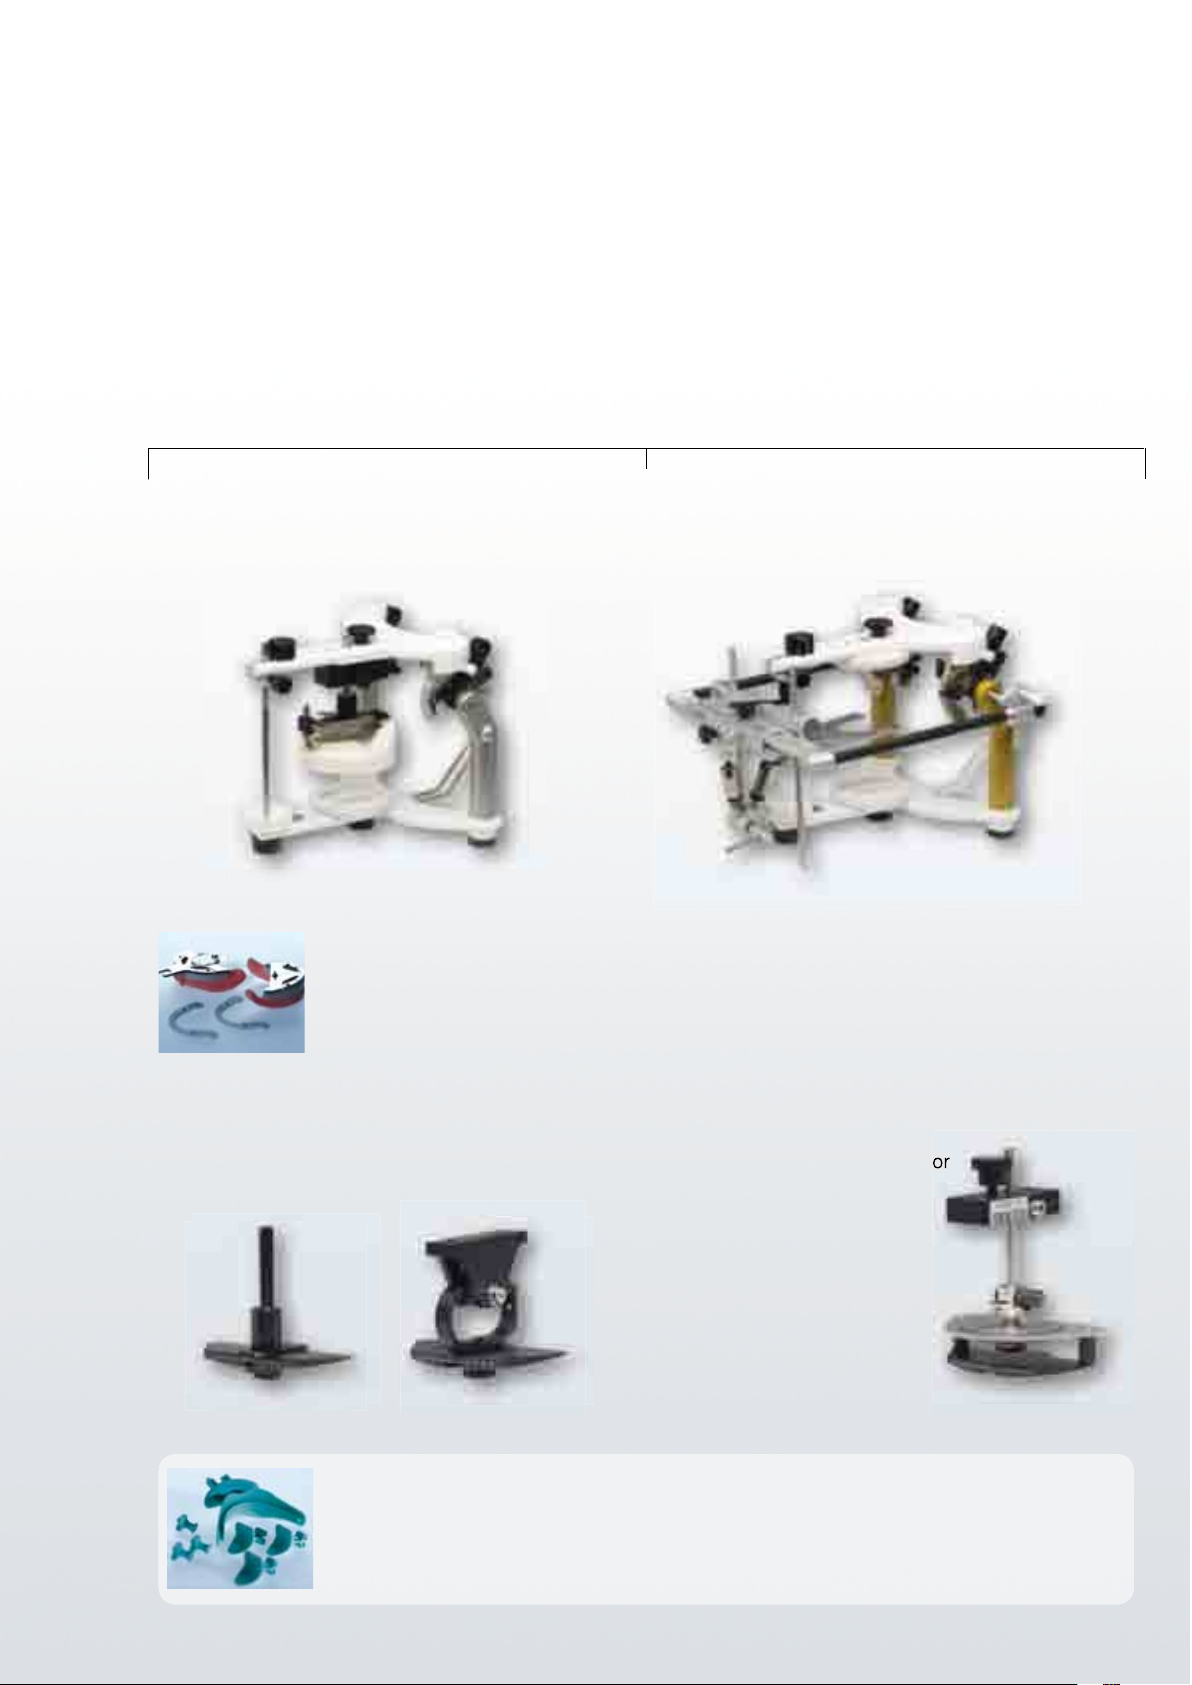
model orIentatIon
The transfer of the patient's specific jaw relations with the individually adjustable UTS 3D facebow
is an essential step to achieve functionally effective dentures. The accessories of the Stratos articulator
range also allow average-value mounting of the casts.
Average-value model orientation Individual model orientation
Use a horizontal guide to achieve average-value
orientation of the mandibular cast to the articulator.
The Gnathometer M assists in the correct final recording of the relationship of the upper and
lower jaw.
Utilize the UTS 3D transferbow for skull-related
individual model orientation.
We recommend using a 2D or 2.5D template.
A 3D template should be used for
the setup in conjunction with a
skull-related model orientation.
NOTE
Ivoclar Vivadent recommends Centric Tray for a preliminary centric bite registration. This
method allows the occlusal rims to be ideally dimensioned in line with the patient-specific
oral situation and to optimally place the bite pattern.
12
Page 13

Model analysis: Maxilla
model analysIs
Marking:
Raphe median plane
Relevance:
Reference plane for the transversal
symmetry of the anterior setup
Marking:
Centre of the incisive papilla
Relevance:
• Anatomical midline of the upper jaw
• Labial positioning of the central
incisors at a distance of
approx. 7 mm sagitally
Marking:
First large pair of rugae
Relevance:
Labial positioning of the canine teeth at
a distance of approx. 9 mm from the tip
of the rugae
Marking:
Post dam
Relevance:
Posterior palatal limit of the denture base
Marking:
Deepest point of the vestibule
Relevance:
Starting point for measuring the vertical
dimension and the incisal height of the
central incisors
Marking:
Crest of the alveolar ridge
Relevance:
Provides orientation in the determination
of the bite type
Model analysis: Mandible
Marking:
Upper third of the retromolar pad
Relevance:
• Positioning of the template on the
dorsal aspect (corresponds to the
height of the occlusal plane)
• Dorsal positioning of the lateral
wings of the horizontal guide
Marking:
Deepest point of the vestibule
Relevance:
Starting point for measuring the total
vertical dimension
Marking:
Pound's line
Relevance:
Lingual limit of mandibular tooth setup
Marking:
Crest of the alveolar ridge
Relevance:
The central fossae of the posterior teeth
run along this line
Marking:
Anatomical midline of the model
Relevance:
• Bilateral orientation of the anterior
setup
• Positioning of the symphysis fork of
the horizontal guide
13
Page 14

anterIor tooth setuP
Natural anterior esthetics
SR Phonares embodies a new generation of anterior teeth
that deliver lifelike esthetics in prosthetic dentistry.
The texture of the labial surfaces reproduces the mild
ripple effect (perikymata) seen on natural enamel surfaces.
The perikymata lend a natural vitality to the tooth moulds.
The design of the anterior arch has a decisive effect on the
facial appearance of the patient.
The SR Phonares anterior teeth are suitable for various
anterior setup techniques, ranging from classic to highly
individualized. This allows you to achieve an anterior setup
that matches the natural esthetic characteristics of the
individual patient.
14
Page 15

anterIor tooth setuP
Set & Fit
The Set & Fit design is based on convex distal margins and concave mesial proximal surfaces,
which interlock like a joint. The Set & Fit technique ensures the natural closure of interdental
spaces. This facilitates denture hygiene and enhances the esthetic appearance.
Black triangles are reduced from occurring at the cervical portion due to the wide tooth necks,
regardless of which setup technique is chosen; the gingival portions of the dentures can be designed
to look more natural. In addition, metal structures and abutments are covered more reliably.
Setup variations
The SR Phonares anterior teeth can be set up in a range of variations. The images below should
encourage you to respond to your patients' needs in a more individualized manner.
Harmonious Slightly individualized Highly individualized
15
Page 16

anterIor tooth setuP
Setup according to model analysis
The incisive papilla provides a reliable reference point for the anterior setup because of its
transverse and sagittal wear resistance.
In a normal bite situation, the central incisors are aligned with the incisive papilla by positioning
the labial surface approx. 7 mm towards the front from the centre of the incisive papilla.
The raphe median plane determines the symmetry axis of the anterior setup in the upper jaw. The
course of the incisal edges of the central incisors is determined by half the height of the overall
vertical dimension plus a 2-mm overlap.
The position of the canine teeth plays a decisive role in achieving a harmonious facial expression.
In the dental arch, the canines are positioned in the area of the first large pair of palatine rugae,
with the labial surface of the maxillary canines being placed at a distance of approx. 9 mm. The
vertical alignment of the canines significantly influences the curvature of the smile line.
After the canines have been positioned, the lateral incisors are placed in the space between the
central incisors and the canines. By slightly rotating or interlocking the lateral incisors, highly
individualized effects can be achieved.
Starting with the canines, the lower incisors are set up in a vertical and sagittal distance that is in
line with the respective occlusal position and bite situation.
You can check if the smile line runs symmetrical to the arch of the lower lip by transferring the
markings on the bite rim to a silicone key.
approx.
7 mm
approx. 9 mm
Please refer to the BPS handbook for a detailed description of the model analysis and anterior setup
16
method.
Page 17

anterIor tooth setuP
Anterior tooth setup in function
Most conventional denture occlusal schemes suggest a bilateral balanced occlusion in the posterior
region on the working and non-working side and in protrusion.
Guiding contacts during laterotrusion and protrusion are not desirable in the anterior region.
– In general, it is suggested that anterior teeth have approx. 1.5 mm of vertical overlap and
approx. 1.5 mm of horizontal overlap.
– The overlap should be designed in such a way that the anterior teeth are prevented from
contacting in functioning.
– Anterior guidance – as sometimes practised in crown and bridge techniques – is not
recommended for conventional denture prosthetics.
– Anterior contacts during functioning may lead to parafunctions.
CENTRIC PROTRUSION
VERTICAL OVERBITE SAGITTAL OVERBITE
No contact Shear contact
in bilateral balanced occlusion
Anterior setup in implant-supported dentures
Premature contacts can destabilize the dentures during functioning. Even if retention elements, or
implants, ensure increased denture stability, it is advisable to avoid anterior contacts. Patients with
implant-supported restorations are generally capable of exerting higher chewing forces and lack the
necessary proprioceptive feedback to correctly monitor these forces. Therefore, anterior contacts
may have the potential for excessive wear or chipping.
17
Page 18

PosterIor tooth setuP
Typ
Classic occlusion
The SR Phonares II Typ teeth continue the 40-year-old
success story of the Orthotyp moulds.
The Ivoclar Vivadent "Typ" tooth lines are based on
the principle of group function of the latero- and
mediotrusion side according to Dr Strack.
1:2
The Typ moulds are set up in a one-to-two-tooth relation as in a normal bite situation. Consequently, the
primary contacts in the centric position are located in
the central fossae of the mandible and on the marginal
ridges.
The Typ moulds are supported by a secondary contact
area on the buccal cusps in the mandible.
The SR Phonares II Typ moulds are suitable for universal
application in dental prosthetics.
18
Page 19

PosterIor tooth setuP
Typ
Setup with a template
Align the template with the height of the distal third of the retromolar pad in the posterior region
and the height of the distal angle of the mandibular canines in the anterior region.
The template ensures that the anterior-posterior (curve
of Spee) and medio-lateral compensating curve (curve
of Wilson) are taken into account. The compensating
curves of the natural dentition are essential for bilateral
balanced group guidance.
When viewed from an occlusal perspective, the central
fossae of the mandibular posterior teeth are positioned
over the crest of the alveolar ridge. The lingual border
of the posterior setup is defined by Pound's line.
Pound's line extends from the mesial corner of the
mandibular canine to the lingual border of the
trigonum on the same side.
The markings on the template assist in achieving a
symmetrical setup. Begin the setup of the mandibular
teeth by positioning the first premolars, followed by
the second premolars, first molars and then second
molars.
Note that both the buccal cusp tips and mesio-lingual
cusps make contact to the template.
The vertical axes of the first and second molars are automatically aligned in the process. Viewed from the buccal
side, the axes of the first and second premolars should be
aligned perpendicular to the template.
19
Page 20

Posterior tooth setuP
Typ
Intercuspation
The maxillary teeth can now be aligned with the
mandibular teeth in a one-tooth-to-two-tooth relationship to achieve optimum intercuspation.
• The palatal working cusp of the maxillary premolars
engages the marginal ridges of the mandibular
premolars.
• The alignment of the 1st premolar establishes the
buccal corridor.
• The mesio-palatal working cusp engages the central
fossa of the mandibular 1st molar.
• The distal-palatal working cusp engages the marginal
ridge of its antagonist.
• Viewed from the buccal, the mesio-buccal cusp of the
maxillary 1st molar points towards the mesio-buccal
fissure of its antagonist. This is a typical characteristic
of a classic bite with normal intercuspation.
• The palatal working cusp of the maxillary premolars
engages the marginal ridges of the antagonists.
Maxillary 1st premolar:
Maxillary 1st molar:
Maxillary 2nd premolar:
• The mesio-palatal working cusp engages the central
fossa of the mandibular 2
nd
molar.
Maxillary 2nd molar:
20
Page 21

Typ
Grinding guidelines
Verifying centric contacts:
1
In complete denture prosthetics, it is generally not
recommended to perform major occlusal adjustments
prior to processing the denture base.
Correct increases in vertical dimension prior to
removing the polymerized dentures from the model.
Make sure the centric lock is engaged.
Occlusal adjustments should be performed using the
following guidelines:
• Do not adjust the working cusps.
• Reduce premature contacts in the antagonist fossa.
After adjusting the occlusal height, re-establish all the
centric contacts as determined by the setup.
POSTERIOR TOOTH SETUP
Areas of adjustment to establish centric contacts:
apply contacts
by grinding
do not grind
Adjusting functional movement:
2
Relatively large guiding contacts are desirable to ensure
a balanced occlusion within the functional range.
The following adjustment guidelines are recommended:
• Centric contacts: do not adjust
• Working side (laterotrusion): adjust mesio-buccal
cusps in the maxilla and lingual cusps in the mandible
• Non-working side (mediotrusion): adjust mesio-
buccal cusps in the mandible
• Protrusion: adjust disto-buccal cusps in the maxilla
and mesio-buccal cusps in the mandible
• Retrusion: adjust mesio-buccal cusps in the maxilla
and disto-buccal cusps in the mandible
The incisal edges of anterior teeth should be ground
from the palatal side in the maxilla and from the labial
side in the mandible, in accordance with the wear pattern
occurring in the natural dentition.
Non-working side Working side
21
Page 22

POSTERIOR TOOTH SETUP
Lingual
Lingualized occlusion
The basic characteristics of lingualized occlusion have
been incorporated into the design of the SR Phonares II
Lingual moulds.
The maxillary palatal cusps provide centric contacts
which articulate to the respective mandibular fossae.
The buccal cusps are not set in contact.
An additional buccal contact may be established on the
first premolars for esthetic reasons.
1:1
The marginal ridges of the
Lingual moulds have been
given reduced contours so
that the maxillary palatal
cusps remain free during
protrusive or retrusive
movements.
optional
Depending on the occlusal position and the setup
of the anterior arch, it is
possible to establish a
one-to-two intercuspation.
1:2
22
Page 23

POSTERIOR TOOTH SETUP
Lingual
Setup with a template
In the mandible, the teeth can be set up in either one of two versions: setup with or setup without curve of Wilson. Since all working contacts are lingualized and the buccal surfaces do not
occlude, there is some scope for variation in the degree of the curve of Wilson.
Align the template with the height of the distal third of the retromolar pad in the posterior region
and the height of the distal angle of the mandibular canines in the anterior region.
Setup method WITHOUT curve of Wilson
The buccal cusps do not touch the template in this
setup method. Make sure that the buccal and lingual
cusp tips are on the same plane.
The fissure centre of the mandibular posterior teeth is
aligned with the alveolar ridge. The mandibular
posteriors must not extend beyond Pound's line towards
the lingual.
The contacts to the template are concentrated on the
lingual cusp tips to achieve a setup that has only a
sagittal compensating curve. Viewed from the buccal,
the axis of the posterior teeth should be aligned
perpendicular to the template.
To achieve a horizontal alignment of the cusp tips on
the first premolar, the buccal cusp may be brought into
contact with the template.
optional
Setup method WITH curve of Wilson
If the curve of Wilson is taken into account in the setup of the Lingual moulds, contacts between the
template and the buccal and lingual cusps are required.
23
Page 24

POSTERIOR TOOTH SETUP
Lingual
Intercuspation
The maxillary teeth can now be aligned with the
mandibular teeth in a one-tooth-to-one-tooth relationship to achieve optimum intercuspation.
As an option, it is possible to establish a contact
relation between the mandibular buccal cusp and the
central fossa of the maxillary premolar to achieve an
esthetic transition from the canines to the premolars
and to establish a buccal corridor.
• After the mandibular teeth have been set up in
compliance with the findings of the model analysis,
the mandibular 1st molar is usually positioned at the
lowest point of the alveolar ridge. The lingual cusps
of the maxillary molar form the static chewing centre.
• The palatal cusp of the maxillary premolar engages
the fossa of the mandibular premolar.
Maxillary 1st premolar:
Maxillary 1st molar:
Maxillary 2nd premolar:
• The distance between the buccal cusps increases
along the dental arch due to the Monson curve.
24
Maxillary 2nd molar:
Page 25

Lingual
Grinding guidelines
Verifying centric contacts:
1
In complete denture prosthetics, it is generally not
recommended to perform major occlusal adjustments
prior to processing the denture base.
Correct increases in vertical dimension prior to
removing the polymerized dentures from the model.
Make sure the centric lock is engaged.
Occlusal adjustments should be performed using the
following guidelines:
• Do not adjust the working cusps.
• Reduce premature contacts in the antagonist fossa.
POSTERIOR TOOTH SETUP
After adjusting the occlusal height, re-establish all the
centric contacts as determined by the setup.
Adjusting functional movement:
2
Guiding contacts are desirable to ensure a lingualized
occlusion within the functional range.
The following adjustment guidelines are recommended:
• Centric contacts: do not adjust
• Working side (laterotrusion): adjust buccal facing
inclines of lingual cusps
• Non-working side (mediotrusion): adjust lingual
facing inclines of buccal cusps
Non-working side Working side
25
Page 26

COMPLETION
Minimum layer thickness
It may be necessary to reduce denture tooth material to accommodate different model settings or
to adjust SR Phonares for telescopic/combination work. The structural integrity and shade effect of
the tooth must be preserved.
It is suggested that a minimum thickness be maintained.
2.5 mm
1.5 mm
Anterior teeth:
• grinding of tooth material for retentions or for
placing structural elements: minimum of 1.5 mm
2.0 mm
1.5 mm
Posterior teeth:
• in the central fossa: minimum 2.0 mm
• in the cusp: minimum 2.5 mm
• in the cervical area: minimum 1.5 mm
Facial incisal Nano-Hybrid Composite
Dentin core Nano-Hybrid Composite
Neck PMMA
Back incisal PMMA
26
Page 27

Bonding between tooth and denture base
COMPLETION
SR Phonares II
Denture
base
IvoBase
IvoBase® High Impact
SR Ivocap®
High Impact
ProBase® Hot
ProBase® Cold
®
Hybrid
Bonding between tooth and C&B veneering materials
SR Phonares II
C&B
materials
NHC
(Incisal and dentin core)
OR
OR
OR
OR
NHC
(Incisal and dentin core)
PMMA
(Back incisal and neck)
Bond Conditioning
++
++
++
++ ++
OR
OR
OR
OR
PMMA
(Back incisal and neck)
Bond Conditioning
Bond Conditioning
+++
+++
+++
Bond Conditioning
SR Nexco
Telio® Lab
SR Ivocron
+++
++
++
®
Cold
OR
OR
OR
OR OR
Applying
retentions by
grinding
+++
++
++
Wetting
OR
OR
OR
ConditioningCleaning Roughening
++ good +++ very good
Metal bonding
1. Condition the metal surface with SR Link
Roughen the metal surface by sandblasting it with Al2O3 (100 µm, max. 2 bar/29 psi). Apply SR Link onto the
cleaned surface using a brush and allow to react on the metal surface for 3 minutes.
2. Opaque the metal surface
Both tooth- and gingiva-coloured opaquer pastes from the SR Nexco range of materials are available to
opaque the metal surface. Apply the opaquer with a brush and then light-cure according to the Instructions
for Use. To avoid the formation of smears, remove the inhibition layer of the opaquer with monomer. As an
alternative, the powder-based opaquer (Intensive Opaquer) of the SR Chromasit® range of materials may be
used.
Please refer to the Instructions for Use of the respective material for more detailed information.
27
Page 28

COMPLETION
Surface conditioning
Appropriate treatment of the substrate surface is essential to ensure an effective and durable bond. Select the
individual working steps according to the materials in need of bonding.
1. CLEANING
2. ROUGHENING
OR
3. APPLYING RETENTIONS BY GRINDING
Note:
• This step is only
necessary if the teeth
are bonded to coldcuring materials.
4. WETTING
MONOMER
5. CONDITIONING
Note:
• This step is only
necessary when
OR
28
bonding to composite
materials.
Page 29

COMPLETION
Ensure that surfaces are free of dust, moisture and grease
before conditioning them. For this purpose, each individual
tooth should be cleaned with a steam cleaner and residual
Roughen the bonding surfaces either with a cross-cut
tungsten carbide bur or by abrasive blasting with Al
2O3
(grit
size: 50–100 µm) at a pressure of 1–2 bar (15–29 psi). The
tooth necks should also be carefully roughened. Use
compressed air to remove residual abrasive dust.
If the SR Phonares teeth are bonded to an auto-curing
denture base material, it is necessary to apply mechanical
retentions by grinding. The retentions are best performed
wax should be removed. When applying compressed air,
make sure that the system is free of oil.
Note:
• The difference between PMMA and NHC material can be
easily recognized during grinding: PMMA is softer and
produces shavings, while NHC is harder and produces
grinding dust. *
PMMA
with a round spherical bur to avoid sharp edges. Undercuts
can be created by swivelling the bur head.
Avoid excessive heat build-up when grinding.
NHC
After cleaning and roughening, wet the bonding surfaces
with monomer to allow the resin to expand and consequently
to strengthen the chemical bond. Use a brush to apply the
Note:
• After wetting with monomer, the teeth may no longer be
steam-cleaned.
monomer selectively. Next, allow the monomer-wetted areas
to react for approx. 3 minutes. Avoid contamination after the
reaction time has elapsed.
A bonding agent is required for bonding the teeth to veneering
composites. Two bonding agents are suitable for this purpose:
1. Apply SR Connect onto the "bonding site" in a thin layer
and allow to react for 3 minutes. Then pre-polymerize in a
light polymerization unit according to the Instructions for
Use of SR Nexco.
2. Apply SR Composiv directly from the syringe onto the
"bonding site" and distribute to an even layer using a
thickness of at least 0.2 mm and no thicker than 0.5 mm.
The working time is approx. 3 minutes. Then, polymerize
the material in an Ivoclar Vivadent light-curing unit:
– Quick (60 s)
– Lumamat 100 (11 min)
– Spectramat (4 min)
Please refer to the Instructions for Use of the respective
material/device for more detailed information.
spatula or disposable brush. Apply the material in a layer
* Avoid breathing in grinding dust – use dust evacuation equipment and breathing protection.
29
Page 30

COMPLETION
Completion
Accuracy of fit is decisive for achieving high-quality dentures. We recommend using the innovative
IvoBase® injection system. This system ensures that the chemical shrinkage of the resin is compensated by the flow of additional material in a fully automated injection moulding process.
The high-quality auto-curing polymer material is characterized by excellent accuracy of fit and very
low residual monomer content. IvoBase is ideally combined with the SR Phonares teeth to create
high-quality dentures.
Important notes
• It is important to cover the teeth in a thin layer of A-silicone when they are invested in the flask
to protect them from damage.
• Do not divest the dentures with a hammer; the impact of the hammer may damage the teeth.
• Thermoplastic injection moulding processes (e.g. Polyapress, Valplast) use temperatures of
> 200 °C (392 °F). These temperatures may cause damage to the tooth material. Combining
these materials is not recommended. SR Phonares teeth are durable up to 150 °C (302 °F) and
dimensionally stable up to 110 °C (230 °F).
Implant shades for implant prosthetics
Ivoclar Vivadent has developed a special range of shades for implant-retained restorations: the
Implant Shades. These shades feature an increased degree of opacity and therefore offer excellent
masking capabilities and a convenient shade effect, even if applied in only thin layers.
30
Page 31

COMPLETION
Finishing / Polishing
The following guidelines should be observed when processing the SR Phonares teeth:
PROCESSING IN THE LABORATORY
• After modifying the denture tooth with PMMA or composite, remove polymerized excess
material with a finishing diamond (grit size < 25 microns) and/or an elastic disc.
• After functional adjustments: Use cross-cut burs to remove material, do not use diamond discs
or abrasive stones.
• Pre-polishing: Polish ground surfaces with silicone polishers that are suitable for composite or
ceramic materials.
High-gloss polishing: Use composite polishing material (e.g. Ivoclar Vivadent Universal
Polishing Paste) and a goat's hair brush for final polishing.
• Using glaze varnish or denture cleaning spray is not recommended.
• Do not expose the teeth to a flame or direct heat.
• Do not press too hard against tooth surfaces to avoid heat build-up when processing the
teeth.
• We recommend using mouth protection and, if possible, suction equipment to avoid breathing
in grinding dust.
Processing in the dental practice
• Processed tooth surfaces should demonstrate a polished surface finish before placement. Use
silicone polishers (e.g. Astropol®, Astrobrush) for final polishing.
Denture care instructions for patients
• Thoroughly clean the dentures with a denture brush, soap/toothpaste/nonabrasive denture cleaning paste and warm water twice daily, every morning and
every evening.
• Soaking the dentures in cleaning solution is not sufficient to remove bacteria.
• It is advisable to use an ultrasonic denture cleaner to clean your dentures.
• After each meal, rinse your dentures and your mouth, with the dentures removed,
with water.
• Do not soak or clean the dentures in pure alcohol (or solvent). Alcohol or solvent
may attack the denture base or tooth material and cause white staining.
• Do not use washing-up or dishwashing liquid to clean the dentures.
• Never clean your dentures in hot boiling water or in a dishwasher and never boil
your dentures.
• Have your dentures professionally cleaned by your dentist if hard deposits have
built up on them.
31
Page 32

IMPLANT PROSTHETICS
The SR Phonares teeth have been designed for implant prosthetics. This
means that the specific requirements of removable implant- supported
dentures have been incorporated into the design of the tooth moulds
and materials.
The sequence of steps to create a removable implant-retained
restoration follows the conventional rules of complete denture
prosthetics. However, there is a difference: Implant-supported
dentures have to withstand significantly higher forces that are exerted
on complex constructions involving several components. The teeth
and occlusal scheme are the components that transmit the chewing
forces. As in complete denture prosthetics, it is suggested that an
occlusal scheme that involves simultaneous working and non-working
contacts (group contacts) and eliminates anterior contacts during
excursive movements be applied.
The type of anchorage, i.e. the location of the superstructure,
presents another key element in the distribution of forces because
this plays a central role in the control of the chewing forces.
Basically, implant-retained restorations can be classified by the type of
anchorage into two categories: implant/tissue-supported dentures
and purely implant-supported dentures. Purely implant-supported
bridge constructions are exposed to essentially elevated chewing
forces because the patient cannot properly monitor these forces. This
fact should be considered and particular care should be applied in the
design of the tooth replacement.
32
Page 33

Removable implant prosthetics workflow
IMPLANT PROSTHETICS
Dental practice
Implantation
Preliminary impression-taking
Implant impression-taking
Registration
Dental laboratory
Planning
Customized
impression tray
Master model
Wax set-up and
framework fabrication
Try-in
Placement
Recall
Completion
33
Page 34

IMPLANT PROSTHETICS
Implant prosthetics defines new requirements
for the materials and techniques used in dental
technology.
The periodontium is able to absorb some of the forces
to which restorations on natural abutments are
exposed.
In implant-supported dentures, however, these forces
are not cushioned by the periodontal ligament. The
proprioceptive feedback is reduced and edentulous
patients with implant-supported restorations are
capable of exerting significantly higher chewing forces
than patients with natural abutments.
Cross-section:
Removable restoration on
mandibular implant with tertiary
construction
Force vector
Dental prostheses are constantly exposed to shear,
compressive and tensile forces. Compressive forces,
however, affect the implant interface substantially less
than the torque resulting from tensile or shear forces.
The SR Phonares II Lingual moulds are particularly
suitable for implant-supported prosthetics:
• As most occlusal contact is centralized, denture
stability is enhanced.
• The masticatory forces can be directed to the implant
by a force vector in the longitudinal axis. This results
in a reduction of the shear and tensile forces.
• The occlusal design of the mandibular Lingual mould
is characterized by a widened occlusal table, reduced
marginal ridges and freeway space in the centric
position. As a result, high lateral forces are avoided.
• The specially developed Nano Hybrid Composite
offers excellent wear resistance.
Lingualized
contact
Rationale for choices of occlusal schemes for complete dentures supported by
Implants, Nikolopoulou, Ktene-Aqapitou, Journal of Oral Implantology,
Vol. XXXII/ No. Four/2006
34
Page 35

Implant prosthetics requires the coordination of
different types of materials.
The SR Phonares II is composed of NHC and PMMA
material.
The graph below shows the wide range of materials
involved in implant-supported removable restorations.
It is essential that the materials are compatible with
each other to ensure that the restoration offers
optimum stability and longevity.
Superstructure
Nano-Hybrid Composite
(SR Phonares II)
IMPLANT PROSTHETICS
FACTS
• In the natural dentition,
the Sharpey's fibres are responsible for
anchoring the teeth to the alveolar
bone. The gap created by the periodontal ligament is approx. 0.15 to 0.2
mm in width. Natural teeth are 10 to
100 times more flexible than osseointegrated implants.1
• The threshold of tactile perception is
10 times higher for implants than for
natural teeth.
1)
Spiekermann (1993)
2)
Keller D, Hämmerle CH, Lang NP., Thresholds
for tactile sensitivity perceived with dental
implants remain unchanged during a healing
phase of 3 months., Clin Oral Implants Res. 1996
Mar;7(1):48-54.
2
Superstructure
Nano-Hybrid Composite
(SR Phonares II)
Lab composite material
Composite
(e.g. SR Nexco)
Bonding agent
Composite
(e.g. SR Connector)
Opaquer
Composite
(e.g. SR Nexco)
Metal bonding agent
(e.g. SR Link)
Superstructure
Polymethyl methacrylate
(e.g. SR Phonares II)
Superstructure
Polymethyl methacrylate
(SR Phonares II)
Tertiary framework
Cobalt-chromium alloy
(e.g. Colado
Bonding agent
Luting composite
(e.g. Monobond® Plus/
Multilink® Implant)
Secondary element
Gold (electroplating technique)
Denture base
Polymethyl methacrylate
(e.g. IvoBase)
®
CC)
Mesostructure (2° milled)
Precious metal alloy
(e.g. Academy Gold XH)
Schematic diagram: implant-supported removable restoration with tertiary construction
35
Page 36

IMPLANT PROSTHETICS
A systematic approach to removable implant prosthetics encompasses the entire workflow – from planning to follow-up care. Such a system should be especially designed
to meet the specific requirements of implant prosthetics and coordinate the procedures in the dental practice and laboratory. The following recommendations in particular
should be observed along the prosthetics workflow to ensure that the result ing restorations are capable of withstanding the increased mechanical forces impacting on them.
• Use an X-ray template with functionally
set up denture teeth (SR Vivo TAC /
SR Ortho TAC teeth) for determining
the correct position of the implants.
• Aim for as much soft-tissue support of
the prosthesis as possible.
• Align the implant axis to the centric
contacts of the teeth.
• Gather as much patient-specific
information as possible (facebow,
centric registration).
implanTaTion planning
• During implant insertion, carefully consider the location, position and number
of implants to achieve a functional
result.
• In particular, observe the instructions of
the implant/prosthetics manufacturer.
Temporary
resToraTion
• Check the passive fit of the framework
on the model.
• Join the tertiary structure with the
mesostructure in vivo.
"The following factors are critical for
the success of implant-supported BPS
dentures:
individualized registration according to
BPS, titanium-based superstructure and
close cooperation between dentist and
technician."
Dr Giovanni Molina, Dentist, Mexico
36
Page 37

IMPLANT PROSTHETICS
permanenT
resToraTion
• Use a retention pin to support
SR Phonares II on the framework.
• Select a framework alloy with a high
modulus of elasticity (e.g. Callisto
Implant 60)
• Use a high-impact denture base
material.
• Avoid single contact points or anterior
contacts during function.
• Observe a minimum thickness of 2 mm
for the denture base.
• Avoid large occlusal screw channel
openings to prevent loss of tooth
material.
placemenT
• Check for balanced occlusion in vivo
and, if necessary, adjust and polish
according to the guidelines.
recall
• Reline the dentures to ensure a healthy
soft tissue support.
• Plan recall appointments at short
intervals to check the functionality
of the dentures and to clean them
professionally.
37
Page 38

GENERAL INFORMATION
Additional information
SR Phonares II is part of BPS, the stateof-the-art brand prosthetic system,
which offers customized lab marketing
and professional support by specialized
BPS consultants.
The International Center for Dental
Education (ICDE) offers continuing
education courses on SR Phonares II.
Further information on BPS and
SR Phonares II can be obtained from
Ivoclar Vivadent or from the company's
website at:
www.ivoclarvivadent.com
Literature reference
• Handbook of Complete
Denture Prosthetics,
Ivoclar Vivadent, 1994
• BPS-Totalprothetik, Kurt Fiedler,
Verlag Neuer Merkur GmbH, 2003
• Mavroskoufis, F.; Ritchie, GM.:
The face-form as a guide for the
selection of maxillary central incisors.
J Prosthet Dent. 1980 May;
43(5):501-5
• Mavroskoufis, F.; Ritchie, GM.:
Nasal width and incisive papilla
as guides for the selection and
arrangement of maxillary anterior
teeth.
J Prosthet Dent. 1981 Jun;45(6).592-7
Safety information
• These materials have been developed solely for use
in dentistry. Processing should be carried out strictly
according to the Instructions for Use. Liability cannot
be accepted for damages resulting from failure to
observe the Instructions or the stipulated area of use.
The user is responsible for testing the materials for
their suitability and use for any purpose not
explicitly stated in the Instructions.
• Do not use if the patient is known to be allergic to
any component of the product.
• Store out of the reach of children.
38
Page 39

Delivery forms
®
SR Phonares
18 upper anterior moulds
6 lower anterior moulds
Shade selection
16 A–D shades
4 Bleach shades
II
SR Phonares® II Typ
3 maxillary sets
3 mandibular sets
GENERAL INFORMATION
SR Phonares® II Lingual
3 maxillary sets
3 mandibular sets
Physical values
Test method Example value Example value Example value
Incisal Dentin Neck and
back incisal
Flexural strength ISO 10477 MPa > 100 > 120 > 120
Modulus of elasticity ISO 10477 MPa > 3800 > 4200 > 3000
Ball indentation hardness ISO 2039-1 MPa > 200 > 200 > 170
Water absorption ISO 10477 µg/mm
Water solubility ISO 10477 µg/mm
Vickers hardness HV 0.5/30 Internal directive MPa > 240 > 240 > 190
3
< 36 < 34 < 26
3
< 0.8 < 0.1 < 0.1
39
Page 40

Ivoclar Vivadent – worldwide
Ivoclar Vivadent AG
Bendererstrasse 2
FL-9494 Schaan
Liechtenstein
Tel. +423 235 35 35
Fax +423 235 33 60
www.ivoclarvivadent.com
Ivoclar Vivadent Pty. Ltd.
1 – 5 Overseas Drive
P.O. Box 367
Noble Park, Vic. 3174
Australia
Tel. +61 3 979 595 99
Fax +61 3 979 596 45
www.ivoclarvivadent.com.au
Ivoclar Vivadent Ltda.
Alameda Caiapós, 723
Centro Empresarial Tamboré
CEP 06460-110 Barueri – SP
Brazil
Tel. +55 11 2424 7400
Fax +55 11 3466 0840
www.ivoclarvivadent.com.br
Ivoclar Vivadent Inc.
2785 Skymark Avenue, Unit 1
Mississauga
Ontario L4W 4Y3
Canada
Tel. +1 905 238 5700
Fax +1 905 238 5711
www.ivoclarvivadent.com
Ivoclar Vivadent Marketing Ltd.
Rm 603 Kuen Yang
International Business Plaza
No. 798 Zhao Jia Bang Road
Shanghai 200030
China
Tel. +86 21 5456 0776
Fax +86 21 6445 1561
www.ivoclarvivadent.com
Ivoclar Vivadent Marketing Ltd.
Calle 134 No. 7-B-83, Of. 520
Bogotá
Colombia
Tel. +57 1 627 33 99
Fax +57 1 633 16 63
www.ivoclarvivadent.co
Ivoclar Vivadent SAS
B.P. 118
F-74410 Saint-Jorioz
France
Tel. +33 450 88 64 00
Fax +33 450 68 91 52
www.ivoclarvivadent.fr
Ivoclar Vivadent GmbH
Dr. Adolf-Schneider-Str. 2
D-73479 Ellwangen, Jagst
Germany
Tel. +49 (0) 79 61 / 8 89-0
Fax +49 (0) 79 61 / 63 26
www.ivoclarvivadent.de
Ivoclar Vivadent Marketing (India)
Pvt. Ltd.
503/504 Raheja Plaza
15 B Shah Industrial Estate
Veera Desai Road, Andheri (West)
Mumbai, 400 053
India
Tel. +91 (22) 2673 0302
Fax +91 (22) 2673 0301
www.ivoclar-vivadent.in
Ivoclar Vivadent s.r.l.
Via Isonzo 67/69
40033 Casalecchio di Reno (BO)
Italy
Tel. +39 051 611 35 55
Fax +39 051 611 35 65
www.ivoclarvivadent.it
Ivoclar Vivadent K.K.
1-28-24-4F Hongo
Bunkyo-ku
Tokyo 113-0033
Japan
Tel. +81 3 6903 3535
Fax +81 3 5844 3657
www.ivoclarvivadent.jp
Ivoclar Vivadent Ltd.
12F W-Tower, 1303-37
Seocho-dong, Seocho-gu,
Seoul 137-855
Republic of Korea
Tel. +82 (2) 536 0714
Fax +82 (2) 596 0155
www.ivoclarvivadent.co.kr
Ivoclar Vivadent S.A. de C.V.
Av. Insurgentes Sur No. 863,
Piso 14, Col. Napoles
03810 México, D.F.
México
Tel. +52 (55) 50 62 10 00
Fax +52 (55) 50 62 10 29
www.ivoclarvivadent.com.mx
Ivoclar Vivadent Ltd.
12 Omega St, Albany
PO Box 5243 Wellesley St
Auckland, New Zealand
Tel. +64 9 914 9999
Fax +64 9 814 9990
www.ivoclarvivadent.co.nz
Ivoclar Vivadent Polska Sp. z o.o.
Al. Jana Pawla II 78
00-175 Warszawa
Poland
Tel. +48 22 635 54 96
Fax +48 22 635 54 69
www.ivoclarvivadent.pl
Ivoclar Vivadent Marketing Ltd.
Derbenevskaja Nabereshnaya 11, Geb. W
115114 Moscow
Russia
Tel. +7 495 913 66 19
Fax +7 495 913 66 15
www.ivoclarvivadent.ru
Ivoclar Vivadent Marketing Ltd.
Qlaya Main St.
Siricon Building No.14, 2
nd
Floor
Office No. 204
P.O. Box 300146
Riyadh 11372
Saudi Arabia
Tel. +966 1 293 83 45
Fax +966 1 293 83 44
www.ivoclarvivadent.com
Ivoclar Vivadent Pte. Ltd.
171 Chin Swee Road
#02-01 San Centre
Singapore 169877
Tel. +65 6535 6775
Fax +65 6535 4991
www.ivoclarvivadent.com
Ivoclar Vivadent S.L.U.
c/ Emilio Muñoz Nº 15
Entrada c/ Albarracin
E-28037 Madrid
Spain
Tel. + 34 91 375 78 20
Fax + 34 91 375 78 38
www.ivoclarvivadent.es
Ivoclar Vivadent AB
Dalvägen 14
S-169 56 Solna
Sweden
Tel. +46 (0) 8 514 93 930
Fax +46 (0) 8 514 93 940
www.ivoclarvivadent.se
Ivoclar Vivadent Liaison Office
: Tesvikiye Mahallesi
Sakayik Sokak
Nisantas’ Plaza No:38/2
Kat:5 Daire:24
34021 Sisli – Istanbul
Turkey
Tel. +90 212 343 08 02
Fax +90 212 343 08 42
www.ivoclarvivadent.com
Ivoclar Vivadent Limited
Ground Floor Compass Building
Feldspar Close
Warrens Business Park
Enderby
Leicester LE19 4SE
United Kingdom
Tel. +44 116 284 78 80
Fax +44 116 284 78 81
www.ivoclarvivadent.co.uk
Ivoclar Vivadent, Inc.
175 Pineview Drive
Amherst, N.Y. 14228
USA
Tel. +1 800 533 6825
Fax +1 716 691 2285
www.ivoclarvivadent.us
This prodct forms part of our Implant Esthetics
competence area. All the products from
this area are optimally coordinated with
each other.
EN ISO 22112
Date data prepared: 03/2012 REV.0
These materials have been developed solely for use in dentistry. Processing should be carried out strictly
accord ing to the Instructions for Use. Liability cannot be accepted for damages resulting from failure to
observe the Instructions or the stipulated area of use. The user is responsible for testing the materials for their
suitability and use for any purpose not explicitly stated in the Instructions. These regulations also apply if the
materials are mixed or used in conjunction with products of other manufacturers.
© Ivoclar Vivadent AG, Schaan / Liechtenstein
644197/12-04-2012/e
 Loading...