

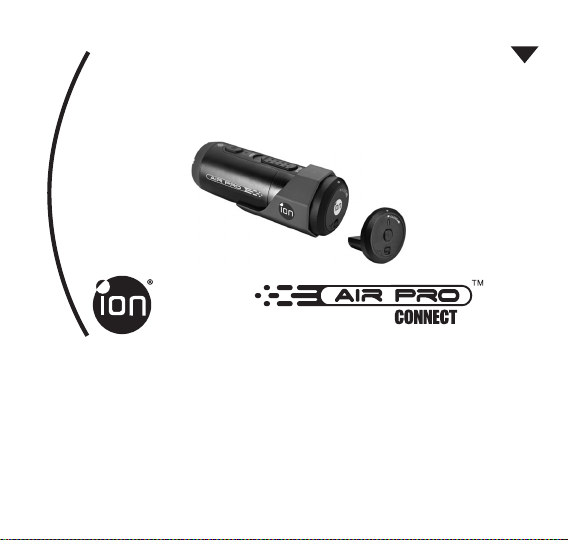
Page 1
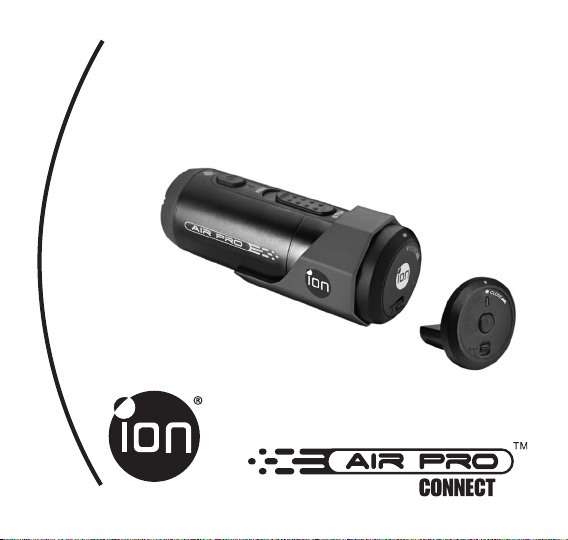
WiFi PODZ & Battery Booster Kit
Quick Start Guide
Page 2
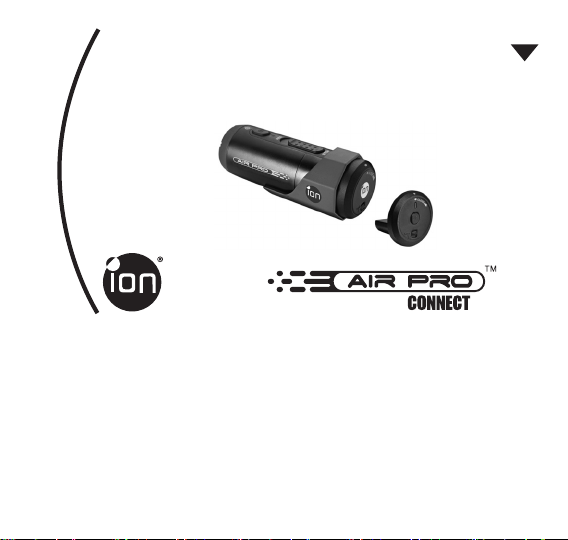
WiFi PODZ & Battery Booster Kit
Quick Start Guide
1. Getting to know your WiFi PODZ and
BatterBooster
ion WiFi PODZ provides the wireless capability to your ion cameras.
As long as you attach the PODZ to the camera and turn it on, your can access and
transfer your camera les through your PC, mobile phone or tablet.
WiFi PODZ also turns your mobile device to be a wireless viewnder and you can preview
the camera view from your mobile device.
The battery booster works as an external battery which allows you to recharge your
camera from empty to full at about 1.5 hrs
EN
Page 3
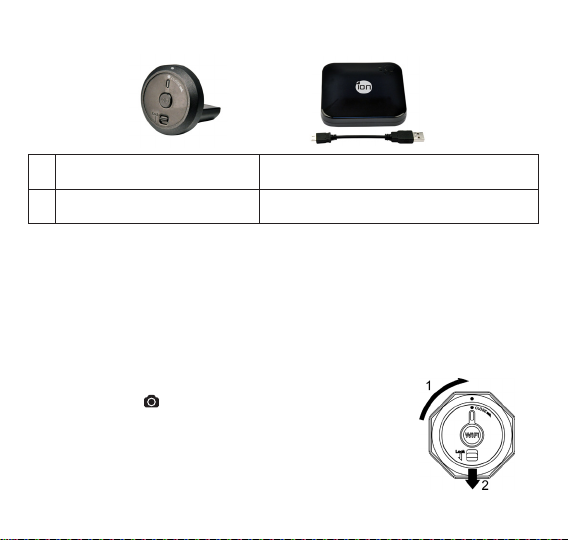
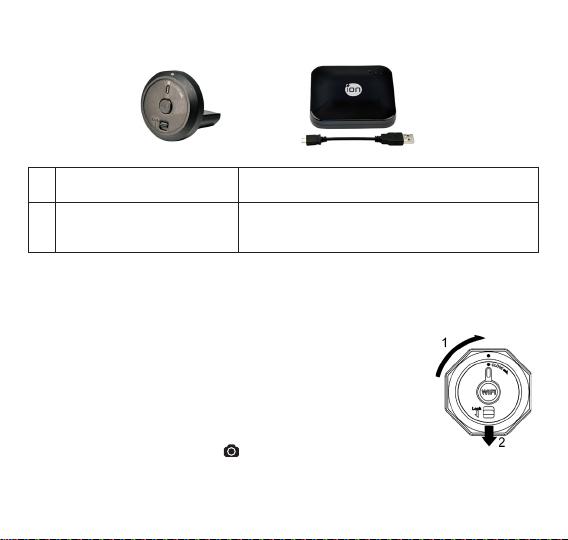
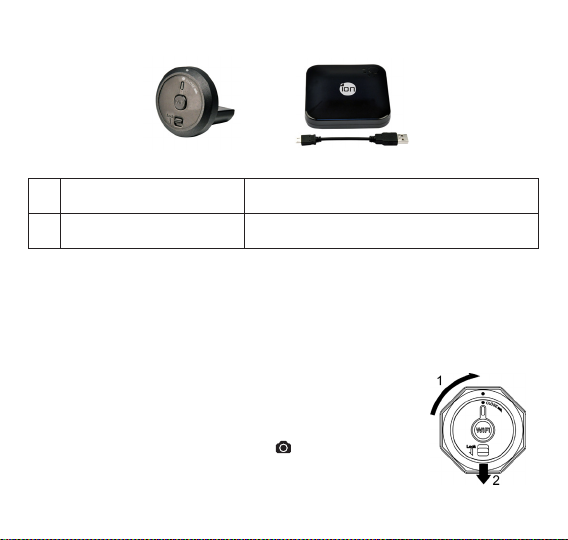
2. Getting to Know Your Package
1 WiFi PODZ
2 Battery Booster and Cable
3. Getting Started
Please connect your Air Pro with PC or Mac to update rmware in order to
activate the WiFi function. For details of rmware update, please refer to
section 3.1 of your camera quick start guide
3.1 Install your WiFi PODZ
1. Remove the PODZ and put your WiFi PODZ to the camera PODZ socket
2. Seal the camera by rotating the back cover clockwise until two dots are aligned.
Slide the latch to lock the PODZ
3. Press and hold
4. Press the WiFi power button on the WiFi PODZ to turn on
your WiFi. The blue LED lights up to indicate the WiFi is
warming up. It will take around 15-20 seconds for the WiFi
to warm up and become connectable. The LED will ash
button to turn on your camera
Provide the wireless capability to your ion
cameras
Allow to fully charge your camera from
empty via the USB cable during your travel
TM
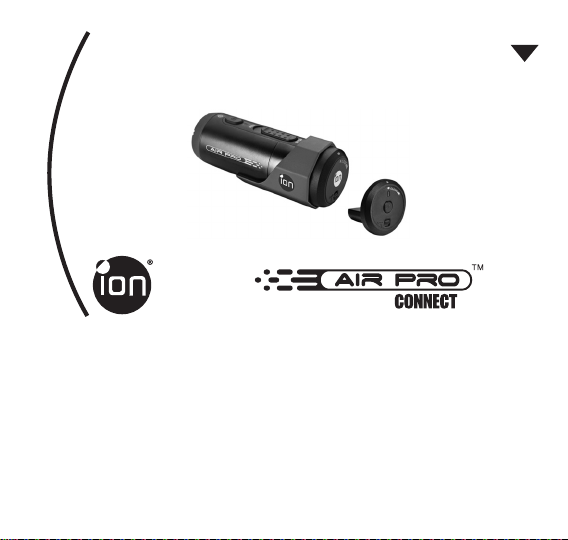
Page 4

when the Wi-Fi function is active or connected.
5. Press the WiFi power button to turn off the WiFi anytime.
Note:
1. WiFi will drain your camera battery more rapidly when activated. Turn the WiFi
off if you are not using it to change settings or upload content.
2. Failure to properly seal your camera can result in leaks that damage or destroy
your camera. Your warranty does not cover water damage resulting from user
damage.
3. The rubber seal on the PODZ forms the waterproof barrier to protect the
camera in wet and underwater conditions. You must keep this seal clean as a
single strain of hair or grain of sand can cause a leak into the product.
4. After every use in salt water, you will need to rinse the outside of the product
and the seal with non-salt water and dry. Not doing this can cause corrosion in
the product or failure in the seal, in turn, damaging the product.
3.2 Connect The Camera to Your Computer
1. Turn on your WiFi PODZ.
2. Go to network setting of your PC and choose WiFi setting. Search the network,
nd and click “WIFIPODZ”
3. Enter password “123456789” and you can connect to your camera.
4. Open your Internet browser and input “192.168.1.2” or “wi.podz”. You can
view the les stored in your camera
3.3 Connect The Camera to Your Smart Device (Browser)
1. Turn on your WiFi PODZ.
2. Go to network setting of your mobile device and choose WiFi setting. Search
the network, nd and click “WIFIPODZ”
3. Enter password “123456789” and you can connect to your camera.
Page 5

4. Open your Internet browser and input “192.168.1.2” or “wi.podz”. You can
view the photos and videos stored in your camera.
3.4 Connect The Camera to Your Smart Device (App)
1. Search iontheaction app at the App store.
2. Download and install the app to your smart device
3. Turn on your WiFi PODZ.
4. Go to network setting of your PC and choose WiFi setting. Search the network,
nd and click “WIFIPODZ”
5. Enter password “123456789” and you can connect to your camera.
6. Open your app.
7. You can refer to app page for the detailed operation description.
Notes: As long as your camera starts video recording, the live streaming and le
play back and transfer function will be temporarily disabled. You can resume the
functions when your camera in standby status.
3.5 Charge your camera by the battery booster
1. Charge up the battery booster by the USB cable or adapter (not included). You
can press the button at the battery booster to show you the power status
2. Remove the PODZ from your camera
3. Connect the battery booster to your camera thru the USB cable and it will start
charging up your camera automatically.
4. It takes around 1.5 hrs to fully charge up your camera from empty.
4. Trademark Information
© 2012 World Wide Licenses Limited.
® The ion logo is a registered trademark of World Wide Licenses Limited.
CamLOCK, PODZ, Shoot/Share and AIR PRO CONNECT and their respective logos are
trademarks or registered trademarks of World Wide Licenses Limited in the United States and
other countries. Copyright © 2012. All Rights Reserved.
Page 6

IMPORTANT
• Keep the lens clean. Dirt and ngerprints will affect the quality of the picture.
• Close the PODZ properly for best water sealing. Do not open it under water.
• Rinse the camera with clean water after used and keep it dry for storage.
• You can refer to the detail operation instruction at the user manual
WARNING: THE TRADEMARK INFORMATION
© 2012 World Wide Licenses Limited.
® The ion logo is a registered trademark of World Wide Licenses Limited.
• CamLOCK, PODZ, Shoot/Share and AIR PRO and their respective logos are
trademarks or registered trademarks of World Wide Licenses Limited in the United
States and other countries. Copyright © 2012. All Rights Reserved.
Page 7

FCC ID: NW71006
IMPORTANT REGULATORY INFORMATION
This device complies with Part 15 of the FCC Rules: Operation is subject to the
following two conditions:
1. This device may not cause harmful interference and
2. This device must accept any interference that is received, including any
interference that may cause undesired ope
WARNING:
Changes or modications to this unit not expressly approved by the party responsible for
compliance could void the user’s authority to operate the equipment.
Changes or modications not expressly approved by the party responsible for compliance
could void the user’s authority to operate the equipment.
NOTE:
This equipment has been tested and found to comply with the limits for a Class B digital
device, pursuant to Part 15 of the FCC Rules. These limits are designed toprovide
reasonable protection against harmful interference in a residential installation.
This equipment generates, uses and can radiate radio frequency energy and, if not
installed and used in accordance with the instructions, may cause harmful interference
to radio communications. However,there is no guarantee that interference will not occur
in a particular installation. If this equipment does cause harmful interference to radio or
television reception, which can be determined by turning the equipment off and on, the user
is encouraged to try to correct the interference by one or more of the following measures:
• Reorient or relocate the receiving antenna.
• Increase the separation between the equipment and receiver.
• Connect the equipment into an outlet on a circuit different from that to which the receiver
is connected.
• Consult the dealer or an experienced radio/TV technician for help.
Page 8

For EU only
Questions?
Need Some Help?
This manual should help you
understand
your new product.
If you still have questions,
visit our website:
www.iontheaction.com
Like Us:
www.facebook.com/iontheaction
Tweet Us:
www.twitter.com/iontheaction
Page 9
WiFi PODZ und Battery Booster
Kurzanleitung
1. Lernen Sie ihren WiFi PODZ und Battery
Booster kennen
Ermöglicht die Kabellose Übertragungsmöglichkeiten ihrer iON Kamera
So lange sie ihren PODZ an die Kamera angebracht haben und eingeschalten haben,
können Sie auf ihre Daten zugreifen und Sie an ihren PC übertragen
WiFi PODZ macht ihr mobiles Gerät zu einem Bildsuchert mit dem Sie das gerade von
der Kamera gesehene Ereignis auf ihrem Mobil Gerät sehen können
Der Battery Booster dient als externe Batterie und ermöglicht es ihnen die Kamera
innerhalb von 1.5 Stunden wieder voll aufzuladen
DE
Page 10
2. Lernen Sie ihr Paket kennen
1 WiFi PODZ
Battery Booster und
2
Kabel
Ermöglicht die Kabellose
Übertragungsmöglichkeiten ihrer iON Kamera
Ermöglicht ihnen ihre Kamera, mittels des
vorhandenen USB Kabels, unterwegs voll
aufzuladen
3. Beginnen Sie
Bitte verbinden Sie ihre AIR PRO mit einem PC oder Mac um die Firmware
upzudaten und um die WiFi Funktion zu benutzen. Für weitere Informationen
zum Firmware Update, siehe Absatz 3.1die Ihrer Kamera Kurzanleitung
3.1 Installation des WiFi PODZ
1. Entfernen Sie den PODZTM und setzen sie den
WiFi PODZTM der Kamera auf den PODZTM Anschluss
2. Verschliessen und Versiegeln sie die Kamera indem sie
die Rückabdeckung verdrehen und den Verschluss bis
zum einrasten verschieben.
3. Drücken Sie die EIN / AUS Taste um ihre Kamera einzuschalten
4. Die WiFi Taste auf dem WiFi PODZTM drücken um die WiFi Funktion
zu aktivieren. Die blaue LED blinkt um anzuzeigen, dass die WiFi
Funktion im Aktivierungsmodus ist. Das WiFi Netzwerk kann gesucht warden
TM
Page 11

bis die LED permanent leuchtetn.
5. Drücken Sie die EIN / AUS Taste um ihre Kamera jederzeit auszuschalten
Hinweis:
1. WiFi führt zu einer elektrischen Belastung der Batterie. Empfehlung: Die WiFi
Funktion abschalten, wenn diese nicht benötigt wird.
2. Ein nicht korrekter Verschluss der Kamera kann zu einem Leck führen und die
Kamera zerstören. Die Garantie und Gewährleistung deckt Wasserschäden
und Feuchtigkeitsschäden die durch Benutzer Fehler hervorgerufen werden
nicht ab3. Die Gummidichtung am podz bildet die wasserdichte Sperre, um die
Kamera in der Nass- und Unterwasserwelt zu schützen. Sie sind verpichtet,
diese Dichtung sauber zu halten. Eiin einzelnes Haar oder Sandkorn kann zu
einem Leck in das Produkt führen kann.
4. Spülen Sie die Kamera nach Gebrauch mit sauberem Wasser ab und
bewahren Sie die Kamera in trockener Umgebung. Dies nicht zu tun, kann
Korrosion am Produkt hervorurufen oder die Versiegelung negativ beeinussen,
die wiederum zu einer Beschädigung des Produktes führen kann
3.2 Die Kamera mit dem Computer verbinden
1. Den WiFi PODZTM einschalten
2. Die Netzwerk Einstellung beim PC anwählen und bei WiFi Einstellungen das
Netzwerk „WIFIPODZ“ auswählen
3. Geben Sie dias Passwort“123456789” ein und verbinden Sie damit ihre
Kamera
4. Öffnen Sie den Internet Browser und wählen sie die Address “192.168.1.2”,
und sie können Ihre gespeicherten Daten ihrer Kamera sehen
3.3 Verbinden Sie Ihre Kamera mit einem Smart Device (Browser)
1. Schalten Sie ihren WiFi PODZ ein.
2. Wählen Sie die Funktion “Netzwerkeinstellungen” auf ihrem mobilen Gerät und
rufen Sie die WiFi Einstellungen auf.
Page 12

3. Geben Sie das Passwort “123456789” um ihr mobiles Gerät mit der Kamera zu
verbinden.
4. Rufen Sie ihren Internetbrowser auf und geben die URL “192.168.1.2” oder “wi.
podz”ein. Nun können Sie die Fotos und Videos die auf ihrer Kamera
gespeichert sind ansehen.
3.4. Verbinden Sie ihre Kamera mit einem “Smart Device” (App)
1. Suchen Sie den iontheaction App in ihrem App Store.
2. Laden Sie die App auf ihr “Smart Device” und Installieren Sie dieses.
3. Schalten Sie ihren WiFi PODZ ein.
4. Wählen Sie die Funktion “Netzwerkeinstellungen” auf ihrem mobilen Gerät und
rufen Sie die WiFi Einstellungen auf.
5. Rufen Sie ihren Internetbrowser auf und geben die URL “192.168.1.2” oder “wi.
podz”ein. Nun können Sie die Fotos und Videos die auf ihrer Kamera
gespeichert sind ansehen.
6. Open your app..
7. Sie können auf die App Information Seite gehen um weitere detaillierte
Informationen zur Benutzung dieser App erhalten
Hinweise: Während der Aufnahme ist der Live Stream und Play-Back Modus
vorläug deaktiviert. Sobald ihre Kamera wieder auf Stand-Bye Modus ist, sind
diese Funktionen wieder verfügbar.
3.5 Auaden Ihrer Kamera mittles des Battery Boosters
1. Laden Sie die den Batter Boosert mit Hilfe des USB Kabels oder des
Netzadapters (nicht in diesem Kit Lieferumfang enthalten). Den Energiestatus
des Battery Boosters können Sie durchDrücken des Tast-Knopfes erkennen.
2. Entfernen Sie den PODZ von ihrer Kamera
3. Verbinden Sie die Kamera mittels des USB Kabels und die Auadung wird
automatisch beginnen.
Page 13

4. In ca. 1,5 Stunden wird ihre Kamera, falls die Batterie voll entladen war, wieder
voll aufgeladen sein.
4. TRADEMARK INFORMATION
© 2012 World Wide Licenses Limited.
® The ion logo is a registered trademark of World Wide Licenses Limited.
CamLOCK, PODZ, Shoot/Share and AIR PRO CONNECT and their respective logos are
trademarks or registered trademarks of World Wide Licenses Limited in the United States and
other countries. Copyright © 2012. All Rights Reserved.
IMPORTANT
• Keep the lens clean. Dirt and ngerprints will affect the quality of the picture.
• Close the PODZ properly for best water sealing. Do not open it under water.
• Rinse the camera with clean water after used and keep it dry for storage.
• You can refer to the detail operation instruction at the user manual
WARNING: THE TRADEMARK INFORMATION
© 2012 World Wide Licenses Limited.
® The ion logo is a registered trademark of World Wide Licenses Limited.
• CamLOCK, PODZ, Shoot/Share and AIR PRO and their respective logos are trademarks
or registered trademarks of World Wide Licenses Limited in the United States and other
countries. Copyright © 2012. All Rights Reserved.
Page 14

FCC ID: NW71006
IMPORTANT REGULATORY INFORMATION
This device complies with Part 15 of the FCC Rules: Operation is subject to the
following two conditions:
1. This device may not cause harmful interference and
2. This device must accept any interference that is received, including any
interference that may cause undesired ope
WARNING:
Changes or modications to this unit not expressly approved by the party responsible for
compliance could void the user’s authority to operate the equipment.
Changes or modications not expressly approved by the party responsible for compliance
could void the user’s authority to operate the equipment.
NOTE:
This equipment has been tested and found to comply with the limits for a Class B digital
device, pursuant to Part 15 of the FCC Rules. These limits are designed toprovide
reasonable protection against harmful interference in a residential installation.
This equipment generates, uses and can radiate radio frequency energy and, if not
installed and used in accordance with the instructions, may cause harmful interference
to radio communications. However,there is no guarantee that interference will not occur
in a particular installation. If this equipment does cause harmful interference to radio
or television reception, which can be determined by turning the equipment off and on,
the user is encouraged to try to correct the interference by one or more of the following
measures:
• Reorient or relocate the receiving antenna.
• Increase the separation between the equipment and receiver.
• Connect the equipment into an outlet on a circuit different from that to which the receiver
is connected.
• Consult the dealer or an experienced radio/TV technician for help.
Page 15

For EU only
Fragen?
Sie benötigen Hilfe?
Das Betriebshandbuch
soll Ihnen helfen ihr News
product kennenzulernen.
Haben Sie noch weitere Fragen,
rufen Sie unsere
oder besuchen Sie unsere
Homepage: www.iontheaction.com
Like Us:
www.facebook.com/iontheaction
Tweet Us:
www.twitter.com/iontheaction
Page 16

WiFi PODZ & Trousse du
FR
Chargeur de Batterie
Guide de démarrage rapide
1. En savoir plus sur votre WiFi PODZ et du
Chargeur de Batterie
L’ion WiFi PODZ offre la capacité sans l à vos caméras ion.
Vous pouvez accéder et transférer les chiers de votre caméra à travers votre PC,
téléphone portable ou tablette, dès que vous y joignez le PODZ à la caméra.
Le WiFi PODZ transforme aussi votre appareil portable en viseur sans l et vous pouvez
prévisualiser l’afchage caméra à partir de votre appareil portable.
Le chargeur de batterie fonctionne sous forme de batterie externe qui vous permet
de recharger progressivement la batterie de votre caméra du point d’indication vide
àpleineen près 1h30.
Page 17

2. Contenu de Votre Emballage
1 WiFi PODZ Offre la fonction sans l à vos caméras ion.
Chargeur de batterie et
2
câble
Permettent de recharger pleinement la
batterie de votre caméra depuis le point
d’indication vide via le câble USB pendant
vos voyages.
3. Démarrer
Veuillez connecter votre Air Pro à un PC ou ordinateur Mac an de mettre à
jour le micro-logiciel et activer la fonction WIFI. Pour plus de détails sur la
mise à jour de ce dernier, veuillez consulter la section 3.1de la caméra Guide
de démarrage rapide
3.1 Installer Votre WiFi PODZ
1. Supprimer votre PODZ et placer votre WiFi PODZ dans la che du PODZ de la
caméra.
2. Sceller la caméra en pivotant le couvercle arrière dans le
sens des aiguille d’une montre jusqu’à ce que les deux
points soient alignés. Coulisser le loquet pour
verrouiller le PODZ .
3. Appuyer et maintenir le bouton pour allumer
votre caméra.
4. Appuyer sur le bouton de mise en marche WiFi sur
TM
Page 18

WiFi PODZ pour activer votre WiFi. Les DEL bleues s’allument pour indiquer
que le WiFi se réchauffe. Cela prendra environ 15-20 secondes
pour que le WiFi se réchauffe et devient connectable. La DEL clignotera
lorsque la fonction WiFi est activée ou connecté.
5. Appuyer le bouton de mise en marche WiFi pour désactiver à tout moment le
WiFi.
Remarque :
1. Le WiFi épuisera la batterie de votre camera plus rapidement lorsqu’elle est
activée. Désactiverle WiFi si vous ne l’utilisez pas pour modier les réglages
ou télécharger le contenu.
2. Si vous ne scellez pas convenablement votre caméra, elle pourra subir des
fuites qui pourront endommager ou détruire votre caméra. Votre garantie ne
couvre pas les dégâts causés par l’eau en provenance des dommages de
l’utilisateur.
3. Le joint en caoutchouc du PODZ constitue la barrière d’étanchéité qui protège
la caméra dansun environnement humide ou sous-marin. Vous devez garde
ce joint propre car un seul brin de cheveu ou une seule graine de sable peut
provoquer une fuite dans le produit.
4. A la suite de chaque utilisation dans de l'eau saline, vous devez rincer
l'extérieur du produit et le joint avec de l'eau douce et le sécher. Le non respect
de cette instruction peut provoquer des corrosions sur le produit ou des
défaillances au niveau du joint et par ricochet endommager le produit.
3.2 Connecter La Caméra à Votre Ordinateur
1. Activer votre WiFi PODZ.
2. Aller au réglage réseau de votre PC et Choisir le réglage WiFi. Rechercher le
réseau, retrouver et cliquer sur « WIFIPODZ »
3. Saisir le mot de passe « 123456789 » pour vous connecter à votre caméra.
4. Ouvrir votre navigateur Internet et saisir « 192.168.1.2 » ou « wi.podz ». pour
visualiser les chiers stockés sur votre caméra.
Page 19

3.3 Connecter La Caméra à Votre Appareil Intelligent (Navigateur)
1. Activer votre WiFi PODZ.
2. Aller au réglage réseau de votre appareil portable et Choisir le réglage WiFi.
Rechercher le réseau, retrouver et cliquer sur « WIFIPODZ.»
3. Saisir le mot de passe « 123456789 » pour vous connecter à votre caméra.
4. Ouvrir votre navigateur Internet et saisir « 192.168.1.2 » ou « wi.podz ». pour
visualiser les photos et vidéos stockées sur votre caméra.
3.4 Connecter La Caméra à Votre Appareil Intelligent (App
1. Rechercher l’application iontheaction dans un magasin d’applications.
2. Télécharger et installer l’application sur votre appareil intelligent.
3. Activer votre WiFi PODZ.
4. Aller au réglage réseau de votre PC et Choisir le réglage WiFi. Rechercher le
réseau, retrouver et cliquer sur « WIFIPODZ ».
5. Saisir le mot de passe « 123456789 » pour vous connecter à votre caméra.
6. Ouvrir votre application.
7. Vous pouvez consulter la page application pour une description détaillée de
l'opération.
Remarques : Dès que votre camera commence l’enregistrement vidéo, la
transmission en direct, la lecture du chier et la fonction de transfert seront
temporairement désactivées. Vous pouvez reprendre les fonctions lorsque votre
caméra est en état d’attente.
)
3.5 Recharger votre caméra à l’aide de votre chargeur de batterie
1. Recharger la batterie à l'aide du câble USB et d'un adaptateur (non inclus).
Vous pouvez appuyer le bouton situé sur le chargeur de batterie pour vous
Page 20

présenter l'état de l'alimentation.
2. Supprimer le PODZ de votre camera.
3. Connecter le chargeur de batterie à votre caméra à travers le câble USB et il
se mettra à charger automatiquement votre caméra.
4. Pour charger pleinement la batterie de votre caméra du point d'indication vide
à plein, il faut environ 1heure 30 minutes.
4. INFORMATIONS LEGALES
© 2012 World Wide Licenses Limited.
® Le logo ion est une marque déposée de World Wide Licenses Limited.
CamLOCK, PODZ, Shoot/Share and AIR PRO CONNECT et leurs logos respectifs
sont des marques commerciales et des marques déposées de World Wide
Licenses Limited aux Etats-Unis et dans d’autres pays. Copyright © 2012. Tous
droits réservés.
Page 21

Avertissement
“Toute modication effectuée sans l’approbation du fabricant de l’équipement pourrait
annuler son autorité sur le bon fonctionnement de cet équipement.”
Instructions
REMARQUE : Cet équipement à été testé et est conforme aux limites d’un appareil de
Classe B, selon l’article 15 des Règles FCC. Ces limites ont étés mises en place pour offrir
une protection raisonnable contre les interférences dans un complexe résidentiel. Si cet
équipement crée des interférences pour la réception radio ou télévisuelle, ce qui peut être
constaté en l’allumant et en l’éteignant, alors il vous est conseillé d’y remédier d’une des
manières suivantes :
• Réorientez ou déplacez l’antenne réceptrice.
• Augmentez la distance entre l’équipement et le récepteur.
• Connectez l’équipement à une prise ou circuit différent de celui du récepteur.
• Prenez conseil auprès du revendeur ou d’un technicien qualié pour obtenir de l’aide.
AVERTISSEMENT : LE FABRICANT NE PEUT EN AUCUN CAS ETRE TENU POUR
RESPONSABLE DES INTERFERENCES CAUSEES PAR UNE MODIFICATION NON
AUTORISEE DE L’APPAREIL TOUTE MODIFICATION POURRAIT REVOQUER LE DROIT
DE L’UTILISATEUR SUR L’UTILISATION DE L’EQUIPEMENT.
Page 22

Pour UE uniquement
Des questions ?
Besoin d’aide ?
Ce guide vous aidera à
comprendre votre nouveau produit
Si vous avez d’autres
questions,
visiter notre site web : www.
iontheaction.com
Suivez nous :
www.facebook.com/iontheaction
Twittez nous :
www.twitter.com/iontheaction
Page 23

WiFi PODZ e Kit di
ottimizzazionedella batteria
Guida Rapida
1. Conoscere il WiFi PODZ e l’ottimizzatore
della batteria
Il WiFi PODZ ion fornisce la capacità wireless alle fotocamere ion.
Fino a quando il PODZ sarà collegato alla fotocamera e sarà acceso, è possibile
accedere e trasferire le della fotocamera mediante, PC, telefono cellulare o tablet.
Il WiFi PODZ rende anche il proprio dispositivo mobile un mirino con la possibilità di
vedere in anteprima la visione della fotocamera dal proprio dispositivo mobile.
L’ottimizzatore di batteria funziona come una batteria esterna che consente di ricaricare
la fotocamera da completamente scarica a carica in circa 1,5 ore.
IT
Page 24

2. Conoscere i contenuti della confezione
1 WiFi PODZ
Ottimizzatore della
2
batteria e cavo
Fornisce la capacità wireless alla fotocamera
ion
Consente di caricare completamente la
fotocamera da completamente scarica
mediante il cavo USB durante il viaggio
3. Per iniziare
Connettere il proprio Air Pro a un PC o Mac per aggiornare il rmware al ne
di attivare la funzione WiFi. Per dettagli sull’aggiornamento del rmware,
fare riferimento alla sezione 3.1 alla la tua ion AIR Pro Guida Rapida
3.1 Installare il WiFi PODZ
1. Rimuovere il PODZ e inserire il WiFi PODZ nella presa
PODZ della fotocamera.
2. Sigillare la fotocamera ruotando il coperchio posteriore
in senso orario no ad allineare i due punti. Far scorrere
il blocco per bloccare il PODZ.
3. Premere e tenere premuto il tasto per accendere la fotocamera.
4. Premere il tasto di accensione del WiFi sul WiFi PODZ per
TM
Page 25

accendere il WiFi. L’indicatore LED blu si accenderà a indicare
che il WiFi è in fase di riscaldamento. Il Wi-Fi impiegherà circa 15-20
secondi per riscaldarsi e diventare connettibile. Il LED lampeggerà quando la
funzione Wi-Fi sarà attiva o connessa.
5. Premere il tasto di alimentazione del WiFi per spegnere il WiFi in qualsiasi
momento.
Nota:
1. Quando attivato, il WiFi scaricherà la batteria più rapidamente. Spegnere il
WiFi quando non lo si utilizza per modicare le impostazioni o caricare dei
contenuti.
2. Sigillare in modo scorretto la fotocamera potrebbe comportare perdite che
potrebbero danneggiare o distruggere la fotocamera. La garanzia non copre i
danni causati dall’acqua come conseguenza di un danno dell’utente.
3. Il sigillo di gomma sul PODZ forma la barriera impermeabile per proteggere la
fotocamera in condizioni di umidità e sott’acqua. È necessario mantenere pulito
tale sigillo in quanto un solo capello o granello di sabbia potrebbe causare una
perdita all’interno del prodotto.
4. Dopo ciascun uso in acqua salata, sarà necessario sciacquare l’esterno del
prodotto e il sigillo con acqua non salata e asciugare. La mancata esecuzione
di questa operazione può causare la corrosione del prodotto o il funzionamento
scorretto del sigillo, danneggiando di conseguenza il prodotto.
3.2 Connettere la fotocamera al computer
1. Accendere il WiFi PODZ.
2. Andare alle impostazioni di rete del PC e scegliere le impostazioni WiFi.
Cercare la rete, trovarla e fare clic su “WIFIPODZ”.
3. Inserire la password “123456789” e sarà possibile connettersi alla fotocamera.
4. Aprire il browser Internet e digitare “192.168.1.2”. oppure “wi.podz”. È
possibile visualizzare i le salvati nella fotocamera.
Page 26

3.3 Connettere la fotocamera al dispositivo Smart (Browser)
1. Accendere il WiFi PODZ.
2. Andare alle impostazioni di rete del dispositivo mobile e scegliere le
impostazioni WiFi. Cercare la rete, trovarla e fare clic su “WIFIPODZ”.
3. Inserire la password “123456789” e sarà possibile connettersi alla fotocamera.
4. Aprire il browser Internet e digitare “192.168.1.2” oppure “wi.podz”. È possibile
visualizzare le foto e i video salvati nella fotocamera.
3.4 Connettere la fotocamera al dispositivo Smart (App)
1. Cercare l’app iontheaction nell’App store.
2. Scaricare e installare l’app nel dispositivo smart .
3. Accendere il WiFi PODZ .
4. Andare alle impostazioni di rete del PC e scegliere le impostazioni WiFi.
Cercare la rete, trovarla e fare clic su “WIFIPODZ”.
5. Inserire la password “123456789” e sarà possibile connettersi alla fotocamera.
6. Aprire l’app.
7. È possibile fare riferimento alla pagina relative alle app per la descrizione
dettagliata del funzionamento.
Note: Fintanto che la fotocamera avvierà la registrazione video, le funzioni di live streaming,
di riproduzione dei le e di trasferimento saranno temporaneamente disabilitate. È possibile
ripristinare le funzioni quando la fotocamera sarà in stato di standby.
3.5 Caricare la fotocamera mediante l’ottimizzatore di batteria
1. Caricare l’ottimizzatore di batteria mediante il cavo USB o l’adattatore (non in
dotazione). È possibile premere il tasto sull’ottimizzatore di batteria per
mostrare lo stato di carica.
2. Rimuovere il PODZ dalla fotocamera.
3. Collegare l’ottimizzatore di batteria alla fotocamera mediante il cavo USB e
comincerà a caricare la fotocamera automaticamente.
4. Impiegherà circa 1,5 ore per caricare completamente la fotocamera da uno
stato di batteria completamente scarica.
Page 27

4. INFORMAZIONI SUL MARCHIO
© 2012 World Wide Licenses Limited.
® Il logo ion è un marchio registrato di World Wide Licenses Limited.
CamLOCK, PODZ, Shoot/Share e AIR PRO e i loro rispettivi logo sono marchi o marchi
registrati di World Wide Licenses Limited negli Stati Uniti e in altri Paesi. Copyright © 2012. Tutti
i diritti riservati.
Dichiarazione FCC
Dichiarazione di avvertenza
“Le modiche non approvate dalla parte responsabile per la conformità possono invalidare
l’autorità dell’utente a mettere in funzione l’apparecchiatura”.
Dichiarazione di istruzioni
NOTA: La presente apparecchiatura è stata testate ed è risultata conforme ai limiti per
un dispositivo digitale di Classe B, ai sensi della Parte 15 delle norme FCC. Tali limiti
sono stati stabiliti per fornire una protezione ragionevole contro le interferenze dannose
in un’installazione residenziale. La presente apparecchiatura genera, utilizza e può
irradiare energia in radio frequenza e, se non installata e utilizzata in accordo con le
istruzioni, potrebbe causare interferenze dannose alla ricezione radio o televisiva, la
quale può essere determinata dallo spegnere e riaccendere l’apparecchiatura; l’utente è
incoraggiato a tentare di correggere
l’interferenza mediante una o più delle seguenti misure:
• Orientare o posizionare nuovamente l’antenna ricevente.
• Aumentare la distanza tra l’apparecchiatura e il ricevitore.
• Connettere l’apparecchiatura a una presa o un circuito differente da quello cui è
collegato il ricevitore.
• Consultare il rivenditore o un tecnico radio/TV esperto per l’assistenza.
ATTENZIONE: IL PRODUTTORE NON È RESPONSABILE PER EVENTUALI
INTERFERENZE RADIO O TV CAUSATE DA MODIFICHE NON AUTORIZZATE
AL DISPOSITIVO. QUALSIASI TALE MODIFICA PUÒ INVALIDARE L’AUTORITÀ
DELL’UTENTE A METTERE IN FUZIONE L’APPARECCHIATURA.
Page 28

Solo per UE
Domande?
Bisogno d’aiuto?
Questo manuale ti aiuterà
a comprendere il tuo nuovo
prodotto.
In caso di ulteriori domande,
visita il nostro sito Internet:
www.iontheaction.com
Seguici su Facebook:
www.facebook.com/
iontheaction
Seguici su Twitter:
www.twitter.com/iontheaction
Page 29

WiFi PODZ y Kit de Batería de
Refuerzo Guía rápida de uso
1. Conocer tu WiFi PODZ y la Batería de
Refuerzo
El WiFi PODZ de ion es el que proporciona la capacidad inalámbrica a las cámaras ion.
Siempre que conectes el PODZ a la cámara y lo enciendas, puedes acceder y transferir
archivos a tu ordenador, teléfono móvil ó tableta.
El WiFi PODZ también convierte tu dispositivo móvil en un visor inalámbrico, desde el
que puedes visualizar lo que la cámara ve.
La batería de refuerzo trabaja como una batería externa que te permite recargar la
cámara de vacía a llena en aproximadamente 1 hora y media.
ES
Page 30
2.Conocer el contenido
1 WiFi PODZ
Batería de refuerzo y
2
cable
Proporciona la capacidad inalámbrica a las
cámaras ion.
Permite cargar totalmente la cámara a través
del cable USB, mientras estás viajando.
3. Empezar
Por favor, conecta tu AIR PRO al ordenador ó Mac para actualizar el rmware
y activar la función WiFi. Para ver más detalles sobre la actualización del
rmware, consulta la sección 3.1 de tu cámara Guía rápida de uso.
3.1 Instalar el WiFi PODZ
1. Retira el PODZ y pon el WiFi PODZ en el interruptor de PODZ
que hay en la cámara.
2. Sella la cámara rotando la parte trasera en el sentido de
las agujas del reloj hasta que los dos puntos se alineen.
Desliza el cierre para cerrar el PODZ.
3. Pulsa y mantén presionado el botón
tu cámara.
4. Pulsa el botón de encendido del WiFi en el WiFi PODZ para
M
T
para encender
Page 31

encender tu WiFi. El indicador LED azul se ilumina para indicarque el WiFi se
está calentando. Necesita unos 15-20 segundos aproximadamente para estar
operativo. El LED brillará cuando la función WiFi esté activa ó conectada.
5. Puedes apagar el WiFi en cualquier momento pulsando el botón de encendido/
apagado del WiFi.
Nota:
1. El WiFi consumirá la batería de la cámara con mucha rapidez cuando esté
activado. Apágalo si no lo estás usando para cambiar los ajustes o subir
contenidos.
2. El no sellar la cámara adecuadamente, puede provocar ltraciones que dañen
ó destruyan la cámara. Tu garantía no cubre daños provocados por el agua
debido a un mal uso por parte del usuario.
3. El sellado de goma del PODZ forma la barrera protectora para proteger la
cámara en condiciones húmedas ó bajo el agua. Debes mantener este sellado
limpio, ya que un simple pelo ó grano de
arena puede causar una ltración.
4. Después de su utilización en agua salada, debes aclarar la parte exterior del
producto y el sellado con agua dulce, y secarlo. No hacer esto puede causar
corrosión ó un fallo en el sellado,
lo que dañaría el producto.
3.2 Conectar la cámara a tu ordenador
1. Enciende el WiFi PODZ.
2. Ve a la conguración de red de tu ordenador y selecciona conguración de
WiFi. Busca la red y cuando la encuentres haz click sobre “WIFIPODZ”
3. Introduce la contraseña “123456789” y conecta tu cámara.
Page 32

4. Abre tu navegador de internet e introduce “192.168.1.2”. Podrás ver los vídeos
y las fotos guardados en tu cámara.
3.3 Conectar la cámara a tu dispositivo móvil (navegador)
1. Enciende el WiFi PODZ.
2. Ve a la conguración de red de tu ordenador y selecciona conguración de
WiFi. Busca la red y cuando la encuentres haz click sobre “WIFIPODZ”
3. Introduce la contraseña “123456789” y conecta tu cámara.
4. Abre tu navegador de internet e introduce “192.168.1.2”. Podrás ver los
vídeos y las fotos guardados en tu cámara.
3.4 Conectar la cámara a tu dispositivo móvil (aplicación)
1. Busca la Aplicación Ion en la App store.
2. Bájate e instala la aplicación en tu dispositivo móvil.
3. Enciende tu WiFi PODZ.
4. Ve a la conguración de red de tu ordenador y selecciona conguración de
WiFi. Busca la red y cuando la encuentres haz click sobre “WIFIPODZ”
5. Introduce la contraseña “123456789” y conecta tu cámara.
6. Abre tu aplicación.
7. Puedes consultar la página de aplicaciones para una descripción más
detallada de la operación.
Notas: Mientras tu cámara empieza a grabar video, los archivos de reproducción
y transmisión en directo están deshabilitados temporalmente. Puedes reanudar
estas funciones cuando la cámara esté en modo reposo (Standby).
3.5 Cargar la cámara con la batería de refuerzo
1. Cargar la batería de refuerzo con el cable USB ó el adaptador (no incluido).
Puedes presionar el botón de la batería de refuerzo para ver el estado de
carga.
2. Retira el PODZ de la cámara
3. Conecta la batería de refuerzo a la cámara con el cable USB y comenzará a
Page 33

cargar la cámara automáticamente.
4. Lleva una hora y media cargar la cámara al completo si está totalmente vacía.
INFORMACION SOBRE LA MARCA
4.
© 2012 World Wide Licenses Limited.
® El logotipo iON es una marca registrada de World Wide Licenses Limited.
CamLOCK, PODZ, Shoot/Share y AIR PRO CONNECT y sus respectivos logotipos son marcas
registradas de World Wide Licenses Limited en los Estados Unidos y otros países. Copyright
© 2012. Todos los derechos reservados
.
Declaración FCC
Declaración de precaución
“Los cambios o modicaciones no acreditadas por la parte responsable de
su cumplimiento, puede invalidar la autoridad del usuario de manejar el
equipo.”
Declaración de instrucción
NOTA: Se ha comprobado que este equipo cumple los límites para dispositivos digitales
de clase B, de acuerdo con el apartado 15 de las normas de la FCC. Estos límites se
han previsto para ofrecer una protección razonable contra interferencias en instalaciones
residenciales. Este equipo genera, utiliza y puede irradiar energía de radiofrecuencia y si
no se instala y se utiliza de acuerdo con las instrucciones suministradas, podría ocasionar
interferencias perjudiciales para las transmisiones de radio y televisión, lo que se puede
determinar apagando y encendiendo el aparato, se recomienda al usuario que intente
corregirlas realizando una o varias de las siguientes acciones:
• Cambie la orientación o ubicación de la antena receptora.
• Aumente la separación entre el aparato y el receptor.
• Conecte el aparato a una fuente de alimentación que esté en un circuito distinto a aquél
donde esté conectado el receptor.
• Consulte con el distribuidor o con un técnico especializado en radio/TV.
AVISO: EL FABRICANTE NO SE HACE RESPONSABLE DE NINGUNA
INTERFERENCIA DE RADIO Ó TELEVISION CAUSADA POR UNA MODIFICACION NO
AUTORIZADA DE ESTE DISPOSITIVO, CUALQUIER TIPO DE MODIFICACION PUEDE
INVALIDAR LA AUTORIDAD DEL USUARIO DE MANEJAR EL EQUIPO.
Page 34

For EU only
¿Preguntas?
¿Necesitas ayuda?
Este manual debería
ayudarte a entender tu
nuevo producto.
Si todavía tienes dudas,
visita nuestra web:
www.iontheaction.es
Like Us:
www.facebook.com/iontheaction
Tweet Us:
www.twitter.com/iontheaction
Page 35
WiFI PODZ e
do kit de bateria de subsituição
Guia de utilização rápido
1. Conheça o seu WIFI PODZ e a bateria de
substituição
o ion WiFi PODZ fornece a capacidade de ligação sem os das câmaras ion
Enquanto tiver o PODZ ligado à câmara e ligá-lo pode aceder e transferir os cheiros da
câmara para o PC, telemóvel ou tablet
o WiFi PODZ permite também que o seu equipamento móvel se torne num visualizador
sem os e veja antecipadamente o visor da câmara a partir do seu equipamento (PC,
telemóvel, Tablet).
A bateria de substituição trabalha como uma bateria externa que carrega a sua câmara
sem carga até estar cheia em apenas 1.5 horas.
PT
Page 36

2.Vja o que tem embalagem
1 WiFi PODZ Fornece a capacidade de ligação sem os às suas
2 Cabo Permite o carregamento quando a bateria está a 0 via usb
câmaras
durante a sua viagem
3. Ligar a câmara
Por favor, ligue a cámara AIR PRO ao seu computador ou Mac para
actualizar o rmware e activar a função WiFi. Para mais detalhes sobre a
actualização o rmware, consulte a seção 3.1 da a câmara Guia de utilização
rápido
3.1 Instale o WiFi PODZ
1. Tire o PODZ e coloque o WiFi PODZ no encaixe do PODZ
2. Feche a câmara rodando a parte de trás até os dois pontos
estiverem alinhados. Deslize a trava do PODZ para
bloqueá-la
3. Prima o botão Power para ligar a câmara
4. Prima o botão de ligação no WiFi PODZ para ligar o WiFi.
O led azul acende para indicar que o Wi está a pesquisar.
Demora cerca de 15-20 segundos para pesquisar e encontrar rede.
O led dá um ash quando a função Wi-Fi está ligada ou encontrou rede.
5. Prima o botão de ligação WiFi para desligá-lo a qualquer momento.
Observação :
1. O WiFi descarrega mais rapidamente a bateria da sua câmara quando está
TM
Page 37

ligada. Desligue o WiFi se não está a utilizar nos parâmetros ou no conteúdo
de upload
2. O facto de fechar mal a sua câmara pode danicar ou destruir a sua câmara.
A garantia não cobre danos criados pelo derrame de água quando resulta de
um manuseamento errado no modo de isolar a máquina.
3. A borracha que encaixa no PODZ cria uma barreira à prova de água
debaixo da chuva ou em ambientes húmidos. Deve manter essa borracha
completamente limpa porque um cabelo ou um grão de areia pode causar um
derrame na câmara.
4. Depois cada utilização em água salgada, deve passar a borracha quando
é retirada da câmara com água doce e secá-la. Senão o zer, pode criar
corrosão na câmara ou deixar passar água pela borracha e danicar o produto.
3.2 Ligue a câmara ao seu computador
1. Ligue o WiFi PODZ
2. Vá às congurações de rede do computador e escolha congurações WiFi.
Pesquise a rede e clique em “WIFIPODZ” quando a encontrou.
3. Coloque a palavra pass “123456789” e ligue-se à câmara
4. Abra o navegador Internet e escreva “192.168.1.2” ou “wi.podz”. Consegue
visualizar os cheiros armazenados na câmara
3.3 Ligue a câmara a um equipamento móvel (navegador)
1. Ligue o WiFi PODz
2. Vá às congurações de rede do seu equipamento e escolha congurações
WiFi. Pesquise a rede. Procure e clique em “WIFIPODZ”
3. Coloque a palavra passe “123456789” e ligue-se à câmara
4. Abra o navegador Internet e escreva “192.168.1.2” ou “wi.podz”. Consegue
visualizar os cheiros armazenados na câmara
3.4 Ligue a câmara a um equipamento móvel (aplicação)
1. Pesquise ia aplicação iontheaction no Apple Store
2. Descarregue e instala a aplicação no seu equipamento
3. Ligue o WiFi PODZ
Page 38

4. Vá às congurações do computador e escolha congurações WiFi. procure e
clique em “WIFIPODZ”
5. Coloque a palavra passe “123456789” e ligue-se à câmara
6. Abre a aplicação
7. Pode ir à página internet da aplicação para ter uma descrição mais detalhada
dos passos a fazer
Observações: Assim que começar a gravar, o streaming ao vivo, a reprodução
e transferência dos cheiros cam temporariamente inativas. Pode efetuar as
operações quando a câmara estiver em modo stand-by.
3.5 Carregue a câmara com a bateria de substituição
1. Carregue a bateria de substituição via cabo USB ou adaptador (não inlcuído).
Pode premir o botão da bateria de substituição para visualizar o status
2. Tire o PODZ da câmara
3. Ligue a bateria de substituição à câmara através do cabo usb a câmara
começa logo a carregar automaticamente.
4. Demora cerca de 1.5 hora para carregar completamente a sua câmara quando
está sem bateria.
4. Informação de Marca registada
© 2012 Licença internacional limitada.
® O logo ion lé uma marca registada da World Wide Licenses Limited.
CamLOCK, PODZ, Shoot/Share e AIR PRO e seus respetivos logos são marcas
ou marcas registadas na World Wide Licenses Limited no Estados Unidos da
América e noutros países. Copyright © 2012. Todos os direitos reservados.
Page 39

FCC Statement
Cuidados de utilização
As “alterações não aprovadas pelo responsável de produto para a conformidade podem
anular a permissão de utilização do equipamento pelo utilizador”
Observação: Este equipamento foi testado e aprovado para cumprir com os limites de um
dispositivo digital da classe B, conforme ao artigo 15 das regras do FCC. Estes limites são
projectados para fornecer uma protecção razoável contra interferências prejudiciais numa
instalação residencial. Este equipamento gera, irradiações e energia da radiofrequência
e, se não for instalado e usado de acordo com as instruções, pode causar interferências
prejudiciais ao rádio ou à recepção de televisão, ao ligar e desligar o equipamento. O
utilizador pode tentar corrigir a interferência por umas ou várias das seguintes medidas:
• Reorientar ou localizar noutro sítio a antena de recepção.
• Aumentar a distancia entre o equipamento e o receptor.
• Ligar o equipamento numa tomada num circuito diferente daquele a que o receptor é
conectado.
• Consulte o vendedor ou um técnico experiente de TV ou rádio para a ajuda.
AVISO: O FABRICANTE NÃO É RESPONSÁVEL POR NENHUMA INTERFERÊNCIA
RÁDIO OU TV CAUSADO POR ALTERAÇÕES DESAUTORIZADAS AO DISPOSITIVO.
ALTERAÇÕES PODEM PROIBIR A UTILIZAÇÃO DO EQUIPAMENTO.
For EU only
Perguntas?
Precisa de ajua?
Este manual ajuda-o a utilizar
o equipamento
Para informações adicionais
consulte o nosso site:
www.iontheaction.com
Ponha um Like:
www.facebook.com/iontheaction
Tweeter:
www.twitter.com/iontheaction
Page 40

WiFi PODZ
和备用电池组
件快速入门指南
1.
瞭解你的
Ion WiFi PODZ
一旦你將
腦寫字薄訪問並轉移你的相機檔。
WiFi PODZ
裏觀看相機捕捉到的的場景。
備用電池組件可以充當一個外部電池,將你的相機充滿電大約需要一個半小
時。
WiFi PODZ
ion
為你的
PODZ
裝到相機裏並將其開啟 , 你就可以通過你的電腦、手機或電
也能將您的移動設備轉換成一個監視器,你可以在你的移動設備
和備用電池
相機提供了無線功能。
Page 41

2.
瞭解你的包裝
1
WiFi PODZ
2
備用電池及線
3.
開始
要使您的
MAC升級 rmware.
快速說明書第
3.1
1.
2
. 順時針旋轉後殼,直至兩個點對齊,密封相機,滑動鎖扣鎖住。
3.
4. 在WiFi PODZ
打開您的
5. 按WiFi
注意
Air Pro Camera
3.1
安裝你的
移除你的
按住電源按鈕 初始化相機。
WiFi
PODZ
WiFi
切換至待機狀態要花約
開關隨時關閉
實現
具體的升級方法, 請參考您的
章節。
WiFi PODZ
,把你的
WiFi
上按下
。藍燈亮起顯示
WiFi
:
ion
為你的
讓你在旅行途中,通過
滿電
WiFi PODZ
電源按鈕 ,
15 - 20
。
相機提供無線功能
WIFI
功能, 您需要通過
TM
插入相機
WiFi
正在暖機。
秒,燈將會閃爍。
USB
線將相機充
PC
Air Pro Camera
PODZ
插槽。
或者
的
Page 42

1. 當WiFi
改變設置或上傳內容時,請關掉它。
2
. 相機密封不當會導致相機漏水,從而損壞甚至破壞你的相機。用戶使
用時,因漏水導致的相機破壞,不在我們的保修範圍之內。
3
. 密封在
水下的環境中保護相機。你必須保持密封處清潔,發絲或沙粒進入密
封圈內都可能會導致外物滲入產品。
4.
這樣做,會導致產品腐蝕或者密封失敗,轉而損壞產品。
3.2
1. 打開WiFi PODZ
2.
擊
3.
4.
機裏的圖片
3.3
1.
2.
並點擊
3.
4.
打開網際網路流覽器並輸入
相機裏的圖片。
3.4
被開啟時,它會更快地耗盡相機電池電量,如果你不是在用它
PODZ
的橡膠圈形成了一層防水屏障,可以保證用戶在潮濕和
每次在海水中使用後,你需要用淡水沖洗產品的外部和密封處。若不
將照相機連接至電腦
進入你的個人電腦網路設置,選擇
“WIFIPODZ”
鍵入口令
打開網際網路流覽器並輸入
“123456789”
你就可以連接至你的相機。
,
。
WIFI
“192.168.1.2”
設置。搜索網路,找到並點
你可以看到儲存在自己相
。
將照相機連接至你的智慧設備(流覽器)
打開你的
進入你的移動設備的網路設置,選擇無線網路設置。搜索網路,找到
鍵入口令
WiFi PODZ
“WIFIPODZ”
“123456789”
你就可以連接至自己的照相機
,
“192.168.1.2”
把照相機連接至你的智慧設備(
你可以看到儲存在自己照
。
。
App
應用程式)
Page 43

1
App
在
.
2.
3
.
4
. 進入你的個人電腦網路設置,選擇
“
5
.
6
.
7
.
注意:一旦你的相機開始錄影 , 直播功能、檔重播功能和傳遞功能將被暫
時禁用。在待機狀態時,你就可以恢復這些功能。
3.5
1
.
電池上的按鈕來顯示電源狀態。
2
.
3
.
電
4
.
4. Trademark Information
© 2012 World Wide Licenses Limited.
® The ion logo is a registered trademark of World Wide Licenses Limited.
CamLOCK, PODZ, Shoot/Share and AIR PRO CONNECT and their respective
logos are trademarks or registered trademarks of World Wide Licenses Limited in
the United States and other countries. Copyright © 2012. All Rights Reserved.
應用存儲中搜索
下載並安裝應用程式至你的智慧設備。
打開你的
鍵入口令
打開你的
你可以參考
WiFi PODZ
WIFIPODZ”
“
app
123456789
應用程式
app
通過備用電池為你的相機充電
USB
通過
從你的相機中移除
通過
。
將你的相機充滿電大約要花一個半小時。
或充電器(附件不包含)為備用電池充電。你可以按備用
線
USB
線連接備用電池至你的相機,它就會開始自動為你的相機充
iontheaction App
WiFi
你就可以連接至照相機。
”,
應用頁面詳細操作描述
PODZ.
應用程式
設置。搜索網路,找到並
。
Page 44

FCC Statement
Caution Statement
“Modications not approved by the party responsible for compliance could void the user’s
authority to operate the equipment.”
Instruction Statement
NOTE: This equipment has been tested and found to comply with the limits for a Class B digital
device, pursuant to Part 15 of the FCC Rules. These limits are designed to provide reasonable
protection against harmful interference in a residential installation. This equipment generates,
uses and can radiate radio frequency energy and, if not installed and used in accordance with
the instructions, may cause harmful interference to radio or television reception, which can be
determined by turning the equipment off and on, the user is encouraged to try to correct the
interference by one or more of the following measures:
• Reorient or relocate the receiving antenna.
• Increase the separation between the equipment and receiver.
• Connect the equipment into an outlet on a circuit different from that to which the receiver is
connected.
• Consult the dealer or an experienced radio/ TV technician for help.
WARNING: THE MANUFACTURER IS NOT RESPONSIBLE FOR ANY RADIO OR TV
INTERFERENCE CAUSED BY UNAUTHORIZED MODIFICATIONS TO THE DEVICE. ANY
SUCH MODIFICATIONS COULD VOID THE USER’S AUTHORITY TO OPERATE THE
EQUIPMENT.
For EU only
Questions?
Need Some Help?
This manual should help you
understand
your new product.
If you still have questions,
visit our website:
www.iontheaction.com
Like Us:
www.facebook.com/iontheaction
Tweet Us:
www.twitter.com/iontheaction
Page 45

WiFi PODZ
和备用电池
组件快速入门指南
1.
了解你的
Ion WiFi PODZ
一旦你将
脑写字薄访问并转移你的相机文件。
WiFi PODZ
里观看相机捕捉到的的场景。
备用电池组件可以充当一个外部电池,将你的相机充满电大约需要一个半小
时
WiFi PODZ
ion
为你的
PODZ
装到相机里并将其开启 , 你就可以通过你的电脑、手机或电
也能将您的移动设备转换成一个监视器,你可以在你的移动设备
和备用电池
相机提供了无线功能
Page 46

2.
了解你的包裝
1
WiFi PODZ
2
备用电池及线 让你在旅行途中,通过
3.
开始
要使您的
MAC
快速说明书第
3.1
1.
2
. 顺时针旋转后壳,直至两个点对齐,密封相机,滑动锁扣锁住。
3.
4. 在WiFi PODZ
打开您的
灯将会闪烁。
5. 按WiFi
注意
1. 当WiFi
Air Pro Camera
rmware.
升级
安装你的
移除你的
按住电源按钮 初始化相机。
WiFi
切换至待机状态要花约
开关随时关闭
具体的升级方法, 请参考您的
3.1
章节。
WiFi PODZ
PODZ
,把你的
上按下
WiFi
。蓝灯亮起显示
:
被开启时,它会更快地耗尽相机电池电量,如果你不是在用它
为你的
实现
WiFi PODZ
WiFi
电源按钮 ,
WiFi
。
ion
相机提供无线功能
USB
线将相机充满电
WIFI
功能, 您需要通过 PC 或者
TM
插入相机
WiFi
正在暖机。
15 - 20
秒,
Air Pro Camera
PODZ
插槽。
的
Page 47

改变设置或上传内容时,请关掉它。
2
. 相机密封不当会导致相机漏水,从而损坏甚至破坏你的相机。用户使
用时,因漏水导致的相机破坏,不在我们的保修范围之内。
3
. 密封在
水下的环境中保护相机。你必须保持密封处清洁,发丝或沙粒进入密
封圈内都可能会导致外物渗入产品。
4.
这样做,会导致产品腐蚀或者密封失败,转而损坏产品。
3.2
1. 打开WiFi PODZ
2.
点击
3.
4.
里的图片
3.3
1.
2.
并点击
3.
4.
机里的图片
3.4
1
.
2.
PODZ
的橡胶圈形成了一层防水屏障,可以保证用户在潮湿和
每次在海水中使用后,你需要用淡水冲洗产品的外部和密封处。若不
将照相机连接至电脑
进入你的个人计算机网络设置,选择
“WIFIPODZ”
键入口令
打开因特网浏览器并输入
“123456789”
你就可以连接至你的相机。
,
“192.168.1.2”
WIFI
设置。搜索网络,找到并
你可以看到储存在自己相机
。
将照相机连接至你的智能设备(浏览器)
打开你的
进入你的移动设备的网络设置,选择无线网络设置。搜索网络,找到
键入口令
打开因特网浏览器并输入
在
下载并安装应用程序至你的智能设备
WiFi PODZ
“WIFIPODZ”
“123456789”
你就可以连接至自己的照相机。
,
“192.168.1.2”
。
把照相机连接至你的智能设备(
App
应用存储中搜索
iontheaction App
。
你可以看到储存在自己照相
App
应用程序)
应用程序。
Page 48

3
打开你的
.
4.
进入你的个人计算机网络设置,选择
击“
5
键入口令
.
6
打开你的
.
7
你可以参考
.
注意:一旦你的相机开始录像 , 直播功能、文件回放功能和传递功能将
被暂时禁用。在待机状态时,你就可以恢复这些功能。
3.5
通过备用电池为你的相机充电
1
通过
.
电池上的按钮来显示电源状态。
2
从你的相机中移除
.
3
通过
.
充电。
4
将你的相机充满电大约要花一个半小时。
.
WiFi PODZ
WIFIPODZ”
123456789
“
app
应用程序
app
应用页面详细操作描述
USB
线或充电器(附件不包含)为备用电池充电。你可以按备用
USB
PODZ.
线连接备用电池至你的相机,它就会开始自动为你的相机
你就可以连接至照相机。
”,
WiFi
设置。搜索网络,找到并点
4. Trademark Information
© 2012 World Wide Licenses Limited.
® The ion logo is a registered trademark of World Wide Licenses Limited.
CamLOCK, PODZ, Shoot/Share and AIR PRO CONNECT and their respective logos are
trademarks or registered trademarks of World Wide Licenses Limited in the United States and
other countries. Copyright © 2012. All Rights Reserved
.
Page 49

FCC Statement
Caution Statement
“Modications not approved by the party responsible for compliance could void the user’s
authority to operate the equipment.”
Instruction Statement
NOTE: This equipment has been tested and found to comply with the limits for a Class
B digital device, pursuant to Part 15 of the FCC Rules. These limits are designed to
provide reasonable protection against harmful interference in a residential installation. This
equipment generates, uses and can radiate radio frequency energy and, if not installed
and used in accordance with the instructions, may cause harmful interference to radio or
television reception, which can be determined by turning the equipment off and on, the user
is encouraged to try to correct the interference by one or more of the following measures:
• Reorient or relocate the receiving antenna.
• Increase the separation between the equipment and receiver.
• Connect the equipment into an outlet on a circuit different from that to which the receiver is
connected.
• Consult the dealer or an experienced radio/ TV technician for help.
WARNING: THE MANUFACTURER IS NOT RESPONSIBLE FOR ANY RADIO OR TV
INTERFERENCE CAUSED BY UNAUTHORIZED MODIFICATIONS TO THE DEVICE. ANY
SUCH MODIFICATIONS COULD VOID THE USER’S AUTHORITY TO OPERATE THE
EQUIPMENT.
For EU only
Questions?
Need Some Help?
This manual should help you
understand
your new product.
If you still have questions,
visit our website:
www.iontheaction.com
Like Us:
www.facebook.com/iontheaction
Tweet Us:
www.twitter.com/iontheaction
Page 50

AM-QG-CONNECT-8L-EU1
 Loading...