

Integra DTR-10.5 Owners manual
Using the Main Unit with <C-HDXM> Tuner Board
Instruction Manual for ONKYO TX-NR1000 / Integra DTR-10.5 / Integra Research RDC-7.1
Thank you for purchasing the Tuner Board <C-HDXM>. When this optional board is inserted into option slot “K” on the main
unit’s rear panel, it can be used as the XM/FM Stereo/AM tuner terminal. Furthermore, <C-HDXM> becomes capable of sup
porting HD Radio™ functionality and RDS as well.
Usage varies depending on the main unit to which you want to add the optional board. Refer to the user’s manual that comes with
your main unit before starting operations.
For some main units, instructions may be provided in the user’s manual. In this case, please find instructions in the manual
that comes with your main unit.
Caution:
• Before connecting or disconnecting the board, make sure to power off the main unit, and then unplug the power cord from the
AC outlet. Connecting or disconnecting the board while power is being supplied to the main unit may cause failure.
• Plug the optional board into the individual designated slot. Plugging it into the wrong slot may cause failure.
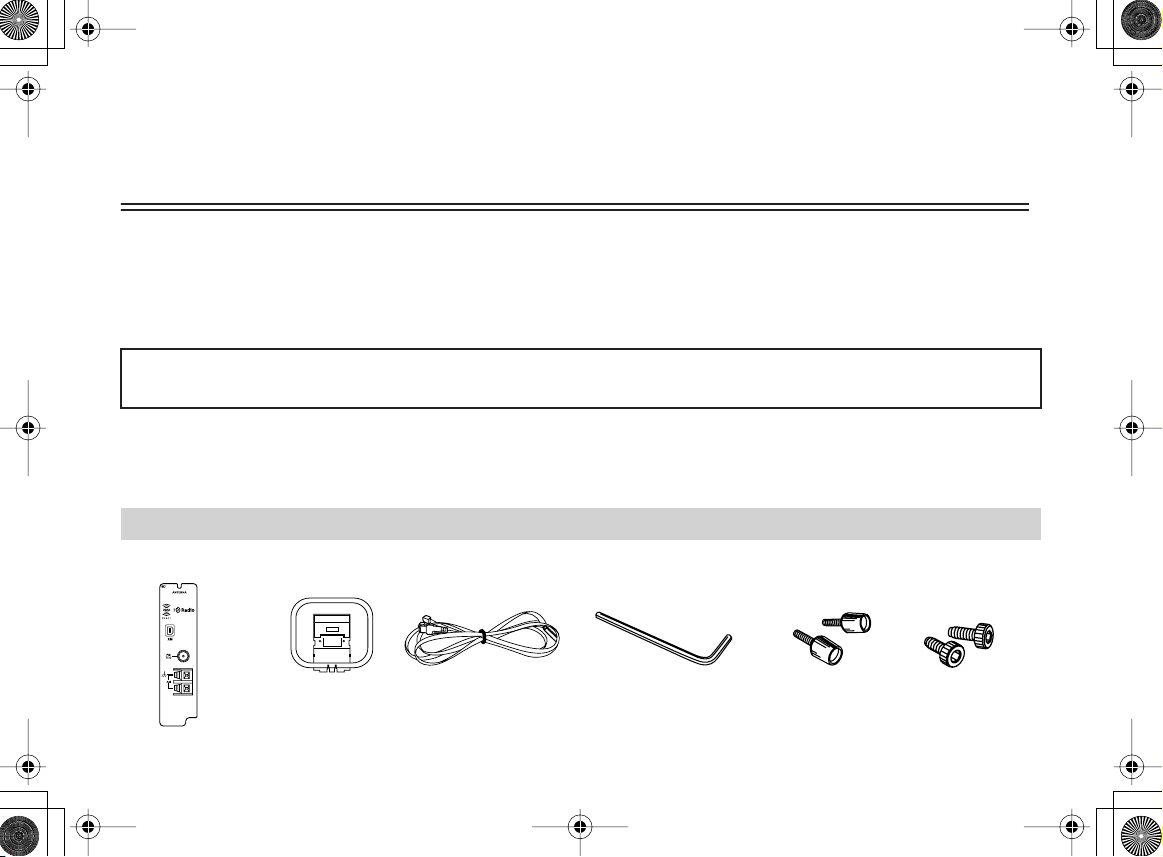
Supplied Accessories
Verify the following items are included in the package:
-
Board
Allen wrench (1 EA)
Hand screws for
removing board
Hexagon
screwsFM antennaAM antenna
1
Installing Board
T
/
C
■
■
Power off the main unit, and then unplug the
1
power cord from the AC outlet.
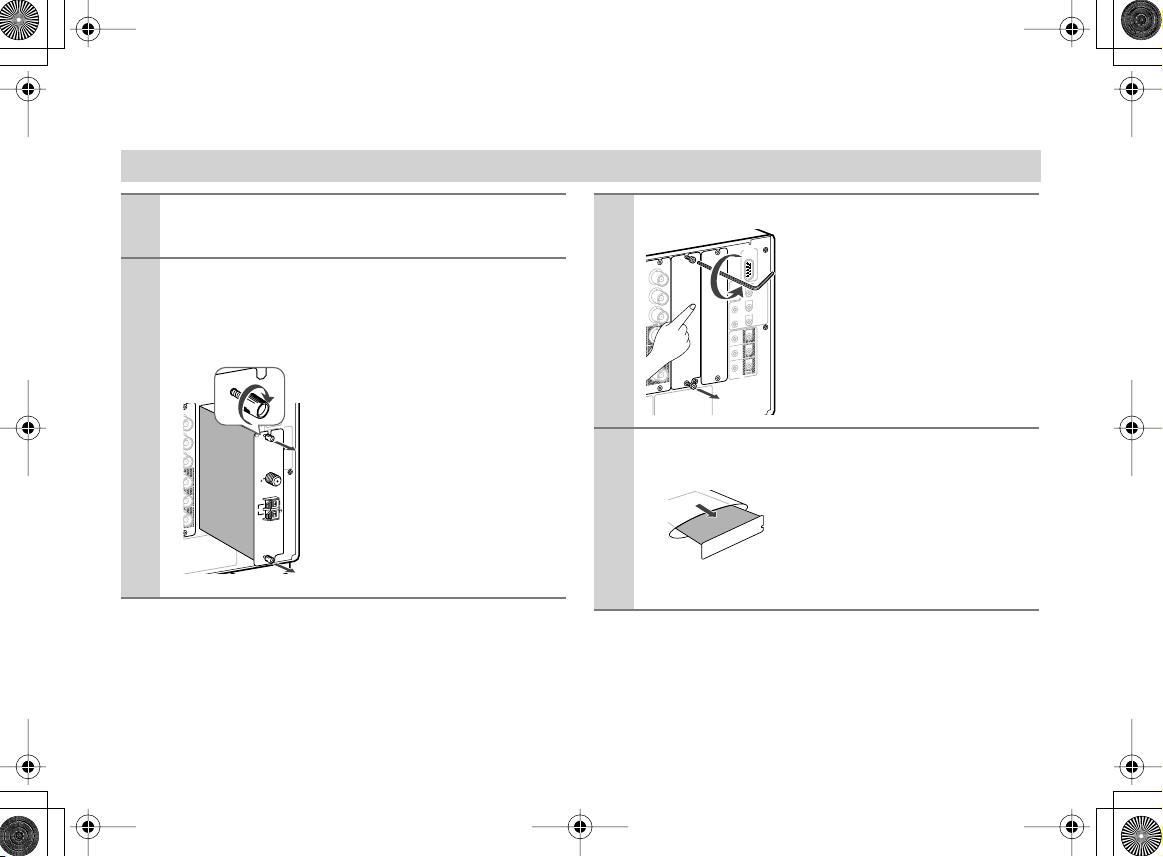
Remove the “K” sub-panel or board from the
2
main unit to which you want to add on the
optional board.
If any other slot is already used:
Remove the hexagon screws, one
top and one bottom of slot “K,”
O
E
D
I
V
IN
Y
B
P
R
P
Y
B
P
R
P
E
T
O
M
E
R
L
O
R
T
N
O
C
K
A
N
N
E
T
N
A
.
X
A
M
A
m
0
0
1
B
.
X
A
M
A
m
0
0
1
D
N
I
A
M
F
M
5
7
2
E
N
O
Z
3
E
N
O
Z
M
A
T
U
O
N
I
R
I
using the provided Allen wrench
in the same way described below.
V
2
1
R
E
G
G
I
R
T
T
U
O
A
.
X
A
M
A
m
0
0
2
Retain the hexagon screws for
C
.
X
A
M
A
m
0
0
1
E
.
X
A
M
A
m
0
0
subsequent reuse.
1
Next, introduce the hand screws
attached to the board into the top
UPP
and bottom screw holes, and
3
drive them in as deep as about 3/
16" (5 mm). Hold the screw
heads to pull out the board.
If this is the first time a slot is used:
O
E
D
I
V
T
N
E
N
O
P
M
O
IN
)
BNC
Y
B
P
R
P
T
U
O
Y
B
P
R
P
R
E
T
O
M
E
R
L
O
R
T
N
O
C
.
X
A
M
A
m
0
0
1
B
.
X
A
M
A
m
0
0
1
D
N
I
A
M
2
E
N
O
Z
3
E
N
O
Z
T
U
O
N
I
R
I
loosen the hexagon screws, one
top and one bottom of slot “K,” to
V
2
1
R
E
G
G
I
R
T
T
U
O
A
.
X
A
M
A
m
0
0
2
remove the sub-panel from the
C
.
X
A
M
A
m
0
0
1
E
.
X
A
M
A
m
0
rear panel. In doing so, loosen the
0
1
screws gradually while holding
UPP
the sub-panel to prevent it from
falling. Retain the hexagon
Using the provided Allen wrench,
2
23
S
screws for subsequent reuse.
Remove the sealing sticker carefully and take
the board out of the bag.
Do not touch any parts, solder
surfaces, or contact points of the
connectors with bare hands to
prevent electrostatic damage on
the circuit. Be sure to hold the
outer edges or panel part of the printed circuit board.
2
T
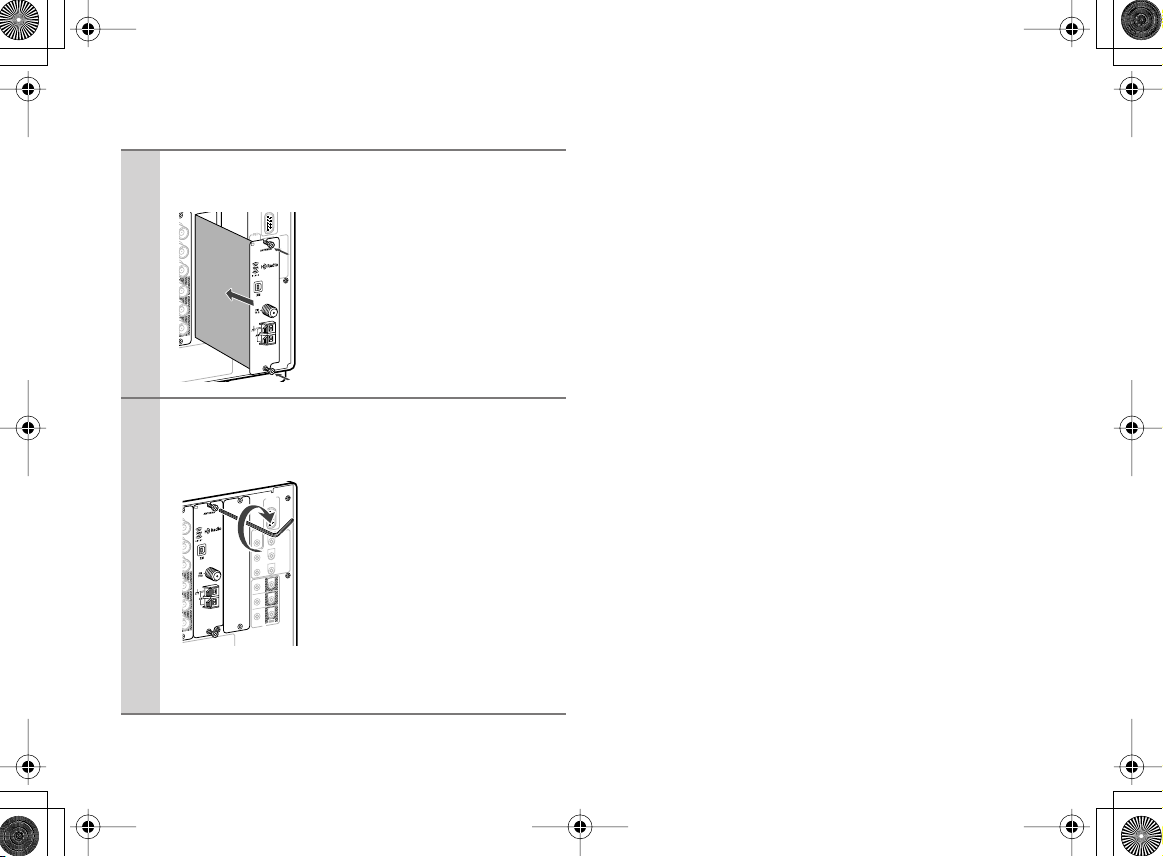
Insert the option board along the upper and
4
lower guide rails.
O
E
D
I
V
IN
Y
B
P
R
P
Y
B
P
R
P
Fix the option board firmly to the main unit
5
using the hexagon screws on the top and bot-
E
T
O
M
E
R
L
O
R
T
N
O
C
K
.
X
A
M
A
m
0
0
1
B
.
X
A
M
A
m
0
0
1
D
N
I
A
M
2
E
N
O
Z
3
E
N
O
Z
U
O
N
I
R
I
When the board hits the connector,
V
2
1
apply a little more pressure so that
R
E
G
G
I
R
T
T
U
O
A
.
X
A
M
A
m
0
0
2
the connector can be inserted com-
C
.
X
A
M
A
m
0
0
1
E
.
X
A
M
A
m
0
0
1
pletely. Make sure the surface of
the panel becomes flush for perfect
insertion.
UPP
T
tom.
Make sure to fasten the two screws
32
2
S
K
O
E
D
I
V
IN
Y
B
P
R
P
Y
B
P
R
P
R
E
T
O
M
E
R
L
O
R
T
N
O
C
.
X
A
M
A
m
0
0
1
B
.
X
A
M
A
m
0
0
1
D
N
I
A
M
2
E
N
O
Z
3
E
N
O
Z
O
N
I
R
I
completely. If they are loose, the
electrical contact between the ter-
V
2
1
R
E
G
G
I
R
T
T
U
O
minals and the ground or the signal
A
.
X
A
M
A
m
0
0
2
C
.
X
A
M
A
m
0
0
1
line may be poor and it may cause
E
.
X
A
M
A
m
0
0
1
failure.
UPP
Caution:
T
U
Be sure to fasten the screws with
washers, if exist, that were previously used to secure any board on the
slot.
3
Using XM Satellite Radio
Listening to XM Satellite Radio
Important XM Radio Information
To receive XM Radio you need to purchase an optional
XM Passport System and subscribe to XM’s paid programming. Please note that XM is currently only
licensed to provide service to the contiguous 48 United
States (not available in Alaska and Hawaii) and portions
of Canada. XM Radio service is not currently available
in Mexico or any other region outside the continental
U.S. and portions of Canada. For updates on service
availability please visit XM's website at
http://www.xmradio.com or http://www.xmradio.ca
Note:
Hardware and required basic monthly subscription sold separately. Premium Channels available at additional monthly cost.
Installation costs and other fees and taxes, including a onetime activation fee may apply. Subscription fee is consumer
only. All fees and programming subject to change.
®
About XM Radio:
There is a world beyond AM and FM. It is XM Satellite Radio.
XM offers more than 160 digital channels of audio entertainment, including 100% commercial-free music channels, in the
top markets in the U.S.
Channels with frequent explicit language are indicated with an
XL. Channel blocking is available by calling 1-800-XMRADIO.
About XM Canada:
XM Canada offers the most commercial-free music – and
engaging talk show programs. XM Canada creates original
content that reflects our unique Canadian culture and broadcasts it throughout North America.
Canadian Satellite Radio Inc. offers its satellite radio service
and operates under the XM Canada™ brand. XM Canada has
an exclusive Canadian licence from XM Satellite Radio Inc.
For more information about XM Canada, visit
www.xmradio.ca or call 1-877-GET-XMSR
4
A warning against reverse engineering:
It is prohibited to copy, decompile, disassemble, reverse engineer, or manipulate any technology incorporated in tuner
boards compatible with the XM Satellite Radio system. Furthermore, the AMBE
®
voice compression software included in
this product is protected by intellectual property rights including patent rights, copyrights, and trade secrets of Digital Voice
Systems, Inc. The user of this or any other software contained
in an XM Radio is explicitly prohibited from attempting to
copy, decompile, reverse engineer, or disassemble the object
code, or in any other way convert the object code into humanreadable form. The software is licensed solely for use within
this product.
The XM name and related logos are registered trademarks of XM Satellite Radio
Inc.
XM Ready
®
, XM Public Radio™ are trademarks of XM Satellite Radio Inc. ©2005 XM Satellite Radio Inc. All rights
reserved. All other trademarks are the property of their
respective owners.
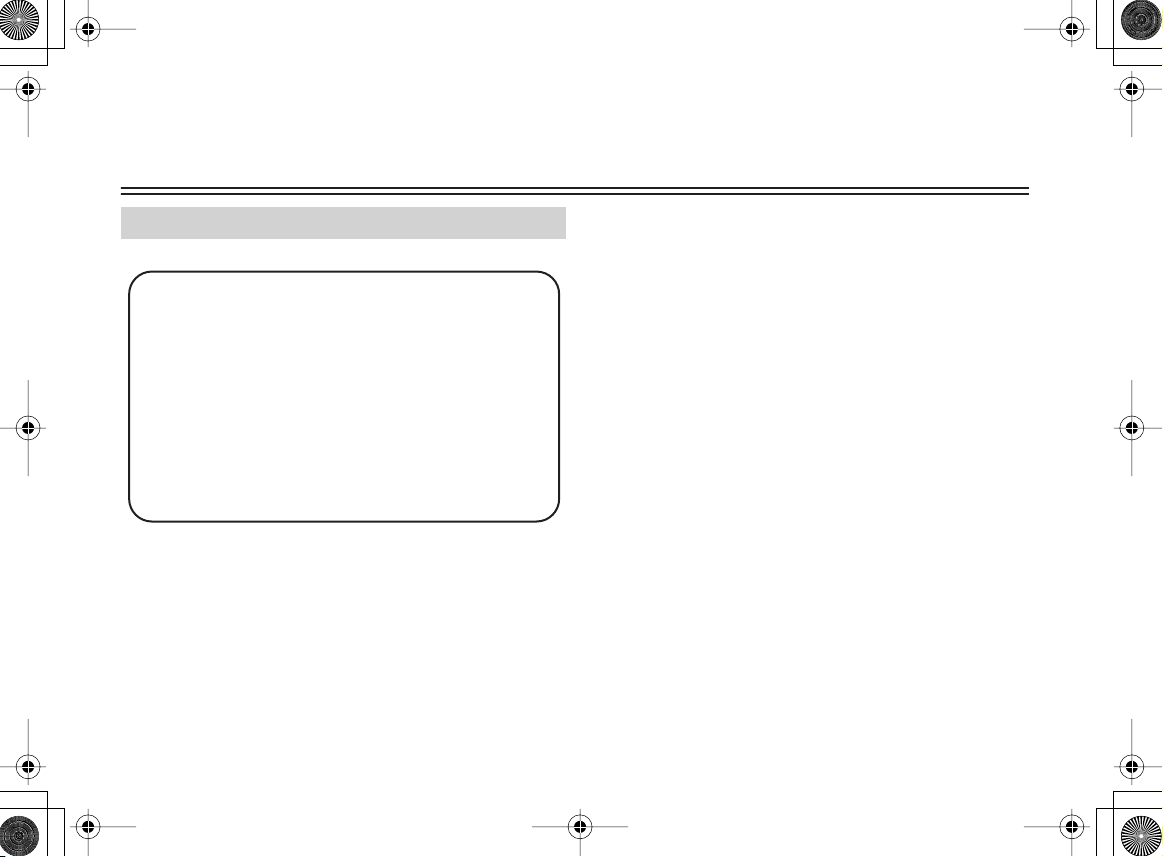
Connecting the XM Passport System
The XM Passport System is sold separately. You can purchase
the XM Passport System from the XM Web site at:
http://www.xmradio.com (U.S.A.)
http://www.xmradio.ca (Canada)
Connect the Passport System to the XM antenna jack on the
board.
XM antenna jack
Put the XM Passport System by a southerly facing window,
with nothing obstructing its path to the sky.
5
 Loading...