

Page 1
HP Color LaserJet CP2020 Series Printer – Manage and Maintain
Load paper and print media
How do I? Steps to perform
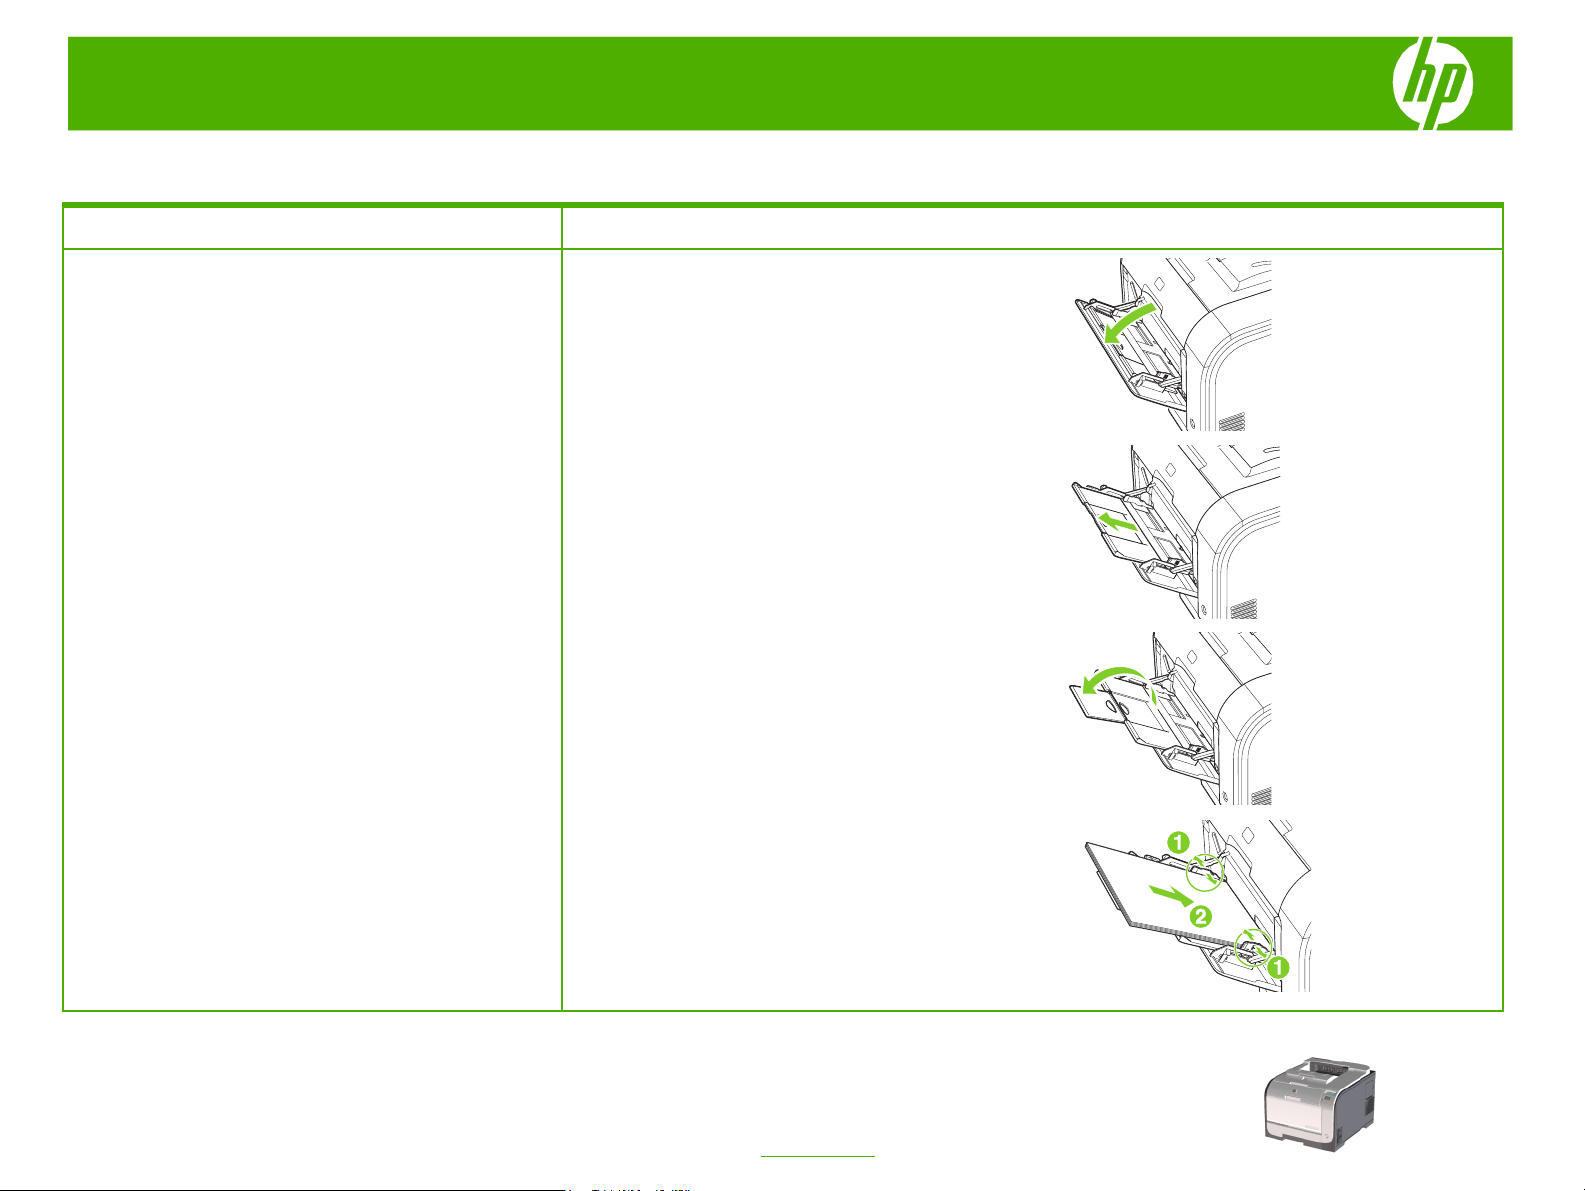
Tray 1
Load paper and print media
1 Open tray 1.
2 If loading long sheets of media, pull out the extension
tray.
3 If necessary, flip out the extension.
© 2008 Copyright Hewlett-Packard
Development Company, L.P.
4 Extend the paper guides fully (callout 1) and then load
the media stack into tray 1 (callout 2). Adjust the paper
guides to the size of the paper.
NOTE: Place the media into tray 1 with the side to be
printed on face-up and the top toward the product.
1
www.hp.com
Page 2
HP Color LaserJet CP2020 Series Printer – Manage and Maintain
How do I? Steps to perform
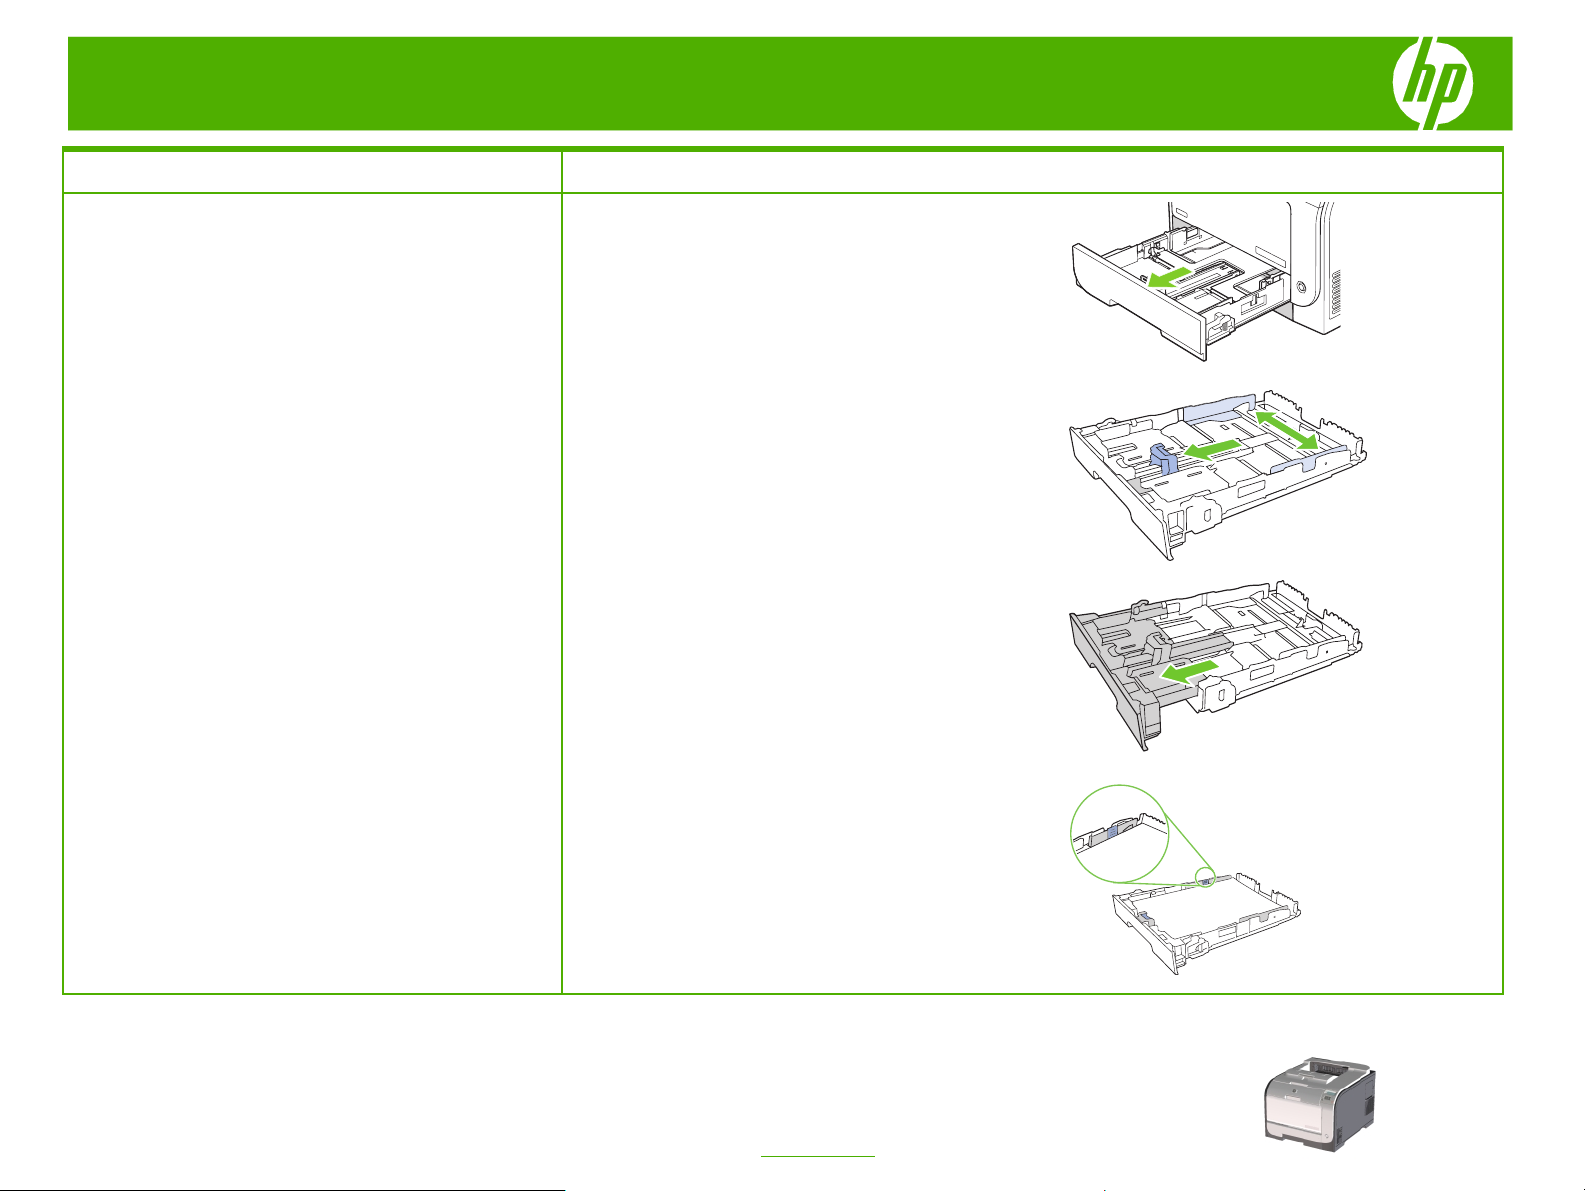
Load tray 2 or 3
Load paper and print media (continued)
2 Slide open the paper length and width guides.
1 Pull the tray out of the product.
● To load Legal-size paper, extend the tray by
pressing and holding the extension tab while pulling
the front of the tray toward you.
© 2008 Copyright Hewlett-Packard
Development Company, L.P.
NOTE: When it is loaded with Legal-size paper, the tray
extends from the front of the product approximately 64
mm (2.5 inches).
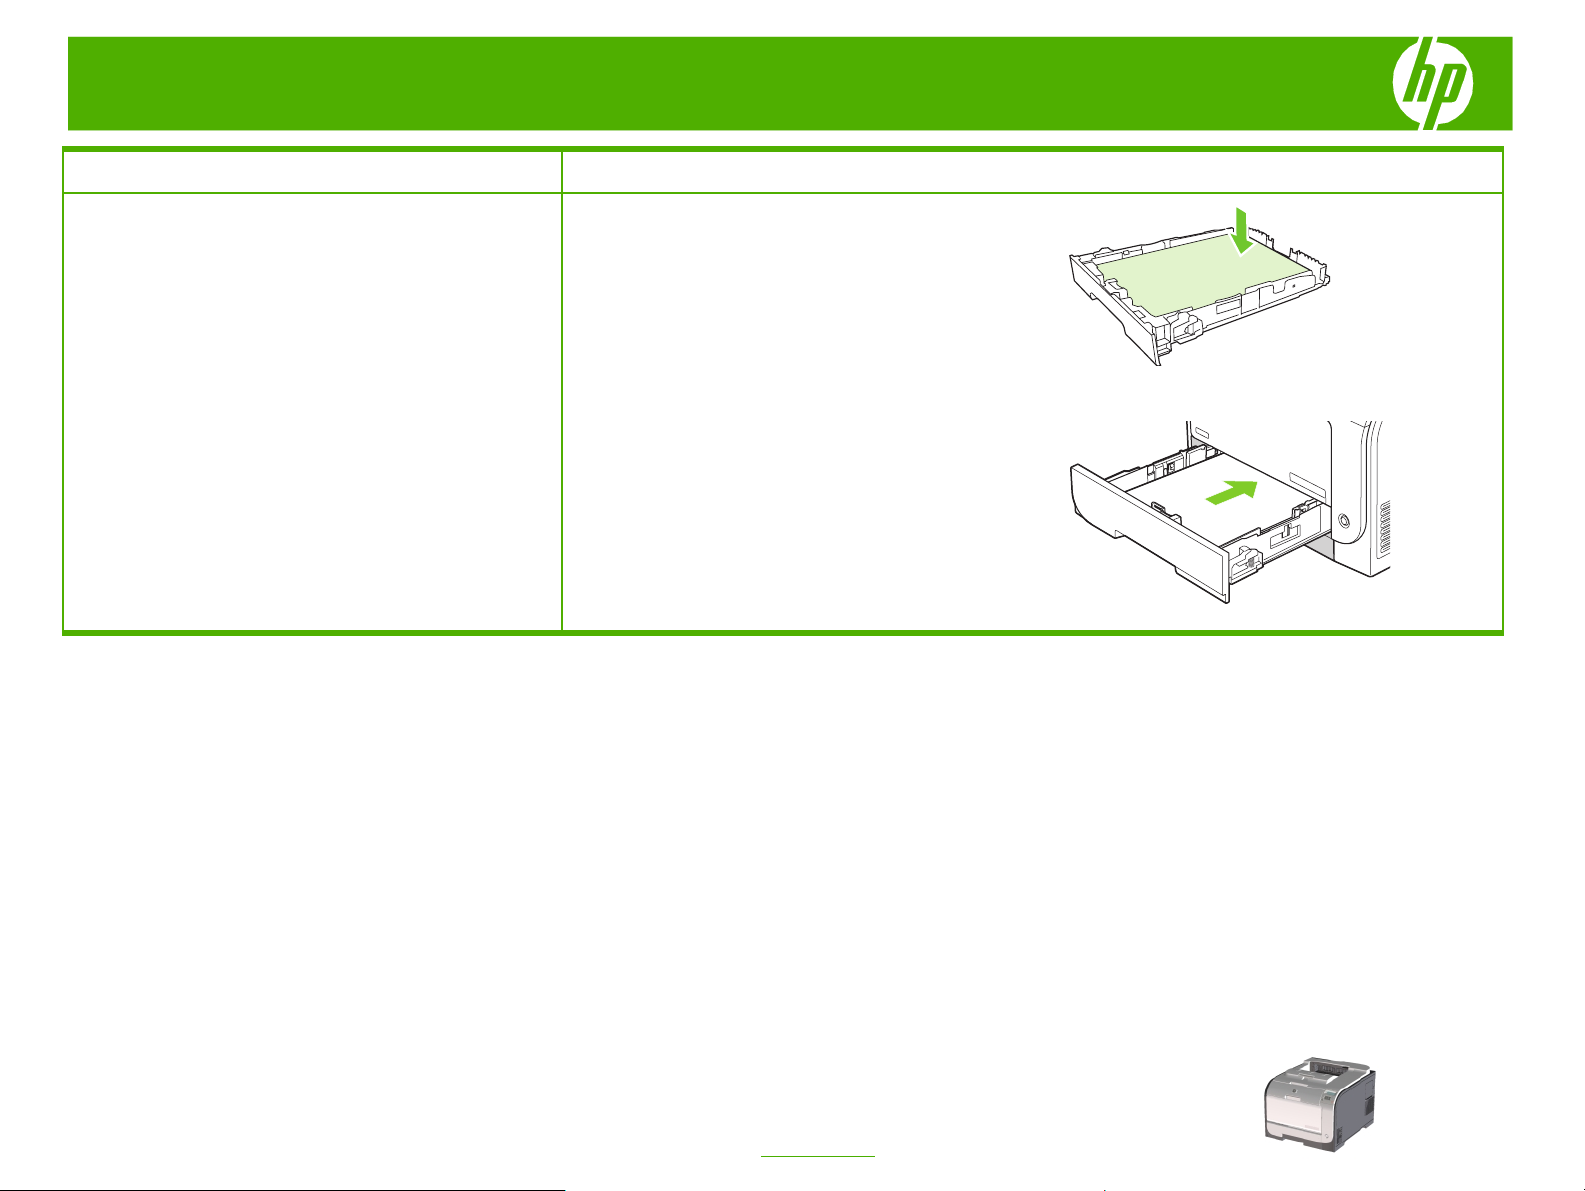
3 Place the paper in the tray and make sure that it is flat at
all four corners. Slide the paper length and width guides
so that they are against the stack of paper.
2
www.hp.com
Page 3
HP Color LaserJet CP2020 Series Printer – Manage and Maintain
How do I? Steps to perform
4 Push down on the paper to make sure that the paper
Load paper and print media (continued)
5 Slide the tray into the product.
stack is below the paper limit tabs on the side of the tray.
© 2008 Copyright Hewlett-Packard
Development Company, L.P.
3
www.hp.com
Page 4
HP Color LaserJet CP2020 Series Printer – Manage and Maintain
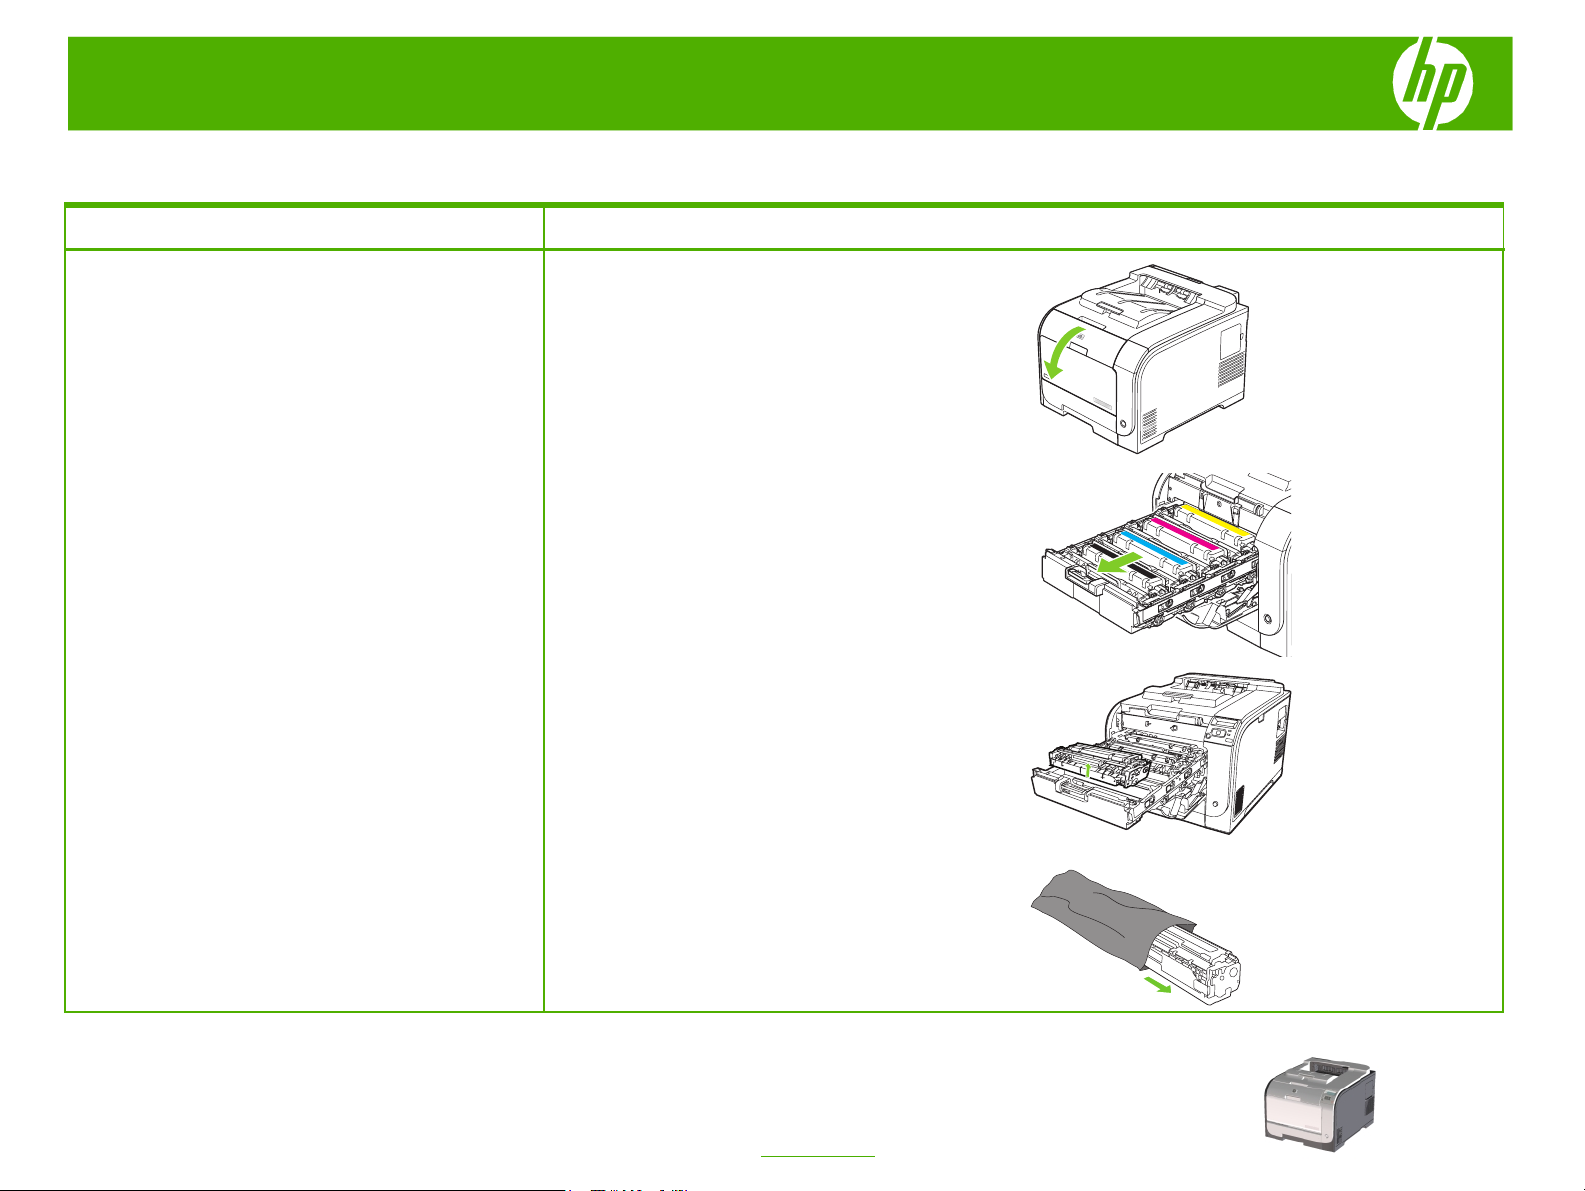
Replace print cartridges
How do I? Steps to perform
1 Open the front door.
Replace print cartridges
2 Pull out the print-cartridge drawer.
3 Grasp the handle on the old print cartridge and then
pull the cartridge straight up to remove it.
© 2008 Copyright Hewlett-Packard
Development Company, L.P.
4 Remove the new print cartridge from the packaging.
1
www.hp.com
Page 5

HP Color LaserJet CP2020 Series Printer – Manage and Maintain
How do I? Steps to perform
5 Remove the orange, plastic shield from the bottom of
Replace print cartridges (continued)
the new print cartridge.
CAUTION: Do not touch the imaging drum on the
bottom of the print cartridge. Fingerprints on the imaging
drum can cause print-quality problems.
6 Insert the new print cartridge into the product.
© 2008 Copyright Hewlett-Packard
Development Company, L.P.
7 Pull the tab on the left side of the print cartridge
straight up to completely remove the sealing tape.
Discard the sealing tape.
2
www.hp.com
Page 6

HP Color LaserJet CP2020 Series Printer – Manage and Maintain
How do I? Steps to perform
8 Close the print-cartridge drawer.
Replace print cartridges (continued)
9 Close the front door.
10 Place the old print cartridge in the box for the new
print cartridge. Follow the recycling instructions that
are included in the box.
© 2008 Copyright Hewlett-Packard
Development Company, L.P.
3
www.hp.com
Page 7

HP Color LaserJet CP2020 Series Printer – Manage and Maintain
Clear paper jams
How do I? Steps to perform
NOTE: If the sheet tears, make sure that all of the fragments
Clear jams in tray 1
are removed before you resume printing.
Pull the jammed sheet from tray 1.
If paper has entered far enough into tray 1, remove tray 2, drop
the tray 1 plate down, and then remove the paper from the
opening.
1 Pull out tray 2 and place it on a flat surface.
Clear jams in tray 2
2 Lower the jam-access tray.
3 Remove the jammed sheet by pulling it straight out.
2008 Copyright Hewlett-Packard
Development Company, L.P.
1
www.hp.com
Page 8

HP Color LaserJet CP2020 Series Printer – Manage and Maintain
!
How do I? Steps to perform
4 Replace tray 2.
Clear jams in tray 2 (continued)
5 Press OK to continue printing.
1 Pull out tray 3 and place it on a flat surface.
Clear jams in tray 3
2008 Copyright Hewlett-Packard
Development Company, L.P.
2 Remove the jammed sheet by pulling it straight out.
2
www.hp.com
Page 9

HP Color LaserJet CP2020 Series Printer – Manage and Maintain
!
How do I? Steps to perform
3 Replace tray 3.
Clear jams in tray 3 (continued)
4 Press OK to continue printing.
1 Open the fuser door.
Clear jams in fuser area
2008 Copyright Hewlett-Packard
Development Company, L.P.
2 If necessary, push the guide (callout 1) and remove any
visible paper (callout 2) from the bottom of the delivery
area.
NOTE: If the sheet tears, make sure that all fragments are
removed before you resume printing. Do not use sharp
objects to remove fragments.
3
www.hp.com
Page 10

HP Color LaserJet CP2020 Series Printer – Manage and Maintain
How do I? Steps to perform
3 Close the rear door.
Clear jams in fuser area (continued)
1 Look for jammed paper in the output bin area.
Clear jams in output bin
Clear jams in duplexer (duplexing
models only)
2 Remove any visible media.
NOTE: If the sheet tears, make sure that all fragments are
removed before resuming printing.
3 Open and then close the rear door to clear the message.
1 Open the rear door.
2008 Copyright Hewlett-Packard
Development Company, L.P.
4
www.hp.com
Page 11

HP Color LaserJet CP2020 Series Printer – Manage and Maintain
How do I? Steps to perform
2 If necessary, pull the guide (callout 1) and remove any
Clear jams in duplexer (duplexing
models only) (continued)
visible paper (callout 2) from the bottom of the delivery
area.
3 If necessary, remove any visible paper from bottom side of
the duplexing unit.
4 If you can not see any jammed paper, lift the duplexing unit
using the tab on the side of the duplexing unit.
2008 Copyright Hewlett-Packard
Development Company, L.P.
5 If you can see the trailing edge of the paper, remove the
paper from the product.
5
www.hp.com
Page 12

HP Color LaserJet CP2020 Series Printer – Manage and Maintain
How do I? Steps to perform
6 If you can see the leading edge of the paper, remove it from
Clear jams in duplexer (duplexing
the product.
models only) (continued)
7 Close the rear door.
2008 Copyright Hewlett-Packard
Development Company, L.P.
6
www.hp.com
 Loading...