

Page 1

welcome to your hp designjet printer
welcome to your
hp designjet printer
hp designjet
5500 series
welcome
how do I ...
tell me about ...
the problem is ...
legal notices
glossary
index
This guide gives you the information you need to make high-quality prints on
a wide range of printing materials.
The information is organized into three main categories:
● How do I ... describes how to carry out routine procedures such as
loading paper or changing an ink cartridge. Many procedures are
illustrated with graphic animations.
● Tell me about ... gives background and reference information about the
printer.
● The problem is ... helps you to solve any problems that may occur
while printing.
In addition, there is a comprehensive
index to the whole guide, and a
glossary of technical terms.
© 2002 hewlett-packard company
file:///C|/Documents%20and%20Settings/---/Desktop/HP/html/start.htm [8/5/2002 8:23:18 PM]
Page 2
how do I...
how do I...
hp designjet
5500 series
welcome
how do I ...
tell me about ...
the problem is ...
legal notices
glossary
index
how do I use paper and other printing materials?
how do I use rolls?
how do I use sheets?
how do I download media profiles?
how do I use non-hp printing materials?
how do I use the ink system?
how do I use the ink cartridges?
how do I use the printheads?
how do I use the printhead cleaners?
how do I switch ink systems?
how do I use the front panel?
how do I print the internal prints?
how do I obtain information on the printing material?
how do I select the ink emulation mode?
how do I change the page size?
how do I change the print quality?
how do I select production mode?
how do I change the drying time?
how do I set page format options?
how do I set image options?
how do I use print management features?
how do I print the front-panel configuration?
how do I change the graphics language setting?
how do I change the language of the front panel?
how do I calibrate the printer?
how do I perform accuracy calibration?
file:///C|/Documents%20and%20Settings/---/Desktop/HP/html/p1000.htm (1 of 2) [8/5/2002 5:06:25 PM]
Page 3

how do I...
how do I perform banding calibration?
how do I calibrate color output?
how do I align the printheads?
other questions
how do I start webaccess?
how do I maintain my printer?
how do I upgrade my printer's software?
© 2002 hewlett-packard company
file:///C|/Documents%20and%20Settings/---/Desktop/HP/html/p1000.htm (2 of 2) [8/5/2002 5:06:25 PM]
Page 4
how do I use rolls?
how do I use rolls?
hp designjet
5500 series
welcome
how do I ...
tell me about ...
the problem is ...
legal notices
glossary
index
loading roll guidelines
loading rolls onto the spindle
trimming the printing material
loading rolls into the printer
unloading rolls from the take-up reel
unloading rolls
changing the core tube
media length tracking
© 2002 hewlett-packard company
file:///C|/Documents%20and%20Settings/---/Desktop/HP/html/p0032.htm [8/5/2002 2:38:12 PM]
Page 5

how do I use sheets?
how do I use sheets?
hp designjet
5500 series
welcome
how do I ...
tell me about ...
the problem is ...
legal notices
glossary
index
how do I load sheets?
how do I unload sheets?
© 2002 hewlett-packard company
file:///C|/Documents%20and%20Settings/---/Desktop/HP/html/p0043.htm [8/5/2002 3:14:13 PM]
Page 6

how do I download media profiles?
how do I download media
profiles?
hp designjet
5500 series
welcome
how do I ...
tell me about ...
the problem is ...
legal notices
glossary
index
Each supported printing material has its own characteristics; refer to physical
characteristics of printing materials. For optimum image quality the printer
changes the way it prints onto each different printing material. For example,
some may need more ink and some may require a longer drying time. So the
printer must be given a description of the requirements of each printing
material. This description is called the “media profile”. Existing media profiles
for your printer are already installed in the printer's software.
However, you would find it inconvenient to scroll through a list of all HP
printing materials, so your printer contains media profiles for only the most
commonly used materials. If you buy an HP printing material for which your
printer has no media profile, you will find that you cannot select that material
in your printer driver, in WebAccess, or in your printer's front panel. In this
case, you should use
webaccess to download the correct media profile.
© 2002 hewlett-packard company
file:///C|/Documents%20and%20Settings/---/Desktop/HP/html/p0025.htm [8/5/2002 2:38:11 PM]
Page 7
how do I use non-hp printing materials?
how do I use non-hp
printing materials?
hp designjet
5500 series
welcome
how do I ...
tell me about ...
the problem is ...
legal notices
glossary
index
During the loading process, the front panel will ask you to select the vendor
of your printing material. In the Media Selection menu, you can choose HP or
Others. If you use UV inks, you can also choose 3M.
hp or 3M
If you choose HP or 3M, you will be shown a list of printing materials.
Whichever you select, a media profile is already available to define to the
printer the precise characteristics of the material.
others
If you choose Others, you are offered a selection of media profiles grouped
by families (coated, photo, fine arts, textile, etc.). Choose the family that
seems closest to the characteristics of your non-HP printing material.
After choosing a family, you have two different options:
● Choose profile to choose a specific media profile from the selected
family.
● Print sample if you need help to decide which media profile to use.
One sample will be printed for each media profile in the family; this
takes some minutes, depending on the printing material and the print
quality selected in the front panel.
When you have printed the samples, choose the media profile that
gives the best results for your printing material. Remember which
media profile you chose, so that you can use it again the next time you
use the same printing material.
RGB sample
CMYK sample
Many of our customers prefer high-grammage printing materials (about 170
g/m²), and HP has provided a generic media profile best suited to such
materials. Choose Heavyweight Coated, and then HW Coated 2. This profile
is designed to give particularly good quality, especially in Production mode.
file:///C|/Documents%20and%20Settings/---/Desktop/HP/html/p1007.htm (1 of 2) [8/5/2002 5:06:44 PM]
Page 8

how do I use non-hp printing materials?
In some cases it may be possible to select Production mode although the nonHP printing material is not compatible with Production mode. In such cases
the printer will print in Productivity mode.
see also
printing materials and print speeds
how do I use rolls?
how do I use sheets?
© 2002 hewlett-packard company
file:///C|/Documents%20and%20Settings/---/Desktop/HP/html/p1007.htm (2 of 2) [8/5/2002 5:06:44 PM]
Page 9

how do I use the ink cartridges?
how do I use the ink
cartridges?
hp designjet
5500 series
welcome
how do I ...
tell me about ...
the problem is ...
legal notices
glossary
index
how do I obtain ink cartridge statistics?
how do I remove ink cartridges?
how do I install ink cartridges?
© 2002 hewlett-packard company
file:///C|/Documents%20and%20Settings/---/Desktop/HP/html/p0058.htm [8/5/2002 3:14:14 PM]
Page 10
how do I use the printheads?
how do I use the
printheads?
hp designjet
5500 series
welcome
how do I ...
tell me about ...
the problem is ...
legal notices
glossary
index
printhead precautions
how do I obtain printhead statistics?
how do I remove printheads?
how do I install printheads?
how do I perform printhead recovery?
© 2002 hewlett-packard company
file:///C|/Documents%20and%20Settings/---/Desktop/HP/html/p0062.htm [8/5/2002 3:23:58 PM]
Page 11

how do I use the printhead cleaners?
how do I use the printhead
cleaners?
hp designjet
5500 series
welcome
how do I ...
tell me about ...
the problem is ...
legal notices
glossary
index
how do I remove printhead cleaners?
how do I install printhead cleaners?
When you change a printhead, you should also change the corresponding
printhead cleaner. Leaving the old printhead cleaner in the printer will
shorten the new printhead's life and possibly damage the printer.
© 2002 hewlett-packard company
file:///C|/Documents%20and%20Settings/---/Desktop/HP/html/p0066.htm [8/5/2002 3:23:58 PM]
Page 12

how do I switch ink systems?
how do I switch ink
systems?
hp designjet
5500 series
welcome
how do I ...
tell me about ...
the problem is ...
legal notices
glossary
index
There are three steps to perform when changing ink systems.
how do I remove the ink system?
how do I install the ink system?
how do I store the ink supplies and ink tubes?
© 2002 hewlett-packard company
file:///C|/Documents%20and%20Settings/---/Desktop/HP/html/p0054.htm [8/5/2002 3:14:14 PM]
Page 13

how do I print the internal prints?
how do I print the internal
prints?
hp designjet
5500 series
welcome
how do I ...
tell me about ...
the problem is ...
legal notices
glossary
index
Select a print ...
menu print
configuration print
printer usage information
image quality print
service configuration
hp-gl/2 palette
samples
© 2002 hewlett-packard company
file:///C|/Documents%20and%20Settings/---/Desktop/HP/html/p0140.htm [8/5/2002 4:23:08 PM]
Page 14
how do I obtain information on the printing material?
how do I obtain
information on the printing
material?
hp designjet
5500 series
welcome
how do I ...
tell me about ...
the problem is ...
legal notices
glossary
index
Choose the icon, then Roll/Sheet Info.
You will see the following information displayed on the front panel:
● The manufacturer's name
● The type of printing material you have selected
● The total width of the roll in millimeters
● The maximum printable area available
● The media profile revision
© 2002 hewlett-packard company
file:///C|/Documents%20and%20Settings/---/Desktop/HP/html/p0024.htm [8/5/2002 2:38:23 PM]
Page 15

how do I select the ink emulation mode?
how do I select the ink emulation mode?
hp designjet
5500 series
welcome
how do I ...
tell me about ...
the problem is ...
legal notices
glossary
index
The ink emulation mode can be set from WebAccess or from your printer
driver.
To set it from the front panel, choose the
icon, then Internal RIP Settings
> Ink Emulation.
The selection you have made will be indicated by the √ symbol.
Watch the animation below.
For an explanation of the ink emulation mode, see
ink emulation mode.
© 2002 hewlett-packard company
file:///C|/Documents%20and%20Settings/---/Desktop/HP/html/p0146.htm [8/5/2002 4:23:13 PM]
Page 16

how do I change the page size?
how do I change the page
size?
hp designjet
5500 series
welcome
how do I ...
tell me about ...
the problem is ...
legal notices
glossary
index
This example shows how to adjust the page size.
Make sure the front panel displays the printer setup menu icon. If it does
not, press the Top key.
The selection you have made will be indicated by the √ symbol.
Watch the animation below.
© 2002 hewlett-packard company
file:///C|/Documents%20and%20Settings/---/Desktop/HP/html/p0147.htm [8/5/2002 4:23:07 PM]
Page 17

how do I change the print quality?
how do I change the print
quality?
hp designjet
5500 series
welcome
how do I ...
tell me about ...
the problem is ...
legal notices
glossary
index
Your printer has four different print modes that determine the print quality
and speed of printing. The four modes are called Max Quality, Productivity,
Production, and Max Speed. For more information on these print modes, see
print resolution and printing materials and print speeds.
You can change from one print mode to another:
● using the printer driver from your software application,
● using WebAccess from your Web browser, or
● using the front panel.
If you would like to select Production mode, see
how do I select production
mode? for more detailed instructions.
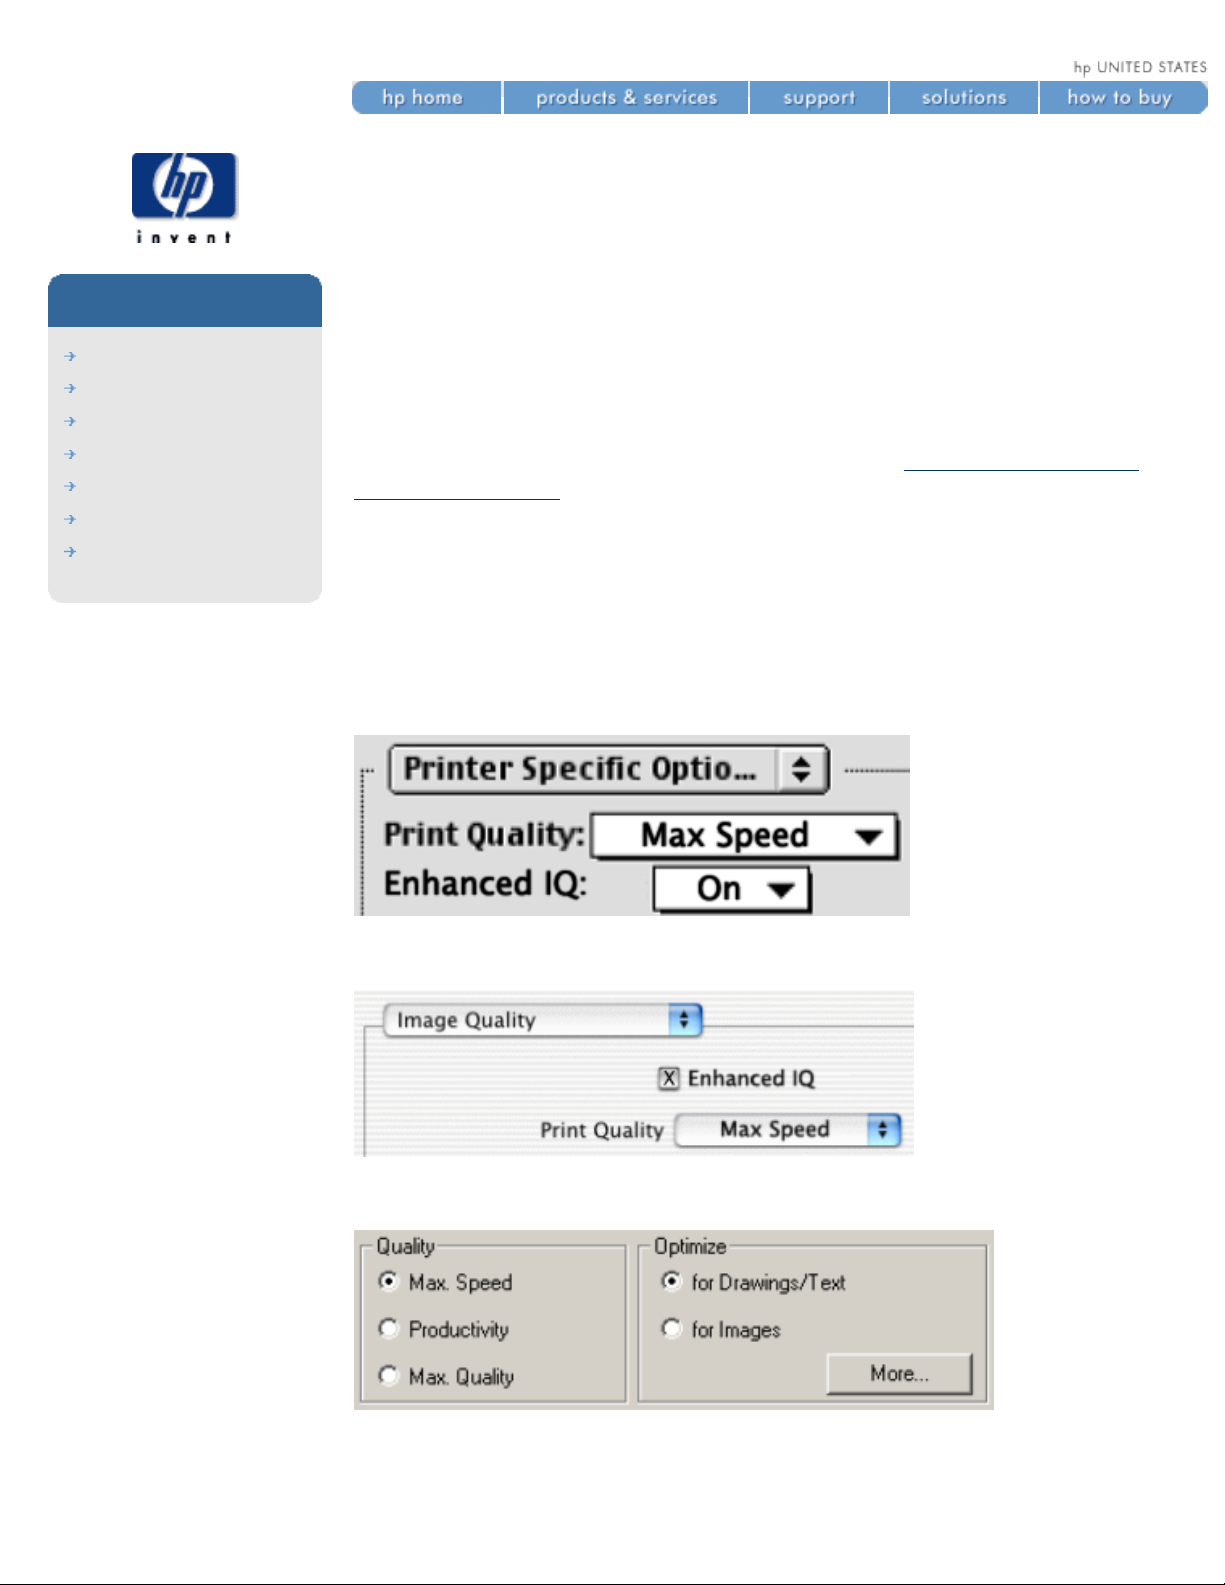
to change the print quality using the printer driver
Go to the Device Options tab (Windows) or the Printer Specific Options tab
(Mac OS). You will see a Print Quality option that allows you to select the
Max Quality, Productivity, or Max Speed print modes.
You will also see an Enhanced IQ check box. If you check this box, the effect
is to increase the quality but decrease the speed of whichever print mode
you have selected. The exact nature of the effect depends on the print mode
selected (see
print resolution).
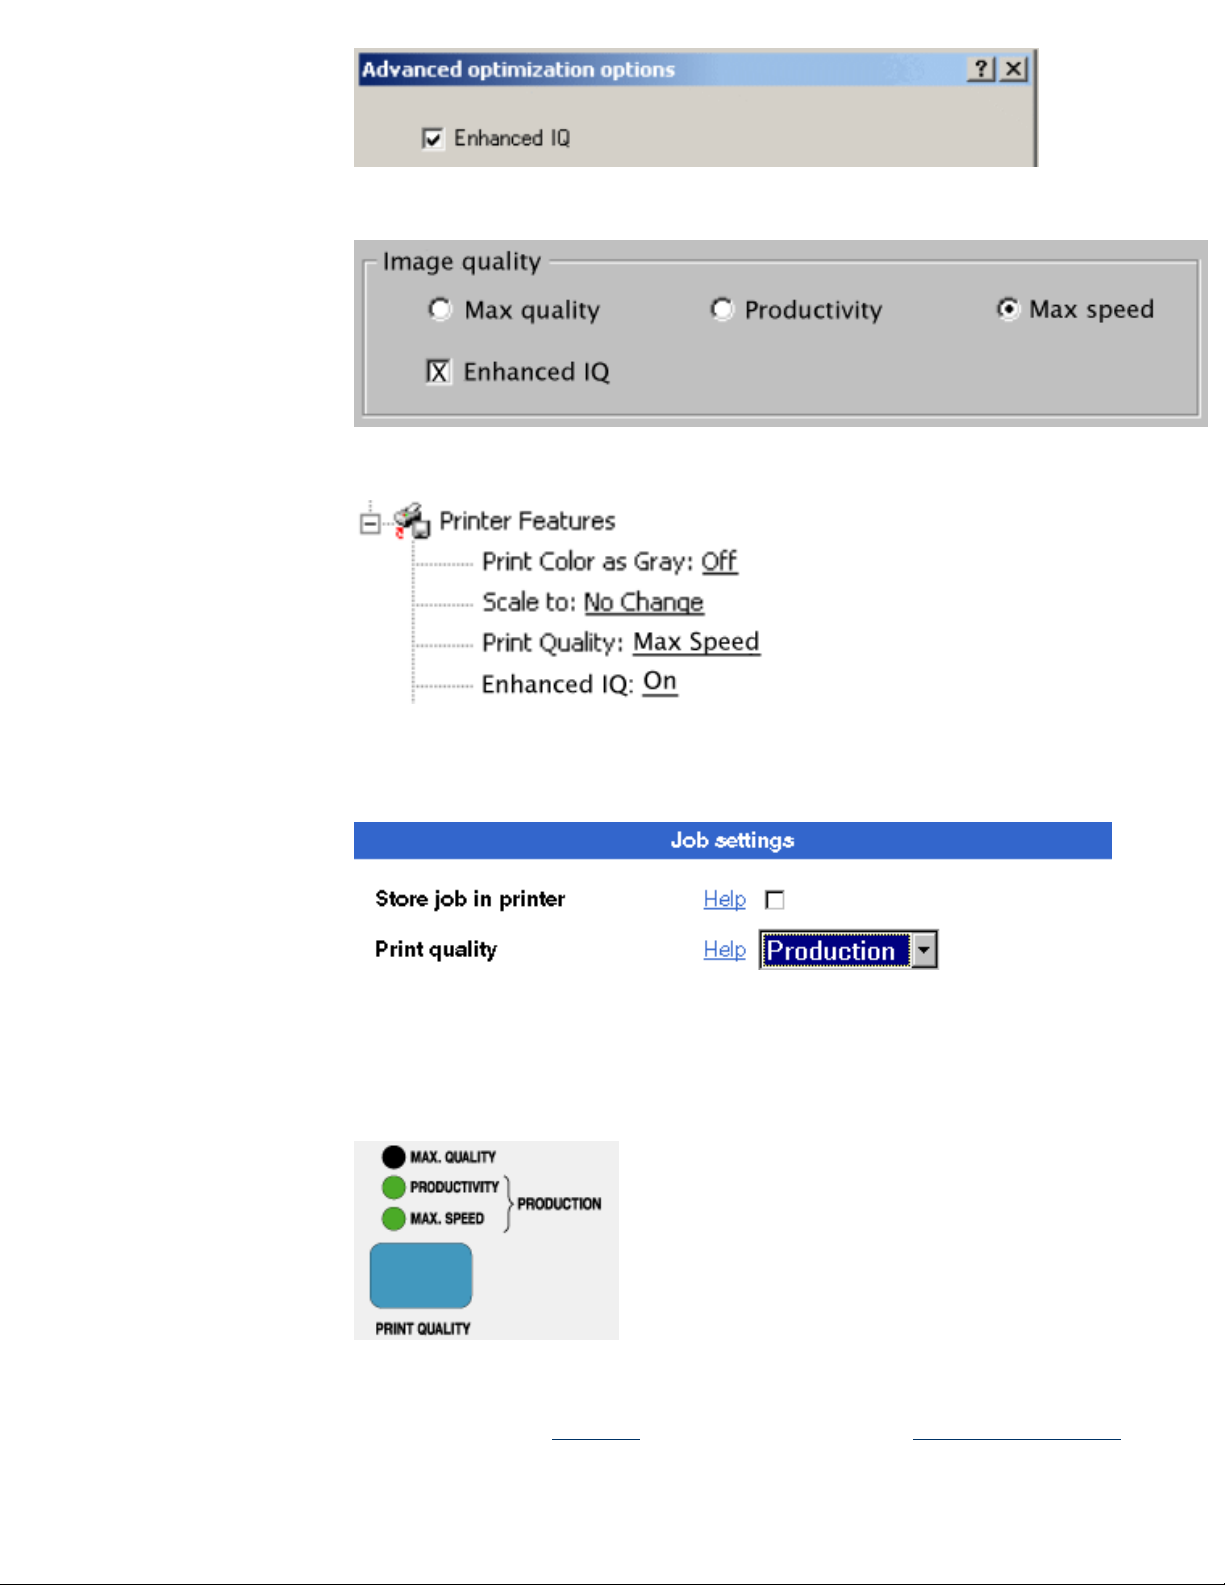
to change the print quality using webaccess
Choose Submit Job and you will see a Print Quality option. With this you can
select the Max Quality, Productivity, Production, or Max Speed print modes.
to change the print quality using the front panel
Press the Print Quality key repeatedly until the print mode you want is
selected. A green light is shown beside the selected print mode. When
Production mode is selected, two green lights are shown.
notes
● The print mode set with the printer driver or with WebAccess overrides
the print mode set with the front panel.
● You cannot change the print mode of pages that the printer is already
receiving or has already received (even if they have not started to print
yet).
© 2002 hewlett-packard company
file:///C|/Documents%20and%20Settings/---/Desktop/HP/html/p0196.htm (1 of 2) [8/5/2002 4:28:35 PM]
Page 18

how do I change the print quality?
file:///C|/Documents%20and%20Settings/---/Desktop/HP/html/p0196.htm (2 of 2) [8/5/2002 4:28:35 PM]
Page 19
how do I select production mode?
how do I select production
mode?
hp designjet
5500 series
welcome
how do I ...
tell me about ...
the problem is ...
legal notices
glossary
index
Production mode is a fast print mode that gives acceptable image quality for
some purposes. It is available only with dye-based inks and certain specific
HP paper types: Coated, Heavyweight Coated, Productivity Gloss, and
Productivity Semi-Gloss. When one of these paper types is loaded, the front
panel announces that Production mode is available.
If you decide to use a non-HP printing material, we recommend a highgrammage (160 to 170 gm) coated material. See
how do I use non-hp
printing materials?
to select production mode using the printer driver
To select Production mode in the printer driver, you must select the Max
Speed mode with the Enhanced IQ option. The exact method of doing this
depends on the driver; see the examples below.
Mac OS 8 or 9 driver
Mac OS X driver
Windows HP-GL/2 driver
Click the More button above to obtain the Advanced Optimization Options
box, below:
file:///C|/Documents%20and%20Settings/---/Desktop/HP/html/p1013.htm (1 of 3) [8/5/2002 5:06:39 PM]
Page 20
how do I select production mode?
Windows 9x or NT PostScript driver
Windows 2000 or XP PostScript driver
to select production mode using webaccess
Choose Submit Job and you will see a Print Quality option. Select Production.
to select production mode using the front panel
Press the Print Quality key repeatedly until you see two green lights, beside
Productivity and Max Speed. The two lights indicate that Production mode is
selected.
image quality problems?
If you experience banding in Production mode, try banding calibration.
see also
file:///C|/Documents%20and%20Settings/---/Desktop/HP/html/p1013.htm (2 of 3) [8/5/2002 5:06:39 PM]
Page 21

how do I select production mode?
how do I select the print quality?
© 2002 hewlett-packard company
file:///C|/Documents%20and%20Settings/---/Desktop/HP/html/p1013.htm (3 of 3) [8/5/2002 5:06:39 PM]
Page 22

how do I change the drying time?
how do I change the
drying time?
hp designjet
5500 series
welcome
how do I ...
tell me about ...
the problem is ...
legal notices
glossary
index
You may wish to change the drying time setting to suit special printing
conditions. For more details, see
tell me about drying time.
Choose the
icon, then Device Setup > Drying Time > Manual.
The selection you have made will be indicated by the √ symbol.
This is illustrated by the animation below.
© 2002 hewlett-packard company
file:///C|/Documents%20and%20Settings/---/Desktop/HP/html/p0148.htm [8/5/2002 4:23:13 PM]
Page 23

how do I set page format options?
how do I set page format
options?
hp designjet
5500 series
welcome
how do I ...
tell me about ...
the problem is ...
legal notices
glossary
index
how do I adjust the margins?
how do I rotate an image?
how do I print a mirror image?
how do I scale the image?
© 2002 hewlett-packard company
file:///C|/Documents%20and%20Settings/---/Desktop/HP/html/p0176.htm [8/5/2002 4:28:35 PM]
Page 24

how do I set image options from the front panel?
how do I set image options
from the front panel?
hp designjet
5500 series
welcome
how do I ...
tell me about ...
the problem is ...
legal notices
glossary
index
how do I view current configuration settings?
how do I view the colors available in a palette?
how do I change the palette settings?
how do I change the treatment of overlapping lines?
© 2002 hewlett-packard company
file:///C|/Documents%20and%20Settings/---/Desktop/HP/html/p1004.htm [8/5/2002 5:06:25 PM]
Page 25

how do I use print management features?
how do I use print
management features?
hp designjet
5500 series
welcome
how do I ...
tell me about ...
the problem is ...
legal notices
glossary
index
canceling a page
canceling the drying time
managing the queue
tell me about nesting pages
Note: RTL and HP-GL/2 jobs are single pages, but PostScript jobs may
consist of more than one page.
© 2002 hewlett-packard company
file:///C|/Documents%20and%20Settings/---/Desktop/HP/html/p0202.htm [8/5/2002 4:36:00 PM]
Page 26

how do I print the front-panel configuration?
how do I print the frontpanel configuration?
hp designjet
5500 series
welcome
how do I ...
tell me about ...
the problem is ...
legal notices
glossary
index
1. Make sure that some printing material is loaded (either a roll or a
sheet).
2. Press the Top key on the front panel.
3. Press the ↑ and ↓ keys at the same time.
The animation below illustrates this procedure.
© 2002 hewlett-packard company
file:///C|/Documents%20and%20Settings/---/Desktop/HP/html/p0212.htm [8/5/2002 4:49:25 PM]
Page 27
how do I change the graphics language setting?
how do I change the
graphics language setting?
hp designjet
5500 series
welcome
how do I ...
tell me about ...
the problem is ...
legal notices
glossary
index
Unless you are troubleshooting any of the problems listed under Comments
in the table below, you should not need to change the default setting.
To change the graphics language setting, choose the
icon, then Device
Setup > Lang, where the following options are available:
Language Comments
Automatic
Choose Automatic to let the printer determine
which type of file it is receiving. This setting
works for most software applications.
HP-GL/2
Choose this setting if you are not working with
PostScript files, and you have experienced image
position problems or timing problems.
PostScript
Choose PostScript if you are printing only
PostScript files and your PostScript jobs do not
include PJL language switching commands.
TIFF, JPEG, PDF, CALS G4
Choose these options only if you are sending a
file of the appropriate type directly to the printer
without going through a printer driver. This is
normally done only from WebAccess, in which
case the language setting is done by WebAccess
and you do not have to do it yourself.
© 2002 hewlett-packard company
file:///C|/Documents%20and%20Settings/---/Desktop/HP/html/p0215.htm [8/5/2002 4:49:28 PM]
Page 28
how do I change the language of the front panel?
how do I change the
language of the front
panel?
hp designjet
5500 series
welcome
how do I ...
tell me about ...
the problem is ...
legal notices
glossary
index
To change the language of the front-panel menus and messages, follow this
procedure:
1. If your printer is switched on, switch it off using the switch at the rear
of the printer.
2. Switch on the printer using the switch at the rear.
3. Hold down the ENTER key on the front panel until the printer makes an
audible beep.
4. As soon as you hear the sound, release the ENTER key.
5. You should see a menu of alternative languages. Highlight the
language you want using the ↑ and ↓ keys, and select it by pressing
the ENTER key.
© 2002 hewlett-packard company
file:///C|/Documents%20and%20Settings/---/Desktop/HP/html/p1016.htm [8/5/2002 5:06:24 PM]
Page 29

how do I perform accuracy calibration?
how do I perform accuracy
calibration?
hp designjet
5500 series
welcome
how do I ...
tell me about ...
the problem is ...
legal notices
glossary
index
Your printer was calibrated at the factory to ensure that it operates with the
greatest accuracy in normal environmental conditions. If you are operating
under significantly different conditions, you should recalibrate the printer as
explained here. You may also need to recalibrate the printer if you are using
non-HP printing materials or if you are experiencing image quality problems
for some other reason. Before recalibrating the printer, you should always
use the
image quality print to verify that you do actually have image quality
problems caused by media advance problems.
Note: the accuracy calibration applies only to the media type currently
selected in the front panel. Other media types will keep their original media
advance settings.
See also
environmental specifications.
To perform accuracy calibration, watch the animation below.
to restore the original calibration
If you notice after calibration that your image quality is worse than before,
you can return to the original settings: choose Utilities > Calibrations >
Accuracy > Restore Factory.
file:///C|/Documents%20and%20Settings/---/Desktop/HP/html/p0091.htm (1 of 2) [8/5/2002 3:29:42 PM]
Page 30

how do I perform accuracy calibration?
© 2002 hewlett-packard company
file:///C|/Documents%20and%20Settings/---/Desktop/HP/html/p0091.htm (2 of 2) [8/5/2002 3:29:42 PM]
Page 31

how do I perform banding calibration?
how do I perform banding
calibration?
hp designjet
5500 series
welcome
how do I ...
tell me about ...
the problem is ...
legal notices
glossary
index
Banding calibration is intended to eliminate the problem of banding, by
optimizing the media advance settings to suit the printing material, and the
environmental conditions such as humidity and temperature.
It is available only for paper types with short drying times: all HP coated
papers, plus HP Bright White Inkjet Paper, HP Productivity Photo Gloss, and
HP Productivity Photo Semi-Gloss.
Banding calibration is most likely to be useful in the faster print modes (Max
Speed and Production).
To perform banding calibration:
1. At the printer's front panel, choose the
icon, then Utilities >
Calibrations > Banding > Recalibrate. The printer will print the
calibration print nine times using nine different media advance settings,
in the print mode currently selected in the front panel. This takes about
seven minutes, depending on the print mode and the printing material.
2. When prompted to select a print in the front panel, choose the print
that shows the best image quality, in your opinion; or select Cancel to
cancel the calibration.
You have now completed banding calibration for the selected printing
material. Whenever you use the same printing material in future, the media
advance settings that you chose will be used.
You can, if you like, repeat the process for another printing material.
If you decide after calibration that your image quality is worse than before,
you can return to the original settings: choose Utilities > Calibrations >
Banding > Restore Factory.
© 2002 hewlett-packard company
file:///C|/Documents%20and%20Settings/---/Desktop/HP/html/p1005.htm [8/5/2002 5:06:34 PM]
Page 32

how do I calibrate color output?
how do I calibrate color
output?
hp designjet
5500 series
welcome
how do I ...
tell me about ...
the problem is ...
legal notices
glossary
index
Color calibration improves color consistency between prints, and from one
printer to another. The printer calibrates the color by printing a “calibration
strip” and then scanning the strip with a built-in optical sensor. The printer
will then calculate the color correction required, which is then applied to all
the subsequent prints.
Color calibration can be performed automatically or manually. To turn the
automatic calibration on or off, choose the
icon, then Internal RIP Settings
> Color Calibration.
On
An automatic calibration is performed whenever the current set of
printheads and the current printing material have not previously been
calibrated together.
Off
The printer uses a default color correction, different for each printing
material and print quality setting.
A color calibration can be started manually at any time: choose the
icon,
then Utilities > Calibrations > Color Calibration.
© 2002 hewlett-packard company
file:///C|/Documents%20and%20Settings/---/Desktop/HP/html/p0093.htm [8/5/2002 3:29:54 PM]
Page 33

how do I align the printheads?
how do I align the
printheads?
hp designjet
5500 series
welcome
how do I ...
tell me about ...
the problem is ...
legal notices
glossary
index
The printer will normally perform an alignment automatically whenever any
printhead is replaced. However, you can turn off this automatic alignment by
choosing the
icon, then Internal RIP Settings > Align Calibration > Off.
You can also request a printhead alignment from the front panel at any time
by choosing the
icon, then Utilities > Calibrations > Printhead Alignment.
In this case the printer will align the printheads immediately; or, if an image
is being printed, as soon as the current print job is finished. The alignment
procedure requires a minimum paper size of A1/D-size (24 inches).
You can use this feature if the
image quality print indicates an alignment
error.
When the front panel displays Ready, you are ready to print.
Make sure the printer window and the right door are closed after you replace
the HP supplies. The printer will not print while these are open.
Watch the animation below.
© 2002 hewlett-packard company
file:///C|/Documents%20and%20Settings/---/Desktop/HP/html/p0092.htm [8/5/2002 3:29:54 PM]
Page 34

how do I start webaccess?
how do I start webaccess?
hp designjet
5500 series
welcome
how do I ...
tell me about ...
the problem is ...
legal notices
glossary
index
Start your Web browser and give the address of your printer, as follows:
http://address/
where address is the IP address of the printer. You can find out the IP
address of the printer from the front panel, as follows:
1. Choose the
icon, then IO Setup > Card ID.
2. Under Card ID, find the line starting with IP=. The remainder of that
line is the IP address of the printer.
As an alternative to the IP address, you may give the DNS name of the
printer. However, you will not be able to find the DNS name in the front
panel; ask your network administrator if you would like to use it.
see also
tell me about webaccess
© 2002 hewlett-packard company
file:///C|/Documents%20and%20Settings/---/Desktop/HP/html/p0009b.htm [8/5/2002 2:29:54 PM]
Page 35

how do I maintain my printer?
how do I maintain my printer?
hp designjet
5500 series
welcome
how do I ...
tell me about ...
the problem is ...
legal notices
glossary
index
service preventative maintenance
user maintenance kit
how do I clean the printer exterior?
how do I store and move my printer?
© 2002 hewlett-packard company
file:///C|/Documents%20and%20Settings/---/Desktop/HP/html/p0220.htm [8/5/2002 4:53:15 PM]
Page 36

how do I upgrade my printer's firmware?
how do I upgrade my
printer's firmware?
hp designjet
5500 series
welcome
how do I ...
tell me about ...
the problem is ...
legal notices
glossary
index
Firmware, also known as system software, is the software that runs the
functions of your printer.
firmware downloading
From time to time there will be firmware upgrades available from HewlettPackard. These upgrades increase your printer's functionality and enhance
the features that your printer already possesses. Firmware can be
downloaded from the Internet and installed into your printer using the
WebAccess maintenance menu.
© 2002 hewlett-packard company
file:///C|/Documents%20and%20Settings/---/Desktop/HP/html/p0218.htm [8/5/2002 4:49:24 PM]
Page 37

loading roll guidelines
loading roll guidelines
hp designjet
5500 series
welcome
how do I ...
tell me about ...
the problem is ...
legal notices
glossary
index
There are three steps to loading rolls into the printer.
1. Load the roll onto the spindle and install the loaded spindle into the
printer.
2. Insert the printing material into the printer and set the media type in
the front panel.
3. Attach the printing material to the take-up reel (if you have one).
When loading rolls there is information available from:
● The Pocket Guide installed at the back of the printer.
● The labels located on the printer and on the spindles.
● The front panel which will guide you through all the procedures step-by-
step.
into the printer
In the initial stages of loading a roll you may want to open the window, but
this is optional. If you are an experienced user for example, you can leave
the window closed, thus saving time.
Always start the procedure through the front panel.
When loading a roll into the printer check:
● The roll is wound onto the spindle tightly.
● Ensure the spindle is loaded correctly, with the spindle guides installed
firmly onto the spindle.
● If you are using a three-inch cardboard core, make sure the core
adaptors supplied with the printer have been installed. See below.
the spindles
If you are a regular user of different types of printing material, you can
change printing materials quicker if you have more than one spindle loaded.
As follows:
file:///C|/Documents%20and%20Settings/---/Desktop/HP/html/p0033.htm (1 of 7) [8/5/2002 2:38:29 PM]
Page 38

loading roll guidelines
● Pre-load the different types of printing materials onto the spindles.
● Remove and replace the spindle with the new type of printing material.
● Extra spindles are available from HP; see ordering other accessories.
the take-up reel
When attaching rolls to the take-up reel:
● Check the leading edge as it unwinds from the spool. If it is not evenly
cut or if it is skewed, trim the printing material as shown in the
animation.
● Check the printing material is straight when it is attached to the take-
up reel, otherwise it will skew as it is wound onto the core.
● The core tube on the take-up reel must be the same width as the
printing material you are using.
● Make sure the take-up core is pushed firmly into both spindle guides.
● If you need to feed more printing material from the printer and the
Move Media screen is no longer displayed, go to the Media menu and
press Enter. Then select Move Media.
● If you are using a three-inch cardboard core, make sure the core
adaptors supplied with the printer have been installed.
1. Use the ↓ key to move the leading edge of the printing material down
until it is level with the centre of the core tube.
2. Make sure the printing material passes in front of the deflector, as
shown below.
file:///C|/Documents%20and%20Settings/---/Desktop/HP/html/p0033.htm (2 of 7) [8/5/2002 2:38:29 PM]
Page 39

loading roll guidelines
3. Move the adjustment levers on the left and right spindle guides to the
unlocked
position.
4. The two spindle guides and core must be positioned on the take-up reel
spindle so that the printing material is in the center, between the
spindle guides. Adjust the position of the core as shown below.
file:///C|/Documents%20and%20Settings/---/Desktop/HP/html/p0033.htm (3 of 7) [8/5/2002 2:38:29 PM]
Page 40

loading roll guidelines
5. When you have adjusted the position of the core, pull the adjustment
levers on both spindle guides to the locked
position.
6. Pull the printing material taut to the position shown below. Do not
attempt to pull more printing material out of the printer; if you need
more material, use the front panel. Use tape to secure the printing
material to the core tube.
7. To avoid the printing material skewing as it is wound onto the core
tube, ensure it is straight when it is attached.
8. Press the ↓ key on the front panel to advance the printing material.
Enough should be advanced so that the printing material can wrap at
least once around the core as shown below.
file:///C|/Documents%20and%20Settings/---/Desktop/HP/html/p0033.htm (4 of 7) [8/5/2002 2:38:29 PM]
Page 41

loading roll guidelines
9. Important: Press the media wind button on the take-up reel panel
indicated below to wind the printing material once around the core.
10. Press the ↓ button on the front panel again to advance some more
printing material: enough to enable you to insert the media weight.
It is important that the media weight is the same width as the printing
material you are using. By matching color coded lengths of plastic
tube, you can make a media weight for different widths of standard
paper sizes.
file:///C|/Documents%20and%20Settings/---/Desktop/HP/html/p0033.htm (5 of 7) [8/5/2002 2:38:29 PM]
Page 42

loading roll guidelines
11. Carefully insert the media weight. Ensure that the end caps are
installed and extend over the edges of the printing material.
12. It is important that the media weight is inserted. The take-up reel will
not function properly without it.
13. Press Enter on the printer's front panel, which will then display the
Ready message.
When the take-up reel is in operation it is important to ensure that the
take-up reel sensor is not blocked.
14. Shown below is how the printer will look when it is in operation. As
printing material is fed from the printer it drops down in a loop and up
into the take-up reel spindle.
file:///C|/Documents%20and%20Settings/---/Desktop/HP/html/p0033.htm (6 of 7) [8/5/2002 2:38:29 PM]
Page 43

loading roll guidelines
© 2002 hewlett-packard company
file:///C|/Documents%20and%20Settings/---/Desktop/HP/html/p0033.htm (7 of 7) [8/5/2002 2:38:29 PM]
Page 44

loading rolls onto the spindle
loading rolls onto the
spindle
hp designjet
5500 series
welcome
how do I ...
tell me about ...
the problem is ...
legal notices
glossary
index
This procedure shows you how to load rolls onto the spindle and into the
printer's spindle hubs.
Make sure the printer wheels are locked (the brake lever is pressed down) to
prevent the printer from moving.
If the roll is very wide, rest the spindle horizontally on a table and load the
roll on the table.
When adjusting the spindle guides, move them as close to the roll as you
can, without applying excessive force.
The printing material should hang down from the roll exactly as shown.
Watch the animation below.
© 2002 hewlett-packard company
file:///C|/Documents%20and%20Settings/---/Desktop/HP/html/p0035.htm [8/5/2002 2:38:12 PM]
Page 45

trimming the printing material
trimming the printing
material
hp designjet
5500 series
welcome
how do I ...
tell me about ...
the problem is ...
legal notices
glossary
index
The knife used to trim the printing material is sharp. Keep fingers clear of the
cutting path. Keep the knife away from children.
You can also trim the printing material automatically when you have loaded
it. Go to the Media Setup menu/Form Feed & Cut.
Watch the animation below.
© 2002 hewlett-packard company
file:///C|/Documents%20and%20Settings/---/Desktop/HP/html/p0036.htm [8/5/2002 2:38:12 PM]
Page 46

loading rolls into the printer
loading rolls into the
printer
hp designjet
5500 series
welcome
how do I ...
tell me about ...
the problem is ...
legal notices
glossary
index
This procedure shows you how to load a roll into the printer. It includes
references to the take-up reel. Front-panel messages that are applicable only
if you have a take-up reel installed are highlighted in green.
If your printer is the HP Designjet 42 inch/1.07 m, the take-up reel is an
optional accessory. See
ordering other accessories.
To start this procedure you need to have a roll loaded on the printer spindle.
See
loading rolls onto the spindle.
When adjusting the spindle guides, move them as close to the roll as you
can, without applying excessive force.
The animation shows the Media Length Tracking function turned On.
Watch the animation below.
© 2002 hewlett-packard company
file:///C|/Documents%20and%20Settings/---/Desktop/HP/html/p0037.htm [8/5/2002 2:38:12 PM]
Page 47

unloading rolls from the take-up reel
unloading rolls from the
take-up reel
hp designjet
5500 series
welcome
how do I ...
tell me about ...
the problem is ...
legal notices
glossary
index
Ensure that the ink is dry.
Watch the animation below.
© 2002 hewlett-packard company
file:///C|/Documents%20and%20Settings/---/Desktop/HP/html/p0039.htm [8/5/2002 2:38:11 PM]
Page 48

changing the core tube
changing the core tube
hp designjet
5500 series
welcome
how do I ...
tell me about ...
the problem is ...
legal notices
glossary
index
Watch the animation below.
© 2002 hewlett-packard company
file:///C|/Documents%20and%20Settings/---/Desktop/HP/html/p0041.htm [8/5/2002 3:14:13 PM]
Page 49

unloading rolls
unloading rolls
hp designjet
5500 series
welcome
how do I ...
tell me about ...
the problem is ...
legal notices
glossary
index
If you have a take-up reel, you must unload the roll from the take-up reel
before performing this procedure. See
unloading rolls from the take-up reel.
If media length tracking is switched On, the printer will first print the
remaining printing material onto the roll before the printer unloads.
Watch the animation below.
© 2002 hewlett-packard company
file:///C|/Documents%20and%20Settings/---/Desktop/HP/html/p0040.htm [8/5/2002 3:14:14 PM]
Page 50

media length tracking
media length tracking
hp designjet
5500 series
welcome
how do I ...
tell me about ...
the problem is ...
legal notices
glossary
index
Media length tracking is a function that enables the printer to keep track of
how much printing material remains on the roll.
The remaining length is displayed on the front panel and printed on the end
of the roll whenever you unload the roll.
To turn on media length tracking, choose the
icon, then Utilities > Track
Media Length > Yes.
Watch the animation below.
© 2002 hewlett-packard company
file:///C|/Documents%20and%20Settings/---/Desktop/HP/html/p0042.htm [8/5/2002 3:14:25 PM]
Page 51

how do I load sheets?
how do I load sheets?
hp designjet
5500 series
welcome
how do I ...
tell me about ...
the problem is ...
legal notices
glossary
index
The minimum size you can load is a A2/C size sheet in portrait orientation.
To help a sheet of this size to load correctly, make sure its leading edge is as
close as possible to the pinch wheels during loading.
Watch the animation below.
© 2002 hewlett-packard company
file:///C|/Documents%20and%20Settings/---/Desktop/HP/html/p0044.htm [8/5/2002 3:14:13 PM]
Page 52

how do I unload sheets?
how do I unload sheets?
hp designjet
5500 series
welcome
how do I ...
tell me about ...
the problem is ...
legal notices
glossary
index
To unload a single sheet from the printer, press the Load/Unload Media key
located on the front panel.
Watch the animation below.
© 2002 hewlett-packard company
file:///C|/Documents%20and%20Settings/---/Desktop/HP/html/p0045.htm [8/5/2002 3:14:32 PM]
Page 53

how do I obtain ink cartridge statistics?
how do I obtain ink
cartridge statistics?
hp designjet
5500 series
welcome
how do I ...
tell me about ...
the problem is ...
legal notices
glossary
index
The information supplied is:
● The manufacturers of the ink cartridge (HP No. 81 or HP No. 83 is
recommended).
● The percentage of ink remaining.
● Original capacity of the ink cartridge in milliliters.
● Re-order part number of the ink cartridge.
● The month and year that the ink cartridge was manufactured.
To obtain ink cartridge statistics, choose the
icon, then the name of the
cartridge.
Watch the animation below.
© 2002 hewlett-packard company
file:///C|/Documents%20and%20Settings/---/Desktop/HP/html/p0059.htm [8/5/2002 3:14:25 PM]
Page 54

how do I remove ink cartridges?
how do I remove ink
cartridges?
hp designjet
5500 series
welcome
how do I ...
tell me about ...
the problem is ...
legal notices
glossary
index
Remove an ink cartridge only if you are replacing it, and always use the front
panel menu to replace the cartridge as shown.
There are two reasons for ink cartridge removal:
● The ink cartridge is very low and you want to replace the ink cartridge
with a full one for unattended printing, with the view to replacing it
again and using until empty.
● The ink cartridge is empty and the front panel tells you to replace the
ink cartridge.
Watch the animation below.
© 2002 hewlett-packard company
file:///C|/Documents%20and%20Settings/---/Desktop/HP/html/p0060.htm [8/5/2002 3:23:59 PM]
Page 55

how do I install ink cartridges?
how do I install ink
cartridges?
hp designjet
5500 series
welcome
how do I ...
tell me about ...
the problem is ...
legal notices
glossary
index
Each ink cartridge slot has a colored label above it. This should match the
colored label on the new ink cartridge.
The ink cartridge is designed to prevent you from inserting the wrong ink
type or into the wrong color slot. If you have difficulty inserting the ink
cartridge, do not attempt to force it. Check again that the color of the ink
cartridge matches the color of the ink cartridge slot, also that the colored
marker is at the top of the ink cartridge.
Avoid storing partially used ink cartridges on their ends.
If the front panel displays an error message, see
ink cartridge error
messages.
to install ink cartridges...
Click on this icon to run the animation sequence.
© 2002 hewlett-packard company
file:///C|/Documents%20and%20Settings/---/Desktop/HP/html/p0061.htm [8/5/2002 3:23:58 PM]
Page 56

printhead precautions
printhead precautions
hp designjet
5500 series
welcome
how do I ...
tell me about ...
the problem is ...
legal notices
glossary
index
Do not touch, wipe or attempt to clean the printhead nozzles. This can
damage the printhead.
Handle the ink supplies with care, in particular the printhead, which is a highprecision device.
● Do not touch the printhead nozzles.
● Do not put the printhead down on the nozzles.
● Do not be rough when handling the printheads. Always set them down
gently.
● Do not drop the printheads.
© 2002 hewlett-packard company
file:///C|/Documents%20and%20Settings/---/Desktop/HP/html/p0052.htm [8/5/2002 3:14:34 PM]
Page 57

how do I obtain printhead statistics?
how do I obtain printhead
statistics?
hp designjet
5500 series
welcome
how do I ...
tell me about ...
the problem is ...
legal notices
glossary
index
The information supplied is:
● The manufacturer and model of the ink cartridge (HP No. 81 or HP No.
83 is recommended).
● The printhead status.
● The printhead warranty status.
● The re-order part number.
● The amount of time the printhead has been in the printer and powered
on.
● The amount of ink consumed.
To obtain printhead statistics, choose the
icon, then Printhead Info, then
the name of the printhead.
Watch the animation below.
© 2002 hewlett-packard company
file:///C|/Documents%20and%20Settings/---/Desktop/HP/html/p0063.htm [8/5/2002 3:24:08 PM]
Page 58

how do I remove printheads?
how do I remove
printheads?
hp designjet
5500 series
welcome
how do I ...
tell me about ...
the problem is ...
legal notices
glossary
index
Printhead replacement must be performed with the printer switched on at the
Power Isolation Switch which is located at the rear of the printer.
Watch the animation below.
© 2002 hewlett-packard company
file:///C|/Documents%20and%20Settings/---/Desktop/HP/html/p0064.htm [8/5/2002 3:23:58 PM]
Page 59

how do I install printheads?
how do I install
printheads?
hp designjet
5500 series
welcome
how do I ...
tell me about ...
the problem is ...
legal notices
glossary
index
The printhead is designed to prevent you from accidentally inserting it into
the wrong position. Check that the colored label on the printhead matches
the colored label of the carriage assembly position that the printhead is to be
inserted in. Do not confuse the light cyan printhead with the dark cyan
position in the carriage.
● Before you install a printhead, it is recommended that you clean the
carriage assembly. See carriage interconnect wiper.
● If the front panel displays an error message, see printhead error
messages.
To install a printhead, watch the animation below.
After you install a printhead, the printer will automatically perform the
alignment procedure.
© 2002 hewlett-packard company
file:///C|/Documents%20and%20Settings/---/Desktop/HP/html/p0065.htm [8/5/2002 3:23:58 PM]
Page 60

how do I perform printhead recovery?
how do I perform
printhead recovery?
hp designjet
5500 series
welcome
how do I ...
tell me about ...
the problem is ...
legal notices
glossary
index
Recovering the printhead(s) means that the printer automatically cleans and
tests the printhead(s).
If you are not sure which printhead to recover, select All Printheads.
To see how to perform printhead recovery, watch the animation below.
If a printhead requires repeated recoveries, it is probably out of warranty and
nearing the end of its life. If you go to the front panel and choose the
icon, then Printhead Info, you can see whether your printhead is in warranty
or out of warranty, and you can also see how much ink it has consumed.
© 2002 hewlett-packard company
file:///C|/Documents%20and%20Settings/---/Desktop/HP/html/p0090.htm [8/5/2002 3:29:54 PM]
Page 61

how do I remove printhead cleaners?
how do I remove printhead
cleaners?
hp designjet
5500 series
welcome
how do I ...
tell me about ...
the problem is ...
legal notices
glossary
index
Watch the animation below.
When removing the printhead cleaners:
● Be careful not to get ink on your hands. There may be ink on, around
and inside the replaced printhead cleaner.
● Do not lay the replaced printhead cleaner on its side or turn it upside
down, as ink may leak out.
● Always handle and store the replaced printhead cleaner upright to
avoid spilling any ink.
When replacing a printhead always replace the corresponding printhead
cleaner. Leaving the old printhead cleaner in the printer will seriously shorten
the new printhead's life and possibly damage the printer.
© 2002 hewlett-packard company
file:///C|/Documents%20and%20Settings/---/Desktop/HP/html/p0067.htm [8/5/2002 3:23:58 PM]
Page 62

how do I install printhead cleaners?
how do I install printhead
cleaners?
hp designjet
5500 series
welcome
how do I ...
tell me about ...
the problem is ...
legal notices
glossary
index
The printer needs all the ink cartridges, printheads and printhead cleaners
installed before it can continue.
Watch the animation below.
If the front panel displays an error message, see
printhead cleaner error
messages.
After you replace a printhead and printhead cleaner, the printer will:
● Perform tests on the printhead nozzles to ensure correct operation.
● Align the printheads.
© 2002 hewlett-packard company
file:///C|/Documents%20and%20Settings/---/Desktop/HP/html/p0068.htm [8/5/2002 3:23:58 PM]
Page 63

how do I remove the ink system?
how do I remove the ink
system?
hp designjet
5500 series
welcome
how do I ...
tell me about ...
the problem is ...
legal notices
glossary
index
To remove the ink system, first remove the ink supplies: the printheads,
printhead cleaners, and ink cartridges. Watch the animation below.
Then remove the ink tubes. Watch the animation below.
file:///C|/Documents%20and%20Settings/---/Desktop/HP/html/p0055.htm (1 of 2) [8/5/2002 3:14:39 PM]
Page 64

how do I remove the ink system?
© 2002 hewlett-packard company
file:///C|/Documents%20and%20Settings/---/Desktop/HP/html/p0055.htm (2 of 2) [8/5/2002 3:14:39 PM]
Page 65

how do I install the ink system?
how do I install the ink
system?
hp designjet
5500 series
welcome
how do I ...
tell me about ...
the problem is ...
legal notices
glossary
index
To install the ink system, first install the ink tubes. Watch the animation
below.
Then install the ink supplies: the printheads, printhead cleaners, and ink
cartridges. Watch the animation below.
file:///C|/Documents%20and%20Settings/---/Desktop/HP/html/p0056.htm (1 of 2) [8/5/2002 8:16:15 PM]
Page 66

how do I install the ink system?
© 2002 hewlett-packard company
file:///C|/Documents%20and%20Settings/---/Desktop/HP/html/p0056.htm (2 of 2) [8/5/2002 8:16:15 PM]
Page 67

how do I store the ink supplies and ink tubes?
how do I store the ink
supplies and ink tubes?
hp designjet
5500 series
welcome
how do I ...
tell me about ...
the problem is ...
legal notices
glossary
index
Whenever you change the ink system you must store the ink tubes and ink
supplies you have removed from the printer in their respective storage
containers. The ink cartridges do not have a specific storage container, so
they should be stored in accordance with instructions given on their
packaging.
The following animation shows how to store the HP No. 81 or 83 ink supplies.
The following animation shows how to store the HP No. 81 or 83 ink tubes.
file:///C|/Documents%20and%20Settings/---/Desktop/HP/html/p0057.htm (1 of 2) [8/5/2002 3:14:14 PM]
Page 68

how do I store the ink supplies and ink tubes?
© 2002 hewlett-packard company
file:///C|/Documents%20and%20Settings/---/Desktop/HP/html/p0057.htm (2 of 2) [8/5/2002 3:14:14 PM]
Page 69

configuration print
configuration print
hp designjet
5500 series
welcome
how do I ...
tell me about ...
the problem is ...
legal notices
glossary
index
The Configuration Print shows all the current front panel settings. To request
a Configuration Print from the front panel:
1. Make sure that printing material is loaded, either roll or sheet.
2. Press the TOP button to select the main menu on the front panel.
3. Make sure that the front panel displays the Ready message.
4. The printer will display the Receiving message shortly. It may take a
few moments.
5. Press the ↑ and ↓ keys on the front panel simultaneously to print the
Configuration Print.
6. The front panel displays the message Receiving while the file is being
processed, and then Printing as the printer starts printing.
See also the animation below.
file:///C|/Documents%20and%20Settings/---/Desktop/HP/html/p0141.htm (1 of 2) [8/5/2002 4:23:21 PM]
Page 70

configuration print
© 2002 hewlett-packard company
file:///C|/Documents%20and%20Settings/---/Desktop/HP/html/p0141.htm (2 of 2) [8/5/2002 4:23:21 PM]
Page 71

menu print
menu print
hp designjet
5500 series
welcome
how do I ...
tell me about ...
the problem is ...
legal notices
glossary
index
You can print out the complete menu structure available in the front panel by
choosing the
icon and then Demos > Menu.
© 2002 hewlett-packard company
file:///C|/Documents%20and%20Settings/---/Desktop/HP/html/p0142.htm [8/5/2002 4:23:12 PM]
Page 72

printer usage information
printer usage information
hp designjet
5500 series
welcome
how do I ...
tell me about ...
the problem is ...
legal notices
glossary
index
The Printer Usage Information includes the total number of prints, number of
prints by type of printing material, number of prints by print mode, and total
amount of ink used per color. The counts in this report are estimates.
To print the report, choose the
icon, then Utilities > Usage > Print Usage.
Alternatively, you can select View Usage to see a shortened form of the
report in the front panel.
© 2002 hewlett-packard company
file:///C|/Documents%20and%20Settings/---/Desktop/HP/html/p0143.htm [8/5/2002 4:23:12 PM]
Page 73

using the image quality print
using the image quality print
hp designjet
5500 series
welcome
how do I ...
tell me about ...
the problem is ...
legal notices
glossary
index
The Image Quality Print helps you to determine whether you have image
quality problems, and if you do, what is the cause of the problem and how to
resolve it. The print contains patterns that are designed to highlight any
image quality problems.
printhead status check
Before printing and analyzing the Image Quality Print, it is recommended
that you use the front panel to check the status of each printhead. Select the
icon, then Printhead Info, then the printhead color, and the front panel
will display the printhead status.
● If the printhead needs replacing, see how do I remove printheads?
● If the printhead needs recovering, see how do I perform printhead
recovery?
A printhead that needs recovering is probably out of warranty and
approaching the end of its life. You do not need to replace it immediately, but
you should at least make sure that you have a replacement printhead ready.
See
ordering ink supplies.
how to print the image quality print
Before you print the Image Quality Print you must ensure that you have A2or C-sized printing material (or larger) loaded into the printer.
To print the Image Quality Print, use the front panel. Choose the
icon,
then Utilities > Test Prints > Image Quality Print > Page1, Page2, Page3,
Page4 and press the Enter key.
how to use the image quality print
1. Use the same media type and image quality setting as you were using
when you discovered the image quality problem.
2. Study each of the test patterns in the order that they are shown; that
is, 1 through 4.
The Image Quality Print should look like this:
file:///C|/Documents%20and%20Settings/---/Desktop/HP/html/p0076.htm (1 of 5) [8/5/2002 3:24:16 PM]
Page 74

using the image quality print
analyzing the image quality print
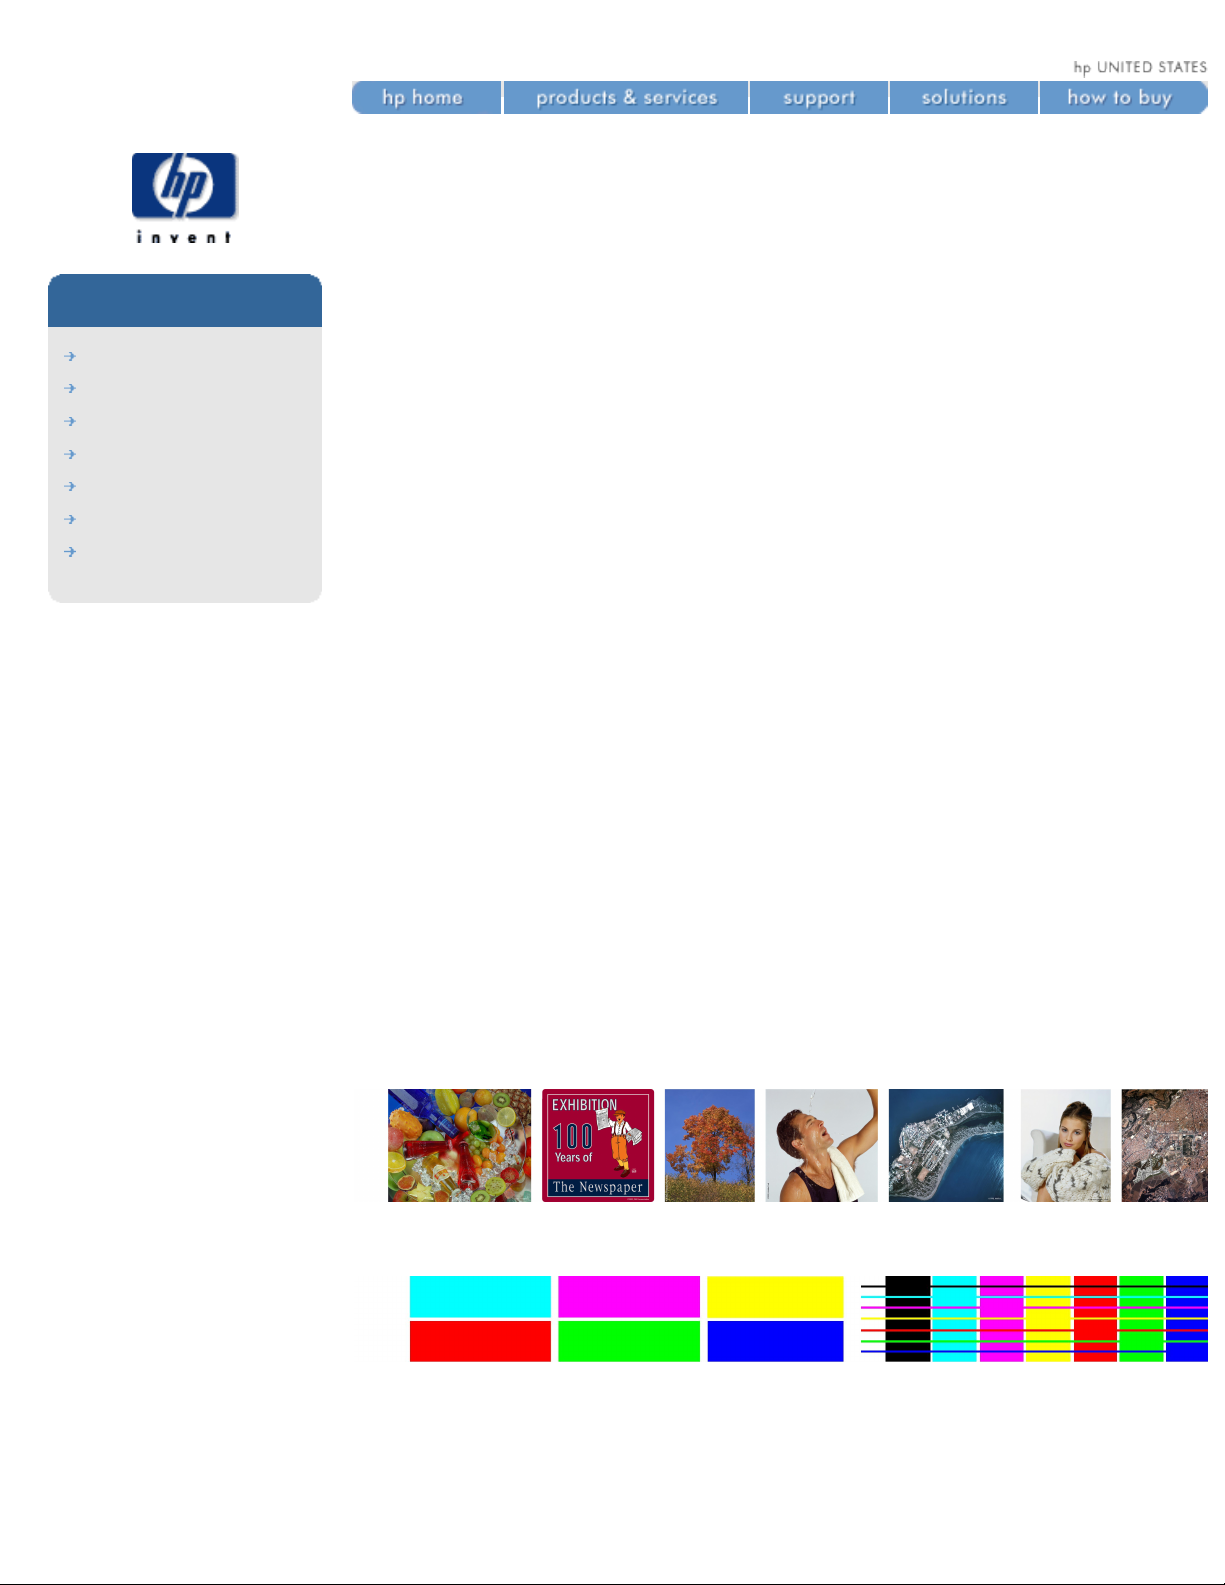
test pattern 1: primary colors
The purpose of this particular part of the Image Quality Print is to test the
overall quality of the document with regard to dense colors.
The colored stripes are in the same order as they appear on the printer as if
you are facing it, that is, from light cyan on the left to black on the right.
Each pair of colors is printed by only one printhead. So it's easy to find the
root cause of the image quality problem.
This array of colored stripes is designed to check for certain defects with the
printer. It should not be used to check for color consistency or accuracy.
If your printer is functioning correctly, this part of the print will have no
problems. There is no banding in any of the colors.
However, if you do see problems with this print and the image quality is not
acceptable, you will need to perform some corrective action.
Banding
Banding occurs when you see repetitive horizontal bands within the printed
image. They can appear as light or dark bands.
Banding is caused by problems with:
file:///C|/Documents%20and%20Settings/---/Desktop/HP/html/p0076.htm (2 of 5) [8/5/2002 3:24:16 PM]
Page 75

using the image quality print
● the printheads
● media advance
Problems with the printheads
Banding caused by problems with the printheads will be apparent in the
Image Quality Print because the banding does not appear in all colors. In this
case, the colored strip that has banding was caused by the printhead of the
same color. The colored stripes are in the same order as they appear on the
printer as if you are facing it; that is, from light cyan on the left to black on
the right.
For example, the Image Quality Print shown below was printed with a printer
that has a cyan printhead problem.
corrective action
1. Perform
printhead recovery if you have not already done so.
2. If there is no improvement in print quality, replace the printhead that
causes the problem.
problems with media advance
If the printer has media advance problems you will see banding in all the
colors.
For example, the Image Quality Print shown below was printed by a printer
that has a media advance problem.
Note: The bands appear light because the roller has advanced too much.
Alternatively, the bands could appear dark because the printing material has
not advanced sufficiently.
file:///C|/Documents%20and%20Settings/---/Desktop/HP/html/p0076.htm (3 of 5) [8/5/2002 3:24:16 PM]
Page 76

using the image quality print
In high quality modes, media advance problems might not appear as lines of
banding, they might appear grainy instead. The banding or graininess will
appear in all the colors.
corrective action
1. If the image is grainy, this could also be a symptom of problems with
the bi-directional alignment. Refer to test pattern 3: bi-directional
alignment (below). If this pattern is OK, go to step 2.
2. Perform the
accuracy calibration with the same printing material with
which you experienced unacceptable image quality.
3. Perform the
banding calibration with the same printing material with
which you experienced unacceptable image quality.
4. If there is no improvement in print quality, contact HP.
It is also possible that this kind of banding was caused because you were
using printing material not supported by HP. In this case, try using HPsupported printing material and see whether the problem is solved.
test pattern 2: color-to-color alignment
If the printer has color-to-color alignment problems then the Image Quality
Print in test pattern 2 (shown below) will have misaligned colors.
corrective action
1. Perform
printhead alignment with the same printing material with
which you experienced unacceptable image quality.
2. If there is no improvement in print quality, contact HP.
test pattern 3: bi-directional alignment
If a printer has bi-directional alignment problems, lines are fuzzy or not
straight. The pattern seen below is designed to highlight this kind of
problem. Check the lines on this test pattern, if they have any defects like
the ones described above, perform the corrective action.
file:///C|/Documents%20and%20Settings/---/Desktop/HP/html/p0076.htm (4 of 5) [8/5/2002 3:24:16 PM]
Page 77

using the image quality print
corrective action
1. Perform
printhead alignment with the same printing material with
which you experienced unacceptable image quality.
2. If there is no improvement in print quality, contact HP.
test pattern 4: vertical line straightness
If a printer has vertical line straightness problems, lines are fuzzy or not
straight. The pattern seen below is designed to highlight this kind of
problem. Check the lines on this test pattern, if they have any defects like
the ones described above, perform the corrective action.
corrective action
1. Perform
printhead alignment with the same printing material with
which you experienced unacceptable image quality.
2. If there is no improvement in print quality, contact HP.
no defects found in the image quality print
If the entire Image Quality Print contains no defects and you still experience
image quality problems, listed below are some things to check:
● Perhaps the print mode in the printer is incorrect; see how do I change
the print quality?
● Check the driver you are using to print. If it is a non-HP driver, go to
http://www.designjet.hp.com/ and click on technical support to find
and download the correct HP driver.
● Perhaps the settings in the non-HP RIP are incorrect. Refer to the
documentation which came with the RIP.
● Perhaps the software applications you are using have the wrong
settings.
© 2002 hewlett-packard company
file:///C|/Documents%20and%20Settings/---/Desktop/HP/html/p0076.htm (5 of 5) [8/5/2002 3:24:16 PM]
Page 78

service configuration
service configuration
hp designjet
5500 series
welcome
how do I ...
tell me about ...
the problem is ...
legal notices
glossary
index
The Service Configuration print provides information needed for the service
engineer, such as the internal current configuration, operating conditions
(temperature and humidity), ink levels, and other statistics about printer
usage.
To print it, choose the
icon, then Utilities > Test Prints > Service Config.
© 2002 hewlett-packard company
file:///C|/Documents%20and%20Settings/---/Desktop/HP/html/p0143d.htm [8/5/2002 4:23:13 PM]
Page 79

hp-gl/2 palette
hp-gl/2 palette
hp designjet
5500 series
welcome
how do I ...
tell me about ...
the problem is ...
legal notices
glossary
index
Choose the icon, then Demos > Palette. This print shows the color or
grayscale definitions in the currently-selected color palette. See
tell me about
pen widths and colors in the internal palettes.
© 2002 hewlett-packard company
file:///C|/Documents%20and%20Settings/---/Desktop/HP/html/p0143e.htm [8/5/2002 4:23:13 PM]
Page 80

samples
samples
hp designjet
5500 series
welcome
how do I ...
tell me about ...
the problem is ...
legal notices
glossary
index
Choose the icon, then Demos > Samples. These prints are designed to
show the capabilities of the printer.
© 2002 hewlett-packard company
file:///C|/Documents%20and%20Settings/---/Desktop/HP/html/p0143f.htm [8/5/2002 4:23:13 PM]
Page 81

how do I adjust the margins?
how do I adjust the
margins?
hp designjet
5500 series
welcome
how do I ...
tell me about ...
the problem is ...
legal notices
glossary
index
The printer margins determine the printable area of the page that can be
used by your application.
There are three margin options that can be selected from the Page Format
menu: Normal, Extended, and Smaller.
Normal Extended Smaller
Top margin
17 mm (sheet)
7 mm (roll)
17 mm (sheet)
15 mm (roll)
5 mm
Side margins
7 mm 15 mm 5 mm
Bottom margin
35 mm 35 mm 5 mm
The Smaller margins option is recommended only for CAD line drawings. If
this option is used for other purposes, there is a risk of a printhead crash,
which may damage the printing material and perhaps also the printhead.
If you use Smaller margins, you will need to
clean the platen more often.
reduced margins
There is an additional Reduced margins option that may be selected from the
Device Setup menu. This is available only if a take-up reel is installed and
loaded with printing material.
Normally the white space between successive prints on a roll is the sum of
the top and bottom margins. When Reduced margins are selected, the
bottom margin is in effect eliminated, and the white space between
successive prints is only the top margin (as set in the Page Format menu).
This option has no effect on the side margins, which remain as set in the
Page Format menu.
© 2002 hewlett-packard company
file:///C|/Documents%20and%20Settings/---/Desktop/HP/html/p0178.htm [8/5/2002 4:28:35 PM]
Page 82

how do I print a mirror image?
how do I print a mirror
image?
hp designjet
5500 series
welcome
how do I ...
tell me about ...
the problem is ...
legal notices
glossary
index
If you are using clear imaging paper, sometimes called backlit, you may want
to print a mirror image of your drawing, so that when the paper is lit from
behind it is in the correct orientation. This can be done from the front panel's
Page Format menu without changing the image in your software.
© 2002 hewlett-packard company
file:///C|/Documents%20and%20Settings/---/Desktop/HP/html/p0182.htm [8/5/2002 4:28:52 PM]
Page 83

how do I rotate an image?
how do I rotate an image?
hp designjet
5500 series
welcome
how do I ...
tell me about ...
the problem is ...
legal notices
glossary
index
rotating a job using the hp PostScript driver
By default, the jobs generated by any of the PostScript drivers provided with
the 5500ps are printed in portrait orientation, even if the image viewed in
your application is in landscape orientation. In order to save paper, you may
need to rotate the job through the Postscript driver interface.
Rotating a job is controlled by a setting in the PostScript driver; it can be
enabled or disabled. When you enable the rotation feature, both the page
and the image are rotated 90 degrees counterclockwise.
Note that the HP driver will override the setting in the front panel.
Consult the PostScript driver documentation to find out where to set the
rotation feature.
page size and rotation
When you rotate a job, the page length may be increased to avoid clipping,
because the top and bottom margins are usually larger than the side
margins.
rotating a job using a non-hp PostScript driver
If you are using a non-HP PostScript driver, you can rotate the image using
the Rotate setting in the front panel (Page Format > Rotate). For more
information, consult the driver documentation.
what on the page is rotated?
If the page size is specified in either the front panel or the application in
which the image was made, then the page and the image are rotated, as
shown below.
However, if the page size is unspecified, the page is not rotated, only the
image.
file:///C|/Documents%20and%20Settings/---/Desktop/HP/html/p0180.htm (1 of 2) [8/5/2002 4:28:49 PM]
Page 84

how do I rotate an image?
To set rotation in the front panel, select Page Format > Rotate.
possibility of clipped images
With either rolls or sheets, if you rotate an image to landscape whose original
orientation was portrait, the printing material may not be wide enough for
the image, and it may be clipped. For example, rotating a portrait D/A1-size
image on D/A1-size paper by 90 degrees will probably result in a clipped
image. If you are using WebAccess, the preview screen will confirm this with
a warning triangle.
© 2002 hewlett-packard company
file:///C|/Documents%20and%20Settings/---/Desktop/HP/html/p0180.htm (2 of 2) [8/5/2002 4:28:49 PM]
Page 85

how do I scale the image?
how do I scale the image?
hp designjet
5500 series
welcome
how do I ...
tell me about ...
the problem is ...
legal notices
glossary
index
You can enlarge your printed image from the printer's front panel by
choosing the
icon, then Internal RIP Settings > Scale.
The Scale feature is useful:
● If your software does not support large formats.
● If your file is too large for the printer's memory. You can reduce the
page size in your software and then scale it up again using the front
panel option.
The Fit To Page setting adjusts the image size to the page size selected for
your printer. For example, if you have selected ISO A2 as the page size and
you print an A4-size image, it will be enlarged to fit the A2 page.
If ISO A3 page size is selected, the printer would reduce a larger image to fit
the A3 size.
If you are printing to a sheet, you must ensure that the image can actually fit
onto the page, otherwise clipping will occur.
© 2002 hewlett-packard company
file:///C|/Documents%20and%20Settings/---/Desktop/HP/html/p0183.htm [8/5/2002 4:28:43 PM]
Page 86

viewing current configuration settings
viewing current
configuration settings
hp designjet
5500 series
welcome
how do I ...
tell me about ...
the problem is ...
legal notices
glossary
index
1. Make sure either a roll or a sheet is loaded.
2. Print the
current configuration print, by pressing the ↑ and ↓ keys
simultaneously.
3. Notice on the Current Configuration Print that the 16 pens are
numbered 0 through 15 and the 256 colors are numbered 0 through
255. These colors are specified in the
palette print.
© 2002 hewlett-packard company
file:///C|/Documents%20and%20Settings/---/Desktop/HP/html/p0188.htm [8/5/2002 4:28:48 PM]
Page 87

changing the palette settings
changing the palette
settings
hp designjet
5500 series
welcome
how do I ...
tell me about ...
the problem is ...
legal notices
glossary
index
You cannot change the Factory palette, but you can define Palettes A and B
to be whatever you choose.
Item Available Options Defaults
Palettes Factory, A, B. Factory
Pens 0 through 15.
Widths (mm)
0.13, 0.18, 0.25, 0.35, 0.50,
0.65, 0.70, 0.80, 0.90, 1.00,
1.40, 2.00, 3.00, 5.00, 8.00,
12.00. Note that 0.13 mm is a
one-pixel line width at 300 dpi
and three-pixels line width at
600 dpi
0.35mm
Colors 0 through 255.
As specified on the Palette
Print.
5500ps only: these settings have no effect on PostScript files.
The following steps show how to define Palette A:
1. In the front-panel menu, go to the Define Palette selection and choose
Palette A.
2. Scroll to the pen number you want to change and press Enter.
3. The current width assigned to this pen is displayed, for example
Width=0.35mm. If you want to change it:
4. Press Enter.
5. Scroll to the width you want.
6. Then press Enter again.
7. Press Back to get to the previous menu: Color/Width.
Otherwise, scroll to Color.
1. The current color assigned to the pen is displayed, for example
Color=110. If you want to change it:
2. Press Enter.
3. Scroll to the color you want.
4. Then press Enter again.
5. Press Back to get to the previous menu.
6. When both width and color are correct, press Back.
7. Scroll to the next pen number you want to change, press Enter and
then repeat steps 3 through 5 again.
8. When all pen definitions are correct, press Top to exit the menus.
important
The palette you have just defined will take effect only when you select it to
be the current palette, as explained in how do I set image options from the
front panel?.
file:///C|/Documents%20and%20Settings/---/Desktop/HP/html/p0190.htm (1 of 2) [8/5/2002 4:28:36 PM]
Page 88

changing the palette settings
© 2002 hewlett-packard company
file:///C|/Documents%20and%20Settings/---/Desktop/HP/html/p0190.htm (2 of 2) [8/5/2002 4:28:36 PM]
Page 89

viewing the colors available for a palette
viewing the colors
available for a palette
hp designjet
5500 series
welcome
how do I ...
tell me about ...
the problem is ...
legal notices
glossary
index
Choose the icon, then Demos > Palette.
In the Palette print, there are 256 squares, numbered 0 through 255, each
showing one of the colors available for selection in the printer's internal
palettes.
© 2002 hewlett-packard company
file:///C|/Documents%20and%20Settings/---/Desktop/HP/html/p0189.htm [8/5/2002 4:28:44 PM]
Page 90

changing the treatment of overlapping lines (merge)
changing the treatment of
overlapping lines (merge)
hp designjet
5500 series
welcome
how do I ...
tell me about ...
the problem is ...
legal notices
glossary
index
The Merge setting controls the overlapping lines in an image. There are two
settings, Off and On. The following illustration shows the effect of each
setting.
To turn Merge on, choose the icon, then HP-GL/2 Settings > Merge > On.
You can set the merge setting from your software in some applications.
Settings in your software override the front-panel settings.
5500ps only: merge settings have no effect on PostScript files.
© 2002 hewlett-packard company
file:///C|/Documents%20and%20Settings/---/Desktop/HP/html/p0192.htm [8/5/2002 4:28:47 PM]
Page 91

canceling a page
canceling a page
hp designjet
5500 series
welcome
how do I ...
tell me about ...
the problem is ...
legal notices
glossary
index
Press Cancel on the front panel.
The printer advances the printing material as though the print were finished.
A multi-page job or a big file may take longer to stop printing than other
files.
© 2002 hewlett-packard company
file:///C|/Documents%20and%20Settings/---/Desktop/HP/html/p0203.htm [8/5/2002 4:37:24 PM]
Page 92

managing the queue
managing the queue
hp designjet
5500 series
welcome
how do I ...
tell me about ...
the problem is ...
legal notices
glossary
index
The information included here only applies if you are using HP drivers.
what is the queue?
turning off the queue
the start printing options
starting to print a file that is waiting for a time-out
identifying a job in the queue
viewing the size of a page in the queue
prioritizing a job in the queue
deleting a job from the queue
making copies of a job in the queue
© 2002 hewlett-packard company
file:///C|/Documents%20and%20Settings/---/Desktop/HP/html/p0204.htm [8/5/2002 4:36:00 PM]
Page 93

canceling the drying time
canceling the drying time
hp designjet
5500 series
welcome
how do I ...
tell me about ...
the problem is ...
legal notices
glossary
index
1. Press the Cancel or Enter key on the front panel.
Use with caution when performing this procedure as an image which has had insufficient time to dry can cause image quality
problems.
pages printing or drying
The terms job and page used here mean RTL and HP-GL/2 jobs are single page jobs. However, a single PostScript job may
have more than one page. When we talk about the printing material, the term “page” means a single output page.
© 2002 hewlett-packard company
file:///C|/Documents%20and%20Settings/---/Desktop/HP/html/p0203b.htm [8/5/2002 4:37:24 PM]
Page 94

tell me about nesting pages
tell me about nesting
pages
hp designjet
5500 series
welcome
how do I ...
tell me about ...
the problem is ...
legal notices
glossary
index
Nesting means placing pages side by side on the paper, rather than one after
the other. This is done to avoid wasting paper.
automatic rotation
which pages cannot be rotated?
when does the printer try to nest pages?
which pages qualify for nesting?
how long does the printer wait for another file?
© 2002 hewlett-packard company
file:///C|/Documents%20and%20Settings/---/Desktop/HP/html/p0208.htm [8/5/2002 4:37:29 PM]
Page 95

what is the queue?
what is the queue?
hp designjet
5500 series
welcome
how do I ...
tell me about ...
the problem is ...
legal notices
glossary
index
Your printer can store pages in a queue at the same time as printing the
current page. It stores them page by page.
When you look at the queue either from WebAccess or from the front panel,
the queue is made up of “jobs”. A job may contain multiple pages.
The length of the queue depends mainly on the jobs that you have in the
queue, however as an approximation the queue can contain about 30 jobs in
A0/E-size in Max Quality mode. The queue stores processed output pages,
not the input jobs. Remember that file size and memory usage are not the
same thing, as explained in
file size and memory usage.
© 2002 hewlett-packard company
file:///C|/Documents%20and%20Settings/---/Desktop/HP/html/p0204b.htm [8/5/2002 4:36:00 PM]
Page 96

how do I turn off the queue?
how do I turn off the
queue?
hp designjet
5500 series
welcome
how do I ...
tell me about ...
the problem is ...
legal notices
glossary
index
To turn off the queue, choose the icon, then Nesting > Queue > Off.
When Queue=Off, the Nest option will no longer appear in the Nesting menu.
© 2002 hewlett-packard company
file:///C|/Documents%20and%20Settings/---/Desktop/HP/html/p1010.htm [8/5/2002 5:06:34 PM]
Page 97

the start printing options
the start printing options
hp designjet
5500 series
welcome
how do I ...
tell me about ...
the problem is ...
legal notices
glossary
index
The Start Printing Options do not apply for PostScript jobs.
You can select at what point you want to print the file you have in the
printer's queue. Choose the
icon, then Internal RIP Settings > Start
Printing. There are three options you can select:
After processing: when this is selected, the printer waits until the whole file
has been processed, and then it starts to print. This is the slowest option but
gives the best image quality.
Immediately: this prints the file as it is processed. This is the quickest
option; however, the printer may stop halfway through a print to process
data. This setting is not recommended for complex images with dense color.
Optimized: this option calculates the best time to begin printing the file. It
is the best compromise between the After Processing and Immediately
options, and is therefore the default option.
© 2002 hewlett-packard company
file:///C|/Documents%20and%20Settings/---/Desktop/HP/html/p0204c.htm [8/5/2002 4:37:23 PM]
Page 98

starting to print a file that is waiting for a time-out
starting to print a file that
is waiting for a time-out
hp designjet
5500 series
welcome
how do I ...
tell me about ...
the problem is ...
legal notices
glossary
index
If all is in order (printing material loaded, all ink components installed, and
no file errors), there are still reasons why a file you have sent from your
computer may not start printing when expected:
● The print file may lack a proper file terminator and the printer is
therefore waiting for the specified I/O time-out period before assuming
it is complete. See
tell me about the i/o time-out setting.
● Nesting may be on and the printer is waiting for the specified nest wait
time-out period before calculating the appropriate nests. In this case,
the printer display shows the remaining time for the nesting time-out.
See
how long does the printer wait for another file?
● You may have Wait For Preview selected in your printer driver. This is a
function you can use to check that the preview image is the one you
want. You can check the preview in the WebAccess tool, then select
Start Print.
© 2002 hewlett-packard company
file:///C|/Documents%20and%20Settings/---/Desktop/HP/html/p0205a.htm [8/5/2002 4:36:00 PM]
Page 99

identifying a job in the queue
identifying a job in the
queue
hp designjet
5500 series
welcome
how do I ...
tell me about ...
the problem is ...
legal notices
glossary
index
In the front panel, if you choose the icon, then Queueing & Nesting >
Queue Mgmt, you can scroll through the pages in the queue.
Each page has an identifier, consisting of:
<position in queue>: <image name>
position in queue
The job currently being printed is in position 0. The next job to be printed is
in position 1, the one after it in position 2, etc.
The previous job printed is in position -1, the one before that in position -2,
etc.
You can also check the queue in hp designjet webaccess, where you will find
more detailed information.
© 2002 hewlett-packard company
file:///C|/Documents%20and%20Settings/---/Desktop/HP/html/p0205b.htm [8/5/2002 4:37:27 PM]
Page 100

viewing the size of a page in the queue
viewing the size of a page
in the queue
hp designjet
5500 series
welcome
how do I ...
tell me about ...
the problem is ...
legal notices
glossary
index
To view the size of any page in the queue, select it and choose Statistics.
Statistic Comments
Width The shorter side of the page, in millimeters.
Length The longer side of the page, in millimeters.
© 2002 hewlett-packard company
file:///C|/Documents%20and%20Settings/---/Desktop/HP/html/p0206a.htm [8/5/2002 4:36:00 PM]
 Loading...