

Page 1
02236
PK 1000
EDITION 2007
Page 2

Page 3
1
Page 4

2
Page 5
3
Page 6
4
Page 7

GRILLO SERIE PK 1000
Dear customer,
Thank you for choosing our PK 1000; we are sure that your new machine’s performance will meet
your requirements in full.
To ensure optimum service and maintenance of its qualities over time, read this manual carefully
and follow its instructions. This will give you the best results and protect your investment. Please
keep this manual, which must always accompany the machine.
CAUTION! Before starting the engine, read this carefully.
The following warnings are very important in ensuring safety!
SAFETY REGULATIONS
Caution is the best way for preventing accidents!
We urge you to read carefully the following regulations for use of the machine before
starting working.
Improper use of the machine and its equipment may cause damage; to reduce this risk, read the
following precautions carefully.
1) Read the whole of this manual before starting the machine or putting it in motion.
2) Pay special attention to the safety warnings and labels.
3) Never load weights in excess of the approved capacity – total weight fully loaded 3500 kg.
4) Before other people are allowed to use the machine they must first be informed about the
safety regulations and how to use the vehicle.
5) Before starting the engine, make sure that nobody is nearby, particularly that there are no child
around.
6) Check for people and obstacles before putting the vehicle in motion.
7) Never carry passengers on the machine, next to the driver over the allowed limit.
8) Never use the machine when tired and do not drink alcohol.
9) Secure the load properly with the hooks provided.
10) Before starting work, put on suitable working clothes, gloves and heavy footwear.
11) Before getting off the machine, switch off the engine, remove the ignition key and engage the
parking brake.
12) Travel at low speed over loose ground.
13) Never allow the machine to be used by anyone under 18 years of age.
14) Never reverse with the engine at high throttle.
15) Load the body tidily and evenly.
16) Never load heavy weights in the back of the body or on one side, since a great deal of stability
safety is lost.
17) Never keep the engine running indoors; you may inhale poisonous gases.
18) Always switch off the engine before filling up with fuel, keep away from sparks or flames and do
not smoke.
19) Avoid fuel spills and after filling the tank clean all spills before starting the engine.
20) Never use the vehicle close to ditches or banks which may give way under its weights,
particularly when the ground is loose or wet.
21) Do not turn sharply when going downhill.
22) Never tamper with or deactivate the safety devices.
23) If you have children, hide the ignition keys when you are not using the machine.
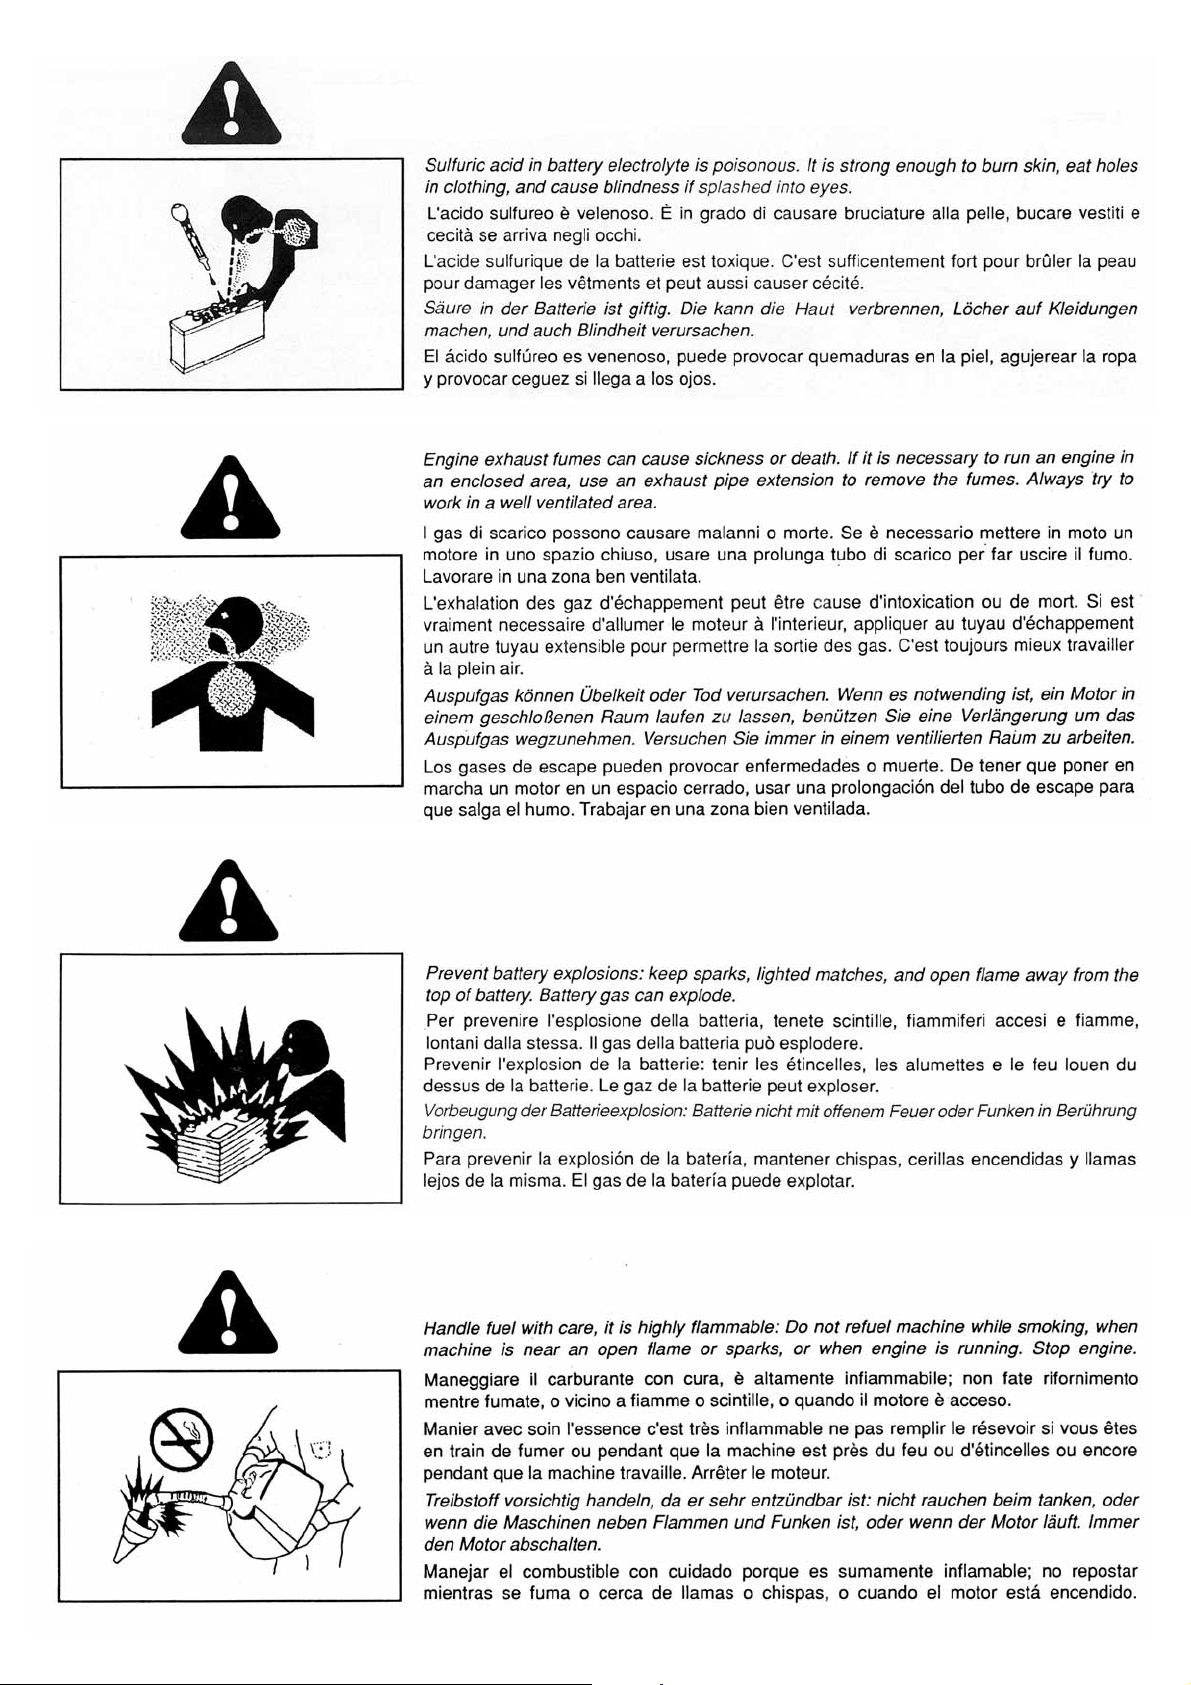
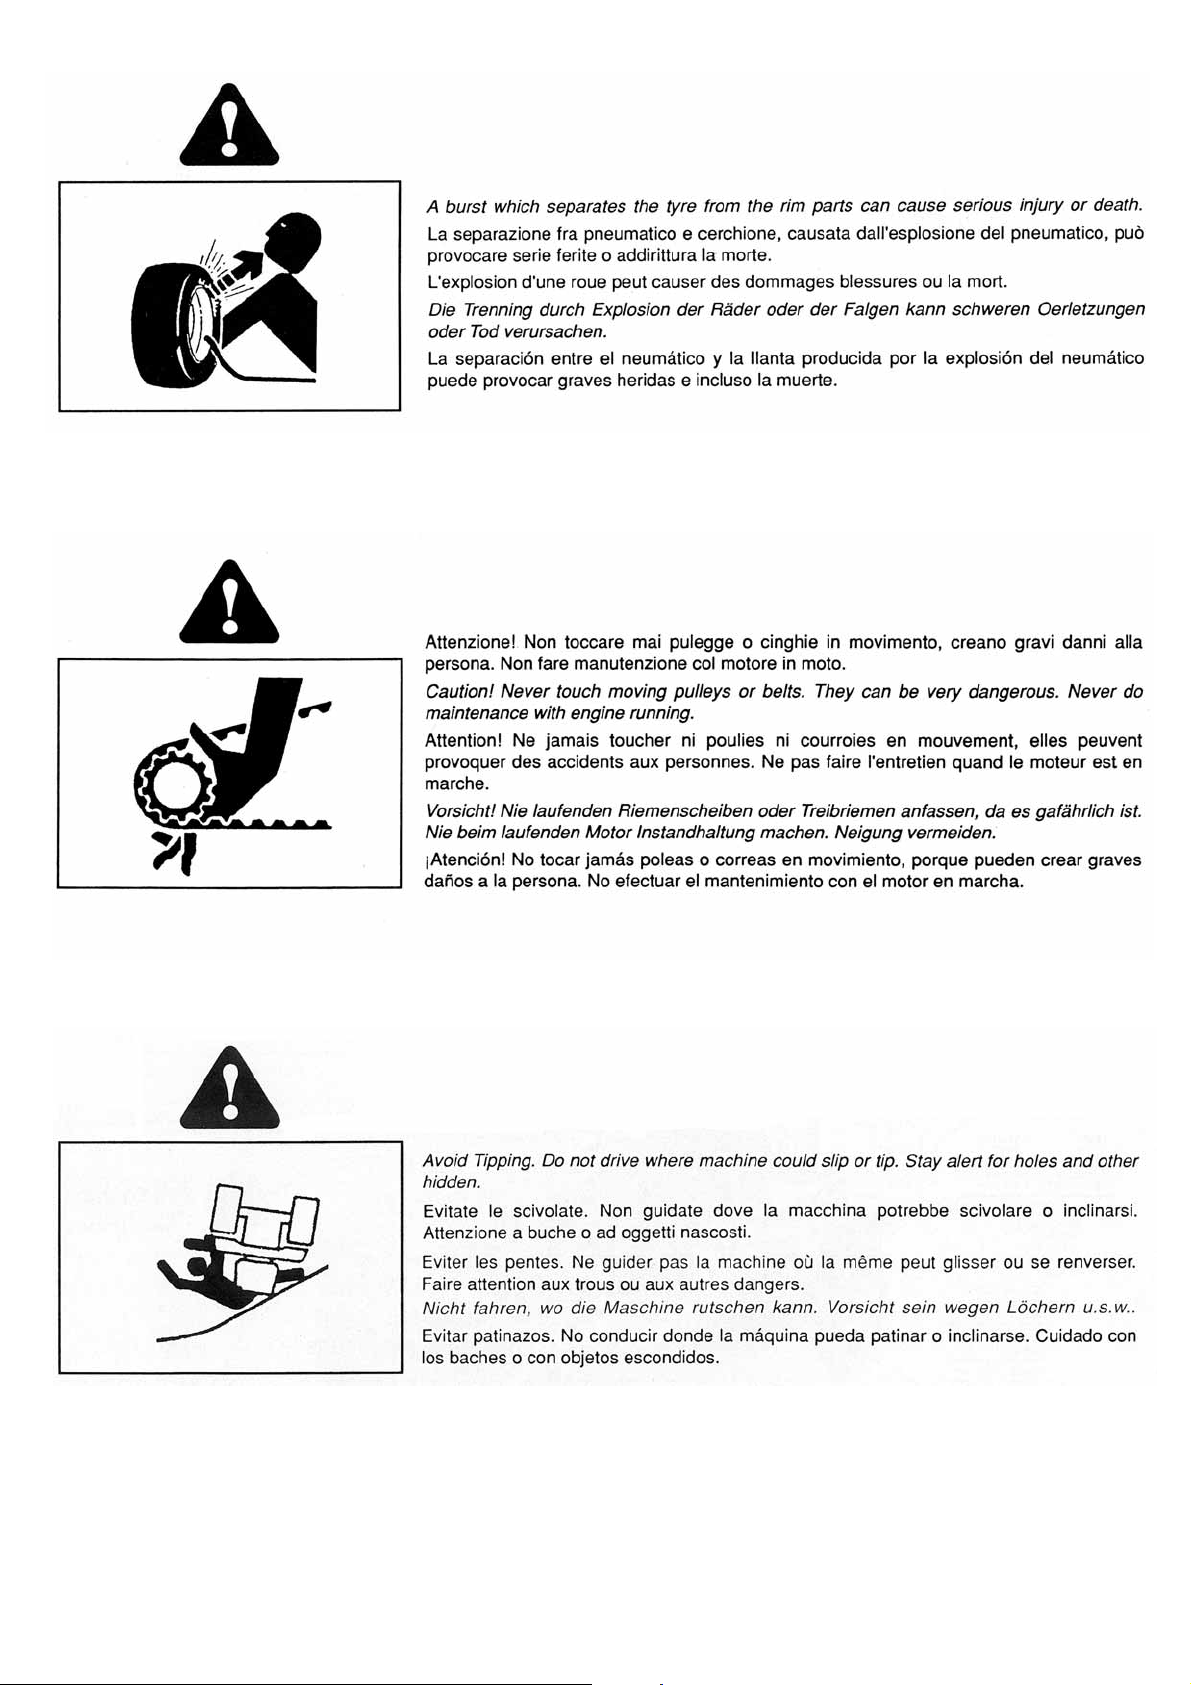
24) Never make any adjustments or do any cleaning with the engine running.
25) Never have anyone checking the machine while you are sitting in the driving seat with
running engine.
26) The user is always responsible for injury or damage to third parties.
27) Any improper uses cause the machine to become null and void and the constructor will decline
any liability.
28) Always use original Grillo spare parts.
5
Page 8

DESCRIPTION
The Grillo PK 1000 is a 4-wheel drive vehicle powered by a 4-stroke, water-cooled Diesel engine.
The precise weight distribution provides the maximum stability, while maintenance is reduced to
just a few simple operations.
TECHNICAL DATA with 10.0/75 – 12 wheels
MODEL: wheeled transporter
ENGINE: Lombardini FOCS 1404 Diesel 1372 c.c. 37 HP (27,2 kW), 4 cylinders liquid
cooled.
Kubota 1105 diesel 3 cylinders liquid cooled–3200 rpm – 21 kW, 28 HP.
Lombardini 12LD477 Diesel 2 cylinders air-cooled– 3.200 rpm – 20 HP
(15kW).
STARTING: electric 12V.
CLUTCH: dry, one-plate with pedal control.
GEARBOX: synchronized, 10 gears, 8 forward + 2 reverse.
SPEED (wheels 10.0/80-12: I 2.7 Km/h – II 4.7 Km/h – III 7.2 Km/h – IV 9.9 Km/h – V 10.8 Km/h –
VI 18.9 Km/h – VII 28.9 Km/h – VIII 40 Km/h – I REVERSE 2.8 Km/h – II REVERSE 11.2 Km/h.
WHEELS: pneumatic tractor 10.0/80-12 (6 PR), 10.0/75–15,3 (10 PR); garden 26x12.00/12
(8 PR).
DIFFERENTIAL: on both axles with locking on the rear axle.
FRONT AXLE: steering.
STEERING: hydraulic.
SEATS: sprung and adjustable.
TRACTION: 4 driving wheels with disengageable front wheels
SERVICE BRAKE: hydraulic, acting on the four wheels
EMERGENCY AND PARKING BRAKE: mechanic, acting on the rear wheels.
LOAD BED: three-sided tipping, hydraulic
DRIVER’S PROTECTING GRILL: on front sideboard.
LOAD CAPACITY: max. 1750 kg with 10.0/75 – 15,3 wheels.
MACHINE’S DIMENSIONS: length 4000 hooks included, width 1500, height 2320, distance
between axles 1800, track 1220.
WEIGHT: 1750 KG max with 10.0/75-15,3 wheels (10 PR).
ATTACHMENTS: driver’s protecting cab, 540 rpm PTO.
N.B. TYPE APPROVAL IN PROGRESS, PROVISIONAL DATA.
6
Page 9

IDENTIFICATION
The vehicle’s serial number is punched on the nameplate on the right-hand longitudinal member of
the chassis and on the gearbox nameplate.
SPARE PARTS
We recommended using only original GRILLO spare parts.
PUTTING THE MACHINE INTO SERVICE
1) Make sure the machine is complete and that it has not suffered any damage during transit.
2) Check the levels of the engine oil, the gearbox oil and the radiator liquid.
3) Check the tyre pressures:
10,0 / 75 – 15,3 10PR (5,3 bar)
10,0 / 80 – 12 6PR (2,6 bar)
26 x 12.00 / 12 8PR (2,7 bar)
4) Check the battery voltage, it must not be less than 12 Volts; recharge if necessary.
If a dry battery has been supplied with separate acid, to put the machine into service proceed
as follows:
1) Pour in the acid and wait 2 hours;
2) Charge the battery with a charger set to 12 Volts on a slow charge for 2 hours.
Caution, if this procedure is not observed this could lead to the battery deteriorating and the
acid leaking out during work.
IMPORTANT!!! When fitting the battery be careful not to reverse the poles. Do not start the
engine if the battery is disconnected.
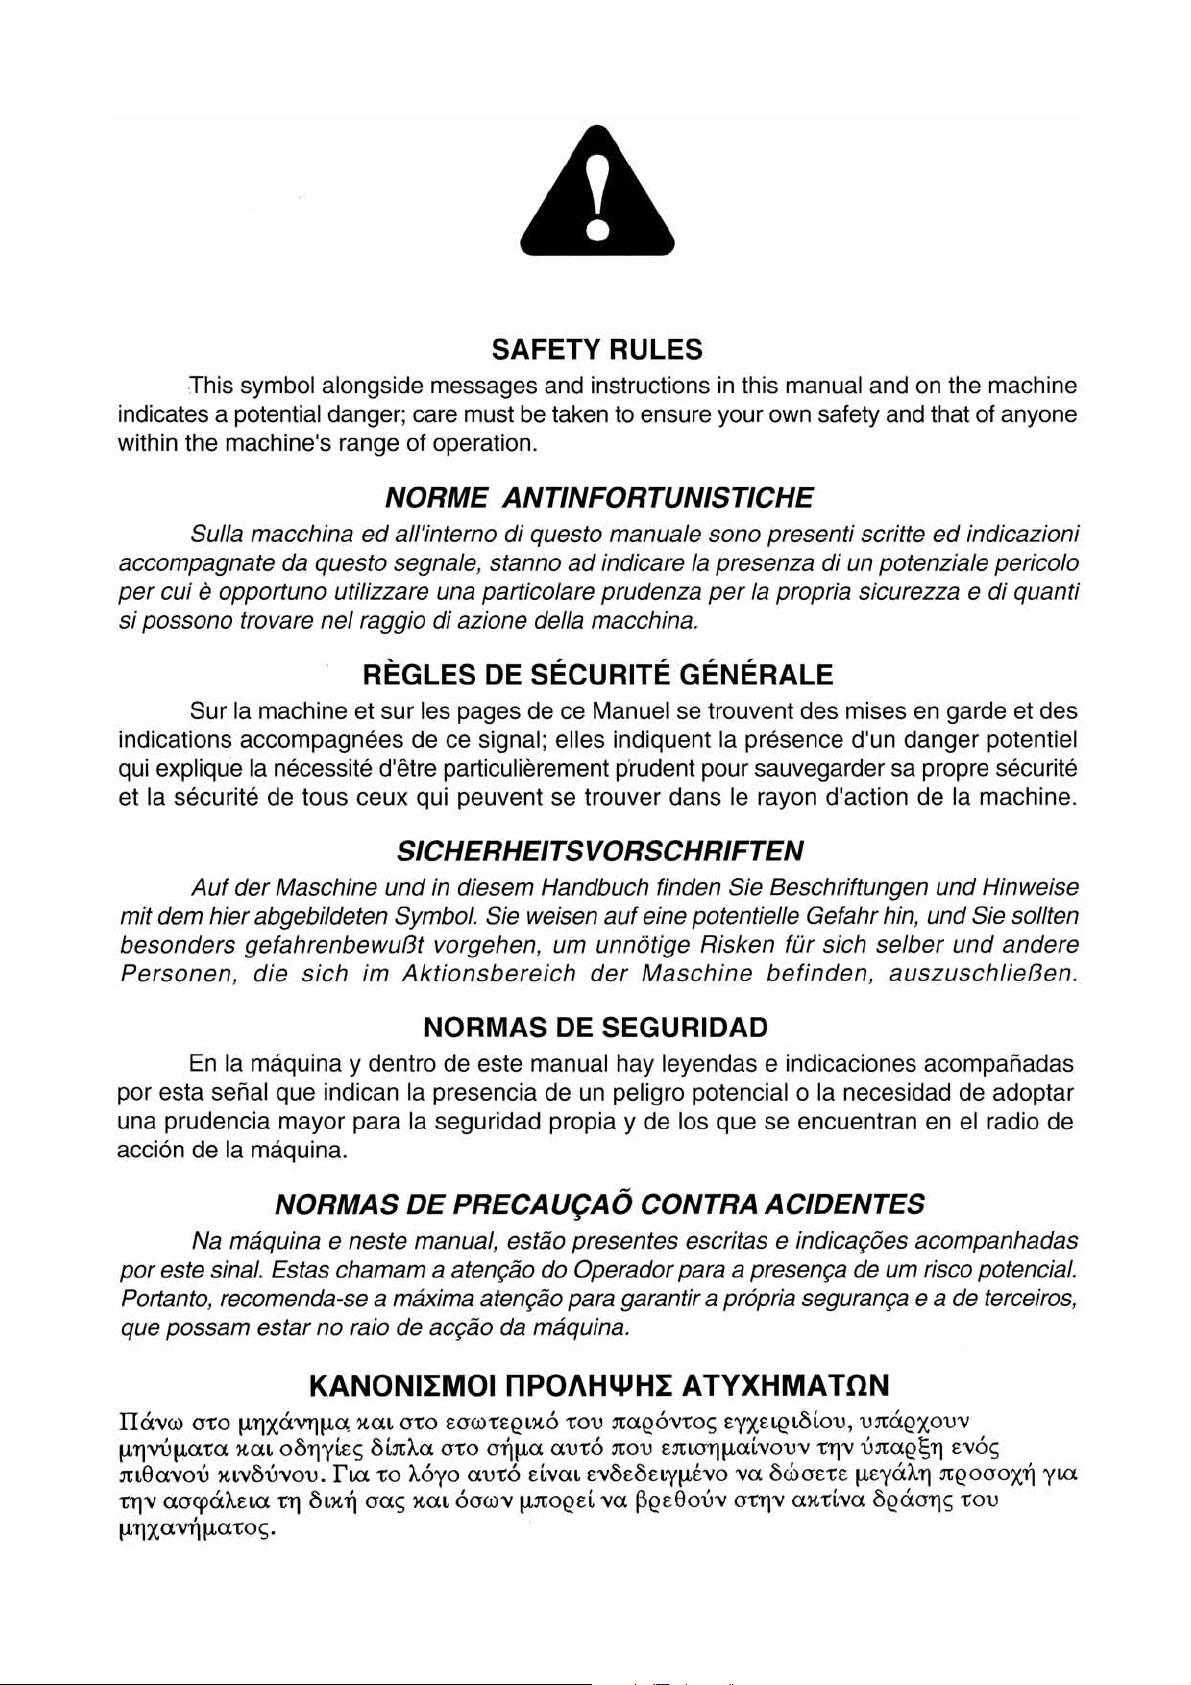
BATTERY – CAUTION!
The gas released by the battery is explosive, so keep it away from naked flames or sparks. Check
the level of the liquid at regular intervals and keep the terminals greased with Vaseline.
RUNNING - IN
During the running-in period (first 70 operating hours), do not work with the engine at high throttle,
taking care not to use more than about 70% of the power available.
After the first 20 operating hours and at the end of the running-in period:
Check the tightness of all the fasteners and connections (screws, nuts and unions).
Check all the units, engine, gearbox and pipelines for oil leaks.
Adjust the handbrake.
Refer to the engine handbook for the specific running-in instructions.
7
Page 10

INSTRUCTIONS FOR USE
DESCRIPTION OF THE CONTROLS (Fig. 1 - Fig. 2)
1) Clutch pedal (Fig. 2 n° 1): disengages the engine from the transmission. It must be operated
whenever various control levers (gearbox, high – low range lever, PTO control lever) are used,
before stopping the machine and before starting the engine.
2) Brake pedal (Fig. 2 n° 2): operates the brakes on the wheels.
3) Throttle pedal (Fig. 2 n° 3).
4) Parking brake lever (Fig. 1 n° 4): acts simultaneously on the brakes of the rear wheels. The
brake is engage by pulling the lever up; to release, press the button on the end of the lever and
lower it.
5) Gear lever (Fig. 1 n° 5):
and two reverse speed.
6) High-low range lever (Fig. 1 n° 6): push forward for high range gears; pull back for a low range
speed.
7) Differential lock lever (Fig. 1 n° 7): pull up to operate.
8) Front axle disengage lever (Fig. 1 n° 8): move forward to release the axle, back to engage. It
may happen that the engage and disengage of the front axle lever is difficult. Do not force the
lever, but move the machine a few cm forward and backward and try again.
9) Dumper control lever (Fig. 1 n° 9).
DESCRIPTION OF THE CONTROLS – Fig. 3
1) Generator warning light (red).
2) Engine oil low pressure warning light (red).
3) Air filter blockage warning light.
4) 4-wheel drive engaged indicator light.
5) Dipped headlight indicator (green).
6) Glow plug preheating indicator.
7) Direction indicator warning light (green).
8) Emergency light switch.
9) Key-switch for switch-on, enabling services, igniting and stopping engine.
10) Direction indicator, horn switch and lights switch.
11) Cooling water temperature indicator.
12) Hour-counter.
13) Rev. Counter.
14) Fuel level indicator.
15) Fuel reserve.
16) Parking lights warning light.
17) Parking brake warning light.
18) Engine oil temperature earning light.
19) Headlights warning light.
in combination with the high – low range lever, this provides eight forward
8
Page 11

BEFORE STARTING UP, CHECK:
Check that the gearbox oil level is in line with the hole on the right-hand side of the gearbox
casing (fig. 4).
Check the engine oil level (follow the instructions in the engine handbook).
Check that the clutch pedal does the first part of its race without actioning it. Regarding the
regulation, operate on the register (fig. 5).
Check the brake fluid level – Fig. 6 The tank is on the right side of the dashboard
Fill the fuel tank, using a funnel with a fine filter (fig. 7).
Make sure that all the levers are in neutral position, then proceed as follows:
1) Starting with engine cold.
2) Depress the clutch pedal.
3) Fit the key into the ignition and turn left for preheating. When the glow-plug indicator light goes
out, turn the key clockwise and release as soon as the engine starts.
To stop the engine, return the key to the central position.
If the engine fails to start, do not keep trying and run down the battery; wait a few minutes before
repeating the starting procedure.
Check the liquid level in the battery often and if necessary add distilled water.
LOAD BED TIPPING USE INSTRUCTIONS
Load bed tipping operations:
Lock with two latches the two load bed frame cross rails, which are located on the tipping
side do you prefer and make you sure that the hinge pins are properly fitted in the load
deck.
To put the load bed upward, operate on the lever (fig. 1 n° 9) keeping it actioned “upward”.
The load deck goes upward only if the lever is continually pressed. You can immediately
stop the tipping releasing the lever.
CAUTION!
The tipping load bed must never be locked in points which are diagonally opposing; to
avoid the wrong location, the two latches are of different shape.
Use only original latches.
Before every lateral tipping make you sure that the sides are opened.
Before beginning the tipping operations, make you sure that the vehicle is located on a
horizontal and not yielding ground and that the charge is uniformly distributed.
NOTES FOR THE LOAD BED USE
The three-sided tipping load bed is built and fitted with some devices, which can assure the total
security, even if the driver is inexperienced. However, it is necessary to follow the fundamental
security rules, here listed:
Before beginning the tipping operations make you always sure that the vehicle is located on
horizontal and not yielding ground and that the charge is uniformly distributed.
Before beginning the tipping make you sure that there are no people, animals or any other
things nearby the vehicle.
Before beginning the tipping operations makes you sure that the latches are locked in order
to allow the tipping in the direction do you prefer.
9
Page 12

When the load bed is charged, above all with no fixed materials, pay attention to the sides
opening, because the materials pressure makes the side open violently and the material
falling down can hit the operator.
Make you sure that during the travel the sides are properly closed and locked.
Pay attention in case of tipping inside enclosed areas, particularly to the possible
interference with beams, ceilings, scaffoldings, installations, or other.
Never lift the load deck near electric aerial lines or similar.
During the maintenance operations, position the strut which must support the load bed in
security conditions (fig. 8). It is forbidden to go under the load deck with every body parts if
the strut is not properly positioned.
In case of engine breakdown you can lift the load deck actioned on the manual pump,
which is located on the right side of the rear frame (Fig. 14 and Fig. 15).
CAUTION!
1. It is absolutely forbidden the improper use of the tipping equipment.
2. The hydraulic system working pressure is regulated by the builder, taking into consideration
the vehicle capacity.
It is absolutely forbidden to change the calibration of the pressure control valve.
3. Never halt under the tipping load bed if it is lifted and if the strut is not properly fixed.
4. It is absolutely forbidden to travel when the load deck is lifted.
MATERIAL CHARGE OPERATION
The charge must be uniformly distributed, in order to avoid the material falling danger on
the street.
Never exceed the allowed charge.
The material must be put in the load bed from the minimum possible height.
Check that the sides are closed, in particular that the rear side is locked by the ratchets.
Big stone blocks or demolition material rubbles must be placed cautiously on the load deck
and you must not make them fall down from strong height.
CAUTION!
Avoid overcharging the vehicle.
Before the travel make you sure that the load bed is completely lowered and avoid to travel
when it is lifted.
STOPPING THE ENGINE
After moving all control levers to the NEUTRAL position, to stop the engine, move the ignition key
to the central position.
MAINTENANCE AND LUBRIFICATION
ENGINE OIL
During the running-in period, make the first oil change after the first 20 hours’ work and the second
80 hours, and then change every 120 operating hours. Use AGIP F.1 D. RANGE SAE 40 engine
summer, and AGIP F.1 D. RANGE SAE 20 in winter. It is essential to check the oil level every 4
hours of work. (Follow the instructions in the engine handbook).
CAUTION!
If the engine oil exceeds the maximum level, the engine performances are reduced and the
functioning may be irregular.
10
Page 13

GEARBOX – REAR RETAINER - HYDRAULIC DUMPER – POWER STEERING OIL
Check the level about every 50 working hours (Fig. 4), placed on the right-hand side of the gearbox
casing. If necessary, add AGIP ROTRA JD, gearbox oil. Change the oil once a year. To drain the
old oil from the casing, unscrew the plug in the centre of the gearbox casing under the differential
(Fig. 11) Quantity 26 lt. The filter cap is under the load bed (Fig. 9).
The hydraulic oil filter is near the gearbox (Fig. 10). Change once a year.
To make the oil refilling or substitution faster, take off the screw which is located on the gearbox
cover (Fig. 9).
FRONT AXLE OIL
Check the level trough of the cap in the front part of the casing (Fig. 19); change the oil every 500
hours using AGIP ROTRA 85 W 90 gearbox oil, quantity 5 litres.
BRAKE FLUID
Check the level of the brake fluid in the tank which is on the right side of the drive seat (Fig. 6)
every 8 hours. Add brake fluid if necessary. Check the braking system periodically for leaks.
A special tool for venting the brake circuit is available. Connect it in the place of the cap of the tank,
and vent first the rear trailer circuit, and then the front circuit.
Users without the tool can try to vent the circuits using the machine’s pump, but this is not always
successful.
BRAKES REGULATION
Take off the plastic plug placed in the low part of the braking system elements (Fig. 16). Turn the
toothed ring nut downwards.
The parking brake can be regulated operating on the registers located on the braking system
elements (Fig. 17).
ATTENTION!
Grease the transmission universal joint, the articulated joint of the machine and the steering
articulations periodically.
RADIATOR LIQUID
Check the level every 8 hours with the engine cold; if hot, the water may cause scalding.
Replace the liquid once a year.
Capacity 16 litres (Fig. 6).
CAUTION!
In case of liquid loss, after repairing the damage, fill the circuit up, purging repeatedly the air from
the plug, which is placed on the engine in correspondence with the superior sleeve (Fig. 18).
FUEL OIL FILTER
The fuel oil (Fig. 12) is fitted with an electrovalve to stop the engine. The air purging from the
conduits is automatic. However on the filter is positioned a purging screw. Regarding the filter
substitution follow the engine handbook. However we advise to substitute it in case of engine
irregularities.
11
Page 14

AIR FILTER
The air filter is placed under the load deck (Fig. 13). It must be substituted when the red warning
light on the dashboard (Fig. 3 n° 3) is switched on.
In case of duster areas it is advised the daily cleaning.
END OF SEASON MAINTENANCE
When the vehicle is to be out of use for a long period, the following procedure is recommended:
Clean the machine in general.
Place it in a position free from dust and damp.
Remove the battery and put it in a dry place without risk of freezing. Recharge it at least
once a month.
Place planks of wood under its wheels to keep it off the ground, cover the vehicle with a
protective sheet.
12
Page 15

GRILLO SERIE PK 1000
Gentile cliente,
nel ringraziarLa per la fiducia e la preferenza accordata al nostro PK 1000, confidiamo che l’uso di
questa sua nuova macchina risponda pienamente alle sue esigenze.
Per l’impiego ottimale e per la sua manutenzione nel tempo, la preghiamo di leggere
attentamente e eseguire scrupolosamente le indicazioni di questo libretto. Ciò le consentirà
di ottenere i massimi risultati e salvaguardare la sua spesa. La preghiamo di conservare questo
libretto, che dovrà sempre accompagnare la macchina.
ATTENZIONE! Prima di avviare il motore leggere attentamente.
Le seguenti avvertenze sono importanti per l’incolumità!
NORME ANTINFORTUNISTICHE
La prudenza è l’arma principale nella prevenzione degli incidenti!
La preghiamo vivamente di leggere con attenzione le seguenti avvertenze nell’uso della
macchina, prima ancora di iniziare il lavoro.
L’uso improprio della macchina e il suo equipaggiamento può risultare dannoso; per impedire che
ciò avvenga osservare le precauzioni necessarie di seguito riportate:
1) Leggere questo manuale interamente prima di accendere e mettere in movimento la
macchina.
2) Dare particolare attenzione alle ammonizioni e alle etichette di sicurezza.
3) Non caricare pesi superiori alla portata omologata – complessivo a pieno carico Kg 3500
4) Prima di fare lavorare altre persone bisogna metterle al corrente delle norme di sicurezza e di
come si usa la macchina.
5) Prima di accendere il motore verificare che non ci siano persone intorno; specialmente
bambini.
6) Prima di partire con la macchina in marcia indietro controllare che non ci siano persone od
ostacoli.
7) Non trasportare passeggeri sulla macchina oltre a quanto consentito a fianco del guidatore.
8) Non usare la macchina quando si è affaticati e non bere alcolici.
9) Fissare bene il carico negli appositi ganci.
10) Prima di iniziare il lavoro, indossare indumenti appropriati da lavoro, guanti, scarponi.
11) Prima di scendere dalla macchina, spegnere il motore, rimuovere la chiave di avviamento,
inserire il freno di stazionamento.
12) Sui viali sconnessi viaggiare a bassa velocità.
13) Non fare lavorare ragazzi troppo giovani: è vietato l’uso ai minori di 18 anni.
14) Non fare retromarcia col motore accelerato.
15) Caricare il cassone in maniera ordinata e uniforme.
16) Non caricare molto peso nella parte posteriore del cassone oppure su un lato: si perde molto in
stabilità e sicurezza nella guida.
17) Per evitare il pericolo di esalazioni velenose, non adoperare il motore acceso in un locale
chiuso.
18) Spegnere sempre il motore prima di fare rifornimento di combustibile, stare lontano da scintille
o fiamme, non fumare!
19) Evitare fuoriuscite di combustibile e dopo aver riempito il serbatoio pulire ogni fuoriuscita prima
di avviare il motore.
20) Non operare con la macchina vicino a fossati o banchine che si possono rompere sotto il peso
della macchina, specialmente quando la superficie è staccata o bagnata.
21) In discesa curvare sempre lentamente.
22) Non manomettere o disattivare i dispositivi di sicurezza.
23) Se avete dei bambini, quando non usate la macchina nascondete le chiavi di avviamento.
24) Non fare nessun tipo di regolazione o pulizia col motore in moto.
25) Non fare controllare la macchina da nessuno mentre siete seduti alla guida col motore
in moto.
13
Page 16

26) L’utilizzatore è sempre responsabile dei danni arrecati a terzi.
27) Ogni utilizzo improprio comporta il decadimento della garanzia ed il declino di ogni
responsabilità del costruttore.
28) Usare sempre ricambi originali Grillo.
DESCRIZIONE
La motoagricola GRILLO PK 1000 è un veicolo a 4 ruote motrici azionato da un motore Diesel a 4
tempi raffreddato a liquido.
L’esatta distribuzione dei pesi consente di ottenere la massima stabilità. La manutenzione della
macchina è ridotta a poche e semplici operazioni.
CARATTERISTICHE TECNICHE con ruote 10.0/75 - 12
MODELLO: transporter a ruote.
MOTORE: Lombardini FOCS 1404 Diesel 1372 c.c. 37 HP (27,2 kW) potenza massima, (potenza
omologata kW 22,5 a 3000 G/1’), raffreddato a liquido 4 cilindri.
AVVIAMENTO: Elettrico 12V.
FRIZIONE: monodisco a secco con comando a pedale.
CAMBIO: sincronizzato a 10 marce, 8 avanti + 2RM.
VELOCITÀ (con ruote 10.0/75-15,3): I Km/h 2,44 – II Km/h 4,25 – III Km/h 6,56 – IV Km/h 8,93
V Km/h 9,76 – VI Km/h 17,00 – VII Km/h 26,26 – VIII Km/h 35,71 – IRM Km/h 2,54 – IIRM Km/h
10,14
RUOTE:pneumatiche tractor 10.0/80-12 (6 PR); 10.0/75-15,3 (10 PR); garden 26x12.00/12 (8 PR).
DIFFERENZIALE: su entrambi gli assi con bloccaggio sull’asse posteriore.
ASSALE ANTERIORE: sterzante.
STERZO: idraulico.
SEDILI: molleggiati e registrabili.
TRAZIONE: a 4 ruote motrici con le anteriori disinnestabili.
FRENO DI SERVIZIO: idraulico agente sulle 4 ruote.
FRENO DI SOCCORSO E STAZIONAMENTO: meccanico agente sulle ruote posteriori.
CASSONE: ribaltabile trilaterale, idraulico, cm 220 x 134 x 40
ALTEZZA PIANALE CASSONE DA TERRA: cm 85
GRIGLIA PROTEZIONE CONDUCENTE: sulla sponda anteriore del cassone.
PORTATA: 1750 kg con ruote 10.0/75 – 15,3.
DIMENSIONI MACCHINA: lunghezza 4000 compreso di ganci, larghezza 1500, altezza 2320,
passo 1800, carreggiata 1220.
PESO: 1750 kg max con ruote 10.0 / 75 – 15,3 (10 PR).
ACCESSORI: cabina, presa di forza a 540 G/1’.
14
Page 17

IDENTIFICAZIONE DELLA MACCHINA
Il numero di matricola della macchina è stampigliato sulla targhetta posta sul longherone destro del
telaio rimorchio e sulla targhetta cambio.
Il numero di matricola deve essere sempre citato nell’eventuale richiesta delle parti di ricambio.
PARTI DI RICAMBIO
Si consiglia di usare esclusivamente ricambi originali GRILLO.
MESSA IN OPERA DELLA MACCHINA
1) Controllare l’integrità della macchina e accertare che non abbia subito danni durante il
trasporto.
2) Verificare i livelli olio motore, olio cambio e liquido radiatore.
3) Verificare la pressione dei pneumatici:
10,0 / 75 – 15,3 10PR (5,3 bar)
10,0 / 80 – 12 6PR (2,6 bar)
26 x 12.00 / 12 8PR (2,7 bar)
4) Controllare il voltaggio della batteria, non deve risultare inferiore al valore di 12 Volt,
eventualmente provvedere alla ricarica.
Se la batteria è stata fornita a secco con acido a parte, per la messa in opera procedere come
segue:
1) Inserire l’acido e attendere 2 ore;
2) Caricare la batteria con un carica batteria regolato a 12 Volt su carica lenta per 2 ore.
Attenzione, non rispettando questa regola si può avere il deterioramento della batteria e la
fuoriuscita dell’acido durante il lavoro.
IMPORTANTE!!! Durante il montaggio evitare di invertire le polarità della batteria. Non avviare
il motore se la batteria non è collegata.
BATTERIA – ATTENZIONE!
I gas sprigionati dalla batteria sono esplosivi, tenetela lontano da fiamme o scintille. Controllate
periodicamente il livello del liquido e mantenete i morsetti lubrificati con grasso di vaselina.
RODAGGIO
Durante il periodo di rodaggio (prime 70 ore di funzionamento) evitare di operare con il motore a
regimi elevati, limitando lo sfruttamento della potenza a circa il 70% di quella disponibile.
Dopo le prime 20 ore di funzionamento ed al termine del periodo di rodaggio:
Controllare il serraggio di tutti gli organi di fissaggio e di collegamento (viti, dadi, raccordi).
Controllare tutti i gruppi, motore, scatola cambio e le tubazioni, accertandosi che non si
presentino perdite d’olio.
Registrare il freno a mano.
Per quanto riguarda le prescrizioni di rodaggio del motore consultare il rispettivo libretto di
istruzioni.
15
Page 18

ISTRUZIONI D’USO
DESCRIZIONE DEI COMANDI (Fig. 1 - Fig. 2)
1) Pedale comando frizione (Fig. 2 n° 1): serve per disinnestare il motore dalla trasmissione.
Deve essere azionato ogniqualvolta si manovrino le varie leve do comando (leva cambio, leve
ridotte-veloci, leva comando presa di forza), prima di fermare la macchina e prima di avviare il
motore.
2) Pedale comando freni (Fig. 2 n° 2): aziona i freni delle ruote.
3) Acceleratore pedale (Fig. 2 n° 3).
4) Leva comando freno di stazionamento (Fig. 1 n° 4):
ruote posteriori. Il freno viene inserito tirando la leva verso l’alto. Per sbloccare la leva stessa, premere il
pulsante sulla sua estremità e portarla nella posizione più bassa.
5) Leva comando marce (Fig. 1 n° 5):
variatore di velocità, otto velocità in avanti e due in retromarcia.
6) Leva comando variatore di velocità - ridotta e veloce (Fig. 1 n° 6): spingendo la leva in avanti
si ottiene una marcia veloce; tirandola indietro si ottiene una marcia lenta.
7) Leva bloccaggio differenziale (Fig. 1 n° 7): si aziona tirando verso l’alto.
8) Leva disinnesto asse anteriore (Fig. 1 n° 8): girando la leva in avanti l’asse è libero; girandola
indietro è innestato.
Può capitare che l’inserimento o disinserimento dell’asse anteriore sia difficoltoso. Non forzare
mai la leva, ma muovere il veicolo di qualche centimetro avanti o indietro e riprovare.
9) Leva azionamento ribaltabile (Fig. 1 n° 9).
consente di ottenere, in combinazione con la leva comando
agisce contemporaneamente sui freni delle
DESCRIZIONE DEI COMANDI – Fig. 3
1) Spia generatore (rosso).
2) Spia insufficiente pressione olio motore (rosso).
3) Spia intasamento filtro aria.
4) Trazione inserita su tutte le 4 ruote.
5) Spia luci anabbaglianti (verde).
6) Spia preriscaldamento candelette.
7) Spia funzionamento indicatori di direzione (verde).
8) Spia luci di emergenza.
9) Commutatore a chiave per accensione, predisposizione servizi, avviamento e arresto
motore.
10) Deviatore indicatori di direzione e avvisatore acustico, commutatore luci.
11) Spia temperatura liquido di raffreddamento.
12) Contaore
13) Contagiri.
14) Spia livello carburante.
15) Riserva carburante.
16) Spia luci di posizione.
17) Spia freno di stazionamento.
18) Spia temperatura olio motore
19) Spia luci abbaglianti.
CONTROLLI DA ESEGUIRE PRIMA DELL’AVVIAMENTO:
Verificare che l’olio del cambio sia a livello, posto sul lato sinistro del carter cambio (fig. 4).
Controllare il livello olio nel motore (attenersi alle istruzioni del libretto motore).
Controllare che il pedale frizione faccia la prima parte della sua corsa senza azionarla. Per
la regolazione agire sul registro (fig. 5).
Controllare il livello olio freni (fig. 6). La vaschetta si trova sul lato destro del cruscotto.
Riempire il serbatoio di carburante, servendosi di un imbuto munito di filtro molto fine (fig. 7).
Accertarsi che tutte le leve siano in posizione folle, indi operare nel seguente modo:
1) Avviamento con motore freddo.
16
Page 19

2) Abbassare la leva frizione.
3) Inserire la chiave nel commutatore avviamento; ruotarla in senso orario per effettuare il
preriscaldamento quando la spia candeletta si spegne ruotare ulteriormente la chiave e
appena il motore si sarà avviato abbandonarla.
Per spegnere il motore ruotare la chiave in posizione centrale.
In caso di mancato avviamento, non insistere in tentativi inutili, che scaricherebbero la batteria, ma
attendere qualche minuto prima di ripetere l’operazione di avviamento.
Inoltre verificare frequentemente il livello del liquido nella batteria e se occorre aggiungere acqua
distillata.
ISTRUZIONI PER L’USO DEL RIBALTABILE
Operazioni per il ribaltamento del cassone:
Bloccare con i chiavistelli le due traverse del telaio del cassone che si trovano sul lato del
ribaltamento desiderato ed accertarsi che gli spinotti di cerniera siano inseriti correttamente
nell’alloggio.
Per la salita del cassone agire sulla leva (fig. 1 n° 9) tenendola azionata verso il “lato
salita”.
La salita si ottiene solo con la leva continuamente premuta. L’interruzione del ribaltamento
si ha immediatamente rilasciando la leva.
ATTENZIONE!
Il cassone ribaltabile non va mai bloccato in punti diagonalmente opposti; per impedire
l’errato posizionamento i chiavistelli sono di forma diversa.
Usare solo chiavistelli originali.
Prima di ogni ribaltamento laterale accertarsi che le sponde siano aperte.
Prima di iniziare le operazioni di ribaltamento assicurarsi che il veicolo sia posizionato su
terreno orizzontale, non cedevole e con il carico uniformemente distribuito.
AVVERTENZE PER L’IMPIEGO DEL RIBALTABILE
Il ribaltabile trilaterale è costruito e dotato di dispositivi per garantire la massima sicurezza anche
per un operatore inesperto, tuttavia è necessario osservare alcune norme fondamentali di seguito
elencate:
Prima di iniziare le operazioni di ribaltamento assicurarsi che il veicolo sia posizionato su
terreno orizzontale, non cedevole e con il carico uniformemente distribuito.
Prima di iniziare il ribaltamento accertarsi che non vi siano persone, animali o cose nelle
immediate vicinanze del veicolo.
Prima di iniziare le operazioni di ribaltamento assicurarsi che i chiavistelli siano alloggiati in
modo tale da permettere il ribaltamento nella direzione voluta.
È vietata la salita di persone ad attrezzatura ribaltabile sollevata o in corso di sollevamento
per operazioni di livellamento del carico.
A cassone carico, soprattutto con materiali sfusi, prestare la massima attenzione
nell’apertura delle sponde, la pressione dei materiali fa aprire la sponda in modo violento
ed il materiale cadendo può colpire l’operatore.
Assicurarsi che durante la marcia le sponde siano chiuse e bloccate regolarmente.
Prestare molta attenzione, nel caso di ribaltamenti all’interno di locali, all’eventuale
interferenza con travi, soffitti, impalcature, impianti o altro.
Non sollevare mai il cassone in presenza di linee aeree elettriche o similari.
17
Page 20

È vietato abbandonare il posto di manovra con l’attrezzatura ribaltabile alzata.
Per azionare il puntone di sicurezza, l’attrezzatura ribaltabile deve essere vuota.
Durante le operazioni di manutenzione collocare in modo sicuro il puntone atto a sostenere
il cassone (fig. 8). E’ vietato esporsi con alcuna parte del corpo sotto il cassone sollevato
senza che il predetto puntone sia stato accuratamente posizionato.
In caso di avaria del motore è possibile sollevare il cassone agendo sulla pompa manuale
posta sulla parte destra del telaio posteriore (Fig. 14 e Fig. 15).
ATTENZIONE!
1. E’ tassativamente vietato l’uso improprio dell’attrezzatura ribaltabile.
2. La pressione di esercizio dell’impianto idraulico è regolata dal costruttore in funzione della
portata del veicolo
E’ tassativamente vietato modificare la taratura della valvola limitatrice di pressione.
3. Non sostare per nessun motivo sotto il cassone ribaltabile sollevato e non puntellato.
4. E’ tassativamente vietato viaggiare con il cassone, anche minimamente sollevato.
OPERAZIONE DI CARICAMENTO MATERIALE
Caricare il veicolo in modo uniforme e tale da non presentare pericolo di caduta materiale
sul piano stradale.
Mai superare il carico consentito.
Il materiale va versato nel cassone dalla minima altezza possibile.
Controllare che le sponde siano chiuse, in particolar modo che la sponda posteriore sia
bloccata dagli arpioni.
Grossi blocchi di pietra, di detriti di materiale di demolizione vanno disposti cautamente sul
cassone e non lasciati cadere da grande altezza.
ATTENZIONE!
Evitare di sovraccaricare il mezzo
Prima della marcia accertarsi che il cassone sia completamente abbassato ed evitare di
viaggiare con il cassone sollevato.
ARRESTO DEL MOTORE
Dopo aver portato tutte le leve di comando nella posizione di FOLLE, per spegnere il motore
portare la chiave del commutatore nella posizione centrale.
MANUTENZIONE E LUBRIFICAZIONE
OLIO MOTORE
Durante il rodaggio si consiglia di effettuare il primo cambio dopo le prime 20 ore di lavoro, il
secondo dopo 80 ore e successivamente, ogni 120 ore di funzionamento. Utilizzare olio motore
AGIP F. 1D. GAMMA SAE 40 in estate, ed olio AGIP F. 1D. GAMMA SAE 20 in inverno. E’
indispensabile controllare il livello ogni 4 ore di lavoro. (Attenersi al libretto motore).
ATTENZIONE!
Se l’olio è superiore al livello massimo si ha un calo di rendimento del motore e un funzionamento
irregolare.
18
Page 21

OLIO CAMBIO – PONTE POSTERIORE - RIBALTABILE IDRAULICO – IDROGUIDA
Controllare il livello ogni 50 ore circa di lavoro dall’occhio visivo (Fig. 4) posta sul fianco destro del
carter cambio. Se occorre, aggiungere olio per cambio AGIP ROTRA JD. Sostituire l’olio una volta
all’anno. Per togliere l’olio vecchio dal carter cambio svitare il tappo posto al centro del carter
cambio sotto il differenziale (fig. 11). Quantità lt. 23. Il tappo di alimentazione si trova sotto al
cassone (Fig. 9).
Il filtro dell’olio idraulico si trova a lato destro del cambio (Fig. 10). Sostituirlo una volta all’anno.
Per velocizzare le operazioni di rabbocco e di sostituzione dell’olio togliere la vite posta sul
coperchio cambio (Fig. 9).
OLIO PONTE ANTERIORE
Controllare il livello tramite il tappo posto sulla parte anteriore del carter (Fig. 19); sostituire l’olio
ogni 500 ore usando olio per cambio AGIP ROTRA 85 W 90, quantità lt. 5.
LIQUIDO FRENI
Verificare ogni 8 ore il livello del liquido dei freni nella vaschetta posta sul lato destro del posto
guida (Fig. 6). Se occorre aggiungere liquido per freni. Controllare periodicamente l’impianto
frenante per verificare che non vi siano perdite.
Come eseguire lo spurgo qualora se ne verificasse la necessità: se si è in possesso dell’attrezzo
collegarsi al posto del tappo della vaschetta; spurgare prima il circuito posteriore del rimorchio, poi
lo spurgo anteriore.
Dovendo eseguire lo spurgo senza attrezzo agire sulla pompa della macchina, ma non sempre
l’operazione riesce.
REGISTRAZIONE FRENI
Togliere il tappo di plastica posto nella parte bassa della massa frenante (Fig. 16). Girare la ghiera
dentata dal basso verso l’alto.
Il freno di stazionamento si regola agendo sui registri posti sulle masse frenanti (Fig. 17).
IMPORTANTE!
Ingrassare periodicamente il giunto cardanico, di trasmissione, lo snodo oscillante della macchina
e le testine sterzo.
LIQUIDO RADIATORE
Controllare il livello ogni 8 ore a motore freddo, altrimenti il liquido caldo potrebbe causarvi ustioni.
Sostituirlo una volta all’anno.
Capacità 12 litri (Fig. 6).
ATTENZIONE!
In caso di perdite di liquido, una volta riparato il guasto riempire bene il circuito spurgando
ripetutamente l’aria dal tappo posto sul motore in corrispondenza del manicotto superiore (Fig. 18).
FILTRO GASOLIO
Il filtro gasolio (fig. 12) è dotato di elettrovalvola per lo spegnimento.
Lo spurgo dell’aria nelle condutture è automatico; tuttavia sopra al filtro è posizionata una vite di
spurgo.
Per la sostituzione del filtro attenersi al libretto motore. Consigliamo comunque di sostituirlo in caso
di irregolarità del motore.
19
Page 22

FILTRO ARIA
Il filtro aria si trova sotto al cassone (fig. 13) e va sostituito quando si illumina la spia rossa sul
cruscotto (fig. 3 n° 3).
E’ consigliata in caso di ambienti polverosi la pulizia giornaliera.
MANUTENZIONE DI FINE STAGIONE
Quando la macchina deve rimanere inattiva per un lungo periodo si consigliano le seguenti
operazioni:
Eseguire una pulizia generale della macchina.
Collocarla in un ambiente che non sia né polveroso, né umido.
Togliere la batteria, collocarla in un locale asciutto in cui non vi sia pericolo di gelo e
ricaricarla almeno una volta al mese.
Mettere delle assicelle di legno sotto le ruote per isolarla dal suolo, ricoprire la macchina
con un telo protettivo.
20
Page 23

GRILLO SERIE PK 1000
Cher Client,
Nous vous remercions de la confiance et de la préférence que vous avez bien voulu accorder à
notre Grillo PK1000 et nous sommes certains que son usage répondra entièrement à vos
exigences. Pour une utilisation optimale et pour sa maintenance à long terme, nous vous
demandons de lire attentivement et de suivre scrupuleusement les indications contenues dans
cette brochure. Ce qui vous permettra d’obtenir des excellents résultats et de sauvegarder votre
investissement.
Nous vous demandons de conserver ce manuel qui doit toujours accompagner le véhicule.
ATTENTION! Lire attentivement les instructions avant de mettre en
marche le moteur.
Les précautions suivantes sont importantes pour votre
sécurité!
NORMES POUR LA PREVENTION DES ACCIDENTS.
La prudence est la meilleure arme pour la prévention des accidents!
Nous vous demandons de lire attentivement les normes suivantes avant la mise en marche
du véhicule et pentant son utilisation.
L’utilisation inadéquate du véhicule et de son équipement peut être dangereuse. Afin de réduire
ces éventualités de danger, veuillez respecter les précautions nécessaires ci-après:
1) Lire entièrement ce manuel avant l’activation et la mise en mouvement du véhicule.
2) Suivre avec une attention particulière les mises en garde et les étiquettes de sécurité.
3) Ne pas charger de poids supérieurs à la portée maximale homologuée – total à pleine charge:
3500 kg.
4) Avant de confier votre véhicule à d’autres personnes, il faut leur illustrer aussi bien les normes
de sécurité que le mode d’emploi.
5) Avant de mettre en marche le moteur, vérifier qu’il n’y ait personne aux alentours et, en
particulier, qu’il n’y ait pas d’enfants.
6) Avant de faire marche arrière vérifier qu’il n’y ait personne et qu’il n’y ait aucun obstacle.
7) Ne pas admettre plus de passager que prévu à côté du conducteur.
8) Ne pas utiliser le véhicule si vous êtes fatigués et ne pas boire d’alcools.
9) Fixer parfaitement la charge avec les crochets spécialement prèvus à cet effet.
10) Avant de commencer le travail, mettre des vêtements de travail appropriés, des gants et
des bottes.
11) Avant de quitter le véhicule, désactiver le moteur, enlever la clé de démarrage et insérer le
frein de stationnement.
12) Adopter une faible vitesse sur les chemins en mauvais état.
13) Ne pas faire travailler des personnes trop jeunes: l’usage est interdit aux mineurs de 18 ans.
14) Ne pas faire marche arrière avec le moteur accéléré.
15) Charger la benne de manière ordonnée et uniforme.
16) Ne pas charger un poids excessif dans la partie arrière de la benne ou latéralement, afin
d’éviter la perte de stabilité et de sécurité dans la conduite.
17) Pour éviter le danger d’exhalations toxiques, ne pas faire tourner le moteur dans un endroit
fermé.
18) Eteindre toujours le moteur avant de faire le plein de combustible; rester loin des étincelles ou
des flammes et ne pas fumer!
19) Eviter les fuites de combustible; après avoir rempli le réservoir, nettoyer soigneusement les
fuites avant d’activer le moteur.
20) Ne pas utiliser la machine près des fossés ou de accôtements qui pourraient s’effondrer sous
le poids du véhicule, en particulier lorsque la surface est en mauvais état ou mouillée.
21) Aborder toujours lentement les tournants pendant les descentes.
22) Ne pas modifier ni désactiver les dispositifs de sécurité.
23) S’il y a des enfants, il faut cacher les clés de démarrage lorsqu’on n’utilise pas le véhicule.
21
Page 24

24) N’effectuer aucun réglage ou nettoyage avec le moteur en marche.
25) Ne pas faire contrôler le véhicule lorsque le conducteur est au volant avec le moteur en
marche.
26) L’utilisateur est toujours responsable des dégâts occasionnés aux tiers.
27) Toute utilisation impropre annulle la garantie et supprime la responsabilité du Constructeur.
28) Utiliser toujours des pièces de rechange d’origine Grillo.
DESCRIPTION
La machine GRILLO PK 1000 est un véhicule à 4 roues motrices, actionné par un moteur Diesel à
4 temps, avec refroidissement par liquide.
La distribution exacte des poids permet d’obtenir une stabilité maximale; l’entretien du véhicule se
limite à quelques simples opérations.
CHARACTERISTIQUES TECHNIQUES AVEC ROUES 10.0/75-12
MODELE: transporteur à roues.
MOTEUR: Lombardini FOCS 1404 Diesel 1372 c.c. 37 HP (27,2 kW) puissance max,
(puissance homologuée kW 22,5 a 3000 T/1’) refroidissement à eau 4 cylindres.
Kubota 1105 diesel 3 cylindres refroidissement à eau – 3.200 T/1’ - 28 HP (21 kW).
Lombardini 12LD477 diesel 2 cylindres refroidissement à air–3.200 T/1’– 20 HP (15 kW).
DEMARRAGE: électrique, 12V.
EMBRAYAGE: Monodisque à sec avec commande à pédale.
BOITE DE VITESSES: synchronisée à 10 marches, 8 avant + 2 AR.
VITESSE: I Km/h 2,7 – II Km/h 4,7 – III Km/h 7,2 – IV Km/h 9,9 – V Km/h 10,8 –
VI Km/h 18,9 – VII Km/h 28,9 – VIII Km/h 40 – IRM Km/h 2,8 – IIRM Km/h 11,2 avec roues
10.0/80-12.
ROUES: pneumatiques 10.0/80-12.
DIFFÉRENTIEL: sur les deux axes avec blocage sur l’axe AR.
AXE AV: directionelle.
BRAQUAGE: hydraulique.
SIÈGES: suspendus et enregistrables.
TRACTION: à 4 roues motrices avec les roues AV. déconnectables.
FREIN DE SERVICE: hydraulique, intervient sur les 4 roues.
FREIN DE SECOURS ET STATIONNEMENT: méchanique, intervient sur les roues AR.
BENNE: basculeur trilatéral, hydraulique, cm 220 x 134 x 40
HAUTEUR DU PLATEAU DE LA BENNE AU-DESSUS DU NIVEAU DU SOL: cm 85
GRILLE DE PROTECTION DU CONDUCTEUR: sur le bord AV. de la benne.
PORTÉE: 1750 kg max avec roues 10.0/75-15.3.
DIMENSIONS MACHINE: longeur 3750, largeur 1500, hauteur 2030, pas 1800, chaussée 1230.
POIDS: 1650 kg.
ACCESSOIRES: cabine, prise de force à 540 T/1’.
22
Page 25

IDENTIFICATION
Le numéro de série du véhicule est estampillé sur la plaque signalétique placée sur le longeron
gauche du chassis-remorque et sur la plaquette de la boîte de vitesses.
Le numéro de série doit toujours être cité dans les commandes des pièces detachées.
PIECES DETACHEES
Nous conseillons d’utiliser exclusivement des pièces détachées originelles GRILLO.
MISE EN SERVICE DE LA MACHINE
1) Contrôler que la machine soit en bon état et qu’elle n’ait pas été endommagée au cours du
transport.
2) Vérifier les niveaux de l’huile moteur, de l’huile boîte de vitesses et du liquide du radiateur.
3) Vérifier la pression des pneus:
10,0 / 75 – 15,3 10PR (5,3 bar)
10,0 / 80 – 12 6PR (2,6 bar)
26 x 12.00 / 12 8PR (2,7 bar)
4) Contrôler le voltage de la batterie qui ne doit pas etre inférieur à la valeur de 12 V; effectuer
éventuellement la recharge. Si la batterie à été livrée à sec avec de l’acide à part, adopter la
procédure suivante pour la mise en service:
1) Introduire l’acide et attendre 2 heures;
2) Charger la batterie avec un charge-batterie réglé à 12 V sous charge lente pendant 2
heures.
Attention! Si l’on ne respecte pas cette règle on peut détériorer la batterie et il pourrait se
vérifier une fuite d’acide pendant le travail.
IMPORTANT!!! Eviter d’inverser les polarités de la batterie pendant le montage. Ne pas
démarrer le moteur si la batterie n’est pas branchée.
BATTERIE – ATTENTION!
Les gaz qui se dégagent de la batterie sont explosifs; garder la batterie loin des flammes ou des
étincelles. Contrôler périodiquement le niveau du liquide et lubrifier les bornes avec de la graisse
de vaseline.
RODAGE
Durant la période de rodage (les 70 premières heures de fonctionnement) éviter de faire tourner le
moteur à plein régime et exploiter la puissance jusqu’à 70% de la puissance totale disponible.
Après les 20 premières heures de fonctionnement et à l’issue de la période de rodage:
- Contrôler le serrage de tous les organes de fixation et de raccordement (vis, écrous, raccords).
- Contrôler tous les groupes, moteur, boîte de vitesse et conduites, en s’assurant qu’il n’y ait pas
de fuites d’huile.
- Régler le frein à main.
En ce qui concerne les préscriptions à suivre pour le rodage du moteur, consulter le manuel
spécifique.
23
Page 26

MODE D’EMPLOI
DESCRIPTION DES COMMANDES (Fig. 1 - Fig. 2)
1) Pédale de commande embrayage (Fig. 2 n°1): elle sert à déconnecter le moteur de la
transmission. Elle doit etre actionnée toutes les fois que l’on manoeuvre les différents leviers
de commande (levier de changement de vitesse, levier des vitesses réduites-rapides, levier de
commande prise de force), avant d’arrêter la machine et avant de mettre en marche le moteur.
2) Pédale commande freins (Fig. 2 n°2): elle met en fonction les freins des roues
3) Accélérateur pédale (Fig. 2 n° 3)
4) Levier de commande du frein de stationnement (Fig. 1 n°4):
freins des roues arrière. L
levier, presser le bouton-poussoir placé à l’extrémité et conduire le levier vers la position la
plus basse.
5) Levier de commande des vitesses (Fig. 1 n°5):
levier de commande du variateur de vitesse, huit vitesses en avant et deux en marche arrière.
6) Levier de commande du variateur de vitesse (réduite et rapide) (Fig.1 n°6): si l’on pousse le
levier en avant on obtient une vitesse rapide; en le tirant vers l’arrière on obtient une vitesse réduite.
7) Levier de blocage du différentiel (Fig. 1 n°7): on l’actionne en le tirant vers le haut.
8) Levier de désembrayagede l’axe AV (Fig. 1 n°8): si l’on tourne le levier en avant, l’axe est
libre; si l’on tourne le levier en arrière, l’axe est embrayé. Il peut arriver que le levier oppose
résistance empêchant la connexion ou la déconnexion de l’axe. Dans ce cas, ne jamais forcer
le levier mais répéter l’opération après avoir déplacé le véhicule de quelque centimètre.
9) Levier d’actionnement du basculeur.
e frein est inséré lorsqu’on tire le levier vers le haut. Pour débloquer ce
il permet d’obtenir, en synchronisation avec le
il agit simultanément sur les
DESCRIPTION DES COMMANDES – Fig. 3
1) Voyant générateur (rouge).
2) Voyant pression de l’huile moteur insuffisante (rouge).
3) Indicateur de l’obstruction du filtre de l’air.
4) Traction activée sur les 4 roues.
5) Voyant feux de croisement (vert).
6) Voyant de préchauffage des bougies.
7) Voyant de fonctionnement des indicateurs de direction (vert).
8) Voyant des feux de detresse.
9) Commutateur à clé pour l’allumage, la prédisposition des services, le démarrage et
l’arrêt du moteur.
10) Commutateur des indicateurs de direction et avertisseur sonore, commutateur
lumières.
11) Voyant température liquide de refroidissement.
12) Compte-heures.
13) Compte-tours.
14) Voyant du niveau de carburant.
15) Reserve de carburant.
16) Voyant feux de position.
17) Voyant frein de stationnement.
18) Voyant température huile moteur.
19) Voyant feux de route.
CONTROLES A EFFECTUER AVANT LE DEMARRAGE:
Vérifier que l’huile de la boîte de vitesses atteigne le niveau indiqué sur le côté gauche du
carter de la boîte de vitesse (fig. 4).
Contrôler le niveau de l’huile dans le moteur (respecter les instructions du manuel du
moteur).
Contrôler que la pédale d’embrayage n’actionne pas l’embrayage pendant le premier trait
de sa course. Pour le réglage modifier le registre (fig. 5).
24
Page 27

Contrôler le niveau d’huile des freins (fig. 6). La cuvette se trouve à la droite du tableau de
bord.
Remplir le réservoir de carburant par le biais d’un entonnoir muni d’un filtre très fin (fig. 7).
S’assurer que tous les leviers soient au point mort, ensuite adpter la procédure suivante:
1) Démarrer avec le moteur froid;
2) Abaisser le levier d’embrayage;
3) Introduire la clé dans le commutateur de démarrage; tourner la clé en sens horaire pour
effectuer le préchauffage; lorsque le voyant de la bougie s’éteint tourner encore la clé et la
laisser dès que le moteur démarre.
Pour éteindre le moteur tourner la clé sur la position centrale.
Dans le cas où la machine ne démarre pas, il ne faut pas insister en faisant des tentatives inutiles
qui déchargeraient la batterie, mais attendre quelques minutes avant de répéter l’opération de
démarrage.
Vérifier fréquemment le niveau du liquide dans la batterie et ajoter de l’eau distillée si nécessaire.
MODE D’EMPLOI DU BASCULEUR
Opérations pour le basculement de la benne:
Par le biais des verrous, bloquer les deux traverses du châssis de la benne placées sur le
côté intéréssé par le basculement et s’assurer que les goujon des charnière soient
correctement insérés.
Pour faire monter la benne, régler le levier (fig. 1 n°9) sur le “côté montée”.
La benne continue de monter jusqu’à ce que l’on fait pression sur le levier. Pour
interrompre le basculemet, laisser le levier.
ATTENTION!
La benne ne doit jamais être bloquée à des points diagonalement opposés; afin
d’empêcher une position incorrecte de la benne, les verrous sont de différentes formes.
N’utiliser que des verrous originels.
Avant tout basculement latéral, s’assurer que les ridelles soient ouvertes.
Avant de commencer les opérations de basculement, s’assurer que le véhicule se trouve
sur un terrain horizontal, non pas mouvant, et avec la charge distribuée de manière
uniforme.
AVERTISSEMENTS POUR L’EMPLOI DU BASCULEUR
Le basculeur est équipé de dispositifs particuliers et conçu afin de garantir la meilleure sécurité
pour tous les utilisateurs jusqu’aux moins experts. Il est néanmoins nécessaire d’observer les
normes fondamentales suivantes:
Avant de commencer les opérations de basculement, s’assurer que le véhicule se trouve
sur un terrain horizontal, non pas mouvant, et avec la charge distribuée de manière
uniforme.
Avant de commencer les opérations de basculement, s’assurer que toute personne, animal
ou chose soient éloignés du véhicule.
Avant de commencer les opérations de basculement, s’assurer que les verrous soient
positionnés de façon à permettre le basculement dans la direction désirée.
Il est interdit aux opérateurs de monter sur la benne pour distribuer les matériaux, pendant
la phase de basculement ou lorsque la benne est soulevée.
25
Page 28

Quand la benne est pleine, sourtout lorsque les matériaux y sont chargés en vrac, il faut
porter une attention particulière pendant l’ouverture des ridelles, car la pression des
matériaux pousse violemment la ridelle et les matériaux qui tombent peuvent frapper
l’utilisateur.
S’assurer que pendant la marche les ridelles soient régulièrement fermées et bloquées.
Lorsque on effectue le basculement dans des locaux fermés, il faut porter une attention
particulière aux poutres, plafonds, échafaudages, installations etc.
Ne jamais soulever la benne tout près de lignes électriques aériennes ou similaires.
Il est interdit d’abandonner le poste de manoeuvre lorsque la benne est soulevée.
Pour pouvoir insérer l’étai de sécurité, la benne doit être vide.
Pendant les opérations d’entretien, bien assurer l’étai qui soutient la benne (fig. 8). Il est
interdit de s’exposer avec toute partie du corps sous la benne sans avoir préalablement
bien positionné l’étai.
Dans les cas de panne du moteur, il est toutefois possible de soulever la benne, en
actionnant la pompe manuelle placée sur le côté droit du châssis postérieur
(Fig. 14 et Fig. 15).
ATTENTION!
1. Toute utilisation inadéquate de l’équipement basculeur est absolument interdite.
2. La pression d’exploitation de l’installation hydraulique est réglée par le constructeur en
fonction de la portée du véhicule.
Il est absolument interdit de modifier le tarage de la soupape de retour.
3. Ne jamais demeurer, pour toute raison que ce soit, au dessous de la benne soulevée et
non fixée avec l’étai.
4. Il est absolument interdit de voyager avec la benne ne serait-ce que légèrement soulevée.
OPERATIONS DE CHARGEMENT MATERIAUX
Charger uniformément le véhicule et de façon à éviter tout danger de chute des matériaux
sur la route.
Ne jamais dépasser la charge maximale.
Les matériaux doivent être versés dans la benne à partir de la moindre hauteur possible.
Contrôler que les ridelles soient fermées et tout particulièrement que la ridelle arrière soit
bloquée avec les cliquets.
Les gros blocs de pierre et les matériaux de démolition doivent être déposés prudemment
dans la benne. Eviter de les laisser tomber d’une grande hauteur.
ATTENTION!
Eviter de charger eccessivement la machine.
Avant de la mise en marche, s’assurer que la benne soit bien abbaissée et éviter de
voyager avec la benne soulevée.
EXTINCTION MOTEUR
Après avoir conduit tous les leviers de commande sur la position POINT MORT, pour éteindre le
moteur tourner la clé du commutateur sur la position centrale.
26
Page 29

ENTRETIEN ET LUBRIFICATION
HUILE MOTEUR
Pendant le rodage, nous vous conseillons d’effectuer la première vidange après 20 heures de
travail, la deuxième après 80 heures et ensuite toutes les 120 heures d’exploitation. Utiliser de
l’huile moteur AGIP F. 1D. GAMME SAE 40 en été , et l’huile AGIP F. 1D. GAMME SAE 20 en
hiver. Il est indispensable de contrôler le niveau de l’huile toutes les 4 heures de travail (suivre les
indications du manuel du moteur).
ATTENTION!
Si l’huile dépasse le niveau maximum, on accuse une détérioration des performances du moteur et
un fonctionnement irrégulier.
HUILE DE LA BOITE DE VITESSES – PONT ARRIERE – BASCULEUR HYDRAULIQUE
– DIRECTION HYDRAULIQUE
Contrôler le niveau toutes les 50 heures de travail en regardant à travers l’oeil (Fig. 4) placé sur le
côté droit du carter de la boîte de vitesses. Si nécessaire, rajouter de l’huile pour boîte de vitesse
AGIP ROTRA JD. Vidanger l’huile une fois par an. Pour effectuer l’opération de vidange du carter,
dévisser le bouchon placé au milieu du carter de la boîte de vitesses sous le différentiel (fig. 11).
Quantité Lt. 23. Le bouchon d’alimentation se trouve sous la benne (Fig. 9).
Le filtre de l’huile hydraulique se trouve à la droite de la boîte de vitesses (Fig. 10). Le remplacer
une fois par an.
Si l’on désire que l’appoint et la vidange de l’huile soient plus rapides, dévisser la vis placée sur le
couvercle de la boîte de vitesses (Fig. 9).
HUILE PONT AVANT
Contôler le niveau par le bouchon placé sur la partie avant du carter (Fig. 19); vidanger l’huile
toutes les 500 heures et utiliser l’huile pour boîtes de vitesses AGIP ROTRA 85 W 90, quantité Lt.
5.
LIQUIDE DES FREINS
Toutes les 8 heures, vérifier le niveau du liquide des freins de la cuvette placée à la droite du poste
de condudite (Fig. 6). Si nécessaire, rajouter du liquide. Contrôler périodiquement le groupe de
freinage pour vérifier qu’il n’y ait pas de fuites.
Comment purger en cas de nécessité: si l’on dispose de l’outil approprié, se relier au poste du
bouchon de la cuvette; purger tout d’abord le circuit arrière de la remorque, et ensuite le circuit
avant.
Si l’on ne dispose pas de l’outil approprié, on peut essayer d’intervenir sur la pompe du véhicule,
mais cette opération ne réussit pas toujours.
REGLAGE FREINS
Enlever le bouchon de plastique placé dans la partie basse de la masse de freinage (Fig. 16).
Faire tourner l’anneau denté du bas vers le haut.
Pour régler le frein de stationnement, intervenir sur les mécanismes de réglement placés sur les
masses de freinage (Fig. 17).
IMPORTANT!
Graisser périodiquement les joints de cardan, les joints de transmission, le joint oscillant du
véhicule et les têtes de la barre de direction.
27
Page 30

LIQUIDE RADIATEUR
Contrôler le niveau toutes les 8 heures avec le moteur froid, le liquide chaud pourrait en effet
provoquer des brûlures à l’opérateur.
Effectuer la vidange une fois par an.
Capacité 12 litres (Fig. 6).
ATTENTION!
En cas de pertes de liquide, après la réparation, bien remplir le circuit, purgeant plusieurs fois l’air
par le bouchon placé sur le moteur en correspondance du manchon supérieur (Fig. 18).
FILTRE GASOIL
Le filtre gasoil (fig. 12) est équipé d’une soupape électrique pour l’extinction.
La purge de l’air dans les conduites est automatique; cependant, il y a une vis de purge au dessus
du filtre.
Pour le remplacement du filtre, suivre les instructions contenues dans la brochure du moteur. Le
remplacement de ce filtre est, néanmoins, conseillé en cas d’irrégularités du moteur.
FILTRE AIR
Le filtre de l’air se trouve au dessous de la benne (fig. 13) et il doit être remplacé quand le voyant
rouge du tableu de bord est allumé (fig. 3 n° 3).
Si le véhicule est utilisé dans des endroits poussiéreux, on conseille le nettoyage une fois par jour.
ENTRETIEN DE FIN DE SAISON
Lorsque l’on prévoit une longue période d’inactivité du véhicule, nous conseillons d’exécuter les
opération suivantes:
Effectuer un nettoyage général de la machine.
Placer la machine dans un endroit sec et non poussiéreux.
Démonter la batterie, la placer dans un local sec, sans qu’elle soit exposée au danger de
gel et la recharger au moins une fois par mois.
Placer des planches de bois sous les roues pour les isoler du sol, recouvrir le véhicule avec
une bâche.
28
Page 31

GRILLO SERIE PK 1000
Sehr geehrter Kunde,
wir danken Ihnen für Ihr Vertrauen und sind sicher, daß Sie mit Ihrem neuen “Grillo PK 1000” voll
und ganz zufrieden sein werden.
In diesem Handbuch finden Sie alles, was Sie für den Gebrauch und die Wartung Ihrer Maschinen
wissen müssen. Lesen Sie es daher aufmerksam durch, und halten Sie sich genau an die
Anleitungen, damit Sie auch wirklich immer optimale Resultate erzielen und lange Freude an Ihrer
Maschine haben werden. Bewahren Sie dieses Handbuch immer zusammen mit der Maschine
auf.
ACHTUNG! Vor dem Anlassen des Motors die folgenden
sicherheitstechnischen Hinweise genau durchlesen.
UNFALLVERHÜTUNGSMASSNAHMEN!
Vorsicht ist immer die beste Maß´nahme, um Unfälle zu vermeiden!
Lesen Sie die folgenden Hinweise genau durch, bevor Sie mit der Arbeit beginnen.
Ein unsachgemäßer Gebrauch der Maschine und Ihrer Ausrüstung kann Personen- oder
Sachschäden zur Folge haben. Um alle eventuellen Risiken zu vermeiden, sind die folgenden
Hinweise genaustens zu beachten:
1) Lesen Sie das gesamte Handbuch vor der ersten Benutzung der Maschine sorgfältig und
ganz durch.
2) Die auf der Maschine angebrachten Hinweise bzw. Plaketten beachten.
3) Niemals die zulässige Nutzlast überschreiten – das maximal zugelassene Gesamtgewicht in
vollbeladenem Zustand beträgt 3500 kg.
4) Soll die Maschine von einer anderen Person benutzt werden, ist diese vorher genaustens im
Gebrauch und über die Unfallsverhütungsmaßnahmen zu unterweisen.
5) Vergewissern Sie sich vor dem Einschalten der Maschine, daß sich keine anderen Personen
und vor allem keine Kinder in der Nähe befinden.
6) Vergewissern Sie sich vor dem Rückwärtsfahren, daß sich keine Personen oder Hindernisse
hinter der Maschine befinden.
7) Nicht mehr Passagiere mitnehmen, als auf dem Beifahrersitz erlaubt.
8) Das Gerät auf keinen Fall benutzen, wenn Sie unter Alkoholeinfluß stehen und/oder müde
sind.
9) Die Last immer gut mit den dafür vorgesehenen Haken befestigen.
10) Beim Aqrbeiten immer geeignete Arbeitskleidung, Handschuhe und Arbeitsschuhe
tragen.
11) Vor dem Absteigen von der Maschine immer den Motor abstellen, den Zündschlüssel abziehen
und die Feststellbremse anziehen.
12) Auf holprigen und unwegsamen Straßen/Wegen angemessen langsam fahren.
13) Das vorgeschriebene Mindestalter für die Benutzung der Maschine beträgt 18 (achtzehn)
Jahre.
14) Im Rückwärtsgang nur langsam fahren.
15) Die Ladefläche ordentlich und gleichmäßig beladen.
16) Die Ladefläche nicht einseitig oder nur hinten mit großen Gewichten belasten, da dadurch die
Stabilität der Maschine und die Sicherheit beim Lenken beeinträchtigt werden.
17) Den Motor nicht in geschlossenen Räumen laufen lassen (Vergiftungsgefahr – gefährliche
Abgase)
18) Beim Nachtanken den Motor immer abschalten, nicht rauchen und offene Flammen bzw.
Funken aus dem Gefahrenbereich entfernen.
19) Keinen Treibstoff verschütten, und beim Tanken ausgetretenen/verschütteten Treibstoff vor
dem Anlassen des Motors entfernen.
20) Nicht in der Nähe von Gräben oder Banketten arbeiten, die unter dem Gewicht der Maschine
nachgeben könnten, vor allem dann, wenn das Erdreich naß oder brüchig ist.
29
Page 32

21) Beim Bergabfahren immer vorsichtig und langlam lenken.
22) Die Sicherheitsvorrichtungen auf der Maschine niemals außer Funktion setzen bzw.
entfernen.
23) Wird die Maschine nicht benutzt, sind die Schlüssel immer an einem für Kinder unerreichbaren
Ort aufzubewahren.
24) Niemals bei laufendem Motor Reinigungsarbeiten bzw. Einstellungen durchführen.
25) Die Maschine niemals von einer anderen Person kontrollieren lassen, während Sie
selbst auf dieser sitzen und der Motor läuft.
26) Der Benutzer ist immer für anderen Personen zugefügte Schäden verantwortlich.
27) Jeder unsachgemäße Gebrauch hat den Verfall des Garantieanspruches und der Haftung des
Herstellers zur Folge.
28) Ausschließlich Original-Grillo-Ersatzteile verwenden.
BESCHREIBUNG
Der Transporter GRILLO PK 1000 ist ein Nutzfahrzeug mit vier Antriebsrädern und einem 4-TaktDieselmotor mit Flüssigkeitskühlung.
Dank der exakten verteilung der Gewichte ist das Fahrzeug besonders stabil. Die Wartung
beschränkt sich auf wenige, einfache Handgriffe.
TECHNISCHE DATEN mit Bereifung 10.0/75 - 12
MODELL: Transporter
MOTOR: Lombardini FOCS 1404 Diesel 1372 ccm. 37 HP (27,2 kW) Maximalleistung,
(homologierte Leistung kW 22,5 bei 3000 U/1’), 4 Zylinder mit Flüssigkeitskühlung
ANLASSER: Ellektrisch 12V
KUPPLUNG: Einscheiben-Trockenkupplung mit Pedalbedienung
GETRIEBE: Synchrongetriebe mit 10 Gängen, davon 8 Vorwärts- und 2 Rückwärtsgänge
GESCHWINDIGKEIT (mit Bereifung 10.0/75-15,3): I Km/h 2,44 – II Km/h 4,25 – III Km/h 6,56
– IV Km/h 8,93 V Km/h 9,76 – VI Km/h 17,00 – VII Km/h 26,26 – VIII Km/h 35,71 – I RG Km/h
2,54 – II RG Km/h 10,14
BEREIFUNG: pneumatische Traktorbereifung 10.0/80-12 (6 PR); 10.0/75-15,3 (10 PR);
Gartenbereifung 26x12.00/12 (8 PR)
DIFFERENZIAL: Auf beiden Achsen mit Sperrung auf Hinterachse
VORDERACHSE: gelenkt
LENKUNG: Hydraulisch
SITZE: Einstellbar und gefedert
ANTRIEB: Allradantrieb, abschaltbar für Vorderräder
BETRIEBSBREMSE: Hydraulisch, auf alle 4 Räder wirkend
FESTSTELL- UND NOTBREMSE: Mechanisch, auf die Hinterräder wirkend
PRITSCHE: Hydraulisch dreiseitig Kippbar; cm 220 x 134 x 40
PRITSCHENHÖHE VOM BODEN: 85 cm
FAHRER-SCHUTZGITTER: Auf dem Vorderrand der Pritsche
NUTZLAST: Max.1750 kg mit Bereifung10.0/75 – 15,3.
MASCHINEN-ABMESSUNGEN: Länge 4000 mm einschließlich Anhängerkupplung, Breite
1500mm, Höhe 2320mm, Radstand 1800mm, Spurweite mm.
GESAMTGEWICHT: Max 3500 kg con ruote 10.0 / 75 – 15,3 (10 PR).
ZUBEHÖR: Kabine, Zapfwelle mit 540 U/1’.
30
Page 33

IDENTIFIKATION DER MASCHINE
Auf dem rechten Längsträger des Anhängerrahmens und auf dem Getriebe befinden sich jeweils
eine Plakette mit der Seriennummer der Maschine, die für die Bestellung von Ersatzteilen und bei
allen die Maschine betreffenden Anfragen dem Hersteller anzugeben ist.
ERSATZTEILE
Benutzen Sie ausschließlich Original-GRILLO-Ersatzteile.
INBETRIEBNAHME DER MASCHINE
1) Unversehrtheit der Maschine überprüfen und nachsehen, ob Transportschäden bestehen.
2) Öl-Niveau des Motors und Gertriebes sowie Kühlflüssigkeit überprüfen.
3) Reifendruck prüfen:
10,0 / 75 – 15,3 10PR (5,3 bar)
10,0 / 80 – 12 6PR (2,6 bar)
26 x 12.00 / 12 8PR (2,7 bar)
4) Die Batteriespannung überprüfen; sie darf nicht unter 12 Volt liegen. Bei Bedarf die Batterie
ans Ladegerät hängen.
Wenn die Batterie trocken, mit bder Säure separat geliefert wurde, bitte wie folgt vorgehen:
1) Säure einfüllen und 2 Stunden warten;
2) Mit einem Batterieladegerät, welches auf 12 Volt eingestellt ist, 2 Stunden langsam laden.
Achtung, bei Nicht-Befolgung dieser Regel, kann die Batterie beschädigt werden, und die
Säure während der Arbeit austreten.
WICHTIG!!! Bei der Montage die Polung der Batterie nicht verwechseln. Den Motor nicht
starten, wenn die Batterie nicht angeschlossen ist.
BATTERIE – ACHTUNG!
Freigesetzte Batteriegase sind explosiv! Halten Sie sie von Feuer oder Funken fern. Kontrollieren
Sie regelmäßig den Flüssigkeitsstand und halten Sie die Anschlußklemmen mit Vaselin-Fett
eingefettet.
EINFAHREN
In der Einfahrzeit (die ersten 70 Arbeitstunden) Fahren mit hohen Drehzahlen vermeiden, indem
nur mit 70% der zur Verfügung stehenden Leistung gefahren wird.
Nach den ersten 20 Arbeitsstunden und nach der Einfahrzeit:
Überprüfung und Anzug aller Befestigungs- und Verbindungsstücke (Schrauben, Muttern,
Verbindungsteile)
Überprüfung aller Aggregate, Motor, Getriebegehäuse und Leitungsrohre, um sich zu
versichern, daß nirgends Öl austritt
Handbremse einstellen
Für die Einfahranforderungen des Motors betrifft, sehen Sie im entsprechenden MotorenHandbuch nach.
31
Page 34

GEBRAUCHSANWEISUNG
BESCHREIBUNG DER BEDIENUNGSELEMENTE (Fig. 1 - Fig. 2)
1) Kupplungspedal (Fig. 2 n° 1): dient zur Auskupplung des Motors von der Übersetzung. Sie
muss jedesmal vor dem Einsatz verschiedener Bedienungselemente getätigt werden
(Gangschaltung, Untersetzte Gänge, Zapfwelleneinschaltung); Betätigung auch vor dem
Anhalten der Maschine und vor dem Starten des Motors.
2) Bremspedal (Fig. 2 n° 2): Betätigt die Bremsen der Räder.
3) Gaspedal (Fig. 2 n° 3).
4) Feststellbremse (Fig. 1 n° 4):
betätigt, indem der Hebel nach oben gezogen wird. Um die Bremse wieder zu lösen, Knopf am Ende
des Hebels betätigen und Hebel nach unten führen.
5) Gangschaltung (Fig. 1 n° 5):
acht Geschwindigkeiten vorwärts und zwei Rückwärtsgänge.
6) Geschwindigkeitsreglungshebel - reduziert und schnell (Fig. 1 n° 6): den Hebel nach vorne
drückend erhält man die schnellen Gänge; den Hebel nach hinten ziehend erhält man die langsamen
Gänge.
7) Hebel für Differenzialsperrung (Fig. 1 n° 7): wird aktiviert, indem Hebel nach oben gezogen wird.
8) Abschalthebel für Vorderachsenantrieb (Fig. 1 n° 8): den Hebel zur Freisetzung der Achse
nach vorne drehend; zum Einschalten nach hinten drehen.
Es kann passieren, daß das Ein- oder Ausschalten der Vorderachse schwierig geht. Auf
keinen Fall mit Gewalt den Hebel betätigen, sondern das Fahrzeug einige Zentimeter nach
vorne oder hinten bewegen und nochmals versuchen.
9) Hebel zur Pritschenkippung (Fig. 1 n° 9).
Wirkt gleichzeitig auf die Bremsen der Hinterräder. Die Bremse wird
verfügt, in Kombination mit dem Hebel zur Geschwindigkeitsregelung,
BESCHREIBUNG DES ARMATURENBRETTS – Fig. 3
1) Lichtmaschinenkontroll-Leuchte (rot)
2) Öldruck-Kontroll-Leuchte (rot)
3) Luftfilterverstopfungs-Anzeige
4) Antrieb auf allen 4 Rädern (Allrad)
5) Abblendlichtanzeige (grün)
6) Vorglühleuchte des Dieselmotors
7) Blinkerfunktionsanzeige (grün)
8) Warnblinklicht-Anzeige
9) Zündschloß; Anlassen und Ausschalten des Motors
10) Schalter für Blinker, Licht und Hupe
11) Temperatur-Kontroll-Leuchte der Kühlflüssigkeit
12) Stundenzähler
13) Drehzahlmesser
14) Tankanzeige
15) Reservetank-Anzeige
16) Standlicht-Anzeige
17) Feststellbrems-Anzeige
18) MotorenölTemperaturanzeige
19) Fernlicht-Anzeige
VOR DEM STARTEN SIND FOLGENDE KONTROLLEN DURCHZUFÜHREN:
Überprüfung des Getriebeöl-Niveaus; befindet auf der linken Seite des Getriebegehäuses
(fig. 4)
Überprüfung des Motorenöl-Niveaus (an die Anweisungen des Motoren-Handbuchs halten)
Überprüfung des Kupplungspedals, so daß es den ersten Teil des Weges ohne Aktion
zurücklegt. Zur Regulierung die Einstellung verändern (fig. 5)
Überprüfung des Bremsöl-Niveaus (fig. 6). Der Behälter befindet sich auf der rechten Seite
des Armaturenbretts
32
Page 35

Den Treibstofftank mit Hilfe eines Trichters mit sehr feinem Sieb füllen (fig. 7).
Vergewissern Sie sich, daß sich alle Hebel im Leerlauf befinden und dann wie folgt vorgehen:
1) Starten bei kaltem Motor.
2) Das Kupplungspedal drücken.
3) Den Zündschlüssel ins Zündschloß stecken; Schlüssel zum Vorglühen im Uhrzeigersinn
drehen; wenn die Vorglühleuchte erlischt, den Schlüssel weiter drehen bis der Motor startet
und dann sofort loslassen.
Zum Ausschalten des Motors den Schlüssel in zentrale Position zurückdrehen.
Wenn der Motor nicht startet nicht unnötig weiterversuchen, da sich dabei nur die Batterie entleert,
sondern einige Minuten warten und dann nochmals den Start versuchen.
Außerdem in regelmäßigen Abständen das Niveau der Batterieflüssigkeit kontrollieren und
gegebenenfalls destilliertes Wasser nachfüllen.
ANWEISUNGEN ZUR BENUTZUNG DES KIPPERS
Vorgehensweise für das Kippen der Pritsche:
Mit den Riegeln die zwei Traversen des Pritschenrahmens, welche sich auf der
gewünschten Kippseite befinden, blockieren und sich versichern, daß die Bolzen des
Scharniers richtig in die Buchsen positioniert wurden.
Für das Anheben der Pritsche den Hebel (fig. 1 n° 9) betätigen und ihn in “Richtung
Anstieg” in Aktion halten.
Die Pritsche steigt nur bei ständiger Betätigung des Hebels. Durch loslassen des Hebels
stoppt der Kippvorgang sofort.
ACHTUNG!
Die Pritsche niemals an zwei diagonal gegenüberliegenden Punkten blockieren; um eine
Fehlpositionierung zu verhindern sind die Riegel verschiedenartig geformt
Nur Original-Riegel verwenden
Vor jedem seitlichen Kippvorgang überprüfen, ob die Seitenwände geöffnet sind
Vor dem Kippvorgang sich vergewissern, daß das Fahrzeug auf ebenem, nicht
nachgiebigem Untergrund steht und die Ladung gleichmäßig verteilt ist.
GEBRAUCHSANWEISUNG FÜR DEN EINSATZ DER KIPP-PRITSCHE
Die dreiseitig kippbare Pritsche ist mit Vorrichtungen konstruiert und ausgerüstet, welche die
maximale Sicherheit auch für nicht Experten bietet; trotzdem ist es Notwendig einige fundamentale
Richtlinien zu befolgen, welche folgend aufgezeigt werden:
Vor dem Kippvorgang sich vergewissern, daß das Fahrzeug auf ebenem, nicht
nachgiebigem Untergrund steht und die Ladung gleichmäßig verteilt ist.
Vor dem Kippvorgang sich vergewissern, daß sich keine Personen, Tiere oder
Gegenstände in unmittelbarer Nähe des Fahrzeugs befinden.
Vor dem Kippvorgang sich vergewissern, daß die Riegel richtig positioniert sind um in die
gewünschte Richtung zu kippen.
Bei beladener Pritsche, vorallem bei losen Materialien, dem Öffnen der Seitenwände die
höchste Aufmerksamkeit widmen, da der Druck der Materialien die Seitenwände
gewaltsam öffnen kann und herabfallende Materialien den Bediener treffen und verletzen
können.
Sich versichern, daß während des Betriebs die Seitenwände geschlossen und
ordnungsgemäß verriegelt sind.
33
Page 36

Besondere Obacht wird gefordert beim Kippen der Pritsche im Inneren von Räumlichkeiten,
wegen Interferenz von Trägern, Decken, Baugerüsten, Anlagen oder anderem.
Niemals die Pritsche anheben, wenn sich elektrische Leitungen oder ähnliches in der Nähe
befinden.
Während der Wartungsarbeiten den roten Sicherheitshebel (Fig. 8) auf sichere Weise
anbringen, daß die Pritsche nicht herunterkommen kann. Es ist Verboten irgendein
Körperteil unter die angehobene Pritsche zu stecken, ohne daß der obengenannte
Sicherheitshebel sorgfältig positioniert wurde.
Im Falle eines Ausfalls des Motors kann man die Pritsche auch mittels Betätigung der
Handpumpe auf der rechten Seite des hinteren Ramens anheben (Fig. 14 e Fig. 15).
ACHTUNG!
1. Es ist absolut Verboten die Kippausrüstung unsachgemäß zu verwenden.
2. Der Arbeitsdruck der hydraulischen Anlage wurde vom Hersteller unter Berücksichtigung
der Nutzlast des Fahrzeugs eingestellt. Es ist absolut Verboten irgendwelche Einstellungen
an dieser Kallibrierung des Drucksicherheitventils zu verändern.
3. Unter keinen Umständen unter der angehobenen Pritsche ohne Sicherung verweilen.
4. Es ist absolut Verboten sich mit auch nur im geringsten angehobener Pritsche mit dem
Fahrzeug fortzubewegen.
BELADUNG VON MATERIALIEN
Das Fahrzeug gleichmäßig beladen, daß keine Gefahr durch herunterfallendes Material auf
die Fahrbahn entsteht.
Nie zulässiges Gesamtgewicht überschreiten.
Das Material aus geringst möglicher Höhe in die Pritsche einladen.
Kontrolle der Seitenwände, daß sie geschlossen, und vorallem daß die Heckwände mit den
Sperrklinken blockiert wurden.
Große Steinblöcke und Bauschutt müssen vorsichtig auf die Pritsche geladen und nicht aus
großer Höhe fallen gelassen werden.
ACHTUNG!
Überladung des Fahrzeugs vermeiden
Vor dem in Gang setzen sich vergewissern, daß die Pritsche komplett abgesenkt wurde
und vermeiden Sie sich mit angehobener Pritsche fortzubewegen.
AUSSCHALTEN DES MOTORS
Nachdem alle Steuerhebel in Neutralstellung gebracht wurden den Zündschlüssel in die zentrale
Position zurückführen.
WARTUNG UND SCHMIERUNG
MOTORENÖL
Während der Einfahrzeit wird empfohlen den ersten Ölwechsel nach 20 Arbeitsstunden, den
zweiten nach 80 und dann alle 120 Arbeitsstunden durchzuführen. Im Sommer folgendes
Motorenöl verwenden: AGIP F. 1D. GAMMA SAE 40, und im Winter AGIP F. 1D. GAMMA SAE 20.
Es ist notwendig alle 4 Arbeitsstunden den Ölstand zu überprüfen (Halten Sie sich an das
Motoren-Handbuch).
ACHTUNG!
Wenn der Ölstand über dem Niveau liegt verliert der Motor an Leistung und läuft unregelmäßig.
34
Page 37

GETRIEBEÖL – HINTERACHSE – HYDRAULISCHE KIPPVORRICHTUNG –
SERVOLENKUNG
Das Niveau ungefähr alle 50 Arbeitsstunden am Sichtfenster auf der rechten Seite des
Getriebeblocks (Fig. 4) überprüfen. Wenn Getriebeöl nachgefüllt werden muss verwenden Sie
AGIP ROTRA JD. Das Öl einmal pro Jahr austauschen. Um das alte Getriebeöl abzulassen, den
Verschluss im Zentrum under dem Differenzial aufschrauben (Fig. 11); Die Menge beträgt 23 Liter.
Der Einfüllverschluss befindet sich unter der Pritsche (Fig. 9).
Der Hydraulik Ölfilter befindet sich rechts vom Getriebe (Fig. 10). Er ist einmal pro Jahr
auszutauschen.
Um das Auffüllen und den Ölwechsel zu beschleunigen, die Schraube auf dem Getriebedeckel
abschrauben (Fig. 9).
ÖL DER VORDERACHSE
Das Öl mittels des Verschlusses, welcher auf dem vorderen Teil des Gehäuses liegt, kontrollieren
(Fig. 19); das Öl alle 500 Stunden mit Getriebeöl AGIP ROTRA 85 W 90 ersetzen. Die Menge
beträgt 5 Liter.
BREMSFLÜSSIGKEIT
Alle 8 Stunden die Bremsflüssigkeit im Behälter, welcher rechts neben dem Fahrersitz liegt,
überprüfen (Fig. 6). Wenn notwendig, Bremsflüssigkeit nachfüllen. Regelmäßig die Bremsanlage
auf Flüssigkeitsverluste überprüfen.
Wie man bei Bedarf entlüftet: wenn man das Werkzeug besitzt, jenes am Behälterverschluss
anschließen; zuerst den hinteren Kreislauf des Anhängers und dann den vorderen entlüften.
Wenn man ohne Werzeug entlüften muß, dann am Besten auf die Maschinenpumpe einwirken.
Diese Operation gelingt nicht immer.
EINSTELLUNG DER BREMSEN
Den Plastikdeckel, welcher auf dem unteren Teil der Bremsbeläge liegt, abnehmen (Fig. 16). Den
gezahnten Ring von unten nach oben drehen.
Die Feststellbremse wird durch Wirken auf den Bremsregler, welcher sich auf den Bremsbelägen
befindet, eingestellt. (Fig. 17).
WICHTIG!
Das Kardangelenk, die Übersetzung, das Drehgelenk des Fahrzeugs und die Lenkköpfe
regelmäßig einfetten.
KÜHLFLÜSSIGKEIT
Bei kaltem Motor alle 8 Stunden kontrollieren; bei Kontrolle bei warmen Motor besteht
Verbrennungsgefahr.
Einmal pro Jahr ersetzen.
Füllmenge 12 Liter (Fig. 6).
ACHTUNG!
Bei Flüssigkeitsverlust, nach der Reparatur den Kreislauf wieder gut auffüllen und sehr gut am
Verschluss, welcher auf dem Motor in Korrespondenz der oberen Manschette liegend, entlüften.
(Fig. 18).
35
Page 38

DIESELFILTER
Der Dieselfilter (fig. 12) wurde mit einem Elektroventil zur Abschaltung des Motors ausgerüstet.
Die Entlüftung der Leitungen erfolgt automatisch; jedoch liegt über dem Filter eine
Entlüftungsschraube.
Für den Filterwechsel halten Sie sich ans Motorenhandbuch. Wir empfehlen ihn bei
Unregelmäßigkeiten des Motors auszutauschen.
LUFTFILTER
Der Luftfilter befindet sich unter der Pritsche (fig. 13) und muß gewechselt werden, wenn die rote
Kontrolleuchte am Armaturenbrett aufleuchtet (Fig. 3 n° 3).
Bei staubigem Umfeld wird eine tägliche Reinigung empfohlen.
WARTUNG AM SAISON-ENDE
Wenn das Fahrzeug für eine längere Zeit stillsteht, werden folgende Operationen empfohlen:
Eine Grundreinigung des Fahrzeugs.
In einem nicht zu staubigen und nicht zu feuchten Raum abstellen.
Die Batterie herausnehmen und an einem trockenen Ort ohne Frost aufbewahren und
mindestens einmal pro Monat aufladen.
Holzlatten unter die Räder legen um sie vom Boden zu isolieren. Das Fahrzeug mit einer
Schutzhülle abdecken.
36
Page 39

GRILLO SERIE PK 1000
Estimado Cliente,
dándole las gracias por la confianza y la preferencia otorgada a nuestro Grillo PK 1000, confiamos
en que el uso de esta máquina se ajuste plenamente a sus necesidades.
Para poderla utilizar en la mejor manera y para su mantenimiento a través del tiempo, le rogamos
que lea atentamente y siga escrúpulosamente las indicaciones de este manual. Esto le
permitirá obtener los máximos resultados y proteger su inversión. Por eso le rogamos que
guarde siempre este manual junto con la máquina.
¡ATENCIÓN! Antes de arrancar el motor, lea atentamente.
¡Las siguientes advertencias son importantes para su
incolumidad física!
NORMAS CONTRA ACCIDENTES
¡La prudencia es el arma principal en la prevención de los accidentes!
Le rogamos que lea cuidadosamente estas advertencias sobre el uso de la máquina, antes
de empezar el trabajo.
El uso incorrecto de la máquina y de su equipamiento puede ser perjudicial; para reducir estas
posibilidades, adopte las precauciones necesarias que se indican a continuación:
1) Lea este manual en su totalidad antes de encender la máquina y ponerla en marcha.
2) Preste una atención especial a las prohibiciones y las etiquetas de seguridad.
3) No cargue pesos superiores a la capacidad homologada – global a plena carga Kg 3500
4) Antes de permitir que otras personas trabajen, es preciso ponerlas al corriente de las normas
de seguridad y de cómo se usa el vehículo agrícola.
5) Antes de encender el motor, compruebe que no haya personas alrededor, especialmente
niños.
6) Antes de moverse con la máquina marcha atrás, controle que no haya personas u obstáculos.
7) No deje subir a más pasajeros de lo permitido, al lado del conductor.
8) No utilice la máquina cuando esté cansado o haya tomado bebidas alcohólicas.
9) Fije bien la carga con los ganchos específicos.
10) Antes de empezar el trabajo, póngase prendas apropiadas de seguridad, guantes y
botas.
11) Antes de bajarse de la máquina, apague el motor, quite la llave de contacto y accione el freno
de estacionamiento.
12) Sobre firmes irregualres, viaje a baja velocidad.
13) No deje trabajar a los menores de 18 años.
14) No haga marcha atrás con el motor acelerado.
15) Cargue la caja de manera ordenada y uniforme.
16) No cargue mucho peso en la parte trasera de la caja o en un lado, porque se pierde mucha
estabilidad y seguridad en la conducción.
17) Para evitar el peligro de exhalaciones venenosas, no utilice el motor encendido en un local
cerrado.
18) Apague siempre el motor antes de repostar combustible, manténgase alejado de chispas o
llamas, ¡no fume!
19) Evite derrames de combustible, y, tras haber llenado el depósito, limpie cualquier derrame
antes de arrancar el motor.
20) No trabaje con el vehículo cerca de fosos o muelles que se pueden romper bajo el peso de la
máquina, especialmente cuando la superficie está desprendida o mojada.
21) Cuesta abajo, entre siempre lentamente en las curvas.
22) No manipule sin autorización y no desactive los dispositivos de seguridad.
23) En presencia de niños, cuando la máquina no se utiliza, esconda las llaves de contacto.
24) No haga ningún tipo de regulación o limpieza con el motor encendido.
25) No haga controlar la máquina cuando esté conduciendo o con el motor en marcha.
26) El usuario siempre es responsable de los daños originados a terceras personas.
37
Page 40

27) Cualquier uso impropio supone la anulación de la garantía y la exoneración de cualquier
responsabilidad del fabricante.
28) Utilice siempre repuestos originales Grillo.
DESCRIPCIÓN
La máquina GRILLO PK 1000 es un vehículo de 4 ruedas motrices accionado por un motor Diesel
de 4 tiempos y refrigeración por líqido.
La correcta distribución de los pesos garantiza la extabilidad máxima. El mantenimiento del
vehículo se reduce a pocas y sencillas operaciones.
CARACTERÍSTICAS TÉCNICAS con ruedas 10.0/75 - 12
MODELO: transportador con ruedas.
MOTOR: Lombardini FOCS 1404 Diesel 1372 c.c. 37 HP (27,2 kW) potencia máxima, (potencia
omologada kW 22,5 a 3000 G/1’), refrigeración por líquido, de 4 cilindros.
ARRANQUE: Eléctrico 12V.
EMBRAGUE: Monodisco en seco con mando a pedal.
CAJA DE VELOCIDADES: Sincronizada de 10 velocidades, 8 avance + 2 retroceso.
VELOCIDAD (con ruedas 10.0/75-15,3): I Km/h 2,44 – II Km/h 4,25 – III Km/h 6,56 – IV Km/h
8,93 V Km/h 9,76 – VI Km/h 17,00 – VII Km/h 26,26 – VIII Km/h 35,71 – IRM Km/h 2,54 – IIRM
Km/h 10,14
RUEDAS: neumáticos tractor 10.0/80-12 (6 PR); 10.0/75-15,3 (10 PR); garden 26x12.00/12 (8
PR).
DIFERENCIAL: en ambos ejes con bloqueo en el eje trasero.
EJE DELANTERO: de dirección.
DIRECCIÓN: hidráulica.
ASIENTOS: ajustables y amortiguado.
TRACCIÓN: de 4 ruedas motrices con las anteriores desaccionables.
FRENO DE SERVICIO: hidráulico en las 4 ruedas.
FRENO DE EMERGENCIA Y DE MANO: mecánico en las ruedas traseras.
CAJA: basculante, trilateral hidráulica, cm 220 x 134 x 40
ALTURA DEL PLATO DE LA CAJA DEL SUELO: cm 85
REJILLA DE PROTECCIÓN CONDUCTOR: en el lado delantero de la caja.
CAPACIDAD DE CARGA: 1750 kg con ruedas 10.0/75 – 15,3.
DIMENSIONES DEL VEHÍCULO : largo 4000 con ganchos, ancho 1500, altura 2320, paso 1800,
calzada 1220.
PESO: 1750 kg máximo con ruedas 10.0 / 75 – 15,3 (10 PR).
ACCESORIOS: cabina, toma de fuerza a 540 G/1’.
38
Page 41

IDENTIFICACÓN DEL VEHÍCULO
El número de bastidor de la máquina está imprimido sobre la placa situada en el larguero derecho
del bastidor del remolque y sobre la placa del cambio.
El número de bastidor se citará siempre cuando se soliciten las piezas de recambio.
PIEZAS DE RECAMBIO
Se aconseja utilizar exclusivamente recambios originales GRILLO.
PUESTA EN SERVICIO DE LA MÁQUINA
1) Compruebe que la máquina esté íntegra y que no haya sufrido daños durante el transporte.
2) Verifique los niveles del aceite en el motor, aceite cambio y líquido radiador.
3) Verifique la presión de los neumáticos:
10,0 / 75 – 15,3 10PR (5,3 bar)
10,0 / 80 – 12 6PR (2,6 bar)
26 x 12.00 / 12 8PR (2,7 bar)
4) Controle que el voltaje de la batería no sea inferior a los 12 Voltios, y, si necesario, haga la
recarga.
Si en su equipamiento la batería está en seco con ácido aparte, para ponerla en función siga
estas instrucciones:
1) Eche el ácido y espere durante 2 horas;
2) Cargue la batería con un cargador tarado a 12 Voltios en carga lenta durante 2 horas.
¡Atención!, si no se sigue este procedimiento, la batería puede deteriorarse y derramar ácido
durante el trabajo.
¡IMPORTANTE! Durante el montaje no invierta la polaridad de la batería. No ponga en
marcha el motor si la batería no está conectada.
BATERÍA – ¡ATENCIÓN!
Los gases emanados por la batería son explosivos, manténgala alejada de llamas y chispas.
Controle periódicamente el nivel del líquido y mantenga los terminales lubricados con grasa de
vaselina.
RODAJE
Durante el periodo de rodaje (70 primeras horas de funcionamiento) evite trabajar con el motor a
regímenes elevados y limite la explotación de la potencia al 70% del total.
Después de las 20 primeras horas de funcionamiento y una vez acabado el periodo de rodaje:
Controle que todos los órganos de fijación y conexión estén bien fijados (tornillos, tuercas,
piezas de conexión).
Controle todos los grupos, motor, caja de cambio y tuberías, para averiguar que no haya
derrames de aceite.
Regule el freno de estacionamiento.
En cuanto a las prescripciones de rodaje del motor, consulte el manual de instrucciones relativo.
39
Page 42

INSTRUCCIONES DE USO
DESCRIPCIÓN DE LOS MANDOS (Fig. 1 - Fig. 2)
1) Pedal mando embrague (Fig. 2 n° 1): sirve para desconectar el motor de la transmisión. Se
tiene que apretar cada vez que se accionan las palancas (palanca de cambio, de marchas
altas y bajas y de toma de fuerza), antes de detener la máquina y de arrancar el motor.
2) Pedal mando frenos (Fig. 2 n° 2): acciona los frenos de las ruedas.
3) Acelerador pedal (Fig. 2 n° 3).
4) Palanca mando freno de estacionamiento (Fig. 1 n° 4):
frenos de las ruedas traseras. El freno se acciona tirando la manija hacia arriba. Para soltar esta manija,
presione el pulsador posicionado en su extremidad y llévela hacia la posición más baja.
5) Palanca mando marchas (Fig. 1 n° 5): en combinación con la palanca mando variación de
velocidad, permite de obtener ocho velocidades de avance y dos de retroceso.
6) Palanca mando variación velocidad – baja y alta (Fig. 1 n° 6): si se empuja la palanca hacia
adelante, se obtiene una marcha rápida ; si se empuja hacia atrás, se obtiene una marcha lenta.
7) Palanca bloqueo diferencial (Fig. 1 n° 7): se acciona tirando la palanca hacia arriba.
8) Palanca desactivación eje delantero (Fig. 1 n° 8):
el eje queda libre; con la palanca hacia atrás, el eje se conecta.
A veces la conexión o desconexión del eje delantero puede ser dificultosa. No insista nunca
en empujar la palanca, sino desplace el vehículo de pocos centímetros hacia adelante o hacia
atrás e intente nuevamente.
9) Palanca activación basculante (Fig. 1 n° 9).
cuando se empuja la palanca hacia adelante,
detiene contemporáneamente los
DESCRIPCIÓN DE LOS MANDOS – Fig. 3
1) Testigo generador (rojo).
2) Testigo presión aceite motor insuficiente (rojo).
3) Testigo obstrucción filtro aire.
4) Tracción activada en las 4 ruedas.
5) Testigo luces de cruce (verde).
6) Testigo precalentamiento bujías.
7) Testigo funcionamiento indicador de dirección (verde).
8) Testigo luces de emergencia.
9) Conmutador con llave para encendido, predisposición servicios, arranque y parada
motor.
10) Mando indicador de dirección y advertidor sonoro, conmutador luces.
11) Testigo temperatura líquido de refrigeración.
12) Contador de horas.
13) Cuentarrevoluciones.
14) Testigo nivel de carburante.
15) Reserva carburante.
16) Testigo luces de posición.
17) Testigo freno de estacionamiento.
18) Testigo temperatura aceite motor.
19) Testigo luces de carretera.
CONTROLES ANTES DEL ARRANQUE:
Verifique que el aceite de la caja de velocidades llegue al nivel indicado, a la izquierda del
cárter cambio (fig. 4).
Controle el nivel del aceite en el motor (siga las indicaciones del maual del motor).
Controle que el pedal del embrague haga la primera parte de su recorrido sin accionar el
embrague. Para la regulación utilice el dispositivo ilustardo en al fig. 5.
Controle el nivel aceite frenos (fig. 6). El tanque se encuentra en el lado derecho del
tablero.
Llene el tanque de carburante, con un embudo de filtro muy fino (fig. 7).
40
Page 43

Compruebe que todas las palancas estén en punto muerto, luego siga estas instrucciones:
1) Arranque con motor en frío.
2) Baje la palanca del embrague.
3) Inserte la llave en el conmutador de arranque; gírela hacia la derecha para efectuar el
precalentamiento, y, cuando se apague el testigo de la bujías, gire nuevamente la llave:
suéltela en cuanto el motor arranque.
Para apagar el motor, gire la llave en posición central.
Si el motor no arranca, no insista inutilmente, para evitar de descargar la batería: espere unos
minutos antes de repeter la operación.
Además, verifique frecuentemente el nivel de líquido de la batería y añada agua destilada si
necesario.
INSTRUCCIONES PARA LA UTILIZACIÓN DEL BASCULANTE
Operaciones para el vuelco de la caja basculante:
Bloquee con los cerrojos los dos travesaños del bastidor de la caja que se encuentran en
el lado del vuelco y averigue que los codos de la bisagra hayan sido insertados
correctamente en su alojamiento.
Para levantar la caja empuje la palanca (fig. 1 n° 9) hacia el “lado subida”.
La caja sale sólo mientras se continúe a empujar la palanca y la salida se interrumpe en
cuanto se deje la palanca.
¡ATENCIÓN!
La caja basculante no tiene que ser bloqueada nunca en puntos opuestos en el sentido
digonal. A tal fin, los cerrojos son de formas diferentes.
Utilice sólo cerrojos originales.
Antes de cada vuelco lateral, verifique que los lados estén abiertos.
Antes de empezar las operaciones de vuelco, verifique que el vehículo esté posicionado
sobre terreno horizontal y no blando y que la carga esté distribuída de manera uniforme.
ADVERTENCIAS PARA LA UTILIZACIÓN DEL DISPOSITIVO DE VUELCO
El vehículo basculante trilateral está equipado de dispositivos útiles para garantizar la máxima
seguridad para todos los operadores, hasta los menos expertos. Sin embargo es necesario
respetar las normas fondamentales que se especifican a continuación:
Antes de empezar las operaciones de vuelco, verifique que el vehículo esté posicionado
sobre terreno horizontal, no blando, y con la carga distribuída de manera uniforme.
Antes de empezar las operaciones de vuelco, verifique que no haya personas, animales o
cosas cerca del vehículo.
Antes de empezar las operaciones de vuelco, verifique que los cerrojos estén ajustados en
la manera adecuada al fin de permitir el vuelco en la dirección deseada.
Cuando la caja esté cargada, sobre todo con materiales a granel, ponga una atención
particular durante la apertura de los lados: la presión de los materiales provoca una
apertura violenta y el material puede perjudicar el operador.
Compruebe que durante la marcha los lados estén cerrados y bloqueados correctamente.
Cuando se opera el vuelco en lugares cerrados, ponga mucha atención en no chocar
contra vigas, techos, andamiajes, cables, ...
No levante nunca la caja cerca de líneas eléctricas aéreas o similares.
41
Page 44

Durante las operaciones de mantenimiento, ajuste bien el tornapunta que sostiene la caja
(fig. 8). Está prohibido exponerse debjo de la caja levantada, cuando el tornapunta no esté
correctamente ajustado.
En caso de avería del motor, es posible levantar la caja por medio de la bomba manual
que se encuentra al lado derecho del chasis trasero (Fig. 14 y Fig. 15).
¡ATENCIÓN!
1. Está absolutamente prohibido utilizar de manera incorrecta el equipamiento de vuelco.
2. La presión de ejercicio de la instalación hidráulica es regulada por el constructor en función
de la portada del vehículo.
Está absolutamente prohibido modificar el calibrado de la válvula de limitación de presión
nominal.
3. No se detenga por ninguna razón debajo de la caja basculante levantada y no asegurada
con el tornapunta.
4. Está absolutamente prohibido viajar con la caja, aunque mínimamente, levantada.
OPERACIÓN DE CARGA DEL MATERIAL
Cargue el vehículo uniformemente y de manera tal al fin de evitar el peligro de caída del
material en la carretera.
No supere nunca la carga máxima permitida.
El material tiene que ser cargado en la caja a partir de la altura mínima posible.
Controle que los lados estén cerrados y especialmente que el lado trasero esté bloqueado
con los garfios.
Los bloques de piedra, o los grandes detritos de demolición deben ser depositados
cautamente en la caja y no dejados caer de un gran altura.
¡ATENCIÓN!
Evite de sobrecargar el vehículo
Antes de poner en marcha el vehículo, compruebe que la caja esté completamente
rebajada y evite viajar con la caja levantada.
PARADA DEL MOTOR
Después de haber posicionado todas las palancas en punto muerto, para apagar el motor, gire la
llave del conmutador en la posición central.
MANTENIMIENTO Y LUBRICACIÓN
ACEITE MOTOR
Durante el rodaje se aconseja efectuar el primer cambio de aceite después de las 20 primeras
horas de trabajo, el segundo cambio después de 80 horas y luego cada 120 horas de
funcionamiento. Utilice aceite motor AGIP F. 1D. GAMA SAE 40 por el verano, y aceite AGIP F.
1D. GAMA SAE 20 en invierno. Es indispensable controlar el nivel del aceite cada 4 horas de
trabajo (siga las indicaciones del manual del motor).
¡ATENCIÓN!
Si el aceite supera el nivel máximo: el motor padece una baja de rendimiento y un funcionamiento
irregular.
42
Page 45

ACEITE CAJA DE VELOCIDADES – PUENTE TRASERO - BASCULANTE
HIDRÁULICO – DIRECCIÓN HIDRÁULICA
Cada 50 horas de trabajo aproximadamente, controle el nivel a través del ojo (Fig. 4) que se
encuentra en el lado derecho del cárter de la caja de velocidades. Si necesario, añada aceite para
cajas de velocidades AGIP ROTRA JD. Cambie el aceite una vez al año. Para quitar el aceite viejo
del cárter: destornille el tapón posicionado en el centro del cárter, debajo del diferencial (Fig. 11).
Cantidad lt. 23. El tapón de alimentación se encuentra debajo de la caja basculante (Fig. 9).
El filtro del aceite hidráulico se encuentra en el lado derecho de la caja de velocidades (Fig. 10).
Cambie este filtro una vez al año.
Para agilizar las operaciones de recarga y de cambio del aceite, quite el tornillo posicionado sobre
la tapa de la caja de velocidades (Fig. 9).
ACEITE PUENTE DELANTERO
Controle el nivel a través del tapón posicionado en la parte delantera del cárter (Fig. 19); cambie el
aceite cada 500 horas utilizando aceite para caja de velocidades AGIP ROTRA 85 W 90, cantidad
lt. 5.
LÍQUIDO FRENOS
Verifique cada 8 horas el nivel del líquido de los frenos en el tanque posicionado al lado derecho
del puesto del conductor (Fig. 6). Si necesario, añada líquido para frenos. Controle periódicamente
la instalación de los frenos para verificar que no se produzcan derrames.
Cómo ejecutar la purga si necesario: si posee la herramienta apropiada, haga la conexión al tapón
del tanque; haga primero la purga del circuito trasero del remolque y luego la purga delantera.
Si tiene que llevar a cabo la purga sin la herramienta apropiada, intervenga en la bomba de la
máquina, pero esta operación puede no funcionar.
REGULACIÓN FRENOS
Quite el tapón de plástico que se encuentra en la parte baja del disco de frenos (Fig. 16). Gire el
anillo dentado de abajo hacia arriba.
El freno de estacionamiento se regula a través de los instrumentos posicionados en los discos de
freno (Fig. 17).
¡IMPORTANTE!
Engrase periódicamente el cardán, la articulación de transmisión, la articulación oscilante de la
máquina y las articulaciones de la dirección.
LÍQUIDO RADIADOR
Controle el nivel cada 8 horas con el motor en frío, para evitar el riesgo de ustiones.
Cámbielo una vez al año.
Capacidad 12 litros (Fig. 6).
¡ATENCIÓN!
En caso de derrames de líquidos, una vez reparado el daño, llene bien el circuito purgando varias
veces el aire desde el tapón posicionado sobre el motor en correspondencia del manguito superior
(Fig. 18).
43
Page 46

FILTRO GASÓLEO
El filtro gasóleo (fig. 12) está equipado de una electroválvula que apaga el motor.
La purga del aire en los conductos es automática; sin embargo sobre el filtro se encuentra un
tornillo de purga.
Para cambiar el filtro, siga las instrucciones del manual del motor. Le aconsejamos cambiarlo
siempre en caso de funcionamiento irregular del motor.
FILTRO DEL AIRE
El filtro del aire se encuentra debajo de la caja (fig. 13) y tiene que ser cambiado cuando se
enciende el testigo rojo del tablero (fig. 3 n° 3).
Si se trabaja en entornos polvorientos, se aconseja limpiar el filtro una vez al día.
MANTENIMIENTO DE FINAL DE TEMPORADA
Cuando la máquina tenga que quedar sin trabajar durante un largo periodo, aconsejamos
proceder con las operaciones siguientes:
Haga una limpieza general de la máquina.
Guárdela en un lugar seco y no polvoriento.
Desmonte la batería, guárdela en un lugar limpio dónde no corra el riesgo de hielo y haga
la recarga una vez al mes.
Para aislar las ruedas del suelo, utilice unas tablas de madera, y cubra la máquina con una
lona de protección.
44
Page 47

Page 48

Page 49

Page 50

Page 51

1
2 3
Fig. 2
Fig. 4
Fig. 6Fig. 5
Fig. 8Fig. 7
Fig. 10Fig. 9
Page 52

Fig. 11
Fig. 12
Fig. 14Fig. 13
Fig. 16Fig. 15
Fig. 18Fig. 17
Page 53

Fig. 19
Page 54

Page 55

Page 56

 Loading...