


WSM2480TCAWW
GE WSM2480TCAWW, WSM2480D3WW, WSM2420D3WW, WSM2420D2WW, WSM2420D2CC Owner’s Manual
...
Spacemaket:MLaundry
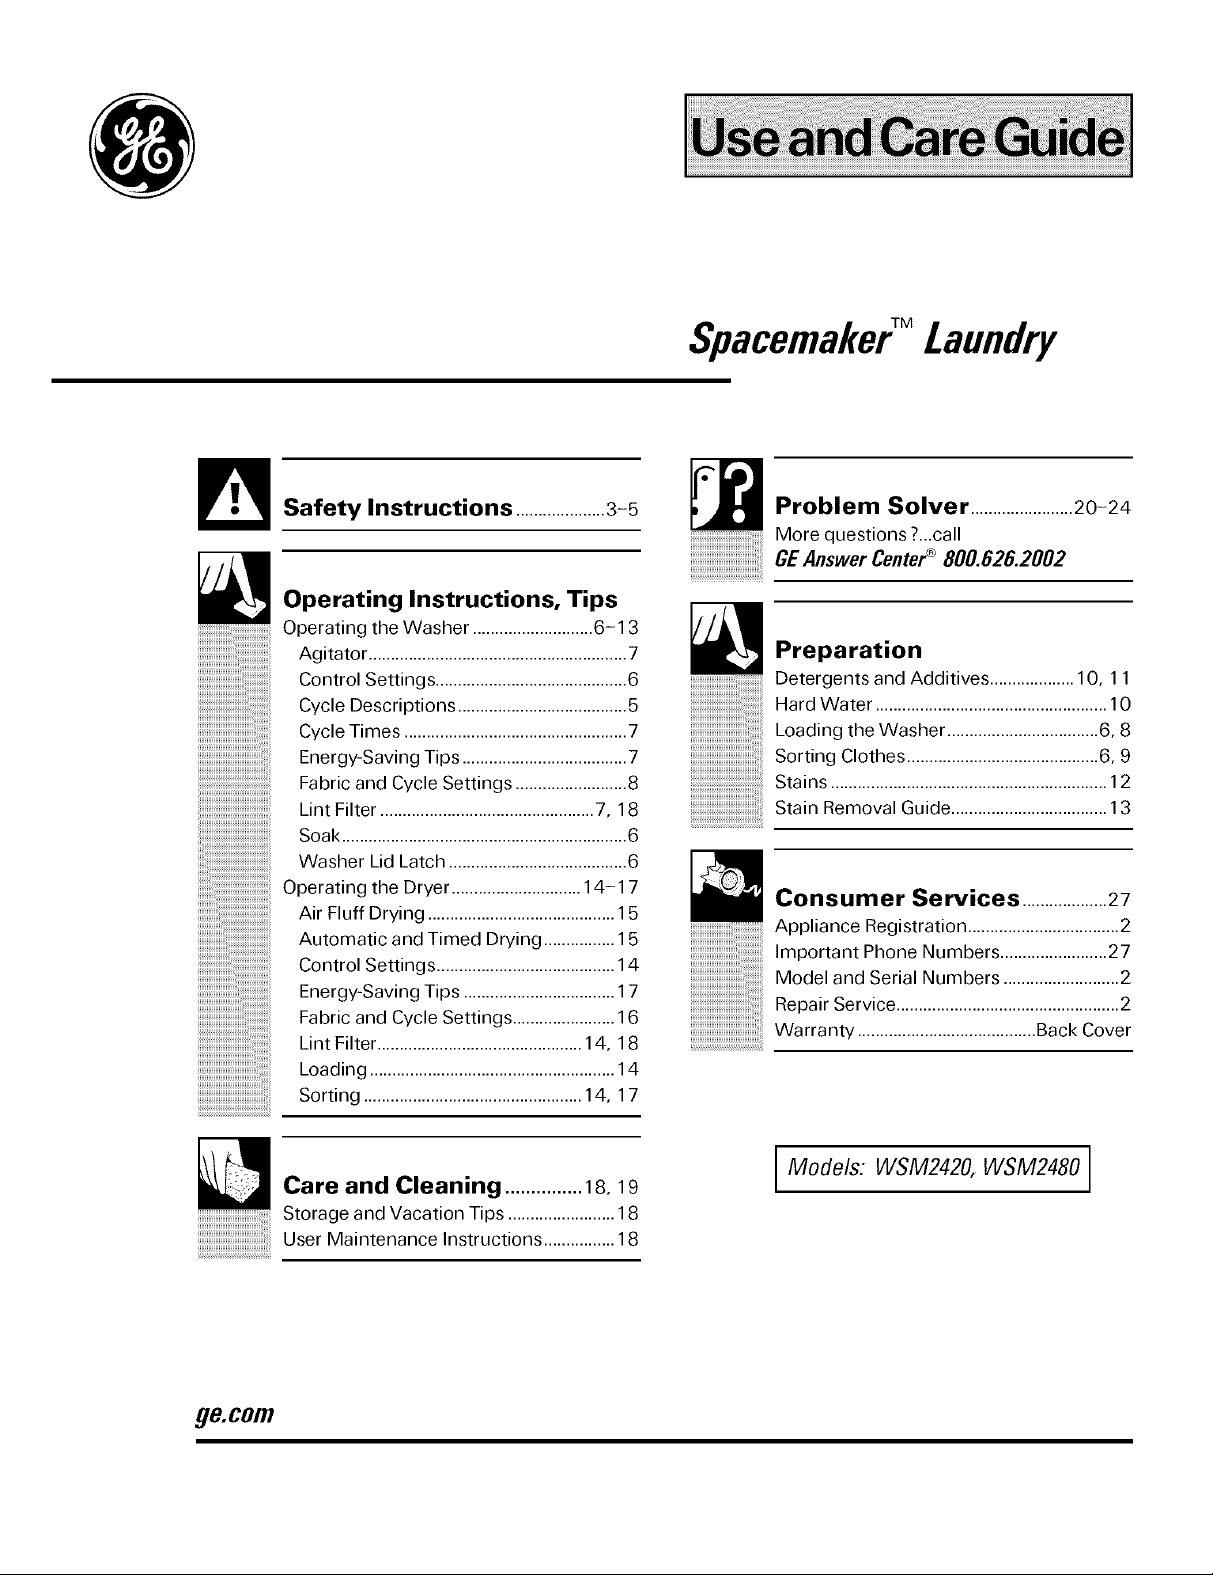
_ Safety Instructions ....................3=5
Operating Instructions, Tips
Operating the Washer ...........................6-13
Agitator ..........................................................7
Control Settings ...........................................6
Cycle Descriptions ......................................5
Cycle Times ..................................................7
Energy-Saving Tips .....................................7
Fabric and Cycle Settings .........................8
Lint Filter ................................................7, 18
Soak ................................................................6
Washer Lid Latch ........................................6
Operating the Dryer ............................. 14-17
Air Fluff Drying .......................................... 15
Automatic and Timed Drying ................ 15
Control Settings ........................................14
Energy-Saving Tips ..................................17
Fabric and Cycle Settings .......................16
Lint Filter .............................................. 14, 18
Loading ....................................................... 14
Sorting .................................................14, 17
Problem Solver .......................20-24
More questions ?...call
GEAnswer Center® 800,626,2002
Preparation
Detergents and Additives ...................10, 1 1
Hard Water ....................................................10
Loading the Washer ..................................6, 8
Sorting Clothes ...........................................6, 9
Stains ..............................................................12
Stain Removal Guide ...................................13
Consumer Services ...................27
Appliance Registration ..................................2
Important Phone Numbers ........................27
Model and Serial Numbers ..........................2
Repair Service ..................................................2
Warranty ........................................Back Cover
Care and Cleaning ...............18, 19
iiiiiiiiiiiiiiiiiiiiiiiiiiiiiiiiiiiStorage andVacation Tips ........................ 18
iiiiiiiiiiiiiiiiiiiiiiiiiiiiiiiiiiiiii_UserMaintenancelnstructions ................18
_&com
I Models: WSM2420, WSM2480
HELP US HELP YOU...
Before using your
Spacemaker TM Laundry,
read this book carefully.
It is intended to help you
operate and maintain your
new appliance properly.
Keep it handy for answers to
your questions.
If you don't understand something
or need more help, write (include
your phone number):
Consumer Affairs
GE Appliances, Appliance Park
Louisville, KY 40225
WARNING:For your SafetYtheh_formationin thismanual must befollowedto minimize
the risk of fire or explosionor topreventpropertydamage,pers0nal iujuryor loss oflife,
Save time and money.
Before you request service...
check the Problem Solver
section. It lists causes of minor
operating problems that you can
correct yourself.
If you received a
damaged appliance...
Immediately contact the dealer (or
builder) that sold you the appliance.
Write down the model
and serial nmnbers.
You'll find them on a label on the
inside of the door or the rating
plate on top of the dryer.
These numbers are also on the
Consumer Product Ownership
Registration Card that came with
your appliance. Before sending in
this card, please write these
numbers here:
Model Number
Serial Number
Use these numbers in any
correspondence or service
calls concerning your appliance.
reDo not store or use gasoline or other
flammable vapors and liquids in the
vicinity of this or any other appliance.
WHAT TO DO IF YOU SMELL GAS
• Immediately call your gas supplier from a
neighbor's phone. Follow the gas supplier's
instructions.
• If you cannot reach your gas supplier, call
• Do not try to light any appliance, the fire department.
• Do not touch any electrical switch; mInstallation and service must be performed
do not use any phone in your building, by a qualified installer, service agency or
the gas supplier.
• Clear the room, building or area
All washing and drying instruction terms in this book conform to the Care
Labeling Rule established by the Federal Trade Commission, January 1984.
If You Need Service
To obtain service, see the
Consumer Services page
in the back of this book.
We're proud of our service and
want you to be pleased. If for some
reason you are not happy with the
service you receive, here are three
steps to follow for further help.
First, contact the people who
serviced your appliance. Explain
why you are not pleased. In most
cases, this will solve the problem.
NEXT, if you are still not pleased,
write all the details--including
your phone number_to:
Manager, Customer Relations
GE Appliances, Appliance Park
Louisville, KY 40225
2

IMPORTANT SAFETY INSTRUCTIONS
Read all instructions before using your appliance.
A arning--To reduce the risk of fire,
basic precautions, including the following:
• Use this appliance only for its intended
_ installed and located in accordance with To Minimize the Possibility
used. If you did not receive an Installation • Exhaust Duct--See Installation Instructions.
electric shock, or injury to persons when
using your appliance, follo,_
purpose as described in this Use and Care Book.
• This appliance must be properly
"_ the Installation Instructions before it is of a Fire Hazard
Instructions sheet with your
appliance, you can obtain one by calling, toll
tree. the GE Answer Center { 800.626.i002.
--Properly ground to conform with all governing
codes and ordinances. Follow details in
Installation Instructions.
--Locate where the temperature is above 50°F.
¢10°C.} for satisfactory operation of the
appliance control system. Do not install or store
the appliance where it will be exposed to the
weather.
--Connect to a properly rated, protected
and sized power supply circuit to avoid
electrical overload.
V_"_ "When disconnecting this appliance
_]] pull by the plug rather than the cord
,F_._ to avoid damage to the cord orjunction
of cord and plug. Make sure that the cord is located
so that it will not be stepped on. tripped over or
otherwise subjected to damage or stress.
Use only metal duct inside for exhausting dryer
to the outside. USE OF PLASTIC OR OTHER
COMBUSTIBLE DUCTWORK CAN CAUSE A
FIRE. FOIL OR OTHER EASILY PUNCTURED
DUCTWORK CAN CAUSE A FIRE IF IT
COLLAPSES OR BECOMES OTHERWISE
RESTRICTED IN USE OR DURING
INS TALLATION.
• Do not use heat to dry articles containing rubber,
plastic, or similar materials (such as padded bras,
tennis shoes, galoshes, bath mats, rugs, bibs, baby
pants, plastic bags. etc._as these materials may
melt or burn. Also. some rubber materials, when
heated, can under certain circumstances produce
fire by spontaneous combustion.
--Do not install against drapes or curtains.
Follow details in Installation Instructions.
--Exhausting to the outside is STRONGLY
RECOMMENDED to prevent large amounts
of moisture and lint from being blown into the
room. Carefully follow the details in the
Installation Instructions. If your appliance is not
vented to the outside, see special instructions in must not be put in your dryer.
Care and Cleaning section. If this appliance has a • Any article on which you have used a cleaning
gas dryer, it must be exhausted outside, solvent, or which contains flammable materials
Do not store items that may burn or melt
Isuch as clothing, paper material, plastics
or plastic containers, etc. _on top of the appliance
during the operation
• Garments labeled "Dry Away from Heat"
(such as life jackets containing Kapok_
{_ part of the appliance or attempt beauty salons, restaurants or barber shops, etc.)
recommended in this Use and Care Book or traces of these flammable liquids or solids and their
in published user-repair instructions that you fumes have been removed. There are many highly
understand and have the skills to carry out. flammable items used in homes such as: acetone.
. Do not repair or replace an) _such as cleaning cloths, mops, towels used in
any servicing unless specifically must not be placed in or near the dryer until all
denatured alcohol, gasoline, kerosene, some
• Turn off water faucets when the washer is not
in use to relieve pressure on hoses and valves.
household cleaners, some spot removers.
turpentines, waxes, wax removers and products
containing petroleum distillates.
and to minimize leakage if a hose or valve should
break or rupture.
rcontinued next pageJ
IMPORTANT SAFETY INSTRUCTIONS
(continued
• Clean the dryer lint filter before each load to
prevent lint accumulation inside the dryer or
in the room. DO NOT OPERATE THE DRYER
WITHOUT THE LINT FILTER IN PLACE.
• Keep the area around and underneath
your appliances free from the accumulation
of combustible materials, such as lint. paper,
rags, chemicals, etc.
• The interior of the machine and the exhaust
ducl connection inside the dryer should be
cleaned periodically by a qualified individual.
•To Minimize the Possibility of Injury
• Do not mix chlorine bleach with ammonia or acids
such as vinegar and/or rust remover. Mixing can
produce a toxic gas which may cause death
WARNING--Fire and
Spontaneous Combustion Hazard
Do not wash or dry items that are
soiled with vegetable or cooking oil. These
1terns may contain some oil after laundering.
Due to the remaining oil. the fabric may smoke
or catch fire by itself causing fire or a
spontaneous combustion hazard.
WARNING--HYDROGEN GAS
_sproduced by the chemical action
within your water heater and the
gas can accumulate in the water heater and/or
water pipes if hot water has not been used for a
period of two weeks or longer. HYDROGEN
GAS CAN BE EXPLOSIVE UNDER THESE
CIRCUMSTANCES. So to prevent the possibility
of damage or injury, if you have not used hot
water for two weeks or more. or move into a
residence in which the hot water system may not
have been used for some time, turn on all hot
water faucets and allow them to run for several
minutes before using any electrical appliance
which is connected to the hot water system. This
will allow any hydrogen gas to escape. Since the
gas is flammable, do not smoke or use an open
flame or appliance during this process.
• Never reach into washer while it is moving.
Before loading, unloading or adding clothes.
push the Cycle Selector knob in, then wait until
the machine has completely stopped before
opening the lid.
• Never reach into the dryer while the
drum is moving. Before loading, unloading
or adding clothes, wait until the drum has
completely stopped.
• Do not wash or dry articles that have been • Do not wash or dry fiberglass articles in your
deaned in. washed in, soaked in. or spotted with
combustible or explosive substances Isuch as.
paint, gasoline, degreasers, dry ldeaning
solvents, kerosene, etc.) which may ignite or
explode.
appliance. Skin irritation could result from the
remaining glass particles that may be picked up by
clothing during subsequent appliance uses.
• The laundry process can reduce
the flame retardancy of fabrics.
Do not add these substances to the wash water
and do not use (Jr store these substances on/or
around your washer and dryer during
operation.
To avoid such a result, the garment
manufacturer's care instructions
should be followed very carefully.
4

• Close supervision is necessary if this appliance • Do not tamper with the controls.
is used by or near children. Do nol allow • Do not operate this appliance if it is damaged,
children to play inside, on. or with this
appliance or any discarded appliance. Dispose missing or broken parts, including a damaged
of discarded appliances and shipping or
packing materials properly. Before discarding cord or plug.
an appliance, or removing from service. • Never climb on or stand on the dryer top.
remove the lid and door.
malfunctioning, partially disassembled, or has
For washer operation
. eep all laundry aids (such as
__.7_ softeners, etc.) out of the reach of
children, preferably in a locked cabinet. Always
read and follow instructions on packages of
detergent and laundr3 aids. Observe all warnings
on container labels to avoid personal injury.
• Keep the floor around your appliance clean
and dry to reduce the possibility of slipping.
14 power supply before attempting an 3 product for which the manufacturer gives written
maintenance or cleaning {except the removal
and cleaning of the lint filter p.
detergents, bleaches, fabric
shock, unplug this appliance from the instructions for those products, or try a dryer-added
. To minimize the possibility of electric in the wash cycle, according to the manufacturer's
NOTE: Pushing the washer cycle
selector knob in or turning the dryer
cycle selector to OFF does NOT
disconnect the appliance from the
power supply.
• Do not leave washer lid up during cycle. This
will stop the spin action and prevent completion
of the cycle.
Dryer-applied Fabric Softeners or
Anti-static Conditioners
You may wish to soften your laundered
fabrics or reduce the static electricity in them.
We recommend you use either a fabric softener
assurance on the package that their product can be
safely used in your dryer.
Service or performance problems caused by
the use of these products are the responsibility
of the manufacturers of those products and are
not covered under the warranty of this appliance,
SAVE THESE
INSTRUCTIONS
TIPS TO HELP YOU SELECT WASHER SETTINGS
Regular Cycle--
For most cottons, linens, work and
play clothes. Longer wash times
plus an extra deep rinse, spray
rinse and spin provide thorough
washing and detergent removal.
Permanent Press Cycle--
For loads of synthetic and/or
delicate fabrics. A cool down
spray helps prevent set-in wrinkles
in permanent press shirts, blouses,
dresses and similar apparel.
Delicates Cycle--
For lingerie and gently used
fabrics, this cycle has a gentle
wash and a slow spin.
5
HOW TO OPERATE YOUR WASHER
Features and appearances may vary slightly
WARNING--To reduce the risk of fire, electric shock, or injury to persons when using your
appliance, read the IMPORTANT SAFETY INSTRUCTIONS before operating this appliance.
_v a
Regular
W_RM
COm Mm PUSHTO
COLD HOT
COL OLD SMALL • L_RGE
* _TOMA_I¢_nEN_
Auto-
WASH
RINSETemp Load Size Start
0 0
0 0
Setting the Controls
Use the Suggested Fabric and Cycle Settings guide
to help you make the proper selections.
_[) Select Water Level.
SMALL: Washer is less than 1/3 full of clothes.
MEDIUM: Between 1/3 and 2/3 full.
LARGE: Over 2/3 full.
For best cleaning results, the load must be able to move
freely in the water. Too big a load or too little water can
cause wear or tear of load items.
Washer Lid Latch
Spacemaker Laundrv
See How to Operate Your Dryer section for the above Dryer controls
O
Select Wash!Rinse Temperature.
Push Cycle Selector knob in and turn clockwise to
O
your selected wash setting.
Pull Cycle Selector knob _., START
O
out to start the washer. If
you wish to change setting
after washer has started, push
Cycle Selector knob in to stop
the washer and reset to the new position. Setting
can be changed at any time.
To Add Items After Washer Has Started
0
Timed
For easier loading convenience,
use the washer lid latch.
To hold the washer lid
up, lift the lid until it
snaps past the latch
under the control panel.
To release the lid, push
the lid latch up.
LID LATCH
• Turn off the washer.
• Latch the washer lid.
• Add any additional articles by submm_ing them next
to the agitator.
NOTE: When washing stockings, panty hose and
other easily tangled items, always handle separately.
To minimize tangling, we recommend the use of a net
laundry bag.
How to Soak in Your Washer
Allow the washer to fill and agitate for a few minutes to dissolve the
soaking agent. Then push in the Cycle Selector knob to stop the washer
(keep lid closed) and allow to soak for as long as desired.
After desired soak period, pull out Cycle Selector knob to complete cycle.
6
Cycle Times m Total Cycle Times (Approximate Minutes)
NOTES:
• Total time includes pauses between each phase of the cycle.
• Total time does not include water fill times. Fill times vary
depending on household water pressure and your selected water level.
t Permanent Press Delicates t Regular
16 12 16
Sorting and Loading
• Sort clothes carefully by fabric type, weight, color
and amount of soil, according to instructions in How
to Sort Clothes section.
• Add measured amount of detergent. See Detergents
section for information on detergents and other
laundry additives.
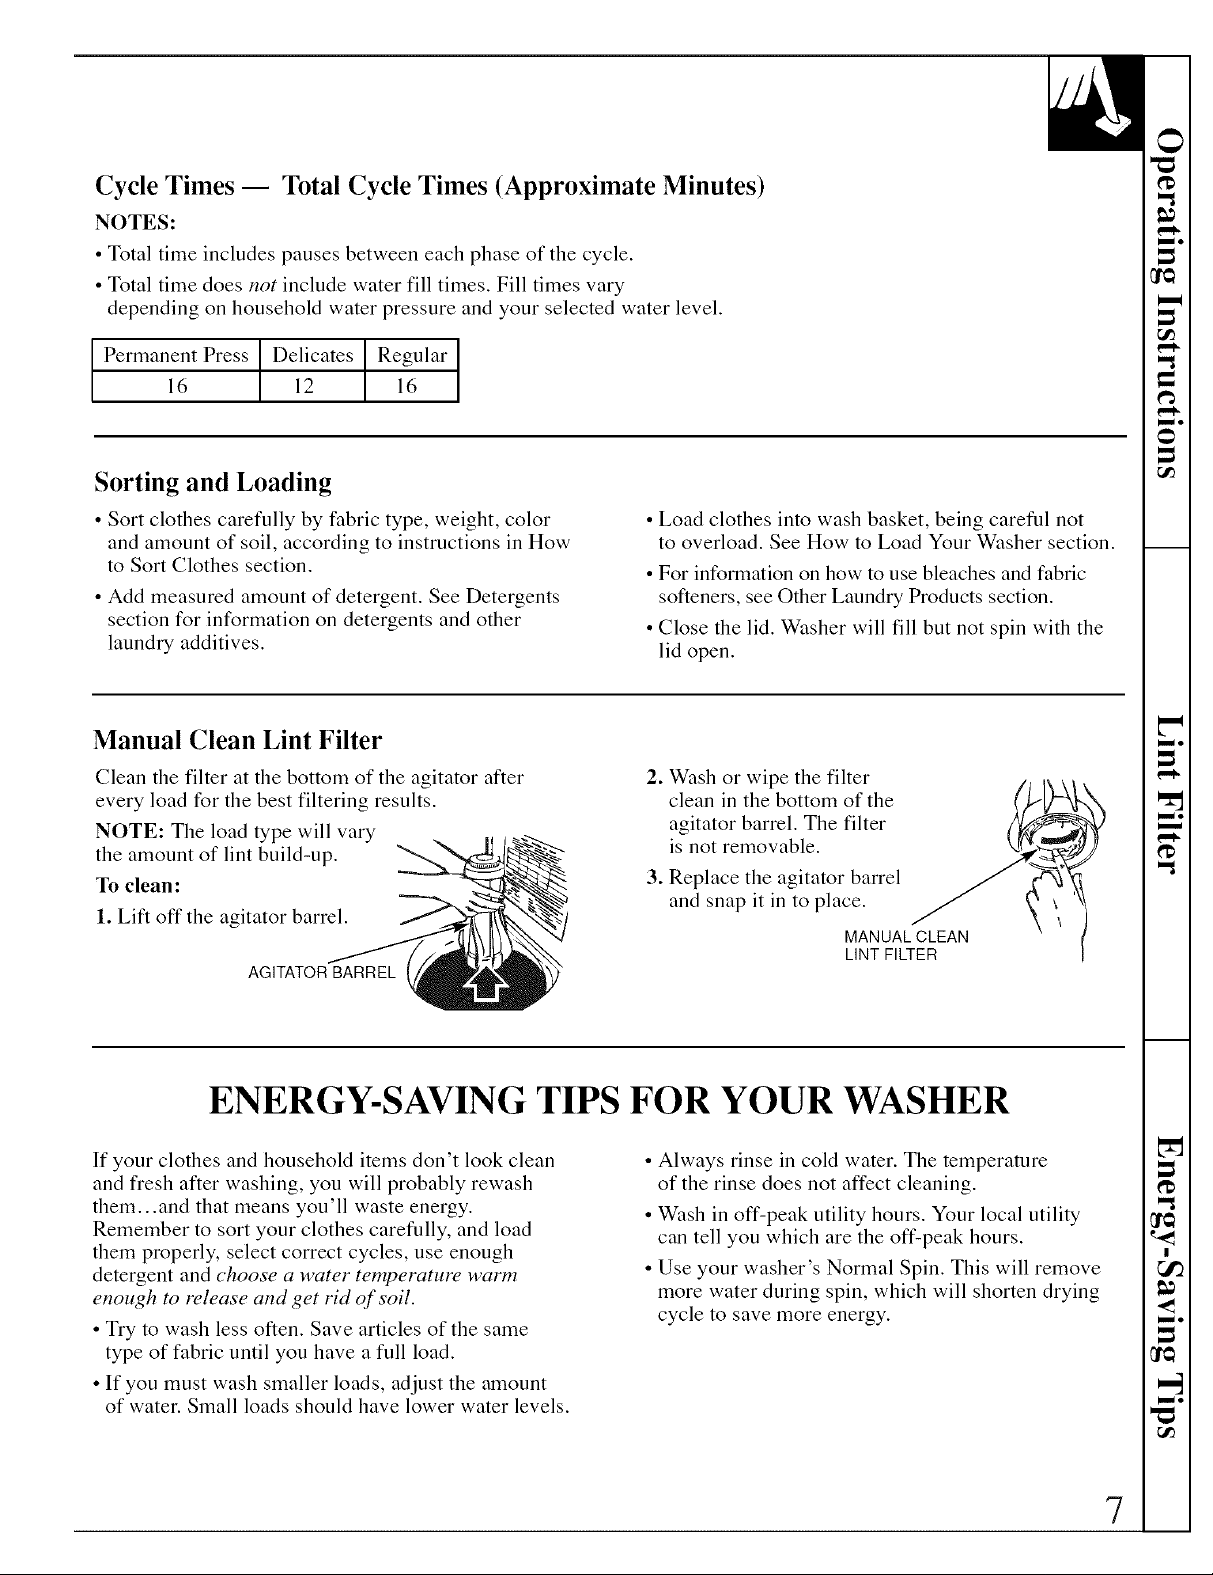
Manual Clean Lint Filter
Clean the filter at the bottom of the agitator after
every load for the best filtering results.
NOTE: The load type will vary
the amount of lint build-up.
To clean:
1. Lift off the agitator barrel.
AGITATOR BARREL
• Load clothes into wash basket, being careful not
to overload. See How to Load Your Washer section.
• For information on how to use bleaches and fabric
softeners, see Other Laundry Products section.
• Close the lid. Washer will fill but not spin with the
lid open.
2. Wash or wipe the filter
clean in the bottom of the
agitator barrel. The filter
is not removable.
3. Replace the agitator barrel
and snap it in to place.
MANUAL CLEAN
LINT FILTER
ENERGY-SAVING TIPS FOR YOUR WASHER
If your clothes and household items don't look clean
and fresh after washing, you will probably rewash
them...and that means you'll waste energy.
Remember to sort your clothes carefully, and load
them properly, select correct cycles, use enough
detm_ent and choose a water temperature warm
enough to release and get rid of soil.
• Try to wash less often. Save articles of the same
type of fabric until you have a full load.
• If you must wash smaller loads, adjust the amount
of water. Small loads should have lower water levels.
• Always rinse in cold water. The temperature
of the rinse does not affect cleaning.
• Wash in off-peak utility hours. Your local utility
can tell you which are the off-peak hours.
• Use your washer's Normal Spin. This will remove
more water during spin, which will shorten drying
cycle to save more enmgy.
7
SUGGESTED FABRIC AND CYCLE SETTINGS
FOR YOUR WASHER
Cycle Suggested
Permanent Press & Knits
Delicates
Regular
Special Instructions
*Down-filled garments Wash frequently to fluff up the down and retain the garment's warmth. WASH
For Clothes Load/Fabrics such as:
• Synthetics
• Permanent press, treated cottons,
blends with cottons
• Down-filled garments, if machine
washing is recommended*
• Baby clothes (delicate)
• Lingerie
• Cottons and linens
• Denims
• Baby clothes (sturdy)
SEPARATELY. Wet down gives off ml odor which may be absorbed by other gannents.
Odor disappears when garment is dry. Treat heavily soiled areas with liquid detergent
or a paste made of water and powdered detergent. Close zippers. Wash 2 or 3 gannents
at a time or add towels to balance. GARMENT MUST BE TUMBLE DRIED.
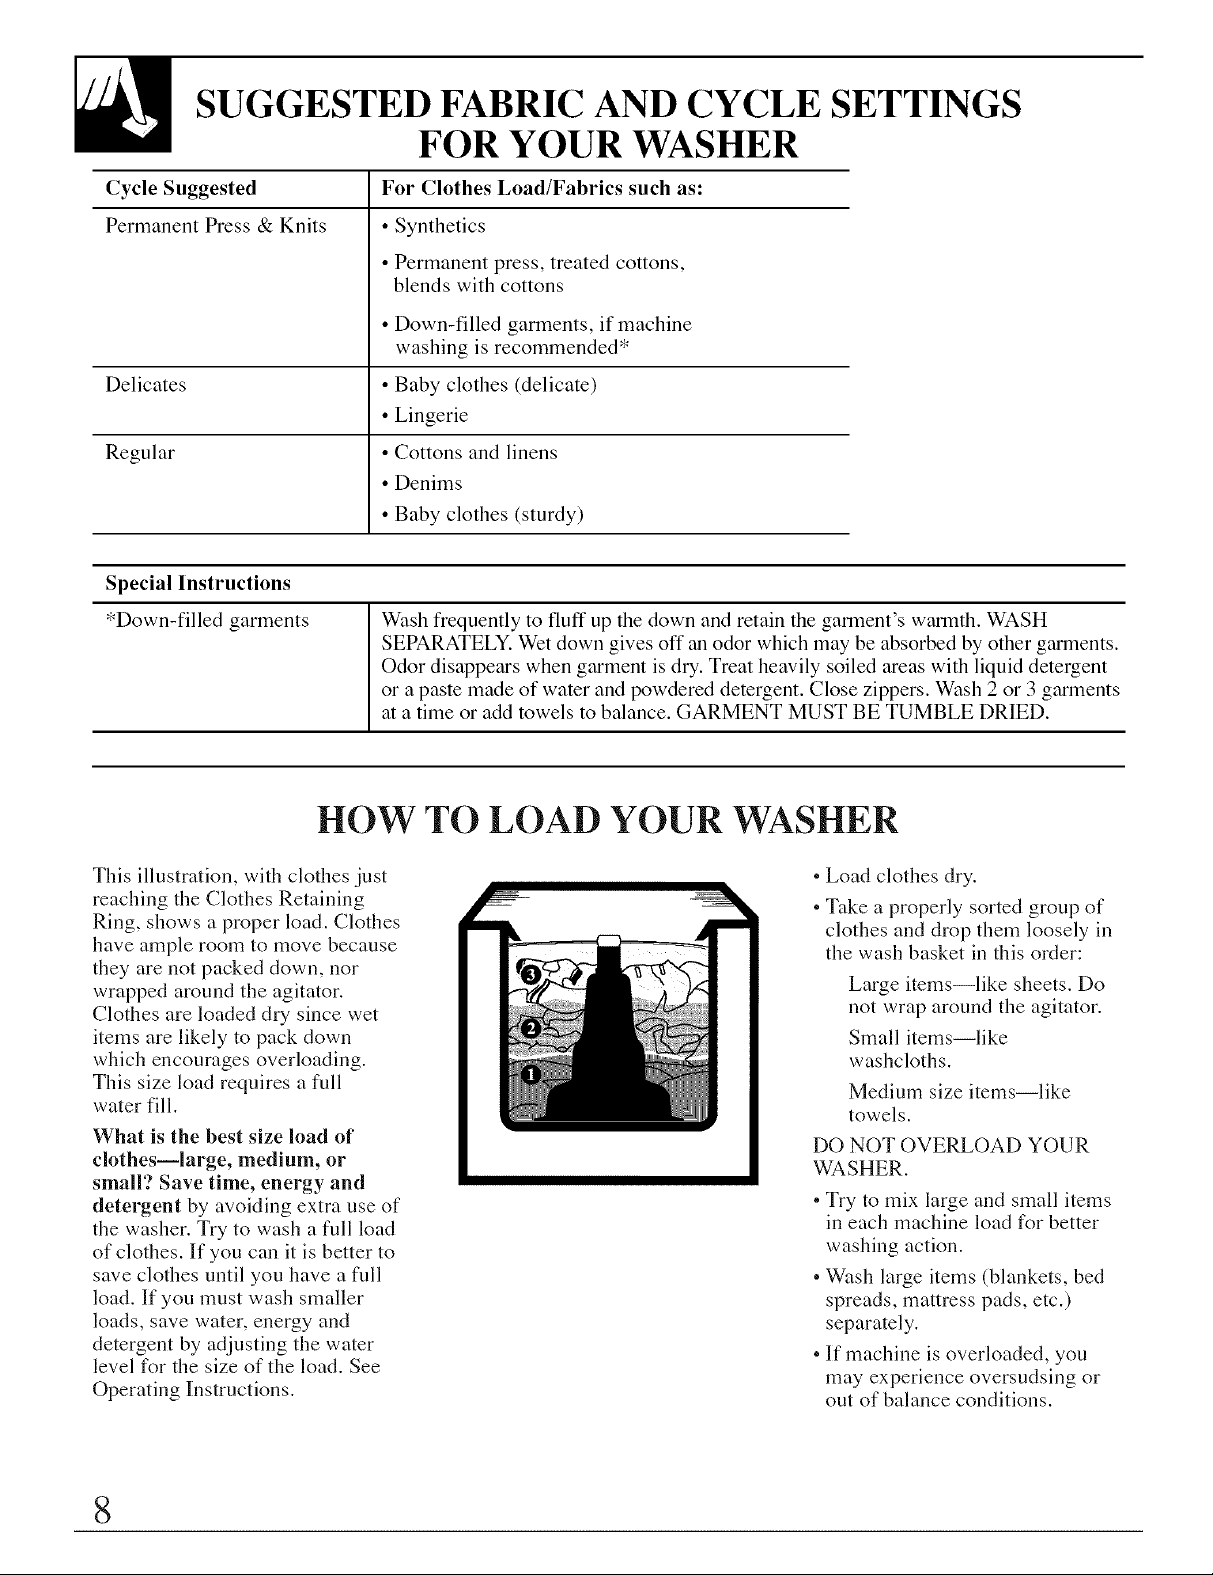
HOW TO LOAD YOUR WASHER
This illustration, with clothes just
reachin_g the Clothes Retaining
Ring, shows a proper load. Clothes
have ample room to move because
they are not packed down, nor
wrapped around the agitator.
Clothes are loaded dry since wet
items are likely to pack down
which encourages overloading.
This size load requires a full
water fill.
What is the best size load of
clothes--large, medium, or
small'? Save time, energy and
detergent by avoiding extra use of
the washer. Try to wash a full load
of clothes. If you can it is better to
save clothes until you have a full
load. If you must wash smaller
loads, save water, energy and
detergent by adjusting the water
level for the size of the load. See
Operating Instructions.
• Load clothes dry.
• Take a properly sorted group of
clothes and drop them loosely in
the wash basket in this order:
L_wge items--like sheets. Do
not wrap around the agitator.
Small items--like
washcloths.
Medium size items--like
towels.
DO NOT OVERLOAD YOUR
WASHER.
• Try to mix large and small items
in each machine load for better
washing action.
• Wash large items (blankets, bed
spreads, mattress pads, etc.)
separately.
• If machine is overloaded, you
may experience oversudsing or
out of balance conditions.
8
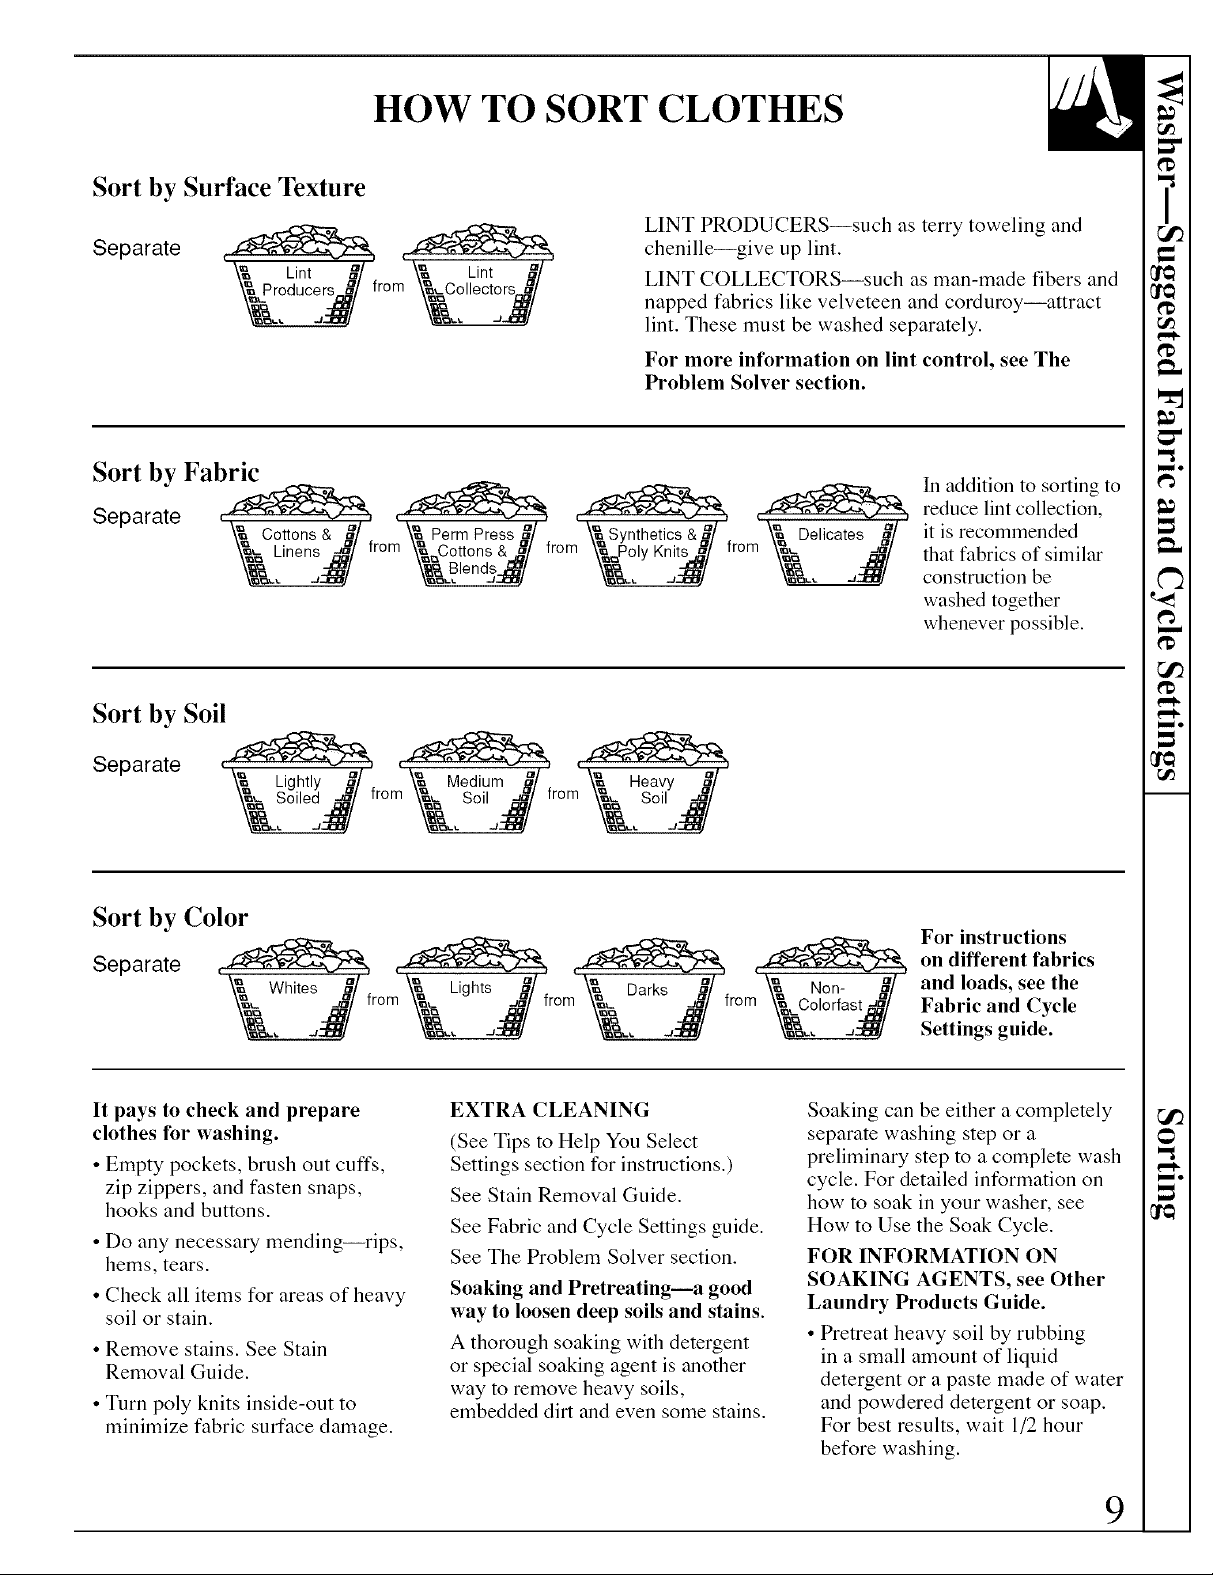
HOW TO SORT CLOTHES
Sort by Surface Texture
Separate ,_, ,_
\_ Lint g/ \_ Lint _/
_,.,.<\_Produo_rs.,__jg/from_Coli_ctors__/,_&,-_-,_/
LINT PRODUCERS--such as terry toweling and
chenilleigive up lint.
LINT COLLECTORS--such as man-made fibers and
napped fabrics like velveteen and corduroyiattract
lint. These must be washed separately.
For more information on lint control, see The
Problem Solver section.
Sort by Fabric
Separate
Sort by Soil
Separate ,_ ,_ ,_
7gilhtldY2/ from _ M_;diTm 2/ from & H_a_y 2/
Sort by Color
In addition to sorting to
reduce lint collection,
it is recommended
that fabrics of similar
construction be
washed together
whenever possible.
For instructions
on different fabrics
and loads, see the
Fabric and Cycle
Settings guide.
It pays to check and prepare
clothes for washing.
• Empty pockets, brush out cuffs,
zip zippers, and fasten snaps,
hooks and buttons.
• Do any necessary mending--rips,
hems, tears.
• Check all items for areas of heavy
soil or stain.
• Remove stains. See Stain
Removal Guide.
• Turn poly knits inside-out to
minimize fabric surface damage.
EXTRA CLEANING
(See Tips to Help You Select
Settings section for instructions.)
See Stain Removal Guide.
See Fabric and Cycle Settings guide.
See The Problem Solver section.
Soaking and Pretreatingia good
way to loosen deep soils and stains.
A thorough soaking with detergent
or special soaking agent is another
way to remove heavy soils,
embedded dirt and even some stains.
Soaking can be either a completely
separate washing step or a
preliminary step to a complete wash
cycle. For detailed information on
how to soak in your washer, see
How to Use the Soak Cycle.
FOR INFORMATION ON
SOAKING AGENTS, see Other
Laundry Products Guide.
• Pretreat heavy soil by rubbing
in a small amount of liquid
detergent or a paste made of water
and powdered detergent or soap.
For best results, wait 1/2 hour
before washing.
9
 Loading...