


Wall Oven
Built-In Combination Microwave/Thermal
For a Spanish version of this manual, visit our Website at GEAppliances.com.
Para consultar una version en español de este manual de instrucciones, visite nuestro sitio de internet GEAppliances.com.
GEAppliances.com
Safety Information . . . . . . . . . . . .2
Warranty . . . . . . . . . . . . . . . . . . . . . . . .8
Assistance / Accessories . . . . . .9
Using The Oven
Oven Controls. . . . . . . . . . . . . . . . . . . . 10
Oven Settings . . . . . . . . . . . . . . . . . . . . 11
Oven Options . . . . . . . . . . . . . . . . . . . . 12
Upper Oven
Microwaving . . . . . . . . . . . . . . . . . . . . . 13
Lower Oven
Cooking Modes . . . . . . . . . . . . . . . . . . 17
Sabbath Mode . . . . . . . . . . . . . . . . . . . 18
Cooking Guide . . . . . . . . . . . . . . . . . . . 19
Racks. . . . . . . . . . . . . . . . . . . . . . . . . . . . 20
Aluminum Foil and Oven Liners . . . 21
Cookware. . . . . . . . . . . . . . . . . . . . . . . . 21
Care and Cleaning
Cleaning The Oven . . . . . . . . . . . . . . . 22
Lower Oven Maintenance . . . . . . . . 24
Troubleshooting Tips . . . . . . . . 25
Owner’s Manual
JT3800 - 30" Double Wall Oven
JK3800 - 27" Double Wall Oven
Write the model and serial numbers here:
Model # __________________
Serial # ___________________
You can find them on a label on the side trim or on the front of the oven behind the oven door.
Printed on Recycled Paper
Printed in the United States |
49-80737-1 06-14 GE |

SAFETY INFORMATION (Upper Oven)
IMPORTANT SAFETY INFORMATION. READ ALL INSTRUCTIONS BEFORE USING.
PRECAUTIONS TO AVOID POSSIBLE EXPOSURE TO EXCESSIVE MICROWAVE ENERGY
(a)Do Not Attempt to operate this oven with the door open since open-door operation can result in harmful exposure to microwave energy. It is important not to defeat or tamper with the safety interlocks.
(b)Do Not Place any object between the oven front face and the door or allow soil or cleaner residue to accumulate on sealing surfaces.
(c)Do Not Operate the oven if it is damaged. It is particularly important that the oven door close properly and that there is no damage to the:
(1)door (bent),
(2)hinges and latches (broken or loosened),
(3)door seals and sealing surfaces.
(d)The Oven Should Not be adjusted or repaired by anyone except properly qualified service personnel.
To reduce the risk of burns, electric shock, fire, injury to persons or exposure to excessive microwave energy:

 WARNING GENERAL SAFETY INSTRUCTIONS
Ŷ Read all instructions before using this appliance. When using electrical appliances, basic safety precautions should be followed, including the following:
Ŷ 5HDG DQG IROORZ WKH VSHFLILF SUHFDXWLRQV LQ WKH 35(&$87,216 72 $92,' 3266,%/( (;32685( 72 (;&(66,9( 0,&52:$9( (1(5*< VHFWLRQ
Ŷ %H VXUH \RXU DSSOLDQFH LV SURSHUO\ LQVWDOOHG and grounded by a qualified technician in accordance with the provided installation instructions.
Ŷ ,QVWDOO RU ORFDWH WKLV DSSOLDQFH RQO\ LQ accordance with the provided installation instructions.
2 |
SAVE THESE INSTRUCTIONS |
49-80737-1 |


 WARNING GENERAL SAFETY INSTRUCTIONS
Ŷ 6RPH SURGXFWV VXFK DV ZKROH HJJV DQG VHDOHG containers—for example, closed jars—are
able to explode and should not be heated in
WKLV RYHQ 6XFK XVH RI WKH RYHQ FRXOG UHVXOW LQ injury.
Ŷ 'R QRW PRXQW WKLV DSSOLDQFH RYHU D VLQN
Ŷ 7KLV RYHQ LV QRW DSSURYHG RU WHVWHG IRU PDULQH use.
Ŷ 7KLV RYHQ LV 8/ OLVWHG IRU VWDQGDUG ZDOO installation.
Ŷ 'R QRW RSHUDWH WKLV DSSOLDQFH LI LW KDV EHHQ damaged or dropped.
Ŷ $V ZLWK DQ\ DSSOLDQFH FORVH VXSHUYLVLRQ LV necessary when used by children.
Ŷ 8VH WKLV DSSOLDQFH RQO\ IRU LWV LQWHQGHG XVH DV described in this manual.
Ŷ 'R QRW XVH FRUURVLYH FKHPLFDOV RU YDSRUV LQ WKLV appliance.
Ŷ 7KLV RYHQ LV VSHFLILFDOO\ GHVLJQHG WR KHDW GU\ RU cook food and is not intended for laboratory or industrial use.
Ŷ 7KLV DSSOLDQFH PXVW RQO\ EH VHUYLFHG E\
TXDOLILHG VHUYLFH SHUVRQQHO &RQWDFW QHDUHVW authorized service facility for examination, repair or adjustment.
Ŷ 'R QRW FRYHU RU EORFN DQ\ RSHQLQJV RQ WKH appliance.
Ŷ 'R QRW VWRUH WKLV DSSOLDQFH RXWGRRUV 'R QRW use this product near water—for example, in a wet basement, near a swimming pool, near a sink or in similar locations.
Ŷ 6HH GRRU VXUIDFH FOHDQLQJ LQVWUXFWLRQV LQ WKH
&DUH DQG &OHDQLQJ RI WKH 2YHQ VHFWLRQ RI WKLV manual.
Ŷ 7R UHGXFH WKH ULVN RI ILUH LQ WKH RYHQ FDYLW\
'R QRW RYHUFRRN IRRG &DUHIXOO\ DWWHQG appliance when paper, plastic or other combustible materials are placed inside the oven while microwave cooking.
5HPRYH ZLUH WZLVW WLHV DQG PHWDO KDQGOHV from paper or plastic containers before placing them in the oven.
'R QRW XVH WKH RYHQ IRU VWRUDJH SXUSRVHV
'R QRW OHDYH SDSHU SURGXFWV FRRNLQJ utensils or food in the oven when not in use.
—If materials inside the oven ignite, keep the oven door closed, turn the oven off and shut off power at the fuse or circuit breaker panel. If the door is opened, the fire may spread.
'R QRW XVH WKH 6HQVRU )HDWXUHV WZLFH LQ
succession on the same food portion. If food is undercooked after the first countdown, use
&22. %< 7,0( IRU DGGLWLRQDO FRRNLQJ WLPH Ŷ 'R QRW RSHUDWH WKH RYHQ ZLWKRXW WKH WXUQWDEOH LQ
SODFH 7KH WXUQWDEOH PXVW EH XQUHVWULFWHG VR LW can turn.
Ŷ 3RWHQWLDOO\ KRW VXUIDFHV LQFOXGH WKH RYHQ GRRU floor, walls, oven rack and turntable.
Ŷ 'RQ¶W GHIURVW IUR]HQ EHYHUDJHV LQ QDUURZ necked bottles (especially carbonated
EHYHUDJHV (YHQ LI WKH FRQWDLQHU LV RSHQ
SUHVVXUH FDQ EXLOG XS 7KLV FDQ FDXVH WKH container to burst, possibly resulting in injury.
Ŷ )RRGV FRRNHG LQ OLTXLGV VXFK DV SDVWD PD\ WHQG to boil more rapidly than foods containing less
PRLVWXUH 6KRXOG WKLV RFFXU UHIHU WR WKH &DUH DQG
&OHDQLQJ RI WKH RYHQ VHFWLRQ IRU LQVWUXFWLRQV RQ how to clean the inside of the oven.
Ŷ +RW IRRGV DQG VWHDP FDQ FDXVH EXUQV %H careful when opening any containers of hot food, including popcorn bags, cooking pouches and
ER[HV 7R SUHYHQW SRVVLEOH LQMXU\ GLUHFW VWHDP away from hands and face.
Ŷ 'R QRW RYHUFRRN SRWDWRHV 7KH\ FRXOG GHK\GUDWH and catch fire, causing damage to your oven.
Ŷ $YRLG KHDWLQJ EDE\ IRRG LQ JODVV MDUV HYHQ ZLWK WKH OLG RII 0DNH VXUH DOO LQIDQW IRRG LV WKRURXJKO\ FRRNHG 6WLU IRRG WR GLVWULEXWH WKH KHDW HYHQO\ %H FDUHIXO WR SUHYHQW VFDOGLQJ ZKHQ ZDUPLQJ IRUPXOD 7KH FRQWDLQHU PD\ IHHO FRROHU WKDQ WKH
IRUPXOD UHDOO\ LV $OZD\V WHVW WKH IRUPXOD EHIRUH feeding the baby.
Ŷ 'R QRW DWWHPSW WR GHHS IU\ LQ WKH RYHQ
Oven) (Upper INFORMATION SAFETY
SAVE THESE INSTRUCTIONS
49-80737-1 |
3 |

SAFETY INFORMATION (Upper Oven)
IMPORTANT SAFETY INFORMATION.
READ ALL INSTRUCTIONS BEFORE USING.

 WARNING 127,&(³3$&(0$.(56
Ŷ 0RVW SDFHPDNHUV DUH VKLHOGHG IURP LQWHUIHUHQFH |
+RZHYHU SDWLHQWV ZLWK SDFHPDNHUV PD\ ZLVK WR |
from electronic products, including microwaves. |
consult their physicians if they have concerns. |

 WARNING ARCING
$UFLQJ FDQ RFFXU GXULQJ PLFURZDYH FRRNLQJ ,I \RX VHH DUFLQJ SUHVV WKH Clear/Off pad and correct the problem.
$UFLQJ LV WKH PLFURZDYH WHUP IRU VSDUNV LQ WKH |
Ŷ 0HWDO FRRNZDUH XVHG GXULQJ PLFURZDYH FRRNLQJ |
RYHQ $UFLQJ LV FDXVHG E\ |
Ŷ 0HWDO VXFK DV WZLVW WLHV SRXOWU\ SLQV RU JROG |
Ŷ 0HWDO RU IRLO WRXFKLQJ WKH VLGH RI WKH RYHQ |
rimmed dishes, in the oven. |
Ŷ )RLO QRW PROGHG WR IRRG XSWXUQHG HGJHV DFW OLNH |
Ŷ 5HF\FOHG SDSHU WRZHOV FRQWDLQLQJ VPDOO PHWDO |
antennas). |
pieces being used in the oven. |
Ŷ 8VH IRLO RQO\ DV UHFRPPHQGHG LQ WKLV PDQXDO |
|

 WARNING FOODS
Ŷ :KHQ PLFURZDYLQJ SODFH DOO IRRGV DQG containers on the clear glass tray.
Ŷ 'R QRW SRS SRSFRUQ LQ \RXU RYHQ XQOHVV LQ D special microwave popcorn accessory or unless you use popcorn labeled for use in microwave ovens.
Ŷ 'R QRW ERLO HJJV LQ WKLV RYHQ 3UHVVXUH ZLOO EXLOG up inside egg yolk and will cause it to burst, possibly resulting in injury.
Ŷ 'R QRW RSHUDWH WKH RYHQ ZLWKRXW IRRG LQVLGH
7KLV PD\ FDXVH GDPDJH WR WKH RYHQ ,W increases the heat around the magnetron and can shorten the life of the oven.
Ŷ )RRGV ZLWK XQEURNHQ RXWHU ³VNLQ´ VXFK DV potatoes, hot dogs, sausages, tomatoes, apples, chicken livers and other giblets, and egg yolks should be pierced to allow steam to escape during cooking.
Ŷ SUPERHEATED WATER
/LTXLGV VXFK DV ZDWHU FRIIHH RU WHD DUH DEOH WR be overheated beyond the boiling point without
DSSHDULQJ WR EH ERLOLQJ 9LVLEOH EXEEOLQJ RU boiling when the container is removed from the
PLFURZDYH RYHQ LV QRW DOZD\V SUHVHQW 7+,6 &28/' 5(68/7 ,1 9(5< +27 /,48,'6 68''(1/< %2,/,1* 29(5 :+(1 7+( &217$,1(5 ,6 ',6785%(' 25 $ 63221 25 27+(5 87(16,/ ,6 ,16(57(' ,172 7+( /,48,'
7R UHGXFH WKH ULVN RI LQMXU\ WR SHUVRQV
'R QRW RYHUKHDW WKH OLTXLG
6WLU WKH OLTXLG ERWK EHIRUH DQG KDOIZD\ through heating it.
'R QRW XVH VWUDLJKW VLGHG FRQWDLQHUV ZLWK narrow necks.
$IWHU KHDWLQJ DOORZ WKH FRQWDLQHU WR VWDQG LQ the microwave oven for a short time before removing the container.
8VH H[WUHPH FDUH ZKHQ LQVHUWLQJ D VSRRQ RU other utensil into the container.
4 |
SAVE THESE INSTRUCTIONS |
49-80737-1 |

 WARNING 0,&52:$9( 6$)( &22.:$5(
0DNH VXUH WR XVH VXLWDEOH FRRNZDUH GXULQJ PLFURZDYH FRRNLQJ 0RVW JODVV FDVVHUROHV FRRNLQJ GLVKHV measuring cups, custard cups, pottery or china dinnerware which does not have metallic trim or glaze with
D PHWDOOLF VKHHQ FDQ EH XVHG 6RPH FRRNZDUH LV ODEHOHG ³VXLWDEOH IRU PLFURZDYLQJ ´
Ŷ 3ODFH IRRG RU PLFURZDYDEOH FRQWDLQHU GLUHFWO\ on the clear glass tray to cook your food.
Ŷ 8VH RI WKH QRQ VWLFN PHWDO WUD\ GXULQJ microwave cooking will result in inferior cooking performance.
Ŷ ,I \RX DUH QRW VXUH LI D GLVK LV PLFURZDYH safe, use this test: Place in the oven both the dish you are testing
and a glass measuring cup filled with 1 cup of water—set the measuring cup either in or next
WR WKH GLVK 0LFURZDYH
30-45 seconds at high. If the dish heats, it should
not be used for microwaving.
If the dish remains cool and only the water in the cup heats, then the dish is microwave-safe.
Ŷ &RRNZDUH PD\ EHFRPH KRW EHFDXVH RI KHDW
WUDQVIHUUHG IURP WKH KHDWHG IRRG 2YHQ PLWWV may be needed to handle the cookware.
Ŷ 'R QRW XVH UHF\FOHG SDSHU SURGXFWV 5HF\FOHG paper towels, napkins and waxed paper can contain metal flecks which may cause arcing or ignite. Paper products containing nylon or nylon filaments should be avoided, as they may also ignite.
Ŷ 8VH IRLO RQO\ DV GLUHFWHG LQ WKLV PDQXDO :KHQ
XVLQJ IRLO LQ WKH RYHQ NHHS WKH IRLO DW OHDVW ´ away from the sides of the oven.
Ŷ 'R QRW XVH WKH RYHQ WR GU\ QHZVSDSHUV
Ŷ ,I \RX XVH D PHDW WKHUPRPHWHU ZKLOH FRRNLQJ make sure it is safe for use in microwave ovens.
Ŷ 6RPH IRDP WUD\V OLNH WKRVH WKDW PHDW LV packaged on) have a thin strip of metal
HPEHGGHG LQ WKH ERWWRP :KHQ PLFURZDYHG the metal can burn the floor of the oven or ignite a paper towel.
Ŷ 3DSHU WRZHOV ZD[HG SDSHU DQG SODVWLF ZUDS can be used to cover dishes in order to retain
PRLVWXUH DQG SUHYHQW VSDWWHULQJ %H VXUH WR YHQW plastic wrap so steam can escape.
Ŷ 1RW DOO SODVWLF ZUDS LV VXLWDEOH IRU XVH LQ
PLFURZDYH RYHQV &KHFN WKH SDFNDJH IRU proper use.
Ŷ ³%RLODEOH´ FRRNLQJ SRXFKHV DQG WLJKWO\ FORVHG plastic bags should be slit, pierced or vented as directed by package. If they are not, plastic could burst during or immediately after cooking,
SRVVLEO\ UHVXOWLQJ LQ LQMXU\ $OVR SODVWLF VWRUDJH containers should be at least partially uncovered
EHFDXVH WKH\ IRUP D WLJKW VHDO :KHQ FRRNLQJ with containers tightly covered with plastic wrap, remove covering carefully and direct steam away from hands and face.
Ŷ Plastic cookware—Plastic cookware designed for microwave cooking is very useful, but should be
XVHG FDUHIXOO\ (YHQ PLFURZDYH VDIH SODVWLF PD\ not be as tolerant of overcooking conditions as are glass or ceramic materials and may soften or char if subjected to short periods of overcooking. In longer exposures to overcooking, the food and cookware could ignite.
Follow these guidelines:
8VH PLFURZDYH VDIH SODVWLFV RQO\ DQG XVH them in strict compliance with the cookware
PDQXIDFWXUHU¶V UHFRPPHQGDWLRQV
'R QRW PLFURZDYH HPSW\ FRQWDLQHUV
'R QRW SHUPLW FKLOGUHQ WR XVH SODVWLF FRRNZDUH without complete supervision.
The turntable must always be |
The clear glass tray should |
in place when using the oven. |
always be in place when |
|
microwaving. |
Oven) (Upper INFORMATION SAFETY
|
SAVE THESE INSTRUCTIONS |
49-80737-1 |
5 |

SAFETY INFORMATION (Lower Oven)
IMPORTANT SAFETY INFORMATION.
READ ALL INSTRUCTIONS BEFORE USING.

 WARNING
5HDG DOO VDIHW\ LQVWUXFWLRQV EHIRUH XVLQJ WKH SURGXFW )DLOXUH WR IROORZ WKHVH LQVWUXFWLRQV PD\ UHVXOW LQ ILUH electrical shock, serious injury or death.
STATE OF CALIFORNIA PROPOSITION 65 WARNING
7KH &DOLIRUQLD 6DIH 'ULQNLQJ :DWHU DQG 7R[LF (QIRUFHPHQW $FW UHTXLUHV WKH *RYHUQRU RI &DOLIRUQLD WR publish a list of substances known to the state to cause cancer, birth defects or other reproductive harm, and requires businesses to warn customers of potential exposure to such substances.
 WARNING 7KLV SURGXFW FRQWDLQV RQH RU PRUH FKHPLFDO NQRZQ WR WKH 6WDWH RI &DOLIRUQLD WR cause cancer, birth defects or other reproductive harm.
6HOI FOHDQ RYHQV FDQ FDXVH ORZ OHYHO H[SRVXUH WR VRPH RI WKHVH VXEVWDQFHV LQFOXGLQJ FDUERQ PRQR[LGH
GXULQJ WKH FOHDQLQJ F\FOH ([SRVXUH FDQ EH PLQLPL]HG E\ YHQWLQJ ZLWK DQ RSHQ ZLQGRZ RU XVLQJ D ventilation fan or hood.

 WARNING GENERAL SAFETY INSTRUCTIONS
Ŷ 8VH WKLV DSSOLDQFH RQO\ IRU LWV LQWHQGHG SXUSRVH DV GHVFULEHG LQ WKLV 2ZQHU¶V 0DQXDO
Ŷ %H VXUH \RXU DSSOLDQFH LV SURSHUO\ LQVWDOOHG DQG grounded by a qualified installer in accordance with the provided installation instructions.
Ŷ 'R QRW DWWHPSW WR UHSDLU RU UHSODFH DQ\ SDUW RI your oven unless it is specifically recommended
LQ WKLV PDQXDO $OO RWKHU VHUYLFLQJ VKRXOG EH transferred to a qualified technician.
Ŷ %HIRUH SHUIRUPLQJ DQ\ VHUYLFH GLVFRQQHFW WKH power supply at the household distribution panel by removing the fuse or switching off the circuit breaker.
Ŷ 'R QRW OHDYH FKLOGUHQ DORQH FKLOGUHQ VKRXOG QRW be left alone or unattended in an area where an
DSSOLDQFH LV LQ XVH 7KH\ VKRXOG QHYHU EH DOORZHG to climb, sit or stand on any part of the appliance.
Ŷ  CAUTION: 'R QRW VWRUH LWHPV RI interest to children in cabinets above an oven - children climbing on the oven to reach items could be seriously injured.
Ŷ 8VH RQO\ GU\ SRW KROGHUV PRLVW RU GDPS SRW holders on hot surfaces may result in burns from
VWHDP 'R QRW OHW SRW KROGHUV WRXFK KRW KHDWLQJ
HOHPHQWV 'R QRW XVH D WRZHO RU RWKHU EXON\ FORWK in place of pot holders.
Ŷ 1HYHU XVH \RXU DSSOLDQFH IRU ZDUPLQJ RU KHDWLQJ the room.
Ŷ 'R QRW WRXFK WKH KHDWLQJ HOHPHQWV RU WKH LQWHULRU
VXUIDFH RI WKH RYHQ 7KHVH VXUIDFHV PD\ EH KRW enough to burn even though they are dark in
FRORU 'XULQJ DQG DIWHU XVH GR QRW WRXFK RU OHW clothing or other flammable materials contact any interior area of the oven; allow sufficient time for
FRROLQJ ILUVW 2WKHU VXUIDFHV RI WKH DSSOLDQFH PD\ become hot enough to cause burns. Potentially hot surfaces include the oven vent opening, surfaces near the opening and crevices around the oven door.
Ŷ 'R QRW KHDW XQRSHQHG IRRG FRQWDLQHUV 3UHVVXUH could build up and the container could burst, causing an injury.
Ŷ 'R QRW XVH DQ\ W\SH RI IRLO RU OLQHU WR FRYHU WKH oven bottom or anywhere in the oven, except as
GHVFULEHG LQ WKLV PDQXDO 2YHQ OLQHUV FDQ WUDS heat or melt, resulting in damage to the product and risk of shock, smoke or fire.
Ŷ $YRLG VFUDWFKLQJ RU LPSDFWLQJ JODVV GRRUV RU FRQWURO SDQHOV 'RLQJ VR PD\ OHDG WR JODVV EUHDNDJH 'R QRW FRRN RQ RU LQ D SURGXFW ZLWK EURNHQ JODVV 6KRFN ILUH RU FXWV PD\ RFFXU Ŷ &RRN PHDW DQG SRXOWU\ WKRURXJKO\ PHDW WR
DW OHDVW DQ LQWHUQDO WHPSHUDWXUH RI ) DQG poultry to at least an internal temperature of
) &RRNLQJ WR WKHVH WHPSHUDWXUHV XVXDOO\ protects against foodborne illness.
6 |
SAVE THESE INSTRUCTIONS |
49-80737-1 |

 WARNING .((3 )/$00$%/( 0$7(5,$/6 $:$< )520 7+( 29(1
Failure to do so may result in fire or personal injury.
Ŷ 'R QRW VWRUH RU XVH IODPPDEOH PDWHULDOV LQ RU QHDU |
Ŷ 1HYHU ZHDU ORRVH ILWWLQJ RU KDQJLQJ JDUPHQWV ZKLOH |
an oven, including paper, plastic, pot holders, |
XVLQJ WKH DSSOLDQFH 7KHVH JDUPHQWV PD\ LJQLWH LI |
linens, wall coverings, curtains, drapes and gasoline |
they contact hot surfaces, causing severe burns. |
or other flammable vapors and liquids. |
Ŷ 'R QRW OHW FRRNLQJ JUHDVH RU RWKHU IODPPDEOH |
|
PDWHULDOV DFFXPXODWH LQ RU QHDU WKH RYHQ *UHDVH |
|
in the oven or near the oven may ignite. |
 WARNING ,1 7+( (9(17 2) $ ),5( 7$.( 7+( )2//2:,1*
STEPS TO PREVENT INJURY AND FIRE SPREADING
Ŷ 'R QRW XVH ZDWHU RQ JUHDVH ILUHV 1HYHU SLFN XS |
Ŷ ,I WKHUH LV D ILUH LQ WKH RYHQ GXULQJ VHOI FOHDQ WXUQ |
a flaming pan. |
the oven off and wait for the fire to go out. 'R |
Ŷ ,I WKHUH LV D ILUH LQ WKH RYHQ GXULQJ EDNLQJ |
not force the door open. Introduction of fresh air |
smother the fire by closing the oven door and |
at self-clean temperatures may lead to a burst |
turning the oven off or by using a multi-purpose |
RI IODPH IURP WKH RYHQ )DLOXUH WR IROORZ WKLV |
dry chemical or foam-type fire extinguisher. |
instruction may result in severe burns. |

 WARNING OVEN SAFETY INSTRUCTIONS
Ŷ 6WDQG DZD\ IURP WKH RYHQ ZKHQ RSHQLQJ WKH
RYHQ GRRU +RW DLU RU VWHDP ZKLFK HVFDSHV FDQ cause burns to hands, face and/or eyes.
Ŷ .HHS WKH RYHQ YHQW XQREVWUXFWHG
Ŷ .HHS WKH RYHQ IUHH IURP JUHDVH EXLOGXS *UHDVH in the oven may ignite.
Ŷ Place oven racks in desired location while oven is cool. If rack must be moved while oven is hot, do not let pot holder contact hot heating element in oven.
Ŷ :KHQ XVLQJ FRRNLQJ RU URDVWLQJ EDJV LQ WKH RYHQ IROORZ WKH PDQXIDFWXUHU¶V GLUHFWLRQV
Ŷ 3XOOLQJ RXW WKH VWDQGDUG UDFNV WR WKHLU VWRS ORFNV or the extension rack to its fully open position is a convenience in lifting heavy foods. It is also
a precaution against burns from touching hot surfaces of the door or oven walls.
Ŷ 'R QRW OHDYH LWHPV VXFK DV SDSHU FRRNLQJ utensils or food in the oven when not in use. Items stored in an oven can ignite.
Ŷ 1HYHU SODFH FRRNLQJ XWHQVLOV SL]]D RU EDNLQJ stones, or any type of foil or liner on the oven
IORRU 7KHVH LWHPV FDQ WUDS KHDW RU PHOW UHVXOWLQJ in damage to the product and risk of shock, smoke or fire.

 WARNING SELF-CLEANING OVEN SAFETY INSTRUCTIONS
7KH VHOI FOHDQLQJ IHDWXUH RSHUDWHV WKH RYHQ DW WHPSHUDWXUHV KLJK HQRXJK WR EXUQ DZD\ IRRG VRLOV LQ WKH RYHQ )ROORZ WKHVH LQVWUXFWLRQV IRU VDIH RSHUDWLRQ
Ŷ 'R QRW WRXFK RYHQ VXUIDFHV GXULQJ VHOI FOHDQ RSHUDWLRQ .HHS FKLOGUHQ DZD\ IURP WKH RYHQ
GXULQJ VHOI FOHDQLQJ )DLOXUH WR IROORZ WKHVH instructions may cause burns.
Ŷ %HIRUH VHOI FOHDQLQJ WKH RYHQ UHPRYH VKLQ\ silver colored oven racks (on some models), the probe, any aluminum foil, and any broiler pan,
JULG DQG RWKHU FRRNZDUH 2QO\ SRUFHODLQ FRDWHG oven racks may be left in the oven.
Ŷ %HIRUH RSHUDWLQJ WKH VHOI FOHDQ F\FOH ZLSH JUHDVH DQG IRRG VRLOV IURP WKH RYHQ ([FHVVLYH
amount of grease may ignite, leading to smoke damage to your home.
Ŷ ,I WKH VHOI FOHDQLQJ PRGH PDOIXQFWLRQV WXUQ WKH
RYHQ RII DQG GLVFRQQHFW WKH SRZHU VXSSO\ +DYH it serviced by a qualified technician.
Ŷ 'R QRW FOHDQ WKH GRRU JDVNHW 7KH GRRU JDVNHW LV
HVVHQWLDO IRU D JRRG VHDO &DUH VKRXOG EH WDNHQ not to rub, damage or move the gasket.
Ŷ 'R QRW XVH RYHQ FOHDQHUV 1R FRPPHUFLDO RYHQ cleaner or oven liner protective coating of any kind should be used in or around any part of the oven.
SAVE THESE INSTRUCTIONS
Oven) (Lower INFORMATION SAFETY
49-80737-1 |
7 |

WARRANTY
6WDSOH\RXUUHFHLSWKHUH3URRIRIWKHRULJLQDOSXUFKDVH date is needed to obtain service under the warranty.
Thank You! ... for your purchase of a GE Brand appliance.
Register Your Appliance: 5HJLVWHU \RXU QHZ DSSOLDQFH RQ OLQH DW \RXU FRQYHQLHQFH
ZZZ JHDSSOLDQFHV FRP VHUYLFHBDQGBVXSSRUW UHJLVWHU
7LPHO\ SURGXFW UHJLVWUDWLRQ ZLOO DOORZ IRU HQKDQFHG FRPPXQLFDWLRQ DQG SURPSW VHUYLFH XQGHU WKH WHUPV RI \RXU ZDUUDQW\ VKRXOG WKH QHHG DULVH <RX PD\ DOVR PDLO LQ WKH SUH SULQWHG UHJLVWUDWLRQ FDUG LQFOXGHG LQ WKH SDFNLQJ PDWHULDO
GE Electric Range Warranty
GEAppliances.com $OO ZDUUDQW\ VHUYLFH LV SURYLGHG E\ RXU )DFWRU\ 6HUYLFH &HQWHUV RU DQ DXWKRUL]HG &XVWRPHU &DUH® technician.
7R VFKHGXOH VHUYLFH RQ OLQH YLVLW XV DW ZZZ JHDSSOLDQFHV FRP VHUYLFHBDQGBVXSSRUW RU FDOO *( &$5(6
(800.432.2737). Please have serial number and model number available when calling for service.
6HUYLFLQJ \RXU DSSOLDQFH PD\ UHTXLUH WKH XVH RI WKH RQERDUG GDWD SRUW IRU GLDJQRVWLFV 7KLV JLYHV D *( IDFWRU\ VHUYLFH WHFKQLFLDQ WKH DELOLW\ WR TXLFNO\ GLDJQRVH DQ\ LVVXHV ZLWK \RXU DSSOLDQFH DQG KHOSV *( LPSURYH LWV SURGXFWV E\ SURYLGLQJ *( ZLWK LQIRUPDWLRQ RQ \RXU DSSOLDQFH ,I \RX GR QRW ZDQW \RXU DSSOLDQFH GDWD WR EH VHQW WR *( SOHDVH DGYLVH \RXU WHFKQLFLDQ QRW WR VXEPLW WKH GDWD WR *( DW WKH WLPH RI VHUYLFH
)RU WKH SHULRG RI RQH \HDU IURP WKH GDWH RI WKH RULJLQDO SXUFKDVH *( ZLOO SURYLGH DQ\ SDUW RI WKH UDQJH ZKLFK IDLOV GXH
WR D GHIHFW LQ PDWHULDOV RU ZRUNPDQVKLS 'XULQJ WKLV OLPLWHG RQH \HDU ZDUUDQW\ *( ZLOO DOVR SURYLGH IUHH RI FKDUJH DOO labor and in-home service to replace the defective part.
What GE will not cover:
Ŷ6HUYLFH WULSV WR \RXU KRPH WR WHDFK \RX KRZ WR XVH the product.
ŶImproper installation, delivery or maintenance.
Ŷ)DLOXUH RI WKH SURGXFW LI LW LV DEXVHG PLVXVHG modified or used for other than the intended purpose or used commercially.
Ŷ5HSODFHPHQW RI KRXVH IXVHV RU UHVHWWLQJ RI FLUFXLW breakers.
Ŷ'DPDJH WR WKH SURGXFW FDXVHG E\ DFFLGHQW ILUH IORRGV RU DFWV RI *RG
ŶIncidental or consequential damage caused by possible defects with this appliance.
Ŷ'DPDJH FDXVHG DIWHU GHOLYHU\
Ŷ Product not accessible to provide required service.
Ŷ 6HUYLFH WR UHSDLU RU UHSODFH OLJKW EXOEV H[FHSW IRU /(' lamps.
EXCLUSION OF IMPLIED WARRANTIES
<RXU VROH DQG H[FOXVLYH UHPHG\ LV SURGXFW UHSDLU DV SURYLGHG LQ WKLV /LPLWHG :DUUDQW\ $Q\ LPSOLHG ZDUUDQWLHV including the implied warranties of merchantability or fitness for a particular purpose, are limited to one year or the shortest period allowed by law.
7KLV ZDUUDQW\ LV H[WHQGHG WR WKH RULJLQDO SXUFKDVHU DQG DQ\ VXFFHHGLQJ RZQHU IRU SURGXFWV SXUFKDVHG IRU KRPH XVH ZLWKLQ WKH 86$ ,I WKH SURGXFW LV ORFDWHG LQ DQ DUHD ZKHUH VHUYLFH E\ D *( $XWKRUL]HG 6HUYLFHU LV QRW DYDLODEOH \RX PD\ EH UHVSRQVLEOH IRU D WULS FKDUJH RU \RX PD\ EH UHTXLUHG WR EULQJ WKH SURGXFW WR DQ $XWKRUL]HG *( 6HUYLFH ORFDWLRQ IRU VHUYLFH ,Q $ODVND WKH ZDUUDQW\ H[FOXGHV WKH FRVW RI VKLSSLQJ RU VHUYLFH FDOOV WR \RXU KRPH 6RPH VWDWHV GR QRW DOORZ WKH H[FOXVLRQ RU OLPLWDWLRQ RI LQFLGHQWDO RU FRQVHTXHQWLDO GDPDJHV 7KLV ZDUUDQW\ JLYHV \RX VSHFLILF OHJDO ULJKWV DQG \RX PD\ DOVR KDYH RWKHU ULJKWV ZKLFK YDU\ IURP VWDWH WR VWDWH 7R NQRZ ZKDW \RXU OHJDO ULJKWV DUH FRQVXOW \RXU ORFDO RU VWDWH FRQVXPHU DIIDLUV RIILFH RU \RXU VWDWH¶V $WWRUQH\ *HQHUDO
:DUUDQWRU *HQHUDO (OHFWULF &RPSDQ\ /RXLVYLOOH .<
Extended Warranties: 3XUFKDVH D *( H[WHQGHG ZDUUDQW\ DQG OHDUQ DERXW VSHFLDO GLVFRXQWV WKDW DUH DYDLODEOH ZKLOH
\RXU ZDUUDQW\ LV VWLOO LQ HIIHFW <RX FDQ SXUFKDVH LW RQ OLQH DQ\WLPH
ZZZ JHDSSOLDQFHV FRP VHUYLFHBDQGBVXSSRUW VKRS IRU H[WHQGHG VHUYLFH SODQV KWP
RU FDOO GXULQJ QRUPDO EXVLQHVV KRXUV *( &RQVXPHU +RPH 6HUYLFHV ZLOO VWLOO EH WKHUH DIWHU \RXU warranty expires.
8 |
49-80737-1 |

Have a question or need assistance with your appliance?
7U\ WKH *( $SSOLDQFHV :HEVLWH www.geappliances.com/service_and_support/) 24 hours a day, any day of the
\HDU )RU JUHDWHU FRQYHQLHQFH DQG IDVWHU VHUYLFH \RX FDQ QRZ GRZQORDG 2ZQHU¶V 0DQXDOV RUGHU SDUWV RU HYHQ schedule service on-line.
Schedule Service: ([SHUW *( UHSDLU VHUYLFH LV RQO\ RQH VWHS DZD\ IURP \RXU GRRU *HW RQ OLQH DQG VFKHGXOH \RXU VHUYLFH DW ZZZ JHDSSOLDQFHV FRP VHUYLFHBDQGBVXSSRUW
2U FDOO *( &$5(6 GXULQJ QRUPDO business hours.
Parts and Accessories: Individuals qualified to service their own appliances can have parts or accessories sent
GLUHFWO\ WR WKHLU KRPHV 9,6$ 0DVWHU&DUG DQG 'LVFRYHU
FDUGV DUH DFFHSWHG 2UGHU RQ OLQH WRGD\ KRXUV HYHU\ day or by phone at 800.626.2002 during normal business hours.
Instructions contained in this manual cover procedures
WR EH SHUIRUPHG E\ DQ\ XVHU 2WKHU VHUYLFLQJ JHQHUDOO\
VKRXOG EH UHIHUUHG WR TXDOLILHG VHUYLFH SHUVRQQHO &DXWLRQ must be exercised, since improper servicing may cause unsafe operation.
Real Life Design Studio: *( VXSSRUWV WKH 8QLYHUVDO
'HVLJQ FRQFHSW RI SURGXFWV VHUYLFHV DQG HQYLURQPHQWV that can be used by people of all ages, sizes and
FDSDELOLWLHV :H UHFRJQL]H WKH QHHG WR GHVLJQ IRU D ZLGH range of physical and mental abilities and impairments.
)RU GHWDLOV RI *(¶V 8QLYHUVDO 'HVLJQ DSSOLFDWLRQV LQFOXGLQJ kitchen design ideas for people with disabilities, check out
RXU :HEVLWH WRGD\ )RU WKH KHDULQJ LPSDLUHG SOHDVH FDOO7'' *($&
Contact Us: If you are not satisfied with the service you
UHFHLYH IURP *( FRQWDFW XV RQ RXU :HEVLWH ZLWK DOO WKH details including your phone number, or write to:
General Manager, Customer Relations
GE Appliances, Appliance Park Louisville, KY 40225
Accessories
Looking For Something More?
GE offers a variety of accessories to improve your cooking and maintenance experiences!
7R SODFH DQ RUGHU YLVLW XV RQOLQH DW
|
|
www.GEApplianceParts.com 8 6 RU www.GEAppliances.ca &DQDGD |
|
|
|
or call 800.626.2002 8 6 800.661.1616 &DQDGD |
|
7KH IROORZLQJ SURGXFWV DQG PRUH DUH DYDLODEOH |
|
||
|
Accessories |
|
|
|
|
6PDOO %URLOHU 3DQ ô ´ [ ó´ [ ò ³ |
:% ; 86 ' * &DQDGD |
|
/DUJH %URLOHU 3DQ ô ´ [ ó´ [ ò ³ |
:% ; 86 ' * &DQDGD |
|
|
;/ %URLOHU 3DQ ´ [ ó´ [ ³ |
:% ; 86 1RW DYDLODEOH LQ &DQDGD |
|
|
Parts |
|
|
|
|
*ODVV 7UD\ |
3DUW QXPEHUV YDU\ E\ PRGHO |
|
|
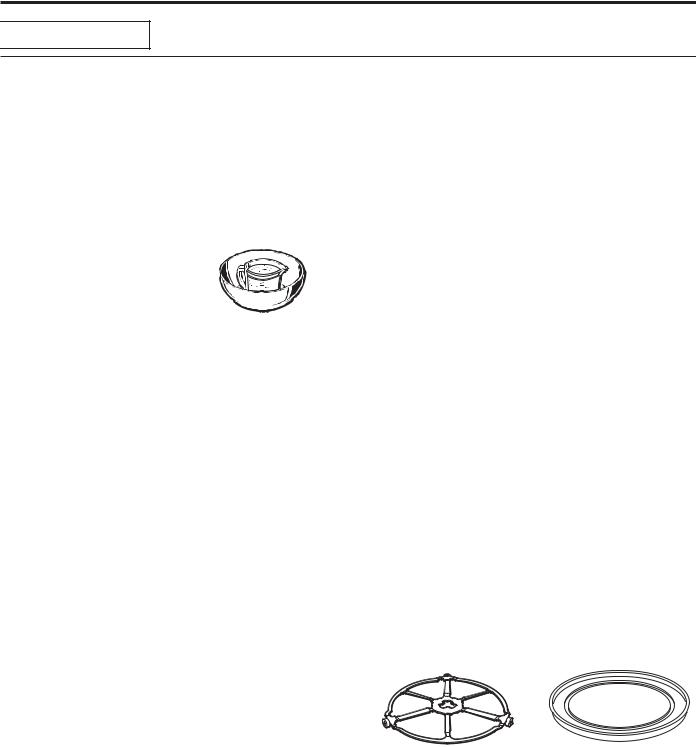
7XUQWDEOH |
3DUW QXPEHUV YDU\ E\ PRGHO |
|
|
2YHQ UDFNV |
3DUW QXPEHUV YDU\ E\ PRGHO |
|
2YHQ HOHPHQWV |
3DUW QXPEHUV YDU\ E\ PRGHO |
|
|
/LJKW EXOEV |
3DUW QXPEHUV YDU\ E\ PRGHO |
|
|
Cleaning Supplies |
|
|
|
|
R] 0LFUR %U\WH® $SSOLDQFH &OHDQHU |
:; ; |
|
|
&LWUX6KLQH 6WDLQOHVV 6WHHO :LSHV |
:; ; |
|
|
&HUDPD%U\WH® 6WDLQOHVV 6WHHO $SSOLDQFH &OHDQHU |
30 ; |
|
|
*UDSKLWH /XEULFDQW |
:% 7 |
7KH ODUJH EURLOHU SDQ GRHV QRW ILW LQ ´ ´ UDQJHV7KH ;/ EURLOHU SDQ GRHV QRW ILW LQ ´ ZDOO RYHQV ´GURS LQV RU ´ ´ UDQJHV
How to Remove Protective Shipping Film and Packaging Tape
&DUHIXOO\ JUDVS D FRUQHU RI WKH SURWHFWLYH VKLSSLQJ ILOP with your fingers and slowly peel it from the appliance
VXUIDFH 'R QRW XVH DQ\ VKDUS LWHPV WR UHPRYH WKH ILOP
5HPRYH DOO RI WKH ILOP EHIRUH XVLQJ WKH DSSOLDQFH IRU WKH first time.
7R DVVXUH QR GDPDJH LV GRQH WR WKH ILQLVK RI WKH product, the safest way to remove the adhesive from packaging tape on new appliances is an application of
D KRXVHKROG OLTXLG GLVKZDVKLQJ GHWHUJHQW $SSO\ ZLWK D soft cloth and allow to soak.
NOTE: 7KH DGKHVLYH PXVW EH UHPRYHG IURP DOO SDUWV ,W cannot be removed if it is baked on.
ACCESSORIES / ASSISTANCE
49-80737-1 |
9 |

USING THE OVEN: Oven Controls
Oven Controls
Upper Oven |
|
|
|
Lower Oven |
||||
|
Controls |
|
Common Controls |
|
|
Controls |
||
7 |
9 |
11 |
1 |
6 |
4 |
13 |
14 |
15 |
8 |
10 |
12 |
2 |
3 |
5 |
18 |
17 |
16 |
Common Controls
1.Timer On/Off: :RUNV DV D FRXQWGRZQ WLPHU 3UHVV
the Timer On/Off pad, select the timer type (hours and minutes or minutes and seconds), use the selector dial to set the time, and press the selector dial to start the timer
FRXQWGRZQ 7KH RYHQ ZLOO FRQWLQXH WR RSHUDWH ZKHQ WKH
WLPHU FRXQWGRZQ LV FRPSOHWH 7R WXUQ WKH WLPHU RII SUHVV the Timer On/Off pad.
2.Settings / Lock Controls: )LQG RYHQ RSWLRQV IRU
+HOS &ORFN 6HWWLQJV 'LVSOD\ 0RGH $XWR &RQYHUVLRQ $XWR 6KXW 2II %HHSHU 9ROXPH 5HPLQGHU 7HPSHUDWXUH 8QLWV 7KHUPRVWDW $GMXVW DQG 2YHQ ,QIRUPDWLRQ XQGHU WKLV VHOHFWLRQ
6HH WKH 2YHQ 6HWWLQJV VHFWLRQ IRU PRUH GHWDLOV 3UHVV and hold Settings pad for 3 seconds to lock or unlock the
FRQWUROV 7KLV ORFNV RXW WKH FRQWURO VR WKDW SUHVVLQJ DQ\ RI
WKH FRQWURO SDGV GRHV QRW DFWLYDWH WKH IHDWXUH &OHDU 2II LV always active, even when the control is locked.
3.Selector Dial: 7KH VHOHFWRU GLDO LV XVHG IRU ERWK
WKH XSSHU DQG ORZHU RYHQV 5RWDWH GLDO WR VHOHFW RYHQ settings, upper/lower oven options and cooking options
WKHQ SUHVV WR FRQILUP WKH VHOHFWLRQ 5RWDWH GLDO WR LQFUHDVH or decrease temperatures or time and then press to confirm the set temperature or time.
4.Back: Press this pad to go back a menu level in the
display.
5.Start/Pause: Press the Start/Pause pad to start any
cooking, clean or timed function. Press the Start/Pause pad to pause any upper oven features.
6.Display: Information about both the upper and lower
ovens is shown in this display window.
Upper Oven Controls
7.Microwave: Press the Microwave pad for microwaving
RSWLRQV 8VH WKH VHOHFWRU GLDO WR ILQG WKH PLFURZDYLQJ option desired and press the selector dial to select it.
2SWLRQV DYDLODEOH LQFOXGH &RRN E\ 7LPH &RRN 'HIURVW %HYHUDJH 3RSFRUQ 0HOW 5HKHDW 6LPPHU DQG 6RIWHQ 8VH WKH FOHDU JODVV WUD\ DQG PLFURZDYH VDIH FRRNZDUH ZKHQ XVLQJ WKH PLFURZDYH IHDWXUHV 6HH 8SSHU 2YHQ 0LFURZDYLQJ VHFWLRQ IRU PRUH GHWDLO
8.Add 30 Sec: Press the Add 30 Sec pad for 30
VHFRQGV RI PLFURZDYH FRRNLQJ WLPH (DFK WLPH WKLV SDG is pressed an additional 30 seconds is added to the
UHPDLQLQJ FRRNLQJ WLPH 7KH RYHQ VWDUWV LPPHGLDWHO\
9.Defrost: Press the Defrost pad to defrost, rotate
selector dial to select the type of defrost and press to
VHOHFW 7\SH RI GHIURVW DYDLODEOH LQFOXGH 'HIURVW E\ )RRG 7\SH 'HIURVW E\ 7LPH 'HIURVW E\ :HLJKW OE 4XLFN
'HIURVW 0HOW DQG 6RIWHQ 6HH WKH 0LFURZDYLQJ VHFWLRQ IRU more information.
10. Reheat: Press the Reheat pad to reheat, rotate selector dial to select food type to reheat and press to select.
7\SHV RI IRRG DYDLODEOH XQGHU WKH 5HKHDW IHDWXUH LQFOXGH %HYHUDJH &DVVHUROH &KLFNHQ 3DVWD 3L]]D 3ODWH RI )RRG 5LFH 6RXS 6WHDNV &KRSV DQG 9HJHWDEOHV
11. Popcorn: Press the Popcorn pad to microwave popcorn, press the selector dial to select. Popcorn feature is a microwave sensor feature and automatically senses
ZKHQ SRSFRUQ LV GRQH DQG VKXWV LWVHOI RII 'R QRW XVH WKH
6HQVRU )HDWXUHV WZLFH LQ VXFFHVVLRQ RQ WKH VDPH IRRG portion.
12. Clear/Off: 7KH &OHDU 2II SDG FDQFHOV $// XSSHU RYHQ programs except the clock and timer.
Lower Oven Controls
13. Light: Press the Light pad to turn the oven light on or
RII LQ WKH ORZHU RYHQ 1RWH WKDW OLJKW LQ WKH ORZHU RYHQ ZLOO not turn on if the oven is in a clean mode.
14. Bake: Press the Bake pad to bake, rotate selector dial to select baking temperature and press to select.
15. Broil: Press the Broil pad to broil, rotate selector dial to
VHOHFW +L /R DQG SUHVV WR VHOHFW
16. Options: )LQG WKH 'HOD\ 6WDUW 3URRI 6DEEDWK 6HOI &OHDQ 6WHDP &OHDQ DQG :DUP IHDWXUHV XQGHU WKLV VHOHFWLRQ 6HH WKH 2YHQ 2SWLRQV VHFWLRQ IRU PRUH GHWDLOV
17. Warm: Press the Warm pad to warm, press the selector
GLDO WR VHOHFW 'R QRW XVH :DUP WR FRRN RU KHDW FROG IRRG 6HH WKH &RRNLQJ 0RGH VHFWLRQ IRU PRUH LQIRUPDWLRQ
18. Clear/Off: 7KH &OHDU 2II SDG FDQFHOV $// ORZHU RYHQ programs except the clock and timer.
10 |
49-80737-1 |
Oven Settings
Help |
Clock Settings |
8VH WKLV IHDWXUH WR ILQG RXW PRUH DERXW \RXU RYHQ DQG its features by pressing the Settings pad and selecting
KHOS 7XUQ WKH VHOHFWRU GLDO DQG SUHVV WR VHOHFW WKH feature you want to find out more about.
NOTE: 1RW DOO IHDWXUHV RI KHOS PD\ EH RQ \RXU RYHQ PRGHO %HORZ DUH IHDWXUHV IRXQG LQ WKH +HOS IXQFWLRQ
8VH WKLV IHDWXUH WR VHW WKH WLPH RI GD\ DQG WR VSHFLI\
KRZ WKH WLPH RI GD\ ZLOO EH GLVSOD\HG <RX FDQ VHOHFW D standard 12-hour clock (12 hr) or 24-hour military time display (24 hr). Prior to the first use of your oven, the clock must be set.
Display Mode
Features found in the Help function.
$GGLQJ 7LPH |
'HIURVW E\ :HLJKW |
6WDUW 3DXVH |
$XWR &RQYHUVLRQ |
'HOD\ 6WDUW /RZHU |
6WHDP &OHDQ |
$XWR 6KXW 2II |
'LVSOD\ 0RGH |
7HPSHUDWXUH 8QLWV |
%DFN |
(GLW |
7KHUPRVWDW $GMXVW |
%DNH |
+HOS |
7LPHU 2Q 2II |
%HHSHU 9ROXPH |
0HOW |
7RDVW |
%HYHUDJH |
0LFUR 6HFV |
:DUP |
%URLO |
0LFURZDYH |
|
&OHDU 2II |
0\ UHFLSHV |
|
&ORFN |
Probe |
|
&RQWURO /RFNRXW |
Proof |
|
&RRN |
5HKHDW |
|
&RRN E\ )RRG |
5HPLQGHU |
|
&RRN E\ 7LPH |
5HSHDW /DVW |
|
&RRN E\ 7LPH |
5HVXPH |
|
&RRNLQJ 2SWLRQV /RZHU |
6DEEDWK |
|
&RRNLQJ 2SWLRQV 8SSHU |
6HOI &OHDQ |
|
'HIURVW |
6HQVRU &RRNLQJ |
|
'HIURVW E\ )RRG |
6LPPHU |
|
'HIURVW E\ 7LPH |
6RIWHQ |
|
|
6SHHG &RRN |
|
|
|
|
8VH WKLV IHDWXUH WR VHW 3RZHU 6DYHU RU 'LVSOD\ $OZD\V 2Q GLVSOD\ PRGH
Auto Shut-Off
8VH WKLV IHDWXUH WR DFWLYDWH GHDFWLYDWH $XWR 6KXW 2II
$FWLYDWLQJ WKH $XWR 6KXW 2II IHDWXUH ZLOO WXUQ RII WKH lower oven after 12 hours of continuous operations.
7KH IDFWRU\ VHWWLQJ IRU $XWR 6KXW 2II IHDWXUH LV DFWLYDWHG :KHQ LQ 6DEEDWK PRGH $XWR 6KXW 2II ZLOO EH deactivated.
Beeper Volume
8VH WKLV IHDWXUH WR VHW %HHSHU 9ROXPH WR 0XWH RU 1RUPDO NOTE: 6RPH WRQHV DUH QRW PXWDEOH
Reminder
8VH WKLV IHDWXUH WR 6HW 5HYLHZ RU &OHDU 5HPLQGHU
Temperature Units
8VH WKLV IHDWXUH WR VHW WKH GLVSOD\ WHPSHUDWXUH XQLW WR °))DKUHQKHLW RU °& &HOVLXV
Thermostat Adjust
7KLV IHDWXUH DOORZV WKH RYHQ EDNLQJ DQG FRQYHFWLRQ baking temperature to be adjusted up to 35°) KRWWHU or down to 35°) FRROHU RQ WKH ORZHU RYHQ 7KH XSSHU
RYHQ FDQQRW EH DGMXVWHG 8VH WKLV IHDWXUH LI \RX EHOLHYH your oven temperature is too hot or too cold and wish to
FKDQJH LW 7KLV DGMXVWPHQW DIIHFWV %DNH PRGHV 1R RWKHU cooking modes are affected.
Oven Information
7KLV IHDWXUH VKRZV WKH 2YHQ 0RGHO DQG 6HULDO QXPEHU
Settings Oven OVEN: THE USING
49-80737-1 |
11 |

USING THE OVEN: Oven Options
Oven Options
Lower Oven Options
Delay Start
8VH WKLV IHDWXUH WR GHOD\ VWDUWLQJ D %DNH RU 6HOI &OHDQ IHDWXUH 7R XVH WKLV IHDWXUH VHOHFW 'HOD\ 6WDUW DQG VHW WKH WLPH WR VWDUW WKHQ VHOHFW FRRN PRGH <RX FDQ DOVR
XVH WKH 'HOD\ 6WDUW IHDWXUH ZKLOH SURJUDPPLQJ D %DNH cooking feature.
Proof
8VH WKLV IHDWXUH WR SURRI GRXJK 6HH /RZHU 2YHQ &RRNLQJ 0RGHV IRU PRUH GHWDLO
Sabbath
8VH WKLV IHDWXUH WR HQWHU 6DEEDWK PRGH 6DEEDWK PRGH VHWV WKH RYHQ IRU REVHUYDQFH RI WKH -HZLVK 6DEEDWK DQG +ROLGD\V 7KLV IHDWXUH FRQIRUPV WR WKH 6WDU .
-HZLVK 6DEEDWK UHTXLUHPHQWV 6DEEDWK PRGH GLVDEOHV the oven lights (the oven light will not turn on when the door is opened), all sounds (the control will not beep when a button is pressed, but will still beep if certain oven faults occur), and all upper oven functions and
ORZHU RYHQ IXQFWLRQV H[FHSW ORZHU RYHQ %DNH 'XULQJ 6DEEDWK PRGH RQO\ ORZHU RYHQ %DNH LV DYDLODEOH
:KLOH LQ 6DEEDWK PRGH DIWHU VHWWLQJ FKDQJLQJ D EDNH temperature, a random delay of approximately 30 seconds to 1 minute will occur before the oven will begin
EDNLQJ 7R VWRS FRRNLQJ SUHVV WKH Back pad and then the Start/Pause SDG <RXU RYHQ ZLOO VKXW RII DIWHU D
random delay of approximately 30 seconds to 1 minute.
7R LPPHGLDWHO\ H[LW ORZHU RYHQ %DNH SUHVV WKH Clear/ Off pad at any time – cooking elements will immediately
WXUQ RII DQG 6DEEDWK %DNH ZLOO FKDQJH WR 6DEEDWK RQ
WKH GLVSOD\ LQGLFDWLQJ WKDW WKH RYHQ KDV WXUQHG RII 7R H[LW 6DEEDWK PRGH SUHVV DQG KROG WKH Back pad for 3
VHFRQGV 'R QRW SUHVV DQ\ RWKHU EXWWRQV XQWLO 6DEEDWK PRGH KDV H[LWHG RU 6DEEDWK PRGH ZLOO EH UH LQLWLDOL]HG
DQG ZLOO QRW H[LW 6HH /RZHU 2YHQ 6DEEDWK 0RGH IRU more detail.
NOTE: ,I SRZHU RXWDJH RFFXUV GXULQJ 6DEEDWK PRGH WKH
XQLW ZLOO UHPDLQ LQ 6DEEDWK PRGH EXW ZLOO QR ORQJHU EH cooking when power is restored.
Self Clean
8VH WKLV IHDWXUH WR HQWHU 6HOI &OHDQ PRGH 6HH &OHDQLQJ 7KH 2YHQ VHFWLRQ IRU PRUH GHWDLO
Steam Clean
8VH WKLV IHDWXUH WR HQWHU 6WHDP &OHDQ PRGH 6HH &OHDQLQJ 7KH 2YHQ VHFWLRQ IRU PRUH GHWDLO
Warm
8VH WKLV IHDWXUH WR ZDUP 6HH /RZHU 2YHQ &RRNLQJ 0RGHV IRU PRUH GHWDLO
12 |
49-80737-1 |

Microwaving
Using The Microwave Features
0DNH VXUH WKH WXUQWDEOH DQG FOHDU JODVV WUD\ DUH LQ SODFH
Place food or microwavable container directly on the clear glass tray to cook your food.
The turntable must always be in |
The clear glass tray should always |
place when using the oven. |
be in place when microwaving. |
MICROWAVE PRESET SELECTIONS:
Ŷ Beverage |
Ŷ Melt |
Ŷ Cook |
Ŷ Defrost |
Ŷ Reheat |
|||
± :DWHU R] |
|
± %XWWHU |
± %\ )RRG 7\SH |
± OE 4XLFN |
|
± %HYHUDJH |
|
± &RIIHH |
|
± &DUDPHO |
± %\ 7LPH |
± %\ 7LPH |
|
± &DVVHUROH |
|
(8-12 oz.) |
|
± &KHHVH |
± %\ 7LPH |
± %\ :HLJKW |
|
± &KLFNHQ |
|
± 7HD R] |
± &KRFRODWH &KLSV |
Ŷ Soften |
± %\ )RRG 7\SH |
|
– Pasta |
||
± 0LON R] |
|
± 0DUVKPDOORZ |
|
± 0HOW |
|
– Pizza |
|
± +RW &RFRD |
|
|
± %XWWHU |
|
± 6RIWHQ |
|
± 3ODWH RI )RRG |
(8-12 oz.) |
Ŷ Simmer |
± &UHDP &KHHVH |
|
|
|
± 5LFH |
|
|
|
|
± )URVWLQJ R] |
|
|
|
± 6RXS |
Ŷ Popcorn |
|
|
± ,FH &UHDP |
|
|
|
± 6WHDNV &KRSV |
|
|
|
|
|
|
± 9HJHWDEOHV |
|
± 3RSFRUQ 6HQVRU |
|
|
|
|
|
||
|
|
|
|
|
|
|
|
How To Use Pre-Set Microwave Selections
1. Press the Microwave pad.
If no selection is made within 15 seconds, the display will revert back to the time of day.
7XUQ WKH VHOHFWRU GLDO WR ILQG WKH IRRG RU EHYHUDJH you want to cook, defrost, soften, melt, simmer or reheat. Press the selector dial to enter.
7XUQ WKH VHOHFWRU GLDO WR VHOHFW WKH W\SH DPRXQW
ZHLJKW DQG RU VL]H $V UHTXLUHG WKH RYHQ ZLOO SURPSW you.) Press the selector dial after each selection.
4.Press the selector dial or the Start/Pause pad to start cooking.
7R UHYLHZ RU HGLW VHWWLQJV GXULQJ FRRNLQJ SUHVV WKH selector dial.
If the door is opened during cooking, the oven will stop
DQG 3$86( ZLOO DSSHDU LQ WKH GLVSOD\ &ORVH WKH GRRU and press Start/Pause pad to resume cooking.
If you enter an undesired selection at any time, simply press the Back pad and reenter the desired selections.
Ŷ :KHQ WKH RYHQ LV RQ OLJKW PD\ EH YLVLEOH DURXQG WKH door or outer case.
Ŷ 7KH RYHQ FDYLW\ OLJKW ZLOO FRPH RQ GXULQJ D microwave cooking cycle.
Ŷ 6WHDP RU YDSRU PD\ HVFDSH IURP DURXQG WKH GRRU
&RRN %\ 7LPH $QG &RRN %\ 7LPH
8VH &RRN %\ 7LPH DQG &RRN %\ 7LPH WR microwave food that is not in the recipe section and at the time(s) you set.
Ŷ 7KH SRZHU OHYHO LV DXWRPDWLFDOO\ VHW DW KLJK EXW \RX can change it for more flexibility.
1. Press the Microwave pad.
7XUQ WKH VHOHFWRU GLDO WR VHOHFW &RRN %\ 7LPH RU
&RRN %\ 7LPH DQG SUHVV WKH VHOHFWRU GLDO WR enter.
7XUQ WKH VHOHFWRU GLDO WR VHW WKH FRRN WLPH DQG SUHVV the selector dial to enter.
6HOHFW SRZHU OHYHO VHWWLQJ
,I \RX VHOHFWHG &RRN %\ 7LPH WXUQ WKH VHOHFWRU dial to set the second cook time, second power level setting and press the selector dial to enter.
5.Press the selector dial or the Start/Pause pad to start cooking.
<RX PD\ RSHQ WKH GRRU GXULQJ &RRN %\ 7LPH DQG &RRN
%\ 7LPH WR FKHFN WKH IRRG &ORVH WKH GRRU DQG press Start/Pause to resume cooking.
Microwaving OVEN: UPPER
49-80737-1 |
13 |

UPPER OVEN: Microwaving
Microwaving (Cont.)
Microwave Power Level(s)
Ŷ <RX FDQ FKDQJH WKH SRZHU OHYHO GXULQJ PRVW FRRNLQJ program.
1. Press the selector dial to edit
5RWDWH VHOHFWRU GLDO WR FKDQJH WLPH DQG RU SUHVV selector dial to enter.
7XUQ WKH VHOHFWRU GLDO FORFNZLVH WR LQFUHDVH DQG counterclockwise to decrease the power level. Press the selector dial to enter.
+HUH DUH VRPH H[DPSOHV RI XVHV IRU YDULRXV SRZHU OHYHOV
High 10 )LVK EDFRQ YHJHWDEOHV ERLOLQJ OLTXLGV
Med-High 7: *HQWOH FRRNLQJ RI PHDW DQG SRXOWU\ EDNLQJ casseroles and reheating.
Medium 5: 6ORZ FRRNLQJ DQG WHQGHUL]LQJ IRU VWHZV DQG less tender cuts of meat.
Low 2 or 3: 'HIURVWLQJ VLPPHULQJ GHOLFDWH VDXFHV
Warm 1: .HHSLQJ IRRG ZDUP VRIWHQLQJ EXWWHU
Defrost By Food Type
$XWR 'HIURVW DXWRPDWLFDOO\ VHWV WKH GHIURVWLQJ WLPHV DQG power levels to give even defrosting results for meats, poultry and fish weighing up to 6 pounds.
5HPRYH IRRG IURP WKH SDFNDJH DQG SODFH LW RQ D microwave-safe dish.
2. Press the Microwave pad and select defrost.
7XUQ WKH VHOHFWRU GLDO WR 'HIURVW %\ )RRG 7\SH
Press the selector dial to enter.
7XUQ WKH VHOHFWRU GLDO WR VHOHFW IRRG W\SH 3UHVV WKH selector dial to enter.
7XUQ WKH VHOHFWRU GLDO WR WKH IRRG ZHLJKW XVLQJ WKH
&RQYHUVLRQ *XLGH DW WKH ULJKW )RU H[DPSOH GLDO for 1.2 pounds (1 pound, 3 oz.) Press the selector dial to enter.
6.Press the selector dial or Start/Pause pad to start defrosting.
7XUQ WKH IRRG RYHU ZKHQ WKH RYHQ VLJQDOV 7XUQ )RRG 2YHU
Ŷ 5HPRYH GHIURVWHG PHDW RU VKLHOG ZDUP DUHDV ZLWK small pieces of foil for even defrosting.
Ŷ $IWHU GHIURVWLQJ PRVW PHDWV QHHG WR VWDQG PLQXWHV
WR FRPSOHWH GHIURVWLQJ /DUJH URDVWV VKRXOG VWDQG IRU about 30 minutes.
Conversion Guide
If the weight of food is stated in pounds and ounces, the ounces must be converted to tenths (.1) of a pound.
Weight of Food |
Enter Food Weight |
in Ounces |
(tenths of a pound) |
1–2 |
.1 |
3 |
.2 |
4–5 |
.3 |
6–7 |
.4 |
8 |
.5 |
9–10 |
.6 |
11 |
.7 |
12–13 |
.8 |
14–15 |
.9 |
Defrost By Time
8VH 'HIURVW %\ 7LPH WR GHIURVW IRU D VHOHFWHG OHQJWK RI time.
1. Press the Microwave pad and select defrost.
7XUQ WKH VHOHFWRU GLDO WR 'HIURVW %\ 7LPH 3UHVV WKH selector dial to enter.
7XUQ WKH VHOHFWRU GLDO WR VHOHFW WKH WLPH \RX ZDQW
Press the selector dial to enter.
4.Press the selector dial or Start/Pause pad to start defrosting.
7XUQ WKH IRRG RYHU ZKHQ WKH RYHQ VLJQDOV 7XUQ )RRG 2YHU
Power level is automatically set at 3, but can be
FKDQJHG 7R FKDQJH WKH SRZHU OHYHOV VHH WKH
0LFURZDYH 3RZHU /HYHO V VHFWLRQ <RX FDQ GHIURVW small items quickly by raising the power level after entering the time. Power level 7 cuts the total defrosting time in about half; power level 10 cuts the total time to
DERXW :KHQ GHIURVWLQJ DW KLJK SRZHU OHYHOV IRRG will need more frequent attention than usual.
14 |
49-80737-1 |

Microwaving (Cont.)
Defrost By Weight
8VH 'HIURVW %\ :HLJKW WR GHIURVW IRU D VHOHFWHG OHQJWK RI |
3UHVV WKH VHOHFWRU GLDO RU 6WDUW 3DXVH SDG WR VWDUW |
|
time. |
defrosting. |
|
1. |
Press the Microwave pad and select defrost. |
7XUQ WKH IRRG RYHU ZKHQ WKH RYHQ VLJQDOV 7XUQ )RRG |
|
7XUQ WKH VHOHFWRU GLDO WR 'HIURVW %\ :HLJKW 3UHVV WKH |
2YHU |
|
selector dial to enter. |
Power level cannot be changed during this setting. |
|
7XUQ WKH VHOHFWRU GLDO WR VHOHFW WKH ZHLJKW \RX ZDQW |
|
|
Press the selector dial to enter. |
|
OE 4XLFN 'HIURVW
8VH OE 4XLFN 'HIURVW IRU TXLFN GHIURVW RI OE RI |
7XUQ WKH IRRG RYHU ZKHQ WKH RYHQ VLJQDOV 7XUQ )RRG |
|
frozen food. |
2YHU |
|
1. |
Press the Microwave SDG DQG VHOHFW /E TXLFN |
Power level cannot be changed during this setting. |
|
defrost. |
|
2. |
Press selector dial or Start/Pause pad to start |
|
|
defrosting. Press the selector dial to enter. |
|
Defrosting Tips
Ŷ )RRGV IUR]HQ LQ SDSHU RU SODVWLF FDQ EH WLPH defrosted in the package, but foods should be taken
RXW RI WKH SDFNDJH ZKHQ XVLQJ 'HIURVW %\ )RRG
7\SH &ORVHG SDFNDJHV VKRXOG EH VOLW SLHUFHG RU vented after food has partially defrosted. Plastic storage containers should be partially uncovered.
Ŷ )DPLO\ VL]H SUHSDFNDJHG IUR]HQ GLQQHUV FDQ EH defrosted and microwaved. If the food is in a foil container, transfer it to a microwave-safe dish.
Ŷ )RRGV WKDW VSRLO HDVLO\ VKRXOG QRW EH DOORZHG WR sit out for more than one hour after defrosting.
5RRP WHPSHUDWXUH SURPRWHV WKH JURZWK RI KDUPIXO bacteria.
Ŷ )RU PRUH HYHQ GHIURVWLQJ RI ODUJHU IRRGV VXFK DV
URDVWV XVH 'HIURVW %\ 7LPH %H VXUH ODUJH PHDWV are completely defrosted before cooking.
Ŷ :KHQ GHIURVWHG IRRG VKRXOG EH FRRO EXW VRIWHQHG LQ all areas. If still slightly icy, return to the microwave very briefly, or let it stand a few minutes.
Microwaving OVEN: UPPER
49-80737-1 |
15 |

UPPER OVEN: Microwaving
Microwaving (Cont.)
Microwave Sensor Cooking
7KH VHQVRU IHDWXUH GHWHFWV WKH LQFUHDVLQJ KXPLGLW\
UHOHDVHG GXULQJ FRRNLQJ 7KH RYHQ DXWRPDWLFDOO\ DGMXVWV the cooking time to various types and amounts of food.
'R QRW XVH WKH 6HQVRU )HDWXUHV WZLFH LQ VXFFHVVLRQ on the same food portion— it may result in severely overcooked or burnt food. If food is undercooked after
WKH ILUVW FRXQWGRZQ XVH &RRN %\ 7LPH IRU DGGLWLRQDO cooking time.
The proper containers and covers are essential for best sensor cooking.
Ŷ $OZD\V XVH PLFURZDYH VDIH FRQWDLQHUV DQG FRYHU
WKHP ZLWK OLGV RU YHQWHG SODVWLF ZUDS 1HYHU XVH WLJKW sealing plastic containers—they can prevent steam from escaping and cause food to overcook.
Ŷ %H VXUH WKH RXWVLGH RI WKH FRRNLQJ FRQWDLQHUV DQG the inside of the oven are dry before placing food in
WKH RYHQ %HDGV RI PRLVWXUH WXUQLQJ LQWR VWHDP FDQ mislead the sensor.
Ŷ %HYHUDJHV DUH EHVW KHDWHG XQFRYHUHG
Covered
Vented
Dry off dishes so they don’t mislead the sensor.
MICROWAVE SENSOR PROGRAMS:
Ŷ *URXQG 0HDW |
Ŷ 9HJHWDEOHV |
Ŷ 3ODWH RI )RRG 5HKHDW |
Ŷ 3RSFRUQ |
(Canned, Fresh, Frozen) |
Ŷ 6RXS 5HKHDW |
Ŷ 6RXS |
Ŷ &KLFNHQ 5HKHDW |
Ŷ 9HJHWDEOH 5HKHDW |
Ŷ 5LFH |
Ŷ 3DVWD 5HKHDW |
|
To Use All Sensor Programs
8SSHU 2YHQ PLFURZDYH PRGH IHDWXUHV VHQVRU FRRNLQJ ,W automatically senses when food is done and shuts itself off—eliminating the need to program cook times and power levels.
1.Press the Microwave pad and turn the selector dial
WR &RRN %\ )RRG 7\SH RU 5HKHDW 3UHVV WKH VHOHFWRU dial to enter.
7XUQ WKH VHOHFWRU GLDO WR VHOHFW WKH IRRG \RX ZDQW
Press the selector dial to enter.
3.Press the selector dial or press the Start/Pause pad to start cooking.
'R QRW RSHQ WKH RYHQ GRRU XQWLO WLPH LV FRXQWLQJ GRZQ in the display or the microwave stop cooking. If the door is opened, close it and press Start/Pause immediately.
,I WKH IRRG LV QRW GRQH HQRXJK XVH &RRN %\ 7LPH LQ WKH microwave selector to cook for more time.
NOTE: 'R QRW XVH WKH 6HQVRU )HDWXUHV WZLFH LQ succession on the same food portion—it may result in severely overcooked or burnt food.
Ŷ ,I \RX KDYH EHHQ VSHHGFRRNLQJ DQG WKH RYHQ LV already hot, it may indicate that it is too hot for
VHQVRU FRRNLQJ 2I FRXUVH \RX FDQ DOZD\V FRQWLQXH ZLWK &RRN %\ 7LPH
NOTE: If the oven is too hot then it will automatically change to time cooking.
Ŷ 7R VKRUWHQ RU OHQJWKHQ WKH FRRN WLPH ZDLW XQWLO WKH
WLPH FRXQWGRZQ VKRZV LQ WKH GLVSOD\ 7KHQ WXUQ WKH selector dial to add or subtract time.
Ŷ ,I \RX RSHQ WKH GRRU ZKLOH 6HQVRU &RRNLQJ 6HQVRU (UURU ZLOO DSSHDU &ORVH WKH GRRU SUHVV Start/Pause to begin again.
Notes about the Reheat program:
5HKHDWHG IRRGV PD\ KDYH ZLGH YDULDWLRQV LQ WHPSHUDWXUH 6RPH DUHDV PD\ EH H[WUHPHO\ KRW
,W LV EHVW WR XVH &RRN %\ 7LPH DQG QRW 5HKHDW IRU WKHVH foods:
Ŷ %UHDG SURGXFWV
Ŷ )RRG WKDW PXVW EH UHKHDWHG XQFRYHUHG Ŷ )RRGV WKDW QHHG WR EH VWLUUHG RU WXUQHG
Ŷ )RRGV FDOOLQJ IRU D GU\ ORRN RU FULVS VXUIDFH DIWHU reheating.
16 |
49-80737-1 |

Cooking Modes
<RXU QHZ RYHQ KDV D YDULHW\ RI FRRNLQJ PRGHV WR KHOS \RX JHW WKH EHVW UHVXOWV 7KHVH PRGHV DUH GHVFULEHG EHORZ 5HIHU
WR WKH &RRNLQJ *XLGH VHFWLRQ IRU UHFRPPHQGDWLRQV IRU VSHFLILF IRRGV 5HPHPEHU \RXU QHZ RYHQ PD\ SHUIRUP GLIIHUHQWO\ than the oven it is replacing.
Baking and Roasting Modes
6HOHFW D PRGH IRU EDNLQJ DQG URDVWLQJ EDVHG RQ WKH W\SH
DQG TXDQWLW\ RI IRRG \RX DUH SUHSDULQJ :KHQ SUHSDULQJ baked goods such as cakes, cookies, and pastries always
SUHKHDW WKH RYHQ ILUVW )ROORZ UHFLSH UHFRPPHQGDWLRQV IRU food placement. If no guidelines are provided, center food in the oven.
Traditional Bake
7KH WUDGLWLRQDO EDNH PRGH LV LQWHQGHG IRU VLQJOH UDFN FRRNLQJ 7KLV PRGH XVHV KHDW SULPDULO\ IURP WKH ORZHU HOHPHQW EXW
DOVR IURP WKH XSSHU HOHPHQW WR FRRN IRRG 7R XVH WKLV PRGH press the Bake pad, turn the selector dial to set the oven temperature and press to enter, then press Start. Preheating is generally recommended when using this mode.
Broiling Modes
$OZD\V EURLO ZLWK WKH GRRU FORVHG 7KH EURLO HOHPHQW LQ WKLV RYHQ LV YHU\ SRZHUIXO 0RQLWRU IRRG FORVHO\ ZKLOH EURLOLQJ
8VH FDXWLRQ ZKHQ EURLOLQJ RQ XSSHU UDFN SRVLWLRQV DV placing food closer to the broil element increases smoking, spattering, and the possibility of fats igniting. Broiling on rack position 6 is not recommended.
7U\ EURLOLQJ IRRGV WKDW \RX ZRXOG QRUPDOO\ JULOO $GMXVW UDFN positions to adjust the intensity of the heat to the food. Place foods closer to the broil element when a seared surface
DQG UDUH LQWHULRU LV GHVLUHG 7KLFNHU IRRGV DQG IRRGV WKDW need to be cooked through should be broiled on a rack
SRVLWLRQ IDUWKHU IURP WKH EURLOHU RU E\ XVLQJ %URLO /R. )RU EHVW performance center food below the broil heating element.
Broil Lo
7KH 7UDGLWLRQDO %URLO /R PRGH XVHV OHVV LQWHQVH KHDW IURP the upper element to cook food thoroughly while also
SURGXFLQJ VXUIDFH EURZQLQJ 8VH %URLO /R IRU WKLFNHU FXWV RI meat and/or foods that you would like cooked all the way
WKURXJK 7R XVH WKLV PRGH SUHVV WKH Broil pad, turn the VHOHFWRU GLDO WR /R DQG SUHVV WR HQWHU DQG WKHQ SUHVV Start. It is not necessary to preheat when using this mode.
Proof
Proof mode is designed for rising (fermenting and proofing) bread dough. Press the Options pad, turn the selector dial to select Proof and press to select, then press Start.
&RYHU GRXJK ZHOO WR SUHYHQW GU\LQJ RXW %UHDG ZLOO ULVH PRUH
UDSLGO\ WKDQ DW URRP WHPSHUDWXUH 1RWH WKDW IRU GRXEOH ZDOO ovens, proof cannot be run when running a clean mode in the lower oven.
Warm
:DUP PRGH LV GHVLJQHG WR NHHS KRW IRRGV KRW IRU XS WR KRXUV 7R XVH WKLV PRGH SUHVV WKH Options pad, turn the
VHOHFWRU GLDO WR VHOHFW :DUP DQG SUHVV WR VHOHFW RU SUHVV the Warm pad, then press Start &RYHU IRRGV WKDW QHHG WR remain moist and do not cover foods that should be crisp.
3UHKHDWLQJ LV QRW UHTXLUHG 'R QRW XVH ZDUP WR KHDW FROG food other than crisping crackers, chips or dry cereal. It is also recommended that food not be kept warm for more than 2 hours.
Broil Hi
7KH 7UDGLWLRQDO %URLO +L PRGH XVHV LQWHQVH KHDW IURP WKH
XSSHU HOHPHQW WR VHDU IRRGV 8VH %URLO +L IRU WKLQQHU FXWV of meat and/ or foods you prefer less done on the interior.
7R XVH WKLV PRGH SUHVV WKH Broil pad, turn the selector GLDO WR +L DQG SUHVV WR HQWHU DQG WKHQ SUHVV Start. It is not necessary to preheat when using this mode.
Modes Cooking OVEN: LOWER
49-80737-1 |
17 |
 Loading...