

Page 1

TABLE OF CONTENTS
INTRODUCTION
ON THE RIGHT PATH
.................................1
..........................1
The Main Menu .............................2
The Game - The Commands..........5
The Map.........................................6
The Castle......................................7
Constructing Buildings...................8
Constructing Roads........................9
The First Serfs...............................11
Demolition...................................11
Saving and Ending the Game.......12
THE TRAINING GAMES
.....................13
♦ Training Game 1 – Land..................13
Building a Guard Hut, Guard Tower,
and Garrison
The Overhead Map
..................................13
.........................14
♦ Training Game 2 – Creating
Construction Materials.....................16
Building a Forest Ranger’s Hut,
Lumberjack’s Hut, Sawmill, and
Quarryman’s Hut
............................16
♦ Training Game 3 – Making Food
and Transporting It...........................18
The Fisherman, Farmer, Miller,
Baker, Pig Farmer, and Butcher
Transporting Food and
Constructing Roads
.........................19
.........18
♦ Training Game 4 – Mining and
Using Gold, Iron, and Coal..............21
Mines and Foundries
.......................21
♦ Training Game 5 – Making Tools
and Weapons...................................24
The Ship Maker, Blacksmith,
and Tool Maker
The Warehouse
..............................24
..............................25
♦ Training Game 6 – Attack and
Conquer Enemy Buildings................27
Knights
..........................................27
Frontier Strategy
THE ECONOMY
..............................28
.................................29
The Economic System .........................29
Your First Serfdom – Mission One.......30
About Statistics....................................31
The Warehouses..................................35
Statistics On Buildings and Flags.........36
The Distribution Menus.......................38
RULES OF COMBAT
...........................39
The Knight Menus ...............................39
The Other Menus ................................42
Messages and Preferences...................43
Replaying a World...............................46
Demo and Team Mode .......................47
The Options.........................................47
Special Functions for the Map.............48
HINTS
.................................................49
The Most Important
Rule – Be Observant............................49
Hints and Tips on Professions..............51
The Behavior of Your Opponents........53
Need Help? .........................................54
The End of the Game...........................54
REFERENCE MATERIAL
.......................55
Jobs .....................................................55
Resources and Tools............................56
Buildings .............................................57
Page 2
On the Right PathIntroduction
INTRODUCTION
Congratulations and welcome to S
C
ITY
: L
IFE ISFEUDAL
! You’ve purchased
a unique computer gaming experience that tests you mentally and
provides you with hours of entertainment and enjoyment.
Our serfs do as you command; history
never saw serfs that worked so efficiently and happily. Our serfs have
occupations; they can be bakers, farmers, knights or any of a number of
different working types.
In S
ERFCITY
you
are the omnipotent
leader of a group of serfs. You lead
your serfs in the creation of a village,
and if you prove to be wise enough,
that village will grow into a great city
(we like to think of them as
serfdoms
Command your serfs to construct
buildings, grow food, attack enemies,
collect minerals, or whatever else you
think is necessary.
The road to success isn’t easy. You
have to allocate your resources efficiently and fend off enemy attacks or
you will see your serfdom go up in
flames. Miners must be fed, knights
must be paid, workers need tools, factories need coal, and buildings need
wood and stone. . . .
Enjoy the challenge that awaits you in
S
ERFCITY
: L
IFE ISFEUDAL
!
ERF
).
ON THE RIGHT PATH
In S
ERFCITY
serfs and try to expand your serdom.
You decide where you want your serfs
to construct buildings, how the roads
are made, where to search for raw
materials, and which enemies to attack.
You can modify numerous parameters
that affect the behavior of your serfs.
The computer handles the execution of
your decisions, sending the commands
to your numerous serfs. The serfs build
houses, cut down trees, work in the
mines, construct weapons and tools,
and dispatch construction materials in
the places where they are needed. They
defend their castles against enemy
knight attacks, provide the miners with
food, and do many other things!
The goal of the game is to build a prosperous, well-organized city and gain
control of the enemy cities. This sounds
simple to do, but in reality it is complex. If you consider all the game’s
challenges inversely, that is from the
end of the game first, you may better
understand the game.
you rule over a group of
In order to conquer the enemy castles,
you need many knights. To keep their
morale up you need gold, and for the
weapons you need iron and coal. Iron
and coal are found in mines. Miners
must be fed and ore must be refined
and smelted in a foundry.
The food supply is provided by the fishermen, farmers, and pig farmers who,
like most other workers, need tools.
These tools are made by blacksmiths. To
build huts, houses, and mines you need
construction materials and workers.
You won’t have to remember all this
for the moment. Everything will be
explained along the way. We recommend that you play the training games
and follow along in this manual as you
go. Enjoy playing S
ERFCITY
!
The Main Menu
Before beginning play, all the preliminary parameters appear on the main
menu. A maximum of four groups of
serfs can participate in the game. A
group of serfs is controlled by: the
player, the computer, or two players
working as a team.
To choose a game mode, left-click on
the second icon from the left. The
icon’s graphic and the text indicates
the game mode chosen from the following options:
Mission: Orders are fixed
for one or two players (in
a team) against computercontrolled opponents.
Training: Orders are fixed for
one or two players in a team.
One player: One or two
players compete
as a team
against computer opponents
that may be modified before
the beginning of the game.
T wo players:Two players compete against each other
and
against computer opponents
that may be modified before
the beginning of the game.
Demo mode: You are only an
observer here. You watch the
computer create serfdoms.
In the lower half of the screen, you see
the participants of the game. The leftmost character is yours. The remaining
images represent your opponents.
The different computer-controlled opponents have their own personalities, and
can be aggressive or reserved, ready to
take risks, or preoccupied with their
own safety. You may find additional
personality quirks as you play.
1
2
Page 3
On the Right Path
On the Right Path
On the right side of each image, you
see three colored bars.
The
blue bar
supplies
indicates the state of the
of a serfdom (city) at the beginning of the game. A large stock allows
for rapid expansion and provides certain advantages. A short supply creates
problems when the city begins to
expand. If you are a novice, make sure
that the blue bar is always above the
50% level.
The
green bar
indicates the
intelligence
level of the computer-controlled players. This level affects how rapidly
computer-controlled players act and
react. (For human players, the green bar
is always at its maximum.)
The
red bar
represents the
growth rate.
The higher it is, the faster your serfdoms
produce, and the faster you can expand.
Novices should try to keep this bar
above the 50% level.
According to the game mode chosen,
you can modify certain other parameters. To start off, we recommend that
you try Training Game 1.
If you choose to play a Mission, in the
middle of the screen you see the current level (beginning 1), the password
(at the beginning the password is
START), and two arrows.
When you successfully complete a mission, the program displays the password
that allows you to restart the game at the
same level. Left-click on the password
and enter the new password. Remember
to press the Return key to confirm. If the
password is incorrect, the message
FALSE appears on the screen. If the
password is correct, you see the level.
Your aim in S
ERFCITY
is always to
“grow” faster and more efficiently than
your rivals. During the missions you
encounter progressively harder opponents. Depending on the stage you’ve
reached, your enemies become smarter,
your beginning supplies may be lower,
and the landscape becomes rougher.
It is a mighty feat to complete every mission, but once you do, you can consider
yourself the Ultimate Serf City Ruler.
The arrows displayed to the right of
the password return you to the levels
already completed. You can activate
the team mode by left-clicking with
the mouse in the left frame.
We recommend that you do not try the
mission orders right away , but rather try
the training games and read along in
this manual first. In training games
there are no passwords. You can select
each available training game by using
the arrows.
In one player, two player, and demo
mode you can modify numerous parameters. The size of the world is displayed
in the center. To modify it, leftclick on the small or the large
planet. (Novices should probably not play worlds with a size greater
than 3, due to the complexity of events.
Try larger worlds as you get better at
playing the game.) You can modify all
data concerning a group of serfs:
❖ the blue bar for the stocks
❖ the green bar for the
intelligence (with computercontrolled opponents)
❖ the red bar for the growth rate
❖ the button to activate or
deactivate the computercontrolled opponents
❖ the image of the computer-
controlled adversary, to
choose another adversary
The initial data is chosen randomly. If
you are a novice, we recommend that
you change the parameters to your
advantage, especially where the supply levels are concerned, because a
large supply of materials and workers
is very important.
The combination of numbers displayed
to the right is a randomly chosen number for the creation of a world. This
combination decides the location of
mountains, lakes, deserts, forests, etc. in
this world. The same combination of
numbers always produces the same
world. To change worlds, left-click on
the icon with the question mark for
another combination of numbers.
To start the game, left-click on the
START icon. The screen fades to black
as the computer creates a world for you.
To reload a previously saved game,
select the LOAD option. A window
appears with a list of files saved on the
hard disk. Left-click on the name of the
saved game and then on LOAD to
load the game, or on EXIT to cancel.
3
4
Page 4
On the Right Path
On the Right Path
The Game - The Commands
You can play alone or with/against
another player. All functions remain
identical. The only differences are that in
two-player mode the screen is divided in
two, the image of the world is smaller,
and the icons are closer together .
After starting the game, you see part of
the world on the screen: perhaps some
grass with some trees or a lake. To simplify future explanations, this part of the
world is called the “screen.” At the bottom of the screen are five different
round icons that have different functions. They are called the “Menu.”
As we have already mentioned, you
only see a part of a world on the screen.
According to the size of the screen, the
world can range from 10 to 1200 times
this size for larger worlds. To move
around in a world, press the right
mouse button and drag it in the desired
direction. When you arrive at the
desired destination, release the mouse
button. Look at the scenery for a
moment. You see deserts, lakes, forests,
mountains, and many other things.
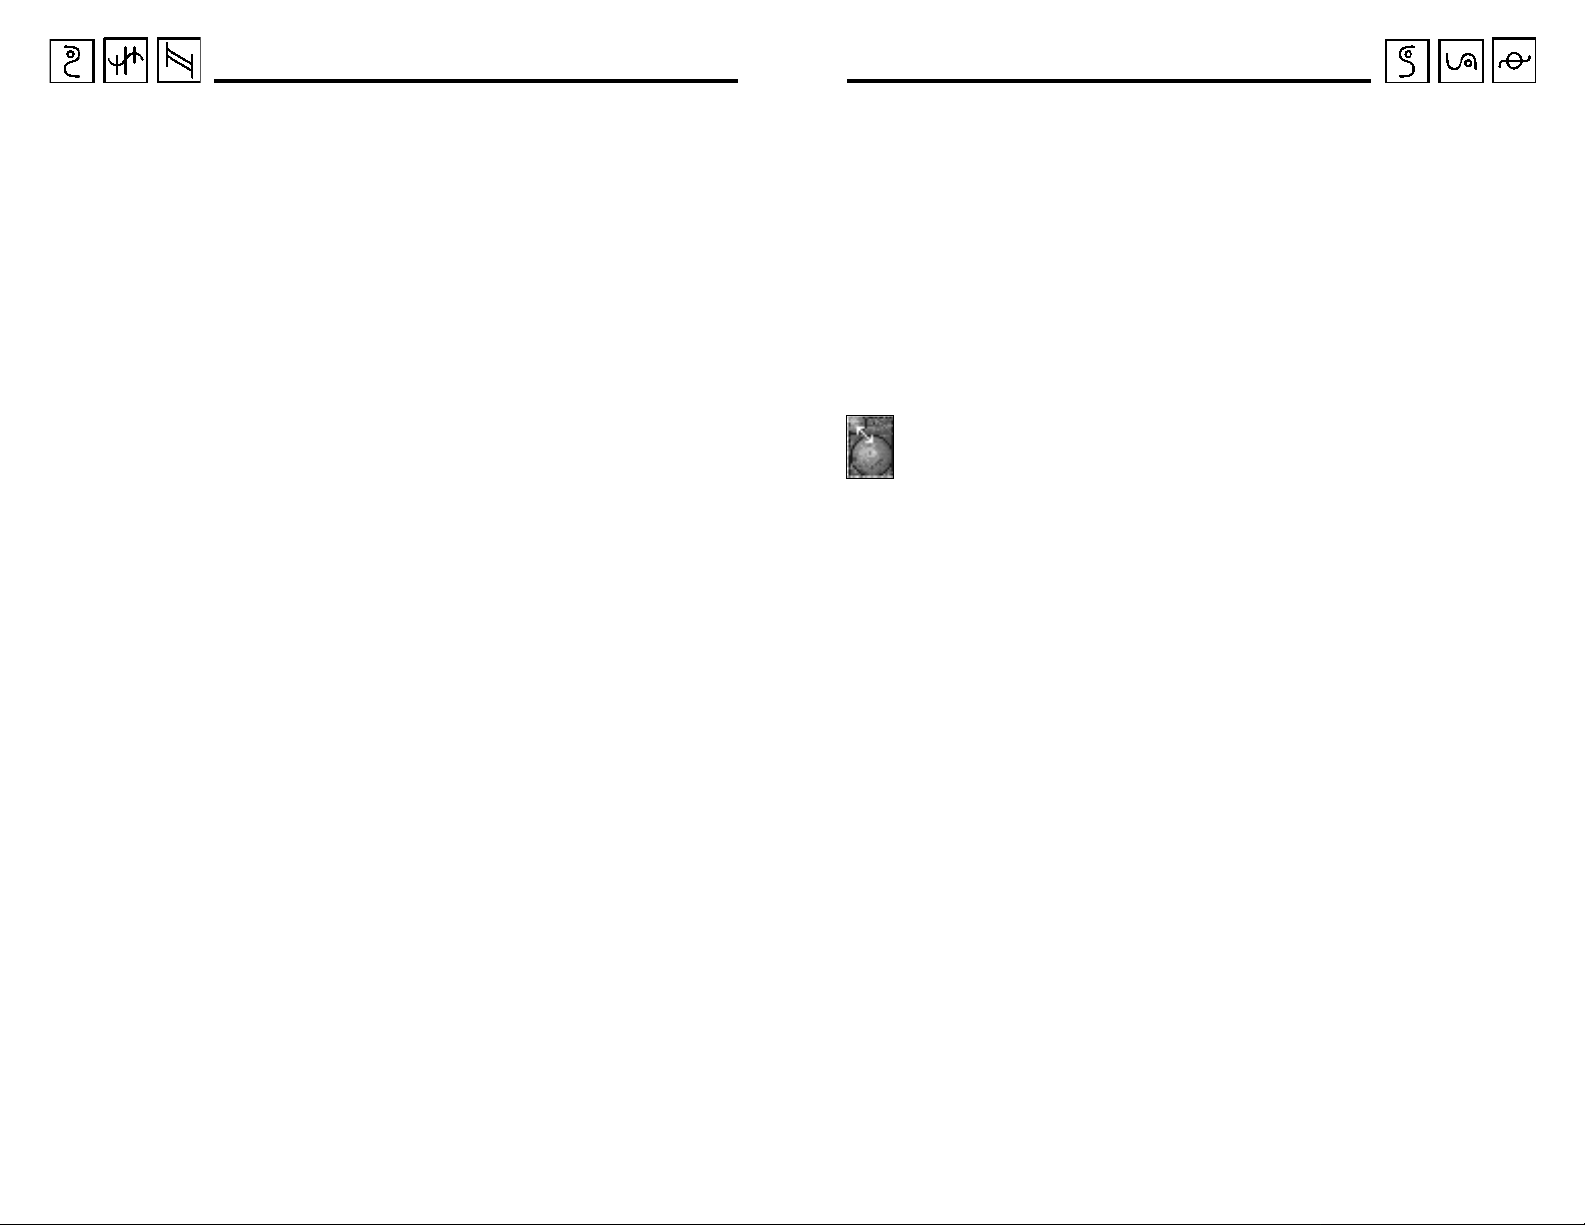
You might have noticed your pointer
in the middle of the image when you
started the game. It is made of a cen-
tral symbol and
six surrounding
points. You position this pointer
where you want to
activate one of the game options. If,
for example, you want to construct a
house or a road somewhere, you must
first place your pointer on this area. To
place the pointer on the desired area,
just left-click on the screen. The pointer’s central icon, which is also
displayed in the lower left of the
menu, will usually change. We discuss
this in the following paragraphs.
SPECIAL-CLICK: In this manual the
term “special-click” means hold down
the right mouse button and left-click.
Pressing P during the game pauses
play; no actions are available until you
press P again.
The Map
In the middle of the menu, you see a
“map” icon. Left-click on this icon with
the mouse. A new window appears
showing an overview map of the game
world. On this map, the grasslands are
indicated in green, the deserts in yellow,
the lakes in blue, and the mountains
(according to their height) in brown and
white. If you left-click somewhere on the
map, your screen moves to the corresponding area and the map disappears.
A world is “endless,” which is to say
that if you continue moving to the left
you eventually return to your point of
departure. The world, therefore, does
not have any “edges.” You will understand this better if you select the map
again and left-click on the icon located second from the right on the
overhead map screen. You see slanted
and horizontal lines that define the
size of the world.
For example, if you have selected size
3, you notice that the world is represented four times on the map, and
sixteen times for a size 1 world. The
different sections are connected to
each other and this is why the game’s
terrain has no limits. The size 5 world
fits perfectly in the map section. The
size 7 world is enormous. You will only
see a small piece of the entire world on
the overhead map at a time! With size 3
and larger worlds, you can move both
the map and the screen by pressing the
right mouse button and dragging in the
desired direction. Remember that this
movement is not possible for smaller
worlds (as they adapt themselves to the
section of the map).
The lower right corner of the overhead
map menu serves as a “zoom” feature.
Left-click here to either “zoom in” on
the map or “zoom out.” The other icons
displayed at the bottom of the map are
discussed further in “The Overhead
Map” on page 14.
5
6
Page 5
On the Right Path
On the Right Path
The Castle
You begin by constructing your castle,
which serves as your headquarters. The
area where you place this castle is of
utmost importance for the rest of the
game. If you are a novice and you have
a large amount of stocks, you will not
run into any immediate problems and
the location of the headquarters is not
terribly important. However, if you
have limited stocks, a poorly placed
castle can be fatal. To illustrate the most
important aspects, we have established
a list of conditions that are favorable to
the construction of your castle:
❖ Avoid narrow valleys in the
mountains. Look for relatively
flat areas.
❖ Choose an area with raw materi-
als that are close to the castle for
the construction of new houses
(trees and rock formations).
❖ Choose an area that has a large
amount of underground riches.
The first two points can easily be verified on the screen. If there are a few
trees and some granite and if the environment is not too inhospitable, these
conditions are fulfilled.
The underground riches are also very
important. These include gold, iron,
coal and granite. Except for granite,
which is often located above ground as
well as below , these materials are found
only in the mountains. To see the
underground riches in the zone displayed on the screen, ask the geologist
to give you an overall estimate of the
area’s riches. The second menu icon
from the left on the menu represents the
geologist. Left-click on this icon to
obtain information on what riches are
present in the current map zone.
All the values do not need to be at a
maximum, but if there is no coal, iron,
or gold, or only small quantities of the
three, look for another area. Left-click
on the Exit icon to back up a step.
The importance of the underground
riches also depends on your strategy.
Often with the size 1 worlds, it is possible that certain riches do not exist at all,
or that there are no mountains (and
therefore no riches). In this case, do not
desperately look for another area; just
forget about the riches. With the geologist, you only have an estimate of the
riches in the area, but you do not know
exactly in which mountains they are
found, or if you are going to find them
at all. Your serfs may have to find them
later in the game.
The castle is a large structure that must
be placed on a relatively flat and grassy
area. To do this, left-click anywhere on
the screen; the pointer will be placed on
this area. If a castle appears in the center
of the pointer , you made a good choice.
In the lower left of the menu you see the
“construct a castle” icon. If, after several
tries, you have not found an area to
construct your castle, use the “construction help” feature. Special-click on the
leftmost menu icon (it does not matter
what is displayed); the construction help
function becomes active. All areas
where a castle can be constructed are
indicated on the screen. Left-click on
one of these areas and the “Construct a
castle” icon appears in the lower left.
Left-click on this symbol and your castle
is constructed in a few seconds. A flag
with the player’s color now flies in front
of the castle.
The castle is the only building that is
“freely” given to you. All the other
houses are built by your serfs. At a certain distance from the castle, you see a
barrier of black and white poles, or of
red posts in the water. This visual barrier indicates the limits of your kingdom;
you may only build buildings within
your kingdom.
Constructing Buildings
You have taken the first step and your
castle has been constructed. Now your
serfs can build other houses. If you
place your pointer somewhere within
the limits around your castle, the central icon tells you the type of buildings
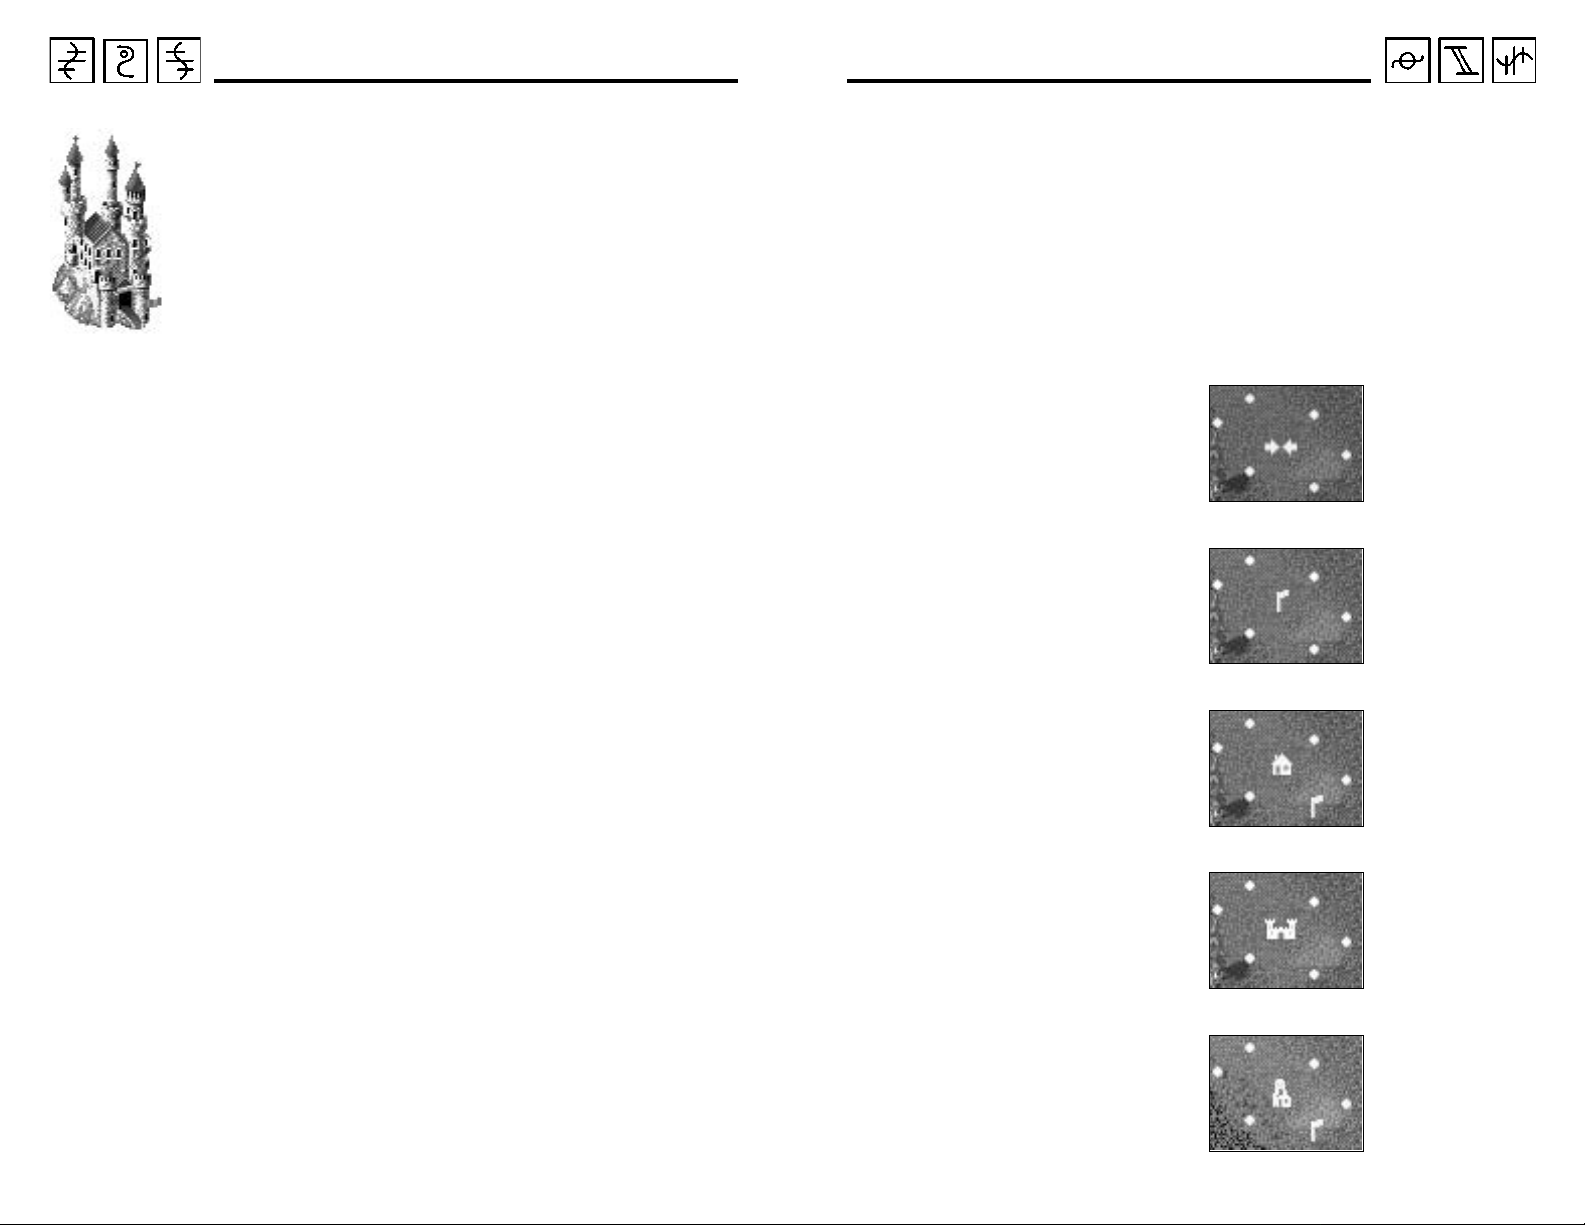
that you can construct (if any):
Two arrows:
You cannot
construct here.
Flag: You can only
place a flag here.
Hut: You can
construct any of
the different types
of huts (small
buildings).
Castle: You have
enough space for
all the buildings.
Mine: You can
build a mine (only
in the mountains).
7
8
Page 6

On the Right Path
On the Right Path
How do you decide which type of
building can be built and where it can
be placed?
First, all buildings must be built on your
land and there must not be any trees or
boulders obstructing the area. All houses, huts, and guard buildings must be
built on a green surface and mines built
in the mountains (but not in the snow).
The type of building that can be constructed depends on the slope of the
terrain. For large buildings, the ground
must be level; their construction is
impossible on steep slopes. If you are
looking for an area that is appropriate
for a large building, the “construction
help” option helps you avoid clicking
all around the screen to find a good
location. Special-click on the left menu
icon. You immediately see the areas
where you can construct a building on
the screen. Choose an area and specialclick again on the left menu icon to
deactivate the construction help.
The left menu icon changes to reflect
the type of item that can be constructed
in the selected map area. For the most
part, the icons represent the following
functions: “place a flag,” “construct a
hut,” or “construct a large building.”
When you left-click on these options,
the icon is highlighted along with a new
window with a choice of buildings. In
some cases, not all available buildings
can be displayed at once in the menu,
so you can scroll through them by click-
ing on the “change page” icon. Choose
one of them and left-click on it to give
the order to construct. The window disappears and you see the first stone of the
construction or a cross on the screen.
The first stone means that a house will
be built in this place. The cross means
the same except that the ground must
first be leveled to provide a solid foundation for the large building.
If you decide not to construct a building
on the chosen area, left-click on the
highlighted icon and quit the construction mode. Your new building must
connect with your current network
of roads before it receives supplies for
its construction.
Constructing Roads
The serfs need roads so that they can
access the different areas of the kingdom. These roads always run from one
flag to another. Your network of roads is
very important. A good network ensures
the rapid transfer of goods. The flags
serve as intersections. Six roads can
begin at each flag to lead to other flags.
There is a flag in front of each one of
your buildings, as well.
You must connect all your newly created construction sites to your main
castle via roadways. You see a flag in
front of the construction site, just like
the flag in front of your castle. Left-click
on one of the two flags. Select the construction icon in the lower left of the
menu. The pointer contains two new
symbols. You are now in “road construction” mode.
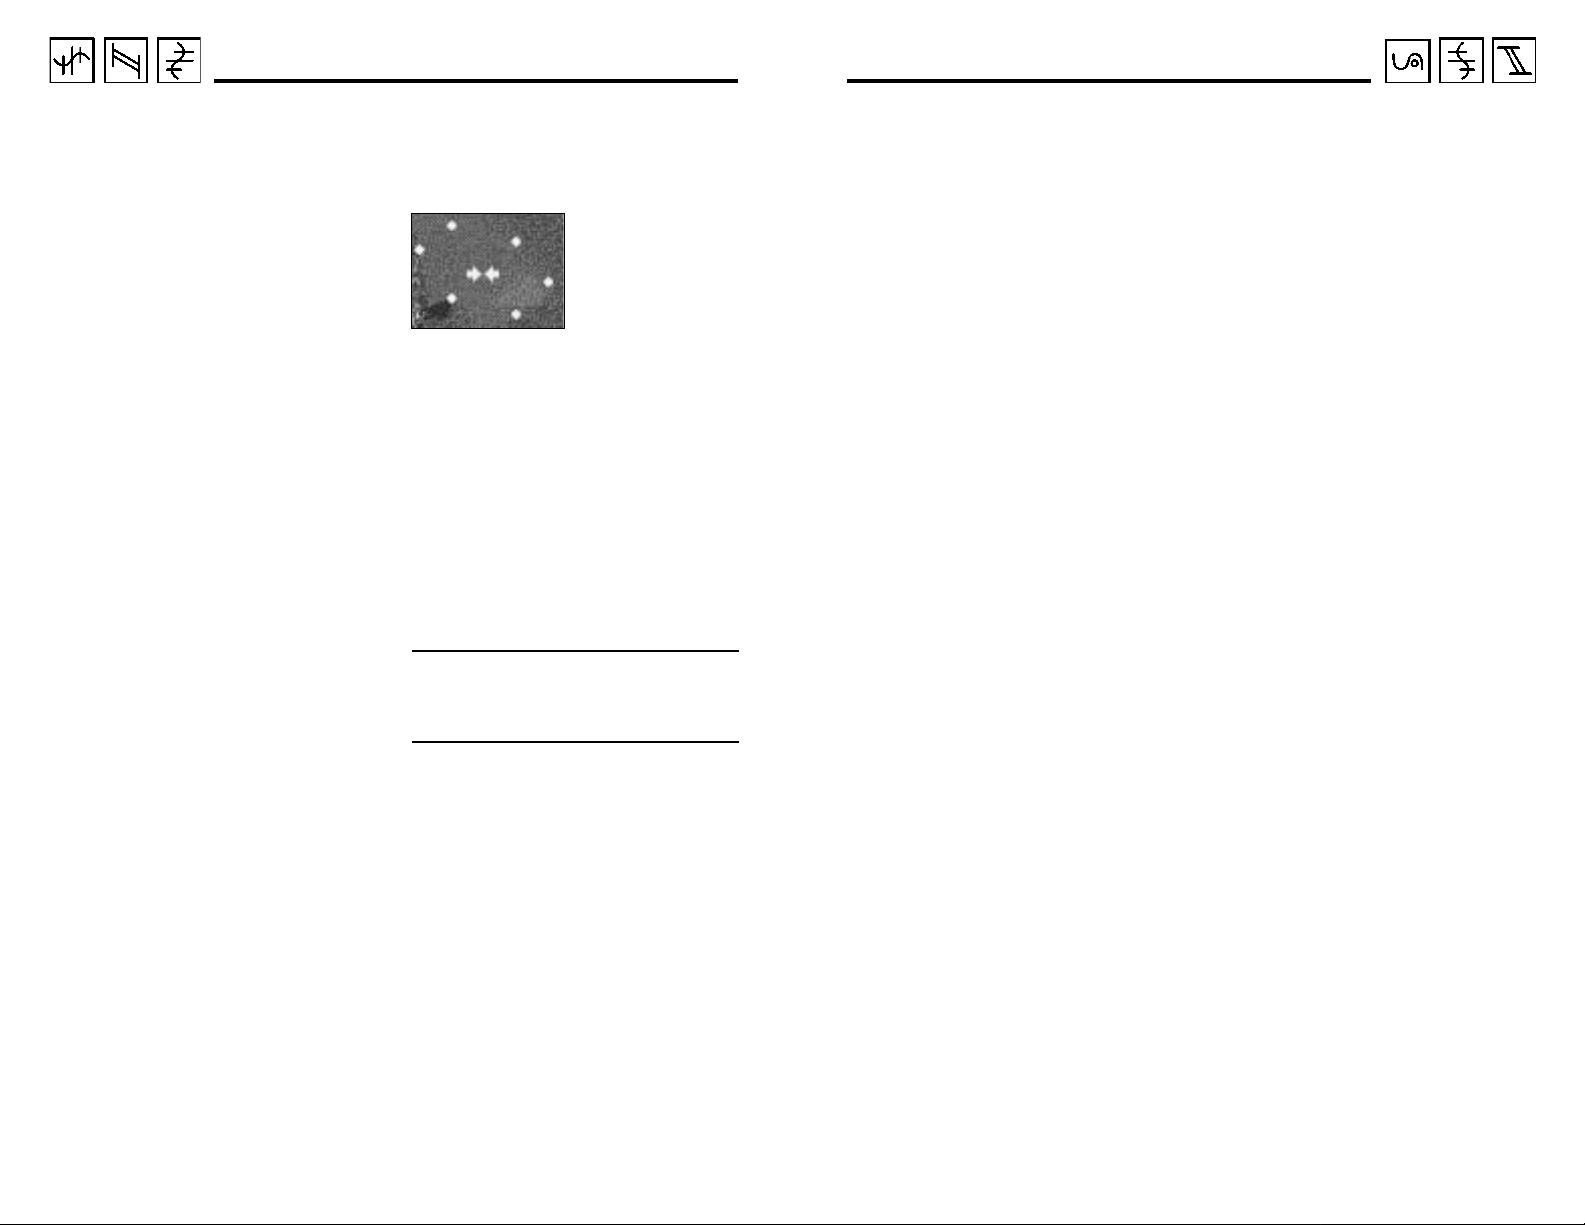
The different symbols around the pointer have the following significance:
❖ Zone hatched in red and yellow:
you cannot construct roads in
this direction.
❖ Different slope symbols that range
from red (very steep ascents and
descents) to yellow (moderately
steep ascents and descents) to
green (flat): you can construct
roads in this direction.
❖ UNDO symbol: if you left-click
on this icon, you destroy the last
part of the road made.
If you left-click on one of the slope
icons, a section of new road appears
and the pointer contains new symbols
for building the next section of road.
Repeat this operation until the road
meets the other flag. The star in the
lower left disappears and the pointer
takes its initial form. The road is constructed and you quit the construction
mode. The first serfs begin to leave
your castle.
The color of the slope icons indicates
the slope of the road. Red indicates a
steep slope, yellow a moderate slope,
and green means flat or almost no
slope. The flatter the terrain, the faster
the merchandise can be distributed.
This is because the serfs tire quickly on
steep slopes.
If you construct a road and then
decide that you no longer want it, leftclick on the highlighted icon. You quit
the “road construction” mode and the
road is erased.
If you want to branch off from an
already existing road, you must place a
flag on the road. Left-click on the
desired area. If it is possible to place a
flag there, a flag appears on the pointer .
If you can’t place a flag there, use the
“construction help” function. It may be
impossible to put a flag down on a road
because the road is too short or a tree is
in the way. If you can create a new
intersection, you see the “place flag”
icon in the menu. Left-click on this icon
to construct the new intersection.
You can also construct water ways. T wo
flags must be on the banks of a lake for
a water way to be built. Construct a
water way between the two flags in
the same way you construct a road.
Remember to connect this water way
with your network of roads. The water
way is used for transporting merchandise. Only transporter serfs with boats
can use waterways.
9
10
Page 7
On the Right Path
On the Right Path
The First Serfs
When the road leading to the first construction site is built, the first serfs begin
to leave your castle.
The first serf who leaves the castle is a
transporter. He takes 100 steps on the
new road and looks to see if there is
some merchandise that needs to be
transported. As soon as he sees some
merchandise on the road to transport,
he takes it to the next flag.
At the beginning of the game, you have
twenty serfs. Some of them already
have jobs, others are waiting for jobs.
If you want to build a large building, a
serf with an orange helmet and a shovel
(the leveler) arrives and walks toward
the construction site. Once there, he
levels the ground. When he has finished, the cross on the site becomes a
building foundation and the serf returns
to the castle. A construction worker then
goes to the site to finish the building.
If you want to build a small building, a
serf with a yellow helmet (construction
worker) arrives and looks for his work
area. He then waits for the construction
materials to arrive so he can begin
building the house.
Another serf distributes the construction
material from the castle to the construction site; this is always wood and
eventually may include stones (depending on what type of building is being
built). The construction worker immedi-
ately begins working and you soon see
scaffolding; eventually, the building
itself is finished. Small huts are built
very quickly; larger buildings take
much longer.
The construction worker returns to the
castle as soon as he finishes his job. A
new worker then arrives to start work in
the new building. The occupation of
the worker who moves in depends on
the type of house that you built for him.
The functions of each worker and of
each building are explained further on.
If you construct a water way , a serf with a
boat leaves the castle and walks toward
the new water way. This serf is able to
use the water way to move merchandise.
You do not have to wait for the construction of your house to be finished
before giving orders to construct other
things (houses, roads, etc.).
Your serfs go about their tasks automatically when adequately supplied with
resources. This is true not only for the
transporters and the construction workers, but also for all the other serfs that
you see later in the game.
Demolition
You may want to demolish a building,
road, or flag for a number of reasons. To
avoid demolishing something by inadvertently pressing a mouse button, a
special-click is required to use the
demolish function.
Demolishing buildings: Leftclick on the desired building.
The second menu icon from
the left transforms into a ruin. Specialclick on this ruin to set the building on
fire and burn it down. If a serf lives in
the building, he returns to the castle
and waits for a new job.
Demolishing roads: Left-click
anywhere on a road and the
“demolish road” icon appears
in the menu. Special-click on this icon
to remove the road. The transporters
that worked on this road return to the
castle and wait for new work. The other
serfs on this road run toward the next
flag and continue on their way.
Demolishing flags: You can demolish
a flag. Left-click on the flag that
you want to remove and a ruin
appears in the menu (if the flag’s
demolition is possible).
Urban renewal: If you want to construct a new building in the place of
another, select the old building and
then select the construction icon in
the menu. A new menu with a list of
buildings that can be built on the
construction site appears. Specialclick on the building you want and
the old building is burned down and
the new building is built.
Saving and
Ending the Game
In two-player mode, these
options can only be activated
by the player on the left. Leftclick on the right menu icon and new
options appear. For now, do not pay
attention to the upper icons, but only
to the SAVE option and END at the
bottom of the screen.
To quit the current game, left-click on
the END option. The program asks
you to confirm. If you have been playing for more than one minute or if you
have not saved the game after more
than one minute, the program asks you
to confirm a second time. You then
return to the main menu. To exit to
DOS, click on the small button at the
top left of the menu.
The SAVE option allows you to access
the saved game menu. The list of saved
games appears on the screen. To save
the current game, left-click on one of the
ten areas and then on the “New name”
option to enter a new name. If you want
to save a game with the same name as a
game already saved, you don’t have to
enter a new name. Be careful! The game
already saved is erased by the new
game. Left-click on the SAVE option to
save the current game.
11
12
Page 8
The Training Games
The Training Games
THE TRAINING GAMES
You now know the game’s basic principles and can begin with the first training
game. Each building is explained and the program tells you where you should be
careful. Each training game contains orders which are specified in the instructions.
You can play and follow the game’s progression on the screen.
In the training games, you are supplied with many tools, food, construction materials, and serfs.
When certain important events occur , you are informed by a sound and a small blinking icon that looks like a piece of paper; it appears in the bottom left of the menu. If
you left-click on the piece of paper , a message is displayed on the screen and the computer moves the screen to where the event is taking place. If you left-click on the
check mark in the window the message disappears.
Training Game 1 – Land
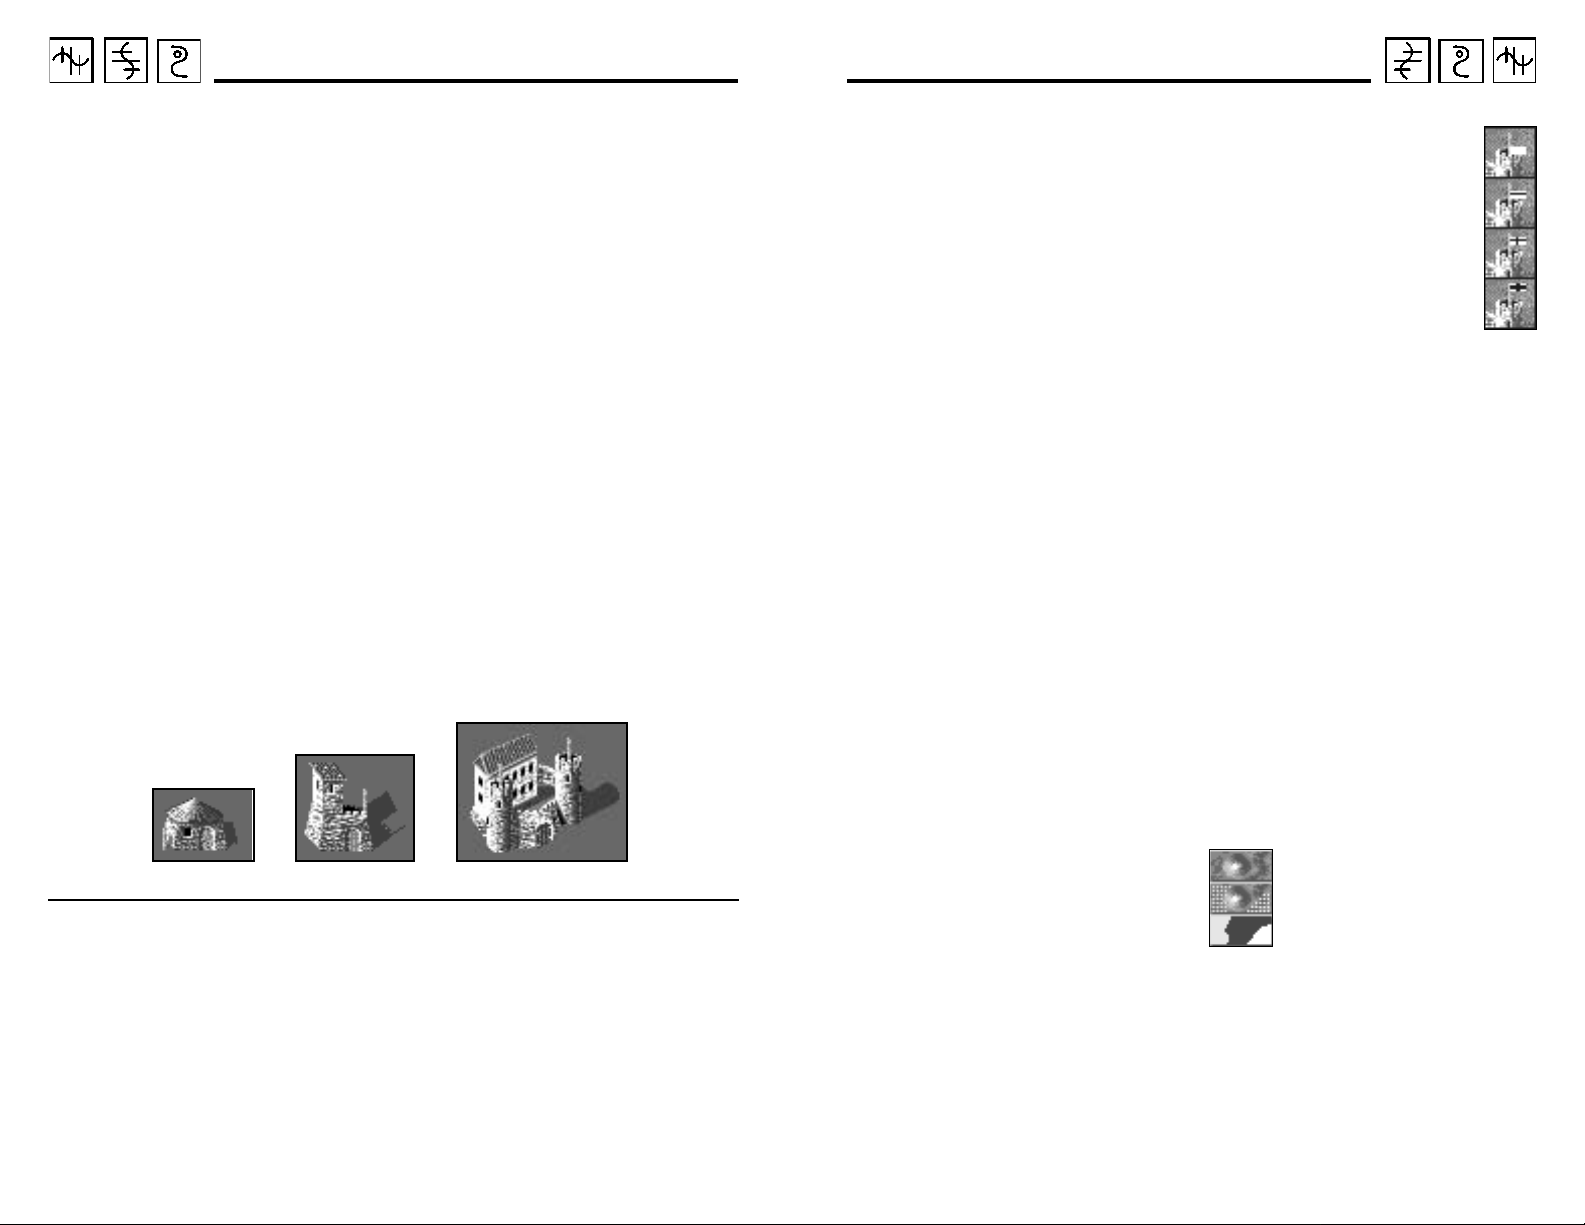
Orders: Have your serfs construct a guard hut, a guard tower, and a garrison.
B
UILDING AGUARDHUT
Guard Hut Guard Tower Garrison
After beginning the game, choose a
location to build your castle. You don’t
need to worry about the fertility of the
soil or the trees. Give the order to con-
, G
UARDTOWER, ANDGARRISON
struct the three required buildings and
wait (use the help functions for construction if you cannot find a good
location right away).
For the garrison and the guard tower, a
leveler begins by leveling the ground.
You have to have the construction
materials transported. While the hut
requires only one delivery of wood and
stones, the garrison requires at least ten.
As soon as the guard hut is built, a
knight leaves your castle in order to
occupy it. When the first knight arrives
in a guard hut, guard tower, or garrison,
your rural property grows. Look and you
see the property limits have expanded.
This is how your kingdom ‘grows’ and
increases its geographic area.
To inform you of this growth (if you
were looking elsewhere in the world),
you hear a noise telling you that you
have received a message. Left-click on
the piece of paper (located in the lower
left of your screen) and you learn that a
building has been occupied by a
knight. Next, some gold is brought to
the hut.
A white flag flies in front of the guard
hut. Later, flags are flown on the guard
tower and on the garrison towers. The
flag’s height indicates the building’s
occupation rate. A hut can house up to
three knights, a guard tower can house
up to six knights, and a garrison can
house up to twelve knights.
The icon on the flag indicates an
enemy’s distance. The white flag
signifies that there is no enemy
colony nearby and that there is
no danger of being attacked in
the immediate future. If you
later you play against computercontrolled opponents or another
player, other symbols appear on the
flags. When the enemy gets close
enough, a black stripe appears on the
flag. As the enemy approaches, the
stripe changes to a black cross. When
the enemy is right outside your door, the
flag has a very thick black cross. (In the
latter case, you should definitely prepare for an attack.)
THEO
Familiarize yourself with the overhead
map. Left-click on the map icon and the
map appears. You see several blue dots
where your buildings (finished or still
under construction) are located. The left
icon activates the map presentation
mode in one of 3 ways:
Left-click on this icon. After the first leftclick, the map’s image changes just a
little. Around the blue dots (your buildings), you now see a surface with dots
VERHEADMAP
scenery
scenery + property
property
13
14
Page 9
The Training Games
The Training Games
that indicate the size of your property . If
you left-click again on this icon, the
scenery disappears completely. Only
your property is still displayed in blue,
and the buildings are represented by little white dots. If you left-click a third
time on this icon, you return to the
mode that you started with. If you are
playing against other players or against
the computer, their property is displayed in their color.
Return once again to “property” mode
(no more scenery) and left-click on the
second icon from the left. You see your
network of roads on the map. If you
left-click again on this icon, the roads
disappear. The third icon from the right
allows you to activate or deactivate the
buildings on the map. Quit the map by
left-clicking on the highlighted icon.
Let’s see what your serfs are doing.
When the buildings are completed, a
window appears to let you know that
the order was executed. You can continue with this game or move to the
next training game.
Training Game 2 – Creating Construction Materials
Orders: Fabricate at least five units of wood and five units of stone.
B
UILDING AFORESTRANGER’SHUT
AWMILL, ANDQUARRYMAN’SHUT
S
Forest Ranger’s Hut Lumberjack’s Hut Sawmill Quarryman’s Hut
This time, you have to watch the
scenery very closely. Choose an area
with trees and, more importantly, a few
slabs of granite (the large gray boulders)
and place your main castle next to it.
You must obtain stones and wood.
These materials are necessary for the
construction of buildings and are generally the first things that you must take
care of in a new serfdom. The stones
come from granite that a quarryman
looks for in rock formations. The wood
is a little more complicated. You need a
lumberjack to cut down trees and a
sawmill worker to transform the trunks
into boards so the wood can be used.
The forest ranger is described in this
section because he plants new trees.
The forest ranger is constantly in the
process of planting new trees. After a
while, the trees grow and can then be
, L
UMBERJACK’SHUT
cut down. If you cut the trees down
without planting new ones, you quickly
find yourself with a shortage of wood.
You can place a forest ranger next to a
lumberjack. The two complement each
other very well. If there is no lumberjack next to the forest ranger, you will
soon have a new forest, but no wood
for construction.
Place a lumberjack’s hut near the trees,
preferably in the middle of a small forest, and a quarryman’s hut somewhere
near the slabs of granite. Look for an
appropriate location for the sawmill
(which is a large building) and place the
forester’s house where there aren’t
many trees. Connect the buildings with
roads. If you have done everything correctly, your work is finished. The rest is
done by your serfs!
,
15
16
Page 10
The Training Games
The Training Games
They build huts and level the ground
for the sawmill. The workers arrive after
the construction of the buildings. The
lumberjack goes to his hut and leaves it
a little while later to find a tree to cut
down. After cutting it down, he lops off
the branches and brings the trunk to his
hut. He then rests a while before returning to work. A transporter sees the trunk
and comes to take it. As your sawmill is
probably still under construction, the
trunk is temporarily stored in the castle.
The quarryman climbs on a boulder
and hammers it with his pickax until he
extracts a few stones. He puts them in
front of his hut where a transporter
comes and takes them to the castle (if
the stones are not needed on a construction site).
The sawmill is the last building to be
completed as it is the largest of the four.
The sawmill worker goes to the
sawmill and waits for the tree trunks
that are brought from the castle or by
the lumberjack. The sawmill worker
then cuts them up and puts the boards
in front of the mill. These boards are
stored in the castle until they are used.
As soon as you have fabricated the
materials asked for, you will have
accomplished your mission.
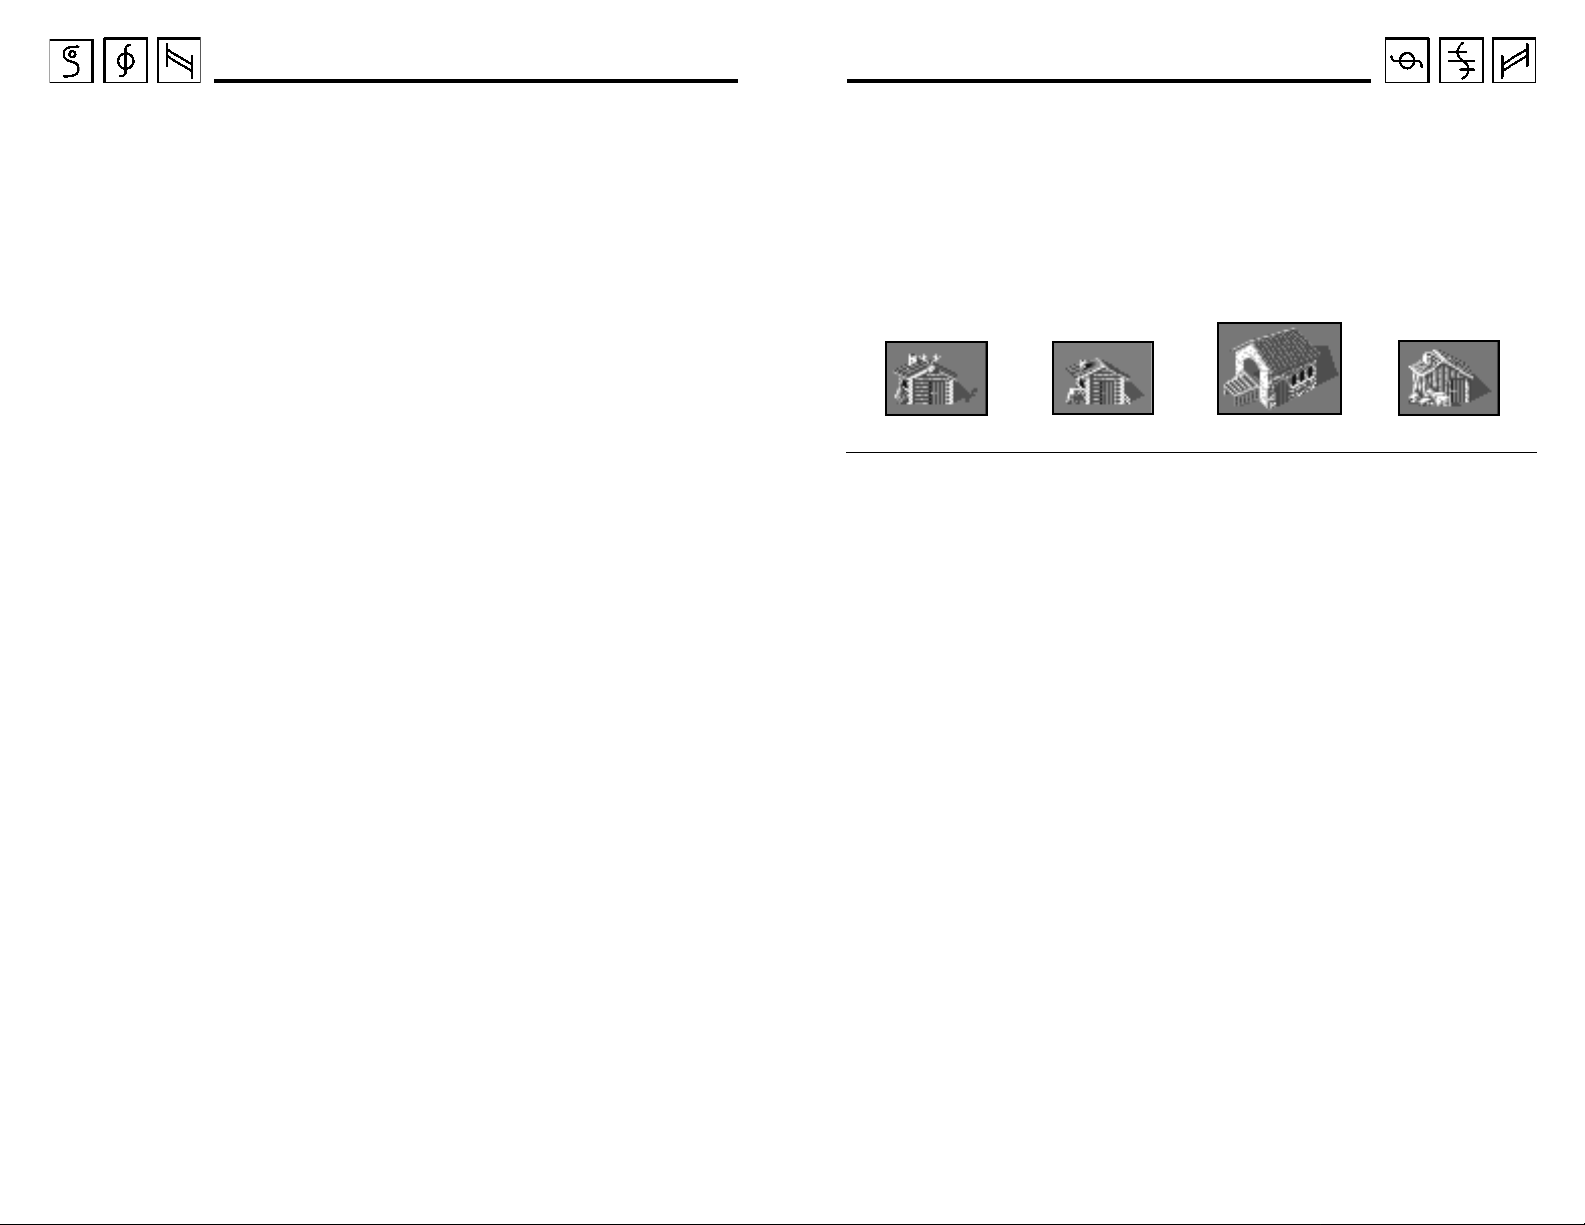
Training Game 3 – Making Food and Transporting It
Orders: Fabricate five units of each of the following foods: fish, meat, and bread.
THEF
ISHERMAN
Windmill Bakery Pig Farm Butcher Shop
Your fisherman needs a lake located
near the castle. Your farmer needs a
large area for his farm so he can grow
wheat. You do not need any underground riches or other raw materials
To allow your serfs to work during the
following explanation, construct the six
required buildings and continue reading while the structures are being put
together. Build:
❖ the farm (a large building), prefer-
ably with a lot of free space, as the
farmer needs land to plant wheat
❖ the fisherman’s hut, as close as
possible to the lake
❖ the pig farm, the bakery, the
butcher’s shop, and the windmill
in the locations of your choice
, F
ARMER
, M
ILLER
, B
AKER
Fisherman’s Hut Farm (Wheat)
If you connect the buildings with roads,
be careful not to build roads on the
banks of the lake because the fisherman
does not fish from the road. He does
yet.
not want to hinder the transportation
of merchandise.
You have three methods of obtaining
food:
❖ The simplest method is by fishing.
, PIGF
ARMER, ANDBUTCHER
A fisherman goes fishing and his
fish can be used as food. One
drawback: you need a lake, and
when there are too many fishermen on a little lake, it is quickly
cleared of fish. As long as there
are fish, they reproduce. Avoid
“over fishing” if you want to continue fishing for a long time.
17
18
Page 11

The Training Games
The Training Games
❖ The second method is by making
bread. The farmer grows the
wheat. When the wheat is
mature, it is harvested and a
transporter takes it to the miller
(in the windmill), who transforms
it into flour. The sacks of flour are
then taken to the baker who uses
them to make bread. Note that
this method requires more
patience, but its return is better.
❖ The third method takes as much
time as the previous method, but
requires less space. The farmer
provides the pig farmer with
wheat, who then uses it to feed his
pigs. When the pigs reproduce,
the farmer removes a pig from his
farm. It is taken to the butcher
who uses it to make meat.
Food is used to feed the miners who
work in the mountains. They strike if
they don’t have anything to eat. Provide
the food that is easiest for you to supply .
T
RANSPORTINGFOOD AND
C
ONSTRUCTINGROADS
Let’s use this occasion to look at some
useful information concerning road
construction. This is not very important
for your current serfdom, but it
becomes crucial when you have built
twenty or more houses.
There is often a lot of circulation in
front of the castle. Later on, when you
have constructed several buildings, you
will have to place them strategically
and build roads in a practical manner.
For example, the transportation of
wheat on a road between the farm and
the mill that passes in front of the castle
is likely to slow down the transportation
of construction materials. Group all
related buildings together and build a
system of roadways that does not pass
in front of the castle. Put a sawmill near
a lumberjack’s hut, for example.
It is also very important to have a good
network of roads. To accomplish this,
take several factors into account. The
construction of an additional small connecting road can considerably improve
the transportation of merchandise. The
experience that you acquire after a few
games helps. W e will, nonetheless, give
you a few tips:
❖ Avoid red (steep slope) sections
of road; it is better to make a
detour by using two other road
sections because the speed with
which the merchandise is transported on a road always depends
on the
slowest
section of the road.
❖ Do not clog up a flag’s six possi-
ble branches with a road that, for
example, goes halfway around
the flag. You will have a hard
time enlarging your network of
roads. In this case, try to construct
a straighter road.
❖ It is possible to construct two
parallel roads between two flags.
When one of the roads is crowded, another one can be used to
transport the merchandise. This
solution is not necessary if you
construct several crossover roads,
but it is very important to have a
good network. If certain lanes of
transport are crowded and the
merchandise begins to pile up,
your serfs are intelligent enough
to transport the merchandise on
another, less crowded, road — as
long as it exists! The least efficient type of network is the one
in the shape of a star beginning at
the castle. In this case, all merchandise is transported on one of
the star’s branches and will have
to pass in front of the castle in
order to access another branch.
An efficient network is a “grided”
network that looks like a piece of
graph paper. To simplify things,
construct several connections
between the buildings so that
your city grows more quickly and
with less effort. If you display the
roads on the map in “property”
mode, you clearly see the places
where the “crossover” connections are missing.
Let’s look at our game again and the
serfs at work:
The fisherman sits on the bank of the
lake and begins fishing. Depending on
the number of fish living in the lake, he
fishes more or less rapidly. He may not
catch anything. Fish are taken to the castle and stored to later feed the miners.
The farmer spreads his wheat seeds, lets
them grow , and then harvests the wheat
which is then taken to the windmill, the
pig farmer, or stored in the castle.
As soon as the wheat is received, the
miller grinds it and delivers the flour in
sacks to the baker. The baker kneads
the dough and makes bread.
The pig farmer uses the farmer’s wheat
to feed his pigs, and he will soon be
able to send some of the pigs to the
butcher. The butcher cuts up the meat
and hangs it up for storage.
As you have seen, the farmer provides
the pig farmer and the miller with
wheat. His production may at times be
insufficient and he may not be able to
deliver his wheat to both of them,
even though they are continually
awaiting a new delivery. In this case,
build another farm.
Wait for all the food to be fabricated
before moving to Training Game 4.
19
20
Page 12

The Training Games
The Training Games
Training Game 4 – Mining and Using Gold, Iron, and Coal
Orders: Search for the underground riches and find
at least five units of gold and of iron.
M
INES ANDFOUNDRIES
Gold Coal Iron Granite Gold Iron
Mine Mine Mine Mine Foundry Foundry
Underground riches are extracted from
the mountains. Raw ores are transported from the mines to the foundries
where the ore is refined into pure gold,
iron, and coal. Iron is an important
raw material because it allows you to
forge new weapons and tools. Gold is
also very important because it raises
the morale of the knights. When the
knights think about their future fortune, they fight with more vigor. Coal
is very important too. You need coal
for the casters in the foundries and
the blacksmith needs coal to forge
weapons. Granite is the least important raw material; however, if there is
no source of granite on the surface, the
situation could change as you need
stones for all the large buildings.
Granite is the only raw material found
both above and under the ground.
Put your castle in a mountainous region
and remember to ask for the geologist’s
help. Place your castle close to an area
where you find coal, iron,
and
gold.
Immediately construct guard huts in the
area in order to expand your rural property and prospect further into the
mountains to find underground riches.
We can now move on to the first geological prospects.
You must place a flag somewhere in the
mountains. Connect this flag to the rest
of the network and special-click on it. A
window with a few symbols appears.
Disregard them all except for the geologist’s head, at the bottom.
Left-click on the geologist and he
tells you that he has received his orders.
He then leaves the castle and heads off
toward the mountains. Once there, he
examines the ground and takes a few
samples. If he finds any riches, he
jumps for joy and plants a sign in the
ground to indicate what he has found.
This sign shows a small circle if there
are small quantities of underground
riches and a large circle if there are
large quantities. The circle can be one
of four colors: yellow for gold, red for
iron, black for coal, and light gray for
granite. If the geologist does not find
anything, he plants a blank sign. When
he finds underground riches for the
first time, you receive a message
because you may not be there to
watch him work.
You can send the geologist toward any
flag (as long as it is connected to the
network of roads) and even toward the
flags in front of buildings. The geologist
examines the area and returns home if
he does not find any mountains.
To accomplish the goal of your training
mission, you must find coal, gold, and
iron. Do not hesitate to send several
geologists into the mountains and to
expand your property by constructing
guard huts if underground riches are
not nearby. You have probably noticed
already that the guard huts cannot be
constructed in the mountains. You will
have to “surround” the large mountains
with guard huts if you want to find the
most underground riches.
Begin constructing a mine as soon as
you have found a likely location. As
soon as the mine is connected to the
network of roads, a construction worker
arrives and goes to work.
If you have given the order to construct
at least one mine for the exploitation of
gold, one for iron, one for granite, and
one for coal, you must now begin
thinking about building some foundries.
Select a location near the castle and
have your serfs construct the gold and
iron foundries.
Your workers construct the mines and
the foundries while the miners are
looking for the necessary raw materials. Food is brought from the castle to
the mines. The raw materials that you
find are taken to the foundries where
the unrefined gold is transformed into
21
22
Page 13

The Training Games
The Training Games
gold and the iron ore into iron. As you
don’t immediately need either of these
raw materials for your city, they are
stored in the castle. You are given
some additional information while the
game progresses.
If your network of roads has been poorly constructed, you will see it in this
training game. If the mines produce too
many raw materials, and if you have set
up only one road (which may also be
steep) between the mines and the
foundries, you will have trouble with
the transportation of merchandise.
Build other roads to clear congestion.
The new roads are used instead, and
the merchandise gets to its destination
much more quickly.
Underground riches are, naturally, limited. When a deposit starts to run low , the
miner finds fewer raw materials. You
receive a message as soon as a mine has
been stripped of raw materials.
Too many mines can be a problem if
you’re not producing enough food. If
your food stocks are low and you
can’t obtain it quickly enough, demolish the excess mines. A miner who
doesn’t receive food strikes and
begins marching in front of the mine
to show his anger.
The geologist’s signs disappear with
time. You can, however, ask for a new
inspection at any time to see if there are
any remaining underground riches in
the areas surrounding an existing mine.
If you are not in a hurry to build the
mines, wait until the geologist plants
several signs so that you can be sure to
find a profitable deposit. On the other
hand, if you are playing against other
players or against computer-controlled
opponents, you should construct the
mines as soon as you think a deposit
may exist because each minute counts.
If the program ever denies your request
for a geologist this means that you do
not have any more workers or tools
available. You must wait a few seconds
before asking for another geologist.
To conclude, here is a tip to better place
your flags in the mountains. When
you place a flag for a geologist, it is
because you plan to construct a mine in
this location later on. If there are underground riches, left-click on the construction help function and choose a
location to build your mine. Next place
the flag next to this location, in the
lower right. Later, you can construct a
mine next to the flag; you won’t need a
new road or a new transporter, and the
mine will be built more rapidly.
Training Game 5 – Making Tools and Weapons
Orders: Make at least ten weapons, ten tools, and five boats.
THES
HIPMAKER
Shipmaker’s Shop Blacksmith’s Shop Tool Maker’s Shop
This training game allows you to create
four new buildings: the shipmaker’s
shop, the blacksmith’s shop, the tool
maker’s shop and the warehouse. You
learn how to fabricate objects with the
materials that you have extracted in the
preceding section. The blacksmith
makes weapons with iron but he needs
coal. The tool maker makes various
tools from wood and iron that are used
by the other serfs. The ship maker only
needs wood to construct his boats. He
is the least used worker and is generally needed only in worlds containing
large expanses of water.
, B
LACKSMITH, ANDTOOLMAKER
This time, you can choose a location
without worrying about the richness of
the ground because you already have
the necessary materials stored in your
castle at the beginning of the game.
Choose any location that provides
enough space for several large buildings. Construct an iron forge, a shop
for the tool maker, a naval shipyard,
and a warehouse.
Give wood to the ship maker; he delivers the first boats as soon as he is done.
The workers can then take these boats
to the banks of the lake and transport
their merchandise on this water way.
This method of transportation is often
quicker than the land routes.
23
24
Page 14

The Training Games
The Training Games
Supply the blacksmith with coal and
iron. He forges swords and shields that
your knights need to guard your castle
and attack the enemy. The weapons are
delivered to the castle where each new
knight can take what he needs.
Supply the tool maker with wood and
iron to make nine different tools: hammer, saw, hatchet, shovel, scythe, pick,
fishing pole, pliers, and butcher’s knife.
These tools are delivered to the castle
and used by the workers. Depending
on their professions, they need different
tools. Some workers (for example, the
baker) don’t use any tools, but most
jobs require at least one tool while others need two:
❖ leveler – shovel
❖ fisherman – fishing pole
❖ butcher – butcher’s knife
❖ farmer – scythe
❖ lumberjack – axe
❖ sawmill worker – saw
❖ miner – pick
❖ quarryman – pick
❖ construction worker – hammer
❖ ship maker – hammer
❖ geologist – hammer
❖ tool maker – hammer and saw
❖ blacksmith – hammer and pliers
You may wonder why you must make
the tools when the workers automatically leave the castle with their tools
in hand. It is because at the beginning
of the game, you had a certain supply
of construction materials, food, and
tools. For the early training games you
had a large stock to start off with and
therefore did not have to fabricate
tools or merchandise.
THEW
AREHOUSE
The warehouse is
used to store merchandise. It is also a
place where serfs
wait for new work (as
at the castle). This is why the warehouse is, with the castle, one of the
most important buildings. In a relatively
large city, the castle quickly reaches its
capacity without an additional warehouse. As soon as the warehouse is
built, a serf leaves the castle and goes to
the warehouse. You thereby have a sort
of “second castle.” The expansion of
your city can be difficult to control if
you only have a castle. The workers
take too much time to go from the castle to the construction site, or they
produce so much merchandise that it
will start to pile up on the road to the
castle and the transporters can no
longer do their job.
Evenly distribute the warehouses to avoid
all this. The warehouse offers practically
all the same benefits as your castle:
❖ When you receive new serfs, they
are divided up between the castle
and the warehouse.
❖ Excess merchandise was brought
to the castle up until now. It is
now taken to the nearest warehouse, thereby cutting down on
return trips.
❖ Merchandise (on a construction
site for example) is ordered from
the nearest warehouse having the
required materials, so the distance
to the site is reduced.
❖ A worker no longer returns to the
castle after his work is finished
but goes to the nearest warehouse
and waits for his next job. The trip
for your workers to their work
sites is reduced.
❖ If a building requires the presence
of a new worker, he is hired from
the nearest warehouse, so his trip
is shorter.
These various points demonstrate that
an even distribution of warehouses is
essential. As soon as your warehouse is
built, you receive a message.
25
26
Page 15

The Training Games
The Training Games
Training Game 6 – Attack and Conquer Enemy Buildings
Orders: Conquer several enemy buildings.
K
NIGHTS
The objective of this training game is to
conquer certain buildings with your
knights. Left-click on the overhead map
and examine the locations of the
enemy’s buildings. Choose a location
close to the enemy so that you do not
have to travel very far to attack.
Construct guard huts around your
frontier. While your serfs are working,
we can take a look at the knights.
There are five kinds of knights in the
game. When you receive a new knight,
he starts at the lowest level. He can,
however, receive training in the main
castle (or later in a warehouse) and
change levels. A knight can also receive
training in a guard tower or in the garrisons, but he progresses very slowly
because he has to work at the same
time. However, during his service he
will not improve his skills if he sits in a
guard hut.
The advantages and disadvantages
are clear: if you leave the knights in
the castle, they become well-trained,
but your city will be poorly guarded.
If you send your knights outside, your
buildings will be well-guarded but
the enemy may have more powerful
knights that could pose problems for
you. If you have built several towers
and guard huts, your knights will go
to them. In this training game, however, your opponents are defenseless.
You only attack castles, garrisons, guard
towers, or guard huts belonging to the
enemy. A knight won’t attack a farmer,
fisherman, nor any other civilian serf.
When you attack, your knights march
toward the enemy building(s). An enemy
knight comes out of the enemy building
and a combat ensues, leaving one knight
victorious; there are no ties in combat.
After a while, either the attackers or the
defending knights in the enemy building are eliminated. If there are no
knights in the enemy building, the
attacker is victorious and takes control
of the building. The frontiers of your
city are consequently modified. The
victorious knights burn any other
unguarded enemy buildings that they
can. Such a defeat can be devastating
for a city . If, for example, your only coal
mine or warehouse is in flames, then
your serfdom’s stability may also be
going up in smoke.
When you have built your first guard
huts and they are occupied by knights,
you see flags with a thick cross. All
guard huts that are located near the
enemy’s territory and that can be tar geted for attack are marked by this cross.
Special-click on any enemy building
having a thick cross on its flag. A new
window appears allowing you to enter
the number of knights you want to
have attack it. The four numbers in the
middle indicate the number of available knights, and then numbers for
knights in the surrounding areas, far
away, or very far away. The distance is
not an essential factor but the knights
will need more time to reach the
enemy. If all the numbers are zeros,
there are not enough knights in your
buildings. You should know that all the
knights that enter a building cannot be
sent into battle because you need some
to defend the building should it be
attacked by enemies.
Launch a new attack; two arrows allow
you to modify the number of knights
that attack the enemy.
If you have sent all your available
knights into combat, you cannot launch
other attacks. You see, however, other
knights immediately leave your castle to
replace those who have left for battle.
When you seize an enemy building,
you receive a message.
Enemy knights engage each other should
they, by coincidence, meet somewhere
on the map.
If the enemy attacks you at an important
corner of your serfdom, look for the
enemy garrison nearest the battle and
give the order to attack this building. If
your knights meet the enemies on their
march, they attack the troops where
they meet them. Of course, the enemies
must be visible; if there are hills separating the soldiers, they can march parallel
to each other and be totally unaware of
the other .
F
RONTIERSTRATEGY
Here’s a final point that does not concern the knights, but rather your rural
property: do not construct civilian
buildings near the enemy frontier . If the
enemy constructs a guard hut near the
frontier at the same time you start
building there, but he finishes before
you do, he will burn down
any of
your
unfinished construction.
Garrisons situated near the frontier are
of no help to you because construction
takes too long. You can try to finish
guard huts before your opponents do,
or place your buildings in safer locations to begin with. Naturally, you can
use this strategy against your opponents
if they had the bad idea of constructing
large buildings too close to the frontier.
27
28
Page 16

The Economy
The Economy
THE ECONOMY
The Economic System
It is essential to know the economic
aspects of each building type and
how that building is tied into the “grand
scheme” of your serfdom. Here is
a summary.
THEF
OODCHAIN
The food chain refers to the production
of fish, meat, and bread. The fisherman
catches fish for immediate consumption. The farmer plants and harvests
wheat that is taken to the pig farmer
who feeds his pigs with it. The pigs
reproduce and can later be slaughtered
for meat. Or, the farmer’s wheat can be
ground by the miller in his windmill
and transformed into flour for the baker
to make bread. In either case, you create food for your workers.
M
ERCHANDISE
Merchandise refers to tools, weapons,
boats, gold, and construction materials
for buildings. The tools, weapons, and
boats are stored in the warehouses. The
gold is guarded in the castle, the garrisons, the guard towers, and the guard
huts. The tool maker needs wood and
iron. The wood comes from the sawmill
where the tree trunks furnished by the
lumberjack are cut. The iron is purified
in a foundry. The caster needs ore and
coal for the forge. These two materials
are extracted from the mines. To fabricate weapons, the blacksmith needs
iron and coal. The ship maker needs
wood for his boats. For the construction
of your buildings, you need (in most
cases) wood and granite. The use of
iron, coal, and wood for the fabrication
of tools has already been discussed.
The granite is found either above
ground in rock formations, or below
ground in a granite mine. The unrefined
gold is extracted from the mines. The
gold is refined by a goldsmith from
unrefined gold. What follows gives you
a better understanding of the numerous
factors that affect the game.
Your First Serfdom –
Mission One
It is essential to build an “active” city.
To do this, you need all the buildings.
When you select the first mission,
notice that you do not have a large
beginning supply level, so be careful.
The first thing to do is to find a good
location for your castle; refer to the section “The Castle” on page 7 earlier in
this manual. Try to expand your rural
property immediately.
Place two to four guard huts near the
frontier. The construction of guard towers and garrisons requires more time
and slows down your expansion. Make
sure that you have enough construction
materials to avoid big problems building the necessary buildings.
Place a lumberjack, sawmill, and quarryman’s hut in appropriate locations.
After completing these three tasks,
the game becomes more complex.
Depending on the layout of your land,
you can do certain things. As soon as
possible, send the geologists into the
mountains. Based on their findings,
construct mines in the appropriate locations. Construct a gold or iron foundry,
and a forge or a tool factory (based on
the underground riches found).
If you can rapidly fabricate weapons,
you gain an advantage during combat.
As soon as the geologists start prospecting in the mountains, think about the
mine workers and their food. If there is
a lake in the area, build a fisherman’s
hut. The fish he catches can be stored
before the first mines are built. Meat
production and the fabrication of bread
take some time. When the castle’s
wheat reserves (for the pigs and the
windmill) run low, you need to wait for
a farmer to plant and harvest more
wheat. If no lake is in the area, build a
farm as quickly as possible. You can
choose between meat or bread,
depending on the situation. If the enemies are still far away and you possess
a lot of land, choose the bread because
it is faster. Place windmills and bakers
close to the farms.
Bread is the most efficient source of
food. If you don’t have enough space,
we recommend pig farming. You need
only one farmer to supply the pig farmers with wheat.
29
30
Page 17

The Economy
The Economy
Remember that lumberjacks cut down
trees constantly, and unless you plan
ahead this may leave you without a single standing tree. Try to have forest
rangers plant trees as soon as possible.
If the region contains large lakes, take
advantage of the speed of the water
ways. You will eventually need a ship
maker if you are short on boats.
Above all, remember to build warehouses. They alleviate congestion on
the roads and speed your progress.
The guard towers and garrisons are
essential to protect important buildings,
especially the warehouses. Depending
on the progression of the game, a mine
or a tool maker could also be very
important (especially if you only have
one of them)! Place your garrisons in
these areas. Don’t let the enemy destroy
your economic system because of a
small victory!
Watch the enemy closely! Find a free
moment in your schedule to see what
your adversary is doing. Is he already in
the process of making weapons? How
far away is he? Which lands should you
occupy before the enemy annexes them?
Which locations are poorly protected
where an attack could be successful?
Your first attempt to construct a city
with several huts and different houses
may not be entirely satisfactory. Don’t
be discouraged. The next time, you can
better plan your city without making
the same mistakes. Experience helps.
About Statistics
THEF
IRSTSTATISTICS
There are statistics for serfs, buildings,
and warehouses. They allow you to
quickly get an idea about important
areas. At the beginning of the game, the
statistics are not very interesting; you
do, however, have to look at them regularly during the course of the game to
see, for example, when you are short
on supplies such as wood or food.
To see the statistics, left-click
on the second icon from the
right in the main menu. Eight
other icons are displayed. Each icon corresponds to specific statistics. If you
left-click on the middle icon, the buildings’ statistics appear. They indicate the
number of each type of building that you
have in your serfdom. All buildings cannot be displayed on one page; the
bottom icon allows you to scroll through
the pages and see the other types of
buildings. If the number is followed by a
+ and another number , then buildings of
this type are under construction. 2 + 1
means two buildings are completed and
one is under construction. These statistics also allow you to foresee certain
difficulties. For example, if you have ten
lumberjacks, they cut down a large
quantity of trees; one sawmill may not
be enough to cut all the wood, and you
may even run out of trees for them to
cut. Adjust your resources for optimum
returns. To quit the statistics and return to
the eight icons, left-click on EXIT.
Left-click on the right icon, in the center .
Y ou see various heads and numbers. The
statistics concern your serfs. Each head
represents a profession, with the number
of people practicing this profession. The
head with a question mark (in the lower
right) indicates the number of serfs that
do not have a profession yet. A good
player tries to have a minimum of unemployed serfs in order to increase
production and yield. The last number in
the lower right indicates the total number of your serfs. To quit these statistics,
left-click anywhere in the window .
Left-click on the left icon, in the center.
These statistics represent your supplies;
they show the type and quantity of merchandise stored in your warehouses.
The merchandise stored in the warehouses is not immediately important,
but a large reserve of wood and granite
is a good sign because you will have
enough materials for your construction
projects. On the other hand, if you have
a lot of iron ore in your warehouses,
and you do not have enough iron
foundries or coal in your city. . . . You
must always stay one step ahead.
THES
TATISTICCURVES
The statistics of comparison
and of production
In the statistics menu, leftclick on the bottom icon in
the center. You see the com-
parison statistics. The color of the
curves corresponds to the different
players. Your color is sky blue, the
same as your serfs’. The vertical scale
ranges from 0 to 100%, and the horizontal scale represents time. The curve
changes over time, from left to right.
The unit used is the hour (.5 hour = 30
minutes). You can choose the display
mode for the statistics in the lower left
of the screen: upper left = overall comparison; upper right = comparison of
rural properties; lower left = comparison of the buildings; and lower right =
combat power.
In the lower right, you see four other
icons that correspond to the time. The
four positions correspond to .5 hours, 2
hours, 10 hours, and 50 (!) hours.
The comparison of the rural properties
only indicates the size of your land
compared to that of your opponents’.
The buildings are evaluated according
to their size and type, and not just
according to their quantity. The combat
power depends on the number, type,
and motivation of your knights. The
overall comparison is based on all three
of these values.
These statistics are the only way to
obtain precise information about your
adversaries. You know who has the
most powerful army and who possesses
the most land. If the curves rise very
quickly at the beginning of the game,
do not worry. It is not an error. The
31
32
Page 18

The Economy
The Economy
player who places his castle first is
momentarily the only person to possess
land and a building (100%).
To see the production statistics concerning
all players
, left-click on the lower
left icon. These statistics indicate the
type and quantity of merchandise produced. The vertical scale corresponds
to the quantity, in units. The horizontal
scale represents the time.
In these statistics, the time counted is
around two hours. At the beginning of
the game, these statistics are at zero
(you have not produced anything yet).
Later on, however, you can choose at
the bottom of the screen the merchandise that your serfs produce. From trees
to tools, you find all the different types
of merchandise.
If you have, for example, selected the
trees at the bottom and the red surface
of the vertical scale stays at one, this
means that your lumberjacks are cutting down about one tree per minute.
This may seem rather confusing, but
you will learn to interpret these statistics
better with practice.
THES
UPPLYSTATISTICS
In these three statistics, small pointers
indicate the state of your supply. The
food chain and the flow of merchandise
are the most important statistics if your
city is relatively large.
Professions Statistics
Let’s begin with the statistics
about the professions. Left-
click on the upper right icon.
As with the statistics for the serfs, all the
heads appear, but with pointers. The
pointers indicate the availability of serfs
that you can use for the corresponding
profession. If none are available, the
pointer stays in the red. It is in the center if you have three serfs, and to the
right if you have twenty or more serfs.
Before building a forge,
look at the statistics. If you
need a blacksmith and the pointer is
red, no serf is available, or perhaps a
tool that he needs is not available in
the warehouses. The number in the
lower right indicates the number of
serfs who are waiting for work. If this
number is ten or greater, and a profession’s pointer is in the red, you lack
tools for this profession.
Food Chain Statistics
Let’s look at the food chain. You see a
diagram with heads, merchandise,
pointers, and arrows. Each head represents a profession. The merchandise is
delivered by one profession to another
profession in the direction of the arrow.
The diagram is presented as follows: the
farmer (in the upper right) delivers the
wheat to the miller and the pig farmer.
The miller delivers the flour to the baker
who, in turn, delivers the bread. The
pig farmer delivers pigs to the butcher
who delivers the meat. The fisherman
(in the lower left) delivers the fish. The
bread, meat, and fish are the three
foods that are delivered to the mines.
The pointers are important in this diagram. There are two types:
1. This is the supply pointer (for
the pig farmer or the miners, for example). The dial is, from left to right: red
(no supply), yellow (good supply), and
green (excellent supply). This dial indicates the supply of the professions; the
more merchandise they receive, the
better off they are. The pig farmer
prefers having a lot of wheat to feed his
pigs, rather than a meager, or non-existent, supply.
2. This is the activity pointer (for
the miller or butcher , for example). This
dial is, from left to right: red (no work),
green (a lot of work), and yellow (too
much work). This means that the ideal
situation for the person receiving the
merchandise is to receive neither too
much nor too little. If the miller does
not receive enough wheat, he has no
work and his windmill is useless. If he
receives a normal delivery, his mill is
active and he is busy. If he receives too
much wheat, however, he is unable to
keep up with the work. The mill turns
constantly, but the wheat arrives too
quickly and begins to pile up. After a
while, you have to put this surplus in a
warehouse. If you build another windmill, you can produce more flour . Later,
when you have ten millers, you can see
the average activity rate for all the
windmills. You see if the mines are
well-supplied, and if the pig farmer is
receiving enough wheat to feed his
pigs. Don’t be surprised if you don’t see
a pointer at the beginning of the game,
as the food supply for a mine cannot be
indicated if it does not exist.
Merchandise Statistics
These statistics are identical to
those for food, except that
they represent all merchandise
except food. The suppliers of raw materials are indicated to the left (miners, for
example). The intermediate professions
are in the center (casters, for example).
The users are to the right (knights, for
example).
The arrows indicate the direction of the
delivery, as explained above. The others function as per the food chain. The
only difference is that certain professions (casters and blacksmiths) cannot
do anything if there is iron but no coal.
33
34
Page 19

The Economy
The Economy
The Warehouses
You already know how to build a
warehouse. If you special-click on
a warehouse (if there are none, use
a castle), a window appears indicating
the state of the stock in this warehouse. By changing the page with the
arrow, you see the serfs that are in this
warehouse. The third page contains
two icons having different symbols.
The upper icon concerns the merchandise, the lower icon concerns the
serfs located in this warehouse.
There are three different settings for
the merchandise in the warehouse.
A checkmark confirms the current
setting. If the checkmark is at the top,
merchandise is brought to this warehouse. When the checkmark is in the
middle, no more new merchandise
will be stored in the warehouse. When
the checkmark is at the bottom, the
warehouse is emptied of its merchandise and nothing else can be stored
there. For the serfs waiting for work in
the warehouse, the settings are practically the same: when the checkmark is
at the top, they must go to the warehouse after work. If it is in the middle,
no new serfs are accepted. If it is at the
bottom, all the serfs must
leave the warehouse. You
must special-click to activate
the two latter options.
What are these options for? If the enemy
approaches your warehouse and you can
no longer defend your position, he could
wipe out your warehouse and you would
lose all your merchandise. Only certain
serfs are able to escape. You have to be
able to retreat and fight if you want to
minimize your losses. Remember that
you need time to empty a warehouse or
evacuate the serfs. If you fight back too
late when retreating, you can save only a
few serfs. The warehouses are, moreover ,
crucial for your economy . If a warehouse
no longer accepts merchandise or serfs,
the others are stocked instead.
The evacuation of the merchandise and
serfs has a negative effect. Think before
deciding if it is better to retreat than to
fight. Do not build your warehouses
too close to the enemy, or if you do,
protect them with garrisons. If a warehouse appears to be in danger, stop the
reception of merchandise before the
enemy crushes the building and all the
goods inside.
You sometimes have problems when
unemployed serfs are in the warehouse and the weapons and tools are
stored elsewhere. In this case, your
serfs automatically go to a warehouse
where tools are stocked and wait there
for work. You have similar problems
with the tools when the pliers are in
one warehouse and the hammers in
another. No blacksmith can set up
shop, as he needs both tools. This
holds true for the tool maker (saw and
hammer) and for the knights (sword
and shield). In this situation, the tools
and weapons are automatically taken
to the other warehouse.
Statistics On
Buildings and Flags
The statistics give you an overview of
your total development. You might, for
example, want to know specific things
about the state of the supplies in a particular building. The statistics give you
the available information for the buildings. This information is always
activated with a special-click.
If you special-click on a construction
site, you see the building that you are in
the process of constructing.
If you special-click on one of your
mines, you immediately see the mine’s
yield. The calculation is made as a
function of the number of trips the
miner makes into the mine (with merchandise). Remember that it requires
several trips into the mines before you
can use this information. It is useful in
determining the future demolition of
these mines, because if a mine no
longer has a yield, the miner still eats
food (which can become scarce,
depending on the progression of the
game). You also see the food stock that
a mine has at its disposal. The miner
accepts fish as well as bread or meat;
the meat icon indicates this quantity. If
there is no food, the hungry miner goes
on strike.
If you special-click on a castle, garrison, guard tower , or guard hut, you can
see the position of your knights. Most
importantly, you see the strength of the
building to be defended. As with the
mines, you also see the state of the
supplies, but this time it concerns the
gold. The guard huts receive a maximum of two units of gold, the guard
towers receive a maximum of four
units, and the garrisons receive a maximum of eight units.
35
36
Page 20

The Economy
The Economy
You see the supplies for all of the following buildings:
❖ Ship maker’s shop
(wood)
❖ Sawmill
(tree trunks)
❖ Pig Farm
(wheat)
❖ Butcher’s shop
(pigs)
❖ Windmill
(wheat)
❖ Baker
(flour)
❖ Iron foundry
(iron ore and coal)
❖ Gold foundry
(unrefined gold and coal)
❖ Blacksmith’s shop
(iron and coal)
❖ Tool maker’s shop
(iron and wood)
The lumberjack huts, forest ranger’s
huts, fishermen’s huts, quarrymen’s
huts, and wheat farms do not supply the
same information because they deliver
merchandise. They don’t store any supplies to operate.
Special-click on any intersection. A flag
is displayed. In each direction from the
flag, where a road branches out from
the flag, you see a check mark or a line.
If everything is normal, you see a check
mark. If you left-click on a flag where
large quantities of merchandise are
being transported, you can uncover
traffic problems. They are indicated by
lines. In other terms, there is a lot of
merchandise to distribute in this direction, but the serfs cannot get by , and the
traffic jam will disappear after they have
distributed all the merchandise that is
blocking the road. You might try to find
other solutions, such as making a
detour, so that the serfs can distribute
the merchandise. In high traffic locations, take a close look at the network
of roads and think about constructing a
new warehouse. Do not wait until several flags are blocked up by the
merchandise.
The Distribution Menus
In the next six pages, we discuss the menus in detail. The
menus allow you to modify
various parameters and to influence
the life of your city. To activate the
menus, left-click on the lower icon.
As with the statistics, you may activate several menus and return to the
main selection.
In each menu, a default button allows
you to reset all the parameters back to
zero. The first three menus are distribution menus for merchandise. There are
several types of merchandise (food,
wood, iron, coal, and wheat) which are
delivered to the different professions.
The tree trunks are delivered to the
sawmills, while iron is delivered to the
blacksmiths and tool makers.
Your iron stock may sometimes be low,
and you may want to fabricate
weapons rather than tools, or vice
versa. You can modify these parameters
in the distribution menus. Left-click on
the top left icon. You see the different
foods displayed at the top of the screen,
with the mine below, each with a “supply bar.” These bars show the food
supply received by each mine.
If you have a very short supply of food
and you want to supply the iron and
coal mines in order to continue fabricating weapons, lower the supply bar
for the other mines to zero (left), and
raise the supply bar of the iron and coal
mines to the maximum (right).
The second menu allows you to organize the wood and iron deliveries.
Wood is used for construction sites,
tools, and boats. If you have a ship
maker and you don’t want him to construct any unnecessary boats, stop
delivering wood to him.
The iron is delivered to the blacksmith
and tool maker. If you are short of iron,
priorities are established according to
your evaluation of the situation and the
condition of your supplies.
The third distribution menu concerns
coal and wheat. Coal is delivered to
the foundries and the blacksmiths.
There too, the distribution depends on
the situation of the game. If you are
short of coal, decrease deliveries to the
gold foundry.
Wheat is delivered to the pig farms
and mills. Your preferences should
depend upon your city and your plan
of distribution.
If you set one of the parameters at zero,
the type of building selected does not
receive any merchandise. If a bar is two
times longer than another one, it means
that the building receives twice as
much merchandise as the other one. If
a piece of merchandise is rare, your
serfs only deliver it to the most important building concerned. If your stock is
large enough, then they also deliver to
the less important buildings.
37
38
Page 21

Rules of Combat
Rules of Combat
RULES OF COMBAT
The Knight Menus
Two icons in the statistics
menu allow you to modify
various parameters for the
knights. Left-click on the lower left
icon in the menu. A new window
appears with four icons on the left, and
two texts relating to each icon. The left
image shows the castles in various
positions based on their distance from
the frontier:
❖ On the front line: Your guard
towers, your garrisons, and
guard huts located right on
the frontier with the enemy
are indicated by a thick
black cross on their flag.
❖ On second line: The guard
towers, etc. located behind
the front are indicated by a
normal black cross on their flag.
❖ On third line: The guard towers,
etc. located far from the frontier
are not immediately threatened.
Their flag bears a black stripe.
❖ Within the inner-serfdom: The
enemy is not visible, and the
guard tower’s, etc. flag is white.
In each case, you decide how many
knights are placed in these buildings
(garrisons, watchtowers, and guard
huts). The optimal occupation rate is
indicated next to the four images. The
buildings located on the front line
should be full, the ones on the second
line should be well occupied, the ones
on the third line moderately full, and
the garrisons deep in the inner-serfdom
should be nearly empty . Thus, your borders are optimally protected.
The second word shows the minimum
amount of troops to be left behind,
should you decide to use knights to
attack the enemy: “good” for the front
line, “average” for behind the front,
“weak” for the third line, and “minimum” for the inner-serfdom. Here are
some examples: if you read “full/good,”
this means that all buildings must be
occupied to the maximum and if your
troops attack the enemy, you only send
out a few knights, keeping enough of
them inside to maintain a “good” occupation rate. If you choose “full/full,” the
knights occupy the buildings equally,
and none of them leave for an attack.
Your front-line will thus be protected to
the maximum. But in this case, the
knights remaining in remote buildings
need more time to get to the front-line,
as the road to travel is longer. With
“full/minimum” settings, all knights
leave the building to attack the enemy,
except one. Of course, this means that
your building is poorly guarded. You
can use such settings for the buildings
located in the inner-serfdom if you have
knights available.
Try not to use settings that could be
detrimental. If you don’t have all the
knights you need, your guard huts, etc.
are emptied sooner or later. To change
these settings, left-click on the + and signs. The upper setting (ideal number
of knights) logically cannot be smaller
than the following one (number of
remaining knights). Change the second
setting. Remember: It is very important
to
immediately
ters. If you change the occupation rate
setting from “full” to “minimum” in the
garrisons located on the front-line, all
your knights will leave, except one.
Think first, and click later.
When your knights leave their homes to
attack the enemy, they are immediately
replaced by new knights from the warehouses or main castle, as long as more
knights are available.
the lower central icon. The “knights’
rate” appears in the upper left corner of
the screen. The default rate is 30%,
change these parame-
The second knight menu
allows you to change several
other parameters. Left-click on
which you can modify as you like. This
rate shows the number of serfs that can
become knights, provided that you
have enough swords and shields. If you
choose a medium setting (bar in the
middle), half of your serfs become
knights. If you set the bar all the way to
the left, you do not receive any knights.
The lower icons allow you to
recruit unemployed workers
to form new knights. The
number of serfs available for recruiting
is displayed to the right. This number
depends mostly on the number of
weapons available in your warehouses.
You also need enough unemployed
serfs, of course.
Another icon allows you to choose the
knights who attack the enemy . With the
default settings, the weaker knights
attack the enemy, while the stronger
ones stay in defense. You can also send
the stronger ones to attack and keep the
weak ones to defend your buildings.
Both options have advantages and
drawbacks. It is usually better to send
the weaker knights in combat and to
maintain a good defense in your forts.
You decide which strategy is best.
39
40
Page 22

Rules of Combat
Rules of Combat
The icon to the right allows you to organize your knight relief force. If the
occupation rate is high enough, when
you left-click on this icon one or more
knights leaves his fortification and goes
to the closest warehouse. New knights
replace those that leave.
The advantage of this is that the weakest knights go back to the warehouses
to receive more training, while the
stronger ones take their place. Before
using this option, you must consider the
following factors:
1. If you fear an attack in the
upcoming minutes, wait. You
will prevent a sudden drop in
the occupation rate of your
buildings for a moment.
2. Make sure you have enough
well-trained knights in your
warehouses. If not, changing
the settings is not useful.
Your knights’ strength depends on their
training level, and their motivation is
increased by the amount of gold stored
in their city. The more gold stored, the
higher their motivation.
At the beginning of the game, it is
extremely difficult to win a battle. You
have no gold extracted and your knights
are not trained enough. If you want to
win, the strength ratio should be at least
4:1. Your losses may, of course, be higher than your opponent’s, so you must
carefully choose the place of the attack.
If your attack allows you to take control
over an enemy gold mine or sole food
producing building, even with heavy
losses, you can profit from the following:
1. The enemy will suffer heavy
economic damage, and
2. The enemy knights who are
weak at the beginning of
the game have a hard time
recapturing their lost territory.
As soon as you have enough gold, your
knights become more motivated. You
can then contemplate the complete
destruction of your enemies. Be careful
if you play against several opponents.
You can check the motivation level of
the enemy knights from the attack
menu. Each gold unit stocked in a garrison, watchtower, or guard hut has a
positive effect. While in transit, gold is
not considered stored.
You have probably noticed the attack
menu displays not only the combat
strength, but also the total number of
gold units owned by the player. The
number of knights defending the castle
is displayed at the bottom of the screen.
You can change this number by leftclicking on the arrows. If you think your
situation is hopeless, you can left-click
on the white flag to quit the game.
You can attack an enemy castle, but
remember the enemy may have left
more knights than usual in his castle. If
you conquer the castle, it is burned
down. Just like the warehouses, the winner strikes a decisive blow on his
opponent, causing him or her to lose the
merchandise and serfs held in the castle.
Furthermore, your knights’ morale rises,
while the enemy knights’ drops.
If you think you can easily conquer a
castle, launch an attack. If you lose a
castle, don’t give up. Enough welltrained knights
can
help you recover,
but it is not easy!
The attack menu allows you to specify
the number of knights remaining in
the castle to defend it. Remember that
the castle is important not only for
your troops’ morale, but also because
it is the only storage location protected by knights, and thus much safer
than the warehouses you construct
later in the game.
The Other Menus
T
OOLFABRICATIONMENU
In the menu, left-click on the
central left icon. The nine dif-
ferent tools are displayed with
a bar showing the number of tools
manufactured by your workers. The
default settings show high rates for
hammers and picks and low rates for
scythes and pliers. Tool makers, geologists, blacksmiths, and construction
workers all need hammers, but only
farmers need scythes.
You can modify the tool fabrication rate
during the game. For example, if you
urgently need a specific tool (you may
have enough hammers, but you need
pliers for a new blacksmith), you can
speed up the manufacturing rate for the
pliers while reducing that rate for the
other tools. Remember to change these
settings later on in the game or you will
wind up with more pliers than you ever
needed or wanted.
The length of the bars shows the number of manufactured tools. If the
hammer bar is twice as long as the saw
bar, this means that your workers will
manufacture two hammers for each
saw. As long as you don’t have a blacksmith, this menu is not useful. If you
want to avoid having to set priorities for
the tools, manufacture as many tools as
possible as soon as you can.
41
42
Page 23

Rules of Combat
Rules of Combat
M
ERCHANDISEPRIORITIESMENU
Click on the central icon to open the
merchandise priorities menu. You see a
list of merchandise and icons. This
menu allows you to define priorities for
merchandise; some of them are transported in priority by your transporters.
The wood has the first priority in
the default settings because it is very
important for construction work, and
must be delivered as soon as possible to
the sawmills. Gold has a lower priority
level; even if it strengthens your troops’
morale, its transportation is less urgent,
and has less effect on the game. You
may also have your own strategy, so
you can change these priority settings.
Left-click on the desired merchandise.
The small arrows allow you to lower
or raise the priority level, and the large
arrow places the merchandise at the
top or bottom of the priority list. The
upper left icon allows you to return to
the initial settings.
If you are fighting against the enemy,
weapons should generally be a transport
priority before construction materials.
However , the choice is yours.
E
V ACUATIONMENU
Another important menu is the evacuation menu. It allows you to evacuate
merchandise; activate it by left-clicking
on the central right icon. If the enemy
gets too close to one of your warehouses and you decide to evacuate it, it
would be a pity to save more wheat
than gold. In this menu, you decide the
evacuation priority of the merchandise.
This option works like the delivery
priorities menu.
Messages and Preferences
During the game, you always know
of important events from the messages
displayed by the program. You can
also send yourself messages to keep
yourself informed.
G
AMEMESSAGES
This section is related to the various
messages sent during the game.
You receive messages for the following:
❖ A new guard building is
occupied for the first time
by a knight. You thus annex
new territories and are able
to plan your city’s expansion.
❖ A new warehouse has
been constructed.
❖ A geologist discovered new
underground riches.
❖ A mine which yields no more
ore must be demolished because
the miners consume food but
produce nothing.
❖ You are attacked.
❖ You conquered an enemy
guard building and gained
new territories.
❖ One of your buildings has been
taken over by the enemy.
❖ The enemy placed a hut near
your territory, and you lost
some land.
❖ Same as above, but you lost land
and one or more buildings.
❖ The construction materials stock
in your castle is too low. An
emergency program is started,
and the only construction
works to receive materials
are the lumberjack huts, the
sawmills, and the quarries.
❖ The emergency program is
stopped, the construction works
mentioned above have been provided with materials, and their
deliveries have been carried on.
You don’t need to read all the messages
the moment they arrive. The program
memorizes more than fifty of them, so
you have time to finish what you are
currently doing.
To view a message, left-click on the
flashing message icon in the menu. If
the message displayed doesn’t interest
you and there are more, left-click on
the sheet to view the next message. An
arrow allows you to come back to the
previous message.
S
ENDINGYOURSELFMESSAGES
S
ERFCITY
includes other message
options. For example, you can send
yourself a message. This option is in
fact a “recall” option which you can
use in two ways:
1. Call yourself to a certain place
after a specified length of time.
2. Call yourself to a menu or a
warehouse after a specified
length of time.
43
44
Page 24

Rules of Combat
Rules of Combat
The different watches in the main
menu allow you to specify the length
of time with brackets of 5, 10, 20, 30
or 60 minutes. When this time has
expired, you receive a message and
are automatically called back to the
desired place or menu. Here are a few
examples of this option:
❖ You urgently need a certain type
of tool and you decide to halt
the manufacture of other tools
with the production menu. If you
forget to change the production
settings later on, no other tools are
manufactured, and you can easily
foresee the consequences. . . .
Left-click on a watch while in
the tools menu. After the specified
length of time, you are informed
that you still have something to
do in this menu.
❖ Your mine workers are on strike
and you urgently need food. You
can modify the delivery priorities
for the merchandise. Fish, meat,
and bread are delivered in priority, before the construction
materials. When the problem is
resolved, the recall option allows
you to change the settings again
and set new priorities.
❖ You want to build new huts for
fishermen in a certain place, but
you have not yet annexed the
land and the guard huts are still
under construction. Specify the
desired length of time after which
you want to check on this place
again. The situation may be
different later on.
❖ You realize that the enemy is
suddenly constructing many
guard huts, and you want to
keep an eye on him. Just set the
length of time after which you
will be called to a certain place
to check on the situation.
Sometimes it is useful to use the recall
option if you want to change the merchandise and/or serfs’ settings again
later on in the game.
You must also consider this: if you play
in team mode with another player (blue
serfs), the right player on the screen
may not use the watches, because all
the messages arrive to the left player.
But you’re playing as a team, right?
Replaying a World
Back to the main menu. In one and
two-player mode and in demo mode,
an icon appears in the center of the
screen. We did not discuss this icon
earlier in this manual. As you already
know, the sixteen digit number affects
the world’s appearance. Thus, the
same number always produces the
same world. If you left-click on this
icon, the same combination is used for
your opponents.
What is the real advantage of this?
For example, say you choose the
6355174823325876 combination and
a size 4 world. At the end of the game,
if you found that this world was interesting and challenging, you can give
that combination and the world size to
a friend. They can play the same game
using the arrow icon, because the
world
and
opponents data are always
based on the digit combination and
world size.
The sixteen digits (between 1 and 8)
allow about 270,000 billion combinations (some are more interesting than
others). Examine your opponent’s abilities carefully, and decide if you want to
accept this game or not. If you want to
play another game, left-click on the
arrow to obtain a new combination,
then left-click again on the bottom
arrow . You can do this as many times as
you want.
If another player gave you a combination, left-click on the dialogue box and
enter the combination, which must
include all sixteen digits. Remember to
note the world size and the combination if you want to pass the game to
another player.
45
46
Page 25

Rules of Combat
Rules of Combat
Demo and Team Mode
In demo mode, you can watch a game
entirely controlled by the computer.
Even if you only watch the game, S
C
ITY
is entertaining and interesting. In
demo mode, the statistics, the menus,
the map and the usual buildings information are available as in a normal
game. You may change some menus
and statistics options, but you cannot
change the settings or construct buildings or roads.
Relax and watch the computer opponents fight for control of the land.
The team mode allows two players to
play together against computer-controlled opponents. Both players control
the same serf group (the blue ones).
Team play has an advantage: you have
more time to think and decide. But
there is also a drawback: you may
experience some coordination problems from time to time. In team mode,
the game is slightly different. Both players
cannot
menus, the attack option, or the geologist. But this is a minor constraint,
because the players are supposed to
inform each other of any change in the
settings anyway.
simultaneously activate the
ERF
The Options
You can define several extra
options for each player. These
options are activated when
left-clicking on the icon on the main
menu or the play menu.
Messages: the game includes four different message display modes.
0. No messages are displayed.
1. Only important messages are
displayed (attacks, victories,
defeats, building losses, and
the emergency program).
2. All messages are displayed,
except the messages concerning
newly constructed buildings
and geologists.
3. All messages are displayed.
Scrolling when building roads: If you
get close to the edge of the play-screen
while building a road, the world scrolls
automatically and you hear a sound.
Fast construction click: If you left-click
twice on the pointer, this has the same
result as left-clicking on the construction icon. Left-click twice on a flag to
build a road, or on an empty place to
construct a building.
Special Functions
for the Map
The map includes a special option:
Display the map and special-click on
the buildings icon. A new window with
buildings appears. This window is identical to the statistics window.
The change page icon allows you to
see the other buildings. Choose a building and left-click on it. The buildings
will disappear and the map appears.
A new icon is displayed at the
bottom of the screen. The
map only displays the selected building. This option allows you to quickly
see where your warehouses, etc. are
located. In very large worlds, this
option is very useful. The buildings currently under construction are displayed
for your convenience, allowing for better planning. For example, if you are
looking for the right spot to place a new
baker, you check for where you placed
your windmills. When you close the
map, the option is still active.
To return to normal mode, left-click
“normally” on the icon. To select another type of building, special-click again.
You can use the flag to select
the type of buildings displayed
on the map. Left-click on the flag. A
new icon appears below the map. All
flags will not be displayed, only the
ones where all roads are not used. This
allows you to see if your network is
jammed by the transport of merchandise. There are three reasons why a
road is not being used:
1. You just built a road and a
transporter hasn’t arrived
on it yet.
2. There is a traffic jam at
this crossroad.
3. There are no more workers
available, so there are no new
transporters for the road.
Another special option, the magnifying
glass icon, is often useful because it
allows you to zoom in on the game map.
47
Fast map click: Double-click on the
right mouse button to display the map.
Double-click again to close it.
48
Page 26

Hints
Hints
HINTS
The Most Important
Rule – Be Observant
As soon as you change one of the
settings, your serfs (small groups or hundreds of them) act differently in order to
follow your new instructions.
A small change may have profound
effects. It is wiser to carefully plan your
construction schedule and your strategy,
rather than build things haphazardly and
constantly attack your enemies. Examine
situations carefully and analyze them
before making decisions. The winner of
the game is not the one who clicks
quicker on the icons, it’s the one who
develops the best tactics and strategies.
You already know how to choose a
good location for your castle, but
observe the positions of your opponents’
castles as well. Avoid placing yourself
too close to a powerful adversary. The
computer-controlled opponents can
actually fight amongst themselves and
destroy each other .
Look at your statistics from time to time,
analyze your development mistakes or
the negative results of an operation, and
find the best solution. You can solve a
problem in many ways.
Let’s take an example: your construction work halts because your wood
(boards, not tree trunks) supply is
exhausted. As long as you have enough
lumberjacks, build a sawmill. In case of
a grave crisis, demolish a few roads to
reduce merchandise deliveries to certain areas in your city. Are some
workers are using the wood needed for
your construction works? Reduce wood
deliveries to the ship makers or tool
makers until the crisis is over. Do you
have enough tools to allow this, or do
you have more urgent problems to
solve in this area? What will you do to
have a sufficient stock of wood? Did
you train enough forest rangers? Will
you be able to solve the crisis more
rapidly by cutting the trees down in a
new forest? If there is no forest around,
a new guard hut will allow you to
annex new lands if you need to. You
will always find new tasks in S
because each game is different.
Carefully examine your opponent’s
strengths; look at his territory and guess
what he is trying to do. Determine his
weak points so that you can attack him.
Has he built only one iron mine?
Destroying that would allow you to
deprive him of his raw materials. Is one
of his warehouses easy to take, or lacking
food? Could you interrupt his food, merchandise, and/or building production?
The problems you face are the same that
your opponents face. There are several
ways to freeze up his economy .
ERFCITY
Depending on the size of the world, the
number of serfs is limited as follows:
world size number of serfs
1 500
2 1,000
3 2,000
4 4,000
5 8,000
6 16,000
7 32,000
49
50
Page 27

Hints
Hints
Hints and Tips
on Professions
This section contains some hints and
tips for the various serf professions.
Butcher: The butcher works quickly
and, in spite of many deliveries from
the pig farmers, he generally does not
have any problems with his work.
Caster: Casting takes a little while and
the caster cannot cast the ore of several
mines fast enough without falling
behind. He can catch up as soon as the
deliveries slow down. Depending on
the size of his backlog, you need to
hold back on new construction.
Construction Worker: The land for
the construction of large buildings is
rare, and consequently, expensive. Do
not construct huts and small roads on
land where you could construct a
larger building.
Farmer: The farmer needs unoccupied
land in order to transform it into fields.
Roads are not considered unoccupied
land, so do not construct too many
roads around a farm. To allow the
farmer quick travel to his fields, avoid
building farms on steep terrain.
Fisherman: A lake that is as big as
the game screen contains enough fish
for three or four fishermen. Spread
the fishermen out on the lake; if they
all fish in the same spot, they will not
catch anything.
Geologist: When the geologists return
home after their prospecting, they stay
in the warehouses with nothing to do.
From time to time, send them back into
the mountains to look for new underground riches. You may discover a new
vein of gold that you had missed before.
Lumberjack and Forest Ranger: These
two complement each other perfectly.
The forest ranger can replace the trees
cut down by the passing of the lumberjack. Wood is the raw material with
the highest demand, so use several
lumberjacks and forest rangers. The
forest rangers cannot plant trees on
the roads. Do not place them in the
general vicinity of the castle or near the
warehouses. Place trees on land that is
not perfectly flat and that cannot be
used for other things.
Miller and Baker: One miller and one
baker are enough for several farms. Be
sure that the roads used for transporting
their merchandise are not too long.
Miner: If he can no longer find anything, burn the mine down so he finds a
new profession. In the mountains, construct a network of roads with
numerous branches to facilitate the
transport of raw materials to the valley.
Sawmill Worker: One sawmill is sufficient for several lumberjacks; as the
game progresses you may have to construct more.
Ship Maker: For large lakes use water
ways to quickly transport merchandise.
Make sure that the ship maker does not
use up all your wood to build a fleet of
boats. As soon as he has finished his
work, stop giving him wood.
T ransporter : When you demolish a road,
you interrupt the transport of merchandise passing in that direction. Try to
figure out a way to leave roads intact,
and do not destroy important connecting
roads. Merchandise has to wait for the
arrival of a new transporter before being
transported on a new road. Any modification of your network affects the
transportation of merchandise. Construct
a well-organized network of roads right
from the start.
How do the serfs choose the road on
which to transport the merchandise? It
is a rather complicated procedure. It is
important to know where the merchandise is needed. A mill can be very close
and contain a lot of wheat, even though
the stock of another mill that is further
away is dried up. Moreover, certain
merchandise is distributed according to
the menu parameters.
When a destination has been found for
the merchandise, the serfs take the
shorter route. The essential element is
the number of roads that the merchandise has to pass by; a very long road
between two flags is faster than a
shorter voyage with an intermediate
flag. You have, therefore, a great
advantage, because you can influence
the choice of roads for transportation.
Here is an example: you have placed a
flag on each side of a warehouse and a
road to connect it to your network. All
merchandise that must travel through
the warehouse is already keeping the
crossroads very busy. The merchandise
transported from one flag to the other,
and in both directions, blocks traffic
even more. On the other hand, if you
create a new connection between the
two flags (even if it makes an apparent
detour around the warehouse), the
traffic no longer passes in front of the
warehouse, but by the new road that
allows you to avoid it. This principle
allows you to construct complex networks around important warehouses
or castles, which, in turn, allows you
to transport merchandise more rapidly.
Remember that any construction,
demolition, and transformation of roads
initially has negative effects on the
transportation of merchandise. It is only
when the serfs adapt to the new situation that the transportation of
merchandise proceeds normally. Your
workers often have to cross over enemy
land to cut down trees or harvest
wheat. In the mines, you can take
advantage of this situation and steal
underground riches from the enemy.
51
52
Page 28

Hints
Hints
The Behavior of Your Opponents
All adversaries have different personalities and playing strategies. Here is a brief presentation of the principal character types:
Lady Amalie
Amalie is an inoffensive,
reserved lady, who goes
about her work peacefully.
Kumpy Onefinger
Kumpy is a very hostile
character who loves gold
above all else.
Balduin, a former monk
Balduin is a very discrete
character who worries chiefly
about protecting his lands
and his important buildings.
Frollin
His unpredictable behavior
may take you by surprise.
Frollin “pilfers” away lands
that are not occupied.
Kallina
Kallina is a fighter who blocks
her enemy’s food supply with
clever tactics.
Rasparuk the Druid
Rasparuk’s tactics consist of
amassing large stocks of raw
materials. He is a sly aggressor .
Count Aldaba
Protect your warehouses well,
because Aldaba is aggressive
and knows exactly where he
must attack.
King Ralph VII
Ralph is a prudent ruler ,
without any particular
weakness. He tries to check
his adversaries’ supply of
construction materials.
Homen Doublehorn
Homen is the most aggressive
enemy . Watch your buildings
carefully , or he may take you
by surprise.
Sollok the Joker
Sollok is coy and treacherous;
he tries to stop the supply of
raw materials to his enemies
from the beginning.
Need Help?
During the game, you can sometimes
find yourself in a “no-win” situation.
For example, if you have lumberjacks
but no more wood, the construction of
a new hut can pose a serious problem.
All is not yet lost, however, because
you can always send your knights into
combat. If you do not have any stocks
at the beginning of the game, you may
end up quickly lacking materials. If you
do not watch your production closely,
you may find that you lack one unit of
wood for the sawmill too late . . . and
have to restart at zero.
To avoid this, an “emergency program”
is started at the beginning of the game.
This program is, in fact, a reserve of
two units of granite and seven units of
wood that allow you to construct a
lumberjack’s hut, sawmill, and quarryman’s hut.
If you need materials, these construction sites receive them as a priority,
because these three buildings are necessary to continue the game. If all the
hammers have been distributed to the
construction workers and to the geologists, you will not have any hammers
left for a new tool maker. The tool
maker is the only person who could
make more! It is for this reason that at
the beginning of the game, certain serfs
take the necessary tools.
The End of the Game
The game finishes when there is only
one city remaining in the game’s world.
You can quit a game by left-clicking on
the white, surrender flag in the attack
menu. If the computer-controlled adversary pleads for you to quit, you can still
decide whether or not to continue the
game. There may be instances when
several cities remain in the game. In this
case, the game is a draw. This situation
can happen when no city has enough
knights and all the deposits of ore and
coal are dried up, prohibiting the fabrication of weapons. In this case, there is
no winner .
Early in the game, you will not have too
many problems. Everything has been
foreseen. But, later on, you become the
sole person responsible for your successes and mistakes. Now that you
know everything about the program,
your knowledge should be sufficient to
confront the computer or challenge
another player! Enjoy.
53
54
Page 29

Reference Material
Reference Material
REFERENCE MATERIAL: Jobs REFERENCE MATERIAL: Resources and Tools
Baker
Blacksmith
Butcher
Caster
(of Iron)
Construction
Worker
Farmer
(of Wheat)
Geologist
Leveler
Lumberjack
Miller
(of Wheat)
Miner
Pig Farmer
Tool Maker
Transporter
(Water W ays)
Transporter
(Merchandise)
Knights
2nd Lance
Corporal
1st Lance
Corporal
Axe
Boat
Bread
Butcher’s
Knife
Coal
Fish
Gold (Ore)
Ham
Hammer
Iron
Iron (Ore)
Pick
Scythe
Shield
Shovel
Stones
Sword
Tree Trunks
55
Fisherman
Forest Ranger
Quarryman
Sawmill
Worker
Ship Maker
Corporal
Lieutenant
Captain
Fishing Rod
Flour
Gold
Pigs
Pliers
Saw
Wheat
Wood
56
Page 30

Reference Material
Reference Material
REFERENCE MATERIAL: Buildings REFERENCE MATERIAL: Buildings
Bakery
Blacksmith’s Shop
Butcher Shop
Castle
Fisherman’s Hut
Forest Ranger’s Hut
Garrison
Gold Foundry
Guard Hut
Guard Tower
Iron Foundry
Iron Mine
Quarryman’s Hut
Sawmill
Ship Maker’s Shop
Tool Maker’s
Shop
57
Coal Mine
Farm (Wheat)
Gold Mine
Granite Mine
Lumberjack’s Hut
Pig Farm
Warehouse
Windmill
58
Page 31

CREDITS
Blue Byte Credits
Producer Thomas Hertzler
Project Manager Stefan Piasecki
Programming and Conception Volker Wertich
Graphics Christoph Werner
Music Haiko Ruttmann
Rule Book Writers Volker Wertich, Stefan Piasecki
PC Adaptation Alexander Jorias, Ingo Frick,
Volker Wertich
Introduction Christoph Werner (Graphics),
Ingo Frick (Program)
Playtesters Matthias Best, Frank Grimm,
Michael Passmann, Birgit Krause
SSI Credits
Producer Bret Berry
Associate Producer and Rule Book Author Jason Ray
Rule Book Editors Eileen Matsumi, André Vrignaud,
Joshua Cloud
Product Test Supervisor Glen Cureton
STRATEGIC SIMULATIONS, INC. LIMITED WARRANTY
Strategic Simulations, Inc. (“SSI”) warrants that the diskette(s) on which the enclosed program is recorded will be free from defects
in materials and workmanship for a period of 30 days from the date of purchase. If within 30 days of purchase the diskette(s) prove
defective in any way, you may return the diskette(s) to Strategic Simulations, Inc., 675 Almanor Avenue, Suite 201,
Sunnyvale, CA 94086-2901 and SSI will replace the diskette(s) free of charge. In addition, if the diskette(s) prove defective at
any time after the first 30 days, return the diskette(s) to SSI and SSI will replace the diskette(s) for a charge of $10.00 (each disk)
plus $4.00 for shipping and handling. California residents, add applicable sales tax.
SSI MAKES NO WARRANTIES, EITHER EXPRESS OR IMPLIED, WITH RESPECT TO THE SOFTWARE PROGRAM RECORDED ON THE
DISKETTE OR THE GAME DESCRIBED IN THIS RULE BOOK, THEIR QUALITY, PERFORMANCE, MERCHANTABILITY OR FITNESS FOR
ANY PARTICULAR PURPOSE. THE PROGRAM AND GAME ARE SOLD “AS IS.” THE ENTIRE RISK AS TO THEIR QUALITY AND PERFORMANCE IS WITH THE BUYER. IN NO EVENT WILL SSI BE LIABLE FOR DIRECT, INDIRECT, INCIDENTAL, OR CONSEQUENTIAL
DAMAGES RESULTING FROM ANY DEFECT IN THE PROGRAM OR GAME EVEN IF SSI HAS BEEN ADVISED OF THE POSSIBILITY OF
SUCH DAMAGES. (SOME STATES DO NOT ALLOW THE EXCLUSION OR LIMITATION OF IMPLIED WARRANTIES OR LIABILITY FOR
INCIDENTAL OR CONSEQUENTIAL DAMAGES, SO THE ABOVE LIMITATION OR EXCLUSION MAY NOT APPLY TO YOU.)
The enclosed software program and this rule book are copyrighted. All rights are reserved. This rule book may not be copied, photographed, reproduced, or translated or reduced to any electrical medium or machine-readable form, in whole or in part, without
prior written consent from SSI. The program accompanying this rule book may be copied, by the original purchaser only, as necessary for use on the computer for which it was purchased.
Any persons reproducing any portion of this book for any reason, in any media, shall be guilty of copyright violation and subject to the appropriate civil or criminal action at the discretion of the copyright holder(s).
1994 Strategic Simulations, Inc. All Rights Reserved.
WHAT TO DO IF YOU HAVE A DEFECTIVE DISK
Each of our games undergoes extensive playtesting prior to its release. Through this process we hope to uncover and correct any
errors in programming. However, due to the complex nature of our simulations, some program errors may go undetected until after
publication. In addition to errors in the program, there are occasionally problems with the disk itself. We experience the industry
standard of approximately a 3 to 5% failure rate of duplicated disks. Before assuming that a disk is defective, make sure to check
your disk drive. Up to 95% of the disks returned to us as defective will run fine on our computer systems. Often the problem is with
a disk drive that needs servicing for alignment, speed, or cleaning.
Should you have a defective disk, please return the disk only (keep all other parts of the game) to our Customer Support
Department, along with a note describing the problem you have encountered. A replacement disk will be provided upon our receipt
of the defective disk.
Should you uncover an error in the program, return both your game disk and any “save game” disks to our Customer Support
Department. Please enclose a description of what was taking place in the game when the error occurred. Upon correction of the program error, we will return an updated disk to you.
Always make sure to include your name, address, and daytime telephone number with any correspondence. We will do our best to see that any problems are corrected as soon as possible.
Product Tester Chris Lanka
Test Support Annette Grove, Rose Ramos
Rule Book DTP LOUIS SAEKOW DESIGN:
Dave Boudreau, Leedara Zola
Rule Book Printing A&a Lithographers
Our main business number is (408) 737-6800. If you encounter disk or system related problems you can call
QUESTIONS OR PROBLEMS?
our Technical Support Staff at (408) 737-6850 between 11 a.m. and 5 p.m., Pacific Time, Monday
through Friday, holidays excluded. NO GAME PLAYING HINTS WILL BE GIVEN THROUGH THIS NUMBER. You can
write to us for hints at: Hints, Strategic Simulations, Inc., 675 Almanor Avenue, Suite 201, Sunnyvale, CA 94086 (include
a self-addressed, stamped envelope for reply).
IBM COMPATIBLE COMPUTER INFORMATION:
Many of our games will work on IBM compatible computers. If you own an IBM compatible computer we suggest that you
consult with our Technical Support Staff at (408) 737-6850 between 11 a.m. and 5 p.m., Pacific Time, Monday
through Friday, (holidays excluded) to see if an SSI game you're considering purchasing is compatible with your computer. If we have insufficient data to determine compatibility, you may wish to purchase the game and test for compatibility
yourself. If the game proves to be incompatible, you may return it within 14 days with your dated receipt and we will refund
your money. Or, if you return the game within 30 days, you may exchange the game for another.
 Loading...