

Page 1

HOMEWORLD: CATACLYSM
Page 2

HOMEWORLD: CATACLYSM
HOMEWORLD: CATACLYSM
PART ONE -- HISTORICAL BRIEF . . . . . . . . . . . . . . . . . . . . . . . . . .3
History of Hiigaran Landfall . . . . . . . . . . . . . . . . . . . . . . . . . . . . . .4
The Rude Awakening . . . . . . . . . . . . . . . . . . . . . . . . . . . . . . . . . . .6
History of Kiith . . . . . . . . . . . . . . . . . . . . . . . . . . . . . . . . . . . . . . .8
History of Kiith Somtaaw . . . . . . . . . . . . . . . . . . . . . . . . . . . . . . . .9
The Taidan Republic . . . . . . . . . . . . . . . . . . . . . . . . . . . . . . . . . .14
The Turanic Raiders . . . . . . . . . . . . . . . . . . . . . . . . . . . . . . . . . . .17
PART TWO -- TECHNICAL BRIEF AND GAMEPLAY GUIDE . .19
Installation . . . . . . . . . . . . . . . . . . . . . . . . . . . . . . . . . . . . . . . . .20
Game Controls . . . . . . . . . . . . . . . . . . . . . . . . . . . . . . . . . . . . . . .20
Options . . . . . . . . . . . . . . . . . . . . . . . . . . . . . . . . . . . . . . . . . . . .68
Game Play . . . . . . . . . . . . . . . . . . . . . . . . . . . . . . . . . . . . . . . . . .73
PART THREE -- TECH TREES . . . . . . . . . . . . . . . . . . . . . . . . . . . .77
Somtaaw Module Tech Tree (Multiplayer) . . . . . . . . . . . . . . . . . . .78
Somtaaw Tech Tree (Multiplayer) . . . . . . . . . . . . . . . . . . . . . . . . .79
Beasts Tech Tree (Multiplayer) . . . . . . . . . . . . . . . . . . . . . . . . . . .81
PART FOUR -- SHIPS . . . . . . . . . . . . . . . . . . . . . . . . . . . . . . . . . . . .83
Kiith Somtaaw Vessels . . . . . . . . . . . . . . . . . . . . . . . . . . . . . . . . . .84
Turanic Raider Vessels . . . . . . . . . . . . . . . . . . . . . . . . . . . . . . . .101
Imperialist Taiidan Vessels . . . . . . . . . . . . . . . . . . . . . . . . . . . . .107
PART FIVE -- CREDITS AND CUSTOMER SUPPORT . . . . . . .135
Credits . . . . . . . . . . . . . . . . . . . . . . . . . . . . . . . . . . . . . . . . . . .136
Technical Support . . . . . . . . . . . . . . . . . . . . . . . . . . . . . . . . . . .140
2
Page 3

PART ONE -- HISTORICAL BRIEF
Page 4
HOMEWORLD: CATACLYSM
HISTORY OF THE HIIGARAN LANDFALL
The story of the Kushan Exodus to Hiigara is widely known and often told; most of us already know all about the
voyage. In six months, the survivors of our entire race traveled from the prison world of Kharak to our once and
future homeworld. The trip was a major turning point not only for the Kushan people, but for most of the
civilized galaxy; our return to Hiigara was not only the end of our 3,000-year exile, but the end of the Taidani
Empire, and its tyranny over billions.
By the ancient Kharakian dating system, the Kushan people returned to Hiigara in the year 1216 (Galactic
Standard Year 9,510). In honor of the momentous occasion, Kiith Sjet declared the beginning of a new
calendar on the day the returning Kushan first set foot on our homeworld. By decree, the Hiigaran Landfall
marked the first day of a new Year Zero. From that time on, “days” have been measured by Hiigara’s period of
rotation, and “years” according to the revolutions of Hiigara around its mother sun.
By the new dating system, these words are written in the year 15 AHL (GSY 9525)-15 years after Hiigaran
Landfall. The past decade and a half have been a time of both celebration and adversity for the Kushan people.
Nearly 550,000 of us survived the Exodus from Kharak, but our culture has been subjected to tremendous stress.
There is not a single aspect of Kushan existence which we have not been forced to re-examine in light of our new
circumstances. Even the simplest things, like providing our population with food and shelter, have proved far
more complicated than we ever imagined.
Defending ourselves has been our most serious concern. The Bentusi and the new Taidanii Republic have
established a small buffer zone around Hiigara, a region approximately 10 lightyears in diameter. Anything within
a 5 lightyear radius of Hiigara is considered our space, and we are obligated to defend it. Our warrior kiithid are
forced to maintain constant patrols to keep our spaceways from being overrun, not only by the mongrel ships of
the pirate races, but by the last bitter remnants of the Imperial fleet.
The Mothership, which once carried our people safely across 35,000 lightyears of uncharted space, is no longer
fully operational. Deprived of the conscious
direction of Karan Sjet, the Mothership’s engines are
set on automatic; She serves as an orbital space
station and shipyard. Manned by a skeleton crew of
8,000 engineers, the Mothership provides living
quarters for those working in low orbit, and She has
given birth to over 30 carrier-class ships since the
Hiigaran Landfall. The result of this phenomenal output has been a new Hiigaran navy, which consists of
six great Fleets; the largest of our present-day kiithid
have each taken command of an autonomous carrier group. The fleets of Manaan, Soban, Naabal,
LiirHra, Paktu and Kaalel take turns patrolling the
outer systems, guarding our trade routes, and
defending Hiigara itself.
44
Page 5

Addressing the practical concerns of our people has been hard enough; up until the year 11 AHL (9521 GSY) ,
food rationing was common, and on the surface of Hiigara, thousands are still engaged in construction. Providing
for our peoples’ practical needs has been difficult, however, providing for their political needs has been far, far
more troublesome. Kushan society has been in a state of flux since the Exodus; finding some way to give all our
people a fair say in government is a serious problem, and no one is entirely satisfied by any solution.
The New Daiamid was completed in the year 4 AHL, (9514 GSY) the crowning glory of our planetary capital at
Asaam Kiith’sid. The Daiamid Assembly is still the main governing body of the Kushan race, although its
detractors claim that the New Daiamid cannot rule as fairly as its predecessor on Kharak once did. Such
hotheads denounce the current Assembly as a sham, and maintain that a few families wield too much power.
Sadly, there is some merit to this accusation! Over one-half of the Kushan population now belong to one of six
kiithid, and by virtue of sheer population the major families have tremendous influence. The Paktu, the Manaan,
the Sjet, Naabal, LiirHra, Kaalel and Soban are by far the largest kiith groupings in existence, and their combined
numbers come to almost 300,000. By contrast, the majority of other kiithid on Hiigara can boast a few hundred
souls at best; most are lucky to have even that many. In some cases the kiithid, once over 100,000 strong on
Kharak, now only have 30 or 40 members.
These smaller kiithid are now collectively known as the Sleepers, because most of them spent the voyage from
Kharak in cryogenic suspension. Coming from all walks of life, the only thing that these men and women have in
common today is their powerlessness in the present Daiamid system. Unable to compete with large kiithid which
can lay claim to half a continent at a time, exhausted by years of struggle for a voice in the Assembly, many of
these small kiithid have given up the fight to establish a power base for themselves on Hiigara. Dozens of Sleeper
clans have chosen in recent years to abandon their ancient names and become vassals instead, joining their
bloodlines to powerhouses like the Paktu or the Naabal. The family honor comes a poor second, as always, to
survival; surrendering to necessity is an ancient tradition among the Kushan. It may eventually come to pass that
the entire kiith system, which still connects us to the life we once lived on Kharak, will collapse.
HOMEWORLD: CATACLYSM
5
HISTORICAL BRIEF
5
Page 6
HOMEWORLD: CATACLYSM
THE RUDE AWAKENING
Sleepers aboard the Mothership would not learn
of the destruction of Kharak until the long journey
to Hiigara had been completed.
THE RUDE AWAKENING
One of the most difficult aspects of the Hiigaran Landfall
was the revival of our so-called “Sleeper Kiithid”, the 92%
of our current population who traveled from Kharak to
Hiigara in cryogenic suspension. Upon arrival on Hiigara, most of our Sleepers faced a very rude awakening. In
some ways, our society is still trying to cope with what they were told, when they rose from cold storage.
There was good news, of course. Every Sleeper was delighted to hear that the Mothership and its crew had
arrived safely on our Homeworld, that the mystery of our origins had been solved, and that the oppressive regime
which once banished us to the far reaches of space had been defeated. But there was very, very bad news as well:
unlike our fighting men and women, the Sleepers had no six-month struggle for survival to cushion their shock
and horror when they heard that Kharak had been destroyed.
No one awakened on Hiigara without an immediate burden of grief and loss...and sometimes guilt and anger as
well. When they went to sleep, most Sleepers had accepted the possibility that they would never see their loved
ones again, but it was generally assumed that those onboard the Mothership would be in far greater danger than
those we left behind. The Sleepers began their mission with a willingness to sacrifice themselves, secure in the
knowledge that their own families and friends would carry on and remember them, if worst came to worst. The
irony of finding that the crew of the Mothership were the only survivors of our race was too much for many to
bear. In the first few weeks after Landfall, there were dozens of suicides.
Only 1 out of every 60 Kushan was aboard the Mothership at launch. Volunteers for Sleep had been forced to
meet some basic criteria for useful skills, age and health. This seemed extremely reasonable at the time, simple
common sense; but some of those practical decisions had cruel consequences in hindsight. For example, no
persons under the age of 17 or over the age of 50 were accepted; the freezing process was considered too great
a risk for those not in optimal condition. There were no children aboard the Mothership, nor any of our
elders. When Kharak burned, the majority of Sleepers lost their blood links to both past and future; they were
left with nothing to hold on to but a few seconds of torturous satellite footage...pictures of our loved ones being
burned alive by the Taidan Imperium.
The Burning of Kharak has kindled a great hatred in the Kushan people, of this there can be no doubt. The
savagery of the Imperial attacks both on Kharak and on their own cryogenic storage units has filled our Sleepers
with what can only be described as bloodthirsty rage...and as many have pointed out, watching the video footage
of the Emperor’s personal guard being cut to ribbons is not the same as being there! We cope with this anger
in various ways, but our society still boils with resentment of the Taidani in general. Of course, most of our
people are capable of distinguishing between the Imperium, which wronged us so cruelly, and the current
besieged Taidan Republic, which is still ruled by the Rebels who helped us win back Hiigara...but sadly, not
everyone can make this distinction. With the constant threat of Imperialist rule, for many Kushan, the only good
66
Page 7

Taidani is a dead one and even the moderates are pushing for he annexation of nearby former Taidan worlds in
the name of security for Hiigara.
All of us have had to make some kind of peace with the past, and go on as best we can. Some of us have thrown
ourselves into the hard work of construction, trying to recreate some small part of what we lost; some of us have
hastened to bring new children into our depleted kiithid. Others have volunteered for military service, and spend
their days repelling Imperial and pirate attacks on our borders. But for some, the ordinary means of coping do
not suffice...
No one embodies the Kushan hatred of Imperials more perfectly than the man now known as Iifrit Tambuur’sa.
Iifrit is the last living member of the Tambuur kiith, and for the past twelve years he has lived largely in the new
Taidan Republic. Tambuur’sa and his young wife, Dava, were the only members of Kiith Tambuur who made the
Gold List, back on Kharak; both of them were chosen as Sleepers, and they were frozen side by side some months
before the Mothership was launched. Unfortunately, when the Taidanii burned Kharak, they also turned and
opened fire on our cryogenic storage units; Dava Tambuur’s life pod was one of many to be irreparably damaged
by the Taidani attack, and she died in transit to Hiigara. When Iifrit Tambuur awoke from cold sleep, he found
that he had lost not only his entire kiith, but his beloved wife as well. He declared Paaura on the Taidan
Imperium, and several Kushan survivors who sympathized with his cause became honorary members of Kiith
Tambuur, in order to share in his “eternal vengeance”. Out of respect for the ancient vow of Paaura, Tambuur’sa
and his people were granted the use of a small frigate, and he has since become one of the most famous bounty
hunters in this quadrant of the galaxy, credited with collecting the heads of over 300 Imperial war criminals.
HOMEWORLD: CATACLYSM
7
HISTORICAL BRIEF
7
Page 8

HOMEWORLD: CATACLYSM
HISTORY OF KIITH
Kushan society is organized along loose family associations. An extended family grouping is called a Kiith
(plural: Kiithid) and most anthrocists agree it is a social artifact that probably dates back before our arrival on
Kharak itself. Interpretation of ancient legends and translations of texts found in the ruins of Khar-Toba suggest
that over generations, all social structures except the most basic family bonds have broken down.
A Kiith has a loose hierarchy based on one’s social position within the family. Originally this was based
primarily on seniority, but as technology has changed the face of life on Kharak, the Kiithid too have changed,
and now family ranking is based more on wealth or personal influence than simple age. Organization within
the Kiith is recursive in nature, and models that of a core family unit. Where a single family has a Primary
leader, a secondary and then a group of dependants, the next level of Kiith organization is based on the same
system. There is a Primary family who makes policy decisions, a Secondary family which hears disputes and
makes recommendations, and a number of families of lesser power that have sworn allegiance to the Primary.
The Primary family for a Kiith is called the Kiith-Sa.
This structure is not static by any means, and, while it is not a trivial matter, families are free to change their
primary allegiances as they see fit. A family’s position within the Kith rises and falls with how many swear
allegiance to them. Although it is much more rare, from time to time a family will move from one Kiith to
another or even feel the need to begin a full Kiith of their own.
In ancient times, a Kiith-Sa could direct the entire Kiith to war, demand all families dedicate time and finances
to special projects, or even move the Kiith to another region. In modern times, the Kiith-Sa is a political and
financial leader only in that it acts on the wishes of the entire Kiith as established by referendums. The Kiith-Sa
from all over Kharak meet in the Great Daiamid located in the capital of Tiir to debate global policy and resolve
legal conflicts between Kiiths.
Traditionally, Kiiths usually concentrate their power in one or two disciplines and gather families under their
banner by being the best place to find advancement in a particular field. For example, Kiith Sjet has been
associated with the sciences on Kharak for over a thousand years, and is known to have the most advanced
computer labs in the world. Bonded couples interested in the field often apply to a S’jet family associated
with such labs. Alliances between Kiith are also based on mutual interests, and they often lead to closer ties
or complete reorganizations.
Never has the Kiith system faced such upheaval than during the years following our people’s arrival on Hiigara,
the homeworld.
88
Page 9

KIITH HISTORY: SOMTAAW
Of the earliest days of Kiith Somtaaw little is known, although this ancient family could once trace its unbroken
lineage back over 1,000 years on Kharak. The Somtaaw made their ancestral homes in the peaks and valleys of
the Kohntala Mountain range, one of the more dramatic geographic features in Kharak’s northern hemisphere.
In the first and second centuries, Somtaaw’s holdings in the Khontala were rich and varied, running the gamut
from farms, dams, and mills to fortresses and towns, including the walled cities of Hameln and Gydeo. The kiith
was more than self-sufficient; the terraced farms of the lowlands and the seasonal grazing pastures of the
highlands produced a great surplus of food and hides, and the Somtaaw prospered in trade.
Starting in the year 178, Kharakian artists from various disciplines were gathered under the patronage of Teigor
Somtaaw, one of the most enlightened kiith’sid of his time. Employing hundreds of skilled masons, painters,
architects and weavers, Kiith Somtaaw began building a series of temples on the slopes of the mountain called
Lungma Jiin, “The Roof of the World”. There were 33 temples in all, leading from the sands of the Kasaar to the
very summit of what was, at that time, the world’s highest known mountain.
Collectively, the 33 temples of the Somtaaw were known as “The Shimmering Path”. For nearly 400 years, it was
considered the height of spiritual devotion for a religiously inclined Kharakian to walk the Shimmering Path;
most Kharakians attempted the trip at least once a lifetime. Beginning at the first temple, the Oracle of Tala, the
distance that a pilgrim was able to travel on his or her own feet was considered a watermark for the strength of
the Faith that burned within.
The vast majority of Kharakians finished the pilgrimage at the Seventh Temple, the famous “Dome of Heaven”,
which lay within the city walls of Gydeo. For those stubborn few who felt the need to move closer to god,
however, there were 26 more temples along the Shimmering Path, each more inaccessible than the last. The
highest of these was Temple of the Mysteries, which very few travelers could reach; the upper slopes of Lungma
Jiin were a blasted ladder of crumbling granite and thin ice, and constantly buffeted by freezing gale force winds.
According to legend, the most sacred relics of the Somtaaw were kept on the altar of this temple, and any
pilgrim who made the journey on foot was permitted to touch them: the famed Star-Metal Scrolls, which were
alleged to have been written by the hand of Jakuul Himself, in a language which no living man could read.
Up until the discovery of Khar Toba, most serious Kharakian scholars had assumed that the Somtaaw’s Star Metal
Scrolls were just a myth, very much like their Chalice of Life or any other mystical refuse from Kharakian legend.
Before the discovery of the Guidestone, the Star-Metal Scrolls were put into the same category as Soban’s sword
Caaliburnos, or the Burning Spear of Gaalsi. However, given the discovery of the Guidestone, a great deal of new
interest was generated in the Somtaaw holy relics. Many prominent anthrocists and historians, including the
famous Mevath Sagald, joined forces and put a motion before the Great Daiamid at Tiir, requesting that the
Somtaaw’s upper temples, which had been closed to outsiders for over 300 years, be re-opened for the benefit
of modern-day scholars.
Alas, nothing came of this motion before the Burning of Kharak. Representatives from Kiith Somtaaw dragged
their heels in the Daiamid assembly, and even went so far as to suggest that archaeologists should approach the
Temple of Mysteries on foot, dressed in traditional pilgrim’s clothes! Sagald and her coalition declared this
notion “ridiculous”, and openly referred to the Somtaaw as “backward barbarians”. Many Sagald supporters
pointed out that the Daiamid was founded to hear sound logical debates, not to listen to superstitious nonsense!
Arguments on both sides were still being heard when the Mothership was launched.
HISTORICAL BRIEF
9
Page 10

HOMEWORLD: CATACLYSM
In any case, we will never know what we might have learned from the Somtaaw Scrolls; they were lost with the
rest of Kharak, and among the Somtaaw survivors who awoke on Hiigara 15 years ago, there were none who
could claim to have seen them. Since the later days of the Heresy Wars, Kiith Somtaaw had largely abandoned
their role as a religious kiith; by the time of the Exodus, the vast majority of Somtaaw’s kiithid were engaged in
another profession, the profession by which they are still best known today: mining.
The transformation of Kiith Somtaaw from a primary religious kiith to a hard-working miner’s kiith was a slow
and painful one, and involved many generations of privation and suffering. The centuries of the Heresy Wars
were hard times for the Somtaaw; their Khontala mountains provided a natural barrier between the forces of
Gaalsi and Siid, and both sides struggled urgently to subdue or seduce the Somtaaw for nearly two hundred years.
The flow of pilgrims to Somtaaw temples slowed disastrously in a world at war, and soon there was not enough
money flowing into the kiith’s coffers to maintain those temples in their intended role, as way-stations along the
Shimmering Path. Eventually, in the year 675, all 33 of the Somtaaw temples were closed to outsiders, except
for the Oracle of Tala and the Dome of Heaven.
By virtue of their own sheer stubbornness, and the natural protection provided by the narrow passes and
forbidding peaks of their homeland, the Somtaaw were able to hold off all invaders during the worst of the
Siidim and Gaalsien conflict. More difficult to resist, however, was the seduction of becoming a vassal clan,
especially when the Somtaaw holdings, although easy to defend, were also easy to cut off from trade routes.
Even a small garrison could hold the Kasaar like a cork in a bottle, and keep the Somtaaw trapped in their
mountain fortresses; invaders couldn’t enter, but neither could caravans and other visitors. Contact with the
outside was sporadic throughout the seventh and eighth centuries...the Somtaaw held no goods sufficiently
inviting to keep the Kasaar Road open.
This changed in the year 789, when Kuura Somtaaw, then kiith’sa of the 30,000 souls who still made their
homes in the Khontala, awoke one night from a strange dream. Kuura had seen the image of the god Sajuuk,
driving a great red sword into the earth in the Khontala mountains, in a seldom-visited region far from the main
roads. Driven by the urgency of her vision, she ordered several smaller families to begin digging in the Red
Creek valley. Because their kiith’sa was descended from the temple women of Tala, the Somtaaw reluctantly
obeyed, and several Somtaaw kiithid moved to the area and began the excavation, although no one was quite
certain what they were looking for.
What the Somtaaw found at Red Creek was a deposit of the richest iron ore ever seen on Kharak, which lay just
six feet below the soft sediments of the valley floor. Here was enough metal to be hammered into a hundred
thousand swords, and Kiith Somtaaw was not slow to announce their find to the rest of the world. Although both
Siid and Gaalsi offered ruinous sums to buy the mine, or the ore that it produced, Kuura Somtaaw refused to
trade with either side. In her own words, “Why should I sell these madmen a knife to cut my throat with?”
Instead, the Somtaaw built their own smelters and began mixing the iron with carbon, producing a very high
grade steel...a commodity far more precious than gold, especially during those dangerous times. An
arrangement that eventually sustained Kuura Somtaaw’s kiith was made with the Sobanii, who immediately saw
the use for Somtaaw steel and the superior weapons that could be forged from it. In exchange for a yearly
tribute from the smelters at Hameln, the Soban signed an unheard-of contract; the mercenary kiith agreed to
keep the Kasaar open and clear of marauders for a period of no less than one hundred years!
With the Naabal intervention, the Somtaaw expanded their operations, throwing themselves into their new
profession with the kiith’s customary enthusiasm. Although they never developed any significant technological
advances on their own, they were always quick to buy, copy or outright steal any new tool or technique, once
10
Page 11
HISTORICAL BRIEF
11
another kiith had put it into operation. Thus the Somtaaw profited greatly from the introduction of
steam-powered drills, narrow-gauge railroads and chemical explosives. By the time of the Exodus, Kiith
Somtaaw was nearly 500,000 strong, and had even built new holdings alongside great industrial kiithid like
Naabal and LiirHra, to the extent of opening off-planet mines in the Kharakian asteroid belt.
The return to Hiigara was not as joyous for Somtaaw as for many of our people. Although a few of their number
were awake during the journey from Kharak, employed in the care and maintenance of resource collectors, the
vast majority of Somtaaw survivors were Sleepers during the journey. When they were awakened on Hiigara, many
were horrified to hear that the families and loved ones they left on Kharak were gone, and that there was no hope
of return. Of a kiith that had once been so strong, very few survivors remained; only 15,000 Somtaaw awakened
on Kharak, less than a twentieth of their number, and the vast majority of these were men.
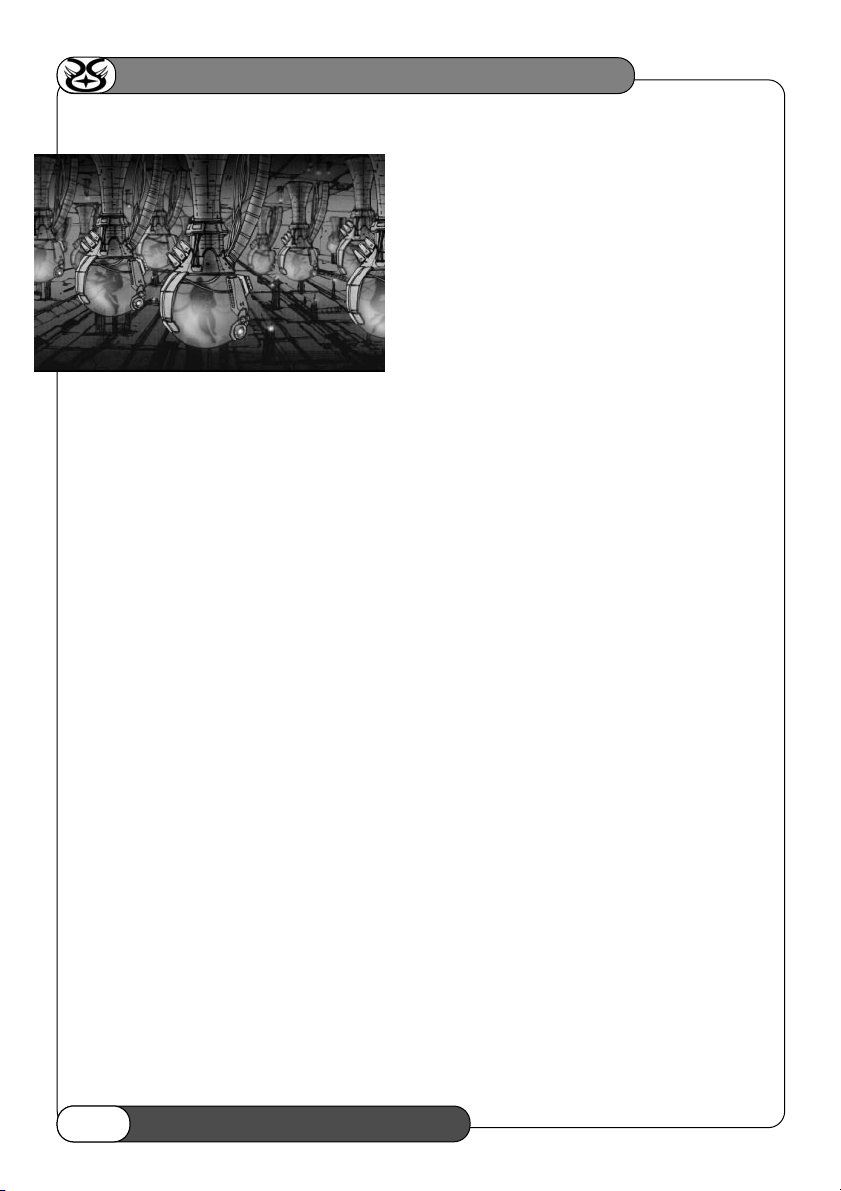
Kiith Naabal elders address
the New Daiamid.
Somtaaw’s fortunes were further
complicated by a political
conflict with Kiith Naabal,
which made a bid seven years
after landfall to absorb the
Somtaaw survivors as a vassal
clan. It was argued in the New
Daiamid that Somtaaw’s kiithid
had valuable skills, which
could be of the greatest possible
use to Hiigara if channeled by
Naabal’s industrial planning committees. According to the Naabal, it was in the best interests of all Hiigarans if
Somtaaw joined with Kiith Naabal, and provided their mining expertise to the Naabal-owned colonies throughout the Hiigaran buffer zone. Many such mergers had taken place in the past decade, with benefits for all concerned.
Somtaaw flatly refused this proposition, and the debate between Somtaaw and Naabal supporters in the New
Daiamid has already been cited by many as a history-making event. According to the Somtaaw survivors, larger
and more powerful kiithid like Naabal were deliberately campaigning to deprive the weakened Sleeper clans of
their sovereign rights, which included the staking of land claims on Hiigara, a voice in the New Daiamid, and
access to the ship-building capabilities of the Mothership Station. Given that the Mothership’s building array had
already provided whole fleets to the larger kiithid, and no less than fifteen carrier groups each to Naabal, Soban,
Kaalel and Manaan, Kiith Somtaaw argued that they also had the right to seek their fortune among the stars. They
proposed to build themselves a tonnage of starships which was proportional to their kiith numbers.
Page 12
HOMEWORLD: CATACLYSM
During the Somtaaw/Naabal debate, dispossessed members of many Kharak’s devastated kiithid joined the
Somtaaw as family members, swelling their ranks from 15,000 to nearly 25,000 in a few short months. The matter
was contended for months in the Daiamid, with the larger kiithid of the inner council arguing bitterly. Kiith Soban
honored its ancient ties to Somtaaw and opposed Naabal’s power-hungry crusade, and so did the Paktu, a kiith
inclined to support Somtaaw both out of historical sympathy with the underdog and respect for the rising
confederation of Somtaaw with other weakened kiithid. On the opposite side of the table, Kiith LiirHra supported
Naabal vigorously, citing the benefits of their own union with the survivors of the Hraal.
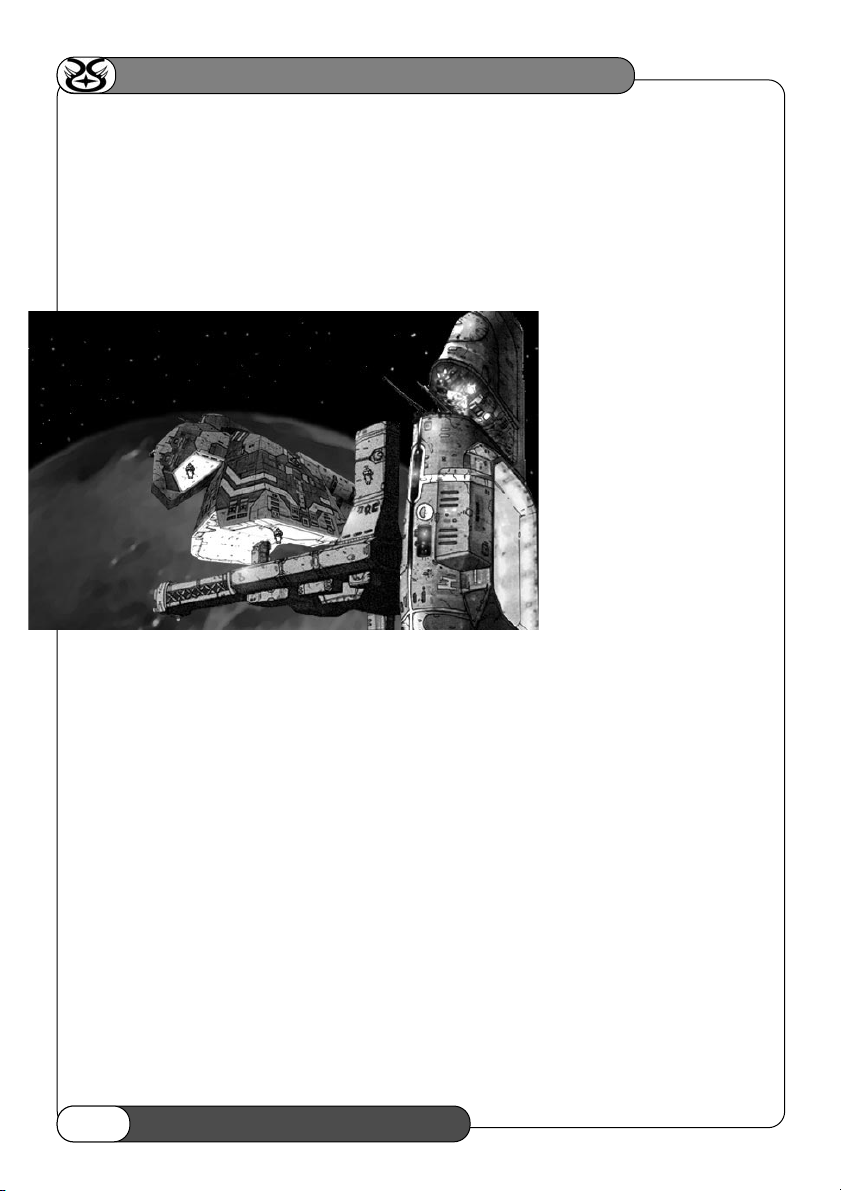
The Kuun-Lan undergoes
final systems check before
launch. The Faal-Corum had
left dock two days earlier.
The matter was eventually
decided in favour of Somtaaw
by a very narrow margin in the
Diamid and only after the
Somtaaw managed to convince
the disenfranchised kiith to
threaten a general strike over
the issue. While many of the established Kiith accused Somtaaw of further undermining the ancient social systems
for their own benifit, the result was Somtaaw was granted access to the Mothership Station for a period of six
months. Mothership access for other lesser Kiith soon followed. In their time, the Somtaaw built two enormous
mining ships, the Kuun-Lan and the Fal-Corum, which were both launched, fully manned,
within 45 days. In the final days of their control over the Mothership’s PDA, Kiith Somtaaw triumphantly built one
final ship, the Clee San, a top-of-the-line deep space research frigate. Students of history will note that the names
of all three vessels derive from the names of temples along the old Shimmering Path: Kuun-Lan, “Purifying Flame”,
Fal-Corum, “Silent Wayfarer”, and Clee San, “Truth Seeker”...
12
Page 13
The Clee-San, Kiith Somtaaw’s
third and final ship. Designed for
deep space mining exploration,
the Clee-San is equipped with an
impression sensor array and
equally impressive onboard
science facilities.
Since then the Somtaaw have
explored many neighboring systems
to Hiigara. Although their numbers
are small, they’ve set up several mining stations to collect rare elements, and they sell the fruits of their labors
to all clients allowed by the current Hiigaran trade regulations. Like all our kiithid, their ships are bound to
respond to any call to arms, when Hiigaran space is violated. But beyond the Somtaaw’s duty to Hiigara, they
live free and bend knee to none but their own kiith’sa...maintaining a centuries-long tradition.
HISTORICAL BRIEF
13
Page 14

HOMEWORLD: CATACLYSM
THE TAIDAN REPUBLIC
THE END OF THE
IMPERIAL ERA
The return of the Exiles to their Homeworld did more than mark a new beginning for life on Hiigara; it also
helped to bring about the end of the Taidani Imperial line, which had ruled continuously for nearly 3,000
standard years.
The Taidan Empire of Year 0 AL (9510 Galactic Standard Year) held 150 star systems in its grip, but not easily.
Emperor Riesstiu IV the Second was rapidly approaching his 4th century of life, and his pogroms and agendas
were becoming increasingly bloody and erratic. Relations with other Galactic civilizations were at an all time
low, with the Empire receiving regular censure from the Galactic Council during their twice-per-decade assemblies.
The Frerrn Aggregate was in a state undeclared war with the Taidan Empire over a number of border issues on
the Far Rim, and even the Bentusi had suspended all trade contact with the Taidan in the year -7 BL (9503 GSY.)
Internal Taidani politics was faring even worse in these last years of the Empire. Tax revolts in the outer systems were
a common occurrence, as Emperor Riesstiu IV’s increasing paranoia led to a prohibitively large and expensive
military. The Taidan Assembly of Lords, a token political body whose task was merely to “rubber stamp” edicts from
the desk of the Emperor, even began to question some of Riesstiu’s more outrageous demands. The entire
political system of the Imperium was corrupt and on the verge of collapse when a Mothership of unknown design
breached Taidani borders, and destroyed 3000 years of political stagnation.
A powerful group of military, political and economic figures had been plotting a coup in secret for years, staying
only steps ahead of one purge or another as they looked desperately for the trigger that could sway 360 billion
souls against their God-like Emperor. Oddly enough, it wasn’t the plight of the Kharakian Exiles as much as the
mindless obedience of the Taidani navy which created that trigger. When the first propaganda images spread
through the Empire, showing yet another victory, this time against an ancient and forgotten enemy, it soon became
obvious that a serious mistake had been made on the part of the Emperor’s political advisors. Instead of
reassuring the Taidani people that their nigh-immortal Emperor was all-seeing and all-powerful, the Taidan reacted
with near-universal horror and disgust. Again and again they were forced to watch one of their fleets commit an
act of genocide against 300 million aliens, who had committed no crime greater than entering hyperspace and
violating a long-forgotten treaty.
The Emperor reacted quickly and ordered the Home Fleet to hunt down and destroy the Exiles before they could
penetrate Taidan space, but it was too late. The political damage had been done, and the secret conspirators
launched their coup against an obviously mad Emperor. While the initial groundswell of support was very strong,
the conspirators and the general public seriously underestimated how prepared the Empire was for just such a
rebellion, and how far their leaders were willing to go in order to maintain their stranglehold on power. After
the first few heady days of rebellion, the Emperor declared full martial-law across the Taidani worlds. According
to his edict, no act performed in the defense of His Throne would be judged in civilian courts.
The death and destruction that followed this announcement throughout the Empire beggars the imagination. For
every military unit that defected to the Coup, 2 others launched an orgy of brutal reprisals. Dukes and Governors
that were unwilling to massacre protestors en masse were executed and replaced by ones who would. Entire
rebellious asteroid cities were exterminated when navy corvettes destroyed their life support systems, and the
slow death throes of millions were recorded, to be shown as an example to the rest of the population. By the
end of the first month it was obvious to all but the most optimistic that the Emperor’s grip on the Taidan could
1414
Page 15

not be thrown off. The final blow was nearly struck at the battle of Vorshan’s Rift, where the gathered rebel Navy
was ambushed and devastated due to a high level defector, who led the rebels into a trap. The ranking surviving
military member of the coup fled for his life, directly into the arms of the one force in the galaxy that was
successfully resisting Imperial power: the returning Exile Fleet. Luckily for the rebellion, the Exiles aided the
Rebel officer, allowing him the chance to escape and regroup the tattered remnants of his fleet.
When news broke that the Exiles were actively aiding the rebellion, it was the final insult to the Emperor. Riesstiu
declared that he would personally command the Taidani High Guard fleet in their crusade against the interlopers.
The final battle took place high above the Exile’s ancient Homeworld, Hiigara, and when it was over the Emperor
lay dead and his Elite guard fleet was shattered.
In the resulting chaos, the Rebels seized their last chance and destroyed the Imperial Gene bank. Without a clear
line of succession through cloning, the Emperor having long ago executed any living relative who might try to
kill him and take power, the Imperial structure collapsed. In its place was erected a new Taidan Republic.
THE TAIDAN REPUBLIC
Even after the death of the Emperor, the new Taidan Republic has had anything but a smooth ride from tyranny
to democracy. What was supposed to be a quick and relatively painless coup flared into a full blown civil war
after the battle of Hiigara. Various factions tried to seize control of the Empire, while entire sectors fought for
independence. After 5 years of skirmishes and all-out battles, the Taidan Republic finally stabilized and established
an uneasy peace within itself...but by the time the shooting stopped, only 60 out of a 150 star systems were willing
to call themselves Taidani. Most of these loyal worlds are centered in the Galactic Core, while the spiral regions
of the old Empire have splintered into a variety of small kingdoms, duchies and independent democratic states.
The Republic is still struggling to restore order both internally and externally and has met with some success.
In year 6 AL (9516 GSY), the Republic signed a formal non-aggression and co-operation pact with the Exiles,
which recognized their ancient claim to Hiigara. A 5-light-year sphere of influence was also granted the new
Hiigarans, in recognition of their aid to the Republic during the dark days of the Coup. Currently, the Republic
and Hiigara share excellent relations, which has only been helped by the Republic’s willingness to extradite war
criminals who took part in the Kharakian Genocide. The Republic also re-established trade relations with the
enigmatic Bentusi, and it is rumored that the Bentusi have been crucial in supplying the new Republic with the
technology, infrastructure and information it needs. Despite these advances, the Republic continues to splinter
away system after system as local leaders decide they are better off on their own, than to be drawn into any
Taidani conflict to come.
While most analysts still are debating whether the worst is over for the Taidan Republic, all agree that stability
needs to be based on military security for the former Empire. With a few years of planning time, the Republic
has stopped trying to match the Imperialist factions on a gun-to-gun basis, and are now trying to seize the high
ground by using advanced technologies. The Taidani military invested vast amounts of their financial reserves in
manpower, for a few crucial fleet Research Stations. Their hope was of making ship design and weapon breakthroughs
that would allow them to defend the Republic’s borders with a vastly reduced fleet. All the progress made by the
Republic could be destroyed overnight, should the surviving Imperialists find a way to overthrow the Republic,
and return a new Emperor to the ancient Throne of Worlds.
HOMEWORLD: CATACLYSM
15
HISTORICAL BRIEF
15
Page 16

HOMEWORLD: CATACLYSM
THE IMPERIALIST FACTION
With the Empire shattered, it was to be expected that many major Imperial figures would flee the Republic to
carve their own domains in the splintered frontier worlds. Many of these Imperialists call themselves “Loyalists”,
and support any one of hundreds of “lost heirs” that have been sprung up over the past 15 years. While the
Imperialist fleet is but a battered shadow of its former power, it is still a significant threat on the frontier, where
many secret naval bases from the Imperial era are intact and functioning.
Imperialist power remains in the hands of the fleet, and while these once-proud ships have been forced to work
as equals with pirates or hire themselves out as mercenaries, they are still a force to be reckoned with, and still
a major threat to the stability of the Republic. Twice in the past 15 years the Imperialists tried to unite the
splintered kingdoms by force of arms, only to be defeated by their own factionalism and the military intervention
of the Galactic Council.
Apart from the desire to overthrow the new Republic, the only other thing that binds the Imperialist Factions
together is their deep, abiding hatred of the new Hiigarans. The Imperialist hold the Exiles and their quest for
their Homeworld directly responsible for the Emperor’s death and the fall of the Empire. Amongst Imperialist
supporters, it is an oft-quoted prophecy that Empire will only rise again when the Imperial Fleet once again orbits
Hiigara, and the work begun with the Kharakian Genocide is finished once and for all.
Needless to say, a state of open warfare exists between Hiigara and all Imperialist factions. Three times in the
past 15 years, (in 4, 9 and 11 AL) the Imperialist led major incursions into the Hiigaran sphere of influence. In
the latter two invasions, strike fleets reached Hiigara itself, only to be thrown back with heavy losses on both
sides. While Hiigaran shipping is constantly being harassed by Imperialist forces, either operating by themselves
or in conjunction with the Turanic Raiders, it has been 4 years since any significant fleet actions took place in
the Hiigaran sphere. This led some analysts to conclude that the Imperialist forces are more interested in consolidating
the splinter kingdoms than wasting more strength and technology on a blood feud with a single world. Others
merely consider this to be the quiet before another inevitable storm.
1616
Page 17

TURANIC RAIDERS
No other group has profited more from the anarchy caused by the retaking of Hiigara and the resulting Taiidani civil
war, than the Turanic Raiders. Nothing is known about the origins of this nomadic race of pirates and mercenaries but
theories range from a disposed race of refugees to a former slave race run amuck. Attacks by Turanic Raiders were first
recorded during the year -475 BL (GSY 9035) in the Turan Sector and hence the name given to this enigmatic warrior
species. Turanic hordes have infested the trade lanes of the galaxy at least twice a century since their arrival and no
matter how much effort is put into hunting them down by one government or another, they always survive in some
hidden base to emerge years later. Most of this growth-and-retreat cycle is spent raiding lone ships or unprotected
convoys in order to slowly build up their power base. The Raiders are at the height of their power fielding carrier groups,
are capable of taking over entire asteroid settlements.
The Turanic Raiders have never been stronger than they were during much of the 1’st century BL when they
enjoyed the patronage of the Mad Taiidani Emperor Riestiu IV. While most details were covered up at the time,
new documents released by the Taiidan Republic during various war crimes trials have revealed the Turanic
Raiders were supported by Imperial funds and supplies. Many of the targets hit by the raiders during this period
were of special military value. Intelligence gathered during these attacks, aided the Emperor to stymie the efforts
of neighboring galactic powers and limit their ambitions. Reliable estimates place Turanic Fleet strengths at
nearly 20 carrier groups spread throughout the Imperial Frontier before the Homeworld War.
Unfortunately for the Raiders, the death of Emperor Reistiu IV and the fall of the Taiidan Empire brought about
their fall as well. As if sensing the wake of history that rippled away from the Exile fleet as it approached Hiigara,
the Turanic Raiders went into hiding and denied the Emperor their firepower when he faced the Exiles in final
battle. The reasons for this may never be exactly known, but when the Taiidani Empire fractured from the pressure
of civil war, the Raiders were in perfect position to seize power in many outlying provinces of the Empire. These
new “Bandit Kingdoms” as they have become known, are centers of power for a new, organized Turanic presence
in the Galaxy and in a final irony, it is now Imperialist factions who come to the Raiders seeking patronage. The
current level of Imperialist/Raider co-operation is not truly known at this point, but there have been scattered
reports in recent years of mixed fleets performing strike and capture operations.
Despite these reports, Raider activity has been relatively low and most experts agree that the Turanic Raiders are
in a build up phase that will continue for quite some time. The only dissenting voice in the Turanic analysis
comes from several Hiigaran Warrior Kiith, who point out the growing number of Hiigaran combat and transport
vessels that have been lost in anomalous circumstances in the past 2 years. The animosity of the Raiders towards
the new Hiigarans is well known, and these losses may be due to new or exotic technologies being introduced
into the Raider’s fleet by their Imperialist Allies.
HOMEWORLD: CATACLYSM
17
HISTORICAL BRIEF
17
Page 18

HOMEWORLD: CATACLYSM
NOTES: ....................................................
..............................................................
..............................................................
..............................................................
..............................................................
..............................................................
..............................................................
..............................................................
..............................................................
..............................................................
..............................................................
..............................................................
..............................................................
..............................................................
..............................................................
..............................................................
1818
Page 19

PART TWO -- TECHNICAL BRIEF + GAMEPLAY GUIDE
Page 20
HOMEWORLD: CATACLYSM
INSTALLATION
Insert the CD- ROM into your CD- ROM drive. The Cataclysm Installation program will automatically start up.
Follow the on-screen instructions to specify the various installation options. When the installation is complete, it
will have created a shortcut in your Start Menu that you can use to run Cataclysm.
If the Cataclysm Installation program does not start up, double-click on the “my computer” icon
on your desktop. Double-click on the CD-ROM drive icon. In the file window, double-click on the
file icon of AUTORUN.EXE. Follow the instructions on screen.
GAME CONTROLS
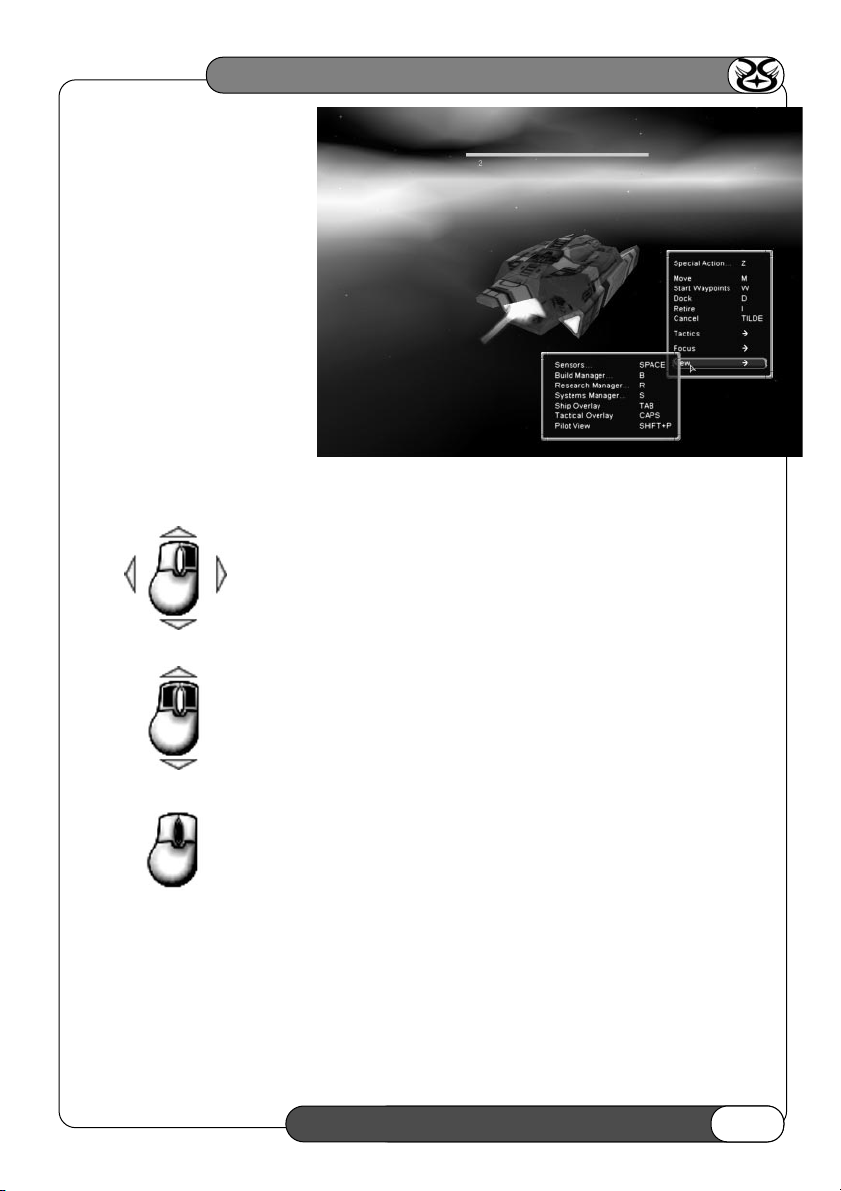
THE RIGHT-CLICK MENU
At any point during the game, you can get a detailed list of command options (some specific to the ships
selected) by right-clicking.
NOTE: When you have the context sensitive right-click enabled (by default), you cannot right-click with
the mouse pointer over some ships and objects in the display. This occurs when a special action icon is
present below the pointer. Simply move the mouse pointer until no icon is present beneath the pointer
and then press the right mouse button to bring up the desired menu.
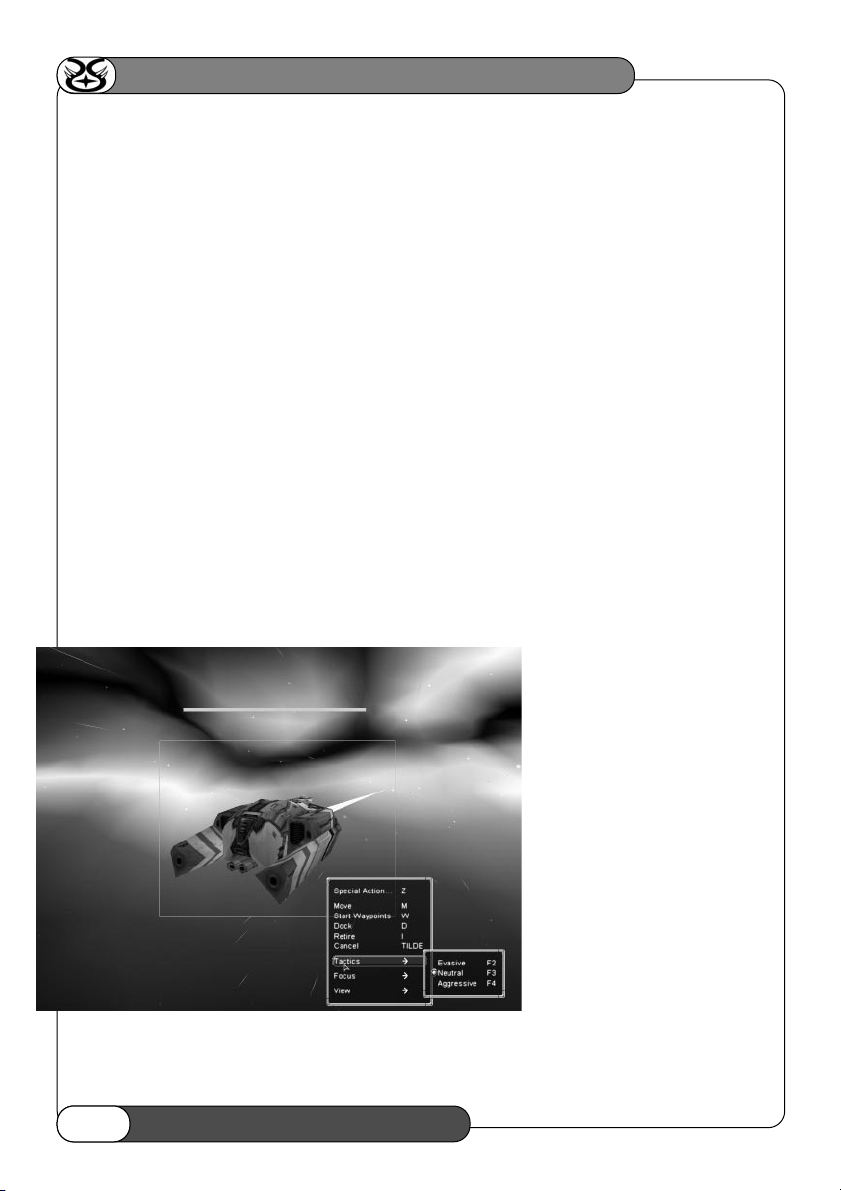
The menu has many options that enable you to control the selected ships. Movement, formations, tactics,
and other commands can all be set via these options.
In the <VIEW> section of the
right-click menu, you can access
the manager screens (build,
research, systems, and sensors)
and turn on/off ship overlay,
tactical overlay, and pilot view.
2020
Page 21
All right-click menu options have
hotkey equivalents. These hotkeys
can be changed via the key binding
settings in the option menu.
CAMERA CONTROLS
Rotating
Hold down the right mouse button and drag the mouse.
Zooming
Hold down the left and right mouse buttons and drag the mouse forward or backward. OR:
If you are using a mouse with a wheel, this can be used to zoom as well..
Focusing
Select a ship and press the middle mouse button or the [F] key.
NOTE: Issuing the focus command a second time will make the camera zoom
in as close as possible.
OR: Call up the right-click menu and select <ON SELECTED> in the <FOCUS> section.
Focus on Ships in View
Press [ALT]+[F] keys. This focuses on all of your ships in the viewable area.
OR: Call up the right-click menu and select <ON SHIPS IN VIEW> in the <FOCUS> section.
Focus on Command Ship
Press the [HOME] key.
OR: Call up the right-click menu and select <ON COMMAND SHIP> in the <FOCUS> section.
HOMEWORLD: CATACLYSM
21
TECHNICAL BRIEF + GAMEPLAY GUIDE
21
Page 22
HOMEWORLD: CATACLYSM
Focus on Event
Press the [ENTER] key.
OR: Call up the right-click menu and select <ON EVENT> in the <FOCUS> section.
ALT Focusing
To focus on a ship without selecting it, hold down the [ALT] key and left-click on it.
Cancel Focus
Press the [DELETE] key. If you wish to go back to a focus you have cancelled, press the [INSERT] key.
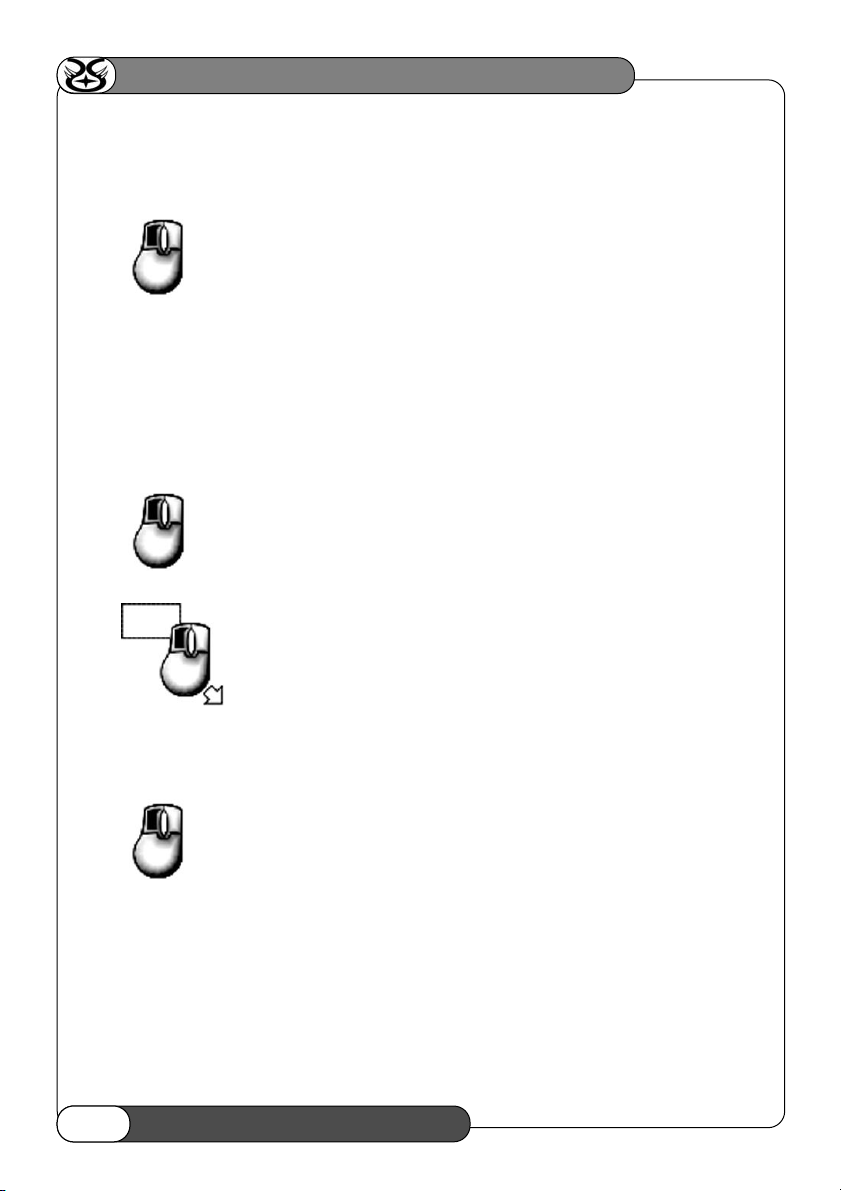
SHIP SELECTION
All selection can be done in both the main view and in sensors manager.
Selecting
Place mouse pointer over desired ship and click the left mouse button to select it. NOTE: If you
left-click on a group of ships in formation, the first left-click will select them all, and a second
left-click will select just that ship. Also, if you have different types of ships selected, you can
left-click to select any ship type from the ships selected list in the top right of the screen.
Drag Selecting
Hold down the left mouse button and drag a box around the desired ships.
Selecting Everything
Press the [E] key.
De-Selecting
Left-click on empty space or press the [ESC] key.
Shift Selecting
To add ships to the selection, hold down [SHIFT] and click the left mouse button on the desired
ship(s). It’s also possible to hold down [SHIFT] and then drag-select the desired ship(s).
NOTE: You can also hold down [SHIFT] and left-click to select multiple types of ships from the ships selected
list in the top right of the screen, (if you already have different ship types selected).
2222
Page 23
Hotkey Grouping
Select the ships you wish to assign a hotkey to and then press [CTRL] + a number key (from 1-9). You may
then select that group at any time, regardless of where you are, simply by pressing its hotkey number. Pressing
it again will focus the camera on the ship(s) in that hotkey group.
Adding Ships to a Hotkey Group
Select the hotkey group with its number key and then use “Shift Selecting” to add ship(s) to the group. Once
this is done, reassign the entire group to the hotkey number with the “Hotkey Grouping” command.
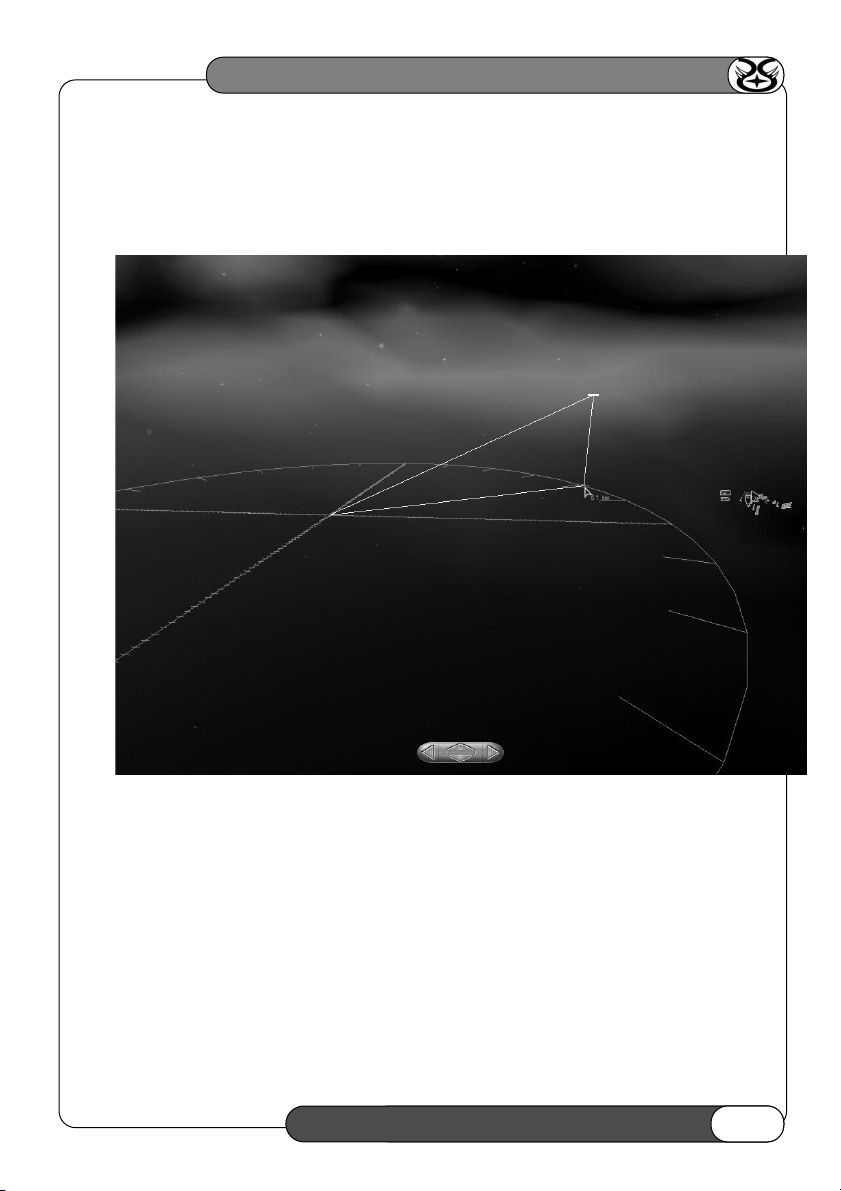
MOVEMENT
All movement can be done in the main view and sensors manager.
Horizontal Movement
Select a ship or group of ships and then press the [M] key. This will bring up the movement disk. Simply move
the mouse pointer to where you wish to go and click the left mouse button to issue the move order.
HOMEWORLD: CATACLYSM
23
TECHNICAL BRIEF + GAMEPLAY GUIDE
23
Page 24
HOMEWORLD: CATACLYSM
2424
3D Movement
With the movement disk up, hold down [SHIFT] and drag the mouse to add elevation to your destination. As
before, clicking the left mouse button will issue the move order. NOTE: To cancel vertical movement and return
the movement disk to horizontal mode, press [CTRL]+[SHIFT].
Page 25
HOMEWORLD: CATACLYSM
25
TECHNICAL BRIEF + GAMEPLAY GUIDE
25
Moving in Sensors Manager
Like most other commands, movement can be done in the Sensors Manager. This is very useful when moving
long distances. Call up the Sensors Manager by pressing the [SPACE] key. Then use the [M] key to bring up the
movement disk and issue your move command, just as you would in the main game view.
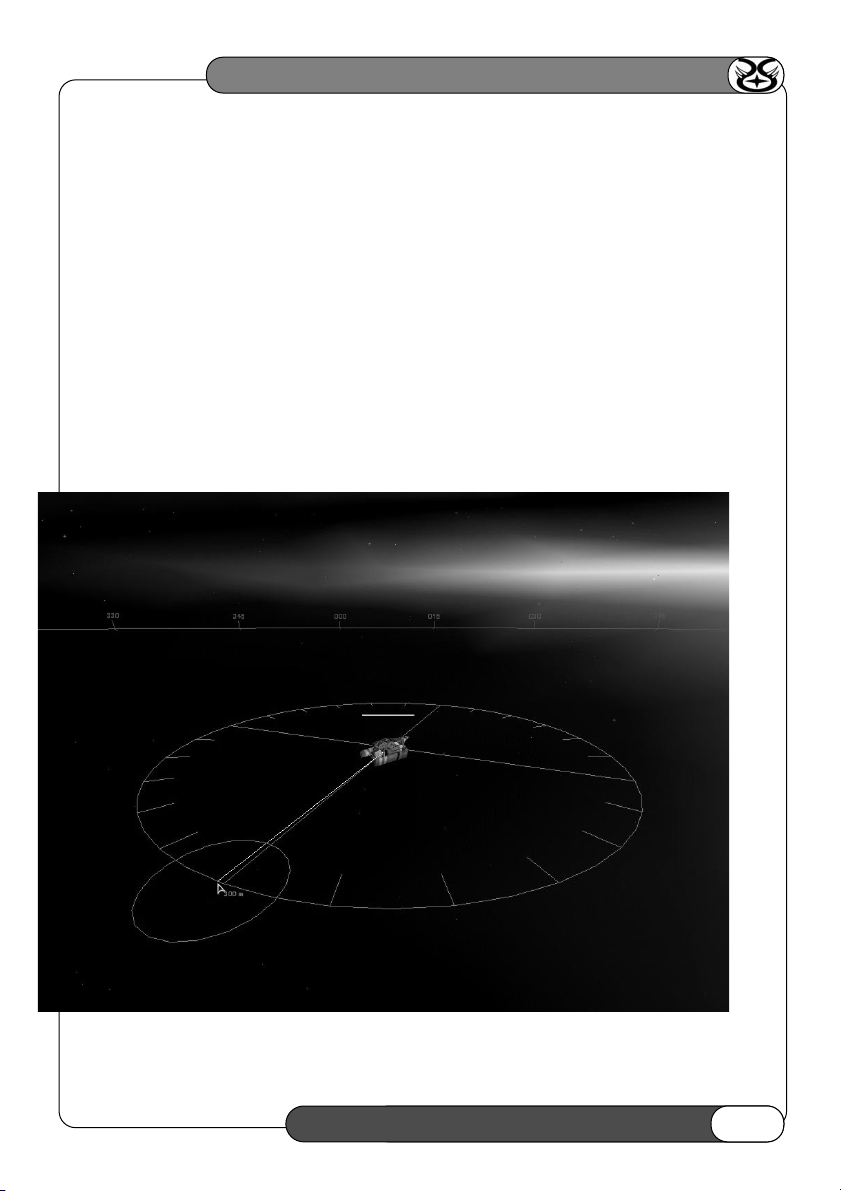
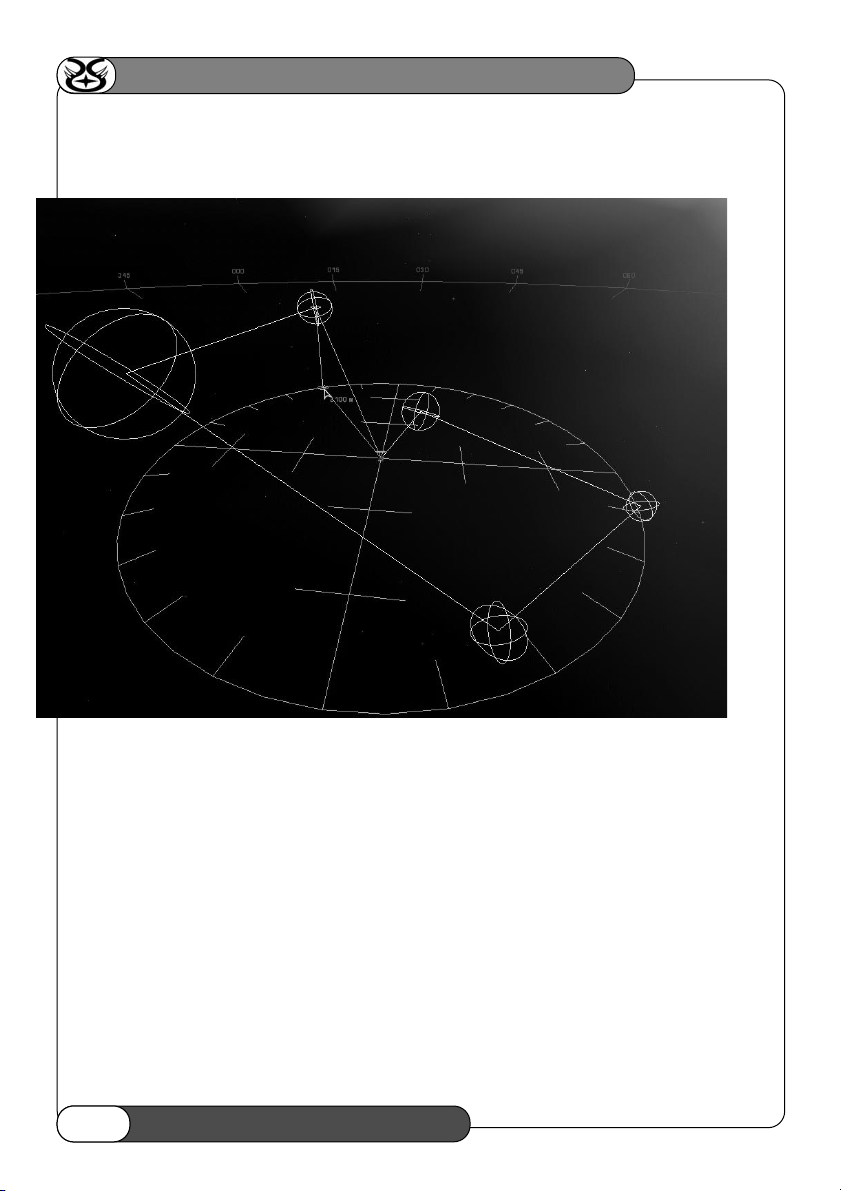
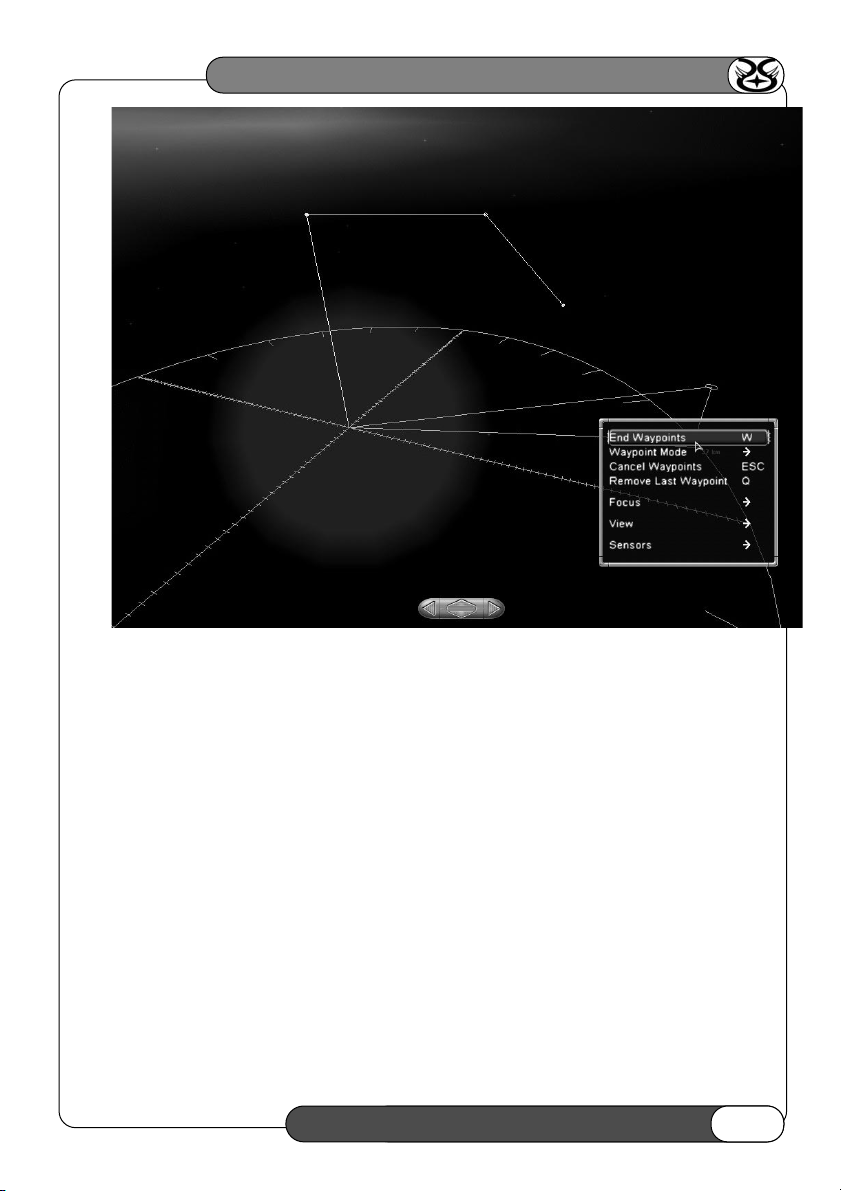
Waypoints
Waypoints are very useful for directing ships around enemy forces or setting up patrol routes. To start setting
waypoints, select some ships, and select the right-click menu option <START WAYPOINTS>.
OR: Select some ships and press [W].
Page 26
HOMEWORLD: CATACLYSM
2626
You can now place each waypoint by pressing the left mouse button at the desired location. You can use the
[SHIFT] key to change vertical elevation of each waypoint, just as you would for a move command.
You can then finish placing waypoints by selecting the <END WAYPOINTS> option in the right-click menu.
OR: By pressing the [W] key again.
Page 27
HOMEWORLD: CATACLYSM
27
TECHNICAL BRIEF + GAMEPLAY GUIDE
27
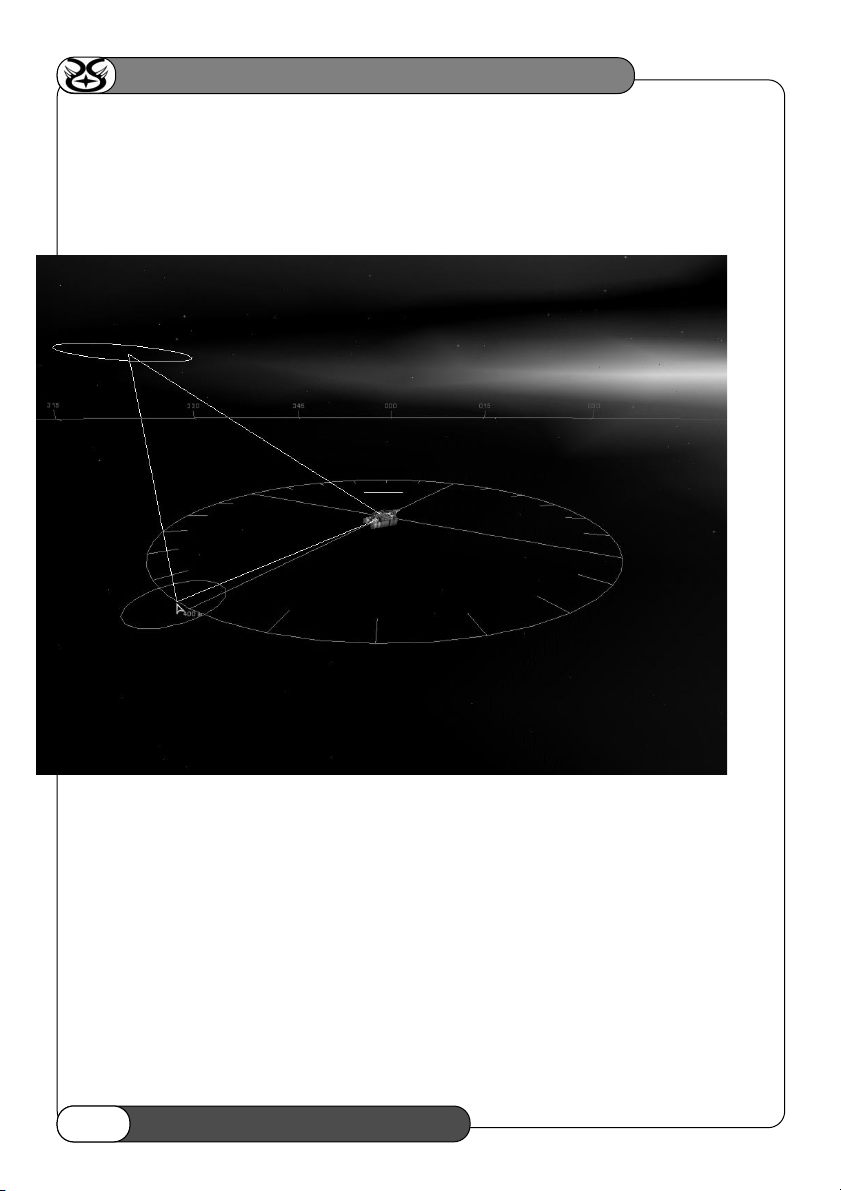
Waypoints have 3 modes that can be set via the right-click menu while placing waypoints, or with the following
hotkeys:
[SHIFT]+[Q] . . . . . . . . . . . . . . . . . . . . . . . . . . . . . . . . . . . . . . . . . . . . . . . . . . . . . . . . . . . . . . . . . . .Linear
[SHIFT]+[W] . . . . . . . . . . . . . . . . . . . . . . . . . . . . . . . . . . . . . . . . . . . . . . . . . . . . . . . . . . . . . . . . .Circular
[SHIFT]+[E] . . . . . . . . . . . . . . . . . . . . . . . . . . . . . . . . . . . . . . . . . . . . . . . . . . . . . . . . . . . . . . . .End-to-End
Linear mode will make the ships go to the end of the path and stop. Circular mode will make the ships continuously
follow the path in a circular fashion, while End-to-End mode will ping-pong the ships from one end of the path to the
other. Use Circular and End-to-End waypoint paths in conjunction with aggressive tactics to set up effective patrols that
require little management.
Page 28
HOMEWORLD: CATACLYSM
2828
COMBAT
Attacking
Move the mouse pointer over an enemy ship and click the left mouse button. NOTE: It is possible
that the attack icon will be replaced with a context sensitive special action icon. This does not mean
that a left-click will not attack, it just indicates that a right-click will perform a special action on that
target with the ships that you currently have selected, rather than bringing up the right-click menu.
Group Attacking
Hold down [CTRL] and drag a box around the targets with the left mouse button.
Force Attacking
Hold down [CTRL]+[SHIFT] and left-click on or bandbox the target(s). NOTE: Force attacking
can be used to attack asteroids and your own ships if necessary.
Moving While Attacking
Capital ships have a special ability to move while keeping their weapons bearing on an enemy ship. To do this,
give the Capital ship its attack order and then give it a movement order. The ship will move and continue to
attack until it is out of range of its target(s).
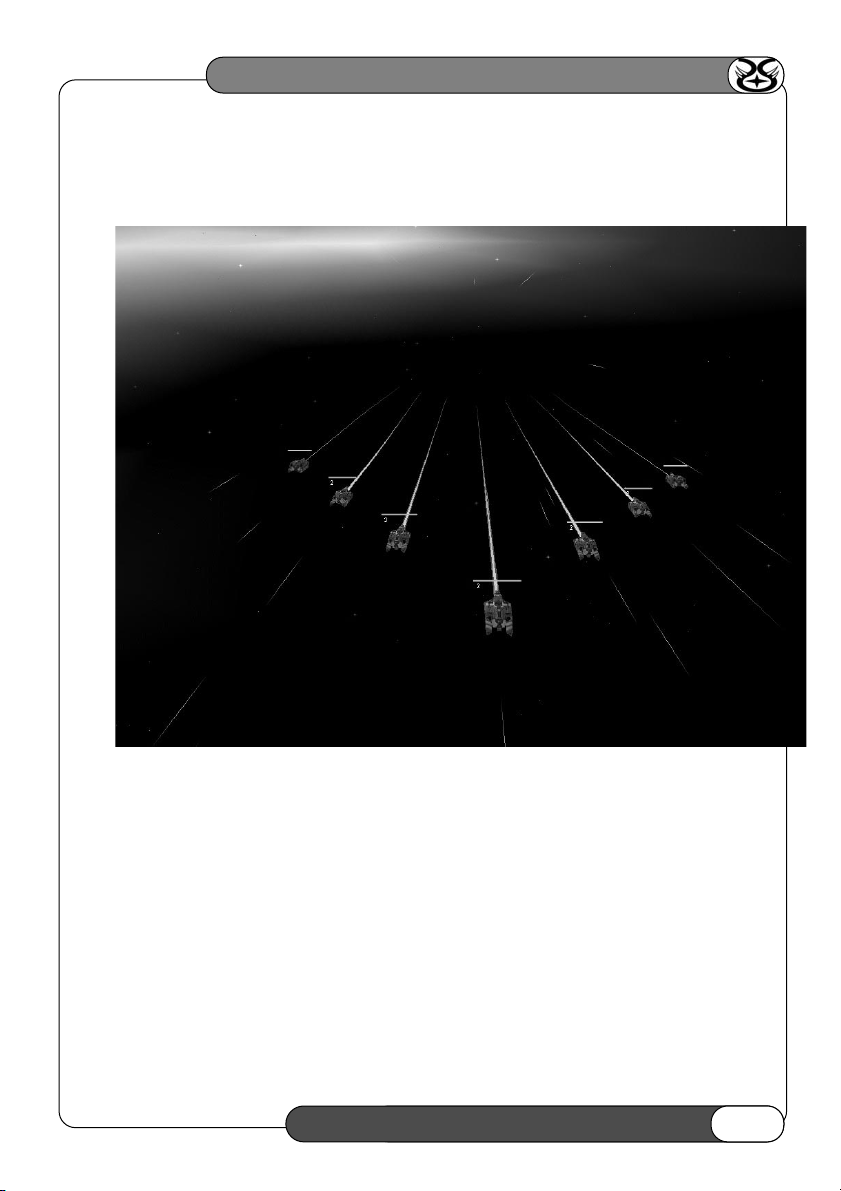
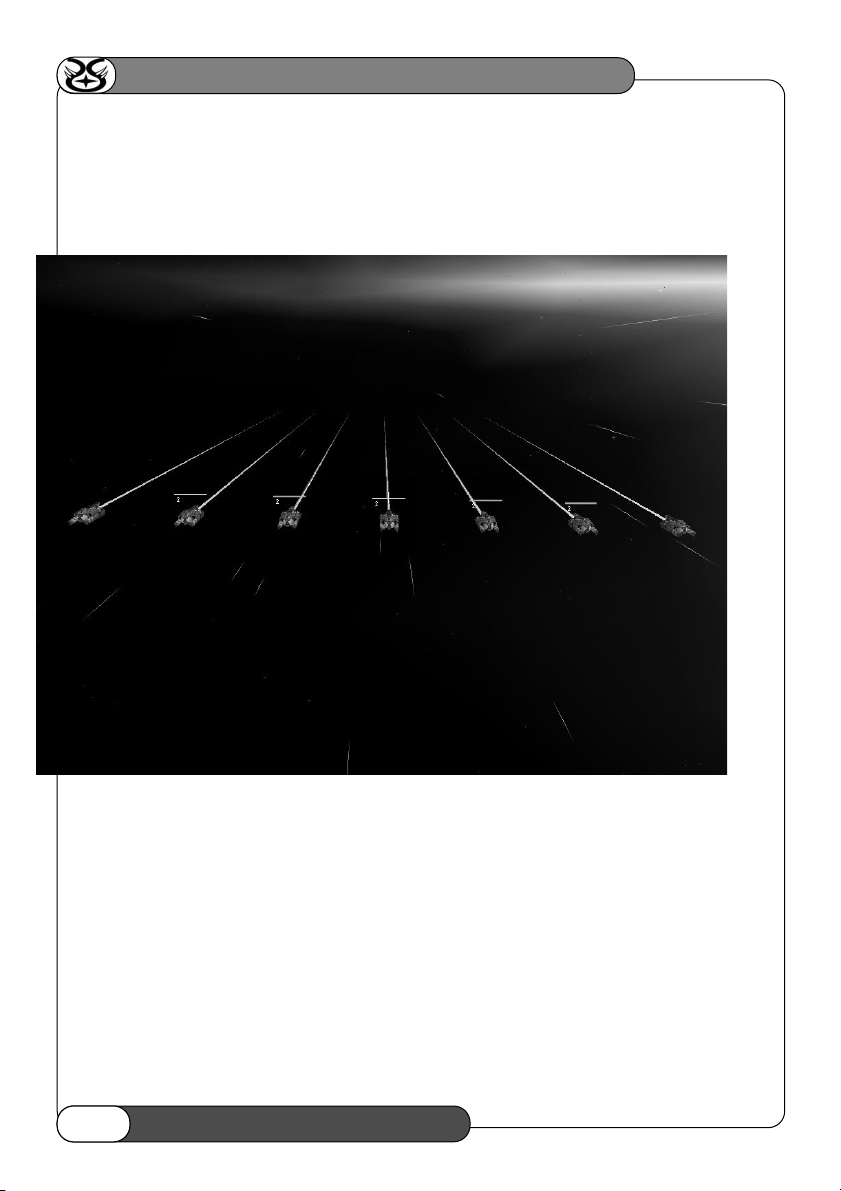
FORMATIONS AND TACTICS
Setting Formations
To set a formation, select the desired ships and bring up the right-click menu. From the <FORMATION>
section, you can choose one of seven formations.
OR: Formations also can be cycled through by pressing the [<] and [>] keys.
OR: Formations can be accessed directly via the F-keys:
F5 Delta
F6 Broad
F7 X
F8 Claw
F9 Wall
F10 Sphere
F11 Custom
Custom Formation
Custom formation lets you create your own formations. To create a custom formation, move your ships into the
desired position, select them all, then select <CUSTOM> from the right-click menu or press [F11].
Military Parade Formation
When you build ships, they come out of your Mothership or Carrier and go into Military Parade formation
with that ship. Frigates, corvettes, and fighters will go back into parade formation after docking with a
Carrier or Mothership.
Page 29
HOMEWORLD: CATACLYSM
29
TECHNICAL BRIEF + GAMEPLAY GUIDE
29
Delta
The standard flat triangle formation can organize groups of Strike Craft into effective squadrons, but it lacks the
flexibility and firepower concentration available to more three-dimensional formations.
Page 30
HOMEWORLD: CATACLYSM
3030
Broad
This flattened line is not effective for Strike Craft, as it disperses their firepower. It is more useful for
squadrons of Capital ships, where quick identification and selection of units is as important as concentrating
firepower. It is a useful formation to approach in, if you are planning to break ships off to strike at specific
targets once the battle is joined.
Page 31

HOMEWORLD: CATACLYSM
31
TECHNICAL BRIEF + GAMEPLAY GUIDE
31
X
The flying X formation is an excellent Strike Craft formation, concentrating a large number of vessels into a
relatively small three-dimensional space. Its only drawback is that the dense formation makes individual ships
vulnerable to slow turret fire, which they might otherwise avoid if they were more widely dispersed.
Page 32
HOMEWORLD: CATACLYSM
3232
Claw
Like its namesake in nature, this formation is deadly when striking out at an individual target. The claw is a
superb formation for Strike Craft when they are targeting a Capital Ship. The four curving lines of Fighters make
concentrating firepower and envelopment deadly efficient. The only drawback is identifying and selecting single
ships inside this complex formation.
Page 33
HOMEWORLD: CATACLYSM
33
TECHNICAL BRIEF + GAMEPLAY GUIDE
33
Wall
Most effective for Capital Ships, the wall formation allows larger vessels to concentrate firepower without
dangerously crowding each other. The wall is not a subtle formation, but gives large groups of big ships an
effective attack mode.
Page 34

HOMEWORLD: CATACLYSM
Sphere
This is the deadliest of all formations, in terms of continuous firepower. Ships in this formation lose their
ability to perform complex flight maneuvers, but gain the ability to constantly fire at targets from every angle.
This is also an effective guarding formation, as it puts the vessel to be protected in the center of the sphere.
Setting Tactics
To change the tactics setting, select the desired ships and bring up the right-click menu. From the <TACTICS>
section you can choose one of three settings: Evasive, Neutral or Aggressive. The tactics setting can be increased
using the ] key and decreased using the [ key.
OR: Tactics can be accessed directly via the F-keys:
F2 Evasive
F3 Neutral
F4 Aggressive
3434
Page 35

Evasive Tactics
Evasive ships will not maintain formation when attacking, and thus are less likely to be hit by fire intended for
nearby wingmen. Evasive ships will also flee enemies that are attacking them, unless instructed specifically to
attack certain ships. Even when instructed to attack, an evasive ship will abort the attack if damaged severely
and return to dock for repairs at the nearest Carrier or Mothership. NOTE: Certain large ships cannot be set to
evasive, as they are too slow to flee enemies and/or cannot dock for repairs due to their size (Motherships,
Carriers, Dreadnoughts, Heavy Cruisers, Destroyers, and Processors).
Neutral Tactics
This is the normal stance for ships. Strike Craft set to neutral will perform evasive maneuvers while attacking
enemy ships, but will maintain specified formations. If no orders are issued and enemies are within weapons
range, ships in neutral will fire from their current position, but will not engage in full combat. All ships that have
just been built are launched with neutral tactics.
Aggressive Tactics
When ships are set to aggressive tactics, they will automatically attack any enemies within weapons range and
attack them until they or their enemies are destroyed. Aggressive ships on patrol will return to the patrol route
after they have destroyed any enemies they encounter. Commands (other than attack) issued to aggressive
ships while they are in the midst of battle will drop them to neutral tactics, so that they can leave the battle and
perform the command issued.w
HOMEWORLD: CATACLYSM
35
TECHNICAL BRIEF + GAMEPLAY GUIDE
35
Page 36
HOMEWORLD: CATACLYSM
OTHER COMMANDS
Upgrade (U key)
Select the ship(s) that you want to upgrade and then press the [U] key.
OR: Select the ship(s) you wish to upgrade, call up the right-click menu, and select the <UPGRADE> option.
This option will not be present if none of the ships selected can be upgraded.
Ships that can upgrade will have a solid blinking yellow circle to the right of their health bar when selected. Ships
can only be upgraded when certain technologies are researched.
Strike craft will automatically dock when instructed to upgrade, while larger ships can upgrade wherever they
are. When larger ships are instructed to upgrade, a tan colored bar will appear below their health bar; this
represents the progress of the upgrade. Ships cannot do anything else while they are upgrading.
Dock (D key)
Select the desired ship(s) and then right-click on the vessel you wish to dock with. A ship will
only dock with a vessel that has docking bays (the dock icon will be visible when the mouse
pointer is over it). NOTE: Some large ships cannot dock (Mothership, Carriers, Destroyers,
Dreadnoughts, Heavy Cruisers, and Processors)
OR: Bring up the right-click menu and select the <DOCK> command. This will cause the
selected ship(s) to dock with the nearest capable vessel.
OR: Press the [D] key. This will instruct your ships to dock with the nearest capable vessel.
Retire (I key)
Select the ships you wish to retire, call up the right-click menu, and select <RETIRE>. The selected ships will
dock and retire with the nearest capable vessel. Once docked, resource units representing a portion of the value
of that ship will be added to your total. Only ships that can dock can be retired.
Hyperspace (J key)
This command allows Capital Ships to perform hyperspace jumps. Just select the ships you wish to hyperspace,
bring up the right-click menu and select the <HYPERSPACE> command. The Sensors Manager and movement
disk will be brought up automatically. Left-click to set the hyperspace destination. The cost of the hyperspace
jump will be displayed near your cursor. If this cost turns red, you don’t have enough Resource Units to make
the jump.
Cancel Orders (~ key)
Select the desired ship(s), bring up the right-click menu and select the <CANCEL ORDERS> command.
OR: Select the desired ship(s) and press the [~] key.
Guard (G key)
Select the ships that you wish to put on guard duty, then hold down the [G] key and left-click on
or left bandbox the target(s) that you wish to guard. Ships will only move as fast as the minimum
velocity of any ship guarding it.
3636
Page 37
HOMEWORLD: CATACLYSM
37
TECHNICAL BRIEF + GAMEPLAY GUIDE
37
Harvest (H key)
Select a Worker, move the mouse pointer over any resource and click the right mouse button.
OR: Bring up the right-click menu and select the <HARVEST> command. This will cause the
Worker to begin harvesting the nearest resource.
OR: Press the [H] key. This will also make the Worker find the nearest resource.
OR: Hold down the [Z] key and left-click on or left bandbox resources.
To harvest crystals, your Workers must be upgraded with salvage technology and your Command Ship (or Carrier
or Processor) must be upgraded with crystal harvesting technology. Instruct your Workers to salvage the crystal
(see special actions section below). It takes 2 Workers to tow a small crystal and 4 Workers to tow a large
crystal. Once a sufficient number of Workers have latched on to the crystal, it will be towed back to the nearest
crystal processing capable ship. If you do not have a ship with the crystal harvesting upgrade, then you will not
be able to issue a salvage command on a crystal.
Kamikaze (K key)
After giving a ship normal attack orders press the [K] key. Only Strike Craft can kamikaze.
Scuttle (SHIFT + S key)
Press the [SHIFT]+[S] keys once you have selected the ship(s) you wish to self-destruct. NOTE: You must issue
the scuttle command twice to confirm this unusual order.
Ship Overlay (TAB key)
Press the [TAB] key.
OR: Call up the right-click menu and select <SHIP OVERLAY> in the <VIEW> section.
Tactical Overlay (CAPS LOCK key)
Press the [CAPS LOCK] key.
OR: Call up the right-click menu and select <TACTICAL OVERLAY> in the <VIEW> section.
Pilot View (Shift key + P key)
Select one ship, then press [SHIFT]+[P] key. Your view is now that of the pilot. To return to regular view,
simply press [SHIFT]+[P] again.
OR: Call up the right-click menu and select <PILOT VIEW> in the <VIEW> section.
Pause (P key)
Press the [P] key at any time during gameplay to pause the game. NOTE: The camera is still fully active
(including focusing) while the game is paused, but no game commands can be issued.
Special Actions
You can call up a special action menu for your currently selected ships at any time by pressing the [Z] key.
Left-click on your choice of action in this menu. If a target is needed for the chosen action, then the closest valid
target will be selected.
OR: Select the <SPECIAL ACTION> option in the right-click menu to call up the special action menu.
If you want to choose a specific target, hold down the [Z] key while left-clicking on or left bandboxing the
Page 38

HOMEWORLD: CATACLYSM
3838
desired target(s). A menu will pop up and you can choose which action to perform by left-clicking on it. Invalid
targets chosen for that action will be ignored. NOTE: Whenever choosing an action from the menu that pops up,
you will notice as your mouse pointer moves over each entry that the ships in your current selection which can
perform that action will have a box drawn around them. This is useful when you have various types of ships
selected.
OR: Place the mouse pointer over a desired target. An icon representing an available special action for your
currently selected ships will appear below the mouse pointer. You can now right-click to perform that action
(provided you haven’t disabled right-click context sensitive commands in the gameplay options).
Some ships do not gain the ability to perform certain special actions until they have been upgraded. For example:
a Worker cannot repair other ships until an engineering module has been built, repair technology has been
researched, and the Worker has been upgraded.
Some ships can perform more than one special action, and some ships have various modes for their special
action, which can be set in the special action menu that pops up when you press the [Z] key.
Below is a quick reference list of special actions for each ship. A more detailed explanation of each special
action is given afterward.
Somtaaw Ships Beast Ships
Recon None Recon None
Leech Leech Sentinel Shield
Sentinel Shield Acolyte Link
Acolyte Link ACV Unlink, EMP
ACV Unlink, EMP Interceptor None
Mimic Link, Mimic Cloaked Fighter Cloak
MCV Unlink, Mimic Attack Bomber None
Ramming Frigate Ram Heavy Corvette None
Multi-Beam Frigate None Multi-Gun Corvette None
Hive Frigate Swarm Missile Corvette None
Destroyer None Cruise Missile None
Dreadnought Repulse Ramming Frigate Ram
Carrier None Multi-Beam Frigate None
Worker Harvest, Repair, Salvage Hive Frigate Swarm
Processor None Ion Array Frigate Cloak
Mothership Siege Cannon DFG Frigate None
Heavy Cruiser Infect
Carrier Infect
Worker Harvest, Repair, Salvage
Processor None
Mothership Infect
Page 39

HOMEWORLD: CATACLYSM
39
TECHNICAL BRIEF + GAMEPLAY GUIDE
39
Repair
When instructed to repair, a Worker will fly within range of the closest target chosen and begin
repairing it. If none of the targets are damaged, the Worker will remain close to the ships and
repair them if they do become damaged.
Leech
When instructed to leech, a Leech will clamp onto a target’s hull. It will then do one of three
things:
1) Spy. Harmless to enemy ship, but enables owner of leech to see what the enemy is up to.
2) Vent. Slowly damage enemy ship by eating though hull and dumping waste into space.
Will continue to do this until the enemy ship is destroyed.
3) Leech. Slowly damage enemy ship by eating through hull, but return gathered material to
nearest Mothership, Carrier, or Processor for resource unit (RU) gain. After dropping off
material, it will return to the same target to gather more material (RUs). Once the enemy
has been reduced to near destruction, the Leech will stop damaging that ship and jump to a
new target, or return gathered material and go into military parade formation.
The mode of leeching can be controlled via the special action menu that pops up after pressing the [Z] key (with
a Leech currently selected).
Shield
When instructed to shield a specific target, the selected Sentinels will attempt to form a sphere
around the target. 12 Sentinels are needed to form a complete sphere. All 12 Sentinels must be
upgraded with at least Force Field Level 1 technology. If less than 12 properly upgraded Sentinels
are instructed to make a shield, they will try to form a sphere that favors the forward direction of
the target ship. If a target is not given, Sentinels will form a wall by themselves.
The shield will not be formed until the Sentinels are close to their desired position around the target, or close
to each other (when forming a wall). Once the shield is active, Sentinels cannot be controlled regularly, and will
remain locked in formation around the target. To regain control of the Sentinels, select them, open the special
action menu and select the <UNLINK FORCE FIELD> option. The Sentinels can now be controlled again.
Sentinels have 3 different levels of effectiveness. When they are upgraded to Force Field Level 3, the shield they
generate will be able to withstand a lot more firepower than Level 1 shields. Each Sentinel that is involved in
forming a shield has a blue bar beneath its health when selected, which represents how strong their part of the
shield is. As soon as this bar reaches nothing, that part of the shield will collapse and the Sentinel will be
vulnerable to enemy fire until it can recharge and reform its part of the shield.
Link
Select 2 or more Acolytes or Mimics that have been upgraded with linking technology. As many pairs of valid ships
in your selection as possible will move together and link to form either ACV or MCV pairs (depending on whether
Acolytes or Mimics were involved). If you notice ships having difficulty linking, it might be due to nearby ships that
are interfering with their maneuvers. Simply move the interfering ships away and the linking process will continue
unimpaired. It is also advisable to avoid linking ships while in the heat of battle, as enemy ships and weapons fire
will impede the linking process.
Page 40
HOMEWORLD: CATACLYSM
4040
Unlink
Select any ACVs or MCVs and issue this command. ACVs will separate into 2 Acolytes and MCVs will separate into
2 Mimics.
EMP
The EMP command can be issued on EMP-upgraded ACVs in two ways. You can use Z left-click,
Z left bandbox, or a context sensitive right mouse click to choose a target; you can also issue an
EMP command via the right-click menu <EMP> option or hotkey.
If a target is chosen, the selected ACVs will move within range and discharge an EMP blast that will
stun the target. The length of time that the enemy ship is stunned depends on the number of ACVs involved in
the attack and the size of the target. 10 ACVs will give the EMP blast its maximum effect.
If a target is not chosen, the selected ACVs will fire an EMP blast immediately if at least one valid target is
within range.
An ACV must recharge its EMP weapon. This recharge time is represented by a blue bar below its health, when
selected. An ACV cannot be involved in an EMP attack if this bar is not full.
Mimic
Mimics and MCVs can holographically emulate the appearance of friendly ships, enemy ships, and asteroids.
You can choose which category to mimic via the special action menu <SELECT MIMIC> section. This section
has a list of all players and an asteroid category. Left-click on the desired choice.
After choosing a category, you can choose exactly what class of ship to emulate via the <MIMIC> section in the
special action menu. This section will list all available ships that you can mimic for that category. Left-click on
the desired choice.
The Mimic or MCV will now transform into the ship or asteroid selected. If you initiated the mimic operation
outside of the visible space for that enemy, you can now infiltrate their forces without detection, unless they have
a Recon or Sentinel nearby that has Advanced Sensors. Small dots above the health bar for the Mimic or MCV
represent which players that ship is currently stealthy with. If the first dot on the left is green, then the ship is
capable of infiltrating player 1’s fleet. If the third dot is red, then player 3’s fleet is aware that this ship is an
enemy. In single player, you are player 1 and any enemy in the current mission is player 2.
When a Mimic or MCV emulates an asteroid, enemy Workers that do not have Recons or Sentinels nearby with
advanced sensors will treat the fake asteroids as real ones. Once they get close, the Mimic will kamikaze into
the Worker, doing substantial damage. This damage is increased if the Mimic or MCV has been upgraded with
Quantum Explosive Charges.
Mimics can emulate corvettes and all classes smaller, while MCVs can emulate frigates and all classes smaller.
Page 41

Ram
Ramming frigates are capable of ramming other ships, both to cause damage and to push them
away from a battle. Once instructed to ram, a Ramming Frigate will move into position and then
make its attack run.
Once it collides with the target, it will remain locked onto the victim until it has pushed it for
approximately 20 seconds, after which it will disengage to recharge its engines. After recharging, it will reposition
itself for another attack run and ram again. While pushing an enemy ship, the Ramming Frigate will also engage
a cutting torch weapon to inflict damage on the hull.
A Ramming Frigate’s effectiveness is greatly improved once it has been upgraded with Afterburner technology (in
multiplayer, you cannot build Ramming Frigates unless you have researched Afterburner technology). A
Ramming Frigate’s cutting torch is also more effective once upgraded with Advanced Ion Cannon technology.
It is possible to ram crystals, thus pushing them around and/or destroying them.
Ramming is a very effective way to take large, dangerous enemies away from your fleet, where they can be
attacked without the support of their escorts.
Swarm
Hive Frigates are equipped with 6 swarmers, which can be launched to attack enemy ships. These
Swarmers are small fighter craft; that continue to attack enemy ships until instructed to return to
the Hive Frigate (via [SHIFT]+[TILDE]) or until the enemy is destroyed. Swarmers are very fast,
able to evade most projectile fire. Their size also makes it impossible for energy weapons to track
them.
If a Swarmer is destroyed, a new one will be constructed within the Hive Frigate and launched immediately.
Note that it is possible to attack a target with the Hive Frigate’s conventional weapons while its Swarmers
are attacking another target entirely.
Repulse
Once upgraded, a Dreadnought can emit a repulse blast that will push and slightly damage enemy ships nearby.
Once fired, the repulse blast expands in a sphere from the Dreadnought. This weapon is capable of taking out small
craft, but is intended to push larger enemies away and give the Dreadnought time to maneuver and bring its
weapons to bear.
Salvage
Once upgraded, Workers can be instructed to salvage both enemy ships and derelicts. Enemy ships
must be substantially damaged before they can be salvaged. If the ship chosen for salvage is not
sufficiently damaged, a message will be sent indicating this, and the Workers will wait nearby until
that ship is damaged enough to begin a salvage operation.
Usually, more than one Worker is needed to salvage a ship. Frigates usually require 2, destroyers 4, and heavy
cruisers 5. Strike craft cannot be salvaged, as they are too maneuverable, even when damaged. During multiplayer
games, a Beast player can only salvage those ships that it can infect, while a Somtaaw player can only salvage either
Somtaaw ships or Beast ships that were once Somtaaw.
HOMEWORLD: CATACLYSM
41
TECHNICAL BRIEF + GAMEPLAY GUIDE
41
Page 42

HOMEWORLD: CATACLYSM
Salvaged ships must be supported just like any other ship, so it is possible to be denied the opportunity to
salvage if you do not have enough Support Units available to support the vessel. If this is the case, a message
will be displayed when you issue a salvage command.
Crystals are harvested by instructing Workers to salvage them. Once the Workers tow them to a ship that has
been upgraded with Crystal Harvesting technology, they are processed for rapid Resource Unit gain. If you do
not have a ship upgraded with Crystal Harvesting technology, you will not be able to salvage a crystal.
Cloak
Beast Ion Array Frigates and Beast Cloaked Fighters can cloak at any time, provided they have enough energy
(indicated by the blue bar beneath the ship’s health bar). Once cloaked, they cannot be seen by enemy forces
unless an enemy Recon or Sentinel with Advanced Sensors is nearby. They must also de-cloak to fire their
weapons. While cloaked, their energy will slowly drain. Once their energy runs out, the ship will automatically
de-cloak.
Siege Cannon
This special action is only available to Somtaaw Command Ships. To fire the cannon, select your command ship
and use the special action key [Z] or use the right click menu.
Once you have built a Siege Cannon module on your Command Ship, and it has been fully charged (indicated by
the blue bar beneath the Command Ship’s health), you can issue this command.
The Sensors Manager will be brought up immediately, and you can move the mouse pointer around to choose
the target area for the weapon. You cannot specifically target ships with this weapon, but rather the area of space
they occupy. The Siege Cannon does have a maximum range, and its effectiveness and accuracy decrease the
farther the blast must travel. Once you have chosen your target area in the Sensors Manager, press the left
mouse button. You will be returned to the game view and the Command Ship will begin maneuvering to fire the
weapon. Once in position, you will see the weapon discharge; and the outgoing blast will ping in the Sensors
Manager for all to see. Once the fireball is near your targeted area, a huge shock-wave will be emitted, causing
damage to almost everything in sight. You cannot fire again until the weapon has recharged.
Infect
This special action is only available to Beast Command Ships, Beast Heavy Cruisers, and Beast
Carriers. Once upgraded, these ships can take over most enemy ships by infecting them with the
Beast virus. To infect enemy ships, select your Beast command ship, heavy cruiser or carrier. Use
the special action key or right click menu. Select infect. An infected ship becomes owned and
controlled by the player that issued the infection attack. If a target is chosen that cannot be
infected, or cannot be supported due to limited Support Units, damage will be inflicted instead. If a target is out
of range, the ship will move within range before firing. If a target is not chosen, the closest enemy ship will be
targeted for infection.
The infection attack is crucial to a Beast player’s ability to acquire technology that it cannot research initially on
its own. Once a ship has been captured, it can then be retired, and all technologies associated with that ship and
its current upgrades will be available for research by the Beast Command Ship. Any time a ship is captured which
possesses new technology—technology which the Beast has not yet acquired—a message will be displayed
announcing this fact. You should immediately protect that captured ship and retire it.
4242
Page 43

HOMEWORLD: CATACLYSM
43
TECHNICAL BRIEF + GAMEPLAY GUIDE
43
MULTIPLAYER CONTROLS
Sending a Chat Message
Press [T] and then type in your message. Press [RETURN] when done. A small number of commands are active
only during multiplayer battles. These are used to interact with other players:
Sending a Private Chat Message
Press [T] and then type [/<playername>] to specify who to send it to. After typing a few letters, the computer
will automatically finish the name for you.
Forming Alliances
Call up the right-click menu and select <FORM ALLIANCE> option. You can then choose with whom you want
to form the alliance.
Breaking Alliances
Call up the right-click menu and select <BREAK ALLIANCE> option. You can then choose with whom you want
to break the alliance.
Transferring Resource Units (RUs)
Call up the right-click menu and select <TRANSFER RU> option. You can then choose with whom you want to
transfer RUs. After this is done, a prompt will appear at the top of the screen. Type in the number of RUs to
transfer and press [ENTER].
OVERLAYS
The gameplay screen has numerous overlays that convey information to the player about the game in text and
graphic form. The gameplay overlays have three different modes of verbosity, which can be cycled via the [V]
key. The default mode displays all information, the second mode displays most of it, and the third mode displays
none of it. Some information is only displayed in multiplayer, and some only in single player.
Player Legend (multiplayer only): This lists each player in the game and displays the colors of their ships.
Build Progress: This shows the progress of all ships currently being built. The number in brackets
represents the number of ships of that type remaining to be built.
Research Progress: This shows the progress of all technology currently being researched.
Message Area: This area of the screen displays messages that inform a player of special events. Tactics and
formation confirmation, notification of completed modules and researched technologies, and multiplayer
messages from other players are all displayed here. Also, if you are ever in doubt as to why you can’t do something, look to this area for a message explaining the problem. For example, if you try to EMP an enemy ship,
but the selected ACV has not recharged yet, then a message will be displayed informing you why you cannot EMP
the target.
Page 44

HOMEWORLD: CATACLYSM
Some messages displayed can be left-clicked to bring you to other areas of the game. For example: if you have
just finished building an Engineering module for your Command Ship, you can left-click on the construction
completed message to bring up the Research Manager and initiate research on a technology available on that
module.
The message area has a history that you can bring up via the arrow buttons to the left of the messages. By leftclicking on the upper button, you can recall older messages that you might have missed. Clicking on the lower
arrow button will return you to more recent messages.
Ships Selected List: If you have ships selected, they will be listed by type in the upper right corner of the
screen. This list is especially useful for identifying smaller ships in the Sensors Manager by selecting them.
Normally ships are listed in white. They are listed in gray if they are currently uncontrollable (i.e. being built,
upgrading, linking, getting infected, etc), and listed in blue if they are allied (and thus uncontrollable).
Ships Selecting List: While you are dragging the mouse with the left mouse button held down, ships that are
being actively selected are listed in green.
Player Information: In the lower right corner of the screen, your current Support Unit count and total, your
current Resource Unit total, and current mission time elapsed are displayed. If you are currently exceeding your
Support Unit capacity, your current Support Unit count (number on left) will pulse red.
4444
Page 45

Ship Selection Overlay: When you select a ship, a green health bar overlay will appear above the ship indicating how much damage the vessel has incurred. The bar will shorten as the ship is damaged and will change
from green to
yellow to red as conditions worsen. Workers have an additional brown bar that represents what percentage of
Resource Unit (RU) capacity they have reached before returning to drop off a load.
Some ships have weapons that need to recharge. The recharge progress of their weapon is represented by a blue
bar below the health bar. Sentinel shield strength is also represented by a blue bar.
While larger ships are upgrading, a tan-colored bar representing the progress of the upgrade will be present.
If a ship is capable of upgrading, a solid blinking yellow circle will be present to the left of the health bar.
If a ship is currently uncontrollable, a red X will be present to the right of the health bar.
Experience levels for a ship are displayed via red stars above the health bar. The more red stars, the more
experienced the pilot of that ship is.
Certain ships can fire missiles. The current number of missiles available for launch is indicated by a number
below the health bar.
HOMEWORLD: CATACLYSM
45
TECHNICAL BRIEF + GAMEPLAY GUIDE
45
Page 46

HOMEWORLD: CATACLYSM
Ship Overlay: You can turn on the ship overlay via the [TAB] key (you must have at least one ship selected). If
more than one ship is selected, the overlay will show information for the first ship that was selected. The ship
overlay gives you detailed information on every aspect of the ship: its experience level, current health, and
available weapons. The overlay also lists all abilities that the ship is capable of developing in Multiplayer. If they
are listed in red, then the associated technology for that ability has not been researched. If they are listed in yellow,
then the ship can be upgraded at any time to obtain that ability. Current abilities of the ship are listed in green.
Tactical Overlay: If you turn on the tactical overlay with the [CAPS LOCK] key, a series of graphic symbols will
be overlaid on all units. A symbol legend will appear in the upper left corner of the screen.
Ship Identification: Simply position the mouse pointer over a ship for a few seconds to get a short description
of what the ship is. In a multiplayer game, it will also list the player that owns that ship (if it is not your own ship).
You can also use this method to get the value of the various types of resources in the game.
MANAGER SCREENS
Many of the more complex tasks, like ship-building and research, have their own special screens to help you
manage them more effectively. They can be accessed at any time and any place during combat by hitting the
appropriate command key. You can return to regular game view by hitting the [ESC] key. The build, research,
and system managers all have buttons in the top right corner that enable easy access to one another.
Build Manager
To access the build manager, select the ship with which you wish to build, and then press the [B] key.
OR: Select the ship with which you wish to build, call up the right-click menu and select <BUILD MANAGER>
from the <VIEW> section.
OR: If you have the SHORTCUT BUTTONS enabled in the gameplay options, select the ship with which you wish
to build, then left-click on the BUILD button at the bottom center of the screen.
The build manager allows you to build ships and set up the construction queue in order to build many units at
once. The build manager also gives basic details of each type of ship presently available for construction, as well
as your current number of resource units.
Building: All the ships your current tech levels allow you to build are listed in the left side panel. Left-click on
the desired vessel with the left mouse button and its image and basic performance details will appear in the right
side window. Left-click again to add units to the production queue. When you are done adding units, left-click
on the <BUILD> button.
Build Progress: At this point, two colored bars will appear above the listing for the ship type you have just
ordered built. The top line shows how close to completion a single vessel is, while the lower bar shows how close
to completion the entire build order is. If you only ordered one vessel built, these two bars will move along
together.
4646
Page 47

Canceling a Build: To cancel a build, left-click on the type of ship being built and then left-click on the
<CANCEL BATCH> button. The RU’s used in construction will be reclaimed.
Pausing a Build: To pause a build, left-click on its progress bar and then left-click on the <PAUSE BATCH>
button. When you are ready for the project to resume, simply re- select the ship type and then left-click on
the <PAUSE BATCH> button again. Construction will resume exactly where it left off.
Support Units (SU): Your Command Ship can only support a certain amount of ships. This limit is represented
by the bar in the middle of the Build Manager. The bottom green section represents how many SU’s you are currently
using. The middle dark section represents how many SU’s you have reserved with the ships that are currently queued
for construction. The top gray section represents how many SU’s you will have remaining after construction is
complete. You can increase the total SU’s available to you by building more support modules on your command ship
or by building more carriers (and more support modules on those carriers).
Build Capable Ship Icons: These icons represent the vessels in your fleet that can build ships. Only your
Command Ship and Carrier Ships can perform this function. For each ship an icon is drawn to the right of your
current RU total. You can left-click on these icons to view and set what they are currently building.
HOMEWORLD: CATACLYSM
47
TECHNICAL BRIEF + GAMEPLAY GUIDE
47
Page 48
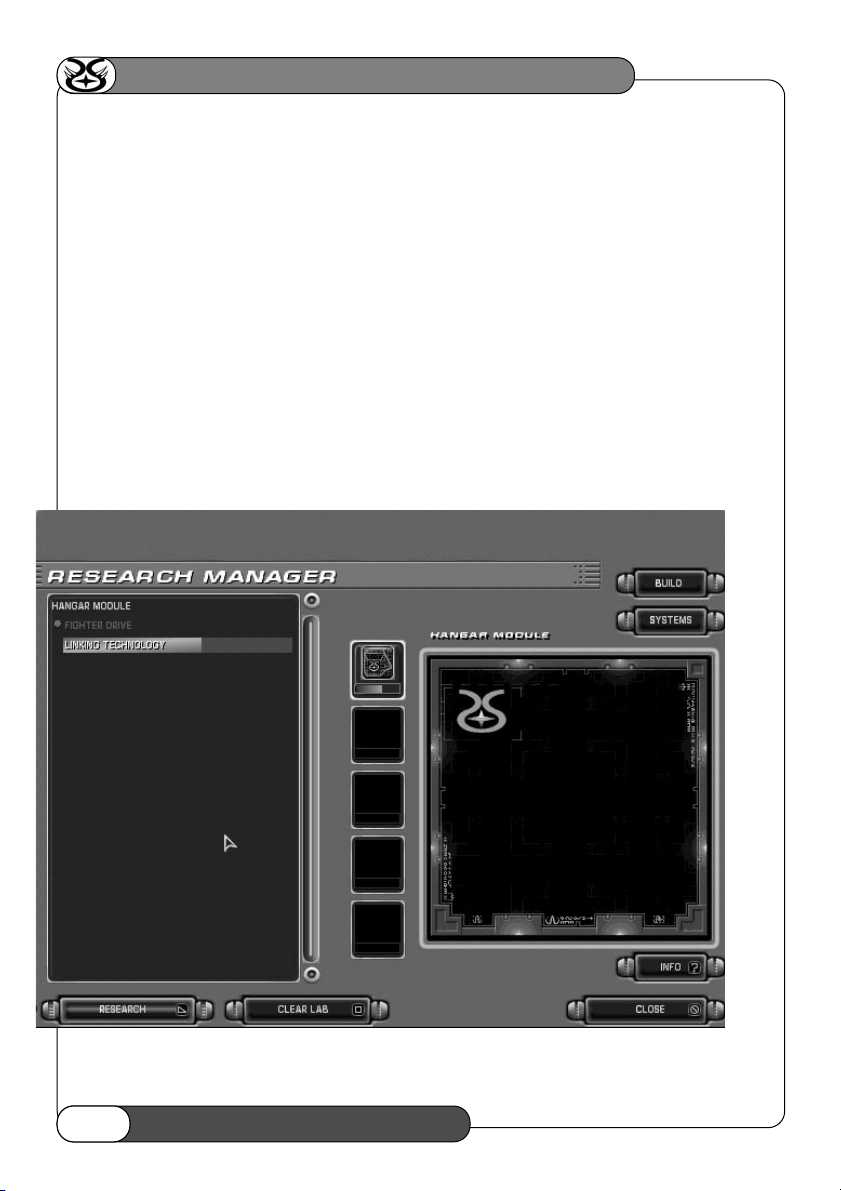
HOMEWORLD: CATACLYSM
Ship Information: For more information on a ship, select it by left-clicking it once. Then toggle the ship
information on by left-clicking the INFO button in the lower right corner.
Research Manager
To access the research manager press the [R] key.
OR: Call up the right-click menu and select <RESEARCH MANAGER> from the <VIEW> section.
OR: If you have the SHORTCUT BUTTONS enabled in the gameplay options, you can left-click on the RESEARCH
button at the bottom center of the screen.
Researching a Technology: Double-click on the technology you wish to research.
OR: Left-click on the <RESEARCH> button.
Canceling Research: Select the technology currently being researched from the left panel list and left-click
on the <CLEAR LAB> button found along the bottom of the manager. You can also halt research in a particular
lab ship by selecting it from the icon strip in the middle of the manager and then left-clicking on the <CLEAR
LAB> button. When a project is canceled, all accumulated research in it is lost.
4848
Page 49
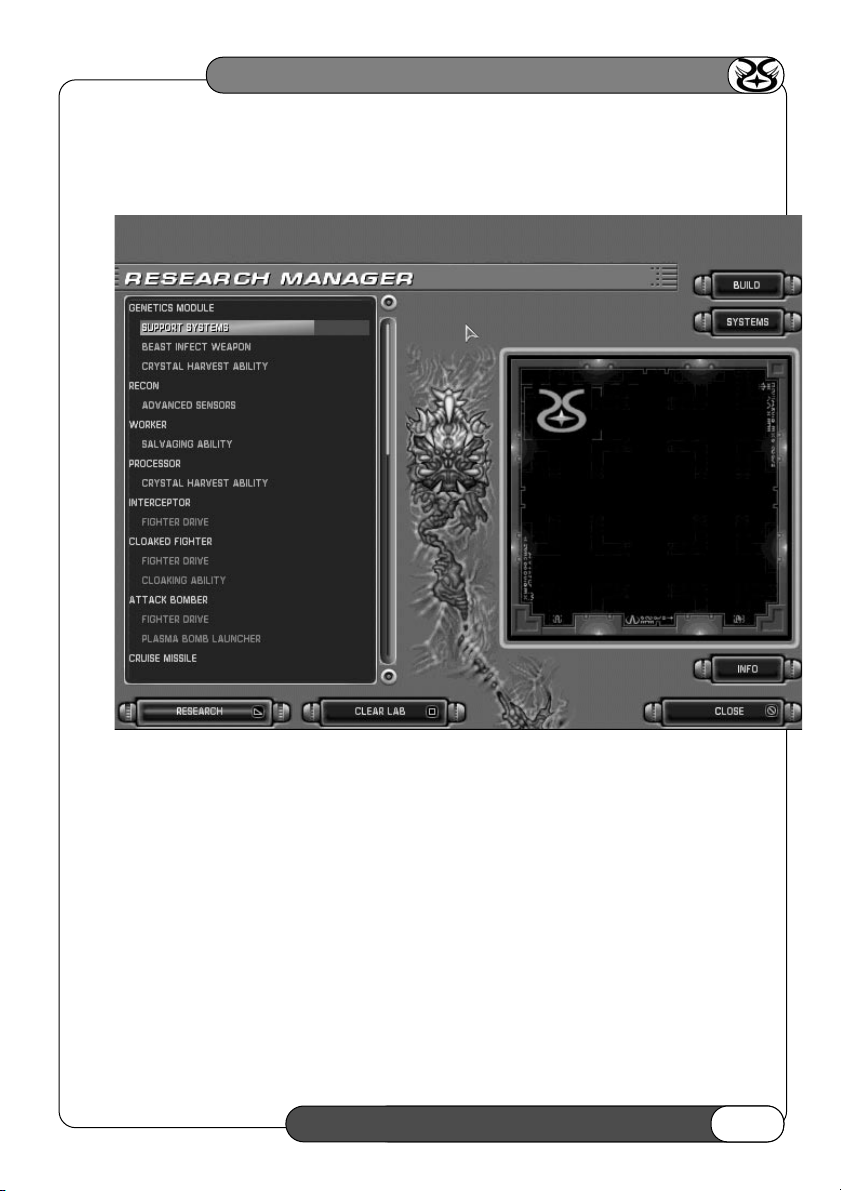
HOMEWORLD: CATACLYSM
49
TECHNICAL BRIEF + GAMEPLAY GUIDE
49
Technology List: This panel contains a list of technologies you can currently research. When a technology has
been selected, a graphic will appear in the right-hand side panel. Technologies that have already been successfully
researched will appear on the list with a green dot beside them.
A Somtaaw player must have research modules built before researching any technologies. Once a module has
been built, you can see the status of any research you are performing in that module via a blue bar under the
technology name in the left display list and via the icons in the middle of the research manager. A Somtaaw
player can research one technology per module.
A Beast player does not need research modules, and can choose to research any technology for ships that it
has captured. To capture a ship, infect it and then retire it. For directions on infecting, view the description
of the Beast Command Ship. Once retired, a new category for that ship will appear in the technology list, with
all technologies associated with that ship listed. You can then choose those technologies for research. A Beast
player can research only one technology at a time.
Page 50

HOMEWORLD: CATACLYSM
5050
Sensors Manager
To open the Sensors Manager (SM), press the [SPACE] key.
OR: Call up the right-click menu and select <SENSORS MANAGER> from the <VIEW> section.
OR: If you have the SHORTCUT BUTTONS enabled in the gameplay options, you can left-click on the SENSORS
button at the bottom center of the screen.
The sensors manager gives you a general view of the entire battlespace. Usually the best way to look at your
fleet is by positioning the camera so that it is looking down on your ships. This yields a more 2D representation
and usually makes it easier to select your units. The camera can be controlled in the Sensors Manager just as
in the game view. In addition to regular camera controls, you can use the arrow buttons at the bottom center of
the screen to pan the view forward, back, left and right. You can also select any ship in the Sensors Manager just
as you would in the game view. You can issue move, attack, special action, guard, dock, hyperspace, and upgrade
commands to any selected ship in the Sensors Manager.
You can focus on a selected ship via the [F] key. This will return you to the game view with the camera focused
on the selected ships.
Visible enemy ships that show up as red pixels can be examined closely via the ALT FOCUS command (holding
down [ALT] and left bandboxing a target).
You can exit the Sensors Manager at any time by pressing the [SPACE] key.
When opening the right-click menu in Sensors Manager, you can control which elements are displayed for the
Sensors Manager via the <SENSORS> section. This enables you to tune the Sensors Manager to give you the
information that you feel is important.
Area Explored: This toggles the display of the gray wireframe that represents the areas that you have explored.
Resources will only be displayed once you have explored the area in which they are found (except for crystals,
which are always visible).
Sensors (Sphere): This toggles the display of the blue spheres that represent the sensor range of each ship
in your fleet. Enemies can only be seen if they are approximately within sensor range of your ships.
Sensors (Wireframe): This toggles the display of the blue wireframe that also represents the sensor range
of each of your ships. You can use either Spheres or Wireframes to display sensor range for your ships. NOTE:
If you want to maximize your frame rate, use the Wireframe option.
Resources: This toggles the display of resources. Asteroids and dust clouds are drawn as brown pixels.
Nebulae are drawn with purple lines. Crystals are drawn with purple pixels.
Dust: This toggles the display of dust. Dust consists of un-harvestable particles, and is represented by gray pixels.
Background: This toggles the display of the background. NOTE: If you want to maximize your frame rate,
toggle the background off.
Page 51
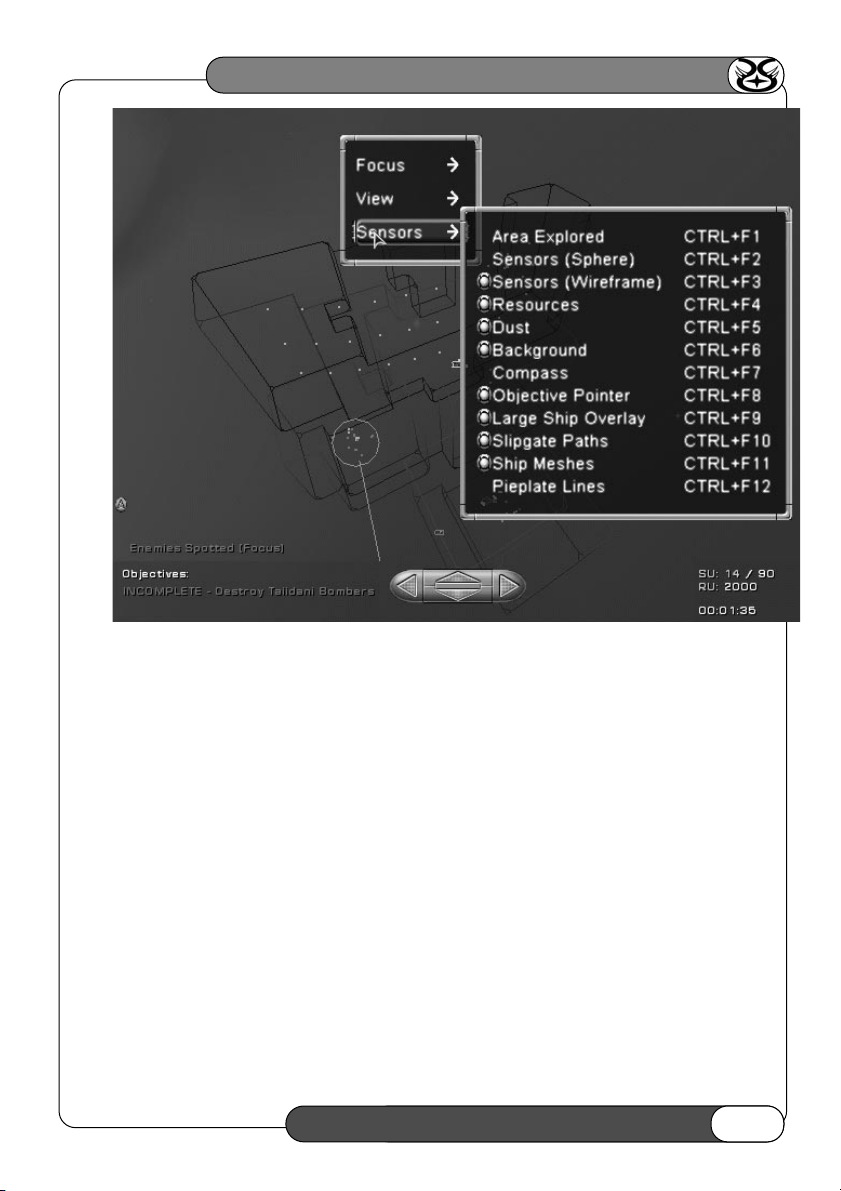
HOMEWORLD: CATACLYSM
51
TECHNICAL BRIEF + GAMEPLAY GUIDE
51
Compass: This toggles a pie plate with numbers drawn to represent degrees from a full 360 degree circle. You
can use these numbers to identify directions to allies during a multiplayer game.
Objective Pointer: This option will toggle the drawing of an arrow from objective text in the lower left
during single player games to important locations in the Sensors Manager.
Large Ship Overlay: This option will toggle icons that are drawn over large ships (yours and enemies).
Slipgate Paths: This option will toggle the display of slipgate paths. They are represented as curved lines that
go from one slipgate to another. You will only see the path once you have gone through the slipgate from one
end to the other.
Friendly Ships: This will toggle the display of friendly ships. Your ships are represented by green pixels, while
allies are represented by blue pixels.
Enemy Ships: This will toggle the display of enemy ships that are within sensor range of your ships. Enemies
are represented by red pixels.
Page 52

HOMEWORLD: CATACLYSM
5252
Systems Manager
To open the Systems Manager, first select a Command Ship or Carrier, then press the [S] key.
OR: Select a Command Ship or Carrier, then call up the right-click menu and select <SYSTEMS MANAGER> from
the <VIEW> section.
OR: If you have the SHORTCUT BUTTONS enabled in the gameplay options, select a Command Ship or Carrier,
then left-click on the SYSTEMS button at the bottom center of the screen.
The systems manager allows you to check which ships are currently docked and toggle automatic launch
parameters for the selected Command Ship or Carrier. By disabling automatic launching, you can have newly
built fighters and corvettes remain inside the docking bay, thus protecting them from enemies outside.
Docking Capacity: These two colored bars graphically represent the remaining capacity of the ship in green.
The actual numbers of Fighters and Corvettes docked are given to the left of their respective bars. Sentinels and
leeches are included in the Fighter category, while Workers are included in the Corvette category.
Selecting the Launch Vessel: If you have built any Carriers, their icons will appear here. To see which ships
are docked in one these vessels, left-click on its icon from this list.
Remain Docked: Left-click on this checkbox to keep Strike Craft inside a Command Ship or Carrier when they
dock.
Launch One: Left-click on the type of ship you wish to launch and then left-click on the <LAUNCH ONE>
button along the bottom of the screen. Only one ship of that type will launch.
Launch Group: Left-click on the type of ship you wish to launch and then left-click on the <LAUNCH GROUP>
button along the bottom of the screen.
Page 53
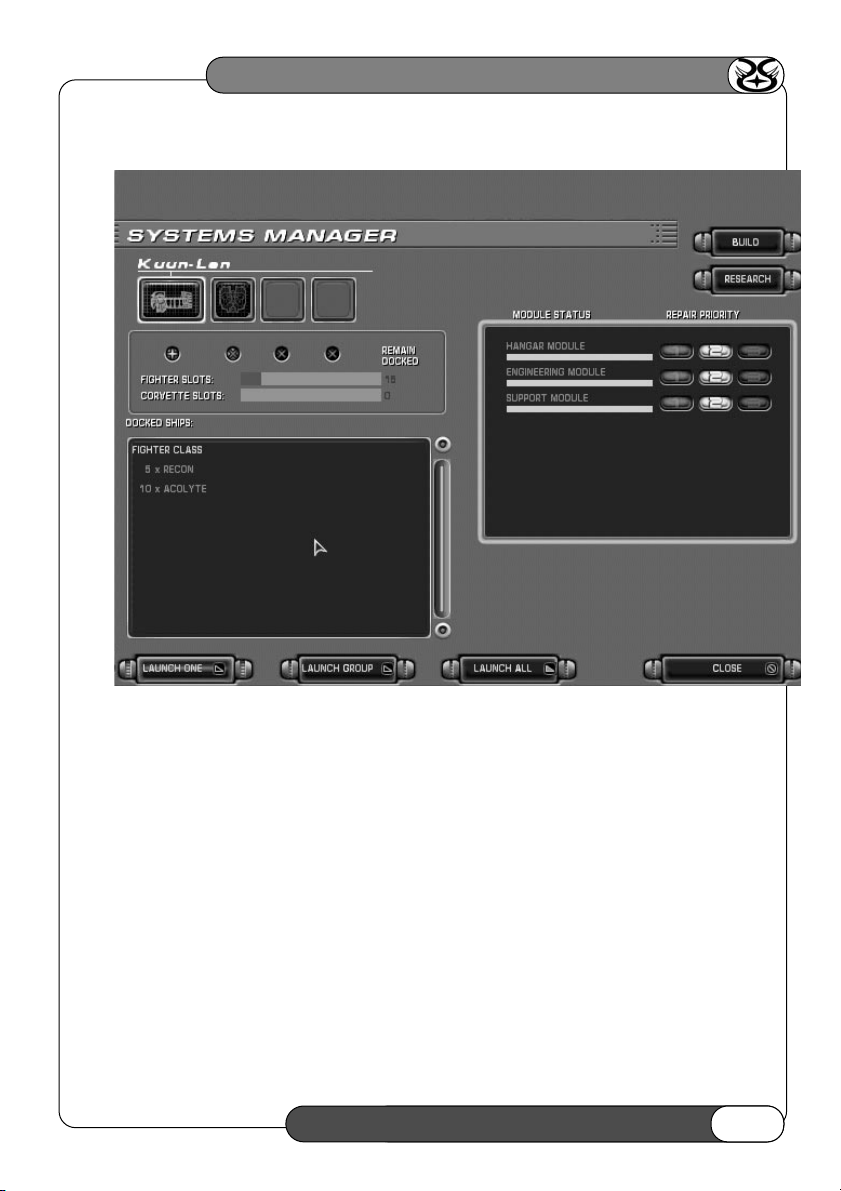
HOMEWORLD: CATACLYSM
53
TECHNICAL BRIEF + GAMEPLAY GUIDE
53
Launch All: To launch all ships held in the bay, left-click on the <LAUNCH ALL> button.
Module Status and Repair Priority: For Somtaaw players, the right panel contains a list of modules on
that Command Ship or Carrier, their current health, and a repair priority. The repair priorities can only be set
once you have researched Repair Bots and upgraded that Command Ship or Carrier.
Page 54
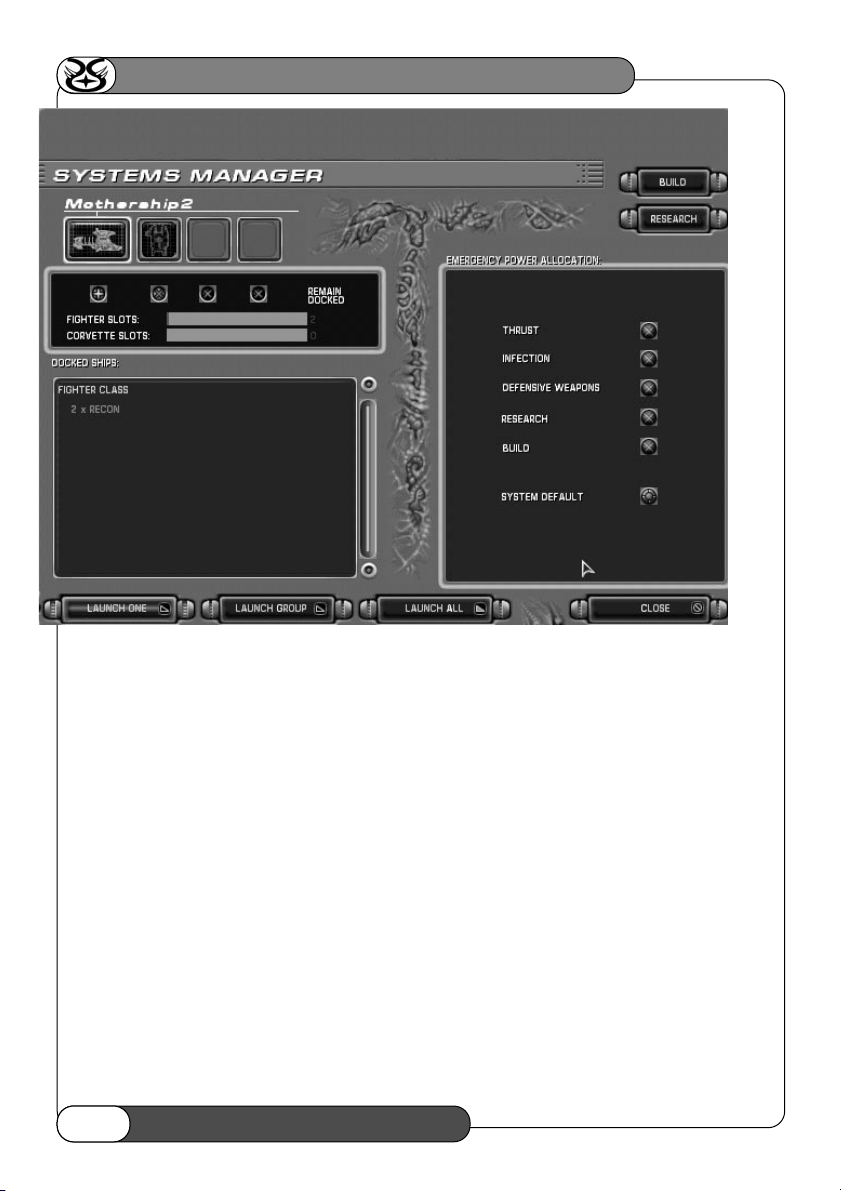
HOMEWORLD: CATACLYSM
5454
Emergency Power Allocation: For Beast players, the right panel contains a list of areas that can be
accelerated at the expense of the health of the Beast Command Ship. All benefits affect only the Beast
Command Ship. For example, you can accelerate research, but your Command Ship will slowly lose health.
Once the Command Ship has lost half of its health, the setting will automatically return to system default
and health will no longer be drained.
Thrust improves Command Ship maximum speed.
Infection accelerates how fast the infection weapon will recharge on your Command Ship.
Defensive Weapons improves the damage that the Command Ship’s guns will do.
Research will decrease research time for technologies.
Build will decrease the build time of ships currently under construction in your Command Ship.
Page 55

SINGLEPLAYER
Starting a Game
In order to start a new single player game, left-click on the <SINGLE PLAYER> button in the Main Menu.
Save a Game: At any time during gameplay, hit the [ESC] key and then choose <SAVE GAME> from the menu.
When the Save Game screen comes up, left-click in the narrow box below the save game list and type in a name
for the saved game. Then left-click on the <SAVE> button.
Loading a Saved Game: Left-click on the <LOAD GAME> button. A screen will appear with a list of saved
games. Cataclysm automatically saves your campaign at the beginning of every new level. These auto-saved games
will appear along with the ones you have saved yourself. To load one, left-click on it and then left-click on the
<LOAD> button.
Player Setup: This screen lets you set the base and secondary colors of your ships. To change your base color,
left-click on the <BASE COLOR> button. A small white circle will appear inside the large rainbow box. Click and
drag the circle around the rainbow box until you have achieved a shade you are satisfied with. To change the
stripe color, simply left-click on the <SECONDARY COLOR> button and repeat the process of dragging the white
circle to choose a stripe color. You can also drag the slider, located to the right of the rainbow box, up and down
to adjust the brightness of the color.
Game Difficulty: Game difficulty affects the production time to build ships, the cost and health of ships, and
enemy fleet size.
Starting The Game: When you are happy with your choice of fleet and ship color, left-click on the <START>
game button to begin the Single Player campaign.
HOMEWORLD: CATACLYSM
55
TECHNICAL BRIEF + GAMEPLAY GUIDE
55
Page 56
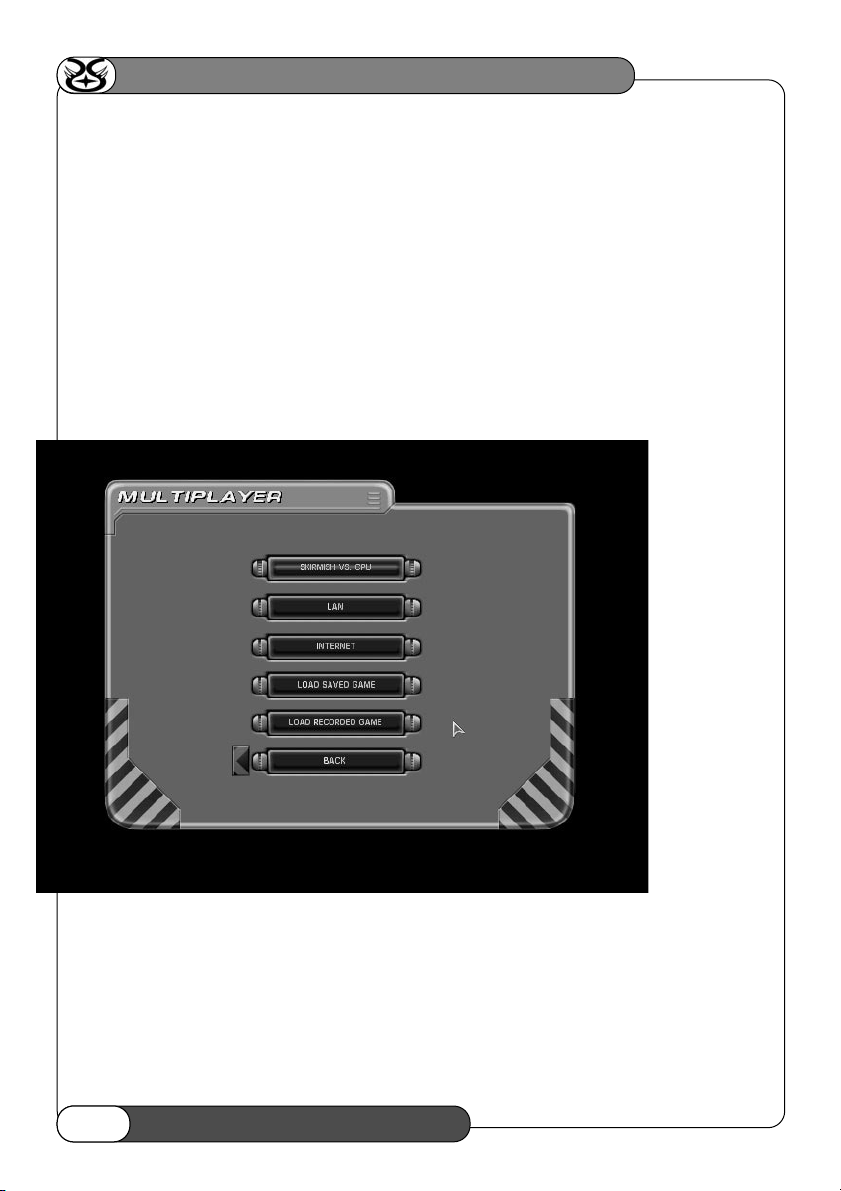
HOMEWORLD: CATACLYSM
5656
Multiplayer
Cataclysm can be played against human and computer opponents through a variety of different modes. While
there are three different ways to engage in a multiplayer game of Cataclysm, they all use the same system for
creating the actual game and setting up the gameplay options and rules.
Skirmish vs. CPU: This option is for playing multiplayer games against computer players. After a game is
created with the desired gameplay options (see “Setting Multiplayer Game Options”), left-click on the
<START> button to begin the action.
LAN (Local Area Network): This option is for playing Cataclysm on a Local Area Network. People who want
to play together on a LAN must be using the same protocol.
Internet: This option is for playing Cataclysm over the Internet via Sierra.com.
Page 57
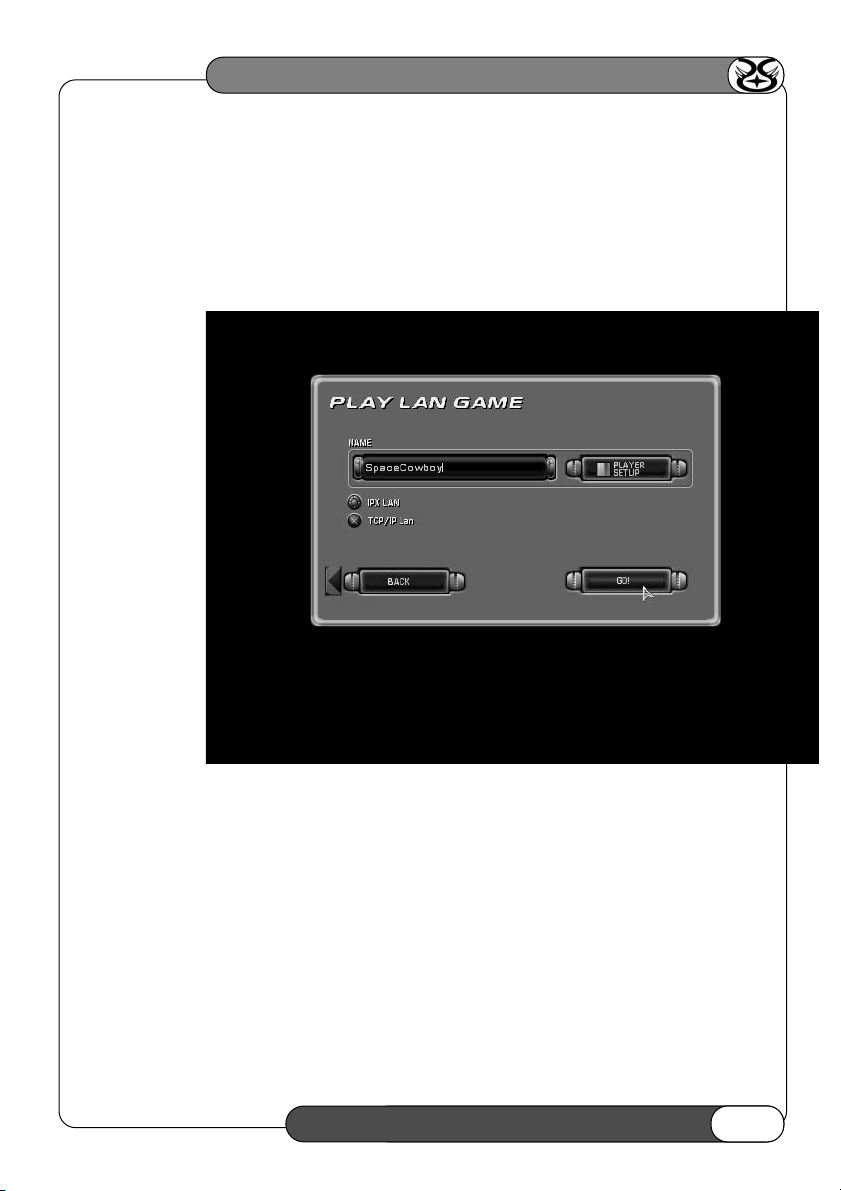
LAN
After selecting the LAN option, another screen will open up. Left-click on the name field and type in the name by
which you wish to be known on the multiplayer battlefield. Hit <ENTER> when you are finished typing. Left-click
on the <PLAYER SETUP> if you need to change your race or ship colors from previous multiplayer sessions.
Once you are satisfied, left-click on the <GO> button.
Cataclysm will auto-detect if you have IPX and/or TCP/ IP LAN and choose the appropriate protocol, so normally
you will never have to touch this setting. If you have both IPX and TCP/ IP installed, Cataclysm defaults to IPX. Users
who want more control and both protocols installed can select the IPX button for IPX, and the TCP/ IP button for
TCP/ IP.
THE LOBBY
The lobby is where you go to see who else is on the LAN, chat, organize your own game, or see what games are
still accepting players. The names of the players currently in the lobby are in the bottom right panel, and any chat
messages are printed in the bottom left panel.
Chatting: If you wish to send messages to the other players in the lobby, just left-click here and type your message.
If you wish to whisper a private message to just one player, type /< playername> and the rest of your message.
HOMEWORLD: CATACLYSM
57
TECHNICAL BRIEF + GAMEPLAY GUIDE
57
Page 58

HOMEWORLD: CATACLYSM
Creating Your Own Game: Left-click on the Create Game button. This takes you to the game setup screen.
Game Details: The list of games available in the lobby is displayed in the large upper display panel. To see
which options are being used in a game, left-click on the game you are interested in and then left-click on this
button.
Joining a Game: Left-click on the game you wish to join on the main list and then left-click on this button.
Player Setup: Left-click on this button to choose your fleet (Somtaaw or Beast) and to modify your ship colors.
Setting Multiplayer Game Options
The setup game screen is where you set the name of your game and the number of CPU players, as well as all the
gameplay options available.
Naming Your Game: Click on this panel and type in a name for your game.
Number of CPU Players: Left-click on the arrows to increase or decrease the number of computer players
you want in the game.
Win Conditions: These checkboxes let you set the various victory conditions for the game. Destroy Enemy
5858
Page 59

Mothership means the enemy’s Mothership must be destroyed; Capture Enemy Capital Ship means you can also win
by capturing an enemy capital ship. Allied Victory means that players who are allied can win the game together by
defeating their enemies.
Password on the Game: If you want to restrict access to your game, left-click on the <password protected>
checkbox. Left-click on the narrow panel directly below and type in the password you wish to use. Confirm your
password by re-entering it in the panel below. In order for other players to join the game you created, you will
have to tell them the password.
CPU Difficulty: This slider lets you set the difficulty of the computer-controlled opponents.
CPU Attacks Humans: This slider lets you set how likely the CPU player will be to attack human opponents.
Create Game:. When you are satisfied with your choices, left-click on the <CREATE GAME> button.
Game Type: Cataclysm comes with several pre-defined setups for different styles of multiplayer gaming.
Selecting one of these game types changes a variety of options on all of the options screens.
I Hate Harvesting: No harvesting of resources is required in this game type. RU injections are turned on with
a lump sum injection as well.
HOMEWORLD: CATACLYSM
59
TECHNICAL BRIEF + GAMEPLAY GUIDE
59
Page 60

HOMEWORLD: CATACLYSM
Bounty Hunter: Bounties are turned on in this game type, meaning each enemy ship you kill brings in a bounty
— in RU’s. Players with larger fleets have higher bounty ratings, making them more attractive targets.
Carpe Diem: “Seize the day.” This game type requires you to capture an enemy ship to win the game.
Select Scenario: This allows you to select the location in which the multiplayer battle will take place. The number
listed after the map name shows how many players that map supports.
Research: If you toggle this off, everyone starts with all technologies already researched. Also, Somtaaw players
will be given all modules on their Command Ship if this option is disabled.
Crates: If you toggle this off, no bonus crates will appear during the course of the game.
Hyperspacing: If you toggle this off, no one will be able to make paid hyperspace jumps during the game.
Allow Allies: If you toggle this off, no one will be able to ally during the game.
Bounties: With this option toggled on, you get a bounty in RU’s for every enemy unit you destroy. Larger units
bring greater rewards.
6060
Page 61

Saving a Multiplayer Game: While playing the game, hit the [ESC] key and then choose ‘save game’ from
the options list. This option functions the same as it does in single player mode.
Loading a Multiplayer Game: From the multiplayer menu, left-click on the <LOAD SAVED GAME> button
to bring up a list of saved multiplayer games. Left click on a game in the list and then left-click on the <LOAD
GAME> button to load it.
Recording a Multiplayer Game: Cataclysm allows you to record any multiplayer game and watch it later,
from any angle. When you wish to start recording a game, hit the [ESC] key and left-click on the <RECORD>
button. Follow the same process that you would if you were saving a game. You may load a recording at any time
by left-clicking on <LOAD RECORDED GAME> from the multiplayer menu. Once loaded, you can focus on any
ship in the world from the Sensors Manager, not just your own.
Resources Options:
Disable Harvesting: This toggles resource collection on or off. With it off, you will have to toggle on some
other supply of RU’s, or your game will run out of resources fairly quickly.
HOMEWORLD: CATACLYSM
61
TECHNICAL BRIEF + GAMEPLAY GUIDE
61
Page 62

HOMEWORLD: CATACLYSM
6262
Starting Resources: This sets the level of resources with which each side begins the scenario.
Resource Injections: This section must be toggled on by left-clicking on the checkbox. You can then set how
often players will receive a chunk of RU’s, and how large that chunk will be.
One Lump Sum: If you toggle this option, you will receive only one lump sum of resources a certain amount
of time after the game begins. Both the amount and timing of this precious gift can be set.
WAITING FOR PLAYERS
After you create the game, you are returned to the lobby to wait for players to join your game. When you are
ready to start, you can left-click on the <START GAME> button. If you wish to change some of the game options,
click on the <SETUP GAME> button and this will take you back to the game options screen. If you no longer
wish to host a game, left-click on the <DISSOLVE GAME> button
Page 63

INTERNET
LOGIN
From this screen you can log onto Sierra.com, change your colors or fleet, change your password, or create
a new account.
Launch WON: To connect to the Sierra.com, left-click on this button and you will find yourself in the Cataclysm
lobby on Sierra.com. Setting up and playing a game on Sierra.com is identical to playing on a LAN, except that
Sierra.com has multiple rooms instead of just one lobby.
Firewall Settings: If you are behind a firewall, you should select the <Behind Firewall> button. If you know
you’re not behind a firewall, you should check the <Not Behind Firewall> button. If you are unsure or don’t
know what a firewall is, choose Auto-detect, which is the default. Technical note: When you create a game, if
one or more players are behind a firewall, Sierra.com will create a dedicated server for the game instead of using
the default peer-to-peer connection. Slow modem users who host games may want to choose the <Behind
Firewall> option (even if they are not behind a firewall), so that Sierra.com always uses a dedicated server, which
will require less bandwidth on the modem. Remember, if you are unsure what your firewall status is, just select
auto-detect.
Player Setup: Left-click on this button if you wish to change your fleet or ship colors.
Change Password: If you wish to change your Sierra.com password, left-click on this button.
HOMEWORLD: CATACLYSM
63
TECHNICAL BRIEF + GAMEPLAY GUIDE
63
Page 64
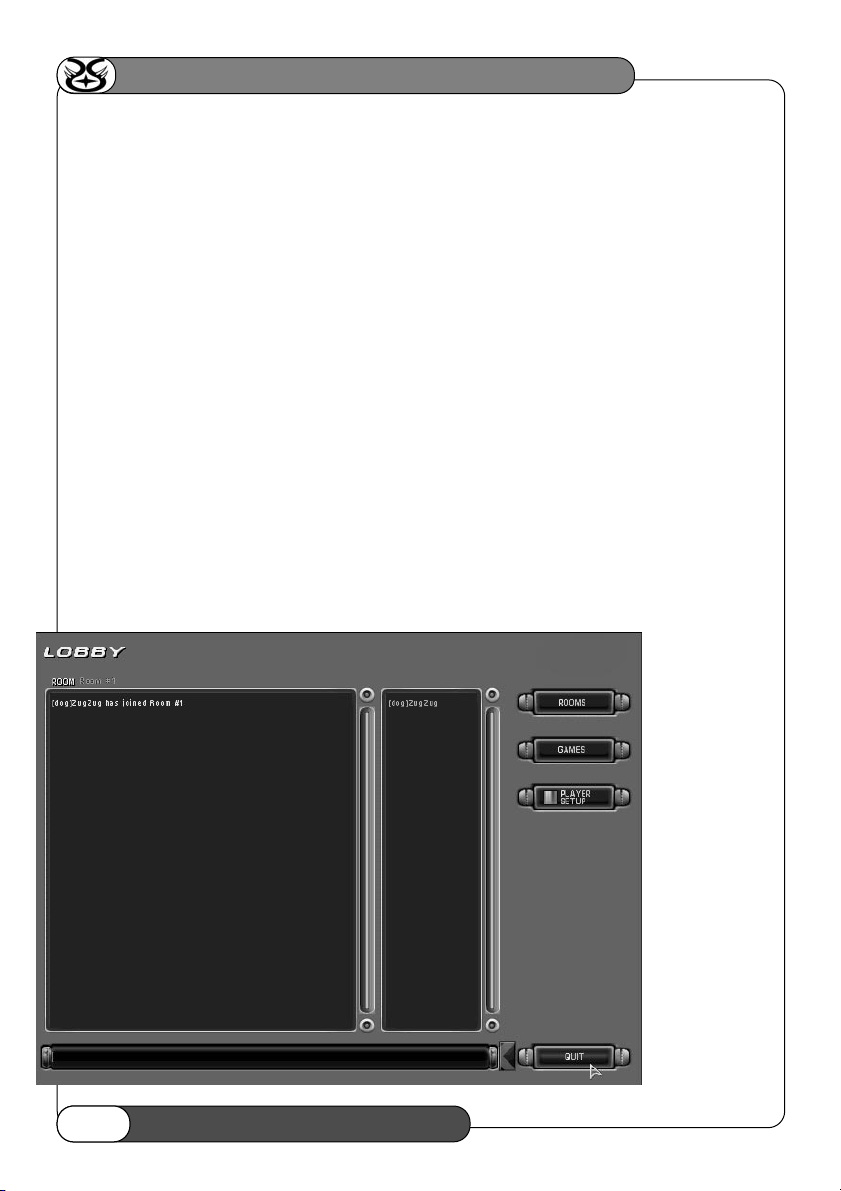
HOMEWORLD: CATACLYSM
Create New Account: If you do not have a Sierra.com account, left-click on this button, then type in
the following information:
Name
Left-click on this panel and type in the name you wish to use for your Sierra.com account.
Password
Left-click on this panel and enter the password you wish to use.
Confirm Password
Left-click on this panel and enter your password again to make sure you have typed it incorrectly in the previous panel.
New Account
Left-click on this button to create a new account. If you chose an account name which is already in use, you will
have to repeat this process using a different account name.
Cataclysm can be played over the Internet only on Sierra.com, a free gaming site. If you do not already have an
account, you must create one before playing Cataclysm.
SIERRA.COM LOBBY
Sierra.com is organized into rooms. Players can leave and enter rooms and create or join games in the current
room. Players in the current room are listed in the panel on the right, and chat messages are listed in the panel on
the left. The names of the players in the lobby are in the bottom right panel, and any chat messages are printed in
the bottom left panel.
6464
Page 65
Chatting: If you wish to send messages to the other players in the lobby, left-click here and type your message.
If you wish to whisper a private message to just one player, type <playername> and then the rest of your message.
Changing Rooms: To join a room or create a room of your own, left-click on this button.
Joining Games: If you want to join a game in this room or create one yourself, left-click on this button.
Contest Server: Left-click on this button to open up a web browser and view official Cataclysm player rank-
ings at Sierra.com’s website.
AVAILABLE GAMES
From this screen you can see a list of games in the room displayed in the large panel. You can join any of these
games, view the options for each of them, update their ping times, or create your own game.
Updating Ping Times: Left-click on this button to update the ping times of all the games in the list. The
lower the ping time, the faster your connection to the game will be.
Joining a Game: Left-click on the game you wish to join on the main list, then left-click on this button.
Creating a Game: Left-click on this button to create a game in the current room. See “setting multiplayer
game options” for more information on creating the game.
HOMEWORLD: CATACLYSM
65
TECHNICAL BRIEF + GAMEPLAY GUIDE
65
Page 66
HOMEWORLD: CATACLYSM
6666
AVAILABLE ROOMS
From this screen you can see a list of the rooms in the large panel. You can join one of these rooms or
create your own.
Joining a Room: To join a room, first left-click on its name in the list, then left-click on the <JOIN ROOM> button.
Creating a Room: To create a room, left-click on the <CREATE ROOM> button and fill in the necessary information.
Page 67
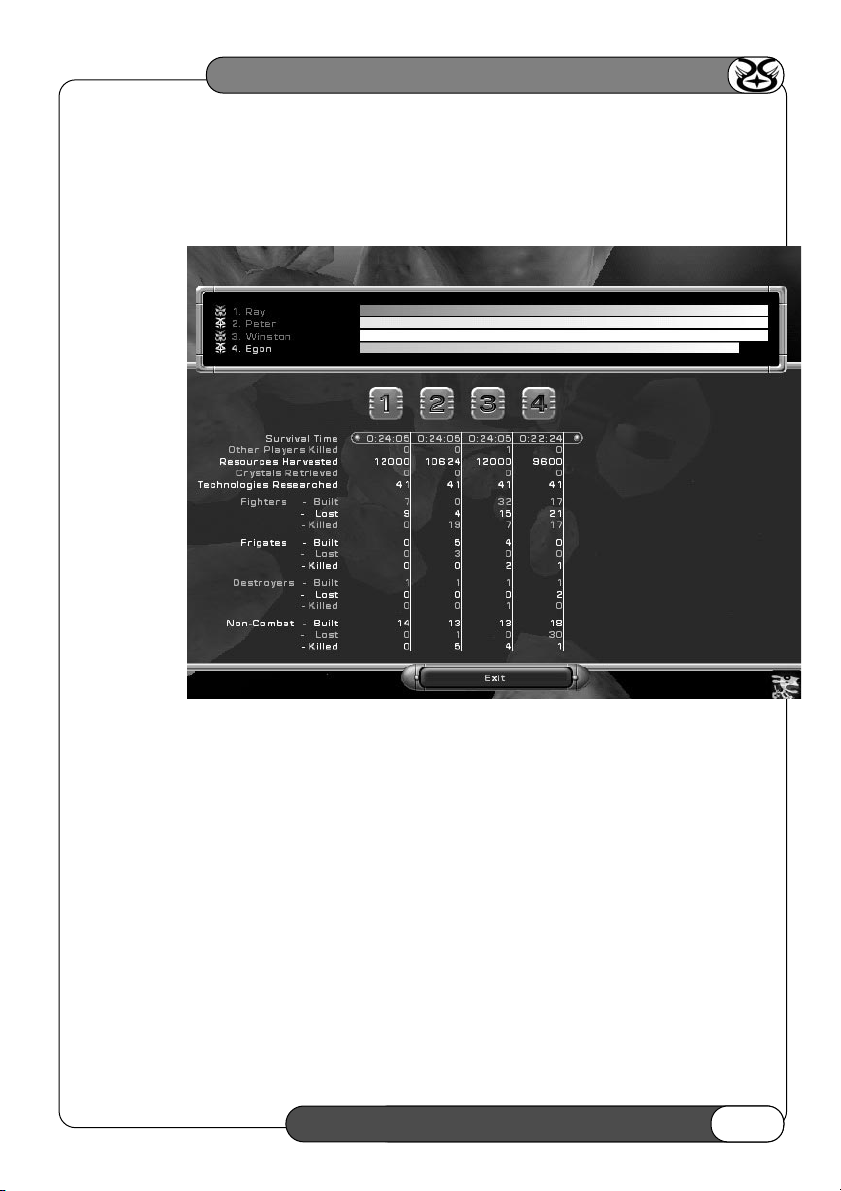
HOMEWORLD: CATACLYSM
67
TECHNICAL BRIEF + GAMEPLAY GUIDE
67
MULTIPLAYER STATISTICS SCREEN
After every multiplayer game, a statistics screen appears detailing information on each player’s performance during
the game. You can left-click on any row of data to receive a bar graph showing each player’s performance at the top
of the table.
Page 68
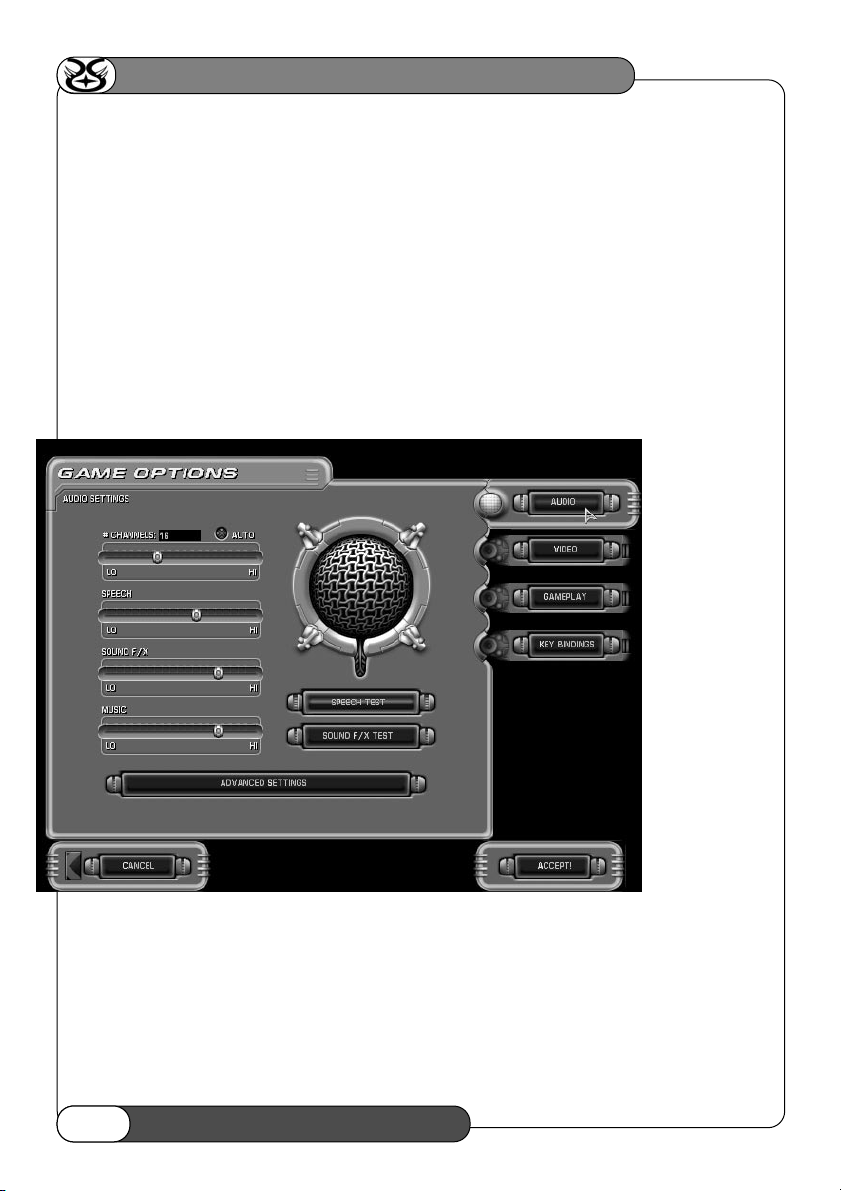
HOMEWORLD: CATACLYSM
OPTIONS
The options menu can be accessed either from the opening menu or by hitting [ESC] at any time during a game.
It gives you access to a number of gameplay and display options.
Audio
Channels: This is the number of sound effects that the game will mix at one time. A high number of channels will
give a more immersive experience, but may adversely affect the frame rate of the game. Selecting auto allows the
audio engine to turn off channels when the frame rate starts to get low; it will automatically increase the number of
channels as the frame rate increases.
Volume Settings: This section, consisting of three slider bars, allows you to set the volume levels for the
game’s speech, sound effects and music independently. Left-click, hold on the level indicator and drag the mouse.
NOTE: While playing a multiplayer game, you may change the music track you are listening to by pressing
[SHIFT]+[<] key to select the previous track or [SHIFT]+[>] key to select the next track. The list of music
tracks is limited to the ambient level tracks and battle tunes.
Advanced Speech Settings Menu: Access this sub-menu by left-clicking on the <ADVANCED SPEECH SETTINGS>
button in the main audio option screen. Left-click on the <ACCEPT> button when the options are set to your preference.
6868
Page 69

Sound Quality: High quality is the recommended setting. Selecting low quality will help increase the frame
rate of the game. Selecting auto allows the audio engine to drop to low quality when the frame rate starts to get
low; it will automatically go back to high quality when the frame rate increases.
Multimedia Speakers: This setting equalizes the audio engine for optimal performance with the average
multimedia speaker system.
Stereo/ Surround Sound: This setting equalizes the audio engine for optimal performance with high-end
multimedia speakers or a home stereo.
Headphones: This setting equalizes the audio engine for optimal performance with average headphones.
Custom: By pressing the change button, you can tune the optimal equalization settings for your speakers or
headphones.
Vocal Settings: This section allows you to pick which speech sounds are heard during the course of your
game. Left-click on the check boxes to turn these sounds on or off. Command voices are the responses to your
commands given during the game. Status reports are the voices that update you on new sensor reports, battles,
and other goings-on in the game. Battle chatter describes the voices of your various pilots and gunners as they
perform their tasks, gloat over victories or yell for assistance.
HOMEWORLD: CATACLYSM
69
TECHNICAL BRIEF + GAMEPLAY GUIDE
69
Page 70
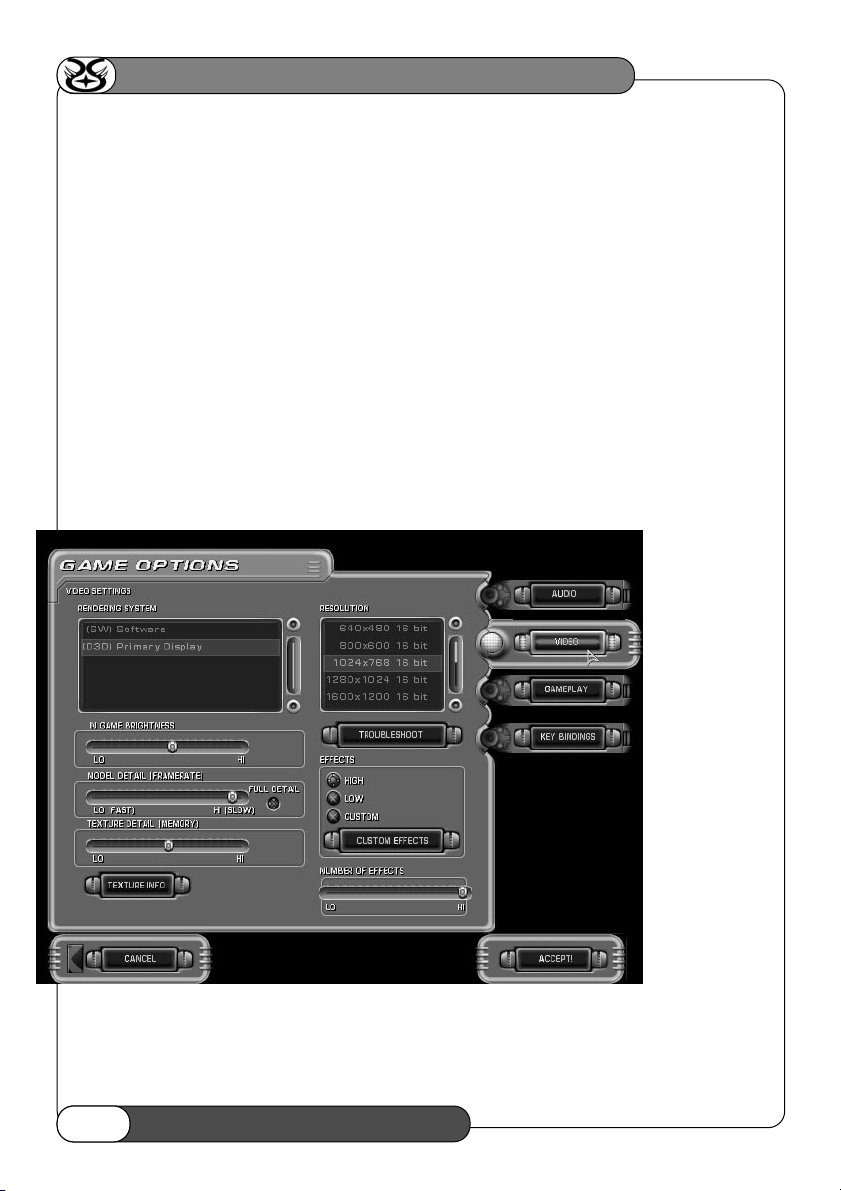
HOMEWORLD: CATACLYSM
Video
Rendering System: All systems that meet Cataclysm’s minimum specifications can run the game in software.
However, many users will have some form of hardware accelerator card that allows them to use Direct3D or
OpenGL acceleration. This listbox lists the supported rendering systems Cataclysm has detected on your system.
The items listed in this window may include Software, Default OpenGL, 3DFx OpenGL and Direct3D Primary
display. If you do not have a hardware accelerator for OpenGL, you will still have an option for Default OpenGL.
Please note that this will be much slower than the Software option.
Resolution: This panel displays the screen resolutions available for the rendering system you have chosen.
Lower resolutions will speed up graphics at the cost of image smoothness and detail. Left-click on the resolution
setting you wish to use.
In Game Brightness: This Option affects how brightly the ships are rendered in the game. It does not effect
the user interface screens or the backgrounds. You can turn this up to improve the brightness or contrast of the
game, depending on your monitor.
Model Detail: This slider bar controls the level of geometric complexity in rendered images. Sliding the bar to
the left reduces the number of polygons in a single frame and results in chunkier-looking ships. Adjust to achieve
a balance between game performance and visual fidelity.
7070
Page 71
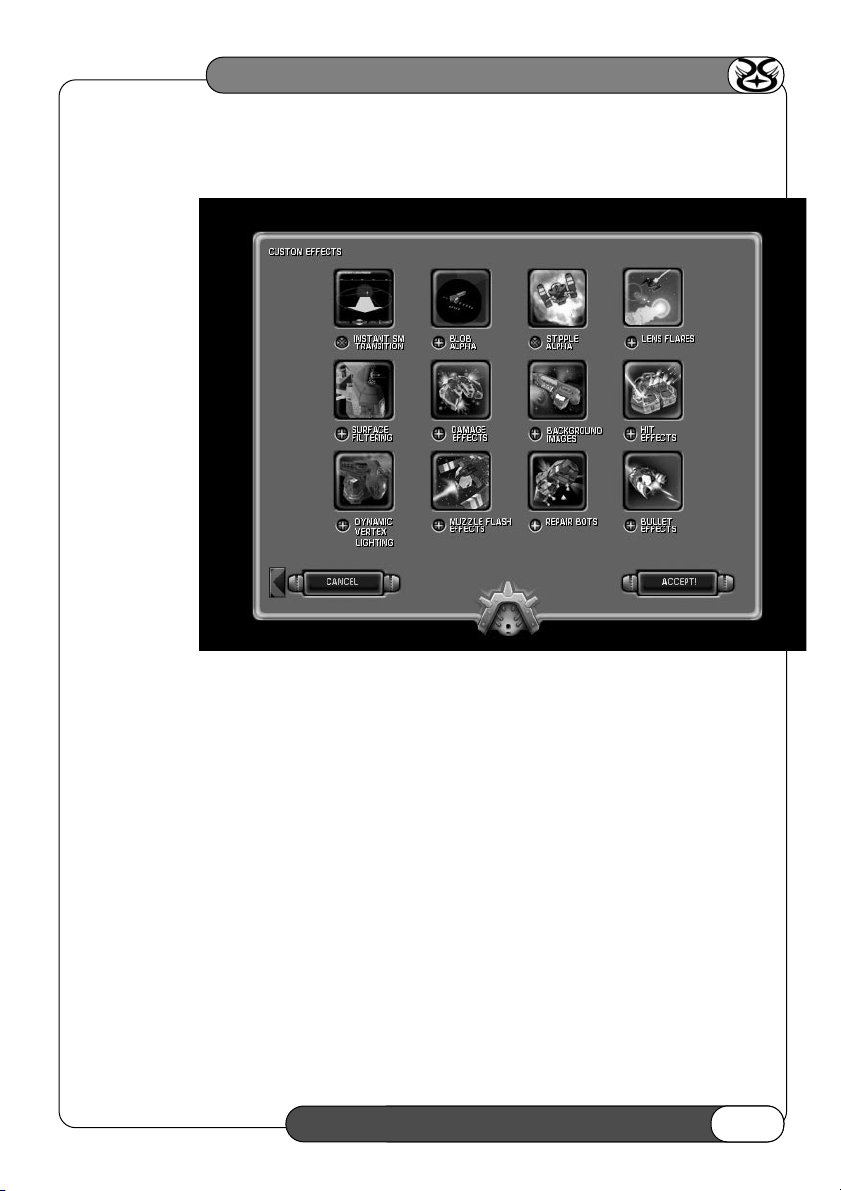
Custom Effects: This button brings up a screen that lets you control which effects to turn on or off. This
screen is covered later.
Number of Effects: This slider bar controls how many effects are drawn in the game. Turning it up will result
in a richer, more detailed game experience with more special effects, but will also make it slower. To improve
frame rate, you may want to turn this option down.
Texture Detail: Certain video cards do not support paletted textures, and require additional RAM to store temporary copies of the converted textures. This control allows you to adjust how much memory is reserved for the
texture pool. Increasing the size of the pool will decrease the amount of graphical slowdown that occurs when
downloading textures to your video card. The control will be disabled if your hardware does not require this
extra step.
Custom Effects: This sub-menu lets you choose which advanced graphic effects will be activated in your game.
Each has its own cost in terms of performance, and its own benefits in terms of visual effect. A particular effect
can be turned on or off by left-clicking on the checkbox at the left of the feature name.
Instant SM Transition: Selecting this option causes the transition from the main game screen to the Sensors
Manager to be immediate instead of smooth and fluid. Users with slower machines may want to enable the instant
transition to improve response.
Blob Alpha: Selecting this option will cause the circles in the Sensors Manager to be displayed with a faded fringe.
Owners of slower computers may want to disable this option to speed up the display when in the Sensors Manager.
HOMEWORLD: CATACLYSM
71
TECHNICAL BRIEF + GAMEPLAY GUIDE
71
Page 72

HOMEWORLD: CATACLYSM
7272
Stipple Alpha: Selecting this option will cause the software rendering system to display transparency effects
with a screen-door appearance, which results in higher graphic performance at the expense of visual quality.
Dynamic Vertex Lighting: Turning this option off will prevent surfaces on your ships from darkening when
being damaged by enemy fire. It will also prevent ship surfaces near engines from lighting up when the engines
are active.
Surfacing Filtering: Selecting this option will make textures appear smoother and less chunky. Surface
filtering is not available when using the software rendering system.
Background Images: This determines whether the galactic backdrop is displayed instead of the blackness of
space. Users with slower machines, or those using the software rendering system, may want to turn this option
off to speed up gameplay.
Hit Effects: Turning this option off will disable “bullet hit” effects. These effects are played whenever bullets hit
ships or other game objects. Owners of slower computers and those without any hardware acceleration may want
to disable this option to speed up the game during big battles. See also “Number of Effects” in the video options
screen.
Lens Flares: Turning this option off will disable the drawing of lens flares when particularly bright effects are
present on the screen.
Damage Effects: When ships get damaged, they may spark, smoke or emit flames. While this is an important
gameplay element, rendering of these effects can cause a slow frame rate on slower machines or machines
without hardware acceleration. Owners of these slower machines may want to disable these effects. See also
“Number of Effects” in the video options screen.
Muzzle Flash Effects: Turning this option off will disable effects that are played when ships fire bullets.
Disabling this option may speed up the game on slower machines during big battles, but will not look as good.
See also “Number of Effects” in the video options screen.
Bullet Effects: Turning this option off will cause all bullets to be drawn with a simple bullet effect. This can
improve the frame rate on slower machines during big battles, but will not look as good. See also
“Number of Effects” in the video options screen.
Repair Bots: When a Somtaaw ship upgraded with self-repair is damaged, small repair droids will fly around
it’s hull making repairs. By turning off this option, you do not turn of the self-repair ability, but the repair bots
will no longer appear.
Ship Meshes: In sensors manager large ships, such as your command ship, will appear in full detail. If you
turn this option off, these large ships will appear as dots, just as your small ships do.
Pieplate Lines: To aid in moving ships vertically in the movement manager, lines that denote their height will
appear. In large, close battle the number of lines can become considerable. By turning off this option, these
height lines will not appear in the movement manager.
Page 73

GAMEPLAY
Mouse Sensitivity: This slider bar controls how much mouse motion it takes to move the cursor on the
screen. Left-click and drag the indicator to the left to make your cursor move more slowly and to the right to
make it respond to mouse movement more quickly.
Game Frame rate: Choosing “Fastest Game Possible” will set audio, video, and gameplay options to maximize
frame rate for low-end systems.
Miscellaneous:
Experience Messages: If this option is enabled, every time a ship in your fleet gains an experience level, a
message will be printed to the screen.
Small Menu Font: If you are running Cataclysm in a low resolution, enable this option to reduce the size of
font used for the right-click menu.
Auto Waypoint Focus: Enable this option to have the camera automatically focus on each waypoint as you
place them in the Sensors Manager.
TECHNICAL BRIEF + GAMEPLAY GUIDE
73
Page 74

HOMEWORLD: CATACLYSM
7474
Context Sensitive Mouse:
Homeworld Left Click: Enable this option to emulate Homeworld-style context sensitive control with the left
mouse button. Along with other variations, this will enable double left-clicking on friendly ships to dock, and
double left-clicking on friendly ship to repair.
Right Click: Enable this option to use the right mouse button for all context sensitive control (Cataclysm default).
In this mode, if the mouse is over an enemy ship, the attack icon will only appear if there are NO special actions to
do. Right clicking will do the special action (if any) while left clicking will attack (if possible). If the mouse is over
a friendly ship right-clicking will do the special action that is displayed (dock, heal, etc.).
Taskbar:
Hidden: Enabling this will make the objectives, shortcut buttons (if enabled), and player information slide into
view only when the user moves the mouse pointer to the bottom of the screen. This emulates Homeworld’s
default taskbar mechanism.
Shortcut Buttons: Enable this option to have the manager buttons accessible at the bottom of the screen.
NOTE: If the “Hidden” option is enabled, you will have to move the mouse pointer to the bottom of the screen
for these buttons to appear.
Backdrop: This option enables the translucent background across the lower section of the screen behind the
shortcut buttons.
Sensors Options: These options control what is drawn in the Sensors Manager. They are exactly the same options that you
can control in the right-click menu while in the Sensors Manager. For more details, read the Sensors Manager description.
Homeworld Classic: Left-click on this button to set all gameplay options to a setting that emulate
Homeworld-style controls.
Cataclysm Default: Left-click on this button to set all gameplay options to Cataclysm default settings.
Page 75

Key Bindings
This menu allows you to change which gameplay commands are activated by which keystroke. To change a
command key, double-click on the command you wish to change and press the new key which will trigger the
command in the future. Should you wish to erase all the changes you have made and return the command keys
to their original assignments, left-click on the <RESET TO DEFAULTS> button.
HOMEWORLD: CATACLYSM
75
TECHNICAL BRIEF + GAMEPLAY GUIDE
75
Page 76

HOMEWORLD: CATACLYSM
NOTES: ....................................................
..............................................................
..............................................................
..............................................................
..............................................................
..............................................................
..............................................................
..............................................................
..............................................................
..............................................................
..............................................................
..............................................................
..............................................................
..............................................................
..............................................................
..............................................................
7676
Page 77

77
PART THREE -- TECH TREES
Page 78

HOMEWORLD: CATACLYSM
7878
Homeworld: Cataclysm uses a research tree system in which research modules, built onto your command ship,
can conduct research into technologies that can be used to build or upgrade ships. Most ships require at least
one or more technologies in order to be built. Starting from each of the five modules that can be built unto a
Command Ship, this chart shows the various paths to more advanced technology.
SOMTAAW MODULE TECH TREE
(MULTIPLAYER)
Hangar Bay Module
FIGHTER DRIVE
ADVANCED FIGHTER DRIVE
LINKING TECHNOLOGY
FRIGATE DRIVE
ADVANCED FRIGATE DRIVE
DESTROYER DRIVE
ADVANCED DESTROYER DRIVE
Armour Module
ARMOUR LEVEL 2
ARMOUR LEVEL 3
FORCE FIELD LEVEL 1
FORCE FIELD LEVEL 2
FORCE FIELD LEVEL 3
Engineering Module
HOLOGRAPHIC EMITTER
SUPPORT SYSTEMS
AFTERBURNER
REPAIR SYSTEMS
SALVAGING ABILITY
CRYSTAL HARVEST ABILITY (Found under
“Advanced Engineering Module”)
Advanced
Engineering Module
MICRO SHIP CONSTRUCTION
REPAIR BOTS
PHASED TELEMETRY
ADVANCED SENSORS
INFECTION VACCINE (Only multiplayer)
CRYSTAL HARVEST ABILITY (Unlocked by
SALVAGING ABILITY found under
“Engineering Module”)
Weapon Module
ADVANCED ION CANNON
MISSILE LAUNCHER
SIEGE CANNON
ENERGY CANNON
E.M.P. WEAPON
QUANTUM EXPLOSIVE CHARGE
REPULSE WEAPON
Page 79

HOMEWORLD: CATACLYSM
79
TECH TREES
79
Besides technologies required to build ships, technologies can also be used to upgrade ships. This list outlines
what upgrades are available for each ship.
SOMTAAW TECH TREE (MULTIPLAYER)
Recon
ADVANCED SENSORS (upgrade)
ADVANCED FIGHTER DRIVE (upgrade)
ENERGY CANNON (upgrade)
ARMOUR LEVEL 2 (upgrade)
Acolyte
FIGHTER DRIVE
ENERGY CANNON (upgrade)
MISSILE TECH (upgrade)
LINKING TECH (upgrade)
ADVANCED FIGHTER DRIVE (upgrade)
ARMOUR LEVEL 2 (upgrade)
Mimic
FIGHTER DRIVE
ENERGY CANNON (upgrade)
HOLOGRAPHIC EMITTER
LINKING TECHNOLOGY (upgrade)
QUANTUM EXPLOSIVE CHARGE (upgrade)
ADVANCED FIGHTER DRIVE (upgrade)
ARMOUR LEVEL 2 (upgrade)
Leech
PHASED TELEMETRY
ARMOUR LEVEL 2 (upgrade)
ACV
FIGHTER DRIVE
ENERGY CANNONS (upgrade)
LINKING TECHNOLOGY
E.M.P. WEAPON (upgrade)
ADVANCED FIGHTER DRIVE (upgrade)
ARMOUR LEVEL 2 (upgrade)
MCV
FIGHTER DRIVE
ENERGY CANNONS (upgrade)
HOLOGRAPHIC EMITTER
LINKING TECHNOLOGY
QUANTUM EXPLOSIVE CHARGE (upgrade)
ADVANCED FIGHTER DRIVE (upgrade)
ARMOUR LEVEL 2 (upgrade)
RammingFrigate
ADVANCED ION CANNON (upgrade)
REPAIR BOTS (upgrade)
AFTERBURNER
INFECTION VACCINE (upgrade)
ARMOUR LEVEL 3 (upgrade)
MultibeamFrigate
FRIGATE DRIVE
ADVANCED ION CANNON
REPAIR BOTS (upgrade)
ADVANCED FRIGATE DRIVE (upgrade)
ARMOUR LEVEL 3 (upgrade)
HiveFrigate
FRIGATE DRIVE
ENERGY CANNONS (upgrade)
MICRO SHIP CONSTRUCTION
REPAIR BOTS (upgrade)
ADVANCED FRIGATE DRIVE (upgrade)
ARMOUR LEVEL 3 (upgrade)
Dreadnought
ADVANCED DESTROYER DRIVE
MISSILE LAUNCHER
ENERGY CANNONS
ADVANCED ION CANNON
REPULSOR WEAPON (upgrade)
REPAIR BOTS (upgrade)
ARMOUR LEVEL 3 (upgrade)
Page 80

HOMEWORLD: CATACLYSM
8080
Carrier
DESTROYER DRIVE
ENERGY CANNONS (upgrade)
SUPPORT SYSTEMS
CRYSTAL HARVESTING ABILITY (upgrade)
REPAIR BOTS (upgrade)
ADVANCED DESTROYER DRIVE (upgrade)
ARMOUR LEVEL 3 (upgrade)
Worker
INFECTION VACCINE (upgrade)
REPAIR SYSTEMS (upgrade)
SALVAGING ABILITY (upgrade)
REPAIR BOTS (upgrade)
ARMOUR LEVEL 3 (upgrade)
Processor
CRYSTAL HARVESTING ABILITY (upgrade)
ENERGY CANNONS (upgrade)
REPAIR SYSTEMS (upgrade)
REPAIR BOTS (upgrade)
ARMOUR LEVEL 3 (upgrade)
Sentinel
MICRO SHIP CONSTRUCTION
ENERGY CANNONS (upgrade)
FORCE FIELD LEVEL 1 (upgrade)
FORCE FIELD LEVEL 2 (upgrade)
FORCE FIELD LEVEL 3 (upgrade)
ADVANCED SENSORS (upgrade)
ARMOUR LEVEL 3 (upgrade)
Mothership
ENERGY CANNONS (upgrade)
CRYSTAL HARVESTING ABILITY (upgrade)
REPAIR BOTS (upgrade)
SIEGE CANNON WEAPON (upgrade)
SUPPORT SYSTEMS (upgrade)
ARMOUR LEVEL 3 (upgrade)
Destroyer
DESTROYER DRIVE
ENERGY CANNONS (upgrade)
MISSILE LAUNCHER
ADVANCED ION CANNON
ADVANCED DESTROYER DRIVE (upgrade)
REPAIR BOTS (upgrade)
ARMOUR LEVEL 3 (upgrade)
Page 81

HOMEWORLD: CATACLYSM
81
TECH TREES
81
Unlike the tech trees of the Taiidan and Kushan from Homeworld, or the Somtaaw from Cataclysm, the Beast
acquires its fleet technologies by reverse engineering ships from other races. Each Beast fleet has a variety of
ships it can immediately begin researching and building, however most upgrades have to be reverse engineered
from captured enemy ships.
BEAST TECH TREE (MULTIPLAYER)
Genetics Module
SUPPORT SYSTEMS
BEAST INFECT WEAPON (upgrade)
CRYSTAL HARVEST ABILITY (upgrade/captured)
Recon (~captured)
ADVANCED SENSORS (upgrade)
ADVANCED FIGHTER DRIVE (upgrade/captured)
ARMOUR LEVEL 2 (upgrade/captured)
Acolyte (captured)
FIGHTER DRIVE
LINKING TECHNOLOGY (upgrade/captured)
ADVANCED FIGHTER DRIVE (upgrade/captured)
ARMOUR LEVEL 2 (upgrade/captured)
Interceptor
FIGHTER DRIVE
ADVANCED FIGHTER DRIVE (upgrade/captured)
ENERGY CANNONS (upgrade/captured)
ARMOUR LEVEL 2 (upgrade/captured)
CloakedFighter
FIGHTER DRIVE
CLOAKING ABILITY
ADVANCED FIGHTER DRIVE (upgrade/captured)
ENERGY CANNONS (upgrade/captured)
ARMOUR LEVEL 2 (upgrade/captured)
AttackBomber
FIGHTER DRIVE
PLASMA BOMB LAUNCHER
ADVANCED FIGHTER DRIVE (upgrade/captured)
ARMOUR LEVEL 2 (upgrade/captured)
ACV (captured)
FIGHTER DRIVE
LINKING TECHNOLOGY (captured)
E.M.P. WEAPON (upgrade/captured)
ADVANCED FIGHTER DRIVE (upgrade/captured)
ARMOUR LEVEL 2 (upgrade/captured)
MultiGunCorvette
FIGHTER DRIVE
FAST TRACKING TURRETS
ADVANCED FIGHTER DRIVE (upgrade/captured)
ENERGY CANNONS (upgrade/captured)
ARMOUR LEVEL 2 (upgrade/captured)
HeavyCorvette
FIGHTER DRIVE
HEAVY CORVETTE UPGRADE
ADVANCED FIGHTER DRIVE (upgrade/captured)
ENERGY CANNONS (upgrade/captured)
ARMOUR LEVEL 2 (upgrade/captured)
MultibeamFrigate (cap-
tured)
FRIGATE DRIVE
ADVANCED ION CANNON
ADVANCED FRIGATE DRIVE (upgrade/captured)
ARMOUR LEVEL 3 (upgrade/captured)
HiveFrigate (captured)
FRIGATE DRIVE
MICRO SHIP CONSTRUCTION (captured)
ADVANCED FRIGATE DRIVE (upgrade/captured)
ARMOUR LEVEL 3 (upgrade/captured)
Page 82

HOMEWORLD: CATACLYSM
8282
IonArrayFrigate
FRIGATE DRIVE
ADVANCED ION CANNON
CLOAKING ABILITY (upgrade)
ADVANCED FRIGATE DRIVE (upgrade/captured)
ARMOUR LEVEL 3 (upgrade/captured)
DFGFrigate
FRIGATE DRIVE
DEFENSE FIELD
ADVANCED FRIGATE DRIVE (upgrade/captured)
ARMOUR LEVEL 3 (upgrade/captured)
HeavyCruiser
DESTROYER DRIVE
HEAVY GUNS
ADVANCED ION CANNON
ENERGY CANNONS (upgrade/captured)
ADVANCED DESTROYER DRIVE (upgrade/cap-
tured)
BEAST INFECT WEAPON (upgrade)
ARMOUR LEVEL 3 (upgrade/captured)
Carrier
DESTROYER DRIVE
CRYSTAL HARVESTING ABILITY (upgrade)
ADVANCED DESTROYER DRIVE (upgrade/cap-
tured)
ENERGY CANNONS (upgrade/captured)
BEAST INFECT WEAPON (upgrade)
ARMOUR LEVEL 3 (upgrade/captured)
RammingFrigate (captured)
REPAIR BOTS (upgrade/captured)
AFTERBURNER (upgrade/captured)
ARMOUR LEVEL 3 (upgrade/captured)
Worker (~captured)
REPAIR SYSTEMS (upgrade/captured)
SALVAGING ABILITY (upgrade/captured)
ARMOUR LEVEL 3 (upgrade/captured)
Processor (~captured)
CRYSTAL HARVESTING ABILITY (upgrade)
REPAIR SYSTEMS (upgrade/captured)
ARMOUR LEVEL 3 (upgrade/captured)
Sentinel (captured)
MICRO SHIP CONSTRUCTION (captured)
FORCE FIELD LEVEL 1 (upgrade/captured)
FORCE FIELD LEVEL 2 (upgrade/captured)
FORCE FIELD LEVEL 3 (upgrade/captured)
ADVANCED SENSORS (upgrade)
ARMOUR LEVEL 3 (upgrade/captured)
Mothership
BEAST INFECT WEAPON (upgrade)
CRYSTAL HARVESTING ABILITY (upgrade)
SUPPORT SYSTEMS (upgrade)
ARMOUR LEVEL 3 (upgrade/captured)
CuiseMissile
FIGHTER DRIVE
MISSILE LAUNCHER
BIO-WARHEAD
ADVANCED FIGHTER DRIVE (upgrade/captured)
BEAST INFECT WEAPON (upgrade)
ARMOUR LEVEL 3 (upgrade/captured)
MissileCorvette
FIGHTER DRIVE
MISSILE LAUNCHER
ADVANCED FIGHTER DRIVE (upgrade/captured)
ARMOUR LEVEL 2 (upgrade/captured)
Page 83

83
PART FOUR -- SHIPS
Page 84
HOMEWORLD: CATACLYSM
KIITH SOMTAAW VESSELS
“Mimic”
Class Infiltration ship
Mass: 55 tons
Firepower: Armor: 20
Coverage: Maneuverability: very high
Max. Velocity: 750 m/s
Special Action: Mimic
After encounters with Raider ships equipped with holographic projectors, Somtaaw Tactical command
realized the need for their own infiltration strike craft. With little to go on except pieces of pirate wreckage,
Somtaaw engineers were able to create a holofield projector that would just fit into the confines of a fighter
hull. The Maach-Nar Projection system requires two full laser arrays, spread out on either side of the fighter.
While these arrays rob the fighter of all of its conventional offensive power, they are capabl e of en veloping the ship
completely in a hologram that perfectly mimics the form of any strike- or corvette- class ship recorded
in the tactical data banks. Mimics have even been known to disguise themselves as harmless asteroids.
Additional signal jammers completely remove the Mimic from enemy scanners, while its visual cross section
is immune to all but the closest inspection.
Mimics were originally used simply to infiltrate enemy fleets and orbital bases, in order to assess enemy
strength or eavesdrop on close communication bands. Unfortunately, desperate times have lead to desperate
measures, and more and more Mimics find themselves pressed into an offensive role as a suicide unit, especially
in circumstances where friendly fleet strength is not high enough to break through to the objective.
Pilots for this duty are drawn from the ranks of the Sleepers, those destitute souls who awakened on Hiigara
without a single friend or family member left alive after the destruction of Kharak. These pilots have no
motivation except revenge against those who took everything from them, and Mimics perform their suicide
missions fearlessly and without regret. The last thing that many a surprised resourcer or minelayer will hear is
the strangled cry of victory from a Sleeper as he detonates his Mimic against the enemy hull.
Required Tech - FIGHTER DRIVE
MIMIC TECH
Upgrade Tech - ENERGY CANNON
LINKING TECHNOLOGY
QUANTUM EXPLOSIVE CHARGE
ADVANCED FIGHTER DRIVE
ARMOUR LEVEL 2
8484
Page 85
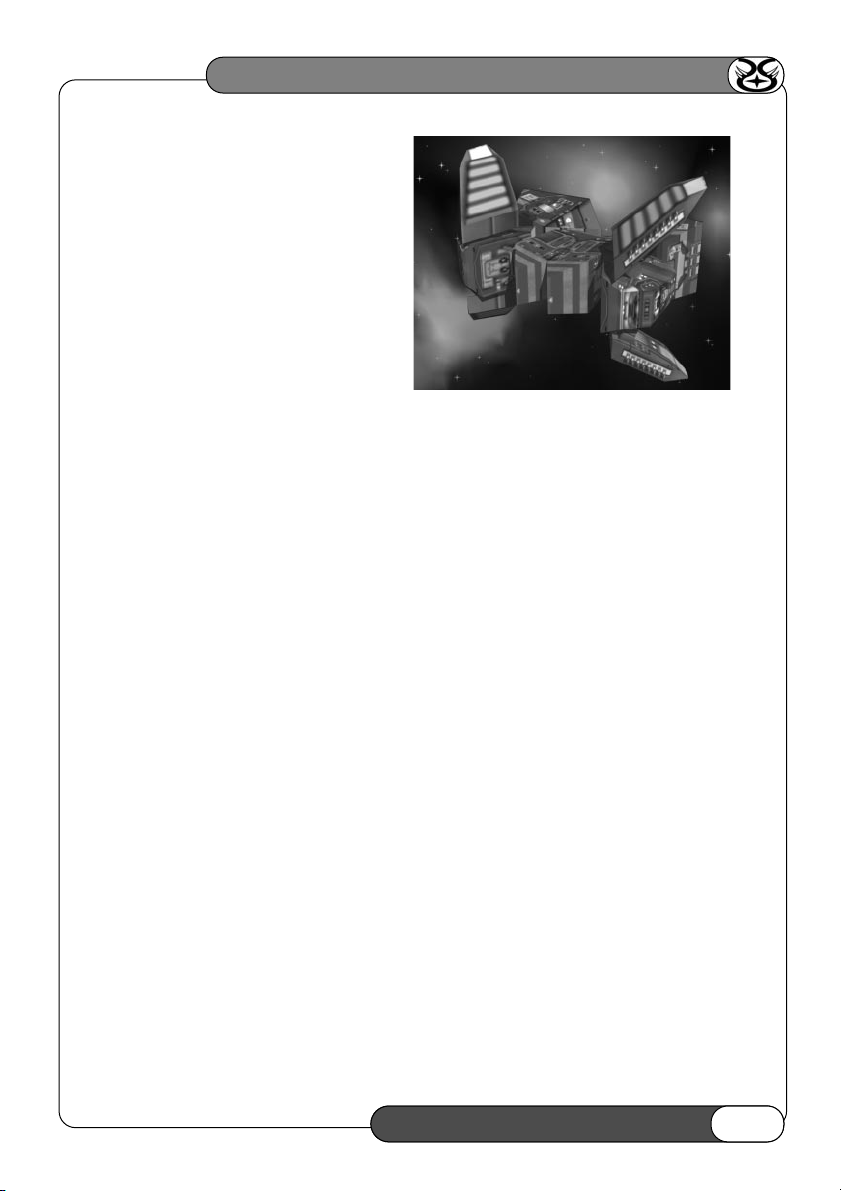
“Martyr”
Class (MCV)
Infiltration Corvette
Mass:
110 tons
Firepower: Armor: 40
Coverage: Maneuverability: high
Max. Velocity: 550 m/s
Special Action: Mimic
The Martyr is, in essence, a virtual corvette that is formed when two Mimic strike craft dock to form a larger
composite vehicle known as an M.C.V. (Mimic Composite Vehicle). The double-hulled Martyr is capable of
generating a much larger holofield than the solitary Mimic, and can disguise itself as various frigate-sized ships
or very large asteroids. This greater disguise ability can be used offensively to lull an enemy into thinking that
reinforcements have arrived for them, or defensively to make a desperate fleet seem much more substantial than
it is, with the addition of 2 or 3 phantom frigates.
For more desperate times, the Martyr, like the Mimic, can be used as a suicide craft of devastating power.
The overloading of the linked drives can pack enough explosive force to gut a Frigate-sized vessel. Theoretical
work on quantum explosives could lead to an increased payload to this subtle and terrifying suicide corvette.
When left to their own devices, Martyr teams will often disguise themselves as a friendly damaged frigate and
loiter at the edge of a battle, emitting a distress call. When enemy salvagers come alongside to take control of
their prize, the Martyr will detonate, trading the lives of the two pilots for those of a dozen or more of the enemy.
For revenge-driven Sleepers, there are few better ways to go...
Required Tech - FIGHTER DRIVE
HOLOGRAPHIC EMITTER
LINKING TECHNOLOGY
Upgrade Tech - ENERGY CANNON
QUANTUM EXPLOSIVE CHARGE
ADVANCED FIGHTER DRIVE
ARMOUR LEVEL 2
HOMEWORLD: CATACLYSM
85
SHIPS
85
Page 86
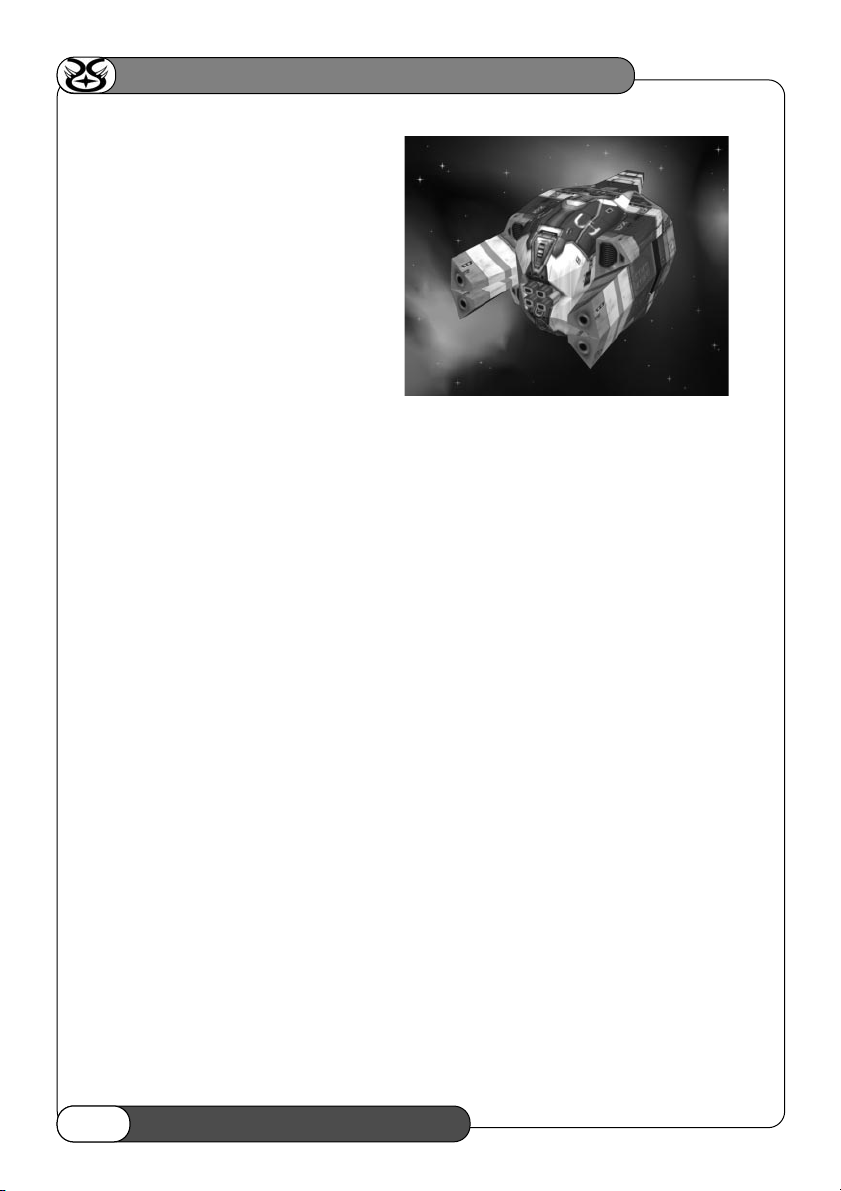
HOMEWORLD: CATACLYSM
“Avenger”
Class (ACV)
corvette
Mass:
180 tons
Firepower: 170
Armor: 140
Coverage: 6%
Maneuverability: high
Max. Velocity: 600 m/s
Special Action: Unlink, EMP
The Avenger was the first breakthrough that Somtaaw engineers made in ship linkage technology. Utilizing
some of the remnants of dynamic surface technology passed down through analysis of Bentusi designs, the
Acolyte heavy fighter was created with ventral docking ports and control links, so that two heavy fighters could
dock to form a corvette class ship. While others had thought this kind of solid link could only be achieved with
a full tech team in a hanger bay, the dynamic surface systems of the Acolyte are capable of linking in a matter of
seconds while the two ships drift in deep space.
Once linked into the Avenger corvette composite craft, one pilot takes over the actual flying of the craft while
the other takes over as weapons officer. While both cockpits are capable of assuming either function through
the use of virtual displays, it is traditionally the officer with the best combat record who ends up “on top”, flying
the Avenger. The WO is responsible for managing both the nose-mounted quad mass drivers and the highly
advanced Electromagnetic Pulse system, which is capable of overloading the systems of any enemy ships nearby.
The Avenger is technically designated as a corvette due to its mass and dual crew, but in reality it inhabits the
middle ground between heavy fighter and full corvette. The Avenger has less armor, less firepower and lacks the
turret coverage of a traditional corvette, but it is faster and more maneuverable, which allows it to bring its fixed
weaponry to bear almost as fast as a turret mount would. Economic considerations and sheer hangar space
problems aboard its command and carrier vessels have led Somtaaw Fleet Command to reject a standard corvette
design in favor of composite vehicles such as the Avenger and the Martyr MCV. This has resulted in the Avenger
being the workhorse of the Somtaaw fleet, and in any combat situations, Avenger wings will be deployed directly
from their command ships to guard against incoming strike craft, or even engage enemy frigates en masse. Their
ability to split into high speed Acolytes and rejoin at the target area for heavy firepower makes them one of the
most adaptable weapons systems in Hiigaran space.
Required Tech - FIGHTER DRIVE
LINKING TECHNOLOGY
Upgrade Tech - ENERGY CANNON
E.M.P. WEAPON
ADVANCED FIGHTER DRIVE
ARMOUR LEVEL 2
8686
Page 87
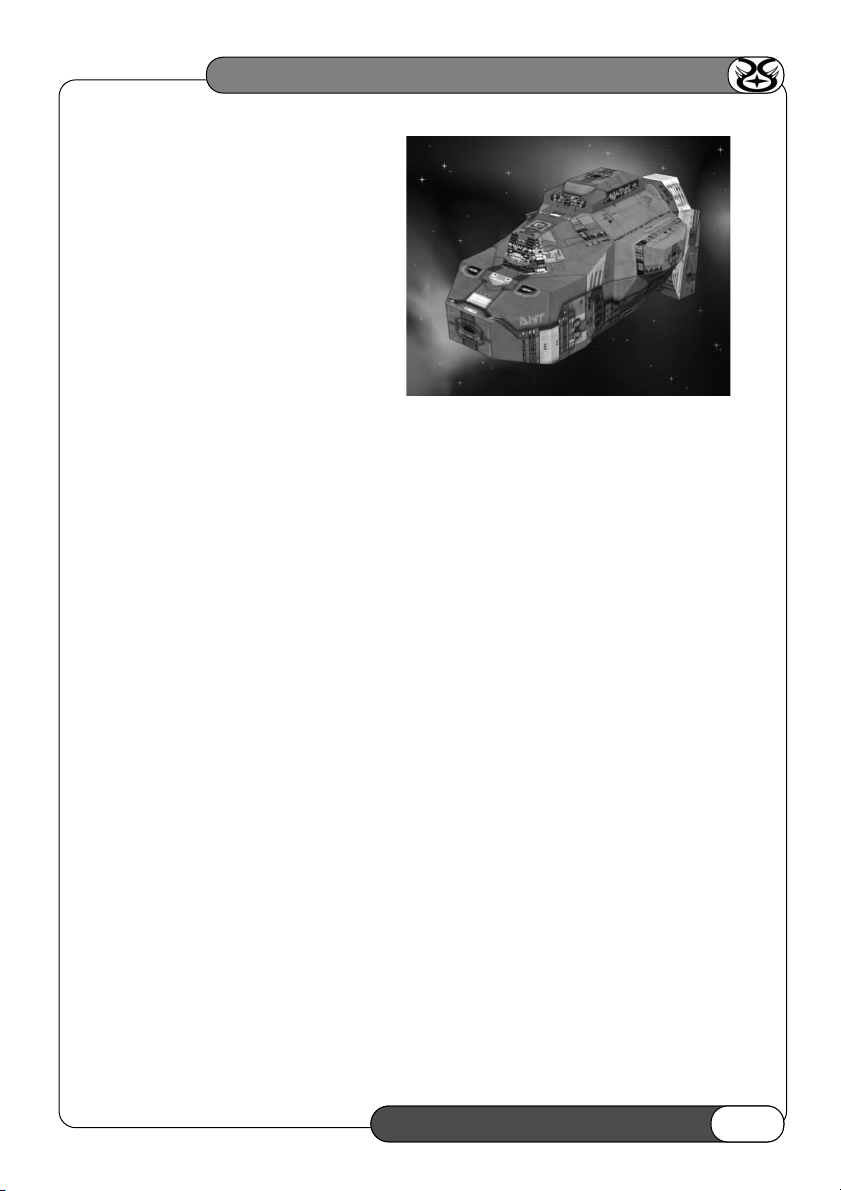
“Dervish”
Class
Multi-Beam Frigate
Mass: 10200 tons
Firepower: 3900
Armor: 4000
Coverage: 90%
Maneuverability: medium
Max. Velocity: 370 m/s
Special Action: None
The Ion Beam Frigate has long been the mainstay of any offensive star fleet. The only drawback to these
powerful beam weapons is that they are so large that frigate-sized craft can only support them in a spinal mount
configuration... and this restricts combat coverage. Somtaaw Fleet Command, unwilling to make the jump to the
heavy cruiser chassis just to incorporate ion cannons in turret mounts, instead decided to research advanced
ion beam technology jointly with Kiith Paktu. This change in initiative resulted in the development of the helix
bundle, which allows charged streams to be accelerated in a tightly curved configuration.
The Dervish class frigate is built around just such an accelerator helix, and uses a multi-path beam-splitter
to direct the charged ion stream to any or all of its five focusing turrets. The turrets themselves are solid state
devices that use magnetic fields to focus and direct the ion beam in a large firing arc. Using the cold vacuum of
space to keep functioning at super-cooled temperatures, the focusing turret is highly efficient and capable of a
high rate of fire. While these ion beams are not as powerful as the ones fired from a traditional Ion Frigate, this
lack is more than made up by the increased coverage and decreased fire time.
Dervishes function best in the anti-strike craft role, where their rapid tracking ability allows them to tag
enemy fighters with devastating firepower. The sight of a single Dervish plowing through a cloud of enemy strike
craft with all beams firing is often enough to cause even the most dedicated fighter pilot to reconsider his options.
When faced with enemy capital ships, especially other beam frigates such as the Taiidani Sajuuk Cor, the Dervish
is forced to rely on its maneuverability to keep turning out of the enemy’s strongest firing arc, while still bringing
at least 2 or 3 turrets to bear.
Required Tech - FRIGATE DRIVE
ADVANCED ION CANNON
Upgrade Tech - ENERGY CANNON
REPAIR BOTS
ADVANCED FRIGATE DRIVE
ARMOUR LEVEL 2
HOMEWORLD: CATACLYSM
87
SHIPS
87
Page 88

HOMEWORLD: CATACLYSM
“Hive”
Class Advanced
Drone Frigate
HIVE FRIGATE
FIREPOWER: 1400
COVERAGE: 12%
MANEUVERABILITY: MEDIUM
ARMOR: 3800
MAX VELOCITY: 390 m/s
MASS: 9900 TONS
Special Action: Swarm
During the Homeworld wars, the Puppeteer class drone frigate was an excellent idea that arrived ahead of its
time. While the Puppeteer could surround itself in a sphere of remote turrets, the drones lacked maneuverability,
and once they were destroyed, the unarmed Puppeteer either retreated or was destroyed as well. This lack of
adaptability quickly relegated the Puppeteer to light anti-strike craft roles and rear area guard duty, where its
weakness would not prove quite so deadly.
Seeing potential in a design that other Kiith were quickly abandoning, Somtaaw engineers went back to the
drawing board both with the frigate itself and the drones. The major breakthrough in drone design came from
studying the attack swarms used by the protectors of Khadesh. Using that technology as a baseline, engineers
were able to design and build their own Swarmer drone fighter, which retained the firepower of the old static
drone but combined it with full maneuverability and a combat AI. Now that the drones were able to control
themselves, the space aboard the command frigate that was being used for drone techs and their equipment
could be utilized for weaponry.
The result of all this design work is the Hive class ADF, a heavily armored frigate armed with twin medium
mass drivers in a fixed forward mount and having the capacity to launch and maintain six Swarmer class attack
drones. The Hive’s mass drivers are not powerful enough to handle another capital ship all by themselves, but
are very effective in supplying heavy fire support for the Swarmer wing. While the Hive is a much more rounded
combat craft than the Puppeteer, it is still vulnerable to massed strike craft attacks if its compliment of Swarmers
is destroyed. Hive squadrons will often enter combat first and use their drones to draw fire away from more valuable
manned strike craft, and then retire for a few minutes to rebuild their Swarmer compliment before returning to battle.
Required Tech - FRIGATE DRIVE
MICRO SHIP CONSTRUCTION
Upgrade Tech - ENERGY CANNON
REPAIR BOTS
ADVANCED FRIGATE DRIVE
ARMOUR LEVEL 2
ARMOUR LEVEL 3
8888
Page 89

“Sentinel”
Class defence pod
Mass:
21 tons
Firepower: 290
Armor: 350
Coverage: 15%
Maneuverability: high
Max. Velocity: 250 m/s
Special Action: Shield
The Sentinel has the dubious distinction of being the smallest manned craft currently serving in any Hiigaran
fleet. Microships were developed by Somtaaw engineers to function purely as remote drone craft, like the
Swarmer attack drone or the Leech breaching pod; the Sentinel was originally intended as an advanced mobile
sensor platform. Unfortunately, as more and more design features were added to the Sentinel’s specs, it
quickly outpaced the control capability of even the most advanced AI. The final breaking point came when
energy scientists came up with a compact force-field generator and added it to the Sentinel’s systems. Flight
AI’s were unable to cope with the distortions created by the polarized gravity fields, and this finally had tragic
results during a live test, when drone Sentinels created a full strength field and slipped out of position, slicing
a Dervish frigate in half with a loss of all hands.
The Sentinel project would have been cancelled at this point if not for the efforts of a certain Aart ne Somtaaw,
a rather vertically challenged junior member of the engineering team. After installing a rudimentary cockpit into
the prototype and donning the lightest vacc suit he could find, Aart put the Sentinel through a punishing set of
trials, using all the Sentinel’s advanced systems and proving that powerful guns, long range sensors and a field
generator could all function in one very small craft.
As a reward, Aart was put in charge of assembling the first Sentinel Squadron. Dubbed the War Dwarves by
the rest of the fleet, these small pilots have one of the most dangerous and unglamorous jobs in the fleet:
standing guard in tiny cans of plasteel, keeping an eye out for incoming threats and protecting thousands of their
Kiith mates aboard the larger ships of the fleet.
Required Tech - MICRO SHIP CONSTRUCTION
Upgrade Tech - ENERGY CANNONS
FORCE FIELD LEVEL 1
FORCE FIELD LEVEL 2
FORCE FIELD LEVEL 3
ADVANCED SENSORS
ARMOUR LEVEL 2
HOMEWORLD: CATACLYSM
89
SHIPS
89
Page 90

HOMEWORLD: CATACLYSM
“Leech”
Class breaching pod
Mass:
26 tons
Firepower: Armor: 30
Coverage: Maneuverability: very high
Max. Velocity: 1250 m/s
Special Action: Leech
The Leech is the most sophisticated drone in the Somtaaw fleet, and is designed to get in and heavily damage
enemy ships in situations where a conventional attack craft would be destroyed in seconds. The Leech is
designed to be stealthy and evade all conventional sensors, so that it can come right up to an enemy vessel and
clamp on. The drone is unarmed except for a payload of molecular acid, which it uses to bore through enemy
hulls so that it can access the plasma drive conduits. Once bonded to the enemy ship, the Leech uses the enemy
ship’s own drive plasma to melt through the hull, damaging it slowly. The Leech’s AI is designed to infiltrate the
enemy ship’s systems and relay false messages, silencing damage alarms and repair routines; in general, the crew
of an enemy vessel doesn’t realize anything is wrong until it is too late. The Leech carries a resource pod as well,
so that it can actually absorb the mass of the enemy vessel instead of simply venting it into space. This mass can
be returned as raw materials to the Command ship, if required.
In order to stay in contact with the Command ship, but avoid having its transmissions picked up by enemy
ships, the Leech uses a phased telemetry system that actually shunts part of the signal through hyperspace. It is
rumored that Taiidani scientists are already working on a system that would detect these signals, but this would
require a massive upgrading to advanced sensors.
Required Tech - PHASED TELEMETRY
Upgrade Tech - ARMOUR LEVEL 2
9090
Page 91

“Deacon”
Class Destroyer
Mass:
28,000 tons
Firepower: 8500
Armor: 16,000
Coverage: 30%
Maneuverability: low
Max. Velocity: 325 m/s
Special Action: None
When the great Crusade against the Beast was in its darkest days, Kiith Somtaaw found itself desperate for
heavier firepower and the capital ships to carry it. While research into Bentusi design philosophy would
eventually bear fruit in the awe-inspiring Dreadnought, it would have not come in time had the Deacon class
Destroyer not been pushed into service. The Deacon was originally intended to be a new generation of heavy
transports, but when the demands of war hit the Somtaaw fleet hard, the design was quickly modified while still
on the drawing board. The Deacon’s loading booms were scrapped and replaced with heavy ion beams in a fixed
forward mount, while the 4 side-mounted point-defense turrets were replaced with medium rail guns to give
all-around firepower. The most innovative addition was the dorsal mounted missile turret, which gives the
destroyer a full 360 degrees of long-range hitting power—capable of tearing apart enemy frigates before they
can get into range to return fire.
The Deacon’s baptism of fire came at the battle of Coruc Farr, when two Somtaaw destroyers were left alone to hold
off a Beast Heavy Cruiser and a full flight of infected strike craft. In the thick of battle, the lead destroyer, the Naar-Tel,
closed with the beast cruiser and was raked by an infection beam. As deck after deck of the Destroyer fell to the Beast
infection, the Naar’s Captain made a desperate decision to vent drive plasma into the infected areas and then out into
space. At the cost of gutting a quarter of his own ship and killing a sizable percentage of his own crew, the Naar’s
Captain was able to keep his ship in the battle and help destroy the beast Cruiser.
From that day on, the Naar Directive, as it became known, became the standard response from Allied heavy
capital ships to Beast infections. And, while the price in Hiigarian life is always high, instant death in a blast of
high-energy plasma is preferable to the twisted immortality of becoming part of the Beast.
Required Tech - DESTROYER DRIVE
MISSILE LAUNCHER
ADVANCED ION CANNON
Upgrade Tech - ENERGY CANNONS
ADVANCED DESTROYER DRIVE
REPAIR BOTS
ARMOUR LEVEL 2
HOMEWORLD: CATACLYSM
91
SHIPS
91
Page 92

HOMEWORLD: CATACLYSM
“Shaman”
Class Carrier
Mass: 129,000 tons
Firepower: 4200
Armor: 65,000
Coverage: 80%
Maneuverability: very low
Max. Velocity: 300 m/s
Special Action: None
The Shaman class Carrier had been in development for some time before it was finally brought into battle.
This Carrier was based on Kiith Somtaaw’s first foray into heavy ship construction, the Chieftan class Ore
Processor, and retains the same no-frills approach to capital ship building; engineers arrived at the design by
upgrading the Chieftan’s main power plant to support a military-class drive system and a PDA construction bay.
The Shaman is not an elegant Carrier, but it is durable, efficient and crewed by the best that Kiith Somtaaw has
to offer. The two outboard bays are capable of launching and retrieving multiple strike craft, while the inboard
Frigate bays are guarded by heavily reinforced doors, capable of taking multiple ion beam strikes and still
protecting the fragile construction and maintenance equipment within.
The Shaman was originally designed as the second phase of Kiith Somtaaw’s expansion into deep space. With
the two main Command Ships exploring and exploiting a sector, Shamans were meant to consolidate and help
harvest multiple resource sites while the Command ships moved on. Their construction bays were never
intended for anything more than building a couple of recon squadrons and acolytes for survey/guard duty; the
frigate bay was there simply to build and maintain Worker class vessels. With the advent of full-blown war,
however, the Shaman’s bays were upgraded to full production ability, and room was made in what was supposed
to be a resource hold for sleeper bays to support spare pilots.
In their combat role, Shamans will often construct a wing of Sentinel defense pods and operate behind their
forcefields while supporting a fleet in direct combat. The Shaman’s medium turrets are not meant to operate
offensively, but they can still cause considerable damage to any slow-moving target that wanders into range. With
repair bays so close to combat, Hive and Dervish frigates can afford to quickly pull back behind the Shaman’s
Sentinel shield and dock with relative safety.
Required Tech - DESTROYER DRIVE
SUPPORT SYSTEMS
Upgrade Tech - ENERGY CANNONS
CRYSTAL HARVESTING ABILITY
REPAIR BOTS
ADVANCED DESTROYER DRIVE
ARMOUR LEVEL 2
9292
Page 93

“Archangel”
Class Dreadnought
Mass:
152,000 tons
Firepower: 24,000
Armor: 85,000
Coverage: 80%
Maneuverability: very low
Max. Velocity: 280 m/s
Special Action: Repulse
Desperate wars require desperate measures, and the development of the Archangel class dreadnought was no
exception. Even though Kiith Somtaaw was struggling valiantly, it eventually became clear that the fleet had no answer
to the Beast version of the Taiidan Heavy Cruiser. And, while it would obviously take another full cycle for Somtaaw to
research and develop the technologies needed to build the Hiigaran Avatar Heavy Cruiser, it was
equally obvious that there would be nothing left of Kiith Somtaaw by the time a cycle of research could be completed!
Taking deep penetration scans of Bentusi tradeships, Somtaaw engineers tried to duplicate the radial binding
design that give Bentusi ships their incredible durability and energy control. The experiments were less than
successful, and dozens of engineers died as experimental alloys gave out under the incredible pressure to which
they were subjected. Finally, as losses were threatening to push the Hiigaran fleet back into their home system,
Somtaaw engineers were able to produce a hybrid design that had some of the durability and power of a Bentusi
craft and was still manageable with Hiigaran crews and technology.
The Archangel combines the best attributes of the Avatar Heavy Cruiser and the Taiidani Missile Destroyer, and
shields it all in a hull of curved, bonded armor plate that deflects more damage than it absorbs. With 4 heavy
turrets backed by 2 full missile banks, the Archangel initially had a powerful offensive punch, but was still
vulnerable to flanking maneuvers that brought enemy fire in from the rear, where the heavy mass drivers
couldn’t reach. This problem was solved rather dramatically with the addition of two heavy ion turrets, which
covered the top fore and bottom aft firing hemispheres. Once released into active service, the Archangel has
proved devastating to Beast and Imperial forces alike, despite the fact it takes a crack crew to keep her power
systems under control.
Required Tech - ADVANCED DESTROYER DRIVE
MISSILE LAUNCHER
ENERGY CANNONS
ADVANCED ION CANNON
Upgrade Tech - REPULSOR WEAPON
REPAIR BOTS
ARMOUR LEVEL 2
HOMEWORLD: CATACLYSM
93
SHIPS
93
Page 94

HOMEWORLD: CATACLYSM
“Chieftan Mk3”
Class
Ore Processor
Mass:
89,000 tons
Firepower: 2500
Armor: 45,000
Coverage: 80%
Maneuverability: low
Max. Velocity: 250 m/s
Special Action: None
Next to the Worker resource collector, the Chieftain is one of the most venerable designs in the Somtaaw fleet.
As its designation implies, the Chieftain is basically a massive ore processing and refinery unit, designed to take
in cargo from workers in deep space and process it. While it is almost as large as a carrier, the Chieftain is mostly
composed of vast storage bays and long processing lines. Duty aboard a Chieftain is hard, dirty work, but most
of Kiith Somtaaw is more comfortable with the honest work of mining than the killing and dying of war.
The first Chieftains produced were strictly industrial ships; with 4 high-speed transfer docking pads for
Workers, they could strip an asteroid pocket bare in days. It was only after a series of attacks from Turanic
raiders that the Chieftain was fitted with 4 medium mass driver turrets. As full war broke out, the Chieftain was
yet again modified with 4 automated repair beams. Since there are no excess officers to manage these systems,
the repair beams are under AI control, and automatically begin to repair any friendly unit in range.
Despite these changes, which have led to the Mark 3 version, the Chieftain is one of the few pre-war ship
designs that has never brought aboard combat officers to help with managing ship systems and fleet coordination.
Every Chieftain that has ever been launched and every one that has been lost in combat to this date has been
crewed by nothing more or less than the ancient soul of Kiith Somtaaw: the Miners.
Required Tech - HANGAR MODULE
Upgrade Tech - CRYSTAL HARVESTING ABILITY
ENERGY CANNONS
REPAIR SYSTEMS
REPAIR BOTS
ARMOUR LEVEL 2
9494
Page 95

“Explorer”
Class Deep Space
Mining Vessel
Mass:
613,000 tons
Firepower: 5400
Armor: 98,000
Coverage: 70%
Maneuverability: very low
Max. Velocity: 110 m/s
Special Action: Siege Cannon
The epic voyage of the Mothership proved that in
order to survive the threats posed by a hostile
Galaxy, you had to have a vessel that was prepared
to handle anything. Once it became obvious that
politics on Hiigara would favor the most powerful
families, lesser Kiith like Somtaaw realized that
their only hope to achieve some sort of political and
social autonomy lay in the stars. Already experienced in deep space mining techniques from their
work in the Kharak system, Somtaaw engineers
began to design the kind of deep space mining vessel they knew would be able to spend a year or
more on the circuit, harvesting, refining and trading while supporting a crew of nearly a thousand engineers, miners and flight crew.
A ship of this size and power exceeded even the construction capabilities of the Imperator class
Carrier, and so Somtaaw petitioned for access to the shipyard facilities of the orbiting Mothership herself.
Through many political trials, (see History of Kiith Somtaaw) the New Daiamiid finally granted Somtaaw
access to the Mothership for a mere 45 days. The Explorer Class design was finished within days when
Somtaaw Engineers gained control of the Mothership’s PDA, and construction began immediately; all parties involved knew full well that this was probably the only time Somtaaw would have access to the massive construction facility. Accordingly, no expense was spared!
The first Explorer was dubbed the Faal-Corum and launched on day 20, to the rousing cheers of thousands
of Somtaaw watching from monitors planetside. Even before the Faal-Corum cleared the docks, engineers were
modifying the design of the second Mining ship to incorporate the lessons learned in constructing the first. The
Kuun-Lan launched on day 35 with more powerful engines, an extra layer of armor, and a 30% greater module
capacity.
It is these modules that are the core of the Explorer class design philosophy. Knowing that this was the only
chance they had to create a near-Mothership class vessel, Somtaaw engineers designed the Explorer to adapt to
almost any situation through the use of modules that could be constructed by the Explorer herself while still in deep
space. The hard lessons of the Homeworld War were also not forgotten, and, though intended for
exploration and mining, the Explorer carries a full compliment of heavy and medium turrets for self protection, and
is capable of constructing both the Seeker class reconnaissance fighter and the Acolyte heavy fighter. Pirate corvettes
expecting an easy prize have often realized their error too late as an Explorer’s heavy rail guns come on-line; Worker
class resourcers will always retreat to the protection of the Command ship’s guns at the first sign of trouble.
HOMEWORLD: CATACLYSM
95
SHIPS
95
Page 96

HOMEWORLD: CATACLYSM
Both the Faal-Corum and the Kuun-Lan require a crew of 1150, and during long missions they carry an additional 2000 crew members in cold sleep, to help man the ship in 3-month shifts. Currently the Faal-Corum is on
a deep space survey mission, while the Kuun-Lan is on the second leg of a 9-month mission to mine the star systems surrounding Hiigara.
Required Tech - NONE
Upgrade Tech - ENERGY CANNONS
CRYSTAL HARVESTING ABILITY
REPAIR BOTS
SIEGE CANNON WEAPON
SUPPORT SYSTEMS
ARMOUR LEVEL 2
9696
Page 97
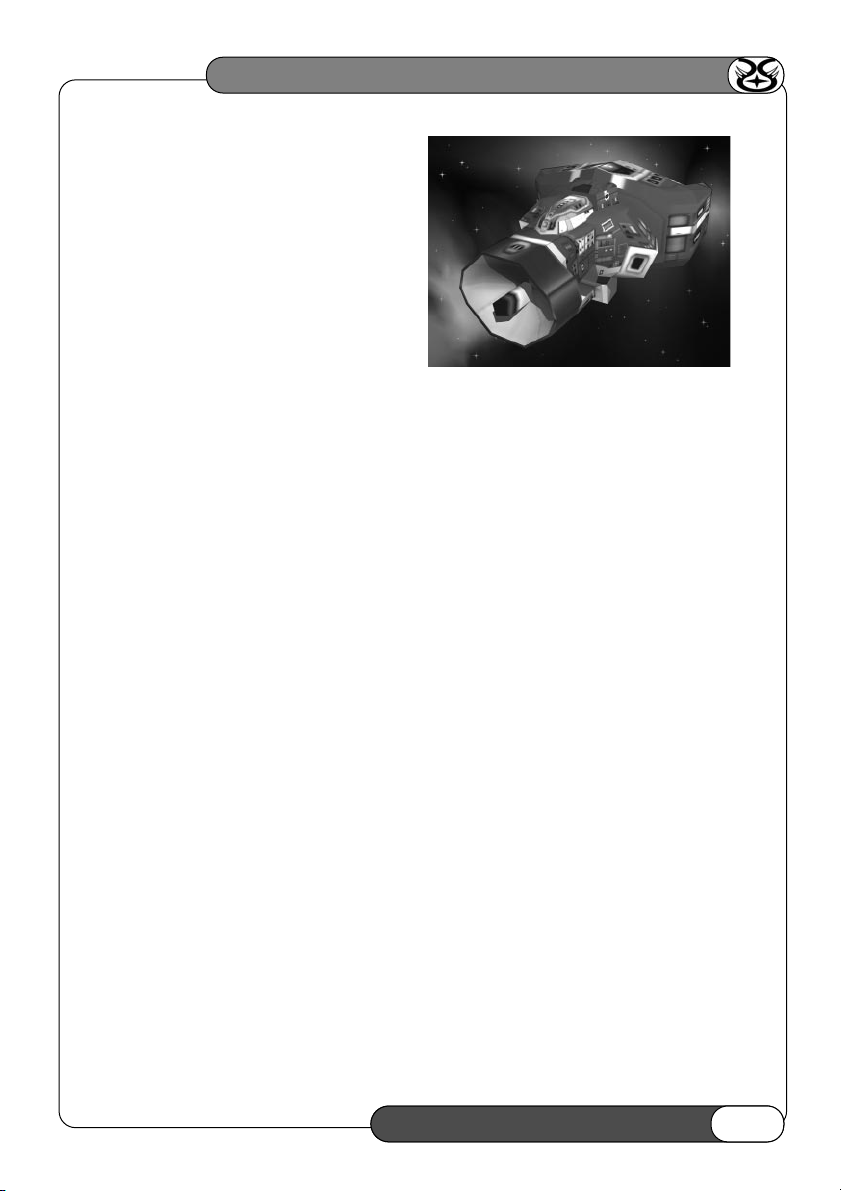
“Seeker”
Class Reconnaissance
fighter
Mass:
41 tons
Firepower: 40
Armor: 25
Coverage: 4%
Maneuverability: very high
Max. Velocity: 1050 m/s
Special Action: None
The Seeker class of deep reconnaissance and survey vessels was one of the first original designs produced
by the Kiith Somtaaw Engineering families. The first priority of the Somtaaw mining fleet was to find and
process the rarest and most valuable resources to be found in deep space, especially exotic volatiles and
super-stable elements. To this end, Somtaaw purchased the manufacturing rights to the Heavy Neutrino
scanning array from Kiith S’jet. While the unusual size of the scanning array means it is usually placed on
research platforms or Frigate-sized explorers, Somtaaw needed the array to rapidly search entire systems at
relatively close range. To that end, Somtaaw Engineers have basically wrapped a simple cockpit and maneuver
drive around the array. While the shakedown period for this design was extensive, due to the unorthodox
approach, the result is a high speed recon platform that has the attributes of a standard light fighter and the
sensor abilities of a ship 20 or 30 times the size and expense.
While the initial prototype was unarmed, repeated encounters with Turanic raiders convinced Somtaaw Fleet
Command that the Seeker needed to carry some sort of weapons system. In the end, a light mass driver was
jury-rigged on a belly mount, which gives the Seeker a limited self-defense capability that can usually deter
raiders until the recon ship can use its superior speed to escape. While the main function of the Seeker’s array
is to scan for minerals and radiation signatures, it is quickly reconfigured to track vessels.
As a result of the fact that most recon patrols require spending long periods of time in a small cockpit, many
Seekers pilots are young, single women of smaller stature. This has led to deep recon missions being referred
to as “Heartbreak Patrols”...but whether this is more to do with the stress they put on fledgling relationships or
the disruptions caused by these pilots making up for lost time upon their return is not known.
Required Tech - NONE
Upgrade Tech - ADVANCED SENSORS
ADVANCED FIGHTER DRIVE
ENERGY CANNON
ARMOUR LEVEL 2
HOMEWORLD: CATACLYSM
97
SHIPS
97
Page 98
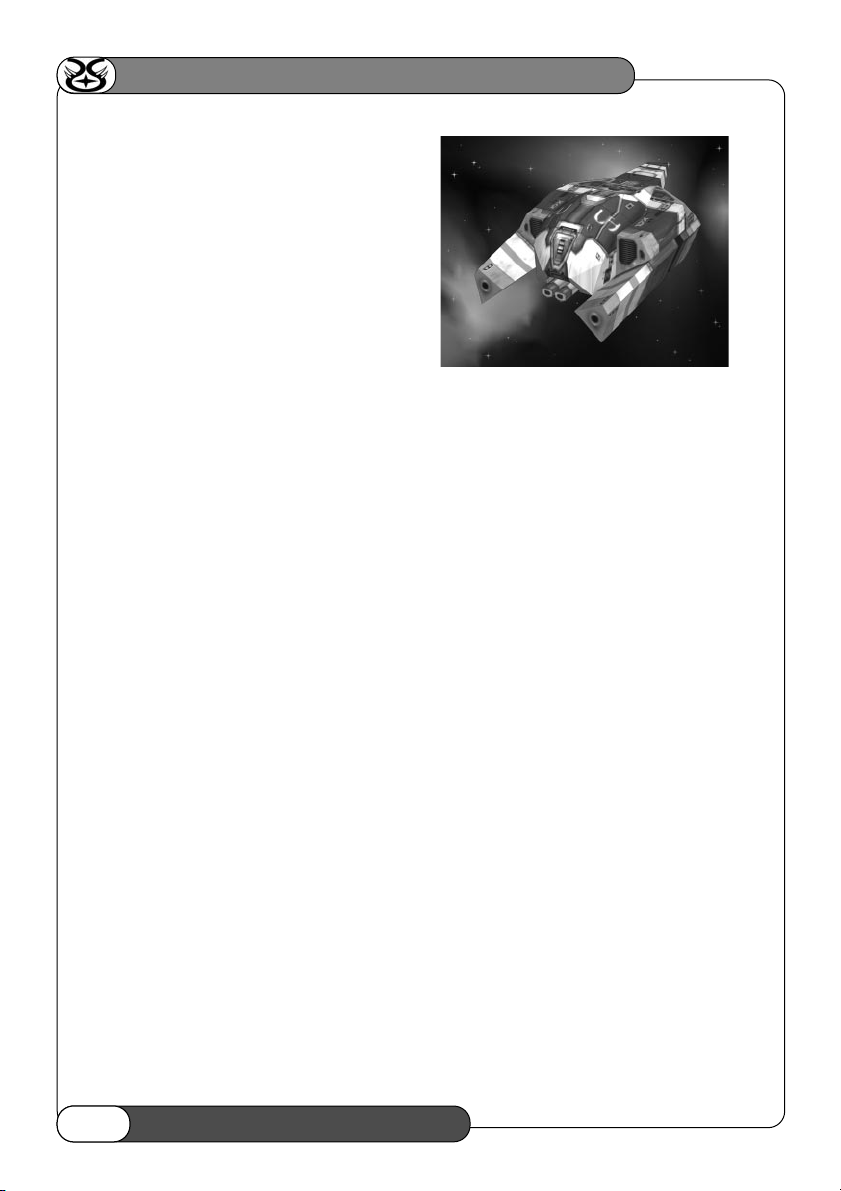
HOMEWORLD: CATACLYSM
“Acolyte”
Class heavy fighter
Mass:
90 tons
Firepower: 85
Armor: 70
Coverage: 6%
Maneuverability: very high
Max. Velocity: 825 m/s
Special Action: Link
The Acolyte class of heavy fighter/interceptor is unique to Kiith Somtaaw. While other Kiith have worked to
advance the traditional Blade series of interceptors, Somtaaw found itself unable to afford the various patents
and maintenance licenses being charged by the martial Kiithid to participate in the upgrade program. Instead,
Somtaaw struck a deal with the enigmatic Bentusi. The Bentusi trade-ships are some of the most powerful
vessels in the Galaxy, but there are some conditions that even they are unable or unwilling to take their ships
into. In return for the services of the mining vessel Faal-Corum in retrieving certain artifacts from very compact
asteroid belt, the Bentusi “handed down” an advanced fighter and drive system, which eventually was
back-engineered into the Acolyte fighter. While the relatively pacifistic Bentusi would not transfer any
weapons technology along with the Acolyte design, they seem to have no long-term objections to the
Somtaaw arming the Acolyte with duel rapid-fire mass-drivers.
With the inherent advantages of an being based on adaptive Bentusi technology, the Acolyte lends itself
easily to modification, and Somtaaw engineers are still working on expanding the full potential of this fighter
design. The ultra-efficient fusion drive allows the Acolyte to function without refueling, and this technology has
been integrated into other Somtaaw strike craft.
While Kiith Somtaaw is a mining Kiith by trade, it does require protection against Raiders and Imperialist
patrols, as its two Command ships, the Kuun-Lan and the Faal-Corum, range far from the protection of Hiigaran
space in their exploration and resourcing missions. Acolyte wings are manned by a relatively small group of
hardened combat veterans that began their careers during the Homeworld War. These pilots are not easily
surprised after 15 years in the cockpit, and are the equals of any fighter pilots found in the martial Kiithid...as
many a pirate scout has discovered to his regret.
Required Tech - FIGHTER DRIVE
Upgrade Tech - ENERGY CANNON
MISSILE TECH
LINKING TECH
ADVANCED FIGHTER DRIVE
ARMOUR LEVEL 2
9898
Page 99
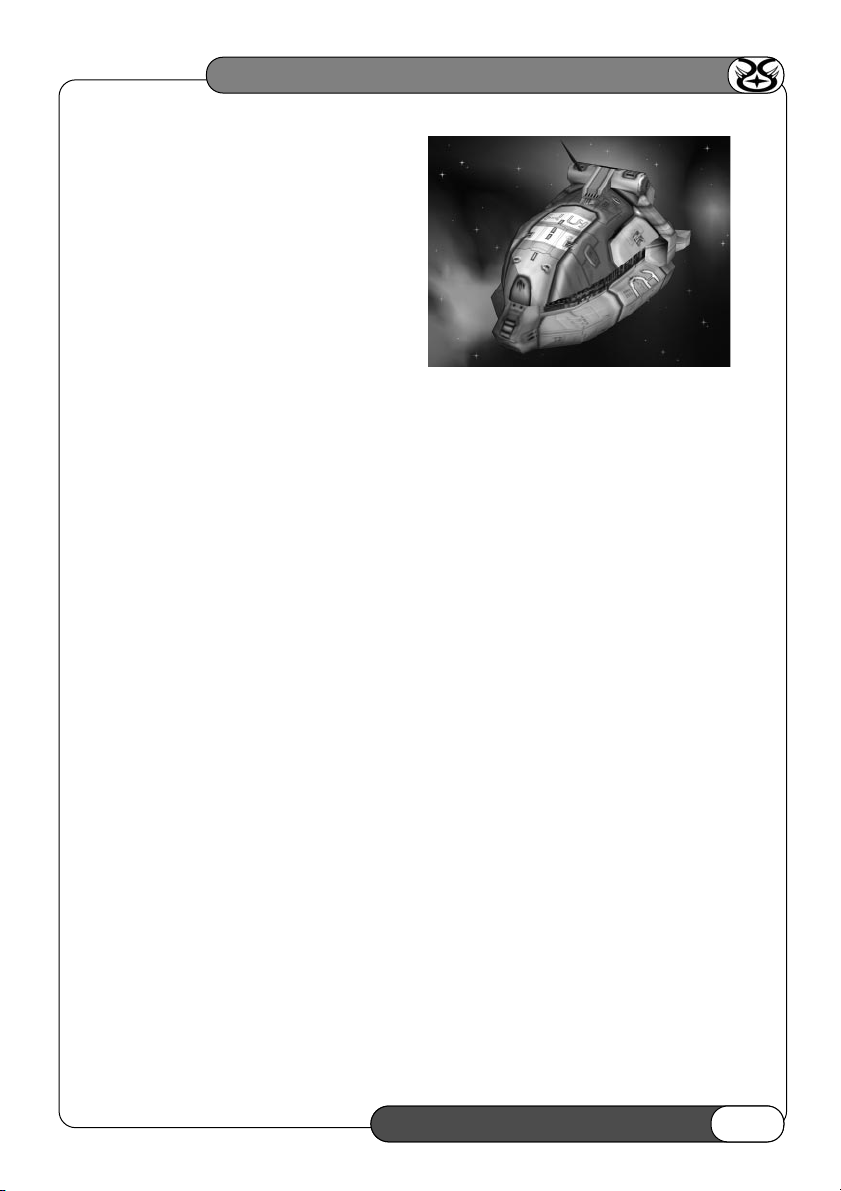
“Worker”
Class
resource collector
Mass:
5200 tons
Firepower: Armor: 1500
Coverage: Maneuverability: medium
Max. Velocity: 425 m/s
Special Action: Harvest, Repair, Salvage
While most Kiith still use the primary resource collector design created nearly 50 years ago during the
Mothership’s construction, Kiith Somtaaw has been forced by circumstance to radically redesign the entire
resourcer concept. Somtaaw fleets often work deep inside dense asteroid fields, where the massive resource
collector cannot maneuver fast enough to avoid disastrous collisions, and so a completely different vessels design
was needed, in order to function in more complex environments.
While various hi-maneuver resourcer/frigate hybrids were attempted, none of the prototypes survived actual
field-testing as the turn-rate was disastrously compromised by the full loads a resourcer is expected to carry.
Then, deep in the Mothership’s main databanks, a Somtaaw engineer came across a hull design for a heavy cargo
re-entry vehicle. It had been used 120 years earlier on Kharak to haul crews and raw components to and from
low orbit during the construction of the Mothership Scaffolding. While the original purpose of the ship was no
longer relevant, the shaped, blunt-projectile hull shape that had been crucial to re-entry was now ideal for
providing a compact center of gravity. When refitted with modern engines and control systems, this new
resourcer design can haul almost as much as the old one, but can rotate quickly on its center of gravity and
easily avoid collision, even in the most congested flight spaces.
The first production model is just now being accepted by Somtaaw mining teams, though there is some
resentment to the ship’s class name, the “Worker”... as it seems to make an already mundane task seem even
less glamorous than it was before. Engineers argue that as they devise new applications for the ship, such as
repair or possibly salvaging, the multi-purpose nature of the word “worker” will become readily apparent.
Required Tech - NONE
Upgrade Tech - INFECTION VACCINE
REPAIR SYSTEMS
SALVAGING ABILITY
REPAIR BOTS
ARMOUR LEVEL 2
HOMEWORLD: CATACLYSM
99
SHIPS
99
Page 100

HOMEWORLD: CATACLYSM
“Minion”
Class Heavy Tug
[Ramming Frigate]
Mass:
12900 tons
Firepower: 2500
Armor: 4700
Coverage: 6%
Maneuverability: medium
Max. Velocity: 398 m/s
Special Action: Ram
The Minion class of heavy tugs is another pre-landfall design, which has been resurrected and adapted to the
unique needs of Kiith Somtaaw. The original Minion design was used for moving massive modular sections of
the scaffold and Mothership into position for final lockdown. For the Somtaaw, this frigate class hull with a
massive bow section, a heavy engine module and built-in grapple capabilities was exactly what they needed in an
asteroid tug. With extensive modifications to the high-output fusion drive and a redesign of the armor layering,
the newly christened Minion was ideal for pushing very large asteroids out of dense, dangerous belts of debris
for fast processing close to the command ship. In circumstances where a larger mass needs to be broken down
in order for Workers to harvest it, The Minion employs a short-range fusion torch to carve up the target rock.
Since the Minion is a relatively simple vessel to fly, the 5-man crew is usually composed of non-combat flight
officers fresh from training, in order to give them experience in the field. While this “on the job training” is
highly efficient, and frees experienced personnel up for more complex vessels and tasks, it does lead to some
unusual interpretations of the Minion mission profile. Recently, the mining fleet headed by the command-ship
Kuun-lan was under attack by a Turanic Raider fleet, backed up by a Chieftain Class carrier. Standard Somtaaw
procedure has all non-combat vessels, including Workers and Minions, retreating to the command ship at the
first sign of battle, but two Minion crews took it upon themselves to ignore this command. Realizing that the
pirate Carrier would eventually overwhelm the Somtaaw Acolytes and Seekers, forcing a retreat from a highly
valuable belt of radioactives, the Minions drove straight into battle and rammed the Chieftain broadside. After
grappling on and giving maximum power to their fusion drives, the Minions were able to push the Pirate Carrier
deep into a fast-moving pack of asteroids, where the larger ship was battered and finally destroyed by rock
impacts. From this event on, Minion pilots have jokingly referred to their ships as “Ramming Frigates” and have
begun painting kill markers on their crash helmets.
Required Tech - AFTERBURNER
Upgrade Tech - ADVANCED ION CANNON
REPAIR BOTS
INFECTION VACCINE
ARMOUR LEVEL 2
100100
 Loading...