

Page 1

historical + technical briefing
part i:
Page 2
homeworld
page
The debate over our past on this world reaches back
through the entire documented history of
civilization, a period covering over 1300 years. The
harsh conditions across this world, Kharak,
[A1]
fueled the myths of other places and times where we
did not have to spend so much of our strength on
simple survival. While the issue of our distant
past was primarily a religious matter
[A2], it wasn’t
until the dawning of the Time of Reason
[A3] that
advances in the biological and chemical sciences
revealed a disturbing lack of commonality between
our biochemical makeup and that of most Kharakid
life. Ironically, it was the birth of the Daiamid
Movement, with its many scientific breakthroughs,
that created a philosophical environment where the
oldest myths and the newest theories could be
wedded into what we now have accepted as the
XenoGenesis Theory. Except for a small variety of
bacteria and a single species of small forager, our
helix proteins are completely different from all
other forms of life on Kharak. We are left with no
other choice but to seriously consider the theory
that we are aliens to this world. Of course, this
answer only led to more questions.
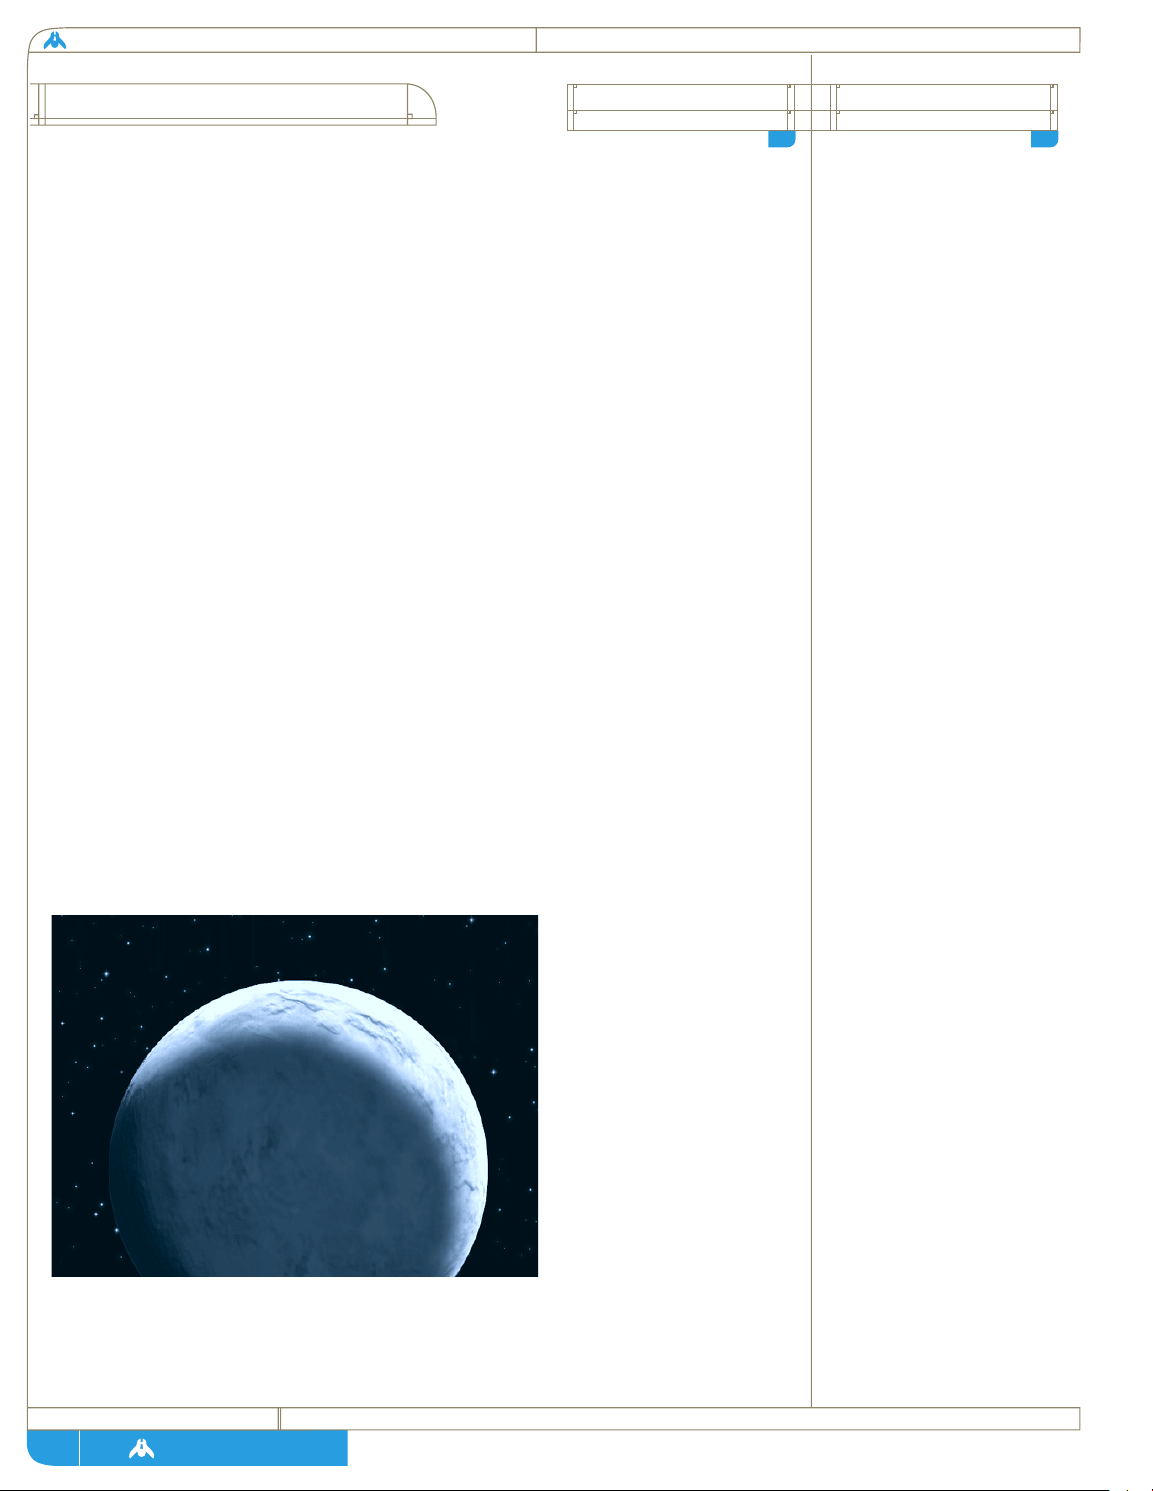
Fig 1.1:
The desert planet Kharak
as seen from space.
Early history on Kharak is
marked by conflicts between
various clans based on
territorial considerations and
religious dogma. This came to
a head in 520 when the two
largest clans in the north,
the Siiddim and Gaalsien went
to war over the issue of what
had caused the Gods to place
us on such a world. The
Siiddim believed that we had
once been a great race living
in paradise but had been
punished by the Gods for our
hubris and cast down to this
world. The Gaalsien believed
this idea to be heretical
arrogance in the light of their
belief that we had been
created to suffer from the
beginning and Kharak was all
we could hope for. The
conflict eventually spread to
the southern zone as well.
Even more obscure points of
theology provided the
rationalization for a series of
wars, large and small, that
lasted almost 300 years and
created clan feuds that would
not be put to rest until the
discovery of the Guidestone.
a
Kharak is an old planet (6.7
billion years) that is nearing
the end of it geological
activity. Most major terrain
features have been weathered
down and vast deserts cover
most of the world except for
the polar regions. These are
shielded from the encroaching
sands by the three northern
seas and the great Majiirian
Ocean in the south.
Temperatures along the
equator can approach the
boiling point of water and the
only life forms larger
than microbes survive by
burrowing deep under the
sands and along sub-surface
water channels or by
hibernating during the
hottest months. The polar
regions are almost optimal
for our people but the limited
arable land and scarce
resources has prevented our
population from growing
beyond 300 million people.
heresy wars
CIRCA 520
kharakid
environment
A1
A2
1
question of
origins
Page 3

page
technical + historical brief
The Heresy Wars left our
people on the brink of
extinction, with precious
resources and infrastructure
destroyed during 3 centuries
of religious conflict. In 810,
with all factions exhausted
and falling from internal
anarchy, a small clan emerged
from hiding from the
settlement at Tiir. This
obscure northern clan was
the first to develop chemical
explosives and were thus
unmatched in clan warfare.
They also preached a
worldview based on science
and logic and offered
protection to anyone who
wished to live in such a world.
A few decisive battles showed
that none of the theological
clans could hope to defeat the
Naabel and within 20 years Tiir
was the new capital and the
Age of Reason had begun.
It was becoming more obvious that we, as a species,
were relatively new to Kharak. However this theory,
by itself, did not bring peace to our world. The
mechanism and reason for arrival was still being
hotly debated and was even cause for a theological
revival on the eve of our first orbital flights.
[a4]
The age of orbital exploration revealed the first
clues that we were not indigious to our planet.
Once we had progressed to piloted flights, reports
of unusual pieces of metallic debris in high orbit
soon led to dedicated retrieval missions, with
surprising results. While nothing larger than a
handspan could be found, samples were brought
down from orbit and soft landed in the High
Desert. Initial analysis made it obvious these were
pieces of advanced manufactured and machined
structures. Detailed atomic analysis revealed trace
elements and isotope combinations unknown on
Kharak or, as it was eventually discovered, anywhere
else in the stellar system.
This was yet another piece to the puzzle of our
origins, but it did not truly confirm anything
except that some kind of alien device or ship had
once orbited our world. Though not decisive, the
discovery of this tiny debris belt spurred great leaps
in metallurgy and manufacturing, simply by
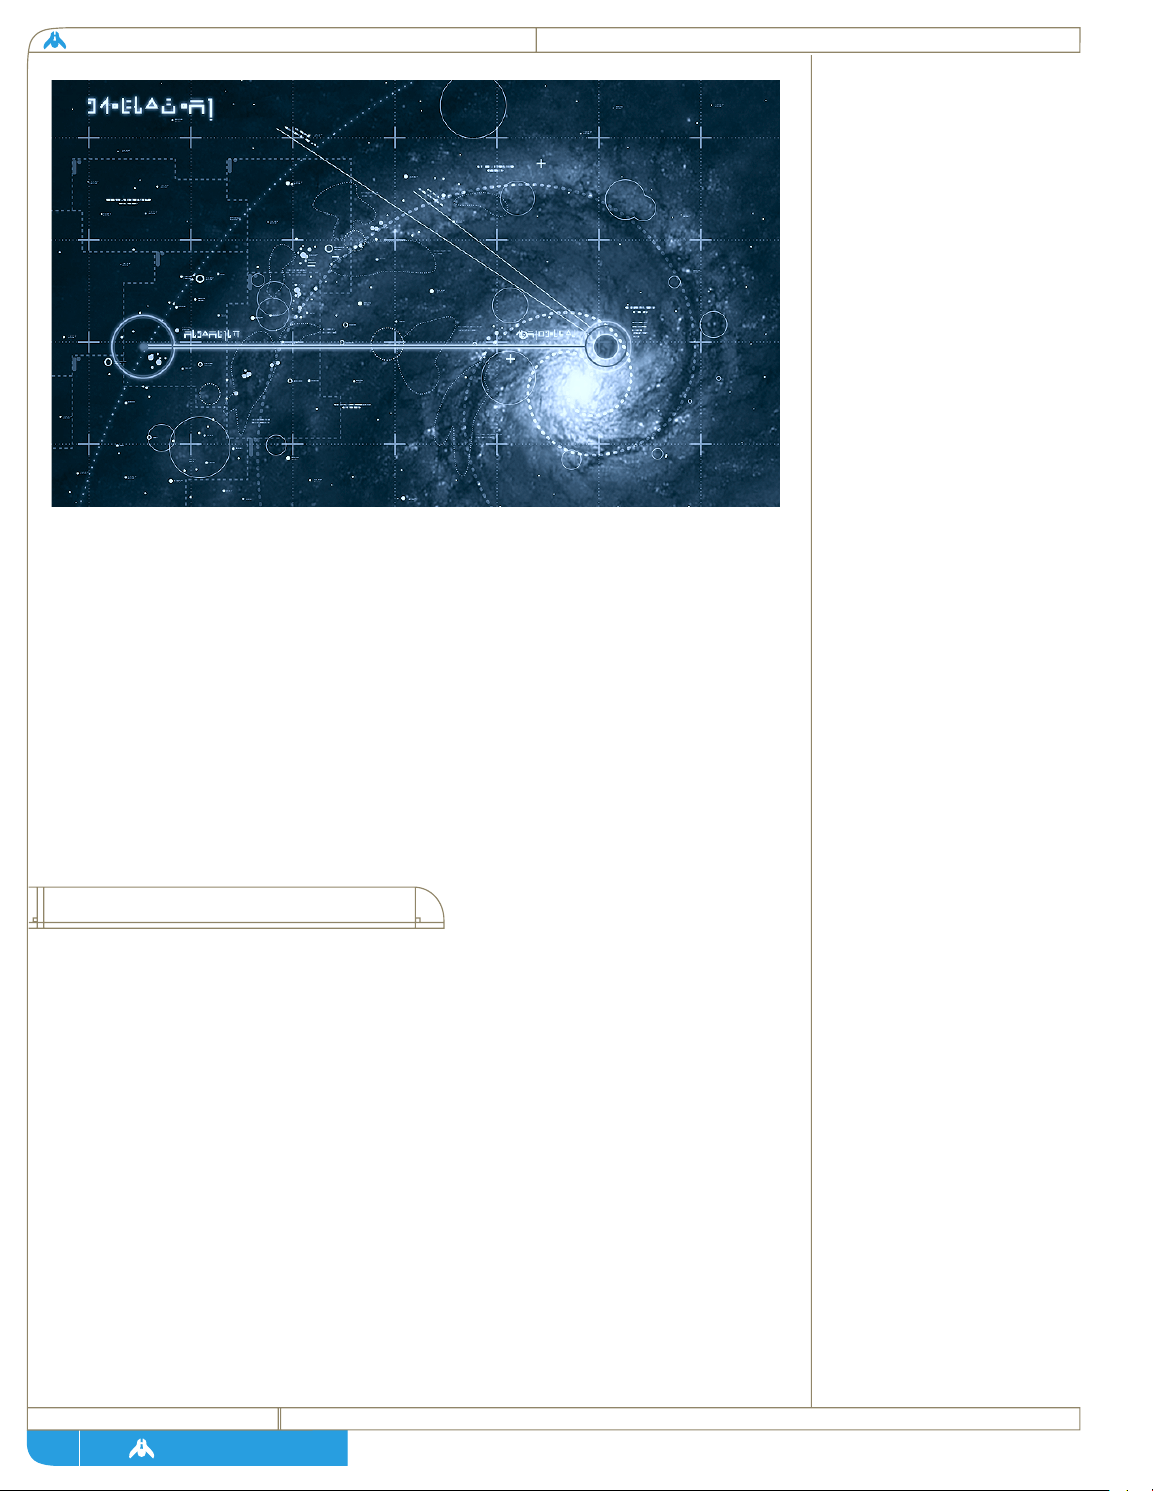
Fig 1.2:
Peering towards the heart of our own spiral galaxy. The dark horizontal
band is a vast bank of interstellar dust that obscures the more distant
bright core region approximately 35,000 light years away.
Space exploration was not
greeted favorably by the
entire population. Large
factions from some of the
poorer clans felt that
technology and industrial
output was being wasted on
this effort. They felt that it
would be put to better use
trying to alter Kharak or at
least discover ways to
support more population and
hold back the encroaching
deserts. As final preparation
for the first orbital flight
were being made, an obscure
theologian named Per Doine
provided the unifying force to
these factions by resurrecting
the old myth that tragedy
would befall our people
should we offend the gods
with another act of
arrogance. This religious
revival spread throughout
both polar territories and it
culminated with an attempt by
a frenzied mob to tear down
the Silumiin launch vehicle on
the eve of it’s liftoff. This
disaster was only averted by
the wisdom of the High
Technocrats who stood on the
launch base’s defense turrets,
preventing them from firing
on the crowd, while they
preached reason to the crowd
for the entire 14 hours
required for launch. Per Doine
died a martyr for the cause as
he slipped through the cordon
and prayed for salvation
beneath the rocket’s main
engines until they ignited,
vaporizing him.
tor
CIRCA 810
A3
mission silumiin riots
CIRCA 1024
A4
2
the
xenogenesis question
and early spaceflight missions
Page 4

homeworld
page
khar-toba appears to be the
first city built by our
ancestors after surviving
planetfall on Kharak. Analysis
of the ancient infrastructure
seems to indicate this ancient
vessel suffered irreparable
damage and was unable to
move it’s crew to a more
temperate polar climate. Thus
the city spreads radially
around the wreck and much of
it is underground where it
is logical to believe our
ancestors went seeking relief
from the high desert
temperatures and regular
sandstorms. Many of the
structures closest to the hull
are made up of patched
together sections of hull
plate. As the city grew
outward, more rudimentary
structures were carved from
the local sandstone by hand.
The massive fusion core had
obviously been moved from the
ship to the underground
chamber where it was found in
order to feed power to the
original city, which probably
fell soon after the ship’s
plant failed for the last time.
khar-toba analysis
A5
3
the
discovery of khar-toba
showing that exotic, high tensile composite
materials could exist. This in turn led to advances in
propulsion, first with limited fissioning of unstable
heavy elements and then with more viable hydrogen
fusion powerplants, as effective shielding systems
became lighter and smaller. The combination of
these technologies spurred our fledgling space
program even further and our first steps became
leaps. We were poised on the threshold of space,
looking outwards for answers, when a twist of fate
turned our eyes back to the surface of our adopted
world.
In 1106 a powerful radar satellite was launched in
the hopes of detecting larger debris belts elsewhere
in our star-system. A malfunction in its
maneuvering jets caused the satellite to turn
towards Kharak and scan the surface. Leykab Jaraci,
a technician on the project, noticed a strong return
where there should be none. A quick analysis
showed the powerful radar had penetrated the
equatorial desert sand to a depth of 75 meters and
there was strong evidence of an ancient city
centered around a large metallic structure.
By 1110 enough science Ministers had been
convinced, by repeated radar scans, to allocate
resources to an expedition into the Great Desert.
Despite conditions that would daunt personnel in
modern enviro suits, these first brave excavators
managed to uncover what has come to be known as
the First City, Khar-Toba. While this discovery was
the stuff that Archaeologists dream of, even greater
secrets revealed themselves when the central
metallic structure was revealed to be the skeletal
chassis of an advanced vessel.
[a5] Though virtually
nothing of relevant substance remained except a
vast array of structural beams, the real treasure lay
in a shielded chamber deep below the surface.
While tracing the ancient maze of power cables
Page 5
page
technical + historical brief
4
during the first triad of 1112, engineers opened a shielded chamber
containing the remains of the ancient ship’s powerplant. Painstakingly
transported to the modern polar capital of Tiir, this ancient device was backengineered to provide another generation of breakthroughs in power and
material sciences. But what catapulted our technology 500 years forward was
the analysis of a module attached to the powerplant. This device was nothing
less than a solid state hyperspace induction module. In a decade of analysis,
we were ready to take our first steps back out into the galaxy, but it was not
until 1135 that it was revealed just how far we had to go.
The discovery of the powerplant and hyperspace module was considered the
gem of ancient Khar-Toba, and with them safely in research labs in the
temperate poles, the old city was left in the hands of a few dedicated
Archaeologists. They struggled to do their work under some of the harshest
conditions on Kharak. Led by a young woman named Mevath Sagald, they
gave our entire civilization an answer and a goal as she pieced together the
location of the mythical Observatory Temple of Khar-Toba. Accidents left her
to excavate the site nearly single-handedly, but when she opened the inner
chamber she recognized immediately the full import of what she found,
etched on a single piece of black stone.
Archaeologist Sagald had found something that was as unremarkable to the
casual eye as it was monumental to the future of our people. When she
studied this stone further, she discovered it had once been an ornately carved
artifact that had been nearly destroyed by intense heat. Whatever message it
had been originally intended to convey had long since been erased. Some
distant ancestor had cast it through time as a message for generations to
come. Etched into the upper surface is a simple diagram of our galaxy, and a
single gouged line leading from
a point on the rim to one deep in
the galactic center. Adjacent to a
spot easily identifiable with
Kharak’s actual position is a
single string of numbers that
give a three dimensional vector.
And at the other end of the line
is a single word, ancient but
common to all clan dialects:
Hiigara . . . Home.
the
guidestone
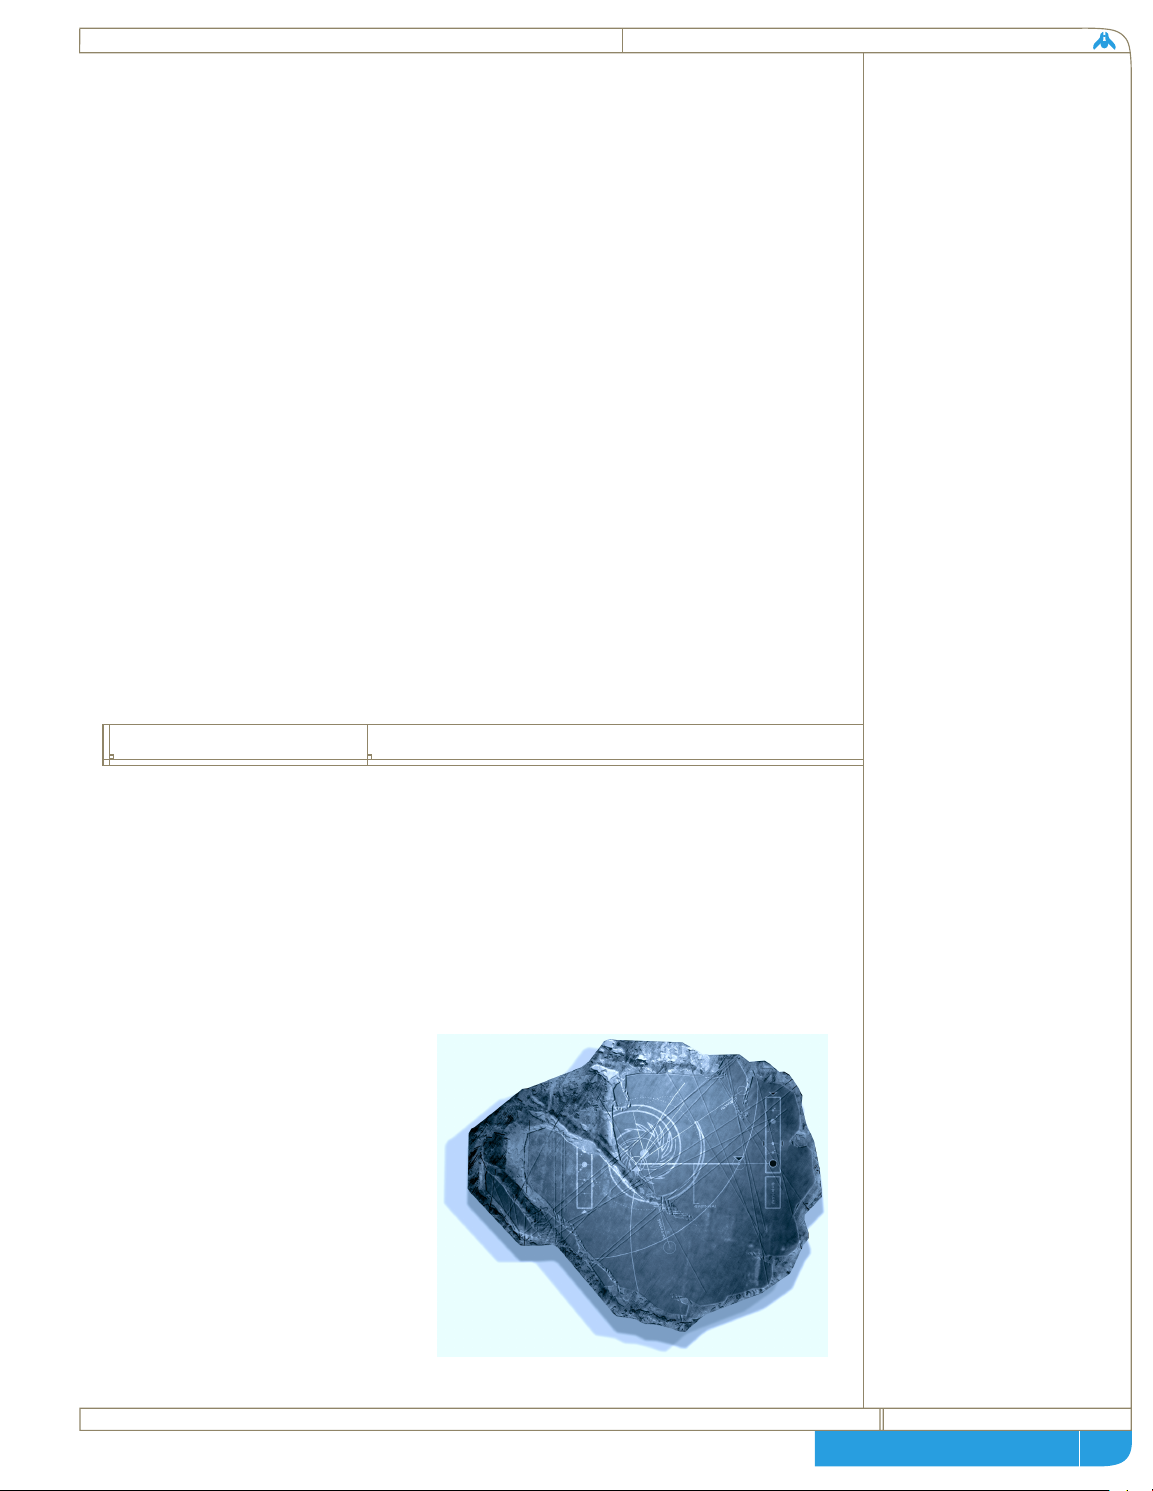
FIG 1.3:
The Guidestone.
Found in the ruins of KharToba, it has been dated at over
3000 years old. Precise galactic
features and the indisputable
coordinates of Kharak were
etched into its dark surface. In
a small area near the region
representing the galactic core,
a single ancient word is clearly
visible: “Home”.
Page 6

homeworld
page
The effect on our culture of this simple artifact,
now known as the Guidestone, has been
unprecedented. Our materials scientists confirmed
the age of the artifact at approximately 3000 years,
and are assured that they can match the Guidestone
to its system of origin should we come across it.
After a long history of struggle, strife and inter-clan
warfare, the confirmation that Kharak was never
our true home inspired an era of co-operation like
none ever known.
[a6]
For the past two hundred and fifty years there have
been no significant conflicts or bloodshed. We have
dedicated our entire industrial and scientific
resources towards a single, common goal:
Returning to Hiigara, our Homeworld.
In the first triad of 1159, a final plan was accepted
for the vessel that would follow the path indicated
by the Guidestone. What had delayed the project
for so long was simply that no one, neither
astronomers nor religious leaders, could say for
certain what had brought us to Kharak, and so
none could say what an expedition would
encounter. It was finally decided to build a vessel
that was capable of doing everything, including
establishing a new colony deep coreward. Known
simply as the Mothership, this vessel would be part
carrier, part survey ship, part factory complex and,
most importantly of all, the temporary home for
millions of our people frozen in cryogenic sleep. It
would have to be able to deal with the great
unknown reaches of the galaxy, and whatever
discoveries or threats they might contain. It would
be the greatest construction project in our history.
Ministers from every clan abandoned their
cloistered, competitive policies and pooled every
resource to develop strategems and designs, and
Had Archaeologist Sagald
brought the Guidestone back
to her own clan stronghold,
Kharak might have found itself
once again descending into
partisan struggles over
possession of the artifact and
who would be first to exploit
its secrets. Instead she
realized what she had found
was far more important than
loyalties to family or clan. It
was a startled gathering of
High Ministers that found
their debate disrupted by a
sand-covered young woman
carrying an ancient stone. By
nightfall of the following day
some of the greatest minds in
the Daiamid had examined the
Guidestone and confirmed not
only its validity but also
its implications. With this
knowledge in hand the High
Ministers returned to their
home clans to bring the word
that we were not indigenous
to this planet. From the
most powerful cross-territory
industrial Clans to the
smallest agricultural villages,
the word was unanimous:
The entire industrial and
scientific might of all Kharak
would be put to the task of
following the path laid by the
Guidestone. For the first time
since we came to this world,
we were one Clan.
5
the
mothership
global plebiscite
of 1155
A6
Page 7
page
technical + historical brief
then allocated them to the various industrial hubs
throughout the polar zones. In the meantime, clans
that had been trailing the cutting edge in
technology and production turned their efforts
completely over to agricultural work, feeding those
who were occupied by the construction effort.
The planned Mothership was so massive that it took
twenty years simply to build up the infrastructure
required for the construction project. Asteroids
from the debris belt were pulled into a parking
orbit around Kharak. Here, manned cutter ships
used high-energy lasers to break these planetoids
into manageable sections that could be towed into
the great maw of the Phased Disassembler Array.
The PDA used a series of fusion torches to reduce
the planetoid chunks into their component
elements. Robotic Materials plants then combined
these elements into whatever alloys and composites
were required for the grand task at hand. Many of
the lessons learned here were refined and
implemented into the next generation of resourcegathering ships that would serve the Mothership
herself.
The next step was to construct the orbiting Scaffold
where the Mothership would be built. This
framework took 10 years to complete, and is the
single largest structure ever built. New disciplines
in macro-engineering had to be created and put
into practice just to complete this construction
yard. The Scaffold runs 25.6 kilometers long, and
is stationed in middle orbit around our world.
Easily visible from the planet’s surface, it is the only
moon that Kharak has ever known, and has been a
natural fixture in the night sky for almost four
generations now. Only the eldest of our people can
remember a time when the skies were dark and
there was no glittering lattice work to remind our
people of their destiny.
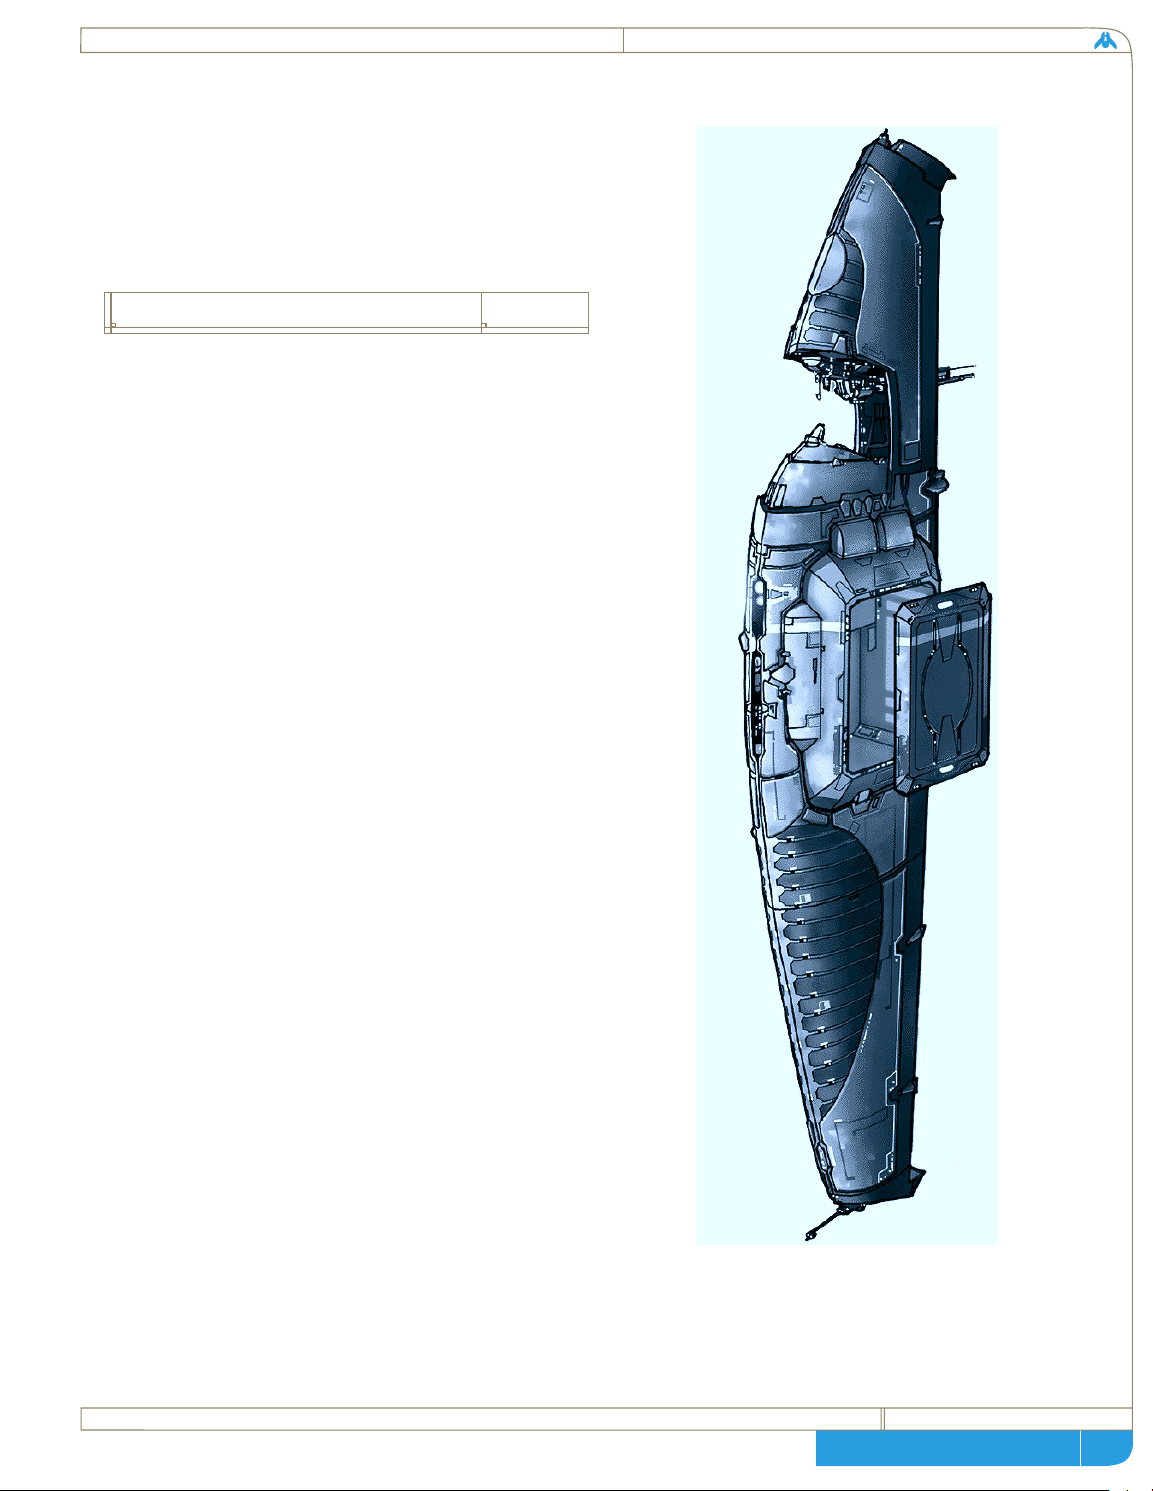
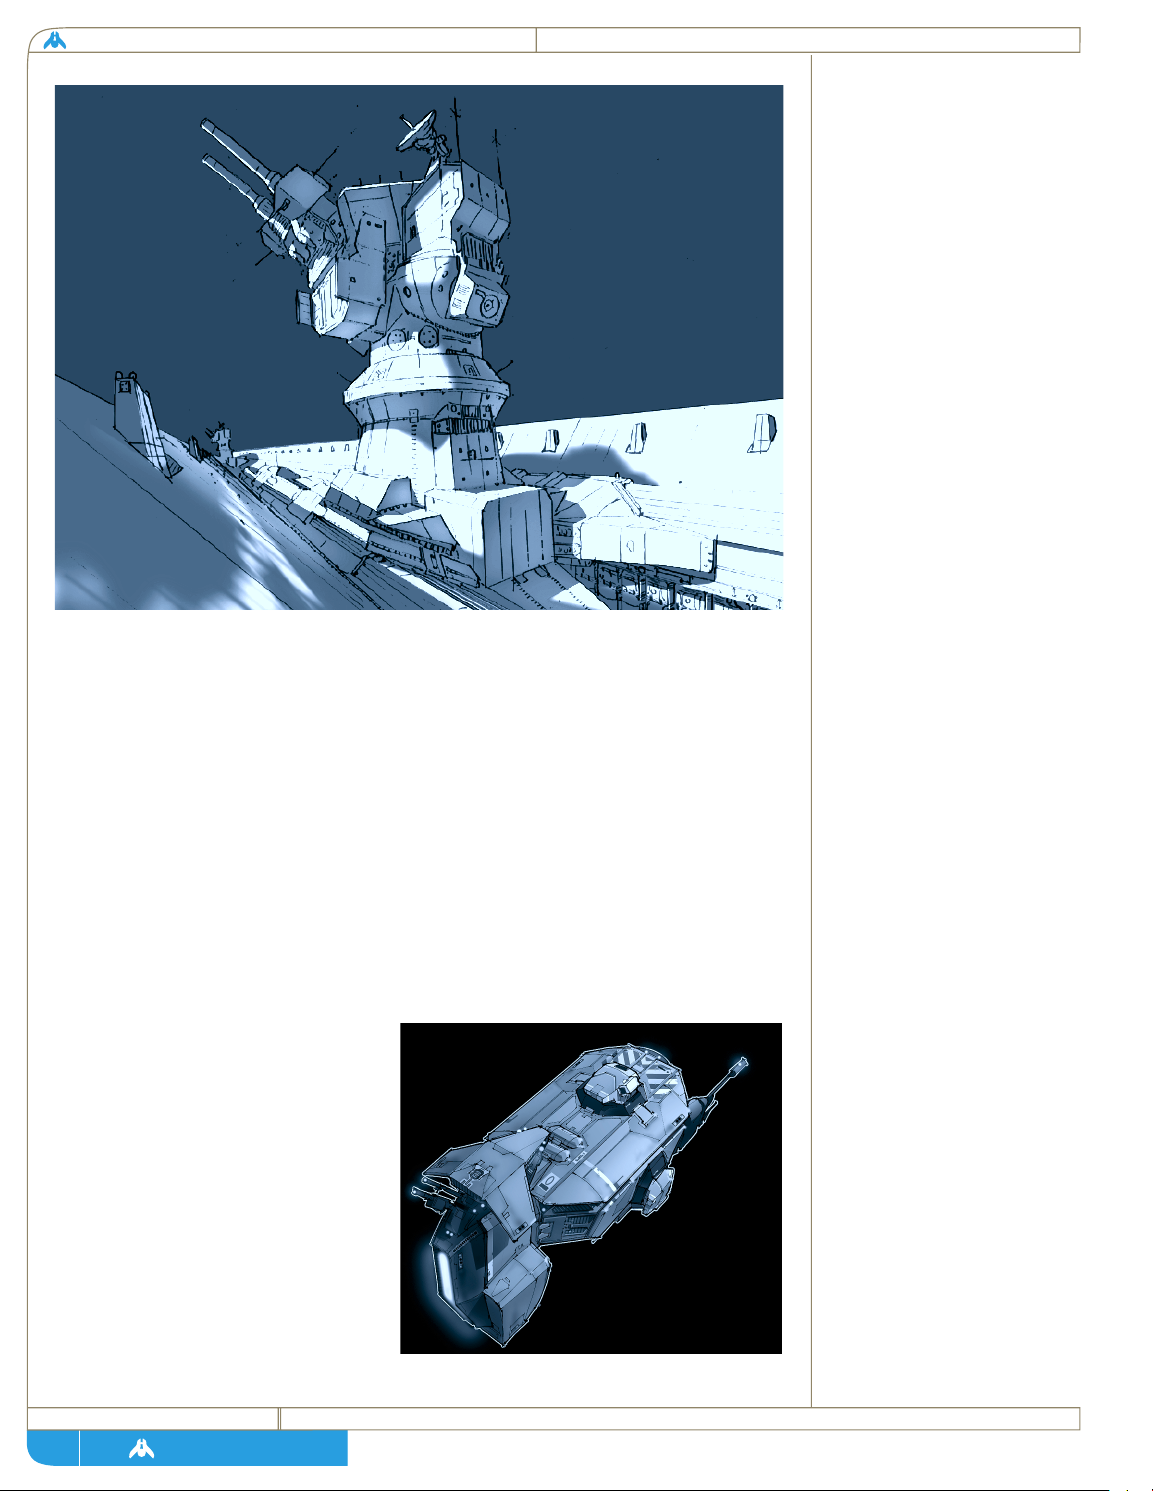
Fig. 1.4:
An early Mothership design.
The Mothership will serve
as the base of all operations
for the trans-galactic voyage.
6
construction challenges
Page 8
homeworld
page
Over the next 25 years, the Mothership slowly took form inside the Scaffold,
building up in layers from the center sections outward, until the final layer of
ceramic armor was laid down just last year. For the last eight decades, there
have been over 10,000 technicians along with another 25,000 robots working
on this ship continuously. Many of the fusion torches and materials plants
that broke down and processed the planetoids early in the construction
program were cannibalized and incorporated into the Mothership itself.
During the course of this massive project, 2,357 personnel have given their
lives for the future of our people, and their names have been engraved on the
central hyperdrive core aboard the Mothership. They will never be forgotten,
and their brave spirits will precede this vessel into the gulf of hyperspace.
In such a huge vessel dedicated to so many tasks, it is necessary to devote
entire areas towards fulfilling each part of the ship’s mandate.
Fleet Foundry:
The Mothership is designed to be a mobile construction yard on par with the
original orbital facilities which created the mega-vessel in the first place. The
automated manufacturing bay is capable of high-speed production of vessels
from tiny Scouts to larger ships that are yet to be designed. Various parallel
production bays allow for dozens of larger components to be cast and
assembled at the same time, thus radically reducing the time needed to build
larger vessels. Ships components are based on modular technologies, many of
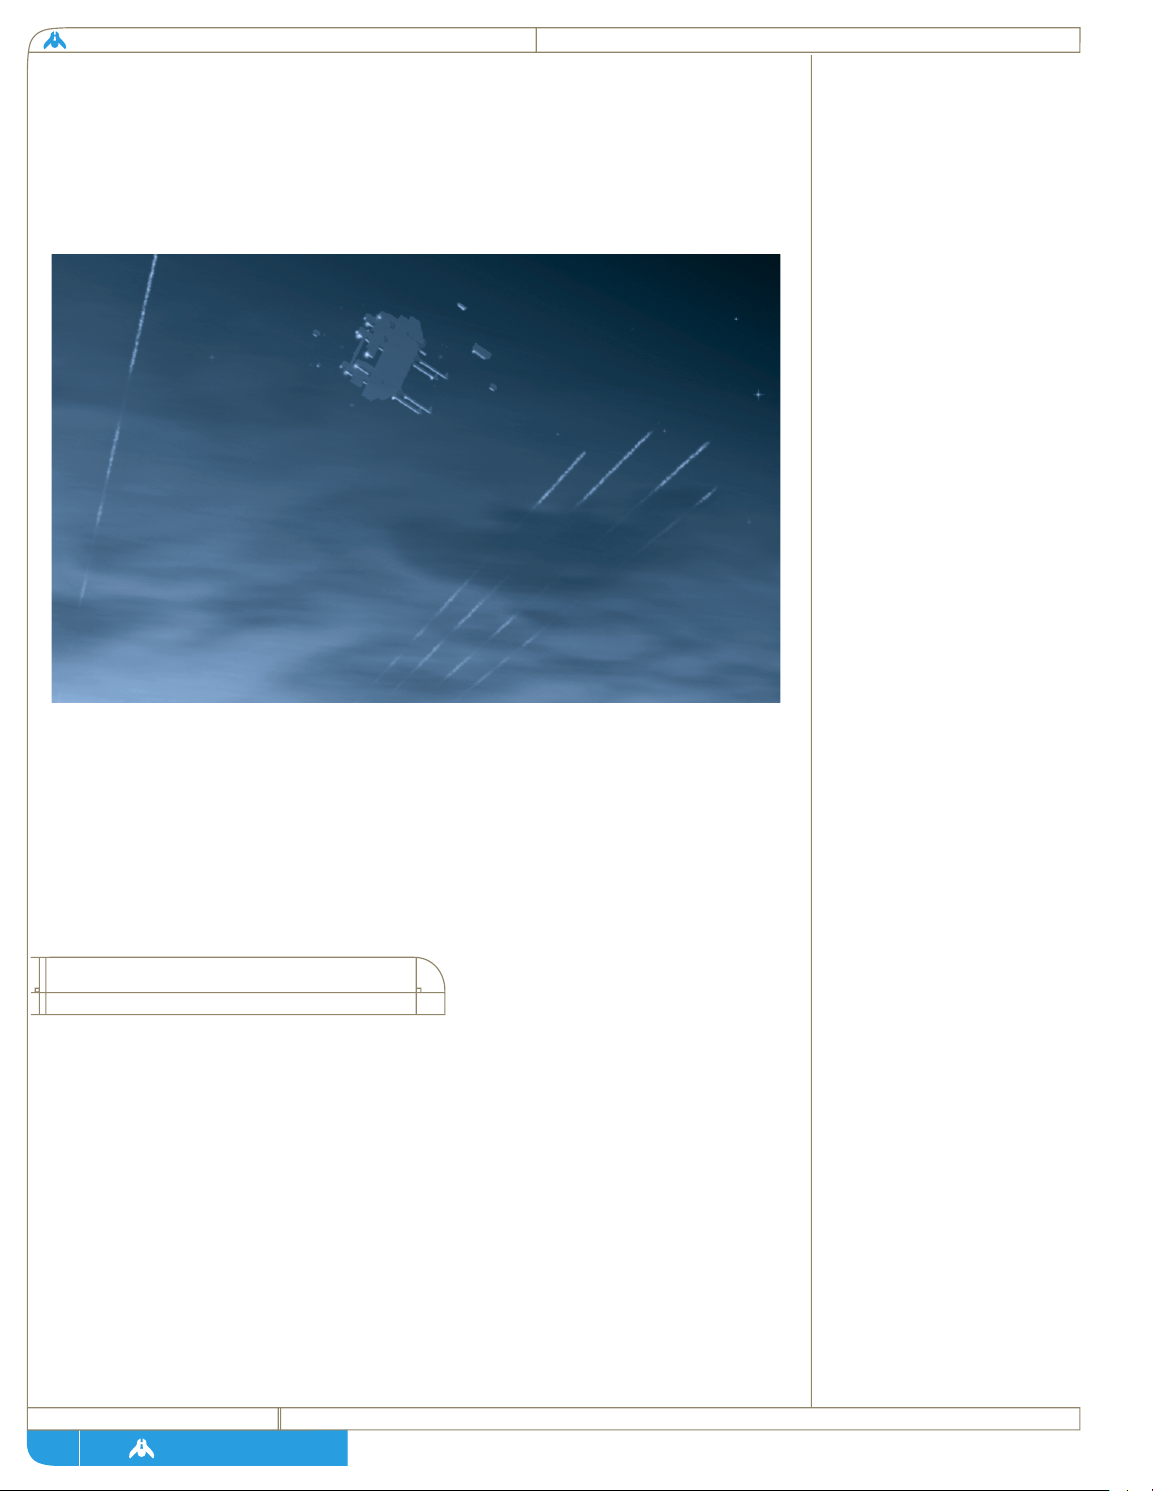
Fig. 1.5:
Four generations witnessed the
Scaffold silently orbit the
moonless Kharak. In this view,
supply and service vehicles can
be seen adjacent to the main
assembly.
7
mothership
sections and systems
Page 9
page
technical + historical brief
the same ones being used across various hull designs, thus saving time and
allowing for faster simultaneous construction. The foundry floor is capable of
using multiple construction tracks to simultaneously build a fleet of scouts,
assemble a squadron of corvettes, and create enough ordinance for both sets
of new ships. A large hanger provides docking sleeves for a huge array of
vessels to be serviced - or the same sleeves can simply be used as berths should
the Mothership need to enter hyperspace with a large fleet of auxiliary ships.
None of this would be possible without the immense quantity of raw materials
brought in by the Resource Collector vessels. Built around the model of the
original cutting ships, which were used to break down raw materials for the
initial construction of the Scaffold and the Mothership, the Resource
Collectors are designed to reduce and acquire a variety of space material,
ranging from solid planetoids to gas nebulae. The Collectors then return to
the Mothership and transfer the contents of their holds for processing
through a Phased Disassembler Array. While this PDA is smaller and quite a
bit more efficient than the orbital array used to supply the Scaffold, it works
on the identical principal of arrayed fusion torches. It will reduce any material
to its component elements, while a Magneto-Hydrodynamic Shunt Field
sorts the vaporized elements according to atomic weight and carries them to
the storage shells. The massive honeycomb of storage shells, (almost 3 cubic
kilometers of storage space) lies just under the surface of 65% of the
Mothership’s hull. This allows for quick access and venting, in the event of a
jam or storage cell rupture, as well as providing a final layer of armor.
Navigation:
The Mothership has two modes of travel. The first is based on conventional
fusion drive technology, and is basically a series of large fusion reactors
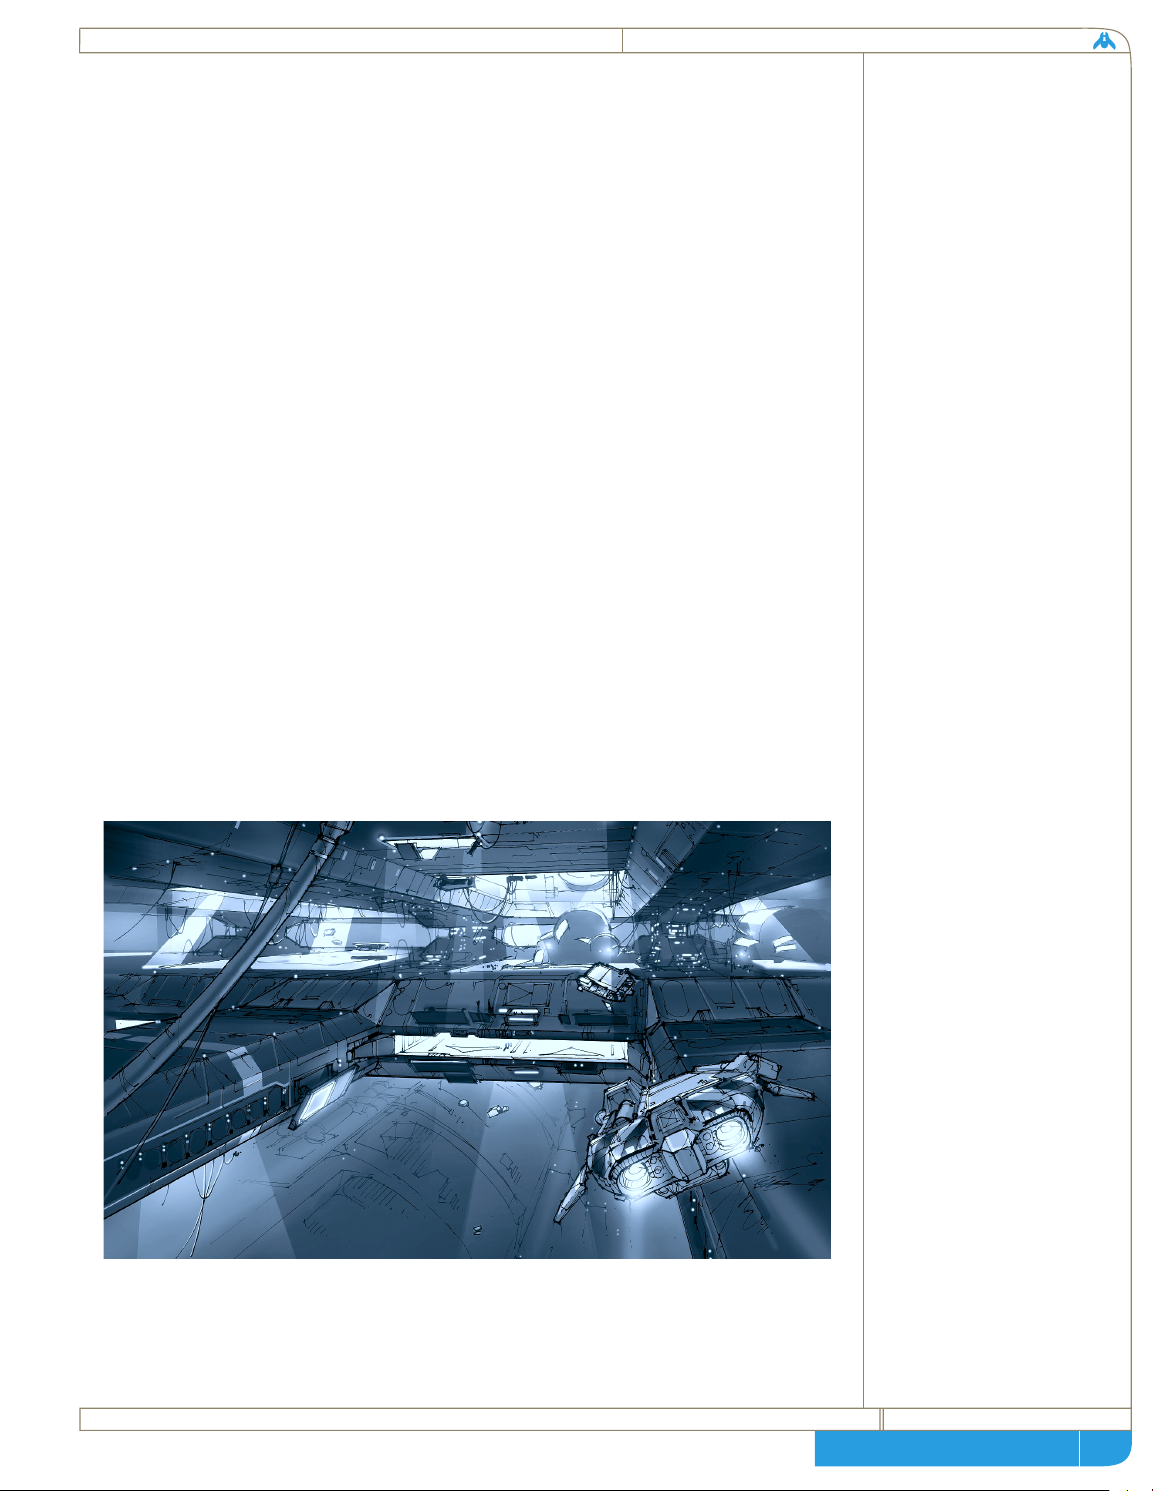
Fig. 1.6:
Inside the Mothership’s main
Construction Hangar. It is the
single largest enclosed volume
ever built and will be capable of
shipbuilding on every scale
possible. In this view, the vast
Main Hangar is visible looming
beneath a factory slab in the
assembly area. Strike Craft
docking sleeves are housed
within these huge sub-decks.
Service vehicles populate all
sections of the Hangar in great
numbers. Highly versatile, they
provide countless vital operations
from simple maintenance tasks
to complex assembly.
8
Page 10
homeworld
page
designed to vent high-energy plasma through an
opening in a shaped magnetic bottle. Maneuvering
jets are fed plasma from the main exhaust through
a series of conduits, and this allows a portion of the
main thrust to be diverted to maneuvering.
The Mothership’s secondary drive is less well
understood, but it is the system that makes this
voyage possible. Toward the lower aft portion of
the ship lies the large shielded area containing the
Hyperspace Module. This is a direct copy of the
one found under the sands of Khar-Toba, but
expanded twelve-fold to accommodate a vessel of
the Mothership’s mass.
[a7] Even though the
effect has been tested extensively through ships
fitted with test modules of various sizes, our
control and understanding of the effect is
somewhat limited. This has resulted in a need for
massive energy to induce the wavefront,
prohibiting its use on any vessel too small to carry
at least three industrial fusion plants.
There is another drawback to our limited
understanding of hyperspace. We can only induce a
linear tunnel effect of massive proportions, with
relatively crude control of distance. The module is
projected to have a range of 2500 light years for a
single waveform event, and in order to trigger the
drive we must charge the module with all the
The solid-state Hyperspace
Module is a quantum
oscillation device capable of
generating a waveform
throughout any surrounding
structure. It does this in
order to induce an effect
known as quantum tunneling.
Because the device was
reverse engineered, the exact
workings of the module are
still very uncertain. All that
our scientists know about
the effects of hyperspace
transport has been derived
from limited empirical data -
theoretical data is almost
totally nonexistent.
The risk involved in employing
a technology that we know
so little about, on such a
vital mission, could not be
avoided. The raw materials
needed to build the Hyperspace
Modules are extremely rare
on Kharak; only a few
prototype drives were built
prior to the Mothership
module due to this material
shortage.
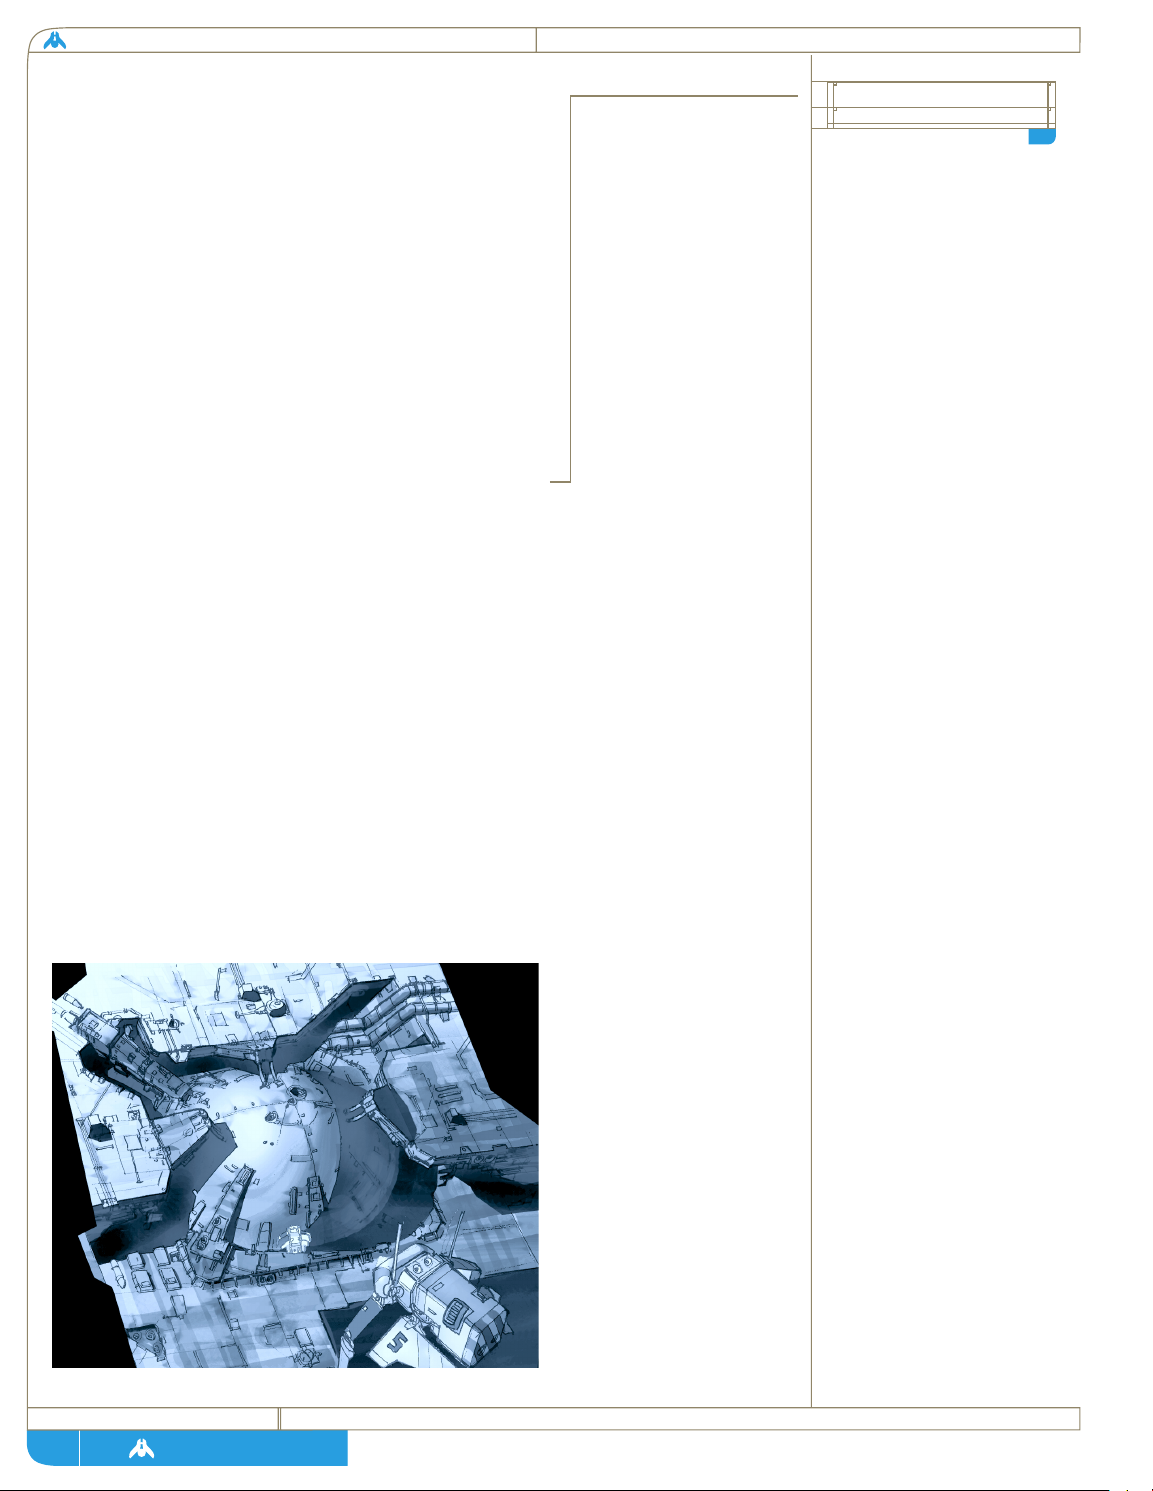
Fig. 1.8:
The enormous Hyperspace
Module under construction in
orbit. Although the core of the
device is entirely solid state,
the power and control systems
that embed it are the most
complex devices ever built.
Only the upper part of a
hemisphere can still be seen
bulging above the surrounding
construction.
hyperspace physics
A7
9
Page 11

page
technical + historical brief
energy required for such a stunning distance.
Should we wish to travel a more appropriate and
cautious distance, we must crudely halt the wave
effect by discharging the module’s energy, and
dropping back into normal space-time.
[a8]
Currently the Hyperdrive Module is programmed
for three priority interrupts. The Achieved Target
interrupt is based on our own astronavigation
technology, which takes a ‘sighting’ in normal space
and will discharge the module once the time vs.
distance hyperspace algorithms state that we are
roughly near our programmed coordinates. The
Anomaly Interrupt occurs when a gravimetric
anomaly is detected by ship’s sensors, and the vessel
is automatically returned to normal space to either
gather resources or, in the case that the disturbance
is actually another vessel, investigate further.
Finally, the Safety Interrupt occurs when ship’s
control computers sense any irregularities in either
the waveform effect or the Mothership’s hull
integrity. All three of these interrupts empower the
navigation computer to automatically drop the ship
into normal space.
Fleet Command:
As the project neared completion and the full size
and complexity of the Mothership became clear,
System Coherency specialists encountered a problem
that seemed to defy solution. In even the most
basic function simulations, there was so much data
to be analyzed, so many responses per second
required, that the projected bridge crew grew into
the hundreds. As new command staff were added
to the simulation, the hierarchy became completely
unmanageable. It became apparent that in any sort
of crisis, the Mothership would quickly suffer from
communications paralysis.
Computational experts tried, but no simulated
intellect system they could devise could be trusted
100%, and the whole project was at the verge of
collapse when a young neuronics expert stepped
forward with a desperate plan. Karan Sjet was
Another problem with our
current understanding of
hyperspace is that we can
only take limited gravimetric
readings of the normal space
we are tunneling through.
This means we can detect a
mass that disagrees with our
navigational data, but should
we wish to know anything
about the anomaly we must
interrupt the Hyperspace
Module. Gravity wells also
have a destabilizing effect on
hyperspace travel. Test ship
losses have taught us that a
hyperdrive must be shut down
well outside any star system’ s
gravitational curve.
A8
further hyperdrive
limitations
10
Page 12

homeworld
page
working on experimental biological circuits that
would mimic brain functions. When she heard that
an information bottleneck was facing the systems of
the Mothership, she realized her research could be
put to another purpose.
Neuronisist Sjet suggested using an existing brain
- her own - to bridge the gap between living nerve
branches and the Mothership’s data shunts.
[a9]
As Fleet Command, she is capable of handling
hundreds of alerts and updates per second, while
analyzing what tasks can be handled automatically
and which situations need to be brought to the
attention of the crew. Should the ship come under
fire, she will instantly analyze systems across the
entire length of the ship and monitor all response
activities. Fleet Command observes the status of all
vessels and updates their positions. Research
reports are also processed through her central core,
along with information on construction projects.
Fleet Intelligence:
It is the job of Fleet Intelligence to analyze
incoming data from probes, observation equipment
and sensors. Centered just below the main bridge is
a large spherical chamber containing work/com
stations, with data shunts centered around a full
holographic projection pit. When the Mothership
is under way, this pit will be manned permanently
by shift teams composed of the best scientists,
diplomats, linguists and tactical officers, all
specially selected not only for their knowledge, but
their adaptability. Fleet Intelligence has access to
not only the Mothership’s sensor arrays, but to the
Fleet Archives as well. Whatever the Mothership
should encounter in deep space, Fleet Intelligence
will interpret the data and give as accurate an
analysis as the situation permits, offering tentative
conclusions and tactical recommendations.
Cryogenics:
The major stumbling block for the plans to start a
The drawback was that her
research was still decades
away from even a basic
neuronic interface, and the
only way to patch someone
into the data system of the
Mothership was to lay a nerve
trunk open and attach the
shunt directly with a bio-
circuit interface. In order to
serve as a living command core
to the Mothership, one of
our people would have to
volunteer to be surgically
altered so that most of the
nerve trunks serving limbs
and senses would be patched
into ship systems instead. The
subject would then have to
be embedded permanently in
the bridge of the ship. Karan
Sjet refused to allow her
technology to be used on
anyone else. She is now the
mind of the Mothership, and
the voice of Fleet Command.
karan sjet solution
A9
11
Page 13
page
technical + historical brief
new colony was life support. The resources needed
to keep 600,000 people alive for years in deep space
are simply impossible to store and transport; the
Mothership would have to be so huge that no
number of fusion plants could move it. To solve the
problems of a long spaceflight, our life-scientists
turned to cryogenic suspension.
[a10] With the
technology tested and perfected, engineers began
filling the cryonic hold with the 600,000 pods that
would be required for the voyage.
Volunteers have chosen to surrender as much as 12
years of their lives before the voyage even starts in
order to be processed for cold sleep. First, they are
prepared and placed in their Cryonic Pods, where
they are slow frozen over a period of two weeks.
The Pods are then stored in holding areas deep
under the surface of Kharak until 100 of them are
ready to be placed on a Rack Module and boosted
into space together aboard the Heavy Lifter Units.
These Rack Modules are then loaded into large
Cryo-Trays. A single Tray provides power and
stable containment for a thousand Rack Modules,
100,000 individuals in all.
The six cargo trays will be loaded in to the
Mothership once the Hyperspace drives have been
successfully tested. Until then, they will wait in a
stable orbit near the Scaffold.
Biotechs studied numerous
desert-dwelling animals that
go into a form of suspended
animation, deep under the
sands, during the hottest
times of high summer. The
biological mechanism that
Kharakid lifeforms use to
deplete their cells of water,
to avoid vaporization expansion
during the high temperature
exposure, was recreated
artificially in order to solve a
similar but opposite problem;
the destruction of cells due
to ice expansion during a
cryogenic freeze. Early
experiments with adaptive
cryogenic technology were
successful, and in 1185, Rei
Magann was placed into a
cryogenic pod and placed
aboard a small probe vessel
set to circumnavigate the
Kharak system in a cross
elliptic path. This journey
took 6 months to complete,
and it was planned that pilot
Magann would not awaken nor
consume life-support elements
during the entire voyage. The
test was successful, and the
only side effect was a book of
poetry Pilot Magann wrote
afterwards to describe the
long vivid dream that he
experienced while in cryogenic
fugue.
cryonic studies
A10
12
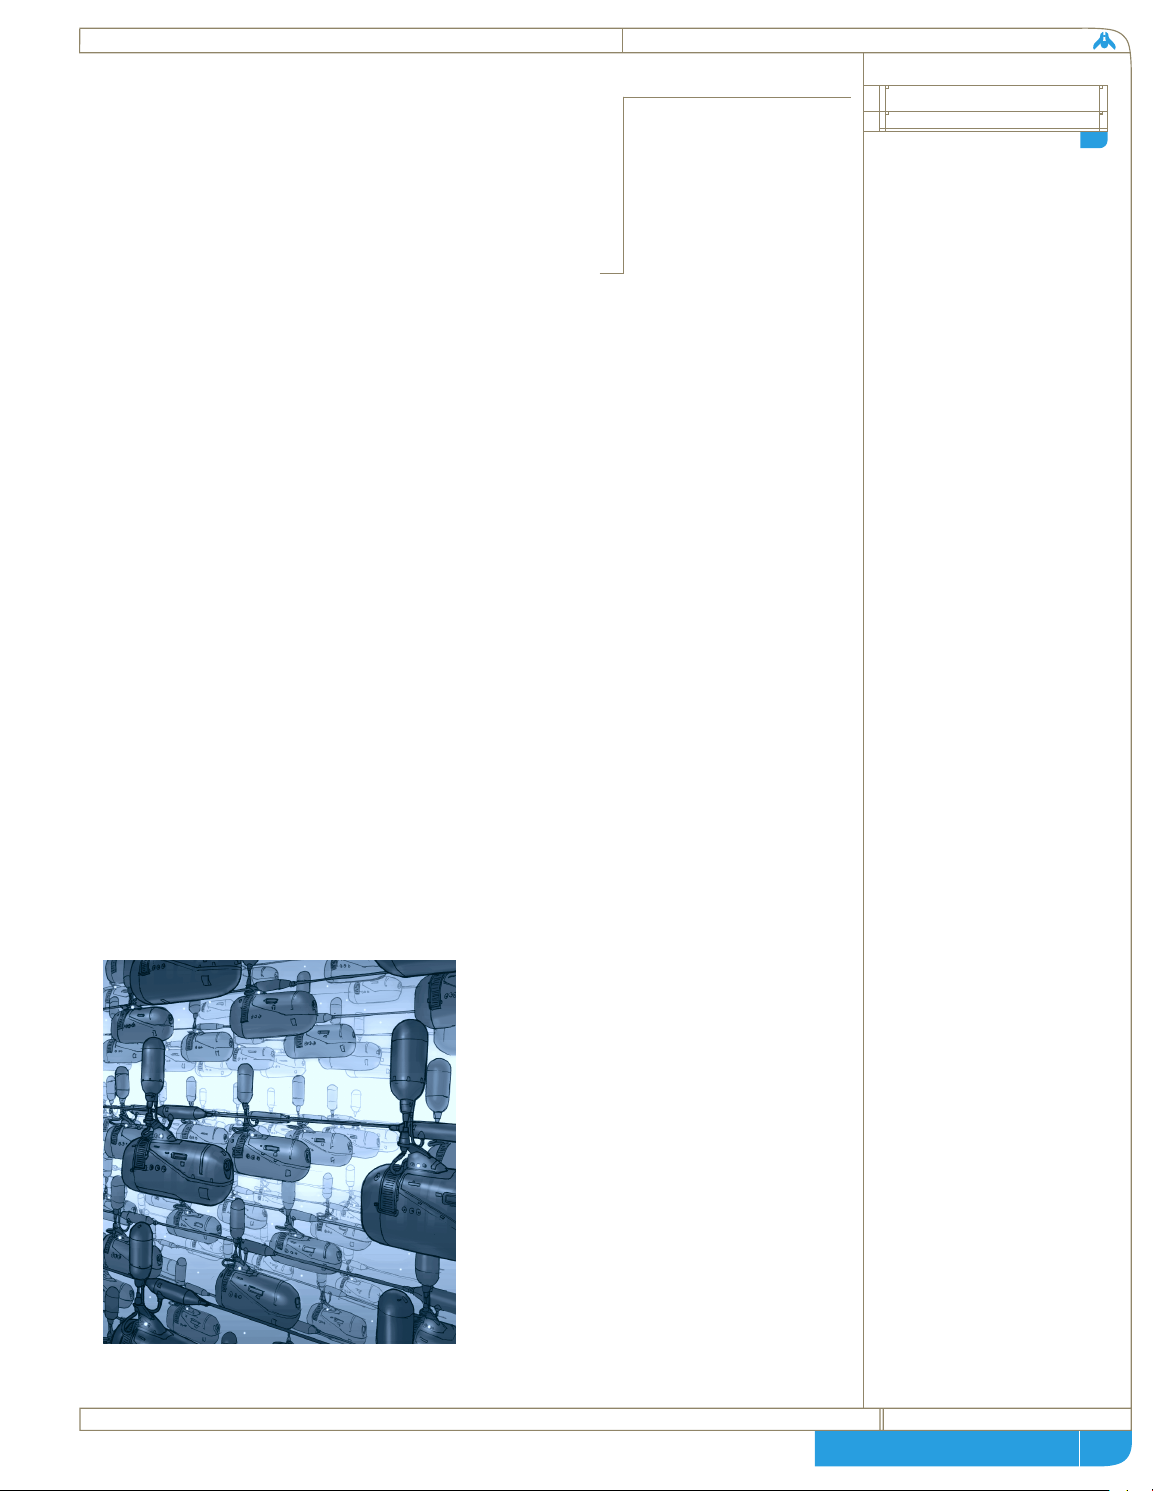
Fig. 1.7:
Inside the cryogenics hold. The pods are
widely spaced apart in the buffer solution.
Due to the narrow temperature tolerances of
the cryo-pod systems, a large bath of buffer
fluid is necessary to maintain even
temperature in the hold. In the event of a
total power failure in the hold, and
spontaneous malfunction of all auxiliary
fusion pylons, this system will still support its
frozen occupants for six months if the
insulated walls of the hold are not breached.
Page 14
homeworld
page
The vast hall aboard the Mothership containing our people is in the most
protected and armored area of the vessel. The cryonic vault stretches for
three kilometers and is almost a kilometer across. All that is required for life
support is a constant supply of power to the freezing units. A deviation of
even a single degree can be fatal to the occupants if it occurs outside the
intricate revivification procedure. In light of this, even though the 600,000
pods draw their power from the main reactor core, some auxiliary fusion
pylons are set into the vault walls, each one capable of handling the power
demands of the vault by itself. Boarding and cryogenic placement has been
occurring on schedule for the past decade.
Due to the unprecedented concentration of research and development
required for the construction of the Mothership, our strike craft technologies
and capabilities are in relative infancy. Compensation for this shortcoming
will continue at every opportunity, with more volatile experiments taking
place aboard auxiliary Research Ships to be constructed during the course of
the voyage. Our present capabilities in auxiliary ship systems are detailed
here, as well as some projected systems on which our scientists are nearing
breakthrough as the Mothership prepares for launch. Presently the largest
auxiliary vessel we are capable of constructing is the Resource Collector, with
combat vessels restricted to the single seat Scout.
Maneuvering:
All small vessels are based on the same ducted fusion torch drive which moves
the Mothership through normal space, but on a much smaller scale. Fighter
and Corvette drives are so small that they must carry onboard reactive mass
to be passed through the fusion torch and ejected as relativistic plasma. This
limits their range greatly. Larger, self-sustaining power plants will enable the
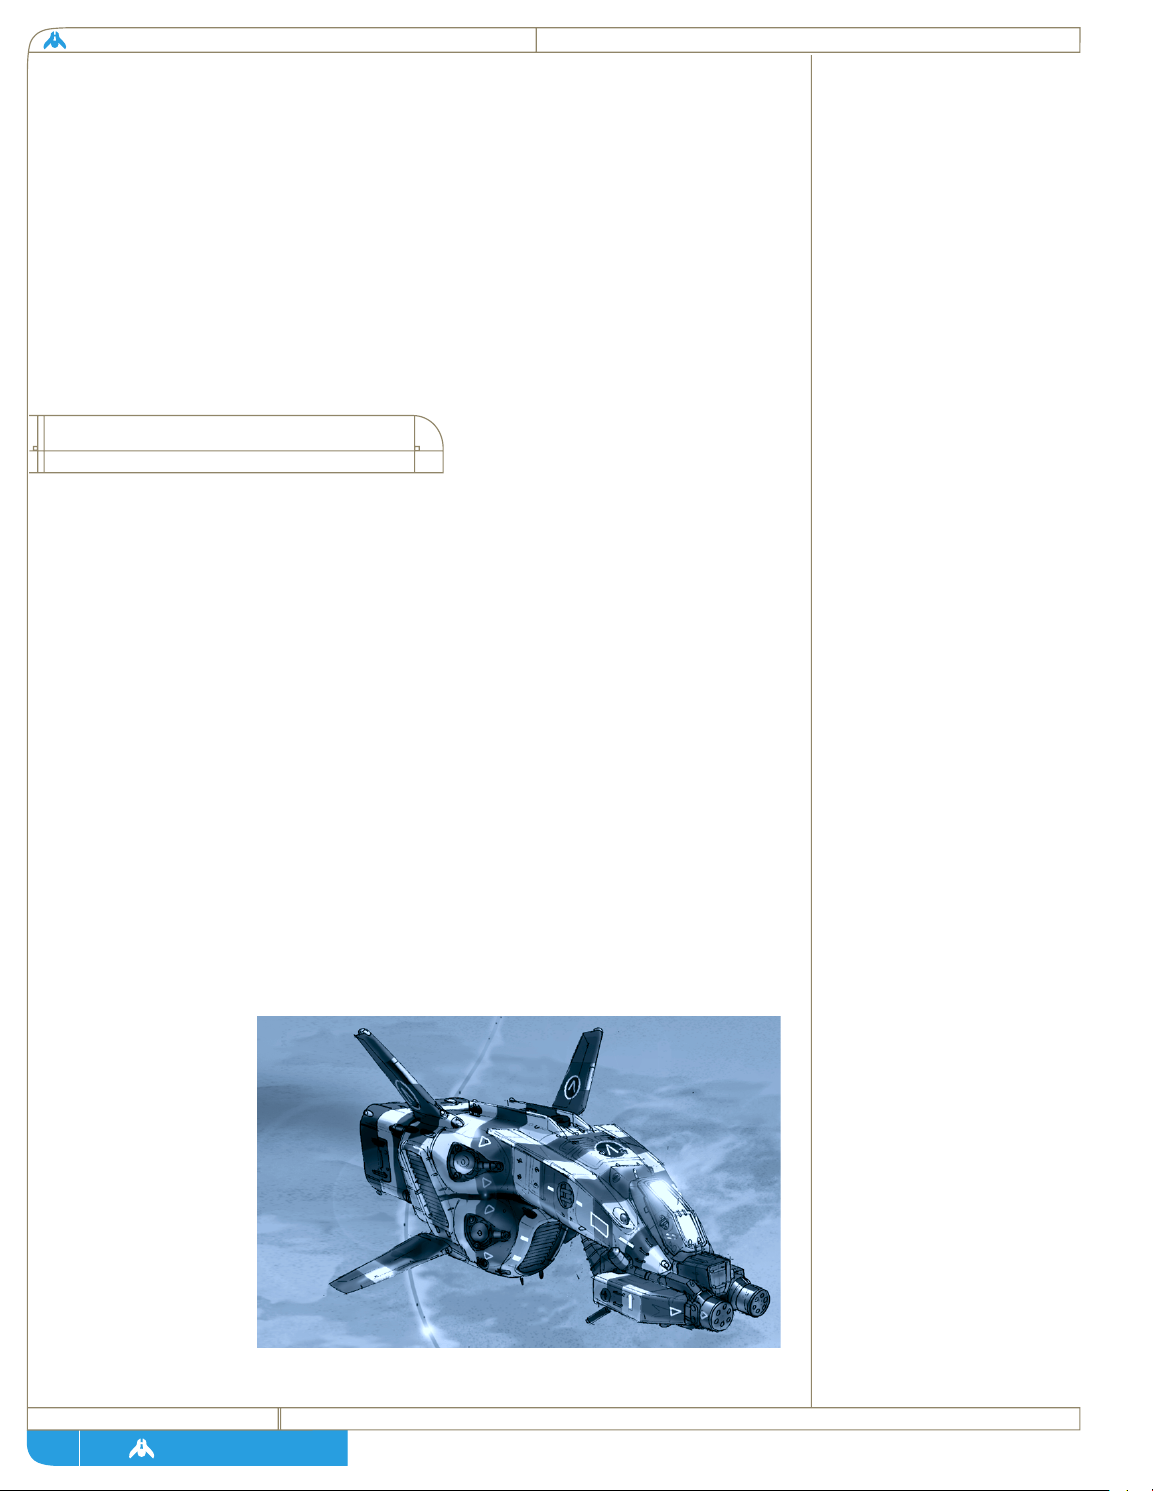
Fig. 1.9:
An early scout prototype
during trials over the desert
proving grounds.
13
auxiliary vessel
technologies
Page 15

page
technical + historical brief
construction of a new Capital Ship class, provided the necessary chassis and
drive research is successfully completed.
Vector-altering maneuvers are achieved by ducting small amounts of the main
drive plasma through various ports scattered across the hull of smaller ships.
Since the mass directly affects the inertia of ships in space, small fighters are
capable of extreme maneuvers from the ducting of small amounts of plasma.
These craft are capable of intricate attack and defense maneuvers. It is likely
that with increases in ship size agility will drop considerably and the proposed
Capital Ship class will probably be restricted to slower movement.
Weaponry:
We have no idea if there are any military dangers lurking between us and the
Galactic Core, but the Mothership is carrying our most advanced weapons
technology to cope with any possible threats. Our current space weapons
technology is based on two principles of directing catastrophic levels of
energy at a target. The first and best-known is the kinetic weapon. Projectile
guns have been an art unto themselves for nearly a thousand years now.
In space, the principles remain the same but the implications are far deadlier.
The lack of atmospheric friction allows for high speed projectiles to be fired
by magnetic acceleration. Currently, space-based cannons use cylinders of
heavy elements, covered in a superconductive shell and fired from a fairly
simple magnetic accelerator known as a mass driver. Speeds of almost 10,000
meters per second are possible, and there are plans for larger ship’s guns that
could fire much larger projectiles. Currently, fighters carry small rapid-fire
mass drivers in a multiple rotating barrel configuration.
Another weapon discipline was born in our exploration of space, and is based
on the focused direction of high-energy particles. These Ion Beam weapons,
as they have come to be known, are currently based on the principle of firing
streams of positive ions from a particle accelerator. These weapons are
capable of delivering incredible levels of energy to a small area.
Unfortunately, the prohibitive energy cost of creating large beams at long
range means that our current powerplant technologies are inadequate for
fielding these systems. In fact, beam weapons may be so massive that entire
ships may have to be built around the weapon itself.
Currently, the ranges and velocities of space combat have made missile
technology completely inadequate to the task of delivering explosive payloads.
While there are no foreseeable plans for missile-based weaponry, a recent
projection analysis has revealed the possibility of a quantum leap in missile
speed and intelligence, which would make them viable weapons again.
14
Page 16
homeworld
page
Armor and Defensive systems:
Survival in space through the preservation of pressurized crew areas, is the
highest priority of ship designers. Whether considering theoretical enemy
action or disastrous encounters with natural phenomena, ship hulls are
designed to survive, with multiple layers of redundancy to compensate for a
variety of effects. Presently, combat vessels are equipped with an initial
ablative layer designed to vaporize instantly at the point of contact with either
kinetic or beam weapons. The high-speed cloud of vapor serves to either
deflect the rest of an armor piercing round, or cause interference with a
particle beam and dissipate its power. Beneath this ablative layer is a thin,
power absorbing layer. And finally, the last layer protecting a ship is a thick
Crystal polymer composite, interwoven with advanced ceramics. This armor
is the strongest material we have yet developed, but it is capable of flexing
under extreme impacts. Cockpits
are double layered with this
kinetic armor.
Short of the fantasy of an allpowerful energy shield, this
combined kinetic/beam defense
gives our ships the greatest chance
of surviving damage, while
maintaining a manageable massto-thrust ratio.
15
Fig 1.11:
Early mass-drives were cumbersome,
inefficient and unreliable. Designers
continued to refine super-ballistics
until compact and powerful
weapons were available for the
Mothership and it’s accompanying
vessels.
Fig. 1.10:
Frigate Class ships will be heavily
armored. The darker composite
sub-skin can be seen beneath the
ceramic surface armor.
Page 17

page
technical + historical brief
The mission facing the crew of the Mothership is profound. It is nothing less
than the quest for the origins of an entire people. Our mission is now
irrevocable. It has become clear through the past 120 years of driven
industrial and technological expansion that Kharak can no longer sustain us.
While always harsh and unforgiving, our technological development has
stripped the planet of what few vital resources it contained, and the narrow
bands of temperate climate at the poles have been slowly shrinking. In order
to survive as a people we must leave Kharak.
While the Guidestone map is crude, it does allow us to make certain
assumptions and correlate them with our knowledge of galactic cartography.
Galactic Co-ordinates:
Kharak is situated on the outer edge of our Spiral galaxy, along a secondary
arm populated mainly by stars in the early to mid stages of the main
sequence. While our galaxy’s core is obscured by dark interstellar dust clouds,
our position allows for clear study of neighboring galaxies. From these
studies we can infer the structure of our own. From what we can observe, our
galaxy is a standard spiral type A, with a pair of stellar arms radiating out in a
curved fashion from a central hub. This galactic core is the home to an ultramassive black hole.
The Guidestone map seems to indicate that the Homeworld lies in the
resource-rich inner galactic sphere, where the star systems are older and
closer together. If there are other species of sentient star-faring life out in the
greater galactic neighborhood, then it follows that our odds of encountering
them will climb as we approach the central hub. This should be taken into
strategic account.
Guidestone Origins:
While the map gives a crude indication that we seek a star system on the edge
of the galactic hub, the inner sphere is so massive and dense that we must
look to the makeup of the stone itself for clues to narrow down our search to
realistic proportions.
The black stone seems bear the unmistakable characteristics of being formed
in a vacuum. Most theorists think this indicates that it may be an artifact of
a moon, instead of a planet. Analysis of its atomic structure indicates a rock
16
mission priorities
the
guidestone in relation
to galactic structures
Page 18
homeworld
page
formed by slow accumulation of layers; some of these layers are composed of
high-energy isotopes, which could only have been created with bombardment
by extremely high-energy photons. These are produced only in the most
violent of galactic phenomena. In observing other galaxies, we have noted
periodic flarings of high-energy particles generated when the central galactic
black hole swallows a particularly massive star. If we apply this knowledge to
our own galaxy, we can roughly calculate the distance of the Homeworld
system from the galactic core based on isotope density per layer in the
Guidestone. This calculation, combined with the map itself and the vector
provided, should narrow the search to less than 350 star systems once we
arrive in the general area indicated.
The Command staff will be responsible for the priority functions of the
Mothership and her auxiliaries. Local commanders will handle
the execution of said orders. Command will assign formation, destination and
even targeting priority to a squadron. Individual pilots will determine attack
and evasion maneuvers independently. Strike Craft will notify Command of
fuel-critical situations but will not refuel on their own discretion unless
ordered.
Given the possibility of encountering space-faring races, the Mothership will
carry a diplomatic cadre prepared to deploy automatically in any peaceful firstcontact situation. They will report back their findings and opinions to Fleet
Intelligence, who will in turn make their recommendation. Command staff
may have to make the choice between war and peace.
Fig. 1.12:
Kharak’s position in the outer
spiral arm of the galaxy can be
seen encircled at left in this
celestial navigation chart.
The horizontal line indicates
the projected heading of the
Mothership as it moves towards
the galactic core.
17
command priorities
Page 19

page
technical + historical brief
Command also will be required to order new auxiliary vessels to be
constructed and will be expected to monitor resource levels aboard the
Mothership, assigning resource collectors to priority targets if necessary. The
Automated systems in the Fleet Foundry will attempt to devote equal
amounts of resources to whatever production assignments are queued up but
will halt all construction across the board should resources be depleted.
Command may cancel projects in order to concentrate resources or simply
wait for re-supply as the Foundry will automatically restart when raw
materials are made available.
And finally, while scientists will be in control of their own departments and
research vessels, it is Command that will designate overall research goals for
each team as well as an overall research strategy. Command will also be able
to link multiple research teams together in order to concentrate resources on
a single goal, theoretically reducing the time required to make a
breakthrough and integrate the technology into our infrastructure.
Decades of effort and the entire economic and industrial output of our planet
have been dedicated to this mission. Mounting this fleet has stripped our
planet of essential materials and drained our energy reserves. Those of us who
will remain behind will suffer many hardships, but so long as our people have
a fighting chance of returning home, our sacrifices will not have been in vain.
Good luck.
18
Page 20

clan histories
Page 21

homeworld
page
Society on Kharak is organized along loose family associations, many of which
now include hundreds of thousands of members. An extended family
grouping is called a kiith (plural: kiithid), and most archaeologists agree it is
a social artifact that dates back before our arrival on Kharak itself.
Interpretation of ancient legends and translations of texts found in the ruins
of Khar-Toba suggest that our ancestors’ journey to this world was arduous
enough to break down all social structures except the most basic family
bonds. When the power plant at Khar-Toba failed, refugees in all probability
fled in small groups of friends and relatives. Harsh conditions and the passage
of hundreds of years hardened what was originally a practical system, taking
care of your own loved ones first, into a ritualized system of alliances and
loyalties we have come to know as the kiith system.
A kiith has a loose hierarchy based on one’s social position within the family.
Originally this was based primarily on seniority, but as technology has
changed the face of life on Kharak, the kiithid too have changed, and now
family ranking is based more on wealth or personal influence than age.
Organization within the kiith is recursive in nature and models that of a core
family unit. Where a single family has a primary leader, a secondary and then
a group of dependents, the next level of kiith organization is based on the
same system -- there is a primary family who makes policy decisions, a
secondary family which hears disputes and makes recommendations, and a
number of families of lesser power that have sworn allegiance to the primary.
The primary family within a kiith is called the kiith-sa.
This structure is not static by any means and, while it is not a trivial matter,
families are free to change their primary allegiances as they see fit. A family’s
position within the kiith rises and falls with how many swear allegiance to
them. Although it is much rarer, from time to time a family will move from
one kiith to another or even feel the need to become their own full kiith.
In ancient times, a kiith-sa could direct all within the kiith to war, demand
families dedicate time and finances to special projects, or even move the Kiith
to another region. In modern times, the kiith-sa is a political and financial
leader only in that it acts on the wishes of the entire kiith as established by
referendums. The kiith-sa from all over Kharak meet in the Great Daiamid
located in the capital of Tiir, to debate global policy and resolve legal conflicts
between kiiths.
Traditionally, kiithid concentrate their power in one or two disciplines and
gather families under their banner by being the best place to find
the
kharakid social system
21
Page 22

page
technical + historical brief
advancement in a particular field. For example, Kiith Sjet has been associated
with the sciences on Kharak for over a thousand years and is known to have
the most advanced computer labs in the world. Bonded couples interested in
the field often apply to a Sjet family associated with such labs. Alliances
between kiith are also based on mutual interests, and they often lead to closer
ties or complete reorganizations. During the last century, when the
manufacturing families of Kiith Hraal realized that the future was in orbital
systems, they first tried to influence Sa Hraal to begin investing in aerospace
technologies. When this gambit failed, the entire manufacturing branch of
Kiith Hraal broke away and joined with a relatively small kiith that specialized
in space technologies. The new kiith, LiirHra, has gone on to take the lead
in the design and construction of the Mothership.
In the modern era, the kiithid have slowly transferred their power to the
individual, but it should be noted that it is still a powerful means of social
identity. Kharakid society pursues a single goal today, and our new sense of
racial destiny has reminded us that we are all families of one grand kiith.
Unfortunately for the unity of our people, tradition dies hard, and it takes
little stress for any Kharaki to think of family first and Kharak second.
Of all the kiithid, none has lost more
throughout the centuries than Kiith
Gaalsien. The Gaalsien line is ancient and
some of the oldest documents on Kharad
bear their sigil. While there is some debate
about their specific origin in the collapse of
Khar-Toba, it is clear that by the time
civilization once again rose on Kharak, the
Gaalsieni were already a spiritual and
political force to be reckoned with.
Historically, while minor cults have come and gone, the majority of Kharaki
have always believed in the Great Maker Sajuuk, whose Hand Shapes What Is.
The majority of religious sects differ not over whether Sajuuk exists, but in
what His nature may be, and His reasons for bringing us to Kharak. The
majority view until the Time of Reason was some variation on the theme of
punishment; the logic being that no just God would leave His people on such
an inhospitable world if they had not done something to earn this fate. Many
vital survival tactics, such as conservation of resources and not risking the
future of the kiith on untried methods, were reinforced by dogma in ancient
22
kiith gaalsien
Page 23

homeworld
page
Kharak - undesirable acts were always described in terms of punishable
arrogance. These beliefs helped keep our people alive during the great trek
from the central deserts, but once in the temperature polar regions, the same
beliefs held back useful innovations that the more hospitable environment
made possible. Generally, how wrathful one believed Sajuuk to be tended to
dictate how wary one was of cultural and technological advances.
Of the three major religious kiithid, Gaalsien, Ferriil, and Somtaaw, it was
Gaalsien that preached the strongest message of punishment. The dogma of
righteous suffering and humility held that Sajuuk had cast our people down
to Kharak from some celestial paradise to pay for our arrogance. Gaalsien
theologians preached that to deviate from the most accepted and ritualized
survival methods was to actually extend the period of time before our people
would be lifted back up to heaven. In the early days, this strict dogma paid
off and allowed Kiith Gaalsien to survive and prosper during various
ecological disasters during the period between 75-250. Once this turbulent
time passed and people penetrated further into the temperate polar region,
more innovative kiithid regained their power and Gaalsien power began to
fade somewhat. Many archaeologists believe that Kiith Gaalsien deliberately
started the Heresy Wars as an attempt to bring all the lesser kiithid back under
its power during the resulting chaos.
Fortunately for the technically inclined among us, it was Kiith Naabal which
emerged victorious from the Heresy Wars, and the dogma of penance and
repression begin to fade from the hearts and minds of Kharaki. Despite this,
the Gaalsien, power shattered forever after nearly 300 years of war, became
even more extreme in their religious beliefs -- as if to compensate for the rest
of the sinful planet. By the time the Time of Reason was at its height in 710,
the Gaalsien were down to less than 30 vassal families, and only the great
desert temple city of Saju-ka remained under its power. Perhaps it was the
sense that history had passed them by, or simply a desire to commit an act of
sacrifice strong enough to regain the favor of Sajuuk Himself, but in the year
717, the kiith-sa of the Gaalsien performed an act that has lived in infamy
ever since.
At the time, Saju-ka was the artistic gem of Kharak. In its great temples and
halls were most of the great works commissioned in the name of the God
Sajuuk, and in its libraries were the collected works of our people, gathered
before His eyes so that He could see them and judge us worthy. Though
Saju-ka had been built in the first hospitable valley found in the north, time
had allowed the deserts to crawl ever northward themselves, and by the 700s,
sand would have completely swallowed Saju-ka if not for the complex series
of wind baffles, dikes and sand paths designed by the great Engineer Gar
23
Page 24
page
technical + historical brief
Naabal. One night, during the height of the spring winds, Saju-ka was lost
to our people. In a single act of divine madness, Miirpat Gaalsien-Sa ordered
his people to blow up the entire system that held back the sand. The light
from the hundreds of explosions was still visible when the hungry sands began
pouring down the streets of Saju-ka. Within two days the city was completely
buried, and thousands died in the mass evacuation.
The whole of Kiith Gaalsien was convicted in absentia by the Daiamid in Tiir
and deemed an outlaw kiith, but this punishment had very little effect on the
Gaalsien, as they slipped away into the wastes during that terrible night,
abandoning the progress they saw as a decadence that would eventually bring
down the wrath of God.
Since then, K iith Gaalsien has wandered the great central deserts, surviving
by the skills and rituals they held so dear. Occasionally they will make
themselves known by raiding scientific communities or stations in the wastes
and leaving massive theological documents proclaiming how close we are to
the end. Military expeditions to track them down once and for all have always
failed, and a certain mythology has grown up around them -- as if there is a
nagging suspicion in the minds of modern Khiraki that the only way Kiith
Gaalsien could have survived is if they really did have the grace of Sajuuk.
Some say that they have even found His lost city under the sands, and Sajuka once again echoes with mumbled prayers, and offerings made in the
darkness.
Certain acts of sabotage during the construction of the Mothership seemed to
be Gaalsien-inspired, and it’s likely that even today there are families secretly
aligned with the ancient religious kiith.
Prior to the year 462, Kiith Paktu was a
minor farming kiith, living on the slopes
above the Salt Sea. On the year their most
famous leader, Majiir Paktu, was born, the
long rift between the religious leaders of
Kiith Siid and Kiith Gaalsi, which were
then the most powerful kiithid of the
north, finally became an unbridgeable
divide. In 462, the famous Siidim Council
announced a new Dogma - - the traditional
Siidim cosmology, which once held that all
24
kiith paktu
Page 25

homeworld
page
kiithid on Kharak were exiled from a heavenly paradise, was abandoned. The
truth, according to the proclamation of 462, was that only the Siidim were of
divine origin - - all other kiiths were native to Kharak, and therefore inferior,
their blood tainted by corrupting sand.
In accordance with the new Dogma, many cruel pogroms were passed against
non-Siidim kiiths -- the people known as “Gritiidim,” or “sand people.” By
far the harshest of these measures was the Clean Water Act, which forbade
non-Siidim kiithid from living at the headwaters of a river or stream, lest they
foul the water which Siidim downstream would have to drink. Hundreds of
families were displaced by Siidim temple men, turned out of their ancestral
homes and made to march downstream, carrying as much of their former lives
with them as they could. In 488, Kiith Paktu joined the ranks of the
dispossessed.
At the same time, the temples of the neighboring Kiith Gaalsi had become
obsessed with sins of pride and by the redemption of Kharak through
suffering. The Siidim made obvious targets for the sermons of Gaalsi holy
men: for every Siidim sin of pride, they said, a more brutal and excruciating
expiation was demanded by the gods of Kharak. Lesser kiiths of the north,
already suffering under the weight of Siidim oppression, often were willing to
join their holdings to the Gaalsi rather than see them taken by the Siidim;
many welcomed Gaalsien soldiers and temple men into their holdfasts, only
to find themselves held at swordpoint and made to watch as their “sinful”
books and belongings were burned to appease the gods. Heavy tributes of
both food and fodder were demanded by Gaalsien armies, and appalling
sacrifices were sometimes demanded by Gaalsien priests, who saw no reason
why the pure of heart should suffer alone.
Clashes between Siidim and Gaalsien holdings intensified over time, and even
remote kiithid were forced to choose sides; both great kiithid were too
powerful for any smaller kiith to challenge on its own. Caught between the
proverbial rock and a hard place, the Gritiidim were finally ready to try
the unthinkable: crossing the Great Banded Desert to the south, looking for
new land.
By this time Majiir Paktu had become head of the Paktu kiith-sa. Although
the First Migration may not have been entirely his idea, it’s certain that the
fate of all the people of Kiith Paktu was in his hands. It is difficult for us to
imagine today what he must have felt as his people built the first great sailers
at the edge of the desert. Although many Kharakii believed there might be
arable land at the southern pole, no one had ever attempted to cross the
Great Banded and returned to tell the tale. The only confirmation of a land
25
Page 26

page
technical + historical brief
south of the desert came from mad Mannanii travelers, rambling about
endless seas and “grasses that touched the sky.”
The Migration offered slim hope at best, so slim that no Kharakian dared to
risk it until there was no other hope at all.
The rest, as they say, is history. Nearly 50 kiithid set out from the plain at
Albegiido in 490 and sailed into the Great Banded Desert, sweeping over the
burning sands on the winds of the seasonal storm, the Chak m’Hot. By the
time the men, women and children of the First Migration reached the shore
of the Hunon Mountains, only 17 families were left, and all of them had lost
weaker members on the journey. Still more died as they struggled over the
Hunon; without anyone to guide them to the easiest pass, they lost many to
poisonous water, rockfalls, thirst and lizard-bite.
As the story goes, many of the Firsters fell into despair among the burning
red canyons of the Hunon and did not want to go on. Depite whether he had
been the leader from the beginning of the Migration, Majiir Paktu was
definitely the leader on that day. He stood at the head of the column and
pleaded with the people to continue. “I can smell the sea,” he said. “It’s only
a little farther.”
The people did not believe him, and more than a few turned to start the hard
trek back to their sand-sailers, still docked at the desert shore. But as legend
has it, at that moment a bird appeared in the cloudless sky above them -- a
sea-spirit, circling against the hot sun.
The kiithid of the First Migration followed the sea-spirit and Majiir Paktu
through the mountains, and when they stood on the last red hilltop, they
were looking down at the rolling breakers of a great grey sea. Straight away,
that expanse of water was named the Majiirian Sea, after the man who
brought them there.
The people of the First Migration settled on the shores of the Majiirian, and
were presumed dead by many in the North for the almost two years it took to
build up their homes and holdings. In the spring of the third year, however,
Majiir Paktu and a group of picked volunteers attempted another crossing of
the Great Banded Desert to take back word of the new land to the North,
where so many still lived in a nightmare of war and oppression.
Majiir Paktu did not survive the return, but seven of his followers did. These
seven Paktu kiithsmen passed through the northlands on foot, taking word of
the new land with them everywhere they went. Once that word spread, there
26
Page 27

homeworld
page
was no stopping it. Dozens of families built sandsailers on the famous plain
of Albegiido every year, trying to escape the Heresy Wars and the madness of
their Siidim and Gaalsi masters.
Alas, Siidim and Gaalsi were not quite finished with the people who escaped
their tyranny. Although they ignored the Migrations for many years, both
Siidim and Gaalsi lost many hectares of holdings to the war. By 650 it
occurred to both of the great northern kiithid that many of those who fled to
the south were still considered their vassal clans and by treaty still owed them
lands and tribute.
There were at least three major attempts to assault the southern lands from
652-700. The last of these was the most successful; the army of Liam Gaalsi
actually arrived at the pass of the Hunon mountains almost intact in the
spring of 698, ready to subdue the unruly kiithid of the southlands and their
kiith-sa.
On that day, Kim Paktu, the grandson of Majiir Paktu and leader of the Paktu
kiith-sa, arrayed an army of 30,000 swords on the shore of the Majiirian.
Every one of them wore the colors of Kiith Paktu, and every standard bearer
carried its flag.
“These are my people,” Kim Paktu said. “And this land is ours. You have no
vassals here.”
Badly outnumbered and facing a fresh and well-supplied army, Liam Gaalsi
nonetheless led his troops into battle. Very few of the Gaalsi who followed
him that day escaped with their lives. Although they killed hundreds of Paktu,
the southern kiith-sa eventually prevailed, and no such crusade ever was
attempted again.
To this day, the Paktu are still the kiith-sa of all southern kiithid, even those
that are not closely related to them by blood. The flag of the Paktu is white,
the color of the sandsails which carried its people across the Banded Desert,
emblazoned with a sun stained red by the blood of those who died in search
of -- or in defense of -- freedom. Silhouetted against that sun is the shape of
the sea-spirit, an eternal symbol of hope and faith.
Paktu believe fiercely in independence and despise priests and dictators. Its
people are optimistic, innovative, and venturesome -- when things are darkest,
someone will almost always repeat the kiith’s motto: “I can smell the sea.”
27
Page 28
page
technical + historical brief
In Kharakid society, the majority of
citizens are secure in their kiith ties.
Within the immediate family and within
the larger circle of more distant blood
relationships, not to mention our
professional associations and alliances,
most of us are bound at many levels. If we
should ever have a falling-out with one
kiith-sa, we belong to many other kiithid
by marriage and inclination and could
change our alliances at any time.
This was not always the case. Prior to the emergence of the southern
federation and the Naabel intervention, very few Kharakians had ties outside
their own kiith, and if they did, they were ties of dominance and submissionone kiith was made vassal to another and owed tribute to its masters, in return
for which it was given the protection of the larger kiith’s army and the benefit
of trade with the larger kiith’s holdings.
In all of this, however, there was no provision made for those who were
without kiith. Unthinkable as this state may seem to us today, it can still bring
a shudder to the modern Kharakian to consider the fate of a kiithless man or
woman during those times. Banishment from the kiith was effectively a death
sentence at any time prior to the year 416, when Kiith Soban was born.
The origins of Kiith Soban, the “Grey Brotherhood,” are somewhat hazy. It
appears that two vassal kiithid, which held lands along the second sea, were
invaded by the temple men of a strong neighboring kiith. The vassals fought
back furiously, defending their homes with desperate strength, and succeeded
in killing a few of the raiding kiith. In revenge, the invaders punished the
survivors brutally, although they had already surrendered. Many of the basic
taboos of Kharakian society were violated; all the children of the farmers were
murdered as well as the leader, man or woman, of every family. Those that
remained were driven from their holdings, and fled across the Sparkling
Desert to carry the news of these atrocities to their kiith-sa.
The leader of this group was Soban, later known as Soban the Red. When he
knelt before his sa, he recounted the horrors that the neighboring kiith had
committed against his people and demanded vengeance. He offered to
personally lead the army that would ravage the invaders and teach them the
28
the kiith soban,
“the kiith of spirit”
Page 29

homeworld
page
error of their ways, and waited for the men and women of his kiith-sa to join
him in a rush across the Sparkling Desert.
Unfortunately, this support was never to come. Soban’s kiith-sa, afraid of the
possible repercussion or perhaps simply realizing the kiith was not strong
enough to prevail against a larger and stronger kiith, refused to attack the
reavers. Instead, members of the smaller kiith became vassals to the larger,
joining their blood to the blood of the murderers.
When he heard of this, Soban tore the colors of his kiith from his body in
shame. His followers did the same, and in doing so they abandoned their
kiith completely -- an unheard-of gesture at the time, especially coming as it
did from landless men and women. According to legend, Soban then declared
the word “kiith” was meaningless when any kiith-sa could turn a deaf ear to
the blood of children crying from the ground. He vowed that he would never
belong to any false kiith again -- the only kiith which deserved the word was
the kiith of spirit, the brotherhood of like mind and shared ambitions.
All the followers of Soban took a new color: a deep and vivid red, the color
of blood flowing from the heart. Although they could not have been many,
their first act as a kiith was a successful attack on the holdings which had once
been their homes. When they left their old farms behind, not a blade of grass
was left green nor one stone standing on top of another -- everything was
razed and every invader killed in ways that gave Kiith Soban a bloody
reputation for years to come.
Kiith Soban became a martial kiith from then on, and as years passed, a
peculiar set of rituals developed among them. Although many other warrior
kiithid existed at the time, those kiithid were standard in their aims and
organization; they were martial to the extent that they desired the property
and possessions of their weaker neighbors. Only the Soban were completely
landless and existed purely as mercenaries.
The Sobanii mercenary is a curious feature of Kharakian history. For
centuries, Sobanii took part in every military conflict on the planet, and their
skills as soldiers and commanders were highly prized. When the services of
any given Soban were bought, he or she would dress in the colors of the new
kiith and fight in the service of that kiith, regardless of personal risk or cost.
When the term of service was over -- down to the hour and minute -- Soban
mercenaries would put down their arms, remove their adopted colors, and
return to their own kiith. If the end came during the middle of a battle or a
thousand miles from home, they would still go; contracts for their services
could not be renewed on the scene, and only through their kiith-sa.
29
Page 30

page
technical + historical brief
To this day, the Sobanii are completely devoid of standard family groupings.
No “marriage,” as such, is permitted among their ranks; and although male
and female Sobanii are permitted to form whatever alliances they might want,
there is no such thing as a Sobanii child. Children born to the Soban are left
as foundlings with other kiiths or their parents are made to leave Kiith Soban
to raise them.
Despite the fact there has not been a major war on Kharak for 200 years, the
skills of Kiith Soban are still valuable, and they never lack for money and
influence. Sobanii are often preferred when influential kiithid like the Naabel
need intelligence officers or security officers, and virtually all modern-day
admirals and generals are trained at Soban-run military academies, which are
now open to the public -- one can pay for the training and discipline that was
once available only to life-long Sobanii.
A current of true Sobanism still exists in our society and always will as long as
some men and women continue to reject the status quo. Some Kharaki still
join Kiith Soban of their own free will, renouncing all other kiith ties and
associations; others are forced to join when driven from other kiiths for
violating their taboos. Before “taking the red,” as it is called, a prospective
Sobanii must repeat the ritual which Soban performed centuries ago; all other
kiith colors must be forcibly ripped from the body, a powerful gesture of
negation. To some it represents the ultimate rebellion, to some the only
salvation, but Kiith Soban imposes the same discipline and solidarity on them
all -- for which Kharakian society may well thank them.
Kiith Sjet is something of an oddity
among the power structures of the
kiithid. While they are an ancient and
respected kiith whose expertise has been
courted by kiithid-sa across Kharak, they
have never parlayed this influence into
any real political power. Kiith Sjet is, in
fact, one of the only kiith to have a
validated claim to direct kiith descent
from the ancient first city of Khar-Toba.
Translations of the words and calculations
found on the wall of the TempleObservatory where the Guidestone was
30
kiith sjet
Page 31

homeworld
page
found make several mentions of a group of astronomical philosophers with
the family name of Sjet. Even the Sjet sigil, a series of embedded circles
representing the celestial spheres, can be found etched in the temple doors.
It is now an accepted fact that Kiith Sjet once was responsible for the
preservation of the Guidestone and constructed the Temple-Observatory to
protect it and scan the heavens. And therein lies the true power of Kiith Sjet -its undying desire to question, observe, predict and record.
In ancient times they were the first to plot the path of the planets in the
Kharakid system and derive a calendar from them. They were the first to
discover the 13-year progressive cycle of sandstorms that tear around the
equator of this world and predict where the rains that follow the end of every
cycle would fall. Most of the impartial histories of the Heresy Wars and the
resulting reformation were penned by Sjet scribes, who recorded it along with
their observations of top-soil destruction and the slow crawl of the sands
northward.
During periods of upheaval, Kiith Sjet have always been too valuable as allies
and advisors to be turned into vassals. Any kiith who killed or attempted to
interrogate a Sjet was shunned by the Science philosophers for a period no
shorter than 100 years, and in order to keep their knowledge from being
corrupted, any kiith who wished to become Sjet swore an oath directly to the
Sjet-Sa and had to serve faithfully for two generations before being instructed
in the sacred wisdoms. The closest thing to a scandal that has ever shaken
the Sjet Kiith occurred during the Time of Reason, when it came to light that
during the Heresy Wars certain Sjet vassals had actually lived under a secret
secondary oath to Kiith Naabal. These secret Naabali used their positions of
Sjet immunity to move through the various warring factions and carry out
missions of retrieval and intelligence-gathering. When this truth was revealed,
the sense of outrage was strong, but Fliir Sjet-Sa realized the extremity of the
situation may have justified the betrayal. Even though she was able to bring
enough of her kiith over to this line of reasoning to avoid sanctions or exile
for the families involved, there is still a lingering thread of mistrust between
some Sjetti and Kiith Naabal to this very day, and the debate over the use of
Science as Power is still a passionate one.
As the Time of Reason progressed, Kiith Sjet expanded their studies and
moved away from the tradition of celestial mechanics and mathematics.
Various families began to delve into the nature and origin of life on Kharak.
Within a century, Kriil Sjet presented a paper to the Daiamid in Tiir
presenting the scientific evidence that we bore little biological similarity to
the vast majority of Kharakid life. This scientific proof of the religious tenet
of Exile shook Kharakid society but established once and for all that Kiith Sjet
31
Page 32
page
technical + historical brief
served the truth, however disturbing that might be.
With the advent of the Mothership project, Kiith Sjet finally found a goal
wherein pure science could be applied without the danger of corruption. This
belief was strong enough for Sjet to overcome its distrust of Kiith Nabaal and
join their theories to Naabali applied sciences. Sjet supercomputers have
worked out the theoretical quantum waveforms of the hyper drive module.
Sjet bio labs help perfect the cryogenic process which will allow us to colonize
the stars. And it was a Sjet who came to the conclusion that the Mothership
could never function without a radical redesign of the command core.
Karan Sjet, the only daughter of Huur Sjet-Sa and in direct line for the
leadership of all Kiith Sjet, was a neuroscientist in charge of the research
division that was designing the command and control systems in the
Mothership. Many other researchers would have balked at having to tell an
entire world that its dream was impossible, but Karan was true to the spirit of
her Kiith, and broke not only the news to the Daiamid, but also suggested a
terrifying solution. Again, as a Sjet, she rejected fear in the face of the truth
and demanded that her own system, using a living being as the command core
for the Mothership, be applied to herself.
As our people are on the brink of a new voyage of discovery, it is only fitting
that a Sjet is at the frontier, helping us satisfy our desire to know the truth
and face down the terrors of the unknown, no matter what the cost.
Not much is known about Kiith Naabal
prior to their dramatic emergence at the
end of the Heresy Wars. There are a few
scattered mentions of them in the records
of the major kiithid of the first epoch, but
the name Naabal arises only in terms of
tradesmen or heretics. Kiith Gaalsien
were particularly vehement in the
persecution of families under the Naabal
flag, and there is some evidence that it
was Gaalsien persecution which drove
Naabal to their hidden valley refuge, blasted into the edge of Kharak’s tiny
northern ice cap. Based on the fact that the Naabal crest, a Kharaki
silhouetted against a background of tiny circles and stripes, loosely resembles
symbols found etched into panels on the wreck at Khar-Toba, some
32
kiith naabal
Page 33

homeworld
page
archaeologists have put forth the theory that the Naabal are actually direct
descendants from some sort of engineering core that ran the ship that
brought us here. While the theory is convenient in terms of linking the
unknown past with the present age of exploration, the evidence is just too
circumstantial for most scholars to give it much weight.
Kiith Naabal itself seems uninterested in clearing up the distant past, and the
hard facts only begin to appear in the years directly before the Naabal
intervention, when the kiith moved to end the Heresy Wars and establish the
Daiamid. In those three centuries of chaos, Kiith Nabaal had almost
completely cut off contact with the rest of Kharak. Traders or refugees who
accidentally stumbled into the valley were welcomed with open arms and
given a place to make their lives anew. There is no record of any rejecting this
offer, so we are not quite sure what the alternative might have been…. Small
parties, always made up of families with direct fealty to the kiith-sa, were sent
out occasionally to bring back texts that were in danger of destruction, usually
because the cities that held them were being constantly sacked. Sometimes
these parties would even spirit away scholars imprisoned for heresy. It wasn’t
until Ifriit Naabal-Sa came to head the secretive Kiith that a less isolated
philosophy began to take hold. Ifriit realized the wars were dangerously
close to destroying the last of the infrastructure that kept the bulk of the
Kharaki people alive. Fields were being burned, dams demolished and sand
traps torn down simply to deprive the enemy of valuable resources. Under
such an onslaught, the days of civilization on Kharak were numbered.
Though declared pacifists, much of the knowledge discovered and hoarded by
Kiith Naabal had direct military application and so, when Ifriit Naabal-Sa
finally proposed intervention to his people, it took only a few years for a
military force to be assembled. The Naabal had been keeping the secrets of
explosives, steam and refining for more than a hundred years, and when they
rose, they swept out of their hidden city of Tiir like the gleaming servants of
Jaakul himself. Steam-powered vehicles towed cannons to bring down the
walls of despotic kiith, while handfuls of soldiers carrying repeater rifles and
wearing hardened armor moved to route marauding armies 20 times their
size. Ifriit Naabal-Sa spoke at every holding, village and city his army
liberated, and offered those people all the fruits of Naabal science and
technology if they would but lay down their arms and end the pointless
destruction. Unlike the major powers in the Heresy Wars, Naabal-Sa did not
demand renunciation of former kiith ties; all he asked for was an ending. The
lesser kiithid, brutalized by nearly 300 years of war, gratefully accepted his
terms, and soon the Naabal army had grown fifty-fold with kiithid whose only
desire was to end the Heresy Wars any way they could.
33
Page 34

page
technical + historical brief
And in three short years they had done it. Ifriit Naabal-Sa’s last act before
stepping down as Sa was to establish the Daiamid in Tiir as a place where all
kiith, powerful and weak, could gather to resolves disputes and set policy for
all of Kharak.
In the decades to follow, Naabal rebuilt the damaged infrastructure of Kharak
and improved upon it with their no-longer-secret construction and
metallurgical techniques. Any minor kiithid were accepted into Naabal if they
simply wanted to learn new crafts and trades. These same kiithid were then
allowed to go their own way if they chose, and many of the major industrial
kiith of the modern world began under Naabal’s wing. By the Time of Reason
200 years later, Kiith Naabal had replaced the perilous sand-sail routes to the
south with rail mounted steam cars, and had given Kiith Paktu-Sa of the
southern polar region a permanent presence in the Daiamid.
Kiith Naabal seemed content to fade slowly into history for many years, but
the discovery of Khar-Toba seemed to change all that. From that point on,
Naabal formed permanent alliances with both the Sjet and Saban kiith, and
began to influence first the excavation of Khar-Toba and then the exploitation
of technologies discovered there. Again, the Naabal-Sa have been careful to
spread the wealth and knowledge, but remaqin adamant about driving
forward with the Mothership project and returning to our ancient
Homeworld.
While the Mothership has neared completion over the past five years, Kiith
Naabal has once again begun retreating behind the scenes both politically and
industrially. Financial analysts have noted heavy Naabal investment in offKharak facilities, especially in the asteroid belt, and in proposed research
facilities on the moons of the Gas Giant Haarsuk. Others have noted the
slightly higher ratio of Naabal kiithlings among the cold-sleep volunteers
waiting to be loaded onto the Mothership at the conclusion of her trials.
Most analysts agree this is another sign of Kiith Nabaal’s desire to be part of
whatever future our people will find among the stars.
Perhaps the strangest of all Kharakid
kiithid is the Manaan, or “the
Travelers.” Although the blood bonds
between Manaani are not strong -- they
range greatly in physical appearance and
kiith traditions -- they are nevertheless
34
the
kiith manaan
Page 35

homeworld
page
all considered one family, especially by outsiders, who for centuries viewed
these nomads as a dire threat to decency and morals, to unprotected
holdings, and to the virtue of young men and women from good families.
The antipathy toward Manaani is simple enough to explain. During a time
when the majority of Kharakians were hard-working farmers, clinging to life
with teeth and fingernails, the Manaani maintained a traditional nomadic
existence. They traveled from place to place, stopping at watering places to
rest; if the water was surrounded by a hold, the Manaani expected hospitality.
Although they were rarely hostile toward farmers and city dwellers, they
resisted any attempts to settle or civilize their kiith. Driven by a hunger for
new experiences and a restlessness few other Kharakians could understand, the
Manaani could never stay in one place for long—they simply picked up stakes
and moved on into the wastes again, leaving the security (and the hard work)
of house and hold behind them.
The earliest historical mention of “Manaani wanderers” comes from the year
340, when holdings along the shore of the White Desert complained that
their farms had been raided by the Travelers. According to the report they
sent to their kiith-sa, the White Desert holders had recently closed their gates
to a wandering kiith, refusing them permission to make camp by the
waterside. Although the Manaani went away peacefully at the time, they
returned by night and came over the wall “by the hundreds”, overwhelming
the resistance of the surprised holders. In the end, the Manaani were accused
of stealing nearly a ton of food and many hundred man-weights of water -which was, coincidentally, just a bit more than the tribute which was owed
by the White Desert holders to their kiith-sa that year.
The tale of the White Desert holders was dubious for many reasons, although
it was widely believed by landed Kharakii at the time and for many centuries
to follow. The report that Manaani came over the wall of a sand-dike “by the
hundreds” is absurd, given the fact that traditional Manaani never traveled in
groups larger than an extended family and in such a group, there would have
been a dozen able-bodied men at most. To find Manaani “by the hundreds,”
one would have had to seek them out at a Gathering, their yearly meeting on
the sands of Ferin Sha (“The Dancing Ground”). Not only was Ferin Sha
nearly 200 miles from the White Desert, but focus at such a Gathering would
be celebration and drinking, not killing and looting. Fighting of any kind was
forbidden at Ferin Sha -- to profane sacred ground with spilled blood was the
greatest Manaani taboo.
Is this to say there was no basis for Kiith Manaan’s early reputation as thieves?
Unfortunately, no. If the majority of Manaani were innocent of raiding, there
35
Page 36

page
technical + historical brief
were still some who undoubtedly traveled in greater strength and might have
been capable of carrying off a few water barrels. The majority of travelers
were probably guilty of a little judicious pilfering from time to time, even if
it was only picking a pocket or picking fruit in the night. The real question
is not whether the Manaani were really thieves, but why, if they were widely
believed to be thieves, would the majority of holdings open their gates to
Manaani visitors? An answer of one word will suffice: entertainment.
The Manaani were always traders, but prior to the Great Migration they could
never compete with the legitimate trade routes among the northern holdings - at least when it came to transporting mundane cargoes. In order to survive,
a kiith of travelers needed to bring their would-be hosts something they could
not get cheaper or more routinely somewhere else. In some cases, Manaani
would carry rare drugs or medicines that could be found only in remote
places, or traffic in taboo items, but since their caravans were often searched
before being allowed to enter a holding, the Manaani would more often carry
a less tangible but even more valuable freight: music, laughter, and spectacle,
a break from the hard and unending work of a desert farmer’s life. For many
years, Kiith Manaan survived by their wits and their ability to amuse holdborn Kharaki. Singers and poets, magicians, dancers, actors and con men -there was nothing to the rumor that Manaani could perform dark magic, but
they could certainly make your purse and your 15-year-old daughter disappear.
After the Great Migration began, life changed drastically for the Manaani.
Although they played no important role in the First Crossing, a small kiith of
travelers accompanied the Paktu in the sandsailers that left Albegiido in 490.
Most of them returned to the north in 497, bringing their three-masted ships
with them. The Manaani took to the new technology in droves and made
many improvements to the original design.
During the beginning of the Heresy Wars, Manaani still living in the north
suffered badly under the rule of Siidim and Gaalsi; their free-wheeling and
joyous attitude was anathema to both of the great kiith, and one of the few
points of doctrine that both parties could agree on was that Manaani were
abominations before the eyes of Sajuuk. The last celebration at Ferin Sha was
held in 513; during which an army of Siddim attacked the Dancing Ground
and slaughtered the celebrants wholesale.
After the massacre at Ferin Sha, the majority of Kiith Manaan survivors took
to the sail and the sword. Manaani raiders, once largely a myth, became a
grim and terrible reality to Siddim holdings that bordered on the desert. No
one was safe from the pirate sailers, and the sight of a mast on the horizon
was an occasion of panic and terror. Within a hundred years, however, the
36
Page 37

homeworld
page
Manaani exhausted their appetite for bloodshed and began to use their ships
for more profitable ventures. When the great mother of their kiith-sa, Jora
Manaan, declared the war on the Siidim at an end in 656, the Manaani built
a new Dancing Ground in the Paktu-held south and turned their fleet
completely to trade.
The questing spirit of the Manaani is not dead even today. Kiith Manaan still
controls enormous wealth, and of all the Kharakid kiithid it is the most likely
to produce a diplomat or a statesman. Manaani also are common in the ranks
of Scout pilots and are always eager to volunteer when it’s time to fly an
experimental craft. Being the first to see anything new and different is a
hunger that still burns deep in their blood.
(Fleet Admiral Paktu and Admiral Riif-Sa)
(Topic: Fleet Composition)
Adm. Riif-Sa:
If one looks at the combat data available, the answer to the question we are
discussing here today becomes obvious. Both Strike and Defensive fleets must
be composed mainly of Capital Ships, with Fighters serving only as escorts
and deep harassment forces. Only Capital Ships have the firepower and range
to do significant damage to an enemy force.
F. Adm Paktu:
While my colleague has a valid point, I believe his tactical doctrines are based
on ideal situations instead of the actual pressure situations a fleet will find
itself under. We all would like to command fleets of nothing but the best and
biggest, but the reality is that time and resources in combat often do not
allow the creation and maintenance of a large force of Capital Ships. And we
needn’t even bother to analyze the true costs of losing a single large vessel
when compared to the attrition a fighter squadron can suffer while still being
maintained at combat readiness. No, as much as I find the thought of
commanding multiple destroyers attractive, I have to favor the opposite fleet
strategy; that of large groups of massed Strike Craft anchored by a handful of
Capital Ships.
Adm. Riif-Sa:
Oh, no you don’t, Chiisur, I have seen you undermine by generalization since
we were just gnats learning to sail sand skimmers at the training crèche. I am
not talking about vague plans and mythical battles! I am talking about precise
37
excerpts from fleet tactical debate 7.12.1302
Page 38

page
technical + historical brief
deployment plans, with each Capital Ship escorted by six Interceptors or
three multi-gun Corvettes. Once each Capital Ship has its Strike Craft escort,
they should be organized into attack divisions based on class and combined
arms theory. Frigate divisions should consist of two or three Ion Cannon
ships in a tight V formation, with an Assault Frigate positioned below and
another in a higher slot. This creates a fighting wedge with significant
firepower, while creating a deadly sphere of anti-fighter fire provided by the
Assault frigate turrets and the strike craft surround each frigate. No attacking
force of Strike Craft could survive their first pass against such a squadron
intact, while the forward firepower could punch through any opposing
Capital Ships easily. When using Super-Capital Ship types like Destroyers or
Cruisers, formational doctrine places these admittedly expensive and
invaluable vessels in the core any given formation, surrounded by an escort of
four to eight multi-gun Corvettes to provide point defense fire. The key to
this kind of formation is that enemy commanders are usually driven to order
attacks against the heaviest enemy vessel threatening them, and this means the
super-heavy ship at the core of this formation serves double duty, both as the
heart of the division’s firepower and as a lure to bring lesser enemy craft into
the deadly crossfire of the division’s massed turrets.
F. Adm. Paktu:
Once again I do not doubt the power of these fantastic collections of Capital
Ships, but my point of cost versus benefits still stands. Are you aware of the
number of Interceptors one can build for the cost of a single Assault Frigate?
Now granted, each one packs only a tiny amount of the Frigate’s firepower
and certainly cannot survive more than one or two hits from a heavy gun, but
I ask you: Exactly how much damage can 75 interceptors do in the time it
takes to kill just one of them?
In my tactical deployment plan, Fighter wings work in massed formations and
attack in waves, each with a specific purpose. The advantage of my system is
flexibility and speed, a decided improvement over Admiral Riif-Sa’s
deployment strategies, which trade these attributes for extreme concentrations
of firepower.
In my strike fleet, an attack group is made up of three distinct Fighter waves.
The first wave to attack is a group of 20 to 30 scouts in X-formation, ordered
to fly in Evasive mode. Their job is to pull the enemy Heavy Fighter screen
into a series of long, drawn-out dogfights and attract as much defensive fire
as possible. The extremely high speed and maneuverability of the Scout will
result in most of the enemy turret fire missing its mark. Approximately 10
seconds later, four wings of Interceptors consisting of eight to sixteen fighters
each enter the battle and attack any obvious enemy fighter groups which are
38
Page 39

part 2:
homeworld
page
already busy hunting the scouts. Corvettes should be the other priority target
for the Interceptor wing. And finally, with all of the enemy fleet assets tied
up in tracking small fast targets, the plasma bombers wings, in V-formations
five to eight ships and ordered to attack aggressively, should vector in on all
Capital Ships positioned on the outer edge of the enemy fleet.
Backing up this attack should be two Support Frigates, guarded by five to ten
multi-gun Corvettes. The attacking Strike Craft should be ordered to retreat
to the support ships for repairs at the 60 to 70 percent damage level in order
to not waste personnel. This tactic has the added bonus of luring enemy
Fighters toward the support group, where the point defense fire from the
Corvettes can cut them to pieces. The mopping up force should consist of
one or two Ion Cannon Frigates, escorted by flights of Heavy Corvettes, and
should concentrate fire on the heaviest of the remaining enemy Capital Ships.
Adm. Riif-Sa:
Fah! My deployment plans are idealistic? You would need the multi-tasking
skills of a whip-crawler to orchestrate that battle. Your fighter groups would
be cut to pieces while you were still directing in more attackers. It is
unworkable! My deployment system depends more on local commanders to
make the correct targeting decisions without constant choreography from
Fleet Command.
F Adm. Paktu:
If my esteemed colleague is saying that he no longer has the skills and stamina
to command such an attack, that is understandable, given his years, but ...
Adm. Riif-Sa:
Too old? Your Kiith Matron!!
…………………….
(Tactical Debate temporarily adjourned for consultation purposes.)
39
Page 40

gameplay guide
part 2:
Page 41

homeworld
page
1 Installation
2 Training
2.1 Starting the Training
2.2 Saving a Lesson
2.3 Loading a Lesson
3 Game Controls
3.1 Camera Controls
3.2 Ship Selection
3.3 The Rightclick Menu
3.4 Movement
3.5 Combat
3.6 Formations and Tactics
3.7 Other Commands
3.8 Misc. Commands
3.9 Multiplayer Controls
3.10 Technology Tree
4 Managers and Overlays
4.1 Interface Overlays
4.2 The Manager Screens
4.2.1 The Build Manager
4.2.2 The Research Manager
4.2.3 The Sensors Manager
4.2.4 The Launch Manager
5 Single Player
5.1 Starting a Game
5.2 Characters
5.3 Mission Objectives
6 Multiplayer
6.1 Skirmish vs. CPU
6.2 LAN
6.2.1 Play LAN Game
6.2.2 The Lobby
6.2.3 Setup Game
6.2.4 Waiting for Players
6.3 Internet
6.3.1 Logging In
6.3.2 WON Lobby
6.3.3 Available Games
6.3.4 Available Rooms
6.4 Setting Multiplayer Game Options
6.5 Saving a Multiplayer game
6.6 Loading a Multiplayer game
6.7 Recording a Multiplayer game
7 Options
7.1 Audio Options
7.2 Video Options
7.3 Gameplay Options
7.4 Key Bindings
8 Ship Data
8.1 Ship Categories
8.2 Ship Stats and Descriptions
8.2.1 Scout
8.2.2 Interceptor
8.2.3 Defender
8.2.4 Cloaked Fighter
8.2.5 Attack Bomber
8.2.6 Defense Fighter
table of contents
41
page#
43
43
43
43
43
45
45
46
46
47
48
49
54
55
56
57
59
59
60
60
61
62
63
64
64
65
65
page#
66
66
66
66
67
68
69
70
70
71
72
73
74
75
75
75
77
77
78
80
81
83
83
84
85
85
85
86
86
86
Page 42

page
technical + historical brief
8.2.7 Light Corvette
8.2.8 Heavy Corvette
8.2.9 Repair Corvette
8.2.10 Salvage Corvette
8.2.11 Multi-Gun Corvette
8.2.12 Minelayer Corvette
8.2.13 Assault Frigate
8.2.14 Ion Cannon Frigate
8.2.15 Support Frigate
8.2.16 Drone Frigate
8.2.17 Defense Field Frigate
8.2.18 Missile Destroyer
8.2.19 Carrier
8.2.20 Heavy Cruiser
8.2.21 Destroyer
8.2.22 Mothership
8.2.23 Resource Collector
8.2.24 Resource Controller
8.2.25 Probe
8.2.26 Cloak Generator
8.2.27 GravWell Generator
8.2.28 Proximity Sensor
8.2.29 Sensors Array
8.2.30 Research Ship
9 Technologies
9.1 Capital Ship Chassis
9.2 Capital Ship Drive
9.3 Super-Heavy Chassis
9.4 Cloaked Fighter (Kushan Only)
9.5 Cloak Generator
9.6 Corvette Chassis
9.7 Corvette Drive
9.8 Super-Capital Ship Drive
9.9 Defense Fighter (Taiidan Only)
9.10 Defense Field (Taiidan Only)
9.11 Drone Technology (Kushan Only)
9.12 Fast-Tracking Turrets
9.13 Fighter Drive
9.14 Sensor Array
9.15 Defender Sub-Systems
9.16 Gravity Generator
9.17 Guided Missiles
9.18 Heavy Corvette Upgrade
9.19 Fighter Chassis
9.20 Heavy Guns
9.21 Ion Cannons
9.22 Minelaying Tech
9.23 Plasma Bomb Launcher
9.24 Proximity Detector
42
page#
87
87
87
88
88
88
89
89
89
90
90
91
91
91
92
92
93
93
93
94
94
94
95
95
97
97
97
97
98
98
98
99
page#
99
99
100
100
100
101
101
101
102
102
102
103
103
103
104
104
104
Page 43

23
1 installation
Insert the CD-ROM into your CD-ROM drive. The Homeworld
Installation program will automatically start up. Follow the
on-screen instructions to specify the various installation options.
When the installation is complete, it will have created a shortcut
in your Start Menu that you can use to run Homeworld.
homeworld
page
2 training
screen shot
2.1 Starting the Training
It’s strongly recommended you
pass the Homeworld training
section before starting a
singleplayer or multiplayer
game. It’s easy to do and it
will teach you all the essential
controls of the game.
To start the training, leftclick
on the <TRAINING> button
in the Main Menu, then leftclick
on <BEGIN TRAINING>.
2.2 Saving a Lesson
Your progress will be saved
automatically at the beginning
of each lesson. You can
therefore quit the tutorial at
any time and restart it where
you left off.
2.3 Loading a Lesson
To load a lesson from the
Main Menu, leftclick on the
<TRAINING> button, then on
the <LOAD LESSON> button.
Select the saved lesson from
the list, then leftclick on the
<LOAD LESSON> button.
43
Page 44

game controls
Page 45

homeworld
page
3.1 camera controls
rotating
command action
Hold down the right mouse
button and drag the mouse.
zooming
command action
Hold down the left and right
mouse buttons and drag the
mouse forward or backward.
OR: If you are using a mouse
with a wheel, this can be used
to zoom as well.
focusing
command action
Select a ship and press the
middle mouse button or
the [F] key.
NOTE: Issuing the focus
command a second time will
make the camera zoom in as
far as possible.
f
c
or
command action
To focus on a ship without
selecting it, hold down the
[ALT] key and leftclick on it.
command action
Press the [C] Key.
If you wish to go back to a
focus you have cancelled, press
the [V] key.
cancel
focus
alt
focusing
fleet
view
command action
Press the [F1] key.
This focuses on all of your ships
in the viewable area.
command action
Press the [HOME] key
or press [ALT]+[F] keys.
mothership
view
f1
home
3 game controls
45
Page 46
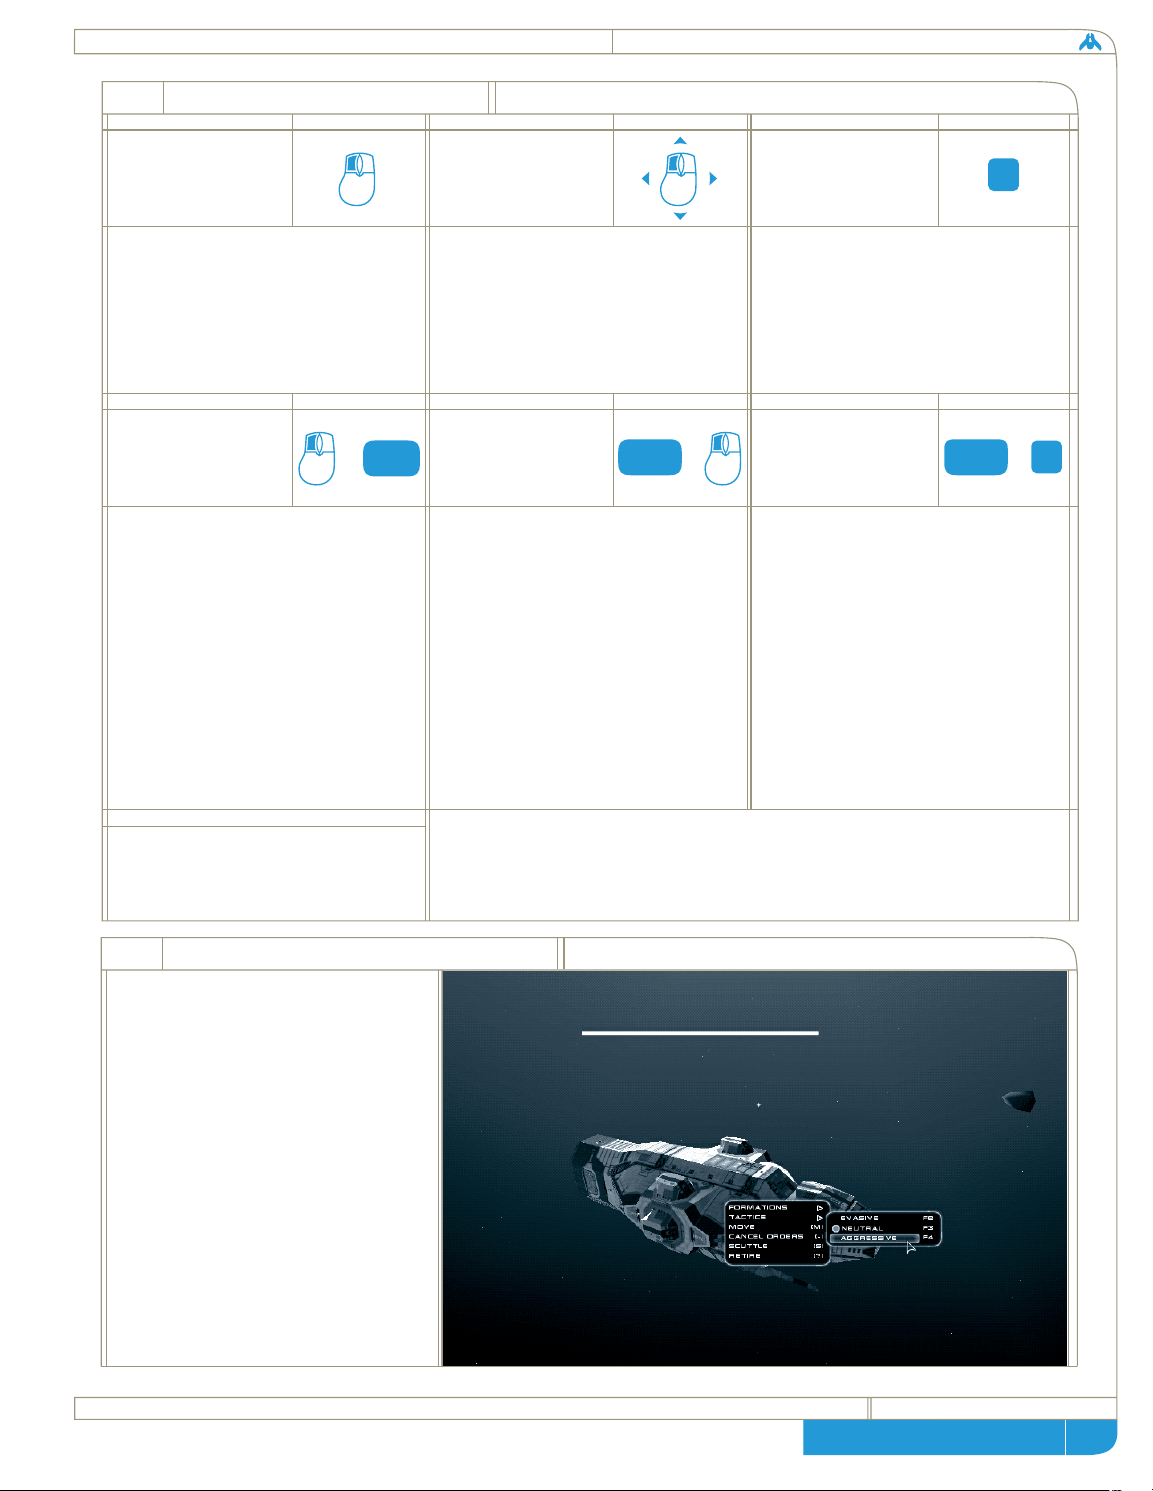
page
technical + historical brief
3.2 ship selection
selecting
command action
Place mouse pointer over desired
ship and click the left mouse
button to select it. NOTE: If you
leftclick on a group of ships in
formation, they all will be selected.
drag
selecting
selecting
everything
command action
Hold down the left mouse
button and drag a box around
the desired ships.
command action
Press [E] or [CTRL]+[A] to
select all of your ships presently
on the screen.
e
command action
Leftclick on empty space or
press the [ESC] key.
command action
To add ships to the selection,
hold down [SHIFT] and click
the left mouse button on the
desired ship(s). It’s also possible
to hold down [SHIFT] and then
drag-select the desired ship(s).
shift
selecting
de-selecting
hotkey
grouping
command action
Select the ships you wish to
assign a hotkey to and then
press [CTRL] + a number key
(from 0-9). You may then
select that group at anytime,
regardless of where you are,
simply by pressing its hotkey
number. Pressing it again
will focus the camera on the
ship(s) in that hotkey group.
command
adding ships to
a hotkey group
#
or +
shift
+
ctrl
Select the hotkey group with its number key and then add the ship
or ships to the group as above. Once this is done, reassign the entire
group to the hotkey number with the [CTRL]+[0-9] command.
esc
46
3.3 the rightclick menu
At any point during the game, you
can get a detailed list of command
options specific to a ship or group
of ships by rightclicking on one
of them while it is selected. This
will bring up a menu of command
options tailored to that vessel.
For instance, rightclicking on a
Resource Collector will bring up
a menu with the <HARVEST>
command on it, while the same
rightclick on a group of Fighters
will bring up formation options.
Page 47

homeworld
page
47
3.4 movement
command action
horizontal
movement
Select a ship or group of ships
and then press the [M] key.
This will bring up the movement
disk. Simply move the mouse
pointer to where you wish to go
and click the left mouse button
to issue the move order.
command action
3d movement
With the movement disk up,
hold down [SHIFT] and drag
the mouse to add elevation to
your destination. As before,
clicking the left mouse button
will issue the move order.
NOTE: To cancel vertical
movement and return to the
movement disk to horizontal
mode, press [CTRL]+[SHIFT].
m
+
shift
command
long-distance
movement
Call up the Sensors Manager using
the taskbar or by pressing [SPACE].
Then use the [M] key to bring up
the movement disk. You can now
move over much longer distances.
Page 48
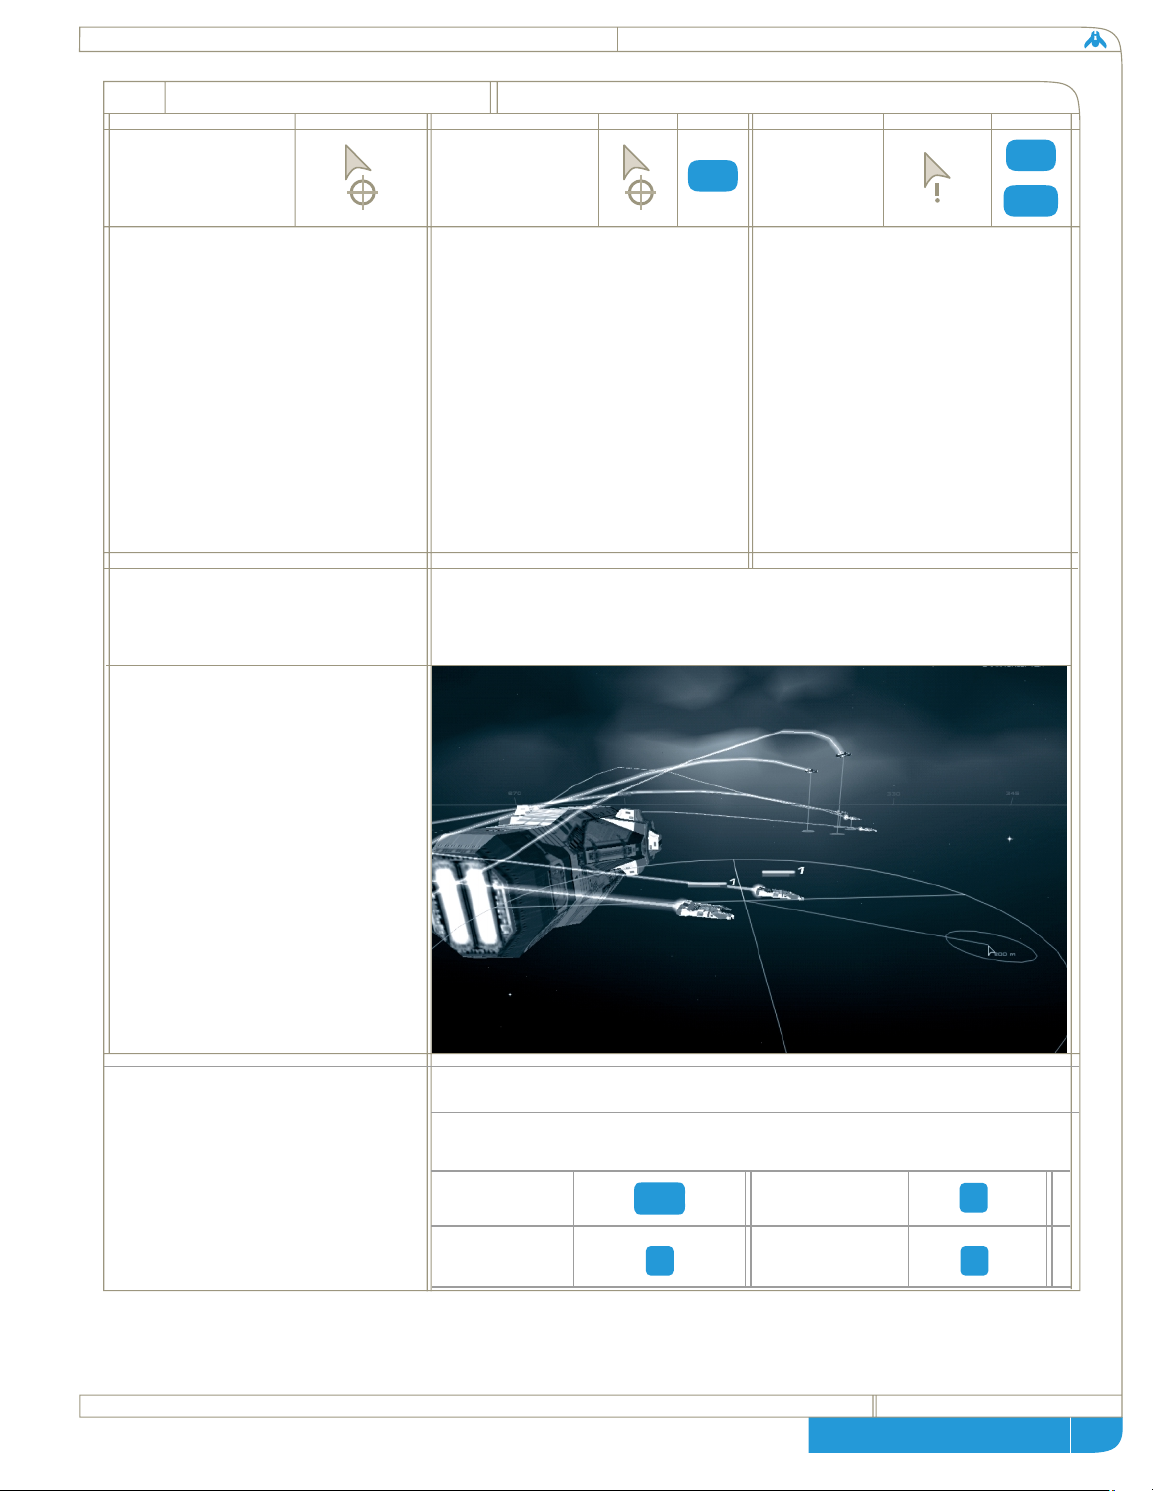
page
technical + historical brief
3.5 combat
48
command cursor icon
command
cursor icon action actioncursor icon
command
attacking
Move the mouse pointer over
an enemy ship and click the left
mouse button.
command
moving while
attacking
Capital Ships have a special
ability to move while keeping
their weapons bearing on an
enemy ship. To do this, give
the Capital Ship its attack order
and then give it a movement
order. The movement disk will
be yellow to signify this mode.
When moving in this mode, the
line to the destination point will
be blue if the destination is still
in range of the target or red
if the destination is out of range.
group
attacking
Hold down [CTRL] and drag
a box around the targets with
the left mouse button.
ctrl
force
attack
Hold down [CTRL]+[SHIFT]
and leftclick on the target. To
force an attack on a group of
targets, hold down the same keys
and drag a box around the targets
with the left mouse button.
NOTE: Force attacking can be
used to attack asteroids and dust
clouds as well as your own ships
if necessary.
ctrl
+
shift
manager screens
There are several important full-screen interfaces in Homeworld. All
can be accessed via the taskbar, or by pressing the appropriate hotkey:
sensors
manager
research
manager
space
r l
build
manager
b
launch
manager
Page 49
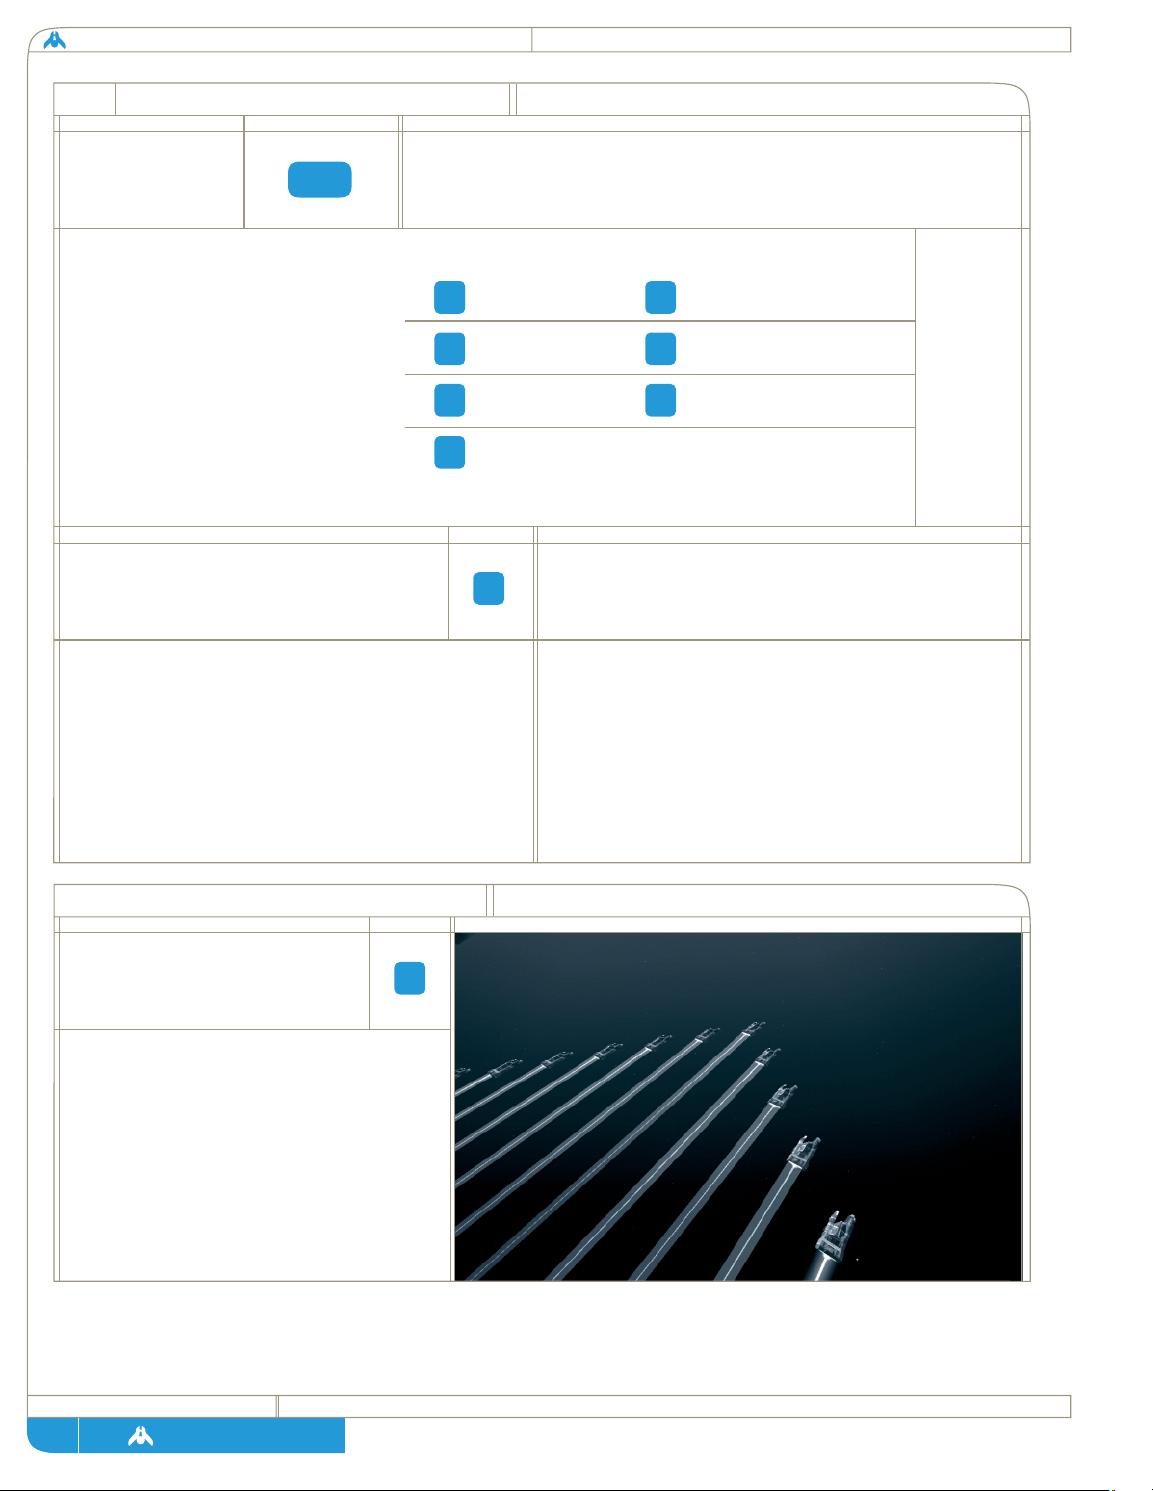
homeworld
page
49
3.6 formations and tactics
setting
formations
command action
action
To set a formation, select the desired
ships and bring up the rightclick
menu. From the <FORMATION>
section, you can choose one of seven
formations.
command
Custom formation lets you create your own
formations. To create a custom formation, move
your ships into the desired position, select them
all, then select <CUSTOM> from the rightclick
menu or press [F11].
command
f5
f6
f7
f9
f10
f11
f11
f8
tab
custom
formation
When you build ships, they come out of your
Mothership or Carrier and go into Military Parade
formation with that ship. If at any time you want
to put ships back into Military Parade formation,
select them and the Mothership, then press
[TAB] or any of the formation function keys
[F5] - [F11].
military parade
formation
Delta
Broad
X
Claw
Wall
Sphere
Custom
OR: Formations can be accessed directly via the F-keys:
OR: Formations also can be cycled
through by pressing the [TAB] key.
[SHIFT]+[TAB] will cycle the
formations backward.
formation descriptions
formation
delta
The standard flat triangle formation is
an excellent way of organizing groups
of Strike Craft into effective squadrons,
but it lacks the flexibility and firepower
concentration available to the more
three-dimensional formations.
f5
Page 50

page
technical + historical brief
formation descriptions
50
formation
broad
This flattened line is not effective for
Strike Craft as it disperses their firepower.
It is more useful for squadrons of Capital
Ships, where unit quick identification and
selection are as important as firepower.
It is useful formation to approach in if you
are planning to break ships off to strike
at specific targets once the battle is joined.
formation
x
The flying X formation is an excellent
Strike Craft formation, concentrating
a large number of vessels into a relatively
small three-dimensional space. Its only
drawback is that the dense formation makes
individual ships vulnerable to slow turret
fire they might otherwise have avoided if
they were dispersed.
f6
f7
formation
claw
Like its natural namesake, this formation
is deadly when striking out at an individual
target. The claw is a superb formation
for Strike Craft when they are targeting
a Capital Ship. The four curving lines of
Fighters make concentrating firepower
and envelopment deadly efficient. The
only drawback is identifying and selecting
single ships inside this complex formation.
f8
Page 51

homeworld
page
51
formation descriptions
formation
formation
Most effective for Capital Ships, the wall
formation allows larger vessels to
concentrate firepower without dangerously
crowding each other. The wall is not a
subtle formation but does give large
groups of big ships an effective
attack mode.
wall
sphere
This is the deadliest of all formations in
terms of continuous firepower. Ships in
this formation lose their ability to perform
complex flight maneuvers but gain the
ability to constantly fire at targets from
every angle. This is also an effective
guarding formation as it puts the vessel
to be protected in the center of the sphere.
f9
f10
Page 52
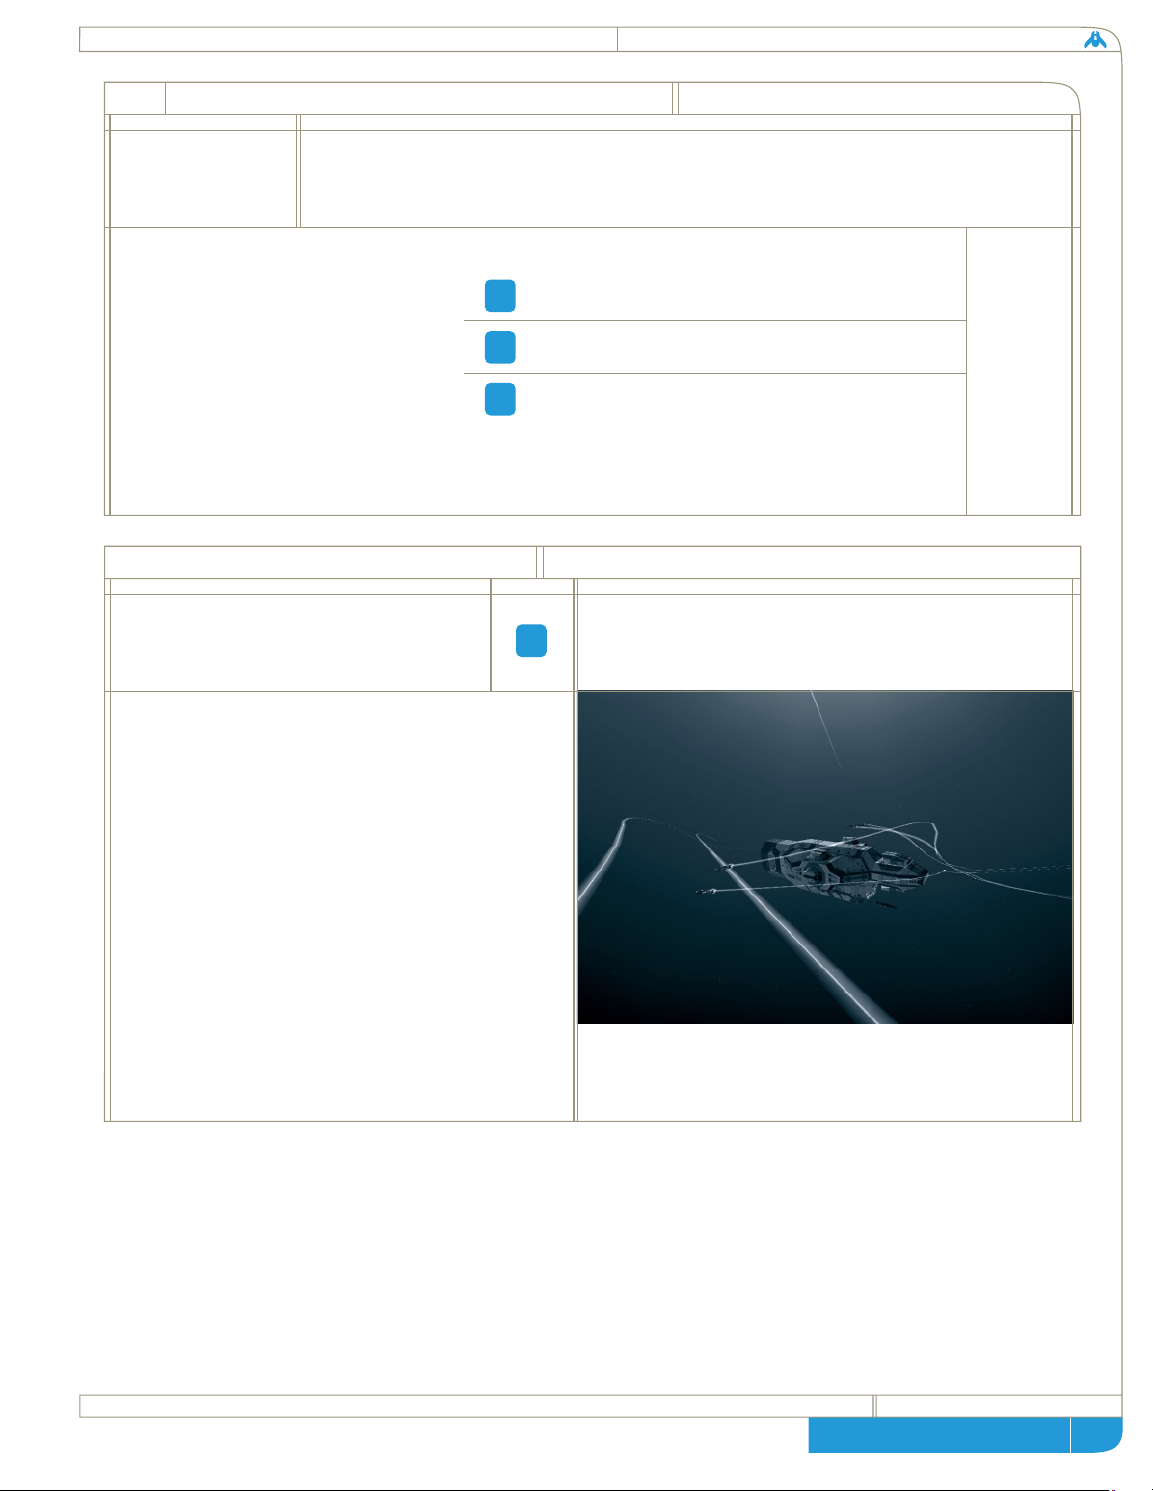
page
technical + historical brief
3.6 formations and tactics (cont’d)
52
command
setting
tactics
To change the tactics setting,
select the desired ships and bring
up the rightclick menu. From the
<TACTICS> section you can choose
one of three settings: Evasive,
Neutral or Aggressive.
The tactics setting can be increased
using the ] key and decreased using
the [ key.
OR: Tactics can be accessed directly via the F-keys:
f2
f3
f4
tactic descriptions
tactic
evasive
Evasive tactics are best used when resources are
tight and each ship is vital. Your ships won’t hit as
hard, but they are more likely to come home. Ships
set to Evasive will boost power to engines in order
to increase speed and maneuverability. This will
come at the cost of lowered power to weapons
and a slight increase in fuel consumption for Strike
Craft (Fighters and Corvettes). When attacking,
Fighter groups also will break up into flight pairs,
where one ship will take point and the other will
serve as wingman and take measures to remove
threats that lock onto the lead vessel.
f2
Evasive
Neutral
Aggressive
Page 53

homeworld
page
53
tactic descriptions
tactic
neutral
This is the normal stance for ships. Strike Craft
set to neutral will perform evasive maneuvers
while attacking enemy ships. If no orders are
issued and enemies are nearby, ships in neutral
will fire from their current position, but will not
engage in full combat.
tactic
aggressive
Ships in Aggressive mode are out for blood and
will attempt to destroy the enemy even at the cost
of their own lives. Use this tactical stance if
resources are not a factor or if you need to hurt
your opponent as hard and as quickly as possible.
Strike Craft in this mode shunt power from the
engines into the weapons grid, so speed and agility
are reduced but firepower is increased. Ships in
Aggressive tactics will not perform any kind of
evasive maneuvers and also will attack nearby
enemies without being issued orders.
Resource Collectors in Aggressive tactics will
continue to harvest even if under attack.
f3
f4
Page 54

page
technical + historical brief
3.7 other commands
harvesting
command action
cursor icon
Select a Resource
Collector, move
the mouse pointer
over any resource
and click the left mouse button.
OR: Bring up the rightclick menu
and select the <HARVEST>
command. This will cause the
Resource Collector to begin
harvesting the nearest resource.
OR: Press the [H] key. This will
also make the Resource Collector
find the nearest resource.
docking
command action
Select the desired
ship(s) and then
doubleclick on the
vessel you wish to
dock with (it must have docking
capabilities).
OR: bring up the rightclick
menu and select the <DOCK>
command. This will cause the
selected ship(s) to dock with the
nearest capable vessel.
OR: Press the [D] key. This will
instruct your ships to dock with
the nearest capable vessel.
supporting
command action
Select the support
ship, then hold
down the [Z]
key and leftclick
on the Fighters or Corvettes
to service.
z
hd
z
command action
Hold down both
[CTRL] + [ALT]
and then leftclick
on the ship you
wish to guard.
OR: Hold down the [G] key
and click the left mouse button
on the ship you wish to guard.
command action
If a ship has a
special function,
you can activate
it by pressing the
[Z] key. If the special function
has to be performed on another
vessel, hold down the [Z] key
and then click the left mouse
button while the cursor is over
the target vessel.
special
operations
guarding
ship special operation ship special operation
+
ctrl alt
cursor icon cursor icon
cursor icon cursor icon
Missile Destroyer
Carrier
Resource Collector
Resource Controller
Cloak Generator
GravWell Generator
Defense Field Frigate
Scout
Cloaked Fighter
Heavy Corvette
Salvage Corvette
Minelayer Corvette
Support Frigate
Drone Frigate
Speed Burst
Cloaking
Charged Burst Attack
Captures enemy ships
Creates minefields
Can repair & refuel Strike Craft
Drone launching/retraction
Missile Volley Attack
Can repair & refuel Strike Craft
Can refuel Strike Craft
Can refuel Strike Craft
Cloaking
Captures Strike Craft
Defense Field (always on)
54
Page 55

homeworld
page
55
3.8 miscellaneous commands
cancel
orders
command action
Select the desired ship(s), bring
up the rightclick menu and select
the
<CANCEL ORDERS> command.
OR: Select the desired ship(s)
and press the [~] key.
salvage retire
command
Select a Salvage Corvette, then
leftclick on the ship to be salvaged.
OR: Hold down the [Z] key and
leftclick on the ship to be salvaged.
OR: Hold down [Z] and drag a
box around the target with the
left mouse button.
command action
Bring up the rightclick menu and
select the Retire command.
Ships given the Retire order will
return to the nearest Mothership
or Carrier and be scrapped. A
percentage of the construction
cost (in RUs) will be recovered.
OR: Press the [I] key once you
have selected the ship(s) you wish
to retire.
i
~
command action
After giving a ship normal attack
orders press the [K] key. Only
Strike Craft can kamikaze.
command action
Bring up the rightclick menu
and select the Scuttle command.
OR: Press the [S] key once you
have selected the ship(s) you
wish to self-destruct.
NOTE: You must issue the scuttle
command twice to confirm this
unusual order.
kamikaze
scuttle
tactical
overlay
command action
Press the [CAPS LOCK] key.
k
s
caps
lock
command action
Press the [P] key at any time
during gameplay to pause
the game.
NOTE: The camera is still fully
active (including focusing) while
the game is paused, but no game
commands can be issued.
pause
p
command action
This multiplayer-only command
allows Capital Ships to perform
hyperspace jumps. Just select the
ships you wish to hyperspace,
bring up the rightclick menu and
select the <HYPERSPACE>
command. The Sensors Manager
and movement disk will be
brought up automatically.
Leftclick to set the hyperspace
destination. The cost of the
hyperspace jump will be displayed
near your cursor. If this cost turns
red, you don’t have enough
Resource Units to make the jump.
hyperspace
jump
j
cursor icon
Page 56

page
technical + historical brief
3.9 multiplayer controls
56
A small number of commands are active only during multiplayer
battles. These are used to interact with other players:
command
sending a chat
message
Press [T] and then type in your
message. Press [RETURN]
when done.
command
breaking
alliances
Turn on the Tactical Overlay,
rightclick on the player’s name
you wish to end your alliance
with and choose <BREAK
ALLIANCE> from the menu.
command
t
sending a private
chat message
Press [T] and then type
[/<playername>] to specify
who to send it to. After typing
a few letters, the computer will
automatically finish the name
for you.
command
Turn on the Tactical Overlay
[CAPS LOCK] and then click
the right mouse button on the
name of the player you wish
to ally with.
Select <FORM ALLIANCE>
from the menu that appears.
command
forming
alliances
transferring rus
Turn on the Tactical Overlay,
rightclick on the player you wish
to send Resource Units and choose
<TRANSFER RESOURCES>
from the menu. After this is
done a prompt will appear at
the top of the screen. Type in
the number of RUs to transfer
and press [ENTER].
Page 57

3.10 technology tree
fighter
drive
fighter
chassis
cloaked fighter/
defense fighter
interceptor
attack bomber
plasma bomb launcher
cloaked fighter (kushan)
defender
defense fighter (taiidan)
defender subsystems
Technology
Ships Produced
Technology Description
technology
technology tree legend
icon description
corvette
drive
corvette
chassis
fast tracking turrets
heavy
corvette upgrade
light corvette salvage corvette
minelaying tech
multigun corvette
heavy corvette
mine layer corvette
MULTIPLAYER
Homeworld uses a research tree system in which basic technologies can lead to more advanced
breakthroughs. Most ships require at least one or more technologies in order to be built. The
following section will describe each technology to be found in Homeworld, as well as listing
the discoveries required to reach that branch and the new technologies it might suggest.
homeworld
page
57
Page 58

capital
ship drive
capital
ship chassis
ion cannons
drone tech /defense field
guided missiles
support frigate assault frigate
resource controller
ion cannon frigate
drone frigate (kushan)
defense field frigate (taiidan)
missile destroyer
super heavy
chassis
carrier**
proximity
detector
sensors
array
sensors array
proximity detector
Technology
Ship Produced
Technology Description
technology
technology tree legend
icon description
page
homeworld gameplay guide
heavy guns
heavy cruiser** †
super capital
ship drive
destroyer †
** also requires super
capital ship drive
† also requires
ion cannons
gravity generator
cloak generator
gravity well generator
cloak generator
58
Page 59

4 managers and overlays
4.1 interface overlays
screen shot
The gameplay screen has
numerous overlays that convey
information to the player about
ships in text and graphic form.
Taskbar: When the mouse
pointer touches the bottom of
the screen, the taskbar will
appear. It contains a set of
buttons for the Managers, a
display for the current health of
your Mothership, your current
amount of Resource Units, and
a Fleet Intelligence box that will
display mission objectives in
single player games. This taskbar
can be toggled to be
permanently visible from the
gameplay options menu.
Cursor Text: When the cursor
is on top of a ship, its type will
be displayed on the bottom left-
hand corner of the screen.
Ship Selection Overlay:
When you select a ship, a green
health bar overlay will appear
above the ship indicating how
much damage the vessel has
incurred. The bar will shorten as
the ship is damaged and will
change from green to yellow to
red as conditions worsen.
Strike Craft (Fighters and
Corvettes) require fuel, so they
also have a blue fuel bar overlay
when they are selected. The
length of this bar indicates how
much fuel the Strike Craft has
left. Certain ships use a brown
bar in addition to the green
health bar. For the Resource
Collector, this indicates how
much of its resource capacity is
used. For the Cloak Generator
and Gravity Well Generator, this
indicates how much energy is left
to maintain the cloaking or
gravity field.
Tactical Overlay: If you turn on
the tactical overlay with the
[CAPS LOCK] key, a series of
graphic symbols will be overlaid
on units that are too distant from
your camera view to make out
clearly. A symbol legend will
appear in the upper left hand
corner of the screen. In
multiplayer mode, a list of
players will also be displayed.
Alliance and resource transfer
options can be accessed by right
clicking on any of the names on
the list.
Info Overlay: On the top right-
hand corner of the screen is a list
of currently selected ships and
the number of each type if you
have selected a group of ships.
You can leftclick on a ship type
from that list in order to select
one group of vessels from a
group of many different types.
homeworld
page
59
Page 60
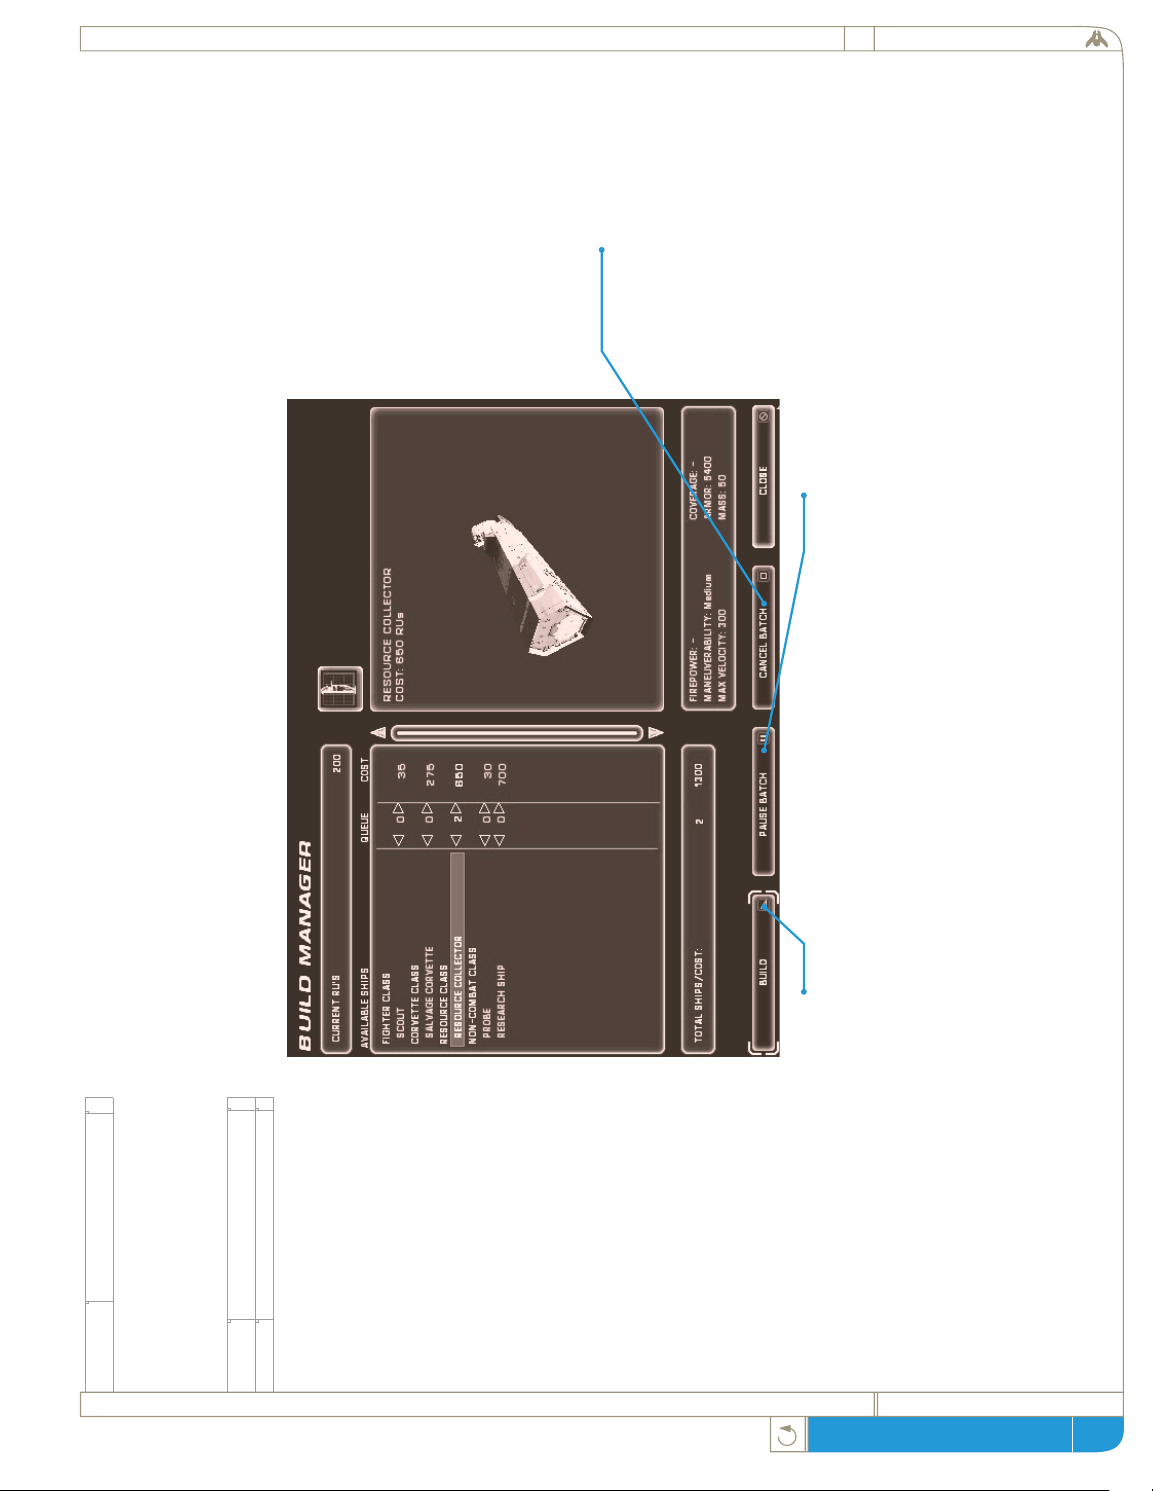
4.2.1 build manager
screen shot
To access the build manager,
do one of the following:
Doubleclick on the Mothership
or Carrier from which you
wish to build.
Select the ship you wish to
build.
Bring up the rightclick menu
and then select the <build>
command.
Bring up the taskbar at the
bottom of the screen and
leftclick on the build button.
Press the [B] key.
The build manager allows you
to build ships and set up the
construction queue in order to
build many units at once.
The build manager gives
basic details of each type of
ship presently available for
construction as well as your
current number of resource
units.
Building:
All the ships your current tech
levels allow you to build are
listed in the left side panel.
Leftclick on the desired vessel
with the left mouse button
and its image and basic
performance details will appear
in the right side window.
Leftclick again to add units to
the production queue. When
you are done adding units,
leftclick on the <BUILD>
button.
Build Progress:
At this point, two colored bars
will appear above the listing for
the ship type you have just
ordered built. The top line
shows how close to completion
a single vessel is, while the
lower bar shows how close to
completion the entire build
order is. If you only ordered
one vessel built, these two bars
will move along together.
Canceling a Build
To cancel a build, leftclick on
the type of ship being built
and then leftclick on the
<CANCEL BATCH> button.
The RUs used in construction
will be reclaimed.
Pausing a Build:
To pause a build, leftclick on
its progress bar and then
leftclick on the <PAUSE
BATCH> button. When you
are ready for the project to
resume, simply re-select the
ship type and then leftclick on
the <PAUSE BATCH> button
again. Construction will resume
exactly where it left off.
4.2 manager screens
Many of the more complex tasks, like ship building and research, have their own special
screens to help you manage them more effectively and keep track of the strategic
considerations of battle. They can be accessed at any time or place during combat by hitting
the appropriate command key, and you can return to tactical view by hitting the [ESC] key.
(a)
(b)
(c)
(d)
(e)
page
homeworld gameplay guide
60
Page 61
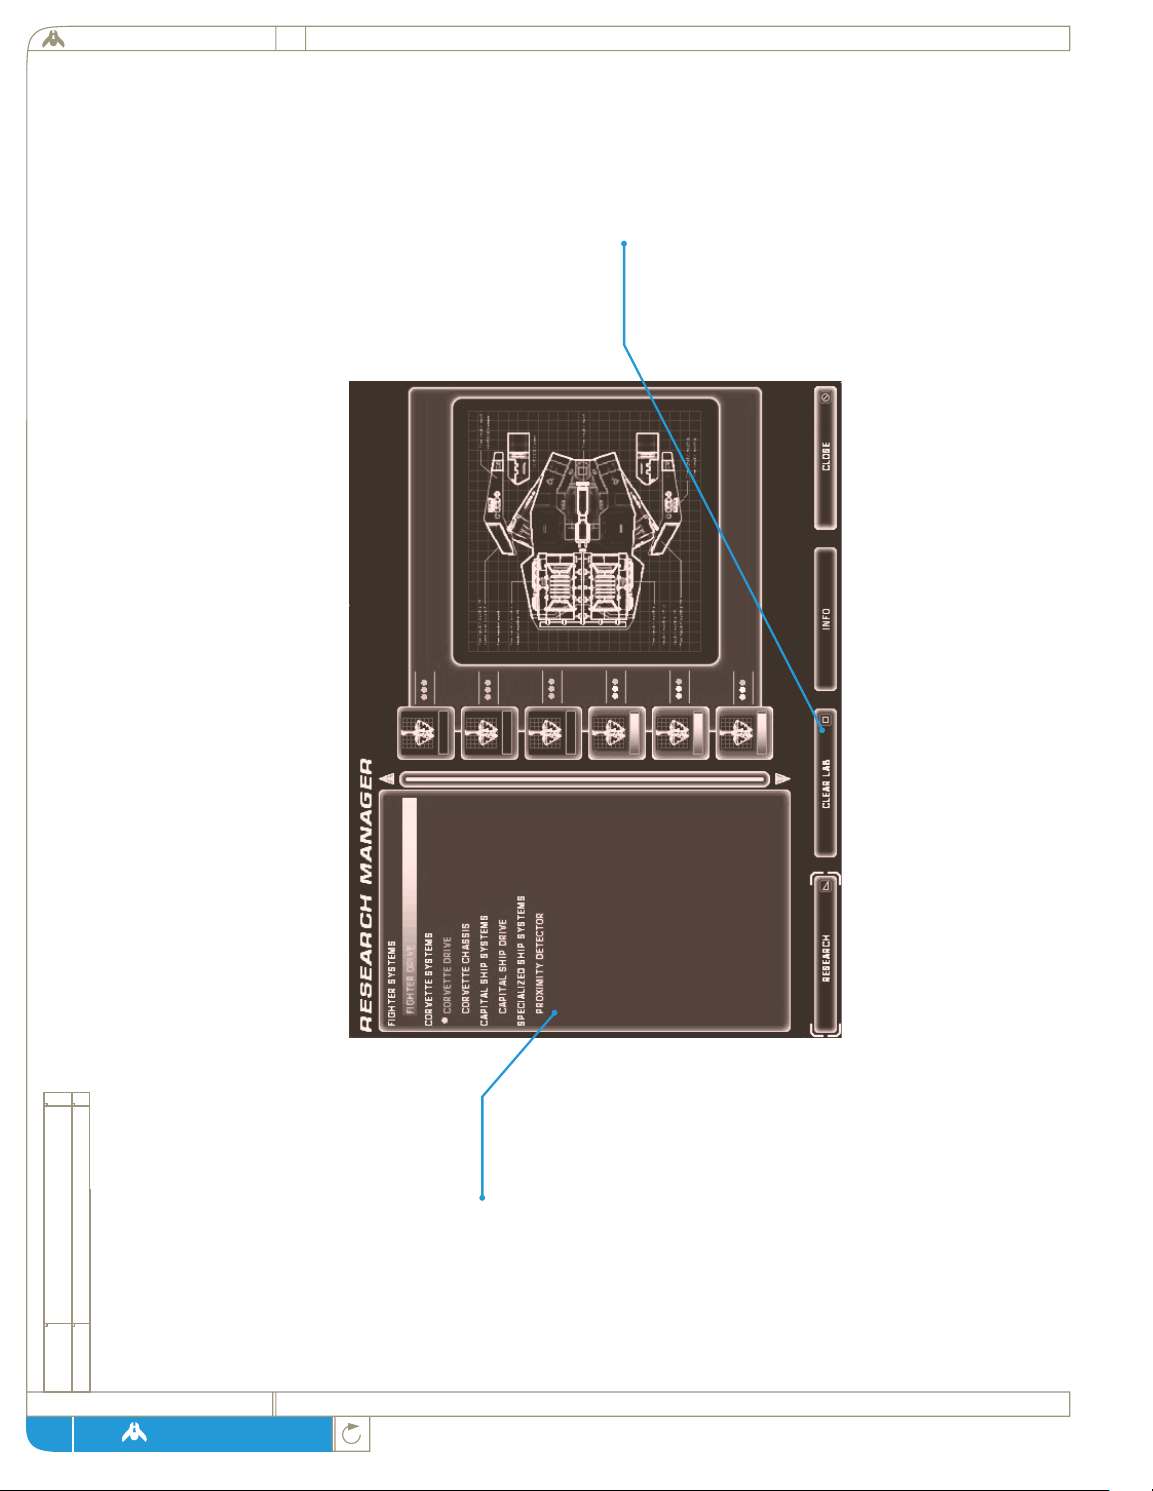
4.2.2 research manager
screen shot
In order to access the
research manager, do one of
the following:
Doubleclick on your Research
Ship.
Select the Research Ship,
bring up the rightclick menu,
and select the <RESEARCH>
command.
Bring up the taskbar at the
bottom of the screen and
leftclick on the research
button.
Press the [R] key.
Researching a Technology:
Doubleclick on the technology
you wish to research.
NOTE: If you want to use
multiple lab ships, select
them first, then doubleclick
on the technology.
OR: Leftclick on the
<RESEARCH> button.
Canceling Research:
Select the technology currently
being researched from the left
panel list and leftclick on the
<CLEAR LAB> button found
along the bottom of the
manager. You can also halt
research in a particular lab
ship by selecting it from the
icon strip along the upper
right side of the manager and
then leftclicking on the
<CLEAR LAB> button. When
a project is canceled, all
accumulated research in it is
lost.
Technology List:
This panel contains a list of
technologies you can currently
research. When a technology
has been selected, a brief
description of it and a graphic
appear in the right-hand side
panel. Technologies that have
already been successfully
researched will appear on the
list with a green dot beside
them.
(a)
(b)
(c)
(d)
homeworld
page
61
Page 62

4.2.3 sensors manager
screen shot
In order to access the sensors
manager, do one of the
following:
Bring up the taskbar at the
bottom of the screen and
leftclick on the sensor button.
Press the [SPACEBAR]
The sensors manager gives you a
general view of the entire
battlespace, and a detailed view
of the space surrounding any of
your vessels. Detailed areas exist
within the blue spheres, and
represent where your scanners
are giving accurate information
on what lies in the region. The
black areas represent space
outside of your scanning range,
and so they are without detail.
Note: The normal camera
commands of rotate and zoom
are still fully functional in the
sensors manager.
Looking:
Leftclick on any ships in the
blue area to leave the Sensors
Manager and go to that
location.
OR: Drag a small box around
the ships you wish to go to using
the left mouse button.
Panning:
A 2-D disk has been provided to
give a frame of reference for
direction and distance. Use the
crosshair in the middle of it to
get a better look at different
parts of the battlespace. Leftclick
on the <PAN> button. While
holding the button, drag the
mouse around. When you’ve
centered the crosshair on the
area you want to look at, release
the mouse button, and the
normal camera controls are
active again.
Using The Tactical Overlay:
Leftclick on the <TACTICAL
OVERLAY> button along the
bottom edge of the manager.
With this button activated, the
Tactical Overlay symbols from
the normal gameplay screen will
appear for Resource Collectors
and Capital Ships.
Hyperspace:
This command allows Capital
ships to perform hyperspace
jumps. With some Capital ships
selected, click on this button to
bring up the movement disk.
Leftclick to set the destination
you wish to hyperspace to. The
cost of the hyperspace jump will
be displayed near your cursor. If
this cost turns red, you don't
have enough Resource Units to
make the jump.
Moving Ships:
Press the [M] key or leftclick on
the <MOVE> button, and then
issue movement commands as
you would from the normal
gameplay screen. This is very
useful for moving ships across
long distances.
item: indicates:
sensors manager legend:
green dots your ships
flashing green dots selected ships
red dots enemy ships
yellow dots allies
brown dots asteroids
fuzzy brown dots dust clouds
red 'pings'
green 'pings'
show where battles are taking place
and where Proximity Detectors have
found enemy ships
yellow 'pings'
show where anomalies are located
(single player only)
show where newly-built ships are located
(a)
(b)
page
homeworld gameplay guide
62
Page 63

4.2.4 launch manager
screen shot
To Access the Launch
Manager:
Select the ship you wish to
launch from, bring up the
rightclick menu and select the
<LAUNCH> command.
Bring up the taskbar at the
bottom of the screen and
leftclick on the sensor button.
Press the [L] key.
The launch manager allows you
to check which ships are
currently docked and set
automatic launch parameters.
The list of docked ships is in the
left panel with a visual display of
a selected ship type visible in the
right-hand panel. The icons in a
row above the right panel
represent your Mothership and
any Carriers you may have.
Docking Capacity:
These two colored bars
graphically represent the
remaining capacity of the ship in
green. The actual numbers of
Fighters and Corvettes docked
are given to the left of their
respective bars.
Selecting the Launch Vessel:
If you have built any Carriers,
their icons will appear here. To
see which ships are docked in
one these vessels, leftclick on its
icon from this list.
Remain Docked:
Leftclick on this checkbox to
keep Strike Craft inside a
Mothership or Carrier when
they dock.
Launching Ships:
Leftclick on the type of ship you
wish to launch and then leftclick
on the <LAUNCH> button
along the bottom of the screen.
If you want to select multiple
ship types for simultaneous
launch, hold down the [CTRL]
key or the [SHIFT] key while
you select ship types.
Launching Everything:
To launch all ships held in the
bay leftclick on the <LAUNCH
ALL> button.
(a)
(b)
(c)
homeworld
page
63
Page 64

page
homeworld gameplay guide
5 single player
screen shot
Choosing Your Fleet:
Leftclick on the <KUSHAN>
or <TAIIDAN> button to
choose which fleet to play. A
sample ship appears in the
window in order to show the
currently selected color scheme.
5.1 Starting a Game
In order to start a new single
player game, leftclick on the
<SINGLE PLAYER> button
in the Main Menu.
Save a Game:
At anytime during gameplay,
hit the [ESC] key and then
choose <SAVE GAME> from
the menu. When the Save
Game screen comes up,
leftclick in the narrow box
below the save game list and
type in a name for the saved
game. Then leftclick on the
<SAVE> button.
Loading a Saved Game:
Leftclick on the <LOAD
GAME> button. A screen will
appear with a list of saved
games. Homeworld automatically
saves your campaign at the
beginning of every new level.
These auto-saved games will
appear along with the ones you
have saved yourself. To load
one, leftclick on it and then
leftclick on the <LOAD!>
button.
Player Setup :
This screen lets you set the
base and stripe colors of your
ships. To change your base
color, leftclick on the <BASE
COLOR> button. A small
white circle will appear inside
the large rainbow box. Click
and drag the circle around the
rainbow box until you have
achieved a shade you are
satisfied with. To change the
stripe color, simply leftclick on
the <STRIPE COLOR>
button and repeat the process
of dragging the white circle to
choose a stripe color. You can
also drag the slider, located to
the right of the rainbow box,
up and down to adjust the
brightness of the color.
Starting The Game:
When you are happy with your
choice of fleet and ship color,
leftclick on the <START!> game
button to begin the Single
Player campaign.
64
Page 65

5.2 characters
screen shot
5.3 mission objectives
screen shot
The two characters you will
hear from most often in
Homeworld are Fleet Command
and Fleet Intelligence. Anytime
a character speaks, subtitles
will appear at the top of the
screen next to the icon.
Mission objectives in the single
player game are displayed on
the right side of the taskbar.
You can leftclick on an
objective to replay the speech
event that describes it. Primary
objectives must be completed
for the mission to end,
but secondary objectives are
optional.
homeworld
page
65
Page 66

6 multiplayer
screen shot
6.2 lan
screen shot
Homeworld can be played
against human and computer
opponents through a variety of
different modes. While there
are three different ways to
engage in a multiplayer game
of Homeworld, they all use the
same system for creating the
actual game and setting up the
gameplay options and rules.
6.1 Skirmish vs. CPU
This option is for playing
multiplayer games against
computer players. After a game
is created with the desired
gameplay options (see “Setting
Multiplayer Game Options”),
leftclick on the <START>
button to begin the action.
To play Homeworld on a Local
Area Network, choose <LAN>
from the multiplayer menu.
People who want to play
together on a LAN must be
using the same protocal.
6.2.1 Play Lan Game
On this screen, leftclick on the
name field and type in the
name you wish to be known by
on the multiplayer battlefield.
Hit <ENTER> when you are
finished typing. Leftclick on the
<PLAYER SETUP> if you need
to change your race or ship
colors from previous multiplayer
sessions. Once you are satisfied,
leftclick on the <GO!> button.
IPX LAN:
Homeworld will auto-detect if
you have IPX and/or TCP/IP
LAN and choose the
appropriate protocal, so
normally you will never have to
touch this setting. If you have
both IPX and TCP/IP
installed, Homeworld defaults
to IPX. Users who want more
control and both protocals
installed can select the IPX
button for IPX, and the
TCP/IP button for TCP/IP.
page
homeworld gameplay guide
66
Page 67

6.2.2 the lobby
screen shot
The lobby is where you go
to see who else is on the
LAN, chat, organize your
own game, or see what games
are still accepting players. The
names of the players currently
in the lobby are in the bottom
right panel, and any chat
messages are printed in the
bottom left panel.
Chatting:
If you wish to send messages
to the other players in the
lobby, just leftclick here and
type your message. If you
wish to whisper a private
message to just one player,
type /<playername> and the
rest of your message.
Creating Your Own Game:
Leftclick on the Create Game
button. This takes you to the
game setup screen.
Game Details:
The list of games available in
the lobby is displayed in
the large upper display panel.
To see which options are
being used in a game,
leftclick on the game you are
interested in and then
leftclick on this button.
Joining a Game:
Leftclick on the game you
wish to join on the main
list and then leftclick on
this button.
Player Setup:
If you wish to change your
fleet or ship colors at any
time, leftclick on this button.
homeworld
page
67
Page 68

6.2.3 setup game
screen shot
Setup Game:
The setup game screen is
where you set the name of
your game and the number of
CPU players, as well as all the
gameplay options available.
Naming Your Game:
Click on this panel and type in
a name for your game.
Number of CPU Players:
Leftclick on the arrows to
increase or decrease the
number of computer players
you want in the game.
Win Conditions:
These checkboxes let you set
the various win conditions
for the game. Destroy enemy
Mothership means the enemy’s
Mothership must be destroyed
and capture enemy capital
ship means you can also win
by capturing an enemy capital
ship. Allied victory means that
players who are allied can win
the game together by defeating
their enemies.
Password on the Game:
If you want to restrict access
to your game, leftclick on
the <password protected>
checkbox. Leftclick on the
narrow panel directly below
and type in the password you
wish to use. Confirm your
password by re-entering it in
the panel below. In order for
other players to join the game
you created, you will have to
tell them the password.
Start With:
This setting lets you decide
whether to start the game
with a Mothership or
a Carrier.
CPU Difficulty:
This slider lets you set the
difficulty of the computer-
controlled opponents.
CPU Attacks Humans:
This sliders lets you set how
likely the CPU player will
attack human opponents.
Create Game:
The rest of the game options
are explained below in the
“setting multiplayer game
options” section. When you
are satisfied with your choices,
leftclick on the <CREATE
GAME> button.
page
homeworld gameplay guide
68
Page 69

6.2.4 waiting for players
screen shot
After you create the game,
you are returned to the lobby
to wait for players to join your
game. When you are ready to
start, you can leftclick on the
<START GAME> button. If
you wish to change some of
the game options, click on the
<SETUP GAME> button and
this will take you back to the
game options screen. If you
no longer wish to host a
game, leftclick on the
<DISSOLVE GAME> button.
homeworld
page
69
Page 70

6.3 internet
6.3.1 login
screen shot
From this screen you can log
onto WON, change your
colors or fleet, change your
password, or create a new
account.
Launch WON!:
To connect to the World
Opponent Network, leftclick on
this button and you will find
yourself in the Homeworld
lobby on WON. Setting up
and playing a game on WON is
identical to playing on a LAN
except WON has multiple
rooms instead of just one
lobby.
Firewall Settings:
If you are behind a firewall,
you should select the <Behind
Firewall> button. If you know
you're not behind a firewall
you should check the <Not
Behind Firewall> button. If
you are unsure or don’t know
what a firewall is, choose Auto-
detect, which is the default.
Technical note: When you
create a game, if one or more
players are behind a firewall,
WON will create a dedicated
server for the game instead of
using the default peer-to-peer
connection. Slow modem
users who host games may want
to choose the <Behind
Firewall> option (even if they
are not behind a firewall) so
WON always uses a dedicated
server, which will require less
bandwidth on their modem.
Remember, if you are unsure
what you firewall status is, just
select auto-detect.
Player Setup:
Leftclick on this button if you
wish to change your fleet or
ship colors. Change Password:
If you wish to change your
WON password, leftclick on
this button.
Create New Account:
If you do not have a WON
account, leftclick on this
button, then type in the
following information:
Name
Leftclick on this panel and type
in the name you wish to use
for your WON account.
Password
Leftclick on this panel and
enter the password you wish to
use.
Confirm Password
Leftclick on this panel and
enter your password again to
make sure you have typed it in
correctly in the previous panel.
New Account
Leftclick on this button to
create a new account. If you
chose an account name already
in use you will have to repeat
this process using a different
account name.
Homeworld can be played over the Internet only on the World Opponent
Network, a free gaming site. If you do not already have an account, you
must create one before playing Homeworld.
page
homeworld gameplay guide
70
Page 71

6.3.2 won lobby
screen shot
WON is organized into rooms.
Players can leave and enter
rooms and create or join
games in the current room.
Players in the current room
are listed in the panel on the
right, and chat messages are
listed in the panel on the left.
The names of the players in
the lobby are in the bottom
right panel and any chat
messages are printed in the
bottom left panel.
Chatting:
If you wish to send messages
to the other players in the
lobby, leftclick here and type
your message. If you wish to
whisper a private message to
just one player, type
<playername> and then the
rest of your message.
Changing Rooms:
room or create a room of your
own, leftclick on this button.
Joining Games:
If you want to join a game in
this room or create one yourself,
leftclick on this button.
homeworld
page
71
Page 72
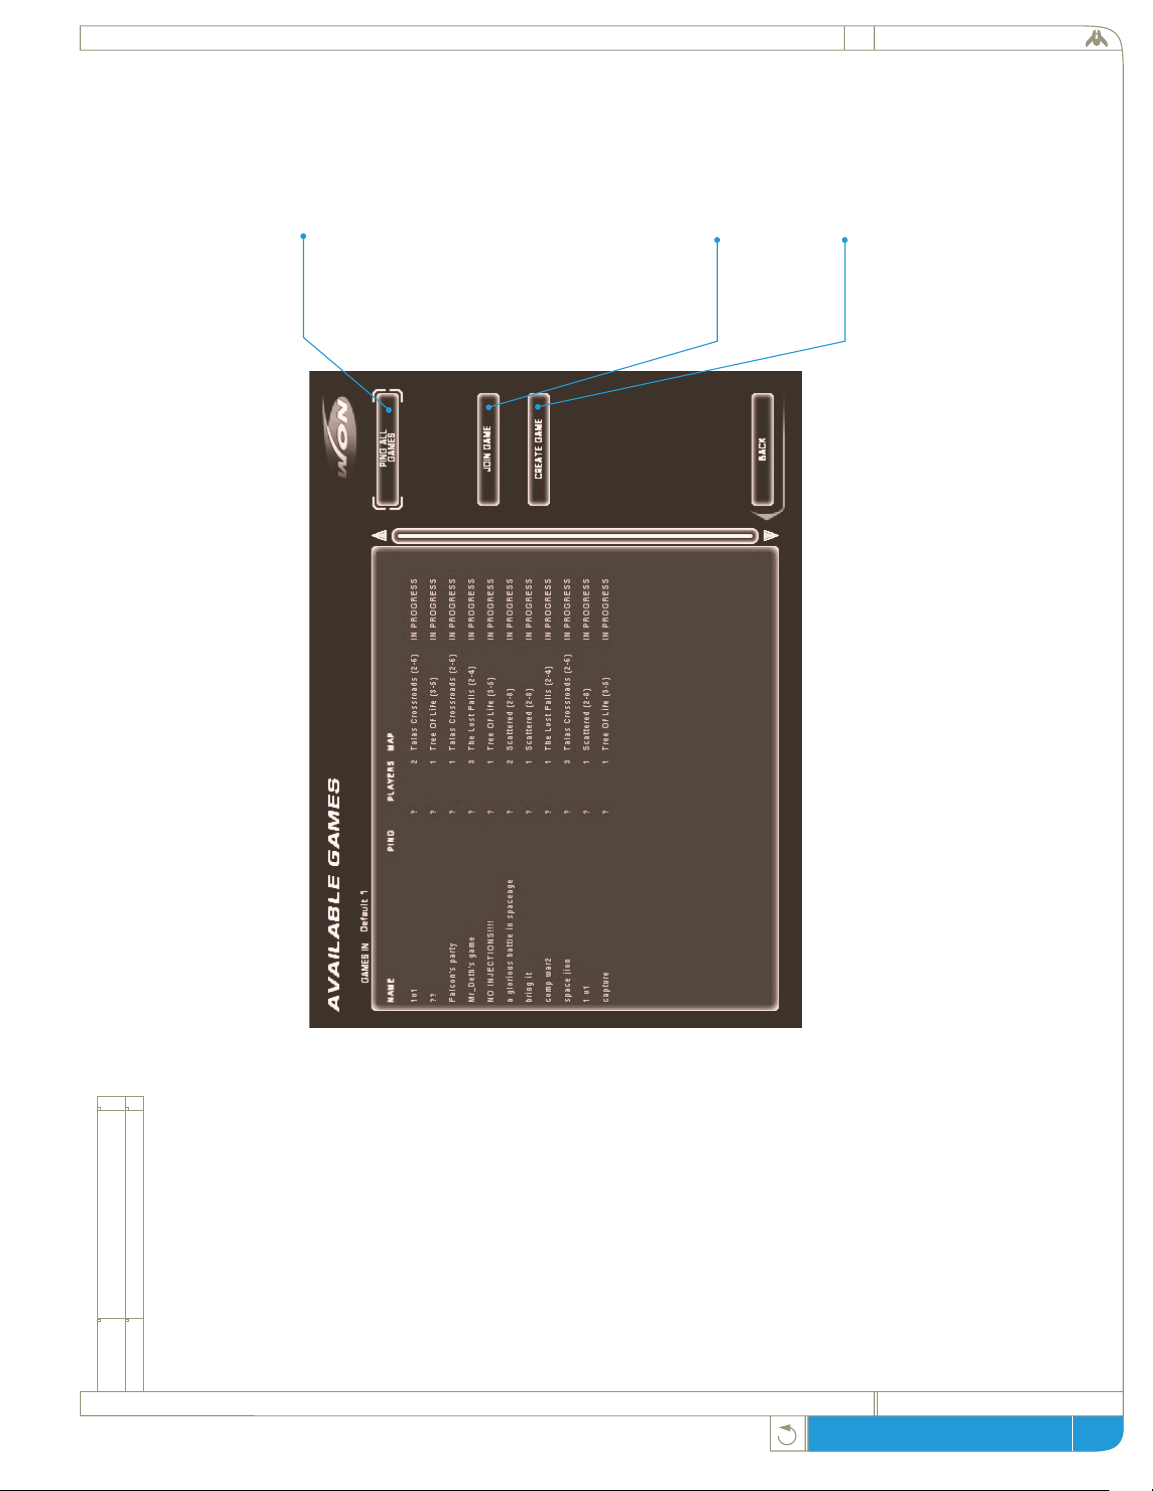
6.3.3 available games
screen shot
From this screen you can see a
list of games in the room
displayed in the large panel.
You can join any of these
games, view the options for
each of them, update their
ping times, or create your
own game.
Updating Ping Times:
Leftclick on this button to
update the ping times of all
the games in the list. The
lower the ping time, the faster
your connection to the game
will be.
Joining a Game:
Leftclick on the game you wish
to join on the main list, then
leftclick on this button.
Creating a Game:
Leftclick on this button to
create a game in the current
room. See “setting multiplayer
game options” for more
information on creating the
game.
page
homeworld gameplay guide
72
Page 73

6.3.4 available rooms
screen shot
From this screen you can see a
list of the rooms on WON in
the large panel. You can join
one of these rooms or create
your own.
Joining a Room:
To join a room, first leftclick
on its name in the list, then
leftclick on the <JOIN
ROOM> button.
Creating a Room:
To create a room, leftclick on
the <CREATE ROOM>
button and fill in the
necessary information.
homeworld
page
73
Page 74
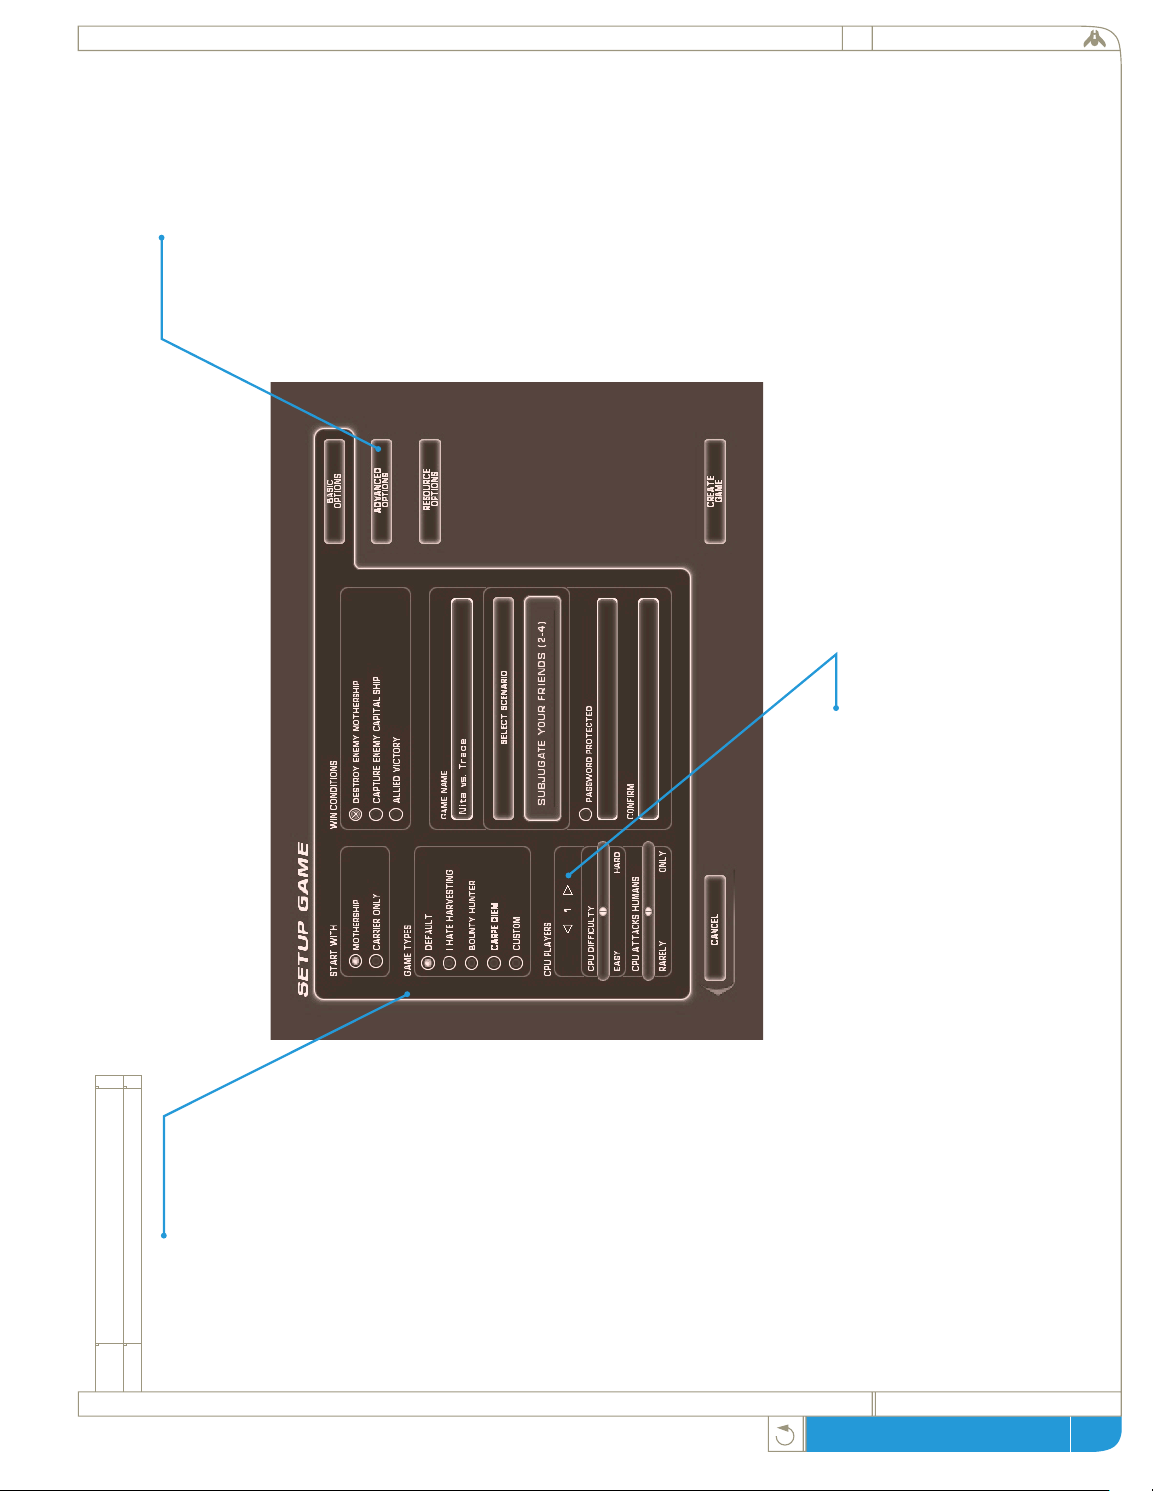
6.4 set up game multiplayer
screen shot
Game Type:
Homeworld comes with
several pre-defined setups for
different styles of multiplayer
gaming. Selecting one of these
game types changes a variety of
options on all of the options
screens.
I Hate Harvesting:
No harvesting of resources is
required in this game type. RU
injections are turned on with a
lump sum injection as well.
Bounty Hunter:
Bounties are turned on in this
game type, meaning each
enemy ship you kill brings in a
bounty -- in RUs. Players with
larger fleets have higher
bounty ratings, making them
more attractive targets.
Carpe Diem:
“Seize the day.” This game
type requires you to capture an
enemy ship to win the game.
Basic Options:
Select Map:
This allows you to select in
which location the multiplayer
battle will take place. The
number listed after the map
name shows how many players
that map supports.
CPU players:
This sets how many computer
players will be present in a
game.
Start With:
This option lets you decide if
everyone starts the battle with a
Mothership or only a Carrier.
Advanced Options:
Win Conditions:
This sets whether the game is
won by destroying everyone’s
Mothership or by capturing an
enemy Capital Ship.
Disable Research:
This option turns off the
research model in the game and
allows all players full access to
all technologies from the
beginning of the game.
Disable Crates:
If you toggle this off, no bonus
crates will appear during the
course of the game.
Disable Unit Capping:
This allows an unlimited
number of vessels to be
produced in the game. This can
seriously slow down the game,
even on the best of home
computers.
Disable Fuel Burn:
If keeping track of fuel for
Strike Craft (Fighters and
Corvettes) is getting to be too
much of a problem, turn off
fuel consumption with this
selection.
Allied Victory:
Checking this box will ensure
that players who are allied can
win a game together when they
defeat players not in their
alliance.
Bounties:
With this option toggled on,
you get a bounty in RUs for
every enemy unit you destroy.
Larger units bring greater
rewards.
page
homeworld gameplay guide
74
Page 75

6.5 Saving a Multiplayer
Game: While playing the
game, hit the [ESC] key and
then choose ‘save game’ from
the options list. This option
functions the same as it does in
Single-Player mode.
6.6 Loading a Multiplayer
Game: From the multiplayer
menu, leftclick on the <LOAD
SAVED GAME> button to
bring up a list of saved
multiplayer games. Left click on
a game in the list and then
leftclick on the <LOAD
GAME> button to load it.
6.7 Recording a Multiplayer
Game: Homeworld allows you
to record any multiplayer game
and watch it later, from any
angle. When you wish to start
recording a game, hit the
[ESC] key and leftclick on the
<RECORD> button. Follow
the same process that you
would if you were saving a
game. You may load a
recording at any time by
leftclicking on <LOAD
RECORDED GAME> from
the multiplayer menu. Once
loaded, you can focus on any
ship in the world from the
Sensors Manager, not just your
own.
6.4 set up game multiplayer
screen shot
Player Options:
Selecting a Fleet:
Here you can choose to play
either Kushan or Taiidan in the
game you are creating.
Choosing Ship Colors:
This screen lets you set the
base and stripe colors of your
ships. To change your base
color, leftclick on the <BASE
COLOR> button. A small
white circle will appear inside
the large rainbow box. Click
and drag the circle around the
rainbow box until you have
achieved a shade you are
satisfied with. To change the
stripe color, leftclick on the
<STRIPE COLOR> button
and repeat the same process of
dragging the white circle to
choose a stripe color. You can
also drag the slider, located to
the right of the rainbow box,
up and down to adjust the
brightness of the color.
Resources Options:
Disable Harvesting:
This toggles resource collection
on or off. With it off, you will
have to toggle on some other
supply of RUs or your game
will run out of resources fairly
quickly.
Starting Resources:
This sets the level of resources
with which each side begins
the scenario.
Resource Injections:
This section must be toggled
on by leftclicking on the
checkbox. You can then set
how often players will receive a
chunk of RUs, and how large
that chunk is.
One Lump Sum:
If you toggle this option, you
will receive only one lump sum
of resources a certain amount
of time after the game begins.
Both the amount and timing of
this precious gift can be set.
homeworld
page
75
Page 76

options
Page 77
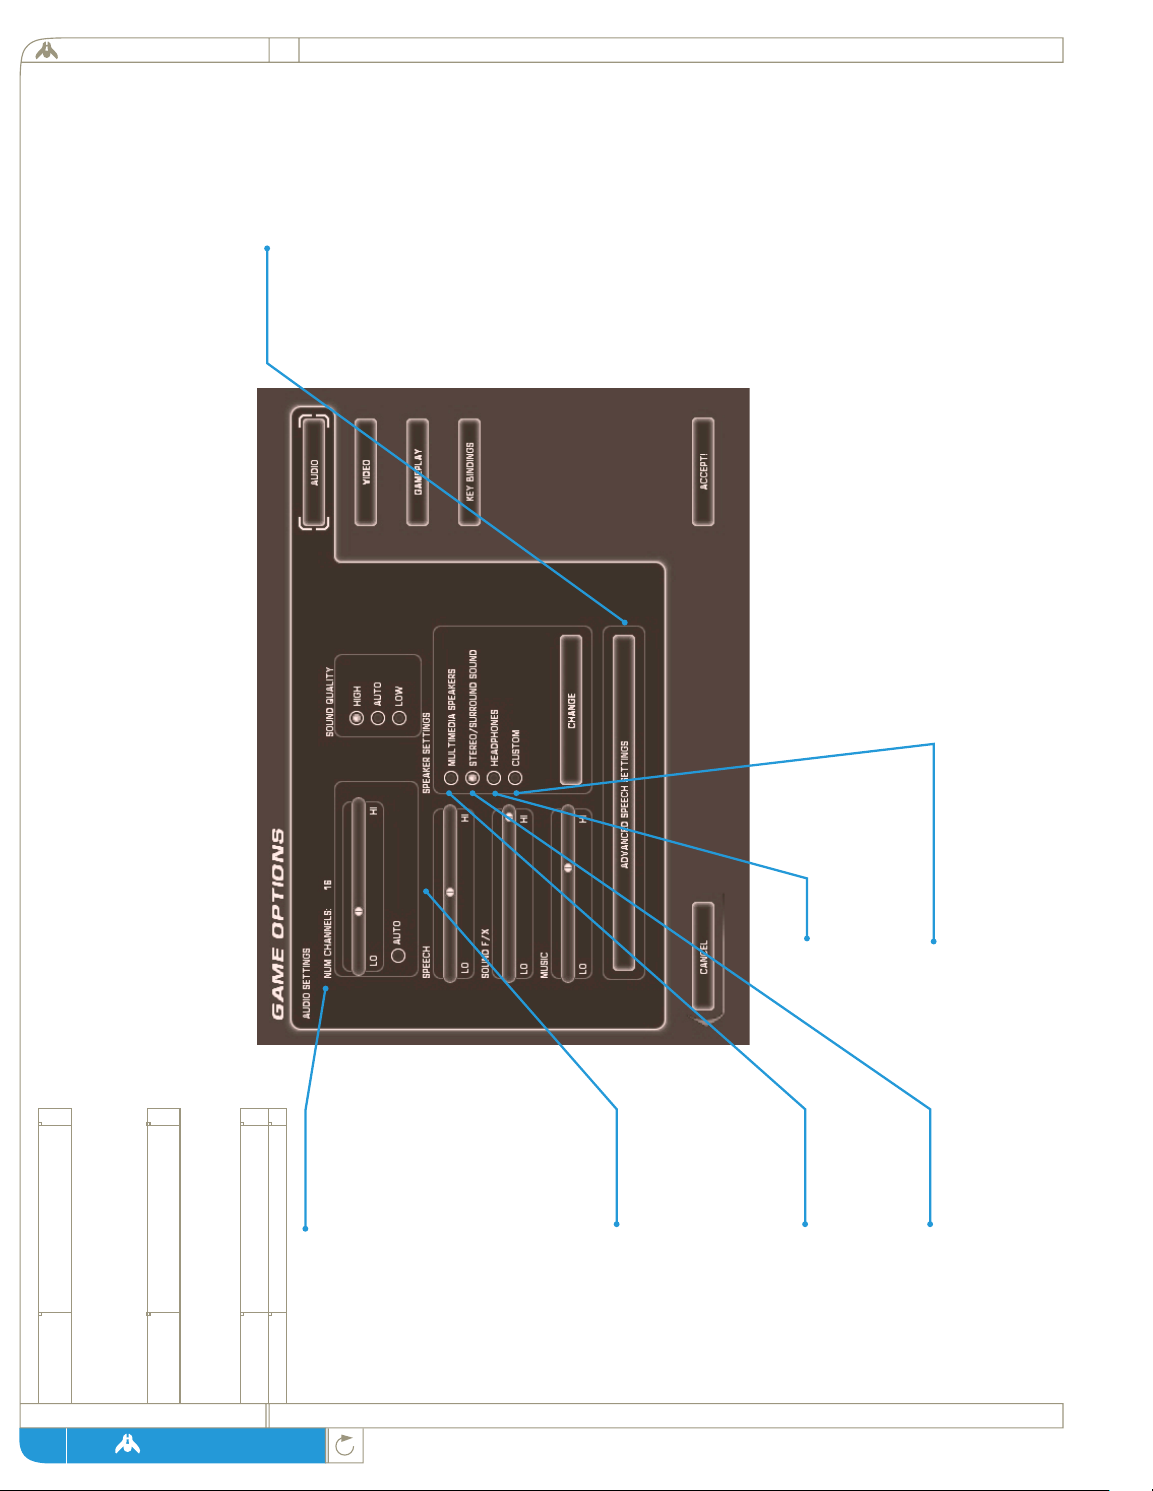
Sound Quality:
High quality is the recommended setting.
Selecting low quality will help increase the
frame rate of the game. Selecting auto allows
the audio engine to drop to low quality when
the frame rate starts to get low, it will
automatically go back to high quality when
the frame rate increases.
NOTE: While playing a multiplayer game,
you may change the music track you are
listening to by pressing the [<] key to select
the previous track or the [>] key to select the
next track. The list of music tracks is limited
to the ambient level tracks and battle tunes
7.1 audio options
screen shot
7 options
1 installation
Num Channels:
This is the number of sound
effects that the game will mix
at one time. A high number of
channels will give a more
immersive experience but may
adversly affect the frame rate of
the game. Selecting auto
allows the audio engine to
turn off channels when the
frame rate starts to get low, it
will automatically increase the
number of channels as the
frame rate increases.
Volume Settings:
This section, consisting of
three slider bars, allows you to
set the volume levels for the
game’s speech, sound effects
and music independently. Left-
click, hold on the level
indicator and drag the mouse
The options menu can be accessed either from the opening menu or by hitting [ESC] at any
time during a game. It gives you access to a number of gameplay and display options.
Insert the CD-ROM into your CD-ROM drive. The Homeworld Installation program will automatically start up. Follow the on-screen
instructions to specify the various installation options. When the installation is complete, it will have created a shortcut in your Start
Menu that you can use to run Homeworld.
Multimedia Speakers:
This setting equalizes the
audio engine for optimal
performance with the average
multimedia speaker system.
Stereo/Surround Sound:
This setting equalizes the
audio engine for optimal
performance with high end
multimedia speakers or a home
stereo.
Advanced Speech Settings
Menu:
Access this sub-menu by left-
clicking on the <ADVANCED
SPEECH SETTINGS> button.
Leftclick on the <ACCEPT>
button when the options are set
to your preference.
Vocal Settings:
This section allows you to pick
which speech sounds are heard
during the course of your
game. Leftclick on the check
boxes to turn these sounds on
or off. Command voices are the
responses to your commands
given during the game. Status
reports are the voices that
update you on new sensor
reports, battles, and other
goings-on in the game.
Random chatter describes the
voices of your various pilots
and gunners as they perform
their tasks, gloat over victories
or yell for assistance. Random
chatter is not vital to your
situational awareness but adds
greatly to the immersive
quality of the game.
Voice Selection:
This section allows you to turn
off any or all of the three
voices used in the game.
Leftclick on the <HEAR>
button to sample the voices.
Headphones:
This setting equalizes the
audio engine for optimal
performance with average
headphones.
Custom:
By pressing the change button,
you can tune the optimal
equalization settings for your
speakers or headphones.
homeworld
page
77
Page 78
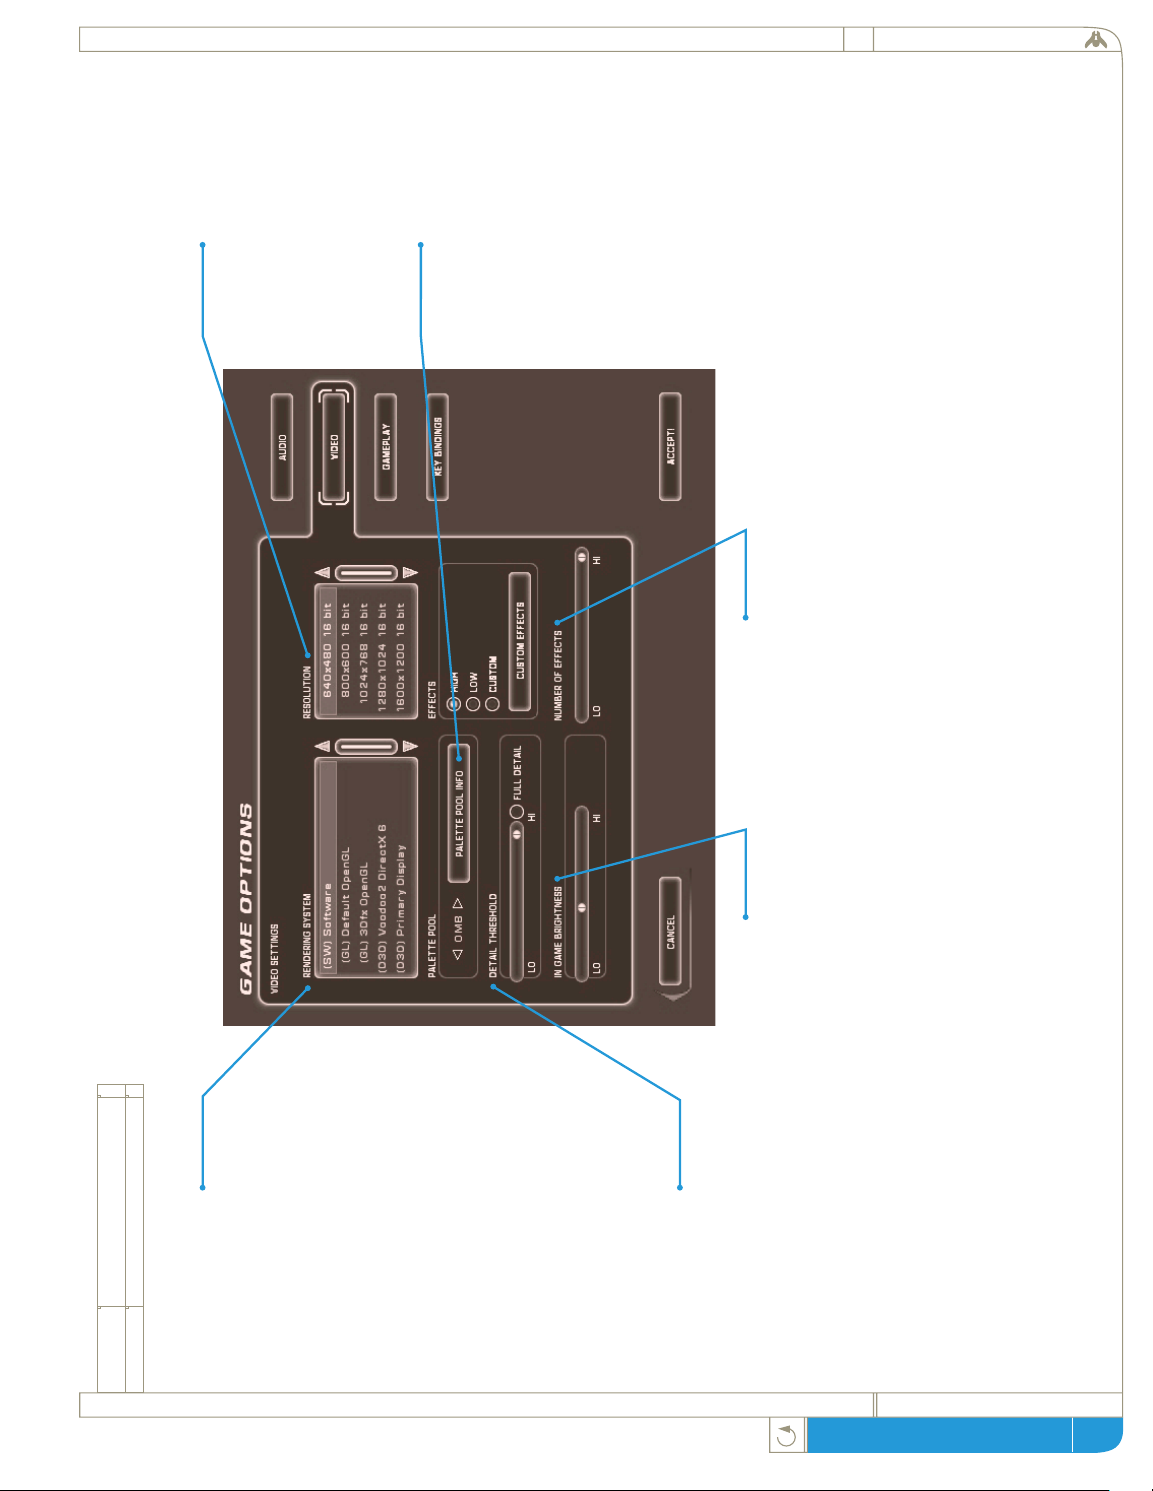
page
homeworld gameplay guide
7.2 video options
screen shot
Rendering System:
All systems that can run
Homeworld will be able to run
it in software. However, many
users will have some form of
hardware accelerator card that
allows them to use Direct3D
or OpenGL acceleration. This
listbox lists the supported
rendering systems Homeworld
has detected on your system.
The items listed in this
window may include Software,
Default OpenGL, 3DFx
OpenGL and Direct3D
Primary display. If you do not
have a hardware accelerator for
OpenGL, you will still have an
option for Default OpenGL.
Please note that this will be
much slower than the Software
option.
Level of Detail Threshold:
This slider bar controls the
level of geometric complexity in
rendered images. Sliding the
bar to the left reduces the
number of polygons in a single
frame and results in chunkier
looking ships. Adjust to
achieve a balance between
game performance and visual
fidelity.
In Game Brightness:
This Option affects how
brightly the ships are rendered
in the game. It does not effect
the user interface screens or
the backgrounds. You may
want to turn this up to
improve the brightness or
contrast of the game
depending on your monitor.
Number of Effects:
This slider effects how many
effects are drawn in the game.
Turning it up will result in a
richer, more detailed game
experience with more special
effects but will also make it
slower. To improve frame rate,
you may want to turn this
option down.
Resolution:
This panel displays the screen
resolutions available for the
rendering system you have
chosen. Lower resolutions will
speed up graphics at the cost of
image smoothness and detail.
Leftclick on the resolution
setting you wish to use.
Palette Pool:
Certain video cards do not
support paletted textures and
require additional RAM to
store temporary copies of the
converted textures.
This control allows you to
adjust how much memory is
reserved for the texture pool.
Increasing the size of the pool
will decrease the amount of
graphical slowdown that
occurs when downloading
textures to your video card.
The control will be disabled if
your hardware does not
require this extra step.
78
Page 79
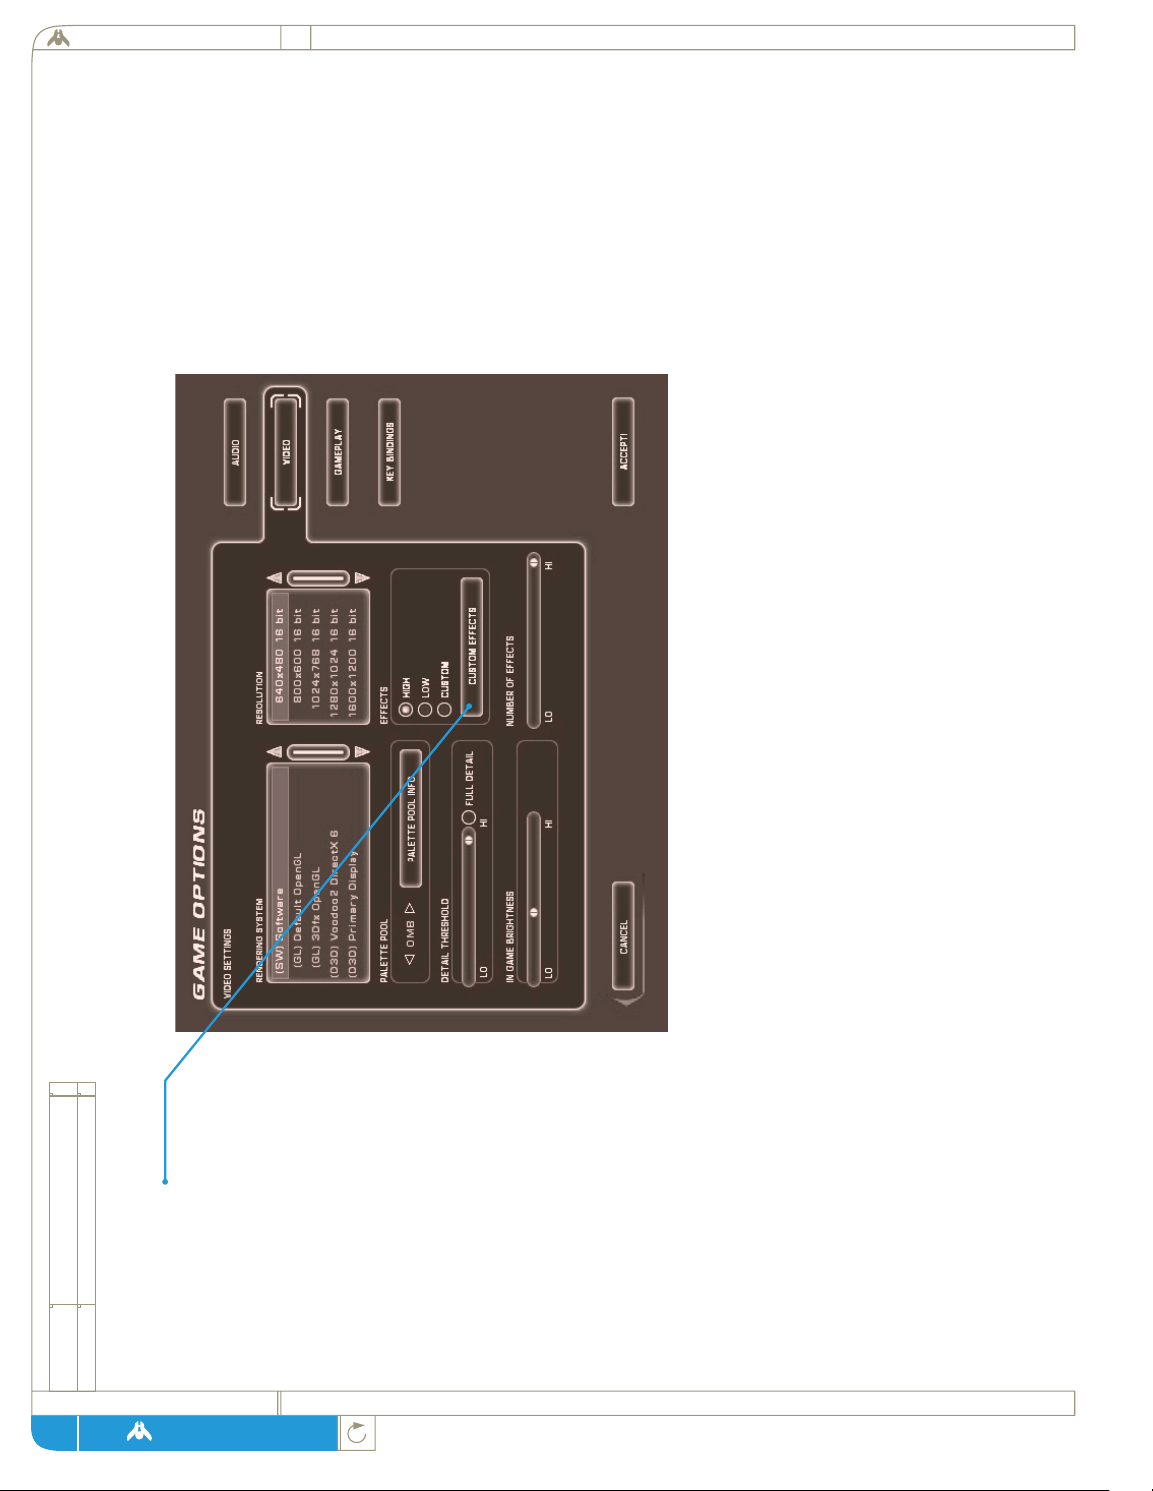
7.2 video options
screen shot
Blob Alpha:
Selecting this option will
cause the circles in the
Sensors Manager to be
displayed with a faded
fringe. Owners of slower
computers may want to
disable this option to speed
up the display when in the
Sensors Manager.
Instant SM Transition:
Selecting this option causes
the transition from the
main game screen to the
Sensors Manager to be
immediate instead of
smooth and fluid. Users
with slower machines may
want to enable the instant
transition to improve
response.
Bullet Effects:
Turning this option off
will cause all bullets to be
drawn with a simple bullet
effect. This can improve
the frame rate on slower
machines during big
battles, but will not look
as good. See also
“Number of Effects” in
the video options screen.
Custom Effects :
This sub-menu lets you choose
which advanced graphic effects
will be activated in your game.
Each has its own cost in terms
of performance, and its own
benefits in terms of visual
effects. A particular effect can
be turned on or off by left
clicking on the checkbox at
the left of the feature name.
Surfacing Filtering:
Selecting this option will make
textures appear smoother and
less chunky. Surface filtering is
not available when using the
software rendering system.
Background Images:
This determines whether the
galactic backdrop is displayed
instead of the blackness of
space. Users with slower
machines, or those using the
software rendering system, may
want to turn this option off to
speed up gameplay.
Stipple Alpha:
Selecting this option will cause
the software rendering system
to display transparency effects
with a screen-door appearance,
which results in higher graphic
performance at the expense of
visual quality.
Hit Effects:
Turning this option off will
disable bullet hit effects.
These effects are played
whenever bullets hit ships or
other game objects. Owners
of slower computers or
without any hardware
acceleration may want to
disable this option to speed up
the game during big battles.
See also “Number of Effects”
in the video options screen.
Damage Effects:
When ships get damaged, they
may spark, smoke or emit
flames. While this is an
important gameplay element,
rendering of these effects can
case a slow frame rate on
slower machines or machines
without hardware acceleration.
Owners of these slower
machines may want to disable
these effects. See also
“Number of Effects” in the
video options screen.
Muzzle Flash Effects:
Turning this option off will
disable effects that get played
when ships fire bullets.
Disabling this option may
speed up the game on slower
machines during big battles,
but will not look as good. See
also “Number of Effects” in
the video options screen.
homeworld
page
79
Page 80

7.3 gameplay options
screen shot
Mouse Sensitivity:
This slider bar controls how
much mouse motion it takes to
move the cursor on the screen.
Leftclick and drag the indicator
to the left to make your cursor
move more slowly and to the
right to make it respond to
mouse movement more quickly.
Info Overlay:
With this toggled on, every
time you select a ship or group
of ships, their type and number
will appear in the upper right
corner of the screen.
page
homeworld gameplay guide
80
Page 81

screen shot
81
7.4 key bindings
This menu allows you to
change which gameplay
commands are activated by
which keystroke. To change a
command key, doubleclick on
the command you wish to
change and press the new key
you wish to trigger the
command. Should you wish to
erase all the changes you have
made and return the command
keys to their original assign-
ments, leftclick on the <RESET
TO DEFAULTS> button.
page
homeworld
Page 82

ship data
Page 83

homeworld
page
8.1 Ship Categories
Ships in Homeworld are divided into several broad categories based on
tonnage. Initially, no combat vessel larger than a Corvette is available, but
through research all classes become available. Those classes are as follows:
Strike Craft:
This small ship class includes both Fighter and Corvette hulls.
While highly maneuverable (Fighters are the only vessel class
capable of performing special combat flight maneuvers), Strike
Craft are unable to carry enough reactor mass to generate a selfsustaining drive torch, and so they must be refueled. This limits
their range from the Mothership, unless a Support Frigate is
provided to carry fuel for them. Strike Craft also are too small
to carry the hyper drive module and cannot enter hyperspace
by themselves.
Capital Ships:
This class represents the first generation of large crew vessels and
includes the Frigate and Destroyer classes of warships along with
the larger support vessels like the Cloak Generator, Resource
Collector and Grav Well Generator. Capital Ships are the hard
backbone of any attack fleet, and what they lack in speed and
maneuverability is made up for in firepower and armor. Capital
Ships have a limited self-repair capability.
Super Capital Ships:
These huge warships represent vast investments of resources, time
and technology, and are as valuable as they are powerful. Second
only to the massive Mothership in size and capability, these vessels
are dreadnoughts of cutting edge-technology. They carry their
own hyper drive modules and some even have onboard
manufacturing arrays in order to replace ordinance or construct
smaller vessels. While extremely powerful and able to absorb large
amounts of damage, they are still vulnerable to masses of small
ships and should never be deployed without a flotilla of smaller
warships.
8 ship data
83
Page 84

page
homeworld gameplay guide
some definitions:
Mass:
Firepower:
Armor:
Coverage:
Maneuverability:
Max. Velocity:
The mass of the ship in tons
The amount of damage the ship
can inflict (relative weighting)
The amount of damage the ship’s
armored hull can withstand
The percentage of a sphere the
ship can cover with its guns
How maneuverable and agile the
ship is
The ship’s top speed
8.2 Ship Stats and Descriptions
84
Page 85

True to its name, the Scout is a
fast, cheap ship that is useful for
scouting out enemy locations.
Because of its high maneuverability,
the Scout is excellent for creating
diversions and light harassment
while avoiding enemy fire.
While less maneuverable than the
Scout, the Interceptor easily
compensates with its much
heavier weaponry. The
Interceptor is a good Fighter
killer and stacks up favorably
against Capital Ships when used
in greater numbers.
Although its slow speed keeps the
Defender from being a primary
attack force, its gimbaled guns and
high power rotational thrusters
allow it the greatest coverage of all
Fighters.
40 tons
10
110
8%
Very high
1000m/s
Speed burst
(press [z] to activate)
none
scout
60 tons
18
160
10%
high
875 m/s
none
Fighter Drive, Heavy Fighter Chassis
interceptor
60 tons
30
280
90%
high
385 m/s
none
Fighter Drive, Heavy Fighter Chassis, Fire Control
defender
fighter class
8.2.1- 8.2.3
85
designation
description
required technology:
mass:
firepower:
armor:
coverage:
kushan taiidan
maneuverability:
max. velocity:
special function:
designation
description
required technology:
designation
description
required technology:
page
homeworld
mass:
firepower:
armor:
coverage:
mass:
firepower:
armor:
coverage:
kushan taiidan
maneuverability:
max. velocity:
special function:
kushan taiidan
maneuverability:
max. velocity:
special function:
Page 86
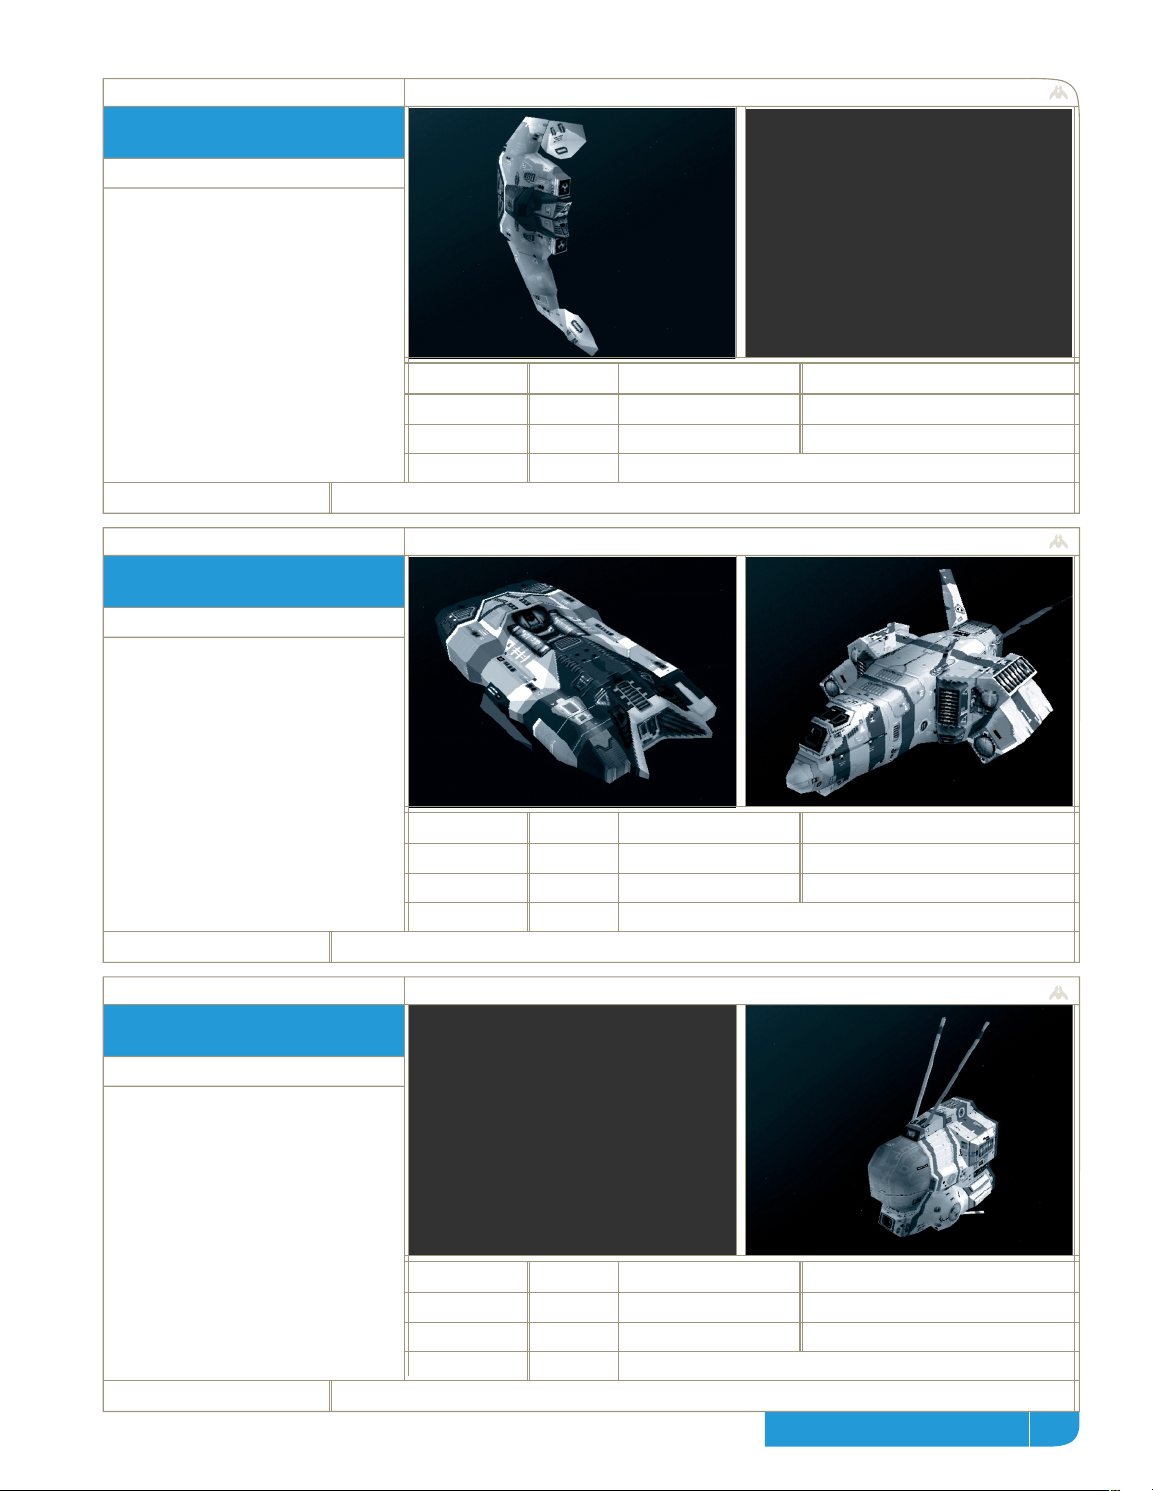
With cloaking sails active, the
Cloaked Fighter is the stealthiest
ship around. Highly useful for
simple surveillance, the Cloaked
Fighter is also a good attack craft.
It must, however, de-cloak to fire,
making it vulnerable for a short
period of time.
A technological advance created
plasma bomb technology small
enough to fit in a Fighter-sized
craft. The Attack Bomber was
born. While its slow-moving
plasma bombs can be outrun by
Fighters, they make short work of
Frigates and other Capital Ships.
The Defense Fighter has no
attack weaponry to speak of;
instead, it fires beams from its
emitter dome to shoot down
oncoming enemy fire. This
makes the Defense Fighter an
excellent mobile protective force,
especially when used with other
Fighter craft.
40 tons
10
150
10%
high
775 m/s
Cloaking (doubleclick or:
press [z] to activate)
Fighter Drive, Heavy Fighter Chassis, cloaked fighter
cloaked fighter
90 tons
45
300
5%
medium
700 m/s
none
Fighter Drive, Heavy Fighter Chassis, Plasma Bomb Launcher
attack bomber
75 tons
300
80%
high
875 m/s
none
Fighter Drive, Heavy Fighter Chassis, Defense Fighter
defense fighter
fighter class
8.2.4 - 8.2.6
86
(kushan only)
(taiidan only)
designation
description
kushan taiidan
required technology:
designation
description
required technology:
mass:
firepower:
armor:
coverage:
mass:
firepower:
armor:
coverage:
maneuverability:
max. velocity:
special function:
kushan taiidan
maneuverability:
max. velocity:
special function:
designation
description
required technology:
mass:
firepower:
armor:
coverage:
kushan taiidan
maneuverability:
max. velocity:
special function:
homeworld gameplay guide
page
Page 87

Its heavy-duty engine, chassis,
and armor make the Light Corvette
significantly slower than any of
the Fighter-class ships.
Its salvation comes in a powerful
turreted gun which is fast enough
to hit Fighters flying at full speed.
More armored than its light
cousin, the Heavy Corvette adds
a second high powered turret to
an already powerful craft. Its
turrets allow the Heavy Corvette
to track two Fighters at once and
also make it a moderate threat to
Capital Ships.
The Repair Corvette is capable of
repairing and refueling Fighters
“in the field.” While equipped
with only a small gun, the Repair
Corvette has heavy armor to
protect itself and the craft it’s
repairing. Timely support from a
Repair Corvette can be quite
useful in a long battle.
400 tons
100
900
40%
medium
575 m/s
none
Corvette Drive, Corvette Chassis
light corvette
750 tons
200
1700
50%
medium
350
charged burst attack
Corvette Drive, Corvette Chassis, Heavy Corvette Upgrade
heavy corvette
750 tons
65
1200
10%
medium
500 m/s
can repair + refuel strike
none
repair corvette
corvette class
8.2.7 - 8.2.9
87
(hold [z] + leftclick on the target to activate)
craft, repair capital ships. (hold [z] + leftclick
on the ship(s) to service)
designation
description
required technology:
kushan taiidan
mass:
firepower:
armor:
coverage:
maneuverability:
max. velocity:
special function:
designation
description
required technology:
designation
description
required technology:
page
homeworld
mass:
firepower:
armor:
coverage:
mass:
firepower:
armor:
coverage:
kushan taiidan
maneuverability:
max. velocity:
special function:
kushan taiidan
maneuverability:
max. velocity:
special function:
Page 88

This beefy Corvette was once
used exclusively for towing junk
and salvaging derelicts. After
being adapted for combat, the
Salvage Corvette gained the
ability to capture enemy ships
that are heavily damaged. Once
captured, these ships are towed
back to a Carrier or the
Mothership for refitting.
Following advances in turrets and
auto-targeting, the Multi-Gun
Corvette was conceived. It sports
a full six articulating turrets. This
allows it to track numerous fast-
moving targets at once, making it
especially deadly against large
groups of Fighters.
While the Minelayer has normal
attack capability (dropping mines
that float slowly toward their
target), it can also perform a force
mine drop, where a wall of mines
are laid at the current location.
Running into a minefield with a
fleet of Capital Ships is sure to
ruin anyone’s day.
1200
NA
1200
-
medium
425 m/s
capture of enemy ships
Corvette Drive, Corvette Chassis
salvage corvette
750 tons
180
1400
78%
medium
695 m/s
none
Corvette Drive, Corvette Chassis, Fast Tracking Turrets
multi-gun corvette
900 tons
300
800
-
medium
425 m/s
creation of minefields
Corvette Drive, Corvette Chassis, Minelaying Tech
minelayer corvette
corvette class
8.2.10 - 8.2.12
88
(leftclick on enemy ships to activate)
(doubleclick or: press [z] to activate)
designation
description
required technology:
mass:
firepower:
armor:
coverage:
kushan taiidan
maneuverability:
max. velocity:
special function:
designation
description
required technology:
designation
description
required technology:
mass:
firepower:
armor:
coverage:
mass:
firepower:
armor:
coverage:
kushan taiidan
maneuverability:
max. velocity:
special function:
kushan taiidan
maneuverability:
max. velocity:
special function:
homeworld gameplay guide
page
Page 89
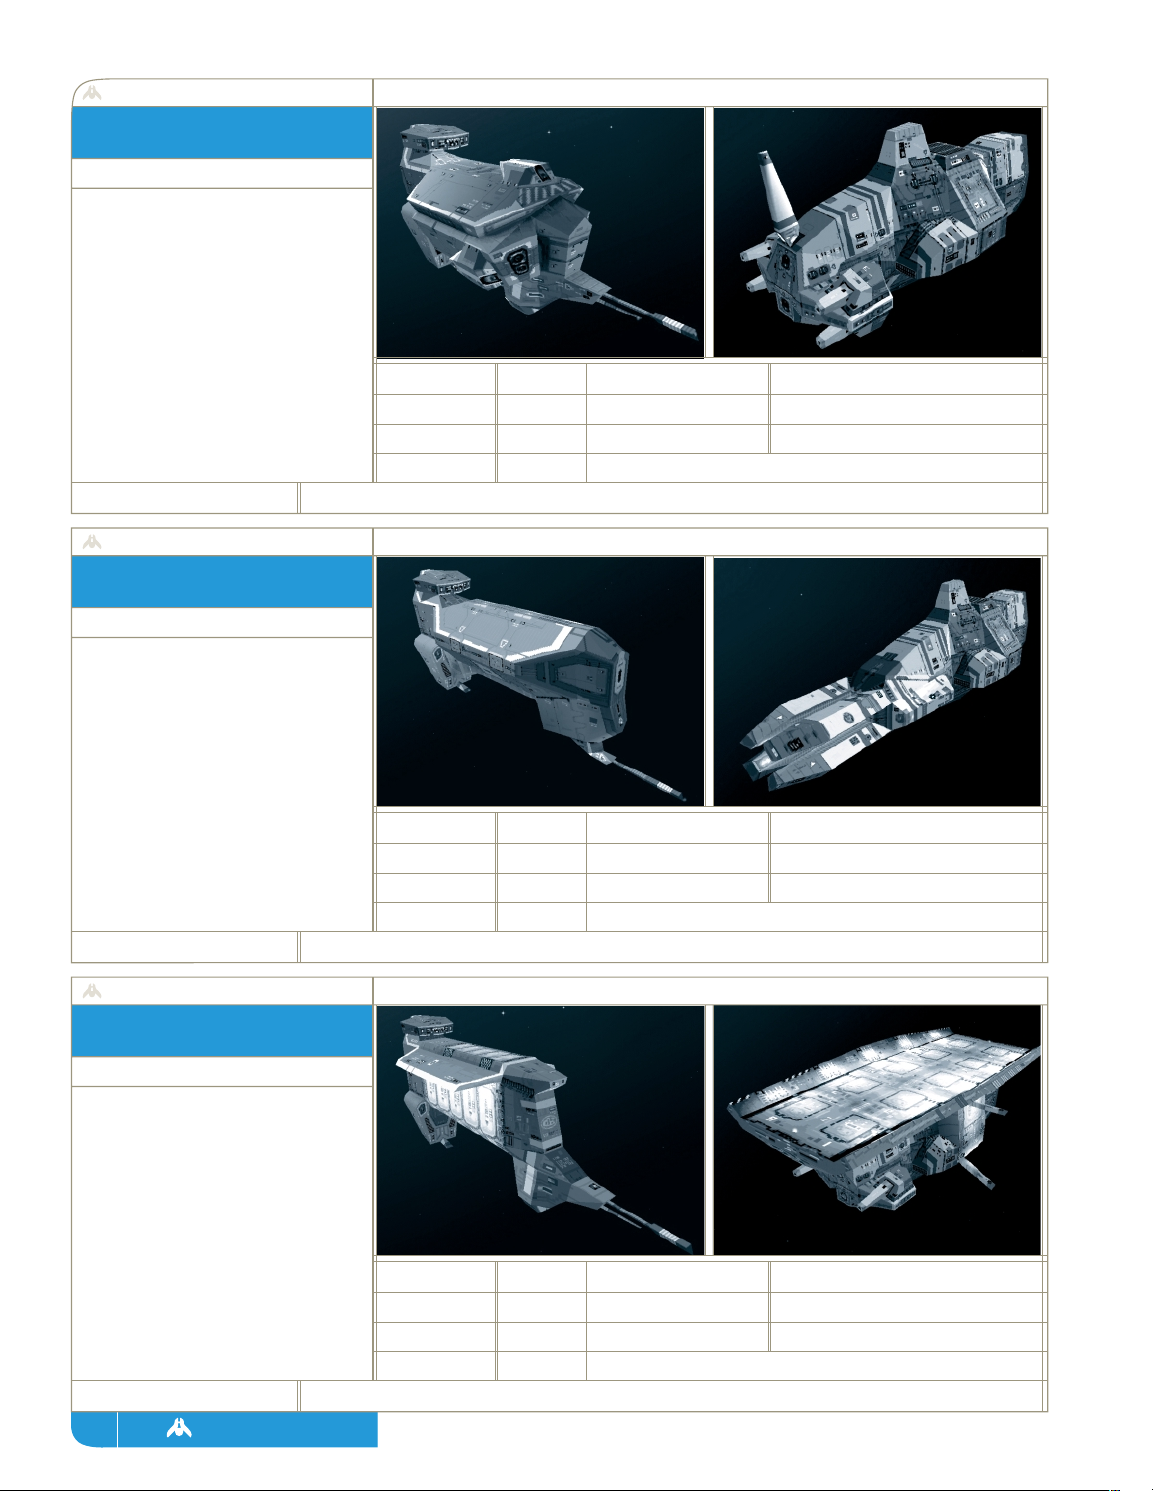
The Assault Frigate is the most
general purpose combat ship of
the capital ships. It has four large
turrets, which afford it excellent
coverage, as well as two fixed
plasma bomb launchers. While its
turrets are too slow to track fast-
moving Fighters, they can take out
the slower Corvettes with ease.
When ion beam power was
harnessed, the scale necessary to
produce a severely damaging
beam meant that an entire Frigate
could hold only one cannon. The
acceleration ladder alone runs the
entire length of the ship. What
results is a devastatingly powerful,
focused ion beam.
Giving support to Strike Craft in
combat is the Support Frigate’s
main role. It has ten Fighter
docking pads and four Corvette
docking arms for repairing and
refueling. Although it is well
armored, the Support Frigate has
only one large turret for defense
and is best not left alone.
45,000
2400
16000
75%
low
325 m/s
none
Capital Ship Drive, Capital Ship Chassis
assault frigate
57,000
4000
15000
2%
low
300 m/s
none
Capital Ship Drive, Capital Ship Chassis, Ion Cannons
ion cannon frigate
45,000
760
12000
15%
low
450m/s
can repair + refuel strike
Capital Ship Drive
support frigate
frigate class
8.2.13 - 8.2.15
89
craft (hold [z] + leftclick on ship(s) to service
designation
description
required technology:
kushan taiidan
mass:
firepower:
armor:
coverage:
maneuverability:
max. velocity:
special function:
designation
description
required technology:
designation
description
required technology:
page
homeworld
mass:
firepower:
armor:
coverage:
mass:
firepower:
armor:
coverage:
kushan taiidan
maneuverability:
max. velocity:
special function:
kushan taiidan
maneuverability:
max. velocity:
special function:
Page 90

The Drone Frigate is essentially a
holding and control system for
the 24 drones it houses. These
highly maneuverable drones each
contain a powerful gun and, when
launched, form a sphere around
the Drone Frigate, giving it superb
protection against Fighters.
Like the Defense Fighter, the
Defense Field Frigate has no
attack capability. It can, however,
deflect almost 100 percent of all
oncoming enemy fire, with the
exception of ion beams, mines,
and missiles.
60,000
4900
16000
100%
low
325 m/s
drone launching /retraction:
Capital Ship Drive, Capital Ship Chassis, Drone Technology
drone frigate
53,000
17600
100%
low
325 m/s
Defense field (always active)
Capital Ship Drive, Capital Ship Chassis, Defense Field
defense field frigate
frigate class
8.2.16 - 8.2.17
90
(kushan only)
(taiidan only)
(doubleclick or: press [z] to activate)
designation
description
kushan taiidan
required technology:
designation
description
required technology:
mass:
firepower:
armor:
coverage:
mass:
firepower:
armor:
coverage:
maneuverability:
max. velocity:
special function:
kushan taiidan
maneuverability:
max. velocity:
special function:
designation
description
required technology:
mass:
firepower:
armor:
coverage:
kushan taiidan
maneuverability:
max. velocity:
special function:
homeworld gameplay guide
page
Page 91

Although its total firepower is
significantly less than that of a
regular Destroyer, the guided
missiles it launches make the
Missile Destroyer a formidable
foe to Strike Craft and Capital
ships alike. For supply, the Missile
Destroyer has a full missile
manufacturing center in its belly.
A veritable feat of engineering,
the Carrier incorporates an entire
construction center, capable of
building up to Frigate-class ships.
In addition, a huge docking array
provides space for up to 50
Fighters and 25 Corvettes. Its
rapid fire deck guns give it
adequate defense.
The goliath of Capital Ships, this
bruiser carries four twin-mounted
ion cannons and six heavy turrets,
each almost half the size of an
entire Frigate. When a Heavy
Cruiser shows up on the scene,
things get really quiet really fast.
200,000
8500
42000
-
low
295 m/s
missile volley attack
Super Capital Ship Drive, Guided Missiles
missile destroyer
600,000
4100
72000
60%
very low
300 m/s
Can repair and refuel strike
Super Capital Ship Drive, Super Heavy Chassis
carrier
800,000
19,000
70000
80%
very low
190 m/s
none
Super Capital Ship Drive, Super Heavy Chassis, Heavy Guns
heavy cruiser
super capital class
8.2.18 - 8.2.20
91
(hold [z] and leftclick on the target to activate)
craft. (hold [z] and leftclick on the
ship(s) to service)
designation
description
required technology:
mass:
firepower:
armor:
coverage:
kushan taiidan
maneuverability:
max. velocity:
special function:
designation
description
required technology:
designation
description
required technology:
page
homeworld
mass:
firepower:
armor:
coverage:
mass:
firepower:
armor:
coverage:
kushan taiidan
maneuverability:
max. velocity:
special function:
kushan taiidan
maneuverability:
max. velocity:
special function:
Page 92
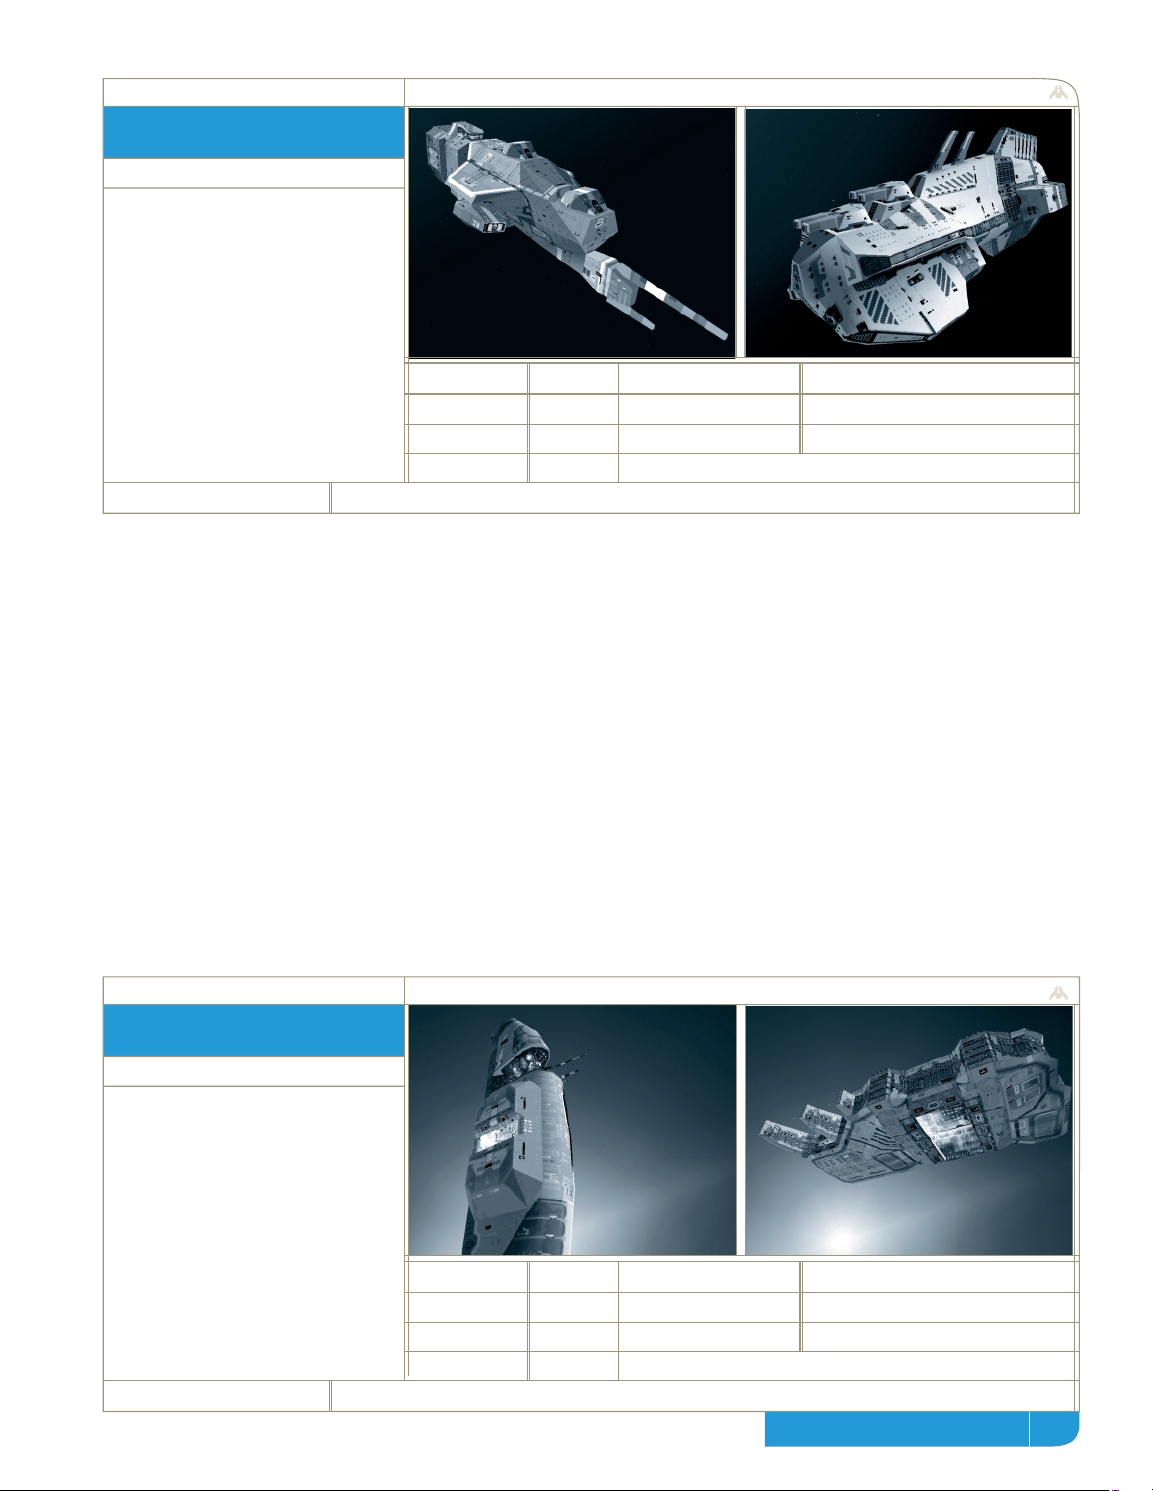
When it comes to taking down
other Capital Ships, the Destroyer
is a first choice. It has twin ion
cannons and two modified large
turrets. With maneuverability
almost equal to a Frigate, the
Destroyer is able to move around
well in combat and react quickly
to changes in the battle.
her
The massive mothership contains
three main sections: navigation,
the fleet foundry, and cryogenics.
Navigation analyzes local sensor
data, the foundry provides
complete construction capability,
and cryogenics maintains the
500,000 colonists aboard.
185,000
10500
44000
35%
low
315 m/s
none
Super Capital Ship Drive
destroyer
5,000,000
7500
160000
60%
50m/s
-
-
mothership
super capital class
8.2.21
92
mothership class
8.2.22
designation
description
required technology:
mass:
firepower:
armor:
coverage:
kushan taiidan
maneuverability:
max. velocity:
special function:
designation
description
required technology:
designation
description
mass:
firepower:
armor:
coverage:
kushan taiidan
maneuverability:
max. velocity:
special function:
kushan taiidan
required technology:
mass:
firepower:
armor:
coverage:
maneuverability:
max. velocity:
special function:
homeworld gameplay guide
page
Page 93
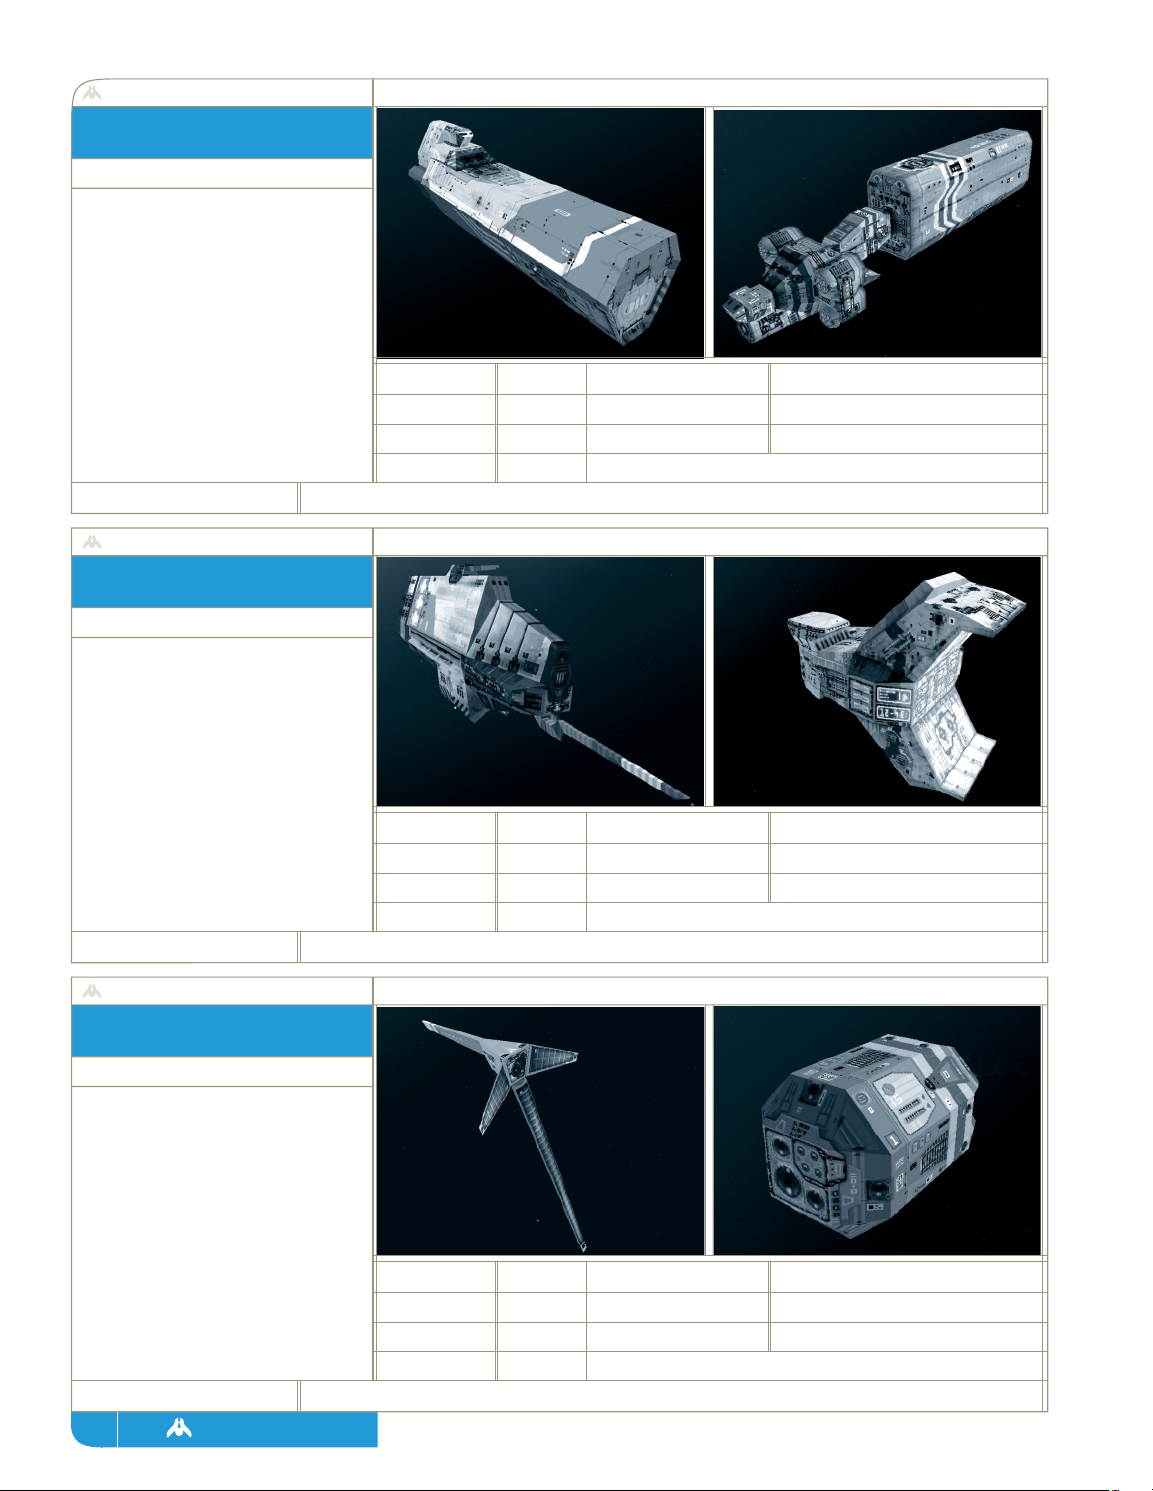
Using a modified Phased Dis-
assembler Array, the Resource
Collector extracts at a molecular
level the base elements in any
resource. It then converts these
elements into Resource Units,
the generic term for base levels of
material necessary for construction.
The Resource Controller provides
remote drop-off capability to the
Resource Collector, minimizing
time spent in transit. Additionally,
it supports refueling of six
Fighters and two Corvettes at
once via its docking pads.
The Probe is outfitted with a one-
time use engine which provides a
huge power output for a short
period of time. This results in
very fast travel, but once in place
the probe can’t be moved again.
40,000
10800
-
medium
300 m/s
can refuel strike craft.
none
resource collector
79,000
13600
-
low
300 m/s
can refuel strike craft.
Capital Ship Drive
resource controller
40 tons
800
-
medium
4000 m/s
none
none
probe
non-combat class
8.2.23 - 8.2.25
93
(hold [z] and leftclick on the ship(s) to service)
(hold [z] and leftclick on the ship(s) to service)
designation
description
required technology:
mass:
firepower:
armor:
coverage:
kushan taiidan
maneuverability:
max. velocity:
special function:
designation
description
required technology:
designation
description
required technology:
page
homeworld
mass:
firepower:
armor:
coverage:
mass:
firepower:
armor:
coverage:
kushan taiidan
maneuverability:
max. velocity:
special function:
kushan taiidan
maneuverability:
max. velocity:
special function:
Page 94

The Cloak Generator creates a
cloaking field large enough to
contain up to two Frigates. Any
ship inside the field is completely
invisible except when firing. The
generator can operate only for a
fixed amount of time before
recharging must occur.
The Gravity Well Generator
creates a strong field around it
which stops all Strike Craft in
place. Gravity Well technology
is less understood than cloaking
and, as a result, the Grav Well’s
unstable field must be shut down
after a certain amount of time and
never restarted.
A remote sensor pack with an
engine strapped onto it pretty
much sums up the Proximity
Sensor’s. Beyond normal watch-
dogging, its ability to detect
cloaked vessels can make the
lowly Proximity Sensor a handy
ship to have around.
22,000
6000
-
low
325 m/s
cloaking (doubleclick or:
press [z] to activate)
Capital Ship Drive, Cloak Generator
cloak generator
65,000
8000
-
low
325
captures Strike Craft in its
Capital Ship Drive, Gravity Generator
grav well generator
40 tons
800
-
very high
1000 m/s
none
Proximity Detector
proximity sensor
non-combat class
8.2.26 - 8.2.28
94
field (Doubleclick or: Press [Z] to activate)
designation
description
required technology:
mass:
firepower:
armor:
coverage:
kushan taiidan
maneuverability:
max. velocity:
special function:
designation
description
required technology:
designation
description
required technology:
mass:
firepower:
armor:
coverage:
mass:
firepower:
armor:
coverage:
kushan taiidan
maneuverability:
max. velocity:
special function:
kushan taiidan
maneuverability:
max. velocity:
special function:
homeworld gameplay guide
page
Page 95
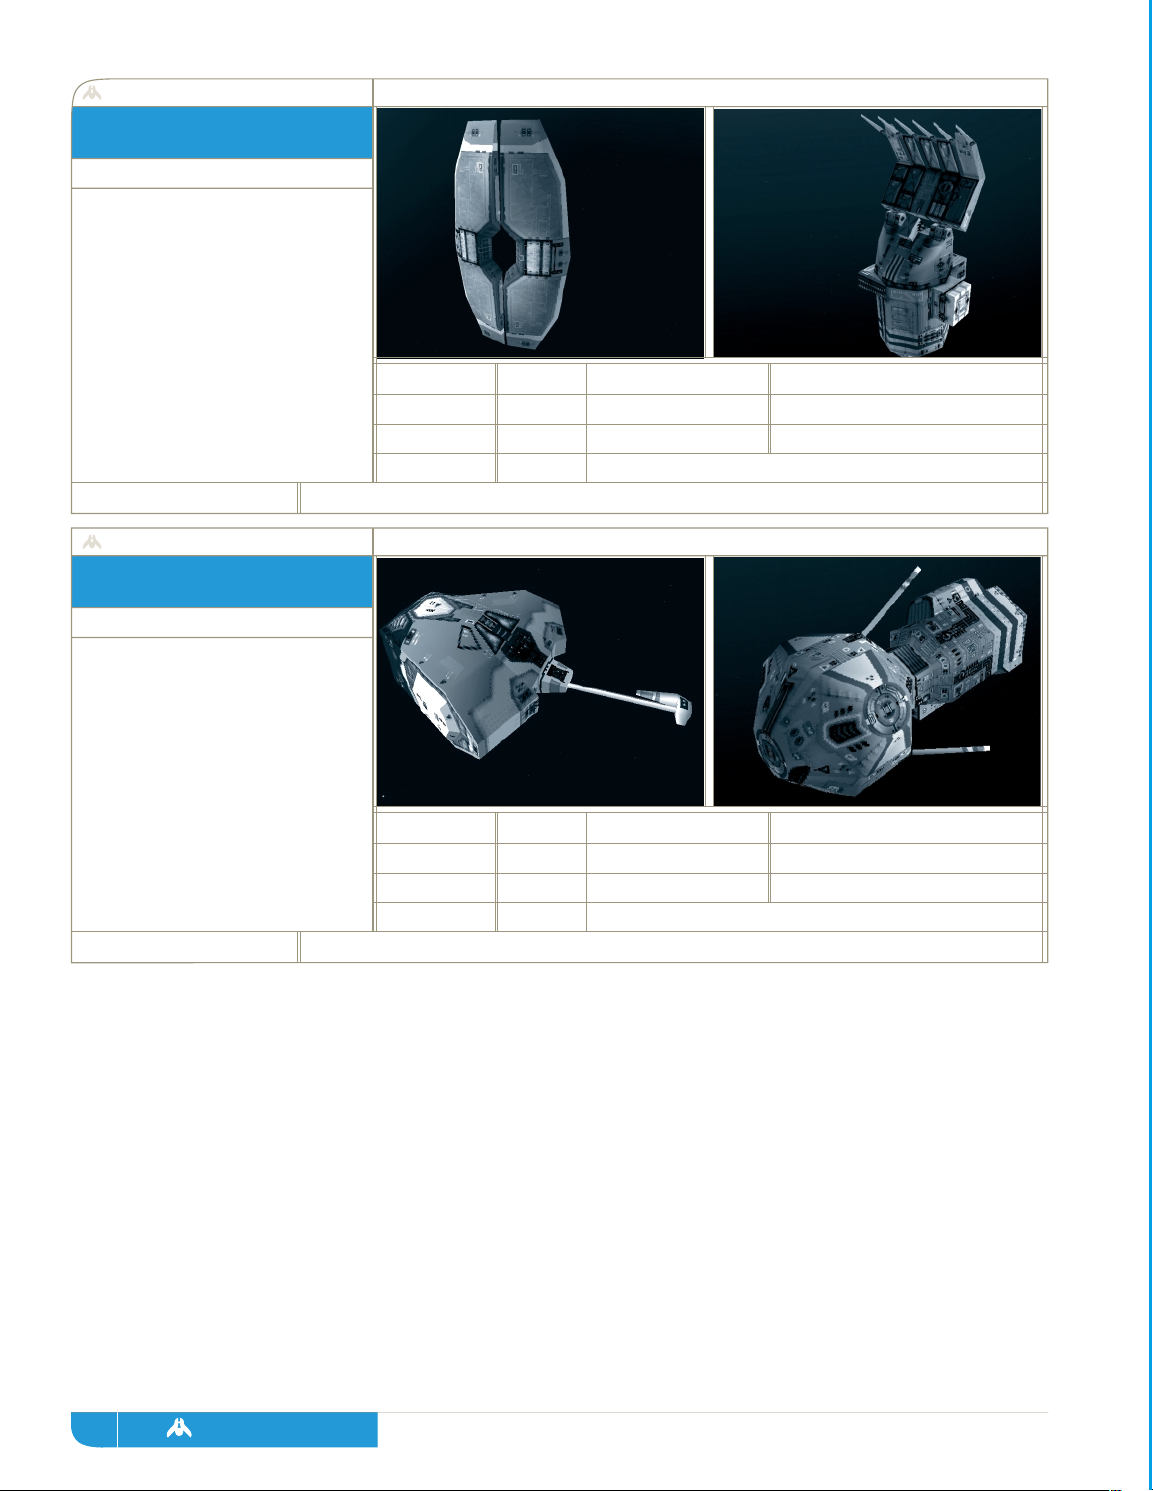
Expanding the sensor ability of
the Mothership with its larger-
scale design, the Sensors Array
provides full data on the local
environment, letting you see the
position and number of all enemy
ships, as well as resource pockets.
Each Research Ship is a fully-
functioning science facility that
develops new technologies for the
fleet. Newly-built Research Ships
will link up with existing ones,
increasing the aggregate armor of
the facility.
here
2900
6000
-
low
280m/s
none
Proximity Detector, Sensor Array
sensors array
11,000
4500
-
low
280 m/s
none
none
research ship
non-combat class
8.2.29 - 8.2.30
95
designation
description
required technology:
kushan taiidan
mass:
firepower:
armor:
coverage:
maneuverability:
max. velocity:
special function:
designation
description
required technology:
designation
description
mass:
firepower:
armor:
coverage:
kushan taiidan
maneuverability:
max. velocity:
special function:
kushan taiidan
required technology:
page
homeworld
mass:
firepower:
armor:
coverage:
maneuverability:
max. velocity:
special function:
Page 96

technologies
Page 97

homeworld
page
designation
required tech:
leads to:
needed for:
designation
required tech:
leads to:
needed for:
designation
required tech:
leads to:
needed for:
The new heavy drives require a whole new hull technology based on heavily reinforced alloy skeletons that can
bear the stress of multi-level decking and heavy weapon mounts. The groundwork has been laid to design the
ship’s spine to incorporate theoretically very heavy beam weapons. This breakthrough can be adapted to several
special purpose designs as well as the creation of Frigate class warships. Scientists believe this chassis could lead
to even more massive ship designs.
Capital Ship Drive
Capital Ship Production, Ion Cannons, Super Capital Ship Drive, Super Heavy Chassis,
Gravity Generator, Cloak Generator
Frigate, Ion Cannon Frigate, Drone Frigate, Defense Field Frigate.
9.1 capital ship chassis
The advances in Strike Craft drives soon made it obvious that the next step in ship engineering should be drives
large enough to achieve self-sustaining fusion torches while accelerating high mass vessels to combat speeds.
The capital ship drive finally allows for vessels that do not require refueling.
none
Capital Ship Chassis
Frigate, Ion Cannon Frigate, Drone Frigate, Defense Field Frigate, Support Frigate,
Gravwell Generator, Cloak Generator, Resource Controller
9.2 capital ship drive
In an inspiration of design not seen since the Mothership was built, engineers have worked out the plans for the
biggest and deadliest starships that can possibly be built by our manufacturing centers. The Heavy Cruiser and
Carrier hulls based on this chassis require vast resources but should be considered the final words in offensive
firepower and durability.
Capital Ship Chassis
nothing
Carrier, Heavy Cruiser
9.3 super-heavy chassis
97
Page 98

designation
required tech:
leads to:
needed for:
designation
required tech:
leads to:
needed for:
designation
required tech:
leads to:
needed for:
page
homeworld gameplay guide
While researching electromagnetic ram-scoops, a Kushan scientist stumbled across a process by which intense
fields could wrap photons around an object and render it invisible. Because the ratio between the size of the
field and the mass of the generator kept the effect minimal, it was considered nothing more than a scientific
curiosity. This was until a research team discovered that a generator large enough to emit electromagnetic fields
just strong enough to render a Fighter invisible could be mounted on a Fighter chassis.
Fighter Chassis
nothing
Cloaked Fighter
9.4 cloaked fighter (kushan only)
Scientists have taken an entire Frigate hull and dedicated it to housing the electromagnetic field emitters needed
to generate the strong light-warping field. The invisibility effect is an impressive one but requires every erg of
power not going into propulsion and life support.
Capital Ship Chassis
nothing
Cloak generator
9.5 cloak generator
With an improved engine, engineers were quickly able to expand their initial large utility hulls into a full-fledged
combat chassis. This new generation of Strike Craft had large crew areas with multiple control stations which
would open the door for heavy, multi-role Strike Craft with full turret capability and superior composite armor
plating.
Corvette Drive
Heavy Corvette Upgrade, Fast Tracking Turrets, Minelaying Tech, Corvette Production
Light Corvette, Salvage Corvette, Multi-Gun Corvette, Heavy Corvette,
Minelayer Corvette
9.6 corvette chassis
98
Page 99

homeworld
page
designation
required tech:
leads to:
needed for:
designation
required tech:
leads to:
needed for:
designation
required tech:
leads to:
needed for:
This improvement to the Fighter drive trades mass for power. While far too big to wrap a Fighter around, this
new drive is perfect for the Corvette class of ships. The higher power output allows for heavier weapon systems
and powered turrets. Unfortunately, despite a higher degree of fusion efficiency, these drives still require
reaction mass to be injected into the fusion torch and must be refueled regularly.
nothing
Corvette Chassis
Light Corvette, Salvage Corvette, Multi-Gun Corvette, Heavy Corvette, Minelayer Corvette
9.7 corvette drive
Exploiting the Fighter frame even further, Taiidan scientists were able to produce a design capable of supporting
the large Dome Array mounting which makes the Defense Laser possible.
Fighter Chassis
nothing
Defense Fighter
9.9 defense fighter (taiidan only)
99
The key to this giant drive system is to pulse and shape the torches of multiple fusion engines into one coherent
thrust factor strong and stable enough to accelerate a huge mass without tearing the structure apart with
oscillation instabilities. The super-capital class of drive systems is derived from mating the efficiency of the
standard Capital Ship drive with power plants in the same league with the ones that power the Mothership
herself. Not only does this drive system allow for the largest designs of warships but the incredible power output
also makes possible new weapon systems.
Capital Ship Chassis
Heavy Guns, Guided Missiles
Destroyer, Missile Destroyer, Carrier, Heavy Cruiser
9.8 super-capital ship drive
Page 100

designation
required tech:
leads to:
needed for:
designation
required tech:
leads to:
needed for:
designation
required tech:
leads to:
needed for:
page
homeworld gameplay guide
The defense field is actually an extremely low frequency EM transmitter - ‘mass wave’ being the common name
for extremely low frequency, high amplitude EM radiation. To broadcast waves with enough energy to block a
cannon round, but at a low enough frequency to match that of the round's mass wave required extensive
research and testing by Taiidan scientists. The system that was devised is so bulky that it could only be fitted on
a Frigate chassis. It is never built into larger ships because of interference with other ship’s systems. Special
modification needed to be made to the drive systems of the Frigate chassis to make it possible to bear the
distinctive white drum of the transmitting antenna.
Capital Ship Chassis
nothing
field frigate
9.10 defense field (taiidan only)
Scientists working on remote-controlled Fighters have joined forces with turret engineers to produce a small,
free turret system that is basically a gun with a small station-keeping engine attached to it. While a single drone
barely packs enough firepower to threaten a Scout, in larger numbers they can combine to create a storm of
withering fire.
Capital Ship Chassis
nothing
Drone Frigate
9.11 drone technology (kushan)
In an attempt to further increase fleet defense against high speed Fighter attacks, breakthroughs were made in
both computerized tracking systems and high-speed magnetic couplings. Engineers combined these into a new
series of fast-tracking turrets that can be mounted in multiple configurations on hulls as small as Cor vettes. This
ability to track multiple targets and engage them with separate turrets has allowed the creation of small gunships
that can serve effectively in the anti-Fighter role.
Corvette Chassis
nothing
Multi-Gun Corvette
9.12 fast-tracking turrets
100
 Loading...