

Page 1

Page 2
EPILEPSY WARNING
A very small percentage of individuals may experience epileptic seizures when exposed to certain light
patterns or flashing lights. Exposure to certain patterns or backgrounds on a television screen or while
playing video games may induce an epileptic seizure in these individuals. Certain conditions may induce
previously undetected epileptic symptoms even in persons who have no history of prior seizures of epilepsy.
If you, or anyone in your family, have an epileptic condition, consult your physician prior to playing. If you
experience any of the following while playing a video game – dizziness, altered vision, eye or muscle
twitches, loss of awareness, disorientation, any involuntary movement, or convulsions – IMMEDIATELY
discontinue use and consult a physician before resuming play.
PRECAUTIONS TO TAKE DURING USE
• This game disc is intended for use exclusively on Windows®-based systems with the minimum
configurations specified on the system requirements of the game purchased.
• Do not sit too close to the screen. Sit a good distance away from the monitor, as far away as the length
of the cable allows.
• Avoid playing if you are tired or have not had much sleep.
• Make sure that the room in which you are playing is well lit.
• Rest for at least 10 to 15 minutes per hour while playing a video game.
HANDLING YOUR GAME DISC
• Avoid bending the disc. Do not touch, smudge or scratch its surface.
• Do not leave the disc in direct sunlight or near a radiator or other source of heat.
• Take occasional rest breaks during extended play.
• Always store the disc in its protective case.
ESRB RATING
This product has been rated by the Entertainment Software Rating Board. For information about the ESRB
rating, or to comment about the appropriateness of the rating, please contact the ESRB at 1-800-771-3772.
CONTENTS
GAMEPLAY . . . . . . . . . . . . . . 2
INSTALLING HITMAN:
CONTRACTS . . . . . . . . . . . . 2
UNINSTALLING HITMAN:
CONTRACTS . . . . . . . . . . . . 2
GAMEPLAY . . . . . . . . . . . . . . 3
MENU CONTROLS . . . . . . . . 3
GAMEPLAY CONTROLS . . . . 3
MAIN MENU . . . . . . . . . . . . 4
START . . . . . . . . . . . . . . . . . . 4
OPTIONS . . . . . . . . . . . . . . . 4
LOAD . . . . . . . . . . . . . . . . . . 5
TRAINING . . . . . . . . . . . . . . . 5
CREDITS . . . . . . . . . . . . . . . . 5
OPTIONS . . . . . . . . . . . . . . . . 6
GRAPHICS OPTIONS . . . . . . . 6
SOUND OPTIONS . . . . . . . . . 7
CONTROL SETUP OPTIONS . . 8
IN-GAME MENU. . . . . . . . . . 9
SAVE . . . . . . . . . . . . . . . . . . . .9
LOAD . . . . . . . . . . . . . . . . . . 9
DELETE SAVE GAMES . . . . . 10
OPTIONS . . . . . . . . . . . . . . 10
RESTART MISSION . . . . . . . 10
QUIT . . . . . . . . . . . . . . . . . . 10
CONTINUE GAME . . . . . . . . 10
MISSION BRIEFING . . . . . . . . 10
REGISTER YOUR GAME AT
WWW.EIDOS.COM
SELECTION . . . . . . . . . . . . . 11
WEAPON SELECT SCREEN . . 11
INVENTORY . . . . . . . . . . . . 11
DISPLAYS . . . . . . . . . . . . . . . 12
ON-SCREEN DISPLAY . . . . . 12
STATISTICS . . . . . . . . . . . . . . 13
TECHNIQUES . . . . . . . . . . . . 14
DISGUISES . . . . . . . . . . . . . . 14
SNEAKING . . . . . . . . . . . . . . 14
CLOSE COMBAT AND
SILENT KILLS . . . . . . . . . . . 14
WEAPONS . . . . . . . . . . . . . 15
PISTOLS AND
HANDGUNS . . . . . . . . . . . 15
SUB-MACHINE GUNS
(SMGs) . . . . . . . . . . . . . . . 15
ASSAULT RIFLES . . . . . . . . . .15
SHOTGUNS . . . . . . . . . . . . . 16
MACHINE GUNS . . . . . . . . . 16
SNIPER RIFLES . . . . . . . . . . . 16
EQUIPMENT . . . . . . . . . . . . 17
BINOCULARS . . . . . . . . . . . .17
MAP . . . . . . . . . . . . . . . . . . 17
NIGHT VISION GOGGLES
(NVGs) . . . . . . . . . . . . . . . 17
HINTS AND TIPS . . . . . . . . . 17
CREDITS . . . . . . . . . . . . . . . .18
Page 3

INSTALLING AND UNINSTALLING
DEFAULT CONTROLS
INSTALLING HITMAN: CONTRACTS
1. Quit all applications and close all
windows on your desktop.
2. Insert the HITMAN: CONTRACTS
CD into your CD-ROM drive.
After you close the drive door,
the HITMAN: CONTRACTS
installation menu will appear.
NOTE: If AutoPlay is disabled, the
menu will not appear. To manually
access the installation menu, doubleclick on the MY COMPUTER icon on
your desktop, and then double-click
on the CD-ROM icon that appears
in the newly opened window. Finally
double-click on AUTORUN.EXE
to open the installation menu.
UNINSTALLING HITMAN: CONTRACTS
To uninstall the game, use any one
of the following three methods:
1. Insert the CD into the CD-ROM
drive to activate AutoPlay. This
will bring up the Launch Panel.
Click on UNINSTALL and follow
the onscreen prompts.
2. Click on the START button from
the Windows taskbar. Choose
PROGRAMS from the pop-up
menu. Locate the HITMAN:
CONTRACTS shortcut menu,
click on UNINSTALL and follow
the onscreen prompts.
3. From this point, follow
the onscreen prompts to proceed
through the installation.
4. When installation is complete,
you will see options to: a) launch
the game; b) quit without playing
the game; or c) read the Readme
text file. (Refer to the Readme file
for updates, manual alterations
and troubleshooting.)
3. Go to the Control Panel and select
ADD/REMOVE PROGRAMS. Click
on HITMAN: CONTRACTS, click
on the ADD/REMOVE button
and follow the onscreen prompts.
NOTE: If you experience difficulties
uninstalling HITMAN: CONTRACTS,
please consult the Troubleshooting
and Performance Issues section
of the ReadMe File.
MENU CONTROLS
mouse movement or arrow (cursor) keys Highlight selection
left mouse button or Enter key Confir m selection
click BACK button/Esc key Cancel selection
GAMEPLAY CONTROLS
E key Action
right mouse button Inventory/Exit sniper mode/Zoom map out
G key Drop weapon or item
Q key Draw/Holster weapon
1 key Equip close combat weapon
2 key Equip Pistol
3 key Equip Sub-machine Gun
4 key Equip Rifle
5 key Equip Binoculars
6 key Equip Night Vision Goggles
7 key Equip Lockpick
M key Map
left Ctrl key Crouch/Sneak
spacebar Toggle Crouch/Sneak
left Shift key Run
Caps Lock key Toggle Run
left mouse button Fire/Zoom map in
R key Reload
F1 key Toggle 1st and 3r d person camera mode
F12 key Take screenshot
Esc key Open/Close Pause/Options menu
B key Mission briefing
Z/C keys Lean left/right
mouse wheel up/down Zoom in/out
Scroll up/down list
Scroll through maps
W/A/S/D keys Move forward/back
Strafe left/right
mouse movement Look up/down
Turn left/right
2
3
Page 4
START, OPTIONS
LOAD, TRAINING, CREDITS
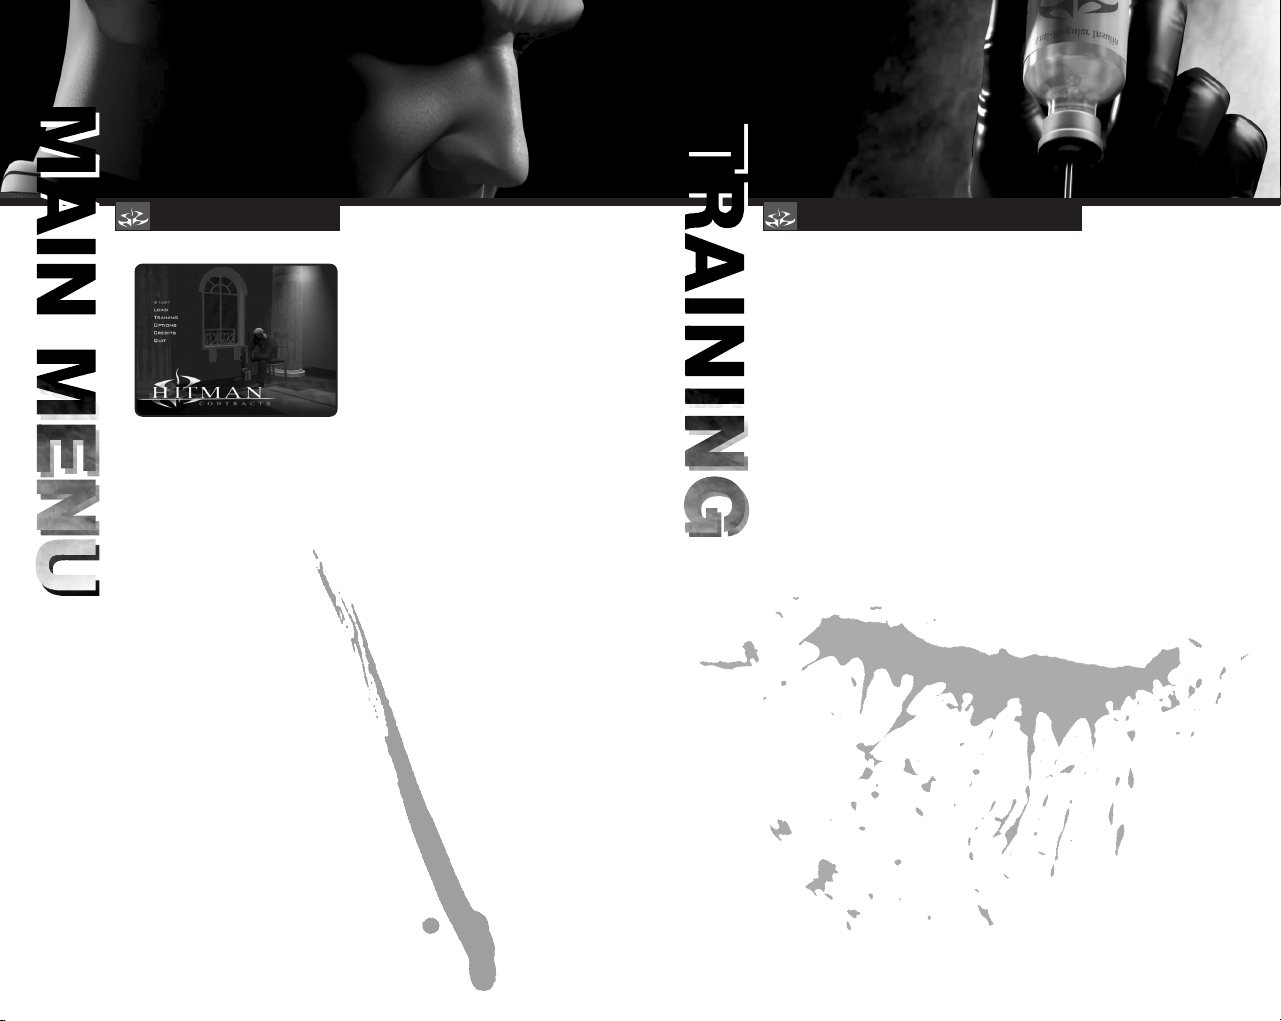
START
Select START in the Main Menu
to begin a new game. Before
the game begins, select your
difficulty level.
• SELECT DIFFICULTY
This menu allows you to select
a difficulty level (Normal, Expert
or Professional).
A number of different factors ar e
influenced by the difficulty level
you choose. These factors include:
• The amount of damage Hitman
can receive before dying.
• The amount of accuracy shown
on the map.
• The reaction speed and firing
accuracy of guards and targets.
Each difficulty level has its own
permitted number of progress saves
per mission.
• NORMAL – 7 saves allowed
per level.
• EXPERT – 2 saves allowed per level.
• PROFESSIONAL – 0 saves allowed
per level.
OPTIONS
Adjust various graphics, sound
and control settings in the game.
(See page 6.)
LOAD
If you previously saved your
game, you can continue it from
the Load Screen accessed
from the Main Menu.
If you have HITMAN: CONTRACTS
save game data on your hard drive,
then when you select LOAD
from the Main Menu, a list of your
save games will be displayed.
Select the save game you want to
resume. The game will be restored
at the point where it was saved.
TRAINING
The training area allows you to
become familiar with the controls
and various abilities of Hitman
in a non-hostile environment.
It is highly recommended that you
practice the techniques you will need
before starting your missions.
The training area also serves
as a storage area for the weapons
you collect during missions. Each
silhouette represents a weapon
that you can collect or unlock
during the game.
CREDITS
Select CREDITS from the Main Menu
to see a roster of those responsible
for HITMAN: CONTRACTS.
4 5
Page 5
GRAPHICS OPTIONS SOUND OPTIONS
To open the Options Menu, select
OPTIONS from the Main Menu
or press the Esc key to pause a game
and select OPTIONS from
the Pause Menu.
Three sub-menus are available
with options for adjusting the game’s
Graphics, Sound and Control Setup.
GRAPHICS OPTIONS
Use these two menus to set your
graphics and display choices.
• DRAW DISTANCE: Drag the slider
right to increase the visible
distance.
• OBJECT DETAIL: Drag the slider
right to increase the level of detail
on objects.
• SHADOWS: Enable or disable
character shadows.
• WEATHER EFFECTS: Enable
or disable weather effects.
• SUBTITLES: Enable or disable
the display of in-game subtitles.
• BLOOD AND GORE: Toggle
the display of blood ON/OFF.
• RESOLUTION: Set the display
resolution.
• TEXTURE RESOLUTION: Drag
the slider right to increase
texture quality.
• TEXTURE FILTER: Set BILINEAR
(fastest), TRILINEAR (slower),
or ANISOTROPIC (slowest).
• DXT COMPRESSION: Enable
or disable texture compression.
• GAMMA CORRECTION: Adjust
the screen brightness.
• POST FILTER: Adjust the slider to
change the level of special graphics
effects applied in the game.
(You need a modern graphics card
to take advantage of the latest
graphics effects.)
SOUND OPTIONS
Use this menu to configure sound
and audio settings:
• MUSIC: Move the slider to adjust
the game’s music volume.
• SPEECH: Move the slider to adjust
the volume of spoken dialogue.
• EFFECTS: Move the slider
to adjust the volume of in-game
sound effects.
• 3D SOUND RENDERER: Set
DIRECTSOUND or OPEN AL.
• EAX: Enable EAX 3D sound.
• NUMBER OF VOICES: Set
the maximum number of voices
played at one time.
6 7
Page 6

CONTROL SETUP OPTIONS
SAVE AND LOAD
CONTROL SETUP OPTIONS
Use this menu to configure various
control settings:
• MOUSE SPEED: Drag the slider
to the right to increase overall
mouse sensitivity.
• INVERT UP/DOWN AIM: Change
this option to switch the movement
control on the Y axis. If you find
yourself looking down at the floor
when you want look up, try
adjusting this setting.
• HORIZONTAL TURN SENSITIVITY:
Move the slider to adjust the speed
at which Hitman turns. Higher
settings make Hitman turn faster.
• VERTICAL TURN SENSITIVITY:
Move the slider to adjust the speed
at which Hitman looks up and
down. Use a higher setting
for faster response.
• BUTTON CONFIGURATION: Make
your own control assignments
for the keyboard and/or mouse.
To change the mapping, click on
a command and then press the new
key or mouse button.
Press the Esc key during play
to pause the game and access
the In-Game Menu, which offers
the following options:
SAVE
While playing HITMAN: CONTRACTS,
you’ll want to save your game often
to preserve your progress.
To save a game:
1. Press the Esc key to pause
the game.
2. Select SAVE GAME
from the menu.
3. Select CREATE NEW to create
a new save game or select
a save game to overwrite.
5. To resume a saved game, follow
the steps in LOAD below.
NOTE: You cannot save your
game while performing some
complicated actions.
LOAD
You can resume save games by using
the LOAD option from either the
Main Menu or the In-Game Menu.
If HITMAN: CONTRACTS save game
data is available on your hard drive,
then when you select LOAD, a list
of available save games is displayed.
Select a save game to load it.
The game will be restored
at the point where it was saved.
8 9
Page 7

WEAPON AND ITEM SELECTIONIN-GAME MENU
DELETE SAVE GAMES
You can delete save games by using
the DELETE SAVE GAMES option
in the In-Game Menu. Select the
unwanted save game to delete it.
OPTIONS
Select this option to access
the Options Menu. Options available
in this menu are the same as those
found in the Main Menu Options
Menu. (See page 6.)
RESTART MISSION
Select this option to restart
the current mission.
QUIT
Select this option to quit the current
game and return to the Main Menu.
CONTINUE GAME
Select this option to exit the In-Game
Menu and resume the current game.
MISSION BRIEFING
When Hitman receives a mission
from Agency, the details are always
delivered through the Mission
Briefing Screens. All information
valid to the mission is stored
in this briefing, which you can display
at any point during a mission.
The following information is usually
available from the Briefing Screen:
• Target profiles and descriptions.
• Any additional mission objectives.
• Background information
on the mission scenario.
• Escape and exit points.
Once an objective has been met,
it will be marked off as completed.
WEAPON SELECT SCREEN
Once you complete a mission
successfully, you can replay it
with the weapons you’ve collected
in previous missions. These weapons
are selectable from the Weapon
Select Screen.
NOTE: When you are finished with
this screen, press the right arrow key
to proceed to the mission, or the Esc
key to return to the previous screen.
• EQUIPMENT
This shows a list of weapons and
equipment you can take along
for the mission ahead. Select
the item you want to equip to add it
to your Inventory.
• When a weapon is equipped,
it will be marked with a cross.
• To deselect a weapon, select
it again.
• SPECIFICATIONS
This displays the weapons
specifications. The information
detailed here can include ammo
type, caliber, clip capacity, length,
weight and storage.
• WEAPON DISPLAY
An image of the currently selected
item appears at the top of the
Specifications window.
INVENTORY
Press the right mouse button during
a mission to display the Inventory.
This menu allows fast access to the
Weapons and Item Inventory.
To use an item from the Inventory,
highlight it using the mouse wheel
or A/D keys and press the left mouse
button to equip it.
To discard or drop an item, highlight
it and press the G key.
Detailed information on both
weapons and items appears
at the bottom of the screen.
NOTE: You cannot drop
or discard items that are crucial
to Hitman’s progress.
10 11
Page 8
ON-SCREEN DISPLAY
STATISTICS
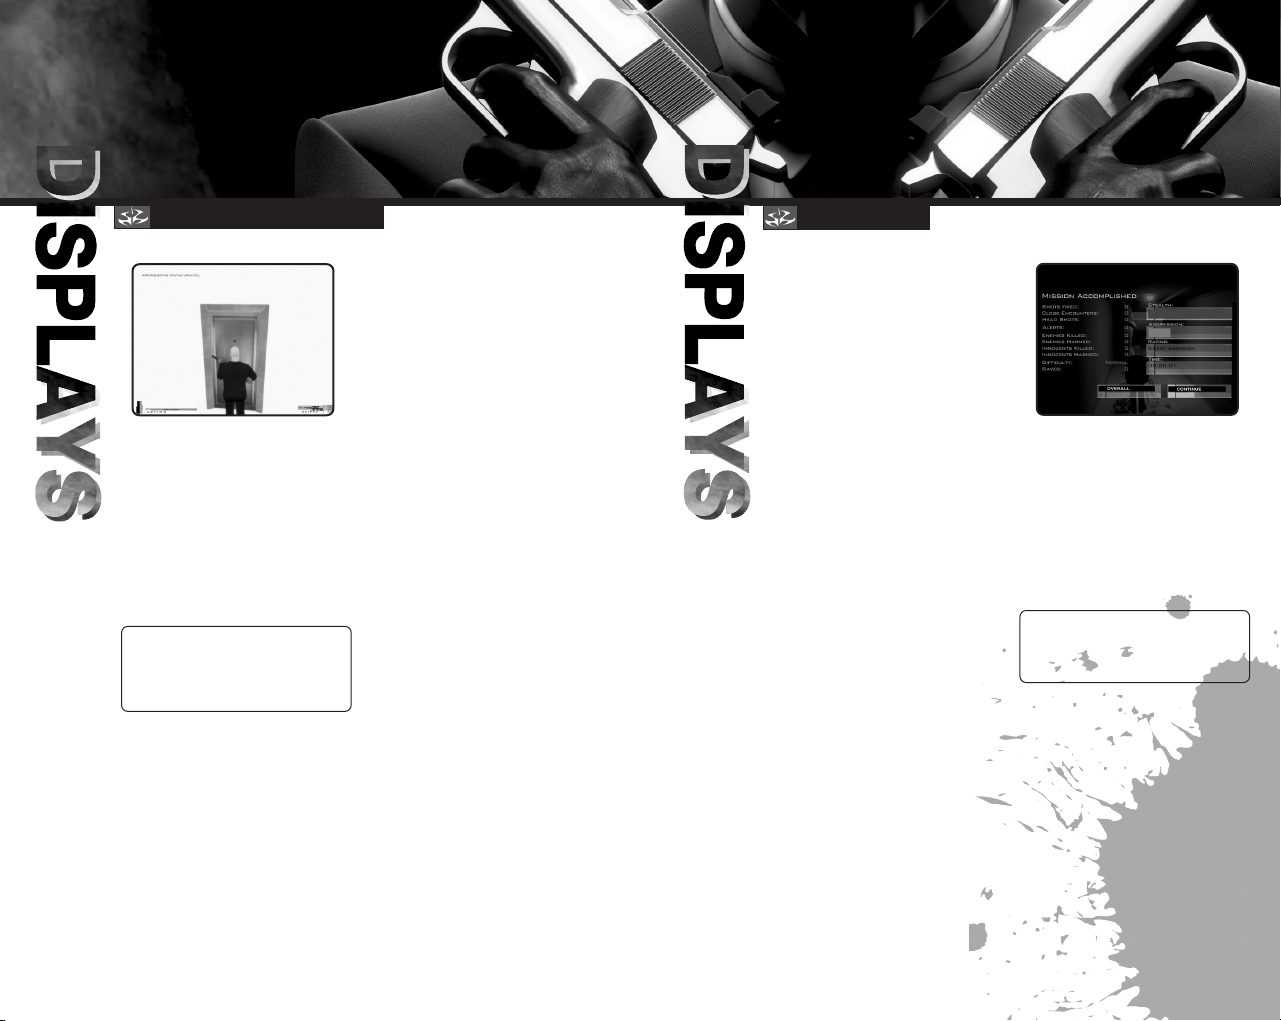
ON-SCREEN DISPLAY
• HEALTH BAR
This bar shows Hitman’s current
health. Every time Hitman sustains
damage the bar decreases.
If the bar dips to the danger point,
below 25% capacity, it turns red to
alert you to Hitman’s predicament.
NOTE: Damage is location-based.
This means a shot to the head is
almost certain to kill Hitman
while a shot to the arm will not.
• THREAT METER
Displayed next to the Health Bar,
the Threat Meter gives an indication
of the danger Hitman faces.
An increase in movement signifies
an increase in danger. The meter can
alert you to potential problems such
as a failed disguise or Hitman being
spotted in restricted access zones.
• ACTION LIST
This Action List displays a list
of context-sensitive choices.
Use this menu to control
complex interactions in the game
environment. With its options you
can manipulate doors, victims,
vehicles and items.
If only one choice appears on the list,
press the E key to perfor m that
action. If you have multiple choices,
hold down the E key and use
the mouse wheel or the W/S keys
to highlight the option you want.
Release the E key to perform
the selected action.
• WEAPON DISPLAY
Displayed in the bottom right corner
of the screen, the Weapons Display
shows an icon of the currently
equipped weapon.
• AMMO DISPLAY
This is a graphical and numerical
display of the current ammo level
in both the clip currently in the
weapon and the total bullet count
for all remaining clips.
• CROSSHAIRS
The crosshairs represent the exact
point at which Hitman is aiming.
The size of the crosshairs indicates
the accuracy of any shots fired
from the currently equipped weapon.
The larger the crosshairs the wider
the grouping of any shots fired.
• INFORMATION BOX
Useful information and warnings are
displayed here.
STATISTICS
After a successful hit and the
fulfillment of all mission objectives,
a ratings screen is displayed to show
performance levels. The statistics
are presented as a mission and
overall score and give a breakdown
of the stealth and aggression levels
used in the mission.
NOTE: You can earn bonuses
by completing missions with a high
level of professionalism.
12 13
Page 9

TECHNIQUES
WEAPONS
DISGUISES
You can use disguises and costume
changes to throw off pursuers
and gain access to restricted areas.
When you’re wearing a disguise,
it is important that you perform
actions natural to the character
you’re impersonating. Alert guards
and soldiers will notice suspicious
behavior and inconsistent
weapon usage.
SNEAKING
The ability to successfully sneak
through areas undetected is a very
important skill to master. When he’s
moving in Sneak Mode, Hitman’s
movement is completely silent.
With patience and skill it is possible
to sneak through almost any
environment and creep up behind
any enemy. Before entering rooms
that potentially contain a threat,
it is always worth your time to spy
through the keyhole or check your
map for activity.
CLOSE COMBAT
AND SILENT KILLS
Hitman’s most powerful weapons are
also the most difficult to master.
Close combat weapons allow Hitman
to neutralize targets without raising
alarms or creating unwanted noise.
Close combat weapons are most
effective when used from behind
on an unsuspecting enemy. In order
to get close enough to use the
weapons successfully, Hitman must
use sneaking techniques. Once he’s
directly behind an enemy, the fully
charged close combat weapons will
deliver a fatal blow.
Close combat weapons can also
be used in melee attacks but their
effectiveness is seriously reduced.
PISTOLS AND HANDGUNS
Pistols and handguns offer a wide
range of power, capacity and caliber.
Easily concealed and once silenced,
the pistol can be one of the most
effective tools in Hitman’s arsenal.
When used in both hands, pistols
pack a high level of firepower.
Clip capacity and accuracy over
distance are the main drawbacks
for the handgun class.
SUB-MACHINE GUNS (SMGs)
Typically issued to commando forces
in the military, sub-machine guns are
small, lightweight and often use
pistol ammunition. Designed for use
in close quarters, SMGs are often
inaccurate. This is more than
compensated for by their high rate
of fire and maneuverability.
ASSAULT RIFLES
The military-designed assault rifles
were developed for fire support
and combat over distances of up to
300m. The rifle is in its element
when used outdoors and over
distance. Single shot and burst fire
are a necessity if you want to
maintain accuracy.
14 15
Page 10
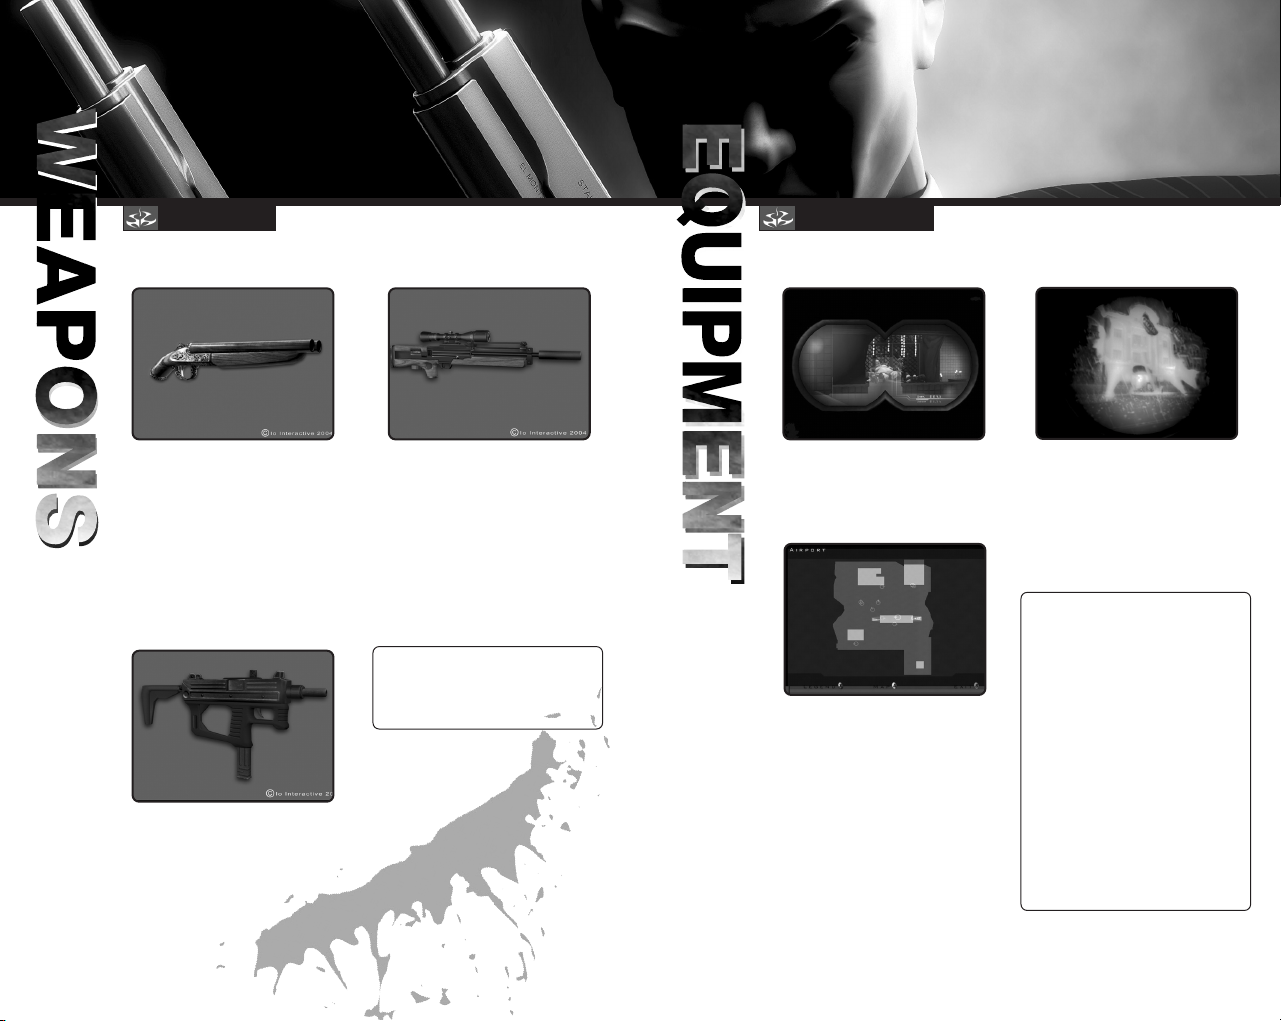
WEAPONS
EQUIPMENT
SHOTGUNS
Devastatingly powerful at close
range, the shotgun’s defining
characteristics are having a smooth
bore and firing “shot” from an
explosive cartridge. Designed for
close combat situations, the shotgun
is mainly used by law enforcement
agencies and as a hunting weapon.
MACHINE GUNS
Fully automatic, low-caliber
and capable of rapid fire,
the machine gun is designed
to provide suppressing cover fire
more than aim and accuracy.
SNIPER RIFLES
In the hands of trained professionals,
the sniper rifle is perhaps the most
powerful of all projectile weapons.
Offering precision and accuracy
over long distances, this weapon
can be used to eliminate targets
from a safe position.
The W2000 Sniper Rifle is Hitman’s
rifle of choice and comes silenced
and concealable in its own briefcase.
NOTE: Crouching while aiming
improves the accuracy and reduces
the movement of the rifle
in Hitman’s hands.
BINOCULARS
Excellent for surveillance and spying
on targets from a distance.
MAP
Hitman is equipped with a map
of his surroundings at all times. Using
the map to plan your route can
prevent unwanted surprises and will
often reveal hidden access points.
NIGHT VISION GOGGLES (NVGs)
When worn in a dark environment,
night vision goggles amplify the light
levels, allowing you to navigate
through darkened areas. Normally
confined to military use, the NVGs
will draw suspicion if noticed
by guards or civilians.
HINTS AND TIPS
• Proper planning always increases
the chance of making a successful
hit. Spend time on surveillance
and try changing your approach
if your current plan isn’t working.
• High-caliber ammunition will
penetrate doors and obstacles.
• Sound is Hitman’s friend. Loud
music can often mask the sound
of gunshots, allowing the use
of firearms to go unnoticed.
• Keep your eye on the Threat Meter
when accessing areas that are
out of bounds.
16 17
Page 11

CREDITS
CREDITS
PROGRAMMERS
Bo Cordes
Brian Meidell Andersen
David Guldbrandsen
Hakon Steinø
Jens Bo Albretsen
Jeroen M. Wagenaar
Lars Piester
Marcell Baranyai
Martin Amor
Peter Wraae Marino
Pèter Màlnai
Rune Brinckmeyer
Sàndor Nyako
Torsten Kjær Sørensen
SCRIPTERS
Jacob Mikkelsen
Jesper Donnis
Jonas Lind
ADDITIONAL PROGRAMMERS
Jørgen Larsen
Rasmus Sigsgaard
ARTISTS
Allan Hansen
Asi Siemenshaus
Balàzs Kiss
Bo Heidelberg
Daniel Windfeld Schmidt
David Giraud
Henrik Hansen
Israfel Abainza
Jacob Andersen
Jamie Benson
Jesper Vorsholt Jørgensen
Jørgen Ørberg
Lukas Jevcak
Mads H. Peitersen
Marek Bogdan
Martin Kramme Guldbæk
Michal Bendtsen
Miklos Büte
Morten Christian Bramsen
Peter Fleckenstein Andersen
Peter Eide Paulsen
Peter von Linstow
Rasmus Højengaard
Rasmus Kjær
Sebastian Lindoff
Stephan Nilsson
Svend Christensen
Søren B. Jensen
Thomas Storm
Thor Frölich
Tom Isaksen
ADDITIONAL ARTISTS
Jeremy C. Petreman
Michael Heilemann
Oskar Lundqvist
Riana Møller
Timothy Evison
Tobias Biehl
Tore Blystad
Trey Turner
ANIMATORS
Barbara Bernád
Frederik Budolph Larsen
Gabor Horvath
Jens Peter Kurup
Kim Zoll
Martin Poulsen
ADDITIONAL ANIMATORS
Frederic Poirier
Karsten Lund
Thomas P. Theede
SOUND
Ivan Brandt
Michael Ziegler
Simon Holm
Thomas Pedersen
QA
Hugh Grimley
Jakob Rød
Klavs Kofod
Kristian Rise
Oliver Winding
Petronela Cimpoesu
PROJECT COORDINATOR
Helle Marijnissen
SCRIPT
Greg Nagan
MUSIC COMPOSED & PRODUCED BY
Jesper Kyd www.jesperkyd.com
ADDITIONAL SOUND DESIGN BY
Jun Mizumachi
ENGINE PROGRAMMERS
Henning Semler
Jon Rocatis
Karsten Hvidberg
Martin Pollas
Mircea Marghidanu
Morten Mikkelsen
ADDITIONAL ENGINE PROGRAMMERS
Jens Skinnerup
Michael Bach Jensen
Steffen Toksvig
Thomas Jacobsen
Andreas Thomsen
IOI MANAGEMENT
Janos Fløsser
Morten Borum
Thomas Howalt
SUPPORT
Anni G. Andersen
Charlotte Delran
Chris Edgar
Christoffer Kay
Daniel Fløsser
Else Andersen
Fredrik Ax
Martin Schröder
Michael Andersen
Niels Jørgensen
Rune Nielsen
Søren Reinhold Jensen
Ulf Maagaard
Ulla Goldberg
VOICE ACTORS
Andrew Thomson
Barbara Bernád
Betty Glosted
Chun Hou Cheung
David Bateson
Francois Erik-Grodin
Gabor Horvath
Jean Claude Flamant
Jennifer Xiao Bao Huang
Joost Alexander Van Der Berg
Michael Booth
Mircea Marghidanu
Muk Wing Cheung
Nikolaj PapaDuke
Noah Lazarus
Ovidio Romanescu
Peter Màlnai
Petronela Cimpoesu
Róbert Nagy
Runi Lewerissa
San Tai Cheung
Scott Farrell Strichen
Sue Hansen Styles
Thomas Chaanhing
Ulle Bjørn Bengtsson
Vivienne McKee
Vladimir Pintchevski
MOCAP ACTORS
Bo Thomas
Maria Erwolter
Tina Robinson Hansen
18 19
Page 12

CREDITS
SENIOR PRODUCER
Neil Donnell
EXECUTIVE PRODUCER
Ed Bainbridge
PRODUCER
Clayton Palma
DIRECTOR OF PRODUCT OPERATIONS
Kathy Schoback
PRODUCT OPERATIONS MANAGER
Brian King
QA/CS MANAGER
Micheal R. Kelly
QA ASSISTANT MANAGER
Colby McCracken
PTC
Daniel Franklin
QA SAN FRANCISCO
Kip Ernst
Mike Gonos
Patrick Goodspeed
Stephan Cavoretto
Nicole Ferrara
Jordan Romaidis
QA CRYSTAL DYNAMICS
Dave Baker
Joe Quadara
Benny Ventura
Chris Bruno
Gregg Stephens
Patrick Conner
CUSTOMER SUPPORT SUPERVISOR
Scott Holbert
CUSTOMER SUPPORT AGENTS
Adam Braswell
Shelley Porter
VP MARKETING
Paul Baldwin
BRAND DIRECTOR
Chip Blundell
CREDITS
MUSIC
BRAND MANAGER
Matt Knoles
MARKETING COORDINATOR
Wyman Jung
PR MANAGER
Michelle Seebach-Curran
SENIOR PR SPECIALIST
Kjell Vistad
PR COORDINATORS
Denny Chiu
Loretta Stevens
DIRECTOR OF CHANNEL AND
INTERACTIVE MARKETING
Kim Pendleton
CREATIVE
Julie Leibowitz
WEB SUPPORT
Boon Khoo
Roderick van Gelder
PRODUCTION
Michael Minson
Greg Wu
SPECIAL THANKS
Rob Dyer
Kevin Weston
Christian Chatterjee
Jamie Bartolomei
Paula Cook
Dan Johnson
Sharon Gamble
Kevin Gill
Renee Pletka
Matt Gorman
Janty Sumimoto
Sam Tehrani
Tom Marx
Mike Schmitt
Mike Orenich
Robert Fitzpatrick
Hanshaw Ink & Image
Eclipse Advertising, Inc.
“Le Souteneur (Mr Claude)”
(R. Mussard / R. Mussard).
©1999 Editions Chroniques
de Mars / EMI Virgin Music
Publishing France.
Avec l'autorisation d'Emi
Music Publishing France.
“Brand New Image”
Performed by Cecilia
Cheung.
Courtesy of Universal Music
Hong Kong.
Licensed by Kind
permission from the Film &
TV Licensing Division, Part
Of The Universal Music Group.
“Walking Dead”
Performed
by Puressence.
Courtesy of Universal-Island
Records Ltd.
Licensed by Kind
permission from the Film &
TV Licensing Division, Part
Of The Universal Music Group.
Licensed Music Sourced by i10Q
Uses Bink Video Technology.
Copyright © 1997-2003 by RAD Game Tools, Inc.
20 21
“Immortal” (Fallon / West)
Performed by Clutch
Published by Rykomusic Inc
(ASCAP) / Earl Music Co.
(ASCAP)
Taken from the CD “Pure
Rock Fury” Atlantic 7567-
83433-5 (2001).
“Put Your Head on my
Shoulder”
Performed by
Paul Anka.
Licensed courtesy of BMG
UK & Ireland Ltd.
Written by Paul Anka.
Published by ChrysalisMusic Ltd.
Wewe - Happy Day
Original Title: Festival
Original Author:
Chu, Young Hoon
Sub Author: Lin Min
Original Publisher: The
Music Asia Co. Ltd.
Sub Publisher: Rock Music
Publishing (Taiwan) Co., Ltd.
Page 13
NOTES
A NEW STRATEGY GUIDE FORMAT ON DVD PACKED WITH
INSIDER TIPS, SECRETS, AND ENTERTAINMENT!
FEATURING:
•Video-Based Walkthrough Showcasing Perfect Gameplay
•Detailed Equipment and Weapons Sections
•Stealth Tactics and Techniques Instruction
•Bonus Entertainment Content You Won’t Find in the Game
22
© g-NET Media, LLC. All Rights Reserved. g-NET Media, the g-NET logo, and the iGuide Official logo are all property of g-NET
Media, LLC. Distributed by FUNimation Productions, Ltd. Hitman: Contracts © IO Interactive A/S 2004. All Rights Reserved.
All trademarks are the property of their respective owners.
visit www.iguides.net <http://www.iguides.net/> for more information
Page 14

CONTACTING TECH SUPPORT
If you have a technical problem with the game, our Support Department is here to help. Our web site
contains up-to-date information on the most common difficulties with our products; this information is the
same as that used by our support agents. If you are unable to find the information you need on our web
site, please feel free to contact us via email, fax, telephone or letter.
please ensure you put the game title in the subject of your message.)
ASSISTANCE VIA THE WORLD WIDE WEB
The fastest way to answer most questions is by visiting our online support. You may find the latest support
information at http://support.eidosinteractive.com/GI/CustomerSupport/FaqSearch.jsp. Our support FAQs
are available 24-7 for your convenience. These pages are updated frequently and have the same
information that our support techs will use to answer your question if you call or email us. The answers to
about 90% of the questions we are asked can be found there, so it really is worth the time to take a look!
The second fastest way to get an answer to your question is to email us. (You will find our email submission
forms at our web site.) We typically respond to email queries within 24-48 hours during the business week.
Response times can be considerably longer over the weekend, holidays and immediately after a product
release. It all depends on how many people we have working and how much email is coming in at any one
time, but we do try really hard to get you the right answer as quickly as possible. Weekdays, excluding
holidays, during the hours when the phones are open, we still give email questions our highest priority.
Through this site you will also have access to our FTP (File Transfer Protocol) area where you can
download patches and new enhancements as soon as they become available.
(When contacting us via email or fax,
ASSISTANCE VIA TELEPHONE OR FAX
We are available to take your calls Monday through Friday from 9:00 a.m. to 12:00 p.m. and 1:00 p.m. to 5:00
p.m., Pacific Time at (415) 615-6220 (voice) or (415) 547-1201 (fax). Our tech support department is closed on
all major holidays. Note: You are responsible for all toll charges when calling.
To ensure the quickest service you will need to be at your computer and have the following information
at hand:
• A complete listing of your computer’s hardware. (Contact your computer manufacturer if you are unsure.)
• What version of Windows
• A copy of your DirectX Diagnostics report.
– Click on Start.
– Click on Run.
– Type
dxdiag.
– Click on OK.
– Click on the Save Information button and save the file to your computer.
–
When you call our Technical Support line either have this file open or have a printed copy. If you send
an email query you may attach the file to the email.
• What error message(s), if any, you have had.
• How the game is currently configured.
®
you are using.
NOTE: OUR SUPPORT AGENTS DO NOT HAVE AND WILL NOT GIVE GAME HINTS, STRATEGIES OR CODES.
PRODUCT RETURN PROCEDURE
In the event our support agents determine that your game disc is defective, you will need to forward
material directly to us. Please include a brief letter explaining what is enclosed and why you are sending it
to us. The agent you speak with will give you an authorization number that must be included and you will
need to include a daytime phone number so that we may contact you if necessary. Any materials not
containing this authorization number will be returned to you unprocessed and unopened.
Your postage paid package should be sent to the following address:
Eidos, Inc. Customer Services
RMA# (include your authorization number here)
651 Brannan Street, suite 400
San Francisco, CA 94107
EIDOS, INC., LIMITED WARRANTY
Eidos, Inc., warrants to you, the original purchaser of this disc, that for a period of ninety (90) days from the
date of your purchase, this disc shall be free from defects in materials and workmanship. If, at any time
during the applicable ninety (90) day warranty period you determine that this limited warranty has been
breached, Eidos, Inc., agrees, in its sole option, to repair or replace, free of charge, any such disc, provided
the disc is returned postage paid to the Eidos, Inc., Factory Service Center and a proof of date of purchase
is included. This limited warranty is not applicable to normal wear and tear and shall be void with respect
to any defects that arise from disc abuse, unreasonable use, mistreatment or neglect. This disc is sold "as
is" without any warranties of any kind, express or implied, including implied warranties of merchantability or
fitness for a particular purpose, other than the limited warranty expressly stated above.
No other claims arising out of your purchase and use of this disc shall be binding on or obligate Eidos, Inc.,
in any manner. Eidos, Inc., will not be liable to you for any losses or damages incurred for any reason as a
result of your use of this disc, including, but not limited to, any special, incidental, or consequential
damages resulting from your possession, use or malfunction of this disc.
This limited warranty states the entire obligation of Eidos, Inc., with respect to the purchase of your disc. If
any part of this limited warranty is determined to be void or illegal, the remainder shall remain in full force
and effect.
REGISTER YOUR GAME AT
WWW.EIDOS.COM
 Loading...