

Page 1

Star Trek:
THE NEXT GENERATION
®
Birth of the
Federation
Birth of the
Federation
TM
BOF ALL TOGETHER-singles 25/05/99 13:32 Page 1
Page 2
First Edition, May 1999
Underlying computer code and manual © 1999 Hasbro Interactive, Inc.
All Rights Reserved. STAR TREK: THE NEXT GENERATION ™, ® &
© 1999 Paramount Pictures. All Rights Reserved. STAR TREK and
related marks are trademarks of Paramount Pictures. Used under license.
ii
BOF ALL TOGETHER-singles 25/05/99 13:32 Page 2
Page 3
Table of Contents
Introduction:
Explore the Final Frontier . . . . . . . . . . . .xi
Chapter 1:
Game Installation . . . . . . . . . . . . . . . . . . . . . . . . .1
System Requirements . . . . . . . . . . . . . . . . . . . . . . . . . . . .2
Installing the Game . . . . . . . . . . . . . . . . . . . . . . . . . . . . .2
The ReadMe File . . . . . . . . . . . . . . . . . . . . . . . . . . . . . . . .3
Using the Tutorials . . . . . . . . . . . . . . . . . . . . . . . . . . . . . .3
Chapter 2:
Game Overview . . . . . . . . . . . . . . . . . . . . . . . . . . . . .5
Game Terms . . . . . . . . . . . . . . . . . . . . . . . . . . . . . . . . . . . .6
Selecting Buttons . . . . . . . . . . . . . . . . . . . . . . . . . . . . . .6
Active and Inactive Buttons . . . . . . . . . . . . . . . . . . . . . .6
Tool Tips . . . . . . . . . . . . . . . . . . . . . . . . . . . . . . . . . . . .6
Game Artificial Intelligence . . . . . . . . . . . . . . . . . . . . . .6
Turns . . . . . . . . . . . . . . . . . . . . . . . . . . . . . . . . . . . . . . .6
Strategic Turns . . . . . . . . . . . . . . . . . . . . . . . . . .7
Tactical Turns . . . . . . . . . . . . . . . . . . . . . . . . . . .7
Screen Saver . . . . . . . . . . . . . . . . . . . . . . . . . . . . . . . . .8
Playing Empires . . . . . . . . . . . . . . . . . . . . . . . . . . . . . . . . .8
Cursor . . . . . . . . . . . . . . . . . . . . . . . . . . . . . . . . . . . . . . . . .9
Game Victory Conditions . . . . . . . . . . . . . . . . . . . . . . . .10
Domination . . . . . . . . . . . . . . . . . . . . . . . . . . . . . . . . .10
Vendetta . . . . . . . . . . . . . . . . . . . . . . . . . . . . . . . . . . .10
Team Play . . . . . . . . . . . . . . . . . . . . . . . . . . . . . . . . . .11
Game Screens . . . . . . . . . . . . . . . . . . . . . . . . . . . . . . . . .11
Marker Window . . . . . . . . . . . . . . . . . . . . . . . . . . . . . .12
iii
BOF ALL TOGETHER-singles 25/05/99 13:32 Page 3
Page 4
Game Resources . . . . . . . . . . . . . . . . . . . . . . . . . . . . . . .13
System-Level Resources . . . . . . . . . . . . . . . . . . . . . . . .14
Energy . . . . . . . . . . . . . . . . . . . . . . . . . . . . . . .14
Food . . . . . . . . . . . . . . . . . . . . . . . . . . . . . . . . .14
Industry . . . . . . . . . . . . . . . . . . . . . . . . . . . . . .14
Empire-Level Resources . . . . . . . . . . . . . . . . . . . . . . . .15
Credits . . . . . . . . . . . . . . . . . . . . . . . . . . . . . . .15
Dilithium . . . . . . . . . . . . . . . . . . . . . . . . . . . . .16
Intelligence Points . . . . . . . . . . . . . . . . . . . . . . .16
Research . . . . . . . . . . . . . . . . . . . . . . . . . . . . . .16
Population . . . . . . . . . . . . . . . . . . . . . . . . . . . . . . . . . .17
Morale . . . . . . . . . . . . . . . . . . . . . . . . . . . . . . .17
Chapter 3:
Empires . . . . . . . . . . . . . . . . . . . . . . . . . . . . . . . . . . . . . .19
United Federation of Planets . . . . . . . . . . . . . . . . . . . . .20
Klingon Empire . . . . . . . . . . . . . . . . . . . . . . . . . . . . . . . .21
Romulan Star Empire . . . . . . . . . . . . . . . . . . . . . . . . . . .22
Ferengi Alliance . . . . . . . . . . . . . . . . . . . . . . . . . . . . . . . .23
Cardassian Union . . . . . . . . . . . . . . . . . . . . . . . . . . . . . . .24
Chapter 4:
Main Menu . . . . . . . . . . . . . . . . . . . . . . . . . . . . . . . . . .25
Continue Button . . . . . . . . . . . . . . . . . . . . . . . . . . . . . . .26
New Single Player Game Button . . . . . . . . . . . . . . . . . .26
New Multiplayer Game Button . . . . . . . . . . . . . . . . . . .27
Load Game Button . . . . . . . . . . . . . . . . . . . . . . . . . . . . .28
Save Game Button . . . . . . . . . . . . . . . . . . . . . . . . . . . . . .28
Options Button . . . . . . . . . . . . . . . . . . . . . . . . . . . . . . . .29
Hall of Fame Button . . . . . . . . . . . . . . . . . . . . . . . . . . . .29
Retire Button . . . . . . . . . . . . . . . . . . . . . . . . . . . . . . . . . .30
Quit Game Button . . . . . . . . . . . . . . . . . . . . . . . . . . . . . .30
iv
Table of Contents
BOF ALL TOGETHER-singles 25/05/99 13:32 Page 4
Page 5

Chapter 5:
Single Player Game . . . . . . . . . . . . . . . . . . . . . .31
Configuration Screen . . . . . . . . . . . . . . . . . . . . . . . . . . . .32
Civilization Level Buttons . . . . . . . . . . . . . . . . . . . . . .33
Game Preferences . . . . . . . . . . . . . . . . . . . . . . . . . . . .33
Minor Races Button . . . . . . . . . . . . . . . . . . . . . .34
Difficulty Button . . . . . . . . . . . . . . . . . . . . . . . .35
Strategic Timer . . . . . . . . . . . . . . . . . . . . . . . . .35
Tactical Timer . . . . . . . . . . . . . . . . . . . . . . . . . .35
Random Events Button . . . . . . . . . . . . . . . . . . . .36
Tactical Combat Button . . . . . . . . . . . . . . . . . . .36
Victory Conditions Button . . . . . . . . . . . . . . . . .36
Galaxy Options . . . . . . . . . . . . . . . . . . . . . . . . . . . . . .37
Galaxy Size Button . . . . . . . . . . . . . . . . . . . . . . .37
Galaxy Shape Button . . . . . . . . . . . . . . . . . . . . .37
Empire Selection Screen . . . . . . . . . . . . . . . . . . . . . . . . .38
Chapter 6:
Main Galactic Screen . . . . . . . . . . . . . . . . . . .39
Main Galactic Window . . . . . . . . . . . . . . . . . . . . . . . . . .40
First Contact Window . . . . . . . . . . . . . . . . . . . . . . . . .41
Galactic Map Window . . . . . . . . . . . . . . . . . . . . . . . . .42
Sectors . . . . . . . . . . . . . . . . . . . . . . . . . . . . . . .43
Galactic Map Buttons . . . . . . . . . . . . . . . . . . . . .43
Map Button . . . . . . . . . . . . . . . . . . . . . . . . . . . .43
Military Button . . . . . . . . . . . . . . . . . . . . . . . . .44
Events Button . . . . . . . . . . . . . . . . . . . . . . . . . .44
Economic Button . . . . . . . . . . . . . . . . . . . . . . . .44
Overlay Button . . . . . . . . . . . . . . . . . . . . . . . . .45
Redeployment Window . . . . . . . . . . . . . . . . . . . . . . . .47
Redeploying Starships . . . . . . . . . . . . . . . . . . . .48
Turn Button . . . . . . . . . . . . . . . . . . . . . . . . . . . . . . . . . . .48
Summary Button . . . . . . . . . . . . . . . . . . . . . . . . . . . . . . .48
Turn Timer . . . . . . . . . . . . . . . . . . . . . . . . . . . . . . . . . . . .49
Empire Info Panel . . . . . . . . . . . . . . . . . . . . . . . . . . . . . .49
v
Table of Contents
BOF ALL TOGETHER-singles 25/05/99 13:32 Page 5
Page 6

Main Galactic Panel . . . . . . . . . . . . . . . . . . . . . . . . . . . . .50
Events Panel . . . . . . . . . . . . . . . . . . . . . . . . . . . . . . . .50
Task Force Panel . . . . . . . . . . . . . . . . . . . . . . . . . . . . .51
Moving Task Forces . . . . . . . . . . . . . . . . . . . . . .51
Attacking Solar Systems . . . . . . . . . . . . . . . . . . .52
Trade Routes Panel . . . . . . . . . . . . . . . . . . . . . . . . . . .53
Trade Routes . . . . . . . . . . . . . . . . . . . . . . . . . . .54
Trade Routes Button . . . . . . . . . . . . . . . . . . . . .54
Main Galactic Information Window . . . . . . . . . . . . . . . .55
Solar System Information Window . . . . . . . . . . . . . . . .55
Solar System Statistics . . . . . . . . . . . . . . . . . . . .56
Terraforming . . . . . . . . . . . . . . . . . . . . . . . . . . .56
Task Force Information Window . . . . . . . . . . . . . . . . .57
Cloak Button . . . . . . . . . . . . . . . . . . . . . . . . . . .58
Orders Button . . . . . . . . . . . . . . . . . . . . . . . . . .58
Redeploy Button . . . . . . . . . . . . . . . . . . . . . . . .60
Chapter 7:
Tactical Combat Screen . . . . . . . . . . . . . . .61
Initiate Combat Window . . . . . . . . . . . . . . . . . . . . . . . . .62
Tactical Combat Window . . . . . . . . . . . . . . . . . . . . . . . .63
Tactical Commands Menu . . . . . . . . . . . . . . . . . . . . . .64
Turn Button . . . . . . . . . . . . . . . . . . . . . . . . . . . . . . . . . . .66
Options Button . . . . . . . . . . . . . . . . . . . . . . . . . . . . . . . .66
Tactical Turn Timer . . . . . . . . . . . . . . . . . . . . . . . . . . . . .66
Playback Button . . . . . . . . . . . . . . . . . . . . . . . . . . . . . . .67
Playback Panel . . . . . . . . . . . . . . . . . . . . . . . . . . . . . .67
Tactical Button . . . . . . . . . . . . . . . . . . . . . . . . . . . . . . . . .67
Tactical Combat Panel . . . . . . . . . . . . . . . . . . . . . . . . . . .68
Starship Statistics Panel . . . . . . . . . . . . . . . . . . . . . . . .69
Tactical Viewpoint Panel . . . . . . . . . . . . . . . . . . . . . . .69
Tactical View Controls . . . . . . . . . . . . . . . . . . . .70
vi
Table of Contents
BOF ALL TOGETHER-singles 25/05/99 13:32 Page 6
Page 7

Tactical Viewpoint Panel Buttons . . . . . . . . . . . .71
Reset Button . . . . . . . . . . . . . . . . . . . . . . . . . . .71
Views Button . . . . . . . . . . . . . . . . . . . . . . . . . . .72
Status Button . . . . . . . . . . . . . . . . . . . . . . . . . .73
Auto Button . . . . . . . . . . . . . . . . . . . . . . . . . . .73
Fleets Button . . . . . . . . . . . . . . . . . . . . . . . . . . .73
Enemy Button . . . . . . . . . . . . . . . . . . . . . . . . . .73
Tactical Events Window . . . . . . . . . . . . . . . . . . . . . . . . .73
Exiting the Tactical Combat Screen . . . . . . . . . . . . . . . .74
Chapter 8:
Solar System Screen . . . . . . . . . . . . . . . . . . .75
Systems Button . . . . . . . . . . . . . . . . . . . . . . . . . . . . . . . .77
Solar System Screen Buttons . . . . . . . . . . . . . . . . . . . . .77
Solar Systems Window . . . . . . . . . . . . . . . . . . . . . . . . . .78
Production Summary . . . . . . . . . . . . . . . . . . . . . . . . . . .78
Production Summary Sliders . . . . . . . . . . . . . . . . . . . .78
Labour Pool Slider . . . . . . . . . . . . . . . . . . . . . . . . . . . .79
Energy Management Window . . . . . . . . . . . . . . . . . . . .80
Energy Slider . . . . . . . . . . . . . . . . . . . . . . . . . . . . . . . .81
Build List Window . . . . . . . . . . . . . . . . . . . . . . . . . . . . . .81
Ship List Window . . . . . . . . . . . . . . . . . . . . . . . . . . . . . . .82
Structures Window . . . . . . . . . . . . . . . . . . . . . . . . . . . . .84
Scrap Window . . . . . . . . . . . . . . . . . . . . . . . . . . . . . . .85
System Info Window . . . . . . . . . . . . . . . . . . . . . . . . . . . .86
Build Queue . . . . . . . . . . . . . . . . . . . . . . . . . . . . . . . . . . .86
Chapter 9:
Intelligence Screen . . . . . . . . . . . . . . . . . . . . .89
Intelligence Window . . . . . . . . . . . . . . . . . . . . . . . . . . . .91
Empire Intelligence Information Window . . . . . . . . . . .91
vii
Table of Contents
BOF ALL TOGETHER-singles 25/05/99 13:32 Page 7
Page 8

Management Button . . . . . . . . . . . . . . . . . . . . . . . . . . . .92
Internal Security Slider . . . . . . . . . . . . . . . . . . . . . . . .92
Espionage and Sabotage Sliders . . . . . . . . . . . . . . . . . .93
Agent Specialty . . . . . . . . . . . . . . . . . . . . . . . . . . . . . .94
Report Button . . . . . . . . . . . . . . . . . . . . . . . . . . . . . . . . .95
Empire Status Button . . . . . . . . . . . . . . . . . . . . . . . . . . .96
Chapter 10:
Diplomacy Screen . . . . . . . . . . . . . . . . . . . . . . . .99
Diplomatic Relations Window . . . . . . . . . . . . . . . . . . .101
Sympathy Bar . . . . . . . . . . . . . . . . . . . . . . . . . . . . . . .101
Diplomacy Window . . . . . . . . . . . . . . . . . . . . . . . . . . . .101
Active Button . . . . . . . . . . . . . . . . . . . . . . . . . . . . . . . . .101
Propose Button . . . . . . . . . . . . . . . . . . . . . . . . . . . . . . .102
Treaties with Empires . . . . . . . . . . . . . . . . . . . . . . . .104
Treaties with Minor Races . . . . . . . . . . . . . . . . . . . . .106
Terms of Treaties . . . . . . . . . . . . . . . . . . . . . . . . . . . .107
Event Button . . . . . . . . . . . . . . . . . . . . . . . . . . . . . . . . .109
Race Information Button . . . . . . . . . . . . . . . . . . . . . . .110
Diplomatic Summary . . . . . . . . . . . . . . . . . . . . . . . . . .111
Chapter 11:
Technology Screen . . . . . . . . . . . . . . . . . . . . .113
Empire Technology Information . . . . . . . . . . . . . . . . . .115
Technology Window . . . . . . . . . . . . . . . . . . . . . . . . . . . .115
Research Button . . . . . . . . . . . . . . . . . . . . . . . . . . . . . .115
GRP Allocation Slider . . . . . . . . . . . . . . . . . . . . . . . .116
Technology Field Database . . . . . . . . . . . . . . . . . . . . . .117
Object Database . . . . . . . . . . . . . . . . . . . . . . . . . . . . . .118
Database List . . . . . . . . . . . . . . . . . . . . . . . . . . . . . . . . .119
Database Description . . . . . . . . . . . . . . . . . . . . . . . . . .119
viii
Table of Contents
BOF ALL TOGETHER-singles 25/05/99 13:32 Page 8
Page 9

Ships Filter . . . . . . . . . . . . . . . . . . . . . . . . . . . . . . . . . . .120
Requirements List . . . . . . . . . . . . . . . . . . . . . . . . . . . . .121
Chapter 12:
Multiplayer Game . . . . . . . . . . . . . . . . . . . . . . .123
Multiplayer Victory Conditions . . . . . . . . . . . . . . . . . .124
Multiplayer Setup Screen . . . . . . . . . . . . . . . . . . . . . . .125
Types of Multiplayer Connections . . . . . . . . . . . . . . . .126
Network Button . . . . . . . . . . . . . . . . . . . . . . . .126
Modem Button . . . . . . . . . . . . . . . . . . . . . . . . .128
Serial Button . . . . . . . . . . . . . . . . . . . . . . . . . .129
Configuration Screen . . . . . . . . . . . . . . . . . . . . . . . . . . .129
Multiplayer Lobby Screen . . . . . . . . . . . . . . . . . . . . . . .130
Empire Selection Screen . . . . . . . . . . . . . . . . . . . . . . . .130
Chat Window . . . . . . . . . . . . . . . . . . . . . . . . . . . . . . . . .130
MSN Gaming Zone . . . . . . . . . . . . . . . . . . . . . . . . . . . . .132
Chapter 13:
Game Options . . . . . . . . . . . . . . . . . . . . . . . . . . . . .133
Sound Options . . . . . . . . . . . . . . . . . . . . . . . . . . . . . . . .134
Game Preferences . . . . . . . . . . . . . . . . . . . . . . . . . . . . .135
Tool Tips Button . . . . . . . . . . . . . . . . . . . . . . . . . . . .135
Random Events Button . . . . . . . . . . . . . . . . . . . . . . .135
Tactical Combat Options Button . . . . . . . . . . . . . . . . .135
Autosave Button . . . . . . . . . . . . . . . . . . . . . . . . . . . .136
Appendix A:
Starships and Starbases . . . . . . . . . . . . .137
Starships . . . . . . . . . . . . . . . . . . . . . . . . . . . . . . . . . . . . .138
Colony . . . . . . . . . . . . . . . . . . . . . . . . . . . . . . . . . . . .139
Command . . . . . . . . . . . . . . . . . . . . . . . . . . . . . . . . .139
Raider . . . . . . . . . . . . . . . . . . . . . . . . . . . . . . . . . . . .140
Scout . . . . . . . . . . . . . . . . . . . . . . . . . . . . . . . . . . . . .140
Strike Cruiser . . . . . . . . . . . . . . . . . . . . . . . . . . . . . .141
ix
Table of Contents
BOF ALL TOGETHER-singles 25/05/99 13:32 Page 9
Page 10

Troop Transport . . . . . . . . . . . . . . . . . . . . . . . . . . . . .141
Warship . . . . . . . . . . . . . . . . . . . . . . . . . . . . . . . . . . .141
Starbases . . . . . . . . . . . . . . . . . . . . . . . . . . . . . . . . . . . .142
Outpost . . . . . . . . . . . . . . . . . . . . . . . . . . . . . . . . . . .142
Starbase . . . . . . . . . . . . . . . . . . . . . . . . . . . . . . . . . . .142
Appendix B:
Structures . . . . . . . . . . . . . . . . . . . . . . . . . . . . . . . .143
Basic . . . . . . . . . . . . . . . . . . . . . . . . . . . . . . . . . . . . . . . .144
Defence Structures . . . . . . . . . . . . . . . . . . . . . . . . . . .144
Development Structures . . . . . . . . . . . . . . . . . . . . . . .144
Energy Structures . . . . . . . . . . . . . . . . . . . . . . . . . . .145
Food Structures . . . . . . . . . . . . . . . . . . . . . . . . . . . . .145
Research Structures . . . . . . . . . . . . . . . . . . . . . . . . . .146
Special . . . . . . . . . . . . . . . . . . . . . . . . . . . . . . . . . . . . . . .146
Dilithium Refineries . . . . . . . . . . . . . . . . . . . . . . . . . .146
Orbital Batteries . . . . . . . . . . . . . . . . . . . . . . . . . . . .147
Scanners . . . . . . . . . . . . . . . . . . . . . . . . . . . . . . . . . .147
Shield Generator . . . . . . . . . . . . . . . . . . . . . . . . . . . .147
Shipyards . . . . . . . . . . . . . . . . . . . . . . . . . . . . . . . . . .147
Other Structures . . . . . . . . . . . . . . . . . . . . . . . . . . . .148
Race-Specific . . . . . . . . . . . . . . . . . . . . . . . . . . . . . . . . .148
Customer Support . . . . . . . . . . . . . . . . . . . . . .149
x
Table of Contents
BOF ALL TOGETHER-singles 25/05/99 13:32 Page 10
Page 11

EXPLORE THE FINAL
FRONTIER
Envision a future where the choices you make determine the fate of an
entire galaxy. A future where your sense of diplomacy can forge alliances
between solar systems. A future where your strategic skills can win battles, and even wars, to save the very galactic society you strive to create.
Explore this future, the future of Star Trek: The Next Generation. In the
24th century, five influential empires—the United Federation of Planets,
the Klingon Empire, the Romulan Star Empire, the Ferengi Alliance and
the Cardassian Union—expand across the galaxy, encountering new races
and mapping the unknown territories of space.
As you play Star Trek: The Next Generation Birth of the Federation, you
command one of those five empires. You determine when to ally your
empire with others and when to fight. Each empire has its own specific
advantages during gameplay, be it the diplomatic expertise of the
Federation in gaining allies or the combat strength of the Klingons in winning battles.
As Star Trek: The Next Generation depicted the Federation’s progress
from its initial encounter with the Vulcans in 2063 to its uneasy truce with
the Cardassians in 2367, likewise your decisions guide the actions of an
empire as it struggles from the surprises of a first contact to the resolutions of its last treaty.
All you need do is to boldly go where no one has gone before.
xi
Introduction
BOF ALL TOGETHER-singles 25/05/99 13:32 Page 11
Page 12

BOF ALL TOGETHER-singles 25/05/99 13:32 Page 12
Page 13

You left spacedock
without a tractor beam?
–Captain James T. Kirk
It won’t be installed until
Tuesday.
–Captain John Harriman
Chapter 1
GAME INSTALLATION
BOF ALL TOGETHER-singles 25/05/99 13:32 Page 1
Page 14
System Requirements
The minimum system requirements are:
166MHz Pentium or faster
Windows 95 or Windows 98
DirectX 6.0 or later
16MB RAM
Quad-speed CD-ROM drive
Hard drive with 160MB free
High Color graphics for 800 x 600 x 16-bit color (2MB video
RAM minimum)
Mouse
DirectX-compatible sound card
The recommended system requirements are:
IBM PC 200MHz Pentium or compatible system
32MB RAM
8x-speed CD-ROM drive
The multiplayer system requirements are:
Null-modem serial cable
Windows-compatible 28.8 kps modem or faster
LAN with IPX or TCP/IP protocol
Internet connection with true TCP/IP connection
If your system does not already have DirectX installed, it can be installed
from the Birth of the Federation CD-ROM.
Installing the Game
To install Star Trek: The Next Generation, Birth of the Federation,
follow these instructions:
2
1
Game Installation
BOF ALL TOGETHER-singles 25/05/99 13:32 Page 2
Page 15
1. Place the Birth of the Federation disc in the CD-ROM drive and
then close the drive. Since Birth of the Federation is a Windows
95/98 AutoPlay CD-ROM program, the installation program will
begin at this point.
2. Click on the Install button at the Main Menu to continue the
installation process.
3. Next, decide which directory you want to place the game in. The
default directory is C:\BOTF. If you wish to install the game to a different directory, type in your own directory path or click the Browse
button to find an available directory. Click the Next button to continue.
4. The installation program will copy files from the CD-ROM to your
hard drive. The game needs 160MB free on your hard drive.
To play the game, just place the Birth of the Federation disc in your
CD-ROM drive, click the Start Menu and then click on Programs >
MicroProse > Birth of the Federation > Birth of the Federation.
The ReadMe File
Birth of the Federation has a ReadMe file with which you can view
updated information about the game. To view this file, double-click on
README.DOC in the Birth of the Federation directory on your hard
drive. You can also view the ReadMe file by first clicking on the Start button on your Windows taskbar. Then select Programs > MicroProse > Birth
of the Federation > ReadMe.
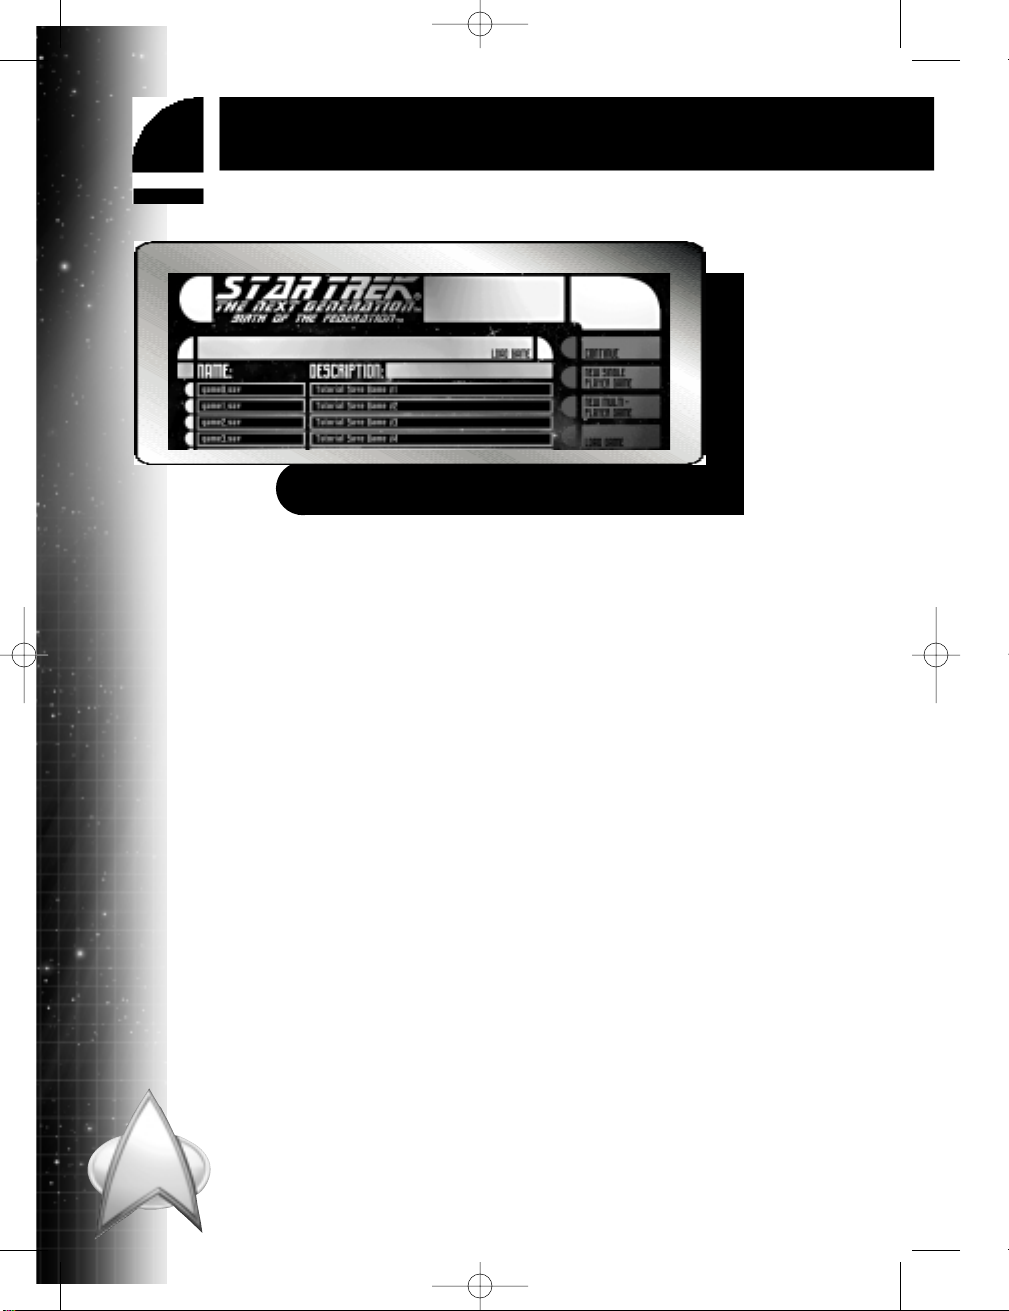
Using the Tutorials
We recommend that you learn how to play Birth of the Federation by first
playing the four tutorial saved games. Playing as the Romulan Star
Empire, you will learn how the game plays throughout its different stages.
The saved games (labelled “Tutorial #1,” “Tutorial #2,” “Tutorial #3” and
“Tutorial #4”) can be found in the Load Game menu.
Click on the Load Game button on the Main Menu, which is the first
screen you see after the opening movie. Select the tutorial you want
to load by clicking on its slot. The selected tutorial will light up.
Then click the Accept button to start that tutorial.
3
1
Game Installation
BOF ALL TOGETHER-singles 25/05/99 13:32 Page 3
Page 16
An online manual covering these tutorial games is included. We recommend that you print this out to read while playing the tutorials. To read
this online manual, you will need Adobe Acrobat Reader 3.0 or later. You
can install Adobe Acrobat Reader from the Birth of the Federation CDROM. Then click on the Start button and select Programs > MicroProse
> Birth of the Federation > Tutorial Guide.
Tutorial #1 shows you how to terraform planets, create colonies, build
structures and starships, manage your labour resources and how to use
the Marker window to move from one game screen to another.
Tutorial #2 demonstrates how to make first contact with a minor race and
establish diplomatic relations with it, how to construct outposts, how to
build special structures, how to upgrade and scrap other structures, and
how to establish and maintain trade routes with a minor race.
Tutorial #3 teaches you how to build starships, construct starbases and
establish diplomatic relationships with other empires.
Tutorial #4 shows you how to conduct research, how to engage in intelligence operations, how to command your starships during tactical combat,
how to carry out invasions and how to support your starships.
4
1
Game Installation
Saved Tutorial Games
BOF ALL TOGETHER-singles 25/05/99 13:33 Page 4
Page 17
“You are about to move into
areas of the galaxy contain-
ing wonders more incredible
than you can possibly imag-
ine… and terrors to freeze
your soul.”
–Q, a member of the
omnipotent Q-Continuum
Wasn’t it your own Hartley
who said ‘Nothing reveals
humanity so well as the
games it plays?’ Almost
right. Actually, you reveal
yourselves best in how you
play.
–Q, a member of the
omnipotent Q-Continuum
Chapter 2
GAME OVERVIEW
Wasn’t it your own Hartley
who said “Nothing reveals
humanity so well as the
games it plays?” Almost
right. Actually, you reveal
yourselves best in how you
play.
–Q, a member of the
omnipotent Q-Continuum
BOF ALL TOGETHER-singles 25/05/99 13:33 Page 5
Page 18

Game Terms
This section defines some common game terms since they are used
throughout this manual and describe unique aspects of this game.
Selecting Buttons
In general, left-clicking, or “clicking,” your mouse on an onscreen button
selects that button. Clicking and holding on to your mouse button, or
“dragging,” will change settings for onscreen slide bars, or “sliders.”
Active and Inactive
Buttons
Buttons are “active” when they can be selected. An active button is lit
when your cursor passes over it. Otherwise, the button will be unlit.
Buttons are “inactive” when they cannot be selected and will be darkened.
Tool Tips
When you pass your cursor over a button, slider or icon on the screen, a
Tool Tip appears. These Tool Tips supply you with information about that
specific button and its functions. For more information, see Chapter 13:
Game Options.
Game Artificial
Intelligence
“AI” refers to the game’s Artificial Intelligence, which controls minor
races and empires that are not controlled by human players.
Turns
There are two types of turns since Birth of the Federation has two gameplay modes: strategic and tactical.
6
2
Game Overview
BOF ALL TOGETHER-singles 25/05/99 13:33 Page 6
Page 19
Strategic Turns
A turn is the time in the game when you can relay orders to your starships,
give specific strategic commands, and review your supplies and territory.
After the turn is ended, all of your orders are processed.
There are two ways for a strategic turn to end. First, you can decide to end
your strategic turn by selecting the Turn button available on the Main
Galactic screen. Second, the player who hosts a multiplayer game can set
the same strategic turn time limit for all players.
The Strategic Timer defaults to None. For more information, see Chapter
5: Single Player Game.
Tactical Turns
When starship combat between your empire and an enemy race starts, you
will go to the Tactical Combat screen. While combat is played out on this
screen, the Strategic Timer is paused. Instead, combat is resolved during tactical turns, which is the time when you order tactical commands to your starships in battle. After the tactical turn is ended, all
the player’s orders are processed.
7
2
Game Overview
Tool Tip
BOF ALL TOGETHER-singles 25/05/99 13:33 Page 7
Page 20

As with a strategic turn, there are two ways for a tactical turn to end. First,
you can decide to end your tactical turn by selecting the Turn button available on the Tactical Combat screen. Second, the player who initiates a
game can set a tactical turn time limit for all players.
The Tactical Timer defaults to None. For more information, see Chapter
5: Single Player Game.
Screen Saver
When you have been inactive in the game for more than 20 minutes, a
screen saver will play. This screen saver features a rotating view of starships and alien monsters. Press any key or move the mouse to deactivate
the screen saver and restore the game.
Playing Empires
You must select one of five empires to control in Birth of the Federation.
The five empires are:
The Cardassian Union is structured around a highly efficient
military intelligence organisation that conquers other races to
ensure its continued survival.
The United Federation of Planets is based on Earth and is
devoted to peaceful relations with other races, the exploration
of space and the pursuit of scientific knowledge.
The Ferengi Alliance is mainly an economic power interested
in continued financial gain.
The Klingon Empire is a warrior society pledged to honour
and strength through conflict.
The Romulan Star Empire is a reclusive society that protects
its privacy mainly through its military intelligence agency and
cloaked starships.
After you choose an empire to play, you will gain a strategic advantage by
basing your strategy on the guiding philosophy of each empire. For fur-
ther information, see Chapter 3: Empires.
In addition to the empires, each game can have up to 30 minor
races, each controlled by the game’s AI. These minor races will
8
2
Game Overview
BOF ALL TOGETHER-singles 25/05/99 13:33 Page 8
Page 21
interact with each empire differently. You may form partnerships with
them or fight them in starship battles. For more information, see Chapter
5: Single Player Game.
Cursor
Your cursor changes to indicate its current function.
General Cursor This cursor is used to click on buttons and select
onscreen items.
The General cursor looks like this:
Move Cursor This cursor is a flashing green and purple square
with arrows pointing out of all four sides. It
appears only on the Galactic Map window when
a task force has been ordered to move. The Move
cursor changes back to a General cursor when
a destination has been selected.
The move cursor looks like this:
9
2
Game Overview
Empire Selection Screen
BOF ALL TOGETHER-singles 25/05/99 13:33 Page 9
Page 22

Selection Cursor This cursor is used to select all buttons and star-
ships on the Tactical Combat screen. While this
cursor looks slightly different for each empire, all
look like a set of cross hairs.
The Selection cursor looks like this:
Wait Cursor This cursor appears while your commands are
being processed. The cursor will change into a
rotating icon.
Game Victory
Conditions
The victory conditions determine the criteria for winning vs. other players
or the AI. There are three different victory conditions: Domination,
Vendetta and Team Play. To choose a specific victory condition, select the
Victory Conditions button on the Game Preferences screen. After winning
a game, a Confirmation window appears, asking you if you wish to continue playing.
Domination
The Domination victory condition requires your empire to control 60% of
the galaxy’s population and inhabited solar systems. If your empire has
formed an alliance with another galactic power, then the two of you must
collectively control 75% of the existing population and inhabited solar
systems to meet the Domination victory condition. You can also win by
eradicating all other empires.
Vendetta
The Vendetta victory condition requires your empire to eliminate its two
mortal enemies. Each empire has two mortal enemies:
The Federation vs. the Romulans and the Cardassians
The Klingons vs. the Cardassians and the Ferengi
10
2
Game Overview
BOF ALL TOGETHER-singles 25/05/99 13:33 Page 10
Page 23

The Romulans vs. the Federation and the Ferengi
The Ferengi vs. the Klingons and the Romulans
The Cardassians vs. the Federation and the Klingons
Team Play
The Team Play victory condition can only be selected for multiplayer
games. In Team Play, each player selects a team to be in. Empires controlled by the AI will be placed on a team selected by the multiplayer game
host. These teams will start out the game with an alliance treaty established between their empires. Each team must control 75% of the existing
population and inhabited solar systems to win.
Game Screens
Birth of the Federation has seven main screens.
Main Menu From this menu, you set the basic game parame-
ters and save or load games. For further information, see Chapter 4: Main Menu.
Main Galactic Displaying a grid map of the galaxy, this screen
serves as a base of operations from which to
move starships, order task forces and receive a
summary of game actions. For more information
see Chapter 6: Main Galactic Screen.
Tactical Combat This screen appears when your starship prepares
to fight a potentially hostile vessel. All ship-toship battles are conducted on this screen. For a
complete description, see Chapter 7: Tactical
Combat Screen.
Solar System This screen shows what resources are in each of
your solar systems. You also construct buildings
and starships here. For a complete description,
see Chapter 8: Solar System Screen.
Intelligence From this screen, you select what espionage
and sabotage activities to conduct. For
11
2
Game Overview
BOF ALL TOGETHER-singles 25/05/99 13:33 Page 11
Page 24
more information, see Chapter 9: Intelligence
Screen.
Diplomacy On this screen, your empire establishes relation-
ships with other races. You also review basic
information about any race you encounter. For
more information, see Chapter 10: Diplomacy
Screen.
Technology This screen is where you research and review
what structures and starships your empire can
build. For a complete description, see Chapter
11: Technology Screen.
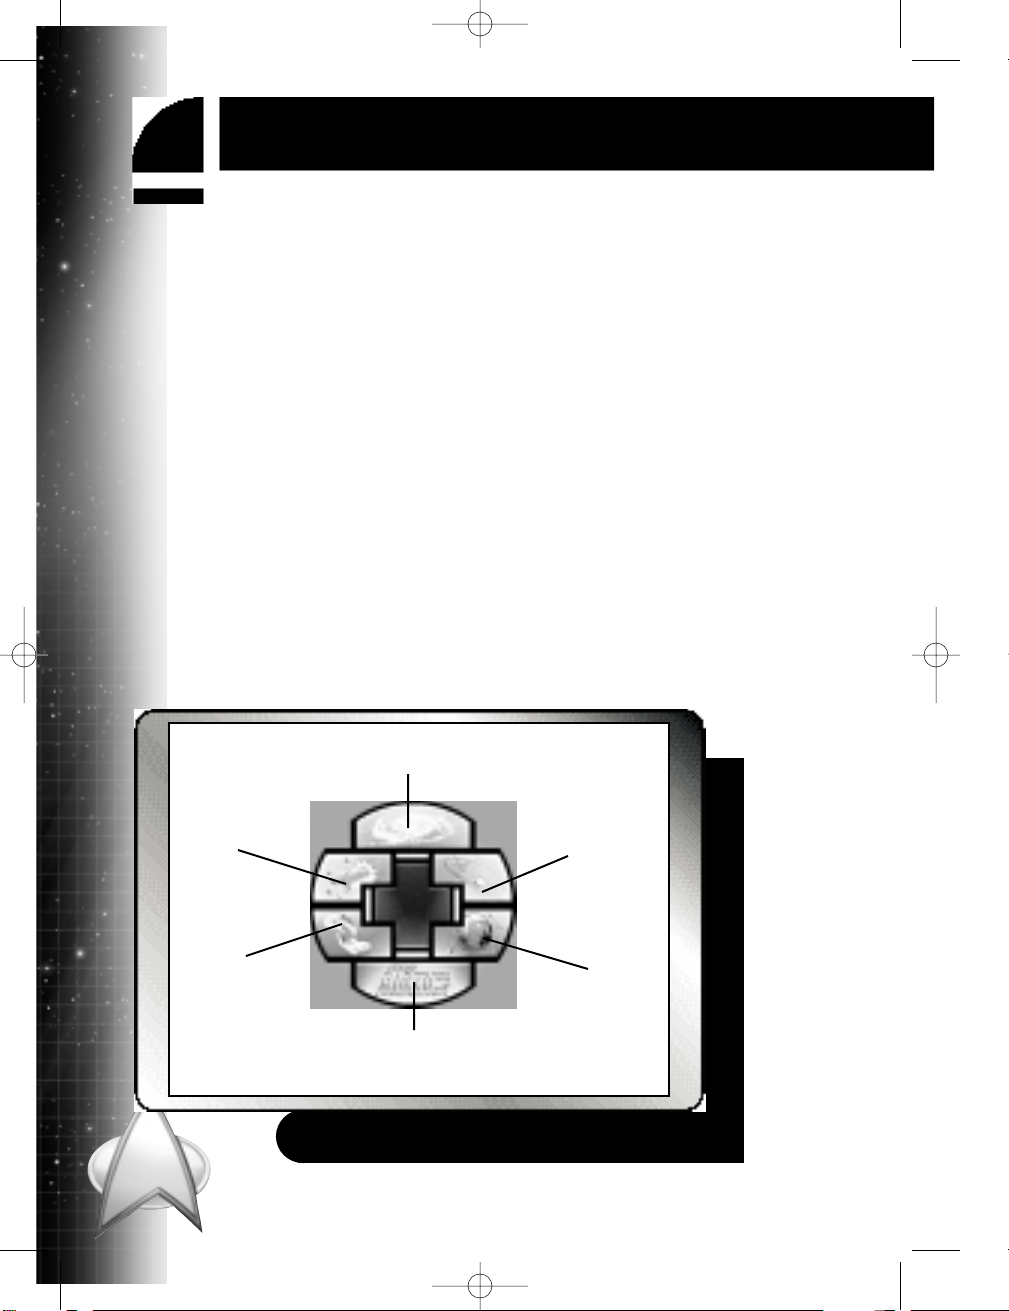
Marker Window
The Marker window is a menu with six buttons, each identified with an
icon for the game screen it represents. With the exception of the Tactical
Combat screen, Summary window and Redeployment window, rightclicking on other game screens will bring up the Marker window.
2
Game Overview
Marker Window
Diplomacy
screen button
Main Galactic screen button
Solar System
screen button
Intelligence
screen button
Main Menu button
Technology
screen button
12
BOF ALL TOGETHER-singles 25/05/99 13:33 Page 12
Page 25

Clicking on a button brings up the particular screen:
Main Galactic screen for ship movement and summaries of
game actions.
Solar System screen to view the solar systems your empire controls.
Intelligence screen to issue espionage and sabotage commands.
You can also read intelligence reports on the other empires.
Main Menu to exit the game, save it or start a new one. You
can also access the Options screen from the Main Menu.
Diplomacy screen to establish relationships with other races.
Technology screen to decide what technological research your
galactic power will conduct.
Clicking outside of the Marker window or on its centre will close it.
You can also move between screens using these function keys:
1 for the Main Galactic screen
2 for the Solar System screen
3 for the Intelligence screen
4 for the Technology screen
5 for the Diplomacy screen
Game Resources
In gaining allies or new solar systems, an empire increases its resources,
allowing it to build new structures and to power existing ones. The eight
basic resources are credits, dilithium, energy, food, industry, intelligence
points, population and research. With the exception of population, these
six resources can be defined as either system-level resources or empirelevel resources. Population acts as both a system-level and an empire-level
resource, as explained later in its own section.
13
2
Game Overview
BOF ALL TOGETHER-singles 25/05/99 13:33 Page 13
Page 26

System-Level Resources
System-level resources can only be used within the solar system they are
generated in. Food, energy and industry are system-level resources. These
resources cannot be stockpiled or transferred between solar systems.
Energy
Energy is needed to power shipyards, dilithium mines and other special structures. Without energy, many special structures will be unable to function.
Energy is generated by energy structures. However, basic structures are
self-powered and do not require additional energy from energy structures.
(For more information on structures, see Appendix B: Structures.)
Food
Food sustains the population of a solar system. Food shortages lead to
starvation and a drop in population. A food surplus stimulates population
growth as long as the solar system has not reached its maximum population limit. Food is produced by food structures.
Industry
Industry is a basic requirement to build structures and starships within a
solar system. Each structure and starship costs a certain amount of industry units to build.
If a solar system has 100 industry
units, it can construct any structure
or starship that has a build cost of
100 units or less in one strategic
turn. Likewise, such a solar system
can build any structure or starship
that has a build cost of 200 units in
two strategic turns, and so on.
Industry units are generated by
development structures, such as
industrial replicators.
This resource will determine the amount of credits produced when
14
2
Game Overview
Cardassian Assembly Yard
BOF ALL TOGETHER-singles 25/05/99 13:33 Page 14
Page 27
solar systems are ready to build products for trade routes. (For more information on trade routes, see Chapter 6: Main Galactic Screen.)
Empire-Level Resources
Empire-level resources are generated in a specific solar system but can be
used by an empire across all its solar systems. These resources are considered to be automatically pooled together and redistributed where
needed within the empire’s territory. Credits, dilithium, intelligence points
and research are considered empire-level resources. These resources, with
the exception of credits, cannot be stockpiled.
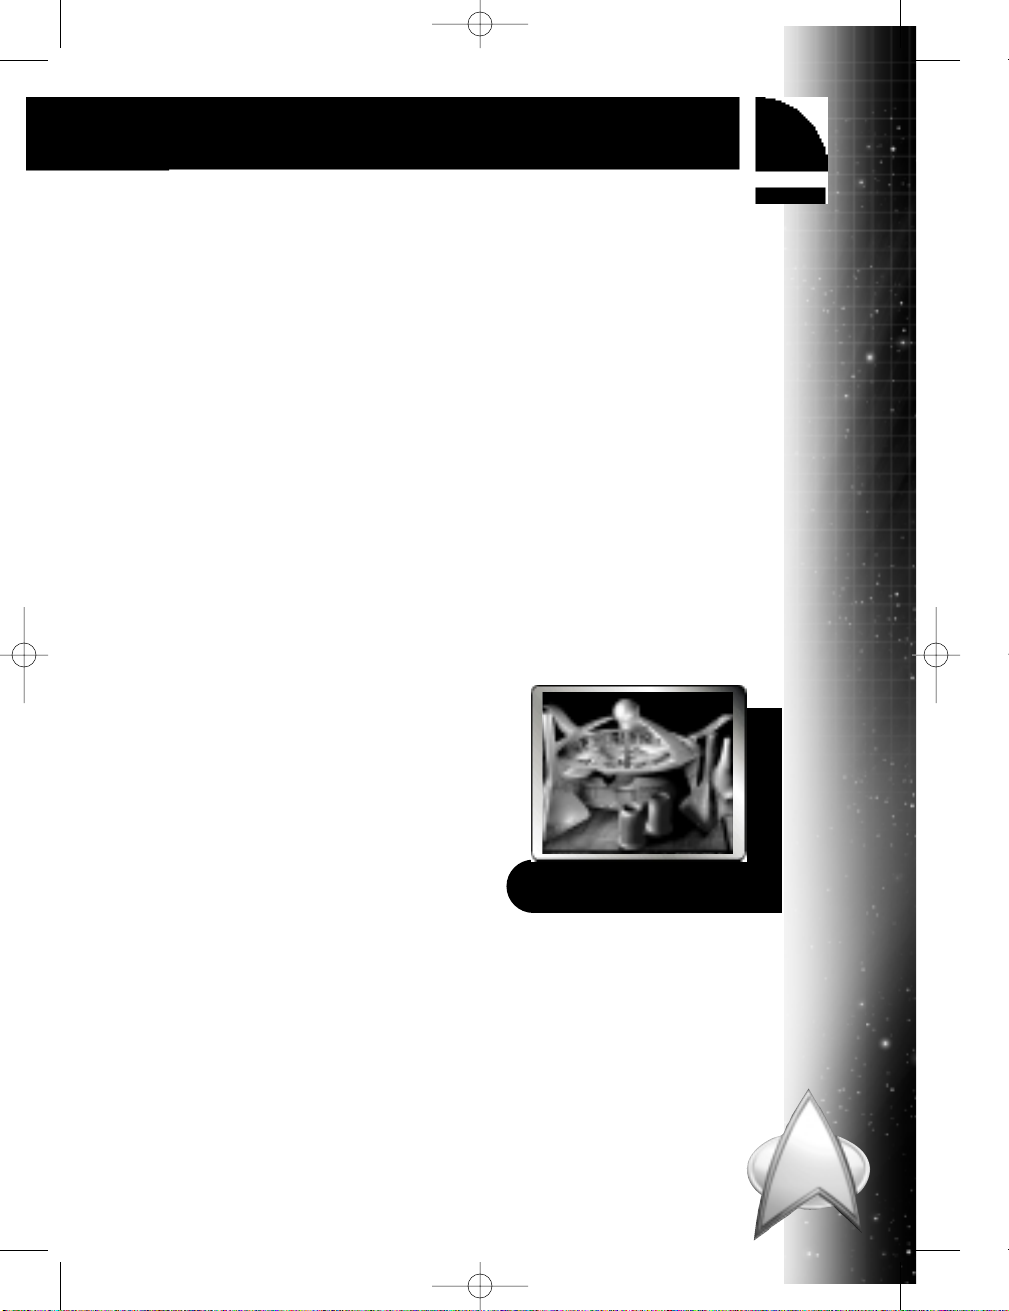
Credits
Credits are the galactic unit of currency. They are produced by an empire’s
population through taxes and by trade routes between solar systems.
Credits are automatically stockpiled each strategic turn based on the cash
production of the empire. As a result, they can be saved for future use.
Credits support excess starships
when the empire’s population cannot. Credits are automatically used
to maintain the extra starships
instead of population units.
Whatever support for starships that
is generated by population is subtracted from the total maintenance
cost, with the balance subtracted
from the credit reserve each strategic turn.
Players can buy structures with
credits before their standard completion time, thus speeding up their construction. The overall cost is determined by spending one credit per
remaining industry unit. For more information, see Chapter 8: Solar
System Screen.
Credits can buy diplomatic gifts, pay for bribes or be offered with a treaty
to enhance diplomatic negotiations with another race. For more information, see Chapter 10: Diplomacy Screen.
15
2
Game Overview
Ferengi Festival of Fun
BOF ALL TOGETHER-singles 25/05/99 13:33 Page 15
Page 28
Dilithium
Dilithium is a crystalline substance that acts as a reaction catalyst in starship engines. It regulates the matter/antimatter reactions which power a
starship’s warp propulsion systems, allowing it to travel through space at
faster-than-light speeds. Dilithium is
produced by dilithium refineries.
The total number of dilithium
refineries in an empire determines
how many shipyards can build starships. One dilithium refinery can
supply a shipyard with enough
dilithium to build a fleet, but only
if each starship is built one at a
time. The more dilithium refineries
an empire has, the more shipyards
can each construct a starship.
Since dilithium cannot be stockpiled, an empire must have one dilithium
mine or refinery for every starship under construction in a given turn. For
more information on dilithium refineries, see Appendix B: Structures.
Intelligence Points
Intelligence points are a basic requirement to conduct espionage and sabotage on other empires. The more intelligence points your empire has, the
more resources it has to spy on the other empires. Intelligence points are
generated by intelligence structures. For more information, see Chapter 9:
Intelligence Screen.
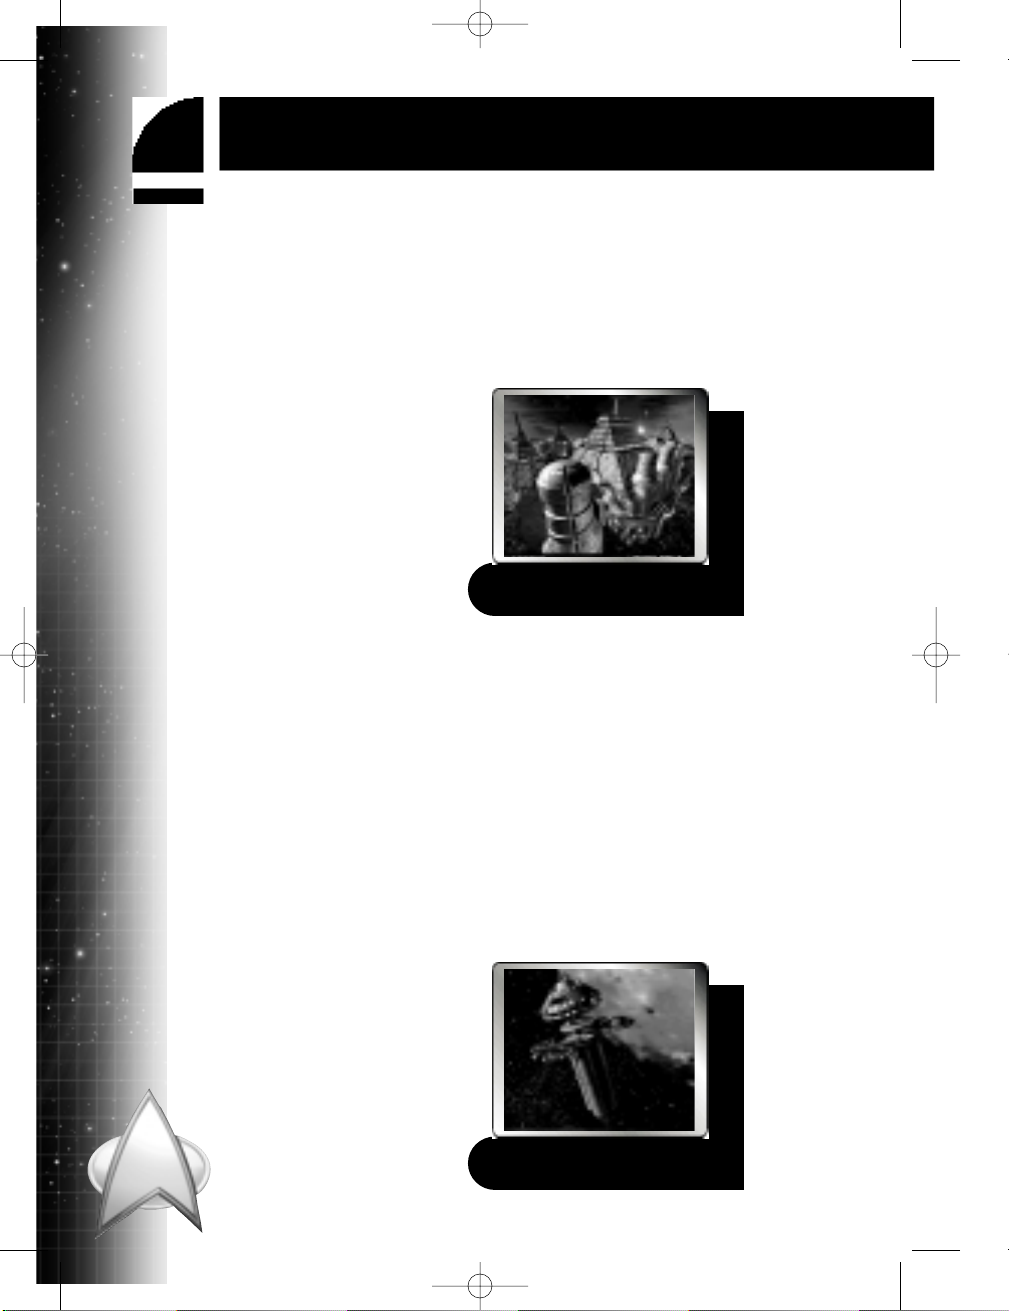
Research
Research is a basic requirement to
upgrade an empire’s technology
level. Each technology level costs a
certain amount of research units to
reach. Research units are generated
by research structures. For further
information, see Chapter 11:
Technology Screen.
16
2
Game Overview
Klingon Mining Prison
Genesis Research Lab
BOF ALL TOGETHER-singles 25/05/99 13:33 Page 16
Page 29

Population
Population is the number of people within a society. Ultimately, population serves as the workforce for each solar system controlled by an empire,
and in this sense it functions as a system-level resource.
Population size within each solar system determines what basic structures
can be operated there. Ten available units of population can operate one
basic structure. The size of a population within a solar system also determines whether trade routes can be established. Depending upon the
empire, 125 to 200 available population units are required to support a
single trade route. More trade routes may be supported if the population
of the solar system is large enough.
As an empire-level resource, the total size of an empire’s population indicates what a solar system’s tax income will be. Depending upon the
empire, each population also has a set percentage that contributes to the
tax rate, with the remaining percentage of the population available to support starships without any economic cost to you. Any amount of the population can be assigned to specific structures, still supporting starships
and counting towards the tax rate.
Morale
Each solar system controlled by an empire has its own morale for that sector’s population. This morale indicates the population’s reaction to your
empire’s actions, such as starting a war or establishing a peace treaty. The
morale reaction depends upon the philosophy of the inhabitants of each
solar system. Klingons will react positively to a declaration of war,
whereas the Federation responds favorably to successful diplomatic relationships.
Morale affects your empire’s production of industry, research and intelligence points. If your morale is very low, unrest events can occur, from
riots that destroy structures to a rebellion of an empire’s solar system. A
high morale can have positive effects, such as a construction boom (which
builds a basic structure for free) or an economic boom (which can double
credit production for a single turn).
Morale is measured on the Solar System screen, as one of eight terms—
fanatic, loyal, pleased, content, apathetic, disgruntled, defiant and
rebellious—with fanatic as the best morale for an empire and rebellious the worst.
17
2
Game Overview
BOF ALL TOGETHER-singles 25/05/99 13:33 Page 17
Page 30
BOF ALL TOGETHER-singles 25/05/99 13:33 Page 18
Page 31

Chapter 3
EMPIRES
Know your enemy and know
yourself, and victory will
always be yours.
–Sun Tzu, from The Art of
War, as quoted by Cmdr.
William Riker
Know your enemy and know
yourself, and victory will
always be yours.
–Sun Tzu, from The Art of
War, as quoted by Cmdr.
William Riker
BOF ALL TOGETHER-singles 25/05/99 13:33 Page 19
Page 32

While Star Trek: The Next Generation focused on the voyages of the
U.S.S. Enterprise, that starship did visit many different planets and
encountered many different civilizations. Predominant among these civilizations were, of course, the United Federation of Planets, as well as the
Klingon Empire, the Romulan Star Empire, the Ferengi Alliance and the
Cardassian Union.
Perhaps the most important aspect of Birth of the Federation is understanding these five cultures. Since each empire has particular gameplay
strengths, you should follow its unique philosophy to gain full advantage
of its specific strengths. Furthermore, understanding each empire’s philosophy will help you in dealing with them, be it through negotiations or
through war. But understand that the specific events mentioned in these
descriptions have not taken place in the game. These descriptions are to
give you the flavour of each empire as you guide its future.
United Federation of
Planets
“To bring light into the darkness.”
–U.S.S. Stargazer dedication plaque
Founded in 2161, the United Federation of
Planets is an alliance of several planets dedicated to peace and scientific exploration. It is
governed by the Federation Council, which in
turn, is led by the Council President.
The Federation’s organisation for interstellar
exploration and defence is Starfleet Command. Starfleet’s mission to
explore strange new worlds, to seek out new life and new civilizations, is
balanced by its Prime Directive: to not interfere in the natural development of any unaligned alien race. As a result, first contact with other races
is very important to the Federation. For every successful first contact, such
as Zefram Cochrane’s peaceful meeting with the Vulcans, there has been
a dangerous encounter, such as the one with the Klingon Empire.
The Federation is also known for its history of able diplomacy.
Through the Khitomer Peace Accords of 2293, the Federation
founded a friendship with their former adversary, the Klingons.
Likewise, the Federation has used diplomacy to rein in the
20
3
Empires
BOF ALL TOGETHER-singles 25/05/99 13:33 Page 20
Page 33

Romulan Star Empire and Cardassian Union by creating buffer zones
between their territories and the Federation’s.
This reputation for diplomacy is the Federation’s most significant gameplay advantage. In diplomacy, the Federation’s credits are extremely effective in establishing treaties. Minor races show more sympathy towards the
Federation than other empires. In combat, the Federation also has an
advantage with strong starship shields and hulls, and it receives a large
bonus for liberating inhabited solar systems.
In Vendetta games, both the Romulans and Cardassians, with their active
distrust of Starfleet, will always be significant threats for the Federation.
Onscreen, the Federation is represented by
Klingon Empire
“So honour the valiant who die ’neath your
sword/But pity the warrior who slays all his
foes.”
–“The Fall of Kang” by the Klingon poet
G’trock
By killing Molor the Tyrant circa 600 A.D. and
defeating the Fek’lhri, Kahless the
Unforgettable united his fellow Klingons with
his acts of honour and courage. Even now, a
clone of Kahless still serves as an inspirational Emperor of the Klingons,
although the government is actually led by the Chancellor, who oversees the
Klingon High Council from the Klingon homeworld, Qo’noS.
Forged in war, the Klingon Empire has continued to temper itself through
conflict. For Klingons, strength and honour in battle is all. Some opponents
they recognise as honourable, others they consider treacherous. Respect for
an enemy’s strength can lead the Klingons to forge a needed alliance.
Sometimes the Klingons fight old allies. Former allies with the Klingons,
the Romulans struck at Klingon outposts in 2344 and 2346, respectively.
Such situations reinforce the Klingons’ belief that the future of their
empire rests on battle readiness.
This readiness for battle at any moment is its main gameplay advantage. The Klingon Empire is quite effective in ground combat.
21
3
Empires
BOF ALL TOGETHER-singles 25/05/99 13:33 Page 21
Page 34

Klingon Colony and Troop Transport starships, unlike those of other
empires, are armed for space battle. Their Birds of Prey starships can
cloak.
During Vendetta games, the Klingons see a great threat in the
Cardassians, who clearly attempt to increase their military strength, and
in the Ferengi, who have no honour.
Onscreen, the Klingon Empire is represented by
Romulan Star Empire
“If we are the strong, is this not the signal for
war?”
–Anonymous Romulan Centurion
To understand the Romulans, one must look
to the planet Vulcan. In the first century
A.D., the Vulcans suffered a series of horrible wars due to their violent and passionate
natures. Then came the Time of Awakening,
when the Surak taught his people the
strength of logic and the peace that came with it. Those Vulcans who
rejected Surak’s teachings left their homeworld for the planets of Romulus
and Remus, founding the Romulan Star Empire.
Now the Romulans are governed by a ruler known as the Praetor, who is
supported by the Imperial Senate, a parliament led by a Proconsul. The
Romulans’ military intelligence agency, the Tal Shiar, not only spies on
their enemies but also on its own citizens for signs of betrayal.
In playing the Romulans, take advantage of their covert means at undermining their foes. The Romulans secretly helped foster the Klingon Civil
War of 2367, attempted a clandestine takeover of Vulcan in 2368, and
have highly placed spies, such as the Federation ambassador T’Pel.
To other races, the Romulans prefer to remain a mystery. In their first battle with Earth in 2160, the Romulans kept their appearance hidden from
their enemies. By 2266, the Romulans had developed a cloaking device
that rendered their starships invisible to enemy sensors. Nevertheless,
the Romulans have entered into military alliances with the Klingons
and with the Cardassians when these empires shared common foes.
22
3
Empires
BOF ALL TOGETHER-singles 25/05/99 13:33 Page 22
Page 35

The Romulans’ reliance upon their military intelligence and their desire to
remain enigmatic serve as their major gameplay advantages. By building
special structures, they have effective intelligence operations. Their starships, with the exception of Colony and Troop Transports, can cloak and
have efficient targeting systems with powerful plasma torpedoes.
In Vendetta games, the Romulans target the Federation and the Ferengi as
being their most significant enemies.
Onscreen, the Romulan Star Empire is represented by
Ferengi Alliance
“A Ferengi without profit is no Ferengi at all”
–The 18th Ferengi Rule of Acquisition
Ferengi personal conduct is influenced by the
285 Rules of Acquisition, first of which is
“Once you have their money, you never give
it back.” These rules were formulated by
Gint, who led the Ferengi as the first Grand
Nagus nearly 10,000 years ago. The current
Grand Nagus oversees the Alliance from the
homeworld of Ferenginar.
By the time a race has encountered them, the Ferengi have already established a financial foothold into that race’s territory. Although the
Federation did not meet the Ferengi until 2364, the Ferengi had been salvaging Federation property since 2355. The Ferengi like to deal with those
races that are unfamiliar with their reputation for greed. First contacts are
excellent opportunities to increase their profit by making deals that are
favourable to themselves.
Since they prefer the acquisition of financial power rather than that of
political or military power, it is easy to underestimate the Ferengi. This
focus upon economic interests gives the Ferengi certain gameplay advantages. They can establish trade routes without treaties and build structures
that boost their income. Another advantage is that Ferengi starships have
strong shields and carry several torpedoes.
In Vendetta games, the Ferengi see the Romulans and Klingons as
their greatest threat since neither galactic power is willing to let the
Ferengi do business in their territory.
23
3
Empires
BOF ALL TOGETHER-singles 25/05/99 13:33 Page 23
Page 36

Onscreen, the Ferengi Alliance is represented by
Cardassian Union
“Confession is good for the soul.”
–Old Cardassian saying
The Cardassian Union was formed by the
civilian Detapa Council 300 years before the
Federation came into existence. With the
Detapa Council controlling both the military
units of the Central Command and the spy
network of the Obsidian Order, the
Cardassian Union grew strong by gaining territory and technology through war, at the price of several million deaths.
Given that before the Union, millions of Cardassians had died due to
plague and famine, success through such brutal means seemed to cost no
more than life before wars.
The Cardassian people, however, were once a spiritual culture, deeply
interested in peace. Now, that spiritual past is no longer acknowledged in
a society that focuses on military order, discipline and conquest. Races,
such as the Bajorans, who are conquered by the Cardassians find their
worlds strip-mined of all resources in order to support the Union. These
actions are seen as acceptable, even efficient, by the Cardassians.
This military efficiency is a gameplay advantage, with their ability to rule
other races best through subjugation by constructing special structures.
The Cardassians gain a great deal of productivity that other races are
unable to do to races they have subjugated. They are also efficient in intelligence operations through the development of structures, and their starships have extremely powerful beam weapons and strong hulls.
In Vendetta games, Cardassians view both the Federation and the
Klingons as enemies due to prolonged wars with each.
Onscreen, the Cardassian Union is represented by
24
3
Empires
BOF ALL TOGETHER-singles 25/05/99 13:33 Page 24
Page 37

Chapter 4
MAIN MENU
All of this might just be an
elaborate simulation running
inside a little device, sitting
on someone’s table.
–Captain Jean-Luc Picard, on
the nature of reality
All of this might just be an
elaborate simulation running
inside a little device, sitting
on someone’s table.
–Captain Jean-Luc Picard, on
the nature of reality
BOF ALL TOGETHER-singles 25/05/99 13:33 Page 25
Page 38

After the opening movie, the first screen you will see is the Main Menu.
From here, you may save, load, start, retire, quit or change the options for
a game. To bypass the opening movie, press the q key.
Continue Button
Click on the Continue button to load the last saved game played. To continue a game you have just exited, click on the Continue button.
New Single Player Game
Button
Click on the New Single Player Game button to start a new game for one
player. This brings up the Configuration screen, where you set the diffi-
culty and technology levels for the game.
Once you set those game parameters, the Empire Selection screen
appears, where you select which empire to play. The other empires
will be controlled by the AI. When the game starts, a movie about
26
4
Main Menu
Main Menu
BOF ALL TOGETHER-singles 25/05/99 13:33 Page 26
Page 39

your empire plays. To bypass the movie, press the q key. The Main
Galactic screen then appears.
Should you already have a game in progress that you have not saved, it
will be erased when you click on the New Single Player Game button.
New Multiplayer Game
Button
Click on the New Multiplayer Game button to start a new game for 2 to
5 players. This will bring up the Multiplayer Setup screen, where the host
sets up the desired game for others to join.
The player who initiates the game, known as the host, can set the difficulty
and technology levels for all players in the game at the Configuration
screen. Each player who joins the game selects which empire to play at the
Multiplayer Setup screen. Any remaining empires are controlled by the AI.
Should you already have a game in progress that you have not saved,
it will be erased when clicking on the New Multiplayer Game button.
27
4
Main Menu
Configuration Screen
BOF ALL TOGETHER-singles 25/05/99 13:33 Page 27
Page 40

Load Game Button
To load a game, click on the Load Game button to load any one of the
saved games from the Load Game menu. To select the game you want to
load, click on its slot and the selected game will light up. Then click the
Accept button to start that saved game.
You can also select any of the four tutorial games to play from this menu.
For instructions on how to use the tutorials, please read the online guide
that is located on your hard drive. To read this online guide, you need
Adobe Acrobat Reader 3.0. See “Using the Tutorials” in Chapter 1: Game
Installation for more information.
Save Game But ton
To save your current game, click on the Save Game button.
In the Save Game menu, you have 12 slots available for saved games. To
select a slot, click on the slot in either the Name Field or the
Description Field. In the Description Field, the galaxy type of the
saved game will appear. If you wish to change the text, click on the
28
4
Main Menu
Multiplayer Setup Screen
BOF ALL TOGETHER-singles 25/05/99 13:33 Page 28
Page 41

Description Field and type in your text. Click the Accept button to save
the game and to resume play. If you save a new game in an older game’s
slot, the older game will be erased in favor of the newer game.
Four slots are already used for tutorials. It is recommended that you not
use those slots to save new games until you learn the game.
Options Button
Clicking on the Options button brings up the Options menu, from which
you can set various game parameters. For further information, see
Chapter 13: Game Options.
Hall of Fame Button
Click on the Hall of Fame button to bring up the Hall of Fame screen,
which lists the top 10 games. The name of the winning empire, the
description of the victory and the winning score are listed.
You can only edit your entry on the Hall of Fame screen immediately
after completing a game. The latest entry will be lit with a blinking
29
4
Main Menu
Save Game Menu
BOF ALL TOGETHER-singles 25/05/99 13:33 Page 29
Page 42

cursor in the name description box. If you wish to change the name of the
empire, click on it and type in your text.
Retire Button
Click on this button to display the Power Graph, which shows the current
progress of each empire in relation to each other. Click on the OK button
to exit the game.
Quit Game Button
To exit the game and return to Windows, click on the Quit Game button.
30
4
Main Menu
Hall of Fame
BOF ALL TOGETHER-singles 25/05/99 13:33 Page 30
Page 43

Chapter 5
SINGLE PLAYER GAME
Destroying an empire to win
a war is no victory, and ending a battle to save an
empire is no defeat.
–Kahless, referring to the
unification of the Klingon
Empire
Destroying an empire to win
a war is no victory, and ending a battle to save an
empire is no defeat.
–Kahless, referring to the
unification of the Klingon
Empire
BOF ALL TOGETHER-singles 25/05/99 13:33 Page 31
Page 44

Single player games give you the opportunity to play any empire against
the AI. Although the AI controls the other four empires, each empire still
acts according to its guiding philosophy.
Whenever you start a new single player game, you erase the current game
unless you first save it. For a complete description of saving games, see
Chapter 2: Game Overview.
Configuration Screen
After you click the New Single Player button, the Configuration screen
will appear. Here you can select the technology level of each empire,
change the difficulty level, determine the number of minor races in the
game, specify the type of galaxy map for that the game and decide the victory conditions of the game. You can also accept the game defaults.
After choosing the Configuration settings, click on the Accept but-
ton to continue to the Empire Selection screen. If you wish to exit
32
5
Single Player Game
Configuration Screen
BOF ALL TOGETHER-singles 25/05/99 13:33 Page 32
Page 45

without saving your changes, select the Cancel button which will return
you to the Main Menu.
Civilization Level
Buttons
Located under each empire name, the Civilization Level button determines what type of structures and starships that empire can construct at
the start of the game. An empire with a higher civilization level has an
advantage over an empire at a lower level.
There are five levels of civilization: Beginning, Early, Developed,
Expanded and Advanced.
Beginning is the lowest level of civilization (technology level
1), and you start with a single solar system.
Early (technology level 2) starts with a fully developed homeworld within a single solar system.
Developed (technology level 3) starts the game with a single
solar system.
Expanded (technology level 5) starts with two solar systems
and a large amount of credits.
Advanced (technology level 8) starts with three solar systems,
an extra starship and a large amount of credits.
For more information about technology levels, see Chapter 11:
Technology Screen.
Civilization Level defaults to Early. To select a Civilization Level, click on
the currently listed option to change it. Press the s key and click on any
Civilization Level button to change all empires to the same technology
level. Press the s key and click on any Civilization Level button a second time to change the Civilization Level to the next choice for all
empires.
Game Preferences
Using the Preferences buttons, you can adjust the overall difficulty of
the game by determining the number of races your empire can
encounter, the duration of gameplay and other gameplay factors.
33
5
Single Player Game
BOF ALL TOGETHER-singles 25/05/99 13:33 Page 33
Page 46

Minor Races Button
You can encounter other races besides the five major empires. Each minor
race (which is controlled by the AI) has its own set of characteristics and
governing philosophy to allow it to react differently to each society. For
instance, the Bajorans are more likely to be favourable to the Federation
than they are to the Cardassians. The Nausicaans, with their violent
nature, are more likely to be sympathetic towards the Klingons than the
Ferengi. Depending upon how your empire treats these minor races
throughout the game, any minor race can grow to like your empire more
or come to care about it less.
There are four different options for the number of minor races: None,
Few, Some and Many. To select the number of minor races, click on the
currently listed option to change it. The more minor races you can
encounter, the more likely it is that empires can expand through diplomacy or though conquest. Fewer minor races mean that empires have to
expand mainly through colonisation. This button defaults to Many.
34
5
Single Player Game
Preferences Buttons
BOF ALL TOGETHER-singles 25/05/99 13:33 Page 34
Page 47

Difficulty Button
There are five levels of difficulty: Simple, Easy, Normal, Hard and
Impossible. When the difficulty level is Simple, random events are infrequent and not very severe. In addition, AI-controlled empires have a small
amount of credits and population with low morale. As the difficulty levels
increase to Impossible, random events are more frequent and severe. Also
AI-controlled empires have a high morale population and a large amount
of credits. The default is Normal. To set the difficulty level, click on the
currently listed option to change it.
Strategic Timer
You can decide how long each strategic turn is. A strategic turn is the time
when you control your starships, give commands, review your supplies
and territories, and gather information on other empires.
Select from several different predetermined time limits or None (no time
limitation). The selected time limitation will be the same for each player.
Click the right arrow to increase the time limit. Click on the left arrow to
decrease the timer. The Strategic Timer defaults to None. For more information on strategic turns, see Chapter 2: Game Overview.
Tactical Timer
You can decide how long each tactical turn in combat is. A tactical turn is
the time when you order tactical commands to your starships in battle.
While you are in tactical combat, the Strategic Timer is paused.
Select from several different predetermined time limits or None (no time
limitation). The selected time limitation will be the same for each player.
Click the right arrow to increase the duration of a tactical turn. Click
35
5
Single Player Game
Strategic Timer
BOF ALL TOGETHER-singles 25/05/99 13:33 Page 35
Page 48

on the left arrow to decrease the duration. The tactical timer defaults to
None. For more information, see Chapter 2: Game Overview.
Random Events Button
Click the Random Events button to set whether you want random circumstances in your game. Click on the currently listed option to change
it. The Random Events button defaults to On.
Random events can increase or decrease the population of a solar system,
destroy structures, improve or weaken diplomatic relations, add to or take
away from your credits, and temporarily block warp travel or trade revenues. These random events can take the form of unusual phenomena,
from the destructive Crystalline Entity to the cybernetic Borg collective.
Tactical Combat Button
Click the Tactical Combat button to set either Manual and Automatic control in tactical combat. Manual gives you control as to how to manoeuvre
your starship and plan tactics. Automatic has the combat occur offscreen.
If you choose Automatic, you will only see a summary of the combat.
To select a Tactical Combat option, click on the currently listed option to
change the choice. The Tactical Combat button defaults to Manual.
Victory Conditions Button
There are three Victory Conditions options: Domination, Vendetta and
Team Play.
Domination requires your empire to control 60% of the
galaxy’s population and inhabited solar systems. If your empire
allies with another empire, then 75% of the inhabited galaxy
must be under the collective control of you and your ally. In
addition, you can win by eliminating all other empires.
36
5
Single Player Game
Tactical Timer
BOF ALL TOGETHER-singles 25/05/99 13:33 Page 36
Page 49

Vendetta requires your empire to eliminate its two mortal
enemies to win the game.
Team Play requires teams, made up of allied empires, to
control 75% of the existing population and inhabited solar
systems. This option is only available in a multiplayer game.
To select a Victory Conditions option, click on the currently listed option
to change it. The Victory Conditions button defaults to Domination. For
more information on victory conditions, see Chapter 2: Game Overview.
Galaxy Options
The size and shape of the galaxy used as the strategic map affects your game.
Galaxy Size Button
The size of the galaxy can be
Small, Medium or Large. The
smaller a galaxy is, the sooner
the empires will come into contact with each other and the
sooner the game will end. The
earlier competing empires meet,
the less time there is to develop
their strategic strengths. On the
other hand, a larger galaxy
makes it more likely that the
empires will be significantly
advanced by the time they
encounter each other.
To select a Galaxy Size option,
click on the currently listed
option to change it. The Galaxy
Size button defaults to Medium.
Galaxy Shape Button
The shape of the galaxy can be Irregular, Elliptical, Ring or Spiral.
Each possible shape for the galaxy can affect all the empires’ growth.
For instance, elliptical galaxies may allow for swift growth in several
37
5
Single Player Game
Galaxy Size and Shape Buttons
BOF ALL TOGETHER-singles 25/05/99 13:33 Page 37
Page 50

different directions whereas the boundaries of a ring galaxy may require
you to build outposts for expansion.
To select the galaxy shape, click on the currently listed option to change
it. The Galaxy Shape button defaults to Irregular.
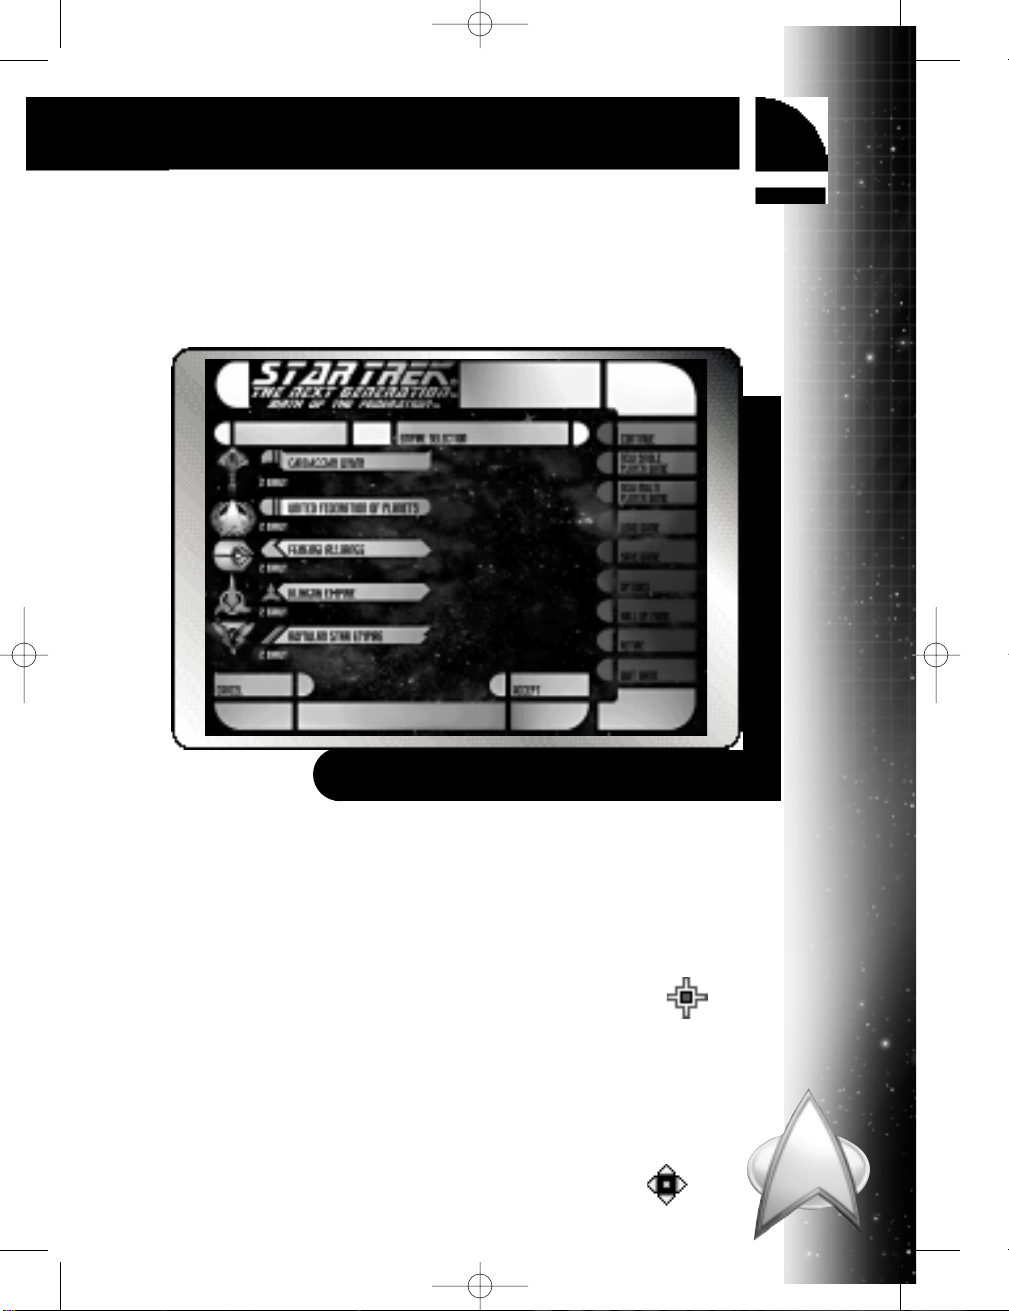
Empire Selection
Screen
Select which empire you wish to play on the Empire Selection screen.
When the cursor passes over the empire’s icon or name, you will see a
description of that galactic power.
Click on the icon or the name of the empire to select it. The empire’s name
will become highlighted. Click on a different icon to select another
empire. After you select which empire to play, click on the Accept button
to start the game.
5
Single Player Game
Empire Selection Screen
38
BOF ALL TOGETHER-singles 25/05/99 13:33 Page 38
Page 51

Chapter 6
MAIN GALACTIC SCREEN
You are about to move into
areas of the galaxy containing wonders more incredible
than you can possibly
imagine… and terrors
to freeze your soul.
–Q, a member of the
omnipotent Q-Continuum
You are about to move into
areas of the galaxy containing wonders more incredible
than you can possibly
imagine… and terrors
to freeze your soul.
–Q, a member of the
omnipotent Q-Continuum
BOF ALL TOGETHER-singles 25/05/99 13:33 Page 39
Page 52

When a game starts, a movie about your empire plays. To bypass the
movie, press the q key. The Main Galactic screen then appears, displaying a map of the galaxy. From here, you can move your empire’s starships, order task forces, view explored solar systems and receive summaries of game events.
Main Galactic
Window
Most of the screen features the Main Galactic window. Depending
upon the game mode, this window alternates between the First
40
6
Main Galactic Screen
Main Galactic Screen
Turn Timer
Empire Info panel
Galactic Map
buttons
Main Galactic
Information window:
Solar System Mode
Main Galactic
window:
Galactic Map Mode
Main Galactic
panel: Task Force
Mode
BOF ALL TOGETHER-singles 25/05/99 13:33 Page 40
Page 53

Contact window, the Galactic Map window and the Redeployment window. The Galactic Map window is the default.
First Contact Window
Whenever your empire encounters another empire or minor race for the
first time, you will be notified of this meeting in the First Contact window.
A voice-over also plays to notify you of this first contact.
The First Contact window contains a picture of the race your empire has
just met. To the right of the race’s image is the Diplomatic Report,
which is your diplomat’s impression of the race. The Diplomatic
Report also contains a first contact statement from that empire.
41
6
Main Galactic Screen
First Contact Window
First Contact window
Sympathy Bar
Diplomatic Background
BOF ALL TOGETHER-singles 25/05/99 13:33 Page 41
Page 54

Under the Diplomatic Report is the Diplomatic Background, which usually
includes an analysis of how that race tends to interact with other races.
How favourably that race is towards your empire is measured on the
Sympathy bar, from left to right. The more of the Sympathy bar that is lit,
the greater the sympathy, which means your empire is more likely to establish strong diplomatic relations with that race. For further information,
see Chapter 10: Diplomacy Screen.
Galactic Map Window
The Galactic Map window is a map of the galaxy with the position of your
starships and territories displayed. Use your W, Z, A and S keys to
scroll the Galactic Map. As you move your starships across the map to
explore, you will see more solar systems and starships displayed. Each of
your starships is represented by your empire’s icon.
When the cursor passes over a task force, a Tool Tip appears listing
the number of task forces belonging to that empire. Whenever your
cursor is over the Galactic Map, sector information appears at the
42
6
Main Galactic Screen
Galactic Map
BOF ALL TOGETHER-singles 25/05/99 13:33 Page 42
Page 55

top of the screen, including the ownership status and grid location of the
sector, as well as the scanning strength of your starships and solar systems.
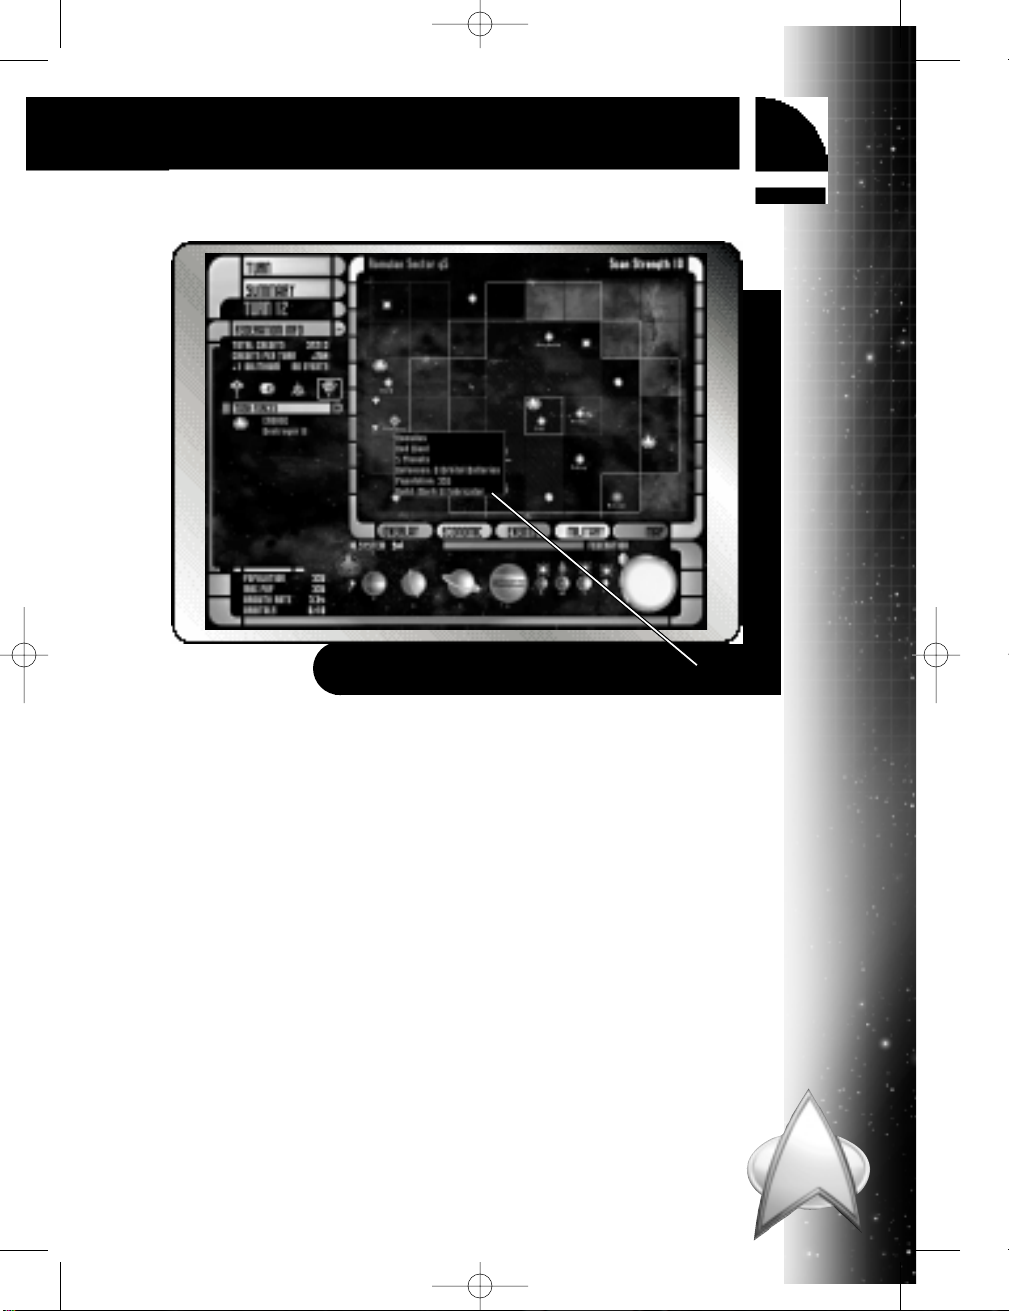
Sectors
Each square on the map grid is called a sector. A sector can contain an
entire solar system, which will be labelled by name upon encountering it.
The colour of that name indicates whether the solar system is inhabited
and who inhabits it.
Blue represents a Federation-controlled solar system.
Green represents a Romulan-controlled solar system.
Purple represents a Cardassian-controlled solar system.
Orange means that the solar system is uninhabited, is con-
trolled by a minor race or has broken away from your empire.
Red represents a Klingon-controlled solar system.
Yellow represents a Ferengi-controlled solar system.
Click on a sector to select it. Double-clicking on a sector will centre the
map view on that sector. Move your cursor over a sector to display its grid
map location, as well as which empire (if any) has claimed it. If there is a
solar system in that sector that your starships have visited, move the cursor over its sun to display a Tool Tip with the solar system name, its star
class, its number of planets, its defences and its current population.
At the start of the game, your position will be the sector your empire’s
home solar system is in. Your initial starship fleet is located here as well.
Galactic Map Buttons
Below the Galactic Map are five buttons, each of which displays additional information.
Map Button
Click on the Map button to bring up a menu bar that changes the display
size of the sectors on the Galactic Map. The menu bar has two labels, one
of which lights up to indicate the current map size.
43
6
Main Galactic Screen
BOF ALL TOGETHER-singles 25/05/99 13:33 Page 43
Page 56

Large Map: the full view of the Galactic Map is shown
Small Map: a portion of the Galactic Map is enlarged
You can also use the I key to zoom in and the O key to zoom out the map.
Military Button
Click the Military button to view the Galactic Map in military mode,
which displays your task forces and calls up the Task Force panel. Click
the Military button again to turn it off.
The Military button default options display all starships with their projected paths and maximum ranges, starbases, outposts and known territories in sensor range of your starships and solar systems. If you want to
change the default options, select
the Overlay button.
Events Button
Click the Events button to view the
Galactic Map in events mode, which
brings up the Events panel and identifies which sectors events have
occurred in. Move your cursor over
the Events icon in those sectors to
learn what the event is.
Click the Events button again to
turn it off. To change the default options for what the Events button
displays, select the Overlay button.
Economic Button
Click the Economic button to view the Galactic Map in economic mode,
which displays your empire’s trade routes and calls up the Trade
Routes panel. The known trade routes of other empires are also displayed. To change the default options for what the Economic button
displays, select the Overlay button.
44
6
Main Galactic Screen
Galactic Map Buttons
Events Icon
BOF ALL TOGETHER-singles 25/05/99 13:33 Page 44
Page 57

Overlay Button
Click the Overlay button to customise the options for the Military, Events
and Economic buttons. When a button on the menu is lit, its information
is currently displayed on the Galactic Map for whichever mode of the
three—military, events or economic—has been selected. When a button
on the Overlay menu is darkened, that specific information is not displayed. Click on a button to either activate or deactivate it.
The Overlay menu buttons are:
Build Tasks Shows the structures and starships being built in
the solar systems you control. It will show the
build information under the star in the sector
which it is taking place. Build Tasks is on by
default for the Economic button.
Defence Displays “OB” for orbital systems or “SH” for
shields in that solar system. This information is
dependent upon intelligence activities and
space exploration.
45
6
Main Galactic Screen
Overlay Menu Bar
BOF ALL TOGETHER-singles 25/05/99 13:33 Page 45
Page 58

Population Shows the population of a solar system with a
number next to the star in each inhabited sector.
This information is dependent upon intelligence
activities and space exploration.
Range Shows a series of colour outlines to indicate the
maximum distance a starship can travel. A green
outline is for short-range starships, a yellow outline is for medium-range starships and a red outline is for long-range starships. Range is on by
default for the Military button.
Ship Paths Shows the projected path that you have selected
for each of your starships. Small green arrows
indicate the direction in the sectors that the starship will pass through; the green box shows
which sector is the destination. Ship Paths is on
by default for the Military button.
System Bonus Shows known resources abundant in each solar
system. A blue crystal means dilithium, a wheat
stalk icon means food and a glowing red rock
icon means energy. These icons only appear when
a given resource is in the solar system. System
Bonus is on by default for the Economic button.
System Names Shows the names of all solar systems you control
and you have explored. System Names is on by
default for the Military, Events and Economic
buttons.
Territory Shows the known territories of each empire with
a colour-coded shading of the Galactic Map. Blue
represents the Federation, green for the
Romulans, purple for the Cardassians, red for the
Klingons and yellow for the Ferengi. Disputed
sectors are multicoloured. Territory is on by
default for the Military button.
Trade Routes Shows your empire’s trade routes with a line
between the two trading sectors. A green line
indicates that the trade route originates in a sector controlled by your empire. A yellow line indicates that the trade route originates in a sector
not under your empire’s control.
46
6
Main Galactic Screen
BOF ALL TOGETHER-singles 25/05/99 13:33 Page 46
Page 59

Redeployment Window
Use the Redeployment window to move starships from one task force to
another. To bring up the Redeployment window, click the Redeploy button in the Task Force Information window. The Redeploy button is only
active after you have two or more task forces in the same sector and you
have selected a task force. All starships in the same sector as the selected
task force are displayed in the Redeployment window.
When the cursor moves over a starship in the Redeployment window, its
image is prominently displayed in the Redeployment Viewer. Under the
viewer are statistics on that starship’s hit points, shield strength, number of
beam weapons, number of torpedoes, speed, range, scanner range,
crew experience and maintenance cost. On the Task Force panel, an
arrow will point to the task force a selected starship is assigned to.
47
6
Main Galactic Screen
Redeployment Window
Redeployment Viewer Redeployment
window
Task Force Information
Window
Task Force Panel
BOF ALL TOGETHER-singles 25/05/99 13:33 Page 47
Page 60

Redeploying Starships
To move a starship to the selected task force, click on the starship’s icon
in the Redeployment window. To release a starship from the selected task
force, click on the starship’s icon in the Task Force Information window.
This starship will then be considered to be a new task force.
To select another task force to change, click its icon in the Task Force
panel.
To accept the redeployments and exit the Redeployment window, click the
Done button. On the Galactic Map window, you can give orders to the
selected task force.
Turn Button
Click the Turn button or press the T key to end the current strategic turn.
In a single player game, the AI will then give its orders, after which, the
strategic turn will be processed, resolving all orders. In a multiplayer
game, the strategic turn will not be processed until all players have ended
their turn or the Strategic Timer runs out. You will want to complete giving orders to all your task forces before clicking on the Turn button.
Summary Button
Click on the Summary button to bring up the Summary window, a review
of your empire in its present state. The three Summary window buttons are:
Events lists all events that took place since your last strategic
turn.
Relationships lists all known treaties established between
empires and minor races.
Systems lists the solar systems under your control, along with
their industry, food units, population morale and current build
lists. When there are short supplies of food and energy, they are
highlighted and appear in red. When there is an abundance of
supplies, they will appear in green.
48
6
Main Galactic Screen
BOF ALL TOGETHER-singles 25/05/99 13:33 Page 48
Page 61

The Summary button is also located on every other screen except for the
Tactical Combat screen.
Turn Timer
Under the Summary button is the Turn Timer. It keeps track of how much
time you have before your strategic turn ends if you set a limit using the
Strategic Timer. If a time limit has
not been set, the Turn Timer will not
be displayed. For more information
about setting a time limit on strategic turns, see Chapter 5: Single
Player Game.
Empire Info
Panel
Located above the Main Galactic panel is the Empire Info panel. Here,
some basic figures are supplied about your empire. Click on the button
under the Turn Timer to open and close the Empire Info panel.
Under that button are listed your empire’s credits, dilithium, event occurrences and current build. Two numbers are displayed for your empire’s
credits. The first is the total number of credits your empire has; the second is the number of credits per strategic turn your empire has. The number for dilithium indicates your empire’s dilithium balance. A positive
number indicates that you are producing more dilithium than the shipyards need. A negative number appears in red. The number for events
indicates how many have occurred this strategic turn. The number for the
current build of a structure is how many turns remain before completing
the build.
49
6
Main Galactic Screen
Turn Timer
BOF ALL TOGETHER-singles 25/05/99 13:33 Page 49
Page 62

Main Galactic Panel
On the lower left side of the Main Galactic screen is the Main Galactic
panel, which alternates between the Events panel, Task Force panel and
Trade Routes panel. The Task Force panel is the default for the Main
Galactic screen.
Events
Panel
Click the Event button on the
Galactic Map window to bring up
the Events panel. The Events panel
lists all the events that occurred in
the previous strategic turn, such as
changes in population growth in
one of your solar systems or the
establishment of a trade
route.
50
6
Main Galactic Screen
Empire Information Panel
Events Panel
BOF ALL TOGETHER-singles 25/05/99 13:33 Page 50
Page 63

Task Force Panel
Your starships can be assigned into a task force. A task force can be just
one lone starship or several grouped together.
Click on a task force on the Galactic
Map to bring up the Task Force
panel. This panel displays information on each task force’s name, its
current orders and the number of
starships assigned to it. Your empire
icon will be displayed to the left of
this information. When the task
force has more than one starship
assigned to it, only the first starship
in the task force will be shown on
the panel.
Located to the left of the Task Force panel is a scroll bar, for looking at all
your task forces. Click on a task force to display all its starships in the
Task Force Information window.
Moving Task Forces
To move a task force, click on its icon in either the Galactic Map window
or the Task Force panel. Then click on another sector to indicate the
intended destination.
A series of purple arrows indicates the task force’s path with a purple
square marking the destination point. Also, a colour outline of its maximum range appears on the Galactic Map window. The task force’s range
will temporarily cause any other displayed ranges to vanish. A task force
cannot move beyond its maximum range.
When a task force has been selected to move and the cursor is over the
Galactic Map window, the cursor will change into a Move cursor (which
is a flashing green and purple square with arrows pointing out all four
sides). The cursor returns to a General cursor when a destination has been
selected.
If a sector has more than one task force, then you can only move one
through clicking on the Galactic Map window. To move the other
task forces and give them orders, you must select them from the
Task Force panel.
51
6
Main Galactic Screen
Task Force Panel
BOF ALL TOGETHER-singles 25/05/99 13:33 Page 51
Page 64

Attacking Solar Systems
Solar systems you wish to attack must belong to a race or empire you have
declared war against on the Diplomacy screen. To order a task force to
invade an enemy’s solar system, move the task force to the solar system
you wish to attack. Next, select the Orders button from the Task Force
panel and click on the Attack System button.
If you select a solar system where an enemy that has subjugated the inhabitants, a window will appear asking if you plan to liberate the solar system. If you click Yes, then you agree to set free the solar system’s inhabi-
tants if you defeat your enemy. During the attack, the inhabitants might
even help you. If successful, that solar system will not be aligned with
you unless you establish diplomatic relations with it. If you click
No, then you indicate that you will subjugate that solar system and
force its inhabitants to work under your rule.
52
6
Main Galactic Screen
Moving Task Forces
Move cursor
Destination arrows
Maximum range outline
Destination location
BOF ALL TOGETHER-singles 25/05/99 13:33 Page 52
Page 65

In an attack, armed starships in the task force will first attempt to destroy
orbital batteries and shield generators and then bombard planets. Troop
transports will deploy armies on habitable planets for ground combat to
gain control of the sector. During any attack, some assigned troop transports will be destroyed in ground combat or by orbital batteries. The success of any attack will be measured by your task force’s experience, technology level and size against your enemy’s defences.
Trade Routes Panel
Click the Economic button to bring up the Trade Routes panel on the
Main Galactic panel. Select any of your solar systems, and the Trade
Routes panel displays that solar system’s name, its population morale,
6
Main Galactic Screen
Trade Routes Panel
Trade Routes
53
BOF ALL TOGETHER-singles 25/05/99 13:33 Page 53
Page 66

amount of credits, amount of food, amount of energy, industry and current build lists.
Trade Routes
Trade routes are shipping lanes you establish to share products with those
empires and minor races with which you have a Friendship Treaty. (If you
play the Ferengi, however, you do not require a Friendship Treaty to establish a trade route with another race.) You can only establish one trade
route to each solar system. For more information on Friendship Treaties,
see Chapter 10: Diplomacy Screen.
Trade routes supply credits for those solar systems that export goods.
Trade routes also influence the receiver towards being sympathetic to the
exporter, creating positive diplomatic benefits.
Trade routes are supported by the current population of a solar system.
Depending upon the empire, 125 to 200 population units are required to
support a single trade route. More trade routes can be supported if the
population of the solar system is large enough. Trade routes become available automatically when the population is large enough to support them.
If a solar system with a trade route is attacked by raiding starships, then
those starships steal all the credits produced by the trade route. When the
raiding starships leave or are destroyed, the exporter then again receives
the full revenue generated from the trade route.
Trade Routes Button
To establish a trade route, select the sector you wish to start it from. Then
click on the Trade Routes button, located under the Trade Routes panel,
to select the trade route icon. Then select the sector you want the trade
route to end at by clicking on it.
When the route path is yellow, it is connected to solar systems capable of
trade. When it is red, the trade route is connected to a solar system that
you cannot trade with. To cancel an intended trade route, right-click on
the Galactic Map window and then click on the trade route’s icon.
54
6
Main Galactic Screen
BOF ALL TOGETHER-singles 25/05/99 13:33 Page 54
Page 67

Main Galactic
Information Window
Along the bottom of the Main Galactic screen is the Main Galactic
Information window, which alternates between the Solar System
Information window and the Task Force Information window. The Solar
System Information window is the default for the Main Galactic screen.
Solar System
Information Window
The Solar System Information window displays a diagram of any explored
solar system you have selected on the Galactic Map. That diagram shows
planetary icons representing the number, relative size and type of planets
present in the solar system. Above the diagram is the name of the solar
system and its inhabitants. To the left of the diagram is the icon of the
empire that controls the sector.
One of three symbols can appear over a planet or sun icon to indicate special resources that planet can offer. Place the cursor over the icon to bring
up a Tool Tip that shows the exact amount of that resource.
means there is dilithium that can be mined.
means there is an abundance of energy.
means there is an abundance of food.
55
6
Main Galactic Screen
Solar System Information Window
BOF ALL TOGETHER-singles 25/05/99 13:33 Page 55
Page 68

If a sector that contains some unusual phenomenon is selected, a picture
of the phenomenon is displayed in the Solar System Information window
along with a description.
Solar System Statistics
To the left of the solar system diagram are statistics about that solar system: its population, maximum population, population growth rate, number of active orbital batteries and total number of orbital batteries. The
number for population indicates its current size, while the number for
maximum population notes how large it can grow.
Place the cursor over any planetary icon to call up the following statistics:
the planet’s name, its specific type, its maximum population, its rate of
growth, the race occupying it and its habitability status (if it has not been
terraformed).
Terraforming
Knowing the specific conditions of a planet is important for ter-
raforming. The information in the Solar System Information is
helpful in determining what planets can be terraformed. Planets
56
6
Main Galactic Screen
Solar System Statistics
Planetary Statistics
BOF ALL TOGETHER-singles 25/05/99 13:33 Page 56
Page 69

that may be habitable list their status on the left side of the window when
the cursor is passed over them.
Planets that are uninhabitable or unable to be terraformed, such as gas
giants, have a green “B” under them in the Solar System Information window. Planets that can be terraformed are designated with a red “P”
(Arctic), “J” (barren), “G” (desert), “L” (jungle), “O” (oceanic), “M” (terrestrial) or “Y” (volcanic). If the letter is yellow, that planet is being terraformed.
How quickly a colony ship can terraform a selected planet is determined
by the number of colony ships and their technology level. A planet must
be terraformed or already habitable before a colony can be established in
the solar system. Other planets must be terraformed before their special
resources can be used or allow the population to grow in the solar system.
To order a colony ship to terraform a specific solar system, move the starship to that sector. Next, select the Orders button from the Task Force
panel and click on the Terraform button. Then click on the selected planet
in the Solar System Information window to terraform it.
Task Force Information
Window
Select a task force from either the Task Force panel or the Galactic Map
screen to bring up the Task Force Information window. All its starships
from the selected task force are displayed in this window. The Task Force
Information window contains an icon of each starship in the task force
with a listing of its ship type and shield status.
To the left of the Task Force Information window are three buttons:
Cloak, Redeploy and Orders. Use these buttons to give specific
commands to your task force.
57
6
Main Galactic Screen
Task Force Information Window
BOF ALL TOGETHER-singles 25/05/99 13:33 Page 57
Page 70

Cloak Button
Click on the Cloak button to command the task force to use their cloaking devices to become invisible to enemy starship sensors. Planetary scanners, however, may be able to detect any cloaked starship. This command
will only work if every ship in the task force has a cloaking device.
Orders Button
Click the Orders button to give new commands to your task forces or
change old ones. The Orders menu lists several specific mission commands. The orders available to your selected task force are displayed.
Attack System Armed starships in the task force will first attack
the selected enemy solar system’s orbital batteries
and shield generators and then bombard planets.
Next, troop transports in the task force will
deploy armies on habitable planets for ground
combat to gain control of the sector. During any
attack, some assigned troop transports will be
destroyed in ground combat or by orbital batteries. The success of any attack will be measured by
your task force’s experience, technology level and
size against your enemy’s defences.
Avoid The task force will keep its current position or
course and avoids engaging enemy ships.
Build Outpost A troop transport in the task force will convert
itself into the basic resources for an outpost. The
number and technology level of the transports
used in construction determine how many strategic turns it takes to build an outpost. During construction, an outpost is vulnerable to attacks.
This order is only effective for task forces with
troop transports.
Build Starbase A troop transport in the task force will convert
itself into the basic resources for a starbase. The
number and technology level of the transports
used in construction determine how many strategic turns it takes to build a starbase. During this
58
6
Main Galactic Screen
BOF ALL TOGETHER-singles 25/05/99 13:34 Page 58
Page 71

construction, a starbase is vulnerable to attacks.
This order is only effective for task forces with
troop transports and can only be given in a sector
with an operational outpost.
Colonize A colony ship in the task force will convert itself
into the basic resources for the new colony. Then
a colony comes into existence. This order is effective only for task forces with colony ships.
Engage The task force will fight any enemy starships it
encounters. While following this order, the task
force will move wherever it is commanded.
Enter Wormhole The task force will travel through a wormhole in
the same sector as it is. Not all wormholes, however, have two sides. Some wormholes are unstable, and only have an entry point but not an exit
point. All starships entering unstable wormholes
are lost. Wormholes remain stable or unstable for
the duration of the game. The only way to distinguish between the two is by trial and error. Travel
though a wormhole takes only one strategic turn.
To extend starship range on the other side of a
wormhole, a starbase must be constructed there.
Intercept The task force will not move until another race’s
starship enters a sector that it can reach in a single strategic turn. Then the task force will move
to encounter that starship. This order is effective
only in sectors that your empire has scanned and
controls.
Raid The task force will attack an enemy solar system
within one sector to steal their credits. If the
solar system has a trade route, then the raid takes
the credits collected from the trade route and
halts those trade routes. Raiding starships also
steal all trade goods and a number of credits
equal to the size of the population. The success of
a raid depends upon the size of the raiding
task force and the amount of credits in the
selected sector. This order is not effective
with colony and transport ships.
59
6
Main Galactic Screen
BOF ALL TOGETHER-singles 25/05/99 13:34 Page 59
Page 72

Scrap The task force will destroy all its starships. If this
order is given in a solar system under your control, then you receive credits for the scrapped
task force.
Terraform Colony ships will terraform any selected habitable
planet you choose. This order is effective only for
task forces with colony ships. The number and
technology level of the colony ships used in construction determines how many strategic turns it
takes to terraform. The base rate for a beginninglevel colony ship is 100 points per strategic turn.
Train Crew The task force will upgrade the experience of its
crews. For the duration of this order, the task
force is effectively avoiding all enemy starships
and will not engage in combat. This order can
only be given in a solar system under your control
that has a training facility. The experience levels
are green, regular, veteran, elite and legendary.
While only Klingons can train to legendary, all
other empires can reach that level through combat experience.
Redeploy Button
Click the Redeploy button to open the Redeployment window to move
starships from one task force to another. This button is only active after
you have two or more task forces in the same sector and you have selected
a task force from either the Task Force panel or from the Galactic Map.
60
6
Main Galactic Screen
BOF ALL TOGETHER-singles 25/05/99 13:34 Page 60
Page 73

In war, there is nothing
more honourable than
victory.
–Klingon maxim
Chapter 7
TACTICAL COMBAT SCREEN
In war, there is nothing
more honourable than
victory.
–Klingon maxim
BOF ALL TOGETHER-singles 25/05/99 13:34 Page 61
Page 74

Initiate Combat
Window
When your task force encounters an enemy task force in the same sector
on the Main Galactic screen, the Initiate Combat window appears with a
description of the initial combat situation and three buttons: Hail, Fight
and Auto.
Click on the Hail button to signal the enemy starship to avoid a fight
before entering the Tactical Combat screen. If all parties involved hail
each other, then the impending battle is called off and you return to the
Main Galactic screen.
Click on the Auto button to display the results of combat without show-
ing the actual combat.
Click on the Fight button to bring up the Tactical Combat screen.
Here, you can either give specific commands or allow the AI to control your starships during battle.
62
7
Tactical Combat Screen
Initiate Combat Window
BOF ALL TOGETHER-singles 25/05/99 13:34 Page 62
Page 75

The Tactical Combat screen also appears when two other races fight in an
inhabited solar system under your control. In this case, you can only view
the battle, not participate in it.
Tactical Combat
Window
The Tactical Combat window shows where your starships and your
enemy’s starships are located in relation to each other. For the duration of
Tactical Combat, your starships are no longer in task forces, but in
groups of like classes instead. You can view the combat between
groups as your starships carry out your commands.
63
7
Tactical Combat Screen
Tactical Combat Screen
Strategic Turn
Timer
Tactical Combat window
Tactical Events window
Tactical Panel
BOF ALL TOGETHER-singles 25/05/99 13:34 Page 63
Page 76

Click on the Tactical Viewpoint buttons to change your point of view of
the combat. You can replay the battle by selecting the Playback button.
Tactical Commands
Menu
To issue tactical commands, click on the starship you want to send orders
to. This selects a group of similar starships belonging to you and brings up
the Tactical Commands menu. Since not all tactical commands are available to all starship types, the menu only lists the available tactics for your
task force.
Click on the tactic to select it. Then click on the enemy starship to target
it and all enemy starships of the same class. If your group was cloaked
before Tactical Combat began, they will automatically uncloak when you
assign them a tactic. The available tactics are:
Assault The selected group will approach the selected
target to fire at medium range.
64
7
Tactical Combat Screen
Tactical Commands Menu
BOF ALL TOGETHER-singles 25/05/99 13:34 Page 64
Page 77

Charge The selected group will approach the selected
target to fire at close range.
Circle The selected group will remain within weapons
range of the selected target by circling it while
firing at long range.
Evade The selected group will take evasive action from
enemy starships but not retreat. The selected
group will only fire weapons if enemy vessels
approach within weapons range.
Flyby The selected group will fly past the selected target
while firing at medium range.
Harry The selected group will remain close to the
selected target by circling it while firing at close
range.
Open Hailing The selected group will hail the selected target in
Frequencies hopes of establishing a peaceful encounter. If all
potential combat participants hail each other,
then the combat ends.
Ram The selected group will set a collision course with
the selected target.
Retreat The selected group will withdraw from combat.
Select Group Use this to give orders to all your starships that
are of the same class as the currently selected
starship. This command is available only when a
single starship is selected.
Select Ship Use this to give orders to only one of your star-
ships in a group. This command is available only
when a group of starships is selected.
Strafe The selected group will fly by the selected target
while firing at close range.
If your group includes starbases, those starbases have some tactics available to them as well. If your group includes command-class starships,
they can target individual enemy starships.
Move the cursor over each tactical option to display a diagram on
the Tactical Combat panel. The diagram shows how the tactical
65
7
Tactical Combat Screen
BOF ALL TOGETHER-singles 25/05/99 13:34 Page 65
Page 78

manoeuvre is supposed to work. The actual success of the manoeuvre
depends upon the combat situation as well as your starship’s type, technology and experience vs. those of the enemy’s starship.
Move your cursor over a starship to display its statistics and current condition on the Starship Statistics panel.
Turn Button
Click the Turn button to end the current tactical turn. In a single player
game, the AI will give its tactical commands, after which the tactical turn
will be processed, resolving all orders. In a multiplayer game, the tactical
turn will not be processed until all players have clicked the Turn button or
the Tactical Timer runs out. You will want to complete giving all your tactical orders before clicking on the Turn button.
Selecting the Turn button does not end the tactical combat. Combat can
last several tactical turns before it is resolved with a clear victory. When
combat is finished, the Turn button changes into an End button. Click the
End button to exit from this screen.
While combat is happening on the Tactical Combat screen, the Strategic
Timer for the rest of the game is paused. The Strategic Timer resumes
when you exit the Tactical Combat screen.
Options Button
Click on the Options button to adjust game settings. For further information, see Chapter 13: Game Options.
Tactical
Turn Timer
Under the Options button is the
Turn Timer. It keeps track of
how much time you have
before your tactical turn
ends. If you did not set a time
66
7
Tactical Combat Screen
Strategic Turn Timer
BOF ALL TOGETHER-singles 25/05/99 13:34 Page 66
Page 79

limit, the Turn Timer will not be displayed. For more information, see
Chapter 5: Single Player Game.
Playback But ton
Click on the Playback button to view
the previous actions taken in tactical
combat. When a battle is resolved,
the playback footage is automatically
displayed on the Tactical Combat
window.
To end the playback, click on the
Playback button again. If that combat is resolved, click on the End button to return to the Main Galactic
screen or continue to the next battle.
Playback Panel
When you click on the Playback button, a Playback panel appears under
the Tactical Viewpoint panel. Control your viewing with these playback
controls.
rewinds the playback footage to the start of battle.
rewinds the playback footage to the previous turn of battle.
plays the playback footage. When playing the footage, click on
this button to stop the playback.
forwards the playback footage to the next turn of battle.
forwards the playback footage to the current turn.
Tactical Button
Click on the Tactical button to display a mini-radar display in the
upper left-hand corner of the Tactical Combat window. The outline
67
7
Tactical Combat Screen
Playback Button
BOF ALL TOGETHER-singles 25/05/99 13:34 Page 67
Page 80

of a sphere is a three-dimensional representation of the sector in which the
combat occurs. Green, yellow and red dots represent, respectively, your
empire’s starships, allied starships and enemy starships. Within the sphere
is an outline of the field of view displayed on the Tactical Combat window.
Tactical Combat
Panel
Under the Tactical button is the Tactical Combat panel. This panel alternates between the Starship Statistics panel and the Tactical Viewpoint
panel. The Tactical Viewpoint panel is the default for this screen.
68
7
Tactical Combat Screen
Mini-Radar
BOF ALL TOGETHER-singles 25/05/99 13:34 Page 68
Page 81

Starship Statistics
Panel
Move your cursor over a starship to display the statistics and current condition of the selected starship. The specific statistics include the starship’s
name and class, current tactical command, defences, crew’s experience,
current hit points, shields status, phaser banks status, photon torpedoes
status, damage control status, and the starship’s specific design capabilities and strengths. If you have a scout starship in your group, you can also
view these statistics for enemy starships.
Tactical Viewpoint
Panel
During combat, when the cursor isn’t over a starship or when playback
footage is on the Tactical Combat window, the Tactical Viewpoint
panel is onscreen in the Tactical Combat panel. From the Tactical
Viewpoint panel, you control what perspective to view either the
69
7
Tactical Combat Screen
Starship Statistics Panel
BOF ALL TOGETHER-singles 25/05/99 13:34 Page 69
Page 82

actual combat or the playback footage. You can also display additional
information about any starship onscreen.
Tactical View Controls
Located under the Tactical button
are four directional buttons. Click
on these buttons to rotate the
Tactical Combat window in a specific direction.
70
7
Tactical Combat Screen
Tactical Viewpoint Panel
Tactical Viewpoint panel
Viewpoint zoom buttons
Viewpoint focus buttons
Viewpoint Focus Buttons
BOF ALL TOGETHER-singles 25/05/99 13:34 Page 70
Page 83

Click the top button to rotate the Tactical Combat window
upward.
Click the right button to rotate the Tactical Combat window to
the right.
Click the bottom button to rotate the Tactical Combat window
downward.
Click the left button to rotate the Tactical Combat window to
the left.
Click and hold down the
mouse button on a
Tactical View to keep
rotating that direction.
You can also use your W, Z, A and
S keys to rotate the Tactical View.
Click on the two buttons underneath to change the display size of
the combat.
Click on the top button to enlarge a portion of the Tactical
Combat window. Hold down the mouse button to keep zooming in.
Click on the bottom button to reduce the view of the Tactical
Combat window. Hold down the mouse button to keep zooming out.
You can also use the I key to zoom in and the O key to zoom out.
Tactical Viewpoint Panel Buttons
Use the Tactical Viewpoint panel buttons to change your viewing perspective or access additional information about the engaged task forces.
Reset Button
Click the Reset button to restore the original perspective of the Tactical
Combat window to a panoramic view. When playback footage is
onscreen, click the Reset button to restore the original perspective of
the footage.
71
7
Tactical Combat Screen
Viewpoint Zoom Buttons
BOF ALL TOGETHER-singles 25/05/99 13:34 Page 71
Page 84

Views Button
Click the Views button to bring up the Views menu, so you can select a
new perspective to view either the actual combat or playback footage. To
select a view and close the Views menu, click on a button.
Top View shows the starship combat from overhead, above all
the opposing task forces or a selected starship in the sector.
Chasing View shows the selected starship from its rear.
Reverse Angle shows, from its front, the selected starship.
From Target shows the combat from your enemy’s perspective.
Towards Target shows the selected starship’s target.
Press the t key to cycle the view between all starships onscreen. Press
the < key to cycle to the previous friendly starship or the > key to cycle
to the next friendly starship. Press the [ key to cycle to the previous
enemy starship or the ] key to cycle to the next enemy starship.
72
7
Tactical Combat Screen
Views Menu
BOF ALL TOGETHER-singles 25/05/99 13:34 Page 72
Page 85

Status Button
Click the Status button to list the specific name and class of all starships
under each specific starship on the Tactical Combat window. Under the
name and class is displayed the hull integrity in red and the shield
strengths in green of all starships under each specific starship. Click the
Status button a second time to remove that data from the screen.
Auto Button
If you want to view the combat but allow the AI to select tactics for your
starships, then click the Auto button and then select the Turn button. To
regain control of your starships, click the Auto button a second time
before selecting the Turn button. Once the Turn button is selected, the AI
will select tactics until that combat is completed.
Fleets Button
Click the Fleet button to bring up a list of your task forces. This button is
inactive when watching playback footage.
Enemy Button
Click the Enemy button to bring up a list of the enemy task forces. This
button is inactive when watching playback footage.
Tactical Events
Window
Located under the Tactical Viewpoint buttons at the bottom of the screen
is the Tactical Events window. The Tactical Events window lists every
action, and which task forces were involved, that occurs during combat.
73
7
Tactical Combat Screen
Tactical Events Window
BOF ALL TOGETHER-singles 25/05/99 13:34 Page 73
Page 86

7
Tactical Combat Screen
Should there be more events than there is room in the window, use the
slider to scroll through the combat events. Click on the top or bottom of
the slider to scroll the text upward or downward.
Exiting the Tactical
Combat Screen
To exit the Tactical Combat screen, order all your task forces to retreat if
you are losing. If all potential combat participants hail each other, then the
combat will end. If the combat last 50 turns, that battle is considered a
draw and ends.
Otherwise, when the last round of combat is finished and there is a clear
victor, the End button will appear instead of the Turn button. Click the
End button to return to the Main Galactic screen.
74
BOF ALL TOGETHER-singles 25/05/99 13:34 Page 74
Page 87

Chapter 8
SOLAR SYSTEM SCREEN
Every member of the
Federation entered as a
unified world… and that
unity said something
about them.
–Captain Jean-Luc Picard
Every member of the
Federation entered as a
unified world… and that
unity said something
about them.
–Captain Jean-Luc Picard
BOF ALL TOGETHER-singles 25/05/99 13:34 Page 75
Page 88

Click the Solar System button on the Marker window to bring up the
Solar System screen. This screen displays the solar system you are currently in or have selected on the Main Galactic screen, with the name of
that solar system at the top of the screen.
On the upper left corner is the Summary button, which brings up the
Summary window, and the Turn Timer, which indicates how much time
you have left in your strategic turn. If a time limit has not been set, the
Turn Timer will not be displayed. For further information about both
functions, see Chapter 6: Main Galactic Screen.
Along the bottom of the screen is the Solar System Information win-
dow, showing all the planets in the selected solar system and their
resources. For further information about this window, see Chapter
6: Main Galactic Screen.
76
8
Solar System Screen
Solar System Screen
Turn Timer
Build List
Solar System window:
Build List Mode
BOF ALL TOGETHER-singles 25/05/99 13:34 Page 76
Page 89

Systems Button
To view another solar system that you control, click on the Systems button
at the top of the screen. This brings up a Solar System Inventory window
with a list of all your solar systems. Clicking on a solar system name selects
it, presenting its data on the Solar System screen. Instead of the Systems button, you can press the A or S keys to cycle through solar systems.
Solar System Screen
Buttons
Under the Summary button and Turn Timer are five buttons:
Production brings up the Production Summary in the Solar
System window.
Energy brings up the Energy Management window.
Build List brings up the Build List window.
77
8
Solar System Screen
Solar System Inventory Window
BOF ALL TOGETHER-singles 25/05/99 13:34 Page 77
Page 90

Shipbuilding brings up the Ship List window.
Structures brings up the Structures window.
Solar System
Window
The Solar System window alternates between the Production Summary,
the Energy Management window, the Build List window, the Ship List
window and the Current Structures window, depending upon your activity. The Build List window is the default for this screen.
Production Summary
Click on the Production button to bring up the Production Summary in
the Solar System window. This summary is where you can allocate the
population of your empire to produce five types of resources: food, industry, energy, intelligence and research productivity.
Each type of resource is represented by a related picture of a structure.
Above that picture is the current number of structures that you have and
their technology level. Food is represented by food structures, industry by
development structures, energy by energy structures, intelligence by
defence structures and research by research structures.
To the right is the current output of those structures. The output shows
how much of a specific resource it supplies.
Production Summary
Sliders
The Production Summary sliders next to each structure picture show how
much of the population is operating those structures. The left end of the
slider represents the minimum number of population at work for that
structure type; the right end represents the maximum number of pop-
ulation at work.
78
8
Solar System Screen
BOF ALL TOGETHER-singles 25/05/99 13:34 Page 78
Page 91

Each lit bar on the slider represents 10 population points, the minimum
number required to operate one basic structure. Unlit bars represent
unoccupied structures. If there are no unoccupied structures, build more
to assign more of the population to the intended resource production.
To increase or decrease the amount of the population at work in any labour,
click on the slider or on the buttons to the left and right of the slider.
Labour Pool Slider
At the bottom of the Production Summary is the Labour Pool slider. This
slider shows the unemployed amount of population remaining in your
empire’s labour pool by the number of lit bars on it. The unlit bars on the
Labour Pool Slider represent the employed amount of the population.
79
8
Solar System Screen
Production Summary Window
Production Summary slider
Labour Pool slider
BOF ALL TOGETHER-singles 25/05/99 13:34 Page 79
Page 92

Energy Management
Window
Click on the Energy button to bring up the Energy Management window
where you can allocate energy to each of your empire’s special and defensive structures. Basic structures do not need energy. If there is not enough
energy to supply all the structures, the structures will be deactivated until
there is a balance.
The Energy Management window is divided into Special, Defence and
Orbital Batteries.
Special This section displays special structures. Each
structure is represented by a picture with a number under it showing its energy cost. Click on a
structure to deactivate it and turn the power cost
red. Click on it again to activate it. When you
hold the cursor over a structure, the structure’s
name is displayed. When a structure is active, it
80
8
Solar System Screen
Energy Management Window
Energy slider
BOF ALL TOGETHER-singles 25/05/99 13:34 Page 80
Page 93

uses energy. Inactive structures require no energy
and provide no benefits. If you deactivate a shipyard, you will be asked to confirm your decision,
since shutting down shipyards can strand starships whose range they extended.
Defence This section displays defence structures. Each
structure is represented by a picture with a number under it to indicate how much energy it is
using. Click on a structure to deactivate it. Click
on it again to activate it. When a structure is
active, it uses energy. Inactive structures require
no energy and provide no benefits.
Orbital Batteries The slider controls how many orbital batteries are
active. The left end of the slider represents the
minimum number of active orbital batteries; the
right end represents the maximum number of
active batteries. Click on the slider to change the
number.
Energy Slider
At the bottom of the Energy Management window is the Energy Slider.
This slider, by the number of lit bars, shows the available amount of
energy to be used for your empire’s structures. The unlit bars on the
Energy slider represent the energy that is being used for your empire’s
structures.
Build List Window
Click on the Build List button to bring up the Build List window. This window lists all available structures that can be built and what they cost in
industry and the time required to build them. To sort the available structures by type or price, click on the Structures or Cost titles above your preferred list. From this window, select which structures and upgrades you
want to build. You can also create trade goods and countermeasures for
unrest events from here.
The basic structures are listed in order of the resources they provide,
with food producing structures first, industry second, energy third,
81
8
Solar System Screen
BOF ALL TOGETHER-singles 25/05/99 13:34 Page 81
Page 94

intelligence fourth and research fifth. Above the basic structures on the list
are all available upgrades. Special structures are listed below the basic structures in alphabetical order. Each structure is accompanied by a number
showing how many strategic turns are needed to build it. You can reduce the
number of turns to construct a structure by spending credits in the Build
Queue window or by allocating more resources to development structures.
Move the cursor over a structure type to view it. The selected structure
has a picture displayed in the bottom left corner. Next to the picture is
data that indicates its name, its benefits, the industry build cost, the
energy maintenance cost and any restrictions involving the structure.
To build a structure, click on a structure type to place it in the Build
Queue. Unique builds, such as structure upgrades and one-time items, are
removed from the Build List as they are placed in the Build Queue.
Ship List Window
Click on the Shipbuilding button to bring up the Ship List window.
This window lists all available starships that can be built, what they
82
8
Solar System Screen
Build List Window
BOF ALL TOGETHER-singles 25/05/99 13:34 Page 82
Page 95

cost and the time required to build them. To sort the available starships
by type or price, click on the Ships or Cost titles above your preferred list.
From this window, select which starships you want to build.
The starships are listed in alphabetical order of class. Each listed starship
has a number that indicates how many strategic turns are needed to build
it. You can reduce the number of turns to construct a starship by spending credits in the Build Queue window or by allocating more resources to
development structures.
Move the cursor over a starship class to view it. The selected starship has
a picture displayed in the bottom left corner. Next to that picture are statistics for the starship’s class, its specific purpose, the industry build cost,
its hit points and shields, number of beam weapons, number of photon
torpedoes, its speed, its range and its maintenance cost.
To construct a starship, click on a starship class to place it in the Build
Queue. As your empire’s technology level increases, starships are automatically upgraded in between strategic turns so there are no upgrades
listed for purchase.
83
8
Solar System Screen
Ship List Window
BOF ALL TOGETHER-singles 25/05/99 13:34 Page 83
Page 96

Structures Window
Click on the Structures button to bring up the Structures window. This
window displays all the structures within the selected solar system in two
columns, with four structures in each column.
Each structure type has the name and number of the structure type along
with a picture of the structure. To the right of the structure’s picture are
statistics about the structure’s population, energy requirements and its
resource benefits.
If there are more structures in the solar system than can be displayed in
both columns, use the arrow buttons at the bottom of the screen to move
to additional pages of structures. The right arrow scrolls to the next page,
while the left arrow scrolls to the previous page. Click on either arrow to
scroll through the windows.
Click on a structure’s picture to bring up the Scrap and Cancel but-
tons.
84
8
Solar System Screen
Structures Window
BOF ALL TOGETHER-singles 25/05/99 13:34 Page 84
Page 97

Scrap Window
Use the Scrap function to determine how many of those specific structure
types you wish to destroy or scrap.
When you upgrade specific structures, you pay the difference in the construction cost from the old technology level to the new one for all structures of the same type, even if you are not using all of them. If you scrap
a number of the same structures, then you will not have to pay for their
upgrade. Since upgraded structures are more efficient in their resource
output than those of lower technology levels, you do not need to keep the
same number of a structure type when upgrading. You also receive a partial refund in credits for the construction costs of scrapped structures.
Click on the arrows to scroll through the number of structures you wish
to scrap. Click the top (or right) arrow to increase the number of structures, or click on the bottom (or left) arrow to decrease them. You cannot scrap more structures than you have.
Click on the Cancel button to stop the scrap function. Click the
Apply button to scrap the selected number and type of structures.
85
8
Solar System Screen
Scrap Window
BOF ALL TOGETHER-singles 25/05/99 13:34 Page 85
Page 98

System Info Window
Located under the Structures button, the System Info window supplies
statistics on the currently selected solar system controlled by your empire.
It lists the population morale and the inhabitants of the selected solar system, as well as its current amount of credits, food, industry, energy, intelligence and research units.
Build Queue
On the upper right corner of the Solar System screen is the Build Queue,
where you construct a structure or a starship. The current item to be built
is displayed at the top of the window.
Click the Buy button, under the picture, to speed up construction for
completion in a single strategic turn. If your empire has the credits,
a Confirmation window shows you how many credits it will cost,
how many credits your empire currently has and asks if you want
86
8
Solar System Screen
Confirmation Window
Build Queue
BOF ALL TOGETHER-singles 25/05/99 13:34 Page 86
Page 99

to buy it. Click the Buy button to confirm. Click the Cancel button to cancel the buy request and return to the Solar System screen.
If your empire does not have enough credits, a Buy Denied window
appears, showing how many credits your empire needs to successfully purchase the constructed item. Click the Close button to cancel the buy
request and return to the Solar System screen.
Under the Buy button is the Build button and a display of four items to be
built, in order of planned construction. Each item is represented by its
icon, its name and the number of that item you plan to build. Only one
structure type can be built at a time. Click the Build button to place the
Build Queue in automatic mode, and the AI will determine which structures need to be built in that solar system.
To select a structure or starship to build, click on its name from the Build
List or Ship List to place it in the Build Queue. To remove a structure
or starship from the Build Queue, click on its icon under the Build
button. Trade Goods is the default for the first item to be built.
87
8
Solar System Screen
Buy Denied Window
BOF ALL TOGETHER-singles 25/05/99 13:34 Page 87
Page 100

8
Solar System Screen
To build more than one structure of
a specific type consecutively, select
the structure as many times as you
desire before moving on to other
structures. All the structures of that
type will be represented by the same
icon.
To remove more than one structure
of a specific type at once, press the
s key as you click on its icon under
the Build button.
88
Planned Items
BOF ALL TOGETHER-singles 25/05/99 13:34 Page 88
 Loading...