

Page 1
P3PC-1852-04ENZ0
Page 2

Page 3

Contents
Copyright ..................................................................................... xi
Introduction .............................................................................. xvii
■ Regulatory Information .............................................................. xvii
■ Trademarks ....................................................................................xix
■ Notice of Liability ..........................................................................xxi
■ Safety Precautions .......................................................................xxiv
Chapter 1 Scanner Overview ................................................. 1
1.1 Scanner Features ............................................................ 2
1.2 Part Names and Functions ............................................. 3
1.2.1 External Parts ........................................................................ 3
1.2.2 Internal Parts ......................................................................... 5
1.3 User Types and Operations ............................................ 6
1.4 Scanner Quick User Guide ............................................. 9
1.4.1 Sending Scanned Data as an e-Mail Attachment.................. 9
1.4.2 Sending Scanned Data by Fax............................................ 11
1.4.3 Printing Scanned Data on a Network Printer....................... 13
1.4.4 Saving Scanned Data in a Network Folder.......................... 15
1.5 Scanner Requirements ................................................. 17
1.5.1 Administrator Requirements for Login
via the Network Interface..................................................... 17
1.5.2 Server Requirement ............................................................ 18
Network Scanner fi-6000NS Operator's Guide iii
Page 4

Chapter 2 Basic Scanner Operations .................................. 21
2.1 Using the Scanner Buttons .......................................... 22
2.1.1 Using the Startup Button ..................................................... 22
2.1.2 Using the Scan Button......................................................... 23
2.2 Using the LCD Touch Panel ......................................... 24
2.3 Using the Keyboard ....................................................... 25
2.3.1 Using the Keyboard: Administrator...................................... 25
2.3.2 Using the Keyboard: Regular Users .................................... 26
Chapter 3 Administrator Operations ................................... 27
3.1 Required Scanner Function Settings .......................... 28
3.2 Administrator Control Screens .................................... 29
3.2.1 Menu Tabs........................................................................... 29
3.2.2 Input Fields and Entering Characters .................................. 30
3.3 Administrator Login:
via the Scanner's Touch Panel .................................... 31
3.4 Administrator Login: via the Network Interface ........ 34
3.4.1 Setting up for Administrator Access
via the Network Interface..................................................... 34
3.4.2 Logging In............................................................................ 41
3.5 Using the System Settings Menus ............................... 45
3.5.1 Calibrating the Touch Panel ............................................... 45
3.5.2 Setting the Scanner Name ................................................. 48
3.5.3 Setting the Region/Timezone ............................................. 53
3.5.4 Setting the Date/Time ......................................................... 55
3.5.5 Setting the Time to Standby Mode ..................................... 57
3.5.6 Changing the Admin Password .......................................... 61
3.5.7 Setting the Multifeed Detection Method .............................. 62
3.5.8 Setting Scanning Performance ........................................... 66
iv
Page 5

3.6 Using the Network Settings Menus ............................. 69
3.6.1 Giving the Scanner an IP Address ..................................... 69
3.6.2 Setting the DNS Server ...................................................... 72
3.6.3 Setting the WINS Server .................................................... 73
3.6.4 Setting the NTP Server ....................................................... 74
3.6.5 Setting the LDAP Server .................................................... 76
3.6.6 Setting the e-Mail Server (SMTP Server) ........................... 83
3.6.7 Setting the Fax Server ........................................................ 85
3.6.8 Setting the Network Printers .............................................. 87
3.6.9 Setting the Network Folders (File Servers) ....................... 107
3.6.10 Setting the Destination for Alert Notifications ................... 119
3.6.11 Checking the Network Connection with a Ping Test ......... 121
3.6.12 Checking the Network Operating Status .......................... 124
3.7 Using the Device Status Menus ................................. 126
3.7.1 Viewing the System Status ............................................... 126
3.7.2 Viewing the Usage Status ................................................ 127
3.8 Using the Operation Logs Menus .............................. 131
3.8.1 Managing User Logs ......................................................... 131
3.8.2 Managing the System Log................................................. 137
3.9 Using the Maintenance Menus ................................... 142
3.9.1 Maintaining the User Data Store ...................................... 142
3.9.2 Maintaining the System Settings ...................................... 152
3.9.3 Updating the Scanner's System Software ........................ 161
3.9.4 Setting the Information Output Level ................................ 164
3.9.5 Obtaining Technical Support ............................................ 165
Chapter 4 Regular User Operations .................................. 169
4.1 Loading Documents .................................................... 170
4.2 Using Touch Panel Screens: Regular User ............... 173
4.2.1 Common Buttons and Indicators ....................................... 173
4.2.2 Main Menu Screen ............................................................ 174
4.2.3 Input Fields and Entering Characters ................................ 176
Network Scanner fi-6000NS Operator's Guide v
Page 6

4.3 Logging in: Regular User Mode ................................. 177
4.4 Sending the Scanned Data by e-Mail ......................... 180
4.4.1 Selecting an e-Mail Address from
the e-Mail Address Book ................................................... 184
4.4.2 Adding a Contact to the e-Mail Address Book................... 187
4.4.3 Editing a Contact in the e-Mail Address Book ................... 189
4.4.4 Deleting a Contact from the e-Mail Address Book............. 191
4.5 Sending the Scanned Data by Fax ............................. 193
4.5.1 Selecting a Fax Number from the Fax Number List .......... 196
4.5.2 Adding a Contact to the Fax Number List.......................... 197
4.5.3 Editing a Contact in the Fax Number List .......................... 199
4.5.4 Deleting a Contact from the Fax Number List ................... 201
4.6 Printing the Scanned Data .......................................... 203
4.6.1 Scaling............................................................................... 208
4.6.2 Positioning ......................................................................... 213
4.6.3 Simplex/Duplex.................................................................. 216
4.7 Saving the Scanned Data to a Network Folder ......... 217
4.8 Setting the Scan Options ............................................ 222
4.8.1 Color Mode ........................................................................ 224
4.8.2 Resolution.......................................................................... 226
4.8.3 Paper Size ......................................................................... 228
4.8.4 Scan Mode ........................................................................ 233
4.8.5 File Format ........................................................................ 234
4.8.6 Searchable PDF ................................................................ 236
4.8.7 PDF Password................................................................... 239
4.8.8 Compression ..................................................................... 241
4.8.9 Brightness.......................................................................... 244
4.8.10 Contrast ............................................................................. 245
4.8.11 Page Orientation................................................................ 246
4.8.12 Blank Page Skip ................................................................ 248
4.8.13 Multifeed Detection (Layer and Length) ............................ 250
4.9 Enabling/Disabling the Scan Viewer .......................... 252
vi
Page 7

4.10 Editing the Scanned Data in the Scan Viewer .......... 255
4.10.1 Viewing a Scanned Page .................................................. 255
4.10.2 Rotating a Scanned Page.................................................. 256
4.10.3 Adding a Scanned Page.................................................... 257
4.10.4 Deleting a Scanned Page.................................................. 258
4.11 Checking the User Log ............................................... 259
4.12 Maintenance ................................................................. 261
Chapter 5 Scanner Care .................................................... 263
5.1 Cleaning ....................................................................... 264
5.1.1 Cleaning Materials............................................................. 264
5.1.2 Which Parts and When...................................................... 265
5.2 Cleaning the ADF ......................................................... 266
5.2.1 Cleaning the ADF .............................................................. 266
5.3 Cleaning the LCD Touch Panel .................................. 272
5.4 Cleaning the Keyboard ............................................... 272
5.5 Replacing Parts ........................................................... 273
5.5.1 Replacing the Pad Assembly............................................. 275
5.5.2 Replacing the Pick Roller .................................................. 276
5.6 Performing a Scan Test .............................................. 280
Chapter 6 Troubleshooting ............................................... 283
6.1 Removing Jammed Documents ................................. 284
6.2 Dealing with Detached Keycaps ................................ 288
Network Scanner fi-6000NS Operator's Guide vii
Page 8

6.3 Network Connection Troubleshooting ...................... 290
6.3.1 Basic Network Operation Tests ......................................... 290
6.3.2 Other Network Connection Troubleshooting ..................... 298
6.3.3 Failure to Connect to the Scanner using
the Network Scanner Admin Tool or Web Browser ........... 302
6.3.4 Problems when Connecting to the Scanner using
the Network Scanner Admin Tool...................................... 304
6.4 Other Troubleshooting ................................................ 305
6.5 Points to Check before Contacting
Your FUJITSU Scanner Dealer ................................... 308
6.5.1 General Details.................................................................. 308
6.5.2 Error Status ....................................................................... 309
6.6 Checking the Scanner Labels .................................... 311
6.7 Pre-Maintenance Preparations ................................... 312
Appendix A ADF Paper Specifications ............................... 313
A.1 Paper Size .................................................................... 314
A.2 Paper Requirements .................................................... 315
A.2.1 Paper Type ........................................................................ 315
A.2.2 Paper Weight..................................................................... 315
A.2.3 Precautions........................................................................ 315
A.3 Maximum Document Loading Capacity .................... 318
A.4 Area not to be Perforated ........................................... 319
A.5 Multifeed Detection Conditions .................................. 320
A.5.1 Detection by Layer............................................................. 320
A.5.2 Detection by Length........................................................... 320
A.5.3 Detection by both Layer and Length.................................. 321
viii
Page 9

Appendix B Scanner Specifications ................................... 323
B.1 Device Specifications .................................................. 324
B.2 Scanner Specifications ............................................... 325
Appendix C Operation Messages ........................................ 327
C.1 Administrator Messages ............................................. 328
C.1.1 Administrator Screen Messages........................................ 329
C.1.2 System Log Messages ...................................................... 348
C.1.3 Alert Monitor System Log Messages................................. 350
C.2 Regular User Messages .............................................. 354
C.2.1 Regular User Screen Messages........................................ 354
C.2.2 System Log Messages ...................................................... 373
C.2.3 User Log............................................................................ 384
Appendix D Glossary ........................................................... 389
Index .......................................................................................... 395
Network Scanner fi-6000NS Operator's Guide ix
Page 10

x
Page 11

Copyright
NetAdvantage 2005
Copyright© 2002-2006 Infragistics, Inc.
LEADTOOLS for .NET
Copyright© 2005 LEAD Technologies, Inc.
WinPcap3.1
Copyright© 1999 - 2005 NetGroup, Politecnico di Torino (Italy).
Copyright© 2005 - 2006 CACE Technologies, Davis (California).
All rights reserved.
Redistribution and use in source and binary forms, with or without
modification, are permitted provided that the following conditions are met:
1. Redistributions of source code must retain the above copyright notice, this list of conditions
and the following disclaimer.
2. Redistributions in binary form must reproduce the above copyright notice, this list of
conditions and the following disclaimer in the documentation and/or other materials provided
with the distribution.
3. Neither the name of the Politecnico di Torino, CACE Technologies nor the names of its
contributors may be used to endorse or promote products derived from this software without
specific prior written permission.
THIS SOFTWARE IS PROVIDED BY THE COPYRIGHT HOLDERS AND CONTRIBUTORS "AS
IS" AND ANY EXPRESS OR IMPLIED WARRANTIES, INCLUDING, BUT NOT LIMITED TO,
THE IMPLIED WARRANTIES OF MERCHANTABILITY AND FITNESS FOR A PARTICULAR
PURPOSE ARE DISCLAIMED. IN NO EVENT SHALL THE COPYRIGHT OWNER OR
CONTRIBUTORS BE LIABLE FOR ANY DIRECT, INDIRECT, INCIDENTAL, SPECIAL,
EXEMPLARY, OR CONSEQUENTIAL DAMAGES (INCLUDING, BUT NOT LIMITED TO,
PROCUREMENT OF SUBSTITUTE GOODS OR SERVICES; LOSS OF USE, DATA, OR
PROFITS; OR BUSINESS INTERRUPTION) HOWEVER CAUSED AND ON ANY THEORY OF
LIABILITY, WHETHER IN CONTRACT, STRICT LIABILITY, OR TORT (INCLUDING
NEGLIGENCE OR OTHERWISE) ARISING IN ANY WAY OUT OF THE USE OF THIS
SOFTWARE, EVEN IF ADVISED OF THE POSSIBILITY OF SUCH DAMAGE.
This product includes software developed by the University of California, Lawrence Berkeley
Laboratory and its contributors.
This product includes software developed by the Kungliga Tekniska Hogskolan and its contributors.
This product includes software developed by Yen Yen Lim and North Dakota State University.
Network Scanner fi-6000NS Operator's Guide xi
Page 12

Portions Copyright© 1990, 1991, 1992, 1993, 1994, 1995, 1996, 1997 The Regents of the University
of California.
All rights reserved.
Redistribution and use in source and binary forms, with or without
modification, are permitted provided that the following conditions are met:
1. Redistributions of source code must retain the above copyright notice, this list of conditions
and the following disclaimer.
2. Redistributions in binary form must reproduce the above copyright notice, this list of
conditions and the following disclaimer in the documentation and/or other materials provided
with the distribution.
3. All advertising materials mentioning features or use of this software must display the
following acknowledgement: "This product includes software developed by the University of
California, Berkeley and its contributors."
4. Neither the name of the University nor the names of its contributors may be used to endorse
or promote products derived from this software without specific prior written permission.
THIS SOFTWARE IS PROVIDED BY THE INSTITUTE AND CONTRIBUTORS "AS IS" AND
ANY EXPRESS OR IMPLIED WARRANTIES, INCLUDING, BUT NOT LIMITED TO, THE
IMPLIED WARRANTIES OF MERCHANTABILITY AND FITNESS FOR A PARTICULAR
PURPOSE ARE DISCLAIMED. IN NO EVENT SHALL THE REGENTS OR CONTRIBUTORS
BE LIABLE FOR ANY DIRECT, INDIRECT, INCIDENTAL, SPECIAL, EXEMPLARY, OR
CONSEQUENTIAL DAMAGES (INCLUDING, BUT NOT LIMITED TO, PROCUREMENT OF
SUBSTITUTE GOODS OR SERVICES; LOSS OF USE, DATA, OR PROFITS; OR BUSINESS
INTERRUPTION) HOWEVER CAUSED AND ON ANY THEORY OF LIABILITY, WHETHER IN
CONTRACT, STRICT LIABILITY, OR TORT (INCLUDING NEGLIGENCE OR OTHERWISE)
ARISING IN ANY WAY OUT OF THE USE OF THIS SOFTWARE, EVEN IF ADVISED OF THE
POSSIBILITY OF SUCH DAMAGE.
Portions Copyright© 1983 Regents of the University of California.
All rights reserved.
Redistribution and use in source and binary forms are permitted provided that the above copyright
notice and this paragraph are duplicated in all such forms and that any documentation, advertising
materials, and other materials related to such distribution and use acknowledge that the software was
developed by the University of California, Berkeley. The name of the University may not be used to
endorse or promote products derived from this software without specific prior written permission.
THIS SOFTWARE IS PROVIDED "AS IS" AND WITHOUT ANY EXPRESS OR IMPLIED
WARRANTIES, INCLUDING, WITHOUT LIMITATION, THE IMPLIED WARRANTIES OF
MERCHANTIBILITY AND FITNESS FOR A PARTICULAR PURPOSE.
xii
Page 13

Portions Copyright© 1995, 1996, 1997 Kungliga Tekniska Hogskolan (Royal Institute of Technology,
Stockholm, Sweden).
All rights reserved.
Redistribution and use in source and binary forms, with or without modification, are permitted
provided that the following conditions are met:
1. Redistributions of source code must retain the above copyright notice, this list of conditions
and the following disclaimer.
2. Redistributions in binary form must reproduce the above copyright notice, this list of
conditions and the following disclaimer in the documentation and/or other materials provided
with the distribution.
3. All advertising materials mentioning features or use of this software must display the
following acknowledgement: "This product includes software developed by the Kungliga
Tekniska Hogskolan and its contributors."
4. Neither the name of the University nor the names of its contributors may be used to endorse
or promote products derived from this software without specific prior written permission.
THIS SOFTWARE IS PROVIDED BY THE INSTITUTE AND CONTRIBUTORS "AS IS" AND
ANY EXPRESS OR IMPLIED WARRANTIES, INCLUDING, BUT NOT LIMITED TO, THE
IMPLIED WARRANTIES OF MERCHANTABILITY AND FITNESS FOR A PARTICULAR
PURPOSE ARE DISCLAIMED. IN NO EVENT SHALL THE INSTITUTE OR CONTRIBUTORS
BE LIABLE FOR ANY DIRECT, INDIRECT, INCIDENTAL, SPECIAL, EXEMPLARY, OR
CONSEQUENTIAL DAMAGES (INCLUDING, BUT NOT LIMITED TO, PROCUREMENT OF
SUBSTITUTE GOODS OR SERVICES; LOSS OF USE, DATA, OR PROFITS; OR BUSINESS
INTERRUPTION) HOWEVER CAUSED AND ON ANY THEORY OF LIABILITY, WHETHER IN
CONTRACT, STRICT LIABILITY, OR TORT (INCLUDING NEGLIGENCE OR OTHERWISE)
ARISING IN ANY WAY OUT OF THE USE OF THIS SOFTWARE, EVEN IF ADVISED OF THE
POSSIBILITY OF SUCH DAMAGE.
Portions Copyright© 1997 Yen Yen Lim and North Dakota State University.
All rights reserved.
Redistribution and use in source and binary forms, with or without modification, are permitted
provided that the following conditions are met:
1. Redistributions of source code must retain the above copyright notice, this list of conditions
and the following disclaimer.
2. Redistributions in binary form must reproduce the above copyright notice, this list of
conditions and the following disclaimer in the documentation and/or other materials provided
with the distribution.
3. All advertising materials mentioning features or use of this software must display the
following acknowledgement: "This product includes software developed by Yen Yen Lim
and North Dakota State University"
4. The name of the author may not be used to endorse or promote products derived from this
software without specific prior written permission.
THIS SOFTWARE IS PROVIDED BY THE AUTHOR "AS IS" AND ANY EXPRESS OR
IMPLIED WARRANTIES, INCLUDING, BUT NOT LIMITED TO, THE IMPLIED WARRANTIES
OF MERCHANTABILITY AND FITNESS FOR A PARTICULAR PURPOSE ARE DISCLAIMED.
IN NO EVENT SHALL THE AUTHOR BE LIABLE FOR ANY DIRECT, INDIRECT,
Network Scanner fi-6000NS Operator's Guide xiii
Page 14

INCIDENTAL, SPECIAL, EXEMPLARY, OR CONSEQUENTIAL DAMAGES (INCLUDING,
BUT NOT LIMITED TO, PROCUREMENT OF SUBSTITUTE GOODS OR SERVICES; LOSS OF
USE, DATA, OR PROFITS; OR BUSINESS INTERRUPTION) HOWEVER CAUSED AND ON
ANY THEORY OF LIABILITY, WHETHER IN CONTRACT, STRICT LIABILITY, OR TORT
(INCLUDING NEGLIGENCE OR OTHERWISE) ARISING IN ANY WAY OUT OF THE USE OF
THIS SOFTWARE, EVEN IF ADVISED OF THE POSSIBILITY OF SUCH DAMAGE.
Portions Copyright© 1993 by Digital Equipment Corporation.
Permission to use, copy, modify, and distribute this software for any purpose with or without fee is
hereby granted, provided that the above copyright notice and this permission notice appear in all
copies, and that the name of Digital Equipment Corporation not be used in advertising or publicity
pertaining to distribution of the document or software without specific, written prior permission.
THE SOFTWARE IS PROVIDED "AS IS" AND DIGITAL EQUIPMENT CORP. DISCLAIMS ALL
WARRANTIES WITH REGARD TO THIS SOFTWARE, INCLUDING ALL IMPLIED
WARRANTIES OF MERCHANTABILITY AND FITNESS. IN NO EVENT SHALL DIGITAL
EQUIPMENT CORPORATION BE LIABLE FOR ANY SPECIAL, DIRECT, INDIRECT, OR
CONSEQUENTIAL DAMAGES OR ANY DAMAGES WHATSOEVER RESULTING FROM
LOSS OF USE, DATA OR PROFITS, WHETHER IN AN ACTION OF CONTRACT,
NEGLIGENCE OR OTHER TORTIOUS ACTION, ARISING OUT OF OR IN CONNECTION
WITH THE USE OR PERFORMANCE OF THIS SOFTWARE.
Portions Copyright© 1995, 1996, 1997, 1998, and 1999 WIDE Project.
All rights reserved.
Redistribution and use in source and binary forms, with or without modification, are permitted
provided that the following conditions are met:
1. Redistributions of source code must retain the above copyright notice, this list of conditions
and the following disclaimer.
2. Redistributions in binary form must reproduce the above copyright notice, this list of
conditions and the following disclaimer in the documentation and/or other materials provided
with the distribution.
3. Neither the name of the project nor the names of its contributors may be used to endorse or
promote products derived from this software without specific prior written permission.
THIS SOFTWARE IS PROVIDED BY THE PROJECT AND CONTRIBUTORS "AS IS" AND ANY
EXPRESS OR IMPLIED WARRANTIES, INCLUDING, BUT NOT LIMITED TO, THE IMPLIED
WARRANTIES OF MERCHANTABILITY AND FITNESS FOR A PARTICULAR PURPOSE ARE
DISCLAIMED. IN NO EVENT SHALL THE PROJECT OR CONTRIBUTORS BE LIABLE FOR
ANY DIRECT, INDIRECT, INCIDENTAL, SPECIAL, EXEMPLARY, OR CONSEQUENTIAL
DAMAGES (INCLUDING, BUT NOT LIMITED TO, PROCUREMENT OF SUBSTITUTE GOODS
OR SERVICES; LOSS OF USE, DATA, OR PROFITS; OR BUSINESS INTERRUPTION)
HOWEVER CAUSED AND ON ANY THEORY OF LIABILITY, WHETHER IN CONTRACT,
STRICT LIABILITY, OR TORT (INCLUDING NEGLIGENCE OR OTHERWISE) ARISING IN
ANY WAY OUT OF THE USE OF THIS SOFTWARE, EVEN IF ADVISED OF THE POSSIBILITY
OF SUCH DAMAGE.
xiv
Page 15

Portions Copyright© 1996 Juniper Networks, Inc. All rights reserved.
Redistribution and use in source and binary forms, with or without modification, are permitted
provided that: (1) source code distributions retain the above copyright notice and this paragraph in its
entirety, (2) distributions including binary code include the above copyright notice and this paragraph
in its entirety in the documentation or other materials provided with the distribution.
The name of Juniper Networks may not be used to endorse or promote products derived from this
software without specific prior written permission.
THIS SOFTWARE IS PROVIDED "AS IS" AND WITHOUT ANY EXPRESS OR IMPLIED
WARRANTIES, INCLUDING, WITHOUT LIMITATION, THE IMPLIED WARRANTIES OF
MERCHANTABILITY AND FITNESS FOR A PARTICULAR PURPOSE.
Portions Copyright© 2001 Daniel Hartmeier
All rights reserved.
Redistribution and use in source and binary forms, with or without modification, are permitted
provided that the following conditions are met:
• Redistributions of source code must retain the above copyright notice, this list of conditions and
the following disclaimer.
• Redistributions in binary form must reproduce the above copyright notice, this list of conditions
and the following disclaimer in the documentation and/or other materials provided with the dis
-
tribution.
THIS SOFTWARE IS PROVIDED BY THE COPYRIGHT HOLDERS AND CONTRIBUTOR "AS
IS" AND ANY EXPRESS OR IMPLIED WARRANTIES, INCLUDING, BUT NOT LIMITED TO,
THE IMPLIED WARRANTIES OF MERCHANTABILITY AND FITNESS FOR A PARTICULAR
PURPOSE ARE DISCLAIMED. IN NO EVENT SHALL THE COPYRIGHT HOLDERS OR
CONTRIBUTORS BE LIABLE FOR ANY DIRECT, INDIRECT, INCIDENTAL, SPECIAL,
EXEMPLARY, OR CONSEQUENTIAL DAMAGES (INCLUDING, BUT NOT LIMITED TO,
PROCUREMENT OF SUBSTITUTE GOODS OR SERVICES; LOSS OF USE, DATA, OR
PROFITS; OR BUSINESS INTERRUPTION) HOWEVER CAUSED AND ON ANY THEORY OF
LIABILITY, WHETHER IN CONTRACT, STRICT LIABILITY, OR TORT (INCLUDING
NEGLIGENCE OR OTHERWISE) ARISING IN ANY WAY OUT OF THE USE OF THIS
SOFTWARE, EVEN IF ADVISED OF THE POSSIBILITY OF SUCH DAMAGE.
Portions Copyright 1989 by Carnegie Mellon.
Permission to use, copy, modify, and distribute this program for any purpose and without fee is hereby
granted, provided that this copyright and permission notice appear on all copies and supporting
documentation, the name of Carnegie Mellon not be used in advertising or publicity pertaining to
distribution of the program without specific prior permission, and notice be given in supporting
documentation that copying and distribution is by permission of Carnegie Mellon and Stanford
University. Carnegie Mellon makes no representations about the suitability of this software for any
purpose. It is provided "as is" without express or implied warranty.
Network Scanner fi-6000NS Operator's Guide xv
Page 16

WinDump3.9.5
Copyright© 1999 - 2005 NetGroup, Politecnico di Torino (Italy).
Copyright© 2005 - 2006 CACE Technologies, Davis (California).
All rights reserved.
Redistribution and use in source and binary forms, with or without modification, are permitted
provided that the following conditions are met:
1. Redistributions of source code must retain the above copyright notice, this list of conditions
and the following disclaimer.
2. Redistributions in binary form must reproduce the above copyright notice, this list of
conditions and the following disclaimer in the documentation and/or other materials provided
with the distribution.
3. Neither the name of the Politecnico di Torino, CACE Technologies nor the names of its
contributors may be used to endorse or promote products derived from this software without
specific prior written permission.
THIS SOFTWARE IS PROVIDED BY THE COPYRIGHT HOLDERS AND CONTRIBUTORS "AS
IS" AND ANY EXPRESS OR IMPLIED WARRANTIES, INCLUDING, BUT NOT LIMITED TO,
THE IMPLIED WARRANTIES OF MERCHANTABILITY AND FITNESS FOR A PARTICULAR
PURPOSE ARE DISCLAIMED. IN NO EVENT SHALL THE COPYRIGHT OWNER OR
CONTRIBUTORS BE LIABLE FOR ANY DIRECT, INDIRECT, INCIDENTAL, SPECIAL,
EXEMPLARY, OR CONSEQUENTIAL DAMAGES (INCLUDING, BUT NOT LIMITED TO,
PROCUREMENT OF SUBSTITUTE GOODS OR SERVICES; LOSS OF USE, DATA, OR
PROFITS; OR BUSINESS INTERRUPTION) HOWEVER CAUSED AND ON ANY THEORY OF
LIABILITY, WHETHER IN CONTRACT, STRICT LIABILITY, OR TORT (INCLUDING
NEGLIGENCE OR OTHERWISE) ARISING IN ANY WAY OUT OF THE USE OF THIS
SOFTWARE, EVEN IF ADVISED OF THE POSSIBILITY OF SUCH DAMAGE.
This product includes software developed by the University of California, Lawrence Berkeley
Laboratory and its contributors.
xvi
Page 17

Introduction
Thank you for purchasing the Network Scanner fi-6000NS.
This easy-to-use image scanner is designed to be connected to a computer network system and is primarily
for office use.
• Copying of the contents of this manual in whole or in part and copying of the scanner application is
forbidden under the copyright law.
• The contents of this manual are subject to change without notice.
• PFU LIMITED. is not liable whatsoever for any damages resulting from use of this scanner and pro-
cedures described in this manual, profit due to defects, and any claims by a third party.
■Regulatory Information
FCC Declaration
This equipment has been tested and found to comply with the limits for a Class B digital device,
pursuant to Part 15 of the FCC Rules. These limits are designed to provide reasonable protection
against harmful interference in a residential installation. This equipment generates, uses, and can
radiate radio frequency energy and, if not installed and used in accordance with the instruction manual,
may cause harmful interference to radio communications. However, there is no guarantee that
interference will not occur in a particular installation. If this equipment does cause harmful
interference to radio or television reception, which can be determined by turning the equipment off and
on, the user is encouraged to try to correct the interference by one or more of the following measures:
•Reorient or relocate the receiving antenna.
•Increase the separation between the equipment and receiver.
•Connect the equipment into an outlet on a circuit different from that to which the receiver is located.
•Consult your dealer or an experienced radio/TV technician.
FCC warning: Changes or modifications not expressly approved by the party responsible for
compliance could void the user's authority to operate the equipment.
NOTICE
The use of a shielded interface cable is required to comply with the Class
B limits of Part 15 of FCC rules. The length of the AC cable must be 2
meters (6.6 feet) or less.
Network Scanner fi-6000NS Operator's Guide xvii
Page 18

Canadian DOC Regulations
This digital apparatus does not exceed the Class B limit for radio noise emissions from digital
apparatus set out in the Radio interference Regulations of the Canadian Department of
Communications.
This Class B digital apparatus complies with Canadian ICES-003.
Le présent appareil numérique n'émet pas de parasites radioélectriques dépassant les limites
applicables aux appareils numériques de la classe B et prescrites dans le Règlement sur le brouillage
radioélectrique dictées par le Ministère des Communications du Canada.
Cet appareil numérique de la classe B est conforme la norme NMB-003 du Canada.
Bescheimigung des Herstellers / Importeurs
Für den fi-6000NS wird folgendes bescheinigt:
•In ÅEereinsstimmung mit den Bestimmungen der EN45014(CE) funkentstört
•Maschinenlärminformationsverordnung 3.GPSGV: Der höchste Schalldruckpegel beträgt 70 dB (A)
oder weniger, gemäß EN ISO 7779.
Use in High-safety Applications
This product has been designed and manufactured on the assumption that it will be used in office,
personal, domestic, regular industrial, and general-purpose applications. It has not been designed and
manufactured for use in applications (simply called "high-safety applications" from here on) that
directly involve danger to life and health when a high degree of safety is required, for example, in the
control of nuclear reactions at nuclear power facilities, automatic flight control of aircraft, air traffic
control, operation control in mass-transport systems, medical equipment for sustaining life, and
missile firing control in weapons systems, and when provisionally the safety in question is not
ensured. The user should use this product with adopting measures for ensuring safety in such highsafety applications. PFU LIMITED assumes no liability whatsoever for damages arising from use of
this product by the user in high-safety applications, and for any claims or compensation for damages
by the user or a third party.
About the Use of Mercury
Lamp(s) inside this product contain mercury and must be recycled or
g
H
To avoid unexpected injury, read the following carefully.
Doing the following actions may result in serious personal injuries:
•Do not lick or consume the substance contained in the lamp.
disposed of according to local, state, or federal laws.
•Do not incinerate, crush, or shred the lamps or scanner parts.
•Do not breathe the chemical liquid contained in the scanner lamps.
xviii
Page 19

LCD Peculiarities
•The LCD backlight is a fluorescent tube that contains some mercury.
•Be aware that neither of the following is considered a fault.
• Despite the fact that the latest advanced technology has been used to produce the scanner’s
TFT color LCD's, the large number of pixels involved means that an occasional (always-on)
bright dot or (always-off) dark dot may be visible.
• The characteristics of the LCD mean that there may be some variation in hue and intensity of
colors across the screen.
Replacing Batteries
This product has a battery (CMOS RAM battery) on board to retain data such as
•Warnin g
• Do not replace the battery yourself, as there is a risk of explosion if the wrong type is used.
Please contact your maintenance engineer in charge when the battery runs low.
• Do not touch the battery. Never install or remove the battery by yourself.
Doing so may cause electric shock or static electricity which can damage the device.
■Trademarks
Microsoft, Windows, and Windows Vista are registered trademarks of Microsoft Corporation in the
United States and/or other countries.
Adobe, the Adobe logo, and Acrobat are either registered trademarks of Adobe Systems Incorporated
in the United States and/or other countries.
ABBYY™ FineReader™ 7.x Engine © ABBYY Software House 2005.
OCR by ABBYY Software House. All rights reserved.
ABBYY, FineReader are trademarks of ABBYY Software House.
Other product names are the trademarks or registered trademarks of the respective companies.
Network Scanner fi-6000NS Operator's Guide xix
Page 20

How Trademarks are Indicated in This Manual
References to operating systems (OS) and applications are indicated as follows:
Windows
Windows® XP
Windows Vista™
Windows® 2000
Server
Windows Server®
2003
.NET Framework 2.0
Adobe Acrobat
Microsoft® Windows® operating system
Microsoft® Windows® XP Professional operating system
Microsoft® Windows® XP Home Edition operating system
Microsoft® Windows Vista™ Home Basic operating system
Microsoft® Windows Vista™ Home Premium operating system
Microsoft® Windows Vista™ Business operating system
Microsoft® Windows Vista™ Enterprise operating system
Microsoft® Windows Vista™ Ultimate operating system
Microsoft® Windows® 2000 Server
Microsoft® Small Business Server 2000
Microsoft® Windows® 2000 Advanced Server
Microsoft® Windows Server® 2003, Standard Edition
Microsoft® Windows Server® 2003, Enterprise Edition
Microsoft® Windows Server® 2003, Datacenter Edition
Microsoft® Windows Server® 2003, Web Edition
Microsoft® .NET Framework 2.0
Adobe® Acrobat®
RightFax
Captaris® RightFax Business Server (Version 9.3)
Where there is no distinction between the different versions of the above operating system, the general
term "Windows" is used.
Where there is no distinction between the different versions of the above application, the general term
"Adobe Acrobat" is used.
The version of Adobe Acrobat provided with this product may change without notice. If the
instructions described in this manual differ from the actual displayed screen, refer to Acrobat's Help.
Manufacturer
PFU LIMITED
International Sales Dept., Imaging Business Division, Products Group
Solid Square East Tower, 580 Horikawa-cho, Saiwai-ku, Kawasaki-shi Kanagawa 212-8563, Japan
Phone : (81-44) 540-4538
All Rights Reserved, Copyright© PFU LIMITED 2007
xx
Page 21
■Notice of Liability
BEFORE USING THIS PRODUCT, PLEASE READ THIS MANUAL CAREFULLY. IF THIS
PRODUCT IS NOT USED CORRECTLY, UNEXPECTED INJURY CAN OCCUR TO USERS OR
BYSTANDERS.
Keep this manual in a safe place so that it can be easily referred to during use of this product.
While all efforts have been made to ensure the accuracy of all information in this manual, PFU
assumes no liability to any party for any damage caused by errors or omissions or by statements of any
kind in this manual, its updates or supplements, whether such errors are omissions or statements
resulting from negligence, accidents, or any other cause. PFU further assumes no liability arising from
the application or use of any product or system described herein; nor any liability for incidental or
consequential damages arising from the use of this manual. PFU disclaims all warranties regarding the
information contained herein, whether expressed, implied, or statutory.
Warning Indications Used in This Manual
This indication alerts operators to an operation that, if not strictly
WARNING
observed, may result in severe injury or death.
CAUTION
This indication alerts operators to an operation that, if not strictly
observed, may result in safety hazards to personnel or damage to
equipment.
Network Scanner fi-6000NS Operator's Guide xxi
Page 22
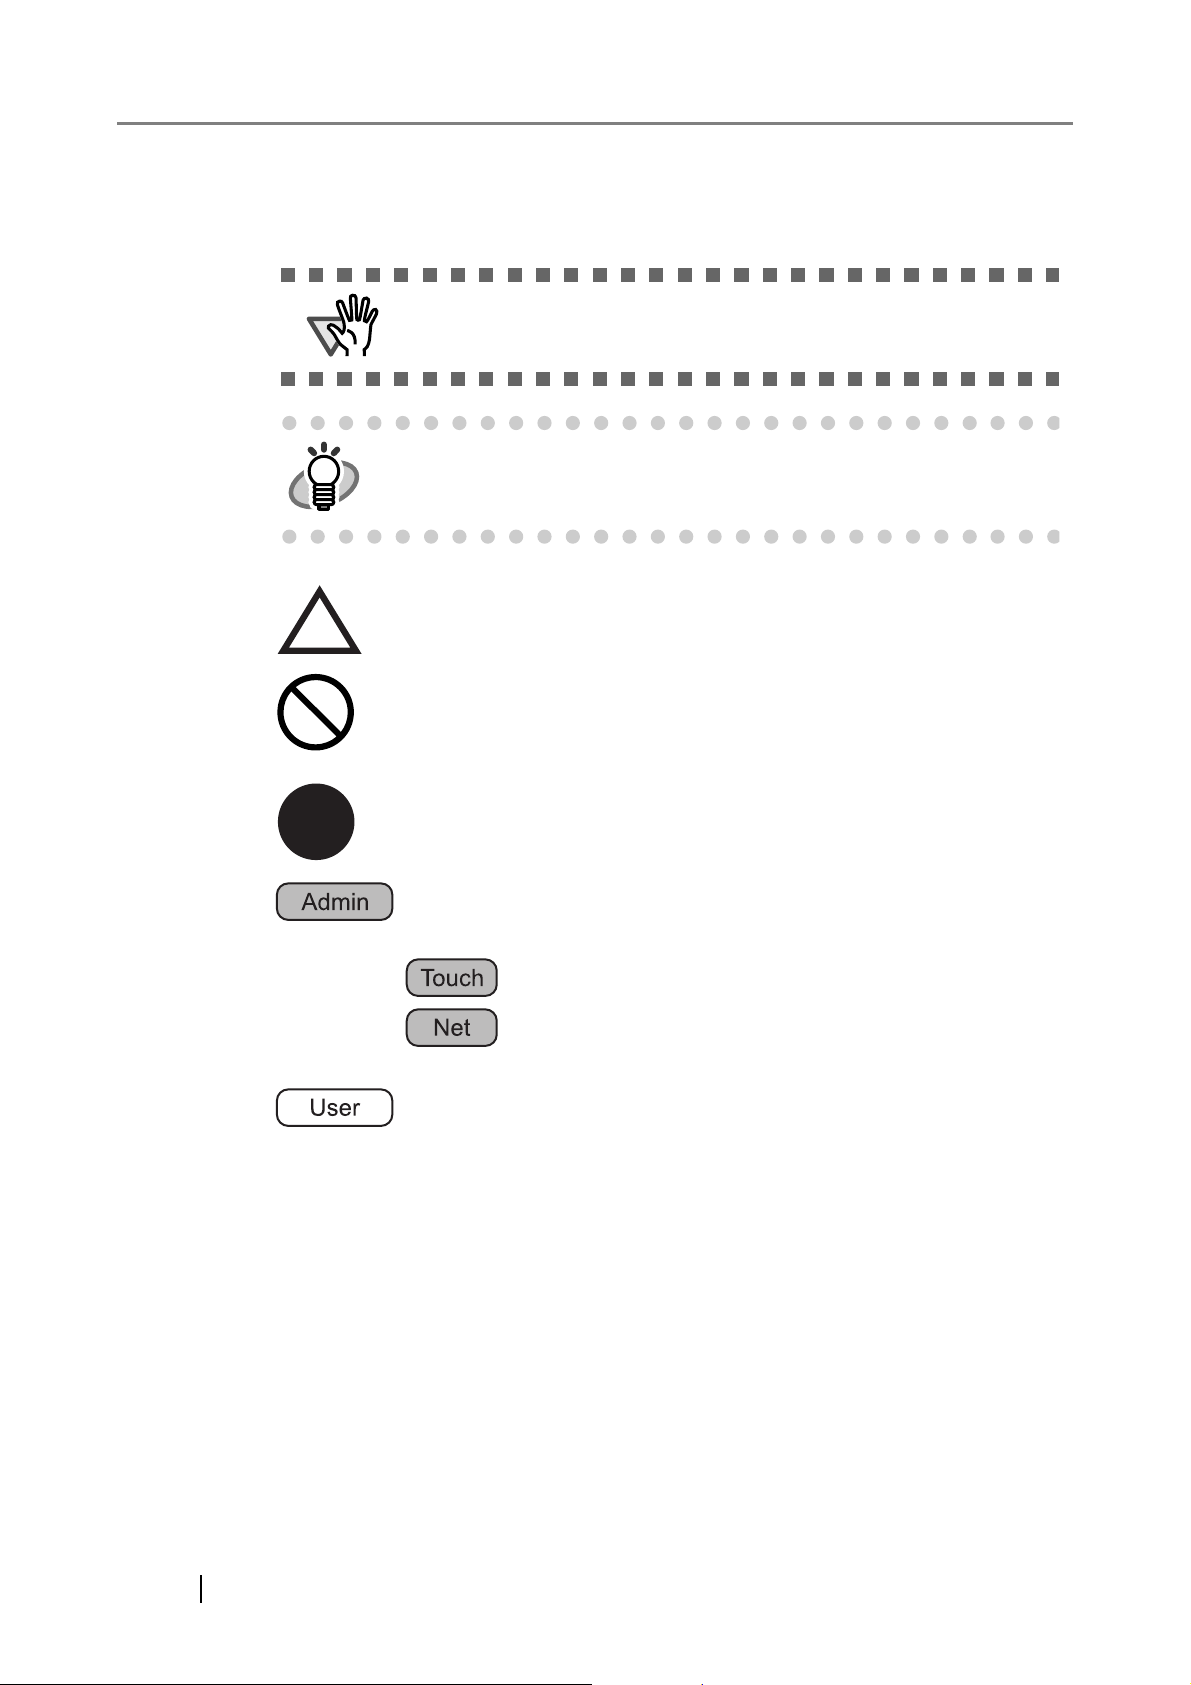
Symbols Used in This Manual
R
This manual uses the following symbols in the explanations in addition to the warning indications.
ATTENTION
HINT
This symbol alerts operators to particularly important information. Be
sure to read this information.
This symbol alerts operators to helpful advice regarding operation.
A TRIANGLE symbol indicates that special care and attention is required.
The drawing inside the triangle shows the specific caution.
A CIRCLE with a diagonal line inside shows action which users may not
perform.
The drawing inside or under the circle shows the specific action that is not
allowed.
Outline characters on a colored background show instructions users should
follow.
It may also include the drawing that shows the specific instruction.
This symbol is used to indicate information about administrator operations.
In Chapter 3, operations that can be performed by either or both of the
administrator login modes one indicated by the following symbols:
: Administrator operating via the touch panel.
: Administrator operating via the network interface using the
fi Network Scanner Admin Tool.
This symbol is used to indicate information about regular user operations.
Screen Examples in This Manual
The screen examples in this manual are subject to change without notice in the interest of product
improvement. If the actual displayed screen differs from the screen examples in this manual, operate
by following the actual displayed screen while referring to the User's Manual of the scanner
application you are using.
The screen examples in this manual are created according to Microsoft Corporation guidelines.
xxii
Page 23

Warning Label
High Temperature
The glass scanner windows surface inside the ADF becomes hot when the
scanner is used. Be careful not to touch the surface of the glass scanner
windows.
ATTENTION
Do NOT remove from the scanner, stain or scratch the warning labels.
About Maintenance
The user must not perform repairs on this scanner.
Contact your FUJITSU scanner dealer or an authorized FUJITSU scanner service provider for repairs
to this product.
Network Scanner fi-6000NS Operator's Guide xxiii
Page 24
■Safety Precautions
This manual describes important details for ensuring the safe and correct use of this product.
Thoroughly read this manual before you start to use this product. In particular, be sure to read and fully
understand the Safety Precautions described in this manual before you use this product.
Also, store this manual in a safe place so that it can be easily referred to during use of this product.
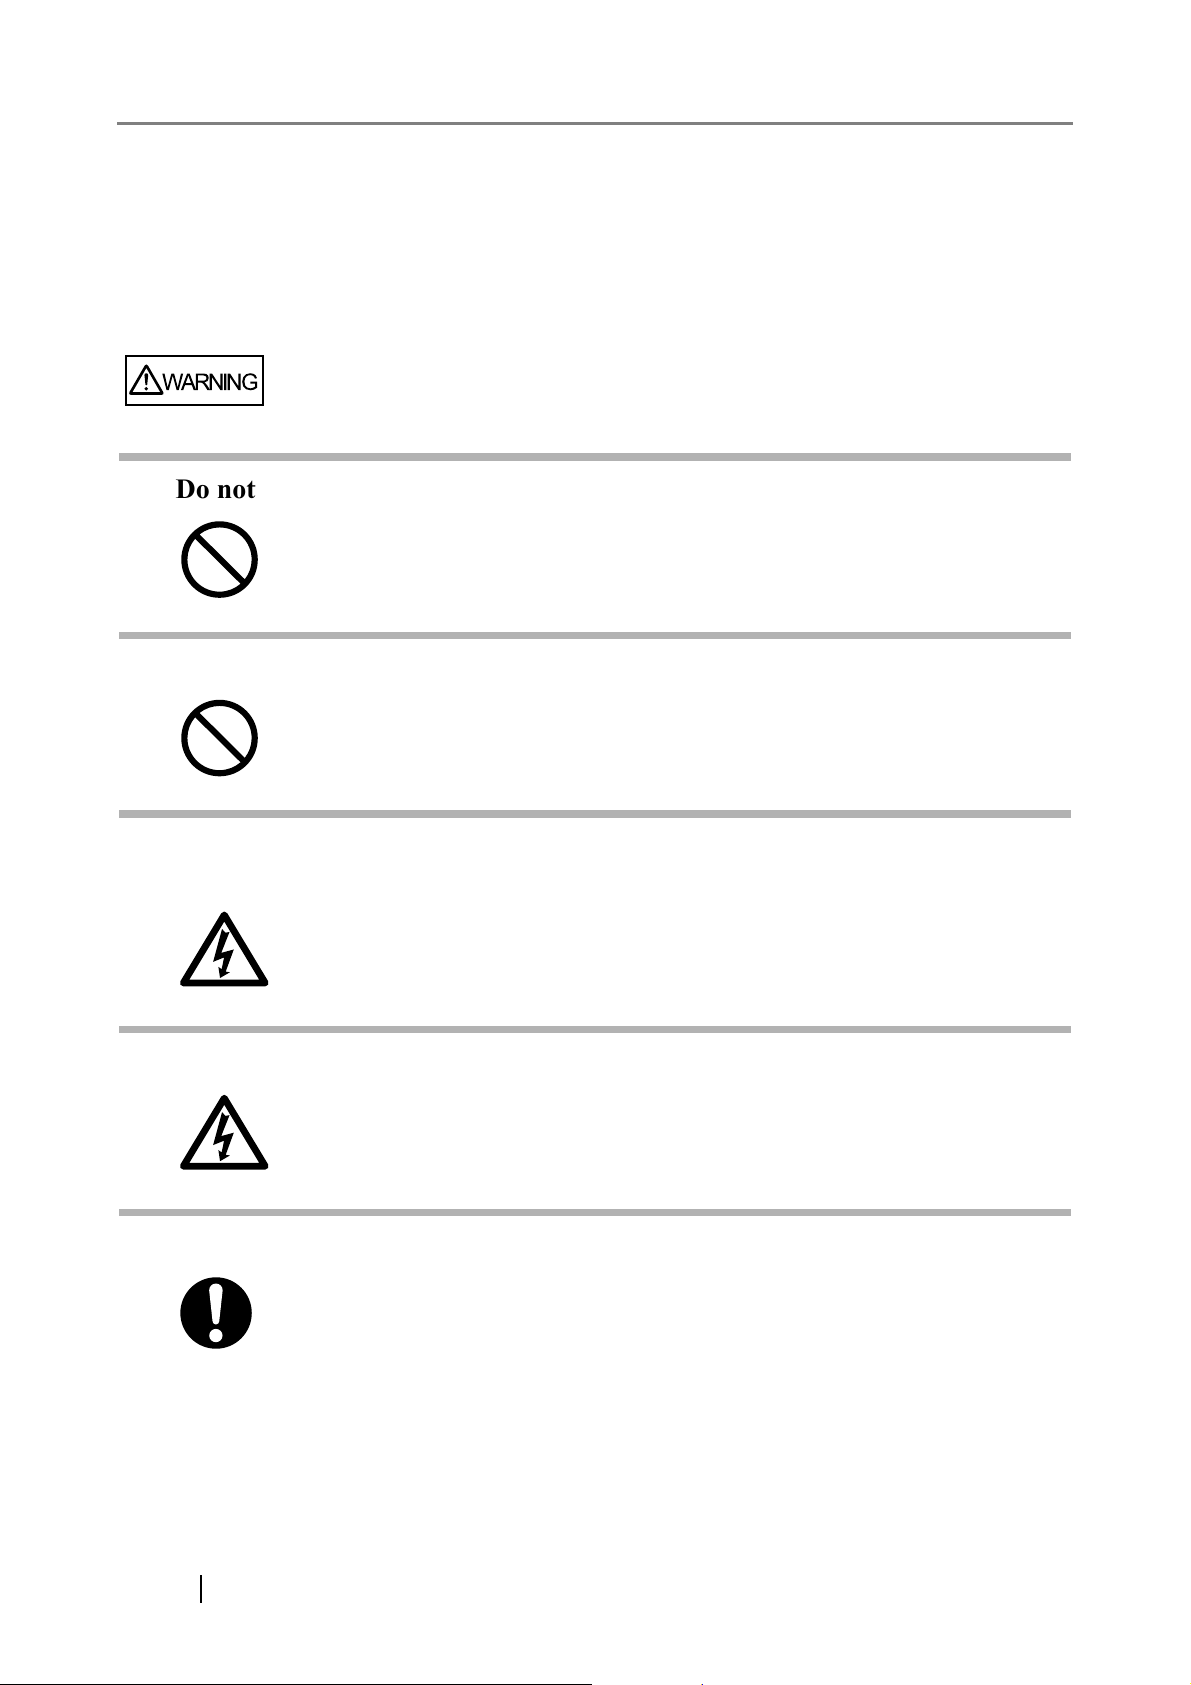
WARNING
Do not damage the AC cable.
A damaged AC cable may cause fire or electric shock. Do not place heavy objects on
AC cables, or pull, bend, twist, heat, damage or modify AC cables.
Do not use damaged AC cables or power plugs, or install any cables or power plugs to
loose wall sockets.
Use only specified AC cables and connector cables.
Use only specified AC cables and connector cables. Failure to use the correct cables
might cause electric shock and/or equipment failure.
Please do not use the AC cable provided with this scanner for other devices, since this
might cause equipment failure and other troubles or an electric shock.
Use this scanner only at the indicated power voltage. Do not connect to
multiple-power strips.
Use this scanner only at the indicated power voltage and current. Improper power
voltage and current might cause fire or electric shock. Do not connect to multiple-power
strips.
Do not touch the AC cable with wet hands.
Do not touch the power plug with wet hands. Doing so can cause electric shock.
Wipe any dust from the power plug.
Wipe off any dust from metal parts on the power plug or metal fittings with a soft, dry
cloth. Accumulated dust can cause fire or electric shock.
xxiv
Page 25

Do not install the device in locations that has oil smoke, steam, humidity,
and dust.
Do not install the scanner in locations subject to oil smoke, steam, humidity, and dust.
Doing so might cause a fire or electric shock.
Turn the scanner OFF if it is damaged.
If the scanner is damaged for any reason,
turn the scanner off and unplug the power cable. Contact your FUJITSU scanner dealer
or an authorized FUJITSU scanner service provider.
Do not use the scanner if there is a strange odor.
If you detect heat coming from the device or detect other problems such as smoke,
strange smells or noises, immediately turn off the scanner and disconnect its power
plug. Make sure that any smoke coming from it has stopped, before contacting your
FUJITSU scanner dealer or an authorized FUJITSU scanner service provider.
Do not put liquids inside the scanner.
Do not insert or drop metal objects in to the scanner. Do not scan wet documents or
documents with paper clips or staples. Do not splash or allow the scanner to get wet.
If foreign objects (water, small metal objects, liquids, etc.) get inside the scanner,
immediately turn off the scanner and disconnect the power plug from the power outlet.
Then, contact your FUJITSU scanner dealer or an authorized FUJITSU scanner service
provider. Pay particular attention to this warning in households where there are small
children.
Do not touch the inside of the scanner unless necessary.
Do not take apart or modify the scanner. The inside of the scanner contains highvoltage components. Touching these components might cause electric shock or fire.
Network Scanner fi-6000NS Operator's Guide xxv
Page 26
CAUTION
Do not install the scanner on unstable surfaces.
Make sure that the scanner is installed on a flat, level surface and that none of its parts
extend beyond the surface top, such as a desk or table. Do not install the scanner on
unstable surfaces. Install the scanner on a level surface that is free of vibration to
prevent it from falling.
Install the scanner on a strong surface that will support the weight of the scanner and
other devices.
Firmly insert the power plug.
Firmly insert the power plug as far it can go into the power outlet.
Do not block the ventilation ports.
Do not block the ventilation ports. Blocking the ventilation ports generates heat inside of
scanner, which may result in fire or scanner failure.
Do not place heavy objects or stand on top of the scanner.
Do not place heavy objects on the scanner or use the scanner's surface top to perform
other work. Improper installation might cause injuries and equipment failure.
Do not use the scanner immediately after moving it from a cold place into a
warm room.
Do not use the device immediately after moving it from a cold place into a warm room.
Condensation may occur, which might lead to scanning errors. Let the device dry about
one or two hours before you use it.
Before moving the scanner, disconnect the power plug from the power
outlet.
Do not move the scanner with the power and interface cables connected as this can
damage the cables, which can later cause fire, electric shock as well as injury.
Before moving the scanner, be sure to disconnect the power plug from the power outlet,
and all other data cables. Make sure that the floor is free of any obstructions.
xxvi
Page 27

Protect the scanner from static electricity.
Install the scanner away from strong magnetic fields and other sources of electronic
noise. Also, protect the scanner against any static electricity, which can cause the
scanner to malfunction.
Do not use aerosol sprays near the scanner.
Do not use aerosol sprays to clean the scanner. Aerosol sprays can blow dirt and dust
inside the scanner, resulting in scanner failure or malfunction.
Avoid any contact when scanner is in use.
Avoid touching any scanner mechanism during scanning since this may cause injuries.
Disconnect the power plug from the power outlet when the scanner is not
used for a long period of time.
When the scanner is not going to be used for a long period of time, be sure to
disconnect the power plug from the power outlet.
Do not install the scanner in direct sunlight.
Do not install the scanner under direct sunlight or near heating apparatus. Doing so
might cause excessive heat to build up inside the scanner, which can cause scanner
trouble or even fire. Install the scanner in a well-ventilated location.
Before moving the scanner, make sure the shipping lock is locked.
When moving the scanner, be sure to lock the shipping lock in order to prevent
damages to the scanner.
Network Scanner fi-6000NS Operator's Guide xxvii
Page 28

xxviii
Page 29

Chapter 1
Scanner Overview
1
1.1 Scanner Features.................................................................................................... 2
1.2 Part Names and Functions..................................................................................... 3
1.3 User Types and Operations ................................................................................... 6
1.4 Scanner Quick User Guide..................................................................................... 9
1.5 Scanner Requirements......................................................................................... 17
Network Scanner fi-6000NS Operator's Guide 1
Page 30
1.1 Scanner Features
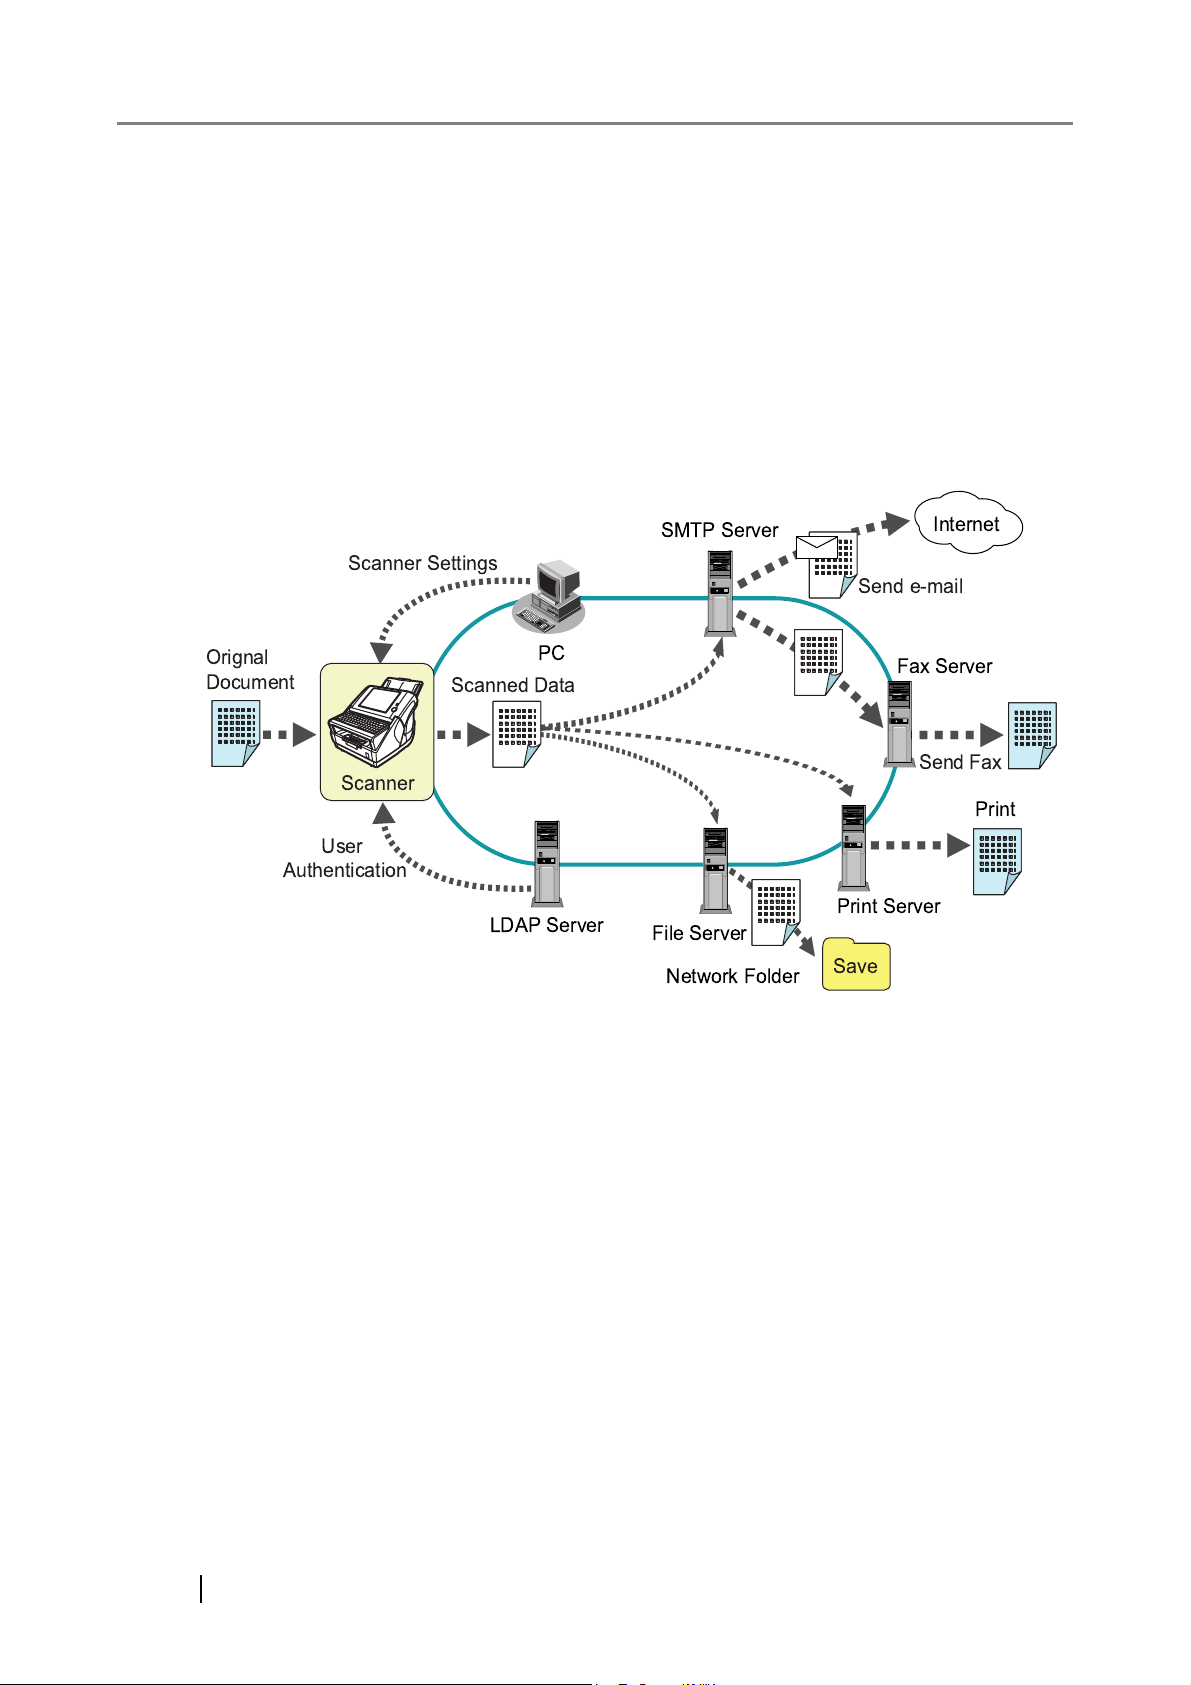
This easy-to-operate network scanner is used to scan documents for further use:
• Scanned document files can be sent as an e-mail attachment.
• Scanned document files can be sent by fax.
• Scanned document files can be printed on a network printer.
• Scanned document files can be saved in a network folder.
The scanner has the following security features:
• Login authentication can restrict user access.
• Scans can be converted to password protected PDF files.
!"
Since the scanner is intended to be shared by multiple users, data privacy is an important factor.
The following security measures are used to protect the data against untoward access:
• Encryption
While it may be temporarily stored in the scanner before being e-mailed, faxed, printed, or
saved, the scanned data is always kept in an encrypted form, in order to prevent exposure of
data via analysis of the disk contents.
• Scanned data deletion
After the scanned data has been e-mailed, faxed, printed or saved, the temporary data is
deleted. Even if an error interrupts this process, leaving some scanned data in the scanner,
this will automatically be deleted at the next start up.
• Key regeneration
When the user data store is cleared from the scanner, the old cipher key is deleted and a
new cipher key is generated. This totally eliminates the possibility of access to any user
data remaining in the freed disk space.
2
Page 31

1.2 Part Names and Functions
1.2.1 External Parts
1.2 Part Names and Functions
1
• Front view
6. ADF paper chute
7. Side guides
8. Top cover
Scanner Overview
1. Startup button
2. Scan button
3. LCD touch panel
4. Keyboard
5. Output tray
• Rear view
9. ADF release
10. Security cable slot
11. AC adaptor connector 12. LAN connector
Network Scanner fi-6000NS Operator's Guide 3
Page 32

No. Part name Function
1
Startup button Turns on scanner or brings up the "Login" screen from
standby mode. For details, refer to
Button" (page 22).
2
Scan button Starts the scan process.
For details, refer to "2.1.2 Using the Scan Button" (page 23).
3
LCD touch panel Accepts user input and displays the scanner control screens.
The LCD touch panel buttons are used to setup scans. For
details, refer to
4
Keyboard Used to enter text in the control screen input fields.
"2.2 Using the LCD Touch Panel" (page 24).
May also be used instead of the touch panel to operate the
control screens. For details, refer to
(page 25).
5
Output tray Scanned documents are ejected from the ADF onto this tray.
Small documents may be retrieved by flipping up the keyboard after scanning has completed.
6
ADF paper chute Holds the documents waiting to be scanned (scan side down).
"2.1.1 Using the Startup
"2.3 Using the Keyboard"
7
Side guides Adjust to the width of the paper, to prevent skewing of the
scanned pages.
8
Top cover Frames the LCD touch panel, and covers the upper scanner/
ADF mechanism. Must be opened to clean inside the scanner,
or when replacing consumable parts.
9
ADF release button Push to unlock the top cover.
10
Security cable slot Slot for commercially available security cable to prevent
against theft.
The following security cable is recommended.
Type: Right angle
Cylindrical part: diameter 25mm (max), length 50mm (max)
(includes bent part if a straight cable is used)
11
AC adaptor connector Connects the scanner to the AC adaptor.
12
LAN connector Connects the scanner to the network.
4
Page 33

1.2.2 Internal Parts
1.2 Part Names and Functions
Separate
shaft and roller
1
5. ADF
1. Pad assembly
Scanner Overview
2. Pick roller
3. Sheet guide
4. Glass scanner windows
No. Part name Function
1
Pad assembly Help to guide documents from the ADF paper chute to the
2
Pick roller
3
Sheet guide
4
Glass scanner windows
5
ADF (Automatic Document Feeder)
glass scanner windows.
Place where the documents are scanned.
Drives the documents from the ADF paper chute, past the
glass scanner windows, to the output tray.
Network Scanner fi-6000NS Operator's Guide 5
Page 34

1.3 User Types and Operations
The scanner functions available after login vary in the following ways for different types of user:
• Administrator
Can setup and manage the scanner. The administrator can operate via the scanner's touch
panel or via the
• Regular User
Can scan documents and then send, print, or save the resulting data.
network by using the network scanner admin tool.
Top Menu Tab
/Side Menu Tab
System Settings
Screen Calibra-
Calibrate the touch panel
tion
Scanner Name Set the scanner name
Date/Time Set the date/time
Region/Time-
Set the region/timezone
zone
Standby Mode Set the standby mode
Admin Pass-
Change the admin password
word
Multifeed Settings
Scanner Adjustment
Set the multifeed detection
method
Set the offset and magnification settings
Used to ...
Admin
Touch Net
A — —
A A —
A A —
A A —
A A —
A A —
A A —
A A —
Regular
User
See ...
page 45
page 48
page 55
page 53
page 57
page 61
page 62
page 66
6
Page 35

1.3 User Types and Operations
Top Menu Tab
/Side Menu Tab
Used to ...
Network Settings
IP Address Set the IP address
DNS Server Set the DNS server
WINS Server Set the WINS server
NTP Server Set the NTP server
LDAP Server Set the LDAP server
SMTP Server Set the e-mail server (SMTP
server)
Fax Server Set the fax server
Network Printer Set the network priners
Network Folder Set the network folders (file
servers)
Alert Notification
Set the destination for alert
notifications
Admin
Touch Net
A A —
A A —
A A —
A A —
A A —
A A —
A A —
A A —
A A —
A A —
Regular
User
See ...
page 69
page 72
page 73
page 74
page 76
page 83
page 85
page 87
page 107
page 119
1
Scanner Overview
Ping Check the network connection
with a Ping test
Network Status Check the network operating
status
Device Status
System Status View the system status
Usage Status View the usage status
Operation Logs
User Log Manage user logs
System Log Manage the system log
Maintenance
User Data Store Maintain the user data store
System Set-
Download the system settings
tings File
System Update Update the scanner's system
software
A A —
A A —
A A —
A A —
A A —
A A —
— A —
— A —
— A —
page 121
page 124
page 126
page 127
page 131
page 137
page 142
page 152
page 161
Technical Support
Set the information output
level
Obtain technical support
A A —
— A —
Network Scanner fi-6000NS Operator's Guide 7
page 164
page 165
Page 36

Top Menu Tab
/Side Menu Tab
Used to ...
Admin
Touch Net
Regular
User
See ...
e-Mail Send the scanned data by e-
mail
Fax Send the scanned data by fax
Save Save the scanned data to a
network folder
Scan Settings Set the scan options
Scan Viewer Enable/disable the scan
viewer
Maintenance
Edit e-Mail
Addresses
Edit Fax Numbers
Edit contacts in the e-mail
address book
Edit contacts in the fax number list
Roller Cleaning Clean the ADF
ScanTest Perform a scan test
Consumable Alert Indicate when parts need
replacing
— — A
— — A
— — A
— — A
— — A
— — A
— — A
— — A
— — A
— — A
page 180
page 193
page 217
page 222
page 252
page 189
page 199
page 266
page 261
page 273
User Log Check user operations
A: available —: not available
— — A
page 259
8
Page 37

1.4 Scanner Quick User Guide
These sections describe the scanner features such as e-mail, fax, print, and save data, for regular
user login.
1.4 Scanner Quick User Guide
1
1.4.1 Sending Scanned Data as an e-Mail Attachment
HINT
Loading Docu-
Logging in: Regu-
lar User Mode
The administrator must setup the "Send e-Mail" function for the user to be able
to send scanned data as an e-mail attachment.
For details about the required settings, refer to "3.1 Required Scanner Function
Settings" (page 28).
For details, refer to "4.1 Loading Documents"
ments
(page 170).
For details, refer to "4.3 Logging in: Regular
User Mode" (page 177).
Scanner Overview
On the "Main
Menu" screen,
press
For details, refer to "4.4 Sending the Scanned
Data by e-Mail" (page 180).
Network Scanner fi-6000NS Operator's Guide 9
Page 38

Setting the Scan Options
Adjust the scan settings as necessary.
For details, refer to "4.8 Setting the Scan
Options" (page 222).
Enabling/Disabling the Scan
Viewer
On the "Send
e-Mail" screen, enter
the mail destination
On the "Send
e-Mail" screen, press
Edit the scanned data as necessary.
For details, refer to "4.9 Enabling/Disabling the
Scan Viewer" (page 252).
For details, refer to "4.4 Sending the Scanned
Data by e-Mail" (page 180).
For details, refer to "4.4 Sending the Scanned
Data by e-Mail" (page 180).
10
On the "Scan Viewer"
screen, check the
scanned data and
press
Document is
Scanned and
e-Mailed
For details, refer to "4.10 Editing the Scanned
Data in the Scan Viewer" (page 255).
To check if the e-mail has been sent successfully, refer to "4.11 Checking the User Log"
(page 259).
Page 39

1.4.2 Sending Scanned Data by Fax
1.4 Scanner Quick User Guide
HINT
The administrator must setup the "Send Fax" function for the user to be able to
send scanned data by fax.
For details about the required settings, refer to "3.1 Required Scanner Function
Settings" (page 28).
Loading Docu-
ments
Logging in: Regu-
lar User Mode
1
Scanner Overview
For details, refer to "4.1 Loading Documents"
(page 170).
For details, refer to "4.3 Logging in: Regular
User Mode" (page 177).
On the "Main
Menu" screen,
press
Setting the Scan Options
For details, refer to "4.5 Sending the Scanned
Data by Fax" (page 193).
Adjust the scan settings as necessary.
For details, refer to "4.8 Setting the Scan
Options" (page 222).
Network Scanner fi-6000NS Operator's Guide 11
Page 40

Enabling/Disabling the Scan
Viewer
Edit the scanned data as necessary.
For details, refer to "4.9 Enabling/Disabling the
Scan Viewer" (page 252).
On the "Send Fax"
screen, enter the
fax destination
On the "Send Fax"
screen, press
Document is
Scanned and
Faxed
For details, refer to "4.5 Sending the Scanned
Data by Fax" (page 193).
For details, refer to "4.5 Sending the Scanned
Data by Fax" (page 193).
To check if the fax has been sent successfully,
refer to "4.11 Checking the User Log" (page
259).
12
Page 41

1.4 Scanner Quick User Guide
1.4.3 Printing Scanned Data on a Network Printer
HINT
The administrator must setup the "Print" function for the user to be able to send
data to a network printer.
For details about the required settings, refer to "3.1 Required Scanner Function
Settings" (page 28).
Loading Docu-
ments
Logging in: Regu-
lar User Mode
For details, refer to "4.1 Loading Documents"
(page 170).
For details, refer to "4.3 Logging in: Regular
User Mode" (page 177).
1
Scanner Overview
On the "Main
Menu" screen,
press
Setting the Scan Options
Setting the Print Properties
For details, refer to "4.6 Printing the Scanned
Data" (page 203).
Adjust the scan settings as necessary.
For details, refer to "4.8 Setting the Scan
Options" (page 222).
Adjust the print settings as necessary.
For details, refer to"4.6.1 Scaling" (page 208)
to "4.6.3 Simplex/Duplex" (page 216).
Network Scanner fi-6000NS Operator's Guide 13
Page 42

Enabling/Disabling the Scan
Viewer
Edit the scanned data as necessary.
For details, refer to "4.9 Enabling/Disabling
the Scan Viewer" (page 252).
On the "Print"
screen, select a
printer
On the "Print"
screen, press
On the "Scan
Viewer" screen,
For details, refer to "4.6 Printing the Scanned
Data" (page 203).
For details, refer to "4.6 Printing the Scanned
Data" (page 203).
For details, refer to "4.10 Editing the Scanned
Data in the Scan Viewer" (page 255).
check the scanned
data and
press
Document is
Scanned and
Printed
To check if the document has been printed
successfully, refer to "4.11 Checking the User
Log" (page 259).
14
Page 43

1.4.4 Saving Scanned Data in a Network Folder
1.4 Scanner Quick User Guide
HINT
The administrator must setup the "Save" function for the user to be able to save
data in a network folder.
For details about the required settings, refer to "3.1 Required Scanner Function
Settings" (page 28).
Loading Docu-
ments
Logging in: Regu-
lar User Mode
1
Scanner Overview
For details, refer to "4.1 Loading Documents"
(page 170).
For details, refer to "4.3 Logging in: Regular
User Mode" (page 177).
On the "Main
Menu" screen,
press
Setting the Scan Options
For details, refer to "4.7 Saving the Scanned
Data to a Network Folder" (page 217).
Adjust the scan settings as necessary.
For details, refer to "4.8 Setting the Scan
Options" (page 222).
Network Scanner fi-6000NS Operator's Guide 15
Page 44

Enabling/Disabling the Scan
Viewer
Edit the scanned data as necessary.
For details, refer to "4.9 Enabling/Disabling
the Scan Viewer" (page 252).
On the "Save As"
screen, select a
folder
On the "Save as"
screen, press
On the "Scan
Viewer" screen,
For details, refer to "4.7 Saving the Scanned
Data to a Network Folder" (page 217).
For details, refer to "4.7 Saving the Scanned
Data to a Network Folder" (page 217).
For details, refer to "4.10 Editing the Scanned
Data in the Scan Viewer" (page 255).
16
check the scanned
data and
press
Document is
Scanned and
Saved
To check if the document has been saved successfully, refer to "4.11 Checking the User
Log" (page 259).
Page 45

1.5 Scanner Requirements
1.5 Scanner Requirements
1.5.1 Administrator Requirements for Login via the Network Interface
For scanner administration carried out via the network interface, the following requirements apply:
■ Software (English versions)
• Windows® XP SP2 or later
(includes installation of Microsoft® .Net Framework 2.0 (*1)),
or Windows Vista™
• Microsoft® Internet Explorer 6 SP2 or later (*2)
*1: When installing the network scanner admin tool, confirm that .NET Framework 2.0
is installed. If not already installed, a message will appear telling you to install
.NET Framework 2.0 from the Microsoft Web site. When installing .NET Frame
work, at least 280MB of additional free disk space is required.
*2: Confirm that the latest security patch has been applied. If the latest patch has not
been applied, downloading operations (such as manual download) may not be pos
sible. For Windows® XP, "KB933566" must be applied to Microsoft® Internet
Explorer.
1
Scanner Overview
-
-
■ Hardware
• Any client PC which runs the supported software
32 MB of free memory space
64 MB of free disk space
• XGA monitor or better
• LAN cable
Network Scanner fi-6000NS Operator's Guide 17
Page 46

1.5.2 Server Requirement
For servers, the following requirements apply.
Server Operating system Software product
LDAP Server Windows® 2000 Server (*1) Active Directory
Windows Server® 2003 (*2) Active Directory
SMTP Server Windows® 2000 Server (*1) SMTP
Windows Server® 2003 (*2) SMTP
File Server Windows® 2000 Server (*1) Windows Shared Folder
Windows Server® 2003 (*2) Windows Shared Folder
Print Server Windows® 2000 Server (*1) Printer Driver (*3)
Windows Server® 2003 (*2) Printer Driver (*3)
WINS Server Windows® 2000 Server (*1) WINS
Windows Server® 2003 (*2) WINS
DHCP Server Windows® 2000 Server (*1) DHCP
Windows Server® 2003 (*2) DHCP
NTP Server Redhat Enterprise Linux ntp
Fax Server Windows® 2000 Server (*1) RightFax
Windows Server® 2003 (*2) RightFax
(*1) Microsoft® Windows® 2000 Server
Microsoft® Windows® 2000 Advanced Server
Microsoft® Windows® 2000 Datacenter Server
(*2) Microsoft® Windows Server® 2003, Standard Edition
Microsoft® Windows Server® 2003, Enterprise Edition
Microsoft® Windows Server® 2003, Datacenter Edition
(*3) Windows® XP compatible printer driver, can be used as a shared network printer.
■ LDAP Server
LDAP (Lightweight Directory Access Protocol) is a protocol for accessing a directory databases
over a TCP/IP network. It can be used to administrator networked users e-mail addresses and oper
ating environments.
The LDAP server can be used to perform the following:
• User authentication at login
• Finding or entering e-mail addresses in an address book
-
18
Page 47

1.5 Scanner Requirements
■ SMTP Server
SMTP (Simple Mail Transfer Protocol) is a protocol for sending e-mail.
The SMTP server can be used to perform the following:
• Sending the scanned data as an e-mail
• Sending the scanned data by fax
■ File Server
The file server shares the disk on a server with other computers on a network, and enables use of
the disk from an external computer.
It can be used to save the scanned data in a network folder.
■ Print Server
The print server is used to print the scanned data. Printers to be used are set on the print server.
1
Scanner Overview
ATTENTION
HINT
• Windows® XP compatible printer drivers must be registered.
• Printer must be able to spool print jobs (to hard disk or memory). Contact
your printer dealer if uncertain whether your printer has a spool function.
• Printers that allow the status of print errors to be easily checked (via a LCD
control panel, or similar) are recommended.
Use only network printers connected to the print server.
■ WINS Server
The WINS server handles name registration requests from WINS clients, register their names and
IP addresses, and responds to NetBIOS name queries submitted by clients, returning the IP address
of a queried name if it is listed in the server database.
In addition, when a DNS name resolution fails, the query can be transferred to the WINS server.
■ DHCP Server
The DHCP server automatically assigns an IP address for this scanner and other client PCs.
■ NTP Server
The NTP server is used when a client makes a time query through network.
Network Scanner fi-6000NS Operator's Guide 19
Page 48

■ Fax Server
The fax server is used for sending faxes.
This scanner supports the following fax servers:
• Captaris® RightFax Business Server (Version 9.3)
This fax server can be used to send the scanned data by fax.
20
Page 49

Chapter 2
Basic Scanner Operations
2
2.1 Using the Scanner Buttons.................................................................................. 22
2.2 Using the LCD Touch Panel................................................................................. 24
2.3 Using the Keyboard .............................................................................................. 25
Network Scanner fi-6000NS Operator's Guide 21
Page 50

2.1 Using the Scanner Buttons
2.1.1 Using the Startup Button
When the scanner is off or in standby mode, pressing the startup button will start the scanner up
and display the "Login" screen.
Operating
LED Lit
Shutdown
LED Dark
Press Button
Login Screen
Login
Operation Screens
No operation
for set period
Standby
LED Blinking
Press Button(*)
* Other than pressing the startup button, any of the following operations will open the "Login"
screen:
• Loading the document in the ADF paper chute.
• Closing the top cover.
• Pressing a keyboard key.
The idle time before standby mode entered can be changed. For details, refer to "3.5.5 Setting the
Time to Standby Mode" (page 57).
ATTENTION
When the scanner is starting up or in standby mode, be careful to never
hold the startup button down for four seconds, as this will cause the scanner
to shutdown. If this happens, saved scanned data may become unusable.
If the startup button is accidentally held down too long, causing the scanner
to shutdown, temporally detach the AC adaptor to ensure that the power is
completely off.
After turning the power off, wait for at least ten seconds before turning the
power back on again. To shutdown the scanner correctly, press the [Shut
down] button on the "Login" screen.
-
22
Page 51

2.1.2 Using the Scan Button
When the [Scan] button on the touch panel is pressed, it will start the scan.
2.1 Using the Scanner Buttons
2
Basic Scanner Operations
This button has the following names.
• [Scan] button
• [Scan&Send] button
• [Scan&Print] button
• [Scan&Save] button
• [Scan More] button
Network Scanner fi-6000NS Operator's Guide 23
Page 52

2.2 Using the LCD Touch Panel
When using the LCD touch panel, buttons only need to be lightly pressed to select them.
For details how to operate the touch panel, refer to "3.2 Administrator Control Screens" (page 29)
or "4.2 Using Touch Panel Screens: Regular User" (page 173).
ATTENTION
• Do not use a pen or other hard object on the LCD touch panel.
The LCD touch panel may be damaged.
• If the screen is dirty, this may cause the LCD touch panel to malfunction.
Clean the screen if it is visibly dirty.
For details, refer to "5.3 Cleaning the LCD Touch Panel" (page 272).
24
Page 53

2.3 Using the Keyboard
Selecting buttons or entering text can also be done on the keyboard.
The keyboard can be used in the following ways:
2.3.1 Using the Keyboard: Administrator
2.3 Using the Keyboard
Key Used to ...
Tab Switch focus to the next field or button.
Space Select the button in focus.
However, this cannot be used for the [Download], [Get CSV], and [Backup]
buttons.
Enter Set the contents of the current screen.
(Used instead of the [OK] button or [Login] button.)
↑ ↓ Change the value of the numerical input for the field in focus.
Page Up
Page Down
ATTENTION
Scroll up or down the contents on the screen.
(Used instead of the scroll buttons.)
The keyboard cannot be used to select a top or left side menu button.
Select buttons in the top menu by pressing the touch panel or by using the
mouse.
2
Basic Scanner Operations
Network Scanner fi-6000NS Operator's Guide 25
Page 54

2.3.2 Using the Keyboard: Regular Users
Key Used to ...
Tab Switch focus to the next field or button.
Space Select the button in focus.
Enter Set the contents of the current screen.
(Used instead of the [OK] button or [Login] button.)
(On Search screens, may be used instead of the [Find] button.)
Esc Return to the previous screen.
(On Main Menu, may be used instead of the [Logout] button.)
Alt+F4 Shutdown the scanner.
(Used instead of the [Shutdown] button on the "Login" screen.)
↑ ↓ Scroll up or down between items.
Page Up
Page Down
Scroll up or down the page on the screen.
26
Page 55

Chapter 3
Administrator Operations
This chapter provides an explanation of the administrator operations, which are used to setup and
manage the scanner.
Messages may appear while performing operations described in this chapter. For more details
about these messages and actions to take, refer to
"C.1.2 System Log Messages" (page 348).
Symbols used in this chapter:
: Administrator operating via the touch panel.
: Administrator operating via the network interface using the fi Network Scanner
Admin Tool.
3.1 Required Scanner Function Settings.................................................................. 28
3.2 Administrator Control Screens............................................................................ 29
3.3 Administrator Login: via the Scanner's Touch Panel........................................ 31
3
3.4 Administrator Login: via the Network Interface................................................. 34
3.5 Using the System Settings Menus ...................................................................... 45
3.6 Using the Network Settings Menus..................................................................... 69
3.7 Using the Device Status Menus......................................................................... 126
3.8 Using the Operation Logs Menus...................................................................... 131
3.9 Using the Maintenance Menus .......................................................................... 142
Network Scanner fi-6000NS Operator's Guide 27
Page 56

3.1 Required Scanner Function Settings
Which scanner settings are required differs according to the type of scan that is to be used.
Note that [Device Status], [Operation Logs], and [Maintenance] menu settings are not required for
normal use.
Top Menu
Left Side Menu e-Mail Fax Print Save See ...
System Settings
Screen Calibration
Scanner Name
Region/Timezone
Date/Time
Standby Mode
Admin Password
Multifeed Settings
Scanner Adjustment
Network Settings
IP Address
DNS Server
WINS Server
NTP Server
LDAP Server
SMTP Server
— — — —
N N N N
A A A A
A A A A
— — — —
A A A A
— — — —
— — — —
N N N N
A A A A
A A A A
A A A A
A (*1) A (*1) A (*1) A (*1)
N N — —
page 45
page 48
page 53
page 55
page 57
page 61
page 62
page 66
page 69
page 72
page 73
page 74
page 76
page 83
28
Fax Server
Network Printer
Network Folder
Alert Notification
Ping
Network Status
— N — —
— — N —
— — — N
A A A A
— — — —
— — — —
N: Necessary A: Advisable —: Not required
(*1): Only necessary if connecting to an LDAP server
page 85
page 87
page 107
page 119
page 121
page 124
Page 57

3.2 Administrator Control Screens
3.2 Administrator Control Screens
3.2.1 Menu Tabs
On the administrators' screen (touch panel or web), when one of the top menu tabs is selected, the
related function tabs are displayed on
the left side menu.
Top Menu
3
Administrator Operations
Left Side
Menu
Actual icon Shown in manual as... Used to ...
[Left] button, [Right] button Switch between top menu tabs (scrolling
the top menu as necessary).
[Up] button, [Down] button Switch between side menu tabs (scrolling
the left side menu as necessary).
[List] button Display a list of possible selections.
[Logout] button Log the current user out.
Network Scanner fi-6000NS Operator's Guide 29
Page 58

Actual icon Shown in manual as... Used to ...
[OK] button Accept any changes to the current screen
settings.
[Cancel] button Abandon any input to the current screen,
and keep present settings and/or return to
the previous screen.
3.2.2 Input Fields and Entering Characters
Only passwords for the following fields are case sensitive.
Screen Field name
Login Password
Admin Password Current Password
New Password
Confirm New Password
Authentication screen for setting a network folder Password
30
Page 59

3.3 Administrator Login: via the Scanner's Touch Panel
3.3 Administrator Login: via the Scanner's Touch
Panel
ATTENTION
HINT
• If the normal screen display does not appear, wait for a few minutes and
try again. If the problem still occurs, contact your FUJITSU scanner dealer
or an authorized FUJITSU scanner service provider.
• If changes are made to settings, such as IP address settings, when buffer
jobs are already queued, these jobs may not be processed normally. In
such cases, wait for all buffer jobs to be processed before changing any
settings.
• If the [Cancel] button is pressed repeatedly in succession, "The page can-
not be displayed" message may appear on the screen. In this case, wait
for a few minutes and try again.
• The user name and initial password for the administrator are as follows:
User Name: admin
Password: password
• Only one administrator or user can login to the scanner at any one time.
• Timeout time is 20 minutes (fixed). The timeout time is extended by a further 20
minutes for the following:
• when a tab on the top menu or left side menu is pressed
• when the [OK] button is pressed
3
Administrator Operations
1. Press the startup button.
⇒ The "Login" screen appears.
Startup button
Network Scanner fi-6000NS Operator's Guide 31
Page 60

2. Enter a "User Name" and "Password".
Enter "admin" for the user name.
Passwords must be between 7 and 127 characters long.
Alphanumeric characters (case sensitive) and symbols may be entered.
HINT
• The "Caps Lock" indicator is on if the keyboard's Caps Lock is set.
• The "Num Lock" indicator is on if the keyboard's Num Lock is set.
32
Page 61

3.3 Administrator Login: via the Scanner's Touch Panel
3. Press the [Login] button.
⇒ If the user name and password are valid, the "System Settings" screen appears.
3
Administrator Operations
Network Scanner fi-6000NS Operator's Guide 33
Page 62

3.4 Administrator Login: via the Network Interface
The network scanner admin tool can be set up to manage the scanner via a personal computer.
HINT
For details about setting up to manage the scanner via a personal computer, refer to "1.5.1 Administrator Requirements for Login via the Network
Interface" (page 17).
3.4.1 Setting up for Administrator Access via the Network Interface
HINT
Check that the Internet Explorer cache settings.
1. From the Internet Explorer [Tools] menu, select [Internet Options].
⇒ The "Internet Options" dialog box appears.
The following are required for administrator login via the network interface:
• "3.5.2 Setting the Scanner Name" (page 48)
• "3.5.6 Changing the Admin Password" (page 61)
• "3.6.1 Giving the Scanner an IP Address" (page 69)
• "3.6.2 Setting the DNS Server" (page 72)
• "3.6.3 Setting the WINS Server" (page 73)
34
2. On the [General] tab, press the [Settings] button on the "Temporary Internet Files".
⇒ The "Settings" dialog box appears.
3. For "Check for newer versions of stored pages", select "Automatically".
Page 63

3.4 Administrator Login: via the Network Interface
4. In the "Temporary Internet files folder" section, specify "Amount of disk space to use"
as 63MB or above.
5. Press the [OK] button.
ATTENTION
HINT
• Different browser versions may require a different set up procedure.
• Do not use a proxy server setting.
If any updates or service packs are available for Internet Explorer, make
sure they are applied.
3
Administrator Operations
Network Scanner fi-6000NS Operator's Guide 35
Page 64

■ Installing the Network Scanner Admin Tool
To configure the scanner settings via the network interface, the network scanner admin tool must
first be installed on PC.
ATTENTION
If this tool has already been installed, skip to section "3.4.2 Logging In"
(page 41) for details about network scanner admin tool operations.
1. Specify the scanner name as a URL in the web browser's location bar.
For example, when the scanner name is "SCAN001":
http://SCAN001/
An IP address can be specified instead of a scanner name for the URL.
If the IP address is xxx.xxx.xxx.xxx, the specified URL is
http://xxx.xxx.xxx.xxx/.
⇒ The "Login" screen appears.
2. Enter a "User Name" and "Password".
Enter "admin" for the user name.
Passwords must be between 7 and 127 characters long.
Alphanumeric characters (case sensitive) and symbols may be entered.
36
Page 65

3. Press the [Login] button.
⇒ The "Download" screen appears.
4. Press the [Download] button.
3.4 Administrator Login: via the Network Interface
3
Administrator Operations
⇒ The "File Download" dialog box appears.
Network Scanner fi-6000NS Operator's Guide 37
Page 66

5. Press the [Run] button.
⇒ The fi Network Scanner Admin Tool Setup Wizard appears.
HINT
If .NET Framework 2.0 has not been installed, the following message
appears.
Pressing [Yes] accesses the Microsoft homepage. Download and install
the ".NET Framework version 2.0 Redistributable Package".
After installing the package, try again from Step 1.
6. Press the [Next] button.
38
⇒ The "Select Installation Folder" window appears.
Page 67

3.4 Administrator Login: via the Network Interface
7. Specify an installation folder for the network scanner admin tool.
To select a different folder, press the [Browse] button.
To check the free space available for the currently selected folder, press the [Disk Cost] button.
ATTENTION
Installation will fail if the length of any installation path (folder path plus
installation file name) exceeds 259 characters. Select an installation
folder that respects this limit.
3
Administrator Operations
Network Scanner fi-6000NS Operator's Guide 39
Page 68

8. Select the target user(s), and press the [Next] button.
⇒ Follow the prompts of the install wizard windows until a "fi Network Scanner Admin
Tool has been successfully installed" message indicates that the installation has com
pleted. Press the [Close] button.
⇒ When the insatllation is completed, logout of the scanner, and close the Web browser.
-
⇒ The network scanner admin tool should now be usable.
Click the [Start] button, select the [Programs] - [fi-scanner] sub-menu, and then click on
[fi Network Scanner Admin Tool].
the
40
Page 69

3.4 Administrator Login: via the Network Interface
■ UnInstalling the Network Scanner Admin Tool
The network scanner admin tool can be uninstalled from the PC it was installed on, from [Control
Panel] -[Add or Remove Programs].
ATTENTION
3.4.2 Logging In
This section explains how to login using the network scanner admin tool.
When uninstalling, if the network scanner admin tool is in use, the following
dialog box appears.
3
Administrator Operations
If [Ignore] is selected, the uninstall process is completed, but operation of
the currently in-use network scanner admin tool is not guaranteed.
ATTENTION
• If the normal screen display does not appear, wait for a few minutes and
try again. If the problem still occurs, contact your FUJITSU scanner dealer
or an authorized FUJITSU scanner service provider.
• If changes are made to settings, such as IP address settings, when buffer
jobs are already queued, these jobs may not be processed normally. In
such cases, wait for all buffer jobs to be processed before changing any
settings.
• If the [Cancel] button is pressed repeatedly in succession, "The page can-
not be displayed" message may appear on the screen. In this case, wait
for a few minutes and try again.
Network Scanner fi-6000NS Operator's Guide 41
Page 70

HINT
• The user name and initial password for the administrator are as follows:
User Name: admin
Password: password
• Only one administrator or user can login to the scanner at any one time.
• Timeout time is 20 minutes (fixed). The timeout time is extended by a fur-
ther 20 minutes for the following:
• when a tab on the top menu or left side menu is pressed
• when the [OK] button is pressed
1. From the [Start] menu, point to [Programs]-[fi-scanner], and then click
[fi Network Scanner Admin Tool].
⇒ The network scanner admin tool is started.
2. Specify the "Connect to" (of the scanner).
Enter the IP address, scanner name, or FQDN for the scanner.
42
3. Press the [Connect] button.
⇒ The "Login" screen appears.
Page 71

3.4 Administrator Login: via the Network Interface
4. Enter a "User Name" and "Password".
Enter "admin" for the user name.
Passwords must be between 7 and 127 characters long.
Alphanumeric characters (case sensitive) and symbols may be entered.
3
Administrator Operations
Network Scanner fi-6000NS Operator's Guide 43
Page 72

5. Press the [Login] button.
⇒ If the user name and password are valid, the "System Settings" screen appears.
44
Page 73

3.5 Using the System Settings Menus
3.5 Using the System Settings Menus
3.5.1 Calibrating the Touch Panel
This should be done when the touch panel responses seem out of alignment with the positions of
objects on the LCD screen.
1. Select the [System Settings] tab on the top menu.
2. Select the [Screen Calibration] tab on the left side menu.
⇒ The "Screen Calibration" screen appears.
3. Press the [Calibrate Screen] button.
3
Administrator Operations
⇒ A blank calibration screen appears, with a red "+" (adjustment mark) in the top-left cor-
ner.
Network Scanner fi-6000NS Operator's Guide 45
Page 74

4. Touch the "+" with your fingertip.
After being touched, the "+" will move to the next calibration position. Each time it stops, touch it again.
HINT
The keyboard may also be used on the calibration screen:
• Press the [Home] key to jump straight to the post-calibration test
screen.
• Use the arrow keys to move the "+" to a different calibration point.
This allows a bad touch to be redone.
• Press the [Esc] key to stop the calibration process and return to the
"Screen Calibration" screen.
• Press the [Enter] key to close the error dialog. (Not normally needed.)
Repeat until the test screen appears, with the following "Calibration" dialog box:
46
Page 75

5. Trace a line on the screen with your fingertip.
⇒ A corresponding line will appear on-screen.
If the line does not appear correctly, press the [Calib screen] button to return to Step 4.
If the screen becomes cluttered, press the [CLR screen] button to remove all the lines.
3.5 Using the System Settings Menus
HINT
6. When you are satisfied with the touch screen response, press the [Update] button.
Press the [Cursor on/off] button to toggle the mouse cursor between
its "visible" and "hidden" states.
⇒ This saves the current calibration data, completing the calibration process, and returns
you to the "Screen Calibration" screen.
ATTENTION
If the calibration is not performed carefully, or the [Enter] key is
pressed before all the calibration points have been touched, the fol
lowing error message may appear:
Parameter Error. Please input, again.
Press the [Enter] key to dismiss the error dialog, and perform the calibration from Step 4 again, being careful to touch each calibration
point accurately.
-
3
Administrator Operations
Network Scanner fi-6000NS Operator's Guide 47
Page 76

3.5.2 Setting the Scanner Name
A scanner name may be set to provide a network alias for the device.
ATTENTION
Do not use a name already being used in the network.
Name duplication will cause a network connection error. For more details
about how to deal with such errors, refer to
Messages" (page 329).
1. Select the [System Settings] tab on the top menu.
2. Select the [Scanner Name] tab on the left side menu.
⇒ The "Scanner Name" screen appears.
"C.1.1 Administrator Screen
48
Page 77

3.5 Using the System Settings Menus
3. Enter a Scanner Name.
Scanner names may be up to 15 characters long.
Alphanumeric characters (case sensitive) and hyphens may be entered.
Initial character may not be a hyphen.
ATTENTION
Do not use a name that is already being used in the network.
3
Administrator Operations
4. Press the [OK] button.
⇒ The restart confirmation screen appears.
Network Scanner fi-6000NS Operator's Guide 49
Page 78

5. Press the [Now] button.
⇒ The system is restarted.
50
Page 79

3.5 Using the System Settings Menus
HINT
If the [Later] button is pressed on the restart confirmation screen, the current scanner name and the next scanner name (after restart) are displayed
on the Scanner Name screen.The next scanner name can be changed
again by entering a new scanner name in the current scanner name field
and pressing the [OK] button. Alternatively, the scanner can be reverted to
its old name (i.e. no change after restart) by pressing the [OK] button with
out changing the current scanner name.
-
3
Administrator Operations
Use the following procedure to restart the scanner after the [Later] option
has been selected:
1. Press the [Logout] button.
A restart confirmation screen appears.
2. Press the [Restart] button.
The scanner is restarted, and the normal "Login" screen appears.
Network Scanner fi-6000NS Operator's Guide 51
Page 80

HINT
• If the new scanner name is the same as another device name already in
use on the network, communication problems will occur. In this case, try
the following steps:
1. Disconnect the LAN cable and turn the scanner off.
2. Reboot the scanner with the LAN cable disconnected, and enter a
non-duplicate scanner name.
3. Reboot the scanner again.
4. Re-connect the LAN cable to the scanner.
• The connection will be lost if the scanner name is changed via the network
interface. To continue with other settings, wait a short time for the device to
restart, then login to the network interface again.
52
Page 81

3.5.3 Setting the Region/Timezone
1. Select the [System Settings] tab on the top menu.
2. Select the [Region/Timezone] tab on the left side menu.
⇒ The "Region/Timezone" screen appears.
3.5 Using the System Settings Menus
3
Administrator Operations
3. Press the [List] button for the "Timezone" input field.
The default timezone is "(GMT+09:00) Osaka, Sapporo, Tokyo".
⇒ A list of timezones appears.
4. Select a timezone.
Network Scanner fi-6000NS Operator's Guide 53
Page 82

5. Select whether "Daylight Savings Time" should be on or off.
This option is not shown for timezones where daylight savings time is not used.
6. Press the [OK] button.
⇒ The Region/Timezone is set.
54
Page 83

3.5.4 Setting the Date/Time
1. Select the [System Settings] tab on the top menu.
2. Select the [Date/Time] tab on the left side menu.
⇒ The "Date/Time" screen appears, with a system date/time near to the current date/time
shown.
3.5 Using the System Settings Menus
3
Administrator Operations
3. Press the Date Format [List] button.
⇒ A date format drop down list appears.
Network Scanner fi-6000NS Operator's Guide 55
Page 84

4. Select a date format.
This date format is applied to the date/time when it is used to name scan data files and the
date shown on screens.
5. Enter the current date and time in the "Date/Time" input field.
The date and time shown are those current for when the "Date/Time" tab on the left side
menu
was selected.
The date/time range that may be entered is from "January 1st 2001, 00:00:00" to "December
31st 2037, 23:59:59".
When entering a one digit number for date and time, such as for January, prepend "0" and
enter "01" in the input field.
HINT
Pressing the [Get Time] button refreshes the current value of the internal
system date/time.
6. Press the [OK] button.
⇒ The date and time are set.
HINT
An adjustment that advances the system time by 20 minutes or more
results in a session timeout and causes the scanner to logout.
56
Page 85

3.5.5 Setting the Time to Standby Mode
The scanner can be set to automatically log out and then enter a standby state after specified periods of non-use.
For any screen after regular user login, if no operations have been performed for the specified
"Logout after" period of time, the scanner automatically logs the user out.
3.5 Using the System Settings Menus
HINT
If no operations are performed for the specified "Standby after" period of time, the scanner enters
standby mode. The touch panel is switched off when the scanner enters standby mode.
When the startup button is pressed, the "Login" screen will appear.
1. Select the [System Settings] tab on the top menu.
2. Press the [Down] button on the left side menu.
⇒ Scroll the left side menu down until the [Standby Mode] tab appears.
The scanner will not logout while the following operations are ongoing:
• Scanning documents
• e-Mailing a scan
• Faxing a scan
• Printing a scan
• Saving a scan
3
Administrator Operations
Network Scanner fi-6000NS Operator's Guide 57
Page 86

3. Select the [Standby Mode] tab on the left side menu.
⇒ The "Standby Mode" screen appears.
4. Press the [List] button for the "Logout after" input field.
⇒ A list of "Logout after" times appears.
58
Page 87

3.5 Using the System Settings Menus
5. Select the desired time before automatic log out.
The default time is "5min".
3
Administrator Operations
6. Press the [List] button for the "Standby after" input field.
⇒ A list of "Standby after" times appears.
Network Scanner fi-6000NS Operator's Guide 59
Page 88

7. Select the desired time before standby mode.
The default time is "15min".
ATTENTION
The "Standby after" time must be longer than the "Logout after" time.
60
8. Press the [OK] button.
⇒ The scanner is set to first standby and then automatically log out after the specified times.
Page 89

3.5.6 Changing the Admin Password
3.5 Using the System Settings Menus
ATTENTION
1. Select the [System Settings] tab on the top menu.
2. Press the [Down] button on the left side menu.
Login is not possible without a password, therefore manage them carefully.
If a password has been lost or forgotten, contact your FUJITSU scanner
dealer or an authorized FUJITSU scanner service provider.
⇒ Scroll the left side menu down until the [Admin Password] tab appears.
3. Select the [Admin Password] tab on the left side menu.
⇒ The "Admin Password" screen appears.
3
Administrator Operations
4. Enter the "Current Password", "New Password", and "Confirm New Password".
A password may be between 7 and 127 characters long. Alphanumeric characters (case sensitive) and symbols may be entered.
HINT
The "Caps Lock" and "Num Lock" indicators are shown when the administrator logs in via the scanner's touch panel.
The "Caps Lock" indicator is on if the keyboard's Caps Lock is set.
The "Num Lock" indicator is on if the keyboard's Num Lock is set.
Network Scanner fi-6000NS Operator's Guide 61
Page 90

5. Press the [OK] button.
⇒ The new admin password is set.
3.5.7 Setting the Multifeed Detection Method
By default, multifeed detection will monitor for paper overlaps in the central column (width:
35mm) of the document being scanned. However, any photos or attachments in this area will also
be detected as a multifeed.
When scanning documents, multifeed detection area may be adjusted to ignore the area (excluding
the photograph or attachments) and prevent mis-detections.
For document requirements for multifeed detection, refer to "A.5 Multifeed Detection Conditions"
(page 320).
1. Select the [System Settings] tab on the top menu.
2. Press the [Down] button on the left side menu.
⇒ Scroll the left side menu down until the [Multifeed Settings] tab appears.
3. Select the [Multifeed Settings] tab on the left side menu.
⇒ The "Multifeed Settings" screen appears.
62
Page 91

3.5 Using the System Settings Menus
4. Set the area for multifeed detection in the "Multifeed Detection" section.
Starting from the top edge of a document sheet, set the area to be checked for multifeeds.
Full Multifeeds will be detected within 35mm (1.4in) of the vertical center-
line of the document.
Middle Multifeeds will be detected within "#1" (upper limit) and "#2" (lower
limit) set. (a)
35mm
#1
Top & Bottom
#2
Up to 510mm
Outside of multifeed
detection area
(a)
Center of paper
Multifeeds will be detected from the top of the page to "#1" (upper
limit), and from #2 (lower limit) to the bottom of the page. (b)
35mm
(b)
Up to 510mm
#1
#2
3
Administrator Operations
(b)
Outside of multifeed
detection area
Center of paper
Network Scanner fi-6000NS Operator's Guide 63
Page 92

ATTENTION
Multifeed may not be detected for the top and bottom 25mm of a document.
64
Page 93

3.5 Using the System Settings Menus
5. In Step 4, if [Middle] or [Top & Bottom] is selected, enter both "#1" (upper limit) and
"#2" (lower limit).
#1: Even numbers from 0 to 508mm can be entered. Odd numbers will be made even by
adding one.
#2: Even numbers from 0 to 510mm can be entered. Odd numbers will be made even by
adding one.
ATTENTION
• Specify a larger value for "#1" than for "#2".
• "#2" can have a maximum value of 510mm. If the paper size setting
is long page mode but the length of the document is longer than
510mm, multifeed cannot be detected by length.
• When [Middle] is selected, if the document is shorter than "#1", multi-
feed will not be detected. When [Top & Bottom] is selected, if the
document is shorter "#2", multifeed will not be detected for the bot
tom part.
• If the values specified for "#1" and "#2" exceed the actual paper size,
multifeeds will not be detected.
-
3
Administrator Operations
6. Press the [OK] button.
⇒ The document area to be monitored for multifeeds is set.
Network Scanner fi-6000NS Operator's Guide 65
Page 94

3.5.8 Setting Scanning Performance
Usually, it is not necessary to make any setting changes.
1. Select the [System Settings] tab on the top menu.
2. Press the [Down] button on the left side menu.
⇒ Scroll the left side menu down until the [Scanner Adjustment] tab appears.
3. Select the [Scanner Adjustment] tab on the left side menu.
⇒ The "Scanner Adjustment" screen appears.
66
Page 95

3.5 Using the System Settings Menus
■ Offset Settings
If the scanned output is found to be displaced relative to the actual documents being scanned, the
scan offsets can be adjusted.
1. On the "Scanner Adjustment" screen, under [Front Side Offsets]/[Reverse Side Offsets], enter values for the "Horizontal Offset" and "Vertical Offset" input fields.
Offset lengths are measured in units of 0.5mm and may be set to between -4 and +4.
3
Administrator Operations
2. Press the [OK] button.
⇒ The offset settings are set.
Network Scanner fi-6000NS Operator's Guide 67
Page 96

■ Length Magnification Setting
If the scanned output is found to be vertically distorted (stretched or squashed) relative to the actual
documents being scanned, the length magnification can be adjusted.
1. On the "Scanner Adjustment" screen, enter the value for the "Length Magnification"
input field.
This changes the length magnification correction value of the vertical scan. Using the factory default setting as a starting point, the length of the scan can be magnified or reduced to
between -3.1% and 3.1%.
2. Press the [OK] button.
⇒ The length magnification setting is set.
68
Page 97

3.6 Using the Network Settings Menus
3.6 Using the Network Settings Menus
3.6.1 Giving the Scanner an IP Address
An IP address must be set in order to connect the scanner to a network.
ATTENTION
1. Select the [Network Settings] tab on the top menu.
2. Select the [IP Address] tab on the left side menu.
⇒ The DHCP or IP address setting screen appears.
Do not use an IP address that already exists in the network. IP address
duplication will cause a network connection error. For more details about
how to deal with such errors, refer to
sages" (page 329).
"C.1.1 Administrator Screen Mes-
3
Administrator Operations
Network Scanner fi-6000NS Operator's Guide 69
Page 98

3. Select whether or not a DHCP is required.
Set the scanner's IP address. This may be done automatically, by pressing the DHCP [On]
button. By default, this is set as [On].
The IP address may also be set manually, by pressing the DHCP [Off] button and entering
the following numerical addresses:
• IP Address
• Subnet Mask
• Default Gateway
4. Press the [OK] button.
⇒ The information entered is set.
70
Page 99

3.6 Using the Network Settings Menus
HINT
• If the IP address is the same as one already in use, network communica-
tion problems will occur. In this case, try the following steps:
1. Disconnect the LAN cable and turn the scanner off.
2. Reboot the scanner with the LAN cable disconnected, and enter a
nonduplicate IP address.
3. Re-connect the LAN cable to the scanner.
• When DHCP is set to "On", the following settings are assigned by the
DHCP:
• IP Address
• Subnet Mask
• Default Gateway
• DNS Server
• WINS Server
Even if DNS or WINS server is set, priority is given to the scanner settings over the DHCP settings.
• The connection will be lost if the scanner's IP address is changed via the
network interface. If connecting via an IP address, to continue with other
settings, login to the network interface again using the new IP address.
3
Administrator Operations
Network Scanner fi-6000NS Operator's Guide 71
Page 100

3.6.2 Setting the DNS Server
A primary DNS and secondary DNS can be set.
1. Select the [Network Settings] tab on the top menu.
2. Select the [DNS Server] tab on the left side menu.
⇒ The "DNS Server" screen appears.
3. Enter the following numerical addresses:
• Primary DNS
• Secondary DNS
If a DNS server setting is not required, enter "0.0.0.0".
4. Press the [OK] button.
⇒ The information entered is set.
72
 Loading...