


TS-550
TS-550 / 5000 Retrot Printer
Installation Instructions
Important: Read instructions carefully before installing.
Note: BEFORE installing a printer into the system, verify the interface board is Rev. 4 or higher. Connecting
a printer to a Rev. 3 or lower interface board may damage either the printer or the system to which it is
connected. The board Rev. level can be found in the middle of the interface board just after the part number.
Warning
Disconnect power before opening control box.
Procedure
1. Remove the screws holding the backplane cover to the front door assembly.
2. Remove the four nuts that secure the printer blank-off plate.
3. Remove the printer blank-off plate (the blank-off plate may stick to the overlay).
4. Carefully cut out the part of the overlay that covers the printer opening using a sharp knife.
Note: The display cable may be temporarily disconnected to cut the opening
5. From the inside of the enclosure, use a sharp pointed knife to cut a small “X” in the overlay at the four printer
enclosure mounting points.
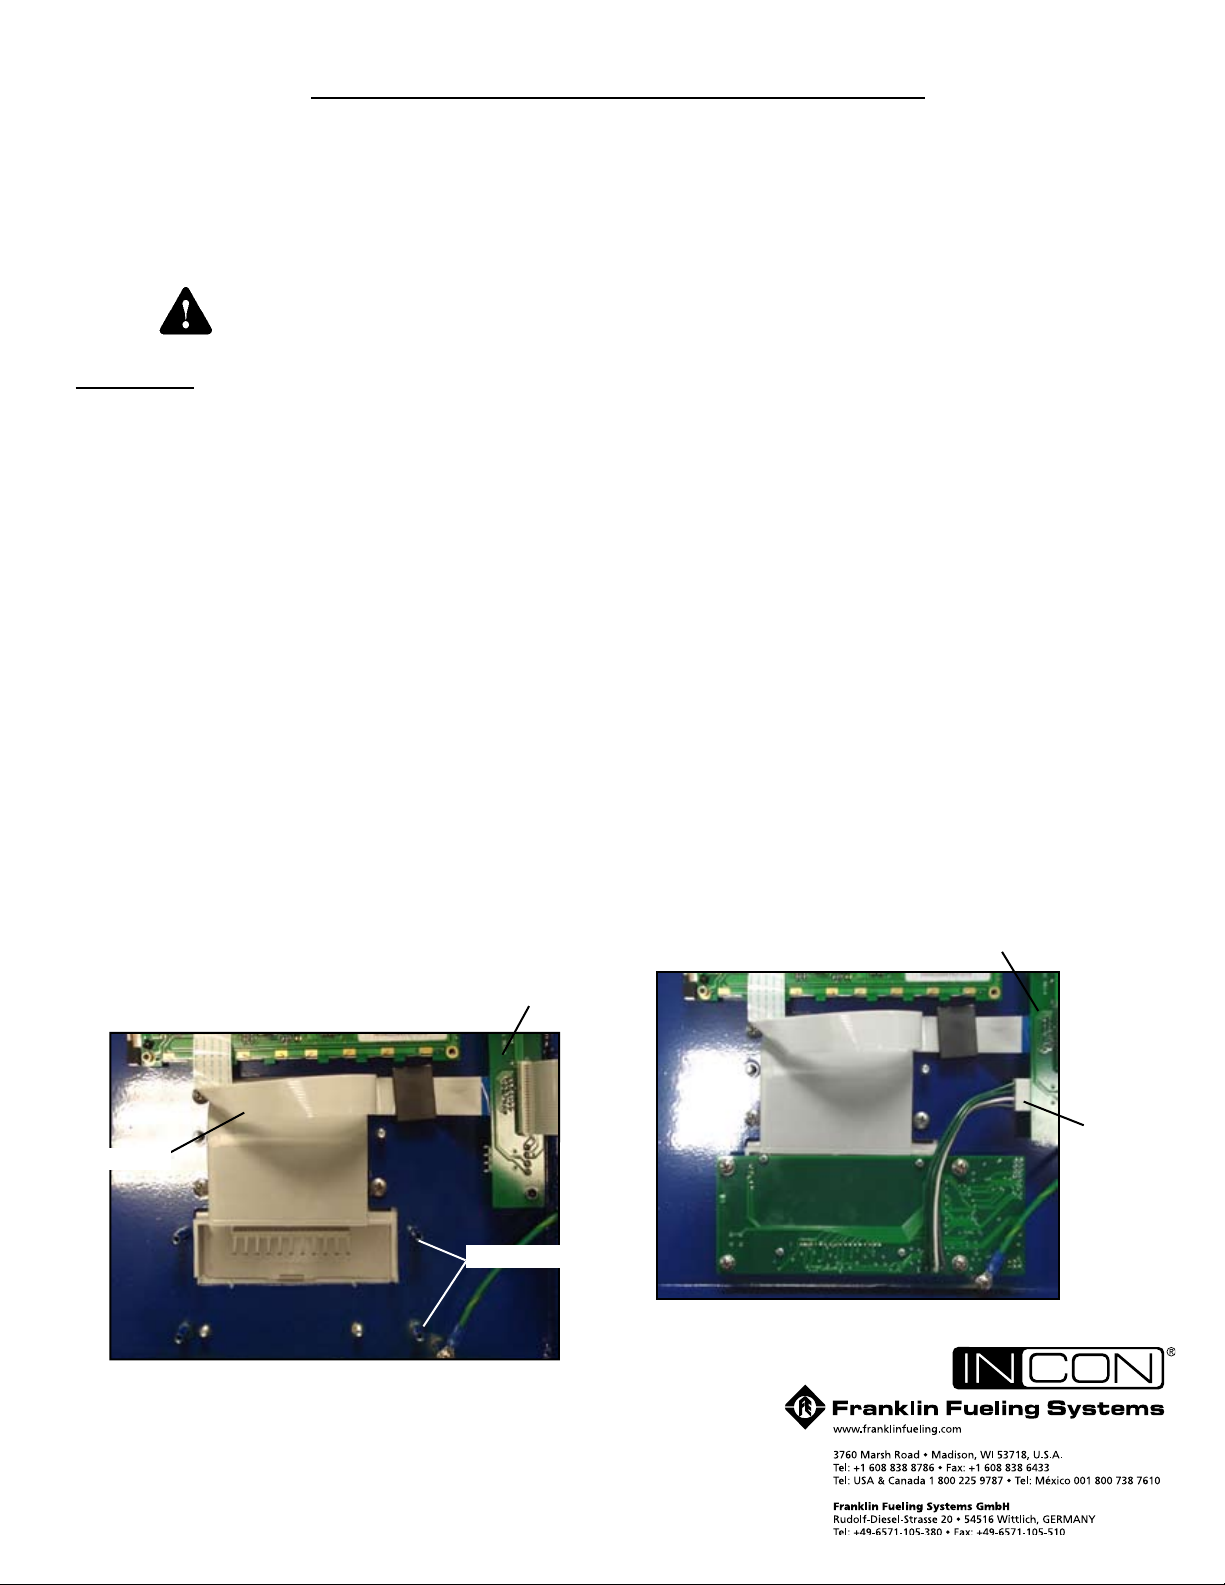
6. Fit the printer housing (white plastic) into the printer opening and attach it by using four 10-24 screws (Figure 1).
7. Mount the printer circuit board on the stand-off posts at the bottom of the cover using four 6-32 X 3/8 screws.
8. Plug the printer cable connector into the lower plug on the interface board (Figure 2).
Note: Ensure the plug is oriented correctly; small tabs on printer harness should engage large tab on
interface board connector to insure cable lock and correct polarity.
Reverse installation will damage printer.
9. Reconnect the display cable if it was disconnected after Step 4.
10. Re-install the front door cover. Make sure that the insulating pad on the cover is lined up with the printer
harness connection on the printer board.
11. Conguretheprinterbyentering“Set-up”ontheLCDpanel.
Displaycable
Figure 1. White Plastic Printer Housing Attached
Interface board
Rev. level location
Cable
connection
Stand-off posts
Figure 2. Printer Circuit Board Attached
©2007 FFS 000-0525 Rev. B
 Loading...