

Page 1
FTB-200 Compact Modular Platform
Release Notes
Introduction
In these release notes, you will find information to help you install and use the
application on your FTB-200 Compact Modular Platform. This document also
provides late-breaking or other information that supplements the user guide or the
online help of the following product:
Handheld Instrument Software Manager, which is used to install all the required
components for the management of FTB-200 Compact Modular Platform.
IMPORTANT
The installation of the new system disk takes several minutes.
Once installed, the components below will be updated with the most recent
version available:
Item Version
FTB-200 Compact Modular Platform 3.4.0
IP Testing Tools 2.0.0
OTDR CE 2.5.0
For more information about FTB-200 Compact Modular Platform, refer to the online
help.
IMPORTANT
BEFORE installing this product pack, you must:
³ Remove the standard OTDR application from your unit (using
HISM).
³ Make sure that the version for your system disk on your unit is
3.4.0.55 or later. Otherwise you cannot access the newest
features for your product.
Copyright © 2009 EXFO Electro-Optical Engineering Inc. All rights reserved. 1/37
Page 2

FTB-200 Compact Modular Platform
System Requirements
The following are the system requirements needed to install the Handheld
Instrument Software Manager (HISM) on your computer.
Windows 2000 Windows XP Windows Vista
Release Notes
Operating
system
Windows 2000
(version 5.00.2195)
Processor Pentium PC
(500 MHz or higher
(800 MHz or higher
recommended)
RAM 128 MB (256 MB
recommended)
Disk space 200 MB required
Monitor Super VGA monitor or better
Other
requirements
Your computer must have the Administrators level of access
ActiveSync (Windows 2000 and Windows XP), Mobile Device Center
(Windows Vista), and .NET Framework 2.0 are installed in English by
default.
³ For ActiveSync, if you want to install another
language, you can download a version from the
Microsoft site For Mobile Device Center, if you want to
install another language, you can download a version
from the Microsoft site
³ For .NET Framework 2.0, if you want to install another
language, you can download the version from the
Microsoft site .NET Framework 2.0 automatically
replaces older versions of .NET Framework. This
installation can take up to 45 minutes.
Windows XP SP2 Windows Vista
(version 6.0.6000.0)
Pen ti um PC
Pent iu m PC
(1 GHz 32-bit (x86)
recommended)
256 MB (512 MB
recommended)
recommended)
512 MB (1 GB
recommended)
Copyright © 2009 EXFO Electro-Optical Engineering Inc. All rights reserved. 2/37
Page 3
Release Notes
FTB-200 Compact Modular Platform
Preparing for Installation
You must install HISM on your computer before connecting the unit to your
computer. If the proper drivers are not already installed when you connect the unit,
Windows will use its own drivers and the communication between the unit and
your computer will be defective.
This document provides information on system requirements and the procedure to
install software.
IMPORTANT
Before connecting the unit to your computer’s USB port, you must
install the HISM, which will install all the components your
computer needs.
Do not connect the unit to your computer before the application
allows you to do so.
Before installing the HISM, you should close all Windows applications. Otherwise,
you might experience a slower and unstable installation.
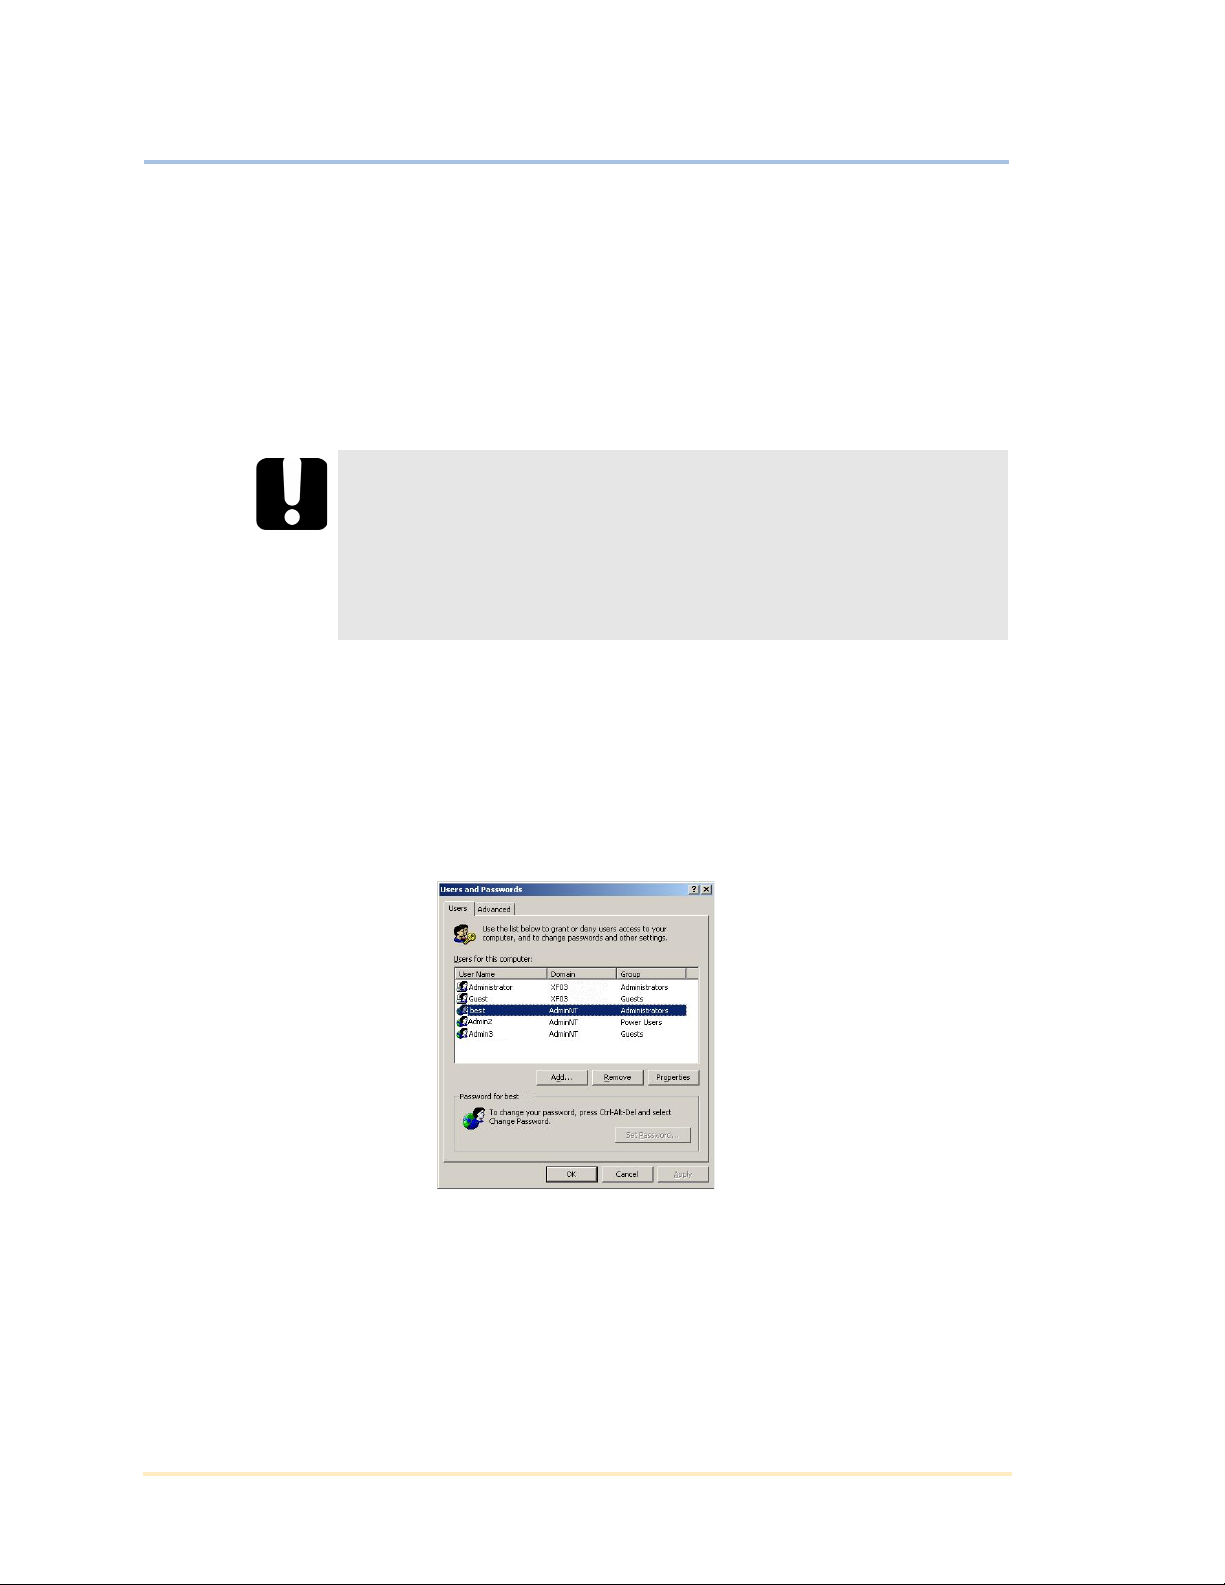
You must have administrator rights to perform the installation. Log on using an
administrator account or contact your IT department.
³ Windows 2000: Control Panel > Users and Passwords
³ Windows XP: Control Panel > Users Accounts
Copyright © 2009 EXFO Electro-Optical Engineering Inc. All rights reserved. 3/37
Page 4

Release Notes
FTB-200 Compact Modular Platform
ActiveSync (Windows 2000 and WindowsXP) and Mobile Device Center
(Windows Vista) are installed in English by default. If you want to install another
language, download it and install it on your computer before installing HISM. You
must install version 4.5 or later.
If your computer is equipped with a version earlier than 4.5, you must remove it
manually before installing the ActiveSync 4.5 (or later) version. If your computer is
already equipped with ActiveSync 4.5 (or later), you do not need to install
ActiveSync.
Disable antivirus, firewall, and diagnostic software for the duration of the
installation. You should re-enable the antivirus software and scan your computer
hard drive after installation.
Copyright © 2009 EXFO Electro-Optical Engineering Inc. All rights reserved. 4/37
Page 5
Release Notes
List of components
(verified and/or
installed in the order
they appear on
screen).
Information to
guide you during
installation
FTB-200 Compact Modular Platform
Software Installation
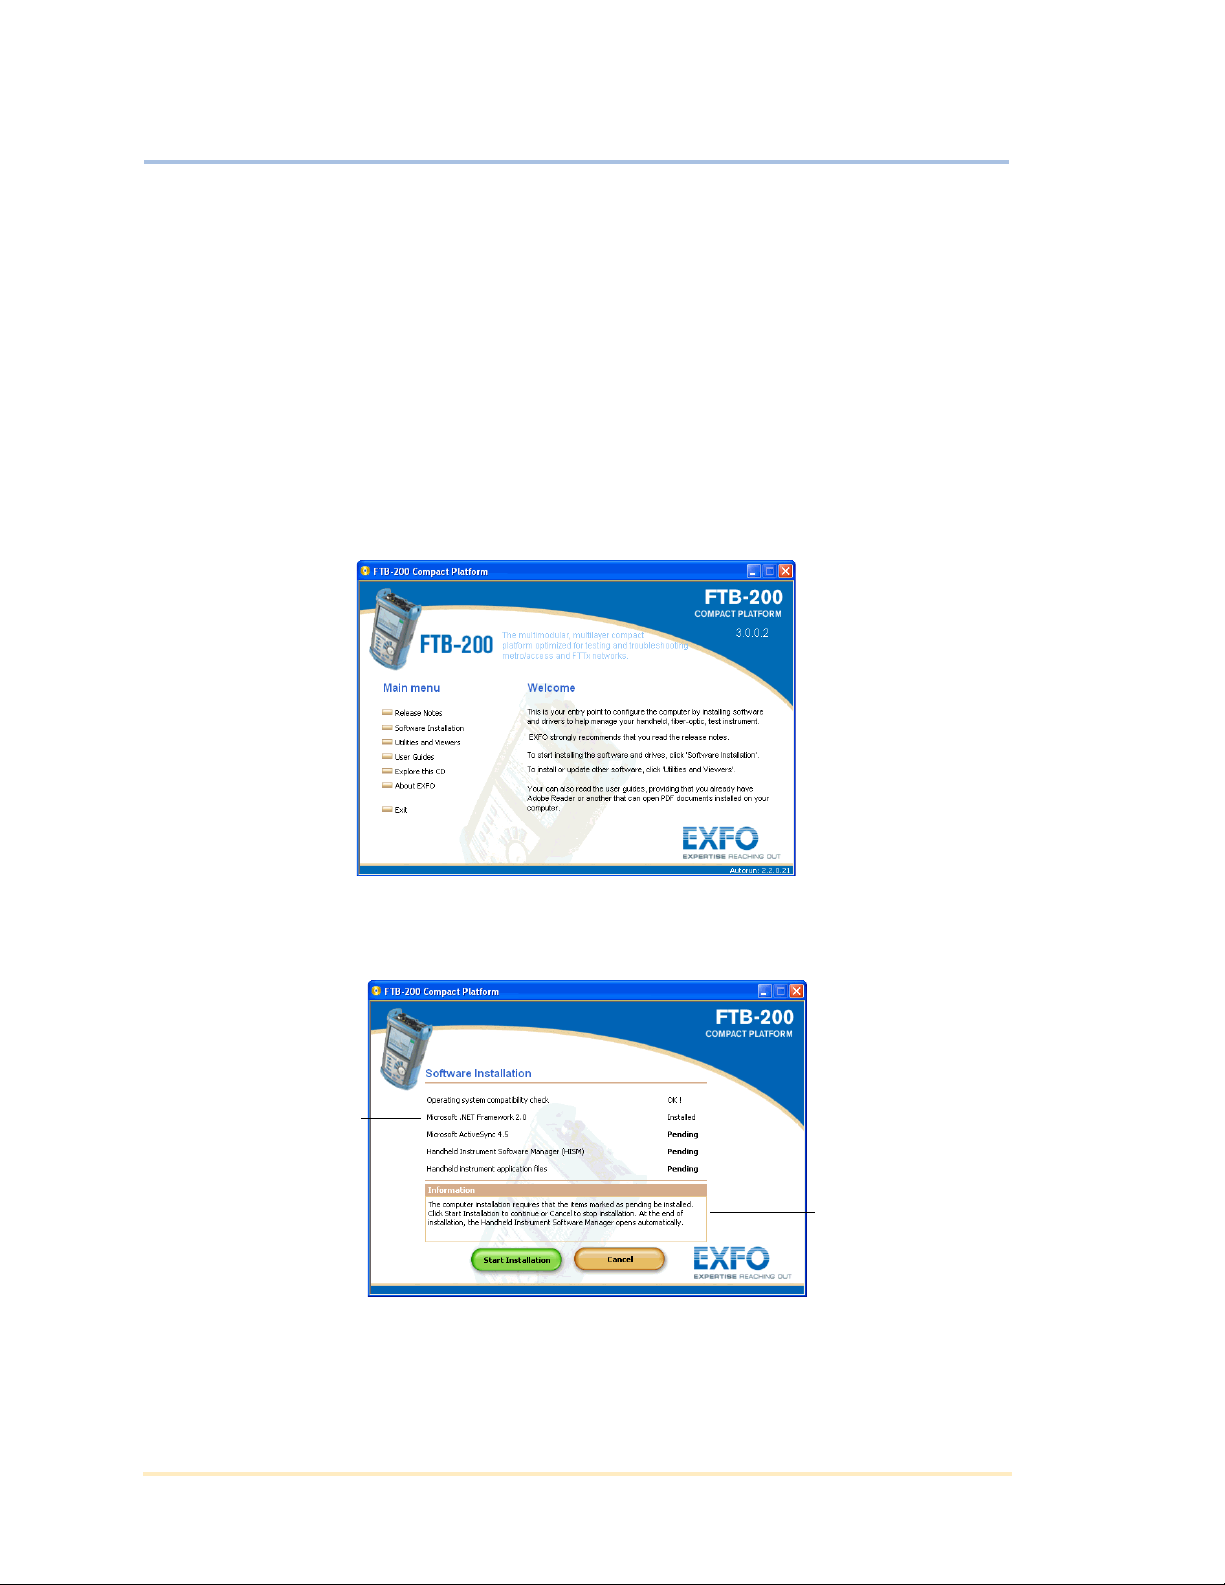
When you insert the installation CD in your computer, the Welcome window
appears automatically.
If it does not, double-click the autorun.exe file located at the root of the installation
CD.
Once you start the installation, the wizard will determine which components must
be installed. The wizard will install the required components in the order indicated
on the screen.
To start the installation:
1. From the Welcome window, click the Software Installation link.
2. From the Software Installation window, click Install HISM.
The wizard determines which components must be installed.
3. From the displayed window, click Start Installation.
Copyright © 2009 EXFO Electro-Optical Engineering Inc. All rights reserved. 5/37
Page 6
Release Notes
FTB-200 Compact Modular Platform
Installing .NET Framework 2.0
The first part of the HISM installation is the installation of .NET Framework 2.0.
If .NET Framework 2.0 is already installed on your computer, the installation setup
will find it and you will not need to go through the .NET Framework 2.0 installation.
Therefore, skip this step and start directly with the installation of the HISM.
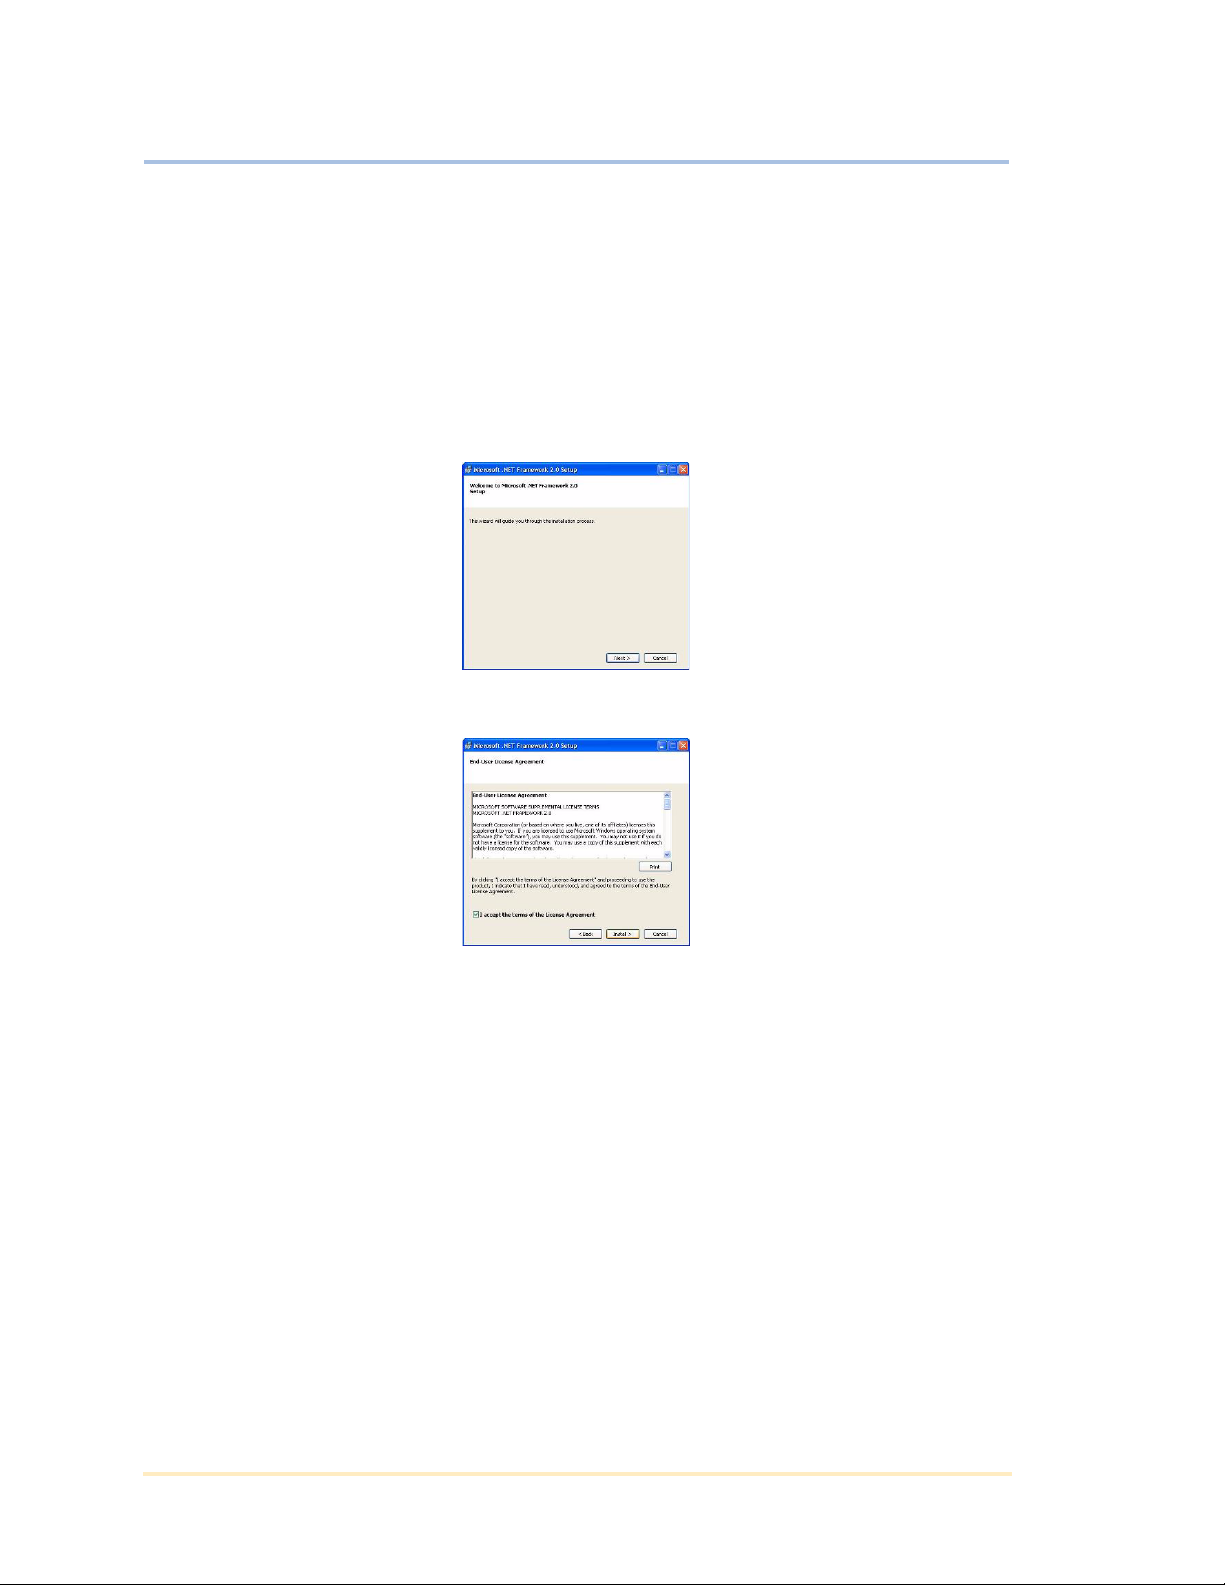
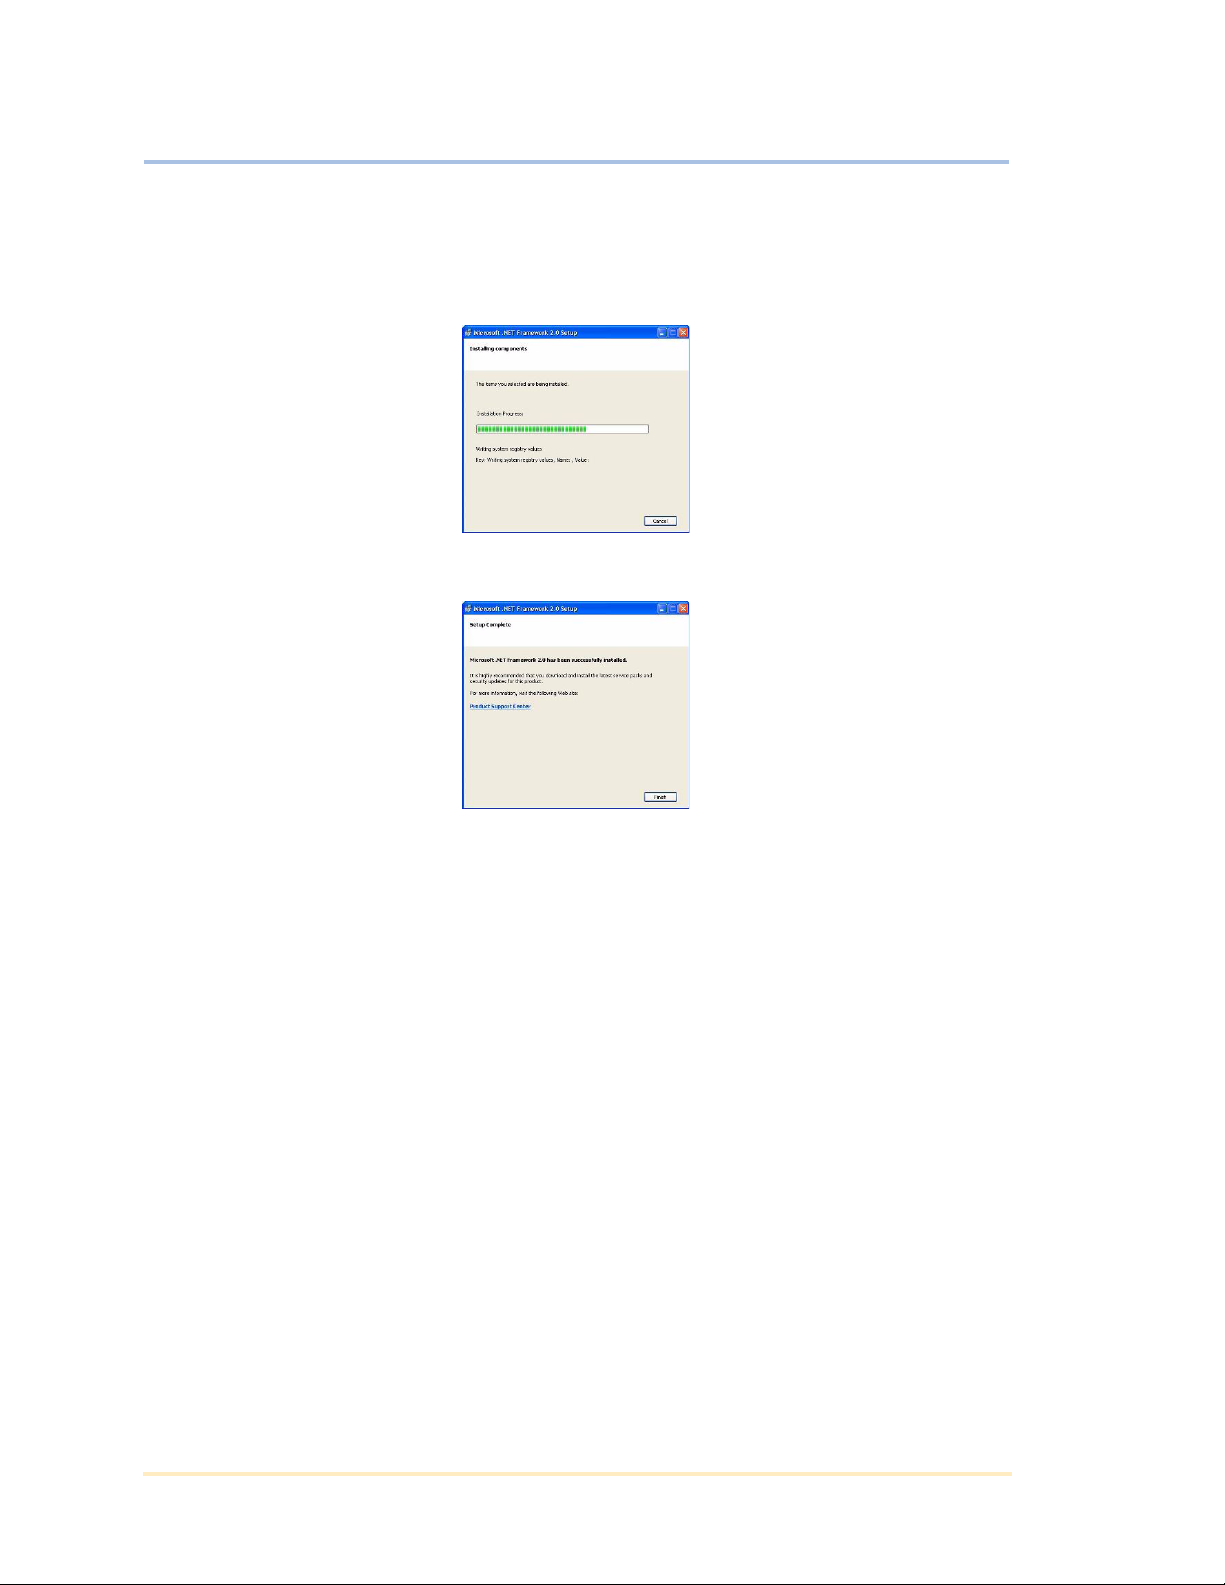
To install .NET Framework 2.0:
1. From the Microsoft .NET Framework 2.0 Setup window, click Next.
2. From the Microsoft .NET Framework 2.0 Setup window, read the agreement.
Copyright © 2009 EXFO Electro-Optical Engineering Inc. All rights reserved. 6/37
Page 7
Release Notes
FTB-200 Compact Modular Platform
3. Select the I accept the terms of the License Agreement check box and click
Install.
The .NET Framework installation starts.
4. When the installation is complete, click Finish.
The installation wizard continues with the installation of Microsoft ActiveSync.
If your computer is already equipped with ActiveSync 4.5, the wizard detects it. You
may proceed with the procedures presented in the Installing Handheld Instrument
Software Manager section.
Copyright © 2009 EXFO Electro-Optical Engineering Inc. All rights reserved. 7/37
Page 8
Release Notes
FTB-200 Compact Modular Platform
Installing Microsoft ActiveSync
The second part of the HISM installation is the installation of ActiveSync.
If your computer is not equipped with ActiveSync 4.5, the installation wizard
detects it and will install it automatically.
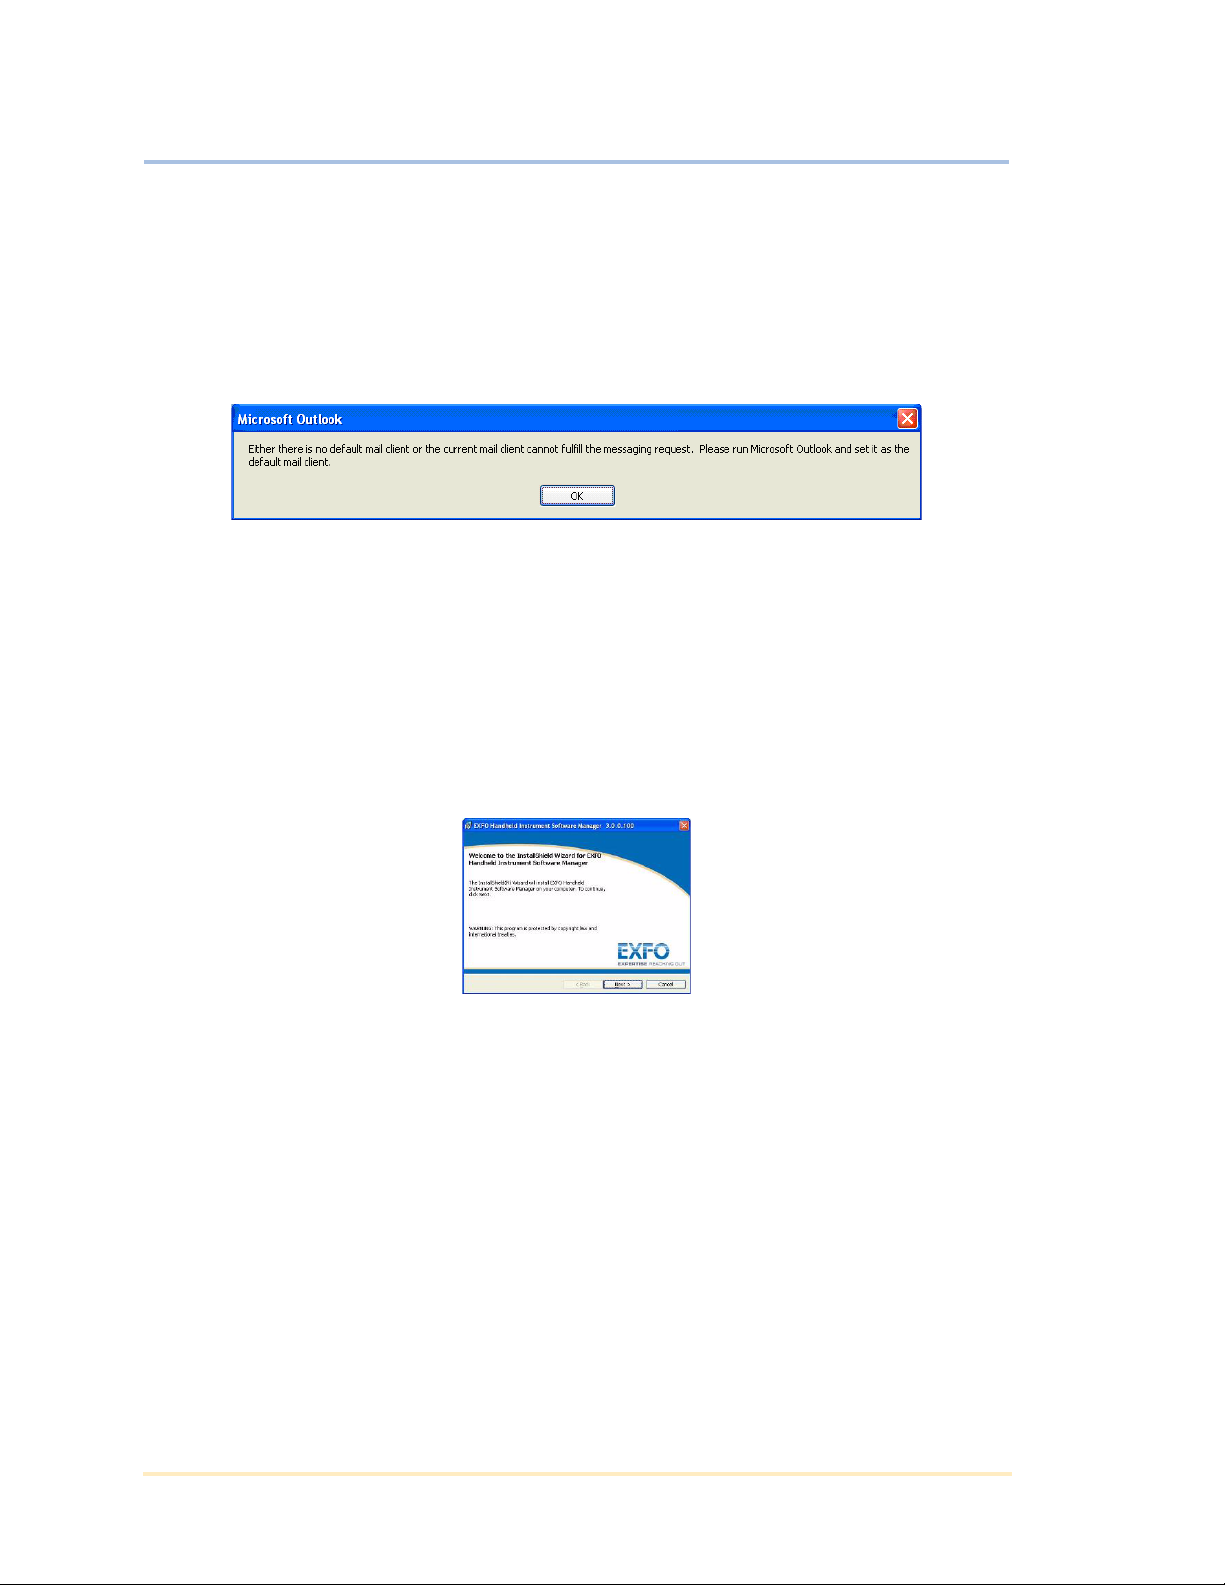
At the end of the installation, you may receive the following message:
Click OK, the system does not need synchronization with an e-mail software.
The installation wizard continues with the installation of HISM itself as presented
hereafter.
Installing Handheld Instrument Software Manager
The third part of the HISM installation is the installation of the manager itself.
To install Handheld Instrument Software Manager:
1. From the Handheld Instrument Software Manager window, click Next.
Copyright © 2009 EXFO Electro-Optical Engineering Inc. All rights reserved. 8/37
Page 9
Release Notes
FTB-200 Compact Modular Platform
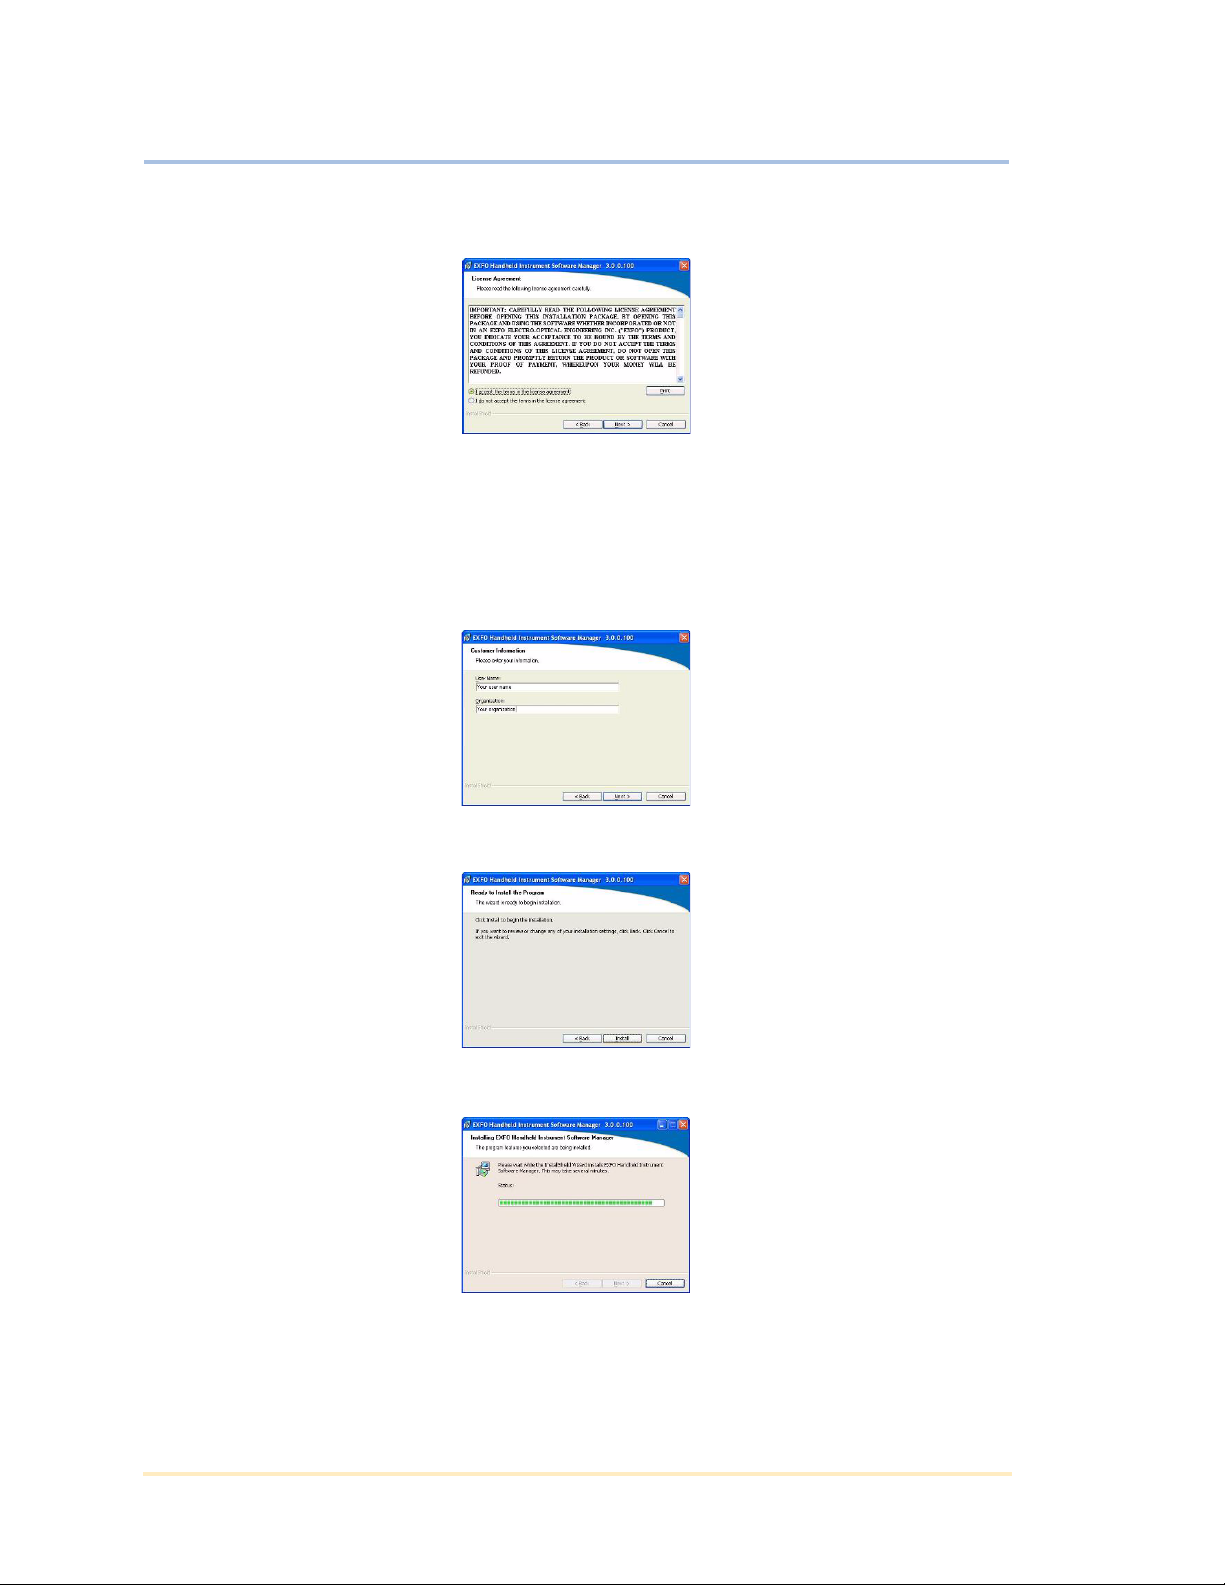
2. From the License Agreement window, read the agreement.
3. Select the I accept the terms of the license agreement check box and click
Next.
4. From the Customer Information window, enter the relevant information, then
click Next.
The default user name is your computer identification.
5. From the Ready to Install the Program window, click Install.
The installation starts.
Copyright © 2009 EXFO Electro-Optical Engineering Inc. All rights reserved. 9/37
Page 10
Release Notes
Type A U S B Type B U S B
FTB-200 Compact Modular Platform
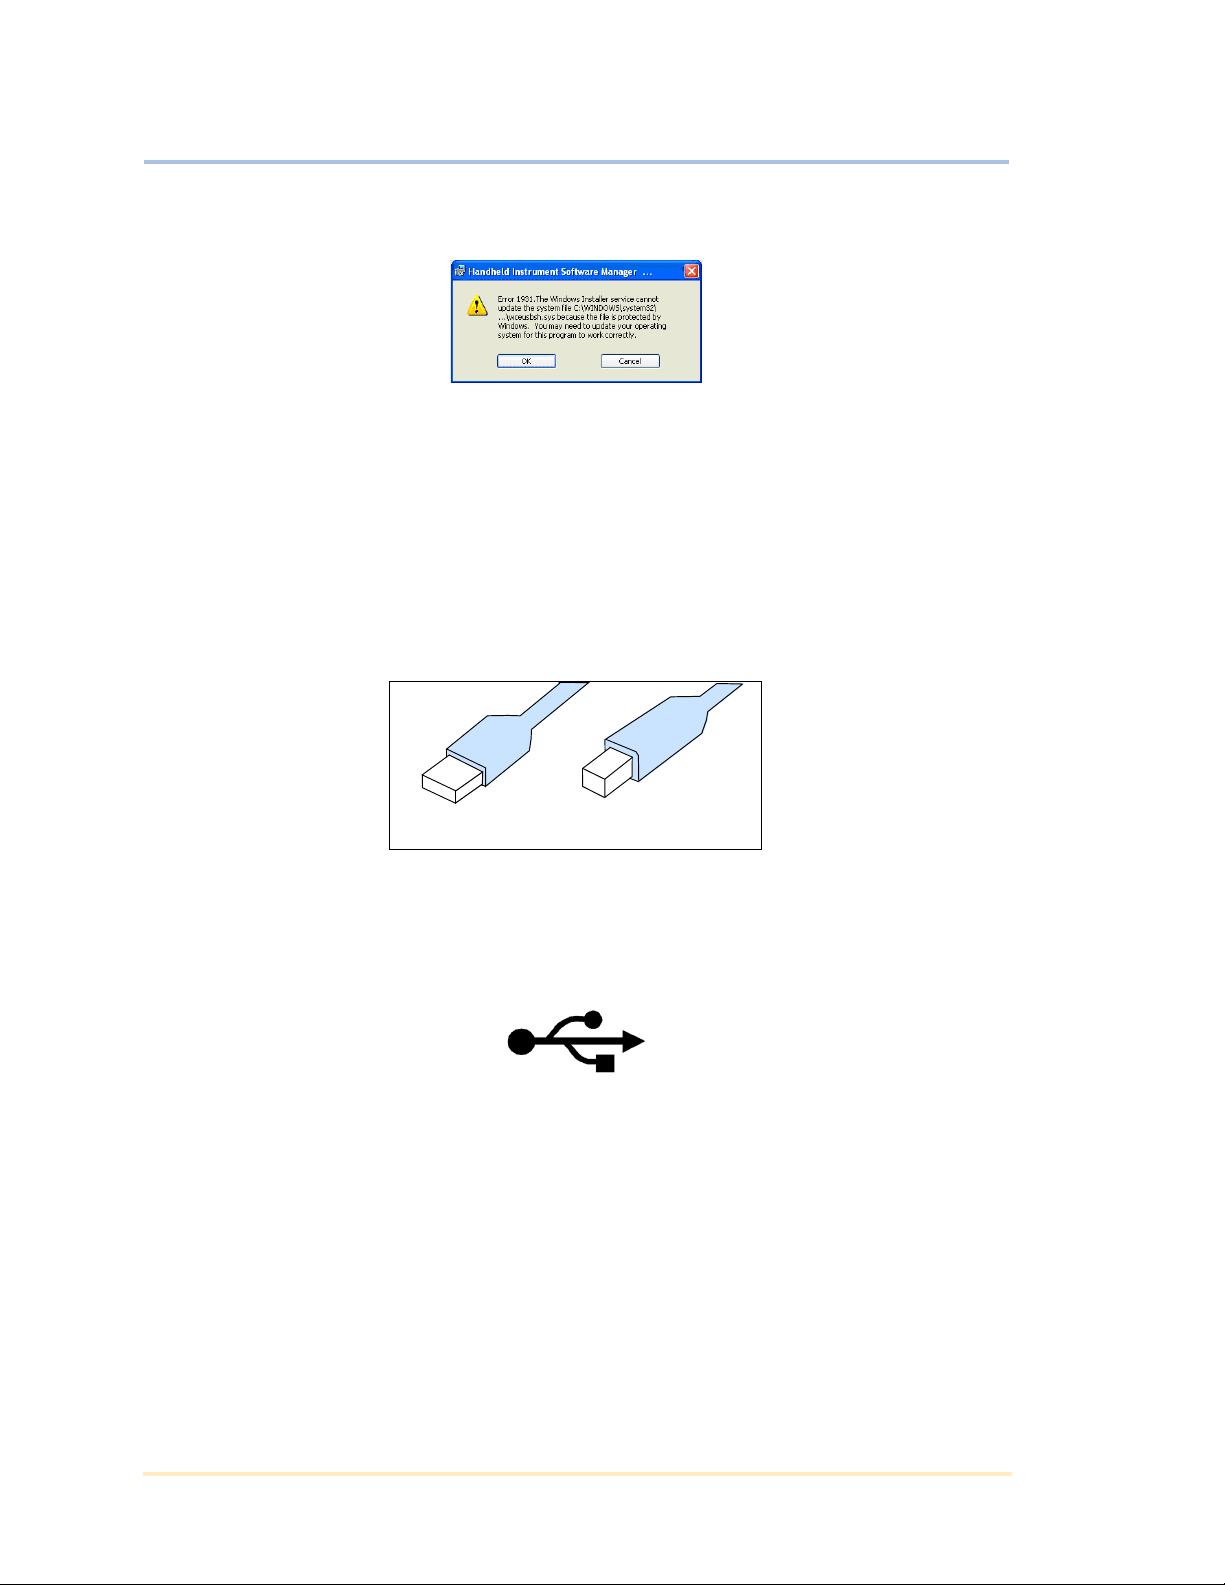
At the end of the installation you may receive the following message:
Click OK, the system update will be done later.
You will know that the installation is complete when the HISM application is
displayed.
You may proceed with the procedures presented in the Connecting your Unit to
your Computer which follows.
Connecting your Unit to your Computer
The unit is connected to the computer with two USB-type connectors.
The type A connector connects to your computer USB port and the type B connects
to your unit USB port.
The USB connector on your computer and on your unit is identified with a
pictogram.
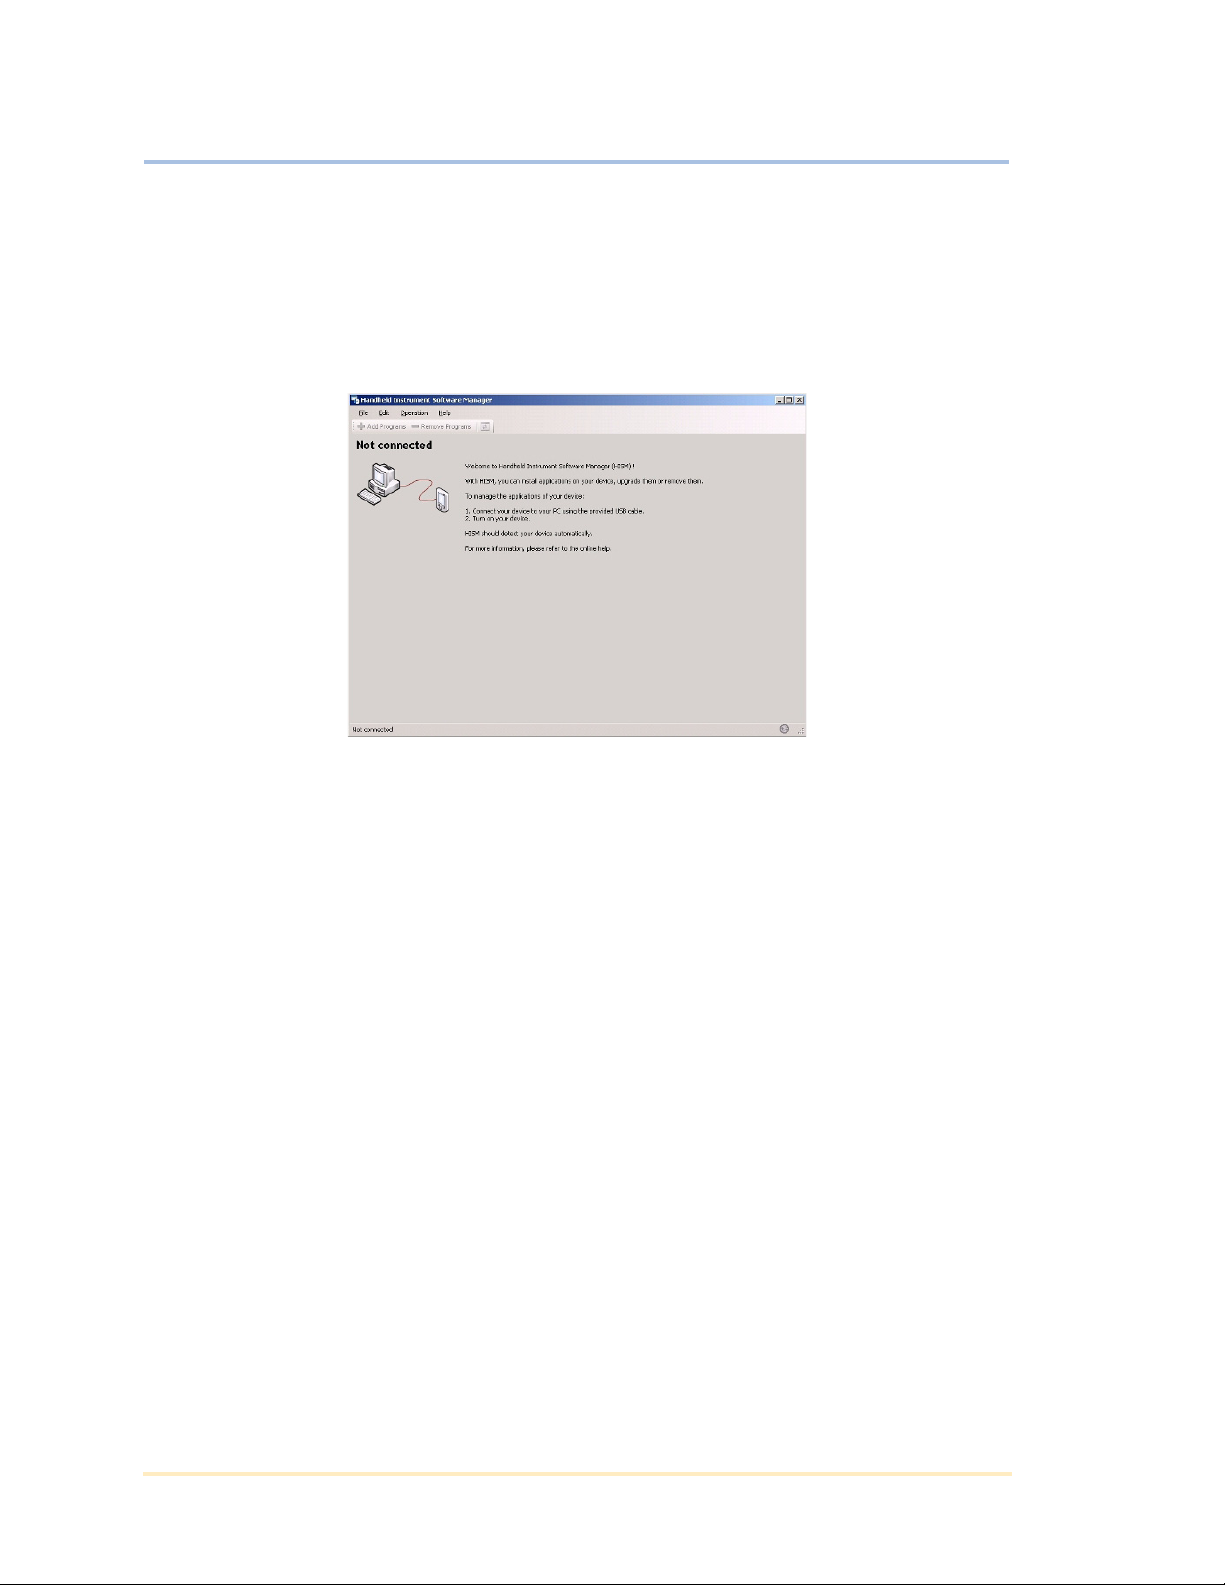
When you connect your unit to your computer for the first time, there are some
initial operations to make. These operations are presented in the following
procedure.
Copyright © 2009 EXFO Electro-Optical Engineering Inc. All rights reserved. 10/37
Page 11
Release Notes
FTB-200 Compact Modular Platform
To connect your unit:
1. On your computer, start HISM.
1a. On the taskbar, click Start, point to All Programs, then point to EXFO.
1b. From the EXFO menu, click EXFO Handheld Instrument Software
Manager.
2. Connect your unit to your computer using the USB cable.
3. Turn on your unit.
Your computer detects your unit and opens the Found New Hardware Wizard.
Copyright © 2009 EXFO Electro-Optical Engineering Inc. All rights reserved. 11/37
Page 12
Release Notes
FTB-200 Compact Modular Platform
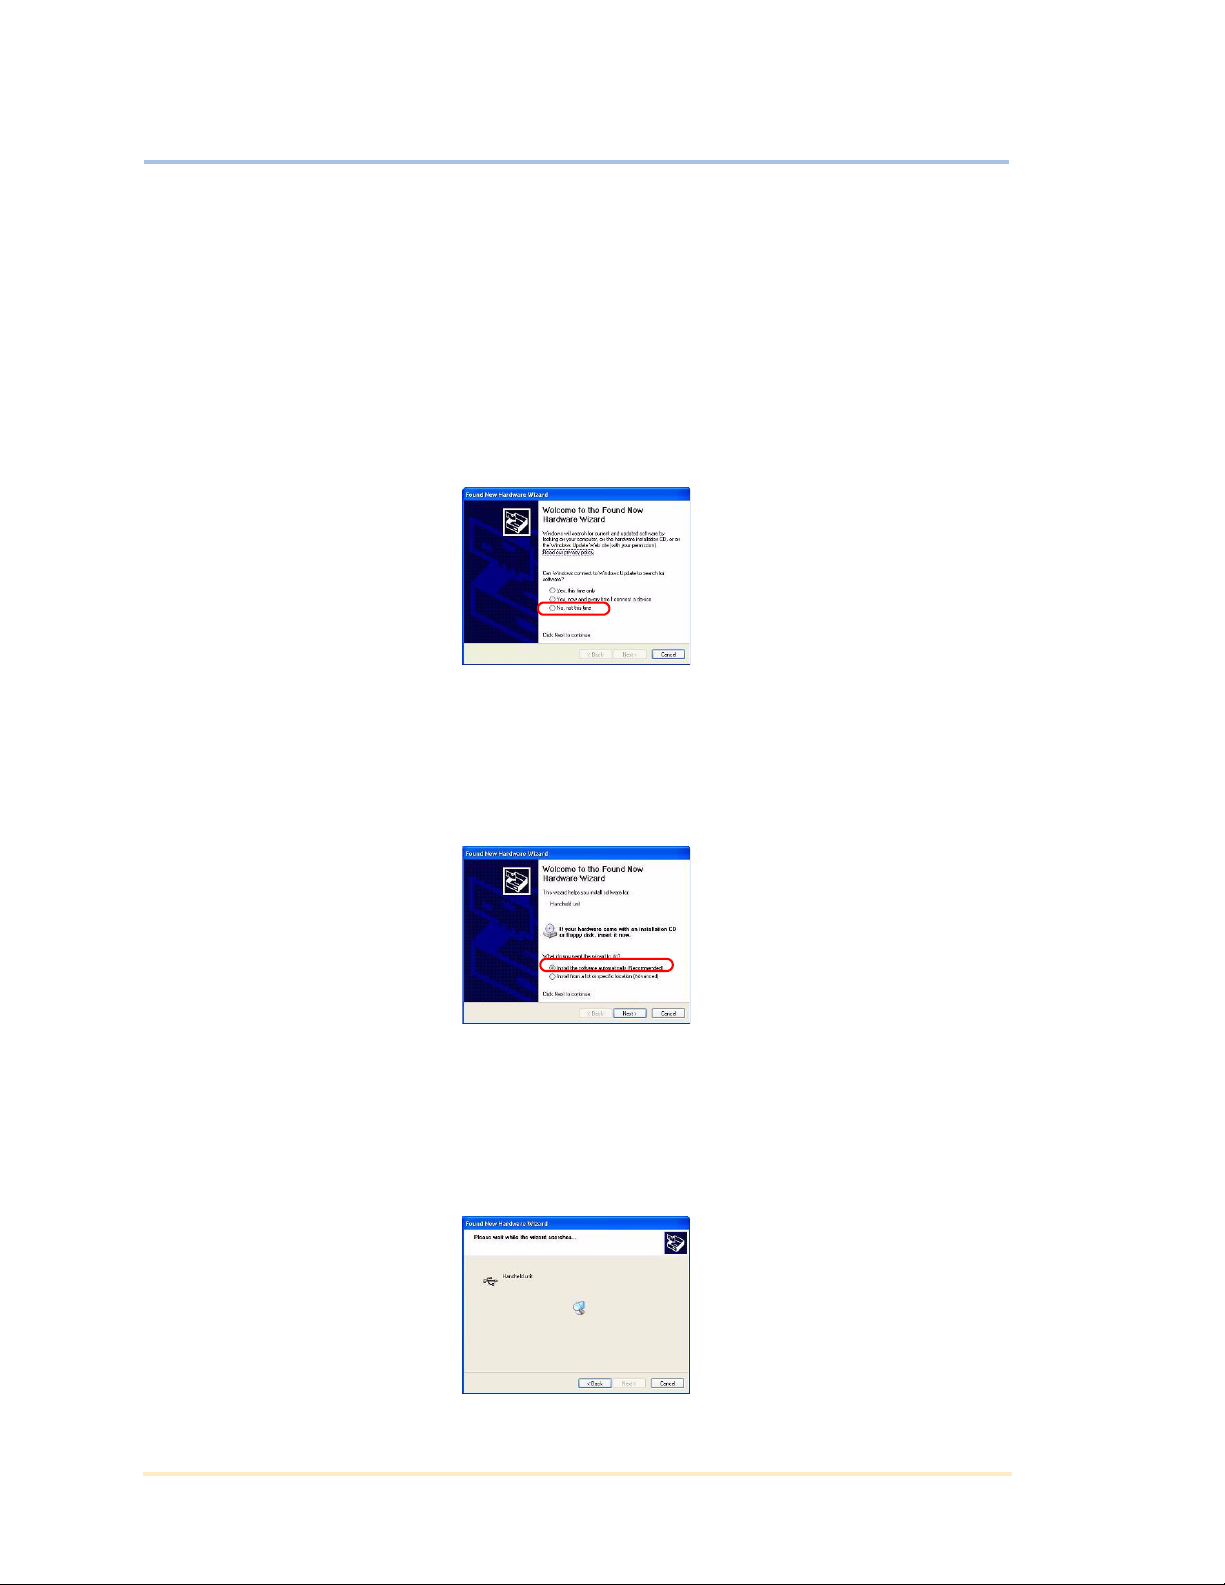
4. If your computer runs Windows XP, go to step 4a.
OR
If your computer runs Windows 2000, go to step 6.
Note: If your computer runs Windows Vista, follow the procedure for Windows XP. Steps
and images may vary.
4a. If the application prompts you for Windows updates, select No, not this
time, and then click Next.
4b. Make sure that the Install the software automatically (Recommended)
option is selected, and click Next.
Note: Under Windows Vista, select Locate and install driver software
(recommended).
Note: Under Windows Vista, when the wizard prompts you to search online for driver
software, select Don’t search online. On your installation CD, go to the USB Drivers
folder, and then go to the Windows Vista folder.
The wizard starts searching for software.
Copyright © 2009 EXFO Electro-Optical Engineering Inc. All rights reserved. 12/37
Page 13

4c. In the Found New Hardware Wizard dialog box, when software is found,
click Next.
Note: Under Windows Vista, you do not need to click Next.
You may receive the following message:
Since it has been verified that the drivers work with Windows, click
Continue Anyway.
4d. From the Found New Hardware Wizard window, click Finish.
Release Notes
FTB-200 Compact Modular Platform
5. Continue installation at step 7.
Copyright © 2009 EXFO Electro-Optical Engineering Inc. All rights reserved. 13/37
Page 14

Release Notes
FTB-200 Compact Modular Platform
6. If your computer runs Windows 2000, proceed as follows.
6a. From the Found New Hardware Wizard window, click Next.
6b. From the Found New Hardware Wizard window, select the Search for a
suitable driver for my device check box and click Next.
6c. From the Found New Hardware Wizard window to locate driver files,
select the CD-ROM drives check box, then click Next.
6d. From the Found New Hardware Wizard window, click Next.
Copyright © 2009 EXFO Electro-Optical Engineering Inc. All rights reserved. 14/37
Page 15

Release Notes
FTB-200 Compact Modular Platform
6e. From Found New Hardware Wizard window, click Finish.
7. The New Partnership window opens automatically. Proceed as follows to
synchronize your computer and your unit information.
Note: Under Windows Vista, the synchronization tool is the Mobile Device Center instead
of ActiveSync.
7a. From the New Partnership window, select Yes , then click Next.
7b. From the New Partnership window, clear all check boxes.
IMPORTANT
To avoid synchronization problems, ensure that NONE of the items
is selected.
Click Next.
Copyright © 2009 EXFO Electro-Optical Engineering Inc. All rights reserved. 15/37
Page 16

Release Notes
FTB-200 Compact Modular Platform
7c. From the New Partnership window for the end of installation, click
Finish.
The Microsoft ActiveSync main window appears and the Handheld Instrument
Software Manager main window displays your unit information.
Copyright © 2009 EXFO Electro-Optical Engineering Inc. All rights reserved. 16/37
Page 17

Release Notes
FTB-200 Compact Modular Platform
Troubleshooting Computer Installation
If a problem occurs during the installation or operation of HISM, or during the
operation of your unit, the following suggestions are likely to solve most issues.
The setup wizard requests the administrators level of access.
Make sure you have the administrators level of access on the computer as
explained at the beginning of the Preparing for Installation section.
Problem Cause and Solution
The Setup Wizard does not start
automatically when you insert
the CD in the computer.
Even if ActiveSync has been
previously installed, you cannot
see the ActiveSync icon on your
computer and the HISM cannot
communicate with the unit.
³ From the computer desktop, double-click My
computer. From My Computer window,
double-click the CD-ROM drive (usually D:).From
the CD, double-click the setup.exe file located at
the root of the CD.
OR
³ From the Windows taskbar, click Start, then click
Run. From the Run window, type D:\setup.exe (if
D corresponds to the CD-ROM drive), then click
OK.
Windows configures user profiles independently from
one another. For this reason, ActiveSync has probably
not been “installed” for your user profile yet.
To configure ActiveSync for your
user profile:
1. From the taskbar, click Start, point
to All Programs, then click
ActiveSync.
2. Follow the on-screen instructions.
You may receive error messages
such as: “Fatal error during
installation” and “Unable to run this
command”. Click OK to
acknowledge.
ActiveSync is now configured properly, even if you
received error messages. Restart ActiveSync.
Copyright © 2009 EXFO Electro-Optical Engineering Inc. All rights reserved. 17/37
Page 18

FTB-200 Compact Modular Platform
Problem Cause and Solution
Release Notes
You can see the ActiveSync
icon on your computer, but
ActiveSync and HISM
applications do not show
Connected when you connect
the handheld unit to the
computer.
From the computer desktop, right-click the My
Computer icon, then click Properties.
From System Properties, select the Hardware tab,
and click Device Manager.
From the Device Manager window, verify the
following:
³ If there is a yellow question mark or exclamation
point next to Other devices, click + next to it and
note the handheld units that are listed.
You must install the associated drivers as
explained in Connecting your Unit to your
Computer, according to the computer’s operating
system.
Copyright © 2009 EXFO Electro-Optical Engineering Inc. All rights reserved. 18/37
Page 19

FTB-200 Compact Modular Platform
Problem Cause and Solution
Release Notes
You can see the ActiveSync
icon on your computer, but
ActiveSync and HISM
applications do not show
Connected when you connect
the handheld unit to the
computer (continued).
³ Is there the Windows CE USB Devices item in the
list? If not, make sure the USB cable is properly
connected to the unit and to the computer. Make
sure the unit is turned on.
³ Click + next to Windows CE USB Devices. If there
is a yellow exclamation point next to a unit name,
it means that the drivers have not been properly
installed.
Double-click the unit name. From the Properties
window, select the General tab, then click
Reinstall Driver.
Install the drivers as explained in Connecting your Unit
to your Computer, according to the computer’s
operating system.
³ When you connect a USB
memory drive or a
CompactFlash card to your
unit, it takes a long time
before you can view its
content on the screen.
OR
³ When you open some
folders on your unit, it takes
a long time before you can
view their content on the
screen.
Copyright © 2009 EXFO Electro-Optical Engineering Inc. All rights reserved. 19/37
The problem occurs when the USB memory drive, the
card or the folder contains one or more files with the
.exe extension. The problem is related to the way
Windows CE manages this type of files.
To build a list of files, Windows CE needs to retrieve
the icons associated with the various types of files. In
the case of an .exe file, it has to read the entire file to
extract the icon, which takes a long time.
Only the first access is slow. The next accesses will be
faster because the information about icon’s location is
kept in memory. This remains true until you perform a
shutdown.
Page 20

FTB-200 Compact Modular Platform
Problem Cause and Solution
Release Notes
Your unit seems to have lost its
connection with the computer
(ActiveSync icon is dimmed).
Even if it is not the first time you
connect a unit to your
computer, you are prompted to
install USB drivers on your
computer.
The splash screen (screen you
can see when you start your
unit) remains displayed and the
unit seems not to respond
anymore.
Disconnect the USB cable from your unit, and then
reconnect it. The communication should be restored
automatically.
³ The unit was probably connected to a USB port
that has never been used with this unit before. It is
normal to be prompted to install USB drivers. USB
ports will only recognize the devices that have
been connected to them at least once.
You must install the required USB drivers for each
USB port you intend to use.
³ The unit you have just connected is probably not
of the same type as the one for which you installed
the drivers (for example, you installed drivers for
an FTB-200 Compact Modular Platform and you
are using an FTB-150 Compact OTDR).
When you are prompted to install the drivers,
simply select the Install the software
automatically check box and click Next.
Windows CE will install the appropriate drivers.
Note the code (made of letters or numbers) you see
on the splash screen and contact EXFO.
The splash screen (screen you
can see when you start your
unit) remains gray and an error
The version of the system disk that is installed on your
unit is prior to 2.3.0.31. Using HISM, reinstall version
2.3.0.31 or later.
message indicates that
Windows CE cannot be loaded.
You cannot see the new
updates for your products from
HISM.
Copyright © 2009 EXFO Electro-Optical Engineering Inc. All rights reserved. 20/37
The version of the system disk that is installed on your
unit is too old. Using HISM, install the most recent
system disk version available.
Page 21

Release Notes
FTB-200 Compact Modular Platform
Removing Software
Handheld Instrument Software Manager
You can remove HISM by using the functions found in Windows Control Panel.
To remove Handheld Instrument Software Manager:
1. From the computer task bar, click Start.
2. From the menu, click Control Panel.
3. From the Control Panel dialog box, double-click Add or Remove Programs.
Copyright © 2009 EXFO Electro-Optical Engineering Inc. All rights reserved. 21/37
Page 22

Release Notes
FTB-200 Compact Modular Platform
4. From the Add or Remove Programs dialog box, click EXFO Handheld
Instrument Software Manager and click Change/Remove or Remove.
Removing Microsoft ActiveSync
You can remove Microsoft ActiveSync by using the functions found in Windows
Control Panel.
Note: Under Windows Vista, the synchronization tool is Mobile Device Center instead of
ActiveSync.
To remove Microsoft ActiveSync:
1. From the computer task bar, click start.
2. From the menu, click Control Panel.
3. From the Control Panel dialog box, double-click Add or Remove Programs.
4. From the Add or Remove Programs dialog box, click Microsoft
ActiveSync x.y (where x.y corresponds to the version number of ActiveSync)
and click Change/Remove or Remove.
Copyright © 2009 EXFO Electro-Optical Engineering Inc. All rights reserved. 22/37
Page 23

Release Notes
FTB-200 Compact Modular Platform
Adding or Removing Applications with the Handheld Instrument Software Manager
With the Handheld Instrument Software Manager (HISM), you can install
applications on your FTB-200 Compact Modular Platform.
To install a program on your unit:
1. From your computer, open the HISM.
1a. On the taskbar, click Start, point to All Programs, then point to EXFO.
1b. From the EXFO menu, click EXFO Handheld Instrument Software
Manager.
2. Connect one end of the provided USB cable to your unit and the other to the
computer.
Copyright © 2009 EXFO Electro-Optical Engineering Inc. All rights reserved. 23/37
Page 24

Release Notes
FTB-200 Compact Modular Platform
3. From HISM, select the items you want to install on your unit and click the
Install Selected Programs button.
Online help is provided with HISM to help you install and remove applications.
IMPORTANT
Make sure that you have the latest system disk version for your
unit. This ensures you that you can see and install all of the
available updates.
IMPORTANT
To avoid problems when you install a system disk on your FTB-200,
do not turn off your unit and wait until ToolBox CE is displayed.
It is normal that the Shutting Down... message remains displayed
during the installation and that your unit restarts a few times.
IMPORTANT
When you attempt to remove an application from your unit, you
may receive an error message indicating that the application could
not close. In this case, close the application manually, then, from
ToolBox CE, select Setup. Use the Remove Programs utility to
remove the application.
IMPORTANT
If Windows opens the Found New Hardware Wizard dialog box,
select Install the software automatically (recommended) option and
click the Next button.
From the displayed window, go to the USB Drivers folder on this
CD. Go to the folder corresponding to the version of Windows that
is installed on your computer (Windows 2000, Windows XP or
Windows Vista).
Windows will install the necessary drivers and will recognize your
device automatically.
Copyright © 2009 EXFO Electro-Optical Engineering Inc. All rights reserved. 24/37
Page 25

FTB-200 Compact Modular Platform
Controlling Your Unit Remotely
Your unit supports remote control via Virtual Network Computing (VNC). This utility
enables you to control your unit from a distant computer exactly as if you had your
device close at hand.
To control your unit remotely:
1. Connect both the computer and your unit to a same network with RJ-45
(network) cables. To connect your unit, use the RJ-45 port located on its right
side.
2. Turn on both the computer and the unit.
3. On your unit, in ToolBox CE, go to Main Menu. Select System Info > Platform.
4. Write down the IP address, then close the window.
Note: It may take a few seconds before you see the IP address on the list.
5. From ToolBox CE, go to the Programs tab, then tap twice on the CEVNCSvr
icon to activate VNC on your unit.
Release Notes
Note: If you are using an older unit, it is possible that you do not see the CEVNCSvr icon.
To be able to control your unit remotely, install the latest version of ToolBox CE.
6. Insert the installation CD in the CD-ROM drive of the computer you want to use
to control your unit remotely.
7. When the Welcome window appears, select Explore CD from the list.
Copyright © 2009 EXFO Electro-Optical Engineering Inc. All rights reserved. 25/37
Page 26

Release Notes
FTB-200 Compact Modular Platform
8. Go to the Utilities and User Documentation folder then copy the folder whose
name begins with “vnc”. Paste the folder in a location of your choice on your
computer.
9. Open the new folder, then double-click the .exe file.
10. From VNC Viewer, in the Server box, enter the IP address of your unit you
wrote down at step 4. Let Encryption to the default value.
11. Click the Options button.
12. From the displayed dialog box, select Auto Select.
Under Colour level, select Full (all available colours), then click OK.
13. From VNC Viewer, click OK to start controlling your unit remotely.
Copyright © 2009 EXFO Electro-Optical Engineering Inc. All rights reserved. 26/37
Page 27

Release Notes
FTB-200 Compact Modular Platform
New Product Registration
You can now register your new EXFO products online and benefit from every
possible opportunity to optimize their performance. By doing so, you will always be
notified of the latest software updates, key product enhancements and up-to-date
support information related to your products.
To register, simply go to http://www.exfo.com/prodreg.
Restoring Your Unit to Normal Operation
If you ever encounter major problems with your FTB-200 Compact Modular
Platform (for example, you cannot start your unit) you can restore your unit to
normal operation from the maintenance mode. For current updates, use the
Handheld Instrument Software Manager (HISM).
The restoration options are described below:
³ Restore Registry: The unit will restart in normal mode using the last
installation software registry that was saved.
³ Restore System Partition: The unit will restart in normal mode. However, you
will have to reinstall the system disk and your applications using HISM.
³ Restore System Partition From USB Flash Drive: The unit will restart in
normal mode. However, you will have to reinstall the system disk and your
applications using HISM.
³ Restore System Partition From CompactFlash card: The unit will restart in
normal mode. However, you will have to reinstall the system disk and your
applications using HISM.
To restore the system registry:
1. Shut down your unit by pressing and holding it down until the unit beeps
twice .
2. Press simultaneously and to enter the maintenance mode. The
window will be displayed after about 30 seconds.
3. Select Restore Registry.
4. When the application prompts you, select Ye s to start the process.
Your unit may restart several times during the installation.
If the operation was successful, you can now use your unit. If your unit still does not
work properly, try restoring the system partition.
To restore the system partition:
1. Shut down your unit by pressing and holding it down until the unit beeps
twice .
2. Press simultaneously and to enter the maintenance mode. The
window will be displayed after about 30 seconds.
Copyright © 2009 EXFO Electro-Optical Engineering Inc. All rights reserved. 27/37
Page 28

Release Notes
FTB-200 Compact Modular Platform
3. Select Restore System Partition.
4. When the application prompts you, select Ye s to start the process.
5. Once the process is complete, reinstall the system disk and your applications
using HISM.
Your unit may restart several times during the installation.
If the operation was successful, you can now use your unit. If your unit still does not
work properly, try restoring the system partition from a USB memory drive or a
CompactFlash card.
Copyright © 2009 EXFO Electro-Optical Engineering Inc. All rights reserved. 28/37
Page 29

Release Notes
FTB-200 Compact Modular Platform
To restore the system partition from a USB memory drive or a
CompactFlash card:
1. Shut down your unit by pressing and holding it down until the unit beeps
twice .
2. Insert the installation CD in the computer CD-ROM drive.
3. On the CD, go to the Utilities and User Documentation folder, and then go to
the System Image folder and copy its contents to the first level of the USB
memory drive or CompactFlash card.
4. Press simultaneously and to enter the maintenance mode. The
window will be displayed after about 30 seconds.
5. Select Restore System Partition From USB Flash Drive.
OR
Select Restore System Partition From CompactFlash card.
The application will search for the required .bex file.
6. Select the desired file, and then select Restore.
7. When the application prompts you, select Ye s to start the process.
8. Once the process is complete, reinstall the system disk and your applications
using HISM.
Your unit will restart several times. This operation takes 5 to 7 minutes to complete
and is done when ToolBox CE is displayed.
If your unit still does not work properly, contact EXFO’s technical support group.
Viewing User Guides in PDF Format
A PDF version of the latest user guides is always available on your installation CD.
They are stored in the Utilities and User Documentation folder. Simply double-click
a file to view it in Adobe Acrobat Reader (version 4.00 and later).
If you do not already have Adobe Acrobat Reader, or if you have an older version
installed, version 8.1 is provided on this CD.
To install Adobe Acrobat Reader:
1. On the installation CD, go to the Utilities and User Documentation folder, and
then select the Adobe Reader x.y (where x.y corresponds to the version of the
reader) folder.
2. Double-click the .exe file to launch the installation process.
3. Follow the instructions on screen.
Copyright © 2009 EXFO Electro-Optical Engineering Inc. All rights reserved. 29/37
Page 30

FTB-200 Compact Modular Platform
Release History
This release of the FTB-200 Compact Modular Platform includes the latest
upgrades for your product.
All changes are identified below.
IMPORTANT
BEFORE installing this product pack, you must:
³ Remove the standard OTDR application from your unit (using
HISM).
³ Make sure that the version for your system disk on your unit is
3.4.0.55 or later. Otherwise you cannot access the newest
features for your product.
Product Release Changes
Release Notes
FTB-200 Compact
Modular Platform
version 3.4.0
Product Pack
OTDR CE 2.5.0.220
FTB-200 Compact
Modular Platform
version 3.2.0
Product Pack
OTDR CE 2.5.0.186
FTB-7000 Series OTDR
³ Improved zoom functions.
³ Improved autonaming functions.
³ Full-screen graph view now available.
OTDR Bidirectional
³ Improved zoom functions.
³ Application and corresponding online help now available in
Simplified Chinese, French, German, Russian, and Spanish.
FTB-7000 Series OTDR
³ Selection of the high-resolution feature is now made from
OTDR Setup.
³ More control over the Pass/Fail thresholds to better suit your
testing needs.
³ Now possible to also display the graph in full screen.
³ Now possible to display the table of events automatically
after acquisitions.
³ Improved zoom functions.
³ Report window has been redesigned to include
Operator A, Operator B, and Company information. This
new information is saved along with the test results and is
available in printed reports.
OTDR Bidirectional
³ New utility designed to perform a bidirectional analysis on
two unidirectional OTDR traces.
Copyright © 2009 EXFO Electro-Optical Engineering Inc. All rights reserved. 30/37
Page 31

Product Release Changes
Release Notes
FTB-200 Compact Modular Platform
FTB-200 Compact
Modular Platform
version 3.2.0
Product Pack
OTDR CE 2.4.0.121
FTB-200 Compact
Modular Platform
version 3.0.0
Product Pack
OTDR CE 2.1.0.100
FTB-7000 Series OTDR
³ Supports the new FTB-7300E model.
FTB-7000 Series OTDR (FTB-7000D models or later)
³ New feature for the detection of reflective ends of fiber
available (application will search the “noisy” portion of the
traces to detect strong reflective events).
Copyright © 2009 EXFO Electro-Optical Engineering Inc. All rights reserved. 31/37
Page 32

Product Release Changes
Release Notes
FTB-200 Compact Modular Platform
FTB-200 Compact
Modular Platform
version 3.0.0
This release brings an overall improvement to the
speed of the applications, and especially the transport
and datacom (protocol) applications.
The installation of the new system disk takes several
minutes.
FTB-5700 Single Ended Dispersion Analyzer
³ New product.
FTB-7000 OTDR Series
³ Includes all features of previous service packs and product
packs.
FTB-8105/8115/8120(NG)/8120NGE/8130(NG)/8130NGE
Transport Blazer
³ New features:
Note: If your unit is equipped with a 1-GB memory, both
the SONET/SDH Analyzer and Ethernet Analyzer
applications will be installed on your unit. If the
memory is less than 1 GB, only the SONET/SDH
Analyzer application will be installed.
³ Compact Report Generation
³ Unified Report Generation Tool
³ BERT layer 3/4 (8120NGE/8130NGE
Ethernet Analyzer)
For details, see Transport Blazer release notes available in
the Utilities and User Documentation folder.
³ Includes all features of previous service packs and product
packs.
FTB-8510B Packet Blazer
³ New features:
³ BERT layer 3/4
³ Compact Report Generation
³ Unified Report Generation Tool
³ Fixed Operational Considerations
For details, see Packet Blazer release notes available in the
Utilities and User Documentation folder.
³ Includes all features of previous service packs and product
packs.
Copyright © 2009 EXFO Electro-Optical Engineering Inc. All rights reserved. 32/37
Page 33

Product Release Changes
FTB-8510G Packet Blazer
³ New features:
³ BERT layer 3/4
³ Compact Report Generation
³ Unified Report Generation Tool
³ Fixed Operational Considerations
For details, see Packet Blazer release notes available in the
Utilities and User Documentation folder.
³ Includes all features of previous service packs and product
packs.
Release Notes
FTB-200 Compact Modular Platform
FTB-200 Compact
Modular Platform
version 2.3.0
Product Pack
OTDR CE 1.4.0.84
FTB-200 Compact
Modular Platform
version 2.3.0
Product Pack
OTDR CE 1.3.3.78
FTB-200 Compact
Modular Platform
version 2.2.0
Product Pack
OTDR CE 1.3.2.67
FTB-7000 Series OTDR
³ Now, the application starts normally, even if only a
reference trace was open when you closed the application.
FTB-7000 Series OTDR
³ Supports the new FTB-7600E model.
This product pack includes all features and fixes of the
previous OTDR CE product packs for the FTB-200
Compact Modular Platform.
FTB-7000 Series OTDR
³ Supports the new FTB-7400E and FTB-7500E models.
Copyright © 2009 EXFO Electro-Optical Engineering Inc. All rights reserved. 33/37
Page 34

Product Release Changes
Release Notes
FTB-200 Compact Modular Platform
FTB-200 Compact
Modular Platform
version 2.1.0
Product Pack
OTDR CE 1.3.0.65
FTB-7000B/70000C/7000D OTDR
³ Applications now also available in the following languages:
³ Czech
³ French
³ German
³ Hungarian
³ Italian
³ Japanese
³ Korean
³ Pol is h
³ Russian
³ Simplified Chinese
³ Swedish
³ Spanish
³ Traditional Chinese
³ Online help now also available in Russian, Simplified
Chinese and Spanish.
Copyright © 2009 EXFO Electro-Optical Engineering Inc. All rights reserved. 34/37
Page 35

Product Release Changes
Release Notes
FTB-200 Compact Modular Platform
FTB-200 Compact
Modular Platform
version 2.1.0
Product Pack
OTDR CE 1.2.3.57
FTB-7000B/70000C/7000D OTDR
³ New Fault Finder mode, which is a special testing feature to
rapidly locate fiber ends. It also gives the length of the fiber
under test.
³ New optional software package offered. With this package
you can:
³ detect macrobends, view and print the
related information.
³ access the “linear view”, which displays
the events sequentially, from left to right.
³ New Summary table that gives, for each wavelength, the
global status of the results (pass/fail), the span loss, and
span ORL values.
³ Now possible to define acquisition time as short as
5seconds.
³ Now possible to define a fiber span for short fibers by
placing the span start and the span end on the same event.
³ Now possible to modify the attenuation of fiber sections.
³ Now supports up to 4 wavelengths.
³ Now supports filtered wavelengths.
³ Better management of the OTDR trace files (EXFO and
non-EXFO).
³ The application no longer prompts you to reanalyze the
trace if you modify the IOR or helix factor.
³ Improved zoom functions.
³ Zoom controls now also available in Auto mode.
³ IOR values are now displayed with 6 digits after the
decimal point.
³ Now possible to also display the graph with a black
background (inverted colors).
³ Now possible to select the attenuation and loss values that
will be displayed:
³ Two-point section attenuation
³ A-B LSA attenuation
³ Four-point event loss
³ A-B LSA loss
³ Printed reports can now include pass/fail thresholds,
summary table and macrobend information.
Copyright © 2009 EXFO Electro-Optical Engineering Inc. All rights reserved. 35/37
Page 36

Product Release Changes
Release Notes
FTB-200 Compact Modular Platform
FTB-200 Compact
Modular Platform
version 2.1.0
FTB-200 Compact
Modular Platform
version 2.0.3
FTB-200
³ An upgrade of the system disk will be performed
automatically if the current system disk version is earlier to
2.0.1.20.
³ A disk scanning utility is now launched automatically at
startup if Windows CE could not have been properly shut
down last time you turned off your unit.
³ For better protection of the unit’s memory, it is now
impossible to turn off the unit during its startup.
FTB-7000B/70000C/7000D OTDR
³ An error message is now displayed if you attempt to save a
trace and the unit’s memory (flash memory) is full.
³ Time zone is now correctly saved with the traces.
³ Overall improvement of the way traces are saved.
³ Better response time when you perform ORL
measurements.
FTB-200
³ Online help now also available in French, Russian,
Simplified Chinese and Spanish.
³ DataFormat application now available (on this CD).
FTB-7000B/70000C/7000D OTDR
³ Online help now also available in French, Russian,
Simplified Chinese and Spanish.
³ Better response time when you modify parameters (using
the knob) during acquisition.
³ In the Measure tab, ORL value is now displayed more
quickly when you move markers with the knob.
³ On the graph, distance scale is now adjusted to reflect the
changes of range.
FTB-8115/8120/8130 Transport Blazer
³ Includes all features and fixes of FTB-200 Compact Modular
Platform version 2.0.1 cSSA PP1. See the corresponding
Release Notes for details.
FTB-8510 Packet Blazer
³ Includes all features and fixes of FTB-200 Compact Modular
Platform version 2.0.1 cPB PP1. See the corresponding
Release Notes for details.
FTB-200 Compact
Modular Platform
version 2.0.1
³ Now supports the FTB-8120 and FTB-8130 Transport Blazer
modules.
For details, see Transport Blazer release notes.
³ Better management of unit’s memory during installation.
Copyright © 2009 EXFO Electro-Optical Engineering Inc. All rights reserved. 36/37
Page 37

Release Notes
FTB-200 Compact Modular Platform
Product Release Changes
FTB-200 Compact
Modular Platform
version 2.0
³ Includes IP testing tools.
³ Includes Battery Calibration utility.
³ Supports remote control via VNC.
³ Applications now available in Polish.
Metrino is a registered trademark of EXFO Electro-Optical Engineering Inc. in
Canada and is used to develop software, namely software used for fiber-optic test
and measurement applications.
Copyright © 2009 EXFO Electro-Optical Engineering Inc. All rights reserved. 37/37
 Loading...