

Page 1

for the Epson Stylus® Pro 4000
User’s Guide
Page 2

All rights reserved. No part of this publication may be reproduced, stored in a retrieval system, or transmitted in any form or by
any means, electronic, mechanical, photocopying, recording, or otherwise, without the prior written permission of Seiko
Epson
Corporation. The information contained herein is designed only for use with this Epson product. Epson is not responsible for any
use of this information as applied to other products.
Trademarks
, Epson Stylus, and MicroWeave are registered trademarks of Seiko Epson Corporation.
Epson
Epson Preferred is a service mark of Epson America, Inc.
ColorBurst is a registered trademark of CSE Systems, Inc.
General Notice: Other product names used herein are for identification purposes only and may be trademarks of their respective
owners. Epson disclaims any and all rights in those marks.
Legal Notices
Neither Seiko Epson Corporation nor its affiliates shall be liable to the purchaser of this product or third parties for damages,
losses, costs, or expenses incurred by purchaser or third parties as a result of: accident, misuse, or abuse of this product or
unauthorized modifications, repairs, or alterations to this product, or (excluding the U.S.) failure to strictly comply with Seiko
Epson Corporation’s operating and maintenance instructions.
Printed on recycled paper.
© 2004 Epson America, Inc. 9/04 CPD-18563
Page 3

| 3
Contents
Introduction
Choosing a RIP Configuration . . . . . . . . . . . . . . . . . . . . . . . . . . . . . . . .5
ColorBurst RIP Features . . . . . . . . . . . . . . . . . . . . . . . . . . . . . . . . . . . . .5
Installing and Setting Up the Server Software
Installing the ColorBurst Server Software for Macintosh OS X . . . . . . . . 7
Setting Up the ColorBurst RIP Server for Macintosh OS X . . . . . . . . . . 8
Installing the ColorBurst RIP Server Software for Windows . . . . . . . . . 15
Setting Up the ColorBurst RIP Server for Windows . . . . . . . . . . . . . . .17
Setting Up Client Systems
Setting Up Macintosh OS X Clients to Print to a Mac OS X
RIP Server . . . . . . . . . . . . . . . . . . . . . . . . . . . . . . . . . . . . . . . . . . . 21
Setting Up Windows Clients to Print to a Mac OS X RIP Server . . . . .24
Setting Up Windows Clients to Print to a Windows RIP Server . . . . . .30
Printing
Printing From an Application . . . . . . . . . . . . . . . . . . . . . . . . . . . . . . . .33
Printing Using a Hot Folder . . . . . . . . . . . . . . . . . . . . . . . . . . . . . . . . . 34
Drag-and-Drop Printing on the RIP Server (Mac OS X) . . . . . . . . . . .38
Supported File Types . . . . . . . . . . . . . . . . . . . . . . . . . . . . . . . . . . . . . .38
Managing Print Jobs on the Mac OS X
RIP Server
Holding, Activating, Canceling, and Deleting Jobs . . . . . . . . . . . . . . . . 39
Changing File Attributes . . . . . . . . . . . . . . . . . . . . . . . . . . . . . . . . . . . . 40
Reordering Print Jobs . . . . . . . . . . . . . . . . . . . . . . . . . . . . . . . . . . . . . .41
Reprinting Files In the Done List . . . . . . . . . . . . . . . . . . . . . . . . . . . . . 42
Color Management and Printer Linearization
Using Color Management Settings in Mac OS X . . . . . . . . . . . . . . . . . 43
Using Color Management Settings in Windows . . . . . . . . . . . . . . . . . . 47
Relinearizing an Existing Printer Setup . . . . . . . . . . . . . . . . . . . . . . . . .51
3
Page 4

4 | Contents
Appendix
Where To Get Help . . . . . . . . . . . . . . . . . . . . . . . . . . . . . . . . . . . . . . . 59
System Requirements . . . . . . . . . . . . . . . . . . . . . . . . . . . . . . . . . . . . . . 59
Index
-4
Page 5

| 5
Introduction
Note: If you are using
Windows,
running Windows XP or
2000; other versions of
Windows are not
supported.
Tip : The recommended
configuration is to
connect the Stylus Pro
4000 via USB to a
Mac OS
up as the dedicated
server with the
ColorBurst RIP. Then
connect the Mac OS X
system to the network.
Mac
may print to the RIP
server. This configuration
minimizes network
traffic.
Note: The Client PPD
does not need to be
installed on the
ColorBurst RIP server.
®
you must be
®
X system set
®
or Windows clients
This User’s Guide provides instructions for installing and setting up the
ColorBurst
®
RIP (Raster Image Processor) software on your server and client
workstations. The software prepares your network for printing on the Epson
®
Stylus
Pro 4000 printer. This guide also explains environment setup and
printer linearization, printing from applications, and using hot folders for
drag-and-drop printing of supported files.
Your ColorBurst software CD-ROM includes the ColorBurst server
software and client PPD (PostScript
as the ChromaCapture CSE (Macintosh
®
Printer Description) software, as well
®
) or ColorBurst ColorCatch
(Windows) utility for printer linearization.
Before setting up the ColorBurst RIP, you should make sure you’ve set up
the Stylus Pro 4000 on the computer that will control the printer. Even if
you plan to connect the printer directly to the network, you should install
and configure it locally first. See your Stylus Pro 4000 Start Here sheet for
instructions.
Choosing a RIP Configuration
There are a number of options available for setting up the ColorBurst RIP
and your Stylus Pro 4000:
• Connect the printer via USB or Ethernet to a Macintosh OS X or
Windows computer with ColorBurst installed. That system acts as the
RIP server on the network. You can print from that computer or send
print jobs from other computers on your network. If you have both Mac
OS X and Windows client systems, you must install the ColorBurst RIP
server software on a Macintosh.
• Connect the printer via USB or Ethernet to a single computer set up as
the ColorBurst RIP server and client.
ColorBurst RIP Features
• Pantone
®
and SWOP® certified for highly accurate color printing
• Full PostScript support including PostScript Language level 1, 2, and 3
support for PS, EPS, TIFF, JPEG, and PDF files
• Hot folder that can be accessed locally or over a network for easy
printing of supported file types
5
Page 6

6 | Introduction
•
Job manager (Mac OS X only) for drag-and-drop printing directly into
the RIP list. Jobs can be reordered, deleted, or placed on hold to be
processed later
• Pre-linearized environments to ensure accurate profiles from the start,
as well as the option to relinearize later with a spectrophotometer, if
necessary
6
Page 7

| 7
Installing and
Setting Up
the Server
Software
You can install and set up the ColorBurst RIP server software on a
Macintosh OS X system or a computer running Windows XP or 2000. See
the appropriate sections:
• “Installing the ColorBurst Server Software for Macintosh OS X” below
• “Setting Up the ColorBurst RIP Server for Macintosh OS X” on page 8
• “Installing the ColorBurst RIP Server Software for Windows” on
page 15
• “Setting Up the ColorBurst RIP Server for Windows” on page 17
Installing the ColorBurst Server Software for Macintosh OS X
Before you begin, make sure you have:
• Set up the Epson Stylus Pro 4000 and installed the standard Epson
printer driver on the computer you intend to use as your ColorBurst
RIP server (see your Epson
• Connected the printer to the server using the USB interface
(recommended method) or connected the printer to an Ethernet
network and assigned it an IP address (see the documentation that came
with the included network card)
®
printer documentation for instructions)
• Closed all open programs and turned off any virus protection programs
Follow these steps to install the server software:
1. Insert the ColorBurst RIP CD-ROM in your CD-ROM or DVD drive.
2. Double-click the CD-ROM icon, then double-click the
ColorBurst RIP Installer icon.
7
Page 8

8 | Installing and Setting Up the Server Software
3. When prompted, enter your Mac OS X Admin password and click OK.
4. Follow the on-screen instructions to install ColorBurst.
5. When installation is complete, go to the next section to set up the
ColorBurst RIP Server.
Setting Up the ColorBurst RIP Server for Macintosh OS X
Note: If you plan to share
the printer with Windows
clients over a network,
you need to make sure
your Macintosh has a
static (manual setting)
IP address that won’t
change. You can change
this setting in the System
Preferences > Network
settings. See your Mac
Help for more
information.
Before you can print with the ColorBurst RIP, you have to set it up so it can
receive print jobs and has the correct printer and environment settings.
Starting the RIP Server and Choosing Your Printer
1. To start the RIP server, double-click the ColorBurst RIP for Epson
icon on your desktop.
Or double-click the
Applications > ColorBurst RIP for Epson folder.
2. When you see the registration window, fill out the information and click
OK to register your software. The serial number is printed on the front
of your ColorBurst RIP CD-ROM.
The registration is sent over the Internet to ColorBurst. If it isn’t sent,
the dialog box will reappear each time you start the RIP.
ColorBurst RIP icon in the
8
Page 9

Installing and Setting Up the Server Software | 9
3. When you see this message, click OK.
4. When you see this message, click
OK.
5. Type a name for the printer in the Printer Name box. It can be any
name you want. This name is used only within the RIP/server interface
and is not the name that will be used on the network. (See “Setting the
Print Server Name” on page 13 to change the RIP name used on the
network.)
6. Choose
7. Choose
USB or Ethernet as the Printer Connection setting.
Stylus Pro 4000 from the Which Printer list that appears, if
necessary.
If you see the message “There are no printers connected to this
computer using USB,” check your USB connection and make sure the
printer is set up and turned on as described on your Stylus Pro 4000
Start Here sheet.
9
Page 10

10 | Installing and Setting Up the Server Software
8. When you see this message, click OK.
9. When you see this screen, enter your Mac OS X Admin password, then
click
OK.
ColorBurst opens and is now set up with the default environment. To enable
the RIP to receive and process print jobs and set up the proper environment
for your needs, see the next section.
Choosing an Environment and Printer Settings
The ColorBurst workflow is designed to be efficient for graphic design as
well as prepress proofing. Several pre-set environments with defined paper
type and resolution settings are included for your Stylus Pro 4000 printer.
Choose an environment for the paper type that is loaded in the printer and
the resolution you prefer for printing. You need to change the environment
each time you load a different type of paper. Also check the printer settings
and adjust them, if necessary. Once the environment and settings are set up,
clients can send print jobs without having to constantly adjust printer and
driver settings.
10
Page 11

Installing and Setting Up the Server Software | 11
1. To start the RIP server, double-click the ColorBurst RIP for Epson
icon on your desktop.
Environment
list
Printer Settings
button
Or double-click the
ColorBurst RIP icon in the
Applications > ColorBurst RIP for Epson folder.
You see the ColorBurst RIP server window:
2. Choose the resolution and paper type you want to use from the
Environment list.
11
Page 12

12 | Installing and Setting Up the Server Software
3. Click Printer Settings to open the Printer Settings window.
Note: The Use Page
Settings options are only
used for files with
unknown page
description information,
such as when you drop a
TIFF or JPEG file into a
hot folder.
4. Make changes to these settings, as necessary:
• Choose 4-Pass for the Print Quality (when available). If you notice
any type of banding, then try
8-Pass. If you still see banding in
8-Pass mode, perform a nozzle check on the Stylus Pro 4000 (see
your Stylus Pro 4000 Printer Guide for details).
• Choose Print from Roll or Print from Sheet, depending on the
paper source you are using
• Choose Use Bidirectional Printing to print in both directions
(turn this off for best quality)
• Choose Edge-To-Edge Printing to allow borderless printing
• Choose Cut Media to allow the printer to use the printer’s cut
method to cut roll paper
• Click Advanced Media Control to adjust the setting for precise
paper feeding
• Click Use Page Settings to set paper width and height settings, to
center the image on the page, or offset it by a specific distance
12
Page 13

Installing and Setting Up the Server Software | 13
5. Click OK. You return to the ColorBurst RIP server window.
Continue with the next section to set a Print Server Name.
Setting the Print Server Name
Note: For Windows
clients, you also need to
know the IP address of
the computer that is
running the ColorBurst
RIP. The IP address
should be static (manual
setting) and can be
found under the System
Preferences > Network
settings.
Before you set up any client computers to print to the RIP, you should check
the Print Server Name and change it, if desired. You need to know the Print
Server Name to set up Windows clients to print to the ColorBurst RIP.
1. Choose
Preferences from the ColorBurst RIP menu. You see this
menu:
Print Server
Name
2. Write down the Print Server Name that appears in the box (the default
is ColorBurst_RIP), or change it to something else to identify the
printer over the network.
3. When you are done, click
OK.
13
Page 14

14 | Installing and Setting Up the Server Software
Enabling the RIP to Receive Print Jobs and Print
By default, the ColorBurst RIP receives and holds print jobs until it is set to
RIP On and the print jobs are activated. You can change this setting to
automatically receive and print jobs as they are sent to the RIP.
1. To start the RIP server, double-click the
ColorBurst RIP for Epson
icon on your desktop.
Or double-click the
Applications > ColorBurst RIP for Epson folder.
ColorBurst RIP icon in the
You see the ColorBurst RIP server window:
RIP On button Receive On Hold box
2. To enable the RIP to print active jobs, click the
RIP On button.
3. To receive print jobs with active status and automatically print them in
the order they are received, click the
Receive On Hold checkbox to
deselect it. If you keep it selected, all the print jobs that are sent to the
RIP will be held until you activate them.
14
Page 15

Installing and Setting Up the Server Software | 15
If you will be printing from other computers on the network, install the
client PPDs and set up the clients for printing. See “Setting Up Client
Systems” on page 21.
For details on managing print jobs, see page 39.
Installing the ColorBurst RIP Server Software for Windows
Note: The Windows RIP
server software supports
printing from Windows
XP and Windows 2000
client computers only. To
print with both Macintosh
and Windows clients, you
must install the RIP
server software on a
Macintosh server.
Seepage7.
Before you begin, make sure you have:
• Set up the Epson Stylus Pro 4000 and installed the standard Epson
printer driver on the computer you intend to use as your ColorBurst
RIP server (see your Epson printer documentation for instructions)
• Connected the printer to the server using the USB interface
(recommended method) or connected the printer to an Ethernet
network and assigned it an IP address (see the documentation that came
with the included network card) and that you are able to print from the
standard driver
• Closed all open programs and turned off any virus protection programs
Follow these steps to install the server software:
1. Insert the ColorBurst RIP CD-ROM into your drive.
2. Double-click the
ColorBurst Epson Installer icon.
3. Follow the on-screen instructions to install the
ColorBurst RIP.
4. When you see the message “Digital Signature Not Found,” click
Yes to
continue the installation.
5. Restart your computer.
6. Go to
Start > Settings > Printers (or Start > Printers and Faxes).
7. Right-click the ColorBurst RIP printer icon and choose
Properties.
15
Page 16

16 | Installing and Setting Up the Server Software
8. Click the Sharing tab.
9. Select
Share this printer. Click OK.
Go to the next section to start and set up the ColorBurst RIP server.
16
Page 17

Installing and Setting Up the Server Software | 17
Setting Up the ColorBurst RIP Server for Windows
1. To start the RIP server, double-click the ColorBurst
Epson
icon on your desktop.
2. When you see the Registration screen, fill out the information and click
OK to register your software. The serial number is printed on the front
of the ColorBurst RIP CD-ROM.
You see the ColorBurst RIP server window:
17
Page 18

18 | Installing and Setting Up the Server Software
3. From the Options menu, choose Printer Options, then click the
General tab.
Note: The Use page
dimensions options are
only used for files with
unknown page
description information,
such as when you drop a
TIFF or JPEG file into a
hot folder. If you are
printing from an
application, your print
settings will override
these settings.
4. Under Print Queue, choose
5. Click
Use page dimensions to set paper width and height settings, to
EPSON Stylus Pro 4000.
center the image on the page, or offset it by a specific distance.
6. Click the
Epson 4000 tab.
Make changes to these settings, as necessary:
• Choose 4 Pass for the MicroWeave
of banding, then try
8 Pass. If you still see banding in 8 Pass mode,
®
setting. If you notice any type
perform a nozzle check (see your Stylus Pro 4000 Printer Guide for
details).
18
Page 19

Installing and Setting Up the Server Software | 19
•
Choose Roll fed media or Sheet fed media, depending on the
paper source you are using
• Choose Borderless printing to allow edge-to-edge printing
• Choose Bidirectional Printing to print in both directions (turn
this off for best quality)
• Choose Cut media to allow the printer to use the printer’s cut
method to cut roll paper
• Enter a value in the Micro media feed adjustment box if you
need to adjust the setting for precise paper feeding
7. Click
OK.
8. From the Environment menu, click
9. Open the
Color or Grayscale folder, then choose the environment file
for your paper type and resolution.
Load.
10. Click
11. Click
Open, then click Yes.
Start Spooler to start the RIP.
19
Page 20

20 | Installing and Setting Up the Server Software
20
Page 21

| 21
Setting Up Client Systems
Note: To print with both
Macintosh and Windows
clients, you must install
the RIP server software
on a Macintosh server.
See page 7.
Note: You can also find
the PPD installer in the
ColorBurst RIP for
Epson > Utilities folder
on the server. Copy the
file to the system where
you want to install it, then
double-click the installer
icon.
See the appropriate section to set up client systems for printing:
• “Setting Up Macintosh OS X Clients to Print to a Mac OS X RIP
Server” below
• “Setting Up Windows Clients to Print to a Mac OS X RIP Server” on
page 24
• “Setting Up Windows Clients to Print to a Windows RIP Server” on
page 30
Setting Up Macintosh OS X Clients to Print to a
Mac OS X RIP Server
1. Make sure your computer is connected to the same network as the
ColorBurst RIP server computer.
2. Insert the ColorBurst RIP CD-ROM in the CD-ROM or DVD drive.
3. Double-click the CD-ROM icon, then double-click
ColorBurst Client Installer icon.
the
4. When you see this screen, enter your Mac OS X
Admin password, then click
OK.
5. Follow the on-screen instructions to install the ColorBurst client
software.
6. When installation is complete, check the ColorBurst RIP server
computer to make sure ColorBurst is running.
21
Page 22

22 | Setting Up Client Systems
7. Open the Mac OS X Print Center (OS X 10.2.x) or
Printer Setup Utility
>
Utilities folder.
(OS X 10.3.x) in the Applications
8. Click the
Add button to add a printer.
You may see this message if you
have not installed any printers on
your computer. Click
Add.
9. On the next screen, select
Rendezvous from the pop-up menu.
22
Page 23

Setting Up Client Systems | 23
10. Select the ColorBurst RIP print server name that you specified (see
“Setting the Print Server Name” on page 13) from the list of
Rendezvous printers.
11. Select
12. Highlight
13. Click
ColorBurst RIP Server from the Printer Model list.
ColorBurst - EPSON StylusPro4000.
Add to add the printer.
You see the ColorBurst RIP Print Server name in the printer list.
14. Close Print Center or the Printer Setup Utility. You’re ready to print to
the ColorBurst RIP.
23
Page 24

24 | Setting Up Client Systems
Setting Up Windows Clients to Print to a
Mac OS X RIP Server
ColorBurst supports Windows 2000 and Windows XP. Other Windows
operating systems are not supported.
1. Make sure your computer is connected to the same network as the
ColorBurst RIP server computer.
2. Insert the ColorBurst RIP CD-ROM into the CD-ROM or DVD drive.
3. Windows 2000: Click
Windows XP: Click
Hardware > Printers and Faxes
4. Double-click the
Start > Settings > Printers.
Start > Control Panel > Printers and Other
.
Add Printer icon, then click Next.
5. The following screen appears. Make sure the
this computer
install my Plug and Play printer
button is selected and Automatically detect and
is unchecked. Then click Next.
Local printer attached to
24
Page 25

Setting Up Client Systems | 25
6. Click Create a new port, select Standard TCP/IP Port, and click
Next.
7. When you see the Add Standard TCP/IP Print Port Wizard screen, click
Next.
8. Enter the IP address for the Macintosh with the ColorBurst RIP server
(located under
Next.
System Preferences > Network settings), then click
25
Page 26

26 | Setting Up Client Systems
9. Select Custom and click the Settings button.
10. You see this screen:
Select the following settings:
• Protocol: LPR
•
Queue Name: enter the ColorBurst Print Server Name
(case-sensitive; found in the ColorBurst RIP Preferences window;
see “Setting the Print Server Name” on page 13)
• Select the LPR Byte Counting Enabled checkbox
11. Click
12. Click
OK.
Next.
26
Page 27

Setting Up Client Systems | 27
13. \Click Finish to close the Add Standard TCP/IP Printer Port Wizard.
14. At the next screen, click
15. Browse to the
Utilities folder on the CD-ROM. Click ColorBurst.INF.
Have Disk, then click Browse.
16. Click
Open to return to the Install from Disk window.
27
Page 28

28 | Setting Up Client Systems
17. Click OK.
18. Select
ColorBurst, then click Next.
19. Leave the default name or enter a new name for the Stylus Pro 4000 in
the Printer name box. Then click
Next.
20. Follow the on-screen instructions to install the software.
28
Page 29

Setting Up Client Systems | 29
21. At the end of the installation, click Finish.
22. Restart your computer. You are ready to print.
29
Page 30

30 | Setting Up Client Systems
Setting Up Windows Clients to Print to a Windows RIP Server
1. Make sure the network is set up and the ColorBurst RIP is running.
2. Windows 2000: Click
Windows XP: Click
Hardware > Printers and Faxes
3. Double-click the
Start > Settings > Printers.
Start > Control Panel > Printers and Other
.
Add Printer icon, then click Next.
4. The following screen appears. Make sure the
selected. Then click
Next.
Network printer button is
30
Page 31

5. Select Type your printer name (Windows 2000) or Browse for a
Windows XP
6. Browse the network and select the ColorBurst RIP printer, then click
printer
Next and click Yes to continue.
(Windows XP) and click Next.
Setting Up Client Systems | 31
Windows 2000
31
Page 32

32 | Setting Up Client Systems
7. If you want to use the ColorBurst RIP as your default printer, choose
Yes. If not, choose No. Click Next.
8. Click
Finish when you see a screen telling you that setup is complete.
The ColorBurst RIP is added as a printer on your computer.
32
Page 33

| 33
Printing
Note: If you are using
Adobe® Photoshop,®
QuarkXPress,
InDesign,
for specific settings you
need to make in those
applications.
®
or Adobe
®
see page 34
When printing over a network, you can print to the ColorBurst RIP from
applications (see below) or you can place image files directly into a shared
hot folder (page 34).
On the ColorBurst RIP server computer, you can print from applications
(see below), place image files into a hot folder (page 34), or drag image files
directly to the RIP List in the ColorBurst window (page 38).
Printing From an Application
To print with Mac OS X, see the section below. To print with Windows, see
page 34.
Printing With Mac OS X
1. Choose File > Print. You see a screen like this:
ColorBurst
Print Server
name
Note: Since you have
already defined the
printer’s settings and
color management from
within the ColorBurst RIP,
you only need to review
basic printer settings
before sending your print
job.
2. For Printer, choose the ColorBurst Print Server name.
3. Click
Print to send your print job to the ColorBurst RIP.
33
Page 34

34 | Printing
Printing With Windows
1. Choose File > Print. You see a screen like this:
2. Make sure the correct printer is selected.
3. Click
OK to send your print job to the ColorBurst RIP.
Printing From Specific Applications
• Adobe Photoshop: Make sure color management is turned off (you can
do this in the
menu). To print, choose
Show More Options, then choose Output. Under Encoding, choose
Binary. This will ensure predictable printing results.
• QuarkXPress: Select the ColorBurst.ppd file in the PPD manager. Do
Photoshop > Color Settings or File > Color Settings
Print with Preview from the File menu. Click
not use other PPDs when printing to ColorBurst.
• Adobe InDesign: Choose File > Page Setup and select the correct
printer for the Printer setting.
Printing Using a Hot Folder
Hot folders create an easy and powerful method of printing to the
Stylus Pro 4000.
If you are printing locally, you can turn any folder into a hot folder and
simply copy the files you want to print to that folder. The ColorBurst RIP
automatically checks the hot folder and prints the files.
34
Page 35

Printing | 35
If you are printing over a network, you need to make sure sharing is enabled
on the server and on client systems, then set up the hot folder as your shared
folder. See your network administrator for help with setting up sharing.
Setting Up a Hot Folder in Mac OS X
Follow these steps to set up a hot folder:
1. To start the RIP server, double-click the
ColorBurst RIP for Epson
icon on your desktop.
Or double-click the
Applications > ColorBurst RIP for Epson folder.
2. Choose
Preferences from the ColorBurst RIP menu.
ColorBurst RIP icon in the
Change button
3. Click the
Change button.
35
Page 36

36 | Printing
Note: Make sure you
enable Personal File
Sharing and Windows
Sharing as necessary to
share your Drop Box and
hot folder with other
users on the network.
You can enable these
options in the System
Preferences > Sharing
settings. See your Mac
Help for detailed
instructions.
4. Browse to the folder you want to use as the hot folder. If you are sharing
the hot folder over a network, you should choose a shared folder, such as
the
Drop Box in the current user’s Public folder, as shown below.
5. Select the folder and click
Choose.
6. Verify that the correct hot folder is selected.
Selected hot
folder
7. If you want to adjust how often ColorBurst checks the hot folder, move
the Folder Scanning Interval slider. You can set the interval from
2 to 30
seconds (in 2-second intervals).
36
Page 37

Printing | 37
8. Click OK to close the Preferences window.
Setting Up a Hot Folder in Windows
In Windows, the Hot Folder - ColorBurst Epson RIP folder
is installed on your desktop when you install the ColorBurst
RIP. Drag the folder anywhere on your system where you
want to store it. If you want to print with the hot folder over
the network, you need to make sure it is shared on the
network. See your network administrator for help with setting
up folder sharing in Windows.
Printing to a Hot Folder
Caution: If you are
printing from the
ColorBurst RIP server
computer, make sure you
make a copy of your file
or create an alias to drag
to the hot folder, instead
of dragging-and-dropping
the original file. If you
drag a file to the hot
folder, it’s deleted from
the hot folder once the
RIP brings it into the RIP
List. (For some files, you
may be able to drag and
copy the file from the RIP
List or the Done List in
the ColorBurst RIP
window into another
folder if it was accidently
placed in the hot folder.)
To print to the hot folder, browse to it over the network or on your
computer, then drag supported image files (see “Supported File Types” on
page 38) to the hot folder. ColorBurst prints files in the order they are
copied to the folder.
37
Page 38

38 | Printing
Drag-and-Drop Printing on the RIP Server
(Mac OS X)
You can drag and drop files directly into the RIP List window for printing.
The RIP automatically receives and prints supported files (see below).
Drag image files here for printing
Supported File Types
The following file types automatically print from hot folders and from local
drag-and-drop printing to the RIP List (Mac OS X only). Print other file
types directly from applications.
• PDF (Adobe Acrobat Portable Document Format)
• PS (PostScript)
• TIFF
• JPEG
• EPS
38
Page 39

| 39
Managing Print
Jobs on the
Mac OS X
RIP Server
Tip : You can select
multiple print jobs at
once; hold down the
Shift key and click the file
names of the print jobs
you want to select.
The ColorBurst RIP for Mac OS X includes the following options for
managing print jobs:
• “Holding, Activating, Canceling, and Deleting Jobs” below
• “Changing File Attributes” on page 40
• “Reordering Print Jobs” on page 41
• “Reprinting Files In the Done List” on page 42
Holding, Activating, Canceling, and Deleting Jobs
The ColorBurst RIP Server window includes buttons for holding, activating,
deleting, and canceling print jobs.
Hold, Activate, Delete, and Cancel buttons
• Holding: Highlight a print job’s file name and click Hold. The print job
Status changes from
remains in the RIP List until you activate it or delete it. If it is printing,
this option is disabled and you must click
Ready to Hold. When you hold a print job, it
Cancel to stop the print job.
39
Page 40

40 | Managing Print Jobs on the Mac OS X RIP Server
• Activating:
name and click
the RIP is set to
•Canceling: To stop a print job, highlight the file name and click
Cancel. You can only cancel print jobs that are currently printing. The
To allow a held print job to start printing, highlight the file
Activate. The Status changes from Hold to Ready. If
RIP On, the print job starts printing.
file is not deleted from the RIP List, so you can print it later or delete it,
as described below.
• Deleting: To delete a print job from the RIP List or the Done List, click
the file name and click
Delete.
Changing File Attributes
You can adjust print size, rotation, and the number of copies for each file
that is sent to ColorBurst. You cannot make changes to the file attributes
while a file is printing.
1. Double-click a File Name in the RIP List.
2. You see this screen:
40
Page 41

Managing Print Jobs on the Mac OS X RIP Server | 41
Make adjustments to the file attributes:
• Scale by Percentage: Adjust the Width and Height percentage
settings to resize the image. Keep
Maintain Proportions checked
to ensure that the image is not distorted. To scale the image up to
the largest recommended size (with the lowest recommended
resolution of 100 ppi), click
100%, click
• Set New Dimensions: Manually enter the Width and Height
Reset Percentages.
Maximum Scaling. To return to
settings to set the image to fit the page size that you want to print.
• Rotation: Click any of the options to rotate the image in the
direction shown.
• Number of Copies: Enter the number of copies that you want to
print of that file.
3. Click
OK when you finish adjusting file attributes.
Reordering Print Jobs
To change the order in which your print jobs print, simply click and drag
the file name above or below another print job file name. You can also hold
down the
Shift key and choose multiple files to drag at one time.
41
Page 42

42 | Managing Print Jobs on the Mac OS X RIP Server
Reprinting Files In the Done List
Tip : You can print
multiple copies of a print
job with the File
Attributes window; see
“Changing File
Attributes” on page 40.
If there is a file in the Done List that you would like to print again, click the
file name and drag it to the RIP List. This allows you to reprint the file as
necessary.
Click and drag files to the RIP List to reprint
42
Page 43

| 43
Color Management and Printer Linearization
Note: All ICC profile files
need to be copied into
the ColorBurst RIP for
Epson > ICC Profiles
folder for the RIP to
see them.
The environment you choose for your paper type and print resolution
includes what are normally the optimum color settings for your
Stylus Pro 4000. If you notice that the colors are not what you expect, or if
you would like to adjust the color management settings to meet your specific
needs, you can make changes to the ColorBurst RIP’s color management
settings and linearize the RIP and your Stylus Pro 4000, if necessary. See
these sections:
• “Using Color Management Settings in Mac OS X” below
• “Using Color Management Settings in Windows” on page 47
• “Relinearizing an Existing Printer Setup” on page 51
Using Color Management Settings in Mac OS X
Click the Ink & Color Settings button in the ColorBurst RIP window to
view the Ink & Color Settings window. The settings are described below.
When you are done making changes to settings, click
• Ink Curves - Channel Ink Reduction: The sliders allow you to adjust
the maximum amount of a specific ink that is used for the current active
environment. You can increase colors by increasing the percent value
with the slider. You can reduce colors by decreasing the slider value. You
can also type in specific percentages.
OK.
43
Page 44

44 | Color Management and Printer Linearization
• Ink Curves - Bezier
Curves:
To use Bezier
Curves to control the color
channel for each ink color,
click
Use Bezier Curves
and then click
Edit Curves.
You see a window like this:
Tip : Hold the ctrl key and
click in the window, then
click Copy Curve To
Other Inks to copy the
curve to all the ink
options.
Click any point on the line
and drag it to the desired
location, then click a
second point and move it to
create the desired curve.
OK to save the curves
Click
that you create.
44
Page 45

Tip : All the Stylus Pro
4000 printers on your
network should go
through this process to
ensure they are providing
the exact same color.
Note: If the color output
from the printer does not
match the settings in the
ColorBurst RIP, you may
need to linearize the
printer by printing a
linearization target and
creating a new
linearization file with
a spectrophotometer
and the included
ChromaCapture Utility.
See “Relinearizing an
Existing Printer Setup” on
page 51 for details.
Color Management and Printer Linearization | 45
•
Linearization: Over time, your Stylus Pro 4000 printer may not be
producing the same accuracy of color as it did when it was new.
Changes to the printer age, environment, ink, and media lots all
have an effect on what the RIP thinks the printer is supposed to be
printing. To better explain to the RIP what the Stylus Pro 4000 is
printing, a linearization process is required. By going through this
process, you are correcting for any changes in your printer over
time.
Click the Linearization tab to view the window shown below. The
current linearization file is shown. To choose an existing
linearization (.LIN) file, click
Open. The file is saved in the current environment.
Open and choose a file, then click
45
Page 46

46 | Color Management and Printer Linearization
Tip : If you have specific
input profiles that you
want to use with the RIP,
you can copy your profile
files to the ColorBurst
RIP for Epson > ICC
Profiles folder. They
appear in the appropriate
lists, depending on the
type of image.
Note: The Rendering
Intents (in the column on
the right) in this dialog
box will always override
what a file may have
embedded within it.
Tip : If you have specific
device profiles that you
would like to use with the
RIP, you can copy your
profile files to the
ColorBurst RIP for
Epson > ICC Profiles
folder. They appear in
the appropriate lists,
depending on the
type of image.
• Input Profiles:
If Use Embedded Profiles is checked, the RIP will
check to see if the print file has a profile. If so, then it will use the
embedded profile (except for the rendering intent) and ignore the
choices made in this dialog box.
• Simulation Profile: The ColorBurst RIP allows your Stylus Pro 4000
printer to simulate other printers for occasions when you need a specific
type of output. Choose an option from the Simulation list, then choose
a rendering intent. If you want to turn off the simulation profile, choose
None.
Note: The simulation
profile is not what the
printer is trying to match.
This choice tells the
printer to simulate the
color defined under the
input profiles dialog not
as a Stylus Pro 4000, but
as the setting you choose
under the Simulation
setting.
46
Page 47

Color Management and Printer Linearization | 47
Using Color Management Settings in Windows
Note: All ICC profile files
need to be copied into
the ColorBurst_Epson >
Profile > Output > ICC
folder for the RIP to see
them.
Choose the options described below to adjust color management settings for
the ColorBurst RIP. (The options are available under the Options menu on
the ColorBurst RIP.)
• Color Adjustments: You can adjust the maximum amount of a specific
ink that is used for the current active environment by entering
percentages for each ink color.
47
Page 48

48 | Color Management and Printer Linearization
Click Edit to adjust an individual ink curve. You see a window like this:
Click
Edit Points and click any point on the line and drag it to the
desired location, then click a second point and move it to create the
desired curve.
Or, click
Click
Use Curve and enter a value for the curve.
Save to save the curves that you create.
48
Page 49

Color Management and Printer Linearization | 49
Tip : If you have specific
input profiles that you
want to use with the RIP,
you can copy your
profile files to the
ColorBurst_Epson >
Profile > Output > ICC
folder. They appear in
the appropriate lists,
depending on the
type of image.
• ICC Profile Options > Input Profiles:
If Use Embedded Profiles is
checked, the RIP will check to see if the print file has a profile. If so,
then it will use the embedded profile and ignore the choices made in this
dialog box. Click
On/Off to disable or enable each profile.
49
Page 50

50 | Color Management and Printer Linearization
Tip : If you have specific
device profiles that you
would like to use with the
RIP, you can copy your
profile files to the
ColorBurst_Epson >
Profile > Output > ICC
folder. They appear in
the appropriate lists,
depending on the
type of image.
• ICC Profile Options > Simulation Profiles:
The ColorBurst RIP
allows your Stylus Pro 4000 printer to simulate other printers for
occasions when you need a specific type of output. Click
output to another printer
Click
Open. Then choose a rendering intent. If you want to turn off the
, then click Find and choose an option.
simulation profile, uncheck the box.
Simulate
50
Page 51

Color Management and Printer Linearization | 51
Relinearizing an Existing Printer Setup
Why you should relinearize? When environments are built for ColorBurst,
one of the most important things is linearization. A linearization file is the
curve that corrects for differences in chroma (a derivative of L*ab) at
different percentages. Over time (and on every different media) a printer will
drift from its original state. By relinearizing you are putting the printer back
into its original state. When you relinearize, you have made your
environment as accurate as the day it was made.
See the section for your operating system:
• “Linearizing in Mac OS X” below
• “Linearizing in Windows” on page 54
Linearizing in Mac OS X
1. Click the Ink & Color Settings button.
2. Click the
Target
Linearization tab and then click the Print Linearization
button.
3. Choose the target that corresponds to the spectrophotometer you are
using.
4. Click
OK to send the target file to the RIP List.
51
Page 52

52 | Color Management and Printer Linearization
Note: The installer for
ChromaCapture CSE is
located in the ColorBurst
RIP > Utilities folder.
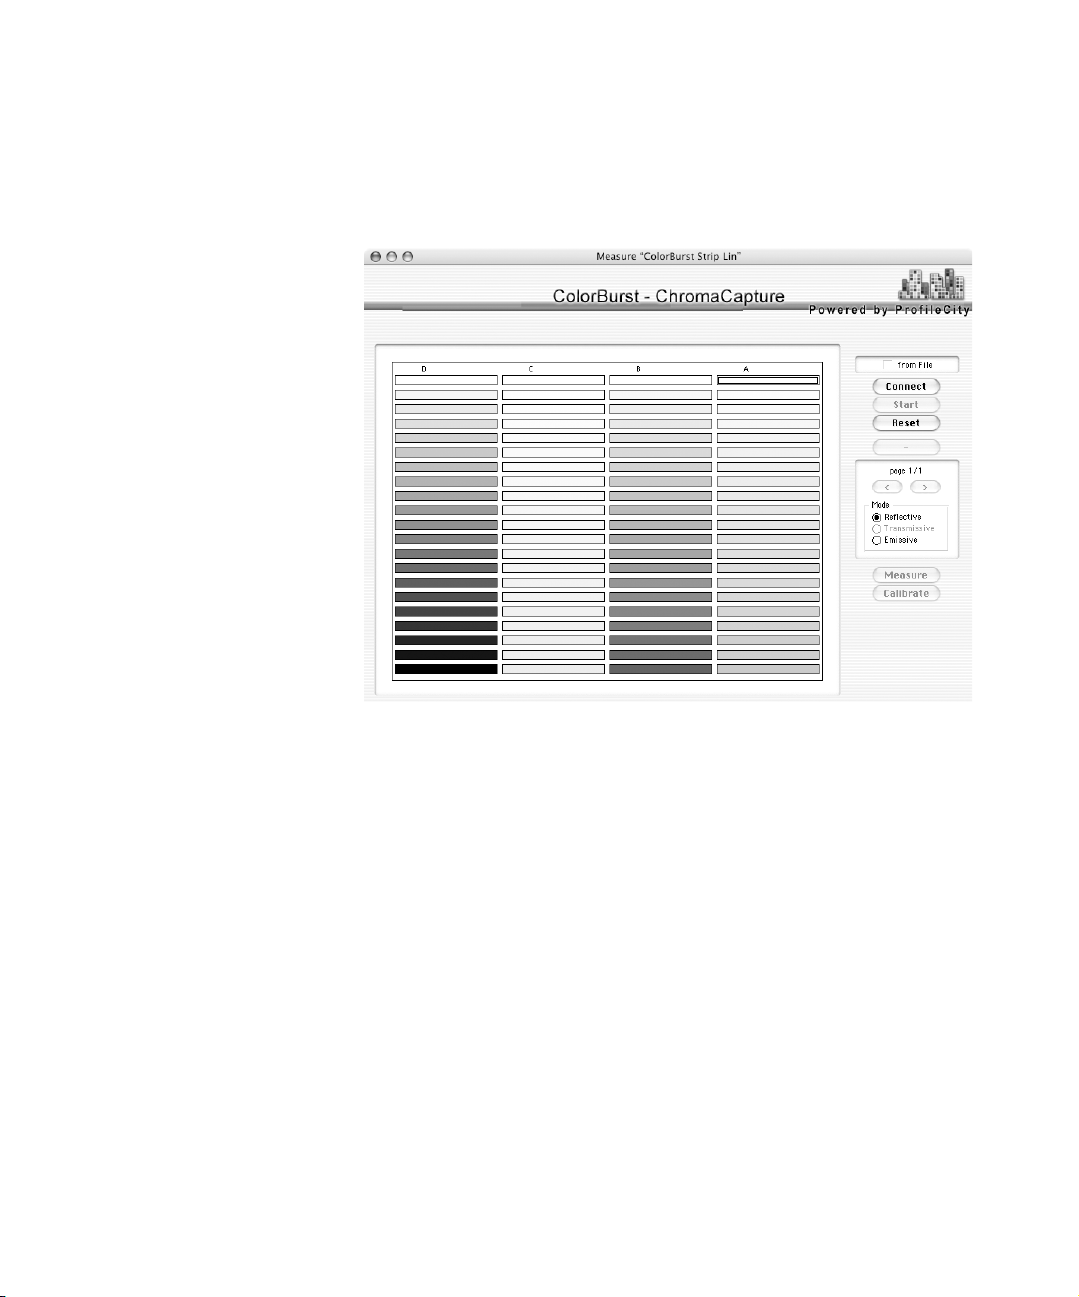
5. After you have printed your linearization target, open the
ChromaCapture CSE application.
6. Select the spectrophotometer you are using and select the port to which
it is connected. Click
Next.
7. Select the Linearization Target that you are reading. The target name
corresponds to the target you printed earlier.
8. Enter a descriptive name for your new linearization file. Then click the
Set button and choose the ColorBurst RIP > Linearization Files
folder.
52
Page 53
Color Management and Printer Linearization | 53
9. Click Connect to enable your spectrophotometer, then click Start and
follow the instructions for positioning your spectrophotometer or for
manually reading in the target patches.
When your patches are completed, ChromaCapture CSE automatically
saves the file to the folder you have specified.
10. Click the
tab and click
11. Select your linearization file and click
Ink & Color Settings button, then select the Linearization
Open.
OK. Click OK to close the Ink &
Color Settings window.
12. Choose
Save from the Environment menu, enter a name, and click OK.
53
Page 54

54 | Color Management and Printer Linearization
Linearizing in Windows
1. Choose an environment file in the Environment > Load menu in
ColorBurst, then click
Open.
2. Click
3. Click
4. Choose a linearization target setting and click
Options > Linearization Options.
Select a lin file and choose a linearization file for your target.
Print target. After the
target prints, let it dry completely.
5. Double-click the ColorBurst ColorCatch icon on your
desktop to start ColorCatch.
54
Page 55

Color Management and Printer Linearization | 55
6. Select New Job from the File menu.
You see the Create Job screen:
7. Enter a Job Name for your linearization and any descriptive text for the
Print Conditions information and Comments.
8. Choose your spectrophotometer device and settings under the
Instrumentation options.
9. Click
OK.
55
Page 56

56 | Color Management and Printer Linearization
Note: If you are using
the DPT41, use the
ColorBurst DPT41 reader
software located in the
LIN folder.
10. Click Connect to enable your spectrophotometer, then click Start and
follow the instructions for positioning your spectrophotometer or for
manually reading in the target patches.
11. Once you have read all of the patches on the linearization chart, save
your file in the LIN folder and name it accordingly. Make sure you have
saved the file in the LIN folder.
12. Open ColorBurst.
56
Page 57

Color Management and Printer Linearization | 57
13. From the Options menu, open the Linearization Options dialog box.
Click the
Select a lin file button to select the lin file you just created.
14. Click
15. Click
16. From the Printer Setup menu, select
Open.
Save.
Save Printer Setup. Enter a name
with the printer name and other identifying information, such as media
type.
You may repeat this process for other media; the densities will be different
for each type of media.
57
Page 58

58 | Color Management and Printer Linearization
58
Page 59

| 59
Appendix
Where To Get Help
Epson provides technical support and information on the installation,
configuration, and operation of professional graphics arts products through
the Epson Preferred Protection Plan. Call (888) 377-6611, 6
SM
AM to 8 PM,
Pacific Time, Monday through Friday.
Before you call, make sure you have your Unit ID number, which is
included with the Epson Preferred Protection Plan information that came
with your printer. You’ll also need your printer serial number and proof of
purchase. If you experience difficulty using your Unit ID number when
accessing the toll-free Epson Preferred phone number, please call
(562) 276-1305 in the U.S. or (905) 709-2567 in Canada during normal
business hours.
Epson also provides technical assistance 24 hours a day through the World
Wide Web. You can reach Epson Support at http://support.epson.com. At
this site, you can download drivers and other files, look at product
documentation, access troubleshooting information, and receive technical
advice through e-mail.
System Requirements
Before you install the software, make sure your computer meets the
minimum system requirements listed below.
Macintosh ColorBurst Server
• Power Macintosh G4, 800 MHz or faster
• Macintosh OS X 10.2.6 or later, or OS X 10.3.4 or later
• 500MB hard drive space (40GB recommended—network storage may
be used, but may result in slower throughput)
• 512MB RAM (1GB recommended)
• USB connection
• TCP/IP networking protocol enabled with a static (manual) IP address
59
Page 60

60 | Appendix
Windows ColorBurst Server
• Pentium
• Windows 2000 or XP
• 500MB hard drive space (40GB recommended—network storage may
be used, but may result in slower throughput)
• 512MB RAM (1GB recommended)
• TCP/IP networking protocol enabled with a static IP address
• 1024 × 768 resolution display
®
4, 1.7 GHz or faster
Macintosh Client Systems
• Power Macintosh G4, 800 MHz or faster
• Macintosh OS X 10.2.6 or later, or OS X 10.3.4 or later
• 500MB hard drive space
• 512MB RAM
• TCP/IP networking protocol enabled
Windows Client Systems
• Pentium
• Windows 2000 or XP
• 500MB hard drive space
• 512MB RAM
• TCP/IP networking protocol enabled
®
4, 1.7 GHz or faster
60
Page 61

Index
| 61
A
Activating print jobs, 14 to 15, 39 to 40
Advanced media control
, 12
B
Banding, 12, 18
Bezier curves
Bidirectional printing
Borderless printing
, 44
, 12, 19
, 12, 19
C
Canceling print jobs, 39 to 40
Channel Ink Reduction
Choosing printer
ChromaCapture CSE
Clients
Macintosh
Windows
Color adjustments
Color management
Macintosh
Windows
ColorBurst ColorCatch
Configuration, RIP
Copies
Copy ink curve
Cut Media setting
, 21 to 23
, 24 to 32
, 43 to 46
, 47 to 50
, 40 to 41
, 44
, 43
, 8 to 10
, 52 to 53
, 47
, 54 to 56
, 5
, 12, 19
E
Edge-to-edge printing, 12, 19
Environment settings
Epson help
, 59
, 10 to 13, 18 to 19
F
File attributes, 40 to 41
File types for hot folder printing
H
Height, 12, 40 to 41
Help, Epson
Holding print jobs
Hot folder
, 59
, 14 to 15, 39
, 12, 18, 34 to 37, 38
I
Increasing colors, 43, 47
Ink & Color settings
Ink curves
Input profiles
Installing
, 43 to 44, 48
Mac OS X client software
server software in Windows
server software on a Macintosh
Windows client software
, 43 to 46
, 46, 49 to 50
, 21 to 23
, 24 to 32
, 38
, 15 to 19
, 7 to 10
D
Deleting print jobs, 39 to 40
Done List
Drag-and-Drop printing
, 42
, 38
L
Linearization
Linearizing
61
in Windows
on a Macintosh
on a Macintosh
, 54 to 57
, 51 to 53
, 45
Page 62

62 | Index
M
Macintosh
client setup
color management
, 21 to 23
, 43 to 46
drag-and-drop printing
linearization
managing print jobs
printing
server software
setting up hot folder
system requirements
Managing print jobs
Micro feed adjustment
MicroWeave setting
, 51 to 53
, 39 to 42
, 33
, 7 to 15
, 35 to 37
, 59 to 60
, 39 to 42
, 12, 19
, 18
N
Network configuration, 5
Network print server name
Number of copies
, 40 to 41
O
Offset image, 12
Order of print jobs
, 41
, 38
, 13
Printing
drag-and-drop
from Adobe InDesign
from Adobe Photoshop
, 38
, 34
, 34
from applications in Mac OS X
from applications in Windows
from QuarkXPress
with a hot folder
Profiles
, 46, 49 to 50
, 34
, 34 to 37
R
Receiving print jobs, 14 to 15
Reducing colors
Relinearizing
Rendering intent
Reordering print jobs
Reprinting files
RIP server
installing in Windows
installing on a Macintosh
name
starting in Windows
starting on a Macintosh
turning on and off
Roll fed media
Rotation
, 43, 47
, 51 to 57
, 46, 49 to 50
, 41
, 42
, 15 to 19
, 13
, 17 to 19
, 8 to 10
, 14 to 15
, 12, 19
, 40 to 41
, 33
, 34
, 7 to 10
P
Page settings, 12
Paper feeding setting
Print from roll
Print from sheet
Print jobs, managing
Print quality
Print server name
Print settings
Print size
, 12, 19
, 12, 19
, 12, 18
, 13
, 10 to 13, 18 to 19
, 40 to 41
, 12, 19
, 14 to 15, 39 to 42
S
Server installation
Macintosh
Windows
Setting up
clients
RIP server in Windows
RIP server on a Macintosh
Sheet fed media
Simulation profiles
Size
, 40 to 41
Spectrophotometer
Starting print jobs
62
, 7 to 10
, 15 to 19
, 21 to 32
, 15 to 19
, 7 to 15
, 12, 19
, 46, 49 to 50
, 51 to 53, 55 to 56
, 39 to 40
Page 63

Index | 63
Support
Supported file types
System requirements
, 59
, 38
, 59 to 60
T
Target, 51 to 53, 54 to 56
W
Width, 12, 40 to 41
Windows
client setup
color management
linearization
printing
server software
setting up hot folder
system requirements
, 24 to 32
, 47 to 50
, 54 to 57
, 34
, 15 to 19
, 37
, 60
63
Page 64

64 | Index
64
 Loading...