

D-Link DUB-AV300 Quick Installation Manual
You must have at least the following:
Pentium IV 2GHz or Above
Microsoft Windows 2000 SP4/XP
256MB RAM or higher
2X CD-ROM
16bit or higher level Sound-Card
One Available USB Port (USB 2.0 )
PCI/AGP 32 Bit VGA card or higher& Monitor
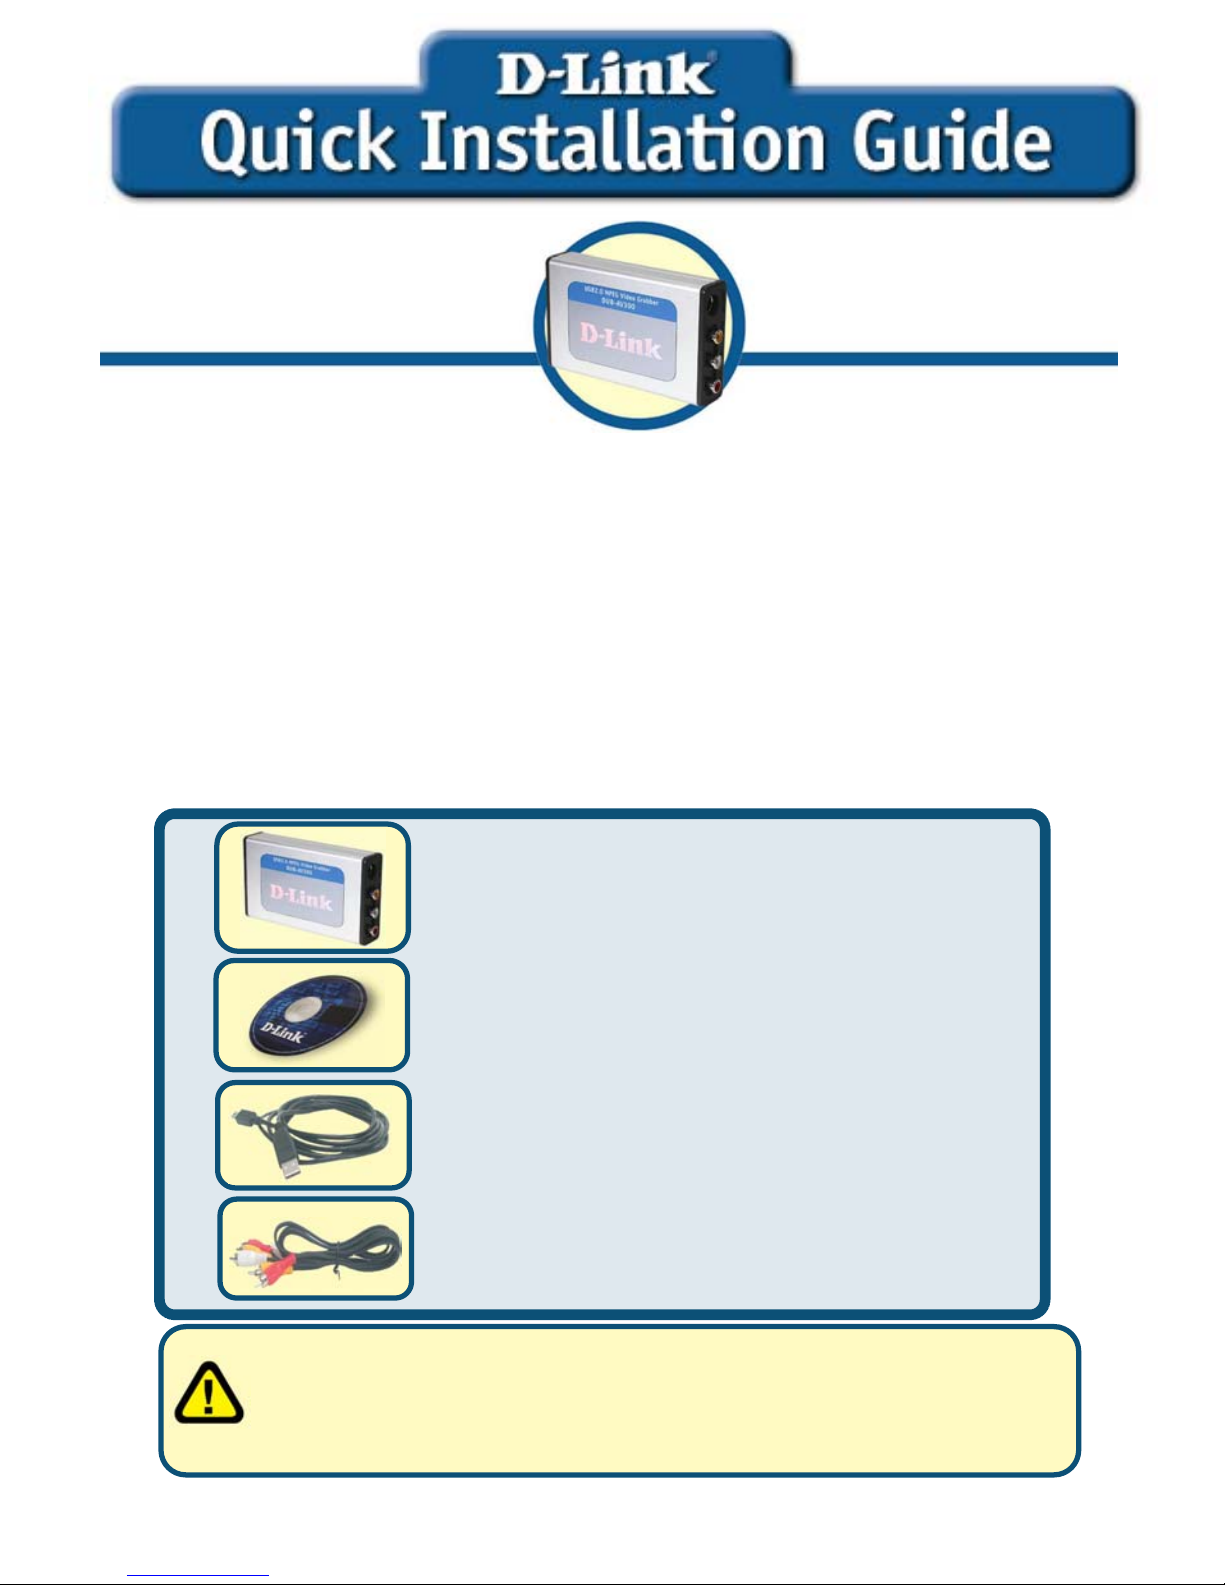
Check Your Package Contents
These are the items included with your purchase:
If any of the below items are missing, please contact your reseller.
©2004 D-Link System, Inc. All rights reserved. Trademarks or registered trademarks are the property of their respective
holders. Software and specifications subject to change without notice.
This product works with the
following operating system
software: Windows 2000 SP4/XP
Before You Begin
DUB-AV300 USB 2.0 MPEG1/2/4
Video Grabber
AV Cable
DUB-AV300
USB 2.0 MPEG1/2/4
V
ideo Grabbe
r
CD-ROM(containing Drivers, Installation
Guide, Manual, Applicaion Software and
Warranty)
USB 2.0 Cable
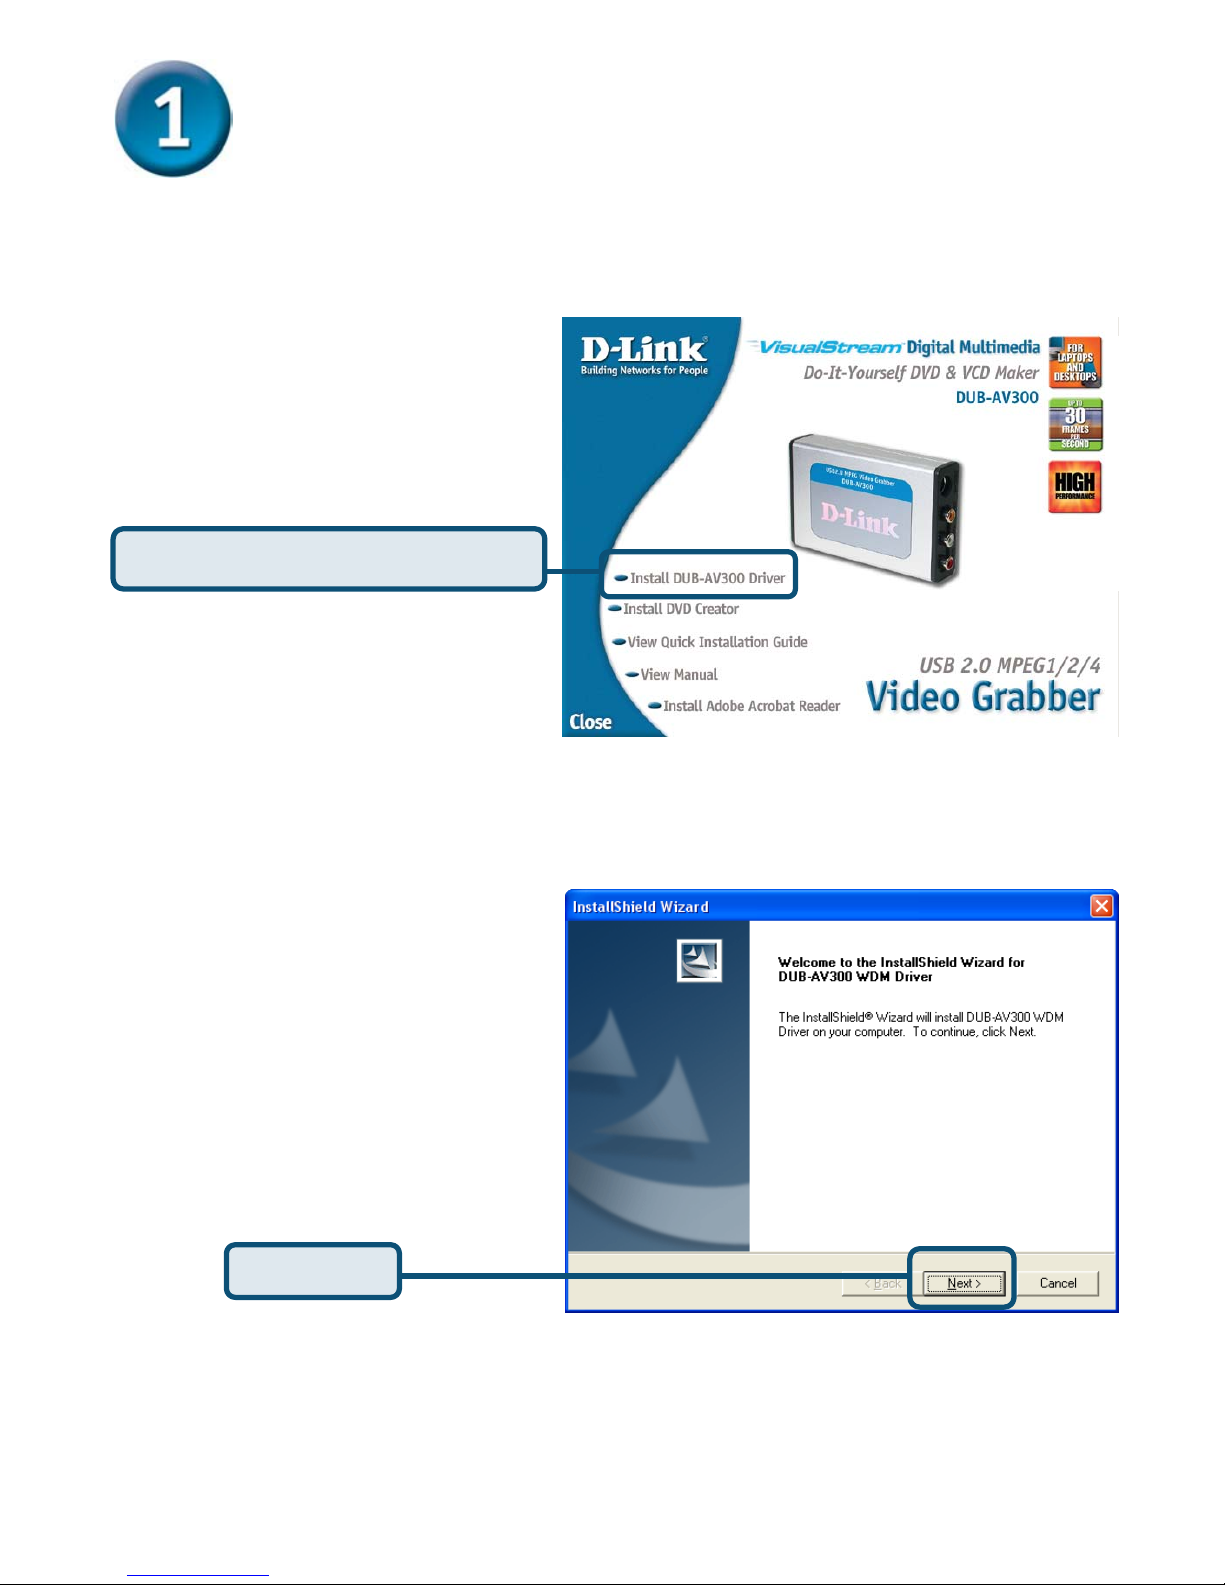
Run the Drvier CD before you install the DUB-AV300
For the first-time installation of DUB-AV300, two steps are involved:
USB 2.0 Driver and Software. See below for detailed descriptions of
these installaions.
2
DUB-AV300 Driver Installation
Please bring out the attached CD-ROM and follow the steps listed below
carefully to insure the installation of DUB-AV300 will be complete.
Click Install DUB-AV300 Driver
Insert the software CD into
CD-ROM. As you can see
the below picture,D-Link
DUB-AV300 startup window
will be displayed.
The InstallShield Wizard
window will show, please
press “Next” to continue.
Click Next
3
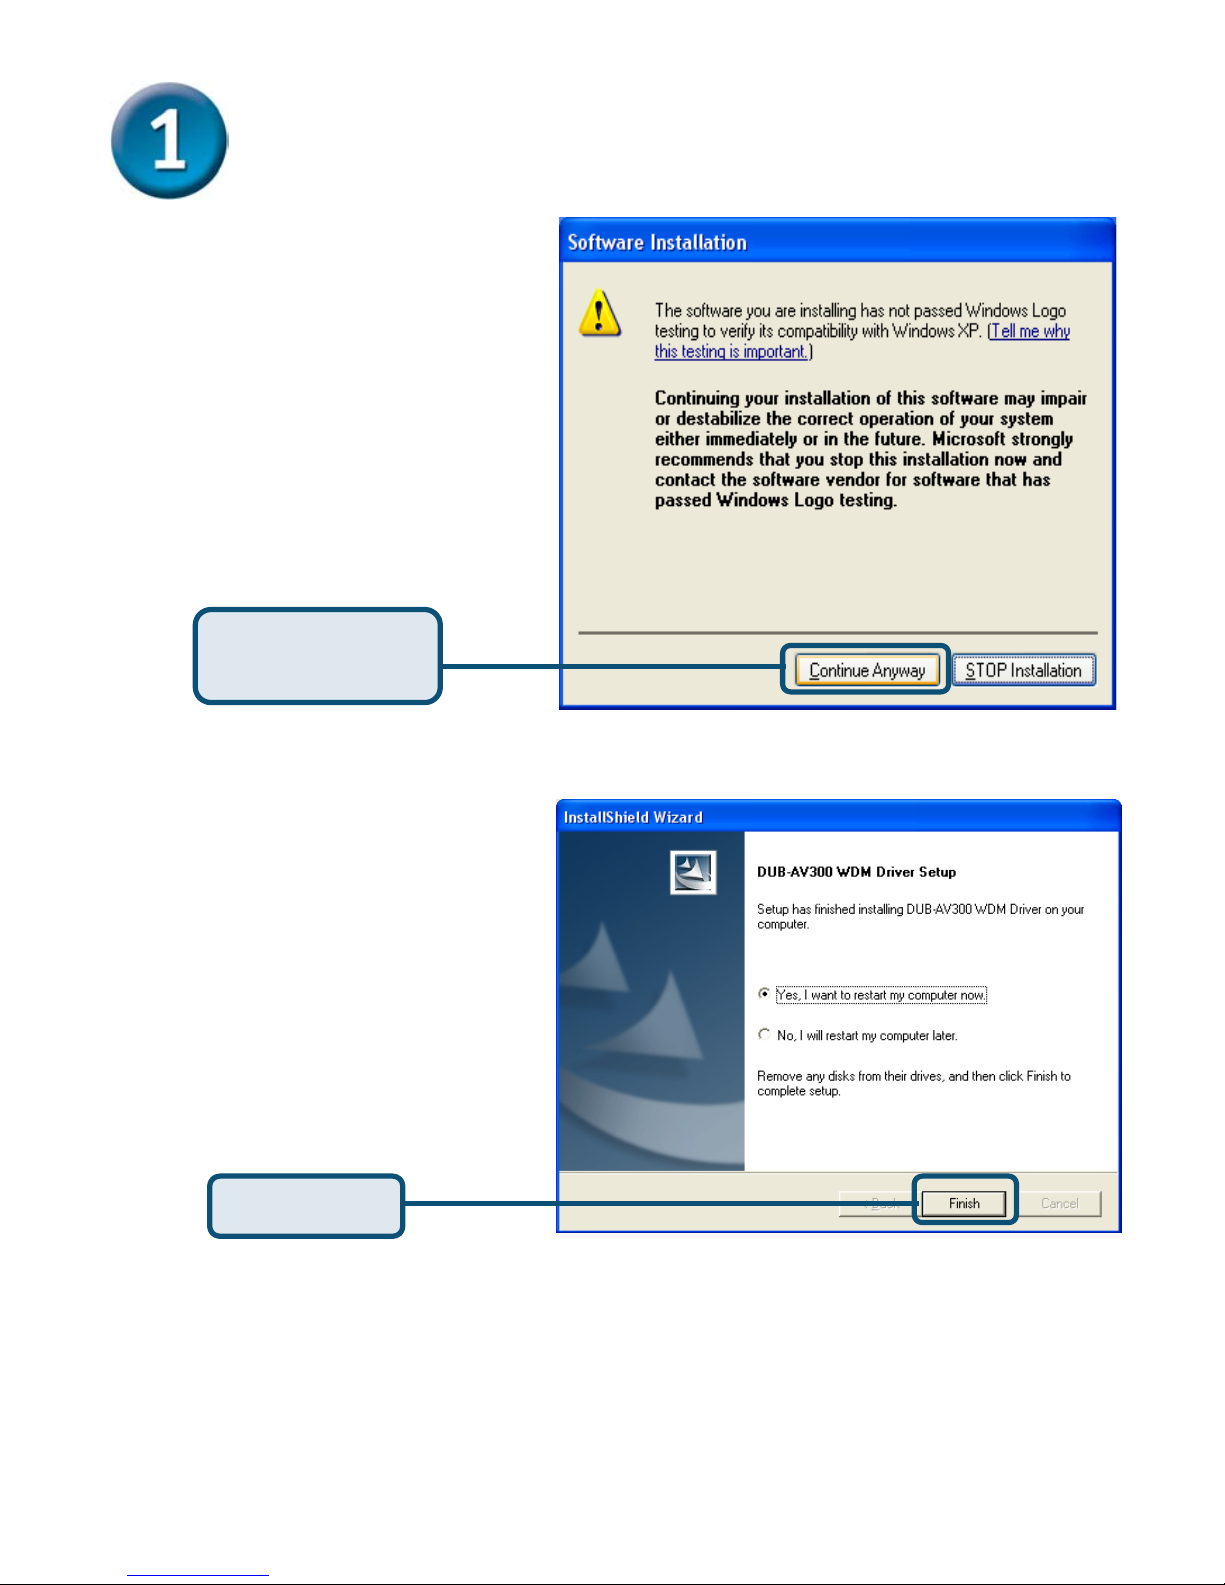
DUB-AV300 Driver Installation
(Continued)
Choose “Continue
Anyway” to ignore the
following warning
message, and continue
the setup processor.
Click Continue
Anyway
Click Finish
After the execution, please
select “Yes, I want to restart
my computer now” and
press “Finish”.
4
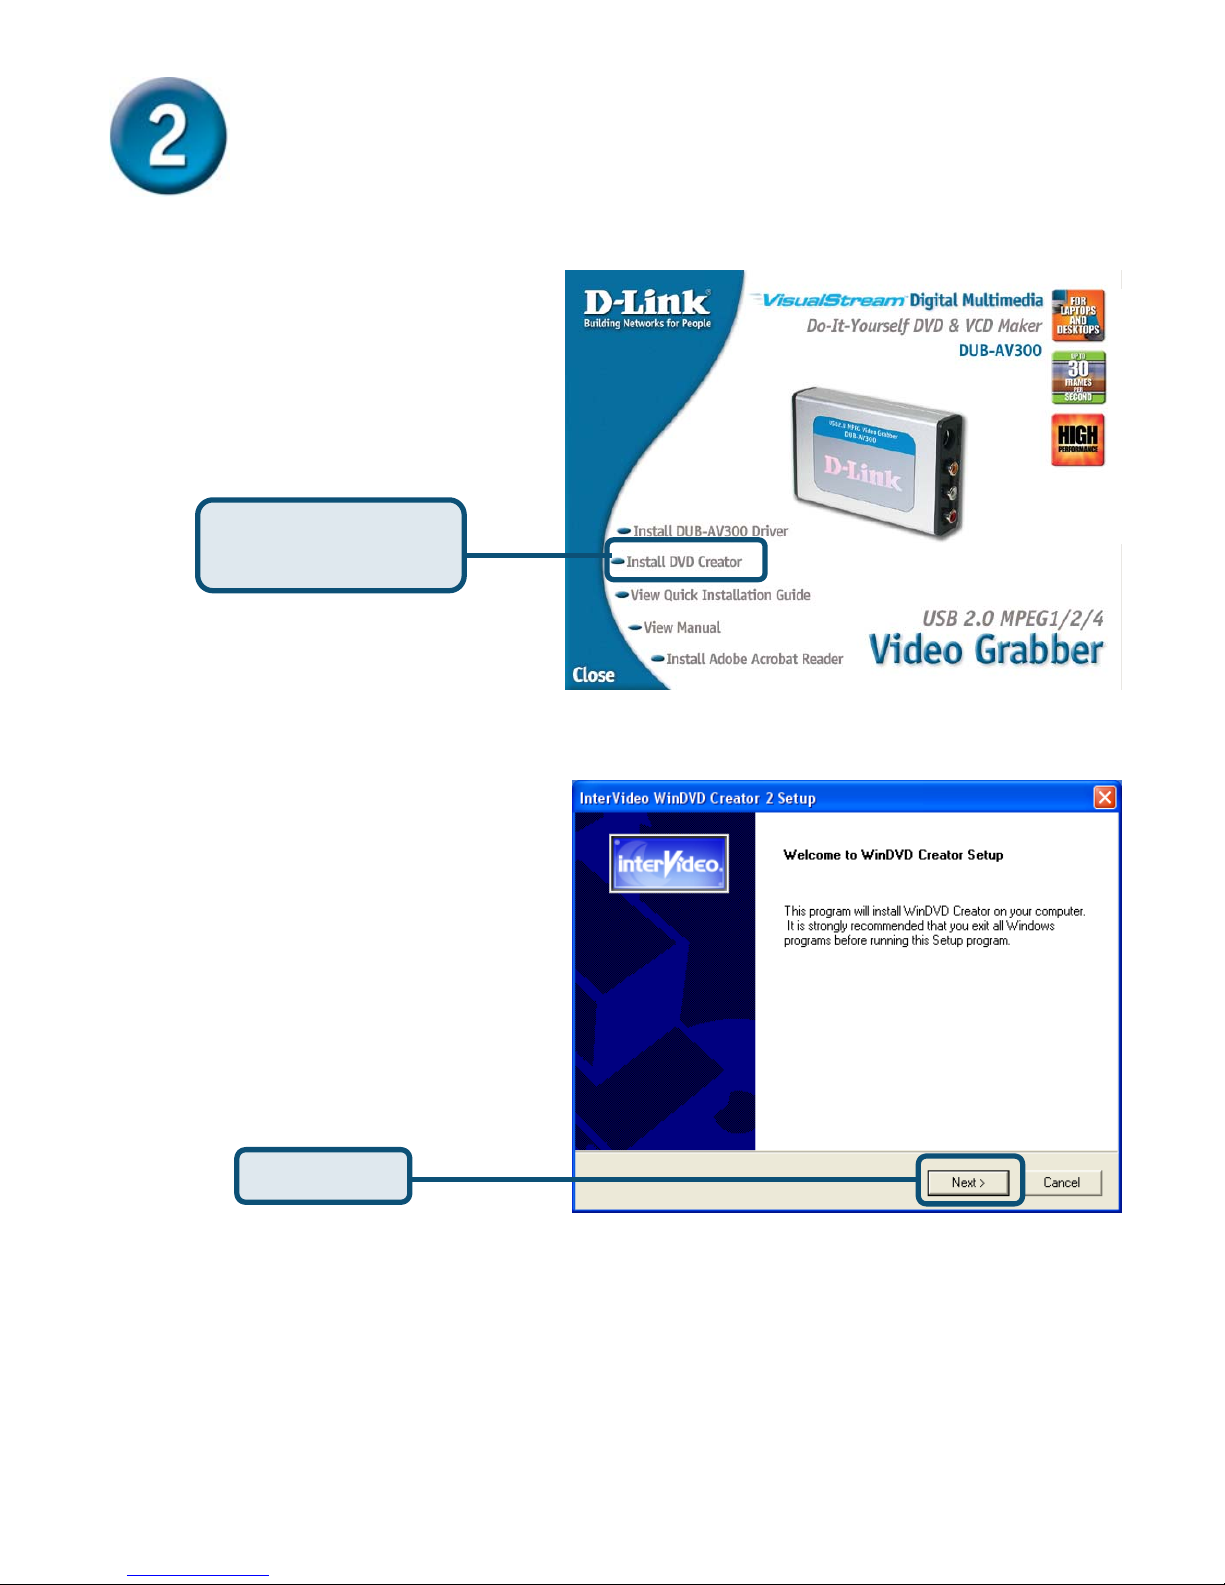
Installing WinDVD Creator 2.0
Click Install DVD
Creator
Please Click “Next” to
continue.
Click Next

5
Installing WinDVD Creator 2.0
(Continued)
Click Yes
Click Yes
Click Next
Please Click “Yes” to continue.
Please click “Yes” to continue.
Please input Name, Company
& Serial Number and then click
“Next” to continue.
 Loading...