

Page 1
This product can be set up usingThis product can be set up using
This product can be set up using
This product can be set up usingThis product can be set up using
DCS-900DCS-900
DCS-900
any current Web browser, i.e.,any current Web browser, i.e.,
any current Web browser, i.e.,
any current Web browser, i.e.,any current Web browser, i.e.,
Internet Explorer 6.0 orInternet Explorer 6.0 or
Internet Explorer 6.0 or
Internet Explorer 6.0 orInternet Explorer 6.0 or
Netscape Navigator 7.0Netscape Navigator 7.0
Netscape Navigator 7.0
Netscape Navigator 7.0Netscape Navigator 7.0
DCS-900DCS-900
Fast EthernetFast Ethernet
Fast Ethernet
Fast EthernetFast Ethernet
Internet CameraInternet Camera
Internet Camera
Internet CameraInternet Camera
Before You Begin
You must have at least the following:
• Existing 10/100 Mbps Ethernet-Based Network
• CD-ROM Drive
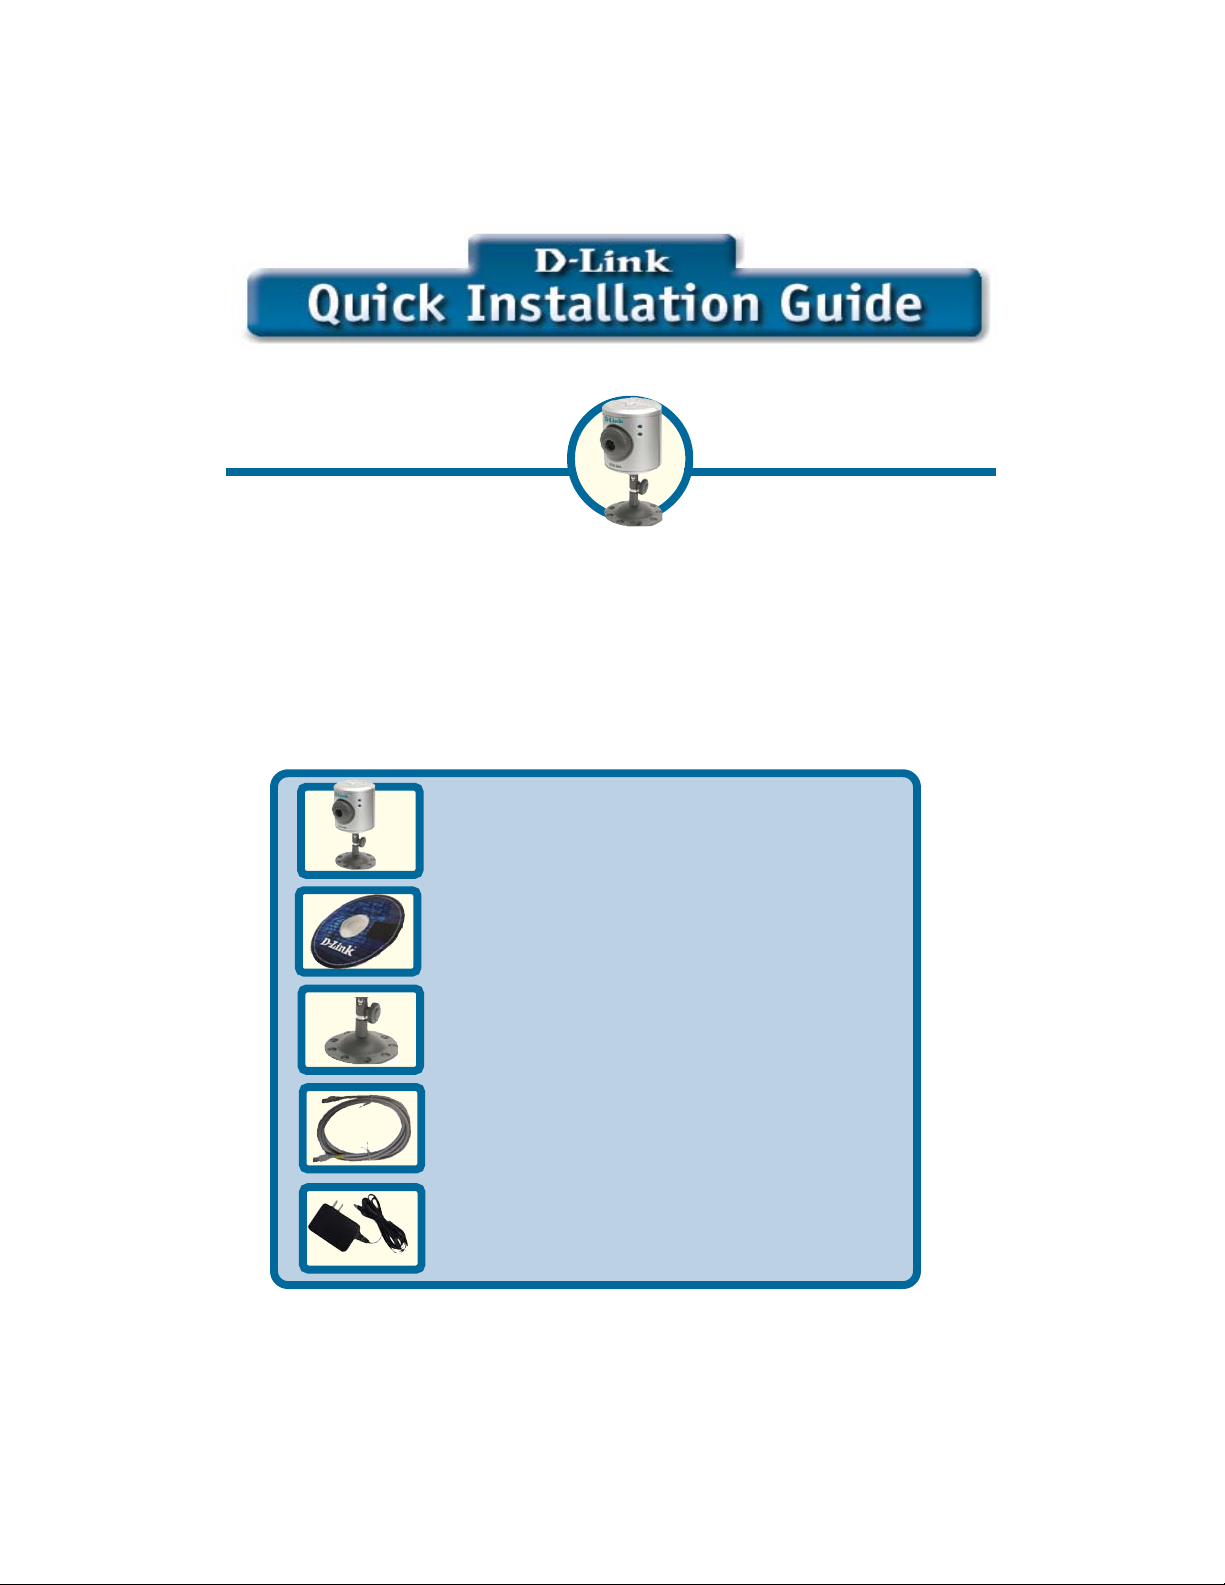
Check Your Package Contents
These are the items included with your purchase:
If any of the below items are missing, please contact your reseller.
• One DCS-900 Internet Camera
• One Installation CD-ROM (containing
Drivers, Installation Guide, Software, and
Manual)
• One Camera Stand
• One Category 5 Ethernet Cable
• One AC Power Adapter
©2003 D-Link Systems, Inc. All rights reserved. Trademarks or registered trademarks are the property of
their respective holders. Software and specifications subject to change without notice. DCS-900.09182003
Page 2
System Requirements
• Java Enabled and Compliant Web Browser
• CPU: Pentium III, 450 MHz or above
• Memory Size: 64 MB
• VGA card resolution: 800x600 or above
• Existing 10/100 Mbps Ethernet-Based Network
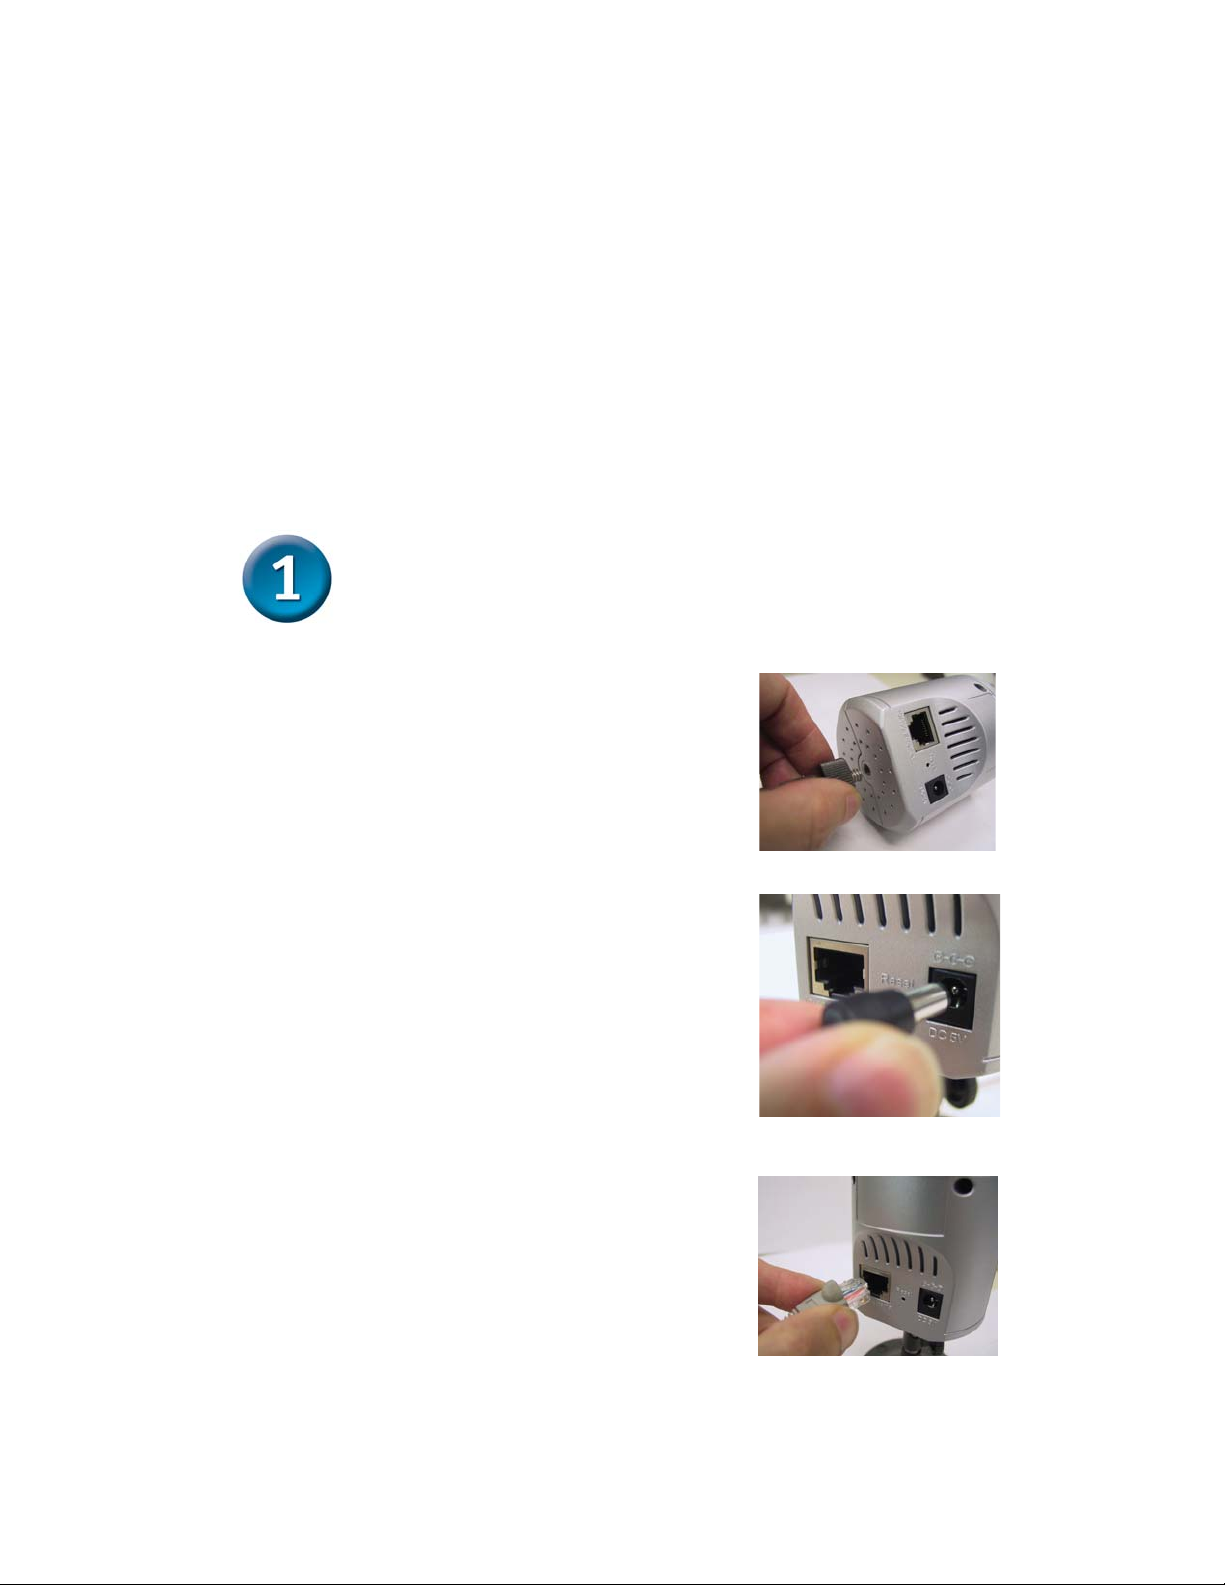
Hardware Installation
Attach the Swivel Stand
Locate the stand connector on the bottom panel of the
DCS-900 and screw on the swivel stand to the base of
the DCS-900.
Attach the External Power Supply
Attach the external power supply to the DC power
input connector located on the rear panel of the
DCS-900 and connect it to your local power supply.
Note: Power source is confirmed when the green LED
Power Indicator located to the right of the lens on the
DCS-900 is illuminated.
Connect the Ethernet Cable
Connect the included Ethernet cable to the network
cable connector located on the back panel of the
DCS-900 and attach it to the network. Network
Connectivity is confirmed when the orange LED
Indicator on the DCS-900 located below the Power LED
is illuminated.
2
Page 3
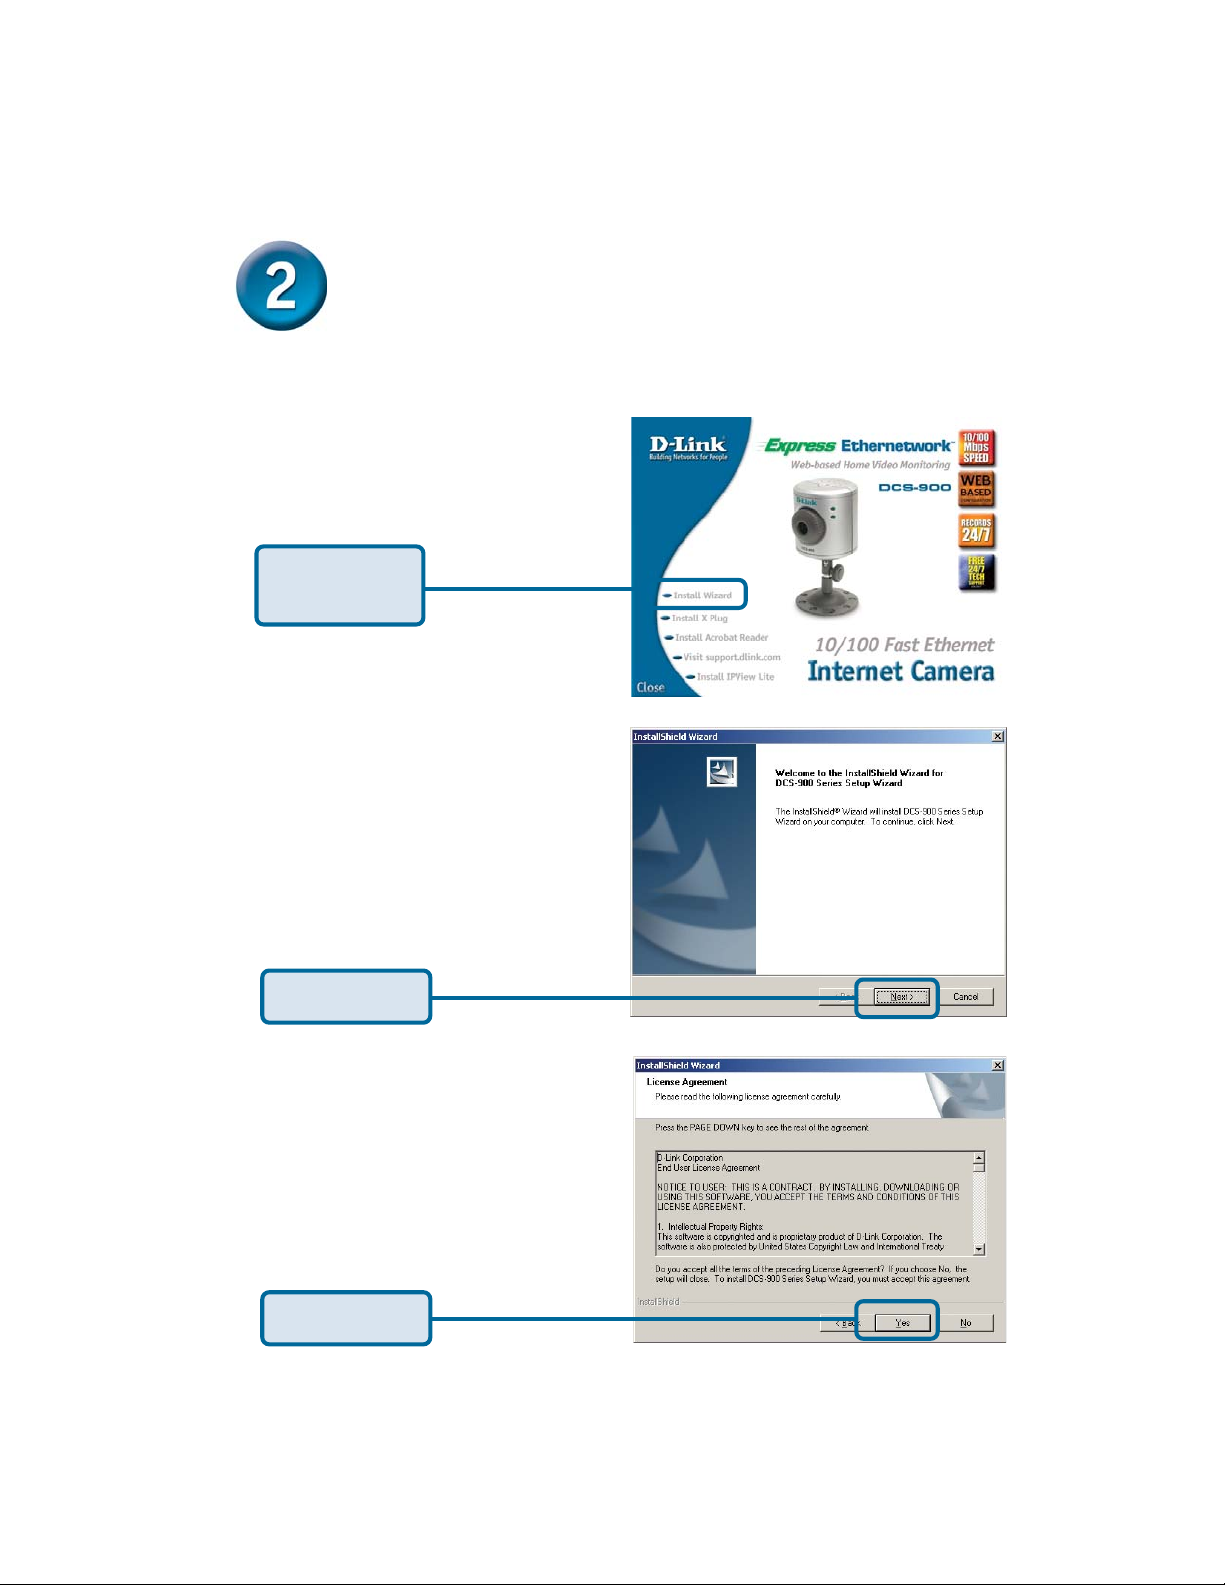
Running the Setup Wizard
You are now ready to run the Setup Wizard, which will guide you quickly through the
installation process.
Insert the D-Link DCS-900 Driver CD into
your CD-ROM drive.
Click Install
Wizard
Click Next
Click Yes
3
Page 4

Running the Setup Wizard (continued)
Click Next
Click Finish
To run the Setup Wizard, click on
Start->Programs->DCS-900 Series
SetupWizard.
Your camera’s IP Address will be
displayed here if it is valid.
Click Wizard
to begin
4
Page 5

Running the Setup Wizard (continued)
You must change the
Admin ID and Password
immediately to protect your
camera against unauthorized
access. By default, the
Admin ID and Password are
blank. To change the Admin
ID and Password, select both
Change boxes and enter a
New ID and New Password.
Click Next
The IP Address and Subnet
Mask of your camera and
Gateway must correspond
with your network settings for
you to access the camera. If
you are unsure of what these
settings should be, please
check with your network
administrator.
Click Next
5
Page 6

Running the Setup Wizard (continued)
If you need to make any
changes, click Back to modify
your camera settings.
Otherwise, click Restart to
save and apply your settings.
Click Restart
Your setup is now
complete! Click Link to
launch your web browser
and view your images.
Click Link
6
Page 7

Viewing the Streaming Video
Using your favorite Web browser, type “http://address” in the address box where
address is the IP address that you assigned to the camera from the previous
section. Press Enter. Note: The Home screen of your camera can also be
accessed from the Setup Wizard using the Link button.
Click Active X or
Java to view your
video images.
• If you are installing several cameras, it is recommended to use one
Tips
computer to configure all of them before you install them
in your planned locations. To avoid IP address conflict, use
192.168.0.20 for the LAST camera that you plan on installing.
• Make sure that you have the latest version of Java installed on your
computer to ensure proper operation when viewing the video in Java
mode. Java can be downloaded for free from Sun’s web site. (http://
www.sun.com.download/)
• The Xplug Control is included with the DCS-900 and should be installed
on your computer if you want to use Active X to view your video images
instead of Java. The Xplug Control must be installed on your computer if
you are using the remote monitoring software. Please refer to the
Manual included on this CD for detailed information on installing the
Xplug Control to your computer for use with the software.
• Please refer to the Manual located on the CD-ROM for additional
information regarding all features and instructions related to the DCS-900.
7
Page 8

Technical Support
You can find software updates and user documentation on the D-Link website.
D-Link provides free technical support for customers within the United States and
within Canada for the duration of the warranty period on this product.
U.S. and Canadian customers can contact D-Link Technical Support through our
website, or by phone.
Tech Support for customers within the United States:
D-Link Technical Support over the Telephone:
(877) 453-5465
24 hours a day, seven days a week.
D-Link Technical Support over the Internet:
http://support.dlink.com
email:support@dlink.com
Tech Support for customers within Canada:
D-Link Technical Support over the Telephone:
(800) 361-5265
Monday to Friday 8:30am to 9:00pm EST
D-Link Technical Support over the Internet:
http://support.dlink.ca
email:support@dlink.ca
 Loading...