

Page 1
Před čtením si nejdříve vyklopte stránku s obrázky a seznamte se se všemi funkcemi přístroje.
Before reading, fold out the illustration page and get to know all of the functions of your unit.
Klappen Sie vor dem Lesen die Seite mit der Abbildung aus und machen Sie sich anschließend mit allen Funktionen des Artikels vertraut.
DELTA-SPORT HANDELSKONTOR GMBH
Wragekamp 6
D-22397 Hamburg
Version: 04/2014
Delta-Sport-Nr.: TR-1836
ZAHRADNÍ TRAMPOLÍNA
ZAHRADNÍ TRAMPOLÍNA
Návodu k montáži
GARTENTRAMPOLIN
Aufbauanleitung
IAN 60237IAN 60237
GARDEN TRAMPOLINE
Assembly instructions
CZ Pokyny k používání a bezpečnostní upozornění Stránka 06
GB Instructions and safety notice Page 10
DE Aufbau- und Sicherheitshinweise Seite 14
Page 2

A
21
22141920 18
L
M
N
B
C
D
E
O
R
P
S
Q
T
F
G
I
J
H
K
U
V W
Page 3

Obsah/Contents/Inhaltsverzeichnis
Rozsah dodávky / označení dílů .................................................. 6
Technická data ................................................................................ 6
Použití v souladu s určením ............................................................ 6
Bezpečnostní pokyny ............................................................... 6 - 7
Nebezpečí ohrožení života! ............................................... 6
Nebezpečí úrazu! .......................................................... 6 - 7
Vyloučení věcných škod! ..................................................... 7
Výběr stanoviště .............................................................................. 7
Transport ............................................................................... 7
Sestavení a složení ................................................................... 7 - 8
Montáž podstavce ............................................................... 7
Nasazení plachty pro skákání ............................................ 7
Montáž bezpečnostní sítě ................................................... 7
Skládání trampolíny ............................................................. 8
Používání trampolíny ...................................................................... 8
Pozor! Nebezpečí úrazu! .................................................... 8
Vstup na trampolínu a výstup z ní ....................................... 8
První skoky ............................................................................ 8
Čištění, ošetřování a údržba .......................................................... 8
Pokyny k likvidaci ........................................................................... 9
3 roky zaruky .................................................................................. 9
Objednací karta ........................................................................... 19
Lieferumfang / Teilebezeichnung ............................................... 14
Technische Daten .......................................................................... 14
Bestimmungsgemäße Verwendung ............................................. 14
Sicherheitshinweise ............................................................... 14 - 15
Lebensgefahr! ..................................................................... 14
Verletzungsgefahr! ..................................................... 14 - 15
Vermeidung von Sachschäden! ........................................ 15
Standortwahl! ............................................................................... 15
Transport ............................................................................. 15
Auf-/Abbau ............................................................................ 15 -16
Untergestell montieren ....................................................... 15
Sprungtuch einsetzen ......................................................... 15
Sicherheitsnetz montieren .................................................. 16
Trampolin abbauen ............................................................ 16
Trampolin verwenden ................................................................... 16
Achtung! Verletzungsgefahr! ............................................. 16
Das Trampolin betreten und verlassen ............................. 16
Die ersten Sprünge ..................................................... 16 - 17
Reinigung, Pflege und Wartung .................................................. 17
Hinweise zur Entsorgung ............................................................. 17
3 Jahre Garantie .......................................................................... 17
Bestellkarte .................................................................................... 19
Scope of delivery / Name of parts ............................................ 10
Technical data ............................................................................... 10
Correct use .................................................................................... 10
Safety notes .......................................................................... 10 - 11
Danger to life! ..................................................................... 10
Risk of injury! .............................................................. 10 - 11
Avoiding damage to the product! .................................... 11
Choice of location ........................................................................ 11
Transport ............................................................................. 11
Assembly / dismantling ................................................................ 11
Mounting the lower frame ................................................. 11
Insert jump map .................................................................. 11
Assemble safety net ........................................................... 11
Dismantle trampoline ......................................................... 11
Using the trampoline .................................................................... 12
Caution! Risk of injury! ....................................................... 12
Mounting and dismounting the trampoline ...................... 12
First jumps ............................................................................ 12
Cleaning, care, and maintenance .............................................. 12
Disposal ......................................................................................... 13
3 Years warranty .......................................................................... 13
Order form .................................................................................... 19
5
Page 4
Srdečně Vás zdravíme!
Vaším nákupem jste se rozhodli pro výrobek vysoké kvality. Před prvním
použitím se s výrobkem dobře seznamte. Přečtěte si pozorně následující
navodu k montaži a bezpečnostní pokyny. Výrobek používejte pouze
tak, jak je popsáno a v uváděných oblastech použití. Tento navodu k
montaži dobře uschovejte. Při předání výrobku dalším osobám rovněž
předejte všechny podklady.
Rozsah dodávky / označení dílů
1 x Návodu k montáži
Podstavec (obr. A)
1 x skákací plachta (1)
1 x ochranný rám (2)
8 x tyč rámu s objímkou pro nohu (3)
4 x úhlová tyč (4)
4 x prodlužovací tyč (5)
4 x prodlužovací tyč, na jedné straně zúžená (6)
64 x pružina (7)
1 x lanko (8)
2 x varovný štítek (9)
2 x vazač kabelu (10)
1 x nářadí pro upínání pružin (11)
8 x šroub, 53 mm (12)
8 x matka s kloboučkem (13)
8 x podložka (14)
Bezpečnostní síť (obr. B)
8 x tyč pro síť (15)
8 x tyč pro síť, na jedné straně zúžená s čepičkou (16)
16 x pěnový obal (17)
16 x šroub, 85 mm (18)
16 x matka, samosvorná (19)
16 x plastová matka s kloboučkem (20)
16 x podložka (14)
1 x bezpečnostní síť (21)
16 x držák pro rozestupy (22)
1 x kroužkový klíč (23)
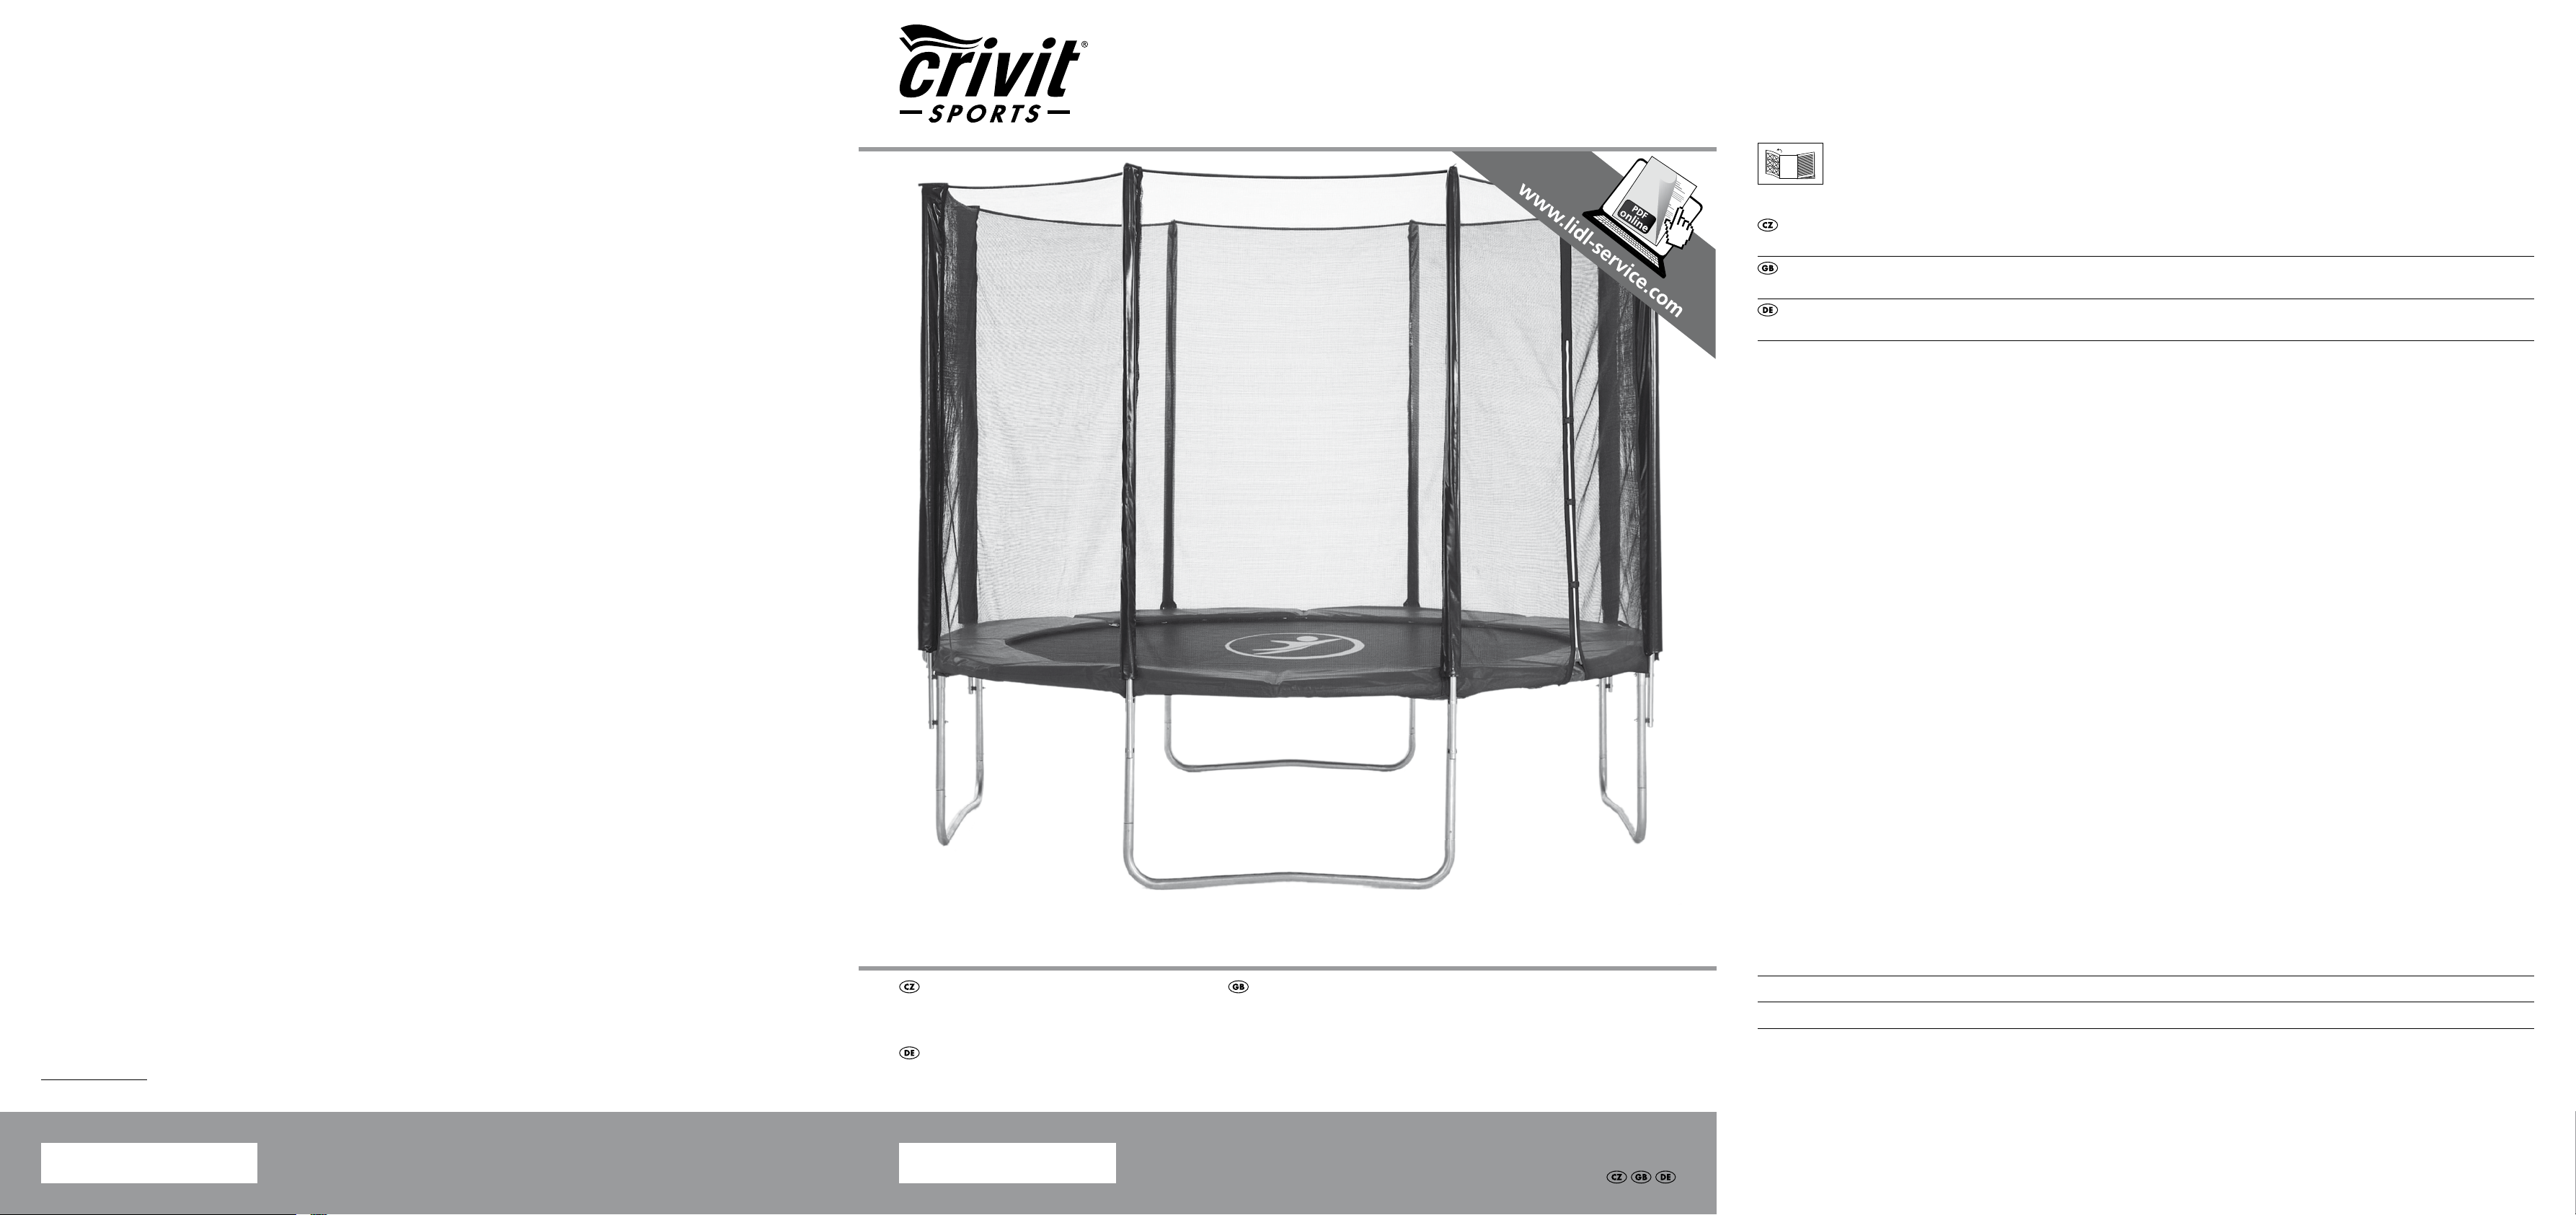
Technická data
Rozměry: Průměr cca 305 cm,
výška bezpečnostní sítě: cca 184 cm,
celková výška: cca 260 cm
Váha (vč. bezpečnostní sítě): cca 61 kg
Maximální zatížení: 150 kg
Použití v souladu s určením
Tato trampolína je sportovní nářadí pro volný čas a je určena výlučně
pro použití na volném prostranství. Je koncipována pro privátní použití
a není vhodná pro podnikatelskou činnost. Maximální zatížení této
trampolíny činí 150 kg!
Tato trampolína není vhodná pro terapeutické účely.
Bezpečnostní pokyny
Důležité upozornění: Pečlivě si přečtěte tento navodu k
montaži a bezpodmínečně ho dobře uschovejte!
Nebezpečí ohrožení života!
• Neprovádějte žádná salta! Dopad na hlavu nebo týl může vést
k těžkým úrazům, ochrnutím nebo dokonce až ke smrti!
Neprovádějte ani žádné riskantní skoky a neskákejte příliš
vysoko nebo ven přes bezpečnostní síť! Také neprovádějte
žádné závody ve skákání nebo cokoli podobného.
• Obalovou fólii udržujte z dosahu osob! Nebezpečí udušení!
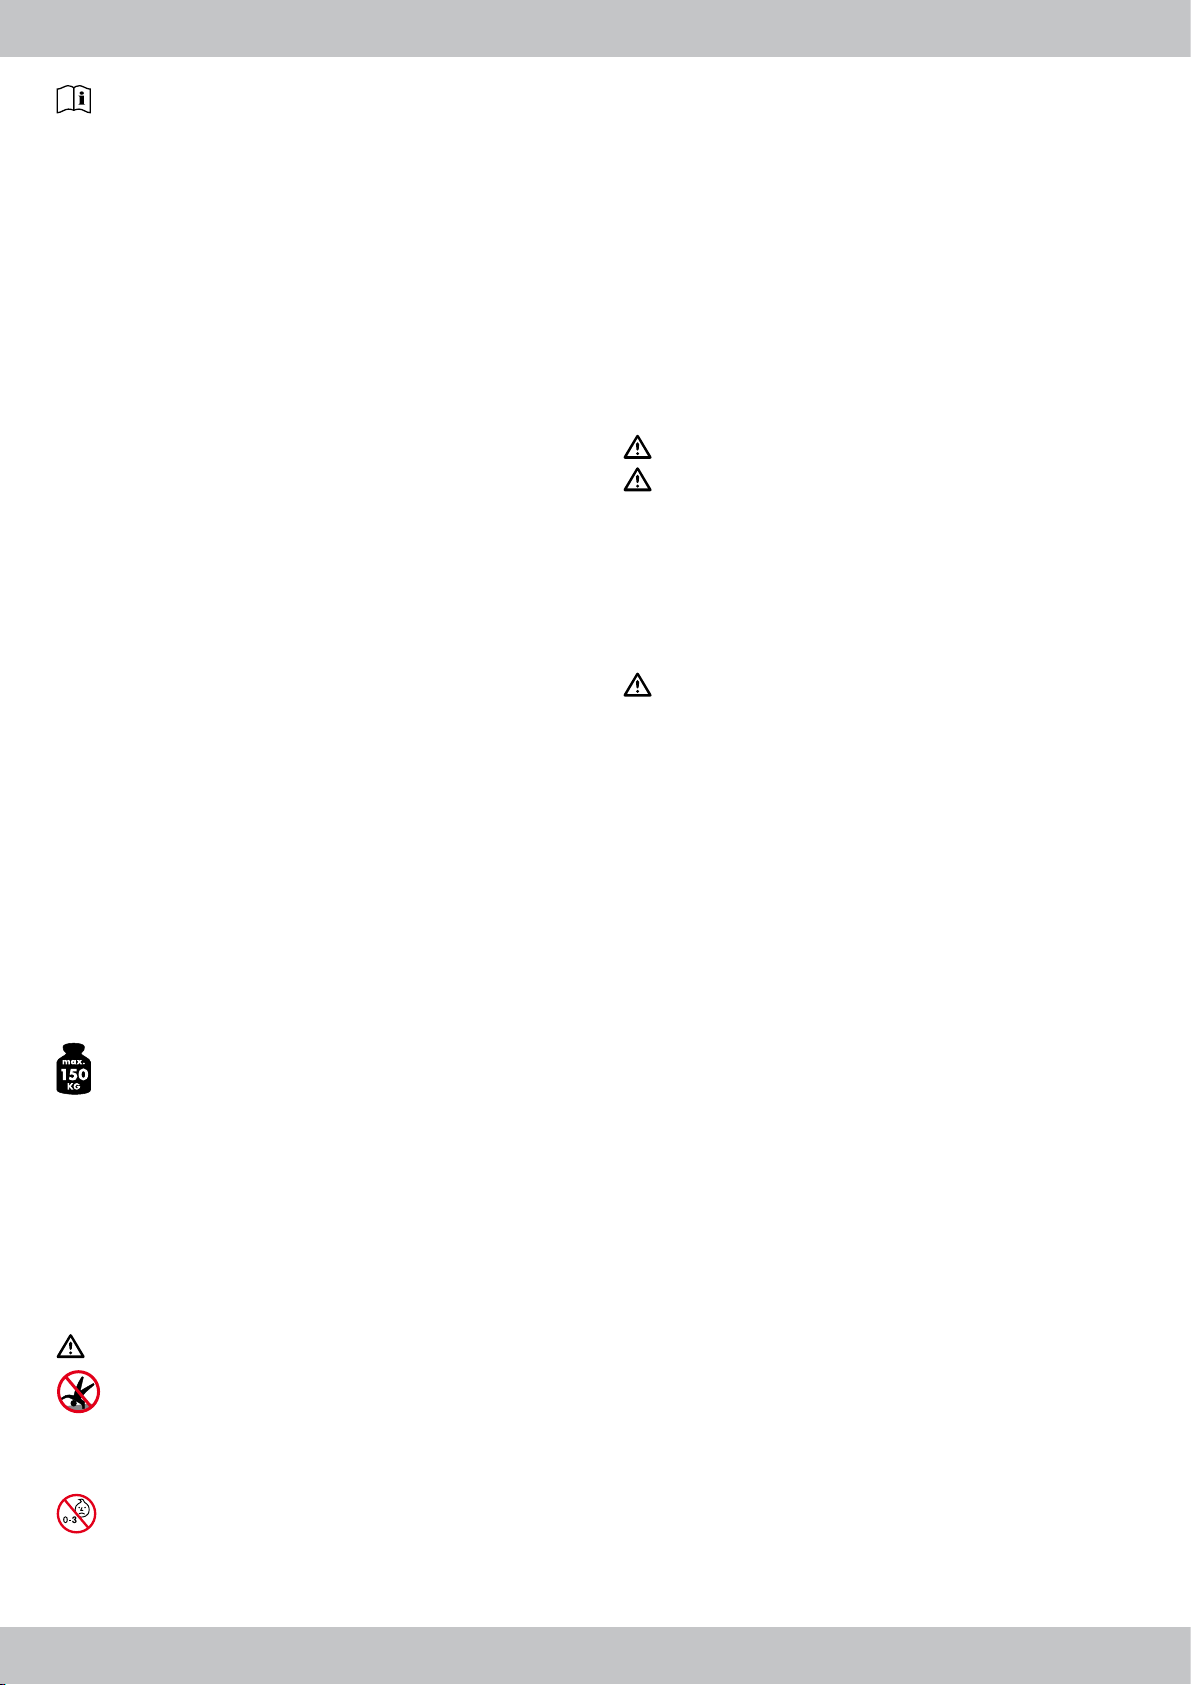
• Pozor! Není vhodné pro děti do 36 měsíců. Nebezpečí
udušení, neboť malé díly lze polknout nebo vdechnout!
• Trampolínu ukládejte tak, aby byla nepřístupná pro děti, obsahuje
malé díly, které lze polknout − nebezpečí udušení!
• Trampolína je vhodná pro děti od 6 let, protože děti do 6 let mohou
jen velmi těžce odhadnout fyzikální a dynamické vlastnosti skákací
plachty a podle okolností i schopnosti své nezbytné koordinace.
• Neskákejte na výrobek ze stromů, balkonů nebo nedělejte něco
podobného.
• Toto nářadí není určeno k tomu, aby ho používaly osoby (včetně dětí)
s omezenými fyzickými, smyslovými nebo duševními schopnostmi nebo
bez dostatečné zkušenosti a / nebo znalosti, leda že by byly k
zajištění své bezpečnosti pod dozorem kompetentní osoby, nebo by
od takové osoby dostaly instrukce, jak se nářadí musí používat.
• Používání dětmi je dovoleno pouze pod dohledem dospělého.
• Těhotné nesmějí trampolínu používat nebo pouze po konzultaci se
svým lékařem!
• Pokud patříte do zdravotně rizikové skupiny, tak před tím, než
použijete trampolínu, to bezpodmínečně konzultujte se svým lékařem.
• Minimální trvanlivost bezpečnostní sítě je jeden rok.
Nebezpečí úrazu!
Nebezpečí úrazu při sestavování!
• Trampolínu smí sestavovat pouze dospělé osoby!
• Při sestavování dávejte pozor na to, abyste se nepřiskřípli! Při montáži
výrobku noste ochranné rukavice.
• Na výrobku neprovádějte žádné změny a sami ho neopravujte!
Neodbornými opravami mohou vzniknout nepředvídatelné škody!
V takovém případě se spojte s naším zákaznickým servisem.
• Okolí trampolíny něčím vypolstrujte, například měkkými žíněnkami
nebo něčím podobným.
Nebezpečí úrazu při používání!
• Před používáním výrobku vždy uzavřete vstupní otvor v síti.
• Trampolínu smí vždy používat pouze jedna osoba! Jinak je tu
nebezpečí kolize!
• Před každým použitím trampolínu překontrolujte, zda není poškozena,
opotřebena, nemá trhliny nebo zda nechybí některé díly!
Pokud vykazuje viditelná poškození a závady, nesmíte ji používat.
Minimální trvanlivost bezpečnostní sítě činí jeden rok.
• Před každým použitím se ujistěte, že trampolína je řádně sestavena,
že ochranný rám a bezpečnostní síť jsou dokonale upevněny a vše je
ve správné poloze.
• Před vstupem na trampolínu dávejte pozor na to, aby skákací plachta
a ochranný rám byly úplně suché!
• Trampolínu nepoužívejte, pokud jste omezeni poraněním nebo
zdravotně, například při úrazu hlezenního kloubu, bolestech zad atd.
• Trampolínu okamžitě opusťte, pokud cítíte závrať, pociťujete bušení
srdce apod. a ihned se poraďte s lékařem.
• Na trampolínu nesmí nikdo vstupovat s cigaretou nebo pod vlivem
alkoholu nebo drog! Nevstupujte na ni ani při únavě!
Existuje nebezpečí ztráty kontroly z nepozornosti!
• Během skákání nejezte, nežvýkejte, ani nedělejte cokoli podobného.
Vzniká tak nebezpečí zalknutí!
• Před vstupem na trampolínu si sundejte své šperky, hodinky, brýle,
sponky ve vlasech atd. a vyndejte všechno ze svých kapes.
• Pokud máte dlouhé vlasy, před vstupem na trampolínu je svažte
gumovou páskou!
• Nikdy neskákejte ve tmě!
• Vždy před tím, než vstoupíte na trampolínu, se ubezpečte, že pod
trampolínou se nenachází žádné osoby, zvířata nebo že na trampolíně
neleží žádné předměty!
• Nikdy nevyskakujte ze skákací plachty přímo ven na zem nebo
podlahu! Tvrdý náraz představuje vysoké riziko úrazu!
• Skákejte stále jen do středu trampolíny a nikdy na její okraj!
• Odrážejte se stále od středu skákací plachty (bíle označeno) a snažte
se dopadat opět do tohoto místa. Pokud přistanete více než 30 cm
vedle označení, ihned svůj skok přerušte a odstartujte znova ze
značky. Neskákejte na ochranný rám!
• Při skákání na trampolíně noste těsně přiléhavé, ale pohodlné,
oblečení. Vrchní část oblečení Vám doporučujeme s dlouhými rukávy a
k tomu dlouhé kalhoty, abyste se chránili před eventuálními škrábanci
a odřeninami.
• Před každým použitím kontrolujte spojení mezi stojinami a díly rámu.
CZ
6
Page 5

• Věnujte pozornost tomu, aby se na Vašem oblečení nenacházely
špičaté háčky, očka nebo něco podobného. Představuje to riziko
úrazu!
• Vyvarujte se skákání příliš vysoko a nepřeceňujte se! Postupně zvyšujte
intenzitu skoků, ale nepřehánějte to. Stále dbejte na to, abyste měli své
skoky pod kontrolou.
• Nikdy neskákejte úmyslně do bezpečnostní sítě nebo, ještě hůře,
nepokoušejte se po ní vytahovat vzhůru nebo se zavěšovat za vršek
podstavce!
• Svůj pohled při skákání zaměřujte do středu trampolíny. Pomáhá to
udržet si kontrolu.
• Vždy se také ubezpečte, že dohlížející osoba je s trampolínou a jejími
vlastnostmi seznámena! Nikdy nenechávejte trampolínu bez dohledu.
• Nikdy také neskákejte na trampolíně příliš dlouho. Může to vyvolat
nepozornost! Vložte po pár skocích vždy přestávku.
• Na bezpečnostní síť se nesmí upevňovat nebo zavěšovat žádné
předměty – s výjimkou, kdy něco takového výslovně uvádí výrobce
nebo importér!
Vyloučení věcných škod!
• Na trampolínu nikdy nevstupujte s pevnou nebo ostrou obuví,
například sportovní nebo vycházkové boty! Ty mohou poškodit
materiál! Vstupujte výlučně bosi, v punčochách anebo s gymnastickými
cvičkami.
• Trampolínu smíte použít pouze tehdy, když je řádně smontována.
• V pravidelných intervalech kontrolujte šroubové spoje a případně je
dotáhněte.
• K čištění skákací plachty nebo podstavce nepoužívejte žádné drhnoucí
nebo žíravé čisticí prostředky.
Výběr stanoviště
• Trampolína není vhodná pro používání ve vnitřních prostorech.
• Stanoviště pro trampolínu vybírejte pečlivě. Trampolínu nesmíte stavět
na tvrdém povrchu.
• Trampolína nesmí být instalována na hladkých površích, jako například
dlaždicích! Mohlo by dojít k podsmeknutí!
• Trampolínu stavte na plochu s odstupem minimálně 2 m od jiných
objektů a překážek. Dbejte na to, aby zejména směrem vzhůru byl
dostatek místa. Nestavte ji do blízkosti oken, stěn, stromů atd.
Nad trampolínou by mělo být minimálně 7,5 m místa.
• Trampolínu stavějte tak, aby ji po použití nemohly nepozorovaně
používat jiné osoby, a zajistěte ji proti nedovolenému použití!
• Trampolína se nesmí používat během vichřice nebo bouřky ani během
silného větru!
• Je-li hlášena vichřice nebo silný vítr, trampolínu demontujte.
• Postavte ji na takové bezpečné místo, aby nemohla být odváta ani
převrácena!
Transport
Pokud byste museli postavenou trampolínu přepravit na jiné stanoviště,
potřebujete k tomu minimálně dvě osoby. Smontovanou trampolínu
převážejte pouze ke střídání menších stanovišť. Za tím účelem zajistěte
a obvažte všechna spojení podstavce lepicí páskou odolnou proti
povětrnostním vlivům. Tím při přepravě zabráníte uvolnění nebo rozpojení spojů. Pro přepravování trampolínu trochu nadzvedněte nad zem a
přenášejte ji vůči zemi v horizontální poloze.
Sestavení a složení
Na volném prostranství vyjměte všechny díly z balení a překontrolujte
jejich úplnost. Pokud by tomu tak nebylo, spojte se prosím s naším zákaznickým servisem.
Upozornění! Při sestavování je bezpodmínečně nutná pomoc druhé osoby! Dejte si pozor, abyste se nepřiskřípli!
Výrobek smí sestavovat a montovat pouze dospělí.
Při sestavování výrobku noste ochranné rukavice!
Společně dodávané nářadí slouží výlučně pro předběžnou montáž.
Pro upevnění všech dílů se doporučuje použití profesionálního nářadí.
Montáž podstavce
1. Na čtyři úhlové tyče (4) nastrčte pokaždé jednu prodlužovací tyč (5)
a jednu prodlužovací tyč, která je na jedné straně zúžena (6) společně
ke stojinám (obr. C).
2. Spojte tyče rámů (3) (obr. D a E).
Upozornění! Dbejte na to, aby otvory dílců rámů ukazovaly
nahoru.
3. Nastrčte čtyři stojiny do objímek pro nohy na částech rámu
(obr. D a E).
4. Nastrčte vždy shora jeden šroub (12) do osmi otvorů podstavce
a zašroubujte je vždy s jednou podložkou (14) a jednou matkou s
kloboučkem (13) (obr. F).
Nasazení plachty pro skákání
Pozor! Postupujte opatrně při vkládání pružin!
Pružiny jsou při vkládání napnuté! Nebezpečí úrazu!
1. Rozprostřete skákací plachtu (1) uvnitř podstavce (obr. G).
Skákací plachta je vybavena 64 očky a podstavec 64 vrtáními na
vrchní straně. Při vkládání pružin (7) postupujte pečlivě a sledujte
přesně následující instrukce tak, aby byla skákací plachta nasazena
správně.
2. Zvolte libovolný bod 0, kam vložíte první pružinu. Zahákněte tuto
pružinu do jednoho očka skákací plachty. Pomocí napínáku pružiny
(11) zahákujte druhou stranu pružiny do vrtání v podstavci (obr. H).
Odpočítejte dále 16 oček a vložte do 16. očka a vrtání druhou
pružinu. Znovu odpočítejte 16 oček a vložte také do 32. a 48. očka
a vrtání (počítáno od bodu 0) vždy jednu pružinu (obr. I).
3. Od bodu 0 vložte do každého osmého očka a vrtání jednu pružinu.
To stále opakujte, až se dostanete znovu k bodu 0. Nyní k prvním
vloženým pružinám je třeba vložit pružiny do oček a vrtání 8, 24, 40
a 56 (obr. J).
4. Od bodu 0 vložte do každého čtvrtého očka a vrtání jednu
pružinu. To stále opakujte, až se dostanete znovu k bodu 0. Nyní k
namontovaným pružinám je nutné opatřit pružinami otvory 4, 12, 20,
28, 36, 44, 52 a 60 (obr. K).
5. Od bodu 0 vložte do každého druhého očka a vrtání jednu pružinu,
až se dostanete znovu k bodu 0. Nyní k již namontovaným pružinám
je nutné opatřit pružinami otvory 2, 6, 10, 14, 18, 22, 26, 30, 34,
38, 42, 46, 50, 54, 58 a 62 (obr. L).
6. Vložte ostatní pružiny do ještě volných oček a vrtání. Jestliže jste
jedno očko nebo vrtání přehlédli, znovu prověřte, která pružina je
vložena nesprávně a dejte ji na správnou pozici! Případně opakujte
shora popsané kroky (obr. M).
7. Položte ochranný rám na skákací plachtu tak, aby pružiny a tyče
rámu byly zakryty.
8. Ochranný rám upevněte pomocí pásků k rámu podstavce (obr. N).
9. Fixační pásku ochranného rámu pevně utáhněte (obr. O).
10. Provlékněte lanko (8) pod ochranným rámem očky a na koncích
lanka udělejte uzel (obr. P).
Montáž bezpečnostní sítě
1. Rozprostřete bezpečnostní síť (21) na trampolínu (obr. Q).
Upozornění! Vstupní otvor bezpečnostní sítě nesmí být nad
stojinou.
2. Nastrčte do sebe tyče pro síť (15) a tyče pro síť na jedné straně
zúžené (16) (obr. R).
3. Nastrčte tyče pro síť (s pěnovými obaly (17)) konci, na nichž jsou
čepičky, do objímek bezpečnostní sítě (obr. S) a přiložte ke stojinám
tyče stojící pro sítě nad nimi.
4. Zašroubujte tyč pro síť do dvou otvorů stojin vždy šroubem (18),
jedním držákem pro rozestupy (22), jednou podložkou (14), jednou
samosvornou matkou (19) a jednou plastovou matkou a s kloboučkem
(20) na stojiny trampolíny (obr. T).
5. Upevněte háčky bezpečnostní sítě do oček skákací plachty (obr. U).
6. Spojte dvě pásky na pouzdrech bezpečnostní sítě kolem tyče pro síť
(obr. V).
7. Upevněte pomocí přiloženého vazače kabelu (10) varovné štítky (9)
na dvou stranách podstavce (obr. W).
Upozornění! Jeden štítek upevněte přímo pod vstupní otvor.
Zvyšuje to pozornost bezpečnostním pokynům.
Minimální trvanlivost bezpečnostní sítě činí jeden rok.
CZ
7
Page 6
Skládání trampolíny
Pokud chcete trampolínu složit, postupujte v opačném sledu kroků!
Používání trampolíny
Pozor! Nebezpečí úrazu!
• Nikdy nevstupujte na trampolínu bez dohledu! Vždy musí být přítomna
jedna dospělá osoba, která je seznámena s trampolínou!
• Trampolínu nepoužívejte, když je skákací plachta mokrá!
• Před každým použitím trampolínu překontrolujte z hlediska opotřebení,
zda není poškozená nebo nechybí některé díly! Pokud byla objevena
poškození, tak ji nepoužívejte!
• Před vstoupením na trampolínu se ujistěte, že se ani pod trampolínou
ani na ní nenacházejí osoby, zvířata nebo předměty!
• Na trampolínu vstupujte výlučně bosi, v punčochách nebo s gymna
stickými cvičkami.
Varování!
• Neprovádějte žádná salta! Dopad na hlavu nebo týl může vést
k těžkým úrazům, ochrnutím nebo dokonce až ke smrti!
• Trampolínu smí vždy používat pouze jedna osoba!
Vstup na trampolínu a výstup z ní
• Před vstupem na trampolínu provádějte protahovací cvičení, abyste
postupně zahřáli své svaly!
• Vyzujte si boty.
• Otevřete tři bezpečnostní uzávěry a potom zipový uzávěr na
bezpečnostní síti.
• Po vstupu na trampolínu zavřete zipový uzávěr na bezpečnostní síti a
tři bezpečnostní uzávěry! Toto musí provést dohlížející osoba!
• Pokud chcete trampolínu opustit, otevřete nejprve zipový uzávěr a
potom bezpečnostní uzávěry.
• Z trampolíny neseskakujte!
• Po opuštění trampolíny zavřete nejprve zipový uzávěr a potom
bezpečnostní uzávěry.
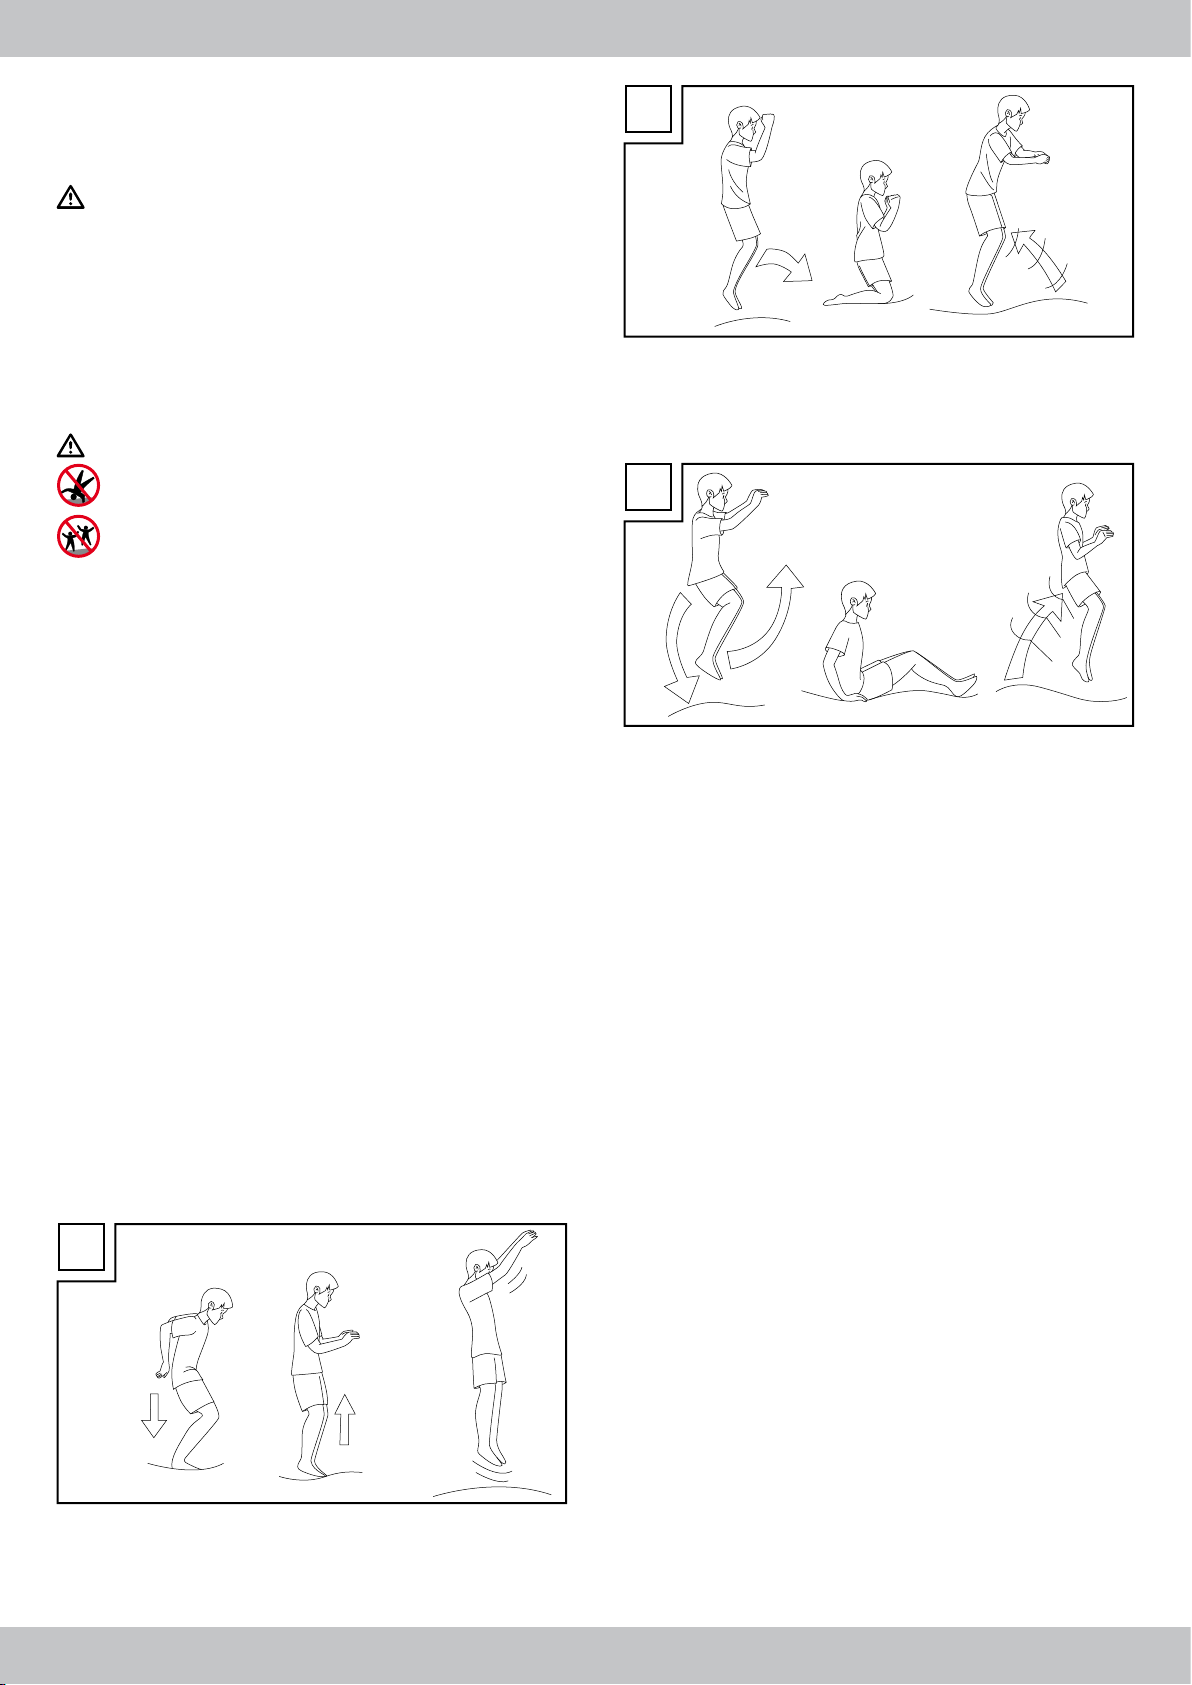
První skoky
• Začněte několika zcela prostými skoky (základní-skok), abyste si poma lu přivykli na vlastnosti trampolíny.
• Neskákejte příliš vysoko a zkoušejte stále udržovat kontrolu.
• Stále vyskakujte z bílého značení skákací plachty a snažte se na něj
stále přistávat! Dbejte na to, abyste nepřistávali na okraj!
• Bezpodmínečně procvičujte přerušení skoku před tím, než se odvážíte
ke komplikovaným skokům! Když přistáváte na trampolínu, pokrčte při
tom lehce kolena (viz „přerušení skoku“).
• Omezte nepřetržité používání trampolíny a vkládejte pravidelně
přestávky.
Základní skok (obr. X)
1. Postavte se do středu trampolíny (bílé označení) a své oči při skoku
zaměřujte stále na značku!
2. Mávejte rukama pomalu nahoru a odrážejte se od trampolíny.
3. Přistávejte opakovaně na značku. Neskákejte příliš vysoko!
X
Kolenový skok (obr. Y)
1. Skákejte jako při základním skoku. Při tom neskákejte příliš vysoko!
2. Zkuste přistát na kolena, přičemž horní část těla zůstává vzpřímená.
3. Při dalším odražení se pokuste dostat znovu na nohy.
Y
Skok ze sedu (obr. Z)
1. Skákejte jako při základním skoku. Při tom neskákejte příliš vysoko!
2. Zkuste přistát v pozici v sedu. Neroztahujte při tom lokty, ale položte
paže a dlaně zcela volně vedle boků.
3. Při dalším odražení se pokuste dostat znovu na nohy.
Z
Přerušení skoku
Pokud chcete skok přerušit, jednoduše lehce pokrčte kolena v momentě
dopadu na skákací plachtu. Síla skoku se tak pomalu ztrácí.
Čištění, ošetřování a údržba
Aby Vám tento výrobek dělal dlouho radost, měli byste dodržovat následující pokyny pro jeho ošetřování a údržbu:
• Výrobek uchovávejte vždy suchý a čistý v temperovaném prostoru.
Důležité upozornění! Čistí se pouze vlhkým hadříkem a pak
se utře do sucha.
• Trampolínu smíte používat pouze do maximální zatížitelnosti a podle
určeného použití. Trampolínu smí používat vždy pouze jedna osoba.
• Na trampolínu je nutné vstupovat naboso, v ponožkách nebo v gym nastických cvičkách.
• Na trampolíně se nesmí nacházet žádná zvířata a všechny ostré nebo
špičaté předměty musí být drženy mimo, jinak hrozí poškození skákací
plachty.
• Výrobek nepoužívejte:
- pokud má plachta pro skákání díry nebo trhliny
- není-li skákací plachta napnuta
- jsou-li díly rámu vadné
- je-li poškozen, chybí anebo není upevněn ochranný rám
- pokud chybí pružiny nebo jsou vadné, neprodleně je
vyměňte
- jsou-li šrouby a matky uvolněné, všechny šrouby a matky v
případě potřeby dotáhněte.
• Samosvorné matky lze použít pouze jednou a při každém novém
skládání je nutné použít nové matky.
• Před každým použitím výrobek překontrolujte, zda nemá opotřebené
nebo chybějící díly. Pravidelně musíte kontrolovat následující
opotřebitelné díly, zda již nejeví opotřebení: skákací plachta, ochranný
rám, bezpečnostní síť, pěnové obaly a čepičky tyčí pro síť.
• Bezpečnostní síť musíte vyměnit, jakmile jsou projevy opotřebení
viditelné. Minimální trvanlivost bezpečnostní sítě je jeden rok.
• Změny na výrobku provádějte jenom tak, jak jsou výrobcem popsány v
návodu k montaži.
Pozor: Je nezbytná pravidelná údržba. Zanedbání pravidelné údržby může přivést uživatele výrobku do nebezpečí.
8
CZ
Page 7

Pokyny k likvidaci
Obal a výrobek prosím roztřiďte a ekologicky zlikvidujte! Výrobek
zlikvidujte prostřednictvím uznávaného likvidačního podniku nebo
vašeho komunálního sběrného střediska. Dodržujte aktuálně platné
předpisy.
3 roky zaruky
Produkt byl vyrobený s velkou pečlivostí a byl průběžně kontrolovaný
ve výrobní procesu. Na tento produkt obdržíte tříroční záruku ode dne
zakoupení. Uschovejte si pokladní stvrzenku.
Záruka se vztahuje jen na vady materiálu a chyby z výroby, nevztahuje
se na závady způsobené neodborným zacházením nebo použitím k
jinému účelu. Tato záruka neomezuje Vaše zákonná ani záruční práva.
Při případných reklamacích se obraťte na dole uvedenou servisní horkou
linku nebo nám zašlete email. Náš servisní pracovník s Vámi co nejrychleji upřesní další postup. V každém případě Vám osobně poradíme.
Záruční doba se neprodlužuje po případných opravách v době záruky
ani v případě zákonného ručení nebo kulance. Toto platí také pro
náhradní a opravené díly. Opravy prováděné po vypršení záruční lhůty
se platí.
IAN: 60237
Servis Česko
Tel.: 800143873
E-Mail: deltasport@lidl.cz
Náhradní díly pro Váš výrobek najdete také na webové stránce:
www.delta-sport.com, Rubrika Servis - Servis pro náhradní díly Lidl
9CZ
Page 8

Congratulations!
You have chosen to purchase a high quality article. Familiarise yourself
with the product before using it for the first time. Read these assembly
instructions and the safety notes carefully. Only use the article in the
manner described and in the prescribed areas. Keep these assembly
instructions in a safe place. If you pass the article on to a third party, then
also provide all documents to the new owner.
Scope of delivery / Name of parts
1 x Assembly instructions
Base frame (figure A)
1 x Jump mat (1)
1 x Frame protection (2)
8 x Frame rods with leg sleeve (3)
4 x Angled rods (4)
4 x Extension rods (5)
4 x Extension rods, tapered on one side (6)
64 x Springs (7)
1 x Rope (8)
2 x Warning signs (9)
2 x Cable ties (10)
1 x Tool to tension the springs (11)
8 x Screws, 53 mm (12)
8 x Nut caps (13)
8 x Washers (14)
Safety net (figure B)
8 x Enclosure poles (15)
8 x Enclosure poles, tapered on one side with a cap (16)
16 x Foam covers (17)
16 x Screws, 85 mm (18)
16 x Nuts, self-locking (19)
16 x Plastic nut caps (20)
16 x Washers (14)
1 x Safety net (21)
16 x Distance holders (22)
1 x Ring spanner (23)
Technical data
Dimensions: diameter approx. 305cm,
height of safety net: approx. 184cm,
total height: approx. 260cm
Weight (including safety net): approx. 61kg
Maximum load capacity: 150kg
Correct use
This trampoline is a piece of leisure sport equipment and only intended
for outdoor use. It is designed for private use and is unsuitable for commercial use. The maximum load for the trampoline is 150kg.
The trampoline is not suitable for therapeutic use.
Safety notes
Important: read the assembly instructions through carefully
and always keep them for future use.
Danger to life!
• Do not perform somersaults. Landing on your head or neck can
lead to serious injury, paralysis, or even death. Do not perform
daredevil jumps and do not jump too high or beyond the safety
net. Do not carry out any jumping competitions or similar.
• Keep the packaging foil away from people. Risk of suffocation.
• Caution! Not suitable for children under the age of 36 months.
Risk of choking as small parts could be swallowed or inhaled.
• Store the trampoline out of the reach of children as it contains small
parts that could be swallowed − risk of choking!
• Suitable for children of 6 years and above, as children under the age
of 6 may find it difficult to assess the physical and dynamic characteris tics of the trampoline mat and the required co-ordination skills.
• Do not jump onto the article from trees or balconies or similar.
• This apparatus is not intended for use by persons (including children)
with limited physical, sensory, or mental capabilities or without experi ence and/or knowledge except where they are supervised by a
person who is responsible for their safety or given instructions on how
to use the apparatus.
• Children may only use the article under adult supervision.
• Pregnant women may not use the trampoline or may only use it fol lowing consultation with their doctor.
• If you belong to a group of people with health risks then always
consult your doctor before using the trampoline.
• The safety net has a minimum durability of one year.
Risk of injury!
Risk of injury during assembly!
• The trampoline may only be assembled by adults.
• During assembly, please ensure that you do not trap any part of your
body! Wear protective gloves while assembling the article.
• Do not make any modifications to the product and do not repair the
article yourself. Improper repairs can cause unforeseeable damage.
Contact our product service in this event.
• Pad the ground around the trampoline, e.g. with soft mats or similar.
Risk of injury during use!
• Always close the net opening before using the article.
• Only one person may use the trampoline at a time. Otherwise there is
a risk of collision.
• Inspect the trampoline before every use for damage, wear, tears, and
missing parts. Use is not permitted if the product has visible damage or
defects. The safety net has a minimum durability of one year.
• Before each use, please ensure that the trampoline has been assem bled correctly, and that the frame protection and the safety nets are
carefully attached and correctly positioned.
• Before mounting the trampoline please ensure that the jump mat and
the frame protection are completely dry.
• Do not use the trampoline if you are injured or if your health is compro mised, e.g. through ankle injuries, back pain, etc.
• Leave the trampoline immediately if you feel dizzy, have palpitations,
etc. and consult a doctor straight away.
• You may not mount the trampoline with a cigarette or under the influ ence of alcohol or drugs. Also do not use the trampoline if tired.
There is a risk of losing control through carelessness.
• Do not eat while jumping and do not chew gum or similar. There is a
risk of choking.
• Remove your jewellery, watch, glasses, hairgrips, etc. before mounting
the trampoline and empty your pockets.
• If you have long hair tie it up with a hair tie before mounting the tram poline.
• Never jump in the dark!
• Before mounting the trampoline, please ensure that there are no
persons, animals, or objects under the trampoline and that there are no
objects on the trampoline.
• Never jump off the jump mat directly onto the floor. There is a risk of
injury from the hard landing.
• Always jump in the centre of the trampoline and never on the edge.
• Always jump in the centre of the jump mat (marked in white) and try to
land there also. If you land more than 30cm away from the mark stop
jumping immediately and start again from the mark. Do not jump on
the edge protector.
• Wear close fitting but comfortable clothing when jumping on the tram poline. We recommend wearing a long-sleeved top and long trousers
to protect yourself from possible scratches and scrapes.
• Examine the connection between the feet and the frame sections
before each use.
• Ensure that there are no sharp hooks, eyes, or other such on your
clothing. There is a risk of injury.
• Avoid jumping too high and do not overestimate your abilities.
Increase your jump intensity gradually but do not go too far.
Always ensure that you are in control of your jumps.
• Never jump intentionally into the safety net or beyond it, and do not
try to pull yourself up on it or to hang on the upper frame.
10 GB
Page 9

• Look at the centre of the trampoline while jumping. This will help you to
keep control.
• Always ensure that the supervisor is familiar with the trampoline and its
characteristics. Never leave the trampoline unsupervised.
• Never jump on the trampoline for too long. This can lead to careless ness! Always take a break after every few jumps.
• No objects may be attached to or hung on the safety net – except
where this is noted expressly by the manufacturer or importer.
Avoiding damage to the product!
• Never mount the trampoline with sturdy or pointed shoes, e.g. training
shoes or outdoor shoes. They can damage the material. Only mount
the trampoline with bare feet, in socks, or with gymnastics slippers.
• The trampoline may only be used when it has been correctly assem bled.
• Check the screw connections at regular intervals and tighten them
where necessary.
• Do not use abrasive or corrosive cleaning materials to clean the jump
mat or the frame.
Choice of location
• The trampoline is not suitable for indoor use.
• Choose the location of the trampoline carefully. The trampoline may
not be assembled on hard surfaces.
• The trampoline may not be assembled on smooth surfaces such as
tiles. It could slip out of place.
• Stand the trampoline in an area with at least 2m space between it and
other structures or obstacles. Ensure that there is sufficient space, es pecially upwards. Do not place it close to windows, walls, trees etc.
There should be at least 7.5m space above the trampoline.
• Install the trampoline in such a way that other people cannot use it
after use without supervision and secure it against unauthorised use.
• The trampoline may not be used during a storm or thunderstorm, or
when there are strong winds.
• Dismantle the trampoline if stormy weather or winter weather con ditions are forecast.
• Store it in a safe place so that it cannot blow away or tip over.
Transport
You will need at least two people to transport the assembled trampoline
to a different location. Only transport an assembled trampoline for a
short distance. Secure and wrap all the connections on the lower frame
for this purpose using weather-resistant tape. This prevents any loosening
or separation of the connections during transportation.
Lift the trampoline slightly off the ground to transport it and carry it horizontally to the ground.
Assembly / dismantling
Remove all the parts from their packaging outdoors and check that all
parts are included. Please contact our customer service is this is not the
case.
Note! Always enrol the help of a second person for assembly. Make sure you do not trap any part of your body.
Only adults may assemble and install this article.
Wear safety gloves to assemble the article.
The included tools are only for pre-assembly. We recommend using
professional tools to tighten all the parts.
Mounting the lower frame
1. Insert an extension rod (5) into each of the four angled rods (4), and
one extension rod, which tapers at one end (6) to make the legs
(figure C).
2. Join the frame rods (3) (figures D and E).
Note! Ensure that the holes in the frame sections are
pointing upwards.
3. Insert the four legs into the leg sleeves of the frame sections (figures D
and E).
4. Insert a screw (12) from above into each of the eight holes on the
lower frame, and connect each one with a washer (14) and a cap
nut (13) (figure F).
Insert jump map
Caution: Proceed carefully when inserting the springs.
The springs are tensioned when inserted. There is a risk of
injury.
1. Spread out the jump mat (1) inside the lower frame (figure G).
The jump mat has 64 eyelets and the lower frame has 64 drill holes
on its upper side. Be careful when inserting the springs (7) and follow
the following instructions exactly to insert the jump mat correctly.
2. Choose any point 0 to insert the first spring. To do this, hook the
spring into one drill hole on the jump mat. Using the spring
compressor (11), hook the other side of the spring into a drill hole
in the lower frame (figure H). Count 16 eyelets further on, and insert
the second spring into the 16th eyelet and drill hole. Count another
16 eyelets, and insert another spring into the 32nd and 48th eyelets
and drill holes (counting from point 0) (figure I).
3. Starting from point 0 insert a spring into every eighth eyeless and
drill hole. Repeat this until you get back to point 0. Now there should
be springs in the eyelets and drill holes at 8, 24, 40, and 56 as well
as the springs you inserted first (figure J).
4. Starting from point 0 insert a spring into every fourth eyelet and drill
hole. Repeat this until you get back to point 0. In addition to the
mounted springs there should now also be springs in holes 4, 12, 20,
28, 36, 44, 52, and 60 (figure K).
5. Starting from point 0 insert a spring in every second eyelet and drill
hole until you get back to point 0. In addition to the mounted springs
there should now also be springs in holes 2, 6, 10, 14, 18, 22, 26,
30, 34, 38, 42, 46, 50, 54, 58, and 62 (figure L).
6. Insert the remaining springs into the free eyelets and drill holes. If you
have missed a drill hole or eyelet then investigate which spring is in
the wrong place and insert it in the correct position. Repeat the above
steps as necessary (figure M).
7. Place the frame protector onto the jump mat in such a way that the
springs and the frame rods are covered.
8. Attach the frame protector with the tapes on the frame of the edge of
the lower frame (figure N).
9. Pull the attachment band on the frame protector tight (figure O).
10. Thread the rope (8) through under the frame protector, through the
eyelets and then knot the ends of the rope (figure P).
Assemble safety net
1. Spread the safety net (21) out on the trampoline (figure Q).
Note! the entrance opening on the safety net may not be
located above a leg.
2. Insert the enclosure poles (15) together with the enclosure pole that
taper on one side (16) (figure R).
3. Insert the enclosure poles (with the foam covers (17) with the ends
with the caps into the tubes on the safety set (figure S) and place the
protruding enclosure poles on the legs.
4. Screw the enclosure poles to the two holes on the legs using one screw
each (18) with one distance holders (22), one washer (14), one self locking nut (19), and one plastic nut cap (20) on the trampoline lets
(figure T).
5. Fasten the hooks on the safety net to the eyelets on the jump mat
(figure U).
6. Tie the two tapes on the tubes to the safety net around the enclosure
pole (figure V).
7. Use the included cable ties (10) to tie the warning signs (9) to two
sides of the lower frame (figure W).
Note! Attach one warning sign directly under the entrance
opening on the lower frame. This increases awareness of
the safety notes.
The safety net has a minimum durability of one year.
Dismantle trampoline
If you wish to dismantle the trampoline then proceed in reverse order.
11GB
Page 10

Using the trampoline
Caution! Risk of injury!
• Never mount the trampoline without supervision. One adult must also
be present who is familiar with the trampoline.
• Do not use the trampoline when the jump mat is wet.
• Examine the trampoline before each use for wear, damage, or missing
parts. Do not use the trampoline if damage is found.
• Before mounting the trampoline ensure that there are no people,
animals, or objects under or on the trampoline.
• Only mount the trampoline with bare feet, in socks, or with gymnastics
slippers.
Warning!
• Do not perform somersaults! Landing on your head or neck can
cause serious injury, paralysis, or even death.
• Only one person may use the trampoline at a time.
Y
Seat jump (figure Z)
1. Jump as for the basic jump. Do not jump too high.
2. Try to land in a sitting position. Do not hold your elbows out straight
but rather keep your arms and hands loosely next to your hips.
3. Push off again and try to stand back on your feet.
Mounting and dismounting the trampoline
• Do some stretches before mounting the trampoline to warm up your
muscles slowly.
• Remove your shoes.
• Open the three safety catches and then the zipper on the safety net.
• After mounting the trampoline, close the zipper on the safety net and
the three safety catches. This must be carried out by the supervisor.
• First open the zipper and then the safety catches in order to dismount
the trampoline.
• Do not jump off the trampoline!
• After leaving the trampoline first close the zipper and then the safety
catches.
First jumps
• Begin with a few simple jumps (basic jump), in order to get used slowly
to the characteristics of the trampoline.
• Do not jump too high and always try to keep control.
• Always jump from the white markings on the spring mat and try to land
on it again. Make sure that you do not land on the edge.
• Always practise interrupting jumps before attempting complicated
jumps. To do this, bend your knees slightly when you land on the
trampoline (see ‘interrupting a jump’).
• Limit the uninterrupted use of the trampoline and take regular breaks.
Basic jump (figure X)
1. Stand in the middle of the trampoline (marked in white) and always
look at the marking while jumping.
2. Slowly swing your arms upwards and push off the trampoline.
3. Land back on the marking. Do not jump too high.
X
Knee jump (figure Y)
1. Jump as for the basic jump. Do not jump too high.
2. Try to land on your knees while keeping your upper body vertical.
3. Push off again and try to stand back on your feet.
Z
Interrupting a jump
If you wish to interrupt a jump, simply bend your knees slightly when you
land on the jump mat. This will slowly reduce the power in your jump.
Cleaning, care, and maintenance
You should observe the following care and maintenance notes in order to
ensure that you can enjoy the article for a long time:
• Always store the article in a dry and clean condition in a temperature controlled room.
Important! To clean use only a damp cleaning cloth and then
wipe dry.
• The trampoline may only be used within the maximum load capacity
and for the specified use. Only one person may use the trampoline at
a time.
• You should always mount the trampoline in bare feet, socks, or gym nastics slippers.
• Do not allow animals on the trampoline and keep all sharp or pointed
objects away from the trampoline as they could cause damage to the
jump mat.
• Do not use the article:
- if there are holes or tears in the jump map.
- if the jump mat is not tense.
- if parts of the frame are broken.
- if the frame protector is damaged, missing, or not attached.
- replace any broken or missing springs immediately.
- if the screw or nuts are loose. Tighten all screws and nuts as
necessary.
• The self-locking nuts are for single use only and new nuts must be used
each time the article is assembled.
• Examine the articles before each use for worn or missing parts.
The following wear parts must be examined regularly for signs of
wear: jump mat, frame protector, safety net, foam sleeves, and caps
on the enclosure poles.
• The safety net must be replaced if signs of wear are found. The safety
net has a minimum durability of one year.
• Only make modifications to the article as described in the
manufacturer’s assembly instructions.
Caution: Regular maintenance is required. If you fail to
carry out regular maintenance this can result in risk to the
users of the article.
12 GB
Page 11

Disposal
Please dispose of the product and packaging in an environmentally
friendly manner, separating different materials for recycling as required!
Dispose of this item through an authorised disposal company or through
your local waste disposal facilities - ask your local authority for information if further guidance is required.
Ensure that you comply with all regulations currently in force.
3 Years warranty
The product was produced with great care and under constant supervision. You receive a three-year warranty for this product from the date of
purchase. Please retain your receipt.
The warranty applies only to material and workmanship and does not
apply to misuse or improper handling. Your statutory rights, especially the
warranty rights, are not affected by this warranty.
With regard to complaints, please contact the following service hotline or
contact us by e-mail. Our service employees will advise as to the subsequent procedure as quickly as possible. We will be personally available
to discuss the situation with you.
Any repairs under the warranty, statutory guarantees or through goodwill
do not extend the warranty period. This also applies to replaced and
repaired parts. Repairs after the warranty are subject to a charge.
IAN: 60237
Service Great Britain
Tel.: 0871 5000 720
(£ 0.10/Min.)
E-Mail: deltasport@lidl.co.uk
You can also find spare parts for your product at:
www.delta-sport.com, category Service - Lidl Spare Parts Service
13GB
Page 12

Herzlichen Glückwunsch!
Mit Ihrem Kauf haben Sie sich für einen hochwertigen Artikel entschieden. Machen Sie sich vor der ersten Anwendung mit dem Artikel vertraut.
Lesen Sie hierzu aufmerksam die nachfolgende Aufbauanleitung und die
Sicherheitshinweise. Benutzen Sie den Artikel nur wie beschrieben und
für die angegebenen Einsatzbereiche.
Bewahren Sie diese Aufbauanleitung gut auf. Händigen Sie alle
Unterlagen bei Weitergabe des Artikels an Dritte ebenfalls mit aus.
Lieferumfang / Teilebezeichnung
1 x Aufbauanleitung
Untergestell (Abb. A)
1 x Sprungtuch (1)
1 x Rahmenschutz (2)
8 x Rahmenstange mit Beinmuffe (3)
4 x Winkelstange (4)
4 x Verlängerungsstange (5)
4 x Verlängerungsstange, einseitig verjüngt (6)
64 x Feder (7)
1 x Seil (8)
2 x Warnschild (9)
2 x Kabelbinder (10)
1 x Werkzeug zum Spannen der Federn (11)
8 x Schraube, 53 mm (12)
8 x Hutmutter (13)
8 x Unterlegscheibe (14)
Sicherheitsnetz (Abb. B)
8 x Netzstange (15)
8 x Netzstange, einseitig verjüngt mit Kappe (16)
16 x Schaumstoffhülle (17)
16 x Schraube, 85 mm (18)
16 x Mutter, selbstsichernd (19)
16 x Kunststoff-Hutmutter (20)
16 x Unterlegscheibe (14)
1 x Sicherheitsnetz (21)
16 x Abstandhalter (22)
1 x Ringschlüssel (23)
Technische Daten
Maße: Durchmesser ca. 305 cm,
Höhe Sicherheitsnetz ca. 184 cm,
Gesamthöhe: ca. 260 cm
Gewicht (inkl. Sicherheitsnetz): ca. 61 kg
Maximale Belastung: 150 kg
Bestimmungsgemäße Verwendung
Dieses Trampolin ist ein Freizeit-Sportgerät und ausschließlich für die
Verwendung im Freien vorgesehen. Es ist für den privaten Gebrauch
konzipiert und für den gewerblichen Einsatz ungeeignet.
Das Trampolin darf maximal mit 150 kg belastet werden!
Das Trampolin ist nicht für therapeutische Zwecke geeignet.
Sicherheitshinweise
Wichtig: Lesen Sie diese Aufbauanleitung sorgfältig und
bewahren Sie sie unbedingt auf!
Lebensgefahr!
• Schlagen Sie keine Saltos! Ein Landen auf dem Kopf oder
Genick kann zu schwerwiegenden Verletzungen, Lähmungen
oder sogar zum Tod führen! Führen Sie keine waghalsigen
Sprünge durch und springen Sie nicht zu hoch oder über das Sicherheitsnetz hinaus! Führen Sie keine Sprungwettkämpfe oder Ähnliches durch.
• Halten Sie die Verpackungsfolie von Personen fern! Erstickungsgefahr!
• Achtung! Nicht geeignet für Kinder unter 36 Monate.
Erstickungsgefahr, da Kleinteile verschluckt oder eingeatmet
werden können!
• Bewahren Sie das Trampolin unzugänglich für Kinder auf, es enthält
verschluckbare Kleinteile − Erstickungsgefahr!
• Für Kinder ab 6 Jahren geeignet, da Kinder unter 6 Jahren die
physischen und dynamischen Eigenschaften des Trampolintuchs sowie
die koordinativ notwendigen Fähigkeiten unter Umständen nur sehr
schwer einschätzen können.
• Springen Sie nicht von Bäumen oder Balkonen o. Ä. auf den Artikel.
• Dieses Gerät ist nicht dafür bestimmt, durch Personen (einschließlich
Kinder) mit eingeschränkten physischen, sensorischen oder geistigen
Fähigkeiten oder mangels Erfahrung und / oder mangels Wissen
benutzt zu werden, es sei denn, sie werden durch eine für ihre Sicher heit zuständige Person beaufsichtigt oder erhielten von ihr Anweisun gen, wie das Gerät zu benutzen ist.
• Das Benutzen ist für Kinder nur unter Beaufsichtigung eines Erwach senen erlaubt.
• Schwangere dürfen das Trampolin nicht oder nur nach Rücksprache
mit ihrem Arzt verwenden!
• Wenn Sie zu einer gesundheitlichen Risikogruppe gehören, konsul tieren Sie unbedingt Ihren Arzt, bevor Sie das Trampolin benutzen.
• Das Sicherheitsnetz hat eine Mindesthaltbarkeit von einem Jahr.
Verletzungsgefahr!
Verletzungsgefahr beim Aufbau!
• Das Trampolin darf nur von Erwachsenen aufgebaut werden!
• Achten Sie beim Aufbau darauf, dass Sie sich nicht klemmen! Tragen
Sie beim Aufbau des Artikels Schutzhandschuhe.
• Nehmen Sie keine Veränderungen am Produkt vor und reparieren
Sie den Artikel nicht selbst! Durch unsachgemäße Reparaturen können
unvorhersehbare Schäden entstehen! Kontaktieren Sie in diesem Fall
unseren Produkt-Service.
• Polstern Sie den umgebenden Untergrund des Trampolins aus, z.B. mit
weichen Matten oder Ähnlichem.
Verletzungsgefahr beim Verwenden!
• Schließen Sie vor dem Benutzen des Artikels immer die Netzöffnung.
• Es darf immer nur eine Person das Trampolin verwenden! Sonst besteht
Kollisionsgefahr!
• Überprüfen Sie das Trampolin vor jedem Gebrauch auf Beschädigun gen, Verschleiß, Risse und fehlende Teile! Es darf nicht verwendet
werden, wenn es sichtbare Schäden oder Mängel aufweist.
Das Sicherheitsnetz hat eine Mindesthaltbarkeit von einem Jahr.
• Vergewissern Sie sich vor jedem Gebrauch, dass das Trampolin
ordnungsgemäß zusammengebaut ist und der Rahmenschutz und die
Sicherheitsnetze sorgfältig befestigt und richtig positioniert sind.
• Achten Sie vor Betreten des Trampolins darauf, dass das Sprungtuch
und der Rahmenschutz vollständig trocken sind!
• Verwenden Sie das Trampolin nicht, wenn Sie verletzt oder gesundheit lich eingeschränkt sind, z.B. durch Sprunggelenksverletzungen, Rücken leiden etc.
• Verlassen Sie das Trampolin sofort, wenn Sie sich schwindelig fühlen,
Herzrasen verspüren etc., und konsultieren Sie sofort einen Arzt.
• Das Trampolin darf nicht mit Zigaretten oder unter Alkohol- und
Drogeneinfluss betreten werden! Betreten Sie es auch nicht bei Müdig keit! Es besteht die Gefahr, durch Unachtsamkeit die Kontrolle zu ver lieren!
• Essen Sie nicht während des Springens und kauen Sie auch keine
Kaugummis oder Ähnliches. Es besteht Verschluckungsgefahr!
• Nehmen Sie vor Betreten des Trampolins Schmuck, Uhren, Brillen,
Haarspangen etc. ab und entleeren Sie Ihre Taschen.
• Wenn Sie lange Haare haben, binden Sie diese vor dem Betreten mit
einem Gummiband zusammen!
• Springen Sie niemals im Dunkeln!
• Vergewissern Sie sich vor dem Betreten des Trampolins, dass sich keine
Personen, Tiere oder Gegenstände unter dem Trampolin befinden und
keine Gegenstände auf dem Trampolin liegen!
• Springen Sie niemals vom Sprungtuch aus direkt auf den Fußboden!
Durch den harten Aufprall besteht hohe Verletzungsgefahr!
• Springen Sie stets nur in der Mitte des Trampolins und niemals am
Rand!
• Springen Sie stets von der Mitte des Sprungtuchs ab (weiß markiert)
und versuchen Sie, auch wieder darauf zu landen. Wenn Sie mehr als
30 cm neben der Markierung landen, unterbrechen Sie Ihren Sprung
sofort und starten Sie erneut von der Markierung aus. Springen Sie
nicht auf den Rahmenschutz!
14 DE
Page 13

• Tragen Sie beim Springen auf dem Trampolin eng anliegende, aber
bequeme Kleidung. Wir empfehlen Ihnen ein langärmliges Oberteil
und lange Hosen anzuziehen, um sich vor eventuellen Kratzern und
Abschürfungen zu schützen.
• Prüfen Sie vor jedem Gebrauch die Verbindung zwischen Standfüßen
und Rahmenteilen.
• Achten Sie darauf, dass sich an Ihrer Kleidung keine spitzen Haken,
Ösen oder Ähnliches befinden. Es besteht Verletzungsgefahr!
• Vermeiden Sie es zu hoch zu springen und überschätzen Sie sich nicht!
Steigern Sie erst nach und nach die Sprungintensität, aber übertreiben
Sie es nicht. Achten Sie stets darauf, dass Sie Ihre Sprünge unter Kon trolle haben.
• Springen Sie niemals absichtlich in das Sicherheitsnetz oder darüber
hinaus, versuchen Sie nicht sich daran hochzuziehen oder sich an das
Obergestell zu hängen!
• Richten Sie beim Springen Ihren Blick auf die Trampolin-Mitte. Dies hilft
dabei die Kontrolle zu behalten.
• Vergewissern Sie sich stets, dass die Aufsichtsperson mit dem Tram polin und seinen Eigenschaften vertraut ist! Lassen Sie das Trampolin
niemals unbeaufsichtigt.
• Springen Sie niemals zu lange auf dem Trampolin. Dies kann zu
Unachtsamkeit führen! Legen Sie nach ein paar Sprüngen stets eine
Pause ein.
• Es dürfen keine Gegenstände an dem Sicherheitsnetz befestigt oder
aufgehängt werden − außer es wird ausdrücklich vom Hersteller oder
Importeur darauf hingewiesen!
Vermeidung von Sachschäden!
• Betreten Sie das Trampolin niemals mit festen oder spitzen Schuhen,
z.B. Turnschuhen oder Straßenschuhen! Diese können das Material
beschädigen! Betreten Sie es ausschließlich barfuß, auf Strümpfen
oder mit Gymnastikschuhen.
• Das Trampolin darf nur verwendet werden, wenn es ordnungsgemäß
zusammengebaut ist.
• Überprüfen Sie in regelmäßigen Abständen die Schraubverbindungen
und ziehen Sie diese gegenbenfalls nach.
• Verwenden Sie zum Reinigen des Sprungtuchs oder des Gestells keine
scheuernden oder ätzenden Reinigungsmittel.
Standortwahl
• Das Trampolin ist nicht zur Verwendung in Innenräumen geeignet.
• Wählen Sie den Standort des Trampolins sorgfältig aus. Das Trampolin
darf nicht über harten Oberflächen aufgebaut werden.
• Das Trampolin darf nicht auf glatten Oberflächen, wie z.B. Fliesen
aufgestellt werden! Es könnte verrutschen!
• Stellen Sie das Trampolin auf eine Fläche mit mindestens 2 m Abstand
von anderen Aufbauten und Hindernissen auf. Achten Sie darauf,
dass besonders nach oben hin genügend Platz ist. Stellen Sie es nicht
in der Nähe von Fenstern, Wänden, Bäumen etc. auf. Oberhalb des
Trampolins sollte mindestens 7,5 m Platz sein.
• Stellen Sie das Trampolin so auf, dass andere Personen es nach dem
Gebrauch nicht unbeaufsichtigt verwenden können und sichern Sie es
vor unerlaubtem Gebrauch!
• Das Trampolin darf nicht während eines Sturms oder Gewitters und
während starken Windes verwendet werden!
• Demontieren Sie das Trampolin, wenn stürmisches Wetter oder winter liche Verhältnisse angesagt werden.
• Stellen Sie es an einem sicheren Ort unter, so dass es nicht wegwehen
oder umkippen kann!
Transport
Sollten Sie das aufgebaute Trampolin an einen anderen Standort transportieren müssen, benötigen Sie dazu mindestens zwei Personen.
Transportieren Sie ein aufgebautes Trampolin nur für kleinere Standortwechsel. Sichern und umwickeln Sie dazu alle Verbindungen des Untergestells mit wetterbeständigem Klebeband. Dadurch wird beim Transport
ein Lockern oder Trennen der Verbindungen verhindert.
Heben Sie zum Transportieren das Trampolin etwas vom Boden hoch
und tragen Sie es horizontal zum Boden.
Auf-/Abbau
Nehmen Sie alle Teile im Freien aus der Verpackung und überprüfen Sie,
ob alle Teile vollständig sind. Sollte dies nicht der Fall sein, kontaktieren
Sie bitte unseren Kundendienst.
Hinweis! Lassen Sie sich unbedingt von einer zweiten Person
beim Aufbau helfen! Achten Sie darauf, dass Sie sich nicht
klemmen!
Der Artikel darf nur von Erwachsenen aufgebaut und
montiert werden. Tragen Sie beim Aufbau des Artikels
Schutzhandschuhe!
Das mitgelieferte Werkzeug dient ausschließlich zur Vormontage.
Zum Befestigen aller Teile wird ein professionelles Werkzeug empfohlen.
Untergestell montieren
1. Stecken Sie auf die vier Winkelstangen (4) jeweils eine Verlängerungs stange (5) und eine Verlängerungsstange, die sich einseitig verjüngt
(6), zu Standfüßen zusammen (Abb. C).
2. Stecken Sie die Rahmenstangen (3) zusammen (Abb. D und E).
Hinweis! Achten Sie darauf, dass die Löcher der Rahmenteile nach oben zeigen.
3. Stecken Sie die vier Standfüße auf die Beinmuffen der Rahmenteile
(Abb. D und E).
4. Stecken Sie jeweils eine Schraube (12) von oben in die acht Löcher
des Untergestells und verschrauben Sie diese jeweils mit einer
Unterlegscheibe (14) und einer Hutmutter (13) (Abb. F).
Sprungtuch einsetzen
Achtung! Gehen Sie beim Einsetzen der Federn vorsichtig
vor! Die Federn stehen beim Einsetzen unter Spannung!
Verletzungsgefahr!
1. Breiten Sie das Sprungtuch (1) innerhalb des Untergestells aus
(Abb. G).
Das Sprungtuch ist mit 64 Ösen ausgestattet und das Untergestell
mit 64 Bohrungen auf der Oberseite. Gehen Sie beim Einsetzen der
Federn (7) sorgfältig vor und befolgen Sie genau die nachfolgenden
Anweisungen, damit das Sprungtuch richtig eingesetzt wird.
2. Wählen Sie einen beliebigen Punkt 0 aus, an dem Sie die erste Feder
einsetzen. Haken Sie dazu die Feder in eine Öse des Sprungtuchs
ein. Mit Hilfe des Federspanners (11) haken Sie die andere Seite
der Feder in eine Bohrung im Untergestell ein (Abb. H). Zählen Sie
16 Ösen weiter und setzen Sie an der 16. Öse und Bohrung die
zweite Feder ein. Zählen Sie wieder 16 Ösen weiter und setzen
Sie auch an der 32. und 48. Öse und Bohrung (vom Punkt 0 aus
gezählt) jeweils eine Feder ein (Abb. I).
3. Setzen Sie vom Punkt 0 aus, in jede achte Öse und Bohrung eine
Feder ein. Wiederholen Sie dies, bis Sie wieder bei 0 angekommen
sind. Zusätzlich zu den zuerst eingesetzten Federn sollten jetzt an den
Ösen und Bohrungen 8, 24, 40 und 56 Federn eingesetzt sein
(Abb. J).
4. Setzen Sie vom Punkt 0 aus, in jede vierte Öse und Bohrung eine
Feder ein. Wiederholen Sie dies, bis Sie wieder bei 0 angekommen
sind. Zusätzlich zu den montierten Federn sollten jetzt die Löcher 4,
12, 20, 28, 36, 44, 52 und 60 mit Federn versehen sein (Abb. K).
5. Setzen Sie vom Punkt 0 aus in jede zweite Öse und Bohrung eine
Feder ein, bis Sie wieder an Punkt 0 angekommen sind. Zusätzlich zu
den schon montierten Federn sollten jetzt die Löcher 2, 6, 10, 14, 18,
22, 26, 30, 34, 38, 42, 46, 50, 54, 58 und 62 mit Federn versehen
werden (Abb. L).
6. Setzen Sie die übrigen Federn in die noch freien Ösen und
Bohrungen ein. Falls Sie eine Bohrung oder Öse übersehen haben,
prüfen Sie nach, welche Feder falsch eingesetzt ist und setzen Sie
sie an die richtige Position! Wiederholen Sie ggf. die oben be schriebenen Schritte (Abb. M).
7. Legen Sie den Rahmenschutz (2) so auf das Sprungtuch, dass die
Federn und die Rahmenstangen verdeckt sind.
8. Befestigen Sie den Rahmenschutz mit den Bändern am Rahmen des
Untergestells (Abb. N).
9. Ziehen Sie das Fixierband des Rahmenschutzes fest (Abb. O).
10. Fädeln Sie das Seil (8) unterhalb des Rahmenschutzes durch die
Ösen und verknoten Sie die Seilenden (Abb. P).
15DE
Page 14

Sicherheitsnetz montieren
1. Breiten Sie das Sicherheitsnetz (21) auf dem Trampolin aus (Abb. Q).
Hinweis! Die Eingangsöffnung des Sicherheitsnetzes darf
nicht über einem Standfuß sein.
2. Stecken Sie die Netzstangen (15) mit den Netzstangen einseitig
verjüngt (16) zusammen (Abb. R).
3. Stecken Sie die Netzstangen (mit den Schaumstoffhüllen (17)) mit den
Enden, auf denen die Kappen sitzen, in die Hülsen des Sicherheits netzes (Abb. S) und stellen Sie die überstehenden Netzstangen an die
Standfüße.
4. Schrauben Sie die Netzstangen an die zwei Löcher der Standfüße
mit jeweils einer Schraube (18), einem Abstandhalter (22), einer
Unterlegscheibe (14), einer Mutter, selbstsichernd (19) und einer
Kunststoff-Hutmutter (20) an den Standfüßen des Trampolins fest
(Abb. T).
5. Befestigen Sie die Haken des Sicherheitsnetzes in den Ösen des
Sprungtuches (Abb. U).
6. Binden Sie die zwei Bänder an den Hülsen des Sicherheitsnetzes um
die Netzstange (Abb. V).
7. Befestigen Sie mit den mitgelieferten Kabelbindern (10) die
Warnschilder (9) an zwei Seiten des Untergestells (Abb. W).
Hinweis! Befestigen Sie ein Warnschild direkt unter
der Eingangsöffnung am Untergestell. Dies erhöht das
Wahrnehmen der Sicherheitshinweise.
Das Sicherheitsnetz hat eine Mindesthaltbarkeit von
einem Jahr.
• Springen Sie nicht zu hoch und versuchen Sie stets die Kontrolle zu
behalten.
• Springen Sie stets von der weißen Markierung des Sprungtuchs ab
und versuchen Sie, auch wieder darauf zu landen! Achten Sie darauf,
nicht am Rand zu landen!
• Üben Sie unbedingt das Abbrechen von Sprüngen, bevor Sie sich an
kompliziertere Sprünge wagen! Beugen Sie dazu die Knie leicht, wenn
Sie auf dem Trampolin landen (siehe „Einen Sprung abbrechen“).
• Begrenzen Sie das ununterbrochene Benutzen des Trampolins und
legen Sie regelmäßig Pausen ein.
Basis-Sprung (Abb. X)
1. Stellen Sie sich in die Mitte des Trampolins (weiß markiert) und richten
Sie Ihre Augen beim Sprung stets auf die Markierung!
2. Schwingen Sie Ihre Arme langsam nach oben und stoßen Sie sich vom
Trampolin ab.
3. Landen Sie wieder auf der Markierung. Nicht zu hoch springen!
X
Trampolin abbauen
Wenn Sie das Trampolin abbauen möchten, gehen Sie in umgekehrter
Reihenfolge vor!
Trampolin verwenden
Achtung! Verletzungsgefahr!
• Betreten Sie das Trampolin niemals ohne Aufsicht! Es muss immer eine
erwachsene Person, die mit dem Trampolin vertraut ist, anwesend sein!
• Verwenden Sie das Trampolin nicht, wenn das Sprungtuch nass ist!
• Überprüfen Sie das Trampolin vor jedem Gebrauch auf Verschleiß,
Beschädigungen oder fehlende Teile! Verwenden Sie es nicht, wenn es
Schäden aufweist!
• Vergewissern Sie sich vor dem Betreten des Trampolins, dass sich
weder unter noch auf dem Trampolin Personen, Tiere oder Gegen stände befinden!
• Betreten Sie das Trampolin ausschließlich barfuß, auf Strümpfen oder
mit Gymnastikschuhen.
Warnung!
• Schlagen Sie keine Saltos! Ein Landen auf dem Kopf oder
Genick kann zu schwerwiegenden Verletzungen, Lähmungen
oder sogar zum Tod führen!
• Es darf immer nur eine Person das Trampolin verwenden!
Das Trampolin betreten und verlassen
• Machen Sie vor dem Betreten des Trampolins einige Dehnübungen,
um Ihre Muskeln langsam aufzuwärmen!
• Ziehen Sie Ihre Schuhe aus.
• Öffnen Sie die drei Sicherheitsverschlüsse und danach den Reißver-
schluss am Sicherheitsnetz.
• Schließen Sie nach Betreten des Trampolins den Reißverschluss am
Sicherheitsnetz und die drei Sicherheitsverschlüsse!
Dies muss durch die Aufsichtsperson durchgeführt werden!
• Öffnen Sie zuerst den Reißverschluss und dann die Sicherheitsver schlüsse, um das Trampolin zu verlassen.
• Springen Sie nicht vom Trampolin!
• Schließen Sie nach dem Verlassen des Trampolins zuerst den Reißver schluss und dann die Sicherheitsverschlüsse.
Die ersten Sprünge
• Beginnen Sie mit ein paar ganz einfachen Sprüngen (Basis-Sprung),
um sich langsam an die Eigenschaften des Trampolins zu gewöhnen.
Knie-Sprung (Abb. Y)
1. Springen Sie wie beim Basis-Sprung ab. Springen Sie dabei nicht zu
hoch!
2. Versuchen Sie auf den Knien zu landen, wobei der Oberkörper auf recht bleibt.
3. Versuchen Sie beim erneuten Abstoßen wieder auf die Füße zu
gelangen.
Y
Sitz-Sprung (Abb. Z)
1. Springen Sie wie beim Basis-Sprung ab. Springen Sie dabei nicht zu
hoch!
2. Versuchen Sie in sitzender Position zu landen. Strecken Sie die Ellen bogen dabei nicht durch, sondern legen Sie die Arme und Hände
ganz locker neben Ihre Hüften.
3. Versuchen Sie beim erneuten Abstoßen wieder auf die Füße zu
gelangen.
Z
16 DE
Page 15

Einen Sprung abbrechen
Wenn Sie einen Sprung abbrechen möchten, beugen Sie einfach die
Knie leicht, wenn Sie auf dem Sprungtuch landen. Dadurch verlieren Sie
langsam an Sprungkraft.
Reinigung, Pflege und Wartung
Damit Sie lange Freude an diesem Artikel haben, sollten Sie die folgenden Pflege- und Wartungshinweise beachten:
• Den Artikel immer trocken und sauber in einem temperierten Raum
lagern.
Wichtig! Nur mit einem feuchten Reinigungstuch reinigen
und anschließend trocken wischen.
• Das Trampolin darf nur mit der maximalen Belastbarkeit und der be stimmungsgemäßen Benutzung verwendet werden. Es darf immer nur
eine Person das Trampolin nutzen.
• Das Trampolin sollte immer barfuß, mit Socken oder Gymnastik schuhen betreten werden.
• Keine Tiere auf dem Trampolin und alle scharfen oder spitzen Gegen stände vom Trampolin fernhalten, da ansonsten eine Beschädigung
des Sprungtuches besteht.
• Den Artikel nicht benutzen:
- bei Löchern oder Rissen im Sprungtuch.
- wenn das Sprungtuch nicht gespannt ist.
- bei kaputten Rahmenteilen.
- bei beschädigtem, fehlendem oder nicht befestigtem Rahmenschutz.
- bei kaputten oder fehlenden Federn. Tauschen Sie diese unverzüg lich aus.
- wenn die Schrauben und Muttern locker sind. Ziehen Sie alle
Schrauben und Muttern bei Bedarf nach.
• Die selbstsichernden Muttern sind nur einmalig zu benutzen und bei
jedem erneutem Aufbau müssen neue verwendet werden.
• Überprüfen Sie den Artikel vor jeder Verwendung auf verschlissene
oder fehlende Teile. Folgende Verschleißteile sind regelmäßig auf
Verschleißerscheinungen zu prüfen: Sprungtuch, Rahmenschutz, Sicher heitsnetz, Schaumstoffhüllen und Kappen der Netzstangen.
• Das Sicherheitsnetz muss ausgetauscht werden, wenn Verschleißer scheinungen zu erkennen sind. Das Sicherheitsnetz hat eine Mindest haltbarkeit von einem Jahr.
• Nehmen Sie nur Änderungen am Artikel vor, wie Sie in der Aufbau anleitung vom Hersteller beschrieben sind.
Achtung! Eine regelmäßige Wartung ist erforderlich.
Vernachlässigen Sie die regelmäßige Wartung, kann es für
die Benutzer des Artikels zu einer Gefahr werden.
IAN: 60237
Service Deutschland
Tel.: 0800 5435 111
E-Mail: deltasport@lidl.de
Ersatzteile zu Ihrem Produkt finden Sie auch unter:
www.delta-sport.com, Rubrik Service - Ersatzteilservice Lidl
Hinweise zur Entsorgung
Verpackung und Artikel bitte umweltgerecht und sortenrein entsorgen!
Entsorgen Sie den Artikel über einen zugelassenen Entsorgungsbetrieb
oder über Ihre kommunale Gemeindeverwaltung.
Beachten Sie die aktuell geltenden Vorschriften.
3 Jahre Garantie
Das Produkt wurde mit großer Sorgfalt und unter ständiger Kontrolle
produziert. Sie erhalten auf dieses Produkt drei Jahre Garantie ab Kaufdatum. Bitte bewahren Sie den Kassenbon auf.
Die Garantie gilt nur für Material- und Fabrikationsfehler und entfällt bei
missbräuchlicher oder unsachgemäßer Behandlung. Ihre gesetzlichen
Rechte, insbesondere die Gewährleistungsrechte, werden durch diese
Garantie nicht eingeschränkt. Verschleißteile sind aus der Garantie und
Gewährleistung ausgeschlossen. Dies betrifft folgende Teile des Produkts:
Sprungtuch, Rahmenschutz, Sicherheitsnetz, Schaumstoffhüllen und
Kappen der Netzstangen.
Bei etwaigen Beanstandungen wenden Sie sich bitte an die unten stehende Service-Hotline oder setzen Sie sich per E-Mail mit uns in Verbindung.
Unsere Servicemitarbeiter werden das weitere Vorgehen schnellstmöglich
mit Ihnen abstimmen. Wir werden Sie in jedem Fall persönlich beraten.
Die Garantiezeit wird durch etwaige Reparaturen aufgrund der Garantie,
gesetzlicher Gewährleistung oder Kulanz nicht verlängert.
Dies gilt auch für ersetzte und reparierte Teile.
Nach Ablauf der Garantie anfallende Reparaturen sind kostenpflichtig.
17DE
Page 16

1818
Page 17

Order form
60237, GARDEN TRAMPOLINE Delta-Sport Nr. TR-1836
Additional parts for our products are delivered against
advance payment by bank transfer or Paypal.
Please be sure to state the article number together with
your name and postcode in the reference field when
sending a payment.
Bank transfer:
Bayerische Hypo- und Vereinsbank AG
Account number: 618435358
Bank code: 20030000
IBAN: DE272003000000618435358
BIC: HYVEDEMM300
Please send your Paypal payment to:
ake@delta-sport.com
Our postal address:
SERVICE.DELTA-SPORT.COM
HÜTTMANNSWEG 11 • 24641 HÜTTBLEK
GERMANY
Here is how you order:
Under “sender/purchaser”, enter in capital letters your
name, address, and telephone number (in case of any
queries).
Sender/purchaser
(please fill out completely in capital letters)
Dodávku našich doplňků provádíme proti platbě předem
bankovním převodem nebo z účtu PayPal.
Při Vaší platbě uvádějte prosím bezpodmínečně jako účel
použití číslo výrobku, Vaše příjmení a Vaše PSČ.
Bankovní převod:
Bayerische Hypo- und Vereinsbank AG
Surname, given name
Číslo účtu 618435358
Kód banky 20030000
IBAN DE27200300000618435358
BIC HYVEDEMM300
Vaši platbu z účtu PayPal posílejte prosím na
House number, street
adresu:
ake@delta-sport.com
Town, postcode
Naše poštovní adresa:
SERVICE.DELTA-SPORT.COM
HÜTTMANNSWEG 11
Telephone number
Alternatively, you can order all articles directly from our on-line store:
D-24641 HÜTTBLEK
www.delta-sport.com, category Service - Lidl Spare Parts Service
Die Lieferung unserer Zubehörteile erfolgt gegen
Vorkasse per Banküberweisung oder Paypal.
Geben Sie bei Ihrer Zahlung als Verwendungszweck
bitte unbedingt Artikelnummer sowie Ihren Namen und
Ihre PLZ an.
Überweisung:
Bayerische Hypo- und Vereinsbank AG
Kontonummer 618435358
Bankleitzahl 20030000
IBAN DE27200300000618435358
BIC HYVEDEMM300
Ihre Paypal-Zahlung schicken Sie bitte an:
ake@delta-sport.com
Unsere Postadresse:
SERVICE.DELTA-SPORT.COM
HÜTTMANNSWEG 11
D-24641 HÜTTBLEK
Objednací karta
60237, ZAHRADNÍ TRAMPOLÍNA Delta-Sport Nr. TR-1836
Správně objednejte takto:
Hůlkovým písmem zapište do kolonky „odesílatel/objed-
natel“ Vaše jméno, Vaši adresu a Vaše telefonní číslo (pro
případné dotazy).
Odesílatel/objednatel
(prosíme o úplné vyplnění hůlkovým písmem)
Příjmení, jméno
Ulice, číslo popisné
PSČ, místo
Telefon
Alternativně můžete všechny výrobky objednat také přímo v našem online-shopu:
www.delta-sport.com, Rubrika Servis - Servis pro náhradní díly Lidl
Bestellkarte
60237, GARTEN-TRAMPOLIN Delta-Sport Nr. TR-1836
So bestellen Sie richtig:
Tragen Sie unter „Absender/Besteller“ Ihren Namen,
Ihre Anschrift und Ihre Telefonnummer (für evtl.
Rückfragen) in Blockschrift ein.
Absender/Besteller
(bitte vollständig und in Blockschrift ausfüllen)
Name, Vorname
Straße, Hausnummer
PLZ, Ort
Telefon
Alternativ können Sie alle Artikel auch direkt in unserem Online-Shop bestellen:
www.delta-sport.com, Rubrik Service - Ersatzteilservice Lidl
Page 18

www.delta-sport.com, category Service - Lidl Spare Parts Service
Alternatively, you can order all articles directly from our on-line store:
60237_Safety net
Article No. 01004
60237_Frame cover/cushioning
Article No. 01002
60237_Set of 4 springs
Article No. 01001
Order form
60237, GARDEN TRAMPOLINE Delta-Sport Nr. TR-1836
01003
01002
QuantityArticle No.
Pcs. x =
Alternativ können Sie alle Artikel auch direkt in unserem Online-Shop bestellen:
www.delta-sport.com, Rubrik Service - Ersatzteilservice Lidl
Artikel-Nr. 01003
59,90 €
59,90 €
SignatureDate and place
Total
€
Alternativně můžete všechny výrobky objednat také přímo v našem online-shopu:
60237_Federn 4er-Set
60237_Rahmenabdeckung/-polsterung
60237_Sicherheitsnetz
Artikel-Nr. 01002
Artikel-Nr. 01001
Bestellkarte
60237, GARTEN-TRAMPOLIN Delta-Sport Nr. TR-1836
www.delta-sport.com, Rubrika Servis - Servis pro náhradní díly Lidl
Č. výrobku 01003
60237_Bezpečnostní síť
5,00 €
Post and packaging
Č. výrobku 01002
60237_Zakrytí – polstrování rámu
€Pcs. x =
€Pcs. x =
Unit price
4,95 €01001
Total
€
60237_Sada 4 pružin
Č. výrobku 01001
Objednací karta
60237, ZAHRADNÍ TRAMPOLÍNA Delta-Sport Nr. TR-1836
UnterschriftOrt/Datum
01003
01002
01003
01002
MnožstvíČ. výrobku
MengeArtikel-Nr.
59,90 €
59,90 €
Stk. x =
Einzelpreis
4,95 €01001
Paušální poplatek za náklady na doručení
59,90 €
59,90 €
x =
Jednotková cena
4,95 €01001
Versandkostenpauschale
PodpisMísto/datum
Gesamtbetrag
Summe
€
5,00 €
€
€Stk. x =
€Stk. x =
Celkem
€
5,00 €
€x =
€x =
Celková částka
€
 Loading...