


EN
AP-470
USER’S GUIDE (Full)
Before using this Digital Piano for the first time, be sure to read the separate USER’S GUIDE to familiarize yourself with basic operations.
AP470-E-3A

 Contents
|
|
|
|
|
|
|
.....................................................................................................Getting Ready |
|
|
EN-49 |
|
|
Assembling the Stand............................................... |
EN-49 |
Opening and Closing the Piano Lid ........................... |
EN-54 |
|
|
To connect the cable................................................. |
EN-52 |
Connecting Headphones ........................................... |
EN-54 |
|
|
To install the music stand............................................ |
EN-53 |
Connecting Audio Equipment or an Amplifier ............ |
EN-55 |
|
|
Install the Headphones Hook ...................................... |
EN-53 |
Bundled and Optional Accessories............................ |
EN-55 |
|
|
Removing the Protective Tape from the Keyboard..... |
EN-53 |
|
|
|
|
|
|
|
|
|
|
|
|
|
|
|
General Guide ................................. |
EN-3 |
FUNCTION Button......................................................... |
EN-4 |
Auto Resume and Operation Lock ................................ |
EN-4 |
About Music Score data ................................................ |
EN-4 |
Power Outlet.................................... |
EN-5 |
Turning Power On or Off ............................................... |
EN-5 |
Returning the Digital Piano to Its Factory Default |
|
Settings.......................................................................... |
EN-5 |
Playing with Different Tones ......... |
EN-6 |
Selecting and Playing a Tone........................................ |
EN-6 |
Adjusting Acoustic Piano Sound Characteristics........... |
EN-7 |
Layering Two Tones ...................................................... |
EN-8 |
Using Effects ................................................................. |
EN-9 |
Using the Digital Piano’s Pedals.................................. |
EN-10 |
Using the Metronome .................................................. |
EN-11 |
Splitting the Keyboard for Duet Play............................ |
EN-12 |
Using Built-in Songs |
|
(Concert Play, Music Library, |
|
Demo Tunes)................................. |
EN-14 |
Performing Demo Play ................................................ |
EN-14 |
Concert Play ................................................................ |
EN-14 |
Practicing with a Concert Play Song ........................... |
EN-14 |
Music Library ............................................................... |
EN-16 |
Playing Back a Specific Music Library Song ............... |
EN-16 |
Practicing with a Music Library Song........................... |
EN-17 |
Playing Back Audio Data Stored on |
|
a USB Flash Drive ....................................................... |
EN-17 |
Recording and Playback.............. |
EN-18 |
Recording to Built-in MIDI Recorder............................ |
EN-18 |
Using the MIDI REC Button......................................... |
EN-18 |
Recording to a USB Flash Drive (Audio Recorder) ..... |
EN-21 |
Configuring Settings with |
|
the Keyboard................................. |
EN-25 |
To configure settings with the keyboard ...................... |
EN-25 |
Keyboard Keys Used for Configuring Settings ............ |
EN-26 |
Parameter List ............................................................. |
EN-28 |
Hall simulator ........................................................... |
EN-28 |
Tone selection.......................................................... |
EN-28 |
Chorus...................................................................... |
EN-28 |
Brilliance................................................................... |
EN-28 |
Layer balance........................................................... |
EN-28 |
Lower Pedal ............................................................. |
EN-28 |
Damper noise........................................................... |
EN-28 |
Hammer response.................................................... |
EN-28 |
String resonance ...................................................... |
EN-28 |
Lid simulator............................................................. |
EN-28 |
Key-on action noise.................................................. |
EN-28 |
Key-off action noise.................................................. |
EN-28 |
Select layer tone ...................................................... |
EN-29 |
Duet mode................................................................ |
EN-29 |
Music Library song select |
|
(MUSIC LIBRARY SELECT).................................... |
EN-30 |
Tempo (TEMPO)...................................................... |
EN-30 |
Beat (BEAT) ............................................................. |
EN-30 |
METRONOME TEMPO............................................ |
EN-30 |
METRONOME BEAT ............................................... |
EN-30 |
CONCERT PLAY a............................................. |
EN-30 |
LISTEN..................................................................... |
EN-30 |
LESSON................................................................... |
EN-30 |
PLAY ........................................................................ |
EN-30 |
CONCERT PLAY SELECT (Song) (SELECT +/–) ... EN-30 |
|
CONCERT PLAY VOLUME (VOLUME +/–) ............ |
EN-30 |
Music Library Song Volume ..................................... |
EN-30 |
Metronome volume .................................................. |
EN-30 |
Temperament........................................................... |
EN-31 |
Temperament Base note.......................................... |
EN-31 |
Temperament select ................................................ |
EN-31 |
Touch response ....................................................... |
EN-31 |
Transpose ................................................................ |
EN-31 |
A-tuning.................................................................... |
EN-31 |
Octave shift .............................................................. |
EN-31 |
Keyboard volume ..................................................... |
EN-31 |
USB flash drive mode .............................................. |
EN-32 |
Local control............................................................. |
EN-32 |
Send channel ........................................................... |
EN-32 |
Audio Recorder Volume ........................................... |
EN-32 |
Operation tone ......................................................... |
EN-32 |
Panel lock................................................................. |
EN-32 |
USB flash drive mode .............................................. |
EN-33 |
Format...................................................................... |
EN-33 |
Save ......................................................................... |
EN-33 |
Load ......................................................................... |
EN-33 |
Delete....................................................................... |
EN-33 |
EN-1

 Contents
Speaker out.............................................................. |
EN-33 |
Head phone mode ................................................... |
EN-33 |
Volume Sync Equalizer............................................ |
EN-33 |
Auto Resume ........................................................... |
EN-33 |
Linking with an Application (APP Function)................. |
EN-34 |
USB Flash Drive............................ |
EN-35 |
Storing Standard Audio Data (WAV Files) to |
|
a USB Flash Drive ....................................................... |
EN-36 |
Connecting a USB Flash Drive to and |
|
Detaching It from the Digital Piano .............................. |
EN-37 |
Formatting a USB Flash Drive..................................... |
EN-37 |
Saving a Recorded Song to a USB Flash Drive .......... |
EN-38 |
Loading Song Data from a USB Flash Drive into |
|
Digital Piano Memory .................................................. |
EN-40 |
Deleting Data from a USB Flash Drive ........................ |
EN-41 |
Simple Play Back of a Song on a USB Flash Drive..... |
EN-42 |
Error Indicators ............................................................ |
EN-43 |
Connecting to a Computer........... |
EN-45 |
Minimum Computer System Requirements................. |
EN-45 |
Connecting the Digital Piano to Your Computer.......... |
EN-45 |
Using MIDI................................................................... |
EN-46 |
Transferring Song Data with a Computer .................... |
EN-46 |
Reference ...................................... |
EN-56 |
Troubleshooting........................................................... |
EN-56 |
Product Specifications ................................................. |
EN-57 |
Appendix ........................................... |
A-1 |
Tone List........................................................................... |
A-1 |
Concert Play List .............................................................. |
A-1 |
Music Library List.............................................................. |
A-1 |
MIDI Implementation Chart
Company and product names used in this manual may be registered trademarks of others.
EN-2


 General Guide
Front
1 |
2 |
3 |
bo |
|
4 |
5 |
6 |
bn |
|
||
7 |
|
|
8 |
|
bp |
|
|
|
9 |
|
|
Bottom
Rear
bk |
|
bl |
bm |
|
EN-3

 General Guide
*CAUTION
•Make sure that the cover is fully open whenever you are playing on the keyboard. A partially open cover can suddenly close unexpectedly and pinch your fingers.
 NOTE
NOTE
• The names shown here are always indicated in bold when they appear within the text of this manual.
P (POWER) button |
Pedal connector |
VOLUME controller |
USB port |
FUNCTION button |
Power terminal (DC 24V) |
METRONOME button |
USB flash drive port |
AUDIO REC button |
PHONES/OUTPUT jacks |
MIDI REC button |
Power lamp |
a button |
|
GRAND PIANO 1 button |
|
GRAND PIANO 2 button |
|
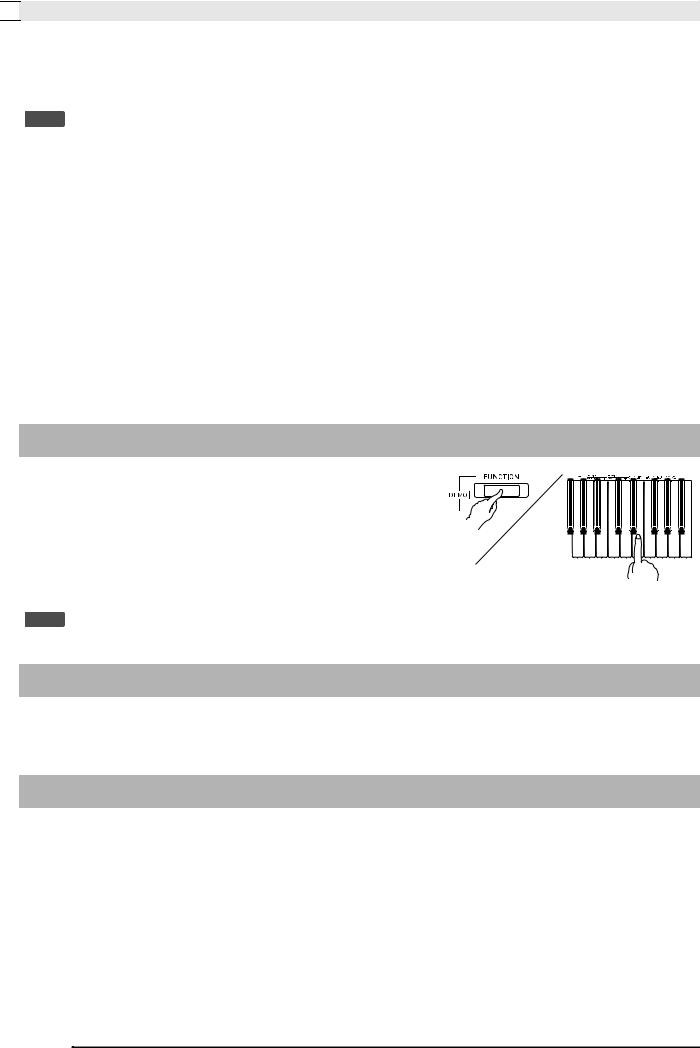
FUNCTION Button
The FUNCTION button is used in combination with other buttons and keys.
To change a setting, hold down the FUNCTION button as you press the button or key that is assigned the setting you want to configure.
When you press a key, the Digital Piano beeps to indicate the current setting.
A long beep indicates that a setting is turned off.
 NOTE
NOTE
• For details about operations and settings, see “Configuring Settings with the Keyboard” on page EN-25.
Auto Resume and Operation Lock
Your Digital Piano can be configured to save its current settings when power is turned off and restore them when turned back on again (Auto Resume). You can also lock its buttons to protect against operation errors (Operation Lock). For details, see “Parameter List” on pages EN-28 - EN-33.
About Music Score data
You can use a computer to download music score data from the CASIO Website. For more information, visit the URL below.
http://world.casio.com/
EN-4

 Power Outlet
After you finish assembling the stand, turn on the Digital Piano. For details, see “Getting Ready” on page EN-49.
Turning Power On or Off
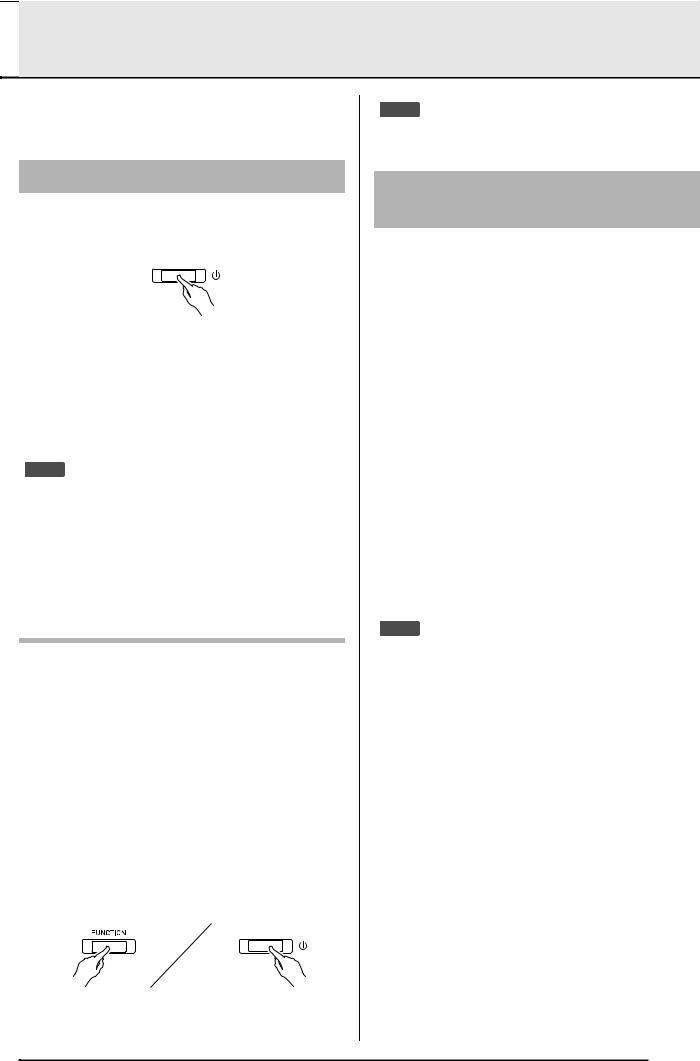
1. Press the P (POWER) button to turn on Digital Piano power.
•The power lamp lights and the Digital Piano powers up. The power up operation takes about 5 seconds.
2.To turn off the Digital Piano, hold down the P (POWER) button until the power lamp goes out.
 NOTE
NOTE
•Pressing the P (POWER) button to turn off power actually puts the Digital Piano into a standby state. Minute amounts of current continue to flow within the Digital Piano in the standby state. If you do not plan to use the Digital Piano for a long time or if there is a lightning storm in your area, be sure to unplug the AC adaptor from the power outlet.
Auto Power Off
This Digital Piano is designed to turn off automatically to avoid wasting power after no operation is performed for a preset amount of time. The Auto Power Off trigger time is about four hours.
•You also can use the procedure below to temporarily suspend Auto Power Off.
■ To disable Auto Power Off
1. While the Digital Piano is turned on, press the
P (POWER) button to turn it off.
2.While holding down the FUNCTION button, press the P (POWER) button to turn on the Digital Piano.
• Auto Power Off will be disabled at this time.
 NOTE
NOTE
•Turning off the Digital Piano after performing the above steps will re-enable Auto Power Off.
Returning the Digital Piano to Its Factory Default Settings
Perform the following procedure when you want to return the Digital Piano’s stored data and settings to their initial factory defaults.
1. Turn off the Digital Piano.
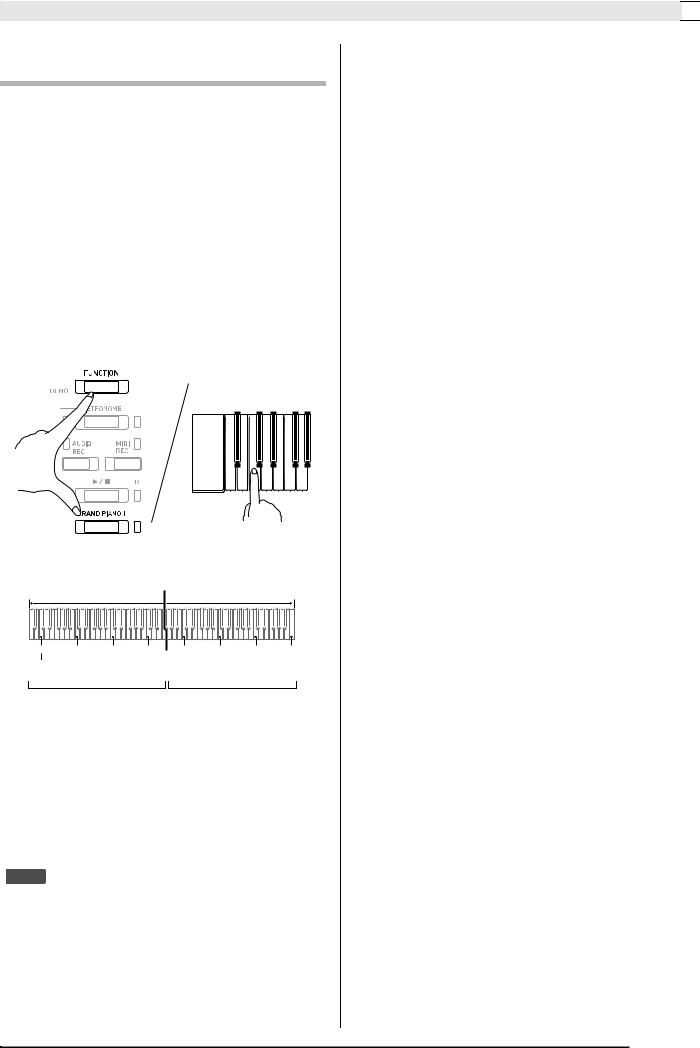
2. Holding down the FUNCTION, MIDI REC and GRAND PIANO 2 buttons, press the P (POWER) button.
3. Hold down the FUNCTION, MIDI REC and
GRAND PIANO 2 buttons until the GRAND PIANO 2 lamp, and then the GRAND PIANO 1 lamp, and then the R lamp start to flash.
•After some time, the flashing will stop.
4.Release the FUNCTION, MIDI REC and GRAND PIANO 2 buttons.
•The Digital Piano will initialize its internal system. You will be able to use the Digital Piano in a short while.
 NOTE
NOTE
•See “Turning Power On or Off” (page EN-5) for information about turning power on and off.
EN-5


 Playing with Different Tones
Selecting and Playing a Tone
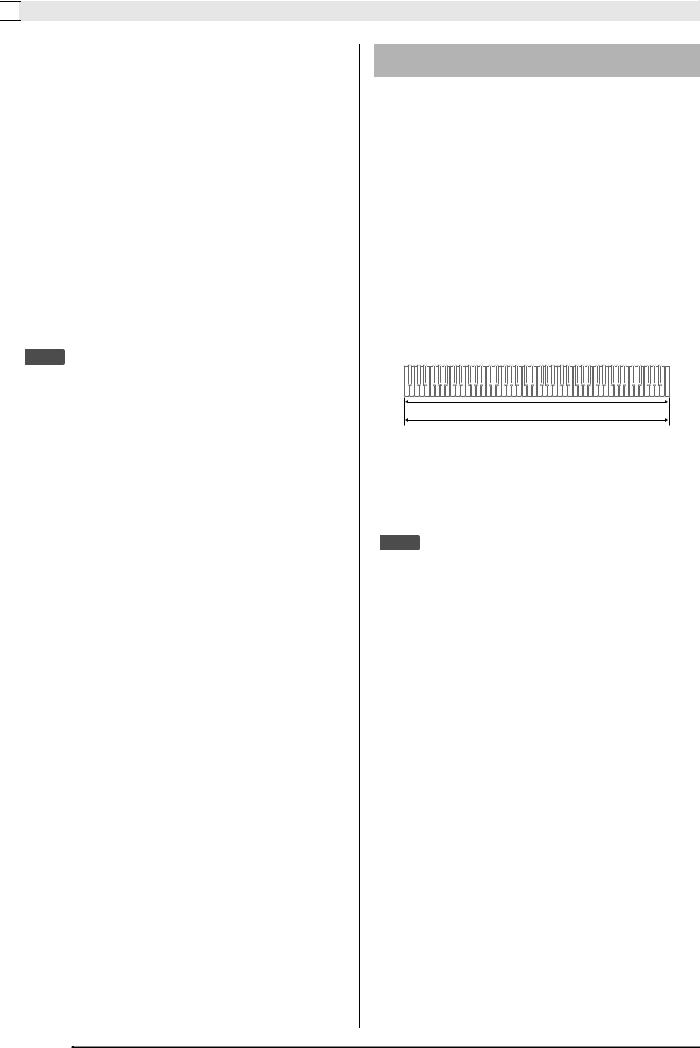
The Digital Piano comes with 22 built-in tones. *1
*2 |
*1: The names of the tones are marked above the keyboard keys to which they are assigned.
*2: In this manual, these nine tones are collectively referred to as “piano tones”. The CONCERT, MELLOW, and BRIGHT tones are collectively referred to as “GRAND PIANO tones”.
To select a tone
1. Select the tone you want.
To select GRAND PIANO 1 CONCERT or GRAND PIANO 2 CONCERT
•Press the GRAND PIANO 1 button or
GRAND PIANO 2 button.
•The button lamp of the selected tone will light.
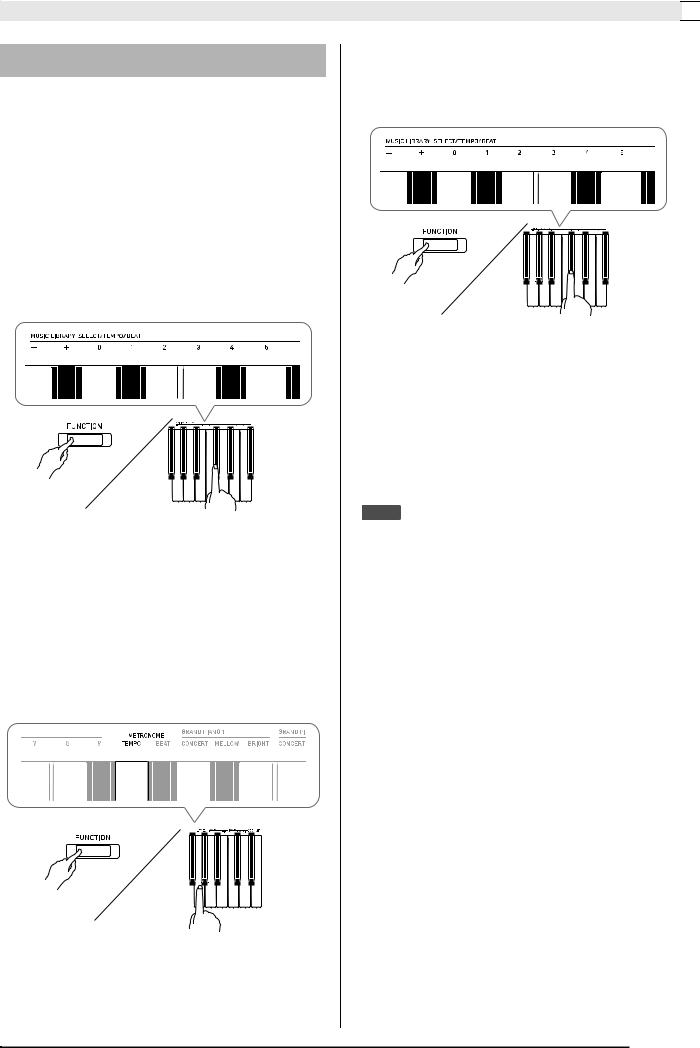
To select one of the other tones
•While holding down the FUNCTION button, press the keyboard key that corresponds to the tone you want to select.
 NOTE
NOTE
•Some keys may have more than one tone assigned. In this case, each press of the key cycles to the next assigned tone. Which tone is selected by the key press is indicated by beeps.
Example: Cycling through MODERN, ROCK, and JAZZ settings
MODERN: (1 beep) ROCK: (2 beeps) JAZZ: (3 beeps)
•Of the Digital Piano’s 22 built-in tones, the first six are grand piano tone. Each tone has its own distinctive merits, so you should select the tone that suits the song you are playing along with or your own personal preferences.
Tone Name |
Characteristics |
CONCERT |
This is a full concert grand piano tone |
|
for dynamic and natural tone changes. |
|
This tone is designed to reproduce |
|
damper, resonance, and other piano |
|
nuances, which makes it ideal for |
|
virtually any type of piano |
|
performance. |
|
|
MELLOW |
A warm, subdued grand piano tone. |
|
|
BRIGHT |
A bright and clear grand piano tone. |
|
|
2. Use the VOLUME controller to adjust the volume.
EN-6

Playing with Different Tones 

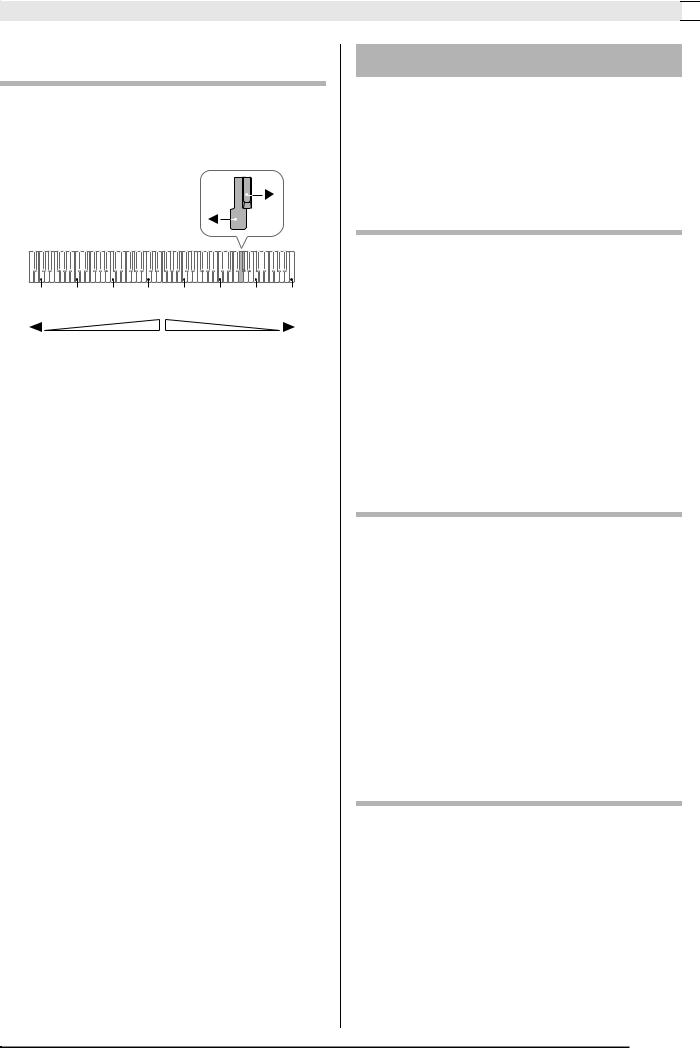
Bass Tone (BASS)
Selecting the BASS (LOWER) tone in step 1 of the above procedure will assign the bass tone to the low range (left side) of the keyboard. The high range (right side) will be assigned the tone that was selected when you pressed the BASS key.
•BASS tone lets you effectively split the keyboard between two different tones.
|
Split Point |
Low Range |
High Range |
BASS |
GRAND PIANO 2 MELLOW |
|
(Currently selected tone) |
 NOTE
NOTE
•To return the keyboard to a single tone, select any tone other than BASS.
•You cannot select BASS when recording to Track 2.
•You can configure settings to sustain reverberation of the BASS (LOWER) tone while the damper pedal or sostenuto pedal is pressed. For more information, see “Lower Pedal” (page EN-28).
Adjusting Acoustic Piano
Sound Characteristics
The tones of your Digital Piano have built-in elements that give them the characteristic reverberation of an acoustic piano (ACOUSTIC SIMULATOR). Each of these elements can be individually adjusted to one of four levels.
HAMMER RESPONSE
Controls the time deviation between when a key is pressed and when the note actually sounds.
Settings
1:Fast 2: Grand piano feel 3: Slightly slower 4: Slow
STRING RESONANCE
Adjusts the characteristic reverberation (string resonance) of an acoustic piano.
You can select a reverberation setting that matches the song being played or your own personal preference.
Settings
1:Suppressed 2: Slightly suppressed
3:Reverberation 4: Strong reverberation
LID SIMULATOR
Adjusts how sound resonates in accordance with the opening state of a grand piano lid.
Settings
1:Lid closed 2: Lid opened slightly 3: Lid fully open
4:Lid removed
 NOTE
NOTE
•Opening or closing the Digital Piano’s lid does not affect the Lid Simulator setting.
1. Hold down the FUNCTION button and press the desired tone key.
•Each press of the keyboard key cycles to the next option for that setting. The Digital Piano emits a beep
pattern that indicates the currently selected option: One beep: Option 1 3 Two beeps: Option 2 3 Three beeps: Option 3 3 Four beeps: Option 4 3 One beep: Option 1, etc.
EN-7

 Playing with Different Tones
In addition to piano tones, the elements below are also available.
KEY OFF SIMULATOR
Causes notes to decay when keyboard keys are released.
KEY-ON ACTION NOISE*
Reproduces the mechanical operation sound (noise) that can be heard when keys of an acoustic piano are tapped with extremely light pressure.
KEY-OFF ACTION NOISE*
Reproduces the mechanical operation sound (noise) that can be heard when keys of an acoustic piano are released.
*Can be applied for any piano tone other than ROCK PIANO and JAZZ PIANO. For details, see “Parameter List” on pages EN-28 - EN-33.
 NOTE
NOTE
•If you change the ACOUSTIC SIMULATOR setting, the newly applied setting is saved. To return the piano tones to their initial default settings, disable Auto Resume and then turn power off and then back on again.
Layering Two Tones
Use the following procedure to layer two tones, so they sound at the same time.
When specifying two tones for layering, first tone you select will be the main tone, while the second tone will be the layered tone.
1. Hold down the FUNCTION button and press the Select Layer Tone key.
•For details about using the keyboard keys for settings, see “Keyboard Keys Used for Configuring Settings” (page EN-26).
•Each press of the keyboard key toggles between on and off.
2.Hold down the FUNCTION button and press key of the tone to be layered.
GRAND PIANO 1 BRIGHT
STRINGS 2
3. To return to the original tone, hold down the FUNCTION button and press the Select Layer Tone key (which exits the Layer Mode).
 NOTE
NOTE
•You cannot layer the BASS tone with another tone.
•You cannot perform the layer operation when recording to Track 2.
EN-8
Playing with Different Tones 

To adjust the volume balance between two layered tones
1. While holding down the FUNCTION button, use the keyboard keys shown below to adjust the volume of the layered tones.
C1 |
C2 |
C3 |
C4 |
C5 |
C6 |
C7 |
C8 |
|
|
|
Center |
|
|
|
|
Volume of the layered tone |
Volume of the main tone |
|
|||||
(Second tone you selected) |
(First tone you selected) |
|
|||||
•To return the volume setting to its initial default, hold down the FUNCTION button and press both of the keys at the same time.
Using Effects
Hall simulator: Makes your notes resonate. Chorus : Adds more breadth to your notes.
•For details about using the keyboard keys for settings, see “Keyboard Keys Used for Configuring Settings” (page EN-26).
To apply a hall simulator
1. While holding down the FUNCTION button, press the keyboard key that corresponds to the hall simulator name you want to select.
Hall simulator |
Description |
|
Name |
||
|
||
DUTCH CHURCH |
Amsterdam church with acoustics |
|
|
that are suitable for music |
|
|
|
|
STANDARD HALL |
Standard concert hall |
|
|
|
|
BERLIN HALL |
Berlin arena type classic concert hall |
|
|
|
|
FRENCH |
Large gothic cathedral in Paris |
|
CATHEDRAL |
|
|
|
|
To apply chorus to a tone
1. While holding down the FUNCTION button, use the Chorus keyboard key to cycle through the available settings.
•Each press of the Chorus keyboard key causes the Digital Piano to beep according to which setting is selected, as shown in the table below.
•Chorus
Number of Beeps |
Setting |
|
1 |
(long) |
Off (OFF) |
1 |
(short) |
Light Chorus |
2 |
|
Medium Chorus |
3 |
|
Deep Chorus |
4 |
|
Flanger (whooshing effect) |
|
|
|
About DSP
DSP makes it possible to digitally produce complex acoustic effects. The DSP is assigned to each tone whenever you turn on Digital Piano power.
EN-9

 Playing with Different Tones
Using the Digital Piano’s
Pedals
Your Digital Piano comes equipped with three pedals: damper, soft, and sostenuto
Soft pedal
Damper pedal
Sostenuto pedal
Pedal Functions
Damper Pedal
Pressing the damper pedal while playing will cause the notes you play to reverberate.
•When one of the piano tone is selected, using the damper pedal adds damper resonance that is similar to that produced on an acoustic grand piano.
Sostenuto Pedal
Only the notes of the keys that are depressed when this pedal is pressed are sustained, even if the keyboard keys are released, until the pedal is released.
Soft Pedal
Pressing this pedal while playing suppresses notes played on the keyboard after the pedal was pressed, and makes them sound softer.
 NOTE
NOTE
•If pressing the pedal does not produce the desired effect, it could mean that the pedal cord is not connected properly. Refer to step 1 under “To connect the cable” (page EN-52).
Disabling Damper Noise Output
Damper noise is a slight metallic ringing sound that is generated as the damper of an acoustic piano separates from the wires pedal when the damper pedal is pressed. The damper resonance of your Digital Piano normally includes damper noise, but you can perform the procedure below to disable its output. Damper noise can be applied to the six GRAND PIANO tones and MODERN.
1. While holding down the FUNCTION button, press the Damper Noise keyboard key.
•For details about using the keyboard keys for settings, see “Keyboard Keys Used for Configuring Settings” (page EN-26).
•Each press of the key toggles the setting and causes the Digital Piano to beep as described below.
–Long beep: Damper noise output disabled
–Short beep: Damper noise output enabled
EN-10
Playing with Different Tones 

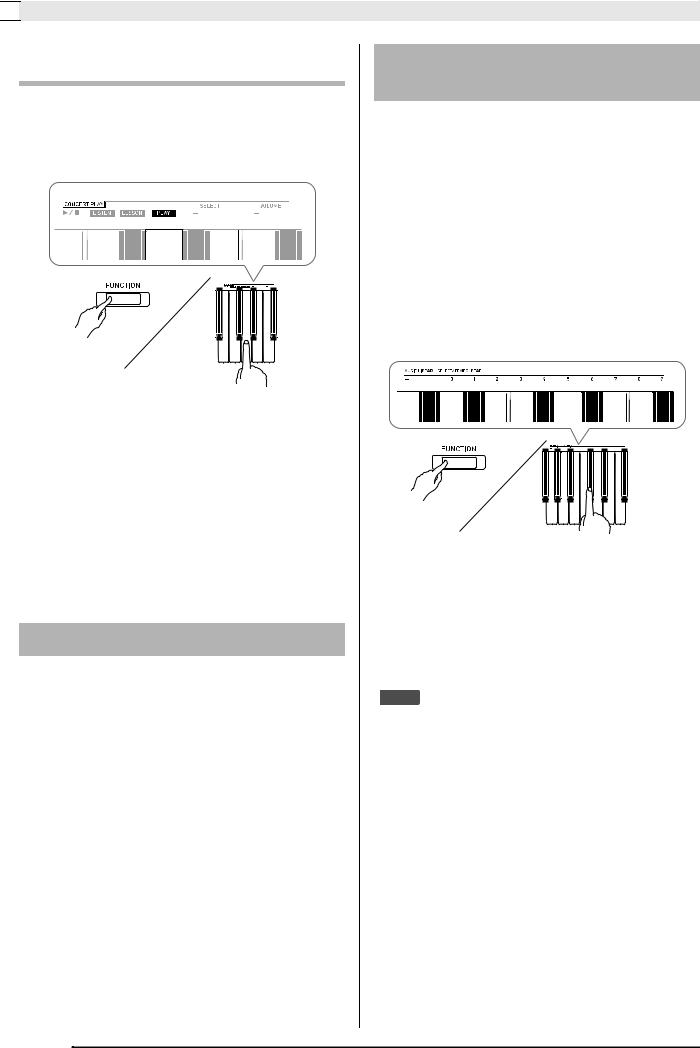
Using the Metronome
1. Press the METRONOME button.
•This starts the metronome.
•The lamp flashes with each beat.
2.While holding down the FUNCTION button, press the METRONOME BEAT keyboard key.
•Keep the FUNCTION button depressed as you advance to step 3.
3.Hold down the FUNCTION button and press the BEAT keyboard key (0 to 9) that corresponds to the beat you want to specify.
•You can specify a beat value in the range of 0 to 9 (beats per measure). A chime will sound on the first beat of each measure, and clicks will sound for the remaining beats. Specifying 0 plays a straight click, without any chime. This setting lets you practice with a steady beat.
4.Release the FUNCTION button and then hold it down again as you press the METRONOME TEMPO keyboard key.
•Keep the FUNCTION button depressed as you advance to step 5.
5. While holding down the FUNCTION button, use the TEMPO keys to specify a tempo value in the range of 20 to 255 beats per minute.
•Each press of the + or – key raises or lowers the tempo value by 1.
•You can also use the tempo value input keys (0 to 9) to enter a specific tempo value.
•Input three digits as the tempo value.
Example: To set a tempo of 20, press keys 0, 2, and then 0.
6.Press the METRONOME button to turn off the metronome.
 NOTE
NOTE
•If you used the numeric input (0 to 9) keyboard keys to input beat and/or tempo values and the values are within the allowable setting ranges, the Digital Piano will emit a high pitch beep when you release the FUNCTION button. If a value is outside the allowable range, a low-pitch sound will be emitted.
•You could also use the procedure below in place of steps 4 and 5 of the above procedure to specify a tempo value.
–While holding down the FUNCTION button, use the TEMPO keyboard keys to specify a tempo value in the range of 20 to 255 (beats per minute).
•In step 5 of the above procedure, pressing the + and
–keys at the same time will set the tempo of the Concert Play lesson song or Music Library song (in the case of a recorded song, the tempo when the song was recorded) that was last selected on the Digital Piano.
EN-11

 Playing with Different Tones
To adjust the metronome volume
You can perform the following procedure at any time, regardless of whether or not the metronome is sounding.
1. While holding down the FUNCTION button, use the Metronome Volume keys to specify a volume value in the range of 0 to 42.
•For details about using the keyboard keys for settings, see “Keyboard Keys Used for Configuring Settings” on page EN-26.
•Each press of the + and – key raises or lowers the metronome volume value by 1.
 NOTE
NOTE
•To return to the initial default setting, press + and – at the same time.
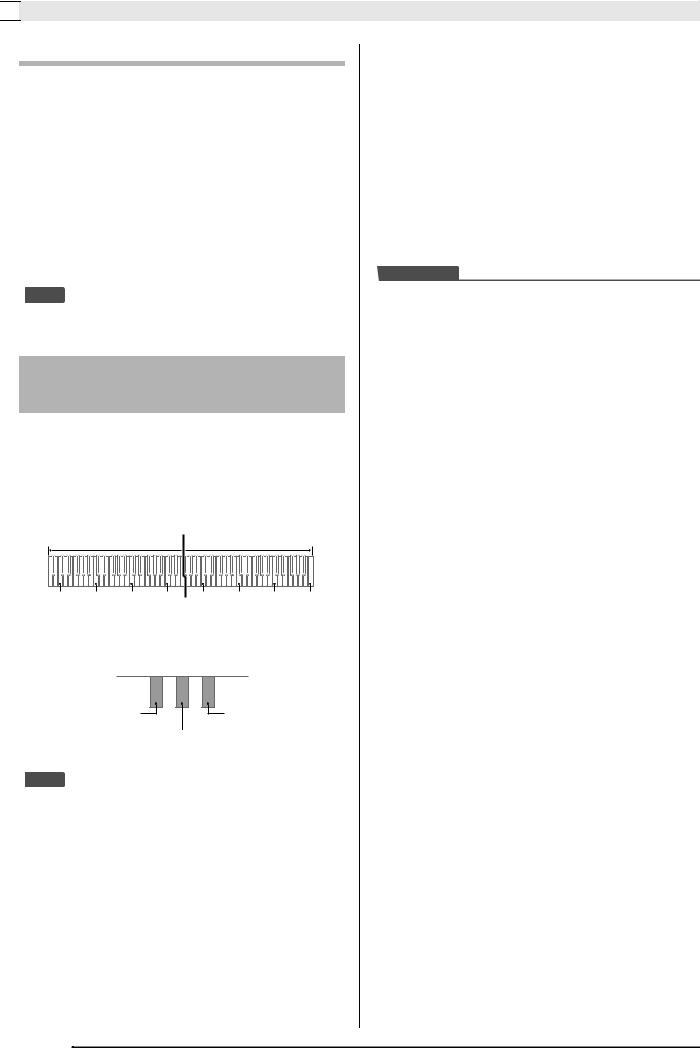
Splitting the Keyboard for Duet Play
You can split the keyboard in the center so the left and right sides have the same range. The left outer pedal is the left side damper pedal, while the right outer pedal is the right side damper pedal.
Keyboard
|
|
|
Split point |
|
|
|
|
|
Left keyboard |
|
|
Right keyboard |
|
||
C3 |
C4 |
C5 |
C6 |
C3 |
C4 |
C5 |
C6 |
|
(middle C) |
|
|
(middle C) |
|
|
|
Pedals |
|
|
|
|
|
|
|
Left side damper pedal |
|
|
Right side damper pedal |
||||
|
|
Left and right side damper pedal |
|
|
|||
 NOTE
NOTE
•Only the damper pedal for the right side keyboard supports half-pedal operations.
1. Select the piano tone you want to use for the duet.
Example: GRAND PIANO 1 (BRIGHT)
2. To cycle between the Duet Mode settings below, hold down the FUNCTION button and press the Duet Mode key.
Off
On
Pan: Outputs left side keyboard tone from the left speaker and right side keyboard tone from the right speaker.
 IMPORTANT!
•The Octave Shift and Transpose settings cannot be changed while On or Pan is selected for the Duet Mode setting.
•While “Pan” is selected for the Duet Mode settings, the Hall Simulator, and Chorus settings cannot be changed.
EN-12
Playing with Different Tones 

Changing the Octaves of the duet keyboards
You can change the ranges of the left and right keyboards in octave units from their initial default settings. This comes in handy, for example, if the initial default range is not enough when one person is playing the left hand part and another person is playing the right hand part.
1. While holding down the FUNCTION and GRAND PIANO 1 buttons, press the keyboard C key that you want located at C4 (middle C) of the left keyboard. Keep
FUNCTION and GRAND PIANO 1 buttons depressed as you advance to step 2, below.
•This will sound the note assigned to C4 and change the octave of the left keyboard.
Example: Press the keyboard key of the leftmost C (C4) will assign the range shown below.
|
Left keyboard |
|
|
Right keyboard |
|
||
C4 |
C5 |
C6 |
C7 |
C3 |
C4 |
C5 |
C6 |
(Pressed key) |
|
|
|
|
|
|
|
1 octave higher than initial |
|
Unchanged |
|
||||
|
|
setting |
|
|
|
|
|
2. While still holding down the FUNCTION and GRAND PIANO 1 buttons, press the keyboard C key that you want located at C4 (middle C) of the right keyboard.
•This will sound the note assigned to C4 and change the octave of the right keyboard.
 NOTE
NOTE
•Exiting the Duet Mode and then selecting On or Pan for the Duet Mode setting again will return the keyboards to their initial default ranges.
EN-13
Using Built-in Songs (Concert Play, Music
Library, Demo Tunes)
Your Digital Piano comes with 10 built-in piano and orchestra tunes (Concert Play 1 through 10), and 60 piano solos (Music Library 1 to 60).
Concert Play lets you enjoy playing along with orchestral accompaniment. You can use Music Library to practice famous piano pieces.
 IMPORTANT!
•Whenever you change to another song, this Digital Piano loads the song data. Note that button operations are disabled while song loading is in progress. If you are playing something on the keyboard, changing the song may cause note output to stop.
Performing Demo Play
1. While holding down the FUNCTION button, press the METRONOME button.
•This starts sequentially looped playback of all Concert Play (Listen) songs and Music Library songs.
•You can play along with a song on the keyboard as it is playing. The tone assigned to the keyboard is the one that is preset for the song that is playing.
2.To change the demo song, hold down the
FUNCTION button and press the MIDI REC button or AUDIO REC button.
•To advance to the next demo song, hold down the FUNCTION button and press the MIDI REC button.
•To return to the previous demo song, hold down the FUNCTION button and press the AUDIO REC button.
•For a list of songs, see page A-1.
3.Press the a button again to stop built-in song play.
 NOTE
NOTE
•Pressing the METRONOME button while holding down the FUNCTION button during Concert Play jumps to the first Music Library song. Performing the same operation during Music Library play jumps to the first Concert Play song.
•The tune selection and playback stop operations described above are the only operations that are possible during demo tune play.
Concert Play
Concert Play has recordings of a live orchestra, which you can use to play along with authentic accompaniment.
You can also use Concert Play for 3-step practice.
Step 1: LISTEN
Listen to playback of the piano and orchestra to familiarize yourself with the music.
Step 2: LESSON
Practice the Concert Play piano part.
•You can turn off the left hand part or right hand part of a built-in song and play along on the piano.
Step 3: PLAY
Play along with the orchestra accompaniment.
•The Concert Play contains actual recordings of an orchestra. Because of this, the instrument sounds are different from the tones that can be selected with this piano (page EN-6). This also means that Concert Play playback includes breath sounds and performance noises.
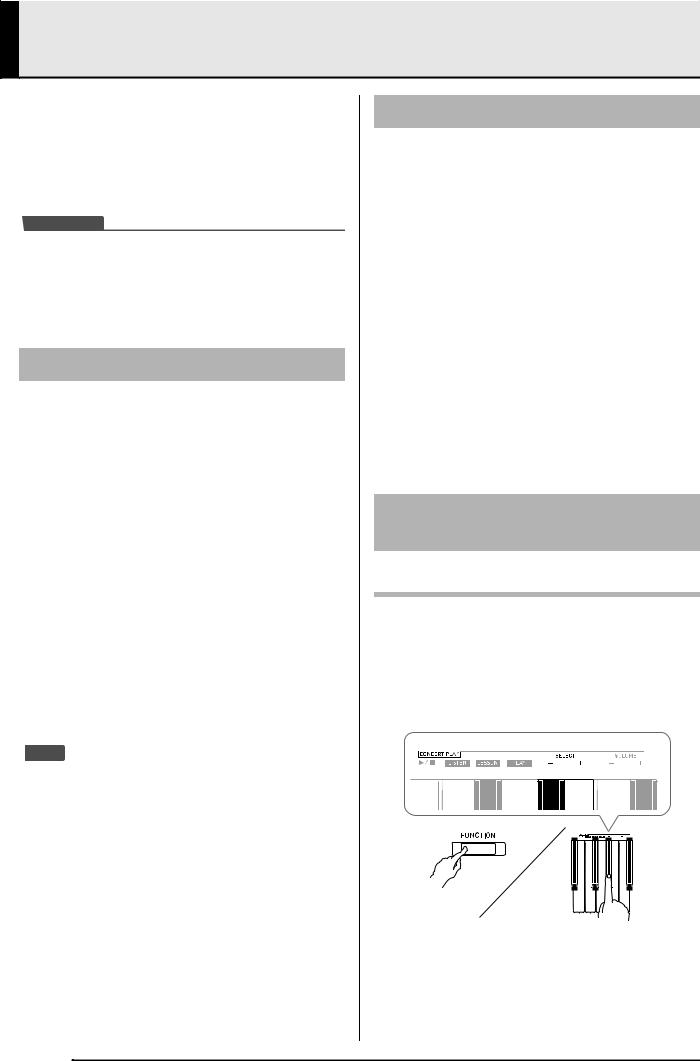
Practicing with a Concert Play Song
To listen to a Concert Play song (LISTEN)
1. While holding down the FUNCTION button, use the CONCERT PLAY SELECT + and – keyboard keys to scroll song numbers in sequences (from 1 to 10).
•For information about Concert Play songs, see the “Concert Play List” on page A-1.
EN-14
Using Built-in Songs (Concert Play, Music Library, Demo Tunes) 

2. While holding down the FUNCTION button, press the LISTEN keyboard key.
•This enters the Listen Mode for listening to the piano and orchestra performance.
•Playback tempo is fixed and cannot be changed during Listen Mode playback.
3. While holding down the FUNCTION button, press the CONCERT PLAY a keyboard key to start playback.
•Playback will stop automatically when the end of the song is reached.
4.To stop playback, hold down the FUNCTION button as you press the CONCERT PLAY a keyboard key again.
 NOTE
NOTE
•You can use adjust the volume level of the playback, if you want. See “Configuring Settings with the Keyboard” (page EN-25) for more information.
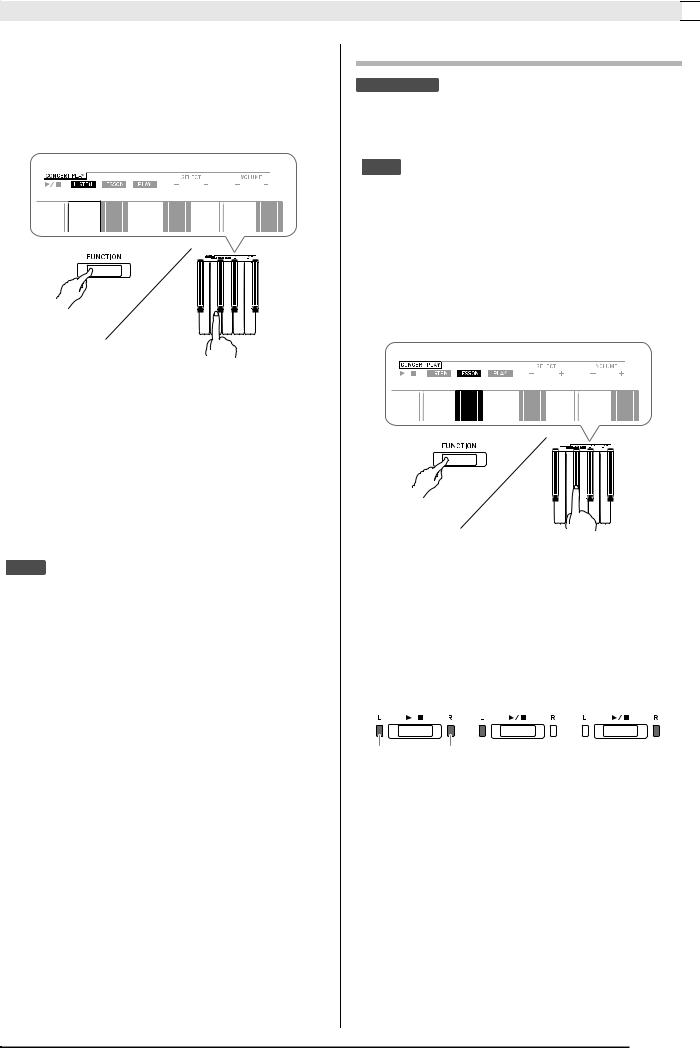
To practice the piano part (LESSON)
PREPARATION
•You can change tempo of the playback, if you want. See “Configuring Settings with the Keyboard” (page EN-25) for more information.
 NOTE
NOTE
•Some Concert Play tunes incorporate tempo changes in their arrangements. Because of this, the playback tempo may at times be faster or slower than the tempo setting.
1. While holding down the FUNCTION button, press the LESSON keyboard key.
•This enters the Lesson Mode, which allows simple play along with the piano part.
2. While holding down the FUNCTION button, press the a button to select the part you want to turn off.
•Pressing a button toggles its part on (button lamp on) and off (button lamp off).
Both parts on |
|
Right hand |
|
Left hand |
|
part off |
|
part off |
|
|
|
|
||
|
|
|
|
|
Left hand |
Right hand |
3. While holding down the FUNCTION button, press the CONCERT PLAY a keyboard key.
•This starts playback, without the part you turned off in step 2.
4.Play the missing part on the keyboard.
5.To stop playback, hold down the FUNCTION button as you press the CONCERT PLAY a keyboard key again.
EN-15

 Using Built-in Songs (Concert Play, Music Library, Demo Tunes)
To play along with the orchestra accompaniment (PLAY)
1. While holding down the FUNCTION button, press the PLAY keyboard key.
•This will enter the Play Mode, which plays the orchestra part without the piano part.
2. While holding down the FUNCTION button, press the CONCERT PLAY a keyboard key to start playback.
•Playback tempo is fixed and cannot be changed during Play Mode playback.
3.Play the piano part on the keyboard.
4.To stop playback, hold down the FUNCTION button as you press the CONCERT PLAY a keyboard key again.
Music Library
You can use the Music Library for your listening enjoyment or to practice piano songs.
•The Music Library includes 60 songs, numbered 1 through 60.
•You can also import up to 10 songs* from a computer to Digital Piano memory, and assign them Music Library song numbers 61 through 70.
*You can download music data from the Internet and then transfer it from your computer to Digital Piano memory. See “Transferring Song Data with a Computer” on page EN-46 for more information.
Playing Back a Specific Music
Library Song
1. Find the song number of the song you want to play in the “Music Library List” on page A-1.
2. To change to another song, hold down the FUNCTION button as you use the MUSIC LIBRARY SELECT (+, –, 0 to 9) keys to specify a song number.
•Each press of the + or – key raises or lowers the song number by 1.
•You can also input a value from 0 to 9 to specify a Music Library song number.
•Input two digits as the song number.
Example: To specify song number 5, press keys 0 and then 5.
3. Press the a button.
•This starts the playback of the song.
4.To stop playback, press the a button again.
•Playback will stop automatically when the end of the song is reached.
 NOTE
NOTE
•Pressing the + and – keys at the same time in step 2 of the above procedure will select song number 1.
•You also can adjust the playback tempo and volume of the song. See “Configuring Settings with the Keyboard” on page EN-25 for more information.
EN-16

Using Built-in Songs (Concert Play, Music Library, Demo Tunes) 

Practicing with a Music Library Song
You can turn off the left hand part or right hand part of a song and play along on the Digital Piano.
 NOTE
NOTE
•The Music Library includes a number of duets. While a duet is selected, you can turn off the first piano (Primo) or second piano (Secondo) tone and play along with the song.
•Some music library tunes incorporate tempo changes in their arrangements. Because of this, the playback tempo may at times be faster or slower than the tempo setting.
PREPARATION
•Select the song you want to practice and adjust the tempo. See step 3 under “Using the Metronome” (page EN-11).
1. While holding down the FUNCTION button, press the a button to select the part you want to turn off.
•Pressing a button toggles its part on (button lamp on) and off (button lamp off).
Both parts on |
|
Right hand |
|
Left hand |
|
part off |
|
part off |
|
|
|
|
||
|
|
|
|
|
Left hand |
Right hand |
2. Press the a button.
•This starts playback, without the part you turned off in step 1.
3.Play the missing part on the keyboard.
4.To stop playback, press the a button again.
Playing Back Audio Data Stored on a USB Flash Drive
You can use your Digital Piano to play back audio data (WAV files*) stored on a commercially available USB flash drive.
See “USB Flash Drive” on page EN-35 for more information.
* Linear PCM, 16bit, 44.1 kHz, Stereo
PREPARATION
•Prepare a USB flash drive that contains data recorded to it using the Digital Piano’s Audio Recorder. See “Recording to a USB Flash Drive (Audio Recorder)” on page EN-21 for more information.
•You can also use a computer to save audio data (WAV file) to the USB Flash Drive for playback. See “Storing Standard Audio Data (WAV Files) to a USB Flash Drive” on page EN-36 for more information.
•Insert the USB flash drive that contains the data you want to play back into your Digital Piano’s USB flash drive port.
1. Press the AUDIO REC button once or twice so the AUDIO REC lamp is lit.
•This enters playback standby.
2.Hold down the FUNCTION button and press a MUSIC LIBRARY SELECT keyboard key.
•Pressing the plus (+) key scrolls forward through song file names (TAKE01.WAV, TAKE02.WAV, etc.) Pressing the minus (–) key scrolls backward.
•You also can use the number (0 through 9) keyboard keys to specify a file number (1 to 99) directly. The Digital Piano will beep if there is no file that corresponds to the number you input.
3.Press the a button.
•This will start playback of the selected song.
4.To stop playback of the song, press the a button.
EN-17

 Recording and Playback
You can record notes you play with the Digital Piano’s MIDI recorder for later playback. When a commercially available USB flash drive is inserted in the Digital Piano’s USB flash drive port, audio data is recorded to and played back from the USB flash drive (Audio Recorder).
Recording to Built-in MIDI Recorder
Tracks
A track is a container of recorded data, and a song consists of two tracks: Track 1 and Track 2. You can record each track separately and then combine them so they play back together as a single song.
|
|
Track 1 |
|
Record |
|
|
|
While playing |
|
|
|
|
|
|
|
|
back. . . |
Song |
|
|
|
|
|
|
|
|
|
|
|
|
|
|
|
|
|
|
|
Track 2 |
|
|
|
|
|
Record |
|
|
|
|
|
|
|
||
|
|
|
|
|
|
|
|
|
Memory Capacity
•You can record approximately 5,000 notes in Digital Piano memory.
•The MIDI REC button lamp will flash at high speed when memory runs low.
•Recording stops automatically if the number of notes in memory exceeds the maximum.
Recorded Data
•Keyboard play
•Tone used for keyboard play
•Beat (Track 1 only)
•Tempo setting (Track 1 only)
•Layer setting (Track 1 only)
•Duet (Track 1 only)
•Temperament (Track 1 only)
•Keyboard volume (Track 1 only)
•Chorus (Track 1 only)
•Brilliance (Track 1 only)
•Hall Simulator setting (Track 1 only)
•Acoustic Simulator (Track 1 only)
Recording Data Storage
•Starting a new recording deletes any data that was previously recorded in memory.
•Should power fail during recording, all of the data in the track you are recording will be deleted.
 IMPORTANT!
•CASIO COMPUTER CO., LTD. takes no responsibility for any damages, lost profits, or claims by third parties arising from the deletion of recorded data due to malfunction, repair, or for any other reason.
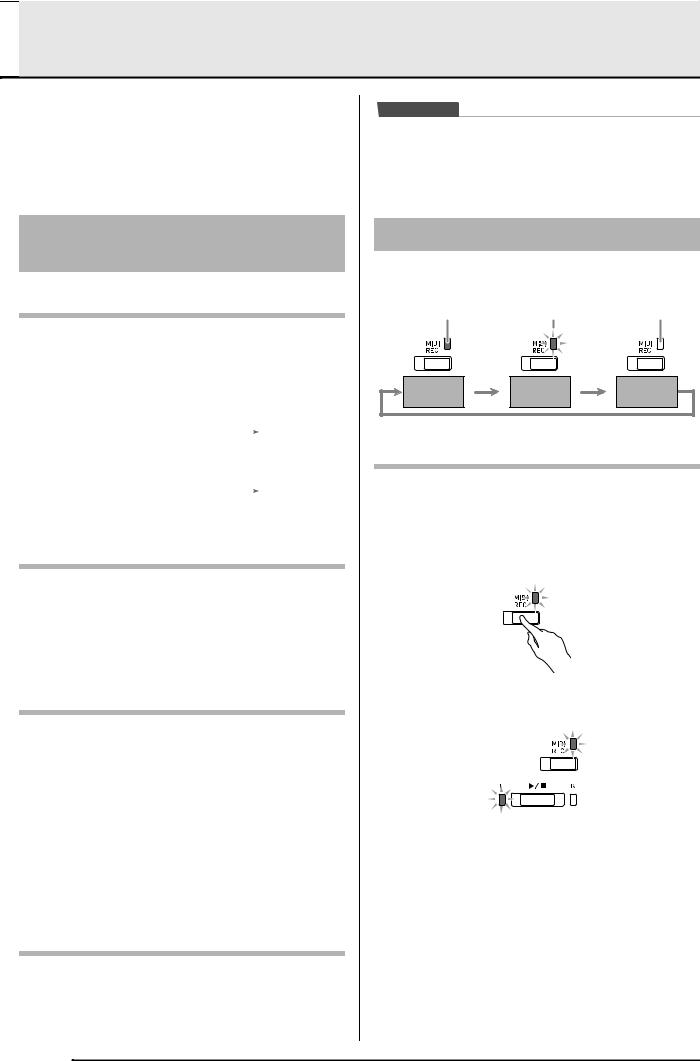
Using the MIDI REC Button
Each press of the MIDI REC button cycles through the recording options in the sequence shown below.
Lit |
Flashing |
Off |
Playback |
Record |
Normal |
|
Standby |
Standby |
||
|
Recording to a Specific Song Track
After recording to either of the tracks of a song, you can record to the other track while listening to playback what you recorded in the first track.
1. Press the MIDI REC button once or twice so the MIDI REC lamp is flashing.
•At this time the L lamp will flash to indicate that the Digital Piano is standing by for recording to Track 1.
EN-18
 Loading...