


ES
USER’S GUIDE
GUÍA DEL USUARIO
AP38-ES-1
AP38_es_cover.p65 |
1 |
02.6.12, 15:55 |
IMPORTANT SAFETY INSTRUCTIONS
WARNING – When using electric products, basic precautions should always be followed, including the following:
1.Read these instructions.
2.Keep these instructions.
3.Heed all warnings.
4.Follow all instructions.
5.Do not use this apparatus near water.
6.Clean only with dry cloth.
7.Do not install near any heat sources such as radiators, heat registers, stoves, or other apparatus (including amplifiers) that produce heat.
8.Do not defeat the safety purpose of the polarized or grounding-type plug. A polarized plug has two blades with one wider than the other. A grounding type plug has two blades and a third grounding prong. The wide blade or the third prong are provided for your safety. If the provided plug does not fit into your outlet, consult an electrician for replacement of the obsolete outlet.
9.Protect the power cord from being walked on or pinched particularly at plugs, convenience receptacles, and the point where they exit from the apparatus.
10.Only use attachments/accessories specified by the manufacturer.
11.Use only with the stand specified by the manufacturer, or sold with the apparatus.
12.Unplug this apparatus during lightning storms or when unused for long periods of time.
13.Refer all servicing to qualified service personnel. Servicing is required when the apparatus has been damaged in any way, such as power-supply cord or plug is damaged, liquid has been spilled or objects have fallen into the apparatus, the apparatus has been exposed to rain or moisture, does not operate normally, or has been dropped.
*8 : applies to the AP-38 only.
428A-E-002A
AP38_e_00.p65 |
2 |
02.6.21, 14:58 |
NOTICE
This equipment has been tested and found to comply with the limits for a Class B digital device, pursuant to Part 15 of the FCC Rules. These limits are designed to provide reasonable protection against harmful interference in a residential installation. This equipment generates, uses and can radiate radio frequency energy and, if not installed and used in accordance with the instructions, may cause harmful interference to radio communications. However, there is no guarantee that interference will not occur in a particular installation. If this equipment does cause harmful interference to radio or television reception, which can be determined by turning the equipment off and on, the user is encouraged to try to correct the interference by one or more of the following measures:
•Reorient or relocate the receiving antenna.
•Increase the separation between the equipment and receiver.
•Connect the equipment into an outlet on a circuit different from that to which the receiver is connected.
•Consult the dealer or an experienced radio/TV technician for help.
FCC WARNING
Changes or modifications not expressly approved by the party responsible for compliance could void the user’s authority to operate the equipment.
TO REDUCE THE RISK OF FIRE OR ELECTRIC SHOCK, REFER SERVICING TO QUALIFIED SERVICE PERSONNEL.
428A-E-003A
AP38_e_00.p65 |
3 |
02.6.12, 15:55 |
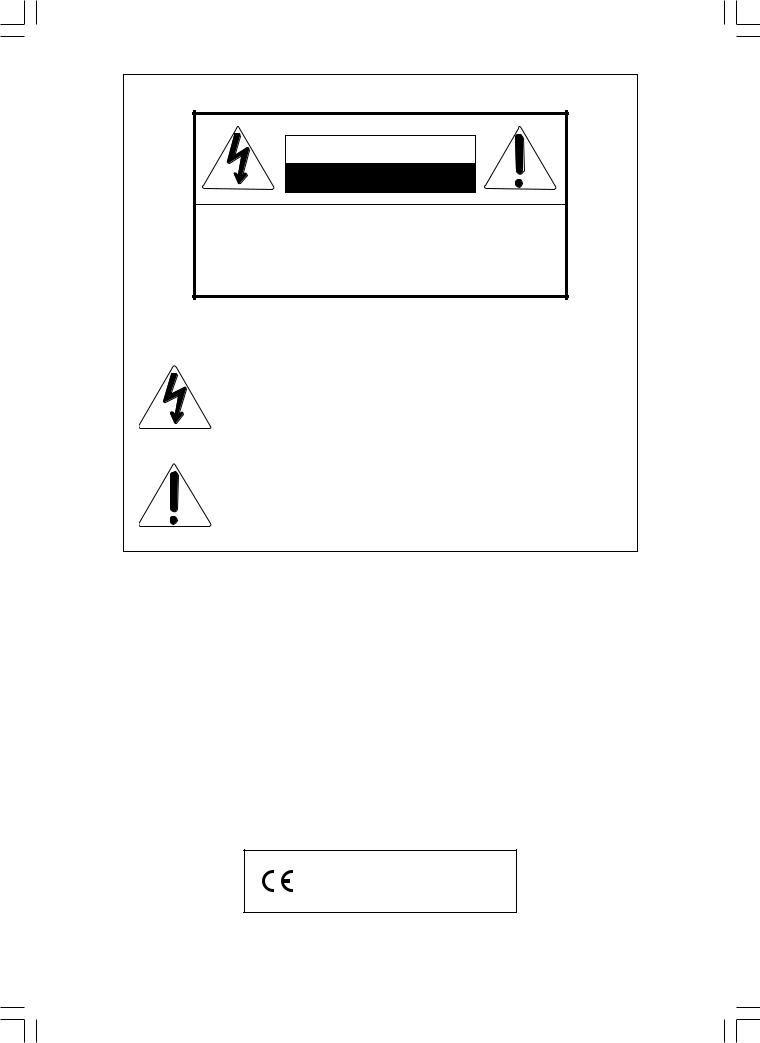
CAUTION
RISK OF ELECTRIC SHOCK
DO NOT OPEN
CAUTION: TO REDUCE THE RISK OF ELECTRIC SHOCK, DO NOT REMOVE COVER (OR BACK). NO USER -SERVICEABLE PARTS INSIDE. REFER SERVICING TO QUALIFIED SERVICE PERSONNEL.
The lightning flash with arrowhead symbol, within an equilateral triangle, is intended to alert the user to the presence of uninsulated “dangerous voltage” within the product’s enclosure that may be of sufficient magnitude to constitute a risk of electric shock to persons.
The exclamation point within an equilateral triangle is intended to alert the user to the presence of important operating and maintenance (servicing) instructions in the literature accompanying the product.
CASIO ELECTRONICS CO., LTD.
Unit 6, 1000
North Circular Road
London NW2 7JD, U.K.
This mark applies to the AP-38V only.
Please keep all information for future reference.
428A-E-004A
AP38_e_00.p65 |
4 |
02.6.12, 15:55 |
Safety Precautions
Congratulations on your selection of the CASIO Digital Piano. This digital piano is a sophisticated musical instrument that blends the very best of traditional piano feel and sound quality with the latest that modern electronics technology has to offer.
•Before using the instrument, be sure to carefully read through the instructions contained in this manual.
•Please keep all information for future reference.
Symbols
Various symbols are used in this user’s guide and on the product itself to ensure that the product is used safely and correctly, and to prevent injury to the user and other persons as well as damage to property. Those symbols along with their meanings are shown below.
 WARNING
This indication stipulates matters that have the risk of causing death or serious injury if the product is operated incorrectly while ignoring this indication.
 CAUTION
This indication stipulates matters that have the risk of causing injury as well as matters for which there is the likelihood of occurrence of physical damage only if the product is operated incorrectly while ignoring this indication.
Symbol Examples
This triangle symbol ( ) means that the user should be careful. (The example at left indicates electric shock caution.)
This circle with a line through it ( ) means that the indicated action must not be performed. Indications within or nearby this symbol are specifically prohibited. (The example at left indicates that disassembly is prohibited.)
The black dot ( ) means that the indicated action must be performed. Indications within this symbol are actions that are specifically instructed to be performed. (The example at left indicates that the power plug must be unplugged from the electric socket.)
428A-E-005A |
E-1 |
AP38_e_01-07.p65 |
1 |
02.6.12, 15:55 |

 WARNING
Power Cord
Improper use of the power cord can create the risk of fire and electric shock. Always be sure to observe the following precautions.
•Use only the power cord specified for this digital piano.
•Make sure that the power source you are using matches the rating marked on the instrument itself.
•Do not use an extension cord to plug multiple devices into the same power outlet.
Power Cord
Improper use of the power cord can create the risk of personal injury, material damage, fire and electric shock. Always be sure to observe the following precautions.
•Do not place heavy objects on the power cord or subject it to heat.
•Never try to modify the power cord or subject it to excessive bending.
•Never twist or pull on the power cord.
•Should the power cord or plug
become damaged, contact your original retailer or an authorized CASIO service provider.
Power Cord
Do not touch the plug with wet hands when it is plugged in. This may cause electric shock.
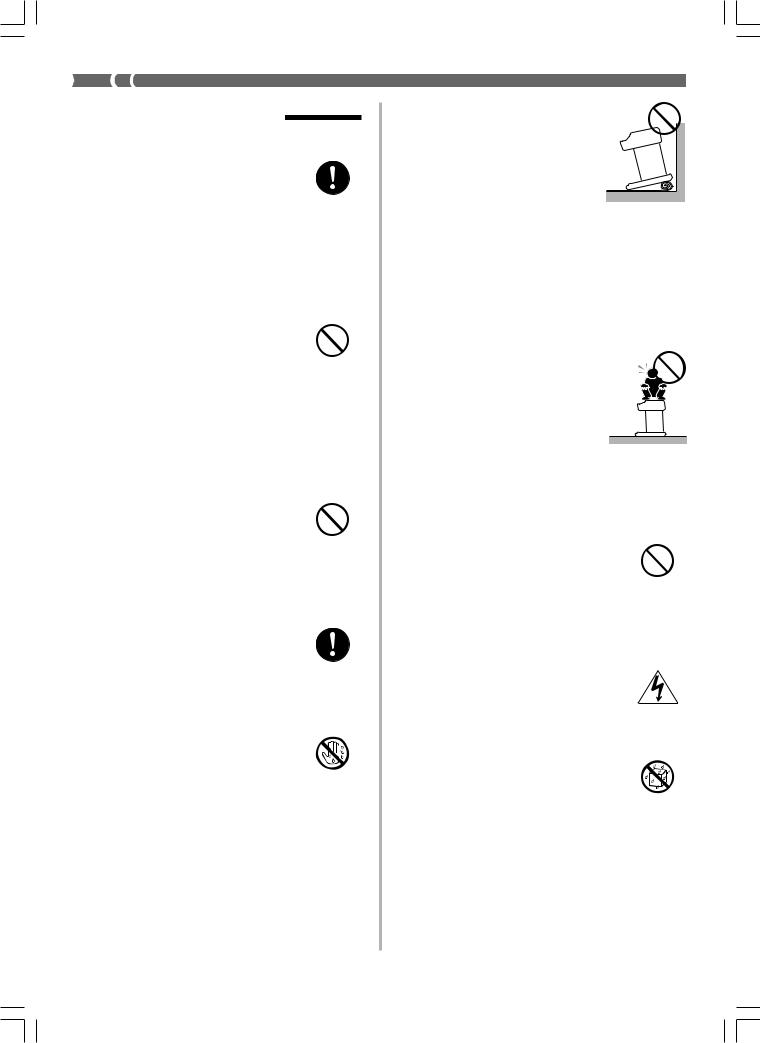
Do not locate the digital piano on an unstable surface.
Never locate the digital piano on a surface that is wobbly, tilted, or otherwise unstable*. An unstable surface can cause the digital piano to fall over, creating the risk of personal injury.
E-2
*Avoid areas where there are multiple layers of carpeting, and where cables are running under the digital piano.
Always make sure you secure
the digital piano to the stand with the screws that are provided. An unsecured the digital piano can fall from the stand, creating the risk of personal injury.
Never climb onto the digital piano or stand.
Never climb onto the digital
piano or hang from its edges. Doing so can cause the digital piano to fall over, creating the risk of personal injury. Special
care concerning this point is required in households where
there are small children.
Never dispose of the digital piano by burning it.
Never dispose of the digital piano by burning it. Doing so creates the risk of fire and personal injury due to explosion.
Do not place containers containing water or other liquids on the instrument.
Do not place the following objects on the instrument. Placing such objects on the instrument may cause fire or electric shock if they spill and get inside the instrument.
•Containers filled with water or other liquids (including vases, potted plants, cups, cosmetics and medicines)
•Small metal objects (including hairpins, sewing needles and coins)
•Flammable objects
•Naked flame sources, such as lighted candles
428A-E-006A
AP38_e_01-07.p65 |
2 |
02.6.12, 15:55 |
In the event a foreign object should happen to get inside the instrument, please take the following actions:
1.Turn off power.
2.Unplug the power cord from the
wall outlet.
3.Consult with the dealer where you purchased the instrument or with an authorized CASIO service provider.
Do not expose this digital piano to rain or moisture.
To reduce the risk of fire or electric shock, do not expose this digital piano to rain or moisture.
Never try to take the digital piano apart or modify it.
Never try to take the digital piano apart or modify it in any way. Doing so creates the risk of electric shock, burn injury, or other personal injury. Leave all internal inspection, adjustment, and repair up to your original retailer or an authorized CASIO service provider.
Precautions concerning smoke, abnormal odor, and other abnormalities
Continued use of the digital piano while it is emitting smoke or abnormal odor, or while it is displaying other abnormalities creates the risk of fire and electric shock. Immediately perform the following steps whenever you notice any abnormality.
1.Turn off the digital piano power.
2.Unplug the digital piano from its
power outlet.
3.Contact your original retailer or an authorized CASIO service provider.
Avoid dropping the digital piano and other strong impact.
Continued use of the digital piano after it has been damaged by dropping or by other external impact creates the risk of fire and electric shock. Immediately perform the following steps whenever the digital piano is damaged by impact.
1.Turn off the digital piano power.
2.Unplug the digital piano from its power outlet.
3.Contact your original retailer or an authorized CASIO service provider.
Do not put plastic bags over your head or in your mouth.
Never allow the plastic bags that the digital piano and its accessories come in to be placed over the head or swallowed. Doing so creates the risk of suffocation. Special care concerning this point is required in households where there are small children.
Opening and closing the keyboard cover
Make sure that the keyboard cover is completely opened as far as it will go. When closing the keyboard cover, hold the front of the cover and close it slowly. Pinching your fingers between the digital piano and keyboard cover creates the risk of personal injury.
428A-E-007A |
E-3 |
AP38_e_01-07.p65 |
3 |
02.6.12, 15:55 |

 CAUTION
Power Cord
Improper use of the power cord can create the risk of fire and electric shock. Always be sure to observe the following precautions.
•Never locate the power cord near a stove or other source of heat.
•When unplugging from an outlet, never pull on the cord.
(Always grasp the plug when pulling.)
•After use turn off the power switch of the instrument and unplug the power cord from the electrical outlet.
Power Plug
Improper use of the power plug can create the risk of fire and electric shock. Always be sure to observe the following precautions.
• Push the plug fully into the power outlet as far as it will go.
•Unplug from the power outlet during lightening storms, and when you do not plan to use the digital piano for a long time (such as before a long trip).
•Unplug from the power outlet at least once a year and clean any dust build up between the prongs of the plug.
Moving the digital piano
Be sure to perform the following steps before moving the digital piano. Failure to do so can damage the power cord, creating the risk of fire and electric shock.
1. Unplug the digital piano from its power outlet.
2.Unplug the pedal connecting cord, and all cords and other items connected to the back of the digital piano.
E-4
Cleaning
Before cleaning the digital piano, unplug it from the power outlet. Failure to do so can damage the power cord, creating the risk of fire and electric shock. It can also cause the digital piano to fall over, creating the risk of personal injury.
Never climb onto the digital piano or stand.
Doing so can cause the digital piano to fall over, creating the risk of personal injury. Special care concerning this item is required in households where there are small children.
Connector
Connect only the specified devices to the digital piano's connectors. Connecting non-specified items creates the risk of fire and electric shock.
Location
Avoid locating the digital piano in the following types of areas. Subjecting the digital piano to the conditions described below creates the risk of fire and electric shock.
•Areas expose to high humidity or large amounts of dust
•Near food preparation areas and other areas where it is exposed to oil smoke
•Near a heater, on a heated carpet, in direct sunlight, inside a closed automobile parked in the sun, and any other area subjected to very high temperature
428A-E-008A
AP38_e_01-07.p65 |
4 |
02.6.12, 15:55 |
Never place the digital piano directly onto furniture or other item that has a finished surface. The rubber feet on the bottom of the digital piano can react with the paint or other coatings, resulting in soiling of or damage to the finished surface. Be sure to lay felt or some other material on the finished surface before placing the digital piano on it.
Do not place heavy objects on the digital piano.
Never place heavy objects on top of the digital piano. Doing so can cause the stand to tip over and the object to fall, creating the risk of personal injury.
Volume setting
Do not play at very loud volumes for a long time. This precaution is especially important when using the headphones. Long-term exposure to very loud sound can damage your hearing.
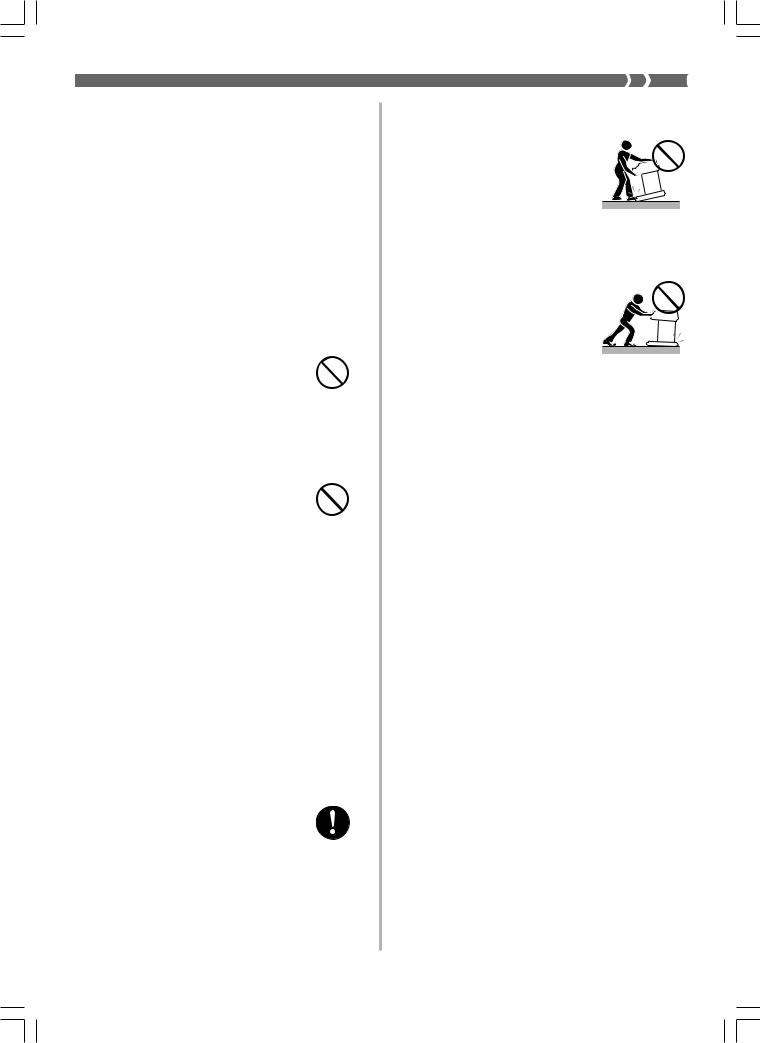
Assemble the stand properly.
Failure to do so can cause the stand to fall over and the digital piano to fall from the stand, creating the risk of personal injury.
Make sure your assemble the stand in accordance with the instructions that come with it, and ensure that all connections are secure. Also make sure that you choose an appropriate location for the stand.
• When placing the digital piano onto the stand, take care that you do not pinch your fingers between the digital piano and the stand.
•At least two people should lift the digital piano when
placing it onto the stand or moving it. Trying to move the digital piano alone can cause the stand to fall over, creating the risk of personal injury.
•Do not drag the stand or tilt it forward or back when
placing the digital piano onto the stand or moving it. Doing so can cause the digital piano to fall over, creating the risk of personal injury.
•Periodically check the screws that secure the digital piano to the stand for looseness. If a screw is loose, retighten it. Loose screws can cause the stand to tip over and the digital piano to fall, creating the risk of personal injury.
428A-E-009A |
E-5 |
AP38_e_01-07.p65 |
5 |
02.6.12, 15:55 |
Main Features
■ 16 versatile tones
16 instrument tones including piano and pipe organ provide plenty of performance versatility.
An easy setting lets you control the brilliance of each tone, and a layer feature lets you assign two tones to sound simultaneously. Other features include digital effects that control the acoustical characteristic of tones, as well as three pedal effects for all the nuances of an acoustic piano.
■ Metronome
A simple operation lets you set the tempo and the beat of the metronome to suit the tune you want to play. It’s the perfect practice tool for players of all levels.
■ 16 demo tunes
16 demo tunes demonstrate how to use each of the built-in tones.
■ Song Memory
Two independent memory areas let you separately record and playback tunes. You can record in one memory and later record in the other memory while playing back your original recording, or even play back from both memories at the same time.
■ Music Library
Playback with any one of 50 built-in Music Library tunes. Right hand and left hand parts are separate, so you can turn off play of either hand and practice along on the keyboard (Part Lesson).
■ Variable temperament, Baroque pitch
Select from a variety of temperament settings and Baroque pitch for realistic play of classical pieces.
■ Powerful keyboard setting functions
A selection of powerful keyboard setting functions helps you get create exactly the musical mood you want. Transpose adjusts the key of the keyboard in semitone steps.
Tuning provides a means to tune with another musical instrument.
Touch Select adjusts the intensity of the output sound in accordance with the amount of pressure you apply to the keyboard.
■ MIDI terminal
Connecting to another MIDI musical instrument lets you play two instruments from the keyboard of this digital piano. You can also connect to a commercially available MIDI sequencer to increase the number of parts you can play.
E-6 |
428A-E-010A |
AP38_e_01-07.p65 |
6 |
02.6.12, 15:55 |
Contents
Safety Precautions .................... |
E-1 |
Main Features ............................ |
E-6 |
Contents ..................................... |
E-7 |
General Guide ............................ |
E-8 |
Attachment of the Score Stand .................. |
E-8 |
Connecting to a Power Outlet ... |
E-10 |
Connections ............................ |
E-11 |
Accessories and Options ......................... |
E-11 |
Basic Operation ....................... |
E-12 |
Using Tones ............................................. |
E-12 |
Using Digital Effects ................................. |
E-16 |
Using the Pedals ...................................... |
E-18 |
Using the Metronome ............................... |
E-18 |
Using the Song Memory ......... |
E-20 |
About the Song Memory .......................... |
E-20 |
Recording ................................................. |
E-20 |
Playback .................................................. |
E-21 |
Deleting Song Memory Contents ............. |
E-22 |
Using Demo Tunes .................. |
E-23 |
Playing the Demo Tunes in Sequence ..... |
E-23 |
Playing a Specific Demo Tune ................. |
E-23 |
Stopping Demo Tune Play ....................... |
E-23 |
Using Music Library ................ |
E-24 |
Playing Back Music Library Tunes ........... |
E-24 |
Practicing Individual Parts (Part Lesson) ... E-25
428A-E-011A
|
|
|
..................Keyboard Settings |
E-26 |
|
|
Using Touch Select .................................. |
E-26 |
|
Using Transpose ...................................... |
E-26 |
|
Adjusting the Tuning of the Digital Piano ... |
E-27 |
|
Temperament ........................................... |
E-27 |
|
Using Baroque Pitch ................................ |
E-29 |
MIDI ........................................... |
E-30 |
What is MIDI? .......................................... |
E-30 |
What you can do with MIDI ...................... |
E-30 |
MIDI Connections .................................... |
E-30 |
MIDI Channels ......................................... |
E-30 |
Simultaneous Receive Over |
|
Multiple Channels (Multi-Timbre) ............. |
E-31 |
Specifying the Keyboard Channel ............ |
E-31 |
Sending Song Memory Playback Data .... |
E-31 |
Turning Local Control On and Off ............ |
E-32 |
MIDI Data Notes ...................................... |
E-32 |
Troubleshooting ...................... |
E-34 |
Assembly Instructions ............ |
E-35 |
Specifications .......................... |
E-38 |
Operational Precautions ......... |
E-39 |
Appendix .................................... |
A-1 |
Initial Power On Settings ............................ |
A-1 |
Music Library Tunes ................................... |
A-3 |
MIDI Data Format ....................... |
A-4 |
Channel Messages .................................... |
A-4 |
System Messages ...................................... |
A-8 |
MIDI Implementation Chart
E-7
AP38_e_01-07.p65 |
7 |
02.6.12, 15:55 |

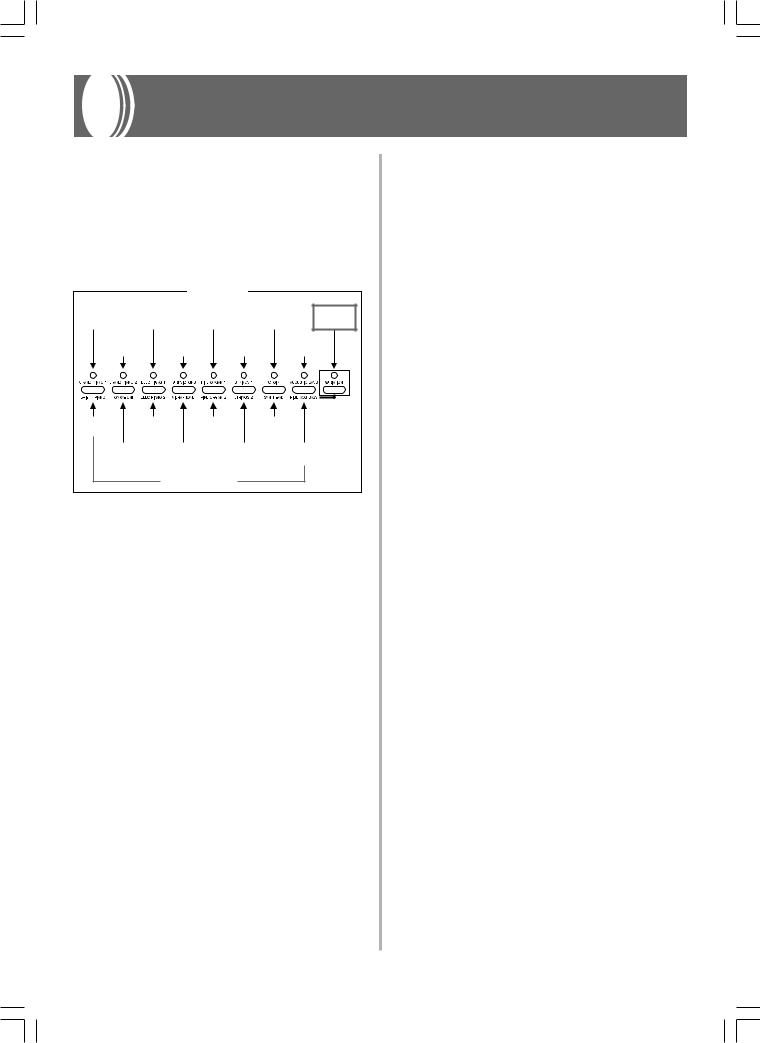
General Guide
Back Panel |
Attachment of the |
|
Score Stand |
Attach the score stand by inserting its pegs into the holes in the top of the digital piano.
|
1 |
2 |
|
|
Front |
|
Bottom |
4 |
Bottom |
|
|
|||
|
|
|
5 |
6 |
|
3 |
|
|
|
7 |
8 |
9 0 A B |
C |
D E F G H I J K |
E-8 |
|
|
|
428A-E-012A |
AP38_e_08-19.p65 |
|
8 |
|
02.6.12, 15:55 |
|
|
|
|
|
|
CAUTION |
Make sure that the cover of the digital piano is fully open whenever you are playing on the keyboard. |
|
A partially open cover can suddenly close unexpectedly and pinch your fingers. |
|
|
|
|
|
|
|
|
*With the AP-38, the power cord is hard-wired to the bottom of the instrument.
1 MIDI IN terminal, MIDI OUT terminal
2 LINE OUT jacks (R, L/MONO )
3 Power Indicator
4 Headphone jacks
5 AC Power jack
6 Pedal Connector
7 POWER button
8 VOLUME slider
9 BRILLIANCE slider
0 CONTROL button
A REVERB button
B CHORUS button
C Tone buttons
D SPLIT button
E SONG MEMORY button
F RECORD button
G TRACK A/PART L button
H TRACK B/PART R button
I PLAY/STOP button
J MUSIC LIBRARY button
K METRONOME button
NOTE |
|
|
|
|
|
|
|
|
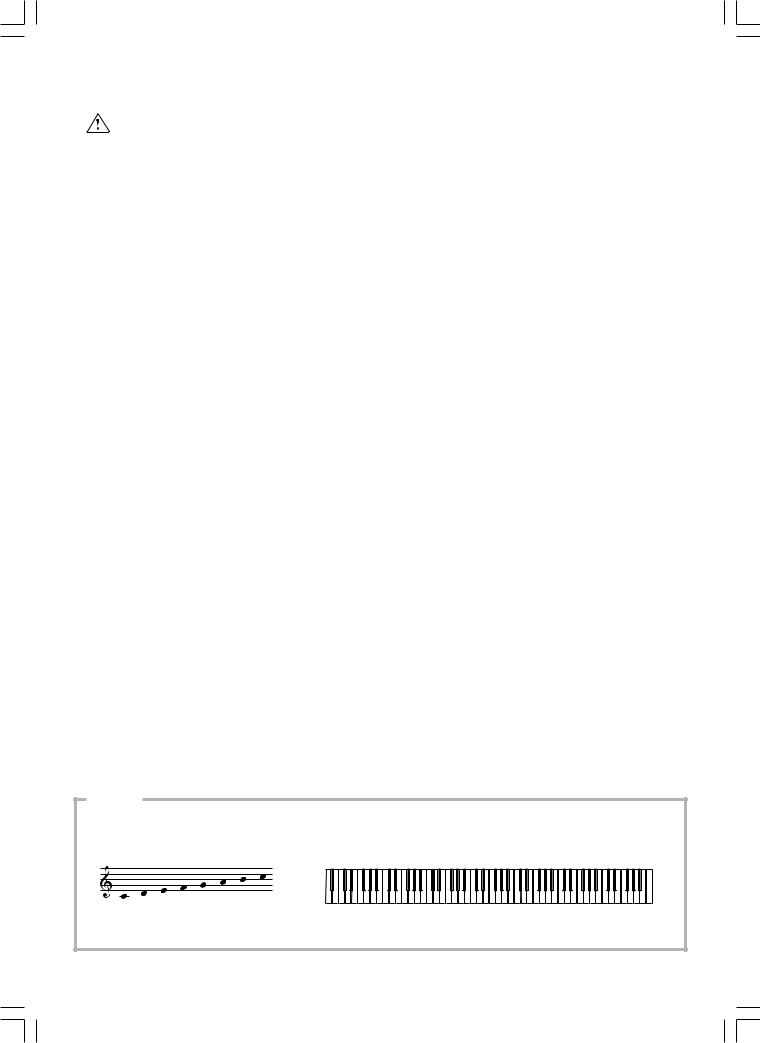
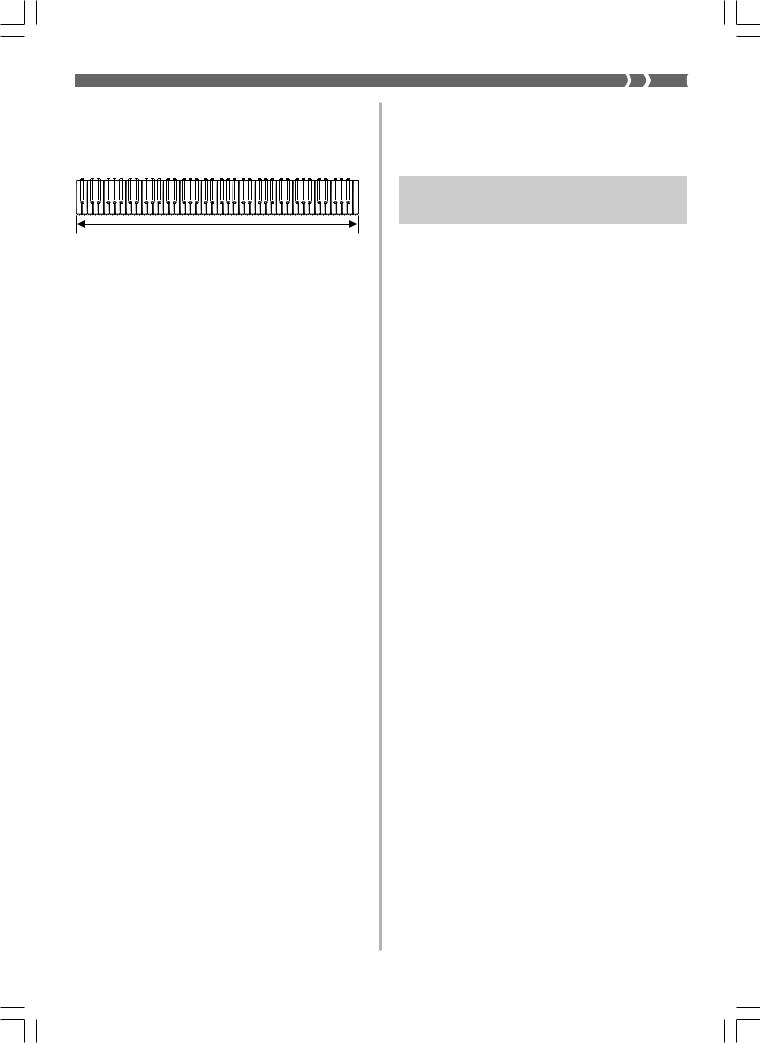
Note Names |
A value next to a note name indicates the relative position of the note |
|||||||
|
on the keyboard as shown below. |
|
|
|
|
|||
C D E F G A B C |
▲ |
▲ |
▲ |
▲ |
▲ |
▲ |
▲ |
▲ |
(H) |
C1 |
C2 |
C3 |
C4 |
C5 |
C6 |
C7 |
C8 |
428A-E-013A |
|
|
|
|
|
|
|
E-9 |
AP38_e_08-19.p65 |
9 |
02.6.12, 15:55 |
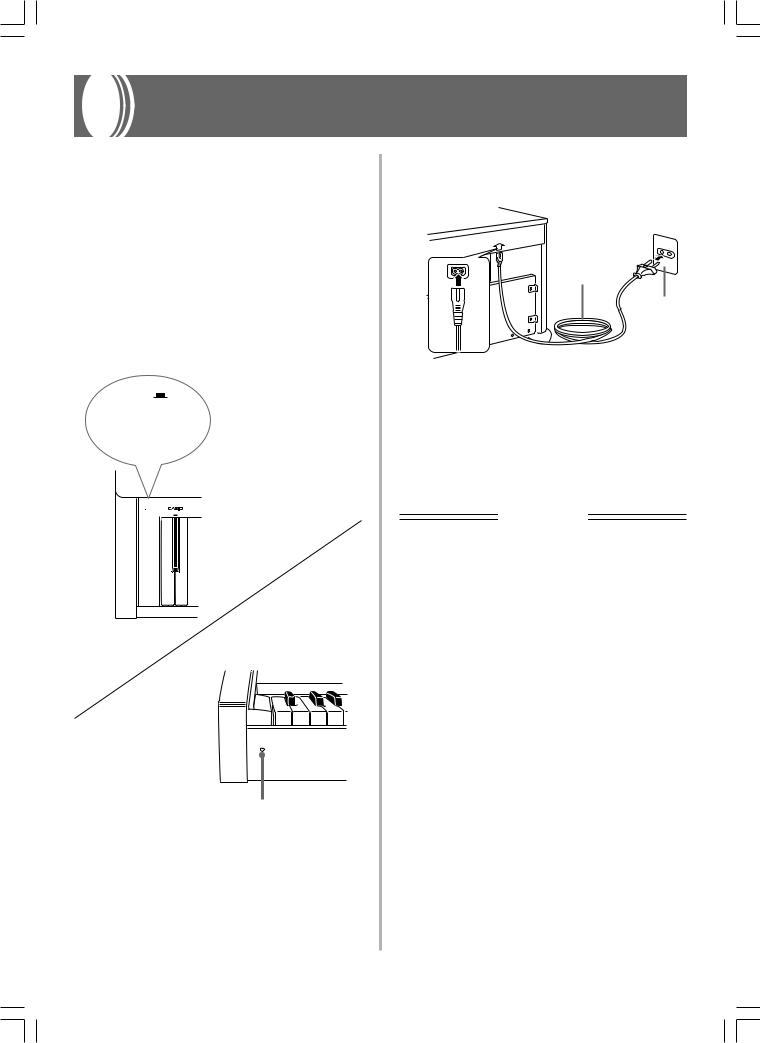
Connecting to a Power Outlet
You can power this digital piano by plugging it into a standard household power outlet.
Be sure you turn off power and unplug the power cord from the electrical outlet whenever the digital piano is not in use.
To connect to a power outlet
1. Check to make sure that the digital piano’s POWER button is in the OFF position.
• If it is ON, press the POWER button to turn it OFF.
POWER button
ON
Power indicator on.
OFF 
Power indicator off.


 POWER button
Front
2. Attach the power cord that comes with the digital piano to the bottom of the digital piano.*
Power cord
Household wall outlet
3. Plug the digital piano’s power cord into a wall outlet.
4. Press the POWER button to turn on power.
* applies to the AP-38V.
IMPORTANT!
•Power should also be turned off before you unplug the digital piano from the wall outlet.
•The shapes of the digital piano’s power cord and wall outlet should be different according to countries or regions. The illustrations are examples.
•With the AP-38, the power cord is hardwired to the bottom of the instrument.
Power Indicator
E-10 |
428A-E-014A |
AP38_e_08-19.p65 |
10 |
02.6.12, 15:55 |
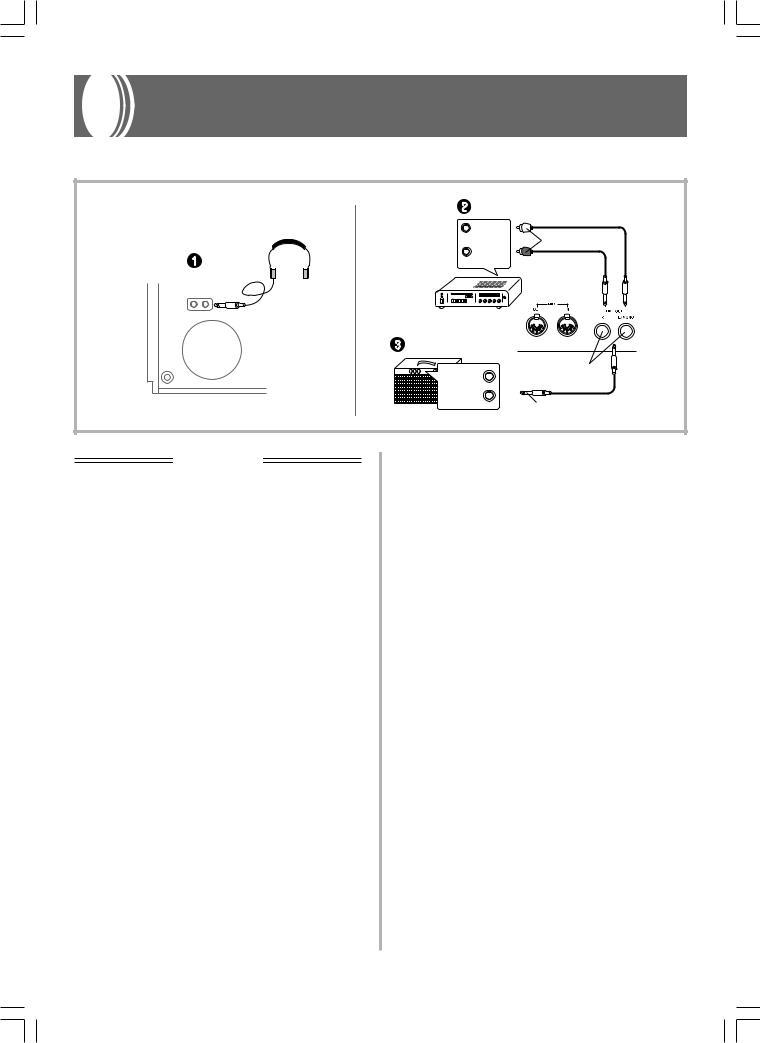
Connections
Connecting to an audio or musical instrument amplifier provides even clearer, more powerful sound through external speakers.
Bottom |
Back |
Audio amplifier AUX IN, etc. |
|
|
|
||
|
|
LEFT |
|
|
|
(White) |
PIN plugs |
|
|
|
|
|
|
RIGHT |
|
Headphones |
|
(Red) |
|
Guitar amplifier, keyboard amplifier, etc.
Standard jacks
INPUT 1
INPUT 2
Standard plug
IMPORTANT!
•Whenever connecting external equipment, first set the
VOLUME slider of the digital piano and the volume controller of the external equipment to relatively low volume settings. You can later adjust volume to the level you want after connections are complete.
•Be sure also to refer to the documentation that comes with the external equipment for its proper connection procedures.
Connecting Headphones 1
Connect commercially available headphones to the digital piano’s headphones jack. This cuts off the built-in speakers, which means you can practice even late at night without disturbing others. To protect your hearing, make sure that you do not set the volume level too high when using headphones.
Connecting to Audio Equipment 2
Use commercially available cables to connect the external audio equipment to the digital piano's LINE OUT jacks as shown in Figure 2. R jack output is right channel sound, while L/MONO jack output is left channel sound. It is up to you to purchase connecting cables like the ones shown in the illustration for connection of audio equipment. Normally in this configuration you must set the audio equipment's input selector to the setting that specifies the terminal (such as AUX IN) to which the digital piano is connected. Use the digital piano's VOLUME slider to adjust the volume level.
Connecting to a Musical Instrument
Amplifier 3
Use commercially available cables to connect the amplifier to the digital piano's LINE OUT jacks as shown in Figure 3. R jack output is right channel sound, while L/MONO jack output is left channel sound. Connecting to the L/MONO jack only outputs a mixture of both channels. It is up to you to purchase connecting cable like the one shown in the illustration for connection of the amplifier. Use the digital piano's VOLUME slider to adjust the volume level.
Accessories and Options
Use only the accessories and options specified for this digital piano. Use of non-authorized items creates the danger of fire, electric shock, and personal injury.
428A-E-015A |
E-11 |
AP38_e_08-19.p65 |
11 |
02.6.12, 15:55 |
Basic Operation
Using Tones |
To select a tone |
|
|
|
|
The following procedures describe everything you need to |
1. |
Press the POWER button to turn on the digital |
know about selecting and using tones. |
||
|
|
piano power. |
Selecting a Tone |
2. |
Press one of the tone buttons to select the tone |
This digital piano has a selection of 16 built-in tones. |
|
you want. |
|
Tone Buttons |
|
|
3. Use the VOLUME slider to adjust the volume. |
||
|
|
|
|
VARIATION |
||
GRAND |
ELEC |
PIPE |
|
• It is a good idea to set the volume to a relatively low |
||
|
CHOIR |
button |
||||
PIANO 1 |
PIANO 1 |
ORGAN 1 |
level at first. |
|||
GRAND |
HARPSI- |
|
|
ACOUSTIC |
|
|
|
STRINGS 1 |
|
• Moving the slider towards MIN decreases volume, |
|||
PIANO 2 |
CHORD |
|
BASS |
|
while moving it towards MAX increases volume. |
|
|
|
|
|
|
|
|
|
|
|
|
|
|
4. Play something on the keyboard. |
|
|
|
|
|
|
• Adjust volume to the level you want as you play. |
BRIGHT |
ELEC |
PIPE |
SYNTH-PAD |
|
5. After you are finished playing, press the POWER |
|
PIANO |
PIANO 2 |
ORGAN 2 |
|
|
||
HONKY- |
VIBRAPHONE |
STRINGS 2 |
RIDE ACO |
|
||
|
button to turn off power. |
|||||
TONK |
|
|
|
BASS |
|
|
|
Variation Tones |
|
|
NOTE |
||
|
|
|
|
|
|
|
• The GRAND PIANO 1 tone is selected automatically whenever
you turn on the digital piano power.
Variation Button
Each tone button is assigned two tones: a “normal tone” |
Selecting a Variation Tone |
|||
(whose name is above the tone button) and a “variation tone” |
||||
(whose name is below the tone button). Which tone is selected |
The tone buttons that are marked as shown below are for |
|||
when you press a tone button depends on the current status |
||||
selecting variation tones. |
||||
of the indicator lamp above the VARIATION button, as shown |
||||
|
||||
below. |
|
|
1. Press the tone button for the tone you want to |
|
|
|
|
||
To select this type of tone: |
The VARIATION button |
|
select. |
|
lamp should be: |
|
|
||
|
|
2. Press the VARIATION button. |
||
Normal tone |
Off |
|
||
Variation tone |
On |
|
• This causes the indicator lamp above the button to |
|
• Press the VARIATION button to toggle its indicator lamp |
light, which indicates that the variation tone is |
|||
selected. |
||||
on and off. |
|
|
3. To switch back from variation tone to normal |
|
• Pressing the tone button of the currently selected tone |
||||
toggles it between the normal tone and the variation tone. |
||||
tone, press the VARIATION button again to the |
||||
|
|
|
||
NOTE |
|
|
indicator lamp goes out. |
|
|
|
|
||
•The tone buttons provide you with a selection of 16 tones that you can assign to and play on the keyboard.
•The GRAND PIANO 1 tone was recorded with stereo sampling.
•See “Selecting a Variation Tone” for information on selecting the tones whose names are marked below each tone button.
E-12 |
428A-E-016A |
AP38_e_08-19.p65 |
12 |
02.6.12, 15:55 |
Using Layer
With layer you can assign two different tones (a main tone and a layered tone) to the keyboard, both of which play whenever you press a key.
Main tone + Layered tone
To layer two tones
NOTE
•To use the variation tone for the main tone and/or the layer tone, perform the required operation to turn on the variation tone(s) before starting the procedure below.
1. While holding down the tone button of the main tone, press the tone button for the layer tone.
•This causes the indicator lamp of the main tone button to light, and the lamp of the layer tone button to flash.
•Whether the normal tone or variation tone is selected for the main tone and layer tone depends on the normal tone/variation tone setting of the tone button you press. The indicator lamp above the VARIATION button is lit when the variation tone is selected for the main tone.
2.Now try playing something on the keyboard.
•Note should sound using both of the tones you selected.
3.To cancel layering, press any tone button.
NOTE
•If you change or turn off a digital effect while layering is turned on, the setting you make is saved to the main tone’s settings only.
•You cannot layer two tones that are assigned to the same tone button (for example: ELEC PIANO 1 + ELEC PIANO 2, or HARPSICHORD + VIBRAPHONE).
428A-E-017A
How digital effects are applied when layering is turned on
The following are the rules that determine what type of digital effects are applied to two tones that are layered.
|
Cause these digital effects to |
|
These conditions: |
be applied to both the main |
|
|
tone and layered tone: |
|
|
|
|
• Digital effects turned on |
|
|
for the main tone |
Main tone digital effects |
|
• Digital effects turned on or |
||
|
||
off for the layered tone |
|
|
|
|
|
• Digital effects turned off |
|
|
for the main tone |
Layered tone digital effects |
|
• Digital effects turned on |
||
|
||
for the layered tone |
|
|
|
|
|
• Digital effects turned off |
|
|
for the main tone |
None |
|
• Digital effects turned off |
||
|
||
for the layered tone |
|
|
|
|
To adjust the volume of the main tone
1. Hold down the CONTROL button, and keep it depressed until you reach step 4 of this procedure.
2. Press the GRAND PIANO 1 button.
•This causes the indicator lamp above the button to flash.
3.Use one of the procedures below to set the main tone volume to a value in the range of 40 to 127.
•To scroll the volume setting value: While holding down the CONTROL button, use the + (increase) and
– (decrease) keys to scroll the volume setting value. Holding down either key changes the setting at high speed.
Pressing + and – at the same time automatically selects a volume setting value of 127.
•To input the volume setting value: While holding down the CONTROL button, use the number input keys to input a two-digit or three-digit volume setting value in the range of 40 to 127. You can input a two digit or a three-digit value. The level you input is applied to the volume setting value when you release the CONTROL button. The volume setting does not change if you input a one-digit value or a value that is outside of the allowable range.
E-13
AP38_e_08-19.p65 |
13 |
02.6.12, 15:55 |
 Loading...