

Page 1

iP2800 series
Online Manual
Read Me First
Useful Functions Available on the Printer
Overview of the Printer
English
Page 2

Contents
Read Me First. . . . . . . . . . . . . . . . . . . . . . . . . . . . . . . . . . . . . . . . . . . . . . . . . . . . 4
How to Use the Online Manual. . . . . . . . . . . . . . . . . . . . . . . . . . . . . . . . . . . . . . . 5
Trademarks and Licenses. . . . . . . . . . . . . . . . . . . . . . . . . . . . . . . . . . . . . . . . . . . 6
Search Tips. . . . . . . . . . . . . . . . . . . . . . . . . . . . . . . . . . . . . . . . . . . . . . . . . . . . . . 7
Notes on Operation Explanations. . . . . . . . . . . . . . . . . . . . . . . . . . . . . . . . . . . . . 9
Useful Functions Available on the Printer. . . . . . . . . . . . . . . . . . . . . . . . . . . . . . 10
Useful Functions Available from Applications and the Main Unit. . . . . . . . . . . . . . . . . . . . 11
Overview of the Printer. . . . . . . . . . . . . . . . . . . . . . . . . . . . . . . . . . . . . . . . . . . . 14
Safety Guide. . . . . . . . . . . . . . . . . . . . . . . . . . . . . . . . . . . . . . . . . . . . . . . . . . . . . . . . . . . . 15
Safety Precautions. . . . . . . . . . . . . . . . . . . . . . . . . . . . . . . . . . . . . . . . . . . . . . . . . . . . . . . . . . . . . . . . . . 16
Regulatory and Safety Information. . . . . . . . . . . . . . . . . . . . . . . . . . . . . . . . . . . . . . . . . . . . . . . . . . . . . 17
Main Components and Basic Operations. . . . . . . . . . . . . . . . . . . . . . . . . . . . . . . . . . . . . . 20
Main Components. . . . . . . . . . . . . . . . . . . . . . . . . . . . . . . . . . . . . . . . . . . . . . . . . . . . . . . . . . . . . . . . . . 21
Front View. . . . . . . . . . . . . . . . . . . . . . . . . . . . . . . . . . . . . . . . . . . . . . . . . . . . . . . . . . . . . . . . . . . . 22
Rear View. . . . . . . . . . . . . . . . . . . . . . . . . . . . . . . . . . . . . . . . . . . . . . . . . . . . . . . . . . . . . . . . . . . . 24
Inside View. . . . . . . . . . . . . . . . . . . . . . . . . . . . . . . . . . . . . . . . . . . . . . . . . . . . . . . . . . . . . . . . . . . 25
About the Power Supply of the Printer. . . . . . . . . . . . . . . . . . . . . . . . . . . . . . . . . . . . . . . . . . . . . . . . . . . 26
Confirming that the Power Is On. . . . . . . . . . . . . . . . . . . . . . . . . . . . . . . . . . . . . . . . . . . . . . . . . . . 27
Turning the Printer On and Off. . . . . . . . . . . . . . . . . . . . . . . . . . . . . . . . . . . . . . . . . . . . . . . . . . . . 28
Notice for the Power Plug/Power Cord. . . . . . . . . . . . . . . . . . . . . . . . . . . . . . . . . . . . . . . . . . . . . . 30
Notice for Unplugging the Power Cord. . . . . . . . . . . . . . . . . . . . . . . . . . . . . . . . . . . . . . . . . . . . . . 31
Loading Paper. . . . . . . . . . . . . . . . . . . . . . . . . . . . . . . . . . . . . . . . . . . . . . . . . . . . . . . . . . 32
Loading Paper. . . . . . . . . . . . . . . . . . . . . . . . . . . . . . . . . . . . . . . . . . . . . . . . . . . . . . . . . . . . . . . . . . . . . 33
Loading Plain Paper / Photo Paper. . . . . . . . . . . . . . . . . . . . . . . . . . . . . . . . . . . . . . . . . . . . . . . . . 34
Loading Envelopes. . . . . . . . . . . . . . . . . . . . . . . . . . . . . . . . . . . . . . . . . . . . . . . . . . . . . . . . . . . . . 37
Media Types You Can Use. . . . . . . . . . . . . . . . . . . . . . . . . . . . . . . . . . . . . . . . . . . . . . . . . . . . . . . 40
Paper Load Limit. . . . . . . . . . . . . . . . . . . . . . . . . . . . . . . . . . . . . . . . . . . . . . . . . . . . . . . . . . . 42
Media Types You Cannot Use. . . . . . . . . . . . . . . . . . . . . . . . . . . . . . . . . . . . . . . . . . . . . . . . . . . . . 43
Printing Area. . . . . . . . . . . . . . . . . . . . . . . . . . . . . . . . . . . . . . . . . . . . . . . . . . . . . . . . . . . . . . . . . . 44
Printing Area. . . . . . . . . . . . . . . . . . . . . . . . . . . . . . . . . . . . . . . . . . . . . . . . . . . . . . . . . . . . . . 45
Other Sizes than Letter, Legal, Envelopes. . . . . . . . . . . . . . . . . . . . . . . . . . . . . . . . . . . . . . . 46
Letter, Legal. . . . . . . . . . . . . . . . . . . . . . . . . . . . . . . . . . . . . . . . . . . . . . . . . . . . . . . . . . . . . . . 47
Envelopes. . . . . . . . . . . . . . . . . . . . . . . . . . . . . . . . . . . . . . . . . . . . . . . . . . . . . . . . . . . . . . . . 48
Page 3

Replacing a FINE Cartridge. . . . . . . . . . . . . . . . . . . . . . . . . . . . . . . . . . . . . . . . . . . . . . . . 49
Replacing a FINE Cartridge. . . . . . . . . . . . . . . . . . . . . . . . . . . . . . . . . . . . . . . . . . . . . . . . . . . . . . . . . . . 50
Maintenance. . . . . . . . . . . . . . . . . . . . . . . . . . . . . . . . . . . . . . . . . . . . . . . . . . . . . . . . . . . . 56
When Printing Becomes Faint or Colors Are Incorrect. . . . . . . . . . . . . . . . . . . . . . . . . . . . . . . . . . . . . . 57
Maintenance Procedure. . . . . . . . . . . . . . . . . . . . . . . . . . . . . . . . . . . . . . . . . . . . . . . . . . . . . . . . . . 58
Printing the Nozzle Check Pattern. . . . . . . . . . . . . . . . . . . . . . . . . . . . . . . . . . . . . . . . . . . . . . . . . . 60
Examining the Nozzle Check Pattern. . . . . . . . . . . . . . . . . . . . . . . . . . . . . . . . . . . . . . . . . . . . . . . 61
Cleaning the Print Head. . . . . . . . . . . . . . . . . . . . . . . . . . . . . . . . . . . . . . . . . . . . . . . . . . . . . . . . . . 62
Performing Maintenance from a Computer. . . . . . . . . . . . . . . . . . . . . . . . . . . . . . . . . . . . . . . . . . . . . . . 63
Cleaning the Print Heads from Your Computer. . . . . . . . . . . . . . . . . . . . . . . . . . . . . . . . . . . . . . . . 64
Cleaning the Paper Feed Rollers from Your Computer. . . . . . . . . . . . . . . . . . . . . . . . . . . . . . . . . . 66
Aligning the Print Head Position from Your Computer. . . . . . . . . . . . . . . . . . . . . . . . . . . . . . . . . . . 67
Use Your Computer to Print a Nozzle Check Pattern. . . . . . . . . . . . . . . . . . . . . . . . . . . . . . . . . . . 70
Cleaning Inside the Printer. . . . . . . . . . . . . . . . . . . . . . . . . . . . . . . . . . . . . . . . . . . . . . . . . . . . . . . 71
Cleaning the Printer. . . . . . . . . . . . . . . . . . . . . . . . . . . . . . . . . . . . . . . . . . . . . . . . . . . . . . . . . . . . . . . . . 72
Cleaning the Exterior of the Printer. . . . . . . . . . . . . . . . . . . . . . . . . . . . . . . . . . . . . . . . . . . . . . . . . 73
Cleaning the Paper Feed Roller. . . . . . . . . . . . . . . . . . . . . . . . . . . . . . . . . . . . . . . . . . . . . . . . . . . 74
Cleaning the Inside of the Printer (Bottom Plate Cleaning). . . . . . . . . . . . . . . . . . . . . . . . . . . . . . . 75
Changing the Printer Settings. . . . . . . . . . . . . . . . . . . . . . . . . . . . . . . . . . . . . . . . . . . . . . . 77
Changing Printer Settings from Your Computer. . . . . . . . . . . . . . . . . . . . . . . . . . . . . . . . . . . . . . . . . . . 78
Changing the Print Options. . . . . . . . . . . . . . . . . . . . . . . . . . . . . . . . . . . . . . . . . . . . . . . . . . . . . . . 79
Registering a Frequently Used Printing Profile. . . . . . . . . . . . . . . . . . . . . . . . . . . . . . . . . . . . . . . . 80
Setting the Ink Cartridge to be Used. . . . . . . . . . . . . . . . . . . . . . . . . . . . . . . . . . . . . . . . . . . . . . . . 82
Managing the Printer Power. . . . . . . . . . . . . . . . . . . . . . . . . . . . . . . . . . . . . . . . . . . . . . . . . . . . . . 83
Reducing the Printer Noise. . . . . . . . . . . . . . . . . . . . . . . . . . . . . . . . . . . . . . . . . . . . . . . . . . . . . . . 85
Changing the Printer Operation Mode. . . . . . . . . . . . . . . . . . . . . . . . . . . . . . . . . . . . . . . . . . . . . . . 87
Tips for Ensuring Optimal Printing Quality. . . . . . . . . . . . . . . . . . . . . . . . . . . . . . . . . . . . . 88
Useful Information about Ink. . . . . . . . . . . . . . . . . . . . . . . . . . . . . . . . . . . . . . . . . . . . . . . . . . . . . . . . . . 89
Key Points to Successful Printing. . . . . . . . . . . . . . . . . . . . . . . . . . . . . . . . . . . . . . . . . . . . . . . . . . . . . . 90
Be Sure to Make Paper Settings after Loading Paper. . . . . . . . . . . . . . . . . . . . . . . . . . . . . . . . . . . . . . . 91
Storing Printed Images. . . . . . . . . . . . . . . . . . . . . . . . . . . . . . . . . . . . . . . . . . . . . . . . . . . . . . . . . . . . . . 92
Printer Handling Precautions. . . . . . . . . . . . . . . . . . . . . . . . . . . . . . . . . . . . . . . . . . . . . . . . . . . . . . . . . . 93
Key to Enjoying Consistent Printing Quality. . . . . . . . . . . . . . . . . . . . . . . . . . . . . . . . . . . . . . . . . . . . . . . 94
Precautions for Safe Transport of the Printer. . . . . . . . . . . . . . . . . . . . . . . . . . . . . . . . . . . . . . . . . . . . . 95
Legal Limitations on Use of Your Product and Use of Images. . . . . . . . . . . . . . . . . . . . . . 96
Specifications. . . . . . . . . . . . . . . . . . . . . . . . . . . . . . . . . . . . . . . . . . . . . . . . . . . . . . . . . . . 97
Page 4

Read Me First
Notes on Online Manual Usage
How to Print
Notes on Online Manual Usage
• Reproduction, diversion or copying of any text, photo or image published in the Online Manual
(hereinafter referred to as "this guide"), in whole or in part, is prohibited.
• In principle, Canon shall change or delete the contents of this guide without prior notice to customers.
In addition, Canon may suspend or stop the disclosure of this guide due to unavoidable reasons.
Canon shall not be liable for any damage suffered by customers as a result of changes in or deletion
of information in this guide, or suspension/stoppage of disclosure of this guide.
• Although the contents of this guide have been prepared with utmost care, please contact the service
center if you find any incorrect or missing information.
• In principle, the descriptions in this guide are based on the product at the time of its initial sale.
• This guide does not disclose the manuals of all the products sold by Canon. See the manual supplied
with the product when using a product that is not described in this guide.
How to Print
Use the print function of your Web browser to print this guide.
To set to print background colors and images, follow the steps below.
Note
• In Windows 8, print in the desktop version.
• In Internet Explorer 9 or 10
1. Select (Tools) > Print > Page setup....
2. Select the Print Background Colors and Images checkbox.
• In Internet Explorer 8
1. Press the Alt key to display the menus.
Alternatively, from Tools, select Toolbars > Menu Bar to display the menus.
2. Select Page Setup... from the File menu.
3. Select the Print Background Colors and Images checkbox.
• In Mozilla Firefox
1. Press the Alt key to display the menus.
Alternatively, click Firefox, then select Menu Bar from the right arrow of Options to display the
menus.
2. Select Page Setup... from the File menu.
3. Select the Print Background (colors & images) checkbox in Format & Options.
4
Page 5

How to Use the Online Manual
Symbols Used in This Document
Warning
Instructions that, if ignored, could result in death or serious personal injury caused by incorrect
operation of the equipment. These must be observed for safe operation.
Caution
Instructions that, if ignored, could result in personal injury or material damage caused by incorrect
operation of the equipment. These must be observed for safe operation.
Important
Instructions including important information. To avoid damage and injury or improper use of the
product, be sure to read these indications.
Note
Instructions including notes for operation and additional explanations.
Basic
Instructions explaining basic operations of your product.
Note
• Icons may vary depending on your product.
Touch-enabled Device Users
For touch actions, you need to replace "right-click" in this document with the action set on the operating
system. For example, if the action is set to "press and hold" on your operating system, replace "right-click"
with "press and hold."
5
Page 6

Trademarks and Licenses
• Microsoft is a registered trademark of Microsoft Corporation.
• Windows is a trademark or registered trademark of Microsoft Corporation in the U.S. and/or other
countries.
• Windows Vista is a trademark or registered trademark of Microsoft Corporation in the U.S. and/or other
countries.
• Internet Explorer is a trademark or registered trademark of Microsoft Corporation in the U.S. and/or
other countries.
• Mac, Mac OS, AirPort, Safari, Bonjour, iPad, iPhone and iPod touch are trademarks of Apple Inc.,
registered in the U.S. and other countries. AirPrint and the AirPrint logo are trademarks of Apple Inc.
• IOS is a trademark or registered trademark of Cisco in the U.S. and other countries and is used under
license.
• Google Cloud Print, Google Chrome, Android, Google Play and Picasa are either registered trademarks
or trademarks of Google Inc.
• Adobe, Photoshop, Photoshop Elements, Lightroom, Adobe RGB and Adobe RGB (1998) are either
registered trademarks or trademarks of Adobe Systems Incorporated in the United States and/or other
countries.
• Photo Rag is a trademark of Hahnemühle FineArt GmbH.
• Bluetooth is a trademark of Bluetooth SIG, Inc., U.S.A. and licensed to Canon Inc.
Note
• The formal name of Windows Vista is Microsoft Windows Vista operating system.
6
Page 7
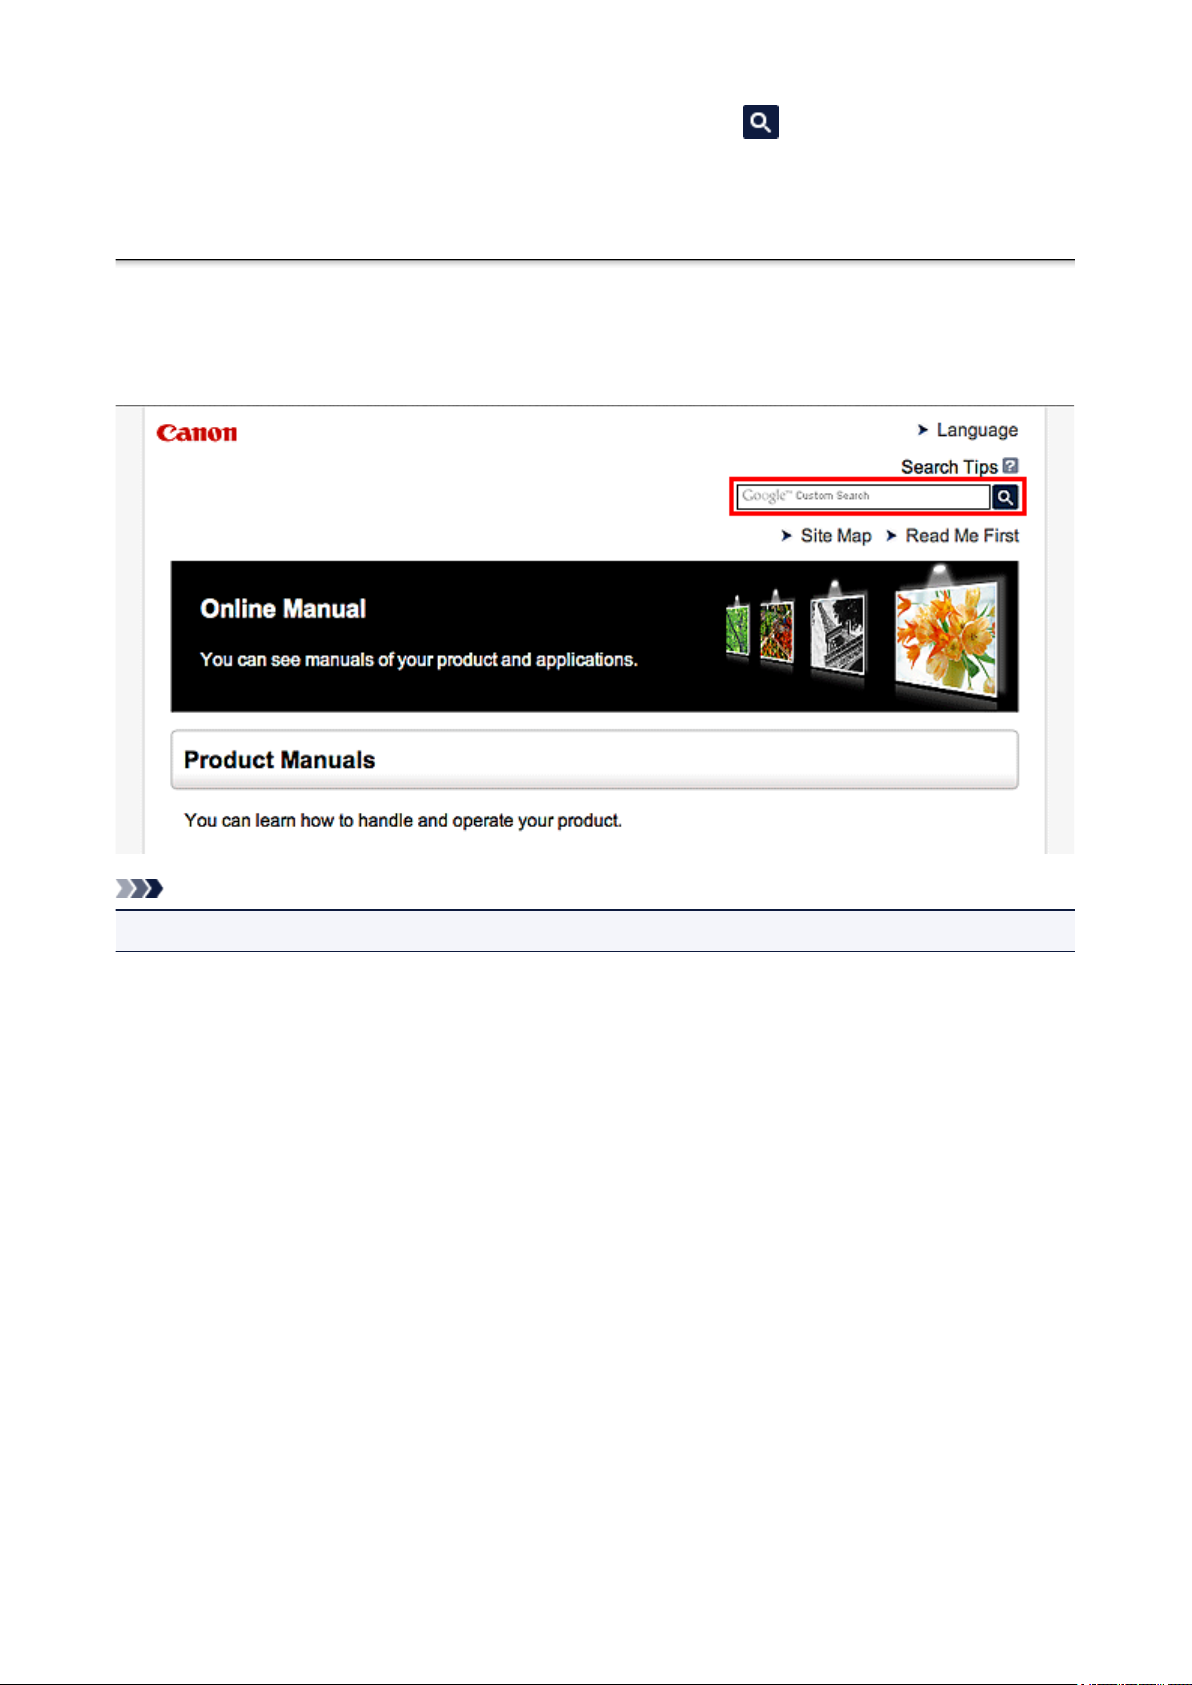
Enter keywords in the search window and click (Search).
You can search for target pages in this guide.
Entry example: "(your product's model name) load paper", "(your product's model name) 1000"
Search Tips
You can search for target pages by entering keywords in the search window.
Note
• The displayed screen may vary.
• Searching for Functions
Enter your product's model name and a keyword for the function you want to learn about
Example: When you want to learn how to load paper
Enter "(your product's model name) load paper" in the search window and perform a search
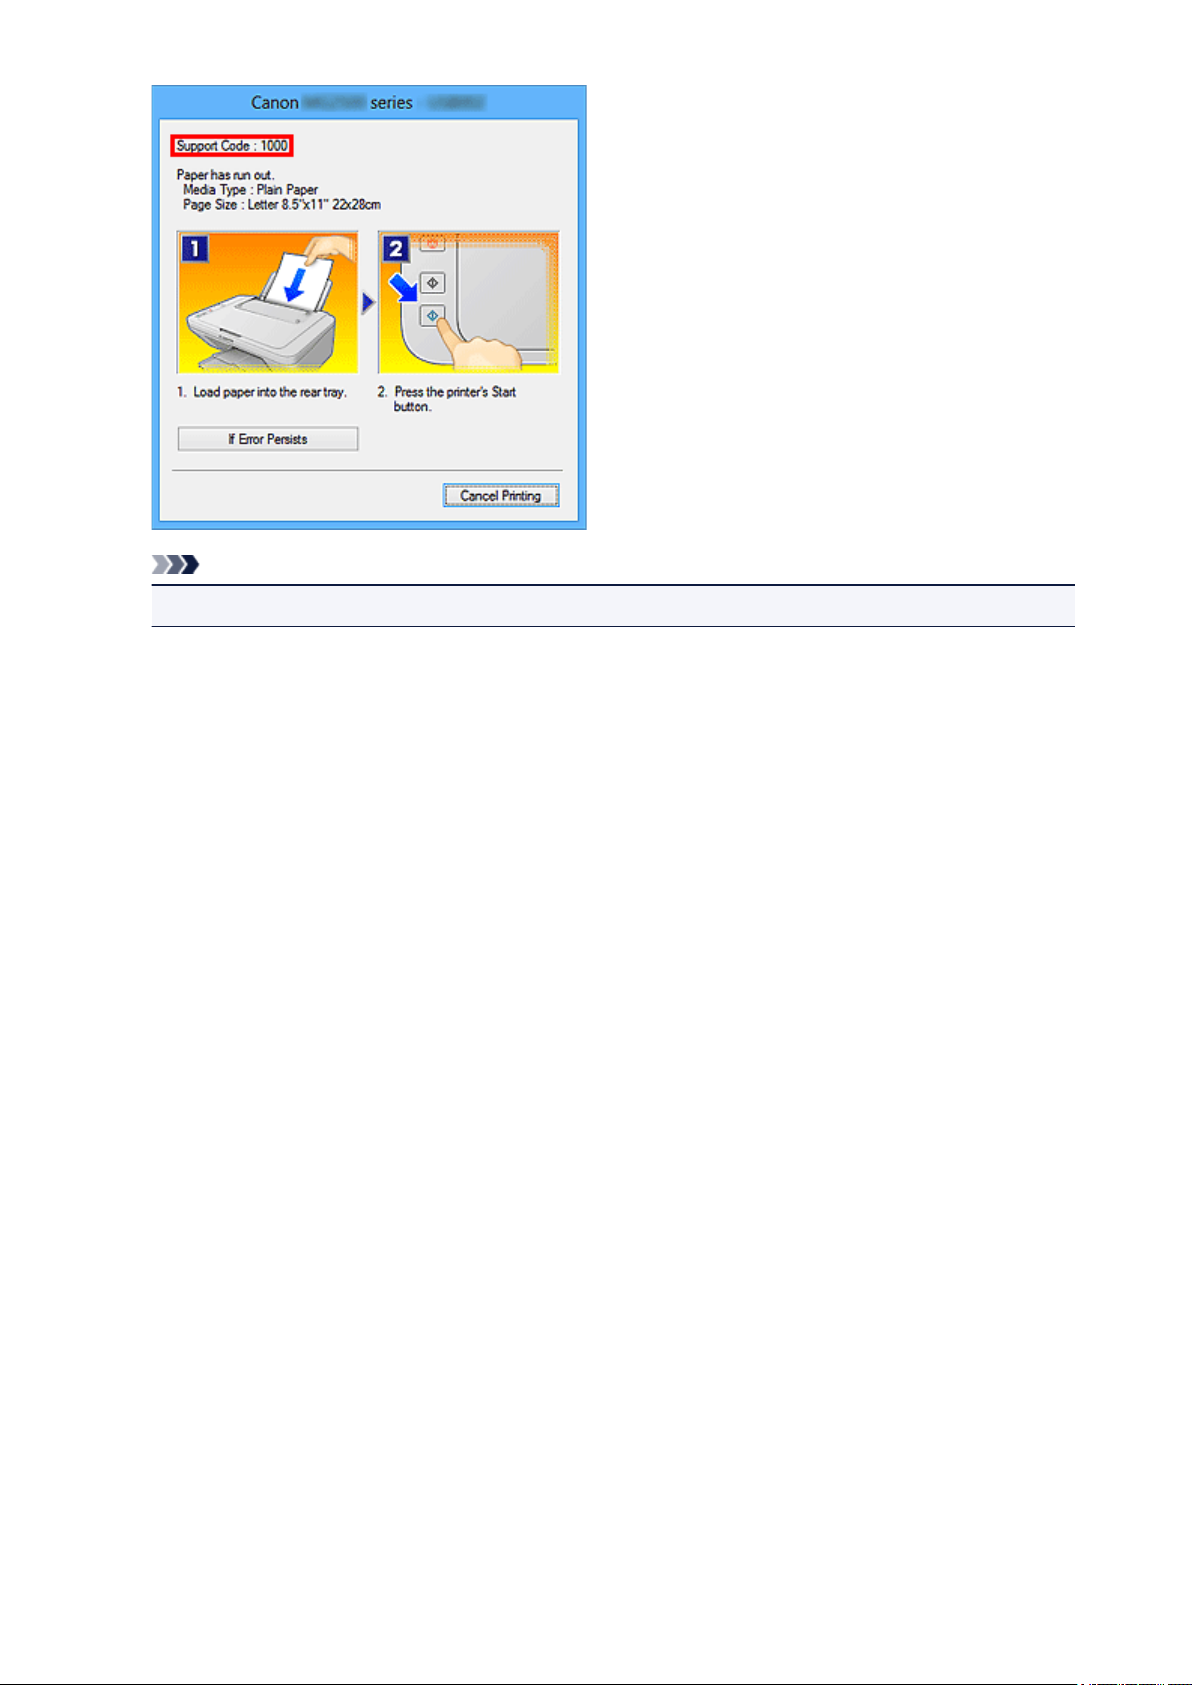
• Troubleshooting Errors
Enter your product's model name and a support code
Example: When the following error screen appears
Enter "(your product's model name) 1000" in the search window and perform a search
7
Page 8
Note
• The displayed screen varies depending on your product.
• Searching for Application Functions
Enter your application's name and a keyword for the function you want to learn about
Example: When you want to learn how to print collages with My Image Garden
Enter "My Image Garden collage" in the search window and perform a search
• Searching for Reference Pages
Enter your model name and a reference page title*
* You can find reference pages more easily by entering the function name as well.
Example: When you want to browse the page referred to by the following sentence on a scanning
procedure page
Refer to "Color Settings Tab" for your model from Home of the Online Manual for details.
Enter "(your product's model name) scan Color Settings Tab" in the search window and perform a
search
8
Page 9

Notes on Operation Explanations
In this guide, most of the operations are described based on the windows displayed when Windows 8
operating system (called Windows 8 below) is used.
9
Page 10

Useful Functions Available on the Printer
The following useful functions are available on the printer.
Enjoy pleasant photography experience by utilizing various functions.
Useful Functions Available from Applications and the Main Unit
You can create items such as collages easily or download delightful
printing materials, and print them.
10
Page 11
Useful Functions Available from Applications and the Main Unit
On the printer, the following useful functions are available from applications and the main unit.
• Print Photos Easily
• Download Content Materials
Print Photos Easily Using an Application
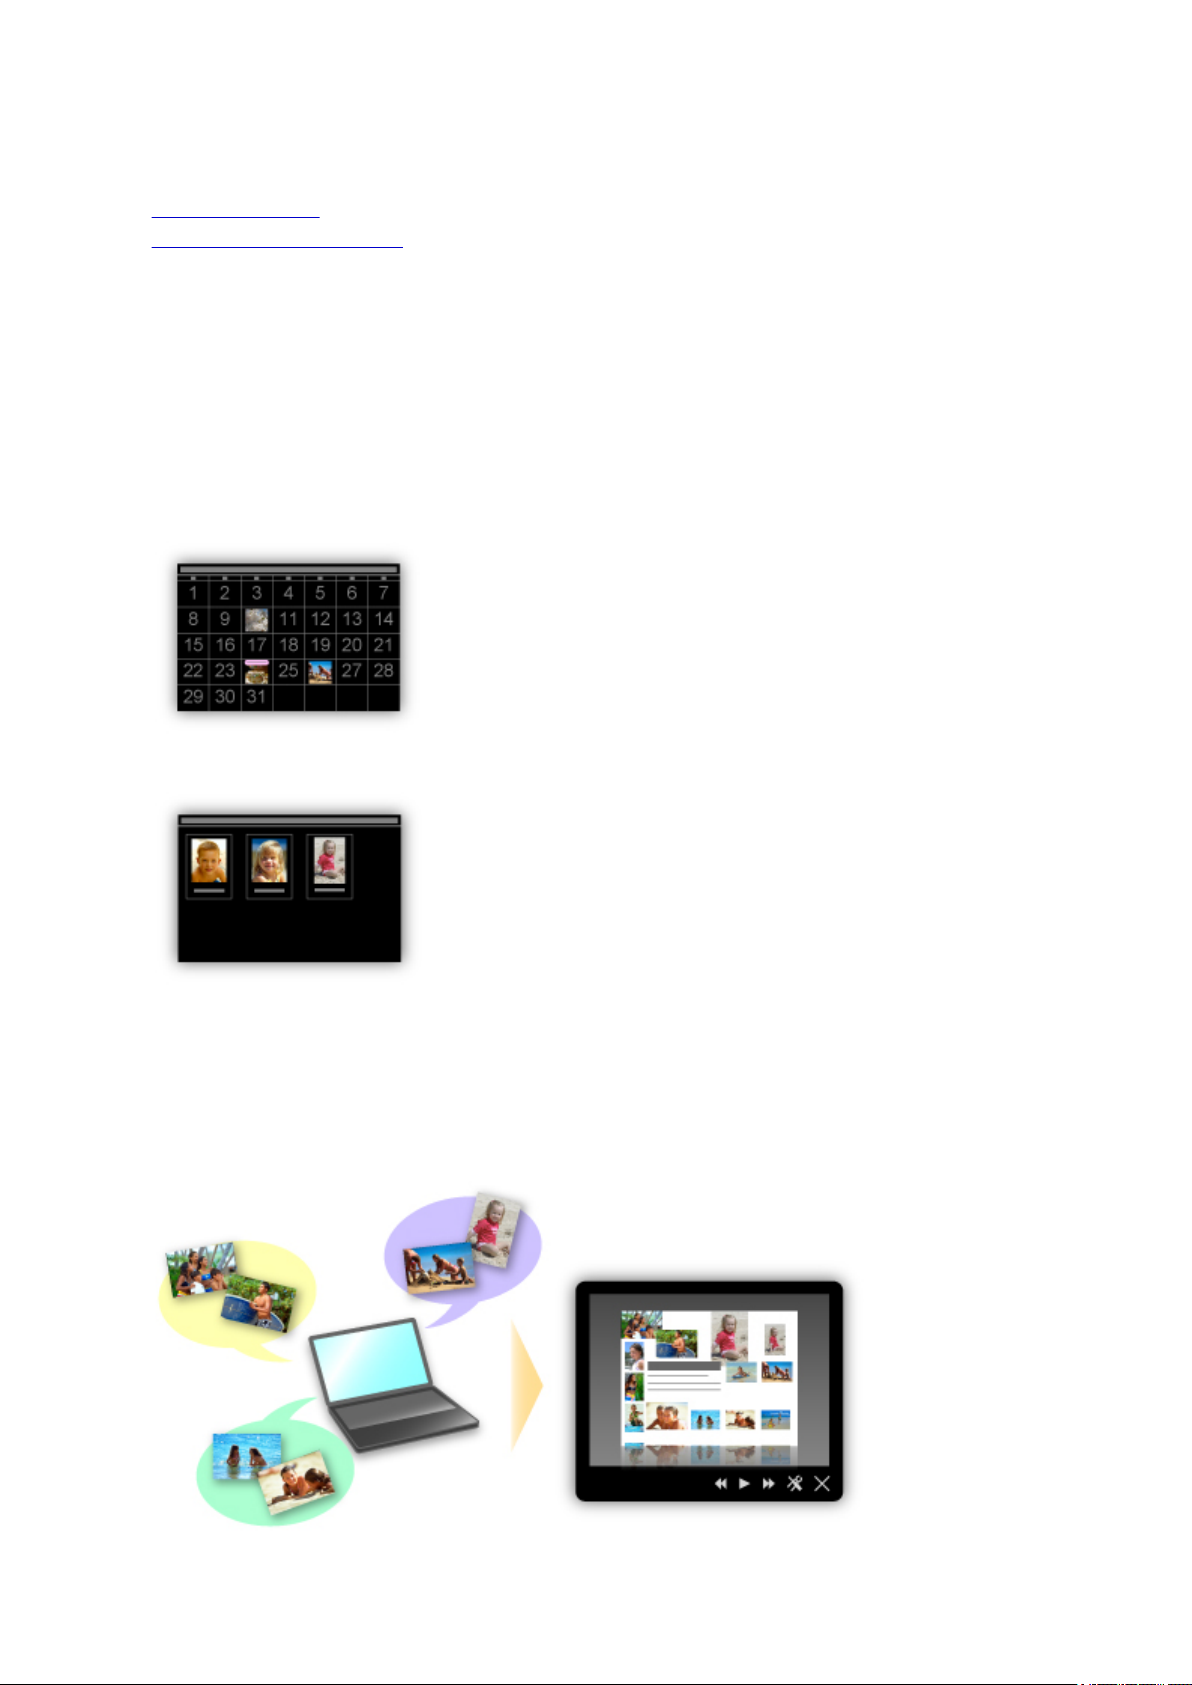
Organize Images Easily
In My Image Garden, you can register the names of people and events to photos.
You can organize photos easily as you can display them not only by folder but also by calendar, event,
and person. This also allows you to find the target photos easily when you search for them later on.
<Calendar View>
<People View>
Display Recommended Items in Slide Shows
Based on the information registered to photos, Quick Menu automatically selects the photos on your
computer and creates recommended items such as collages and cards. The created items appear in
slide shows.
11
Page 12
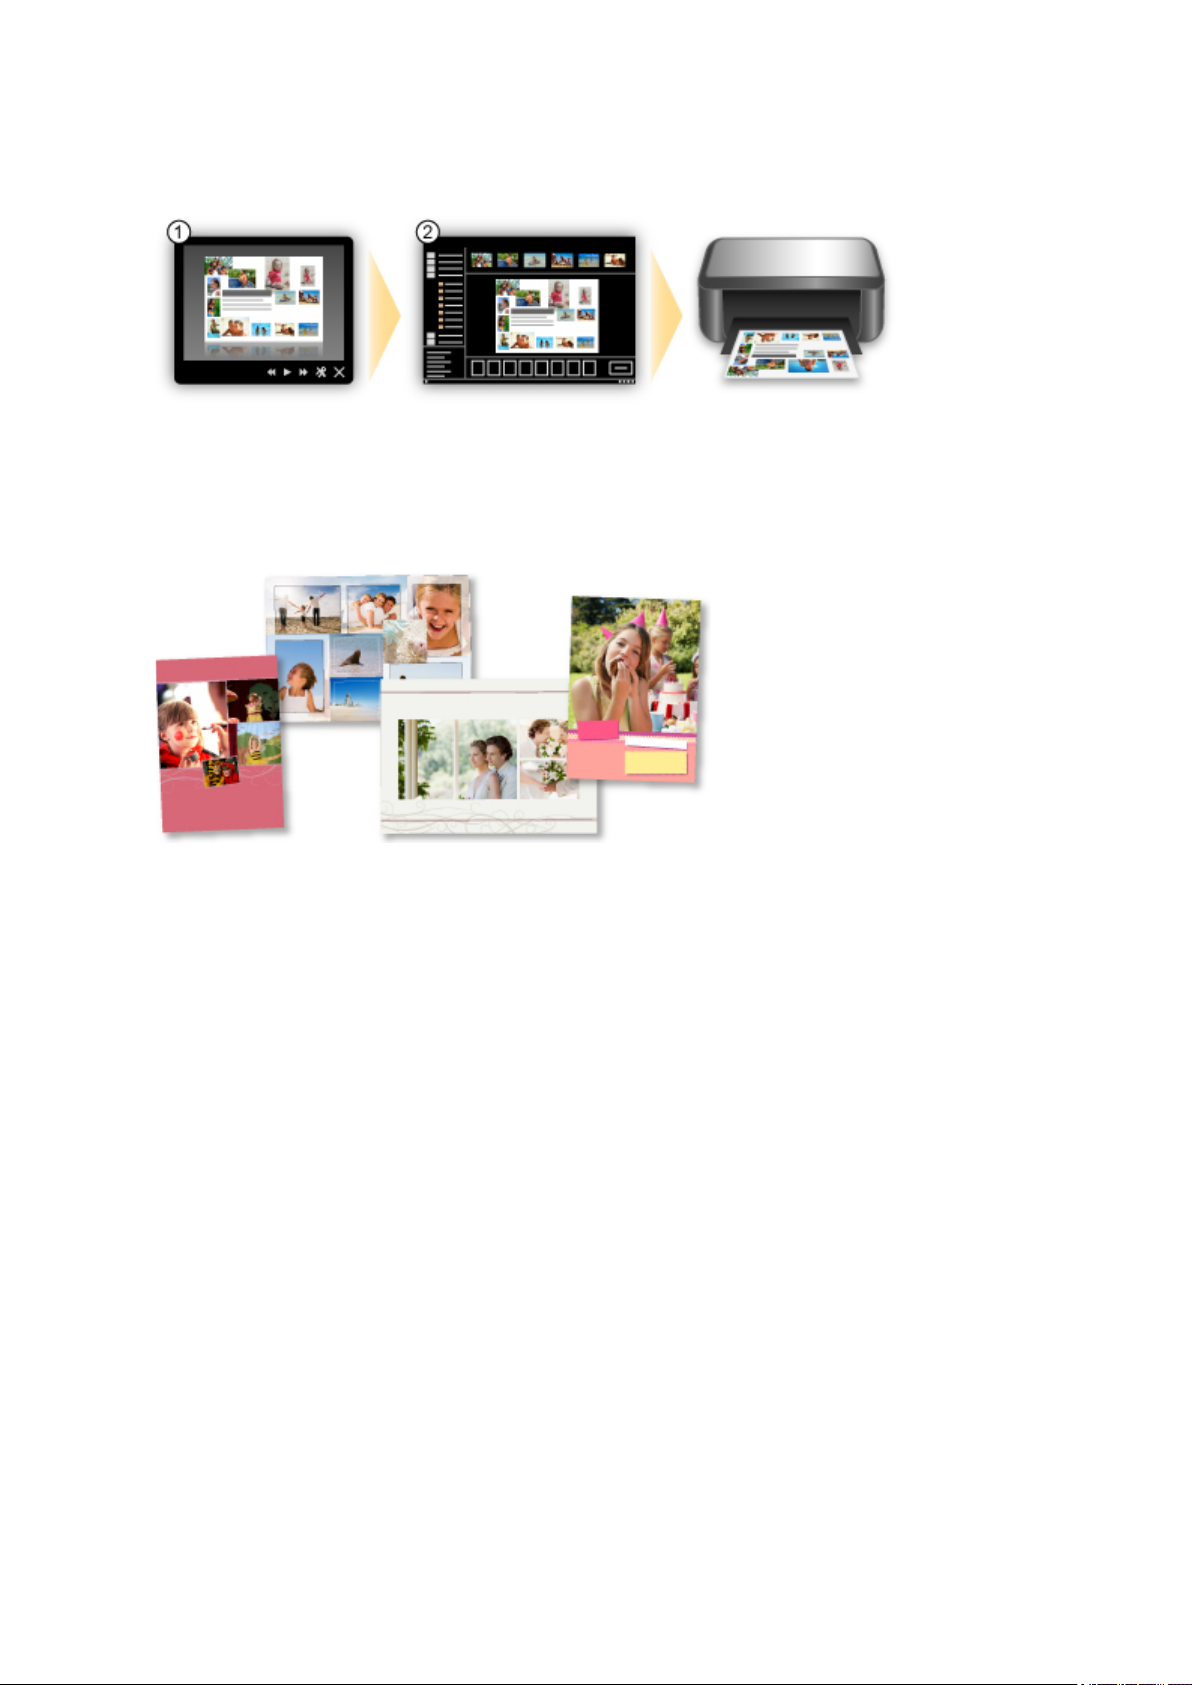
If there is an item you like, you can easily print it in just two steps.
1. In Image Display of Quick Menu, select the item you want to print.
2. Print the item with My Image Garden.
Place Photos Automatically
Delightful items are created easily as the selected photos are placed automatically according to the
theme.
Other Various Functions
My Image Garden has many other useful functions.
Refer to "What You Can Do with My Image Garden" for details.
Download a Variety of Content Materials
CREATIVE PARK
A "printing materials site" where you can download all the printing materials for free.
Various types of content such as seasonal cards and paper crafts that can be made by assembling
paper parts are provided.
It is easily accessible from Quick Menu.
CREATIVE PARK PREMIUM
A service where customers using models that support PREMIUM Contents can download exclusive
printing materials.
PREMIUM Contents can be downloaded easily via My Image Garden. Downloaded PREMIUM
Contents can be printed directly with My Image Garden.
To download PREMIUM Contents, make sure that genuine Canon ink tanks/ink cartridges are installed
for all colors on a supported printer.
12
Page 13

Note
• The designs of PREMIUM Contents provided in this page are subject to change without prior
notice.
13
Page 14

Overview of the Printer
Safety Guide
Safety Precautions
Regulatory and Safety Information
Main Components and Basic Operations
Main Components
About the Power Supply of the Printer
Loading Paper
Loading Paper
Replacing a FINE Cartridge
Replacing a FINE Cartridge
Checking the Ink Status from Your Computer
Maintenance
When Printing Becomes Faint or Colors Are Incorrect
Performing Maintenance from a Computer
Cleaning the Printer
Changing the Printer Settings
Changing Printer Settings from Your Computer
Tips for Ensuring Optimal Printing Quality
Useful Information about Ink
Key Points to Successful Printing
Be Sure to Make Paper Settings after Loading Paper
Storing Printed Images
Printer Handling Precautions
Key to Enjoying Consistent Printing Quality
Precautions for Safe Transport of the Printer
Legal Limitations on Use of Your Product and Use of Images
Specifications
14
Page 15

Safety Guide
Safety Precautions
Regulatory and Safety Information
15
Page 16

Safety Precautions
Choosing a location
• Do not install the machine in a location that is unstable or subject to excessive vibration.
• Do not install the machine in locations that are very humid or dusty, in direct sunlight, outdoors, or
close to a heating source.
To avoid the risk of fire or electric shocks, use the machine under the operating environment specified
in the On-screen Manual.
• Do not place the machine on a thick rug or carpet.
• Do not place the machine with its back attached to the wall.
Power supply
• Ensure that the area around the power outlet is kept clear at all times so you can easily unplug the
power cord if necessary.
• Never remove the plug by pulling on the cord.
Pulling the cord may damage the power cord, leading to possible fire or electrical shock.
• Do not use an extension lead/cord.
Working around the machine
• Never put your hands or fingers in the machine while it is printing.
• When moving the machine, carry the machine at both ends. In case the machine weighs more than
14 kg, it is recommended to have two people lifting the machine. Accidental dropping of the machine
causes injury. For the machine's weight, refer to the On-screen Manual.
• Do not place any object on the machine. Especially do not place metal objects (paper clips, staples,
etc.) or containers of flammable solvents (alcohol, thinners, etc.) on top of the machine.
• Do not transport or use the machine on a slant, vertically or upside-down, as the ink may leak and
damage the machine.
Working around the machine (For the multifunction printer)
• When loading a thick book on the Platen Glass, do not press hard on the Document Cover. The
Platen Glass may break and cause injury.
Print Heads/ink tanks and FINE Cartridges
• Keep ink tanks out of the reach of children. In case ink* is accidentally licked or swallowed, rinse out
mouth or give one or two glasses of water to drink. If irritation or discomfort occurs, obtain medical
advice immediately.
* Clear Ink contains nitrate salts (For models containing Clear Ink).
• In case ink gets in contact with eyes, rinse with water immediately. In case ink gets in contact with
skin, wash with soap and water immediately. If irritation to eyes or skin persists, obtain medical advice
immediately.
• Never touch the electrical contacts on a Print Head or FINE Cartridges after printing.
The metal parts may be very hot and could cause burns.
• Do not throw ink tanks and FINE Cartridges into fire.
• Do not attempt to disassemble or modify the Print Head, ink tanks, and FINE Cartridges.
16
Page 17

Regulatory and Safety Information
About the disposal of the battery (For models containing lithium battery)
Dispose of used batteries according to the local regulations.
Users in the U.S.A.
FCC Notice (U.S.A. Only)
For 120V, 60Hz model
Model Number: K10389/K10392/K10399
This device complies with Part 15 of the FCC Rules. Operation is subject to the following two conditions:
(1) This device may not cause harmful interference, and (2) this device must accept any interference
received, including interference that may cause undesired operation.
Note: This equipment has been tested and found to comply with the limits for a Class B digital device,
pursuant to Part 15 of the FCC Rules. These limits are designed to provide reasonable protection against
harmful interference in a residential installation. This equipment generates, uses and can radiate radio
frequency energy and, if not installed and used in accordance with the instructions, may cause harmful
interference to radio communications.
However, there is no guarantee that interference will not occur in a particular installation. If this equipment
does cause harmful interference to radio or television reception, which can be determined by turning the
equipment off and on, the user is encouraged to try to correct the interference by one or more of the
following measures:
• Reorient or relocate the receiving antenna.
• Increase the separation between the equipment and receiver.
• Connect the equipment into an outlet on a circuit different from that to which the receiver is
connected.
• Consult the dealer or an experienced radio/TV technician for help.
Use of a shielded cable is required to comply with Class B limits in Subpart B of Part 15 of the FCC Rules.
Do not make any changes or modifications to the equipment unless otherwise specified in the manual. If
such changes or modifications should be made, you could be required to stop operation of the equipment.
Canon U.S.A., Inc.
One Canon Park
Melville, New York 11747
1-800-652-2666
European Union (and EEA) only.
This symbol indicates that this product is not to be disposed of with your household waste, according to
the WEEE Directive (2002/96/EC) and your national law. This product should be handed over to a
designated collection point, e.g., on an authorized one-for-one basis when you buy a new similar product
or to an authorized collection site for recycling waste electrical and electronic equipment (EEE). Improper
handling of this type of waste could have a possible negative impact on the environment and human
health due to potentially hazardous substances that are generally associated with EEE. At the same time,
17
Page 18

your cooperation in the correct disposal of this product will contribute to the effective usage of natural
resources. For more information about where you can drop off your waste equipment for recycling, please
contact your local city office, waste authority, approved WEEE scheme or your household waste disposal
service. For more information regarding return and recycling of WEEE products, please visit www.canon-
europe.com/environment.
(EEA: Norway, Iceland and Liechtenstein)
India only.
This product is not to be disposed of with your household waste, according to the e-waste (Management
and Handling) Rules, 2011.
This product should be handed over to a designated collection point, e.g., to an authorized collection site
for recycling waste electrical and electronic equipment (EEE). Improper handling of this type of waste
could have a possible negative impact on the environment and human health due to potentially hazardous
substances that are generally associated with EEE. At the same time, your cooperation in the correct
disposal of this product will contribute to the effective usage of natural resources. For more information
regarding return and recycling of WEEE products, please visit http://www.canon.co.in/environment/.
Also, this product complies with the "India E-waste Rule 2011" and prohibits use of lead, mercury,
hexavalent chromium, polybrominated biphenyls or polybrominated diphenyl ethers in concentrations
exceeding 0.1 % by weight and 0.01 % by weight for Cadmium, except for the exemptions set in Schedule
II of the Rule.
Environmental Information
Reducing your environmental impact while saving money
Power Consumption and Activation Time
The amount of electricity a device consumes depends on the way the device is used. This product is
designed and set in a way to allow you to reduce your electricity costs. After the last print it switches to
Ready Mode. In this mode it can print again immediately if required. If the product is not used for a time,
the device switches to its Power Save Mode. The devices consume less power (Watt) in these modes.
If you wish to set a longer Activation Time or would like to completely deactivate the Power Save Mode,
please consider that this device may then only switch to a lower energy level after a longer period of
time or not at all.
Canon does not recommend extending the Activation Times from the optimum ones set as default.
Energy Star
The Energy Star® programme is a voluntary scheme to promote the development and purchase of
energy efficient models, which help to minimise environmental impact.
Products which meet the stringent requirements of the Energy Star® programme for both environmental
benefits and the amount of energy consumption will carry the Energy Star® logo accordingly.
®
18
Page 19

Paper types
This product can be used to print on both recycled and virgin paper (certified to an environmental
stewardship scheme), which complies with EN12281 or a similar quality standard. In addition it can
support printing on media down to a weight of 64g/m2, lighter paper means less resources used and a
lower environmental footprint for your printing needs.
19
Page 20

Main Components and Basic Operations
Main Components
About the Power Supply of the Printer
20
Page 21

Main Components
Front View
Rear View
Inside View
21
Page 22
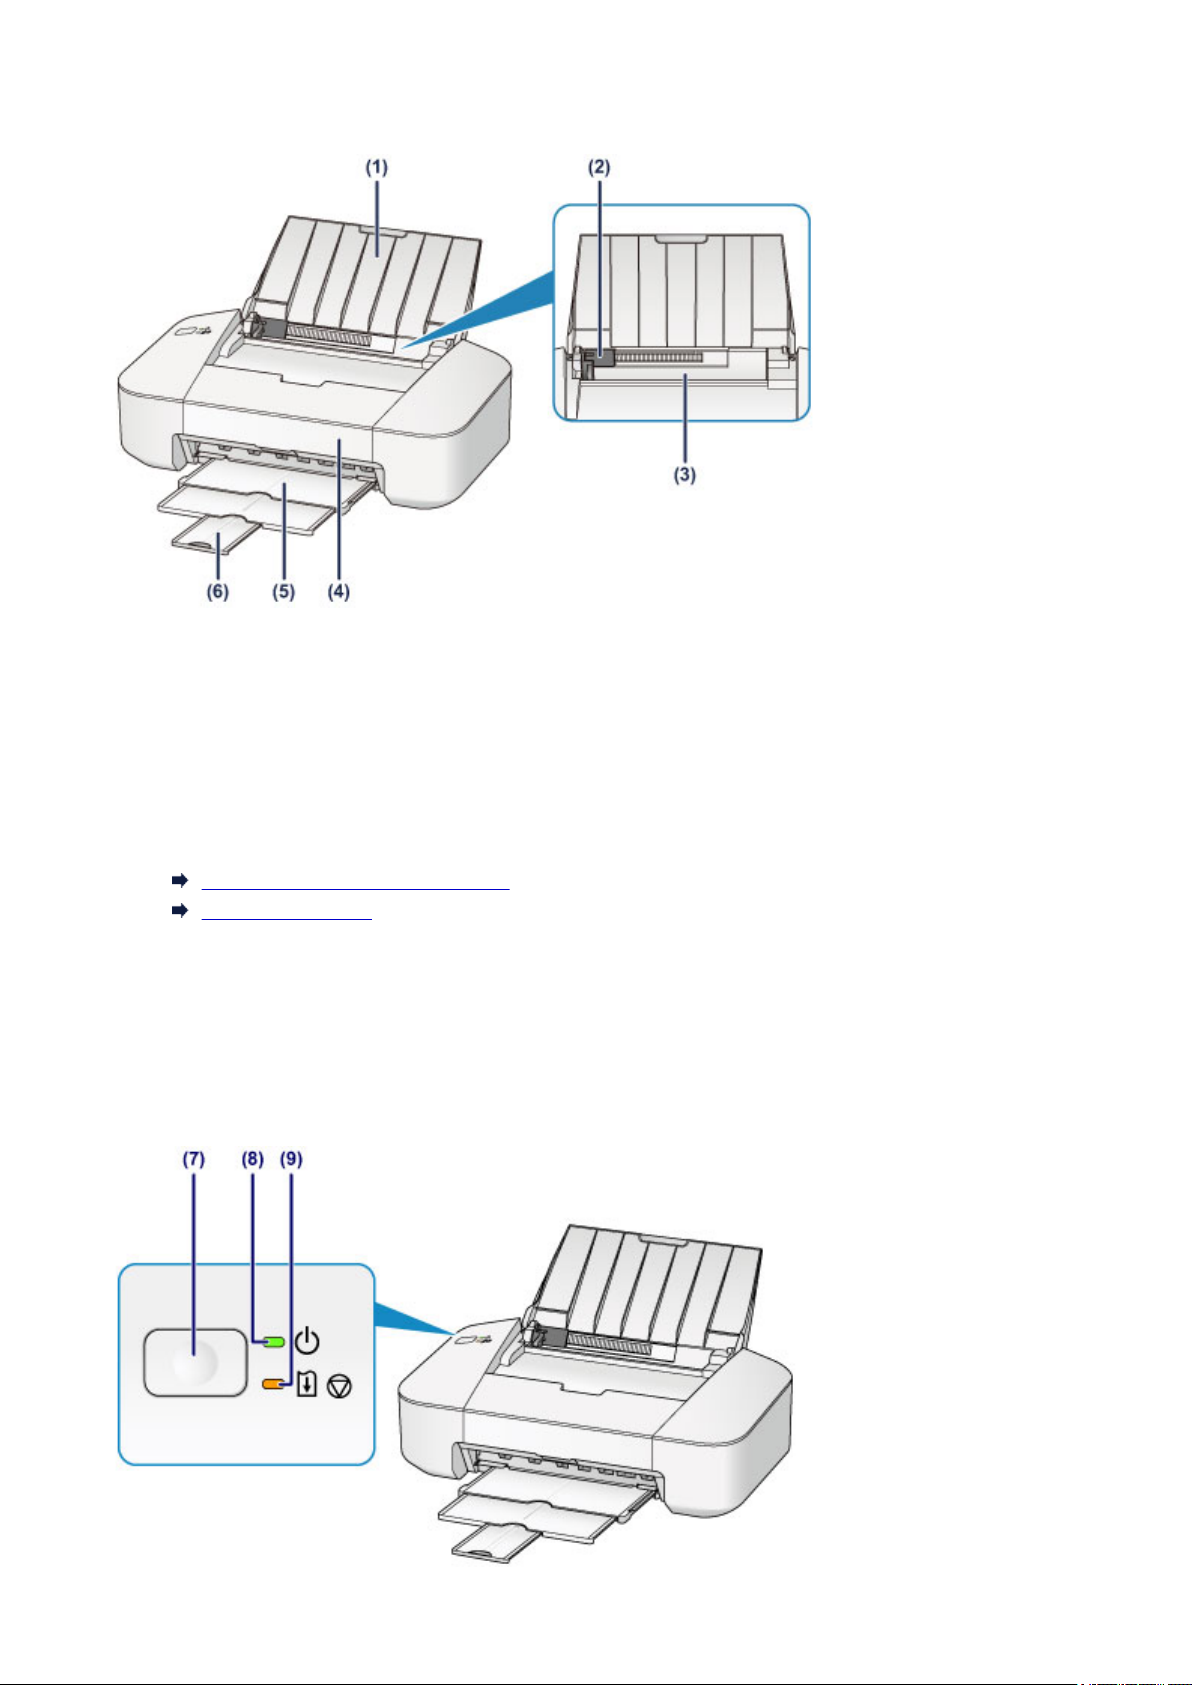
Front View
(1) paper support
Open to load paper in the rear tray.
(2) paper guide
Align with the left side of the paper stack.
(3) rear tray
Load paper here. Two or more sheets of the same size and type of paper can be loaded at the same
time, and fed automatically one sheet at a time.
Loading Plain Paper / Photo Paper
Loading Envelopes
(4) cover
Open to replace the FINE cartridge or remove jammed paper inside the printer.
(5) paper output tray
Printed paper is ejected. Pull out it before printing.
(6) output tray extension
Extend to support ejected paper. Extend it when printing.
22
Page 23

* All lamps are shown lit in the above figure for explanatory purposes.
(7) ON/RESUME button
Press to turn the power on or off. You can cancel a print job in progress. You can also press this button
to release from printer error status or to select a maintenance function.
(8) POWER lamp
This lamp lights green after flashing when the power is turned on.
Note
• You can check the status of the printer by the POWER and Alarm lamps.
• POWER lamp is off: The power is off.
• POWER lamp lights green: The printer is ready to print.
• POWER lamp flashes green: The printer is getting ready to print, or printing is in progress.
• Alarm lamp flashes orange: An error has occurred and the printer is not ready to print.
• POWER lamp flashes green and Alarm lamp flashes orange alternately: An error that requires
contacting the service center may have occurred.
If an Error Occurs
(9) Alarm lamp
This lamp lights or flashes orange when an error occurs.
23
Page 24
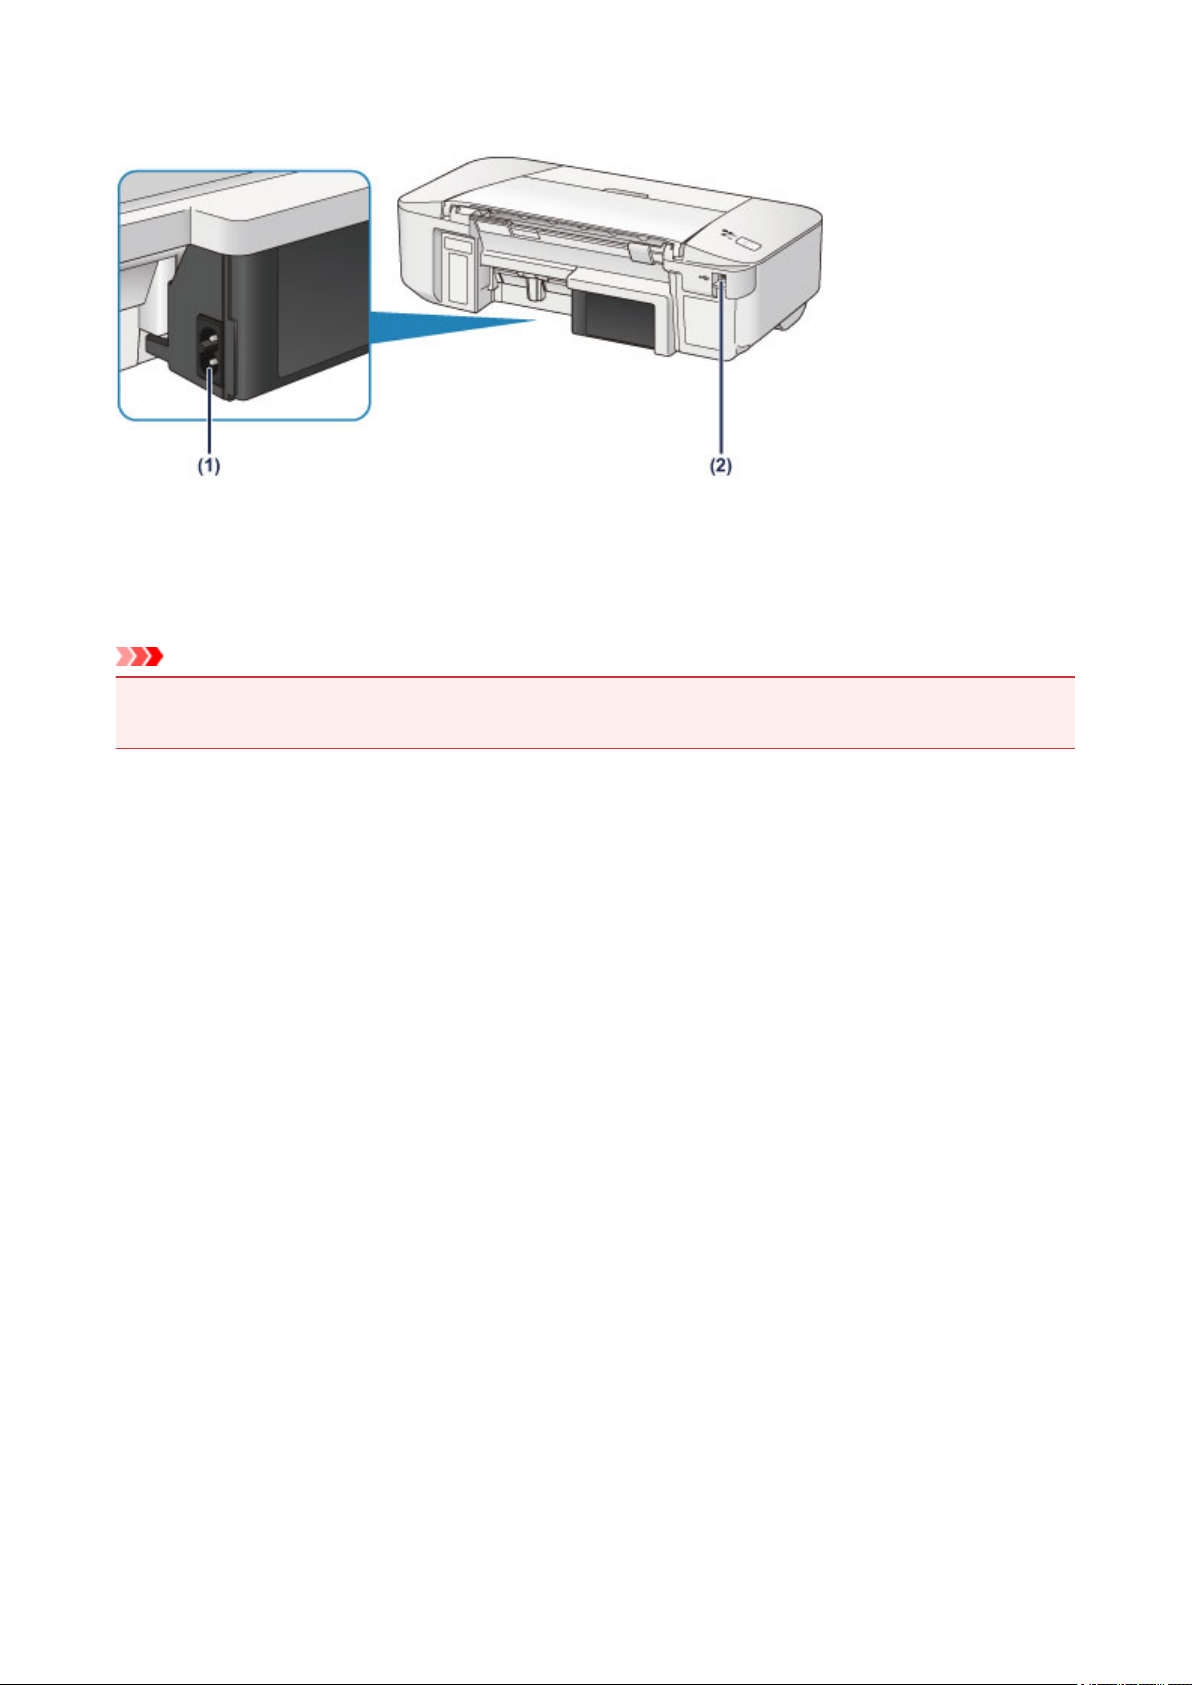
Rear View
(1) power cord connector
Plug in the supplied power cord.
(2) USB port
Plug in the USB cable to connect the printer with a computer.
Important
• Do not touch the metal casing.
• Do not plug in or unplug the USB cable while printing.
24
Page 25
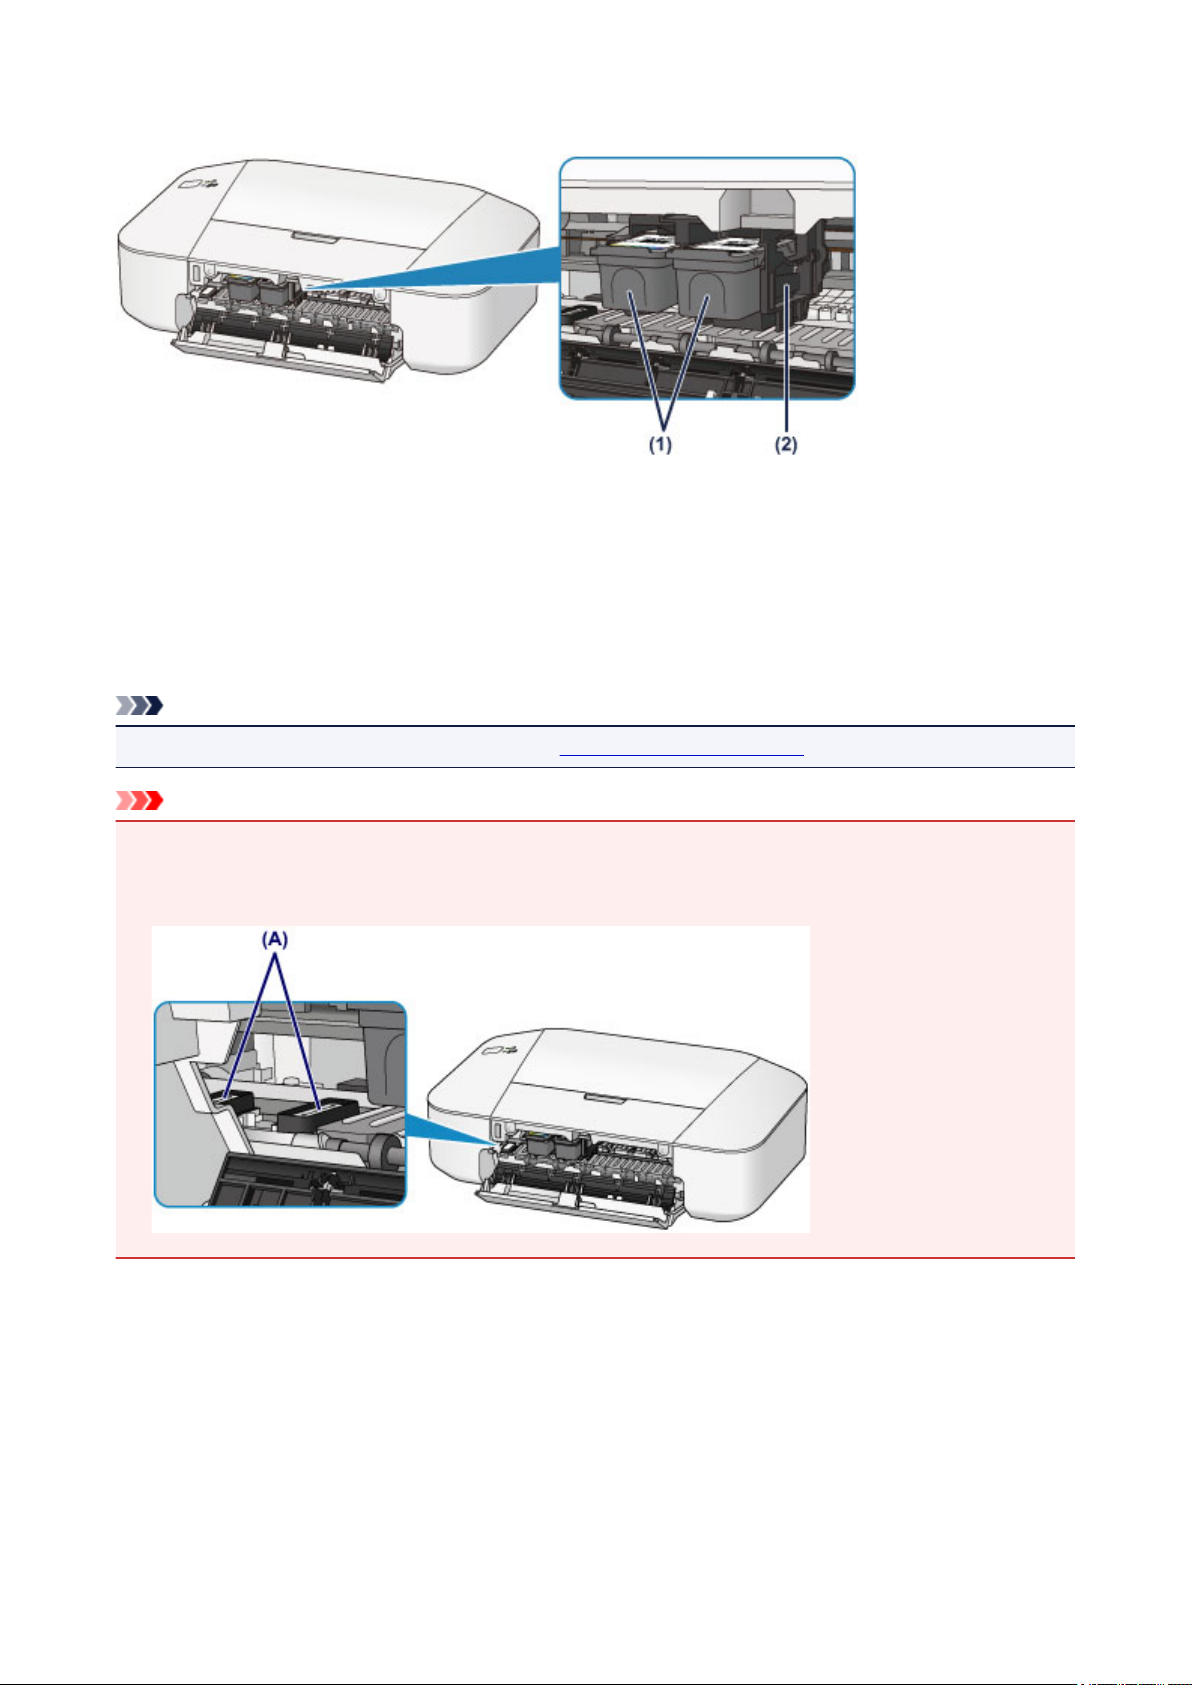
Inside View
(1) FINE cartridge (ink cartridges)
A replaceable cartridge that integrates print head and ink tank.
(2) FINE cartridge holder
Install the FINE cartridge.
The color FINE cartridge should be installed into the left slot and the black FINE cartridge should be
installed into the right slot.
Note
• For details on replacing a FINE cartridge, see Replacing a FINE Cartridge.
Important
• The area around the parts (A) may be splattered with ink. This does not affect the performance of the
printer.
• Do not touch the parts (A). The printer may not print properly if you touch them.
25
Page 26

About the Power Supply of the Printer
Confirming that the Power Is On
Turning the Printer On and Off
Notice for the Power Plug/Power Cord
Notice for Unplugging the Power Cord
26
Page 27
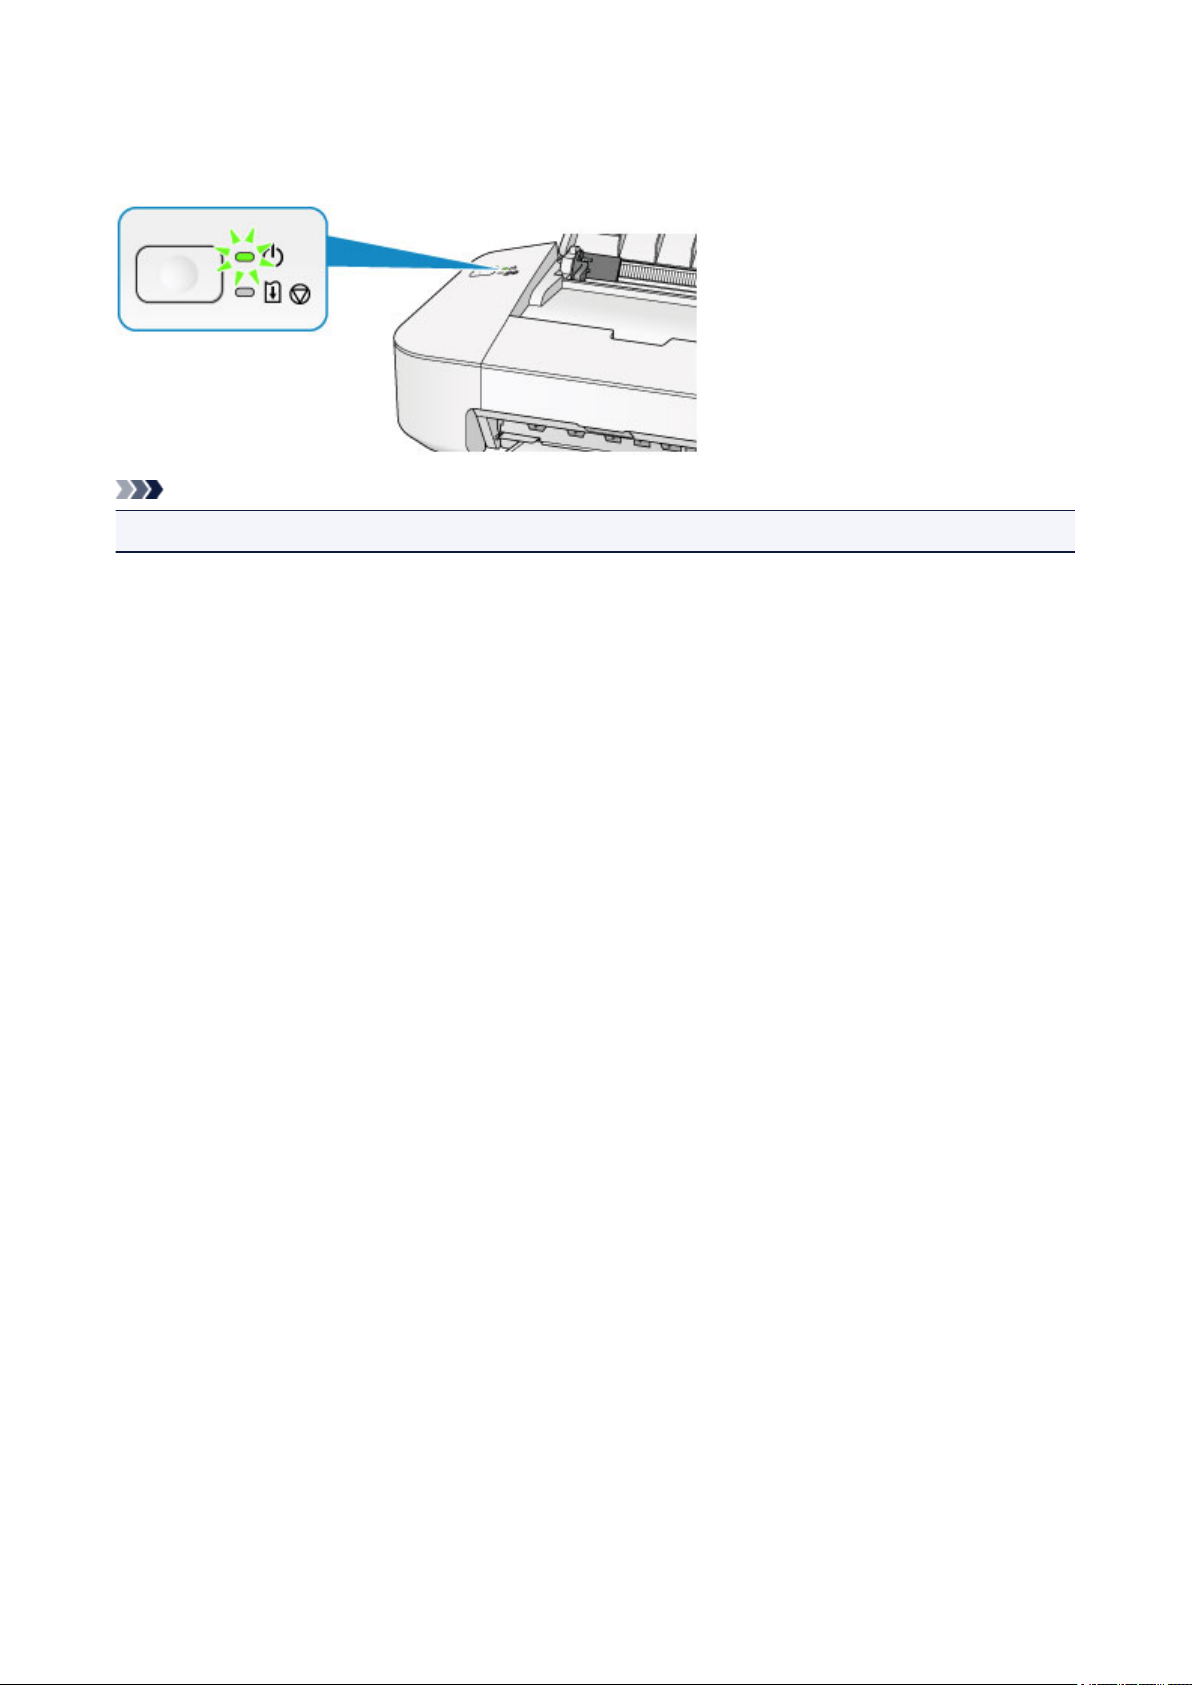
Confirming that the Power Is On
The POWER lamp is lit green when the printer is turned on.
Note
• It may take a while for the printer to start printing immediately after you turn on the printer.
27
Page 28
Turning the Printer On and Off
Turning on the printer
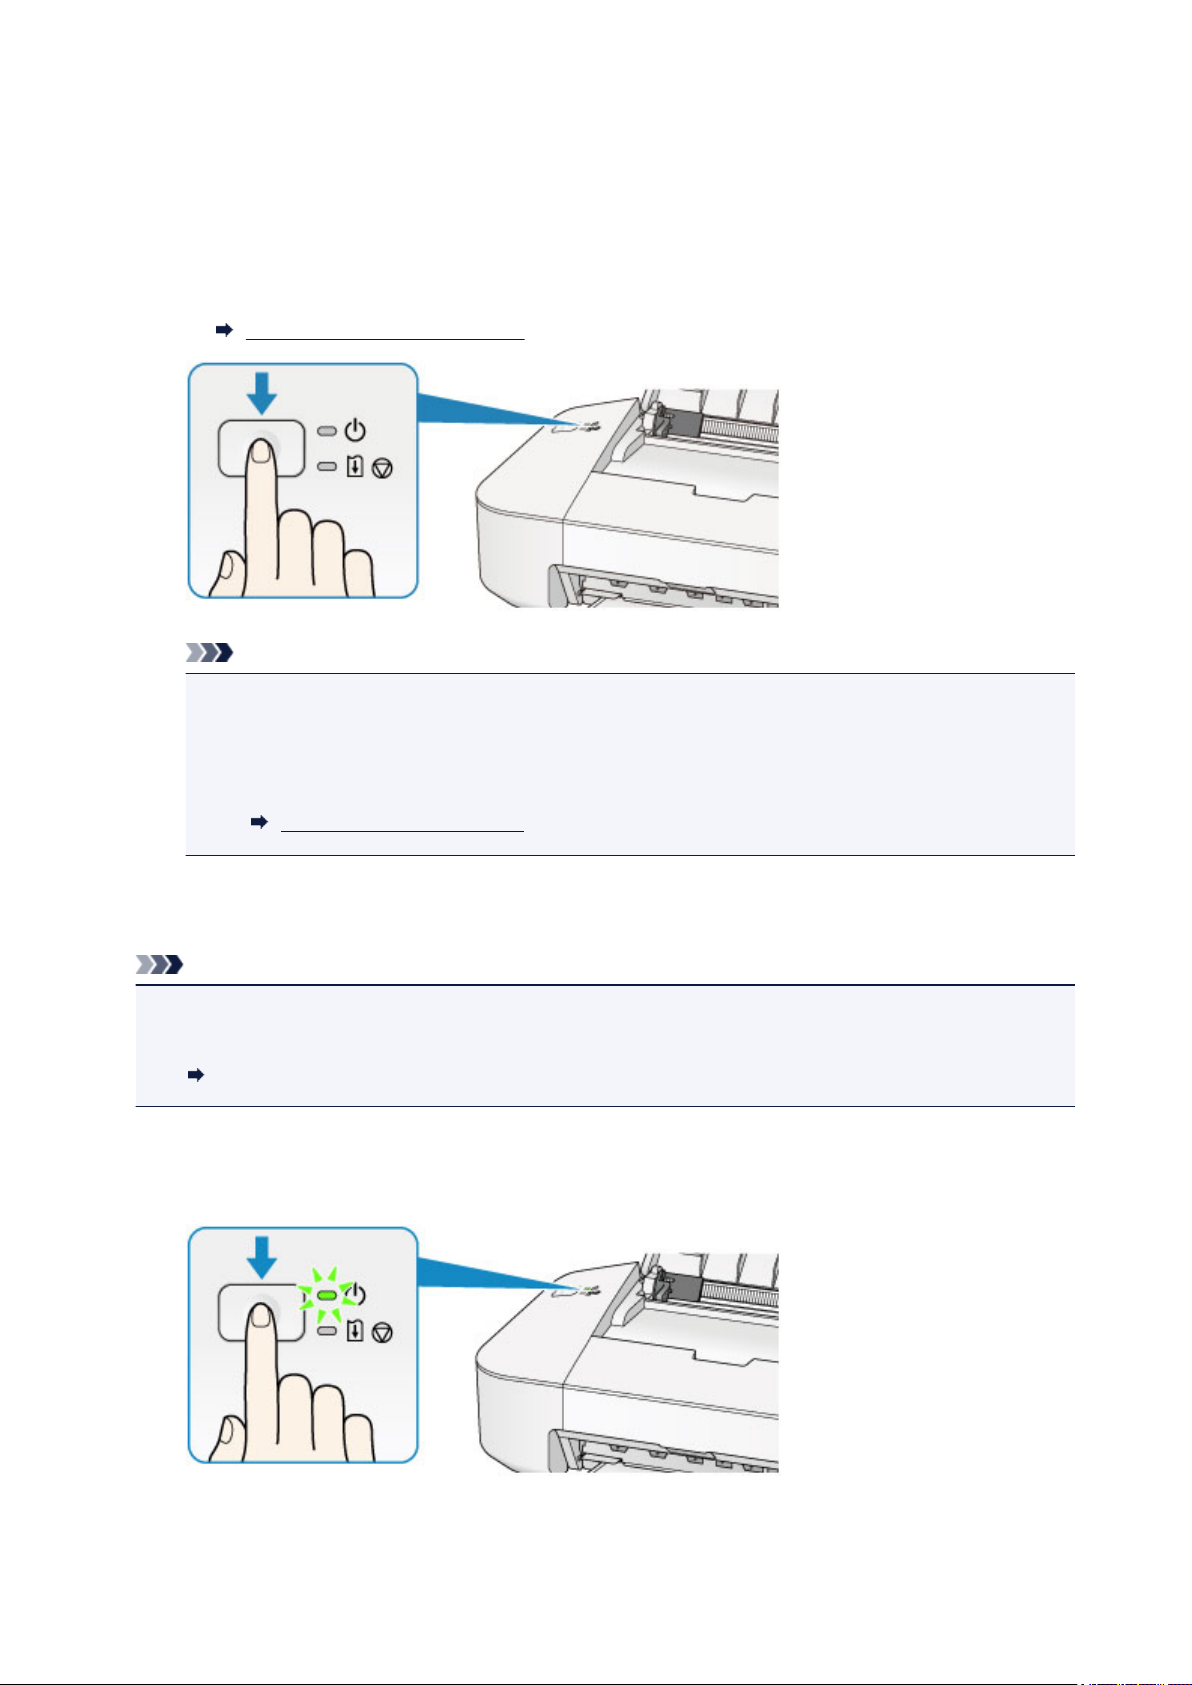
1. Press the ON/RESUME button to turn on the printer.
The POWER lamp flashes and then remains lit green.
Confirming that the Power Is On
Note
• It may take a while for the printer to start printing immediately after you turn on the printer.
• If the Alarm lamp lights up or flashes orange, see If an Error Occurs.
You can set the printer to automatically turn on when a print operation is performed from a
•
computer. This feature is set to off by default.
Managing the Printer Power
Turning off the printer
Note
• When the paper jam error or paper out error has occurred, you cannot turn the printer off even if you
press the ON/RESUME button on the printer. Dismiss the error, then turn off the printer.
If an Error Occurs
1. Press the ON/RESUME button to turn off the printer.
When the POWER lamp stops flashing, the printer is turned off.
28
Page 29

Important
• When you unplug the power cord after turning off the printer, be sure to confirm that the
POWER lamp is off.
Note
•
You can set the printer to automatically turn off when no print jobs are sent to the printer for a
certain interval. This is the default setting.
Managing the Printer Power
29
Page 30

Notice for the Power Plug/Power Cord
Unplug the power cord once a month to confirm that the power plug/power cord does not have anything
unusual described below.
• The power plug/power cord is hot.
• The power plug/power cord is rusty.
• The power plug/power cord is bent.
• The power plug/power cord is worn.
• The power plug/power cord is split.
Caution
• If you find anything unusual with the power plug/power cord described above, unplug the power cord
and call for service. Using the printer with one of the unusual conditions above may cause a fire or an
electric shock.
30
Page 31

Notice for Unplugging the Power Cord
To unplug the power cord, follow the procedure below.
Important
• When you unplug the power cord, press the ON/RESUME button, then confirm that the POWER lamp is
off. Unplugging the power cord while the POWER lamp is lit or flashing may cause drying or clogging of
the print head and print quality may be reduced.
1.
Press the ON/RESUME button to turn the printer off.
Note
When the paper jam error or paper out error has occurred, you cannot turn the printer off even if
•
you press the ON/RESUME button on the printer. Dismiss the error, then turn off the printer.
If an Error Occurs
2.
Confirm that the POWER lamp is off.
3. Unplug the power cord.
The specification of the power cord differs depending on the country or region of use.
31
Page 32

Loading Paper
Loading Paper
32
Page 33

Loading Paper
Loading Plain Paper / Photo Paper
Loading Envelopes
Media Types You Can Use
Media Types You Cannot Use
Printing Area
33
Page 34

Loading Plain Paper / Photo Paper
You can load plain paper or photo paper.
Important
• If you cut plain paper into small size such as 4" x 6" (10 x 15 cm) or 5" x 7" (13 x 18 cm) to perform trial
print, it can cause paper jams.
Note
• We recommend Canon genuine photo paper for printing photos.
For details on the Canon genuine paper, see Media Types You Can Use.
• You can use general copy paper.
For the page size and paper weight you can use for this printer, see Media Types You Can Use.
1.
Prepare paper.
Align the edges of paper. If paper is curled, flatten it.
Note
• Align the edges of paper neatly before loading. Loading paper without aligning the edges may
cause paper jams.
• If paper is curled, hold the curled corners and gently bend them in the opposite direction until the
paper becomes completely flat.
For details on how to flatten curled paper, see "Load the paper after correcting its curl." in Paper Is
Smudged/Printed Surface Is Scratched.
2. Load paper.
1. Open the paper support.
2. Pull out the paper output tray and the output tray extension.
34
Page 35

3. Slide the paper guide (A) to the left, and load the paper against the far right of the rear tray
WITH THE PRINT SIDE FACING YOU.
Slide the paper guide (A) to align it with the paper stack.
4.
Do not slide the paper guide too hard against the paper. The paper may not be fed properly.
Important
Always load paper in the portrait orientation (B). Loading paper in the landscape orientation (C) can
•
cause paper jams.
35
Page 36

Note
• Do not load sheets of paper higher than the load limit mark (D).
Note
• The printer may make operating noise when feeding paper.
• After loading paper, select the size and type of the loaded paper on the print settings screen of the
printer driver.
36
Page 37

Loading Envelopes
You can load Envelope DL and Envelope Com 10.
The address is automatically rotated and printed according to the envelope's direction by specifying with the
printer driver properly.
Important
• Do not use the following envelopes. They could jam in the printer or cause the printer to malfunction.
• Envelopes with an embossed or treated surface
• Envelopes with a double flap
• Envelopes whose gummed flaps are already moistened and adhesive
1.
Prepare envelopes.
Press down on all four corners and edges of the envelopes to flatten them.
•
If the envelopes are curled, hold the opposite corners and gently twist them in the opposite
•
direction.
• If the corner of the envelope flap is folded, flatten it.
• Use a pen to press the leading edge in the inserting direction flat and sharpen the crease.
The figures above show a side view of the leading edge of the envelope.
Important
•
The envelopes may jam in the printer if they are not flat or the edges are not aligned. Make sure
that no curl or puff exceeds 0.1 inch (3 mm).
2. Load envelopes.
1. Open the paper support.
2. Pull out the paper output tray and the output tray extension.
37
Page 38

3. Slide the paper guide (A) to the left, and load the envelopes against the far right of the rear
tray WITH THE PRINT SIDE FACING YOU.
The folded flap of the envelope will be faced up on the left side.
Up to 5 envelopes can be loaded at once.
Slide the paper guide (A) to align it with the envelopes.
4.
Do not slide the paper guide too hard against the envelopes. The envelopes may not be fed properly.
(B) Rear side
(C) Address side
Note
Do not load sheets of paper higher than the load limit mark (D).
•
38
Page 39

Note
• The printer may make operating noise when feeding paper.
• After loading envelopes, select the size and type of the loaded envelopes on the print settings screen of
the printer driver.
39
Page 40

Media Types You Can Use
Use plain paper for printing texts or photo paper for printing photos, for the best print results. We
recommend the use of Canon genuine paper for printing your important photos.
Media Types
Commercially available papers
• Plain Paper (including recycled paper)*1
• Envelopes
Canon genuine papers
The Model Number of Canon genuine paper is shown in brackets. Refer to the instruction manual
supplied with the paper for detailed information on the printable side and notes on handling paper. For
information on the page sizes available for each Canon genuine paper, access our website.
Note
• You may not be able to purchase some Canon genuine papers depending on the country or region
of purchase. Paper is not sold in the US by Model Number. Purchase paper by name.
Paper for printing photos:
• Glossy Photo Paper "Everyday Use" <GP-501/GP-601>
• Photo Paper Glossy <GP-601>
• Photo Paper Plus Glossy II <PP-201>
*1 100% recycled paper can be used.
Paper Load Limit
Setting the Media Type with the Printer Driver
Page Sizes
You can use the following page sizes.
Standard sizes:
• Letter
• Legal
• A5
• A4
• B5
• 4" x 6" (10 x 15 cm)
• 5" x 7" (13 x 18 cm)
• Envelope DL
• Envelope Com 10
Non-standard sizes:
You can print on non-standard size paper within the following ranges.
• Minimum size: 4.00 x 6.00 inches (101.6 x 152.4 mm)
• Maximum size: 8.50 x 26.61 inches (215.9 x 676.0 mm)
40
Page 41

Paper Weight
You can use paper in the following weight range.
• 17 to 28 lb (64 to 105 g /m2) (except for Canon genuine paper)
Do not use heavier or lighter paper (except for Canon genuine paper), as it could jam in the printer.
Notes on Storing Paper
• Take out only the necessary number of paper from the package, just before printing.
• To avoid curling, when you do not print, put unused paper back into the package and keep it on a
level surface. And also, store it avoiding heat, humidity, and direct sunlight.
41
Page 42

Paper Load Limit
Commercially Available Papers
Media Name Rear Tray Paper Output Tray
Plain Paper (including recycled paper) Approx. 60 sheets Approx. 10 sheets
Envelopes 5 envelopes *1
Canon Genuine Papers
Note
• We recommend that you remove the previously printed sheet from the paper output tray before
continuously printing to avoid blurs and discoloration.
Paper for printing photos:
Media Name <Model No.> Rear Tray
Glossy Photo Paper "Everyday Use" <GP-501/GP-601>*2 20 sheets: 4" x 6" (10 x 15 cm)
Photo Paper Glossy <GP-601>*2 20 sheets: 4" x 6" (10 x 15 cm)
Photo Paper Plus Glossy II <PP-201>*2 10 sheets: 5" x 7" (13 x 18 cm)
20 sheets: 4" x 6" (10 x 15 cm)
*1 We recommend that you remove the previously printed envelope from the paper output tray before
continuously printing to avoid blurs and discoloration.
*2 When loading paper in stacks, the print side may become marked as it is fed or paper may not feed
properly. In this case, load one sheet at a time.
42
Page 43

Media Types You Cannot Use
Do not use the following types of paper. Using such paper will cause not only unsatisfactory results, but also
the printer to jam or malfunction.
• Folded, curled, or wrinkled paper
• Damp paper
• Paper that is too thin (weighing less than 17 lb (64 g /m2))
• Paper that is too thick (weighing more than 28 lb (105 g /m2), except for Canon genuine paper)
• Paper thinner than a postcard, including plain paper or notepad paper cut to a small size (when printing
on paper smaller than A5)
• Picture postcards
• Postcards
• Envelopes with a double flap
• Envelopes with an embossed or treated surface
• Envelopes whose gummed flaps are already moistened and adhesive
• Any type of paper with holes
• Paper that is not rectangular
• Paper bound with staples or glue
• Paper with adhesives
• Paper decorated with glitter, etc.
43
Page 44

Printing Area
Printing Area
Other Sizes than Letter, Legal, Envelopes
Letter, Legal
Envelopes
44
Page 45

Printing Area
To ensure the best print quality, the printer allows a margin along each edge of media. The actual printable
area will be the area inside these margins.
Recommended printing area : Canon recommends that you print within this area.
Printable area : The area where it is possible to print. However, printing in this area can affect the print
quality or the paper feed precision.
45
Page 46
Other Sizes than Letter, Legal, Envelopes
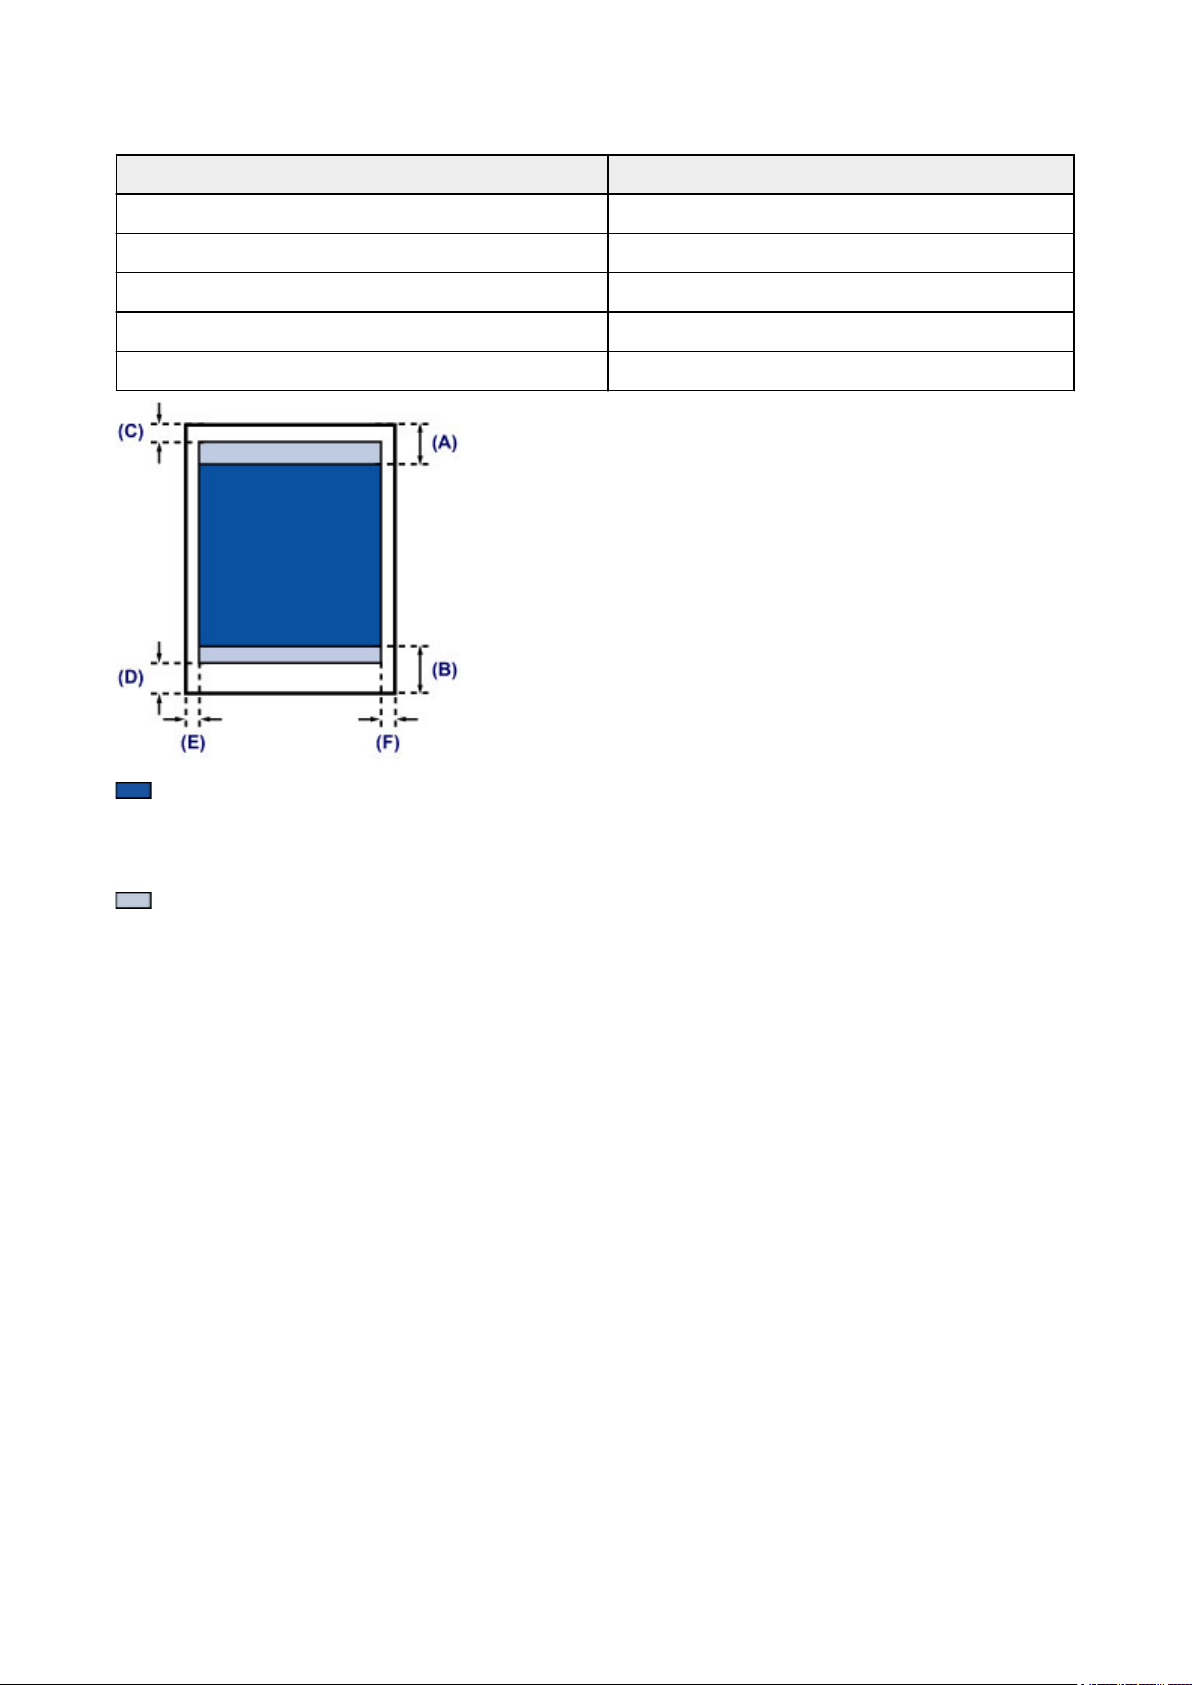
Size Printable Area (width x height)
A5 5.56 x 7.49 inches (141.2 x 190.3 mm)
A4 8.00 x 10.92 inches (203.2 x 277.3 mm)
B5 6.90 x 9.34 inches (175.2 x 237.3 mm)
4" x 6" (10 x 15 cm) 3.73 x 5.22 inches (94.8 x 132.7 mm)
5" x 7" (13 x 18 cm) 4.73 x 6.22 inches (120.2 x 158.1 mm)
Recommended printing area
(A) 1.24 inches (31.6 mm)
(B) 1.15 inches (29.2 mm)
Printable area
(C) 0.12 inch (3.0 mm)
(D) 0.66 inch (16.7 mm)
(E) 0.13 inch (3.4 mm)
(F) 0.13 inch (3.4 mm)
46
Page 47

Letter, Legal
Size Printable Area (width x height)
Letter 8.00 x 10.22 inches (203.2 x 259.7 mm)
Legal 8.00 x 13.22 inches (203.2 x 335.9 mm)
Recommended printing area
(A) 1.24 inches (31.6 mm)
(B) 1.15 inches (29.2 mm)
Printable area
(C) 0.12 inch (3.0 mm)
(D) 0.66 inch (16.7 mm)
(E) 0.25 inch (6.4 mm)
(F) 0.25 inch (6.3 mm)
47
Page 48

Envelopes
Size Recommended Printing Area (width x height)
Envelope DL 3.88 x 7.06 inches (98.8 x 179.5 mm)
Envelope Com 10 3.68 x 7.90 inches (93.5 x 200.8 mm)
Recommended printing area
(A) 0.31 inch (8.0 mm)
(B) 1.28 inches (32.5 mm)
(C) 0.22 inch (5.6 mm)
(D) 0.22 inch (5.6 mm)
48
Page 49

Replacing a FINE Cartridge
Replacing a FINE Cartridge
Checking the Ink Status from Your Computer
49
Page 50

Replacing a FINE Cartridge
When remaining ink cautions or errors occur, the Alarm lamp will flash orange to inform you of the error.
Count the number of flashes and take appropriate action.
If an Error Occurs
Note
• For information on the compatible FINE cartridge, refer to the printed manual: Safety and Important
Information.
Replacing Procedure
When you need to replace a FINE cartridge, follow the procedure below.
Important
• Do not touch the electrical contacts (A) or print head nozzle (B) on a FINE cartridge. The printer may
not print properly if you touch them.
• If you remove a FINE cartridge, replace it immediately. Do not leave the printer with the FINE
cartridge removed.
• Use a new FINE cartridge for replacement. Installing a used FINE cartridge may cause the nozzles to
clog.
Furthermore, with such a FINE cartridge, the printer will not be able to inform you when to replace the
FINE cartridge properly.
• Once a FINE cartridge has been installed, do not remove it from the printer and leave it out in the
open. This will cause the FINE cartridge to dry out, and the printer may not operate properly when it
is reinstalled. To maintain optimal printing quality, use a FINE cartridge within six months of first use.
Note
• If a FINE cartridge runs out of ink, you can print with either color or black FINE cartridge, in whichever
ink remains, only for a while. However the print quality may be reduced compared to when printing
with both cartridges. We recommend to use a new FINE cartridge in order to obtain optimum
qualities.
Even when printing with one ink only, print with leaving the empty FINE cartridge installed. If either of
the color FINE cartridge or black FINE cartridge is not installed, an error occurs and the printer
cannot print.
For information on how to configure this setting, see Setting the Ink Cartridge to be Used.
• Color ink may be consumed even when printing a black-and-white document or when black-and-
white printing is specified.
50
Page 51

Both color ink and black ink are also consumed in the standard cleaning and deep cleaning of the
print head, which may be necessary to maintain the performance of the printer. When ink runs out,
replace the FINE cartridge immediately with a new one.
Useful Information about Ink
1. Make sure that the power is turned on.
Retract the paper output tray and the output tray extension.
2.
Open the cover.
3.
The FINE cartridge holder moves to the replacement position.
Caution
• Do not hold the FINE cartridge holder to stop or move it forcibly. Do not touch the FINE
cartridge holder until it stops completely.
Important
• The inside of the printer may be stained with ink. Be careful not to stain your hands or clothing
when replacing the FINE cartridge. You can easily wipe off the ink from the inside of the printer
with tissue paper or the like.
For details on the cleaning, refer to Safety and Important Information.
• Do not touch the metallic parts or other parts inside the printer.
• If the cover is left open for more than 10 minutes, the FINE cartridge holder may move and the
Alarm lamp light. In this case, close the cover, then open it again.
4. Remove the empty FINE cartridge.
1. Push down the FINE cartridge until it clicks.
51
Page 52

2. Remove the FINE cartridge.
Important
• Handle the FINE cartridge carefully to avoid staining of clothing or the surrounding area.
• Discard the empty FINE cartridge according to the local laws and regulations regarding disposal
of consumables.
5. Prepare a new FINE cartridge.
1. Take a new FINE cartridge out of its package and remove the protective tape (C) gently.
52
Page 53

Important
• If you shake a FINE cartridge, ink may spill out and stain your hands and the surrounding area.
Handle a FINE cartridge carefully.
• Be careful not to stain your hands and the surrounding area with ink on the removed protective
tape.
• Do not reattach the protective tape once you have removed it. Discard it according to the local
laws and regulations regarding disposal of consumables.
• Do not touch the electrical contacts or print head nozzle on a FINE cartridge. The printer may
not print properly if you touch them.
6.
Install the FINE cartridge.
Insert the new FINE cartridge at a slant into the FINE cartridge holder.
1.
The color FINE cartridge should be installed into the left slot and the black FINE cartridge should be
installed into the right slot.
Important
Insert the FINE cartridge gently so that it does not hit the electrical contacts on the FINE cartridge
•
holder.
53
Page 54

Push the FINE cartridge in and up firmly until it snaps into place.
2.
Important
•
Check if the FINE cartridge is installed correctly.
54
Page 55

• The printer cannot print unless both the color FINE cartridge and black FINE cartridge are
installed. Be sure to install both cartridges.
7.
Close the cover.
Note
• If the Alarm lamp lights or flashes orange after the cover is closed, take appropriate action.
• The printer may make noise during operation.
If an Error Occurs
8.
Adjust the print head position.
After replacing the FINE cartridge, align the print head.
Aligning the Print Head Position from Your Computer
55
Page 56

Maintenance
When Printing Becomes Faint or Colors Are Incorrect
Performing Maintenance from a Computer
Cleaning the Printer
56
Page 57

When Printing Becomes Faint or Colors Are Incorrect
Maintenance Procedure
Printing the Nozzle Check Pattern
Examining the Nozzle Check Pattern
Cleaning the Print Head
57
Page 58

Maintenance Procedure
If print results are blurred, colors are not printed correctly, or print results are unsatisfactory (e.g. misaligned
printed ruled lines), perform the maintenance procedure below.
Important
• Do not rinse or wipe the FINE cartridge. This can cause trouble with the FINE cartridge.
Note
• Check if ink remains in the FINE cartridge.
Checking the Ink Status from Your Computer
• Check if the FINE cartridge is installed correctly.
Replacing Procedure
Also check if the protective tape on the bottom of the FINE cartridge is removed.
• If the Alarm lamp lights or flashes orange, see If an Error Occurs.
• Increasing the print quality in the printer driver settings may improve the print result.
Changing the Print Quality and Correcting Image Data
When the Print Results Are Blurred or Uneven:
Step1
From the printer
From the computer
Step2
If there are missing lines or horizontal white streaks in the pattern:
Print the nozzle check pattern.
Printing the Nozzle Check Pattern
Use Your Computer to Print a Nozzle Check Pattern
Examine the nozzle check pattern.
Step3
From the printer
From the computer
Clean the print head.
Cleaning the Print Head
58
Page 59

Cleaning the Print Heads from Your Computer
After cleaning the print head, print and examine the nozzle check pattern: Step1
If the problem is not resolved after cleaning the print head twice:
Step4
From the computer
If the problem is not resolved, turn off the power and clean the print head deeply again after 24 hours.
If the problem is still not resolved:
Step5
Clean the print head deeply.
Cleaning the Print Heads from Your Computer
Replace a FINE cartridge.
Note
• If the problem is still not resolved after replacing the FINE cartridge, contact the service center.
When the Print Results Are Not Even such as the Ruled Lines Are
Misaligned:
Step
Align the print head.
From the computer
Aligning the Print Head Position from Your Computer
59
Page 60

Printing the Nozzle Check Pattern
Print the nozzle check pattern to determine whether the ink ejects properly from the print head nozzle.
Note
• If the remaining ink level is low, the nozzle check pattern will not be printed correctly. Replace the FINE
cartridge whose ink is low.
You need to prepare: a sheet of A4 or Letter-sized plain paper
1.
Make sure that the power is turned on.
2.
Load a sheet of A4 or Letter-sized plain paper in the rear tray.
3.
Pull out the paper output tray and the output tray extension.
4.
Hold down the ON/RESUME button until the POWER lamp flashes green twice, then
release it immediately.
The nozzle check pattern will be printed.
Do not perform any other operations until the printer completes the printing of the nozzle check pattern.
5.
Examine the nozzle check pattern.
60
Page 61

Examining the Nozzle Check Pattern
Examine the nozzle check pattern, and clean the print head if necessary.
1. Check if there are missing lines in the pattern (A) or horizontal white streaks in the pattern
(B).
(C) Number of sheets printed so far
If there are missing lines in the pattern (A):
Cleaning the print head is required.
(D) Good
(E) Bad (lines are missing)
If there are horizontal white streaks in the pattern (B):
Cleaning the print head is required.
(F) Good
(G) Bad (horizontal white streaks are present)
Note
• The total number of sheets printed so far is shown in increments of 50 sheets on the printout of the
nozzle check pattern.
61
Page 62

Cleaning the Print Head
Clean the print head if lines are missing or if horizontal white streaks are present in the printed nozzle check
pattern. Cleaning unclogs the nozzles and restores the print head condition. Cleaning the print head
consumes ink, so clean the print head only when necessary.
1. Make sure that the power is turned on.
Hold down the ON/RESUME button until the POWER lamp flashes green once, then
2.
release it immediately.
The printer starts cleaning the print head.
The cleaning will be complete when the POWER lamp lights green after flashing.
Do not perform any other operations until the printer completes the cleaning of the print head. This takes
about 30 seconds.
3.
Check the print head condition.
To check the print head condition, print the nozzle check pattern.
Note
• If the problem is not resolved after cleaning the print head twice, clean the print head deeply.
Cleaning the Print Heads from Your Computer
62
Page 63

Performing Maintenance from a Computer
Cleaning the Print Heads from Your Computer
Cleaning the Paper Feed Rollers from Your Computer
Aligning the Print Head Position from Your Computer
Use Your Computer to Print a Nozzle Check Pattern
Cleaning Inside the Printer
63
Page 64

Cleaning the Print Heads from Your Computer
The print head cleaning function allows you to clear up clogged print head nozzle. Perform print head
cleaning if printing is faint or a specific color fails to print, even though there is enough ink.
The procedure for cleaning the print head is as follows:
Cleaning
1.
Open the printer driver setup window
2.
Click Cleaning on the Maintenance tab
When the Print Head Cleaning dialog box opens, select the ink group for which cleaning is to be
performed.
Click Initial Check Items to display the items you need to check before performing cleaning.
3.
Execute cleaning
Make sure that the printer is on and then click Execute.
Print head cleaning starts.
4.
Complete cleaning
The Nozzle Check dialog box opens after the confirmation message.
5.
Check the results
To check whether the print quality has improved, click Print Check Pattern. To cancel the check
process, click Cancel.
If cleaning the head once does not resolve the print head problem, clean it once more.
Important
• Cleaning consumes a small amount of ink.
Cleaning the print head frequently will rapidly deplete your printer's ink supply. Consequently, perform
cleaning only when necessary.
Deep Cleaning
Deep Cleaning is more thorough than cleaning. Perform deep cleaning when two Cleaning attempts do
not resolve the print head problem.
1. Open the printer driver setup window
2. Click Deep Cleaning on the Maintenance tab
64
Page 65

When the Deep Cleaning dialog box opens, select the ink group for which deep cleaning is to be
performed.
Click Initial Check Items to display the items you need to check before performing deep cleaning.
3. Execute deep cleaning
Make sure that the printer is on and then click Execute.
Click OK when the confirmation message appears.
Print head deep cleaning starts.
Complete deep cleaning
4.
The Nozzle Check dialog box opens after the confirmation message.
Check the results
5.
To check whether the print quality has improved, click Print Check Pattern. To cancel the check
process, click Cancel.
Important
• Deep Cleaning consumes a larger amount of ink than Cleaning.
Cleaning the print head frequently will rapidly deplete your printer's ink supply. Consequently, perform
cleaning only when necessary.
Note
• If there is no sign of improvement after Deep Cleaning, switch off the printer, wait 24 hours, and then
perform Deep Cleaning again. If there is still no sign of improvement, see "Ink Is Not Ejected."
Related Topic
Use Your Computer to Print a Nozzle Check Pattern
65
Page 66

Cleaning the Paper Feed Rollers from Your Computer
Cleans the paper feed rollers. Perform feed roller cleaning when there are paper particles sticking to the
paper feed rollers and paper is not fed properly.
The procedure for performing the feed roller cleaning is as follows:
Roller Cleaning
1.
Prepare the printer
Remove all sheets of paper from the rear tray.
Open the printer driver setup window
2.
3.
Click Roller Cleaning on the Maintenance tab
The confirmation message appears.
4.
Execute paper feed roller cleaning
Make sure that the printer is on and then click OK.
Paper feed roller cleaning starts.
5.
Complete paper feed roller cleaning
After the rollers have stopped, follow the message instructions and load one sheet of plain paper or a
cleaning sheet available on the market into the rear tray. Then click OK.
Paper will be ejected and feed roller cleaning will be completed.
66
Page 67

Aligning the Print Head Position from Your Computer
Print head alignment corrects the installation positions of the print head and improves deviated colors and
lines.
The procedure for performing print head alignment is as follows:
Note
• If you are adjusting the head position while the software is being installed from the Setup CD-ROM,
start from Step 3.
Print Head Alignment
1.
Open the printer driver setup window
2.
Click Print Head Alignment on the Maintenance tab
The Start Print Head Alignment dialog box opens.
3.
Load paper in the printer
Load three sheets of A4 size or Letter size plain paper into the rear tray.
4.
Execute head alignment
Make sure that the printer is on and click Align Print Head.
Follow the instruction in the message.
5.
Check the printed pattern
Enter the numbers of the patterns with the least amount of streaks in the associated boxes.
Even if the patterns with the least amount of streaks are clicked in the preview window, their numbers
are automatically entered in the associated boxes.
67
Page 68

When you have entered all the necessary values, click OK.
Note
•
If it is difficult to pick the best pattern, pick the setting that produces the least noticeable vertical
streaks.
(A) Least noticeable vertical streaks
(B) Most noticeable vertical streaks
If it is difficult to pick the best pattern, pick the setting that produces the least noticeable
•
horizontal streaks.
(A) Least noticeable horizontal streaks
(B) Most noticeable horizontal streaks
6.
Confirm the displayed message and click OK
The second pattern is printed.
7.
Check the printed pattern
Enter the numbers of the patterns with the least noticeable horizontal stripes in the associated boxes.
Even if the patterns with the least noticeable horizontal stripes are clicked in the preview window, their
numbers are automatically entered in the associated boxes.
When you have entered all the necessary values, click OK.
Note
•
If it is difficult to pick the best pattern, pick the setting that produces the least noticeable vertical
streaks.
68
Page 69

(A) Least noticeable vertical streaks
(B) Most noticeable vertical streaks
8. Confirm the displayed message and click OK
The third pattern is printed.
Check the printed pattern
9.
Enter the numbers of the patterns with the least noticeable horizontal stripes in the associated boxes.
Even if the patterns with the least noticeable horizontal stripes are clicked in the preview window, their
numbers are automatically entered in the associated boxes.
When you have entered all the necessary values, click OK.
Note
•
If it is difficult to pick the best pattern, pick the setting that produces the least noticeable
horizontal stripes.
(A) Least noticeable horizontal stripes
(B) Most noticeable horizontal stripes
Note
• To print and check the current setting, open the Start Print Head Alignment dialog box, and click
Print Alignment Value.
69
Page 70

Use Your Computer to Print a Nozzle Check Pattern
The nozzle check function allows you to check whether the print head is working properly by printing a
nozzle check pattern. Print the pattern if printing becomes faint, or if a specific color fails to print.
The procedure for printing a nozzle check pattern is as follows:
Nozzle Check
1.
Open the printer driver setup window
2.
Click Nozzle Check on the Maintenance tab
The Nozzle Check dialog box opens.
Click Initial Check Items to display the items that you need to check before printing the nozzle check
pattern.
3.
Load paper in the printer
Load one sheet of A4 size or Letter size plain paper into the rear tray.
4.
Print a nozzle check pattern
Make sure that the printer is on and click Print Check Pattern.
Printing of the nozzle check pattern begins.
Click OK when the confirmation message appears.
The Pattern Check dialog box opens.
5.
Check the print result
Check the print result. When the print result is normal, click Exit.
If the print result is smudged or if there are any unprinted sections, click Cleaning to clean the print
head.
Related Topic
Cleaning the Print Heads from Your Computer
70
Page 71

Cleaning Inside the Printer
Perform bottom plate cleaning before you execute duplex printing to prevent smudges on the back side of
the paper.
Also perform bottom plate cleaning if ink smudges caused by something other than print data appear on the
printed page.
The procedure for performing bottom plate cleaning is as follows:
Bottom Plate Cleaning
1.
Open the printer driver setup window
2.
Click Bottom Plate Cleaning on the Maintenance tab
The Bottom Plate Cleaning dialog box opens.
3.
Load paper in the printer
As instructed in the dialog box, fold the A4 size or Letter size plain paper in half horizontally, and then
unfold the sheet.
Load the paper into the rear tray in the portrait orientation with the crest of the crease facing down.
4.
Perform the bottom plate cleaning
Make sure that the printer is on and then click Execute.
Bottom plate cleaning starts.
71
Page 72

Cleaning the Printer
Cleaning the Exterior of the Printer
Cleaning the Paper Feed Roller
Cleaning the Inside of the Printer (Bottom Plate Cleaning)
72
Page 73

Cleaning the Exterior of the Printer
Be sure to use a soft and dry cloth such as eyeglasses cleaning cloth and wipe off dirt on the surface gently.
Smooth out wrinkles on the cloth if necessary before cleaning.
Important
• Be sure to turn off the power and unplug the power cord before cleaning the printer.
• Do not use tissue paper, paper towels, rough-textured cloth, or similar materials for cleaning so as not
to scratch the surface.
• Never use volatile liquids such as thinners, benzene, acetone, or any other chemical cleaner to clean
the printer, as this may cause a malfunction or damage the surface of the printer.
73
Page 74

Cleaning the Paper Feed Roller
If the paper feed rollers are dirty or paper powder is attached to it, paper may not be fed properly.
In this case, clean the paper feed rollers from the computer. Cleaning will wear out the paper feed rollers, so
perform this only when necessary.
Cleaning the Paper Feed Rollers from Your Computer
If the problem is not resolved after cleaning the paper feed rollers from the computer, turn off the power,
unplug the power cord, then wipe the paper feed rollers (the center roller and the right roller) (A) located
inside the rear tray with a moistened cotton swab or the like while rotating them manually. Do not touch the
rollers with your fingers. Rotate the rollers two or more times.
After cleaning the paper feed rollers, turn on the power, then clean the paper feed rollers again.
If the problem is not resolved after cleaning the paper feed rollers, contact the service center.
74
Page 75

Cleaning the Inside of the Printer (Bottom Plate Cleaning)
Remove stains from the inside of the printer. If the inside of the printer becomes dirty, printed paper may get
dirty, so we recommend performing cleaning regularly.
You need to prepare: a sheet of A4 or Letter-sized plain paper*
* Be sure to use a new piece of paper.
1. Make sure that the power is turned on and remove any paper from the rear tray.
2.
Prepare paper.
Fold a single sheet of A4 or Letter-sized plain paper in half widthwise, then unfold the paper.
1.
Load only this sheet of paper in the rear tray with the open side facing you.
2.
Pull out the paper output tray and the output tray extension.
3.
Hold down the ON/RESUME button until the POWER lamp flashes green five times, then
3.
release it immediately.
The paper cleans the inside of the printer as it feeds through the printer.
Check the folded parts of the ejected paper. If they are smudged with ink, perform Bottom Plate Cleaning
again.
Note
•
When performing Bottom Plate Cleaning again, be sure to use a new piece of paper.
If the problem is not resolved after performing cleaning again, the protrusions inside the printer may be
stained. Wipe off any ink from the protrusions using a cotton swab or the like.
75
Page 76

Important
• Be sure to turn off the power and unplug the power cord before cleaning the printer.
76
Page 77

Changing the Printer Settings
Changing Printer Settings from Your Computer
77
Page 78

Changing Printer Settings from Your Computer
Changing the Print Options
Registering a Frequently Used Printing Profile
Setting the Ink Cartridge to be Used
Managing the Printer Power
Reducing the Printer Noise
Changing the Printer Operation Mode
78
Page 79

Changing the Print Options
You can change the detailed printer driver settings for print data that is sent from an application software.
Specify this option if you encounter print failures such as part of an image data being cut off.
The procedure for changing the print options is as follows:
Open the printer driver setup window
1.
2.
Click Print Options... on the Page Setup tab
The Print Options dialog box opens.
Note
•
When you use the XPS printer driver, the functions available to you are different.
3. Change the individual settings
If necessary, change the setting of each item, and then click OK.
The Page Setup tab is displayed again.
79
Page 80

Registering a Frequently Used Printing Profile
You can register the frequently used printing profile to Commonly Used Settings on the Quick Setup tab.
Unnecessary printing profiles can be deleted at any time.
The procedure for registering a printing profile is as follows:
Registering a Printing Profile
1.
Open the printer driver setup window
2.
Set the necessary items
From Commonly Used Settings on the Quick Setup tab, select the printing profile to be used and if
necessary, change the settings after Additional Features.
You can also register necessary items on the Main and Page Setup tabs.
3.
Click Save...
The Save Commonly Used Settings dialog box opens.
4. Save the settings
Enter a name in the Name field. If necessary, click Options..., set the items, and then click OK.
In the Save Commonly Used Settings dialog box, click OK to save the print settings and return to the
Quick Setup tab.
The name and icon are displayed in Commonly Used Settings.
80
Page 81

Important
• To save the page size, orientation, and number of copies that was set in each sheet, click Options...,
and check each item.
Note
• When you re-install the printer driver or upgrade the printer driver version, the print settings that are
already registered will be deleted from Commonly Used Settings.
Registered print settings cannot be saved and preserved. If a profile is deleted, register the print
settings again.
Deleting Unnecessary Printing Profile
1.
Select the printing profile to be deleted
Select the printing profile you want to delete from the Commonly Used Settings list on the Quick
Setup tab.
2.
Delete the printing profile
Click Delete. When the confirmation message appears, click OK.
The selected printing profile is deleted from the Commonly Used Settings list.
Note
• Printing profiles that are registered in the initial settings cannot be deleted.
81
Page 82

Setting the Ink Cartridge to be Used
This feature enables you to specify the most appropriate FINE cartridge among installed cartridges
according to an intended use.
When one of the FINE cartridges becomes empty and cannot be replaced immediately by a new one, you
can specify the other FINE cartridge that still has ink and continue printing.
The procedure for specifying the FINE cartridge is as follows:
Ink Cartridge Settings
1.
Open the printer driver setup window
2.
Click Ink Cartridge Settings on the Maintenance tab
The Ink Cartridge Settings dialog box appears.
3.
Select the FINE cartridge to be used
Select the FINE cartridge to be used for printing and click OK.
The specified FINE cartridge will be used from the next printing.
Important
• When a setting other than Plain Paper or Envelope is selected for Media Type on the Main tab,
Black Only is disabled because the printer uses the color FINE cartridge to print documents.
• Do not detach the FINE cartridge that is not in use. Printing cannot be performed while either FINE
cartridge is detached.
82
Page 83

Managing the Printer Power
This function allows you to manage the printer power from the printer driver.
The procedure for managing the printer power is as follows:
Power Off
The Power Off function turns off the printer. When you use this function, you will not be able to turn the
printer on from the printer driver.
1.
Open the printer driver setup window
2.
Execute power off
Click Power Off on the Maintenance tab. When the confirmation message appears, click OK.
The printer power switches off, and the Maintenance tab is displayed again.
Auto Power
Auto Power allows you to set Auto Power On and Auto Power Off.
The Auto Power On function automatically turns on the printer when data is received.
The Auto Power Off function automatically turns off the printer when there are no operations from the
printer driver or the printer for a specified period of time.
1.
Open the printer driver setup window
2.
Make sure that the printer is on and then click Auto Power on the Maintenance tab
The Auto Power Settings dialog box opens.
Note
•
If the printer is off or if communication between the printer and the computer is disabled, an
error message may appear because the computer cannot collect the printer status.
If this happens, click OK to display the most recent settings specified on your computer.
3. If necessary, complete the following settings:
Auto Power On
Specifying Enable from the list will turn the printer on upon receipt of print data.
Auto Power Off
Specify the time from the list. When this time lapses without any operations from the printer driver
or the printer, the printer is turned off automatically.
4.
Apply the settings
83
Page 84

Click OK. When the confirmation message appears, click OK.
The Maintenance tab is displayed again.
The setting is enabled after this. When you want to disable this function, select Disable from the list
according to the same procedure.
Note
• When the printer is turned off, the Canon IJ Status Monitor message varies depending on the Auto
Power On setting.
When the setting is Enable, "Printer is standing by" is displayed. When the setting is Disable,
"Printer is offline" is displayed.
84
Page 85

Reducing the Printer Noise
The silent function allows you to reduce the operating noise of this printer. Select when you wish to reduce
the operating noise of the printer at night, etc.
Using this function may lower the print speed.
The procedure for using the quiet mode is as follows:
Quiet Settings
1.
Open the printer driver setup window
2.
Click Quiet Settings on the Maintenance tab
The Quiet Settings dialog box opens.
Note
• If the printer is off or if communication between the printer and the computer is disabled, an
error message may appear because the computer cannot collect the printer status.
3.
Set the quiet mode
If necessary, specify one of the following items:
Do not use quiet mode
Select this option when you wish to use the printer with volume of normal operating noise.
Always use quiet mode
Select this option when you wish to reduce the operating noise of the printer.
Use quiet mode during specified hours
Select this option when you wish to reduce the operating noise of the printer during a specified
period of time.
Set the Start time and the End time of the quiet mode you wish to be activated. If both are set to
the same time, the quiet mode will not function.
Important
•
You can set the quiet mode from the printer or the printer driver.
No matter how you use to set the quiet mode, the mode is applied when you perform
operations from the printer or printing from the computer.
•
If you specify a time for Use quiet mode during specified hours, quiet mode is not applied
to operations (direct print, etc.) performed directly from the printer.
4. Apply the settings
Make sure that the printer is on and click OK.
Click OK when the confirmation message appears.
The settings are enabled hereafter.
85
Page 86

Note
• The effects of the quiet mode may be less depending on the print quality settings.
86
Page 87

Changing the Printer Operation Mode
If necessary, switch between various modes of printer operation.
The procedure for configuring Custom Settings is as follows:
Custom Settings
1.
Open the printer driver setup window
2.
Make sure that the printer is on, and then click Custom Settings on the Maintenance
tab
The Custom Settings dialog box opens.
Note
• If the printer is off or if communication between the printer and the computer is disabled, an
error message may appear because the computer cannot collect the printer status.
If this happens, click OK to display the most recent settings specified on your computer.
3.
If necessary, complete the following settings:
Rotate 90 degrees left when orientation is [Landscape]
On the Page Setup tab, you can change the rotation direction of the Landscape in the
Orientation.
To rotate the print data 90 degrees to the left during printing, select this item. To rotate the print
data 90 degrees to the right during printing, clear this item.
Important
Do not change this setting while the print job is displayed in the print wait list. Otherwise,
•
characters may be omitted or the layout may become corrupt.
Ink Drying Wait Time
You can set the length of the printer rest time until printing of the next page begins. Moving the
slider to the right increases the pause time, and moving the slider to the left decreases the time.
If the paper gets stained because the next page is ejected before the ink on the printed page
dries, increase the ink drying wait time.
Reducing the ink drying wait time speeds up printing.
4. Apply the settings
Click OK and when the confirmation message appears, click OK.
The printer operates with the modified settings hereafter.
87
Page 88

Tips for Ensuring Optimal Printing Quality
Useful Information about Ink
Key Points to Successful Printing
Be Sure to Make Paper Settings after Loading Paper
Storing Printed Images
Printer Handling Precautions
Key to Enjoying Consistent Printing Quality
Precautions for Safe Transport of the Printer
88
Page 89

Useful Information about Ink
How is ink used for various purposes other than printing?
Ink may be used for purposes other than printing. Ink is not only used for printing, but also for cleaning the
print head to maintain the optimal printing quality.
The printer has the function to automatically clean the ink jet nozzles to prevent clogging. In the cleaning
procedure, ink is pumped out from the nozzles. Used ink for nozzle cleaning is limited to a small amount.
Does black-and-white printing use color ink?
Black-and-white printing may use ink other than black ink depending on the type of printing paper or the
settings of the printer driver. So, color ink is consumed even when printing in black-and-white.
89
Page 90

Key Points to Successful Printing
Check the printer status before printing!
• Is the print head OK?
If a print head nozzle is clogged, print will be faint and papers will be wasted. Print the nozzle check
pattern to check the print head.
Maintenance Procedure
• Is the inside of the printer smeared with ink?
After printing large quantities of paper, the area where papers go through may get smeared with ink.
Clean the inside of your printer with Bottom Plate Cleaning.
Check how to load the paper correctly!
• Is the paper loaded in the correct orientation?
To load paper in the rear tray, load paper WITH THE PRINTING SIDE FACING YOU.
Loading Paper
• Is the paper curled?
The curled paper causes paper jam. Flatten the curled paper, then reload it.
"Load the paper after correcting its curl." in Paper Is Smudged/Printed Surface Is Scratched
90
Page 91

Be Sure to Make Paper Settings after Loading Paper
If the media type setting is not the one for the loaded paper, printing results may not be satisfactory. After
loading paper, be sure to select the appropriate media type setting for the loaded paper.
Print Results Not Satisfactory
There are various types of paper: paper with special coating on the surface for printing photos with optimal
quality and paper suitable for documents.
Each media type has specific preset settings, such as how ink is used and sprayed, distance from nozzles,
etc., so that you can print on that type with optimal image quality.
This allows you to print with the settings best suited for the loaded media type just by selecting that media
type.
91
Page 92

Storing Printed Images
Store printed images in albums, clear photo sleeves, or glass frames to protect them from direct exposure to
air.
Note
• Storing printed images without sufficient drying may cause blurring or discoloration.
92
Page 93

Printer Handling Precautions
Do not place any object on the printer!
Do not place any object on the printer. It will fall into the rear tray and cause the printer to malfunction.
Also, place the printer where objects will not fall on it.
93
Page 94

Key to Enjoying Consistent Printing Quality
The key to printing with the optimal printing quality is to prevent the print head from drying or clogging.
Always observe the following rules for optimal printing quality.
Never unplug the power cord until the power is turned off!
If you press the ON/RESUME button to turn off the power, the printer caps the print head (nozzles)
automatically to prevent from drying. If you unplug the power cord from the wall outlet while the POWER
lamp is lit or flashing, the print head will not be capped properly and this will cause drying or clogging.
When unplugging the power cord, make sure that the POWER lamp is not lit.
Print periodically!
Just as the tip of a felt pen becomes dry and unusable if it has not been used for a long time, even if it is
capped, the print head too, may become dried or clogged if the printer has not been used for a long time.
We recommend you to use the printer at least once a month.
Note
• Depending on the type of paper, ink may blur if you trace the printed area with a highlight pen or
paint-stick, or bleed if water or sweat comes in contact with the printed area.
94
Page 95

Precautions for Safe Transport of the Printer
When relocating the printer, make sure of the following.
Important
• Pack the printer in a sturdy box so that it is placed with its bottom facing down, using sufficient
protective material to ensure safe transport.
• With the FINE cartridge left installed in the printer, press the ON/RESUME button to turn off the power.
This allows the printer to automatically cap the print head, thus preventing it from drying.
• After packing, do not tilt the box containing the printer or turn it on its side or upside down. Doing so
may cause the ink to leak during transport and cause damage to the printer.
• When a shipping agent is handling transport of the printer, have its box marked "THIS SIDE UP" to
keep the printer with its bottom facing down. Mark also with "FRAGILE" or "HANDLE WITH CARE".
1.
Turn the printer off.
2.
Confirm that the POWER lamp is off and unplugging the power cord.
Important
• Do not unplug the printer while the POWER lamp is lit or flashing green, as it may cause
malfunction or damage to the printer, making the printer unable to print.
3.
Retract the paper output tray and the output tray extension, then close the paper support.
4.
Unplug the printer cable from the computer and from the printer, then unplug the power
cord from the printer.
5. Use adhesive tape to secure all the covers on the printer to keep them from opening during
transportation. Then pack the printer in the plastic bag.
6. Attach the protective material to the printer when packing the printer in the box.
95
Page 96

Legal Limitations on Use of Your Product and Use of Images
It may be unlawful to print the following documents.
The list provided is non-exhaustive. When in doubt, check with a legal representative in your jurisdiction.
• Paper money
• Money orders
• Certificates of deposit
• Postage stamps (canceled or uncanceled)
• Identifying badges or insignias
• Selective service or draft papers
• Checks or drafts issued by governmental agencies
• Motor vehicle licenses and certificates of title
• Traveler's checks
• Food stamps
• Passports
• Immigration papers
• Internal revenue stamps (canceled or uncanceled)
• Bonds or other certificates of indebtedness
• Stock certificates
• Copyrighted works/works of art without permission of copyright owner
96
Page 97

Specifications
General Specifications
Printing resolution (dpi) 4800* (horizontal) x 600 (vertical)
* Ink droplets can be placed with a pitch of 1/4800 inch at minimum.
Interface USB Port:
Hi-Speed USB *
* A computer that complies with Hi-Speed USB standard is required. Since the
Hi-Speed USB interface is fully upwardly compatible with USB 1.1, it can be
used at USB 1.1.
Print width 8 inches/203.2 mm
Operating environment Temperature: 41 to 95 °F (5 to 35 °C)
Humidity: 10 to 90 % RH (no condensation)
* The performance of the printer may be reduced under certain temperature
and humidity conditions.
Recommended conditions:
Temperature: 59 to 86 °F (15 to 30 °C)
Humidity: 10 to 80 % RH (no condensation)
* For the temperature and humidity conditions of papers such as photo paper,
refer to the paper's packaging or the supplied instructions.
Storage environment Temperature: 32 to 104 °F (0 to 40 °C)
Humidity: 5 to 95 % RH (no condensation)
Power supply AC 100-240 V, 50/60 Hz
Power consumption Printing: Approx. 8 W
Standby (minimum): Approx. 0.8 W *1*2
OFF: Approx. 0.5 W *1
*1 USB connection to PC
*2 The wait time for standby cannot be changed.
External dimensions Approx. 16.8 (W) x 9.3 (D) x 5.3 (H) inches
Approx. 426 (W) x 235 (D) x 134 (H) mm
* With the Paper Support and Paper Output Tray retracted.
Weight Approx. 5.0 lb (Approx. 2.3 kg)
* With the FINE Cartridges installed.
Canon FINE Cartridge Total 1280 nozzles (BK 320 nozzles, C/M/Y each 320 nozzles)
Minimum System Requirements
Conform to the operating system's requirements when higher than those given here.
97
Page 98

Windows
Operating System Windows 8, Windows 8.1
Windows 7, Windows 7 SP1
Windows Vista SP1, Windows Vista SP2
Windows XP SP3 32-bit only
Browser Internet Explorer 8 or later
Hard Disk Space 3 GB
Note: For bundled software installation.
The necessary amount of hard disk space may be changed without notice.
Display XGA 1024 x 768
Mac OS
Operating System Mac OS X v10.6.8 or later
Browser Safari 5 or later
Hard Disk Space 1.5 GB
Note: For bundled software installation.
The necessary amount of hard disk space may be changed without notice.
Display XGA 1024 x 768
Other Supported OS
Some functions may not be available with each OS. Refer to the manual or the Canon web site for details on
operation with Windows RT.
• An internet connection is required to view the Online Manual.
• Windows: Operation can only be guaranteed on a computer with Windows 8.1, Windows 8,
Windows 7, Windows Vista or Windows XP pre-installed.
• Windows: A CD-ROM Drive or internet connection is required during software installation.
Windows: Internet Explorer 8, 9 or 10 is required to install Easy-WebPrint EX.
•
Easy-WebPrint EX for Internet Explorer 9 or 10 can be downloaded from the Canon web site.
Windows: Some functions may not be available with Windows Media Center.
•
Windows: .NET Framework 4 or 4.5 must be installed to use the Windows software.
•
Windows: XPS Essentials Pack is required to print on Windows XP.
•
Mac OS: Hard Disk must be formatted as Mac OS Extended (Journaled) or Mac OS Extended.
•
Mac OS: For Mac OS, an internet connection is required during software installation.
•
Specifications are subject to change without notice.
98
 Loading...