


MX450 series
Online Manual
Read Me First
Useful Functions Available on the Machine
Overview of the Machine
English

Read Me First
Notes on Online Manual Usage
Operating Environment
How to Print
Notes on Online Manual Usage
•
Reproduction, diversion or copying of any text, photo or image published in the Online Manual
(hereinafter referred to as "this guide"), in whole or in part, is prohibited.
•
In principle, Canon shall change or delete the contents of this guide without prior notice to customers.
In addition, Canon may suspend or stop the disclosure of this guide due to unavoidable reasons.
Canon shall not be liable for any damage suffered by customers as a result of changes in or deletion of
information in this guide, or suspension/stoppage of disclosure of this guide.
•
Although the contents of this guide have been prepared with utmost care, please contact the service
center if you find any incorrect or missing information.
• In principle, the descriptions in this guide are based on the product at the time of its initial sale.
This guide does not disclose the manuals of all the products sold by Canon.
•
See the manual supplied with the product when using a product that is not described in this guide.
Operating Environment
The following environment is recommended for the use of this guide.
• Recommended Operating System
Windows 8, Windows 7, Windows 7 SP1, Windows Vista SP1, Vista SP2, Windows XP SP3 (32-bit
only)
Recommended Web Browser
•
Internet Explorer 8 or later
(Allow cookies and enable JavaScript in browser settings.)
How to Print
Use the print function of your Web browser to print this guide.
To print background colors and images, follow the steps below to display the Page Setup dialog box,
then select the Print Background Colors and Images checkbox.
In Internet Explorer 9 or 10
•
Select (Tools) > Print > Page setup....
In Internet Explorer 8
•
1. Press the Alt key to display the menus.
2. Select Page Setup... from the File menu.

Symbols Used in This Document
Warning
Instructions that, if ignored, could result in death or serious personal injury caused by incorrect operation of
the equipment. These must be observed for safe operation.
Caution
Instructions that, if ignored, could result in personal injury or material damage caused by incorrect
operation of the equipment. These must be observed for safe operation.
Important
Instructions including important information. To avoid damage and injury or improper use of the product, be
sure to read these indications.
Note
Instructions including notes for operation and additional explanations.
Basic
Instructions explaining basic operations of your product.

Trademarks and Licenses
•
Microsoft is a registered trademark of Microsoft Corporation.
• Windows is a trademark or registered trademark of Microsoft Corporation in the U.S. and/or other
countries.
•
Windows Vista is a trademark or registered trademark of Microsoft Corporation in the U.S. and/or other
countries.
•
Internet Explorer is a trademark or registered trademark of Microsoft Corporation in the U.S. and/or
other countries.
•
Mac, Mac OS, AirPort, Safari, Bonjour, iPad, iPhone and iPod touch are trademarks of Apple Inc.,
registered in the U.S. and other countries. AirPrint and the AirPrint logo are trademarks of Apple Inc.
•
IOS is a trademark or registered trademark of Cisco in the U.S. and other countries and is used under
license.
•
Adobe, Photoshop, Photoshop Elements, Lightroom, Adobe RGB and Adobe RGB (1998) are either
registered trademarks or trademarks of Adobe Systems Incorporated in the United States and/or other
countries.
• Bluetooth is a trademark of Bluetooth SIG, Inc., U.S.A. and licensed to Canon Inc.
• All other company names and products mentioned herein may be trademarks or registered trademarks
of their respective companies.
Note
The formal name of Windows Vista is Microsoft Windows Vista operating system.
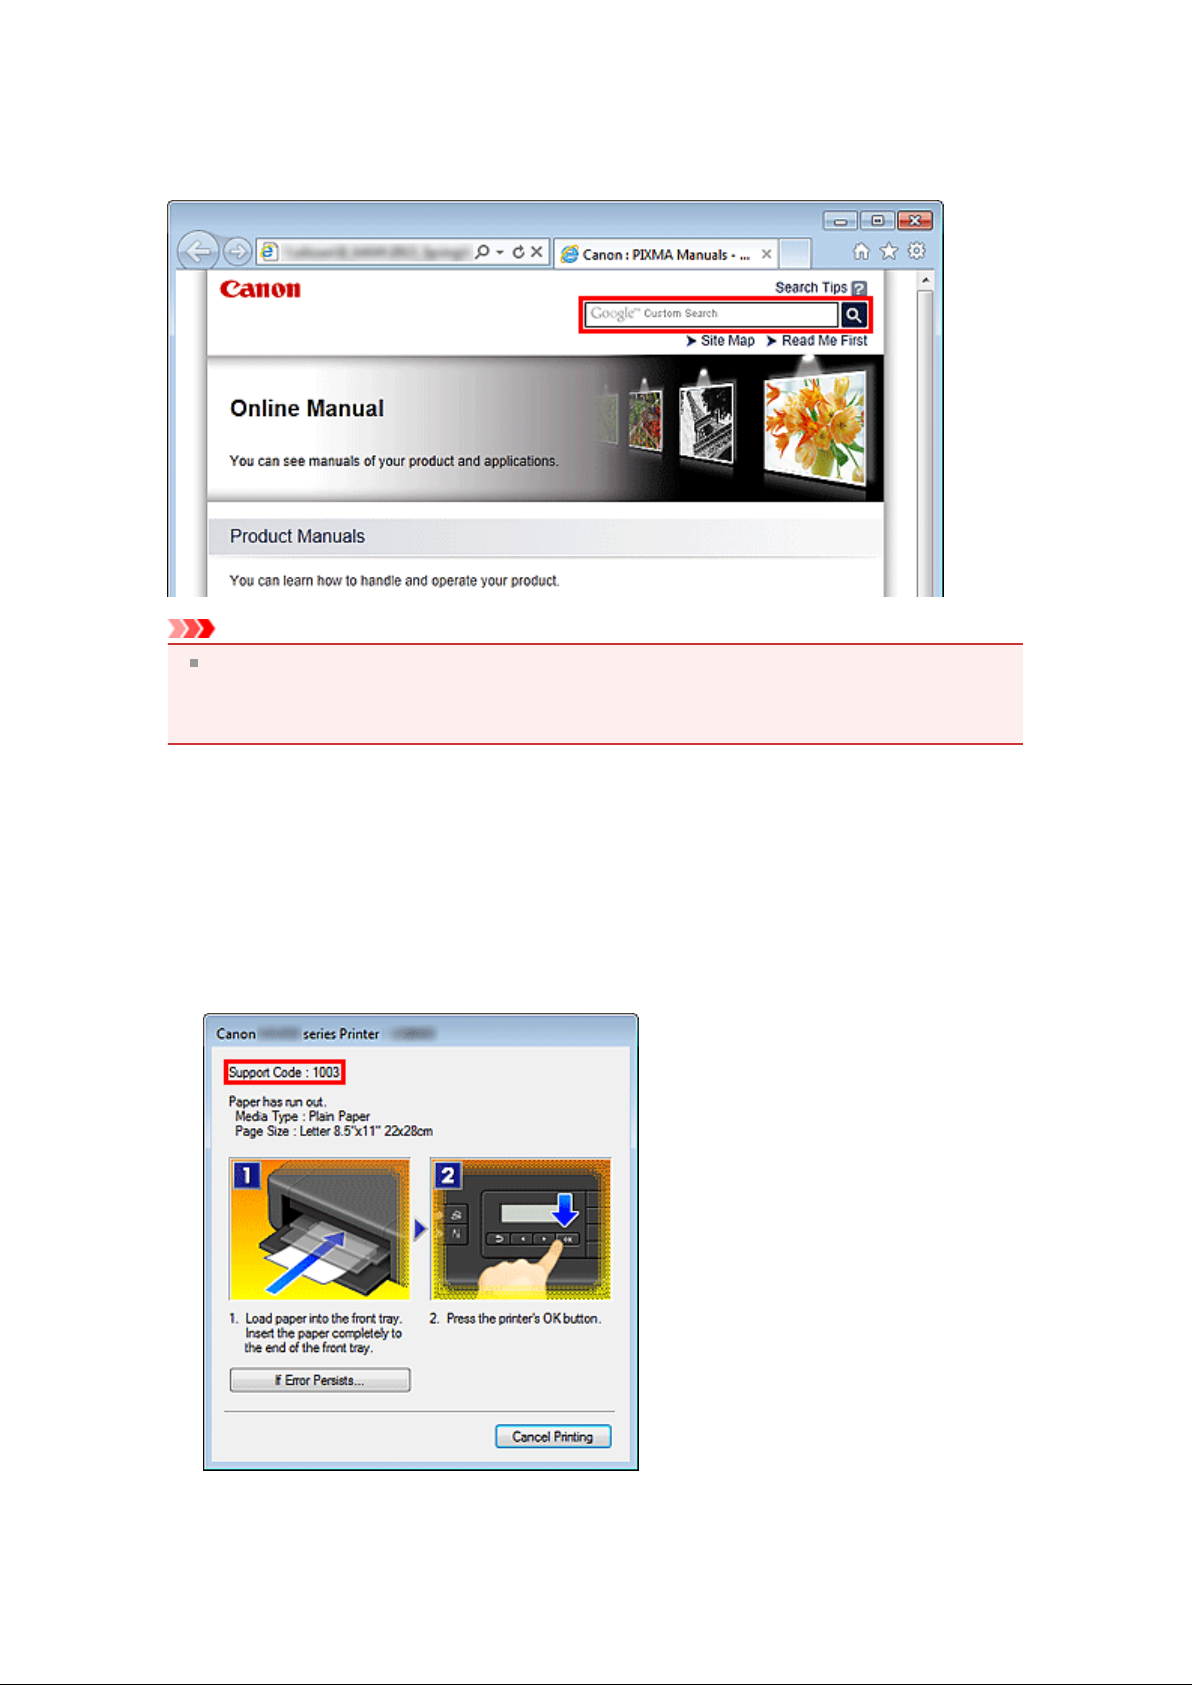
Search Tips
You can search for target pages by entering keywords in the search window.
Important
When performing a search by entering the product's model name, enter only the first two digits of the
number in the model name.
Example: When searching for MX452
Enter "MX45"
• Searching for Functions
You can find target pages easily by entering your product's model name and a keyword for the function
you want to learn about.
Example: When your product is MX450 series and you want to learn how to load paper
Enter "MX45 load paper" in the search window and perform a search
• Troubleshooting Errors
You can obtain more accurate search results by entering your product's model name and a support
code.
Example: When your product is MX450 series the following error screen appears
Enter "MX45 1003" in the search window and perform a search
Searching for Application Functions
•
You can find target pages easily by entering your application's name and a keyword for the function
you want to learn about.

Example: When you want to learn how to print collages with My Image Garden
Enter "My Image Garden collage" in the search window and perform a search
• Searching for Reference Pages
You can search for reference pages described in this guide by entering your product's model name
and a page title.
You can find reference pages more easily by entering the function name as well.
Example: When you want to browse the page referred to by the following sentence on a scanning
procedure page in the Online Manual for MX450 series
Refer to "Color Settings Tab" for your model from Home of the Online Manual for details.
Enter "MX45 scan Color Settings Tab" in the search window and perform a search

Window Used in Operation Explanation
In this guide, most of the operations are described based on the windows displayed when Windows 7
operating system Home Premium (called Windows 7 below) is used.

Overview of the Machine
Main Components and Basic Operations
Main Components
About the Power Supply of the Machine
LCD and Operation Panel
Entering Numbers, Letters, and Symbols
Loading Paper / Originals
Loading Paper
Loading Originals
Inserting the USB Flash Drive
Replacing a FINE Cartridge
Replacing a FINE Cartridge
Checking the Ink Status
Maintenance
When Printing Becomes Faint or Colors Are Incorrect
Performing Maintenance from a Computer
Cleaning the Machine
Changing the Machine Settings
Changing Machine Settings from Your Computer
Changing the Machine Settings on the LCD
Information about Network Connection
Useful Information about Network Connection
About Network Communication
Changing and Confirming Network Settings
Screens for Network Connection of IJ Network Tool
Other Screens of IJ Network Tool
Appendix for Network Communication
Tips for Ensuring Optimal Printing Quality
Useful Information about Ink
Key Points to Successful Printing
Be Sure to Make Paper Settings after Loading Paper
Canceling a Print Job
Key to Enjoying Consistent Printing Quality
Precautions for Safe Transport of the Machine
Legal Limitations on Use of Your Product and Use of Images
Specifications

Maintenance
When Printing Becomes Faint or Colors Are Incorrect
Performing Maintenance from a Computer
Cleaning the Machine

Changing the Machine Settings
Changing Machine Settings from Your Computer
Changing the Machine Settings on the LCD

Changing Machine Settings from Your Computer
Changing the Print Options
Registering a Frequently Used Printing Profile
Setting the Ink Cartridge to be Used
Managing the Machine Power
Reducing the Machine Noise
Changing the Machine Operation Mode

Changing the Machine Settings on the LCD
Changing the Machine Settings on the LCD
Fax settings
Print settings
LAN settings
Dev. user settings
Mob. phone settings
Bluetooth settings
Firmware update
Reset setting
About Quiet setting

Information about Network Connection
Useful Information about Network Connection
Useful Functions Available on the Machine
The following useful functions are available on the machine.
Enjoy even more pleasant photography experience by utilizing various functions.
Print Photos Easily
Download Content Materials
Upload Scanned Images to the Web
Print Easily from a Smartphone
Print Directly from iPad, iPhone, or iPod touch
Print Photos on Facebook
Print Photos Easily Using an Application
•
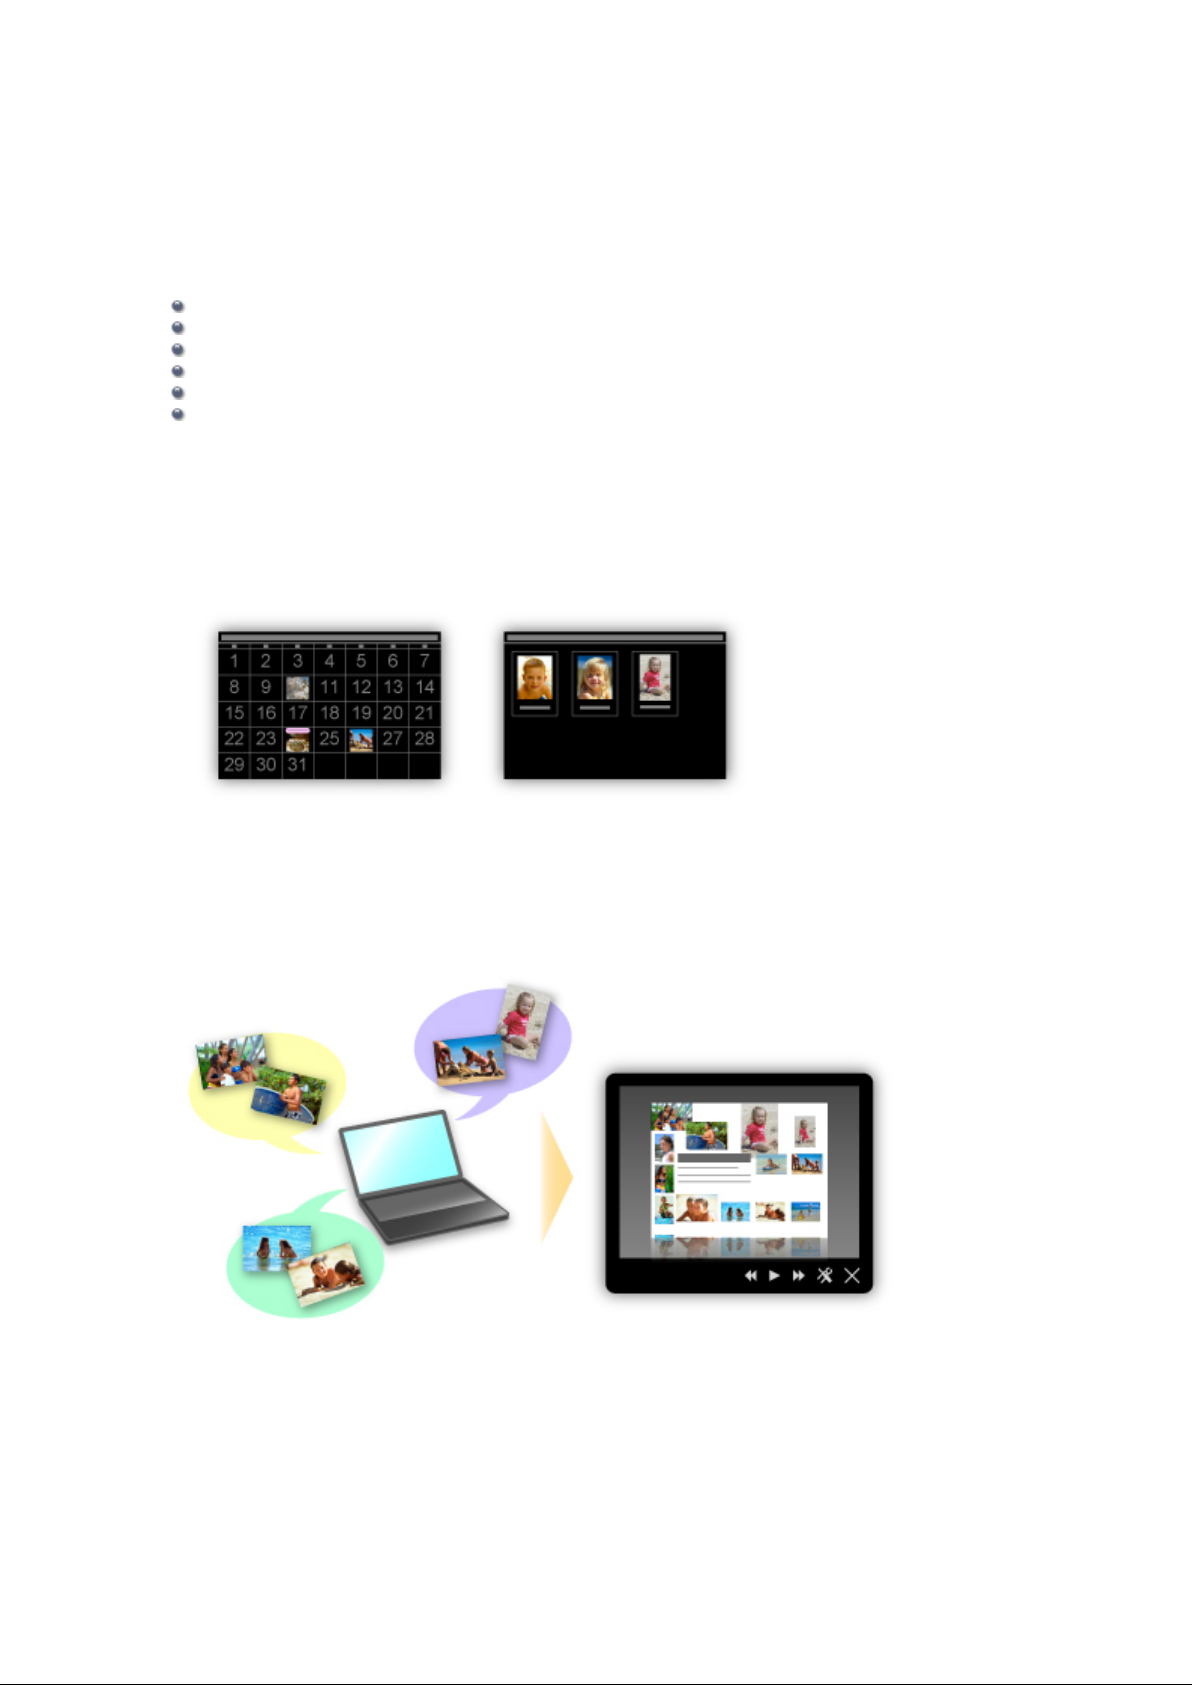
Organize Images Easily
In My Image Garden, you can register the names of people and events to photos.
You can organize photos easily as you can display them not only by folder but also by calendar, event,
and person. This also allows you to find the target photos easily when you search for them later on.
<Calendar View> <People View>
Display Recommended Items in Slide Shows
•
Based on the information registered to photos, Quick Menu automatically selects the photos on your
computer and creates recommended items such as collages and cards. The created items appear in
slide shows.
If there is an item you like, you can easily print it in just two steps.
STEP1 In Image Display of Quick Menu, select the item you want to print.
STEP2 Print the item with My Image Garden.

• Place Photos Automatically
Delightful items are created easily as the selected photos are placed automatically according to the
theme.
Other Various Functions
•
My Image Garden has many other useful functions.
Refer to "What You Can Do with My Image Garden" for details.
Download a Variety of Content Materials
• CREATIVE PARK
A "printing materials site" where you can download all the printing materials for free.
Various types of content such as seasonal cards and paper crafts that can be made by assembling paper
parts are provided.
It is easily accessible from Quick Menu.
• CREATIVE PARK PREMIUM
A service where customers using models that support PREMIUM Contents can download exclusive
printing materials.
PREMIUM Contents can be downloaded easily via My Image Garden. Downloaded PREMIUM Contents
can be printed directly with My Image Garden.
To print downloaded PREMIUM Contents, make sure that genuine Canon ink tanks/ink cartridges are
installed for all colors on a supported printer.
Note
The designs of PREMIUM Contents provided in this page are subject to change without prior
notice.
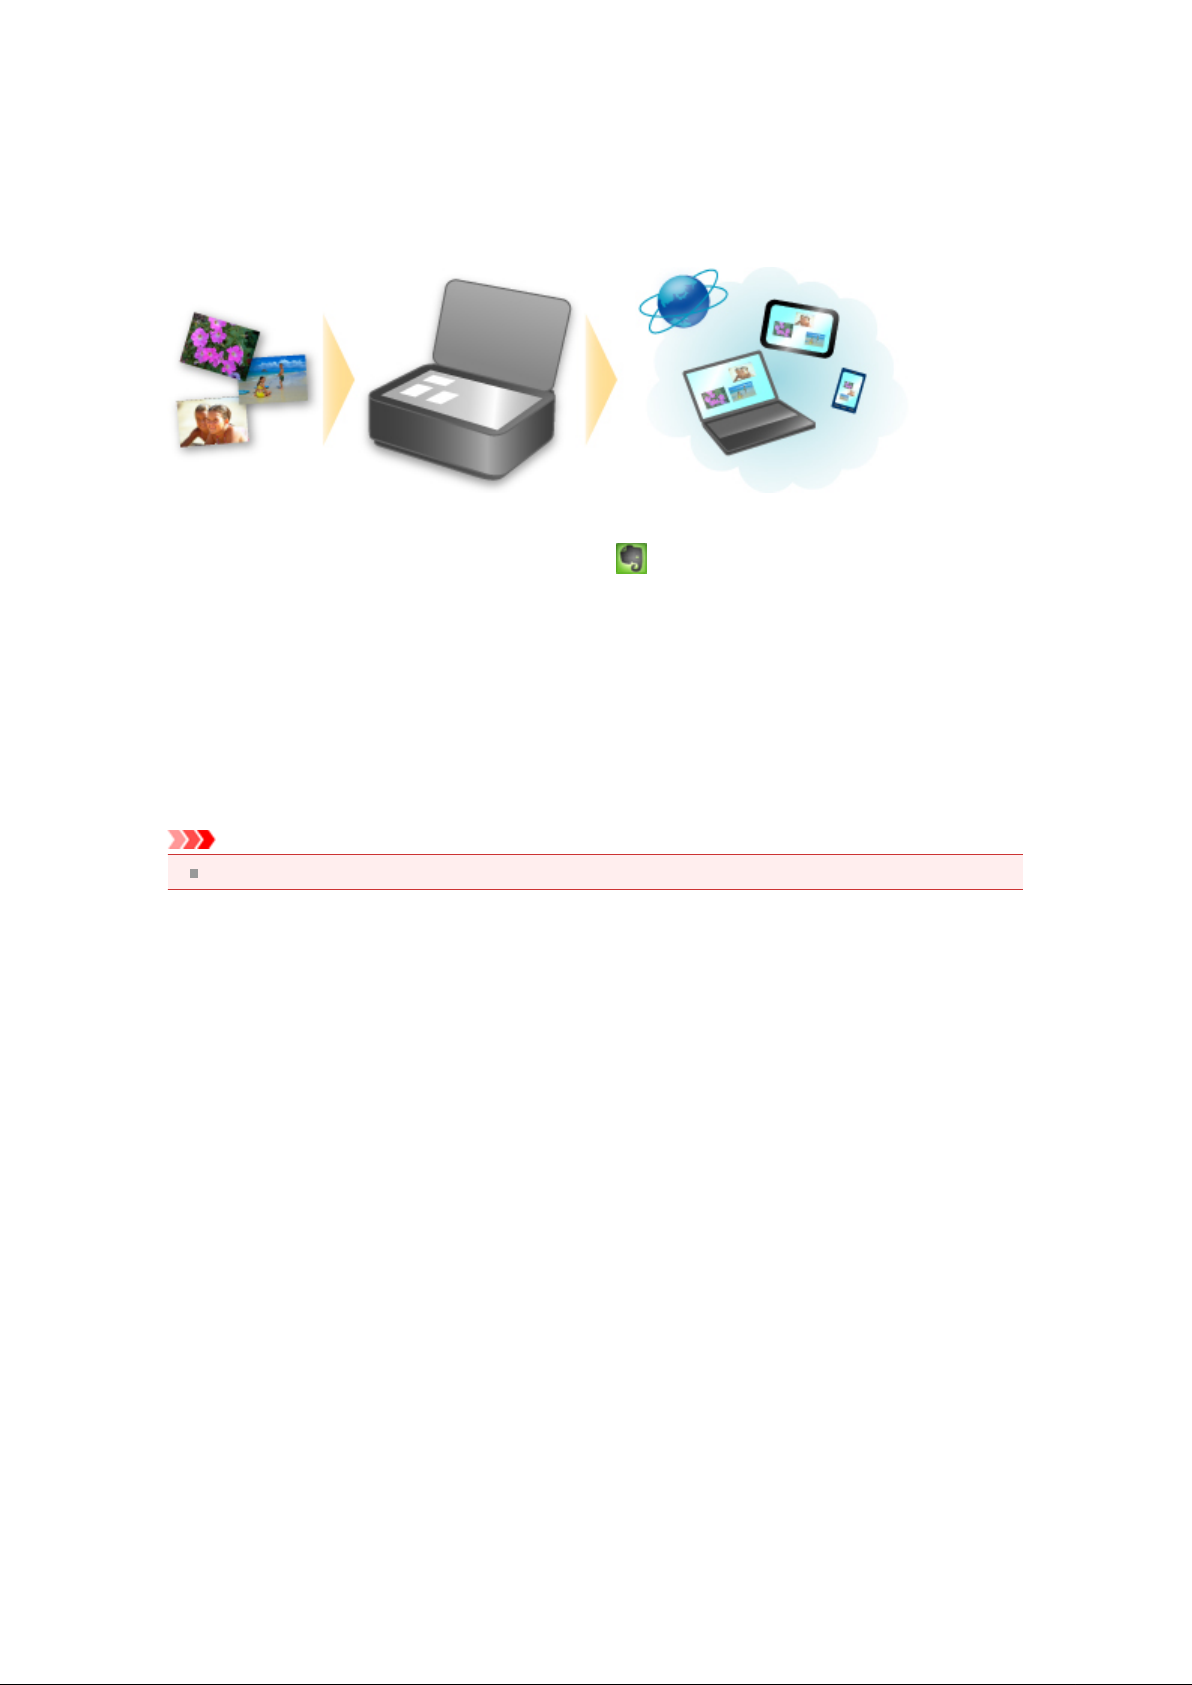
Upload Scanned Images Easily to the Web
If you use Evernote or Dropbox on your computer, you can easily upload scanned images to the web.
Uploaded images can be utilized from other computers, smartphones, etc.
Refer to "Online Storage Integration Function" for details.
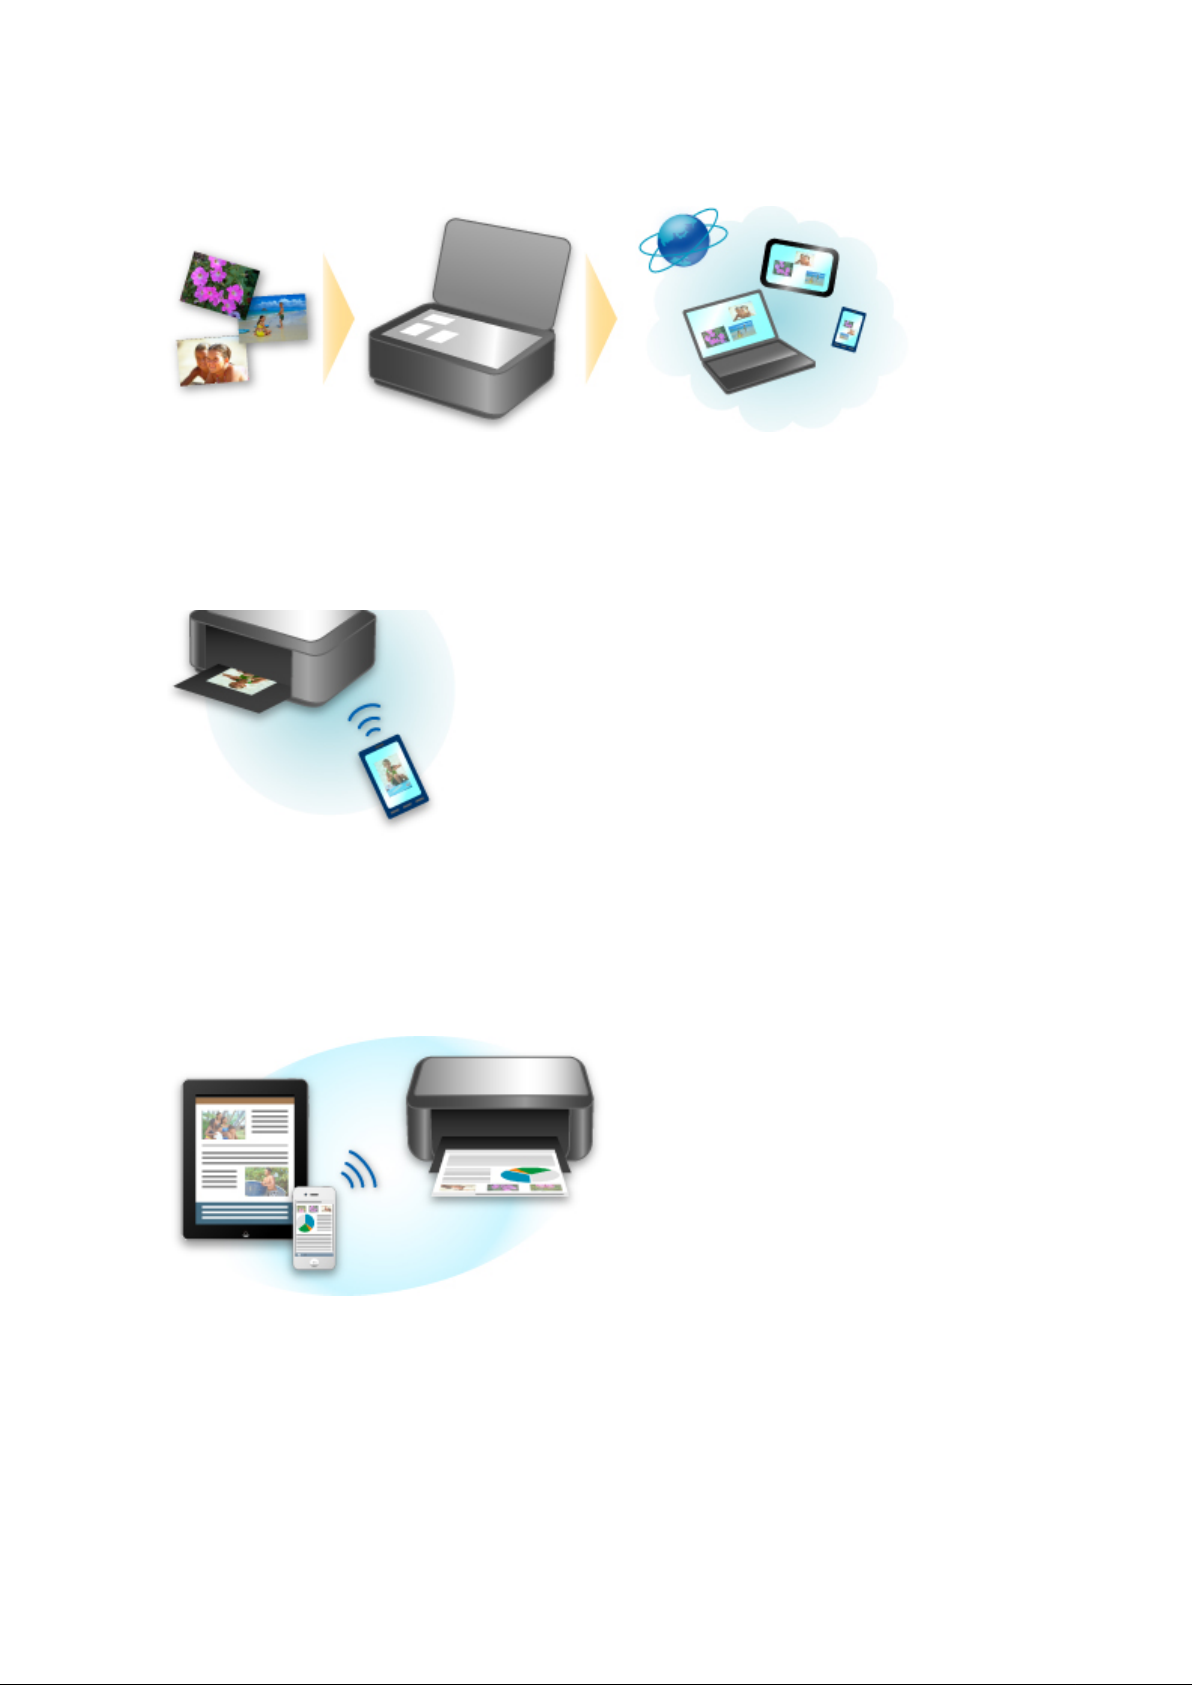
Print Easily from a Smartphone with Canon Easy-PhotoPrint (for iOS/Android)
Use Canon Easy-PhotoPrint (for iOS/Android) to easily print photos saved on a smartphone wirelessly.
You can also receive scanned data (PDF or JPEG) directly on a smartphone without using a computer.
Canon Easy-PhotoPrint (for iOS/Android) can be downloaded from App Store and Google Play.
Print Directly from iPad, iPhone, or iPod touch with Apple AirPrint
The machine is compatible with the AirPrint function of Apple iOS devices.
You can directly print e-mails, photos, web pages, etc. from iPad, iPhone, or iPod touch to the machine
over wireless LAN.
Refer to "Printing from AirPrint Compliant Device" for details.
Print Photos on Facebook Easily Using a Facebook App "Print Your Days"
Use Print Your Days to collect Facebook photos of memories of parties and travel, recent activity of your
family and friends, your hobbies, etc., then create and print a work of art.
Print Your Days is available from the Print Your Days Facebook page.

Online Storage Integration Function
The machine can integrate with online storage services such as Evernote.
Integration with Online Notetaking Service "Evernote"
If an Evernote client application is installed on your computer, you can import scanned images into the
application and upload them to the Evernote server.
The uploaded images can be browsed from other computers, smartphones, etc.
To use Evernote, you need to create an account. See the "CREATE ACCOUNT" page of Evernote for
account creation.
Settings
•
In the Settings dialog box of IJ Scan Utility, select the item you want to set, then select Evernote for
Send to an application in Application Settings.
Refer to "Settings Dialog Box" for details.
Important
The Evernote service features are subject to change or termination without prior notice.
Printing from AirPrint Compliant Device
This document explains how to use AirPrint to print wirelessly from your iPad, iPhone and iPod touch to a
Canon printer.
AirPrint enables you to print photos, email, Web pages and documents from your Apple device directly to
your printer without installing a driver.
Checking Your Environment
First, check your environment.
AirPrint Operation Environment
•
To use AirPrint, you will need one of the following Apple devices running the latest version of iOS: iPad
(all models), iPhone (3GS or later), or iPod touch (3rd generation or later).
• Network Environment
The Apple device (iPad, iPhone, or iPod touch) and this machine must be connected to the same Wi-Fi
network.
Printing with AirPrint
1.
Check that this machine is turned on and is connected to the LAN.
2.
From the application software of your Apple device, tap the operation icon to display
the menu options.

3. From the menu options, tap Print.
4.
From Printer Options, select the model that you are using.
Important
Because some application software does not support AirPrint, Printer Options may not be
displayed. If an application software does not let you use printer options, you cannot print from
that application software.
Note
The printer options differ depending on the application software and model you are using.
Normally, when you tap Print and select a model name, the displayed printer options will include
up to the following four options:
Printer: Select a model that can be used in your wireless LAN.
Copies: Select the number of print copies.
Duplex Printing: If the model supports duplex printing, you can select On or Off.
Range: The page range can be used only with specific application software and file types
(such as PDF files).
5. For 1 Copy, click + or - to set the number of required copies.
6. For Duplex Printing, click On to enable duplex printing or click Off to disable the
function.
When printing a file type that has multiple pages, such as a PDF file, click Range
7.
and then click All Pages or select the range of pages to be printed.
Tap the Print.
8.
When you execute printing, the printer prints according to the specified settings.
Paper Size
With AirPrint, the paper size is selected automatically according to the application software being used on
the Apple device and the region in which AirPrint is used.
When Apple's photo application software is used, the default paper size is L size in Japan, and 4"x6" or KG
in other countries and regions.
When documents are printed from Apple's Safari application software, the default paper size is letter size in
the U.S. region, and A4 in Japan and Europe.
Important
Your application software may support different paper sizes.
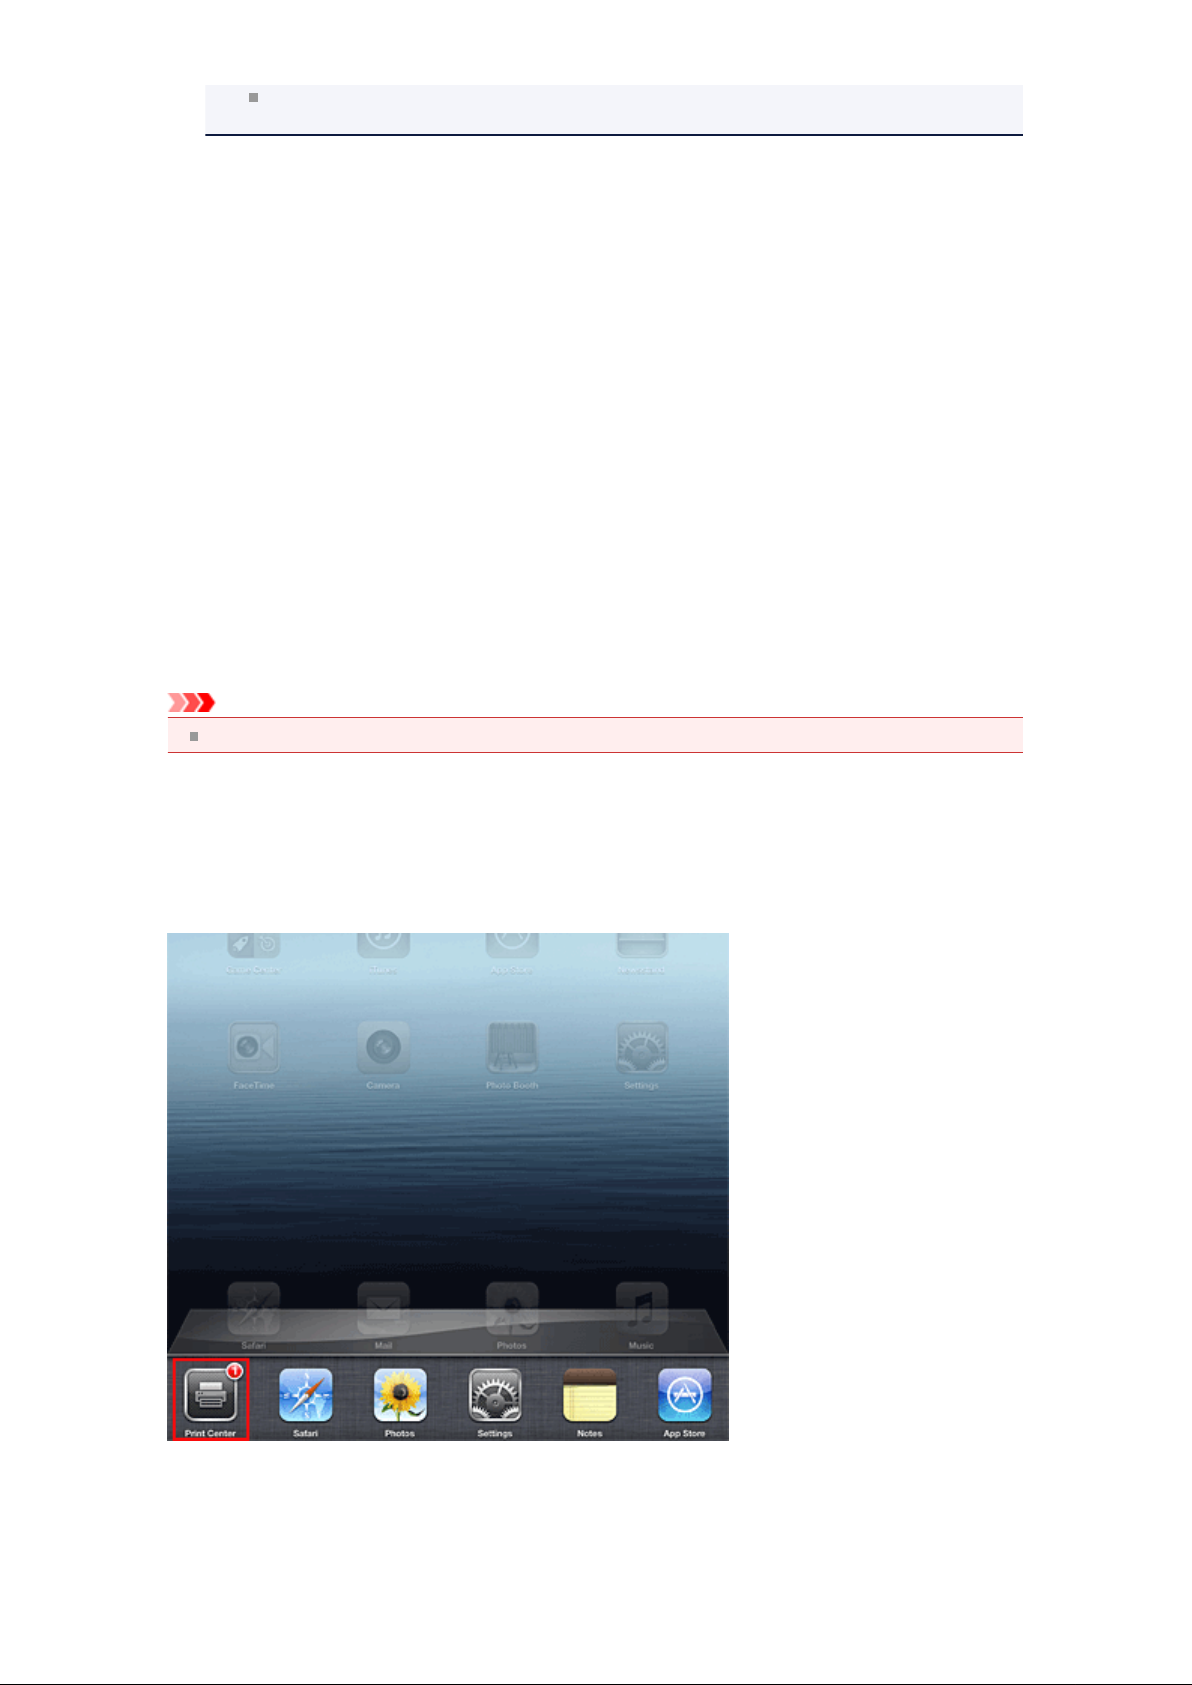
Checking the Print Status
During printing, a Print icon is displayed in the list of recently used application software, and you can use it
to check the print progress.
To display the list of latest used application software, press the Home button on the Apple device twice.
The Print icon is displayed at the bottom of the Home screen.
Deleting a Print Job
To delete a print job with AirPrint, use one of the following two methods:
From the machine: Use the operation panel of the machine to cancel the print job.
•

• From an Apple device: Press the Home button on the Apple device twice. Tap the Print icon and
display the print job list. Tap the print job to be canceled, and then tap Cancel Print.
AirPrint Troubleshooting
If the document does not print, check the following:
1. Check that the machine power is on. If the machine power is on, turn it off and then
back on again, and check whether the issue is resolved.
Check that the machine is connected by LAN to the same network subnet as the
2.
device on which iOS is installed.
Check that the machine has enough paper and ink.
3.
Check that no error message is displayed on the machine operation panel.
4.
If the problem persists, use the printer driver on your computer to execute printing and check whether
the document can be printed normally on the machine.
If the document cannot be printed, refer to the Online Manual for your model.
Note
After you turn on the machine, it may take few minutes before the machine can communicate
through a wireless LAN connection. Confirm that the machine is connected to the wireless LAN, and
then try printing.
If Bonjour on the machine is disabled, AirPrint cannot be used. Check the LAN settings on the
machine, and enable Bonjour.
Note
The windows used in the explanations may differ from those displayed by your Apple product or
application software.

Overview of the Machine
Main Components and Basic Operations
Main Components
About the Power Supply of the Machine
LCD and Operation Panel
Entering Numbers, Letters, and Symbols
Loading Paper / Originals
Loading Paper
Loading Originals
Inserting the USB Flash Drive
Replacing a FINE Cartridge
Replacing a FINE Cartridge
Checking the Ink Status
Maintenance
When Printing Becomes Faint or Colors Are Incorrect
Performing Maintenance from a Computer
Cleaning the Machine
Changing the Machine Settings
Changing Machine Settings from Your Computer
Changing the Machine Settings on the LCD
Information about Network Connection
Useful Information about Network Connection
About Network Communication
Changing and Confirming Network Settings
Screens for Network Connection of IJ Network Tool
Other Screens of IJ Network Tool
Appendix for Network Communication
Tips for Ensuring Optimal Printing Quality
Useful Information about Ink
Key Points to Successful Printing
Be Sure to Make Paper Settings after Loading Paper
Canceling a Print Job
Key to Enjoying Consistent Printing Quality
Precautions for Safe Transport of the Machine
Legal Limitations on Use of Your Product and Use of Images
Specifications

Main Components and Basic Operations
Main Components
About the Power Supply of the Machine
LCD and Operation Panel
Entering Numbers, Letters, and Symbols

Main Components
Front View
Rear View
Inside View
Operation Panel
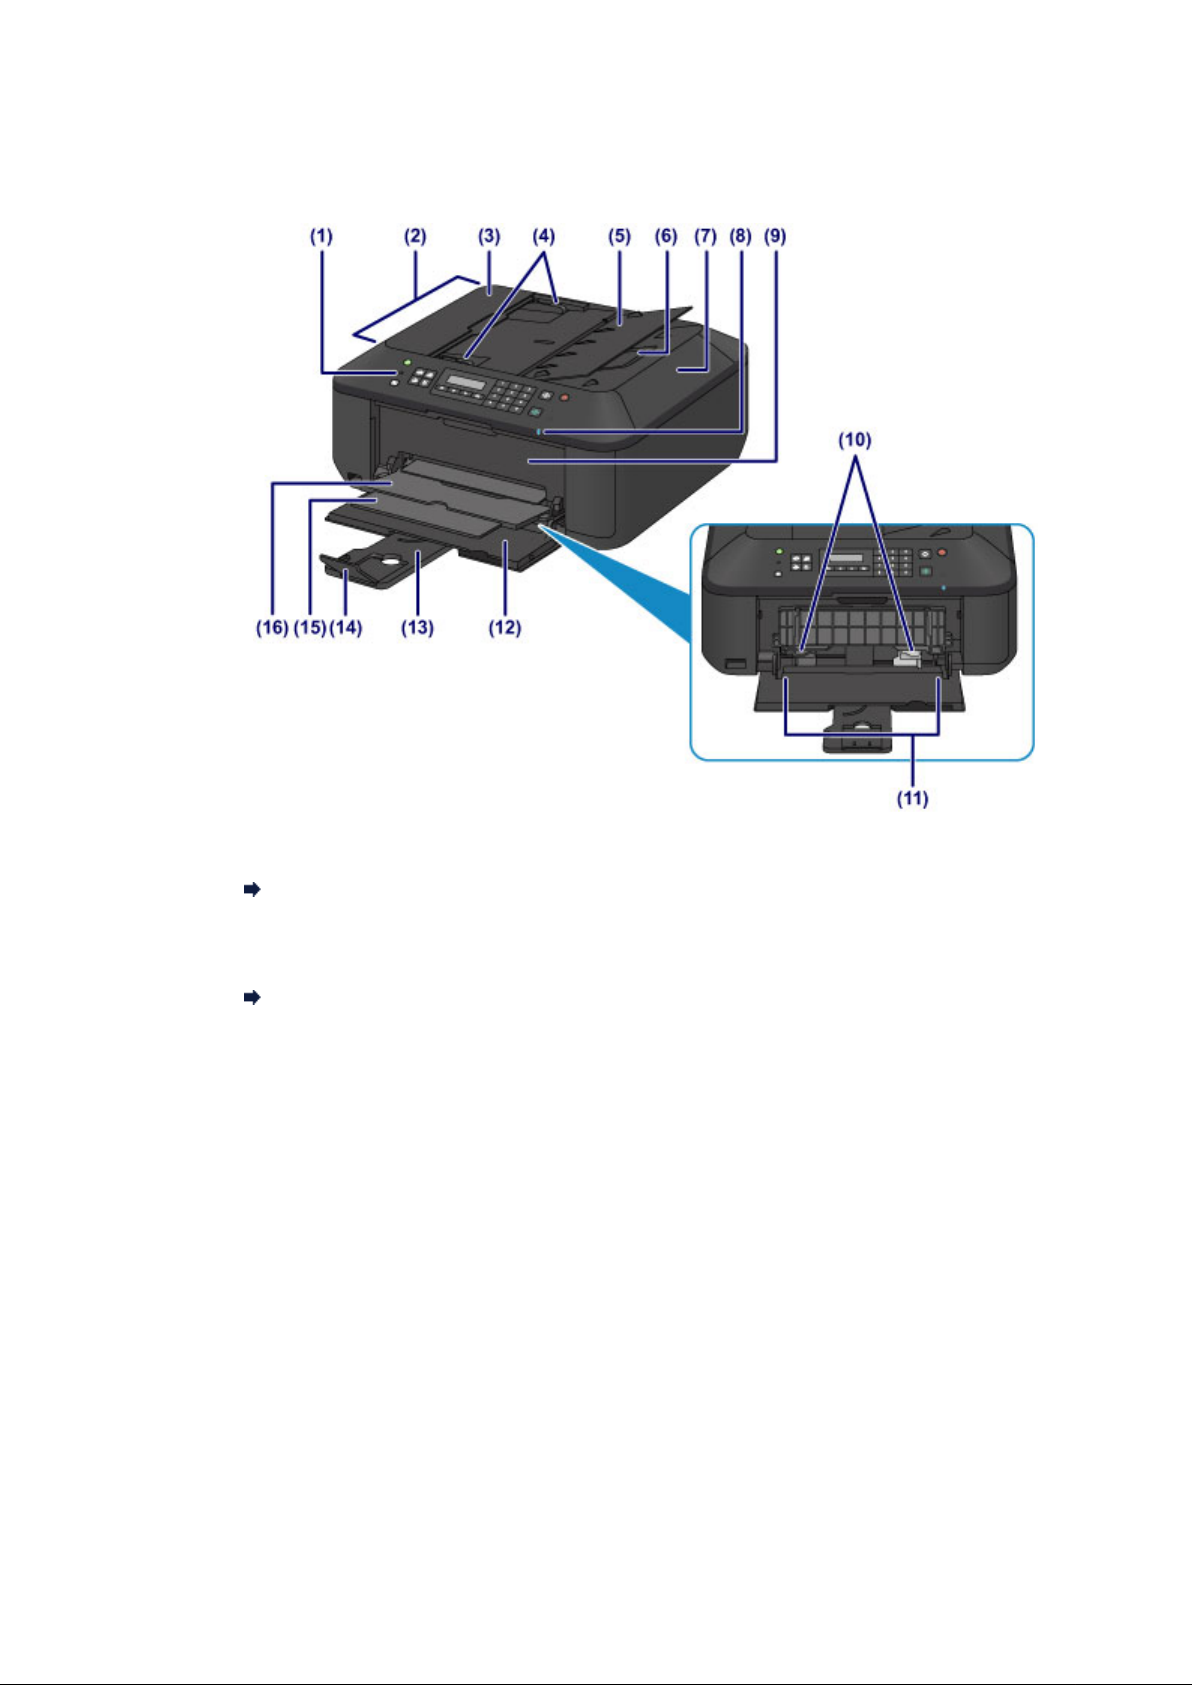
Front View
(1) operation panel
Use to change the settings of the machine or to operate it.
Operation Panel
(2) ADF (Auto Document Feeder)
Load a document to copy, scan, or fax. The documents loaded in the document tray are scanned
automatically one sheet at a time.
Loading Documents in the ADF (Auto Document Feeder)
(3) document feeder cover
Open when clearing jammed documents.
(4) document guides
Adjust these guides to match the width of document in the ADF.
(5) document tray
Open to load a document in the ADF. You can load two or more sheets of document of the same
size and thickness. Load the document with the side you want to scan facing up.
(6) document output slot
Documents scanned from the ADF are delivered here.
(7) document cover
Open to load an original on the platen glass.
(8) Wi-Fi lamp
Lights or flashes blue to indicate the wireless LAN status.
Lights:
Wireless LAN active is selected.
Flashes:
Printing or scanning over wireless LAN. Also flashes while searching for wireless LAN access
point during setup and when connecting to the access point.
(9) paper output cover
Open to replace the FINE cartridge or remove jammed paper inside the machine.
(10) paper guides
Slide to align with both sides of the paper stack.
(11) front tray
Load various sizes or types of paper which you can use on the machine. Two or more sheets of
the same size and type of paper can be loaded at the same time, and fed automatically one sheet
at a time.
Loading Plain Paper / Photo Paper
Loading Envelopes
(12) front cover
Open to load paper in the front tray.
(13) paper support
Extend to load paper in the front tray.
(14) output tray extension
Open to support ejected paper.
(15) paper output support
Extend to support ejected paper.
(16) paper output tray
Printed paper is ejected.
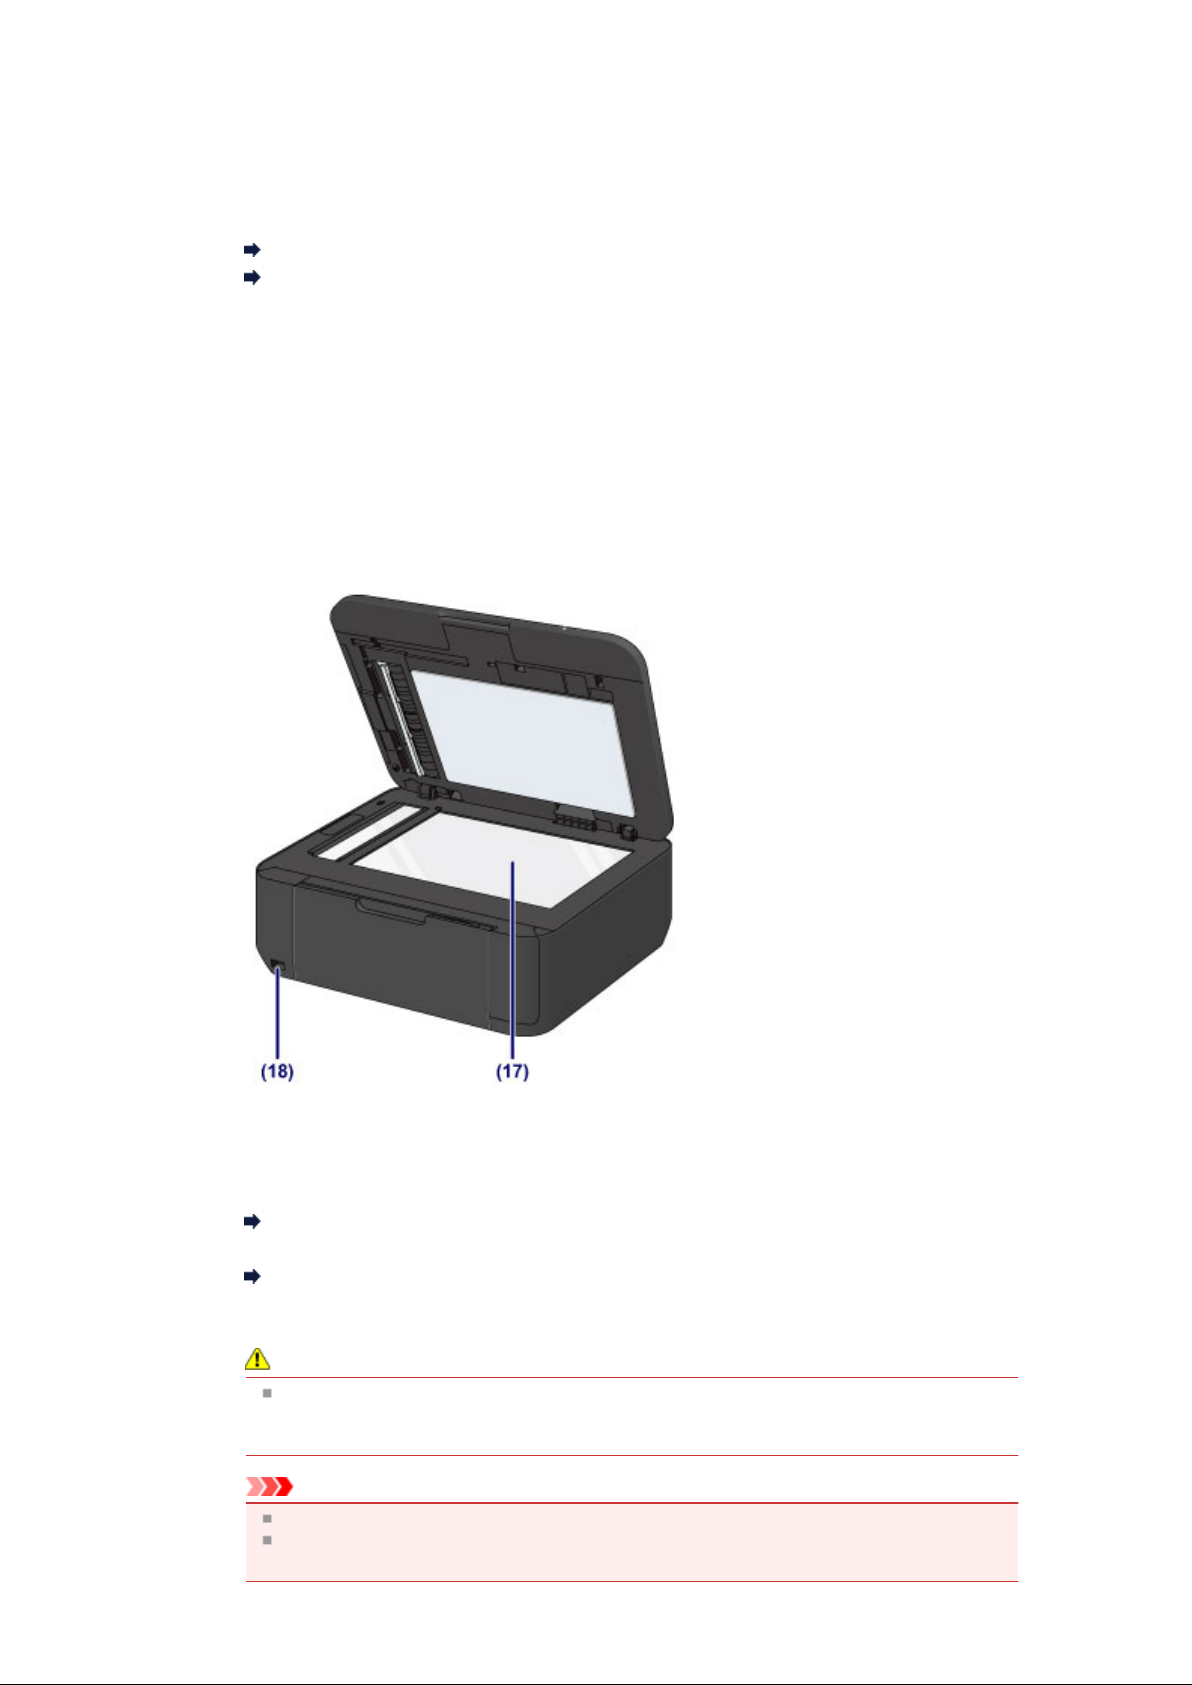
(17) platen glass
Load an original to copy, scan, or fax.
(18) USB flash drive port
Insert a USB flash drive to this port.
Inserting the USB Flash Drive
You can connect the optional Bluetooth Unit BU-30* to print directly.
Printing from a Bluetooth Compliant Device
* The Bluetooth Unit is not available in some countries or regions depending on the local laws and
regulations. For details, contact the service center.
Warning
Do not connect any equipment other than the USB flash drives and optional Bluetooth Unit
BU-30 to the USB flash drive port of the machine. This may cause fire, electric shock, or
damage to the machine.
Important
Do not touch the metal casing.
Do not use the USB cable longer than 10 feet (3 meters) to connect to the machine since it
may affect the operation of other peripheral devices.
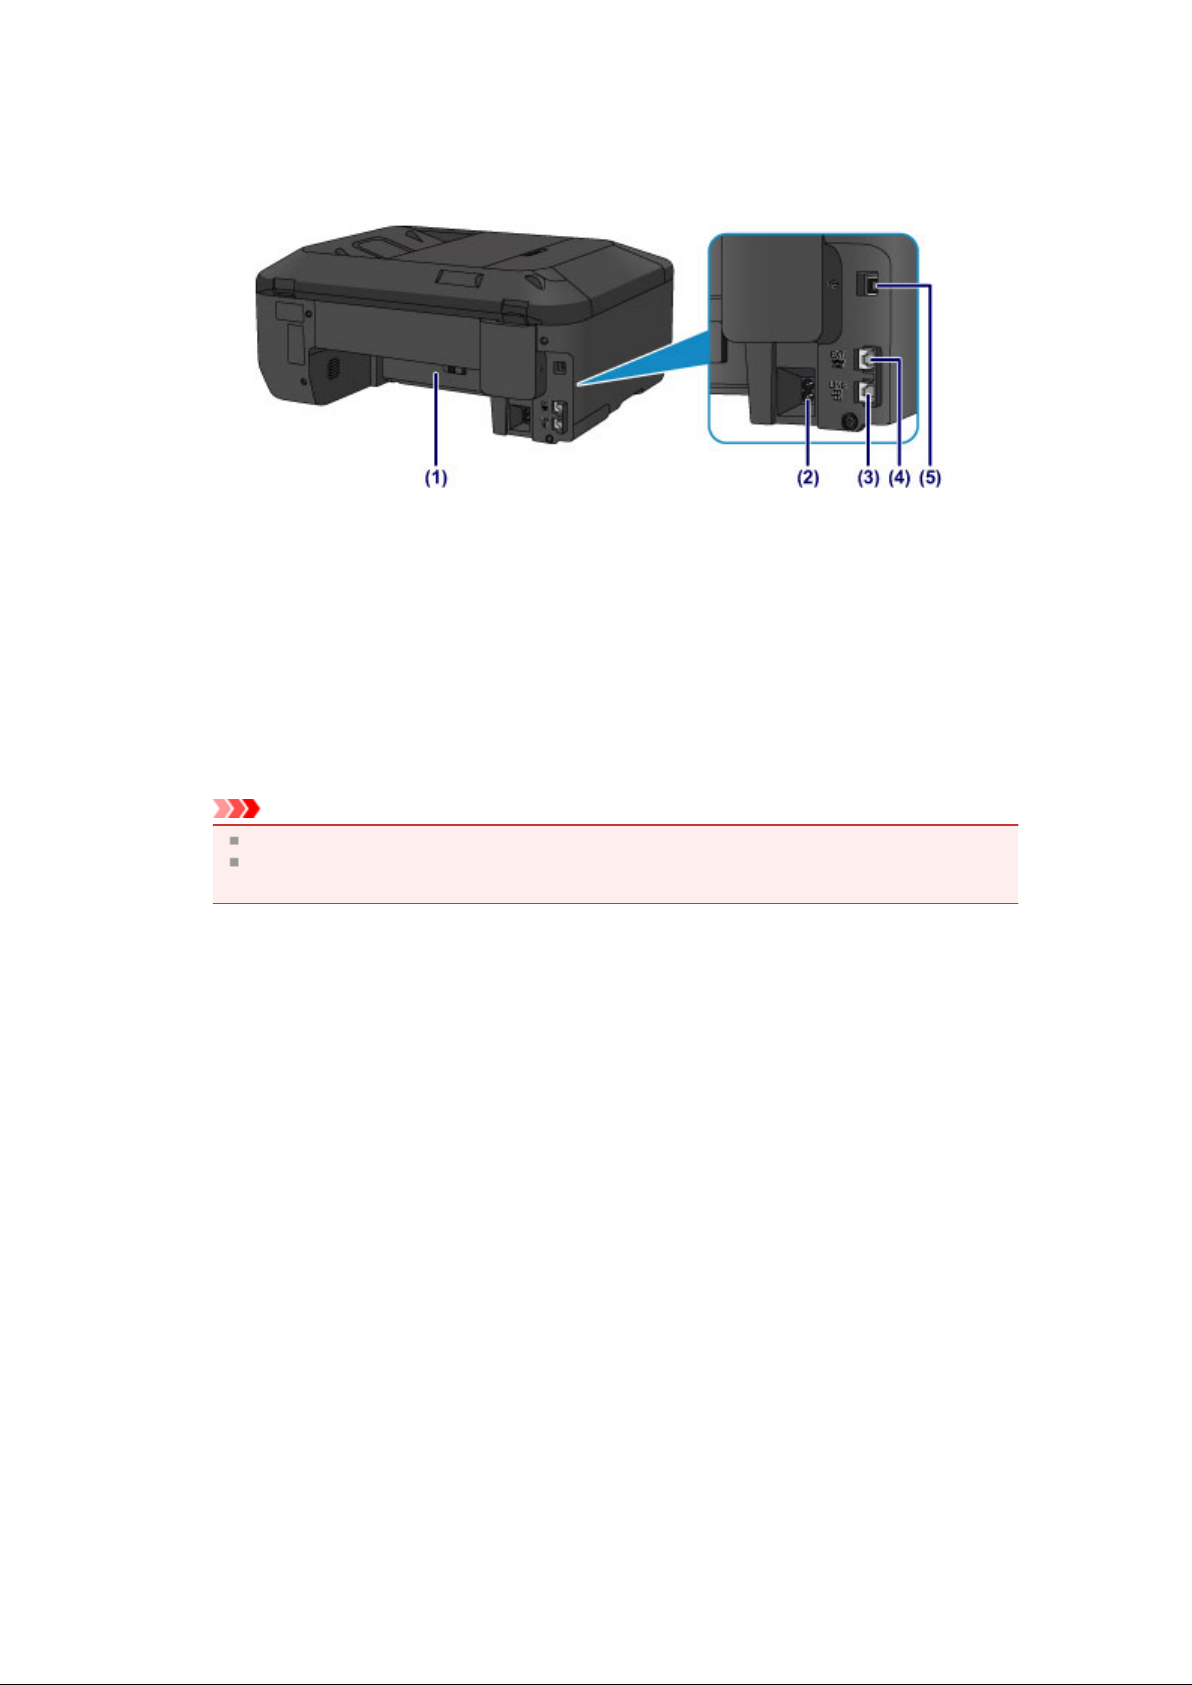
Rear View
(1) transport unit
Open to remove jammed paper.
(2) power cord connector
Plug in the supplied power cord.
(3) telephone line jack
Connect the telephone line.
(4) external device jack
Connect an external device such as telephone or answering machine.
(5) USB port
Plug in the USB cable to connect the machine with a computer.
Important
Do not touch the metal casing.
Do not plug in or unplug the USB cable while the machine is printing or scanning originals with
the computer.

Inside View
(1) ink cartridge lock lever
Locks the FINE cartridge into place.
(2) FINE cartridge (ink cartridges)
A replaceable cartridge that integrates print head and ink tank.
(3) FINE cartridge holder
Install the FINE cartridge.
The color FINE cartridge should be installed into the left slot and the black FINE cartridge should
be installed into the right slot.
(4) head cover
Opens to enable replacement of the FINE cartridge. The head cover will open automatically when
you open the paper output cover.
Note
For details on replacing a FINE cartridge, see Replacing a FINE Cartridge.
Important
The area around the parts (A) may be splattered with ink. This does not affect the performance
of the machine.
Do not touch the parts (A) or the electrical contacts (B) behind them. The machine may not print
properly if you touch them.
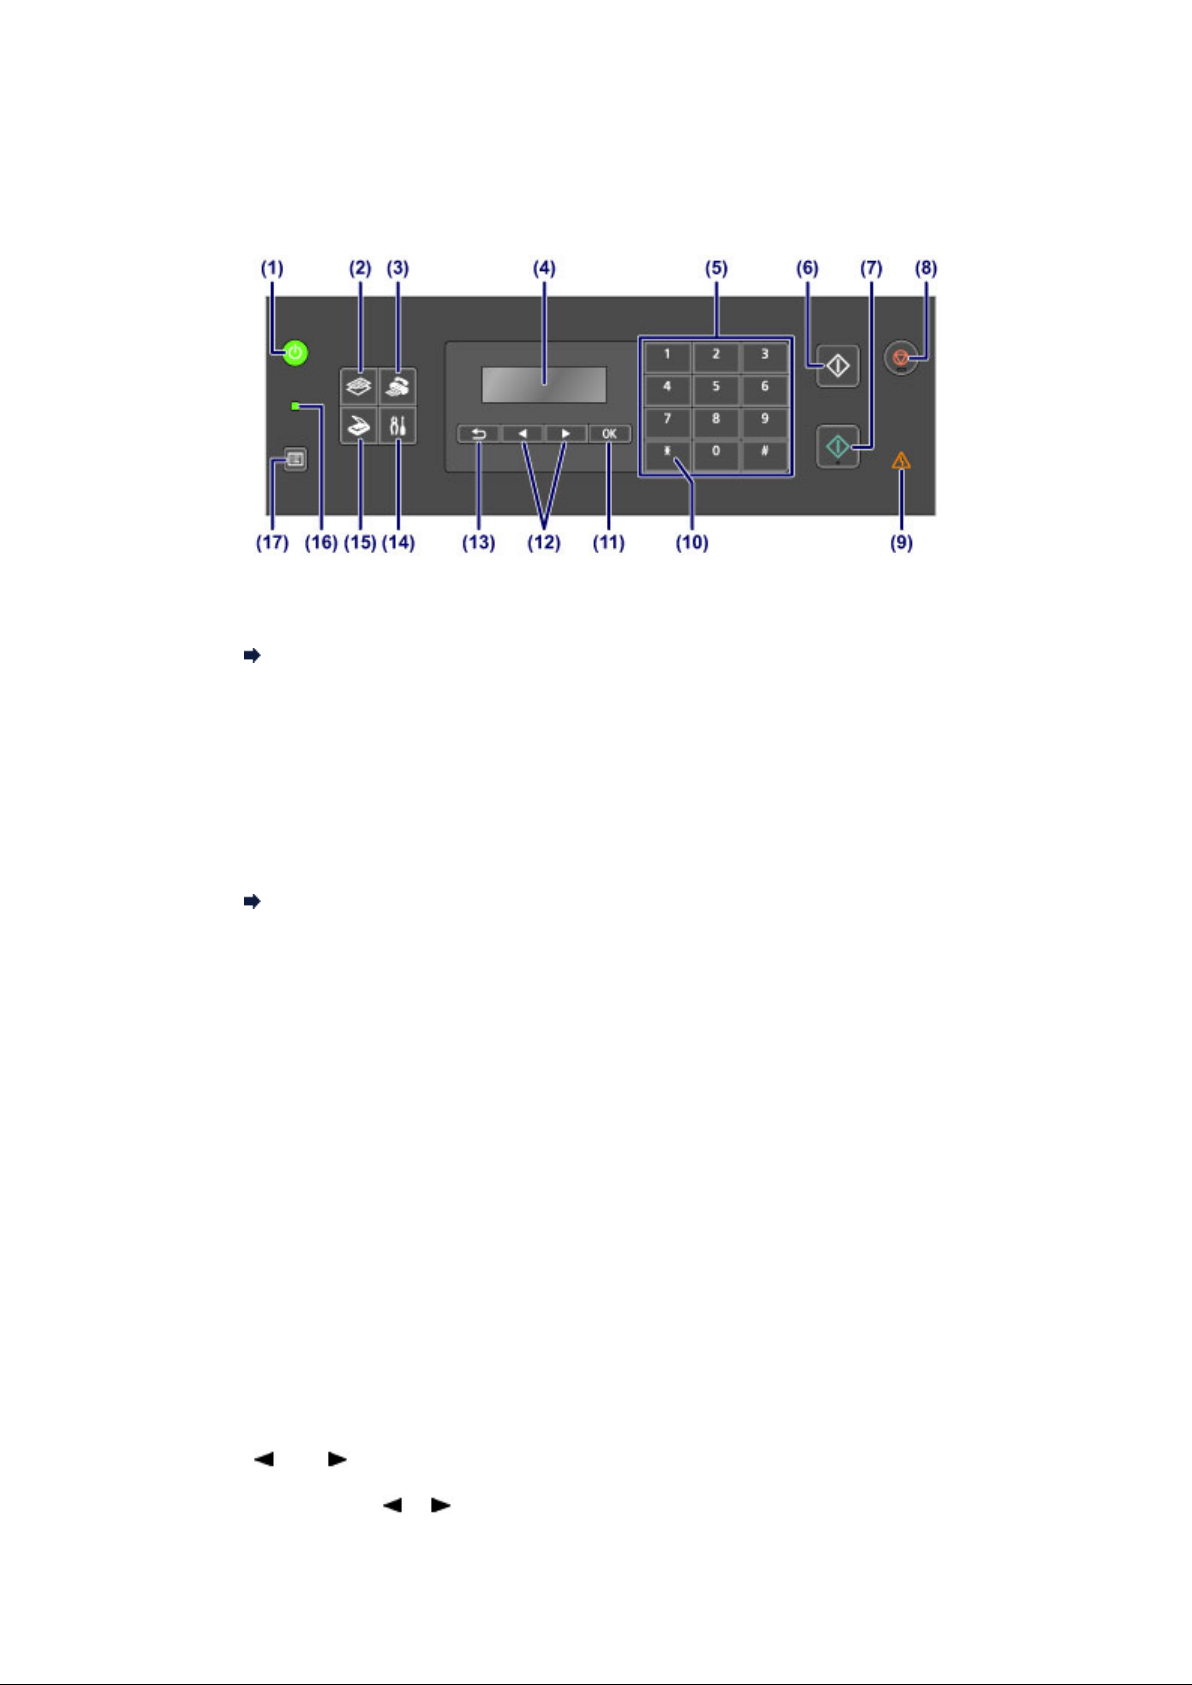
Operation Panel
* All lamps on the operation panel are shown lit in the illustration below for explanatory purposes.
ON button (POWER lamp)
(1)
Turns the power on or off. Lights or flashes green to indicate the power status. Before turning on
the power, make sure that the document cover is closed.
Turning the Machine On and Off
(2) COPY button
Switches the machine to the copy mode. The Copy standby screen is displayed, which lets you
make copies while specifying the number of copies.
(3) FAX button
Switches the machine to the fax mode. The Fax standby screen is displayed, which lets you send
a fax by dialing a fax/telephone number directly with the Numeric buttons.
(4) LCD (Liquid Crystal Display)
Displays messages, menu items, and the operational status.
Confirming that the Power Is On
(5) Numeric buttons
Used to enter numerical values such as the number of copies, as well as fax/telephone numbers
and characters.
(6) Black button
Starts black & white copying, scanning, faxing, etc.
(7) Color button
Starts color copying, scanning, faxing, etc.
(8) Stop button
Cancels operation when print, copy, scan, or fax transmission/reception job is in progress.
(9) Alarm lamp
Lights or flashes orange when an error occurs, such as paper-out or ink-out.
(10) Tone button
Switches to tone dialing temporarily if your machine is connected to a rotary pulse line and
changes the input mode for entering characters. This button is also used to dial with the Numeric
buttons.
(11) OK button
Finalizes the selection of a menu or setting item.
Resolves an error when printing is in progress, resumes the machine's normal operation after
removing jammed paper, or ejects documents remaining in the ADF (Auto Document Feeder).
(12)
and buttons
Used to increase/decrease a setting value such as the number of copies, and select a menu or
setting item. The or button is also used when entering characters.
(13) Back button
 Loading...