

Canon MP360 User Manual

MP360/370/390
Software Guide
Throughout this guide, MP360/
MP370 is referred to as the
“machine,” and MP390 as the “fax
model.”
1
2
3
Installing
System requirements and software Installing the software
Setting the default printer Removing and reinstalling the software
Printing
Printing documents
Changing print settings (Opening the settings dialog box)
Setting the paper type and print quality/[Main] tab
Setting page size and number of copies/[Page Setup] tab
Selecting a stamp/[Stamp/Background] tab
Selecting a background/[Stamp/Background] tab
Setting special effects/[Effects] tab
Saving settings as a print profile/[Profiles] tab
Cleaning and machine settings/[Maintenance] tab
Checking the status of the machine with the BJ Status Monitor
Sharing the printer and using it on a network
Scanning
Scanning with the operation panel Scanning with the MP Toolbox
Scanning an image from an application
Creating one PDF file from two or more pages
Scanning two or more small documents at one time
Setting preferences and scanning with ScanGear MP
Scanning with the WIA driver (Windows XP only)
Go To P.3 Click!
Go To P.18 Click!
Go To P.65 Click!
4
Faxing (Fax model only)
Sending a fax Registering or editing a recipient in the Address Book
Contents About this guide
Troubleshooting Glossary
Index
Go To P.108 Click!
Troubleshooting

X Contents
About this guide ........................................... 1
1: Installing ....................................4
System requirements and software.............. 4
Installing the software .................................. 6
Checking installation .................................. 12
Reading from or writing to a memory card. 15
Setting the default printer........................... 16
Removing and reinstalling the software ..... 17
2: Printing.....................................20
Printing documents .................................... 20
Changing print settings (Opening the settings
dialog box)....................................... 22
Setting the paper type and print quality/
[Main] tab......................................... 24
Setting page size and number of copies/
[Page Setup] tab.............................. 27
Selecting a stamp/
[Stamp/Background] tab.................. 36
Selecting a background/
[Stamp/Background] tab.................. 44
Setting special effects/[Effects] tab ............ 47
Saving settings as a print profile/
[Profiles] tab .................................... 49
Cleaning and machine settings/
[Maintenance] tab............................ 51
Checking the status of the machine
with the BJ Status Monitor............... 60
Sharing the printer and using it
on a network.................................... 63
4: Faxing (Fax model only)....... 109
Sending a fax........................................... 109
Registering or editing a recipient
in the Address Book...................... 114
5: Troubleshooting ................... 122
Problems outputting................................. 122
Memory card problems
(MP390/MP370)............................ 123
Problems installing and
uninstalling software ..................... 124
Problems printing from your computer..... 125
Problems scanning .................................. 126
Glossary................................................... 129
Index........................................................ 133
3: Scanning ..................................67
Scanning with the operation panel ............. 67
Scanning with the MP Toolbox................... 71
MP Toolbox settings................................... 74
Scanning an image from an application ..... 78
Creating one PDF file from two or
more pages ..................................... 79
Scanning two or more small documents at one
time.................................................. 82
Setting preferences and scanning with
ScanGear MP.................................. 87
Scanning with the WIA driver
(Windows XP only)........................ 106

X About this guide
This guide assumes you have a basic understanding of working with Windows and starting your
computer. You should be familiar with common Windows terms such as window, dialog box, point
and drag. For assistance in familiarizing yourself with Windows terms, see your Microsoft
Windows user documentation.
As a general rule, Windows XP dialog boxes are used in this guide, but if necessary Windows 2000/
Me/98 dialog boxes are also used.
Please note that dialog boxes may differ slightly depending on the Windows version you are using.
Control Panel operations in Windows XP appear in Category View.
Symbols used in this guide
The following symbols are used in this guide for safety measures, handling restrictions, and
precautions:
IMPORTANT Indicates important items or precautions that should always be observed when
using the product. These should always be read to avoid damage to the
product due to improper operation.
NOTE Indicates items for reference or supplementary information. Reading these
notes is highly recommended.
Conventions used in this guide
The following conventions are used in this guide.
[ ] Dialog box and window names, items in dialog boxes, buttons and menu commands are
surrounded by square brackets. Menu names are not surrounded by square brackets.
/ A slash is used when the OS and version names are used together. For example,
Windows 2000/XP stands for Windows 2000 and Windows XP.
Copyright
© 2003 Canon Inc. All rights reserved.
This guide may not be reproduced in any form, in whole or part, without the prior written consent
of Canon Inc.
Trademark acknowledgments
Adobe Photoshop is a registered trademark, and Adobe Photo Deluxe is a trademark, of Adobe
Systems Corporation.
Canon and BJ are registered trademarks and ScanGear are trademarks of Canon Inc.
Microsoft, Windows, Exchange, Outlook, and Outlook Express are registered trademarks of
Microsoft Corporation.
OmniPage is a registered trademark of ScanSoft, Inc.
Pentium is a registered trademark of Intel Corporation.
All other trademarks identified herein are the property of their respective owners.
1

Abbreviations used in this guide
In this guide, product and model names are abbreviated as follows:
Microsoft
Microsoft
Microsoft
Microsoft
Microsoft
®
Windows®98/98 Second Edition operating system: Windows 98
®
Windows®Millennium Edition operating system: Windows Me
®
Windows®2000 Professional operating system: Windows 2000
®
Windows®XP Professional/Home Edition operating system: Windows XP
®
Word: Word
The information described in this guide is subject to change without prior notice.
Considerable effort has been made to ensure that this guide is free of inaccuracies and omissions.
However, as we are constantly improving our products, if you need an exact specification, please
contact Canon.
Canon Inc. shall not be liable for any direct, incidental, or consequential damages of any nature, or
losses or expenses resulting from the use of this machine.
2

1
Installing
System requirements and software .................................................................................4
Installing the software ......................................................................................................6
Run the setup screen .................................................................................................6
Step 1 Install MP Drivers............................................................................................7
Step 2 Install MP Toolbox ..........................................................................................8
Step 3 Connect the USB cable ................................................................................11
Install Utility Software...............................................................................................11
View User’s Manual .................................................................................................11
If installation fails before completion ........................................................................11
Checking installation......................................................................................................12
Printer driver and fax driver (fax model only) ...........................................................12
Scanner driver..........................................................................................................13
Memory card (storage device) driver .......................................................................14
MP Toolbox..............................................................................................................14
Reading from or writing to a memory card.....................................................................15
Enabling/disabling overwriting memory card data....................................................15
Setting the default printer...............................................................................................16
Removing and reinstalling the software.........................................................................17
To remove the MP Toolbox......................................................................................17
To remove the MP Drivers .......................................................................................17
To reinstall the software...........................................................................................17

Chapter
1
Installing
X System requirements and software
To use the software, you will need the following hardware and software.
Computer
IBM PC/AT compatible computer
Other software
Internet Explorer 4.01 or later (Service Pack 2 or later)
Hard disk
Available space of 65 MB or more (150 MB or more recommended)
MP Drivers: 50 MB or more
MP Toolbox: 15 MB or more
Disk drive
CD-ROM drive, or access to one over a network connection
Monitor
256-color SVGA monitor or greater (High Color or above recommended)
Interface
USB 1.1 and 2.0 are supported.
• USB 2.0 High-Speed
In order to use the faster High-Speed mode, the machine must be connected to a computer equipped
with a standard USB 2.0 High-Speed interface.
Use a cable supporting USB 2.0.
Operating system CPU Required RAM
Microsoft Windows 2000
Professional
(Service Pack 4 or later)
Microsoft Windows XP
Professional/Home Edition
(Service Pack 1 or later)
NOTE
• Canon cannot guarantee the performance with all computers standard-equipped with a USB2.0 Hi-Speed
interface. For the most up-to-date information, see the Canon home page.
• As a USB2.0 Hi-Speed interface is fully compatible with USB Full-Speed (USB1.1-equivalent), you can use
it as a USB Full-Speed (USB1.1-equivalent) interface.
Pentium/Celeron 566 MHz
processor or higher
128 MB or more
(256 MB or more recommended)
4

• This may not operate correctly with self-made computers, or store-brand computers.
• When installing the MP Drivers in Windows 2000, you must have Service Pack 4 or later version installed.
• When installing the MP Drivers in Windows XP, you must have Service Pack 1 or later version installed.
• USB Full-Speed (USB 1.1 equivalent)
In order to use the Full-Speed mode, the machine must be connected to a computer equipped with
a standard USB Full-Speed interface.
Use a USB-IF-approved cable not longer than 16 3/8 feet (5 meters).
Operating system CPU Required RAM
Microsoft Windows 98
Microsoft Windows Me
Microsoft Windows 2000
Professional
(Service Pack 1 or later)
Microsoft Windows XP
Professional/Home Edition
IMPORTANTIMPORTANTIMPORTANT
While the machine is printing from or scanning images to the computer, or the computer is in the sleep
mode or standby mode, do not disconnect and connect the USB cable.
Pentium/Celeron 233 MHz
processor or higher
Pentium/Celeron 300 MHz
processor or higher
64 MB or more
(128 MB or more recommended)
User privileges when using Windows 2000/XP
When installing, you must have Administrator privileges.
When using, you must have User privileges or greater.
Service packs
Service packs are updates that fix defects in Windows, and are released by Microsoft.
For how to obtain them, please consult Microsoft.
NOTE
To check which service pack is installed on your computer:
1. Right-click [My Computer], and select [Properties].
2. The currently installed service pack is displayed under [System].
5

X Installing the software
Run the setup screen
When you install the software, all the software you need is installed on your local hard disk drive.
IMPORTANTIMPORTANTIMPORTANT
• Do not install the software on the network drive.
• If you have an older version of the MultiPASS Suite software installed on your computer, delete this
version before installing the new version.
• When installing the software in Windows 2000/XP, you must log on as Administrator or have
Administrator privileges.
NOTE
If there is a copy of the software on the local or network drive, you can install from the drive on which the
software is copied without using the Setup CD-ROM.
1 Turn on the machine.
2 Turn on your computer.
IMPORTANT
• Do not connect the machine to the computer with the USB cable until instructed to do so.
• If the machine is connected to your computer, the [New Hardware Found], [Device Driver
Wizard], [Add New Hardware Wizard] etc. screen appears. In this case, disconnect the USB
cable, then click [Cancel] on the screen.
3 Quit any applications (including virus checkers) that are currently running.
4 Insert the Setup CD-ROM into your disk drive.
The [Setup] screen is displayed.
Install the software by following in order steps 1, 2 and 3 as displayed in the [Setup] screen.
[Setup] screen
If this screen is not displayed, on the Windows desktop, double-click [My Computer] (Windows XP:
Click [Start], then click [My Computer]). Open the CD-ROM icon, then double-click
[Setup (Setup.exe)].
If you are installing from a copy saved on a network or hard disk, double-click [Setup (Setup.exe)] in
the copy.
6

Step 1 Install MP Drivers
1 In the [Setup] screen, click [Install MP Drivers].
2 Follow the on-screen instructions to install the software.
z When restarting your computer is necessary in the [InstallShield Wizard Complete]
screen.
Leave the setting selected on [Yes, I want to restart my computer now.] (With the
CD-ROM in the CD drive, clicking [Finish] will restart your computer).
7

z When restarting your computer is not necessary in the [InstallShield Wizard
Complete] screen.
3 Click [Finish].
Step 2 Install MP Toolbox
When you restart your computer and this screen is not displayed or you have closed it, on the Windows
desktop, double-click [My Computer] (Windows XP: Click [Start], then click [My Computer]).
Open the CD-ROM icon, then double-click [Setup (Setup.exe)].
If you are installing from a copy saved on a network or hard disk, double-click [Setup (Setup.exe)] in
the copy.
IMPORTANT
If the screen above is not displayed, installation of the MP Drivers is not complete. J “Problems
installing and uninstalling software”
8

1 In the [Setup] screen, click [Install MP Toolbox].
2 Click [Next].
3 Click [Continue].
4 Follow the on-screen instructions to install the software.
5 When the [Choose Destination Location] dialog box appears, click [Next].
9

6 Click [Next].
7 Click [Finish].
10

Step 3 Connect the USB cable
IMPORTANT
If the screen above is not displayed, installation of the MP Drivers or MP Toolbox is not
complete. J “Problems installing and uninstalling software”
1 Check that the machine is turned on.
2 Connect the USB cable to the machine and computer USB ports.
When you connect the USB cable to the computer, the machine is automatically detected, and the
computer performs the various settings. Wait a while as your computer performs the various settings.
Depending on your computer, a message may display asking you to restart your computer. If this is the
case, restart your computer. After restarting your computer, wait a while for your computer to continue
performing the various settings.
Install Utility Software
To install the Utility Software, in the [Setup] screen, click [Install Utility Software].
You can choose not to install the Utility Software at this stage and install it later.
View User’s Manual
To read the manual on the CD-ROM, click [View User’s Manual] on the [Setup] screen.
Installation is now complete. In the [Setup] screen, click [Exit] to close the screen. Then remove
the CD-ROM from the disk drive.
If installation fails before completion
Remove the software and reinstall it.
J “Removing and reinstalling the software”
11

X Checking installation
To check if installation has been successfully completed, do the following.
If installation has not been successful, remove and reinstall the software.
J “Removing and reinstalling the software”
Printer driver and fax driver (fax model only)
On the Windows taskbar, click [Start], point to [Settings], then click [Printers] (Windows XP: On
the Start menu, click [Printers and Faxes]).
In the open window, if the printer and fax icons for the machine is present, installation has been
successful.
Windows XP window Windows 98/Me/2000 window
12
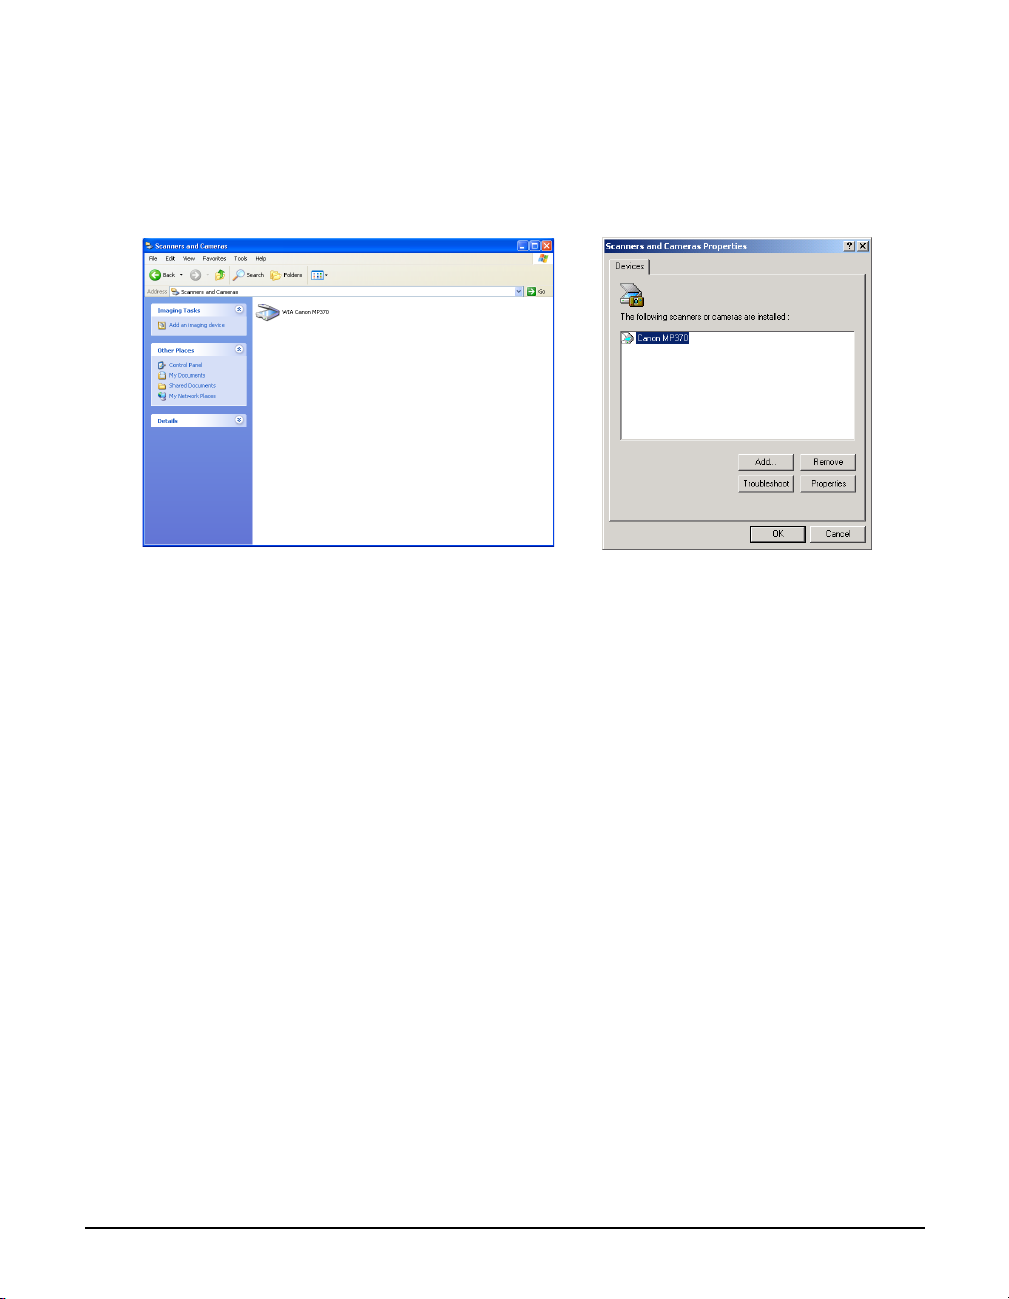
Scanner driver
On the Windows taskbar, click [Start], point to [Settings], then click [Control Panel](Windows XP:
Click [Start], then click [Control Panel]).
In the open window, double-click [Scanners and Cameras](Windows XP: Click [Printers and Other
Hardware], then click [Scanners and Cameras]).
If the scanner icon for the machine is present, installation has been successful.
Example: Windows XP window Example: Windows 2000 window
13

Memory card (storage device) driver
On the Windows desktop, double-click [My Computer] (Windows XP: On the Windows taskbar,
click [Start], then click [My Computer]).
In the [My Computer] window, if the memory card icon for the machine is displayed as the
[Removable Disk], installation has been successful.
Windows XP window
Windows 98/Me/2000 window
MP Toolbox
If the [Canon MP Toolbox 4.1] icon is displayed on the Windows desktop, installation has been
successful.
[Canon MP Toolbox 4.1] icon
14

X Reading from or writing to a memory card
When the machine is connected to a computer, the memory card drive (Removable Disk) will
appear under [My Computer] on the Windows desktop.
By inserting a memory card in the machine, you can view photographs on the memory card by
opening the [Removable Disk] on your computer. You can then copy the photographs to your
computer’s hard disk (similar to copying other files on the hard disk), or by changing the setting,
can copy hard disk files onto the memory card.
IMPORTANTIMPORTANTIMPORTANT
• Do not put your computer in standby or sleep mode when a memory card is inserted in a card slot.
Also, do not remove or switch memory cards when your computer is in standby or sleep mode.
• When switching memory cards, press [ON/OFF] to turn off the machine before removing the card.
• In Windows 2000, if you turn off the machine, the [Unsafe Removal of Device] screen will be displayed.
In this case, click [OK]. This will not affect the machine or computer’s operation.
• While accessing to the storage, do not remove the memory card, or do not disconnect the USB cable.
Enabling/disabling overwriting memory card data
You can enable or disable overwriting memory card data.
Follow the steps below to change the setting:
IMPORTANTIMPORTANTIMPORTANT
Windows 2000: If the <CARD PROTECT> setting for the machine is not recognized on your
computer, a delayed write failed error may occur while you copy data to a memory card, and data
may be broken.
1 Make sure there is no memory card inserted in the machine.
2 Press [Additional Functions].
3 Use [W] or [X] to select <5.CARD PROTECT> (MP390: <7. CARD PROTECT>).
4 Press [OK/Set].
CARD PROTECT
ON
5 Use [W] or [X] to select <ON> or <OFF>.
6 Press [OK/Set].
Press [Stop/Reset] to switch to standby mode.
7 Press [COPY] or [SCAN] to select a mode.
You cannot overwrite in PHOTO mode.
8 Insert a memory card into the appropriate slot.
NOTE
If you change the above setting while a memory card is inserted in a card slot, disconnect and then reconnect
the USB cable to apply the new setting. The new setting will not be activated until you do so.
15

X Setting the default printer
When you install the printer driver, that printer will become your default printer. When the [Set as
Default Printer] setting is applied to the machine, the machine will be used to print from
applications without configuring any other settings. In the [Print] dialog box, you will no longer
need to select the machine. You can change the default printer setting as follows.
IMPORTANTIMPORTANTIMPORTANT
Windows 2000: Just installing the printer driver may not apply the [Set as Default Printer] setting to
that printer. Be sure to follow the steps below to apply the [Set as Default Printer] setting.
1 On the Windows taskbar, click [Start], point to [Settings], then click [Printers]
(Windows XP: On the Start menu, click [Printers and Faxes]).
2 In the [Printers] (Windows XP: [Printers and Faxes]) window, click the icon of the
printer you want to set as the default printer.
3 On the [File] menu, click [Set as Default Printer].
16

X Removing and reinstalling the software
If you do not need the MP Toolbox or MP Drivers any longer, or if they are not installed correctly,
remove them.
When removing the software from a Windows 2000/XP operating computer, you must log on the
computer as an Administrator, or have Administrator privileges.
IMPORTANTIMPORTANTIMPORTANT
When removing the MP Drivers, first remove the MP Toolbox. If the MP Drivers are removed
beforehand, the [Canon] folder may remain in [(All) Programs] on the Start menu.
To remove the MP Toolbox
1 Quit all of the open applications, including the MP Toolbox and virus checkers.
Click [X] at the upper-right of the screen to quit the MP Toolbox.
2 On the Windows taskbar, click [Start], point to [(All) Programs], [Canon], and [MP
Toolbox 4.1] in order. Then click [Uninstall Toolbox].
3 Follow the on-screen instructions.
When the screen appears for repairing or removing the program, select the [Remove] check box, then
click [Next].
If a message appears confirming whether to remove the application, click [OK].
Select [Yes] and click [Finish], if you are prompted to restart your computer.
To remove the MP Drivers
1 Quit all of the open applications, including virus checkers.
2 On the Windows taskbar, click [Start], point to [(All) Programs], [Canon], then [MP
Drivers]. Then click [Uninstall Drivers].
3 In [Please select the device to delete.], select the machine ([MP370 Series], [MP360
Series], or [MP390 Series]), then click [Perform].
If a message appears confirming whether to remove the application, click [Yes].
The [Finish] screen is displayed.
4 Restart your computer if a message asking you to do so appears.
5 Disconnect the USB cable from the computer and machine.
Windows 2000: The [Unsafe Removal of Device] screen appears. Click [OK]. This will not affect the
machine or computer.
IMPORTANT
If you restarted your computer in step 4, disconnect the USB cable before the computer start.
To reinstall the software
After removing the MP Toolbox and MP Drivers, reinstall the software. J“Installing the
software”
17

2
Printing
Printing documents ........................................................................................................20
Previewing your document before printing...............................................................20
Changing print settings (Opening the settings dialog box) ............................................22
To change settings for the current print job..............................................................22
To change settings for all future print jobs ...............................................................22
Setting the paper type and print quality/[Main] tab ........................................................24
Setting a custom print quality...................................................................................25
Setting a custom color adjustment...........................................................................26
Setting page size and number of copies/[Page Setup] tab............................................27
Printing on a custom paper size...............................................................................29
Borderless printing ...................................................................................................33
Enlarging/reducing to fit the paper size (Fit-to-page printing) ..................................29
Scaled printing .........................................................................................................29
Printing multiple pages on one sheet (Page layout printing)....................................30
Poster printing..........................................................................................................31
Duplex printing .........................................................................................................34
Duplex printing and binding a document into a booklet (Booklet printing) ...............32
Setting background printing (Windows 98/Me only).................................................35
Selecting a stamp/[Stamp/Background] tab...................................................................36
Creating or changing a stamp..................................................................................37
Specifying the text and color of a text stamp (Windows 2000/XP)...........................38
Specifying an image for a graphic stamp (Windows 2000/XP) ................................39
Specifying the text and color of a stamp (Windows 98/Me) .....................................40
Changing the placement and rotation of a stamp ....................................................42
To change the position of a stamp ...........................................................................42
Saving or deleting a stamp.......................................................................................43
To save a stamp.......................................................................................................43
To delete a stamp ....................................................................................................43
Selecting a background/[Stamp/Background] tab..........................................................44
Saving a new image as a background/Deleting a background ................................45
To save a new image as a background ...................................................................45
To delete a background ...........................................................................................46
Setting special effects/[Effects] tab................................................................................47
Saving settings as a print profile/[Profiles] tab...............................................................49
To save a print profile...............................................................................................49
To retrieve and use a print profile ............................................................................50
To delete a print profile ............................................................................................50
To restore the factory pre-defined settings ..............................................................50
Cleaning and machine settings/[Maintenance] tab ........................................................51
Cleaning the print head ............................................................................................52
Deep cleaning ..........................................................................................................52

2
Aligning the print head .............................................................................................54
Printing the nozzle check pattern.............................................................................56
Resetting the ink counter .........................................................................................57
Setting for slow-drying paper (Custom Settings)......................................................58
Controlling operating noise (Quiet Mode) ................................................................59
Checking the status of the machine with the BJ Status Monitor....................................60
To start the BJ Status Monitor..................................................................................60
To cancel printing.....................................................................................................61
To display a list of printing jobs................................................................................62
Sharing the printer and using it on a network ................................................................63
Setting up the printer for sharing..............................................................................63
Installing the printer driver on a client system..........................................................63
Sharing the printer in Windows 2000/XP .................................................................64

Chapter
2
Printing
X Printing documents
The general steps for printing a document are set out below.
IMPORTANTIMPORTANTIMPORTANT
While the machine is printing from the computer, or the computer is in the sleep mode or standby
mode, do not disconnect and connect the USB cable.
1 Load paper in the machine.
2 Open the application from which you will print the document, and select the command
to print. (This in most cases will be [Print] in the File menu.)
To print with the current printer driver settings, click the print button on the Toolbar.
Example: [Print] dialog box in Word
[Print] dialog box
3 In the [Print] dialog box, in [Select Printer] or [Name], check that the machine you will
be using is selected. If it is not, select the machine.
4 Click [Print] or [OK] to begin printing.
Previewing your document before printing
You can display a preview of your document before printing to check how it will be printed.
1 Load paper in the machine.
2 Open the application from which you will print the document, and select the command
to print. (This in most cases will be [Print] in the File menu.)
20

3 In the [Print] dialog box, in [Select Printer] or [Name], select the machine, then click
[Preferences] or [Properties].
4 On the [Main] tab, select [Preview before printing].
5 Click [OK].
6 In the [Print] dialog box, click [Print] or [OK].
The preview will be displayed.
Example: [BJ Preview] dialog box
7 To print, click [Start Printing].
To close the preview and cancel printing, click [Cancel Printing].
21

X Changing print settings (Opening the settings
dialog box)
You can change the settings for the particular document you will be printing.
You can change settings such as print media type, page setup and image quality.
To change settings for the current print job
If the [Print] dialog box is displayed from the application, the settings you change are applied only
to the current print job. J “Printing documents”
1 Load paper in the machine.
2 In the [Print] dialog box, in [Select Printer] or [Name], select the machine, then click
[Preferences] or [Properties].
The [Printer Properties] dialog box is displayed.
3 Use one of the methods below to change settings.
z Use a previously-saved print profile
On the [Profiles] tab, in [Printing Profiles], click the print profile you want to retrieve, then
click [Retrieve from Profiles]. When asked to confirm, click [OK].
To register a print profile J “Saving settings as a print profile/[Profiles] tab”
z Print Advisor
In the [Printer Properties] dialog box, on the [Main] tab, click [Print Advisor] and follow
the on-screen instructions.
NOTE
You can configure the settings on the [Main] tab easier. Just answering some questions enables you
to change settings such as [Media Type] properly.
z Manually
In the [Printer Properties] dialog box, change settings on each tab.
J “Setting the paper type and print quality/[Main] tab”
J “Setting page size and number of copies/[Page Setup] tab”
J “Selecting a stamp/[Stamp/Background] tab”
J “Selecting a background/[Stamp/Background] tab”
J “Setting special effects/[Effects] tab”
J “Cleaning and machine settings/[Maintenance] tab”
To revert to default settings, click [Defaults].
To confirm the changes and close the dialog box, click [OK].
To cancel the changes and close the dialog box, click [Cancel].
To change settings for all future print jobs
If the [Print] dialog box is displayed from the Windows taskbar, the settings you change are applied
to all print jobs.
1 On the Windows taskbar, click [Start], point to [Settings], then click [Printers]
(Windows XP: On the Start menu, click [Printers and Faxes]).
2 Do one of the following.
z Windows 2000/XP:
Right-click the printer icon for the machine, then click [Printing Preferences].
22

z Windows 98/Me:
Right-click the printer icon for the machine, then click [Properties].
The [Printer Properties] or [Printing Preferences] dialog box is displayed.
3 Use one of the methods below to change settings.
z Use a previously-saved print profile
On the [Profiles] tab, in [Printing Profiles], click the print profile you want to retrieve, then
click [Retrieve from Profiles]. When asked to confirm, click [OK].
To register a print profile J “Saving settings as a print profile/[Profiles] tab”
z Print Advisor
In the [Printer Properties] or [Printing Preferences] dialog box, on the [Main] tab, click
[Print Advisor] and follow the on-screen instructions.
z Manually
In the [Printer Properties] or [Printing Preferences] dialog box, change settings on each
tab.
J “Setting the paper type and print quality/[Main] tab”
J “Setting page size and number of copies/[Page Setup] tab”
J “Selecting a stamp/[Stamp/Background] tab”
J “Selecting a background/[Stamp/Background] tab”
J “Setting special effects/[Effects] tab”
J “Cleaning and machine settings/[Maintenance] tab”
To revert to default settings, click [Defaults].
To confirm the changes and close the dialog box, click [OK].
To confirm the changes without closing the dialog box, click [Apply].
To cancel the changes and close the dialog box, click [Cancel].
23

X Setting the paper type and print quality/[Main]
tab
In the [Printer Properties] or [Printing Preferences] dialog box, on the [Main] tab, you can change
settings such as print media type, paper source, and print quality.
To open the [Printer Properties] or [Printing Preferences] dialog box J “Changing print settings
(Opening the settings dialog box)”
[Main] tab
[Media Type]
Select the print media type (e.g. plain paper) for printing. Depending on the print media you select,
the choices available for the other items will change.
[Paper Source]
Displays the source from which paper is supplied. You can select [Auto Sheet Feeder] only.
[Print Quality]
Select a print quality suitable for the document to be printed.
z [High]
The print quality will be higher but printing speed will be slower.
z [Standard]
For average printing speed and quality.
z [Draft]
Printing quality will be reduced but the printing speed will be faster. This setting is suitable
when printing multiple-page documents or printing drafts of documents.
z [Custom]
For selecting image quality and halftone settings individually. J “Setting a custom print
quality”
24

[Color Adjustment]
Select the color adjustment method for printing.
z [Auto]
For automatic color correction by the printer driver.
z [Manual]
For color adjustment with detailed specifications. J “Setting a custom color adjustment”
[Grayscale Printing]
Select to print a color document in black and white.
[Preview before printing]
Select if you want to display a preview of your document before printing to check how it will print.
J “Previewing your document before printing”
[Print Advisor]
Select to use the Print Advisor to help you configure printer driver settings by answering a series
of questions.
Operation Preview
The printer illustration at the left of the [Main] tab shows the current settings.
Setting a custom print quality
You can make fine adjustments to print quality and halftoning settings.
The following changes are made in the [Printer Properties] or [Printing Preferences] dialog box, on
the [Main] tab.
To open the [Printer Properties] or [Printing Preferences] dialog box J “Changing print settings
(Opening the settings dialog box)”
1 In [Print Quality], select [Custom], then click [Set].
2 In the [Set Print Quality] dialog box, adjust print quality and halftoning settings.
z [Quality]
Move the slider to the right for higher print quality and to the left for faster printing speed.
IMPORTANT
With some [Media Type], certain quality levels cannot be selected.
z [Halftoning]
Select how the halftone parts of the image will be expressed.
[Auto]
– Automatically sets appropriate dither and diffusion according to the type of image.
25
[Dither]
– Dither creates halftones using pixels arranged in a fixed pattern. Dithering is suitable for graphs
and charts with well-defined color boundaries.
[Diffusion]
– Diffusion creates halftones by arranging image pixels randomly. Diffusion is suitable for
photographs and graphs that require a fine color gradation.
IMPORTANT
With some combination of [Media Type] and [Quality], certain halftoning methods cannot
be selected.
z [Reduce spool data size] (Windows 2000/XP only)
You can reduce the size of printing data when spooling. Select this check box when the
document is not printed properly (in such case as the image is not printed).
NOTE
You may not be able to see the effect of this setting depending on the application you are using.
3 Click [OK].
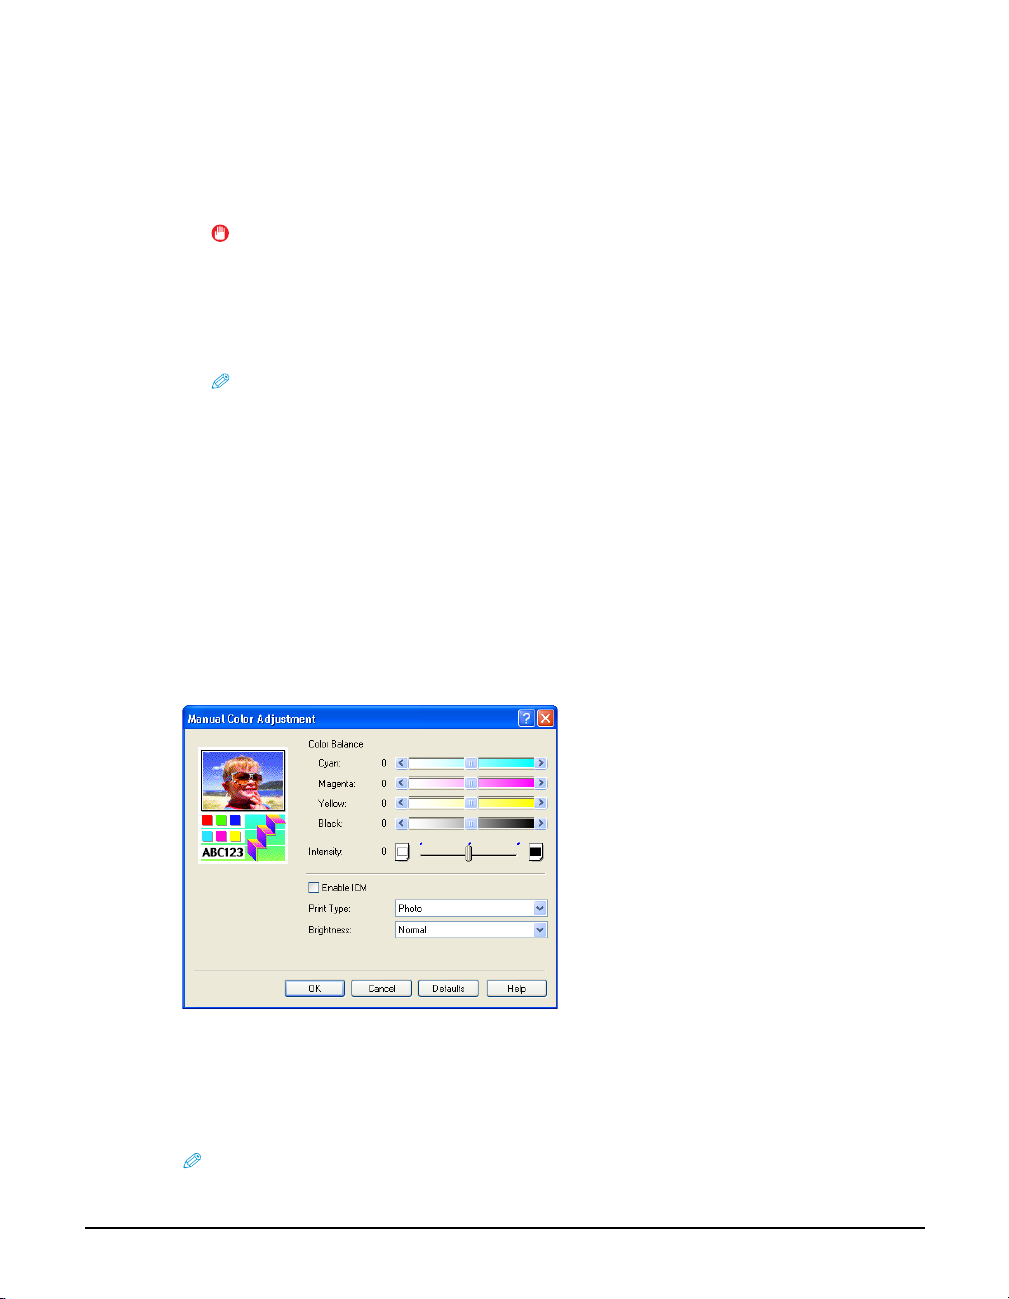
Setting a custom color adjustment
Normally color is adjusted in an application. To make finer adjustments, set up color balance in the
dialog box below. In the photograph and illustration at the upper left of the dialog box, you can
roughly check the changes made.
The following changes are made in the [Printer Properties] or [Printing Preferences] dialog box, on
the [Main] tab.
To open the [Printer Properties] or [Printing Preferences] dialog box J “Changing print settings
(Opening the settings dialog box)”
1 In [Color Adjustment], select [Manual], then click [Set].
2 In the [Manual Color Adjustment] dialog box, move the sliders to the left or right to
adjust color balance and intensity.
3 Click [Enable ICM] to activate the color correction function built into Windows.
If you clear this setting, in [Print Type], select the document type to be printed, and in [Brightness],
select a level of the brightness when printing.
NOTE
ICM stands for Image Color Management.
4 Click [OK].
26

X Setting page size and number of copies/
[Page Setup] tab
In the [Printer Properties] or [Printing Preferences] dialog box, on the [Page Setup] tab, you can
specify settings such as the page size, number of copies and print orientation.
To open the [Printer Properties] or [Printing Preferences] dialog box J “Changing print settings
(Opening the settings dialog box)”
[Page Setup] tab
[Page Size]
Select the same page size as specified in the application. For custom page sizes, select [Custom].
J “Printing on a custom paper size”
NOTE
• If you select a paper size that cannot be loaded in the machine, the following message will be displayed: "The
selected paper size is not supported by your printer. [Fit-to-Page Printing] will be set in [Printing Type]."
Click [OK] to automatically select fit-to-page printing.
(Fit-to-page printing)”
[Orientation]
Select print orientation. Select [Portrait] to print the contents of your document vertically on the
page, or [Landscape] to print it horizontally on the page.
[Printer Paper Size]
If you select a setting other than [Normal-size Printing] in [Printing Type], select the paper size
loaded in the machine.
If the size you require is not in the list, select [Custom]. J “Printing on a custom paper size”
[Printing Type]
Select the print method.
z [Normal-size Printing]
Select for normal printing. For printing with original size.
J“Enlarging/reducing to fit the paper size
27

z [Fit-to-Page Printing]
If the page size and printer paper size are different, this setting will automatically print
your document to fit the printer paper size. J “Enlarging/reducing to fit the paper size
(Fit-to-page printing)”
z [Scaled Printing]
For printing the document at an enlarged or reduced size. J “Scaled printing”
z [Page Layout Printing]
For printing multiple pages on a single sheet of paper (such as when you want to print a
draft document with two pages on one sheet). J “Printing multiple pages on one sheet
(Page layout printing)”
z [Poster Printing]
For printing at poster size divided across several sheets of paper. The sheets of paper are
assembled after printing to form a poster. J “Poster printing”
z [Booklet Printing]
The document is printed on both sides with two pages each on both the front and reverse
side of the paper, and is folded down the middle to create a booklet. J “Duplex printing
and binding a document into a booklet (Booklet printing)”
[Scaling]
If you select [Scaled Printing], either select or enter a percentage.
[Borderless Printing]
Select to make your data larger than the paper size and print over the entire surface of the paper
without any white borders.
If you select borderless printing, you cannot select the [Printer Paper Size], [Printing Type], or
[Duplex Printing] setting on the [Page Setup] tab, or settings on the [Stamp/Background] tab. J
“Borderless printing”
[Amount of Extension]
When you select [Borderless Printing], the sections that extend beyond the paper are not printed
because the image is enlarged to a size larger than the paper size. Use the slider to adjust how much
the image extends beyond the paper.
[Duplex Printing]
Select to print on both sides of a sheet of plain paper. J “Duplex printing”
[Staple Side]
If the long side of the paper is to be stapled, select [Long-side stapling]. If the short side is to be
stapled, select [Short-side stapling].
[Copies]
Either select or enter the number of copies you want to print.
[Reverse Order]
Select to print a multiple-page document from the last page. The pages of the document are stacked
in the correct order.
[Collate]
When printing multiple copies of a multiple-page document, select to print all pages of one
document before the next copy is printed. If not selected, each page is printed for the specified
number of copies before the next page is printed.
28
 Loading...