

Page 1

MF419x / MF418x / MF416dw / MF411dw
User's Guide
USRMA-0821-00 2016-04 en Copyright CANON INC. 2016
Page 2

Contents
Important Safety Instructions ........................................................................................................... 2
Installation ............................................................................................................................................................... 3
Power Supply ............................................................................................................................................................ 5
Handling ................................................................................................................................................................... 6
Maintenance and Inspections .................................................................................................................................... 9
Consumables .......................................................................................................................................................... 10
Basic Operations .......................................................................................................................................... 14
Parts and Their Functions ........................................................................................................................................ 17
Front Side .......................................................................................................................................................... 18
Back Side ........................................................................................................................................................... 20
Interior .............................................................................................................................................................. 22
Multi-Purpose Tray .............................................................................................................................................. 24
Paper Drawer ..................................................................................................................................................... 25
Operation Panel ................................................................................................................................................. 26
Display ........................................................................................................................................................ 29
Customizing the Home Screen ....................................................................................................................... 34
Using the Display .................................................................................................................................................... 38
Entering Text .......................................................................................................................................................... 41
Logging on to the Machine ...................................................................................................................................... 44
Placing Documents ................................................................................................................................................. 47
Loading Paper ......................................................................................................................................................... 51
Loading Paper in the Paper Drawer ....................................................................................................................... 53
Loading Paper in the Multi-Purpose Tray ............................................................................................................... 58
Loading Envelopes .............................................................................................................................................. 61
Loading Preprinted Paper .................................................................................................................................... 63
Specifying Paper Size and Type ............................................................................................................................. 67
Specifying Paper Size and Type in the Paper Drawer ......................................................................................... 68
Specifying Paper Size and Type in the Multi-Purpose Tray .................................................................................. 70
Registering Default Paper Settings for the Multi-Purpose Tray ............................................................................ 72
Registering a Custom Paper Size .................................................................................................................... 74
Limiting the Paper Sizes Displayed .................................................................................................................. 77
Registering in the Address Book .............................................................................................................................. 78
Registering Destinations in the Address Book ........................................................................................................ 80
Registering Destinations for Favorites ................................................................................................................... 87
Registering Multiple Destinations for Group Dial .................................................................................................... 94
Adjusting the Volume .............................................................................................................................................. 99
Entering Sleep Mode ............................................................................................................................................. 101
Setting Auto Shutdown Time ................................................................................................................................. 103
I
Page 3

Copying .............................................................................................................................................................. 105
Basic Copy Operations ........................................................................................................................................... 107
Selecting Copy Paper ........................................................................................................................................ 110
Canceling Copies ................................................................................................................................................... 111
Checking the Copying Status and Log .................................................................................................................... 113
Various Copy Settings ............................................................................................................................................ 115
Enlarging or Reducing ....................................................................................................................................... 116
Selecting Document Type .................................................................................................................................. 117
Adjusting Density ............................................................................................................................................. 118
Adjusting Sharpness ......................................................................................................................................... 120
2-Sided Copying ............................................................................................................................................... 122
Copying Multiple Documents onto One Sheet (2 on 1/4 on 1) ................................................................................. 125
Copying Both Sides of an ID Card onto One Page ................................................................................................. 127
Erasing Dark Borders and Frame Lines (Erase Frame) ............................................................................................ 128
Collating Copies by Page ................................................................................................................................... 129
Conguring Copy Settings to Your Needs ............................................................................................................... 130
Changing Default Settings ................................................................................................................................. 131
Registering Frequently Used Copy Settings .......................................................................................................... 132
Faxing .................................................................................................................................................................. 137
Conguring Initial Settings for Fax Functions (MF419x / MF416dw) ......................................................................... 140
Deciding Which Fax Receive Mode to Use ............................................................................................................ 141
Registering the Fax Number and Unit Name ........................................................................................................ 142
Selecting the Receive Mode ............................................................................................................................... 144
Connecting the Telephone Line .......................................................................................................................... 146
Sending Faxes (MF419x / MF416dw) ........................................................................................................................ 149
Specifying Registered Destinations ..................................................................................................................... 153
Specifying from Address Book ...................................................................................................................... 154
Selecting Destinations Directly by Entering Coded Dial Numbers ...................................................................... 156
Specifying Previously Used Destinations ........................................................................................................ 159
Specifying Destinations in an LDAP Server ..................................................................................................... 162
Various Fax Settings .......................................................................................................................................... 166
Adjusting Resolution ................................................................................................................................... 167
Adjusting Density ....................................................................................................................................... 168
Scanning 2-Sided Documents ....................................................................................................................... 169
Adjusting Sharpness ................................................................................................................................... 170
Conguring Fax Settings to Your Needs ............................................................................................................... 172
Changing Default Settings ........................................................................................................................... 173
Registering Frequently Used Fax Settings ...................................................................................................... 174
Canceling Sending Documents (Fax/I-Fax) ........................................................................................................... 177
Receiving Faxes (MF419x / MF416dw) ..................................................................................................................... 179
Sending and Receiving Faxes According to Your Purposes (MF419x / MF416dw) ....................................................... 183
Making a Call before Sending Faxes (Manual Sending) .......................................................................................... 184
Sending Faxes to Multiple Destinations Simultaneously (Sequential Broadcast) ........................................................ 186
II
Page 4

Storing Received Faxes into Memory (Memory Reception) ..................................................................................... 188
Forwarding Received Faxes ................................................................................................................................ 191
Selecting a Document to Forward ................................................................................................................. 192
Forwarding All the Received Documents Automatically .................................................................................... 194
Archiving Sent Faxes ......................................................................................................................................... 198
Receiving Fax Information Services ..................................................................................................................... 199
Checking Status and Log for Sent and Received Documents .................................................................................... 201
Sending Faxes from Your Computer (PC Fax) (MF419x / MF416dw) ........................................................................... 203
Sending PC Faxes ............................................................................................................................................. 204
Attaching Cover Sheets to PC Faxes .................................................................................................................... 207
Using Address Book for PC Faxes ........................................................................................................................ 211
Registering Destinations ............................................................................................................................. 213
Using Registered Destinations ..................................................................................................................... 217
Importing/Exporting Address Book Data from the Fax Driver ........................................................................... 219
Using Internet Fax (I-Fax) ...................................................................................................................................... 223
Sending I-Faxes ................................................................................................................................................ 224
Receiving I-Faxes .............................................................................................................................................. 231
Using the Machine as a Printer ..................................................................................................... 234
Printing from a Computer ..................................................................................................................................... 235
Printing a Document ......................................................................................................................................... 237
Canceling Prints ............................................................................................................................................... 241
Checking the Printing Status and Log .................................................................................................................. 244
Various Print Settings ........................................................................................................................................ 246
Enlarging or Reducing ................................................................................................................................. 248
Switching 1-Sided and 2-Sided Printing ......................................................................................................... 250
Collating Printouts by Page .......................................................................................................................... 252
Printing Multiple Pages onto One Sheet ........................................................................................................ 254
Printing Posters .......................................................................................................................................... 256
Printing Booklet ......................................................................................................................................... 257
Printing Borders ......................................................................................................................................... 259
Printing Dates and Page Numbers ................................................................................................................ 260
Printing Watermarks ................................................................................................................................... 262
Printing Specic Pages onto Different Paper .................................................................................................. 264
Selecting Document Type ............................................................................................................................ 266
Saving Toner .............................................................................................................................................. 268
Combining and Printing Multiple Documents ................................................................................................. 270
Conguring Printer Settings on the Machine .................................................................................................. 274
Printing a Document Secured by a PIN (Secure Print) ............................................................................................ 276
Preparing for Using Secure Print .................................................................................................................. 277
Printing via Secure Print .............................................................................................................................. 279
Conguring Print Settings to Your Needs ............................................................................................................. 284
Registering Combinations of Frequently Used Print Settings ............................................................................ 285
Changing Default Settings ........................................................................................................................... 287
Printing from USB Memory (Memory Media Print) .................................................................................................. 289
Changing Default Memory Media Print Settings ................................................................................................... 302
III
Page 5

Using the Machine as a Scanner ................................................................................................... 304
Preparing to Use the Machine as a Scanner ............................................................................................................ 305
Scanning from the Machine ................................................................................................................................... 306
Scanning from a Computer .................................................................................................................................... 310
Scanning Using an Application ........................................................................................................................... 311
Conguring Scan Settings in ScanGear MF ........................................................................................................... 313
Conguring Scan Settings in Simple Mode ..................................................................................................... 314
Conguring Scan Settings in Advanced Mode ................................................................................................. 317
Convenient Scanning with a Machine-Based Operation .......................................................................................... 331
Scanning Documents Directly to USB Memory ...................................................................................................... 332
Sending Documents as E-Mails Directly from the Machine ..................................................................................... 335
Saving Documents Directly in Shared Folder/FTP Server ........................................................................................ 342
Canceling Sending Documents (E-Mail/Shared Folder/FTP Server) ........................................................................... 345
Specifying Detailed Settings ............................................................................................................................... 347
Specifying a Scanning Size ........................................................................................................................... 349
Setting Color Mode ..................................................................................................................................... 350
Selecting a File Format ................................................................................................................................ 351
Adjusting Density ....................................................................................................................................... 353
Specifying Orientation of Your Document ...................................................................................................... 354
Selecting Document Type ............................................................................................................................ 355
Scanning 2-Sided Documents ....................................................................................................................... 356
Adjusting Sharpness ................................................................................................................................... 357
Adjusting Balance between File Size and Image Quality ................................................................................... 359
Setting Gamma Values ................................................................................................................................ 360
Sending Using Registered Destinations (E-Mail/I-Fax/Shared Folder/FTP Server) ....................................................... 361
Specifying from Address Book ...................................................................................................................... 362
Selecting Destinations Directly by Entering Coded Dial Numbers ...................................................................... 365
Specifying Previously Used Destinations ........................................................................................................ 368
Specifying Destinations in an LDAP Server (E-Mail/I-Fax) .................................................................................. 371
Conguring Scan Settings to Your Needs ............................................................................................................. 375
Changing Default Settings ........................................................................................................................... 376
Registering Frequently Used Scan Settings (E-Mail/I-Fax/Shared Folder/FTP Server) ............................................ 379
Checking Status and Log for Sent Documents (E-Mail/Shared Folder/FTP Server) ...................................................... 383
Can Be Used Conveniently with a Mobile Device ........................................................... 386
Connecting to a Mobile Device ............................................................................................................................... 387
Make Direct Connection (Access Point Mode) ....................................................................................................... 388
Connecting by a Touch on the Machine (NFC) (MF416dw) ...................................................................................... 390
Making the Best Use of the Machine by Utilizing Applications ................................................................................. 391
Using AirPrint ................................................................................................................................................... 393
Printing with AirPrint .................................................................................................................................. 398
Scanning with AirPrint ................................................................................................................................. 401
Faxing with AirPrint .................................................................................................................................... 403
If AirPrint Cannot Be Used ........................................................................................................................... 405
Using Google Cloud Print .................................................................................................................................. 406
IV
Page 6

Managing the Machine Remotely .......................................................................................................................... 410
Network ............................................................................................................................................................ 413
Connecting to a Network ...................................................................................................................................... 415
Selecting Wired LAN or Wireless LAN ................................................................................................................... 417
Connecting to a Wired LAN ................................................................................................................................ 418
Connecting to a Wireless LAN ............................................................................................................................. 419
Setting Up Connection Using WPS Push Button Mode ..................................................................................... 421
Setting Up Connection Using WPS PIN Code Mode ......................................................................................... 423
Setting Up Connection by Selecting a Wireless Router ..................................................................................... 426
Setting Up Connection by Specifying Detailed Settings .................................................................................... 429
Checking the SSID and Network Key ............................................................................................................. 433
Setting IP Addresses ......................................................................................................................................... 436
Setting IPv4 Address ................................................................................................................................... 437
Setting IPv6 Addresses ................................................................................................................................ 441
Viewing Network Settings ..................................................................................................................................... 445
Conguring the Machine for Printing or Faxing from a Computer ........................................................................... 448
Conguring Printing Protocols and WSD Functions ............................................................................................... 449
Conguring Printer Ports ................................................................................................................................... 453
Setting Up Print Server ...................................................................................................................................... 458
Conguring Scan Settings (E-Mail/I-Faxes/Shared Folders/FTP Server) ..................................................................... 461
Conguring Scan Settings (Sending E-Mail, Sending & Receiving I-Faxes) ................................................................. 462
Conguring Basic E-Mail Settings ................................................................................................................. 464
Conguring E-Mail/I-Fax Communication Settings .......................................................................................... 469
Conguring the Machine for Scanning to Shared Folders ....................................................................................... 474
Setting a Shared Folder as a Save Location .................................................................................................... 475
Conguring the Machine for Scanning to FTP Server ............................................................................................. 480
Conguring FTP PASV mode ........................................................................................................................ 481
Conguring the Machine for Your Network Environment ....................................................................................... 483
Conguring Ethernet Settings ............................................................................................................................ 484
Changing the Maximum Transmission Unit .......................................................................................................... 486
Setting a Wait Time for Connecting to a Network .................................................................................................. 487
Conguring DNS .............................................................................................................................................. 488
Conguring SMB .............................................................................................................................................. 493
Conguring WINS ............................................................................................................................................. 496
Registering LDAP Servers .................................................................................................................................. 499
Conguring SNTP ............................................................................................................................................. 505
Monitoring and Controlling the Machine with SNMP ............................................................................................. 508
Conguring Settings for Device Management Software ......................................................................................... 513
Security .............................................................................................................................................................. 519
Protecting the Machine from Unauthorized Access ................................................................................................ 520
Preventing Unauthorized Access ........................................................................................................................ 521
Setting Access Privileges .................................................................................................................................... 523
Setting the System Manager ID .................................................................................................................... 524
V
Page 7

Setting the Department ID Management ....................................................................................................... 526
Setting a Remote UI PIN .............................................................................................................................. 534
LDAP Server Authentication ............................................................................................................................... 536
Restricting Communication by Using Firewalls ..................................................................................................... 541
Specifying IP Addresses for Firewall Rules ...................................................................................................... 542
Specifying MAC Addresses for Firewall Rules .................................................................................................. 546
Changing Port Numbers .................................................................................................................................... 549
Setting a Proxy ................................................................................................................................................. 551
Restricting the Machine's Functions ...................................................................................................................... 554
Restricting Access to Address Book and Sending Functions .................................................................................... 555
Setting a PIN for Address Book ..................................................................................................................... 556
Limiting Available Destinations ..................................................................................................................... 558
Prohibiting PC Faxing (MF419x / MF416dw) .................................................................................................... 559
Disabling Use of Previously Used Destinations ............................................................................................... 560
Checking Destinations before Sending Documents ......................................................................................... 561
Prohibiting Sequential Broadcasting (MF419x / MF416dw) ............................................................................... 563
Restricting USB Functions .................................................................................................................................. 564
Disabling HTTP Communication ......................................................................................................................... 567
Disabling Remote UI ......................................................................................................................................... 568
Implementing Robust Security Features ................................................................................................................ 569
Enabling TLS Encrypted Communication for the Remote UI ................................................................................... 570
Conguring IPSec Settings ................................................................................................................................. 574
Conguring IEEE 802.1X Authentication ............................................................................................................... 583
Conguring Settings for Key Pairs and Digital Certicates ...................................................................................... 588
Generating Key Pairs ................................................................................................................................... 590
Using CA-issued Key Pairs and Digital Certicates ........................................................................................... 598
Verifying Key Pairs and Digital Certicates ..................................................................................................... 602
Using Remote UI ........................................................................................................................................ 605
Starting Remote UI ............................................................................................................................................... 606
Remote UI Screens ................................................................................................................................................ 608
Managing Documents and Checking the Machine Status ........................................................................................ 613
Setting Up Menu Options from Remote UI ............................................................................................................. 617
Saving/Loading Settings Data ................................................................................................................................ 619
Saving Settings Data ......................................................................................................................................... 620
Loading Settings Data ....................................................................................................................................... 622
Registering Destinations in the Address Book from Remote UI ............................................................................... 624
Setting Menu List ...................................................................................................................................... 629
Network Settings .................................................................................................................................................. 630
Preferences .......................................................................................................................................................... 641
Timer Settings ...................................................................................................................................................... 645
Common Settings .................................................................................................................................................. 649
Copy Settings ........................................................................................................................................................ 653
Fax Settings (MF419x / MF416dw) ........................................................................................................................... 655
VI
Page 8

Scan Settings ........................................................................................................................................................ 666
Memory Media Print Settings ................................................................................................................................ 674
Printer Settings .................................................................................................................................................... 678
Adjustment/Maintenance ..................................................................................................................................... 701
System Management Settings ............................................................................................................................... 707
Troubleshooting ......................................................................................................................................... 721
Clearing Jams ........................................................................................................................................................ 723
When an Error Message Appears ........................................................................................................................... 734
When an Error Code Appears ................................................................................................................................. 747
Common Problems ................................................................................................................................................ 757
Installation/Settings Problems ........................................................................................................................... 758
Copy/Printing Problems .................................................................................................................................... 762
Faxing/Telephone Problems (MF419x / MF416dw) ................................................................................................ 765
When You Cannot Print Properly ............................................................................................................................ 767
Printing Results Are Not Satisfactory ................................................................................................................... 769
Paper Creases or Curls ...................................................................................................................................... 777
Paper Is Fed Incorrectly ..................................................................................................................................... 779
When a Problem Cannot Be Solved ......................................................................................................................... 780
Maintenance ................................................................................................................................................. 783
Cleaning the Machine ........................................................................................................................................... 785
Exterior ........................................................................................................................................................... 786
Platen Glass ..................................................................................................................................................... 787
Feeder ............................................................................................................................................................ 789
Fixing Unit ....................................................................................................................................................... 791
Replacing Toner Cartridges ................................................................................................................................... 793
Using Up Toner ................................................................................................................................................ 796
How to Replace Toner Cartridges ........................................................................................................................ 798
Relocating the Machine ......................................................................................................................................... 801
Maintaining and Improving Print Quality ............................................................................................................... 803
Adjusting the Gradation and Density for Copy Jobs ............................................................................................... 804
Adjusting Print Density ...................................................................................................................................... 806
Printing Reports and Lists ..................................................................................................................................... 808
TX Result Report ............................................................................................................................................... 809
Communication Management Report ................................................................................................................. 812
RX Result Report ............................................................................................................................................... 814
Consumables Status Report ............................................................................................................................... 815
Address Book List ............................................................................................................................................. 816
User Data List/System Manager Data List ............................................................................................................ 818
Department ID Management Report ................................................................................................................... 819
IPSec Policy List ................................................................................................................................................ 820
PCL Font List .................................................................................................................................................... 821
PS Font List ...................................................................................................................................................... 822
VII
Page 9

Viewing the Counter Value .................................................................................................................................... 823
Using a USB Memory Device to Save/Load Settings Data ......................................................................................... 824
Saving Settings Data to a USB Memory Device ..................................................................................................... 825
Loading Settings Data from a USB Memory Device ............................................................................................... 827
Initializing Settings ............................................................................................................................................... 829
Initializing Menu ............................................................................................................................................... 830
Initializing Key and Certicate ............................................................................................................................ 832
Initializing Address Book ................................................................................................................................... 833
Updating the Firmware ......................................................................................................................................... 834
Appendix ........................................................................................................................................................... 838
Feature Highlights ................................................................................................................................................ 839
Going Green and Saving Money ......................................................................................................................... 840
Improving Eciency ......................................................................................................................................... 842
Going Digital .................................................................................................................................................... 845
So Much More .................................................................................................................................................. 848
Specications ....................................................................................................................................................... 851
Machine Specications ...................................................................................................................................... 852
Wireless LAN Specications ................................................................................................................................ 855
Document Type ................................................................................................................................................ 856
Scan Area .................................................................................................................................................. 857
Paper .............................................................................................................................................................. 858
Copy Specications ........................................................................................................................................... 862
Fax Specications (MF419x / MF416dw) ............................................................................................................... 863
Scanner Specications ....................................................................................................................................... 864
Printer Specications ........................................................................................................................................ 865
Specications for E-Mail Sending/I-Faxes Sending and Receiving ............................................................................ 866
Specications for Scanning to Shared Folders/FTP Server ...................................................................................... 867
Consumables ........................................................................................................................................................ 868
Optional Items ...................................................................................................................................................... 869
Manuals Included with the Machine ...................................................................................................................... 873
Using e-Manual ..................................................................................................................................................... 874
Installing e-Manual ........................................................................................................................................... 875
Uninstalling e-Manual ....................................................................................................................................... 880
Screen Layout of e-Manual ................................................................................................................................ 883
Viewing e-Manual ............................................................................................................................................. 889
Manual Display Settings .................................................................................................................................... 890
Others .................................................................................................................................................................. 891
Basic Windows Operations ................................................................................................................................. 892
For Mac OS Users ............................................................................................................................................. 900
Notice ............................................................................................................................................................. 901
Oce Locations .................................................................................................................................................... 906
VIII
Page 10

Important Safety Instructions
Important Safety Instructions
Important Safety Instructions ................................................................................................................... 2
Installation ............................................................................................................................................................ 3
Power Supply ......................................................................................................................................................... 5
Handling ................................................................................................................................................................. 6
Maintenance and Inspections .............................................................................................................................. 9
Consumables ....................................................................................................................................................... 10
1
Page 11

Important Safety Instructions
Important Safety Instructions
0UWX-000
The content described in this chapter is for the prevention of damage to property and injury to users of the machine
and others. Before using this machine, read this chapter and follow the instructions to properly use this machine. Do
not perform any operations not described in this manual. Canon will not be responsible for any damages resulting
from use not described in this manual, improper use, or repair/changes not performed by Canon or a third party
authorized by Canon.
2
Page 12
Important Safety Instructions
Installation
0UWX-001
To use this machine safely and comfortably, carefully read the following precautions and install the machine in an
appropriate location.
Do not install in a location that may result in a re or electrical shock
● A location where the ventilation slots are blocked
(too close to walls, beds, rugs, or similar objects)
● A damp or dusty location
● A location exposed to direct sunlight or outdoors
● A location subject to high temperatures
● A location exposed to open ames
● Near alcohol, paint thinners or other ammable substances
Other warnings
● Do not connect unapproved cables to this machine. Doing so may result in a re or electrical shock.
● Do not place necklaces and other metal objects or containers lled with liquid on the machine. If foreign
substances come in contact with electrical parts inside the machine, it may result in a re or electrical shock.
● When installing and removing the optional accessories, be sure to turn OFF the power, unplug the power
plug, and then disconnect all the interface cables and power cord from the machine. Otherwise, the power
cord or interface cables may be damaged, resulting in a re or electrical shock.
● Do not use near any medical equipment. Radiowaves emitted from this machine may interfere with medical
equipment, which may cause a malfunction and result in serious accidents.
● If any foreign substance falls into this machine, unplug the power plug from the AC power outlet and
contact your local authorized Canon dealer.
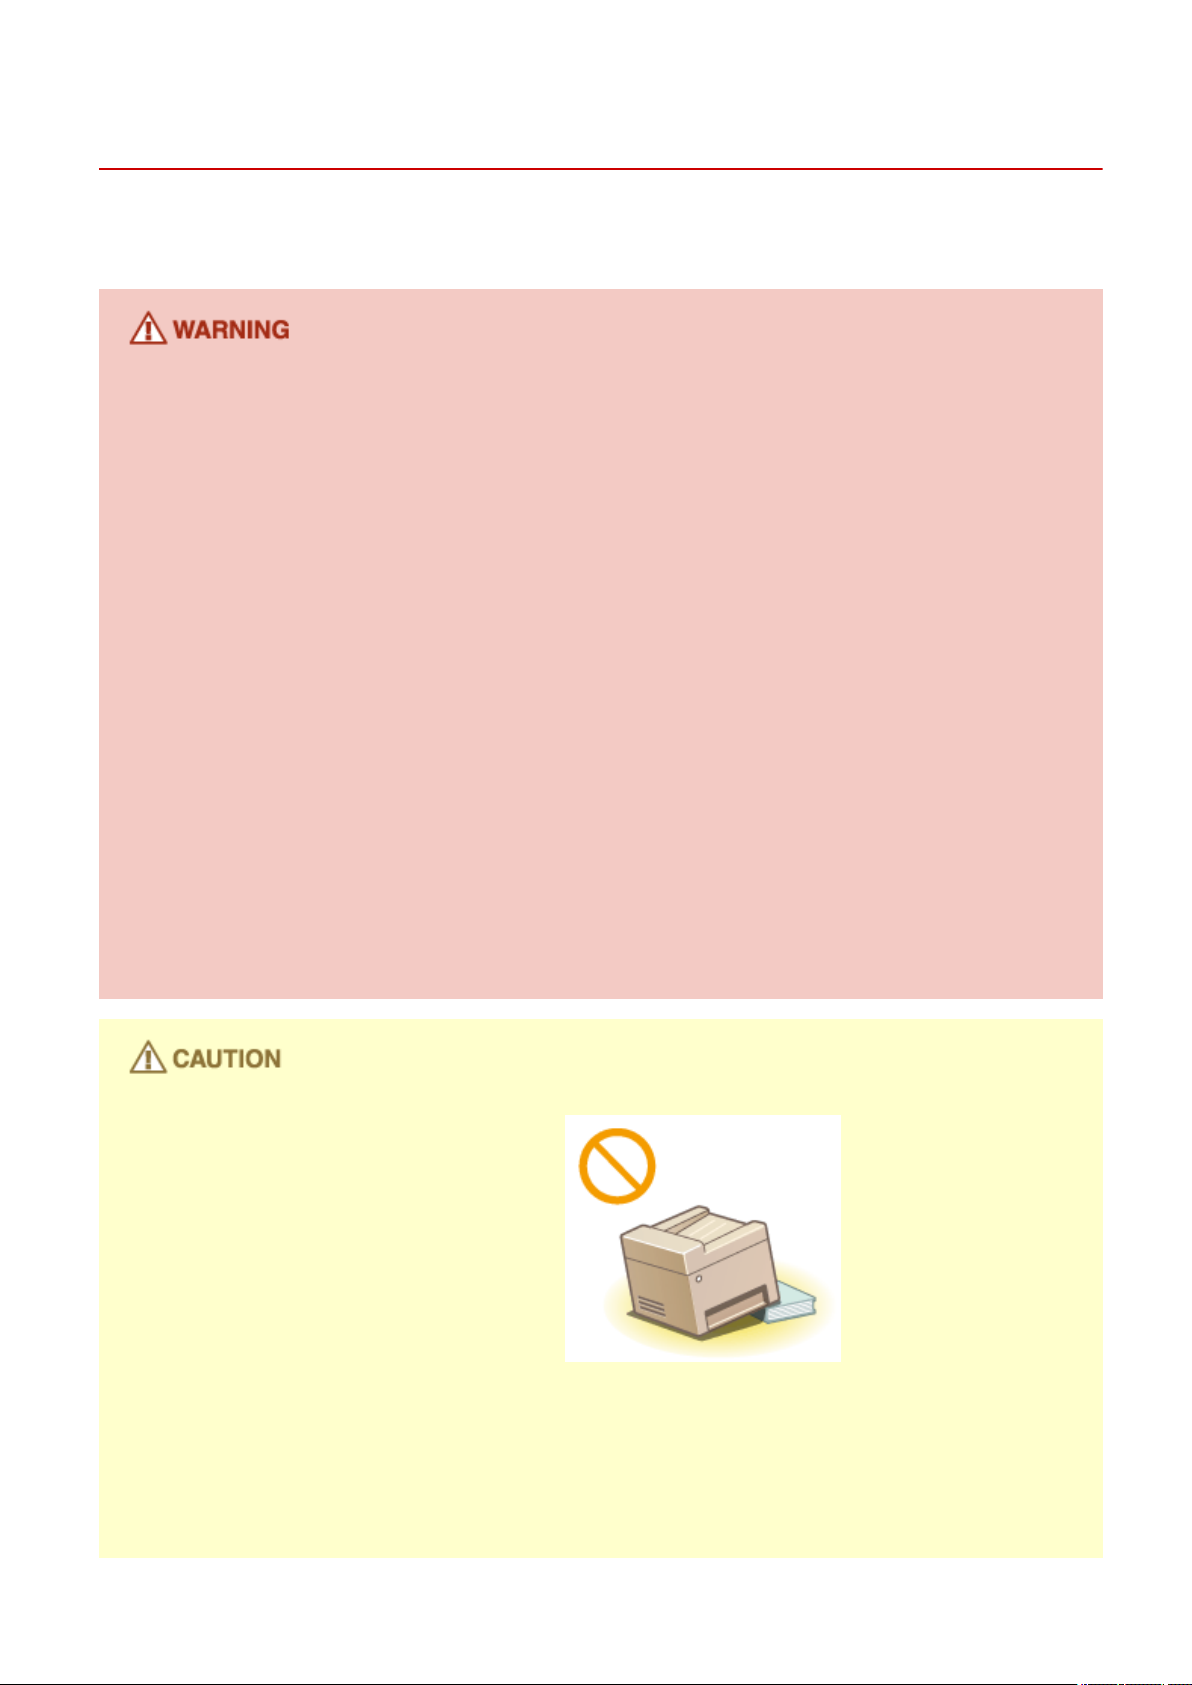
Do not install in the following locations
The machine may drop or fall, resulting in injury.
● Unstable location
● Location exposed to vibrations
Other cautions
● When carrying this machine, follow the instructions in this manual. If carried improperly, it may fall, resulting
in injury.
● When installing this machine, be careful not to get your hands caught between the machine and the oor or
walls, or between the paper drawers. Doing so may result in injury.
3
Page 13

Important Safety Instructions
Do not install in the following locations that may result in damage
● A location subject to dramatic changes in temperature or
humidity
● A location near equipment that generates magnetic or
electromagnetic waves
● A laboratory or location where chemical reactions occur
● A location exposed to corrosive or toxic gases
● A location that may warp from the weight of the machine or
where the machine is liable to sink (a carpet, etc.)
Avoid poorly ventilated locations
● This machine generates a slight amount of ozone, etc. during normal use. Although sensitivity to ozone, etc.
may vary, this amount is not harmful. Ozone, etc. may be more noticeable during extended use or long
production runs, especially in poorly ventilated rooms. It is recommended that the room where the machine
operates be appropriately ventilated to maintain a comfortable working environment. Also avoid locations
where people would be exposed to emissions from the machine.
Do not install in a location where condensation occurs
● Water droplets (condensation) may form inside the machine when the room where the machine is installed
is heated rapidly, and when the machine is moved from a cool or dry location to a hot or humid location.
Using the machine under these conditions may result in paper jams, poor print quality, or damage to the
machine. Let the machine adjust to the ambient temperature and humidity for at least 2 hours before use.
When using wireless LAN
● Set the machine at a distance of 50 m or less from the wireless LAN router.
● Do not set machine in a location where any object blocks communication. The signal may be degraded when
passing through walls or oors.
● Keep the machine as far as possible from digital cordless phones, microwave ovens, or other equipment that
emit radio waves.
Connecting the telephone line
● This machine conforms to an analog telephone line standard. The machine can be connected to the public
switched telephone network (PSTN) only.
If you connect the machine to a digital telephone line or a dedicated telephone line, it might impede proper
operation of the machine and could be the cause of damage. Make sure to conrm a type of telephone line
before connecting the machine.
Contact your optical ber line or IP telephone line service providers if you want to connect the machine to
those telephone lines.
In altitudes of 3,000 m or above sea level
● Machines with a hard disk may not operate properly when used at high altitudes of about 3,000 meters
above sea level, or higher.
4
Page 14

Important Safety Instructions
Power Supply
This machine is compatible with voltages of 220 to 240 V, and electrical frequency of 50/60 Hz.
● Use only a power supply that meets the specied voltage requirements. Failure to do so may result in a re
or electrical shock.
● Do not use power cords other than the one provided, as this may result in a re or electrical shock.
● The provided power cord is intended for use with this machine. Do not connect the power cord to other
devices.
● Do not modify, pull, forcibly bend, or perform any other act that may damage the power cord. Do not place
heavy objects on the power cord. Damaging the power cord may result in a re or electrical shock.
● Do not plug in or unplug the power plug with wet hands, as this may result in an electrical shock.
● Do not use extension cords or multi-plug power strips with the machine. Doing so may result in a re or
electrical shock.
0UWX-002
● Do not wrap the power cord or tie it in a knot, as this may result in a re or electrical shock.
● Insert the power plug completely into the AC power outlet. Failure to do so may result in a re or electrical
shock.
● Remove the power plug completely from the AC power outlet during a thunder storm. Failure to do so may
result in a re, electrical shock, or damage to the machine.
● Install this machine near the power outlet and leave sucient space around the power plug so that it can be
unplugged easily in an emergency.
When connecting power
● Do not connect the machine to an uninterruptible power source.
● If plugging this machine into an AC power outlet with multiple sockets, do not use the remaining sockets to
connect other devices.
● Do not connect the power cord into the auxiliary outlet on a computer.
Other precautions
● Electrical noise may cause this machine to malfunction or lose data.
5
Page 15
Handling
Important Safety Instructions
0UWX-003
● Immediately unplug the power plug from the AC power outlet
and contact an authorized Canon dealer if the machine makes
an unusual noise, emits an unusual smell, or emits smoke or
excessive heat. Continued use may result in a re or electrical
shock.
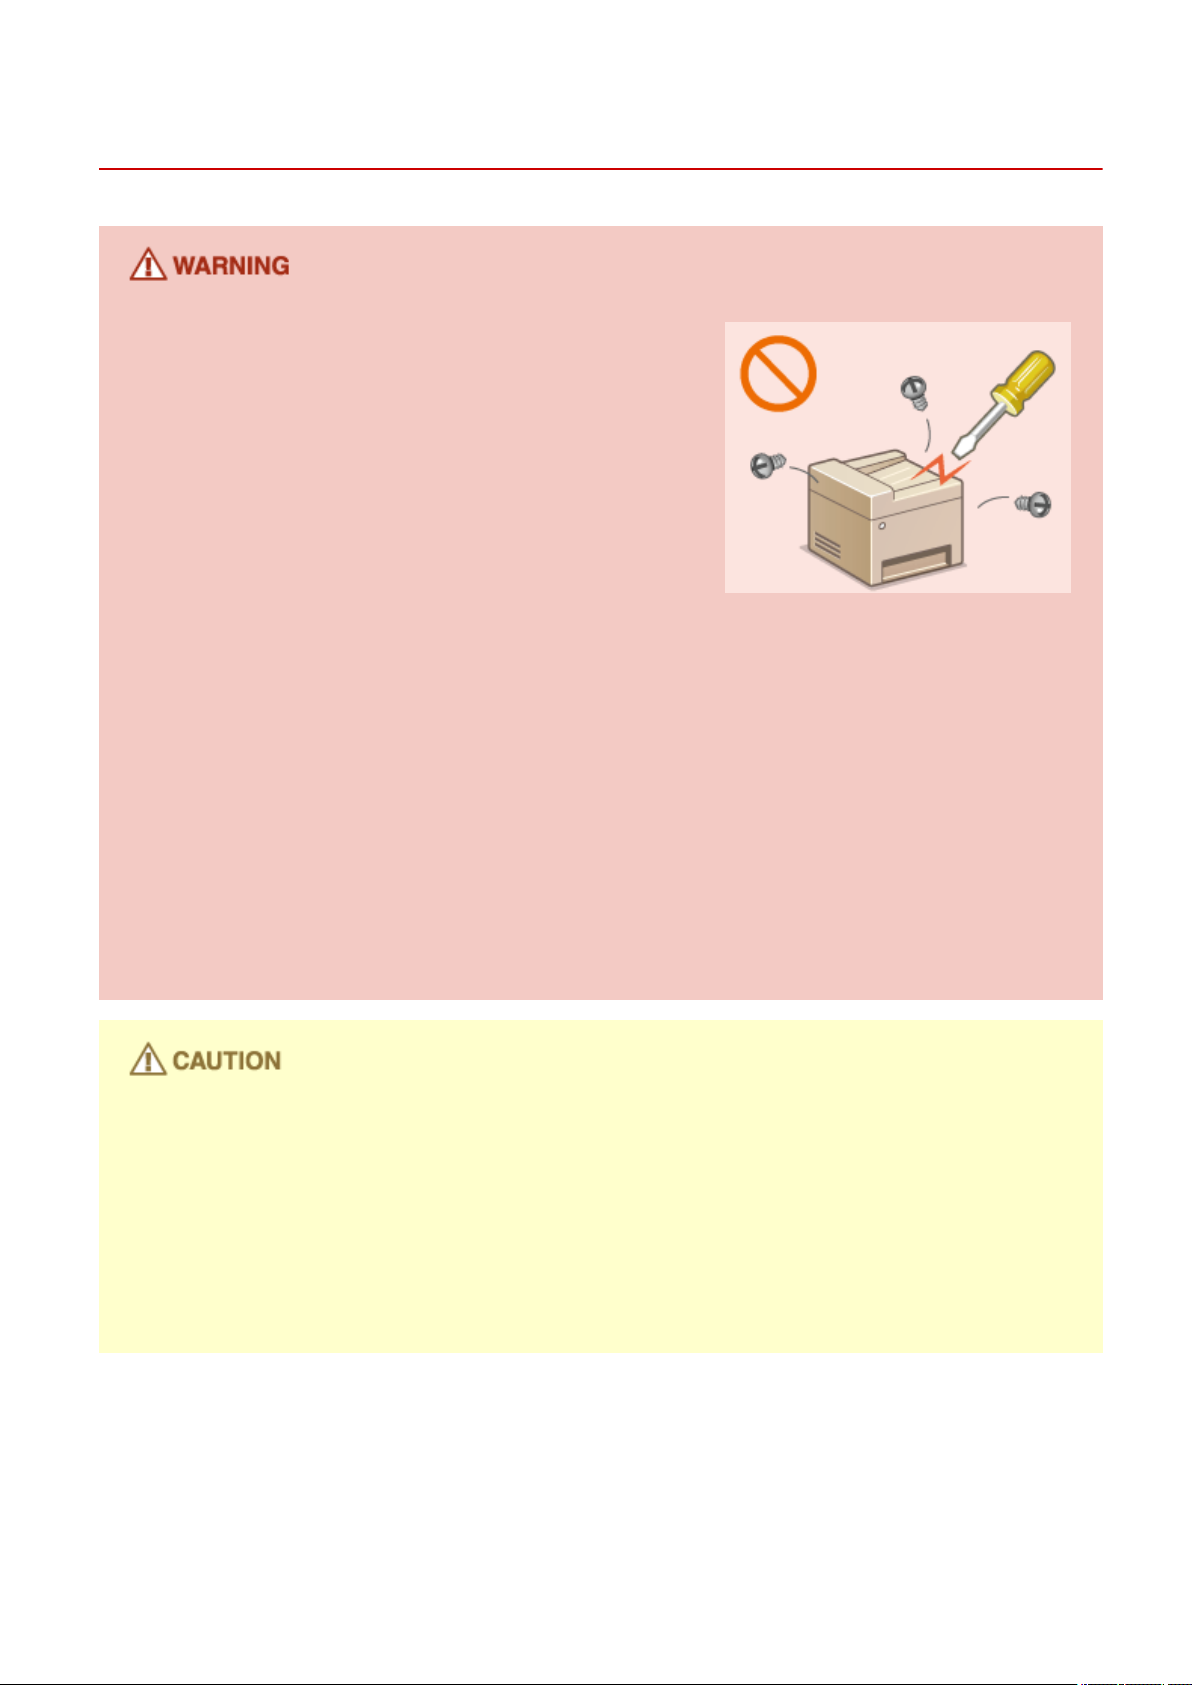
● Do not disassemble or modify this machine. There are high-
voltage and high-temperature components inside the machine
which may result in a re or electrical shock.
● Place the machine where children will not come in contact with the power cord and other cables or internal
and electrical parts. Failure to do so may result in unexpected accidents.
● Do not use ammable sprays near this machine. If ammable substances come into contact with electrical
parts inside this machine, it may result in a re or electrical shock.
● When moving this machine, be sure to turn OFF the power of this machine and your computer, and then
unplug the power plug and interface cables. Failure to do so may damage the power cord or interface
cables, resulting in a re or electrical shock.
● When plugging or unplugging a USB cable when the power plug is plugged into an AC power outlet, do not
touch the metal part of the connector, as this may result in an electrical shock.
If you are using a cardiac pacemaker
● This machine generates a low level magnetic ux. If you use a cardiac pacemaker and feel abnormalities,
please move away from this machine and consult your physician immediately.
● Do not place heavy objects on this machine as they may fall, resulting in injury.
● For your safety, please unplug the power cord if the machine will not be used for a long period of time.
● Use caution when opening and closing covers to avoid injury to your hands.
● Keep hands and clothing away from the rollers in the output area. If the rollers catch your hands or clothing,
this may result in personal injury.
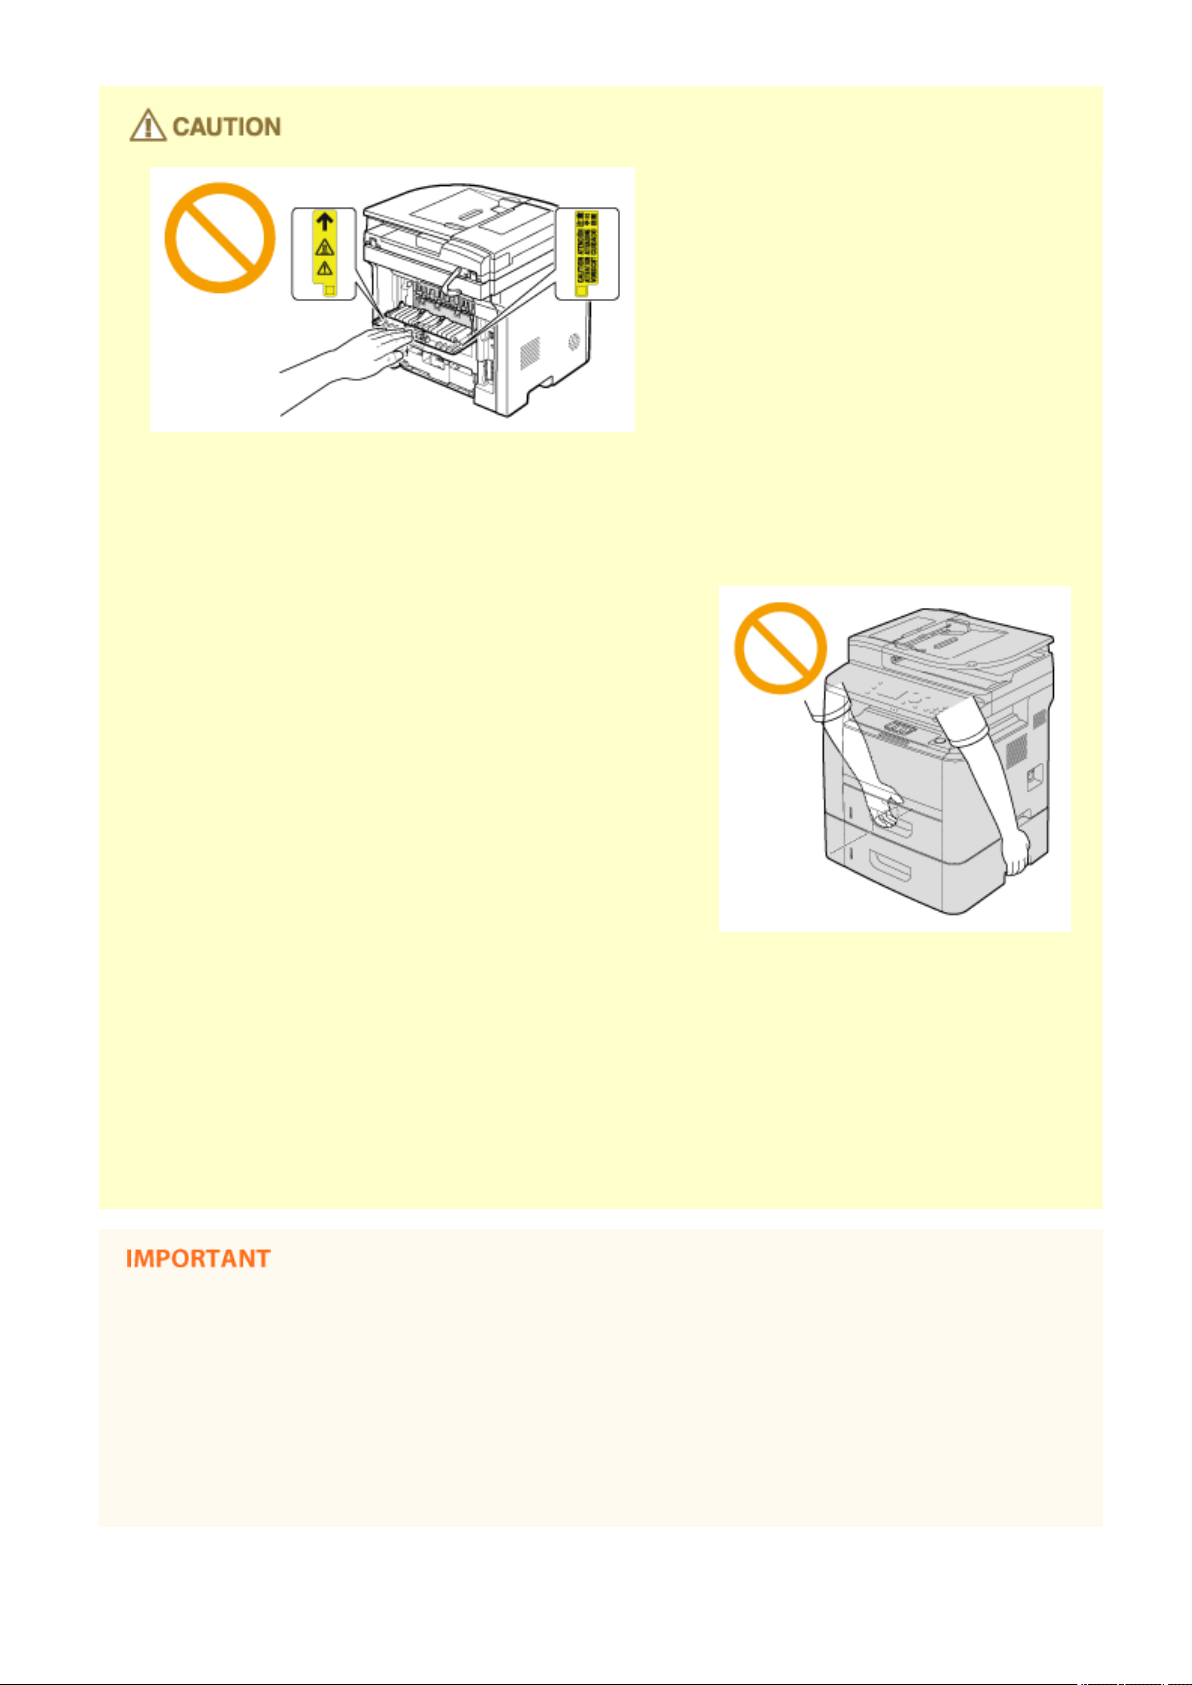
● The inside of the machine and the output slot are very hot during and immediately after use. Avoid contact
with these areas to prevent burns. Also, printed paper may be hot immediately after being output, so use
caution when handling it. Failure to do so may result in burns.
6
Page 16
Important Safety Instructions
● When copying with a thick book placed on the platen glass, do not press the feeder forcefully. Doing so may
damage the platen glass and result in injury.
● Be careful not to drop a heavy object, such as a dictionary, on the platen glass. Doing so may damage the
platen glass and result in injury.
● Do not carry the machine with the paper drawers or the
optional paper feeder installed. Otherwise, the paper drawer
may fall and result in injury.
Laser beam
● This machine is classied as a Class 1 Laser Product under IEC60825-1:2007 and EN60825-1:2007. The laser
beam can be harmful to the human body. The laser beam is conned within protective housings and
external covers, so there is no danger of the laser beam escaping during normal machine operation. For
safety, never open covers other than those indicated in this manual.
● If you operate the machine in manners other than the control, adjustment, and operating procedures
prescribed in this manual, this may result in hazardous radiation exposure.
If the laser beam should escape and enter your eyes, exposure may cause damage to your eyes.
When transporting the machine
To prevent damage to the machine during transport, perform the following.
● Remove the toner cartridges.
● Securely pack the machine in the original box with packing materials.
If the operating noise concerns you
● Depending on the use environment and operating mode, if the operating noise is of concern, it is
recommended that the machine be Installed in a place other than the oce.
7
Page 17
Important Safety Instructions
Other precautions
● Follow the instructions in the caution label attached to this machine.
● Avoid shaking or applying shock to this machine.
● Do not forcibly open and close doors, covers, and other parts. Doing so may result in damage to the
machine.
● Do not touch the contacts ( ) inside the machine. Doing so may result in damage to the machine.
● To prevent a paper jam, do not turn OFF the power, open/close the operation panel area or covers, and load/
unload the paper when printing.
● Use a telephone cable with a length of 3 m or less.
● The display is a touch panel. Press gently to operate. Avoid pressing with a mechanical pencil, ballpoint pen,
or other pointed object. Doing so may scratch or damage the touch panel's surface.
8
Page 18
Important Safety Instructions
Maintenance and Inspections
0UWX-004
Clean this machine periodically. If dust accumulates, the machine may not operate properly. When cleaning, be sure to
observe the following. If a problem occurs during operation, see Troubleshooting(P. 721) . If the problem cannot be
resolved or you feel the machine requires an inspection, see When a Problem Cannot Be Solved(P. 780) .
● Before cleaning, turn OFF the power and unplug the power plug from the AC power outlet. Failure to do so
may result in a re or electrical shock.
● Unplug the power plug periodically and clean with a dry cloth to remove dust and grime. Accumulated dust
may absorb humidity in the air and may result in a re if it comes into contact with electricity.
● Use a damp, well wrung-out cloth to clean the machine. Dampen cleaning cloths with water only. Do not use
alcohol, benzenes, paint thinners, or other ammable substances. Do not use tissue paper or paper towels.
If these substances come into contact with electrical parts inside the machine, they may generate static
electricity or result in a re or electrical shock.
● Check the power cord and plug periodically for damage. Check the machine for rust, dents, scratches,
cracks, or excessive heat generation. Use of poorly-maintained equipment may result in a re or electrical
shock.
● The inside of the machine has high-temperature and high-voltage components. Touching these components
may result in burns. Do not touch any part of the machine that is not indicated in the manual.
● When loading paper or removing jammed documents or paper, be careful not to cut your hands with the
edges of the paper.
● When removing jammed paper or replacing toner cartridges, be careful not to get any toner on your hands
or clothing. If toner gets on your hands or clothing, wash them immediately with cold water.
9
Page 19
Important Safety Instructions
Consumables
● Do not dispose of used toner cartridges in open ames. Also, do not store toner cartridges or paper in a
location exposed to open ames. This may cause the toner to ignite, and result in burns or re.
● If you accidentally spill or scatter toner, carefully wipe up the loose toner with a damp, soft cloth and avoid
inhaling any toner dust. Do not use a vacuum cleaner that is not equipped with safety measures to prevent
dust explosions to clean up loose toner. Doing so may cause damage to the vacuum cleaner or result in a
dust explosion due to static discharge.
If you are using a cardiac pacemaker
● The toner cartridge generates a low level magnetic ux. If you are using a cardiac pacemaker and feel
abnormalities, please move away from the toner cartridge and consult your physician immediately.
0UWX-005
● Use caution not to inhale any toner. If you should inhale toner, consult a physician immediately.
● Use caution so that toner does not get into your eyes or mouth. If toner should get into your eyes or mouth,
immediately wash with cold water and consult a physician.
● Use caution so that toner does not come into contact with your skin. If it should, wash with soap and cold
water. If there is any irritation on your skin, consult a physician immediately.
● Keep the toner cartridges and other consumables out of the reach of small children. If toner is ingested,
consult a physician or poison control center immediately.
● Do not disassemble or modify the toner cartridge. Doing so may cause the toner to scatter.
● Remove the sealing tape of the toner cartridge completely without using excessive force. Doing otherwise
may cause the toner to scatter.
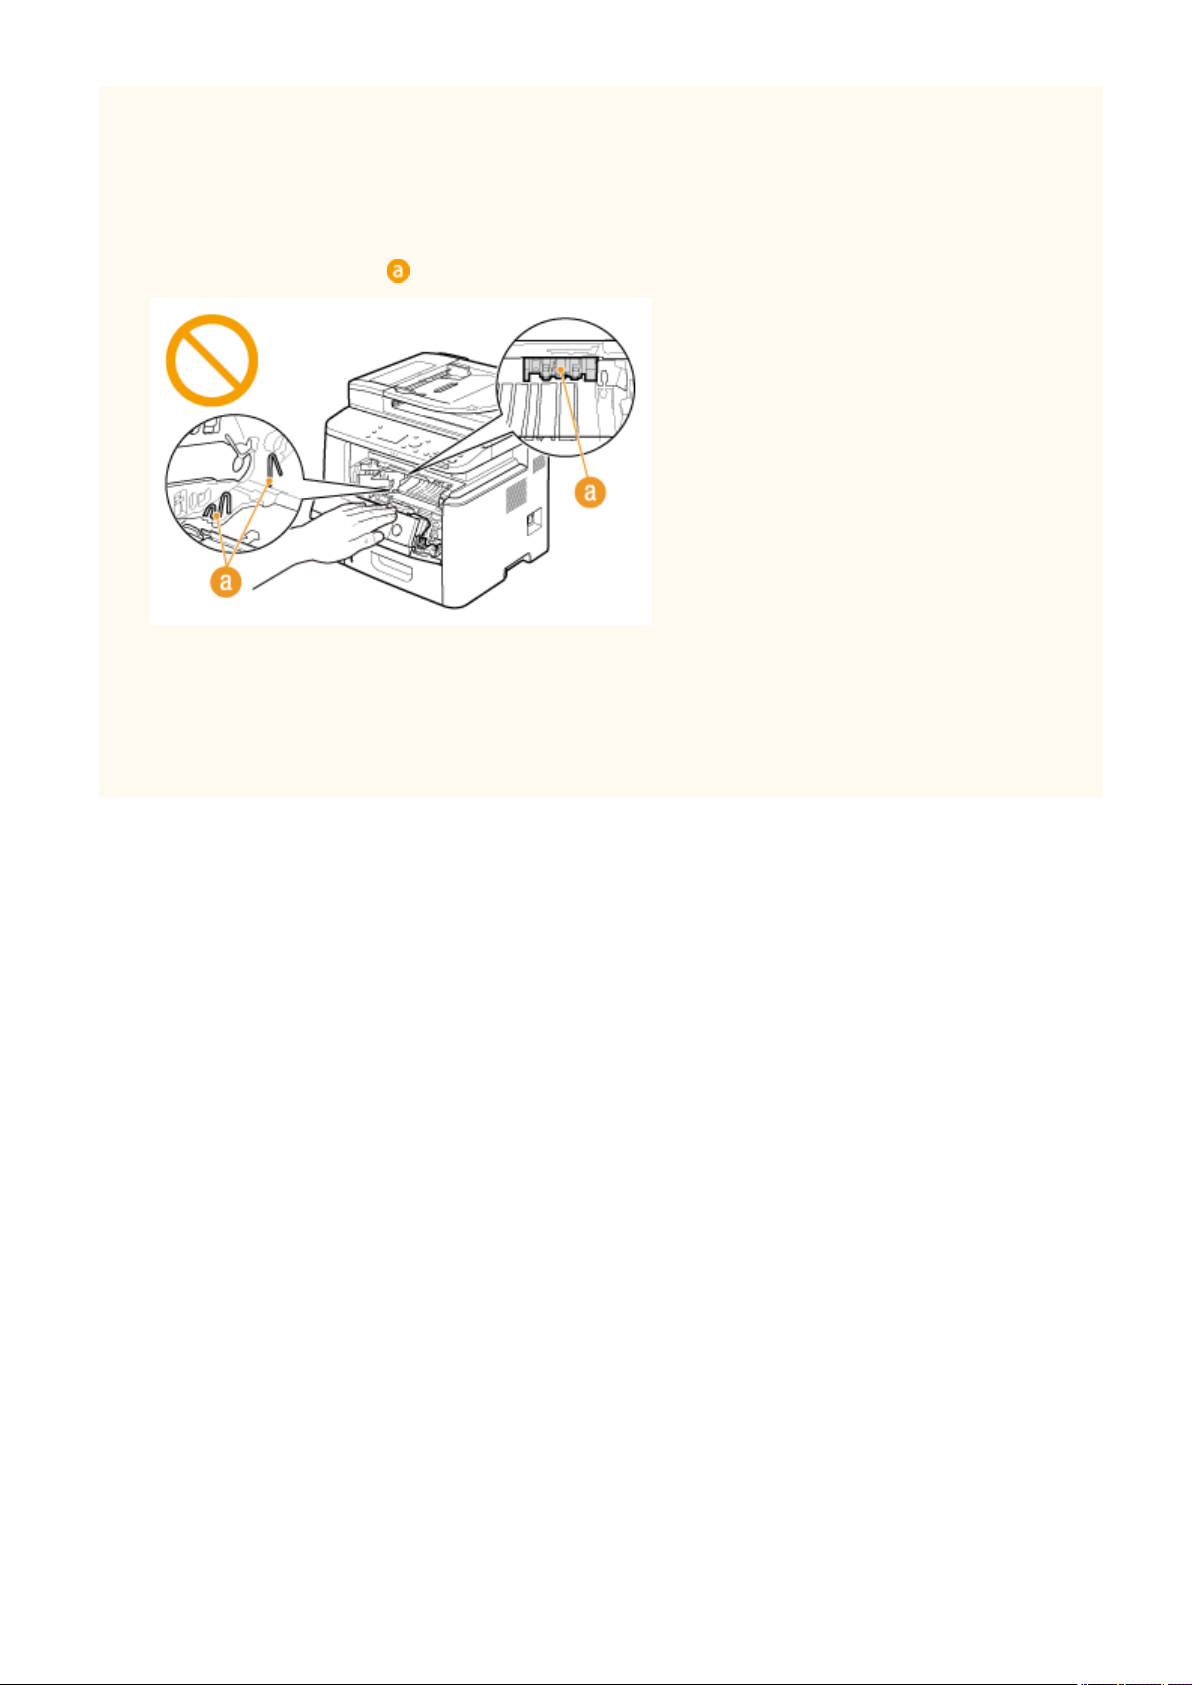
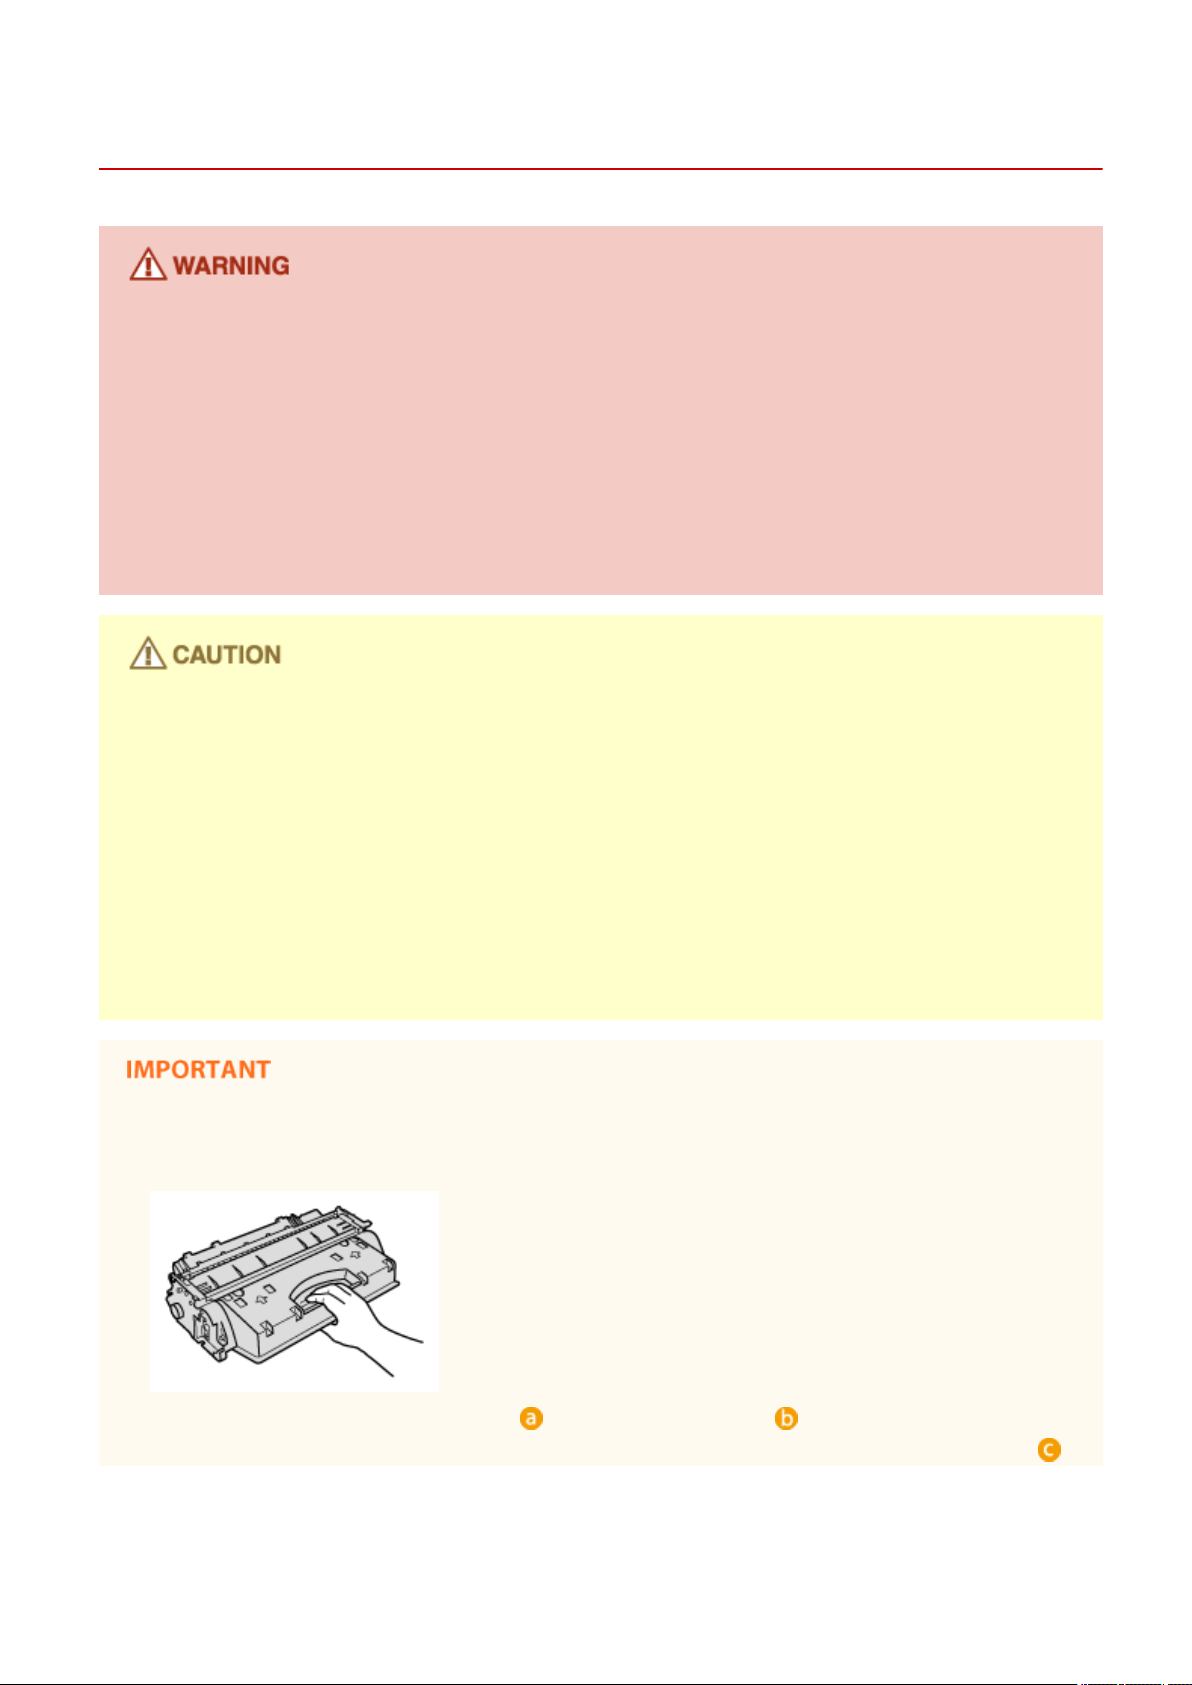
Handling the toner cartridge
● Be sure to hold the toner cartridge using the handle.
● Do not touch the toner cartridge memory ( ) or the electrical contacts ( ). To avoid scratching the
surface of the drum inside the machine or exposing it to light, do not open the drum protective shutter ( ).
10
Page 20

Important Safety Instructions
● Do not remove the toner cartridge from this machine or from the protective bag unnecessarily.
● The toner cartridge is a magnetic product. Do not move it close to products susceptible to magnetism
including oppy disks and disk drives. Doing so may result in data corruption.
Storing the toner cartridge
● Store in the following environment to ensure safe and satisfactory use.
Storage temperature range: 0 to 35°C
Storage humidity range: 35 to 85% RH (relative humidity/no condensation)
*
● Store without opening until the toner cartridge is to be used.
● When removing the toner cartridge from this machine for storage, place the removed toner cartridge into
the original protective bag or wrap it with a thick cloth.
● When storing the toner cartridge, do not store it upright or upside down. The toner will solidify and may not
return to its original condition even if it is shaken.
*
Even within the storable humidity range, water droplets (condensation) may develop inside the toner cartridge if there is a
difference of temperature inside and outside the toner cartridge. Condensation will adversely affect the print quality of
toner cartridges.
Do not store the toner cartridge in the following locations
● Locations exposed to open ames
● Locations exposed to direct sunlight or bright light for ve minutes or more
● Locations exposed to excessive salty air
● Locations where there are corrosive gases (i.e. aerosol sprays and ammonia)
● Locations subject to high temperature and high humidity
● Locations subject to dramatic changes in temperature and humidity where condensation may easily occur
● Locations with a large amount of dust
● Locations within the reach of children
Be careful of counterfeit toner cartridges
● Please be aware that there are counterfeit Canon toner cartridges in the marketplace. Use of counterfeit
toner cartridge may result in poor print quality or machine performance. Canon is not responsible for any
malfunction, accident or damage caused by the use of counterfeit toner cartridge.
For more information, see canon.com/counterfeit .
Availability period of repairing parts and toner cartridges
● The repairing parts and toner cartridges for the machine will be available for at least seven (7) years after
production of this machine model has been discontinued.
Toner cartridge packing materials
● Save the protective bag for the toner cartridge. They are required when transporting this machine.
11
Page 21

Important Safety Instructions
● The packing materials may be changed in form or placement, or may be added or removed without notice.
● Dispose of the removed sealing tape according to local regulations.
When disposing of a used toner cartridge
● Place the toner cartridge into its protective bag to prevent the toner from scattering, and then dispose of the
toner cartridge according to local regulations.
12
Page 22

Basic Operations
Basic Operations
Basic Operations ............................................................................................................................................... 14
Parts and Their Functions ................................................................................................................................... 17
Front Side ....................................................................................................................................................... 18
Back Side ........................................................................................................................................................ 20
Interior ........................................................................................................................................................... 22
Multi-Purpose Tray ......................................................................................................................................... 24
Paper Drawer ................................................................................................................................................. 25
Operation Panel .............................................................................................................................................. 26
Display ..................................................................................................................................................... 29
Customizing the Home Screen ................................................................................................................. 34
Using the Display ................................................................................................................................................. 38
Entering Text ....................................................................................................................................................... 41
Logging on to the Machine ................................................................................................................................. 44
Placing Documents .............................................................................................................................................. 47
Loading Paper ...................................................................................................................................................... 51
Loading Paper in the Paper Drawer ................................................................................................................ 53
Loading Paper in the Multi-Purpose Tray ........................................................................................................ 58
Loading Envelopes .......................................................................................................................................... 61
Loading Preprinted Paper ............................................................................................................................... 63
Specifying Paper Size and Type ....................................................................................................................... 67
Specifying Paper Size and Type in the Paper Drawer ............................................................................... 68
Specifying Paper Size and Type in the Multi-Purpose Tray ....................................................................... 70
Registering Default Paper Settings for the Multi-Purpose Tray ................................................................ 72
Registering a Custom Paper Size ............................................................................................................. 74
Limiting the Paper Sizes Displayed .......................................................................................................... 77
Registering in the Address Book ........................................................................................................................ 78
Registering Destinations in the Address Book ................................................................................................ 80
Registering Destinations for Favorites ............................................................................................................ 87
Registering Multiple Destinations for Group Dial ........................................................................................... 94
Adjusting the Volume .......................................................................................................................................... 99
Entering Sleep Mode ......................................................................................................................................... 101
Setting Auto Shutdown Time ............................................................................................................................ 103
13
Page 23
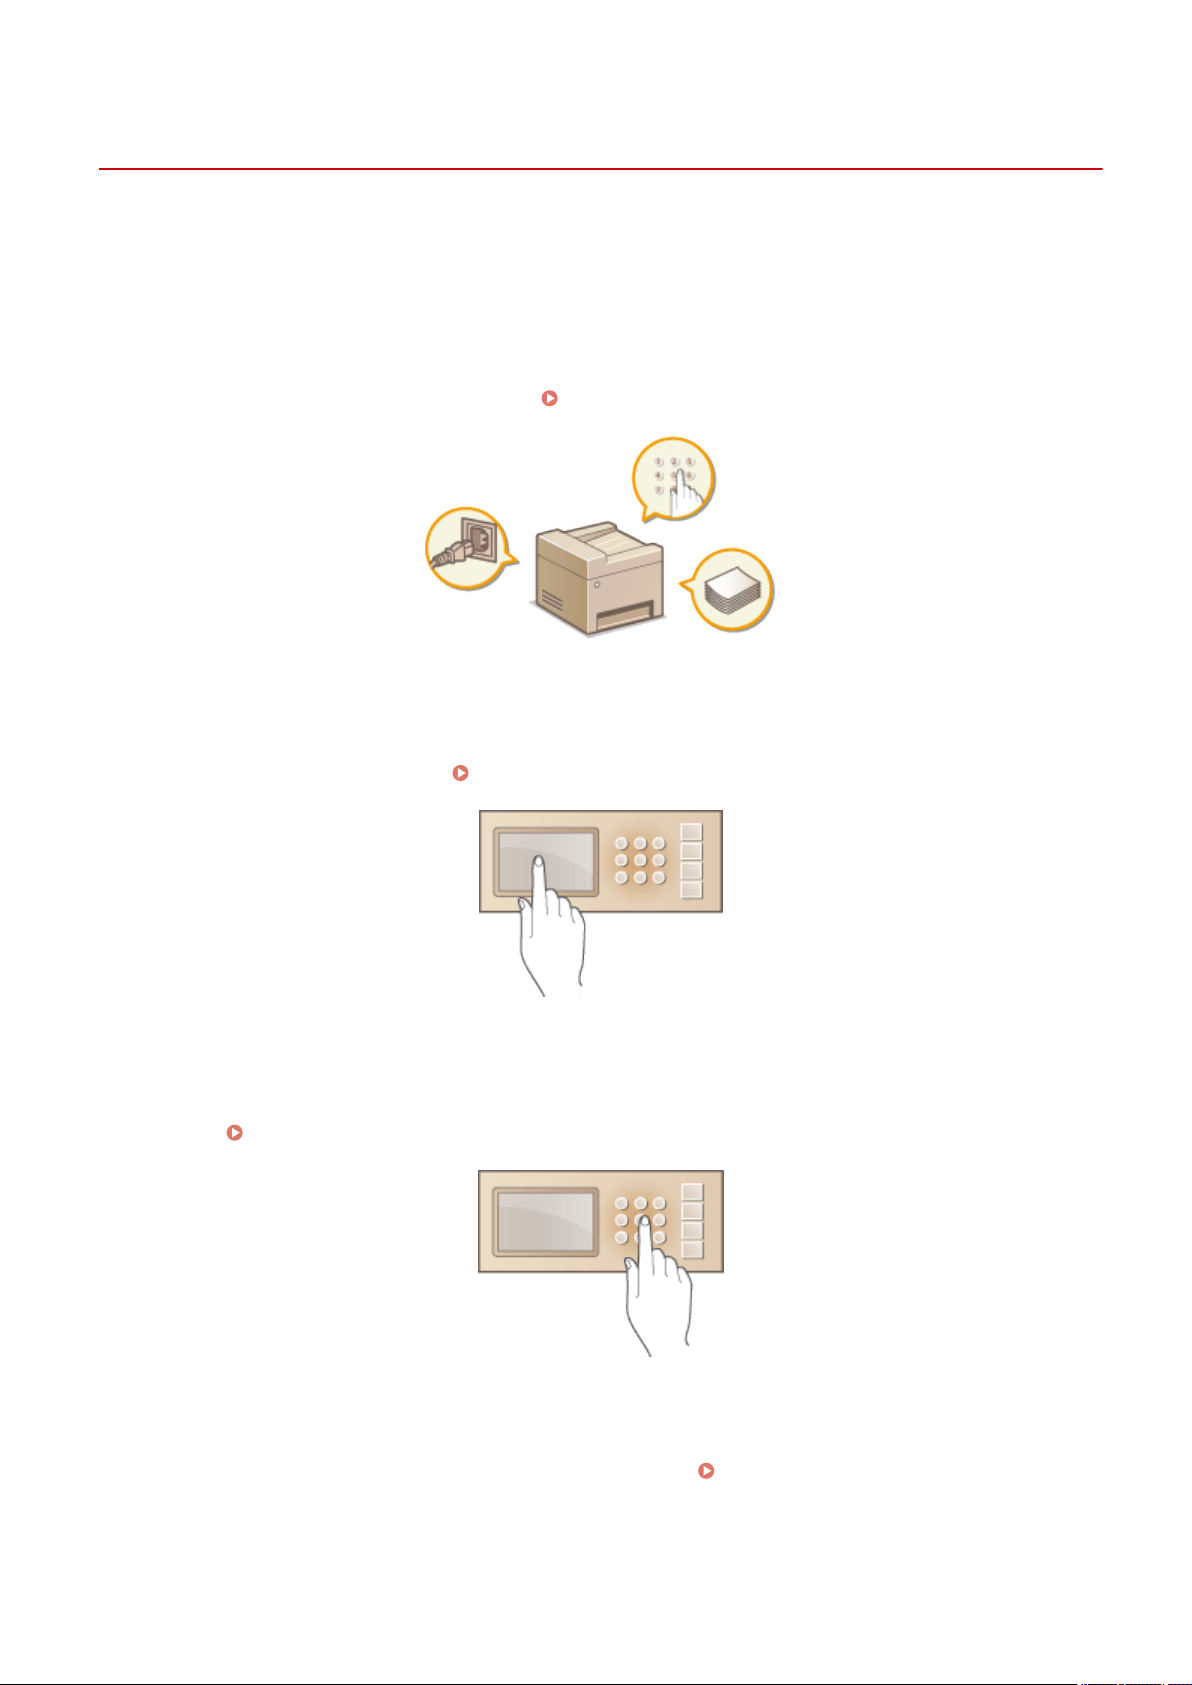
Basic Operations
Basic Operations
0UWX-006
This chapter describes basic operations, such as how to use the operation panel or how to load the paper and
documents, that are frequently performed to use the functions of the machine.
◼ Parts and Their Functions
This section describes the exterior and interior parts of the machine and their functions, as well as how to use the keys
on the operation panel and how to view the display.
Parts and Their Functions(P. 17)
Using the Display
◼
The display used on this machine is a touch panel display. This section describes how to use the display for tasks such
as selecting items and adjusting settings. Using the Display(P. 38)
Entering Text
◼
This section describes how to enter the characters and numbers for registering destinations in the Address Book or
sending faxes. Entering Text(P. 41)
◼ Logging on to the Machine
This section describes how to log on when a logon screen is displayed.
14
Logging on to the Machine(P. 44)
Page 24

Basic Operations
◼ Placing Documents
This section describes how to place documents on the platen glass and in the feeder. Placing Documents(P. 47)
Loading Paper
◼
This section describes how to load the paper into the paper drawer and multi-purpose tray. Loading Paper(P. 51)
Registering in the Address Book
◼
This section describes how to register destinations for sending faxes or scanned documents.
Address Book(P. 78)
Registering in the
◼ Adjusting the Volume
This section describes how to adjust the volume of various machine sounds, such as those produced when fax sending
is complete or when an error occurs. Adjusting the Volume(P. 99)
15
Page 25

◼ Entering Sleep Mode
Basic Operations
This section describes how to set the sleep mode.
◼
Setting Auto Shutdown Time
This section describes how to enable the <Auto Shutdown Time> setting.
Entering Sleep Mode(P. 101)
Setting Auto Shutdown Time(P. 103)
16
Page 26

Basic Operations
Parts and Their Functions
0UWX-007
This section describes the parts of the machine (exterior, front and back side, and interior) and how they function. In
addition to describing the parts of the machine used for such basic operations as placing documents, loading paper,
and replacing the toner cartridges, this section also describes the keys on the operation panel and display. Read this
section for tips on how to use the machine properly.
Front Side(P. 18)
Back Side(P. 20)
Interior(P. 22)
Multi-Purpose Tray(P. 24)
Paper Drawer(P. 25)
Operation Panel(P. 26)
17
Page 27
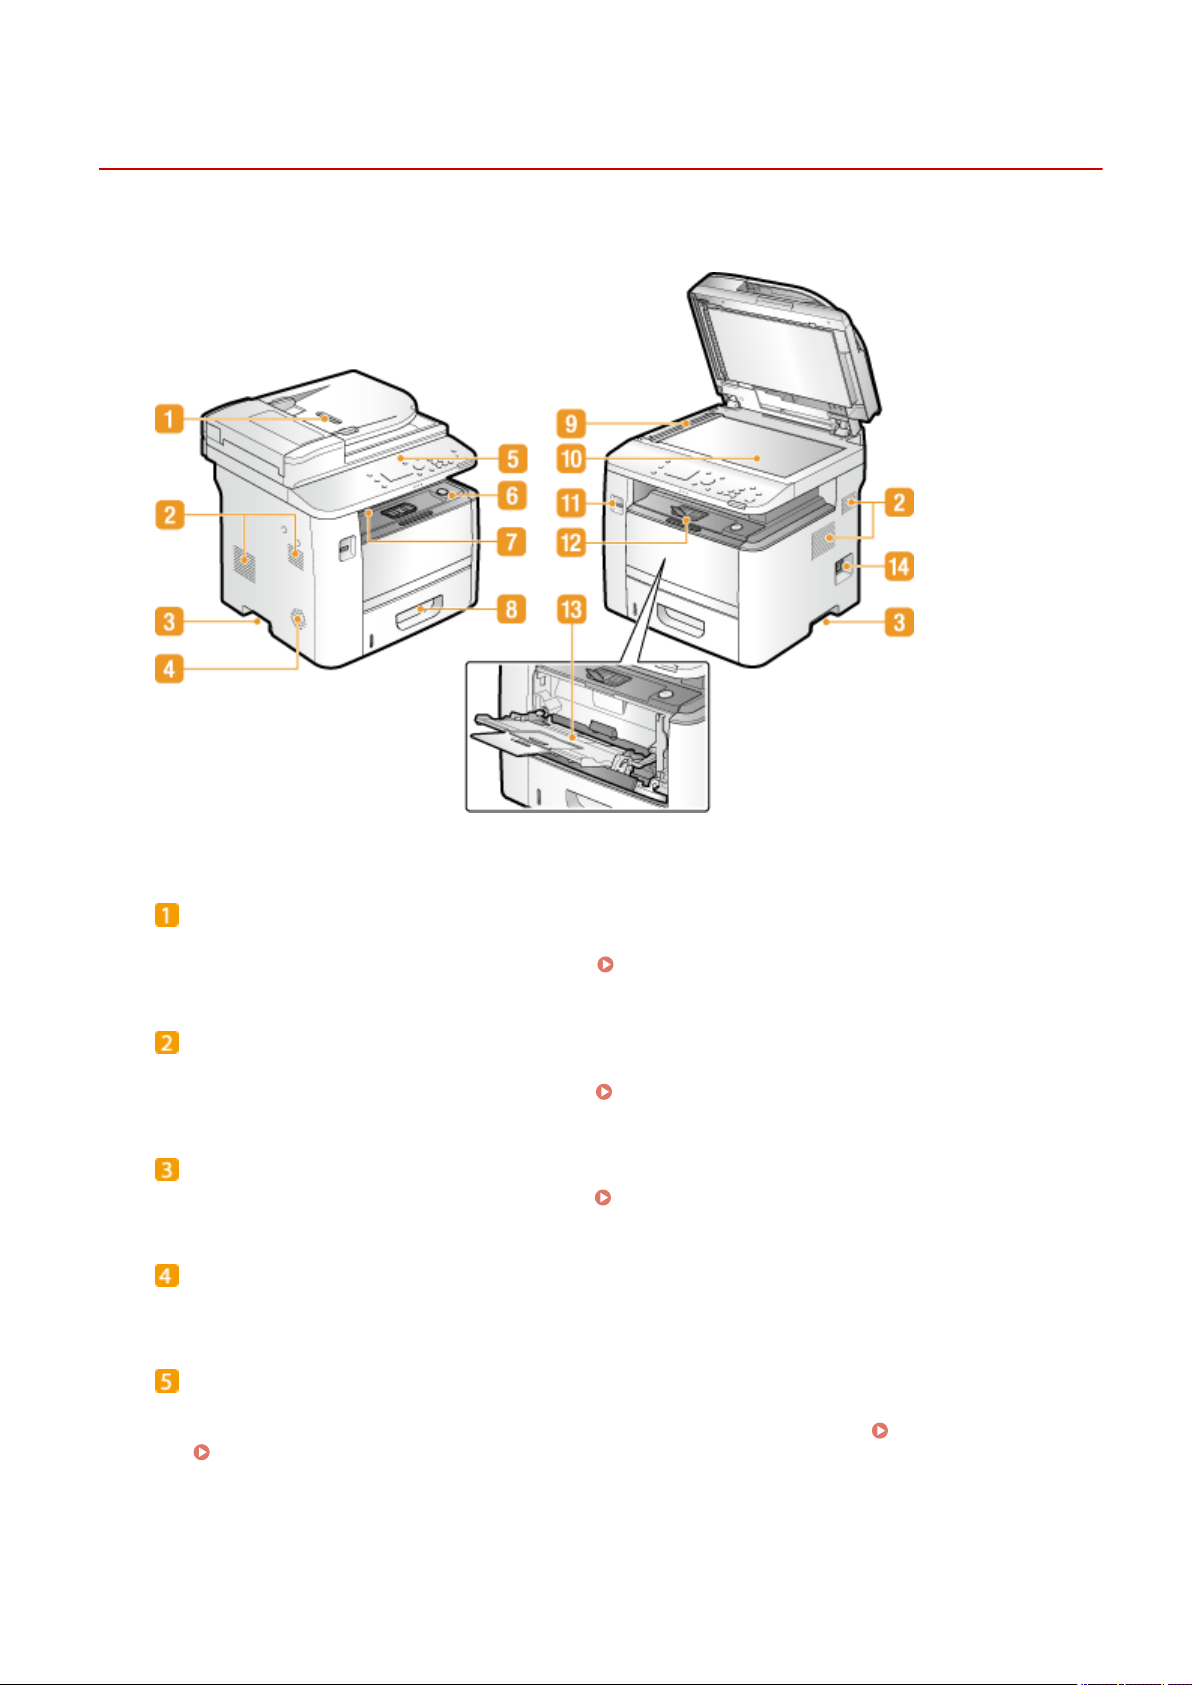
Front Side
Basic Operations
0UWX-008
Feeder
Automatically feeds documents into the machine for scanning. When two or more sheets are loaded in the
feeder, documents can be scanned continuously. Placing Documents(P. 47)
Ventilation slots
Air from inside the machine is vented out to cool down the inside of the machine. Note that placing objects in
front of the ventilation slots prevents ventilation. Installation(P. 3)
Lift handles
Hold the lift handles when carrying the machine. Relocating the Machine(P. 801)
Speaker
Emits sounds produced by the machine, such as fax tones and warning tones.
Operation panel
The operation panel consists of keys such as the numeric keys and Start key, a display, and status indicators.
You can perform all the operations and specify settings from the operation panel. Operation Panel(P. 26)
Display(P. 29)
18
Page 28

Basic Operations
Front cover
Open the front cover when replacing the toner cartridge or clearing paper jams. How to Replace Toner
Cartridges(P. 798) Clearing Jams(P. 723)
Output tray
Printed paper is output to the output tray.
Paper drawer
Load the type of paper you frequently use into the paper drawer.
Drawer(P. 53)
Loading Paper in the Paper
Scanning area
Documents loaded in the feeder are automatically fed to the scanning area for scanning.
Platen glass
Place documents to scan on the platen glass. Also, use the platen glass to place thick or bound documents
such as books when they cannot be loaded in the feeder. Placing Documents(P. 47)
USB port (for USB device connection)
Use this port to connect a USB memory device or USB keyboard. Connecting a USB memory device allows
you to print data from the memory device or save scanned documents to the memory device. Printing
from USB Memory (Memory Media Print)(P. 289) Scanning Documents Directly to USB
Memory(P. 332)
Paper stopper
Open the paper stopper to prevent paper in the output tray from falling.
Multi-purpose tray
Load the paper into the multi-purpose tray when you want to temporarily use a type of paper different from
that which is loaded in the paper drawer.
Loading Paper in the Multi-Purpose Tray(P. 58)
Power switch
Turns the power ON or OFF. To restart the machine, turn OFF the machine, wait for at least 10 seconds, and
turn it back ON.
19
Page 29
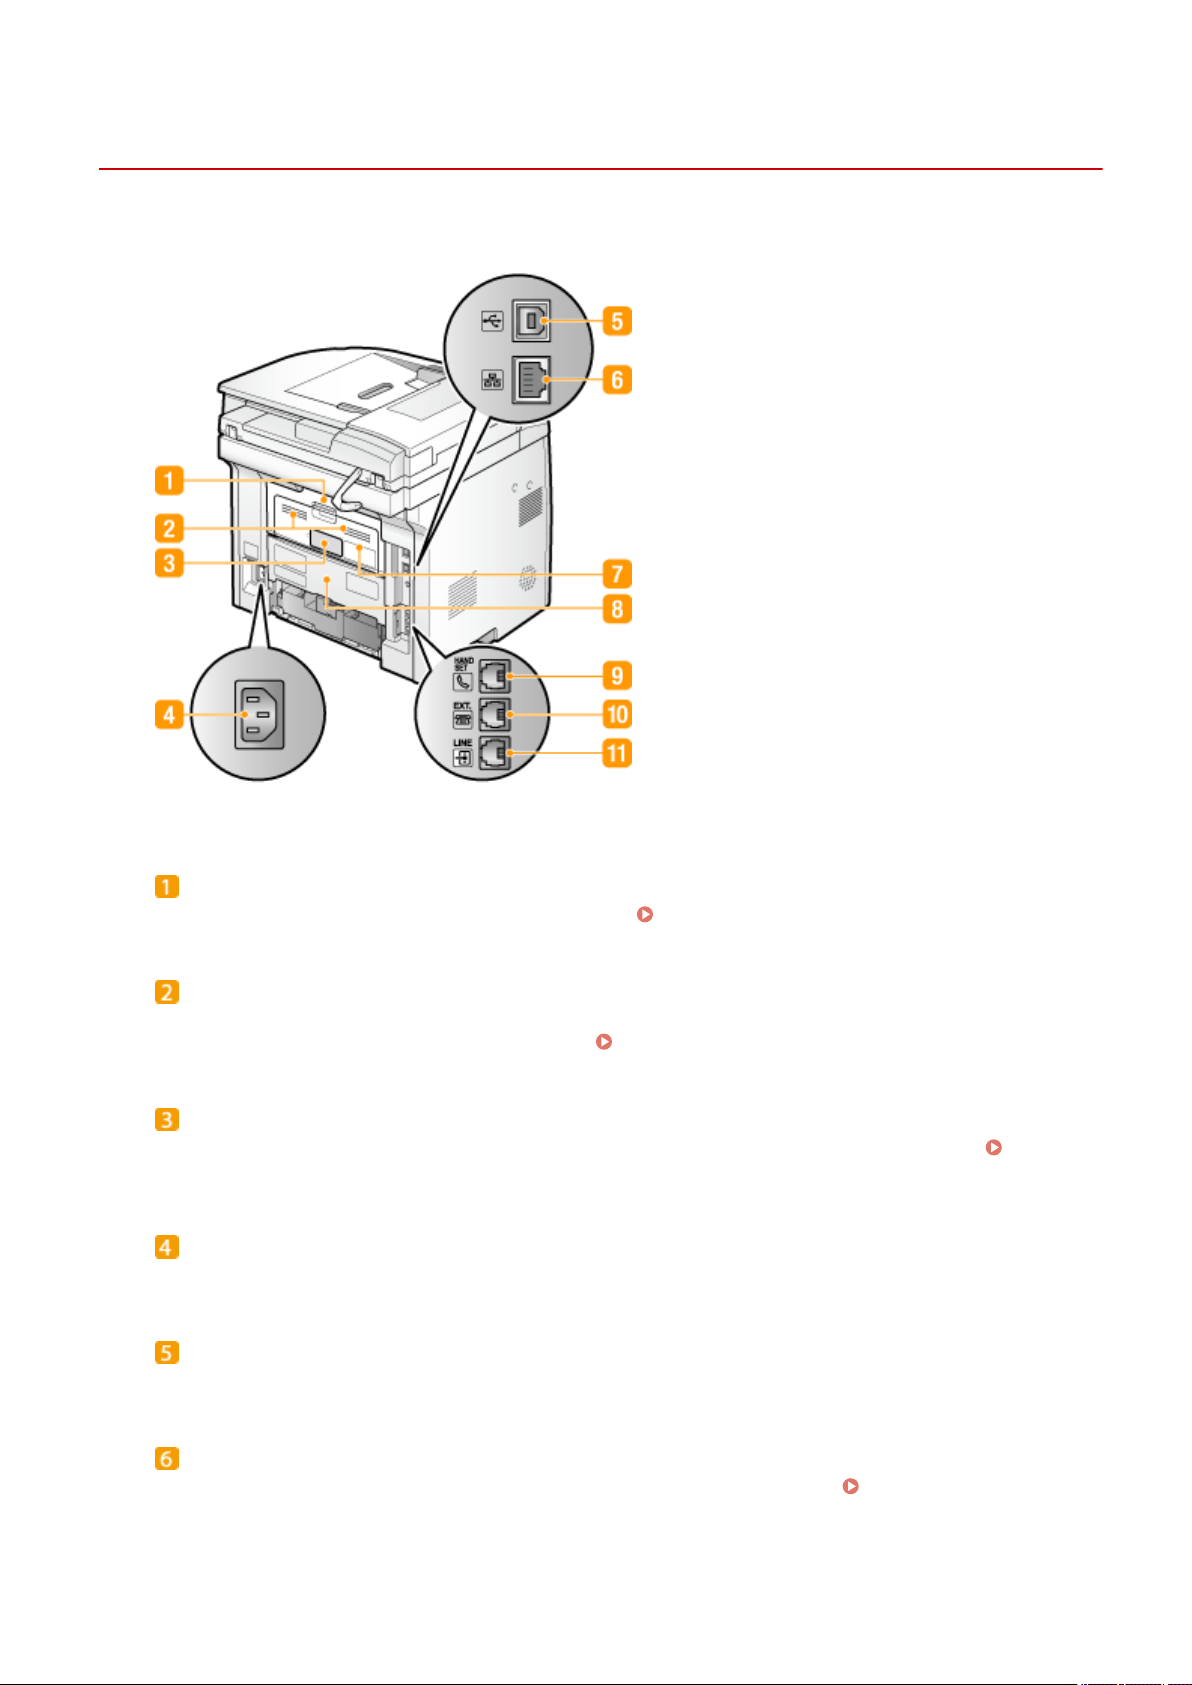
Back Side
Basic Operations
0UWX-009
Upper rear cover
Open the upper rear cover when clearing paper jams. Clearing Jams(P. 723)
Ventilation slots
Air from inside the machine is vented out to cool down the inside of the machine. Note that placing objects in
front of the ventilation slots prevents ventilation. Installation(P. 3)
Rating label
The label shows the serial number, which is needed when making inquiries about the machine.
Problem Cannot Be Solved(P. 780)
When a
Power socket
Connect the power cord.
USB port (for computer connection)
Connect a USB cable when connecting the machine and a computer.
LAN port
Connect a LAN cable when connecting the machine to a wired LAN router, etc.
LAN(P. 418)
20
Connecting to a Wired
Page 30

Basic Operations
Sub-output tray
When using a paper type that easily curls such as labels or envelopes, you can reduce curl by opening this
tray. Paper Curls(P. 777)
Lower rear cover
Open the lower rear cover to set the paper size switch lever or remove jammed paper. Interior(P. 22)
Clearing Jams(P. 723)
Handset jack (MF419x / MF416dw)
Connect the optional handset. Connecting the Telephone Line(P. 146)
External telephone jack (MF419x / MF416dw)
Connect your telephone or answering machine.
Connecting the Telephone Line(P. 146)
Telephone line jack (MF419x / MF416dw)
Connect a telephone cable when connecting the machine to a telephone line. Connecting the Telephone
Line(P. 146)
21
Page 31

Interior
Basic Operations
0UWX-00A
Duplex transport guide
If paper has jammed during 2-sided printing, lower the duplex transport guide to remove the jammed paper.
Clearing Jams(P. 723)
Transport guide
If there is a paper jam inside the machine, raise the transport guide to remove the jammed paper.
Clearing Jams(P. 723)
Paper size switch lever
Before starting 2-sided printing, change the position of this lever properly to match the size of the paper to
print on.
A4 size
Pull the lever towards you.
Letter/Legal size
Push the lever away from you.
22
Page 32

Basic Operations
● In addition to A4, Letter, and Legal sizes, some other paper sizes can be used for 2-sided printing (
Paper(P. 858) ). When using those paper sizes, set the paper size switch lever in the same position as
that for Letter/Legal size.
23
Page 33

Multi-Purpose Tray
Paper guides
Adjust the paper guides to exactly the width of the loaded paper to ensure that paper is fed straight into the
machine.
Basic Operations
0UWX-00C
Paper tray
Pull out the paper tray when loading paper.
Tray extension
Open the tray extension when loading large paper.
LINKS
Loading Paper in the Multi-Purpose Tray(P. 58)
24
Page 34

Paper Drawer
Basic Operations
0UWX-00E
Paper level indicator
Indicates the remaining amount of paper. The mark moves downward as the remaining amount of paper
decreases.
Paper guides
Adjust the paper guides to exactly the size of the loaded paper to ensure that paper is fed straight into the
machine. Press the lock release levers that are marked with arrows in the illustrations to release the locks
and slide the paper guides.
LINKS
Loading Paper in the Paper Drawer(P. 53)
25
Page 35

Operation Panel
MF419x / MF418x
Basic Operations
0UWX-00F
MF416dw / MF411dw
● The operation panel shown above is for the MF416dw. The available functions vary depending on the
model
26
Page 36

Basic Operations
Home key
Press to display the Home screen, which provides access to the setting menu and functions such as copy and
scan. Customizing the Home Screen(P. 34)
Back key
Press to return to the previous screen. If you press this key when specifying settings, for example, the
settings are not applied and the display returns to the previous screen.
Display
You can view the progress of copy, fax, and other jobs and error statuses. The display is also a touch panel,
so you can specify settings by touching the screen directly. Display(P. 29) Using the Display(P. 38)
Quick Guide key
Press to view operation guidance and error causes/solutions.
Status Monitor key
Press to check the status of printing or faxing, to view the usage history, or to view the network settings such
as the IP address of the machine. You can also check the status of the machine, such as the remaining
amounts of paper and the amount remaining in the toner cartridges, or whether any errors occurred.
Display(P. 29)
Numeric keys ([0]-[9] keys)
Press to enter numbers and text. Entering Text(P. 41)
[ID] key
Press after entering the ID and PIN to log on when Department ID Management is enabled. After you nish
using the machine, press this key again to log off. Logging on to the Machine(P. 44)
Clear key
Press to delete the entered numbers and text.
Energy Saver key
Press to put the machine into sleep mode. The key lights up green when the machine is in sleep mode. Press
the key again to exit sleep mode. Entering Sleep Mode(P. 101)
Stop key
Press to cancel copying, faxing, and other operations.
27
Page 37

Basic Operations
Start key
Press to scan or copy documents. Also press this key when you start printing images from a USB memory
device.
Sound Volume key
Press to adjust volume. Adjusting the Volume(P. 99)
Counter Check key (MF419x / MF418x)
Press to view the counter values of printouts as well as the list of the available optional equipment.
Viewing the Counter Value(P. 823) Display(P. 29)
[#] key
Press to enter symbols such as "@" or "/".
Error indicator
Blinks or lights up when an error such as a paper jam occurs
Wi-Fi indicator
Lights up when the machine is connected to wireless LAN.
Processing/Data indicator
Blinks while operations such as sending or printing are being performed. Lights up when there are
documents waiting to be processed.
[*] key
● Press to switch the type of text that is entered.
● Press to use tone dialing such as when receiving fax information services.
Services(P. 199)
Receiving Fax Information
Reset key
Press to cancel the settings and restore the previously specied settings.
NFC (Near Field Communication) mark (MF416dw)
You can also use functions such as printing by waving a smartphone or similar device with Canon Mobile
Application installed over this mark. Connecting by a Touch on the Machine (NFC) (MF416dw)(P. 390)
LINKS
Using the Display(P. 38)
28
Page 38

Basic Operations
Display
0UWX-00H
The Home screen or settings screen appears on the display, allowing you to initiate functions such as copying or
scanning. You can also use the display to check information such as error messages and the machine's operation
status. The screen is also a touch panel, so you can perform operations by touching the screen directly.
Home Screen
The Home screen is displayed when the power is turned ON or by pressing on the operation panel. Use this
screen to specify settings for and register functions.
<Copy>
Use this button to start copying. Copying(P. 105)
<Fax> (MF419x / MF416dw)
Use this button to send a fax from the machine. Faxing(P. 137)
<Scan>
Scans a document and converts it into an electronic le. You can save
scanned les on your computer or send them via e-mail.
Machine as a Scanner(P. 304)
<Memory Media Print>
Prints les stored in a USB memory media.
(Memory Media Print)(P. 289)
Change page button
Use this to view another page in the Home screen. This works in the same
way as icking left/right.
<Address Book>
Use this to register or edit the destinations for e-mails and faxes. You can
also display a registered destination when sending an e-mail or fax.
Registering in the Address Book(P. 78)
<Menu>
<Timer Settings>, <Preferences>, and many other machine settings start
from this button. Setting Menu List(P. 629)
Printing from USB Memory
Using the
29
Page 39

Basic Operations
<Secure Print>
Use this function to print a secure document. Printing a Document
Secured by a PIN (Secure Print)(P. 276)
<Paper Settings>
This button is also used for specifying the size and type of paper loaded in
the paper drawer and multi-purpose tray.
Type(P. 67)
<Home Screen Settings>
Allows you to change the order that Home screen buttons are displayed in.
Customizing the Home Screen(P. 34)
<ID Card Copy>
Settings are preregistered for copying the front and back sides of a driver's
license or other card onto the same side of a page at actual size. Copying
Both Sides of an ID Card onto One Page(P. 127)
Specifying Paper Size and
<Direct Connection>
Use this to establish a direct wireless connection to a mobile device. Make
Direct Connection (Access Point Mode)(P. 388)
Shortcut buttons
Display "Favorite Settings" that are registered to Copy, Fax, and Scan.
Adding Buttons to the Home Screen(P. 34)
<Status Monitor> Screen
When you press , a screen appears in which you can check the progress of documents that are being
printed, sent or received, as well as the status of the machine (amount remaining in the toner cartridge, etc.)
and network settings such as the machine's IP address.
<Error Information/Notication>
Displays the details of any errors that occurred. When an Error Message Appears(P. 734)
30
Page 40

Basic Operations
<Device Status>
Displays the status of the machine, such as the amount of paper or the amount remaining in the toner
cartridges.
<Paper Information>
Displays whether paper is loaded in each paper source.
<Amount Remaining in Cartridge>
Displays the amount remaining in the toner cartridges. Other internal parts may reach the end of their
lifetime before the toner runs out.
<Remove Memory Media>
Use to safely remove a USB memory device.
Scanning Documents Directly to USB Memory(P. 332)
Printing from USB Memory (Memory Media Print)(P. 289)
<Check Counter> (MF416dw / MF411dw)
Displays the total number of sheets that have been printed so far. Viewing the Counter Value(P. 823)
<Secure Print Memory Usage>
Displays the amount of memory currently used for storing secured document data.
Document Secured by a PIN (Secure Print)(P. 276)
<Version Information>
Displays rmware version information.
<Serial Number>
Displays the serial number.
Printing a
Status of copy/print/send/receive jobs
Displays the current status of the selected item. The <Copy/Print Job Status> screen is shown below as an
example.
<Network Information>
Displays the network settings such as the IP address of the machine and status such as the condition of
wireless LAN communications. Viewing Network Settings(P. 445)
31
Page 41

Basic Operations
<Check Counter> Screen (MF419x / MF418x)
When you press ( ), the <Check Counter> screen is displayed. From this screen, you can view the
counter values of printouts, as well as the serial number of the machine and the machine conguration.
<Check Device
Displays the serial number of the machine and the list of the equipment that is attached or enabled.
Conguration>
Counters
Select the counter to check the counter value. Viewing the Counter Value(P. 823)
When a Message Is Displayed
Messages are displayed at the top of the screen in situations such as when paper runs out or end of toner
cartridge lifetime. The display alternates between showing the normal screen and the message.
When an Error Message Appears(P. 734)
When
● Tap
is displayed
to view the notication.
When an Error Occurs
In some cases when an error occurs, instructions on how to respond to the error are displayed. Follow the onscreen instructions to solve the problem. The screen displayed when a paper jam occurs is shown below as an
example.
32
Page 42

LINKS
Customizing the Home Screen(P. 34)
Using the Display(P. 38)
Basic Operations
33
Page 43

Basic Operations
Customizing the Home Screen
0UWX-00J
You can add/delete shortcut buttons displayed in the Home screen according to your application or a preferred
arrangement. You can also change the order that they are displayed in.
Adding Buttons to the Home Screen(P. 34)
Changing the Arrangement of Buttons(P. 35)
Inserting a Blank(P. 36)
Adding Buttons to the Home Screen
You can add shortcut buttons to the Home screen for frequently used functions such as <Copy>, <Fax>, and <Scan>.
For example, you can carry out tasks more quickly and eciently by assigning a sequence of settings (e.g. "Scan both
sides of a document, save it as a highly compressed PDF le and send it via e-mail") to a single button.
● The settings to be added as a shortcut button must be registered beforehand as Favorite Settings.
Registering Frequently Used Copy Settings(P. 132)
Registering Frequently Used Fax Settings(P. 174)
Registering Frequently Used Scan Settings (E-Mail/I-Fax/Shared Folder/FTP Server)(P. 379)
● You can register up to 11 shortcut buttons.
Press and tap <Home Screen Settings>.
1
● If the logon screen appears, enter the correct ID and PIN using the numeric keys, and then press .
Logging on to the Machine(P. 44)
Tap <Select Button to Display>.
2
Select the function with the Favorite Settings you want to add as a button.
3
34
Page 44

Basic Operations
Select the check box for all settings to be displayed in the Home screen and tap
4
<Apply>.
● Clear the check box for the name of the button you want to remove and then tap <Apply>. Once you
remove a registered button, a space appears where the button was displayed in the Home screen. If
necessary, delete the space. Inserting a Blank(P. 36)
Read the message that is displayed, and tap <OK>.
5
A button for the newly selected settings is added to the Home screen.
➠
● If the Home screen is full and no more settings can be registered, Delete registered buttons and spaces in
<Home Screen Settings>.
Changing the Arrangement of Buttons
To make the buttons easier to use, you can rearrange the buttons however you like. For instance, you can put the most
frequently used functions rst, or arrange the function buttons together with shortcut buttons for Favorite Settings.
Press and tap <Home Screen Settings>.
1
35
Page 45

Basic Operations
● If the logon screen appears, enter the correct ID and PIN using the numeric keys, and then press .
Logging on to the Machine(P. 44)
Tap <Set Display Order>.
2
Select the button to move.
3
● The selected button is highlighted. Tap the selected button again to deselect it.
Tap <Previous> or <Next>.
4
● The button moves as many times as you tapped.
● Long touching <Previous>/<Next> to move the button continuously.
Tap <Apply>.
5
Inserting a Blank
To make the Home screen easier to view, you can insert spaces instead of buttons.
Press and tap <Home Screen Settings>.
1
36
Page 46

Basic Operations
● If the logon screen appears, enter the correct ID and PIN using the numeric keys, and then press .
Logging on to the Machine(P. 44)
Tap <Insert and Delete Blank>.
2
Select the button where you want to insert a blank, and tap <Insert>.
3
A space is inserted before the selected button.
➠
Deleting Spaces
● To delete a space, select the space to be deleted and tap <Delete>.
Tap <Apply>.
4
LINKS
Display(P. 29)
37
Page 47

Basic Operations
Using the Display
The display is a touch panel, allowing you to operate directly on the screen.
Avoid the following actions.
The display may misfunction or be damaged.
● Pressing forcefully
● Pressing with pointed objects (ngernails, ballpoint pen, pencil, etc.)
● Operating with wet/soiled hands
● Operating the display while an object is placed on it
Tap
Touch the screen lightly and quickly. Use for selecting or nalizing items.
0UWX-00K
Long Touch
Keep nger held on the screen. When text cannot be completely displayed on one line ("..." appears), touch and
hold the line to scroll all of the text. You can also use a long touch to continuously increase or decrease
numbers, such as the copy magnication.
Flick
Flick with the nger on the display. The effect of icking varies depending on the screen. For instance, icking in
the Home screen moves you one page in the direction of the ick, while icking in the Copy screen scrolls the
screen in accordance with the icking motion.
38
Page 48

◼ Selecting Items
Tap an item name or button to make a selection.
Basic Operations
If an item is mistakenly touched
● Slide your nger away then release it from the screen to cancel the selection.
To return to the previous screen
● Press to return to the previous screen.
◼ Scrolling the Screen
The scroll bar appears on the screen when there is still information that is undisplayed. If the scroll bar is displayed,
ick the screen to scroll in the direction of the ick. Note that the scroll bar only appears while the screen is being
touched.
39
Page 49

Basic Operations
◼ Changing Values and Settings
Changing Values
Tap / to enter values. If an icon such as below is displayed at the upper left of the screen, you can enter
values directly using the numeric keys.
To move the cursor
● When / is displayed, tap to move the cursor.
Value range
● Values in ( ) displayed below the entry box are the enterable value range.
Changing Setting Values
Tap / to adjust the setting on the scale. You can also adjust a setting by icking the slider left or right.
● You can change a variety of display-related settings, such as the scrolling speed or display language:
Display Settings(P. 641)
● To change the screen that is automatically displayed when the machine remains idle for a specied length of
time:
Function After Auto Reset(P. 647)
40
Page 50

Basic Operations
Entering Text
Use the display and numeric keys to enter text and values.
Switching the Type of Text
Tap <A/a/12> to switch the type of text that is entered. The currently selected type of text is indicated by the "A",
"a", or "12" displayed above and to the right of the text input eld.
0UWX-00L
● You can also press to switch the type of text.
Types of Text That Can Be Entered
Text that can be entered is listed below.
Key
A a 12
@ . - _ / 1
ABC abc 2
DEF def 3
GHI ghi 4
JKL jkl 5
MNO mno 6
PQRS pqrs 7
TUV tuv 8
WXYZ wxyz 9
41
Page 51

Basic Operations
(Not available) 0
(space) -.*#!",;:^`_=/|'?$@%&+\~()[]{}<> (Not available)
● Press or tap <#> when the type of text that is entered is <A> or <a> to display enterable symbols
in the screen. Tap symbols to enter.
Deleting Text
One character is deleted each time is pressed. Press and hold to delete all of the entered text.
Moving the Cursor (Entering a Space)
Tap or to move the cursor. To enter a space, move the cursor to the end of the text, and tap .
Example of Entering Text and Numbers
Example: "Canon-1"
Tap <A/a/12> repeatedly until <A> is selected.
1
Press repeatedly until the letter "C" is selected.
2
Tap <A/a/12> repeatedly until <a> is selected.
3
Press repeatedly until the letter "a" is selected.
4
Press repeatedly until the letter "n" is selected.
5
Press repeatedly until the letter "o" is selected.
6
Press repeatedly until the letter "n" is selected.
7
Press repeatedly until the symbol "-" is selected.
8
Tap <A/a/12> repeatedly until <12> is selected.
9
Press .
10
Tap <Apply>.
11
◼ Entering Characters Using a USB Keyboard
When is displayed on the screen, you can connect a keyboard to the USB port for USB devices on the Front
Side(P. 18) and enter text from the keyboard. When using a keyboard, you can still use the number keypad.
● Some keys on the USB keyboard, such as the [Backspace], [Home] and [End] keys, cannot be used. When
keys that cannot be used are pressed, nothing is entered or changed.
● To delete text, press the [Delete] key.
● Pressing the [RETURN/ENTER] key completes text entry in the same way as tapping <Apply>.
● You can specify the type of keyboard layout (US layout or UK layout).
● You can disconnect the USB keyboard from the machine at any time. No special operation is required to
disconnect it.
42
English Keyboard Layout(P. 644)
Page 52

Basic Operations
● Depending on the display language, you may not be able to enter some characters correctly.
43
Page 53

Basic Operations
Logging on to the Machine
0UWX-00R
If Department ID Management is enabled or System Manager IDs are enabled, you must log on before using the
machine. You also need to log on if use of the fax and scan functions is restricted.
Department ID Management logon(P. 44)
Logging on to Authorized Send(P. 45)
Department ID Management logon
When the logon screen appears, use the procedure below to enter the Department ID and PIN.
● If the screen is displayed prompting you to insert a control card, see
Optional Items(P. 869) .
Enter an ID.
1
Tap <Department ID> or <System Manager ID>.
1
Enter a ID using the numeric keys, and tap <Apply>.
2
● If no PIN is registered, proceed to step 3.
Enter the PIN.
2
Tap <PIN>.
1
Enter a ID using the numeric keys, and tap <Apply>.
2
44
Page 54

Press .
3
➠ The logon screen will be changed to the Home screen.
● After you nish using the machine, press again to display the logon screen.
Logging on to Authorized Send
Basic Operations
If the Send function authorization setting (
logon screen appears when the fax or scan function is used.
Enter your user name.
1
Tap <User Name>.
1
Enter your user name using the numeric keys, tap <Apply>.
2
● On how to enter text, see Entering Text(P. 41) .
LDAP Server Authentication(P. 536) ) is enabled, the Authorized Send
Enter the password.
2
Tap <Password>.
1
Enter the password using the numeric keys, tap <Apply>.
2
Tap <Server Name>, and Select the server for your authentication.
3
● Select the LDAP server where your user name and password are registered.
45
Page 55

Basic Operations
Press .
4
➠ The logon screen switches to the fax or scan function Home screen.
● After you nish using the machine, press again to display the logon screen.
If the logout selection screen appears
● If you are logged in to both Authorized Send and Department ID Management, a dialog box appears in
which you can select the items you want to log out of.
<Log Out from All Authenticated Functions>
Select to log out of Authorized Send (fax or scan function) and Department ID Management simultaneously.
<Log Out from Authenticated Sending>
Select to log out of Authorized Send (fax or scan function) only. You are still logging on to Department ID
Management. After you nish using the machine, press
Management.
LINKS
Setting the Department ID Management(P. 526)
Setting the System Manager ID(P. 524)
again to log out of Department ID
46
Page 56

Basic Operations
Placing Documents
0UWX-00S
Place documents on the platen glass or in the feeder. Use the platen glass when scanning thick or bound documents
such as books. You can load two or more sheets of documents in the feeder so that they can be scanned continuously.
For information about the types of documents that can be placed on the platen glass or in the feeder, and information
about the scannable area of a document, see
Placing Documents on the Platen Glass(P. 48)
Placing Documents in the Feeder(P. 48)
Document Type(P. 856) or Scan Area(P. 857) .
Use documents that are completely dry
● When placing documents, make sure that any glue, ink, or correction uid on the documents has
completely dried.
To avoid paper jams
Do not place the following types of documents in the feeder as this may cause paper jams:
● Wrinkled or creased paper
● Carbon paper
● Curled or rolled paper
● Coated paper
● Torn paper
● Onion skin or thin paper
● Stapled or clipped documents
● Paper printed by a thermal transfer printer
● Transparencies
To scan documents more accurately
● Documents placed in the feeder are scanned while being fed into the machine. On the other hand,
documents placed on the platen glass remain in a xed position while they are scanned. To ensure more
accurate scanning results, placing documents on the platen glass is recommended.
To scan tracing paper or transparencies
● To scan transparent documents (for example, tracing paper or transparencies), place them on the platen
glass.
47
Page 57

Basic Operations
Placing Documents on the Platen Glass
Open the feeder.
1
Place the document face down on the platen glass.
2
● Align the corner of the document with the top-left corner of the platen glass.
● To scan transparent documents (for example, tracing paper or transparencies), cover them with plain
white paper.
Gently close the feeder.
3
➠ The machine is ready to scan the document.
When scanning is complete
● Remove the document from the platen glass.
Placing Documents in the Feeder
Spread the document guides apart.
1
● Slide the document guides outward until they are slightly farther apart than the actual document width.
48
Page 58

Basic Operations
Fan the document stack and align the edges.
2
● Fan the document stack in small batches, and align the edges by lightly tapping the stack on a at surface a
few times.
Place the document(s) face up in the feeder.
3
● Make sure that the document stack does not exceed the load limit lines ( ).
● Do not load documents of various sizes at the same time.
● Up to 50 sheets can be loaded at a time. If 51 or more sheets are loaded, scanning may stop or a paper
jam may occur.
Align the document guides against the edges of the document.
4
● Slide the document guides inward until they are aligned securely against the edges of the document.
49
Page 59

Basic Operations
➠ The machine is ready to scan the document.
Align the document guides securely against the edges of the document
● Document guides that are too loose or too tight can cause misfeeds or paper jam.
While documents are being scanned
● Do not add or remove documents.
When scanning is complete
● Remove the scanned documents from beneath the feeder to prevent paper jams.
50
Page 60

Basic Operations
Loading Paper
0UWX-00U
You can load the paper into the paper drawer or multi-purpose tray. Load the paper you usually use into the paper
drawer. The paper drawer is convenient when using large amounts of paper. Use the multi-purpose tray when you
temporarily use size or type of paper that is not loaded in the paper drawer. See Paper(P. 858) for available paper
sizes.
Paper Type and Setting for the Machine
See the table below to specify the paper settings according to the type and weight of the paper to load into the
paper source. For more information about how to specify the paper settings on the machine, see Specifying
Paper Size and Type(P. 67) . For the amount of paper that can be loaded in each paper source, see
Paper(P. 858) .
Paper Type Paper Weight
60 to 89 g/m² <Plain>
Plain paper
60 to 69 g/m²
Recycled paper 60 to 89 g/m² <Recycled>
Color paper 60 to 89 g/m² <Color>
90 to 128 g/m² <Heavy 1>
Heavy paper
129 to 163 g/m² <Heavy 2>
Envelope <Envelope>
Label <Labels>
*1
Specify <Plain L> as the paper type if printouts come out curled with <Plain> specied.
Paper Setting
on the Machine
<Plain L>
*1
Do not use the following types of paper:
● Wrinkled or creased paper
● Curled or rolled paper
● Torn paper
● Damp paper
● Very thin paper
● Paper printed by a thermal transfer printer
● Highly textured paper
● Glossy paper
51
Page 61

Basic Operations
Paper handling and storage
● Store the paper on a at surface.
● Keep the paper wrapped in its original package to protect the paper from moisture or dryness.
● Do not store the paper in such a way that may cause it to curl or fold.
● Do not store the paper vertically or stack too much paper.
● Do not store the paper in direct sunlight, or in a place subject to high humidity, dryness, or drastic
changes in temperature or humidity.
When printing on paper that has absorbed moisture
● Steam may emit from the paper output area, or water droplets may form on the back side of the
operation panel or around the paper output area. There is nothing unusual about any of these
occurrences, which occur when the heat generated from xing toner on the paper causes moisture in
the paper to evaporate (most likely to occur at low room temperatures).
LINKS
Registering a Custom Paper Size(P. 74)
52
Page 62

Basic Operations
Loading Paper in the Paper Drawer
0UWX-00W
Load the paper that you usually use in the paper drawer. When you want to print on paper that is not loaded in the
paper drawer, load the paper in the multi-purpose tray. Loading Paper in the Multi-Purpose Tray(P. 58)
Loading Regular Size Paper(P. 53)
Loading Custom Size Paper(P. 55)
Make sure to load paper in portrait orientation
● Paper cannot be loaded in landscape orientation. Make sure to load the paper in portrait orientation, as
shown in the illustrations below.
*
Custom size paper can only be loaded in landscape orientation. For custom size paper that can be loaded in the paper
drawer, see Paper(P. 858) .
● Follow the procedure below when loading paper into the optional paper feeder.
*
Loading Regular Size Paper
To load paper whose size is found in the paper size markings on the paper drawer, use the following procedure. For
paper whose size is not found in the paper size markings, see Loading Custom Size Paper(P. 55) .
Pull out the paper drawer.
1
● Make sure to hold the paper drawer with both hands, and pull it out gently. Otherwise, you may damage
the paper drawer by dropping it, if it slides out too easily.
53
Page 63

Basic Operations
Adjust the positions of the paper guides to the paper size you want to use.
2
● Press the lock release lever ( ) to align the projection ( ) to the appropriate paper size markings.
Load the paper so that the edge of the paper stack is aligned against the paper guide
3
on the rear side of the paper drawer.
● Load the paper in portrait orientation (with the short edge toward the machine), with the print side face
down. Paper cannot be loaded in landscape orientation.
● Fan the paper stack well, and tap it on a at surface to align the edges.
Do not exceed the load limit line when loading paper
● Make sure that the paper stack does not exceed the load limit line ( ). Loading too much paper can
cause paper jams.
● When loading paper with a logo, see Loading Preprinted Paper(P. 63) .
54
Page 64

Basic Operations
Insert the paper drawer into the machine.
4
● When you insert the paper drawer with <Notify to Check Paper Settings> set to <On>, a conrmation screen
is displayed. Notify to Check Paper Settings(P. 715)
Continue to Specifying Paper Size and Type in the Paper Drawer(P. 68)
»
When changing the paper size or type
● The factory default settings for paper size and type are <A4> and <Plain>, respectively. If you load a
different size or type of paper into the machine, make sure to change the settings. If you do not change
the settings, the machine cannot print properly.
Printing on the Back Side of Printed Paper (Manual 2-Sided Printing)
You can print on the back side of printed paper. Flatten any curls on the printed paper and insert it into the
multi-purpose tray ( Loading Paper in the Multi-Purpose Tray(P. 58) ), with the side to print face up
(previously printed side face down).
● Load one sheet of paper each time you print.
● You can use only the paper printed with this machine.
● You cannot print on the side that has previously been printed on.
Loading Custom Size Paper
To load custom size paper or other paper whose size is not found in the paper size markings on the paper drawer, use
the following procedure.
Pull out the paper drawer.
1
● Make sure to hold the paper drawer with both hands, and pull it out gently. Otherwise, you may damage
the paper drawer by dropping it, if it slides out too easily.
Slide the paper guides apart.
2
● Press the lock release lever to slide the paper guides outward.
55
Page 65

Basic Operations
Load the paper so that the edge of the paper stack is aligned against the front side of
3
the paper drawer.
● Load the paper with the print side face down.
● Fan the paper stack well, and tap it on a at surface to align the edges.
Do not exceed the load limit line when loading paper
● Make sure that the paper stack does not exceed the load limit line (
cause paper jams.
● When loading paper with a logo, see Loading Preprinted Paper(P. 63) .
Align the paper guides against the edges of the paper.
4
). Loading too much paper can
● Press the lock release lever and slide the paper guides inward until they are aligned securely against the
edges of the paper.
56
Page 66

Basic Operations
Align the paper guides securely against the edges of the paper
● Paper guides that are too loose or too tight can cause misfeeds or paper jams.
Insert the paper drawer into the machine.
5
● When you insert the paper drawer with <Notify to Check Paper Settings> set to <On>, a conrmation screen
is displayed. Notify to Check Paper Settings(P. 715)
Continue to Specifying Paper Size and Type in the Paper Drawer(P. 68)
»
When changing the paper size or type
● The factory default settings for paper size and type are <A4> and <Plain>, respectively. If you load a
different size or type of paper into the machine, make sure to change the settings. If you do not change
the settings, the machine cannot print properly.
Printing on the Back Side of Printed Paper (Manual 2-Sided Printing)
You can print on the back side of printed paper. Flatten any curls on the printed paper and insert it into the
multi-purpose tray ( Loading Paper in the Multi-Purpose Tray(P. 58) ), with the side to print face up
(previously printed side face down).
● Load one sheet of paper each time you print.
● You can use only the paper printed with this machine.
● You cannot print on the side that has previously been printed on.
LINKS
Paper(P. 858)
57
Page 67

Basic Operations
Loading Paper in the Multi-Purpose Tray
0UWX-00X
When you want to print on paper that is not loaded in the paper drawer, load the paper in the multi-purpose tray.
Load the paper that you usually use in the paper drawer. Loading Paper in the Paper Drawer(P. 53)
Make sure to load paper in portrait orientation
● Paper cannot be loaded in landscape orientation. Make sure to load the paper in portrait orientation, as
shown in the illustrations below.
*
Custom size paper can only be loaded in landscape orientation. For custom size paper that can be loaded in the multipurpose tray, see Paper(P. 858) .
Open the cover.
1
● Hold the top center of the cover to open it.
*
Pull out the paper tray and the tray extension.
2
● Pull out the tray extension when loading large paper.
Spread the paper guides apart.
3
● Slide the paper guides outward.
58
Page 68

Basic Operations
Insert the paper into the multi-purpose tray until the paper stops.
4
● Load the paper with the print side face up.
● Fan the paper stack well, and tap it on a at surface to align the edges.
Do not exceed the load limit guide when loading paper
● Make sure that the paper stack does not exceed the load limit guide ( ). Loading too much paper can
cause paper jams.
● When loading envelopes or paper with a logo, see Loading Envelopes(P. 61) or Loading Preprinted
Paper(P. 63) .
Align the paper guides against the edges of the paper.
5
● Slide the paper guides inward until they are aligned securely against the edges of the paper.
59
Page 69

Basic Operations
Align the paper guides securely against the edges of the paper
● Paper guides that are too loose or too tight can cause misfeeds or paper jams.
Continue to Specifying Paper Size and Type in the Multi-Purpose Tray(P. 70)
»
Printing on the Back Side of Printed Paper (Manual 2-Sided Printing)
You can print on the back side of printed paper. Flatten any curls on the printed paper and insert it into the
multi-purpose tray, with the side to print face up (previously printed side face down).
● Load one sheet of paper each time you print.
● You can use only the paper printed with this machine.
● You cannot print on the side that has previously been printed on.
LINKS
Paper(P. 858)
60
Page 70

Basic Operations
Loading Envelopes
0UWX-00Y
Make sure to atten any curls on envelopes before loading them. Also pay attention to the orientation of envelopes
and which side is face up. Note that envelopes cannot be loaded in the paper drawer.
Before Loading Envelopes(P. 61)
Loading Envelopes in the Multi-Purpose Tray(P. 62)
● This section describes how to load envelopes in the orientation you want, as well as procedures that you
need to complete before loading envelopes. For a description of the general procedure for loading
envelopes in the multi-purpose tray, see Loading Paper in the Multi-Purpose Tray(P. 58) .
Before Loading Envelopes
Follow the procedure below to prepare the envelopes before loading.
Close the ap of each envelope.
1
Flatten them to release any remaining air, and make sure that the edges are pressed
2
tightly.
Loosen any stiff corners of the envelopes and atten any curls.
3
61
Page 71

Basic Operations
Align the edges of the envelope on a at surface.
4
Loading Envelopes in the Multi-Purpose Tray
Load the envelopes Monarch, COM10, DL, or ISO-C5 in portrait orientation (with the short edge toward the machine),
with the non-glued side (front side) face up. You cannot print on the reverse side of envelopes.
● Load the envelopes so that the edge with the ap is toward the left side as shown in the illustration.
62
Page 72

Basic Operations
Loading Preprinted Paper
0UWX-010
When you use paper that has been preprinted with a logo, pay attention to the orientation of the paper when loading.
Load the paper properly so that printing is performed on the correct side of the paper with a logo.
Making 1-Sided Printouts on Paper with Logos(P. 63)
Making 2-Sided Printouts on Paper with Logos(P. 64)
● This section mainly describes how to load preprinted paper with the proper facing and orientation. For a
description of the general procedure for loading paper in the paper drawer or multi-purpose tray, see
Loading Paper in the Paper Drawer(P. 53) or Loading Paper in the Multi-Purpose Tray(P. 58) .
Making 1-Sided Printouts on Paper with Logos
Printing on Paper with Logos in Portrait Orientation
When loading the paper in the paper drawer
Load the paper with the logo side (the side to print the document) face down.
When loading the paper in the multi-purpose tray
Load the paper with the logo side (the side to print the document) face up.
63
Page 73

Basic Operations
Printing on Paper with Logos in Landscape Orientation
When loading the paper in the paper drawer
Load the paper with the logo side (the side to print the document) face down.
When loading the paper in the multi-purpose tray
Load the paper with the logo side (the side to print the document) face up.
Making 2-Sided Printouts on Paper with Logos
Printing on Paper with Logos in Portrait Orientation
When loading the paper in the paper drawer
Load the paper with the front logo side (the side to print the rst page of the document) face up.
64
Page 74

Basic Operations
When loading the paper in the multi-purpose tray
Load the paper with the front logo side (the side to print the rst page of the document) face down.
Printing on Paper with Logos in Landscape Orientation
When loading the paper in the paper drawer
Load the paper with the front logo side (the side to print the rst page of the document) face up.
When loading the paper in the multi-purpose tray
Load the paper with the front logo side (the side to print the rst page of the document) face down.
65
Page 75

Basic Operations
The <Switch Paper Feed Method> setting
● When you print on preprinted paper, you need to change the facing of the paper to load each time you
switch between 1-sided and 2-sided printing. However, if <Switch Paper Feed Method> is set to <Print Side
Priority>, the facing that you use for loading preprinted paper for 2-sided printing (logo side face up for
paper drawer or down for multi-purpose tray) can also be used for 1-sided printing. This setting is especially
useful if you frequently perform both 1-sided and 2-sided printing. Switch Paper Feed Method(P. 651)
66
Page 76

Basic Operations
Specifying Paper Size and Type
0UWX-011
You must specify the paper size and type settings to match the paper that is loaded. Make sure to change the paper
settings when you load the paper that is different from the previously loaded paper.
● If the setting does not match the size and type of loaded paper, a paper jam or printing error may occur.
67
Page 77

Basic Operations
Specifying Paper Size and Type in the Paper Drawer
● To specify a custom paper size, you need to register that size before hand. Registering a Custom Paper
Size(P. 74)
Press and tap <Paper Settings>.
1
0UWX-012
Tap <Drawer 1> or <Drawer 2>.
2
● <Drawer 2> is displayed only when the optional paper feeder (drawer 2) is installed.
Select the paper size.
3
● If the loaded paper size is not displayed, tap <Other Sizes>.
Select the paper type.
4
68
Page 78

LINKS
Loading Paper in the Paper Drawer(P. 53)
Limiting the Paper Sizes Displayed(P. 77)
Paper(P. 858)
Notify to Check Paper Settings(P. 715)
Basic Operations
69
Page 79

Basic Operations
Specifying Paper Size and Type in the Multi-Purpose Tray
0UWX-013
The screen shown here is displayed when paper is loaded in the multi-purpose tray. Follow the on-screen instructions
to specify settings that match the size and type of the loaded paper.
If the screen shown above is not displayed when paper is loaded
● If you always load the same paper in the multi-purpose tray, you can skip the paper setting operations by
registering the paper size and type as the default setting. When the default setting is registered, however,
the screen shown above is not displayed. To display the screen, select <Specify When Loading Paper> (
Registering Default Paper Settings for the Multi-Purpose Tray(P. 72) ).
Select the paper size.
1
● If the loaded paper size is not displayed, tap <Other Sizes>.
When loading custom size paper
Tap <Custom>.
1
Specify the length of the <X> (shorter) side.
2
● Tap <X>.
● Input the length of the <X> side using / or the numeric keys, and tap <Apply>.
70
Page 80

Basic Operations
Specify the length of the <Y> (longer) side.
3
● Tap <Y>.
● Input the length of the <Y> side, and tap <Apply>.
Tap <Apply>.
4
Select the paper type.
2
LINKS
Loading Paper in the Multi-Purpose Tray(P. 58)
Limiting the Paper Sizes Displayed(P. 77)
Paper(P. 858)
71
Page 81

Basic Operations
Registering Default Paper Settings for the MultiPurpose Tray
0UWX-014
You can register default paper settings for the multi-purpose tray. Registering default settings can save yourself the
effort of having to specify the settings each time you load the same paper into the multi-purpose tray.
● After the default paper setting is registered, the paper setting screen is not displayed when paper is loaded,
and the same setting is always used. If you load a different paper size or type without changing the paper
settings, the machine may not print properly. To avoid this problem, select <Specify When Loading Paper> in
step 3, and then load the paper.
Press and tap <Paper Settings>.
1
Tap <Multi-Purpose Tray>.
2
Select the paper size.
3
● If the loaded paper size is not displayed, tap <Other Sizes>.
Registering a custom paper size
Tap <Custom>.
1
72
Page 82

Basic Operations
Specify the length of the <X> (shorter) side.
2
● Tap <X>.
● Input the length of the <X> side using / or the numeric keys, and tap <Apply>.
Specify the length of the <Y> (longer) side.
3
● Tap <Y>.
● Input the length of the <Y> side, and tap <Apply>.
Tap <Apply>.
4
Select the paper type.
4
LINKS
Loading Paper in the Multi-Purpose Tray(P. 58)
Limiting the Paper Sizes Displayed(P. 77)
Paper(P. 858)
73
Page 83

Basic Operations
Registering a Custom Paper Size
You can register up to three frequently used custom paper sizes.
Press and tap <Paper Settings>.
1
Tap <Register Custom Paper>.
2
0UWX-015
Tap <Not Registered>.
3
● If paper sizes <1> to <3> have already been registered, either change or delete the setting to continue. The
procedures for changing and deleting these settings are described below.
Changing a setting
Select the registered size you want to change.
1
Tap <Edit>, and proceed to step 4.
2
Deleting a setting
Select the registered size you want to delete.
1
74
Page 84

Tap <Delete> <Yes>.
2
Specify the paper size.
4
Specify the length of the <X> (shorter) side.
1
● Tap <X>.
● Input the length of the <X> side using / or the numeric keys, and tap <Apply>.
Basic Operations
Specify the length of the <Y> (longer) side.
2
● Tap <Y>.
● Input the length of the <Y> side, and tap <Apply>.
Tap <Apply>.
3
Select the paper type.
5
75
Page 85

Basic Operations
Selecting a Registered Custom Paper Setting
The paper sizes that are registered in the procedure above are displayed on the screen for selecting the paper
size.
When selecting the paper size for the paper drawer
On the screen to specify the size of the paper that is loaded in the paper drawers, the registered paper sizes
are displayed. Specifying Paper Size and Type in the Paper Drawer(P. 68)
●
Of the registered paper sizes, only those that can be loaded in a paper drawer are displayed.
Paper(P. 858)
When selecting the paper size for the multi-purpose tray
When paper is loaded in the multi-purpose tray, the screen for selecting the paper size for the multi-purpose
tray is displayed. The registered paper sizes are displayed on this screen. Specifying Paper Size and Type
in the Multi-Purpose Tray(P. 70)
● The registered paper sizes are displayed when you set the default paper settings for the multi-purpose
tray. From the screen, you can select one of the displayed sizes as the default paper size for the multipurpose tray. Registering Default Paper Settings for the Multi-Purpose Tray(P. 72)
LINKS
Loading Paper in the Paper Drawer(P. 53)
Loading Paper in the Multi-Purpose Tray(P. 58)
76
Page 86

Basic Operations
Limiting the Paper Sizes Displayed
0UWX-016
You can ensure that only frequently used paper sizes are shown in the screen for selecting the paper size setting.
Press and tap <Paper Settings>.
1
Tap <Select Frequently Used Paper Sizes>.
2
Tap <Multi-Purpose Tray>, <Drawer 1>, or <Drawer 2>.
3
● <Drawer 2> is displayed only when the optional paper feeder (drawer 2) is installed.
Clear the check boxes for paper sizes you do not want displayed.
4
● Ensure that only the check boxes for frequently used paper sizes are selected.
● Paper sizes that are not selected can be viewed by tapping <Other Sizes> in the paper size setting selection
screen.
Tap <Apply>.
5
LINKS
Specifying Paper Size and Type in the Paper Drawer(P. 68)
Specifying Paper Size and Type in the Multi-Purpose Tray(P. 70)
Registering Default Paper Settings for the Multi-Purpose Tray(P. 72)
77
Page 87

Basic Operations
Registering in the Address Book
0UWX-017
You can register frequently used fax/scan destinations in the Address Book and
easily select them when needed. Destinations can be searched alphabetically, from
lists in the Address Book, or by entering three-digit numbers (coded dial numbers).
You can also specify destinations more quickly by using the following features.
◼ Favorites
Registering a lot of addresses in the Address Book makes it dicult to nd the destination you need. To avoid this
situation, register frequently used destinations as Favorites. Destinations registered in Favorites can be searched from
the < > in the Address Book. You can register up to 19 destinations as Favorites. Registering Destinations for
Favorites(P. 87)
◼ Group Dial
You can select multiple destinations that have already been registered and register them together as a group. You can
send faxes or e-mails to multiple destinations at the same time. You can register up to 299 destinations (100
destinations for e-mails) for a group. Groups can also be registered in Favorites.
for Group Dial(P. 94)
Index
◼
The registered destinations are classied into indexes depending on the initial character or the type of address.
Changing indexes allows you to perform a destination search quickly.
<All>
Displays all the destinations registered in the Address Book.
< >
Displays a list of destinations registered in Favorites.
Registering Multiple Destinations
<A-Z>/<0-9>/<ABC> to <YZ>
Displays destinations with recipient names whose rst characters correspond to the characters of the selected
index.
< > (MF419x / MF416dw)
Displays destinations for faxes.
>
<
Displays destinations for e-mails.
< >
Displays destinations for I-Faxes.
78
Page 88

Basic Operations
< >
Displays destinations for shared folders and FTP servers. Registration of destinations is performed from the
computer.
Book from Remote UI(P. 624)
>
<
Displays a list of destinations registered in Group Dial.
● The Address Book allows for registration of up to 300 destinations including average and favorite ones.
● Use the computer to register a shared folder or FTP server as the destination for scans.
Setting a Shared Folder as a Save Location(P. 475)
Registering Destinations in the Address Book from Remote UI(P. 624)
● You can save the Address Book as a le on your computer (although you cannot use the computer to edit
the Address Book). You can also import a saved Address Book from the computer to the machine. Saving/
Loading Settings Data(P. 619)
Setting a Shared Folder as a Save Location(P. 475) Registering Destinations in the Address
● You can print a list of destinations registered in the Address Book. Address Book List(P. 816)
● If your oce has an LDAP server installed, you can make search to nd user information on the server and
register it in the Address Book. You need to specify the settings for connecting to an LDAP server
beforehand. Registering LDAP Servers(P. 499)
79
Page 89

Basic Operations
Registering Destinations in the Address Book
0UWX-018
You can register up to 281 normal destinations in the Address Book. You can edit or delete destinations that you have
registered. Registering Destinations in the Address Book from Remote UI(P. 624)
Press and tap <Address Book>.
1
Tap <Register Dest.>.
2
● If a screen appears prompting you to enter a PIN, enter the correct PIN using the numeric keys, and tap
<Apply>. Setting a PIN for Address Book(P. 556)
Tap <Coded Dial> Select type of address to register.
3
● According to the address being registered, tap <Fax>/<E-Mail>/<I-Fax>.
● The types of destinations that can be selected vary depending on the machine model.
● A three-digit number is automatically specied as coded dial number. You can later change this number to a
different one.
Registering destinations with the LDAP server
If your oce has an LDAP server installed, you can make search to nd user information on the server and
register it in the Address Book.
● To make registration from the LDAP server, you need to specify the settings for connecting to the LDAP
server beforehand. Registering LDAP Servers(P. 499)
Tap <LDAP Server>.
1
80
Page 90

Basic Operations
Select the LDAP server you are using.
2
Select the search criteria.
3
● Name, fax numbers, e-mail addresses, organization names, and organization unit are available criteria
for searching destinations.
Enter the search target character string using the numeric keys, and tap <Apply>.
4
● On how to enter text, see Entering Text(P. 41) .
● To specify multiple search criteria, repeat steps 3 and 4.
Tap <Search Method>.
5
Select the search method.
6
<Using All Conditions Below>
81
Page 91

Basic Operations
Searches and displays the users that meet all the search criteria specied in steps 3 and 4.
<Using Some Conditions Below>
If users that meet even one of the criteria specied in steps 3 and 4 are found, displays all those users.
Tap <Start Search>.
7
➠ The users meeting your search criteria are displayed.
● If the authentication screen appears when you tap <Start Search>, enter the user name of the
machine and the password registered in the LDAP server, and tap <Apply>. Registering LDAP
Servers(P. 499)
Select a user.
8
● The user name, fax number, or e-mail address of the selected user that are registered in the LDAP
server is entered into the destination eld.
Proceed to step 8.
9
Tap <Name>.
4
● Registering <Name> is optional. If you register <Name>, the destination can be searched alphabetically.
Enter the name using the numeric keys, and tap <Apply>.
5
● On how to enter text, see Entering Text(P. 41) .
Tap <Fax Number>, <E-Mail Address>, or <I-Fax Address>.
6
Enter the destination using the numeric keys, and tap <Apply>.
7
82
Page 92

Basic Operations
Making detailed settings (only when registered for fax)
After tapping <Details>, a screen similar to the following is displayed.
<ECM TX>
If an error occurs in an image that is being sent, the error is checked and corrected to prevent an improper
image from being sent when setting <On>.
<TX Speed>
If it takes time for transmissions to start, such as when there is a poor telephone connection, you can adjust
the transmission start speed downward incrementally starting from "33600 bps."
<Long Distance>
Specify <International (1)> to <International (3)> according to the transmission conditions when registering
overseas fax numbers.
● You can also specify <ECM TX> and <TX Speed> from <Menu> <Fax Settings>. However, settings
made from <Address Book> are enabled for the detailed settings of destinations registered in the
Address Book.
Tap <Apply>.
8
83
Page 93

Basic Operations
◼ Editing the Content of Destinations
After registering destinations, you can change the content of registered information. For example, you can change the
fax number or name of a registered destination, change the type from fax number to e-mail, change the coded dial
number, and so on.
Press and tap <Address Book>.
1
Tap <Details/Edit>.
2
Select the index containing the destination you want to edit. Index(P. 78)
3
● You can change the display by tapping / .
Select the destination.
4
Tap <Edit>.
5
● If a screen appears prompting you to enter a PIN, enter the correct PIN using the numeric keys, and tap
<Apply>. Setting a PIN for Address Book(P. 556)
84
Page 94

Basic Operations
After editing the necessary items, tap <Apply>.
6
◼
Deleting a Destination from the Address Book
Press and tap <Address Book>.
1
Tap <Details/Edit>.
2
Select the index containing the destination you want to delete. Index(P. 78)
3
● You can change the display by tapping / .
Select the destination.
4
Tap <Delete>.
5
85
Page 95

Basic Operations
● If a screen appears prompting you to enter a PIN, enter the correct PIN using the numeric keys, and tap
<Apply>. Setting a PIN for Address Book(P. 556)
Tap <Yes>.
6
86
Page 96

Basic Operations
Registering Destinations for Favorites
0UWX-019
You can register frequently used destinations as Favorites in the Address Book. Destinations can be edited or deleted
after they have been registered( Registering Destinations in the Address Book from Remote UI(P. 624) ). You can
register up to 19 destinations in Favorites.
● Three-digit numbers are not assigned to Favorites.
Press and tap <Address Book>.
1
Tap <Register Dest.>.
2
● If a screen appears prompting you to enter a PIN, enter the correct PIN using the numeric keys, and tap
<Apply>. Setting a PIN for Address Book(P. 556)
Tap <Favorites> Select type of address to register.
3
● According to the address being registered, tap <Fax>/<E-Mail>/<I-Fax>.
● The types of destinations that can be selected vary depending on the machine model.
Registering destinations with the LDAP server
If your oce has an LDAP server installed, you can make search to nd user information on the server and
register it in the Address Book.
● To make registration from the LDAP server, you need to specify the settings for connecting to the LDAP
server beforehand. Registering LDAP Servers(P. 499)
87
Page 97

Basic Operations
Tap <LDAP Server>.
1
Select the LDAP server you are using.
2
Select the search criteria.
3
● Name, fax numbers, e-mail addresses, organization names, and organization unit are available criteria
for searching destinations.
Enter the search target character string using the numeric keys, and tap <Apply>.
4
● On how to enter text, see Entering Text(P. 41) .
● To specify multiple search criteria, repeat steps 3 and 4.
Tap <Search Method>.
5
Select the search method.
6
88
Page 98

<Using All Conditions Below>
Searches and displays the users that meet all the search criteria specied in steps 3 and 4.
<Using Some Conditions Below>
If users that meet even one of the criteria specied in steps 3 and 4 are found, displays all those users.
Tap <Start Search>.
7
Basic Operations
➠ The users meeting your search criteria are displayed.
● If the authentication screen appears when you tap <Start Search>, enter the user name of the
machine and the password registered in the LDAP server, and tap <Apply>. Registering LDAP
Servers(P. 499)
Select a user.
8
● The user name, fax number, or e-mail address of the selected user that are registered in the LDAP
server is entered into the destination eld.
Proceed to step 8.
9
Tap <Name>.
4
● Registering <Name> is optional. If you register <Name>, the destination can be searched alphabetically.
Enter the name using the numeric keys, and tap <Apply>.
5
● On how to enter text, see Entering Text(P. 41) .
89
Page 99

Basic Operations
Tap <Fax Number>, <E-Mail Address>, or <I-Fax Address>.
6
Enter the destination using the numeric keys, and tap <Apply>.
7
Making detailed settings (only when registered for fax)
After tapping <Details>, a screen similar to the following is displayed.
<ECM TX>
If an error occurs in an image that is being sent, the error is checked and corrected to prevent an improper
image from being sent when setting <On>.
<TX Speed>
If it takes time for transmissions to start, such as when there is a poor telephone connection, you can adjust
the transmission start speed downward incrementally starting from "33600 bps."
<Long Distance>
Specify <International (1)> to <International (3)> according to the transmission conditions when registering
overseas fax numbers.
● You can also specify <ECM TX> and <TX Speed> from <Menu> <Fax Settings>. However, settings
made from <Address Book> are enabled for the detailed settings of destinations registered in the
Address Book.
Tap <Apply>.
8
90
Page 100

Basic Operations
◼ Editing the Content of Destinations in Favorites
After registering destinations, you can change the content of registered information. For example, you can change the
fax number or name of a registered destination, change the type from fax number to e-mail, and so on.
Press and tap <Address Book>.
1
Tap <Details/Edit>.
2
Tap < >.
3
Select the destination you want to edit.
4
Tap <Edit>.
5
91
 Loading...