

Page 1
Laser Beam Printer
User's Guide
User's Guide
Page 2

1
Table of Contents
Ta ble of Contents . . . . . . . . . . . . . . . . . . . . . . . . . . . . . . . . . . . . . . . . . . .1
Tu r ning the Printer On/Off . . . . . . . . . . . . . . . . . . . . . . . . . . . . . . . . . . . .2
Turning On the Printer. . . . . . . . . . . . . . . . . . . . . . . . . . . . . . . . . . . . . . . . . . . .2
Turning Off the Printer. . . . . . . . . . . . . . . . . . . . . . . . . . . . . . . . . . . . . . . . . . . .3
About Online and Offline . . . . . . . . . . . . . . . . . . . . . . . . . . . . . . . . . . . . .6
Online . . . . . . . . . . . . . . . . . . . . . . . . . . . . . . . . . . . . . . . . . . . . . . . . . . . . . . . .6
Offline . . . . . . . . . . . . . . . . . . . . . . . . . . . . . . . . . . . . . . . . . . . . . . . . . . . . . . . .7
Paper Requirements . . . . . . . . . . . . . . . . . . . . . . . . . . . . . . . . . . . . . . . . .8
Printable Paper . . . . . . . . . . . . . . . . . . . . . . . . . . . . . . . . . . . . . . . . . . . . . . . . .8
Printable Areas . . . . . . . . . . . . . . . . . . . . . . . . . . . . . . . . . . . . . . . . . . . . . . . .13
Paper You Cannot Use . . . . . . . . . . . . . . . . . . . . . . . . . . . . . . . . . . . . . . . . . .14
Printing from the Paper Cassette . . . . . . . . . . . . . . . . . . . . . . . . . . . . . .15
Loading Paper in the Paper Cassette . . . . . . . . . . . . . . . . . . . . . . . . . . . . . . .16
Printing from the Multi-Purpose Tray . . . . . . . . . . . . . . . . . . . . . . . . . . .20
Loading Paper in the Multi-Purpose Tray . . . . . . . . . . . . . . . . . . . . . . . . . . . .21
Clearing Paper Jams . . . . . . . . . . . . . . . . . . . . . . . . . . . . . . . . . . . . . . . 30
Procedure for Clearing Paper Jams . . . . . . . . . . . . . . . . . . . . . . . . . . . . . . . .30
Replacing the Toner Cartridge . . . . . . . . . . . . . . . . . . . . . . . . . . . . . . . .38
Canceling Printing . . . . . . . . . . . . . . . . . . . . . . . . . . . . . . . . . . . . . . . . .43
Checking Operations . . . . . . . . . . . . . . . . . . . . . . . . . . . . . . . . . . . . . . . 45
Status Print . . . . . . . . . . . . . . . . . . . . . . . . . . . . . . . . . . . . . . . . . . . . . . . . . . .45
When a Message Is Displayed . . . . . . . . . . . . . . . . . . . . . . . . . . . . . . . . 47
When <nn-nn
サービス コール
> or <F9-nn
チェック プリンタ
>
Is Displayed. . . . . . . . . . . . . . . . . . . . . . . . . . . . . . . . . . . . . . . . . . . . . . . . . . .47
Error Messages. . . . . . . . . . . . . . . . . . . . . . . . . . . . . . . . . . . . . . . . . . . . . . . .49
Page 3
2
Turning the Printer On/Off
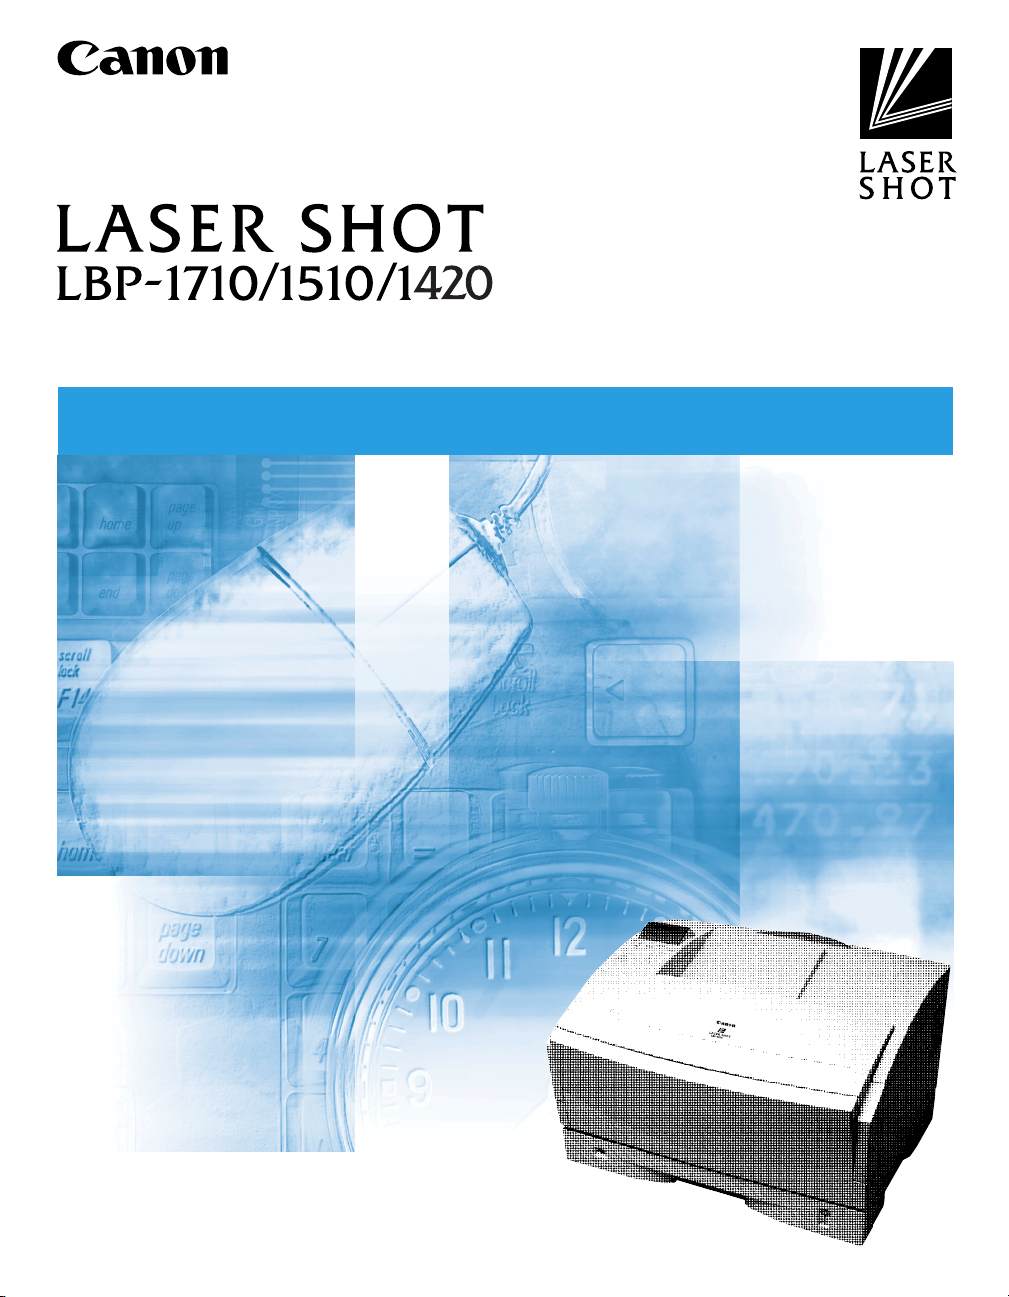
Turning On the Printer
When you turn the printer on, the printer performs a self-diagnostic test to check
the status of the printer and any options installed, and then printing is enabled.
•
Insert the paper cassette before turning the power on when the printer is being turned on
for the first time after it has been installed.
•
A blank sheet of paper may be discharged when the power is turned on for the first time
after the printer has been installed. This is normal, and is not a malfunction.
1
Press the power switch on the left side of the printer to the “I”
position.
When the power is turned on, the indicators and the LCD display on the control
panel are turned on. Then, the printer performs a self-diagnostic test to check the
status of the printer and any options installed.
If no errors are found, the
オンライン
indicator, the
印刷可
indicator and the
selected paper feed indicator light up, and the message <00 LIPS> appears on
the display when the printer is ready to print.
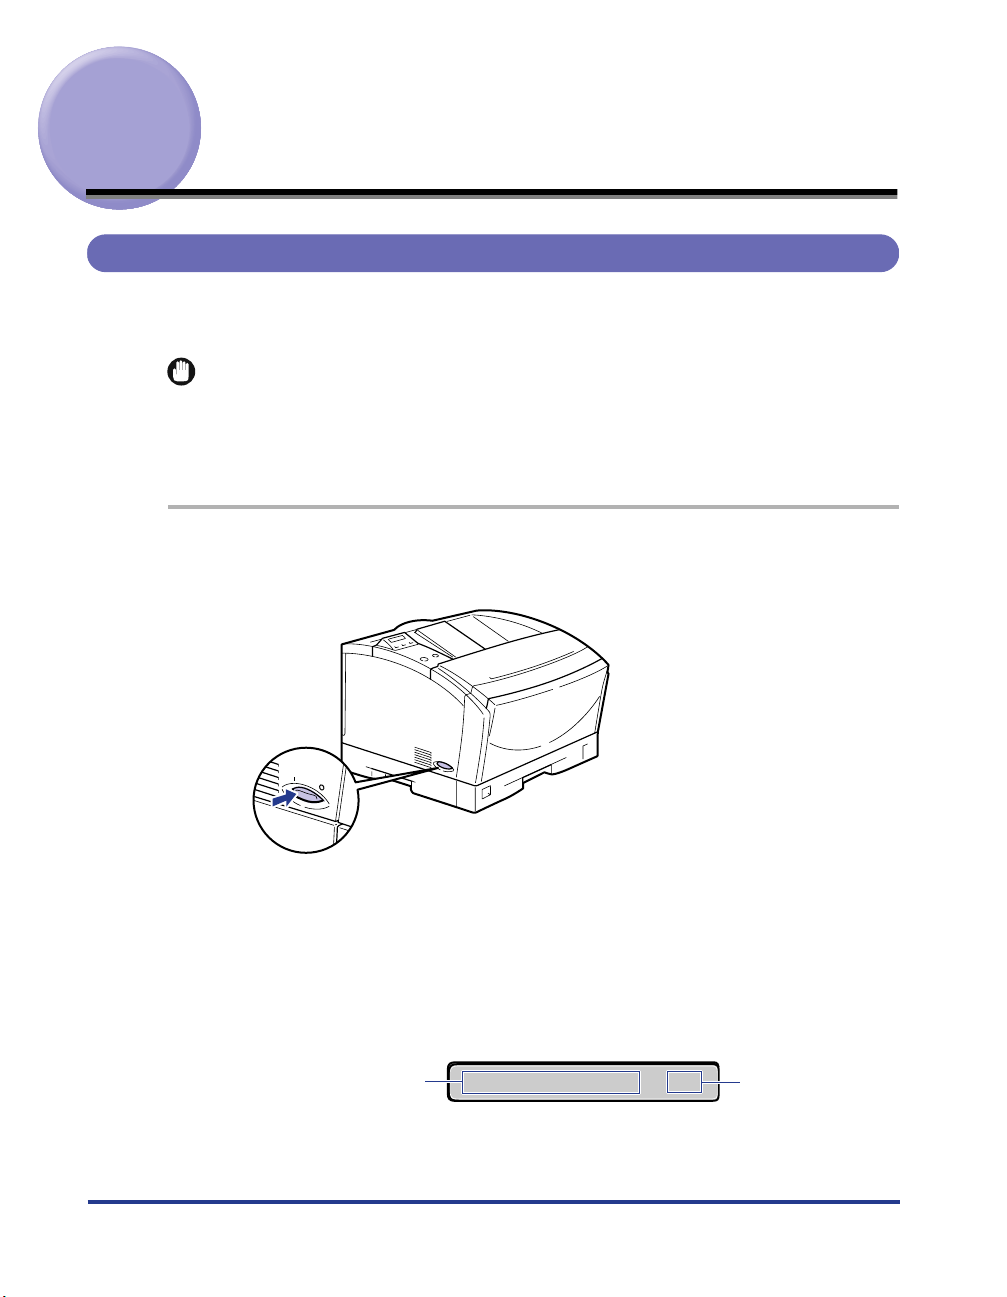
The information shown on the LCD display is as follows:
IMPORTANT
Ready to print and no
data is being
processed for printing.
00 LIPS A4
Currently selected
paper feed size.
Page 4
3
Turning Off the Printer
The printer should be turned off as described in the following procedure. The
procedure for turning off the power differs depending on whether or not the optional
hard disk has been installed. (LBP-1710 only)
•
If the printer has the optional hard disk installed, you should follow the designated
procedure when turning off the power to protect the hard disk. (LBP-1710 only) (
→
P. 4)
•
If the printer is connected to a network, make sure that the printer is not printing data
from another personal computer before turning off the power.
•
If the power is turned off while the
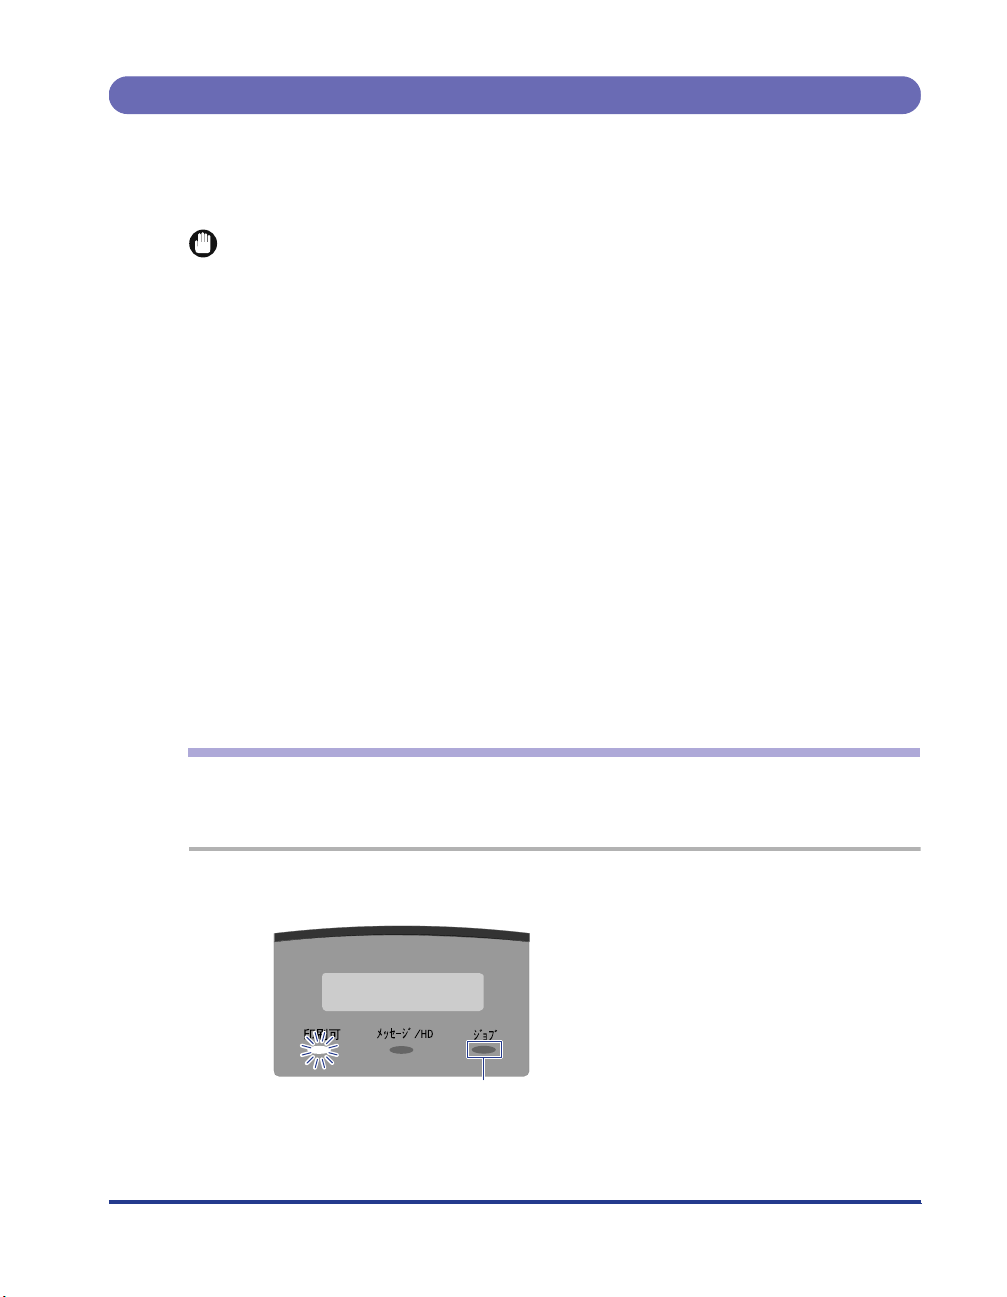
ジョブ
indicator is on, the print data remaining in the
memory of the printer and the print data being spooled in the hard disk are erased
(except for the print data stored in the box). Press [
排出
]
while offline to output any
important print data, or wait until printing is complete, before turning off the power. (
→
P. 43)
•
Do not turn off the power to the printer while it is printing.
•
Do not turn off the power to the printer during the self-diagnostic test performed
immediately after the power has been turned on.
•
If the printer has a hard disk installed, make sure that the HD indicator (green) is not on.
If the power is turned off while the HD indicator is on (the hard disk is reading or writing
data), the hard disk may be damaged and become unusable. (LBP-1710 only)
•
If the message that the NVRAM is initializing or writing data is displayed, make sure that
the message has been canceled before turning off the power.
•
If the message that the Flash Memory is initializing or deleting data is displayed, make
sure that the message has been canceled before turning off the power. (LBP-1710 only)
If the Printer is Not Using a Hard Disk
If the hard disk has not been installed on the printer, turn off the power as described
in the following procedure.
1
Make sure that the
ジジジジョョョョブブ
ブブ
indicator is off.
IMPORTANT
00 LIPS A4
off
Page 5
4
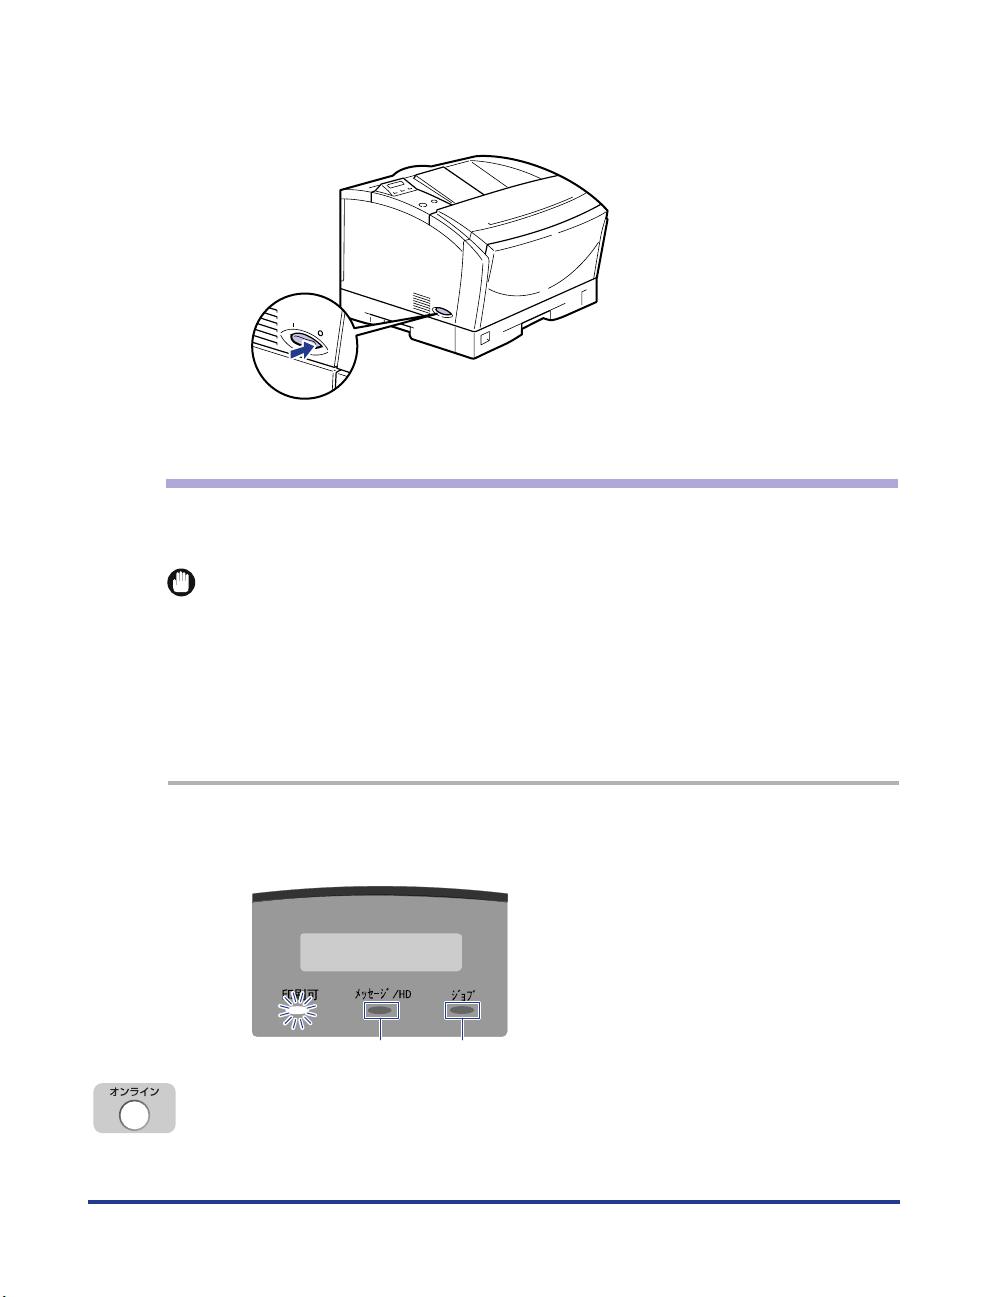
2
Press the power switch on the left side of the printer to the
“
○○
○○
” position.
The power is turned off.
If the Printer is Using a Hard Disk (LBP-1710 only)
If the hard disk has been installed on the printer, turn off the power as described in
the following procedure.
•
If you attempt to shut down the printer when the paused job data or the secure job data
still remains in the hard disk, the message
< ジョブガ ノコッテイマス >
appears. Once the
shut down procedure has been selected, all the jobs are erased. However the job data in
the box is left in the hard disk. To resume printing, press [
オンライン
], to go online.
•
Once the shut down procedure has been selected, you cannot cancel the operation. If
you need to turn the printer on again, first turn off the power by following the instructions
on the control panel and then turn the printer on again.
1
Make sure that the
ジジジジョョョョブブ
ブブ
indicator and HD indicator (green)
are off.
2
Press [
オオオオンンンンラララライイイインン
ンン
] to turn off the
オオオオンンンンラララライイイインン
ンン
indicator.
The printer gets ready for operation using the control panel.
IMPORTANT
00 LIPS A4
off off
Page 6
5
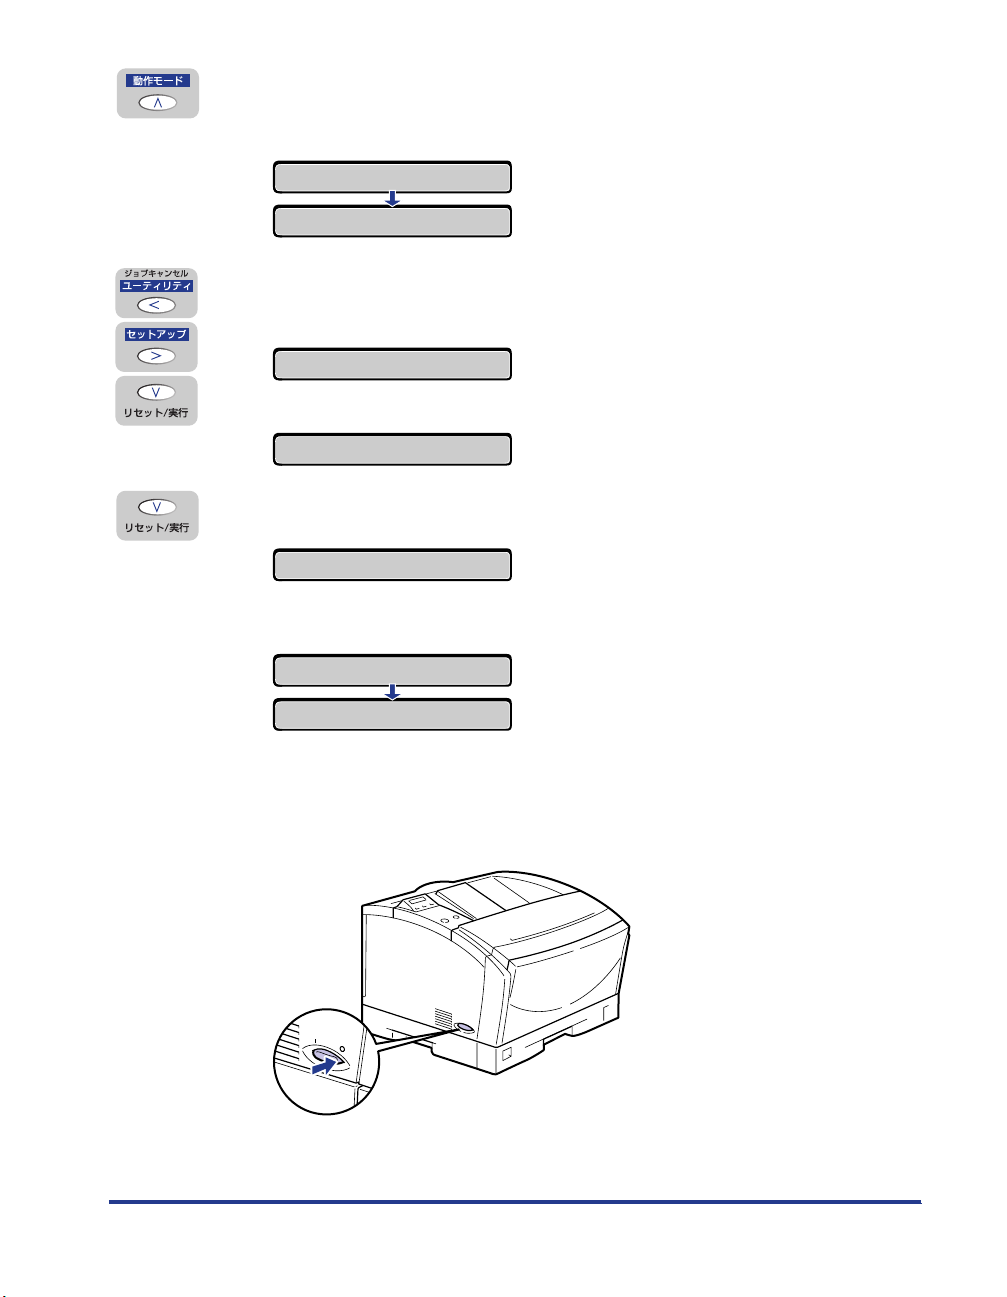
3
Press [
動動動動作作作作モモモモーーーードド
ドド
].
The operation mode menu is displayed.
4
Select
<<<<シシシシャャャャッッッットトトトダダダダウウウウンンンン>>
>>
by pressing [
<<
<<
] or [
>>
>>
], and then press
[
∨∨
∨∨
].
The message
<シャットダウン シマスカ?>
is shown.
5
Check the message and press [
∨∨
∨∨
].
The printer performs the shut down procedure and the message
<デンゲンヲ
オキリクダサイ>
is shown when the printer is ready to be turned off.
6
Press the power switch on the left side of the printer to the
“
○○
○○
” position when the message
<<<<デデデデンンンンゲゲゲゲンンンンヲヲヲヲ オオオオキキキキリリリリククククダダダダササササイイイイ>>
>>
is
displayed.
The power is turned off.
ト゛ウサモート゛
LIPS →
シャットタ゛ウン →
シャットタ゛ウン シマスカ?
シャットタ゛ウン シマスカ?
テ゛ンケ゛ンヲ オキリクタ゛サイ
シ゛ッコウ チュウ
Page 7
6
About Online and Offline
When the printer can receive data from a personal computer and is able to print the
data, this is called “online”, and when the printer cannot receive data, this is called
“offline.” The printer should be offline when you perform operations from the menu
on the control panel.
Online
The printer must be online in order to print data received from a personal computer.
Make sure that the printer is online before you send a job to the printer. If the printer
is not online, bring the printer online as described in the following procedure. The
printer automatically comes online when it is turned on.
1
Press [
オオオオンンンンラララライイイインン
ンン
] to turn on the
オオオオンンンンラララライイイインン
ンン
indicator.
The printer comes online and is ready for printing.
•
If there is an error in the printer (when the
メッセージ
indicator (orange) is on or the
digit part of the message is flashing), the printer will not come online. Eliminate the
cause of the error before bringing the printer online.
•
The printer does not come online during operations such as selecting a menu
function or a paper feed method, or setting the paper size. Complete the operation
before bringing the printer online.
•
Do not open the cover of the printer or remove the paper cassette while printing. If
the cover is opened or the paper cassette is removed, the printer will stop printing
and may not be able to resume printing again.
IMPORTANT
Page 8
7
Offline
The printer must be offline when you use the menu on the control panel of the
printer, to select the paper feeding method, or set the paper size. Check that the
printer is offline before you press any keys on the control panel. If the printer is not
offline, take it offline as described in the following procedure.
1
Press [
オオオオンンンンラララライイイインン
ンン
] to turn off the
オオオオンンンンラララライイイインン
ンン
indicator.
The printer gets ready for operation using the control panel.
•
If you try to print data from a personal computer while the printer is offline, a
message, such as
<プリンタの準備ができていません>
or
<プリンタが接続されていませ
ん>
is shown and the printer is not available for printing.
•
The printer automatically goes online after being left offline for more than five
minutes. However, the printer does not come online when an error occurs (when
the
メッセージ
indicator (orange) is on or the digit part of the message is flashing) or
during operations such as selecting a menu function or the paper feeding method,
or setting the paper size.
●
Saving Power Consumption (Sleep Mode)
After a specific time period has passed without any operation or without any
data sent from the personal computer, the printer automatically switches to
Sleep Mode. Sleep Mode is automatically canceled when any of the buttons on
the control panel are pressed or an error occurs. Sleep Mode is also canceled if
the printer has received data while it is online. Sleep Mode is also canceled
when the error has been canceled while the printer is offline.
•
In the following cases the printer will not switch to Sleep Mode when the
time-out has elapsed.
-When the message
<
nn-nn
サービスコール>
(where nn is a 2-digit number)
is displayed
-During hard disk shutdown or initialization
- When a utility function, such as Status Print, is being run
NOTE
IMPORTANT
Page 9
8
Paper Requirements
Printable Paper
Yo u can use the following types of paper with this printer.
○
indicates that the paper
type is supported, while
×
indicates that it is not supported.
Paper Size
Type of Paper
Paper Source
Multi-Purpose
Tray
Paper Cassette
250-Sheet
Paper Feed
Units (Option)
Plain Paper 64-90 g/m
2
B6*
1
○××
A5
○○○
A5R
○××
B5
○○○
B5R
○××
A4
○○○
A4R
○○○
B4*
1
○○○
A3*
1
○○○
Letter
○○○
Letter R
○××
Executive
○○○
Executive R
○××
Legal*
1
○○○
Ledger*
1
○○○
Custom Paper*
1
Width: 76.2–297 mm
Length: 98–431.8 mm
○××
Page 10
9
*1 Load the paper in the portrait orientation.
*2 Envelopes can be loaded only in the landscape orientation, with the flap open. Only non self-adhesive
envelopes can be used with this printer.
•
Printing speed may decrease depending on settings such as paper orientation, size,
type, and number of print copies.
Postcard or Stamped, self-addressed postcard : About 5ppm
Paper Capacity of Paper Sources
*3 Only about 50 sheets can be loaded when using A3, A4R, B4, Ledger, Legal and Executive R size paper.
*4 The maximum number of sheets of paper that can be loaded may vary depending on conditions, such as
temperature and humidity. Never load label sheets higher than the limit mark.
Heavy Paper (
91–157 g/m
2
)
Width: 100–297 mm
Length: 98–431.8 mm
○××
Tr ansparencies A4
○××
Label sheets A4
×○○
Postcards*
1
○××
Stamped, self-addressed
postcards*
1
○××
Envelope Youkei No.2*
2
○××
Envelope Youkei No.
4
*
2
○××
Type of Paper
Paper Source
Multi-Purpose
Tray
Paper Cassette
250-Sheet
Paper Feed
Units (Option)
Plain Paper 64 g/m
2
About 100
sheets*
3
About 250 sheets About 250 sheets
Heavy Paper 128 g/m
2
About 50 sheets
××
Tr ansparencies About 50 sheets
××
Label sheets
×
*
4
*
4
Postcards About 40 sheets
××
Stamped, self-addressed
postcards
About 40 sheets
××
Envelopes About 10 sheets
××
NOTE
Page 11
10
Paper Capacity of the Paper Delivery Tray
•
The printing speed may decrease depending on the type and the size of the paper used.
Abbreviations of Paper Sizes
The following abbreviations are used on the paper size selector for the paper
cassette.
Heavy (thick) Paper
This printer can handle thick paper of 91-157 g/m
2
. Thick paper should be loaded in
the multi-purpose tray.
•
The size of thick paper (91-157 g/m
2
) that can be loaded in the multi-purpose tray is 100-
297 mm wide and 98-431.8 mm long. You can load up to about 50 sheets of 128 g/m
2
.
•
When printing with thick paper, always set [
用紙タイプ
] in the printer driver’s [
給紙
] sheet
(or [
デフォルト用紙タイプ
] in the set-up menu if you are using an OS which cannot run a
Windows printer driver) to [
厚紙
].
Type of Paper
Paper Delivery Tray
Face-down Delivery Tray
Plain Paper 64 g/m
2
About 250 sheets
Heavy Paper 128 g/m
2
About 150 sheets
Tr ansparencies About 100 sheets
Label sheets 1 sheet
Postcards About 50 sheets
Stamped, self-addressed postcards About 50 sheets
Envelopes About 10 sheets
Paper Size
Paper size selector for the
paper cassette
Ledger 11X17
Legal LGL
Letter LTR
Executive EXEC
IMPORTANT
IMPORTANT
Page 12
11
Transparency Film
Tr ansparencies may sometimes stick together. We recommend that you fan the
transparencies, while holding them by the edges, before loading them in the multipurpose tray.
•
Use only transparencies designed for this printer. If other types of transparencies are
used, this may cause a paper feed failure or deterioration in print quality.
•
Be sure to load transparencies in the landscape orientation.
•
When printing on transparencies, always set [
用紙タイプ
] in the printer driver’s [
給紙
] sheet
(or [
デフォルト用紙タイプ
] in the set-up menu if you are using an OS which cannot run a
Windows printer driver) to [OHP].
Label Sheets
Check which side of the label sheets is the face-up side and then load them face up into the
paper cassette.
•
Load label sheets in the paper cassette only. If they are loaded in the multi-purpose tray,
this may cause hard to clear paper jams or a printer malfunction.
•
Do not use the following types of label sheets. If a sheet type that does not conform to
specifications is used, this may cause hard to clear paper jams or a printer malfunction.
- Sheets with labels that are likely to peel off, or sheets on which some of the labels have been used.
- Coated sheets that can easily peel off from the backing sheet.
- Label sheets with some adhesive surfaces exposed.
•
Be sure to load label sheets in the landscape orientation.
•
When printing on label sheets, always set [
用紙タイプ
] in the printer driver’s [
給紙
] sheet
(or [
デフォルト用紙タイプ
] in the set-up menu if you are using an OS which cannot run a
Windows printer driver) to [
普通紙
].
•
Remove each label sheet as soon as it is delivered into the delivery tray.
Postcards
Load postcards with the print side face down in the multi-purpose tray. For more
details, see “Loading Postcards,” on P. 24.
•
Do not use postcards other than official postcards. If other types of postcards are used,
this may cause a deterioration in the print quality as well as paper jams.
•
You can use only stamped, self-addressed postcard without creases.
•
When the edges of postcards are curled, bend them back in the opposite direction to
straighten them before loading them in the multi-purpose tray.
•
Do not use postcards for ink jet printers.
•
You cannot load postcards and stamped, self-addressed postcards in the landscape
orientation. Be sure to load them in the portrait orientation.
•
When printing on stamped, self-addressed postcards, always set [
往復はがき
] (or
[
往復はがき横
] for Windows NT 4.0/2000) in the printer driver’s [
ページ設定
] sheet, and then
set [
給紙方法
] in the [
給紙
] sheet to [
手差し
(
トレイ
)].
IMPORTANT
IMPORTANT
IMPORTANT
Page 13

12
Envelopes
Open the flap and press the envelope with your hands to expel any air pockets and
press down on the edges. Then load it face down in the multi-purpose tray. For
more details, see “Loading Envelopes,” on P. 27.
•
Never use the following types of envelopes. If envelopes that do not conform to
specifications are used, this may cause hard to clear paper jam or a printer malfunction.
-Envelopes with fasteners or snaps.
-Envelopes with a window cut.
- Self-adhesive envelopes
-Envelopes with wrinkles or creases.
-Envelopes with very irregular thickness at the folds or overlaps.
-Envelopes with irregular shapes not rectangle.
•
Do not print on the back of envelopes.
•
Be sure to load envelopes in the landscape orientation.
IMPORTANT
Page 14
13
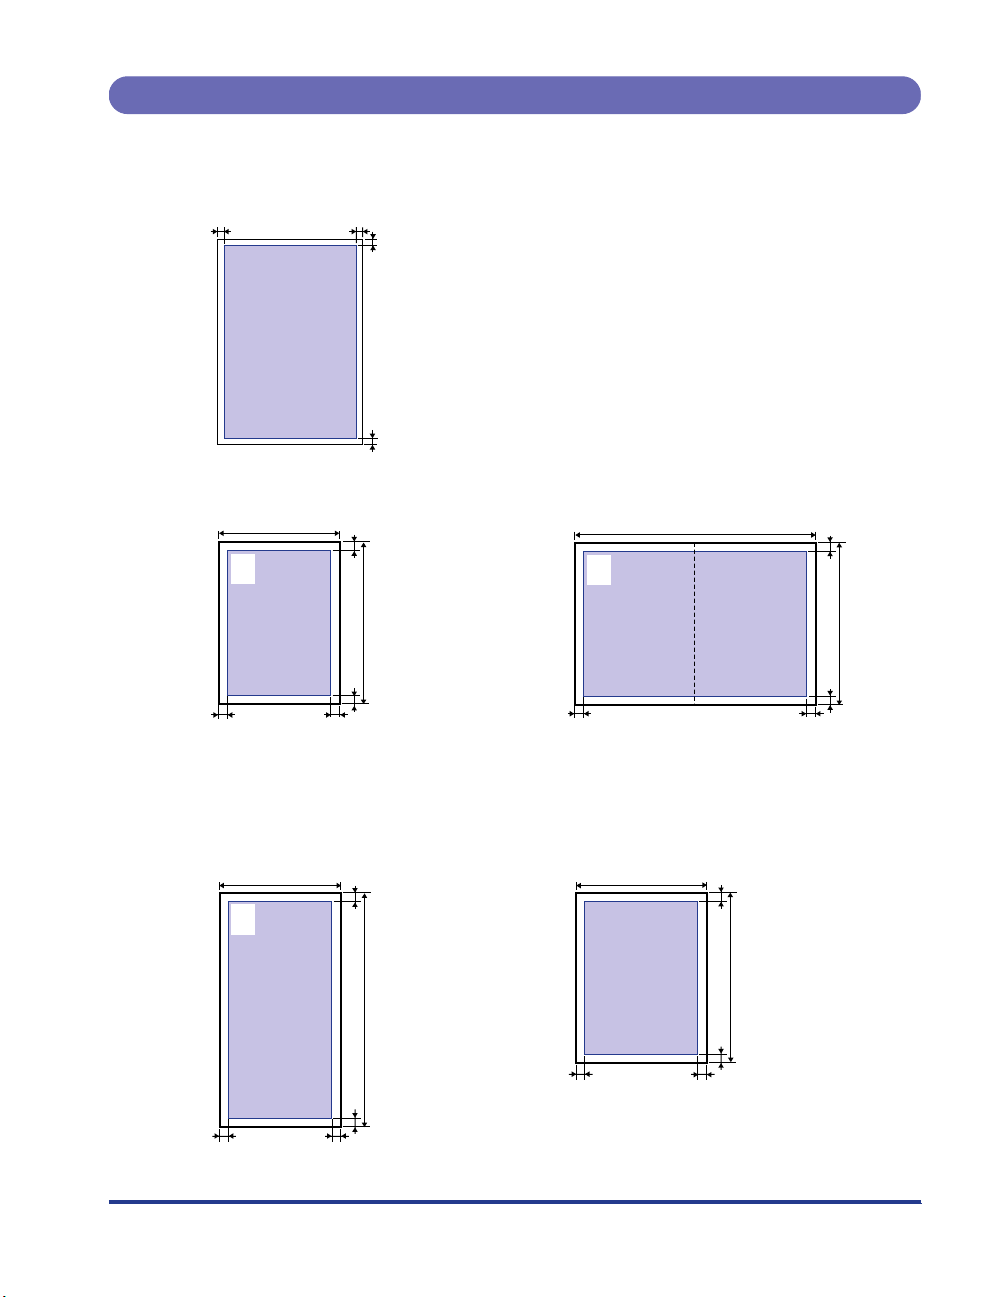
Printable Areas
The areas that can be printed on the paper are shown below.
Plain paper, thick paper, transparencies, label sheets
■
5 mm5 mm
5 mm
5 mm
Postcards
■
東京都千代田区
○○○
5 mm
■
Envelopes
100 mm
123-4567
5 mm
148 mm
5 mm
5 mm
Stamped, self-addressed postcards
■
200 mm
123-4567
東京都千代田区
○○○
5 mm
Adjust the printing location depending on the application being used.
Youkei No.4
105 mm
123-4567
10 mm
東
○
京
○
都
○
千
代
田
区
235 mm
Youkei No.2
114 mm
10 mm
162 mm
5 mm
5 mm
148 mm
5 mm
10 mm10 mm
10 mm
10 mm
10 mm10 mm
Page 15

14
Paper You Cannot Use
To avoid problems such as paper jams and printer malfunctions, the following types
of paper should never be used.
•
Paper that tends to cause paper jams.
-Paper that is too thick or too thin.
-Paper that is irregular shaped.
-Paper that is wet or holding moisture.
-Paper that is torn or damaged.
-Paper that is rough or extremely smooth.
-Paper that has holes for binding or perforations.
- Curled paper and paper with creases.
-Paper with a special coating on its surface (Coated paper for ink jet printers, etc.).
- Label sheets with the base easily peeled.
-Paper that has been used once by the printer, copy machine or other laser printers (the
back of that paper is also improper).
-Paper that has fins.
-Paper that is wrinkled.
-Paper that is folded at corners.
•
Paper that changes its quality at high temperature.
-Paper that uses ink that melts, burns, evaporates or emits dangerous fumes at
temperatures of 150 °C or higher.
- Heat-sensitive paper.
-Paper used for color printing with a processed surface.
-Paper with a special coating on its surface. (Coated paper for ink jet printers, etc.)
-Paper with adhesive on its surface.
•
Paper that causes failure or damage to the printer
- Carbon paper.
-Paper with staples, clips, ribbons or tapes.
-Paper that has been used once by the printer, copy machine or other laser printers (the
back of that paper is also improper).
•
Paper that is difficult for the toner to adhere to.
-Paper with rough surfaces such as rough paper and Japanese paper.
-Paper containing thick fibers.
-Paper with special coating on its surface. (Coated paper for ink jet printers, etc.)
IMPORTANT
Page 16
15
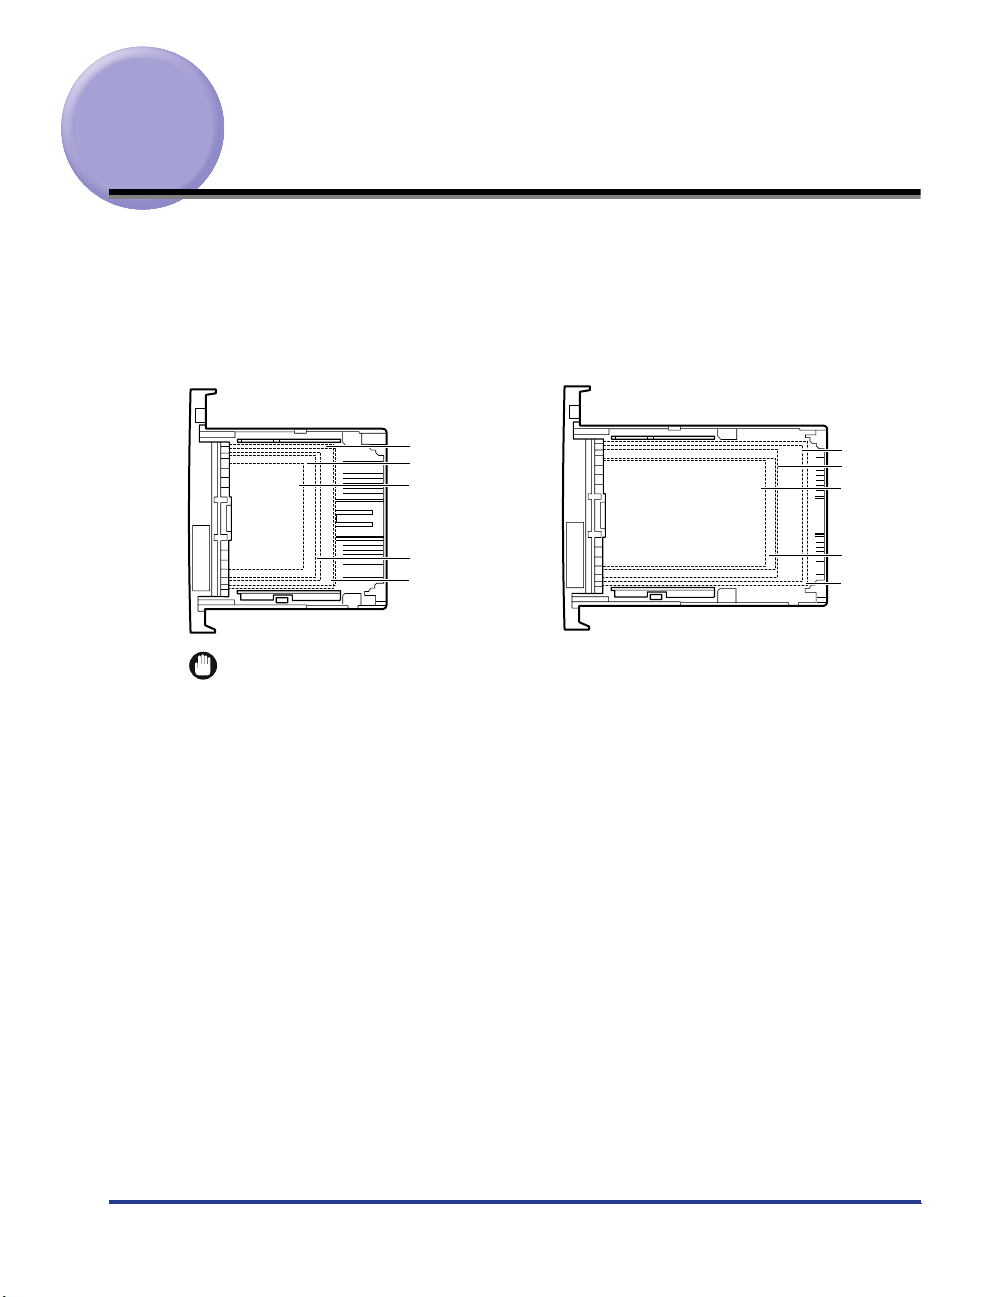
Printing from the Paper Cassette
You can load up to 250 sheets of A5, B5, A4, A4R, B4, A3, Executive, Letter, Legal
or Ledger-size plain paper (64 g/m
2
) into the paper cassette or optional paper feed
unit. A4-size paper is normally loaded in the landscape orientation, however it can
be loaded in the portrait orientation also. Label sheet is also acceptable.
The paper should be loaded as shown below.
•
To avoid paper jams, note the following precautions.
-Never remove the paper cassette while the printer is printing. This may cause paper
jams or a printer malfunction.
-Use only plain paper (64-90 g/m
2
) and label sheets.
-Never use paper that has fins, or paper that is wrinkled or extremely curled.
-Never stack paper in the paper cassette higher than the limit mark located inside the cassette.
-For details about what kind of paper can be used, see “Paper Requirements,” on P. 8.
-Refill the paper cassette with paper after the loaded paper has run out. Refilling the
paper cassette with paper before paper has run out may lead to problems when feeding
paper into the printer.
- If the printer is using a hard disk, do not remove or insert the paper cassette while the
HD indicator is turned on.
•
Load label sheets in the paper cassette only. If label sheets are loaded in the multipurpose tray, this may cause irrecoverable paper jams or a printer malfunction.
•
When printing on label sheets, always set
[ 用紙タイプ ]
in the printer driver’s
[給紙]
sheet
(or
[ デフォルト用紙タイプ ]
in the set-up menu if you are using an OS which cannot run a
Windows printer driver) to
[普通紙]
. •
If A4-size paper is loaded in the paper cassettes in the landscape and portrait orientations
respectively and [
自動
] is selected in the paper source settings, the landscape orientation is
given priority. When you want to feed paper from the paper cassette loaded with paper in
the portrait orientation, select the appropriate paper cassette in the printer driver (if you are
using an OS that cannot run a printer driver, use the control panel) before printing.
Sideways feed
A4, Label sheet
B5
A5
Executive
Letter
IMPORTANT
Lengthways feed
A3
B4
A4R
Legal
Ledger
Page 17

16
Loading Paper in the Paper Cassette
1
Pull out the paper cassette until it stops. Remove it from the
printer body by lifting the front of the cassette slightly.
•
The paper cassette cannot be pulled straight out of the printer. If you use force to
pull it out horizontally, the paper cassette may be damaged.
2
Adjust the extension cassette according to the paper size to
be loaded.
The lock release lever releases the cassette by pushing it inward and locks the
cassette by pushing it outward.
Shorten the extension cassette for landscape orientation.
Extend the extension cassette for portrait orientation.
•
Gently press the lock release levers using the inside of your fingers.
IMPORTANT
Lock
Release
Lock
Release
Separation Pad
IMPORTANT
Page 18

17
•
Never touch the separation pad located at the front side of the cassette. It may lead
to problems when feeding paper into the printer.
3
Press and hold the tab on the rear guide and slide it so that it
aligns with the selected paper size.
4
Slide the side guides so that they align with the selected
paper size.
The paper guides on both sides move together.
5
Fan the stack of paper, then tap it on a flat surface to properly
align the edges.
•
Fan the stack of paper well. Paper feed failure or paper jams may occur if the stack
of paper is not fanned well.
IMPORTANT
Page 19

18
6
Load the stack of paper so that it rests snugly against the rear
guide and side guides.
•
Do not load label sheets with plain paper. If you want to load label sheets when plain
paper is loaded, remove all the plain paper, then load the label sheets.
•
Check which side of the label sheets is the face-up side and then load them face up
into the paper cassette.
•
Be sure to load label sheets in the landscape orientation.
•
Make sure the paper stack is not above the limit mark. If the stack is higher than the
limit mark, this may cause a paper feed failure.
7
Adjust the paper size selector according to the size of the
paper loaded.
The factory-preset is A4.
•
Make sure that the paper size indicated by the selector is the same as the paper
size loaded before inserting the paper cassette in the printer. Errors may occur if
the paper size is incorrect.
Limit Mark
IMPORTANT
Paper Size Selector
IMPORTANT
Page 20

19
8
Insert the paper cassette at a slight angle to insert it to the
printer body.
•
Do not let the paper cassette touch the floor, or other surfaces. If the paper
cassette touches other surfaces, the position of the paper size selector may be
moved.
9
When the extension cassette is extended, mount the cassette
protecting cover on the back of the cassette.
•
Do not put your hands, place objects or push strongly on the cassette protecting
cover. Doing so, may damage the cover.
IMPORTANT
IMPORTANT
Page 21

20
Printing from the Multi-Purpose Tray
The size of paper that can be loaded in the multi-purpose tray is 76.2 mm-297 mm
wide and 98 mm-431.8 mm long. The maximum number of sheets of paper that can
be loaded in the tray varies depending on paper size and types. For more details, see
“Paper Requirements,” on p. 8. You can load thick paper, transparencies, postcards,
stamped, self-addressed postcards and special paper, which is useful when you
want to use paper that is different type from the paper, in the paper cassette. When
printing from the multi-purpose tray, you need to set the following items.
■
Load paper in the multi-purpose tray. ( → “Loading Paper in the Multi-
Purpose Tray”, on P. 21)
■
Set the paper size.
[
キュウシ
] group in the set-up menu
[トレイ ヨウシ サイズ ]=
the paper size to be loaded
■
Set the paper type.
If printing from an OS which cannot run a printer driver, set the following item.
[
キュウシ
] group in the set-up menu
[デフォルト ヨウシ タイプ ]=
the paper type normally used
■
Set the printer driver.
When printing from the printer driver, set the following items.
The items to be set may vary depending on the OS.
The following are items to be set in the printer driver for Windows 98.
[ページ設定]
sheet
[出力用紙サイズ]=
the paper size to be set
[給紙]
sheet
[用紙タイプ]=
the paper type to be set
[給紙方法]=[手差し(トレイ)]
•
The size of thick paper (91-157 g/m
2
) that can be loaded in the multi-purpose tray is 100-
297 mm wide and 98-431.8 mm long. You can load up to about 50 sheets of 128 g/m
2
. •
When printing with thick paper, always set [
用紙タイプ
] in the printer driver’s [
給紙
] sheet
(or [
デフォルト用紙タイプ
] in the set-up menu if you are using an OS which cannot run a
Windows printer driver) to [
厚紙
]. •
Never load label sheets in the multi-purpose tray. If they are loaded in the tray, this may
cause hard to clear paper jams or a printer malfunction. Be sure to load label sheets in
the paper cassette. (
→
“Printing from the Paper Cassette,” on P. 15)
IMPORTANT
Page 22

21
Loading Paper in the Multi-Purpose Tray
Loading Paper (other than postcards and envelopes)
To load plain paper, thick paper, or transparencies in the multi-purpose tray, follow
the procedure described below.
•
Data cannot be printed in the 5 mm wide border of the paper.
•
Be sure to load transparencies in the landscape orientation.
•
Use only transparencies designed for this printer. If other types of transparencies are
used, this may cause a paper feed failure or deterioration in print quality.
•
Never load label sheets in the multi-purpose tray. If they are loaded in the tray, this may
cause hard to clear paper jams or a printer malfunction. Be sure to load label sheets in
the paper cassette.
1
Grasp the tabs on both sides of the multi-purpose tray and
gently pull it open.
•
Support the tray with both hands and gently pull it open.
When loading long size paper, such as B4 or A3, open the extension tray.
•
To avoid damaging the multi-purpose tray and extension tray, do not place anything
other than paper in them. In addition, avoid pressing or applying excessive force on
the tray as this may damage it.
•
To avoid damaging the multi-purpose tray, do not close the multi-purpose tray with
the extension tray left opened.
IMPORTANT
IMPORTANT
IMPORTANT
Page 23

22
2
Fan the stack of paper, then tap it on a flat surface to properly
align the edges.
Align the edges of the stack of paper on a flat surface.
•
When fanning or aligning transparencies, always hold the edges, where possible,
to avoid touching the print side.
•
Be sure to load a stack of transparencies after thoroughly fanning them. Otherwise,
they can be fed overlapped, causing paper jams.
•
Ta ke care not to mark/stain the print side of transparencies with fingerprints, dust
or oil. This may cause poor printing.
•
If the leading edge of the paper is bent or curled, straighten out the paper before
loading it into the tray.
3
Set the paper guide width slightly larger than the paper width.
●
Closing the multi-purpose tray
To close the multi-purpose tray, reverse the procedure for opening the tray.
When you are not using the tray, keep it closed.
IMPORTANT
Page 24

23
4
Insert the paper stack as far as it will go into the printer, with
the print side facing down and the top of the paper facing
toward the printer.
Press the paper stack so it is below the limit guide.
•
There must be some space left between the stack of paper and limit guide. Do not
use force when loading the paper as this may cause a paper feed failure.
•
The number of pages that can be fed from the multi-purpose tray varies depending
on the paper size and type. (
→
“Paper Requirements,” on P. 8)
•
Make sure that the paper in the paper stack is aligned.
•
Be sure to load transparencies in the landscape orientation.
•
When paper such as A4- or Letter-size paper is loaded in the landscape orientation, the
left side of the paper will be the top end of image as viewed from the front of the printer.
•
When paper such as B4- or A3-size paper is loaded in the portrait orientation,
the far side of the paper will be the top end of image.
5
Slide the paper guides so that they closely fit the right and left
edges of the paper.
Limit Guide
IMPORTANT
NOTE
Page 25

24
IMPORTANT
•
Be sure to set the paper guides to the paper width. Misfeeds or paper jams may
occur if the paper guides are too loose or too tight.
Loading Postcards
You can load up to 40 official postcards (100 mm x 148 mm) and stamped, selfaddressed postcards (200 mm x 148 mm) without creases in the portrait
orientation.
To load postcards in the multi-purpose tray, follow the procedure described below.
•
Do not use postcards other than official postcards. If other types of postcards are used,
this may cause a deterioration in the print quality and paper jams.
•
Data cannot be printed in the 5 mm wide border of the postcard.
•
You cannot load postcards and stamped, self-addressed postcards in the landscape
orientation. Be sure to load them in the portrait orientation.
•
Do not use postcards for ink jet printers.
1
Grasp the tabs on both sides of the multi-purpose tray and
gently pull it open.
When loading stamped, self-addressed postcards, open the extension tray.
•
Support the tray with both hands and gently pull it open.
IMPORTANT
IMPORTANT
Page 26

25
2
Fan the stack of postcards, then tap it on a flat surface to
properly align the edges.
Align the edges of the stack of postcards on a flat surface.
• If the postcards are warped, correct the warp so that it does not exceed 2 mm in an
upward direction. Then fan the stack of postcards to make sure that none of the
postcards are stuck together before loading the stack into the multi-purpose tray.
3
Set the paper guide width slightly larger than the postcard
width.
4
Load the stack of postcards or stamped, self-addressed
postcards in the multi-purpose tray.
Press the stack so that it is below the limit guide. You can load up to about 40
postcards or stamped, self-addressed postcards in the multi-purpose tray.
When loading postcards, insert the stack as far as it will go into the printer, with the print
side of the postcards facing down and the top of the postcards going into the printer first.
IMPORTANT
No more than
2 mm
Limit Guide
Page 27

26
To load a stamped, self-addressed postcard in the multi-purpose tray, gently
insert the postcard as far as it will go into the printer, with the print side facing
down, and the top edge on the right.
• There must be some space left between the stack of postcards and limit guide. Do
not use force when loading the stack of postcards as this may cause a paper feed
failure.
• Never use stamped, self-addressed postcards with creases.
• Be sure to load stamped, self-addressed postcards in the portrait orientation. You
cannot load them in the landscape orientation. Furthermore, when you print on a
stamped, self-addressed postcard, make sure that the application page setup and
orientation settings match the way the postcard is loaded in the multi-purpose tray.
(Example: For Windows NT 4.0/Windows 2000, select [
往復はがき横
].)
5
Slide the paper guides so that they closely fit the right and left
edges of the postcard.
•
Be sure to set the paper guides to the postcard width. Misfeeds or paper jams may
occur if the paper guides are too loose or too tight.
IMPORTANT
IMPORTANT
Page 28

27
Loading Envelopes
The multi-purpose tray can hold Youkei No.4, and Youkei No.2 envelopes. To load
envelopes in the multi-purpose tray, follow the procedure described below.
•
You can load envelopes of the sizes shown below:
•
Do not use self-adhesive envelopes. This may cause a deterioration in the print quality or
printer malfunction.
•
Data cannot be printed in the 10 mm wide border of the envelope.
•
Be sure to load envelopes in the landscape orientation.
1
Grasp the tabs on both sides of the multi-purpose tray and
gently pull it open.
If necessary, open the extension tray.
•
Support the multi-purpose tray with both hands and gently pull it open.
2
Place the envelopes on a flat surface, with the flap open. Press
down the corners to crease and flatten the envelopes.
Align the edges of the stack of envelopes on a flat surface.
IMPORTANT
Youkei No.4
(105 mm×235 mm)
Youkei No.2
(114 mm×162 mm)
IMPORTANT
Page 29

28
3
Fan the envelopes, holding them at both edges.
4
Set the paper guide width slightly larger than the envelope
width.
5
Insert the envelope stack into the printer as far as it will go, with
the print side facing down and the flap open.
Press the envelope stack so that it is below the limit guide. The multi-purpose tray
can hold about ten envelopes.
• There must be some space left between the stack of envelopes and limit guide. Do
not use force to load the stack of envelopes as this may cause a paper feed failure.
• You cannot print on the back (adhesive surface) of the envelope.
• Load the envelope with the flap open and facing away from the printer as illustrated below.
Limit Guide
IMPORTANT
Page 30

29
6
Slide the paper guides so that they closely fit the right and left
edges of the envelopes
• Make sure the paper guides are set to the size of the envelopes. A paper feed
failure or paper jams may occur if they are too loose or too tight.
IMPORTANT
Page 31

30
Clearing Paper Jams
When a paper jam occurs during printing, a warning beep will sound and the error
message
<13 ヨウシガツマリマシタ>
will appear on the display. When a paper jam
occurs, follow the procedure below to remove the jammed paper from the printer
and then resume printing. If the message remains after removing the jammed
paper according to the prescribed procedure, torn pieces of the jammed paper may
still remain in the printer. In this case, re-check various sections of the printer and
remove all pieces of the jammed paper from inside the printer.
Procedure for Clearing Paper Jams
If a paper jam occurs, check the message on the display first, reset the pressure
releasing lever, and then remove the jammed paper.
•
The fixing unit may be hot during operation. Do not touch the fixing unit and its
peripherals as this may cause personal injury or burns.
IMPORTANT
Page 32

31
IMPORTANT
•
Never touch the high-voltage contact points inside the front cover. This could damage the printer.
•
Remove the jammed paper while the power to the printer still on. If you turn the power off,
the print data will be erased.
•
When you have opened the front cover, take care not to touch the transfer roller and
discharger inside the front cover.
•
Do not touch the drum when removing paper.
•
If you attempt to remove the jammed paper forcibly, the paper may be torn or parts inside
the printer may be damaged. Pull out the jammed paper in the correct direction according
to the location at which the paper is jammed.
•
If the jammed paper has torn, find the scraps pieces of the paper remaining inside the
printer and remove them.
1
Check all the messages appearing on the display.
The error messages and the locations are shown one by one on the display.
Check all of them. The messages will disappear when you open the front cover. It
is recommended that you note down the messages.
The message indicates the location of the paper jam. The following types of
messages are shown on the display. When two or more messages appear on the
display, note down all of them and check them one by one, in sequence.
Display message
Location of a paper jam Checking sequence
<マエ カバー エリア>
Front cover area 1
<ハイシ エリア>
Paper delivery area 2
<キュウシ エリア>
Paper feed area 3
High-Voltage Terminals
13 ヨウシカ゛ツマリマシタ
マエ カハ゛ー エリア
Page 33

32
2
Grasp the tabs on both sides of the multi-purpose tray and
gently pull it open.
If the paper was fed from the multi-purpose tray, proceed to the next step.
•
Support the multi-purpose tray with both hands and gently pull it open.
3
Remove the paper jammed in the multi-purpose tray.
4
Pull the right and left release levers inside the multi-purpose tray
area towards you, and then pull the front cover forward until it stops.
If you have trouble removing the front cover, lift it slightly. This will enable you to
remove the front cover.
•
Place the front cover in a safe place where it will not be damaged.
IMPORTANT
IMPORTANT
Page 34

33
5
Press down the right and left green pressure release levers to
release the pressure applied by the fixing unit.
6
When the message
<<<<ママママエエエエ カカカカババババーーーー エエエエリリリリアアアア>>
>>
appears on the
display, gently pull out the paper jammed in the front cover
using both hands.
Page 35

34
7
When the message
<<<<ハハハハイイイイシシシシ エエエエリリリリアアアア>>
>>
is displayed, pull out the
jammed paper with both hands as illustrated below.
If you can see the jammed paper inside the front cover, pull it out with both
hands.
If you cannot see the jammed paper inside the front cover, pull it out with both
hands from the paper delivery tray.
•
Open the paper delivery cover to make sure there are no scraps of paper left inside
the printer after you have removed the jammed paper.
NOTE
Paper Delivery Cover
Page 36

35
8
When the message
<<<<キキキキュュュュウウウウシシシシ エエエエリリリリアアアア>>
>>
appears on the display,
pull out the paper cassette until it stops, and then remove it
from the printer body by lifting the front of the cassette
slightly.
When an optional paper feed unit is attached to your printer, remove all the paper
cassettes starting from the top cassette.
•
Remove the paper cassettes starting from the top cassette. If you remove them
starting from the bottom cassette, the jammed paper may tear, leading to more
paper jams.
•
Paper cassettes cannot be pulled out horizontally. If you try to force a paper
cassette out horizontally, it may be damaged.
1
2
3
4
IMPORTANT
Page 37

36
9
Pull out the paper jammed in the front cover using both
hands.
10
Load the paper in the paper cassette and re-install the paper
cassette in the printer.
Page 38

37
11
Raise the right and left pressure release levers to lock them in
place.
12
Close the front cover and raise the right and left release levers
to lock them in place.
•
Do not leave the front cover open for a long time after installing a toner cartridge.
13
Close the multi-purpose tray.
IMPORTANT
Page 39

38
Replacing the Toner Cartridge
To replace the toner cartridge, follow the procedure described below.
•
To avoid a fire or personal injury, never attempt to incinerate a used toner
cartridge. Toner residue inside the cartridge is flammable and if it is scattered
near an open flame, this may result in a fire or personal injury.
•
If you get loose toner powder on your hands or clothing, wash it off with cold
water immediately. Using warm water may fix the toner to your hands or
clothing, making it difficult to remove.
1
When the printer has stopped printing, grasp the tabs on both
sides of the multi-purpose tray and gently pull it open.
•
Support the tray with both hands and gently pull it open.
2
Pull the right and left release levers inside the multi-purpose tray
area towards you, then pull the front cover forward.
•
Never touch the transfer roller or the discharger inside the front cover. This could
reduce the print quality.
WAR NING
CAUTION
IMPORTANT
IMPORTANT
Page 40

39
3
Remove the toner cartridge from the printer by grasping it by
the right and left handles and pulling it out horizontally.
4
Remove the new toner cartridge from its protective bag.
•
We recommend that you use Canon toner cartridges for optimum printing results.
•
Handle the toner cartridge so that the side with arrow always faces up, as
illustrated below. Do not stand the cartridge on end, and do not turn it upside down.
•
Save the protective bag. You may need it later when removing the toner cartridge
for maintenance of the printer.
IMPORTANT
Page 41

40
5
Hold the toner cartridge as illustrated below and gently rock it
5 or 6 times in a horizontal direction 1111, then another 5 or 6
times in a vertical direction 2222 to evenly distribute the toner.
•
If toner is not evenly distributed inside the cartridge, this may cause a deterioration
in the print quality.
6
Place the cartridge on a sturdy surface, then pull the sealing
tape straight out of the cartridge while holding the cartridge.
• Remove the sealing tape completely from the cartridge. Otherwise, this may
cause a deterioration in the print quality.
•
Do not pull the tape diagonally upwards or downwards as the tape may snap off. If you do
not remove the sealing tape completely, you may not be able to use the toner cartridge.
•
Do not stop pulling the sealing tape part way. If you stop pulling it, loose toner will
scatter around causing a reduction in print quality.
•
Dispose of the sealing tape properly.
7
Remove the tapes attaching the protective cover to the toner
cartridge. Then remove the protective cover by pressing the
two levers on the top edge of the cover.
1
2
1
IMPORTANT
IMPORTANT
Page 42

41
IMPORTANT
•
Do not re-attach the protective cover once it has been removed, as this may damage the drum.
•
Do not touch the drum of the toner cartridge.
•
Do not scratch the drum of the toner cartridge.
8
Hold the toner cartridge with both hands, align right and left
handles of the cartridge with the guides inside the printer and
insert the cartridge horizontally into the printer as illustrated below.
9
Push the handles of the toner cartridge to insert it into the printer
securely.
Drum
Page 43

42
10
Close the front cover and push the right and left release levers
back into position to lock the cover in place.
•
If the toner cartridge is not correctly installed, the front cover will not close
completely. Do not try to force the cover shut, as this could damage it. If you cannot
close the front cover completely, open it and check the installation of the toner
cartridge.
•
Do not leave the front cover open for a long time after installing a toner cartridge.
11
Close the multi-purpose tray.
● Recycling Toner Cartridges
Canon supports the collection of used toner cartridges for
recycling. Toner cartridge recycling cannot succeed without your
help. We would like to encourage you to support the Canon
Cartridge Recycling Program and bring your used cartridge to
the CANON distributor from which you have purchased the
cartridge or to your nearest CANON dealer.
IMPORTANT
Page 44

43
Canceling Printing
To cancel printing currently being processed, follow the procedure described below
to perform job cancel. Job cancel lets you cancel a job while data is being received
or processed. It does not affect the print data for the next job or any other interface
jobs for which data processing has not begun.
•
Perform job cancel offline when data is being processed (when the
ジョブ
indicator
is on or flashing). If you press [
ジョブキャンセル
] when the
ジョブ
indicator is off, this
activates the [
ユーティリティ
] function.
•
Data that has already been processed and is currently being printed (when paper
feeding has begun) cannot be canceled. In this case, be careful because
performing job cancel may cancel the print data for the next job.
•
If print data sent from a printer driver not compatible with this printer is mixed with
other data, multiple print jobs may be canceled.
•
When job cancel is performed, the message
<03 ジョブ キャンセル >
is displayed.
However the print job data may not be canceled. You cannot cancel secure job data
before entering a password, or job data to be stored in the box.
Follow the procedure described below to perform job cancel. Only perform job
cancel when the
ジョブ
indicator is on or flashing (when the print data for the job
you want to cancel is being received or processed).
1
Press [
オオオオンンンンラララライイイインン
ンン
] to turn off the
オオオオンンンンラララライイイインン
ンン
indicator.
The printer gets ready for operation using the control panel.
•
The display changes depending on the printer status. During job processing, the
operation mode, a user name or printer status is shown alternately.
IMPORTANT
NOTE
NOTE
Page 45

44
2
Press [
ジジジジョョョョブブブブキキキキャャャャンンンンセセセセルル
ルル
].
The message
<03 ジョブ キャンセル>
appears on the display and the print data
being processed is canceled.
When processing takes time, such as when receiving data, the message on the
display changes to
<00 ジョブ スキップ>
.
When the message
<00
LIPS
>
appears on the display, job cancel is complete.
•
When the message
<00 ジョブ スキップ>
appears on the display, you can press
[
リセット
] to perform a soft reset or hard reset. If you perform a reset, any print data
being received or any other interface print data will be lost. In this case, perform
printing again.
•
When the message
<03 ジョブ キャンセル>
appears on the display, you cannot
perform a soft reset or hard reset. Wait until job cancel is complete or the message
<00 ジョブ スキップ>
appears on the display.
03 シ゛ョフ゛ キャンセル
00 シ゛ョフ゛ スキッフ゜
00 LIPS A 4
NOTE
Page 46

45
Checking Operations
You can use the status print to check the configuration of the printer. Use this
function whenever necessary, such as after preparing and connecting the printer or
whenever you want to check its operating status.
Status Print
Currently available printer functions and a list of setting values are printed in a
status print. To perform a status print, follow the procedure described below.
1
Press [
オオオオンンンンラララライイイインン
ンン
] to turn off the
オオオオンンンンラララライイイインン
ンン
indicator.
The printer gets ready for operation using the control panel.
2
Press [
ユユユユーーーーテテテティィィィリリリリテテテティィ
ィィ
].
The message
<ステータス プリント>
appears on the display.
3
Press [
∨∨
∨∨
].
The message
<01 ステータス プリント>
appears on the display and the status
print begins.
ユーティリティ
ステータス フ゜リント →
ステータス フ゜リント →
01 ステータス フ゜リント →
Page 47

46
Status print contents
A status print is printed as shown below. It allows you to check functions that can be
currently used, provides a list of setting values in the printer function menu, and
versions of software and hardware installed in the printers as well as the page
count.
Page 48

47
When a Message Is Displayed
When <nn-nn
ササササーーーービビビビスス
スス
ココココーーーールル
ルル
> or <F9-nn
チチチチェェェェッッッックク
クク
ププププリリリリンンンンタタ
タタ
> Is Displayed
If a problem has occurred internally in the printer, or if a problem has occurred while
print data was being processed, an error message (error code and message) is
displayed. An error code is a four-digit number as shown in the illustration below.
1
Turn the printer’s power to off, wait for a while, and then turn
the power back to on.
If the message is not displayed again, you can use the printer as it is.
Error code Message
Error code Message
5F-50 サービスコール
F9-nn チェックプリンタ
When these types of messages are
displayed, make a note of the four-digit
number on the display, and then take the
following actions.
Page 49

48
2
If the message is displayed again, turn the printer’s power to
off. Disconnect the power plug and remove the earth cable
from the earth terminal. Then contact the place where you
purchased the printer.
When you contact the place of purchase, describe the problem and quote the
four-digit number.
•
When the message <5F-nn
サービスコール
> is displayed, condensation may have
formed inside the printer. Let the printer stand for two hours or more so that it
adjusts to the surrounding temperature and humidity. If you print while there is
condensation inside the printer, the paper may not feed properly causing paper
jams, and the print quality may also be poor.
NOTE
Page 50

49
Error Messages
If the printer is unable to print for some reason, an alarm sounds, the error indicator
lights up and an error message appears on the display. Furthermore, a warning
message is displayed when you are required to take some sort of action, even
though there is no problem with the print job. When these types of messages are
displayed, take the following actions in response.
•
When multiple warning messages occur at the same time, the messages are displayed
alternately.
•
When an error message occurs at the same time as a warning message, the warning
message is not displayed.
•
When [
ケイコクヒョウジ
] in the set-up menu is set to [
シナイ
], a message with < Warning
message > symbol is not displayed.
•
When a message with the < Error skip > symbol is displayed, press [
オンライン
] to bypass
the error and continue printing. However if you do this, print data may be lost or the data
may not be printed correctly. If you want to cancel the procedure, perform a soft reset to
remove the cause of the problem and then press [
オンライン
] to print the data again.
Furthermore, messages marked with this symbol can be automatically skipped by setting
[
自動エラースキップ
] to [
ツカウ
].
Message
Cause and Remedy
11 XXX ヨウシガアリマセン
(where XXX is the paper size
abbreviation)
Cause: The paper size specified in an
application software has not been
loaded in the paper cassette or
paper tray. (When the paper feed
mode is set to [
自動
], this applies to
all paper cassettes and the paper
tray. When the paper feed mode is
fixed, this applies to a paper cassette
or the paper tray.)
Remedy: Add paper to the paper source or, if
there is no paper in the paper
source, load paper into it.
12 カバーガ アイテイマス
Cause: The front cover is open.
Remedy: Close the front cover firmly.
13 ヨウシガ ツマリマシタ
Cause: Paper has jammed inside the printer.
Remedy: Clear the paper jam.
14 EP カートリッジ ナシ
Cause: The toner cartridge has not been
installed.
Remedy: Install the toner cartridge.
IMPORTANT
Page 51

50
16 トナー チェック
<Warning message>
Cause: The amount of remaining toner is
low.
Remedy: Remove the toner cartridge and
gently rock it 5 or 6 times in the
vertical and horizontal directions.
Then re-install the cartridge in the
printer. If the message is still
displayed after this, or white streaks
appear on the printout, replace the
toner cartridge with a new one.
16 トナー コウカン
<Error skip>
Cause: The cartridge is out of toner.
Remedy: Replace the toner cartridge with a
new one.
17 カセット n ヨウシ ナシ
(n is the cassette number.)
<Warning message>
Cause: Paper in the cassette of the number
indicated on the display has run out.
Remedy: Load paper into the cassette of the
number indicated on the display.
19 ヨウシガノコッテイマス
<Warning message>
Cause: There is still paper inside the printer.
Remedy: Any paper still in the printer will be
output automatically.
40 ツウシン エラー
<Error skip>
Cause: An error occurred when data was
being transferred between a PC and
the printer.
Remedy: Check the interface cable connection
and print the data again.
41 プリント チェック
<Error skip>
Cause: The sizes of the paper loaded in the
paper cassette and paper tray are
different to the paper size settings for
the paper cassette and paper tray.
Remedy: When paper is being fed from the
paper cassette, make sure that the
size of the paper loaded in the paper
cassette is the same as the paper
size settings on the paper size
selector. Also when paper is being
fed from the paper tray, make sure
that the size of the paper loaded in
the paper tray is the same as the
paper size settings for the paper tray
before you press [
オンライン
].
Message
Cause and Remedy
Page 52

51
PC XXX ヨウシ ニ コウカン
(where XXX is the paper size
abbreviation)
<Error skip>
Cause: Either the size of the paper loaded in
the paper source is different to the
paper size setting in the application
software, or a paper source in which
a different size of paper is loaded
has been selected.
Remedy: Replace the paper in the selected
paper source with paper of the size
specified by the application software
(or scaling setting).
Message
Cause and Remedy
 Loading...