

Page 1

Personal Embroidery Design Software System
Startup : Reference Guide
Be sure to read this document before using the software.
We recommend that you keep this document nearby for future reference.
Page 2

Page 3

Read the following before installing
this software
Thank you for purchasing this software. Before installing this software, carefully read the following product
agreement, which has been provided for this product. Use this software only if you agree to the terms of this
agreement. By installing this software, you agree to the conditions of its use.
Product Agreement
1) General terms
This is an agreement between you (the end-user) and our company for this product.
2) Use of this product
You may install and use this product on only one computer.
3) Limitations on duplications
You may not duplicate this product, except for backup purposes.
4) Limitations on modifications
You may not modify or disassemble this product in any way.
5) Limitations on transfer
This software may not be transferred to or used in any other way by a third party.
6) Warranty
We accept no responsibility for your choice or use of this product or for any damages that may arise
out of its use.
7) Others
This product is protected by copyright laws.
Portions of this product were created using technology from Softfoundry International Pte. Ltd.
Page 4

IMPORTANT INFORMATION:
REGULATIONS
Federal Communications Commission (FCC)
Declaration of Conformity (For USA Only)
Responsible Party: Brother International Corporation
200 Crossing Boulevard
P. O . B o x 6 9 11
Bridgewater, NJ 08807-0911 USA
TEL : (908) 704-1700
declares, that the products
Product Name: Brother PE-DESIGN Software Key
Model Numbers: PE-DESIGN 10 / PE-DESIGN 10U
complies with Part 15 of the FCC Rules. Operation is subject to the following two conditions: (1) This device
may not cause harmful interference, and (2) this device must accept any interference received, including
interference that may cause undesired operation.
This equipment has been tested and found to comply with the limits for a Class B digital device, pursuant to
Part 15 of the FCC Rules. These limits are designed to provide reasonable protection against harmful
interference in a residential installation. This equipment generates, uses, and can radiate radio frequency
energy and, if not installed and used in accordance with the instructions, may cause harmful interference to
radio communications. However, there is no guarantee that interference will not occur in a particular
installation. If this equipment does cause harmful interference to radio or television reception, which can be
determined by turning the equipment off and on, the user is encouraged to try to correct the interference by
one or more of the following measures:
- Reorient or relocate the receiving antenna.
- Increase the separation between the equipment and receiver.
- Connect the equipment into an outlet on a circuit different from that to which the receiver is connected.
- Consult the dealer or an experienced radio/TV technician for help.
Important
Changes or modifications not expressly approved by Brother Industries, Ltd. could void the user's authority to
operate the equipment.
Industry Canada Compliance (For Canada Only)
CAN ICES-3(B)/NMB-3(B)
Page 5

Congratulations on choosing our product!
Thank you very much for purchasing our product. To obtain the best performance from this unit and to ensure
safe and correct operation, please read this document carefully, and then keep it in a safe place together with
your warranty.
Please read before using this product
For designing beautiful embroidery designs
This system allows you to create a wide variety of embroidery designs and supports a wider range of sewing
attribute settings (thread density, sewing pitch, etc.). However, the final result will depend on your particular
sewing machine model. We recommend that you make a trial sewing sample with your sewing data before
sewing on the final material.
For safe operation
• Do not save any files on the "PE-DESIGN Software Key" for transferring or storage.
• Do not insert the "PE-DESIGN Software Key" into your embroidery machine.
For a longer service life
• When storing the "PE-DESIGN Software Key", avoid direct sunlight and high humidity locations. Do not
store the "PE-DESIGN Software Key" close to a heater, iron or other hot objects.
• Do not spill water or other liquids on the "PE-DESIGN Software Key".
• Do not drop or hit the "PE-DESIGN Software Key".
For repairs or adjustments
In the event that a malfunction occurs or adjustment is required, please consult your nearest service center.
Notice
Neither this Reference Guide nor the Instruction Manual explains how to use your computer under
Windows
®
. Please refer to the Windows® manuals.
Trademarks / Copyright acknowledgments
Windows® and Windows Vista® are registered trademarks of Microsoft Corporation. Other product names
mentioned in the Instruction Manual and Reference Guide may be trademarks of registered trademarks of
their respective companies and are hereby acknowledged.
Important
Using this unit for unauthorized copying of material from embroidery cards, newspapers and magazines for
commercial purpose is an infringement of copyrights which is punishable by law.
Caution
The software included with this product is protected by copyright laws. This software can be used or copied
only in accordance with the copyright laws.
SAVE THESE INSTRUCTIONS
This product is intended for household use.
For additional product information and updates, visit our web site at:
http://www.brother.com/ or http://support.brother.com/
Page 6
Page 7
Page 8

XX page 29
XX page 40
XX page 34
Page 9
XX page 60
XX page 55 XX page 50
XX page 42
Page 10

Table of Contents
How To Use the Manuals..................... 3
Reference Guide.......................................... 3
Instruction Manual (PDF format).................. 3
Getting Started ..................................... 4
Introduction....................................................... 4
Package contents ........................................ 4
Precautions for using the "PE-DESIGN
Software Key" .............................................. 4
Installation ........................................................ 5
Please Read Before Installation................... 5
System Requirements.................................. 5
Installation Procedure .................................. 6
[STEP1] Installing the Software ................... 6
[STEP2] Activating the "PE-DESIGN Software
Key" (only for users upgrading from PE-
DESIGN version 5, 6, 7, 8 or NEXT)............ 9
Uninstalling the Software ........................... 13
Technical Support/Service.............................. 15
Technical Support...................................... 15
Online Registration .................................... 15
Checking for the Latest Version of
the Program.................................................... 16
Creating the Desired Embroidery
Pattern ................................................. 17
Key Features of Successful
Embroidery Design......................................... 17
Turning Your Ideas Into
Embroidery ......................................... 19
Starting Applications....................................... 19
Starting up Layout & Editing ...................... 19
Using the Startup Wizard................................ 20
Using preset settings ................................. 20
Understanding the Layout & Editing
Window........................................................... 21
Displaying the [Import] pane ...................... 21
Importing Patterns .......................................... 22
Importing outline shapes............................ 22
Laying Out Patterns........................................ 23
Arranging outline shapes ........................... 23
Adding Colors to Patterns............................... 24
Changing colors......................................... 24
Specifying Pattern Sew Types........................ 25
Changing the sew type .............................. 25
Viewing a Pattern as Embroidery Data........... 26
Changing the sewing order ........................ 26
1
Sewing the Pattern ........................................ 27
Transferring to an embroidery machine using
USB media ................................................ 27
Saving/Opening/Printing pattern data file.. 28
Exiting the Application ................................... 28
Exiting Layout & Editing ............................ 28
Creating Various Embroidery
Designs ............................................... 29
Floral wreath – Arranging stitch patterns –.... 29
Importing and rotating a pattern ................ 30
Duplicating a pattern ................................. 31
Flipping a pattern....................................... 32
Arranging patterns..................................... 33
Team Jersey numbers – Combining text –.... 34
Entering text .............................................. 35
Changing text color and sew type ............. 36
Importing transformed text ........................ 38
Aligning patterns........................................ 39
Emblem – Using the Template wizard –........ 40
Starting the wizard..................................... 40
Editing the text........................................... 41
Outputting the design data ........................ 41
Floral patterns – Creating a floral pattern
from a shape –............................................... 42
Drawing base circles ................................. 42
Drawing floral pattern (basic mode) .......... 44
Drawing floral pattern (detailed mode) ...... 46
Drawing using offset lines ......................... 47
Heart pattern – Changing the stitching for
each shape pattern – ..................................... 50
Importing an outline shape........................ 50
Applying patterned stitches to a shape ..... 51
Applying programmable stitches to
a shape...................................................... 52
Applying motif stitches to a shape............. 54
Bird of peace – Applying gradation to
a vector image – ............................................ 55
Importing vector images (SVG files).......... 55
Displaying hidden objects.......................... 56
Decorating the outer heart shape.............. 57
Applying gradation..................................... 58
Symbol – Specifying the sewing direction for
each separate shape – .................................. 60
Splitting patterns........................................ 60
Setting a sewing direction ......................... 63
Optimizing the sewing order...................... 67
Grouping pattern parts .............................. 67
Page 11
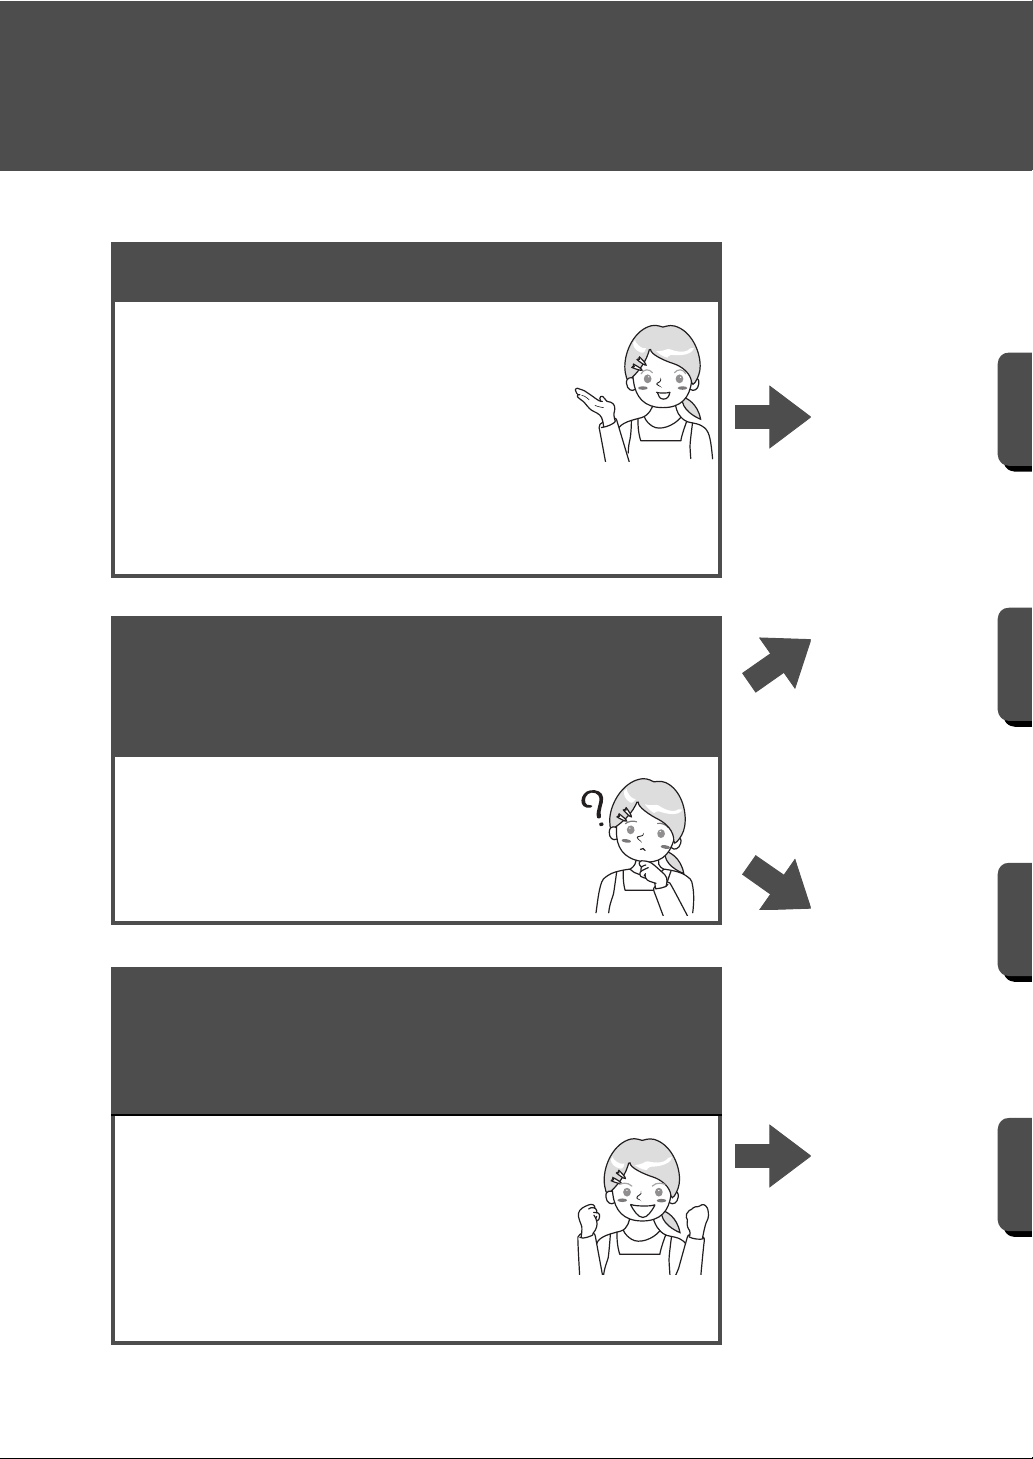
Navigating This Guide for Best
Results
Installation steps
Follow this initial steps to
install the software.
.... Installing PE-DESIGN 10 (For
all users)
.... Activating the “PE-DESIGN
Software Key” (For upgrade
users only)
For people who want to learn
basic application operations
I am...
.... a PE-DESIGN beginner.
.... interested in reviewing basic
operations.
Getting Started
Creating the
Desired
Embroidery
Pattern
Turning Your
Ideas Into
Embroidery
For people who want to
immediately begin creating
patterns
I am...
.... an intermediate/advanced
user of PE-DESIGN.
.... interested in learning
operations for specific
applications and operation
details.
Creating Various
Embroidery
Designs
2
Page 12

How To Use the Manuals
Reference Guide
Read this guide before using the software. The guide begins with procedures for installing the software or
upgrading from a previous version and includes precautions and tips for using this software. The second half
is filled with tutorials that use key features to create embroidery patterns as well as project examples.
• Installation section
1) Read the information about verifying the package contents and installation preparation. (c page 4)
2) Install the software according to the instructions. (c page 5)
3) Learn about the software support information and online registration. (c page 15)
• Basic operation section
1) Learn about key features for creating embroidery patterns. (c page 17)
2) Learn basic screen operations and functions. (c page 19)
3) Try creating sample projects. (c page 29)
• Symbols used in the guide
This indicates precautions to be observed during software operations. Since this information is
a :
necessary for correct operation, be sure to read it when you see this mark.
This indicates useful operation tips. Understanding this information will make creating embroidery
b :
patterns easier and more enjoyable.
Instruction Manual (PDF format)
The manual covers the functions and operations as well as various settings of PE-DESIGN for all levels of
learning from beginner to advanced users. This manual is available as a PDF file.
■ Viewing from the [Start] screen (for Windows® 8.1 users)
Position the mouse pointer in the [Start] screen to display the down arrow in the lower-left corner of the
screen (below and left of the tiles), and click it.
From the list of applications that appears in the screen, click [Instruction Manual] under the title [PE-
DESIGN 10].
b
• For Windows® 8 users: Right-click the [Start] screen in an area where there is no tile, and then click [All
Apps] in the lower-right corner of the screen to display the applications list.
• For Windows
[Instruction Manual].
■ Viewing from the application
Click in the upper-right corner of any application window other than [Design Database], and then
click [Instruction Manual] from the menu. In [Design Database], click [Help] at the top of the window,
and then click [Instruction Manual] from the menu.
b
Adobe® Reader® is required for viewing and printing the PDF version of the Instruction Manual.
®
7 users: Click and then [All Programs]. Click [PE-DESIGN 10] and then select
3
Page 13
Getting Started
Introduction
Package contents
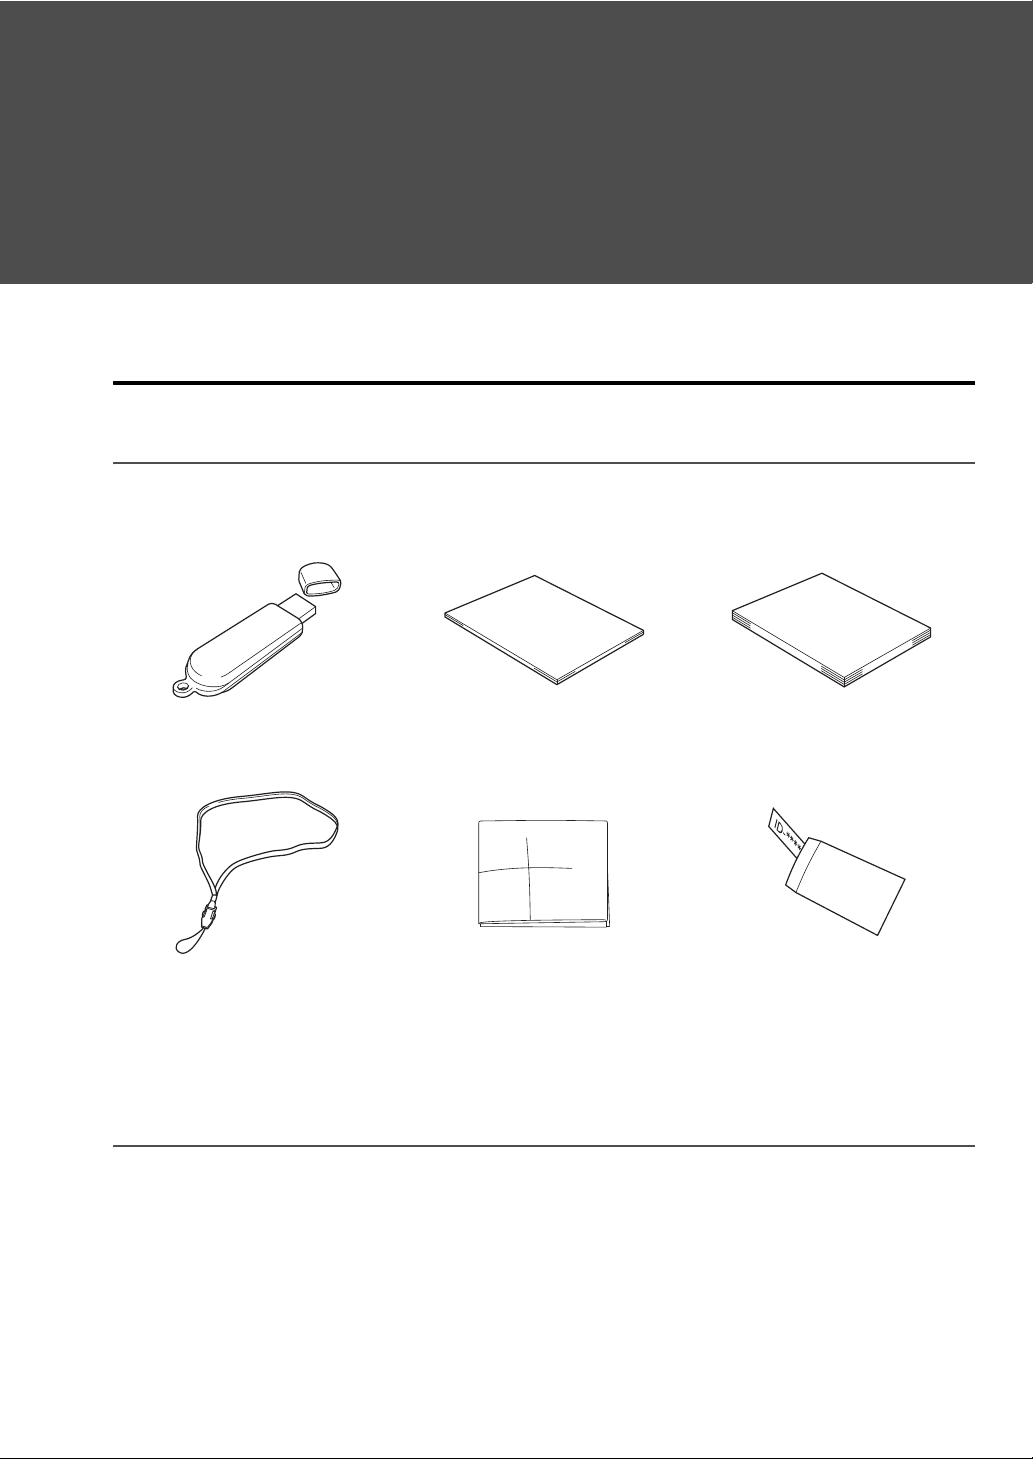
Check that the following items are included. If anything is missing or damaged, contact your authorized
dealer or Brother Customer Service.
PE-DESIGN Software Key
Containing the software and Instruction
Manual (PDF format)
Strap Positioning sheet PRODUCT ID Key envelope
Reference Guide
(this manual)
Instruction Manual
(Only for upgrade customers from previous
versions to PE-DESIGN 10)
PRODUCT ID is printed on a strip of paper.
Precautions for using the "PE-DESIGN Software Key"
• Since this "PE-DESIGN Software Key" device is required to run the software, its replacement value is the
retail price of the software. Please keep in a safe place when not in use.
• The "PE-DESIGN Software Key" prevents unauthorized use of this software. The software cannot be
started if the "PE-DESIGN Software Key" is not plugged in.
• The "PE-DESIGN Software Key" cannot be used as USB media. Do not save embroidery files on the "PEDESIGN Software Key" for transferring or storage.
• Do not insert the "PE-DESIGN Software Key" into your embroidery machine.
• Do not format the "PE-DESIGN Software Key".
4
Page 14

Installation
• Keep the "PE-DESIGN Software Key" away from high humidity, direct sunlight, static electricity and strong
shocks. Furthermore, do not bend the "PE-DESIGN Software Key".
• Before installing, back up the installer stored on the "PE-DESIGN Software Key".
• If the installed application is not operating properly, perform the installation again.
• Before activating the "PE-DESIGN Software Key", run [PE-DESIGN 10 (Layout & Editing)] as an
administrator. (c page 10)
Installation
Please Read Before Installation
• Before beginning the installation, check that the computer meets the system requirements.
• In order to install the software on Windows
account with administrator privileges. For details on logging on to the computer using an account with
administrator privileges, refer to the Windows manual.
• The installation procedure is described for Windows® 8.1. The procedure and dialog boxes for other
operating systems may be slightly different.
• If the installation is canceled before it is completed or if the procedure is not performed as described, the
software will not be installed correctly.
• Do not unplug the "PE-DESIGN Software Key" from the computer while the LED indicator is flashing.
• Do not remove the "PE-DESIGN Software Key" from the USB port of the computer while the installation is
being performed. Remove the "PE-DESIGN Software Key" after the installation is completed.
• In order to activate the "PE-DESIGN Software Key", you must be able to connect to the Internet. If you
cannot connect to the Internet, contact your authorized dealer or Brother Customer Service.
• In order to activate the "PE-DESIGN Software Key", be sure to perform “[STEP2] Activating the "PEDESIGN Software Key" (only for users upgrading from PE-DESIGN version 5, 6, 7, 8 or NEXT)” on page 9.
®
operating system, you must log on to the computer using an
System Requirements
Before installing the software on your computer, make sure that the computer meets the following minimum
PC requirements.
Operating system Windows Vista®, Windows® 7, 8, 8.1 (32 or 64 bit)
Processor 1 GHz or more
Memory 512 MB (1 GB or more is recommended.)
Hard disk free space 300 MB
Monitor XGA (1024 × 768), 16-bit color or higher
Port
Device Mouse
Printer
Internet access Required for activating and updating PE-DESIGN
Two or more USB ports (used for connecting the "PE-DESIGN Software
Key" and for transferring embroidery data to an embroidery machine)
Graphic printer that is supported by your system (if you wish to print your
images)
a
• This product may not operate correctly with some computers.
5
Page 15
Installation
Getting Started
Installation Procedure
The installation procedure will differ depending on the software that you have. For first-time users of PEDESIGN 10, install the full version of PE-DESIGN 10. For users upgrading from PE-DESIGN version 5, 6, 7,
8 or NEXT, install the software and activate the "PE-DESIGN Software Key". Perform the installation
according to the following instructions.
■ Installing PE-DESIGN 10 (full version)
cc “[STEP1] Installing the Software” on page 6
■ Upgrading from version 5, 6, 7, 8 or NEXT
cc “[STEP1] Installing the Software” on page 6
cc “[STEP2] Activating the "PE-DESIGN Software Key" (only for users upgrading from PE-DESIGN
version 5, 6, 7, 8 or NEXT)” on page 9
[STEP1] Installing the Software
This section describes how to install the application software.
a
• If the installation is interrupted or not performed as described, the software will not be installed correctly.
• In order to install the software, you must log on to the computer using an account with administrator
privileges. If you are not logged on with the administrator account, the password for the administrator
account may be requested with Windows
• Before beginning the installation, follow the procedure below to back up the installer onto your computer.
1) Create a backup folder on the computer.
2) Copy the entire [PE-DESIGN 10] folder from the "PE-DESIGN Software Key" into the folder created in
step 1).
• Do not delete the data in the [PE-DESIGN 10] folder on the "PE-DESIGN Software Key".
®
8.1. Type in the password to continue the procedure.
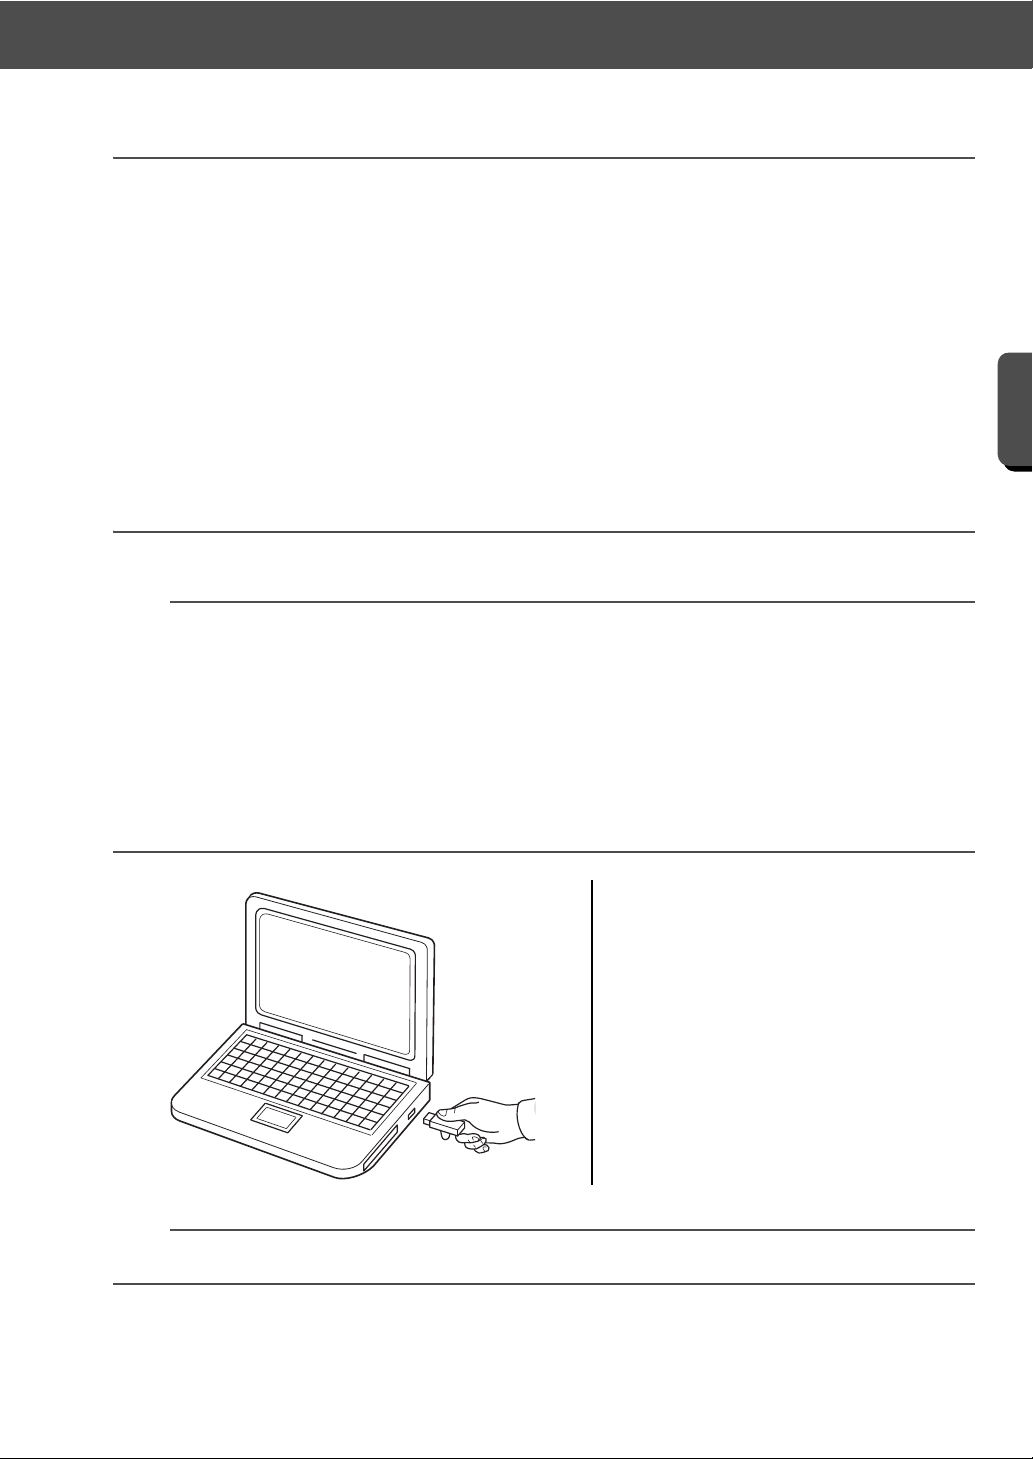
1 Plug the "PE-DESIGN Software Key"
into the USB port on the computer.
→ After a short while, the [AutoPlay]
dialog box automatically appears.
→ For Windows
®
7 users, follow step
3 after the [AutoPlay] dialog
appears.
a
Do not unplug or plug in the "PE-DESIGN Software Key" until the installation is completed.
6
Page 16
Installation
b
•If the [AutoPlay] dialog does not automatically start up:
1) Move the pointer over the lower-left corner of the screen.
→ appears.
2) Right-click and select [Run] in the command list.
→ The [Run] dialog box appears.
3) Type in the full path to the installer, and then click [OK] to start up the installer.
For example: F:\PE-DESIGN 10\setup.exe (where "F:" is the drive name used for "PE-DESIGN
Software Key")
• For Windows
display the [Run] dialog box. Type in the full path to the installer in the input window.
®
7 users, click , then [All Programs]. Select [Accessories] and then click [Run] to
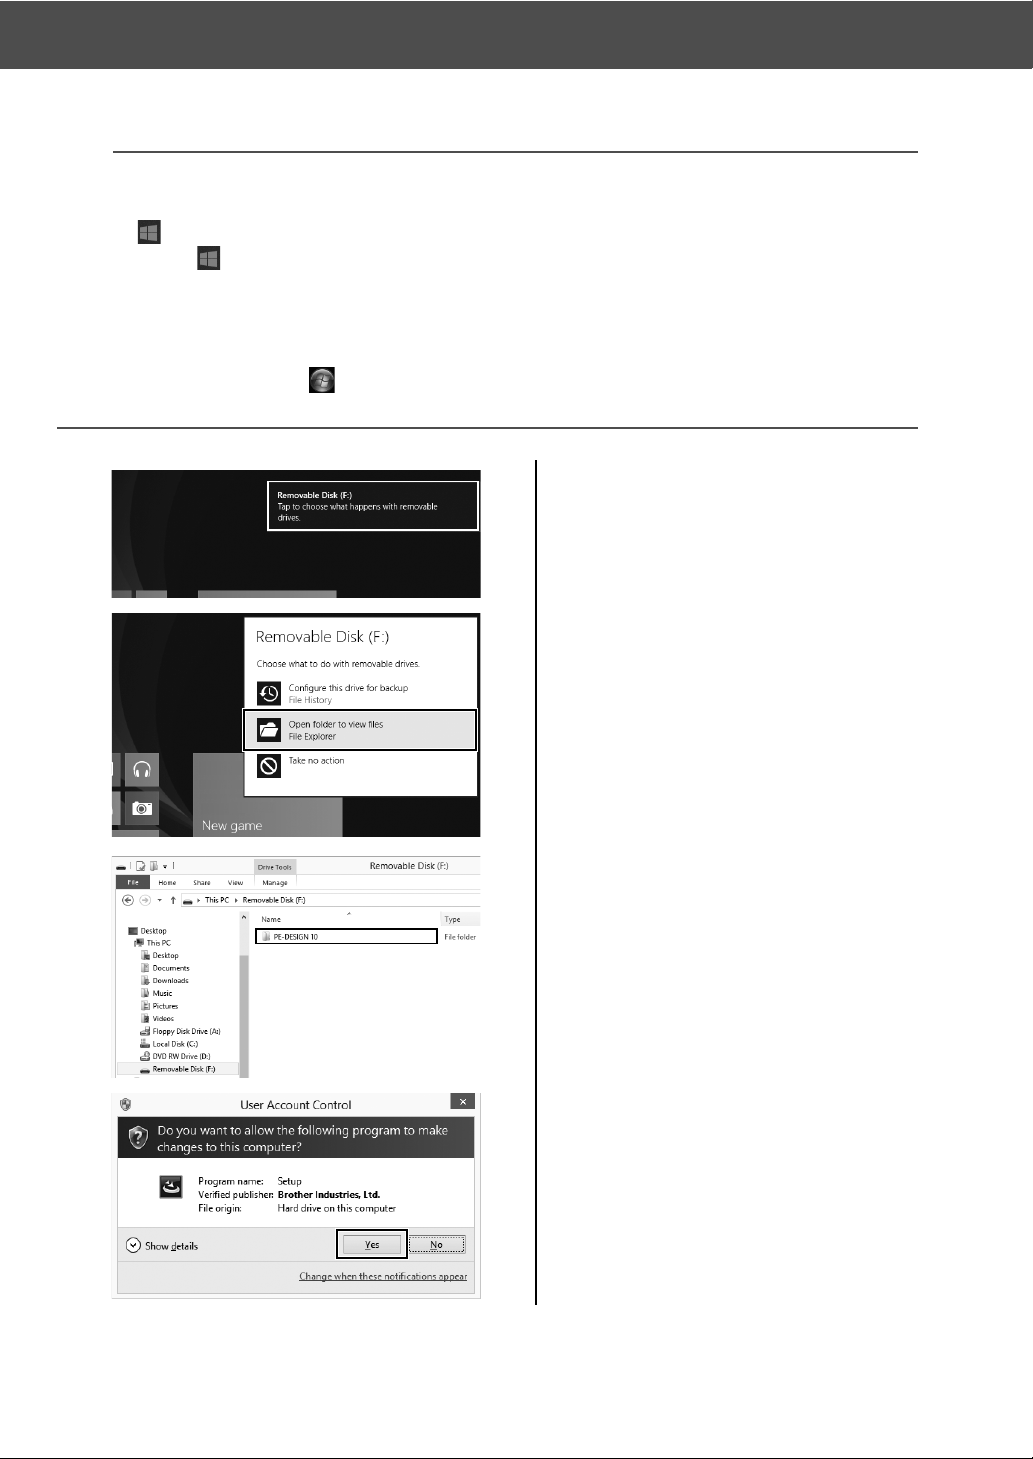
2 Click the message appearing in the
top-right corner of the screen.
→ The [AutoPlay] dialog box
continues to be displayed.
3 Click [Open folder to view files].
→ The [File Explorer] window
appears.
4 Open the [PE-DESIGN 10] folder, and
then double-click the setup.exe file.
→ The [User Account Control] dialog
box appears.
5 Click [Yes].
→ After a short while, the following
dialog box automatically appears.
7
Page 17
Installation
Getting Started
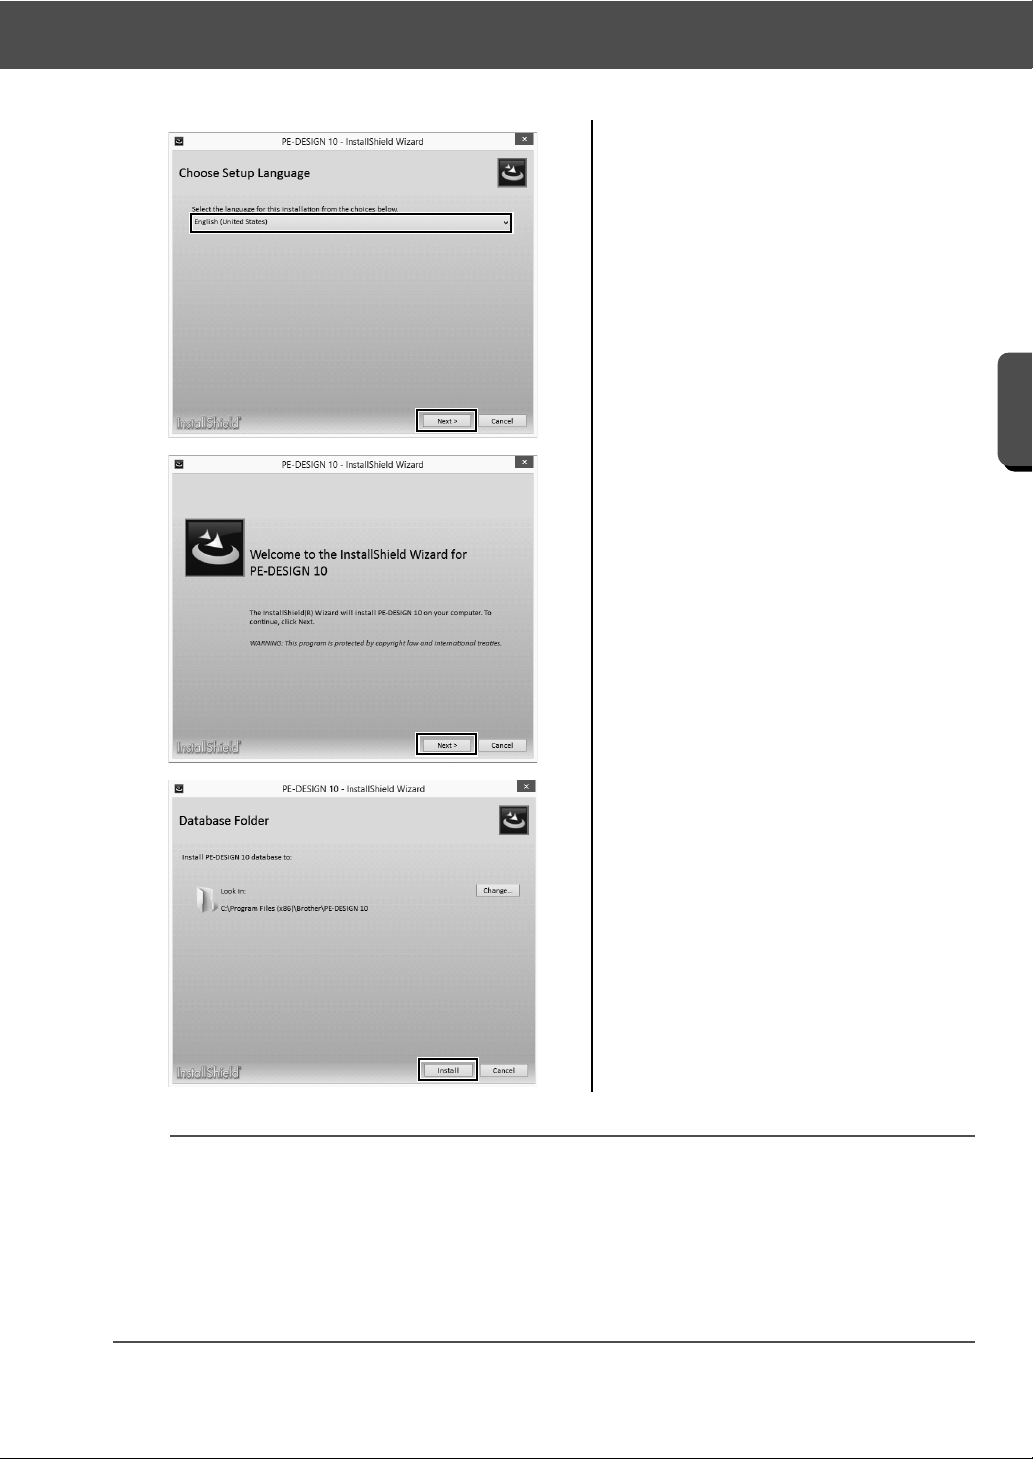
6 Select the desired language, and
then click [Next].
→ The [InstallShield Wizard] starts
up, and the first dialog box appears.
7 Click [Next] to continue with the
installation.
→ A dialog box appears, allowing you
to select the folder where the
software will be installed.
8 Check the installation location, and
then click [Install] to install the
application.
→ When the installation is completed,
the following dialog box appears.
b
To install the application into a different folder:
1) Click [Change].
2) In the [Browse For Folder] dialog box that appears, select the drive and folder. (If necessary, type in
the name of a new folder.)
3) Click [OK].
→ The [Database Folder] dialog box of the [InstallShield Wizard] shows the selected folder.
4) Click [Install] to install the application into the selected folder.
8
Page 18
Installation
b
a
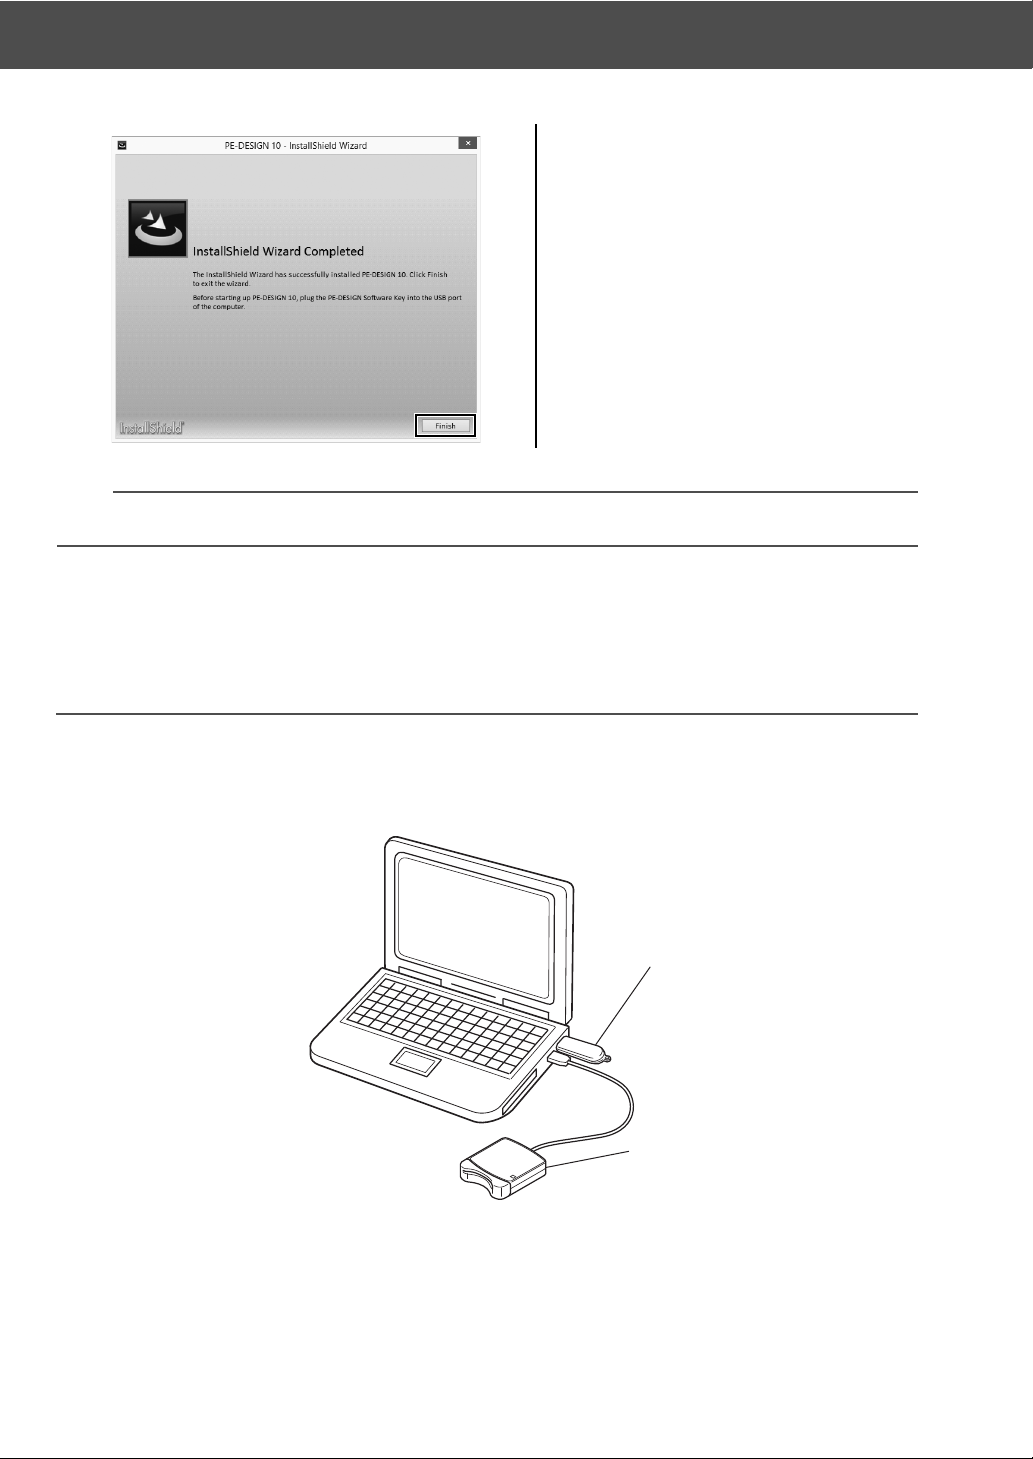
9 Click [Finish] to complete the
installation of the software.
b
If a message appears, indicating that the computer be restarted, it is necessary to restart the computer.
[STEP2] Activating the "PE-DESIGN Software Key" (only
for users upgrading from PE-DESIGN version 5, 6, 7, 8 or
NEXT)
This section describes the procedure for activating the "PE-DESIGN Software Key" when
upgrading from PE-DESIGN version 5, 6, 7, 8 or NEXT. After installing the software, plug the "PEDESIGN Software Key" and your USB card writer module into the computer, and then immediately
activate the "PE-DESIGN Software Key".
1 PE-DESIGN Software Key
2 USB card writer module
9
Page 19
Installation
Getting Started
a
• In order to activate the "PE-DESIGN Software Key", you must be able to connect to the Internet. If you
cannot connect to the Internet, contact your authorized dealer or Brother Customer Service.
• If a firewall is turned on, activation may fail. Turn off the firewall, and then complete the activation.
• Only one PRODUCT ID and one card writer module can be used for activating one "PE-DESIGN
Software Key". A PRODUCT ID and card writer module that have already been used will not be valid for a
different "PE-DESIGN Software Key".
b
No activation steps are required for first-time users of PE-DESIGN (those who have installed the full version
software).
1 Plug the "PE-DESIGN Software Key"
into the computer.
→ The [AutoPlay] dialog box
appears. Select [Take no action] in
the dialog not to use the [AutoPlay]
dialog box.
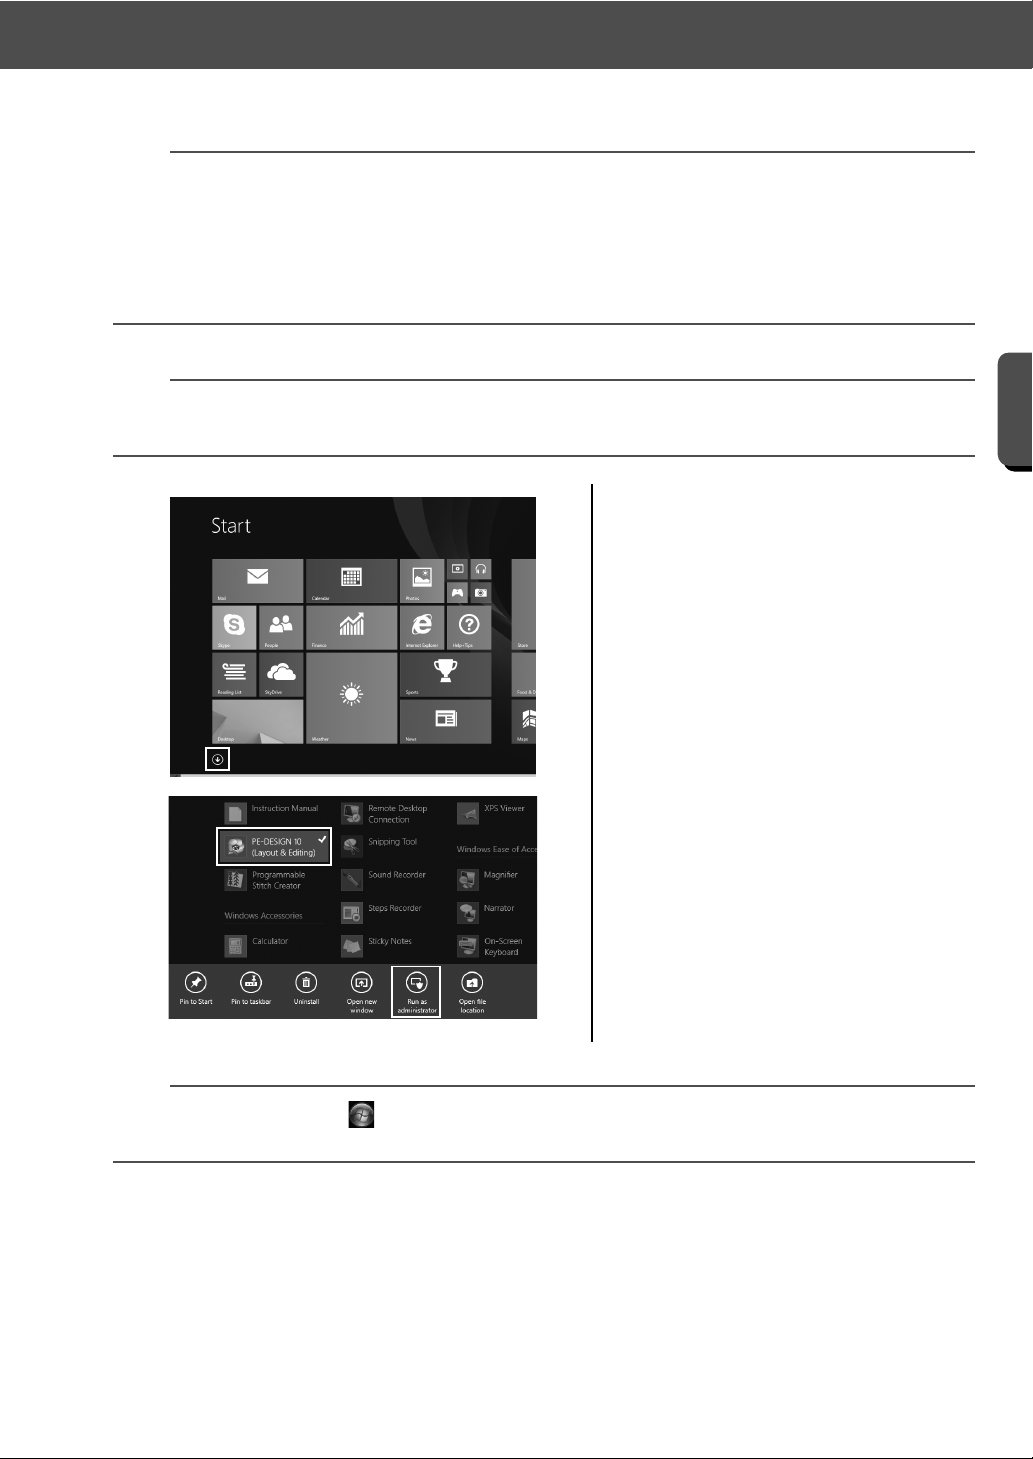
2 Position the mouse pointer in the
[Start] screen to display the down
arrow in the lower-left corner of the
screen, and click it.
→ The list of applications appears.
3 Right-click [PE-DESIGN 10 (Layout &
Editing)], which appears under the
title [PE-DESIGN 10].
→ The taskbar appears at the bottom
of the screen.
4 Click [Run as administrator] in the
taskbar to run the application as an
administrator.
→ The [User Account Control] dialog
box appears.
b
For Windows® 7 users, click , then [All Programs]. Click [PE-DESIGN 10] and then right-click [PEDESIGN 10 (Layout & Editing)]. Select [Run as administrator] in the command list.
10
Page 20
Installation
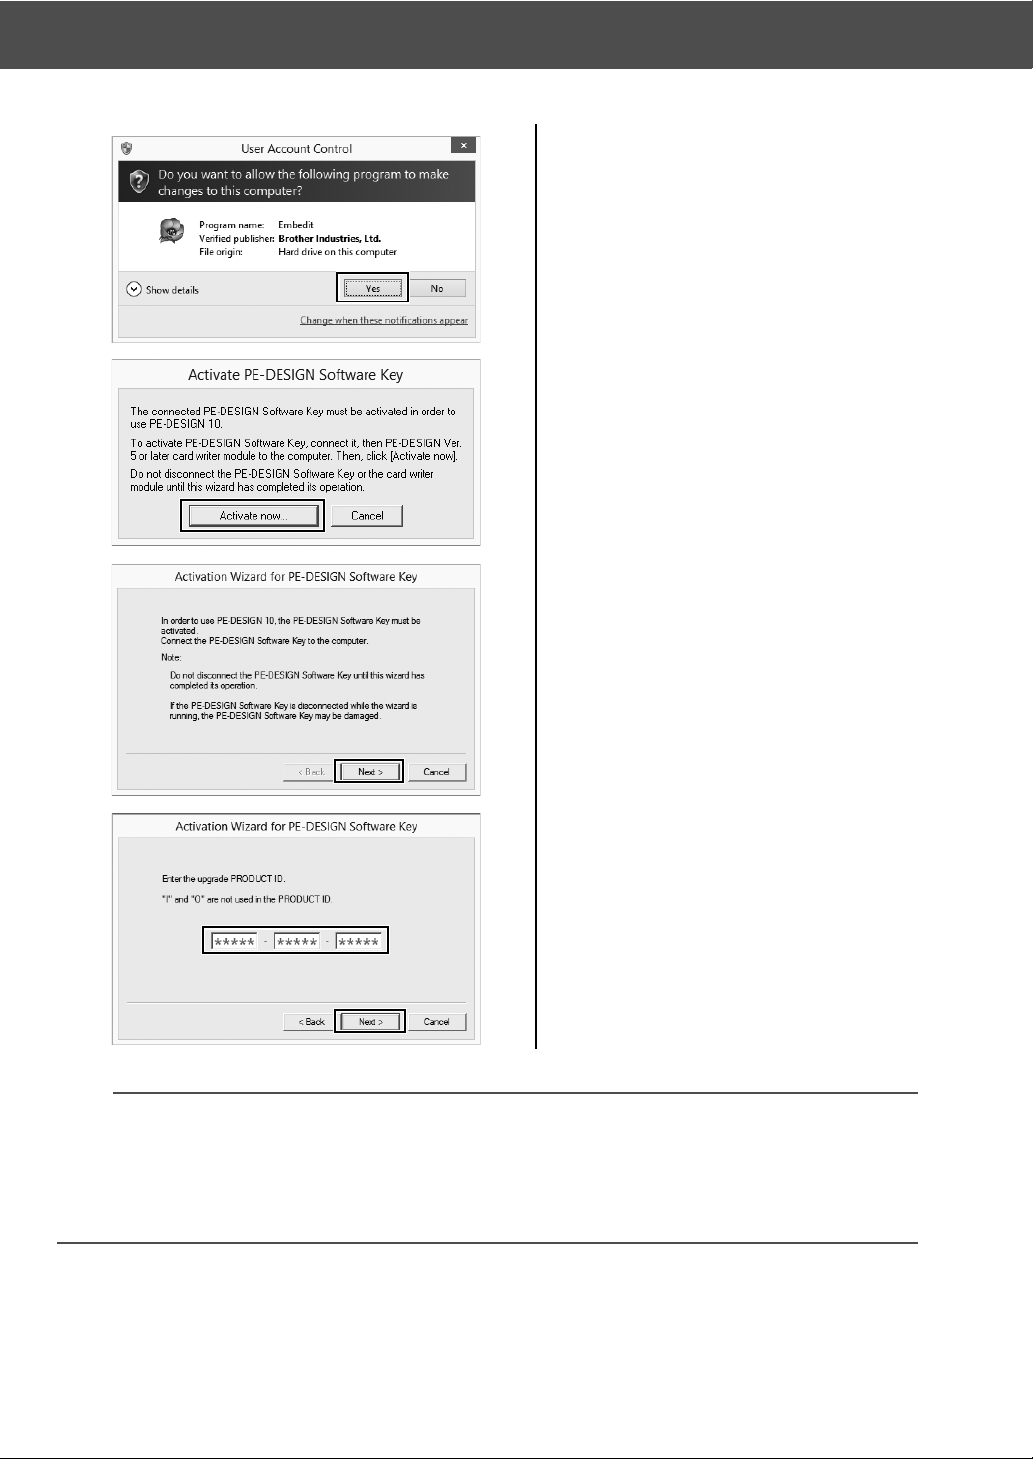
5 Click [Yes].
→ After a short while, the following
dialog box automatically appears.
6 Click [Activate now] to begin
activation.
→ The activation wizard starts up, and
the first dialog box, shown below,
appears.
7 Click [Next].
8 Type in the 15-digit PRODUCT ID,
and then click [Next].
a
• If the PRODUCT ID is incorrectly entered, the message "The product ID is incorrect. Check that a
mistake was not made during typing." appears.
• The uppercase letters "I" and "O" are not used in the PRODUCT ID.
• Each PRODUCT ID can be only used with one "PE-DESIGN Software Key". A PRODUCT ID already
used with a "PE-DESIGN Software Key" cannot be used again.
11
Page 21
Installation
Getting Started
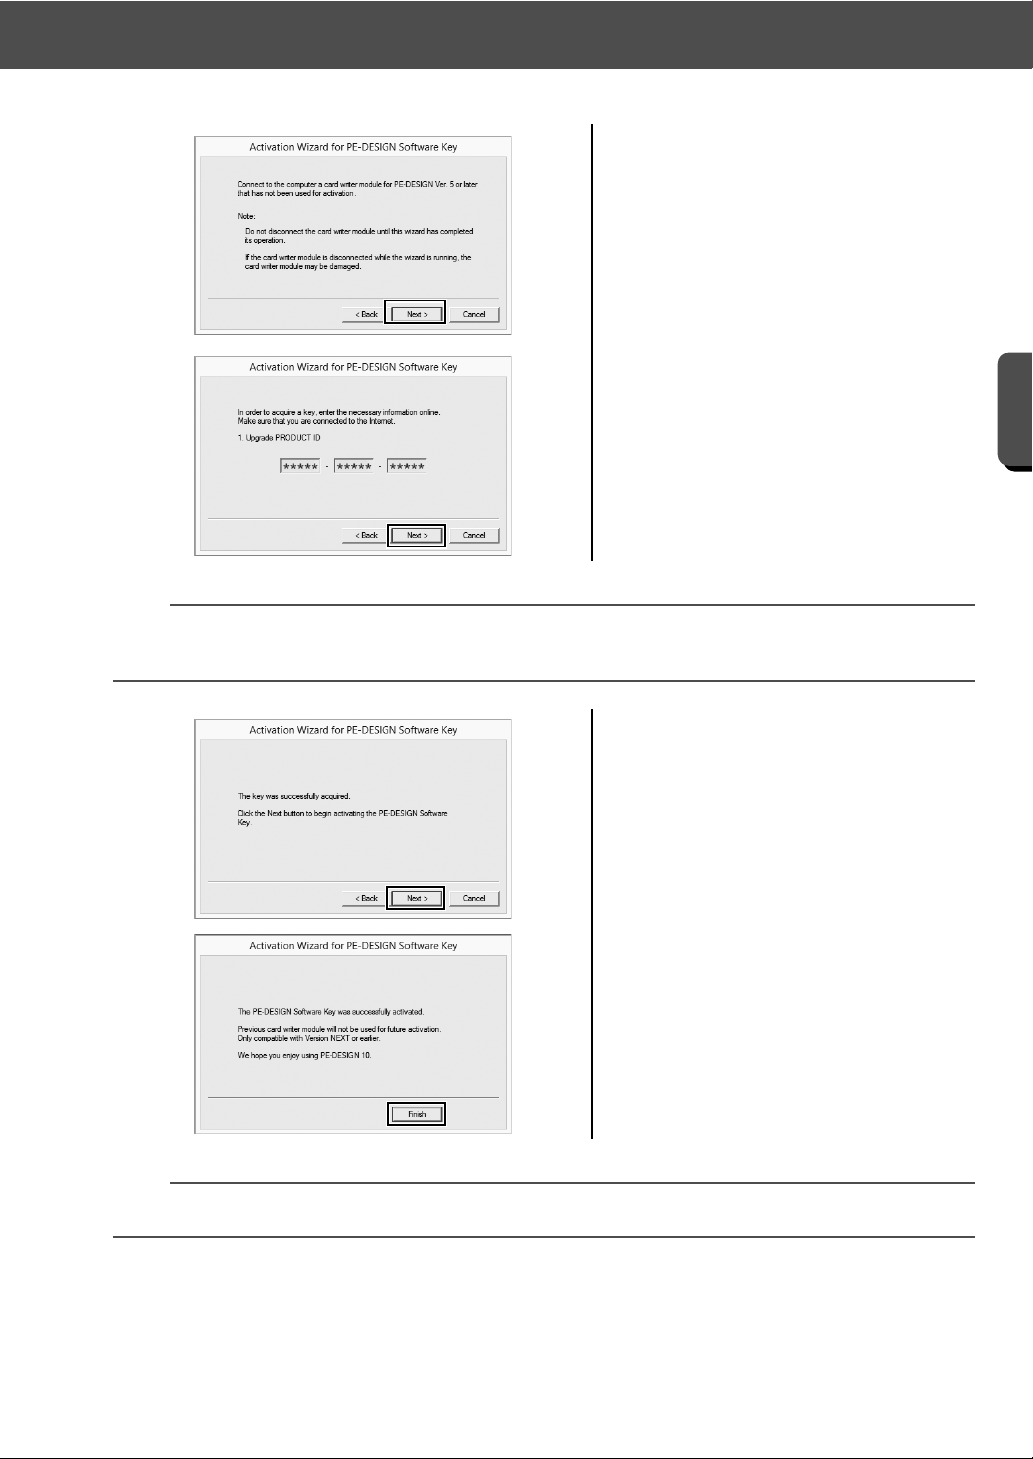
9 Connect USB card writer module
compatible with PE-DESIGN Version
5, 6, 7, 8 or NEXT to the computer,
and then click [Next].
→ The entered PRODUCT ID is
displayed for confirmation before
acquiring the activation key.
10 Click [Next] to access our server
through the Internet and retrieve the
activation key.
→ After the activation key has been
successfully retrieved, the following
dialog box appears.
a
If a firewall is being used, set it so that the Internet can temporarily be accessed while the activation key is
being obtained.
11 Click [Next] to begin activating the
"PE-DESIGN Software Key".
→ If the activation has been
completed successfully, the dialog
box shown below appears.
12 Click [Finish].
a
If a warning appears at any time, follow the instructions that are displayed.
12
Page 22
Installation
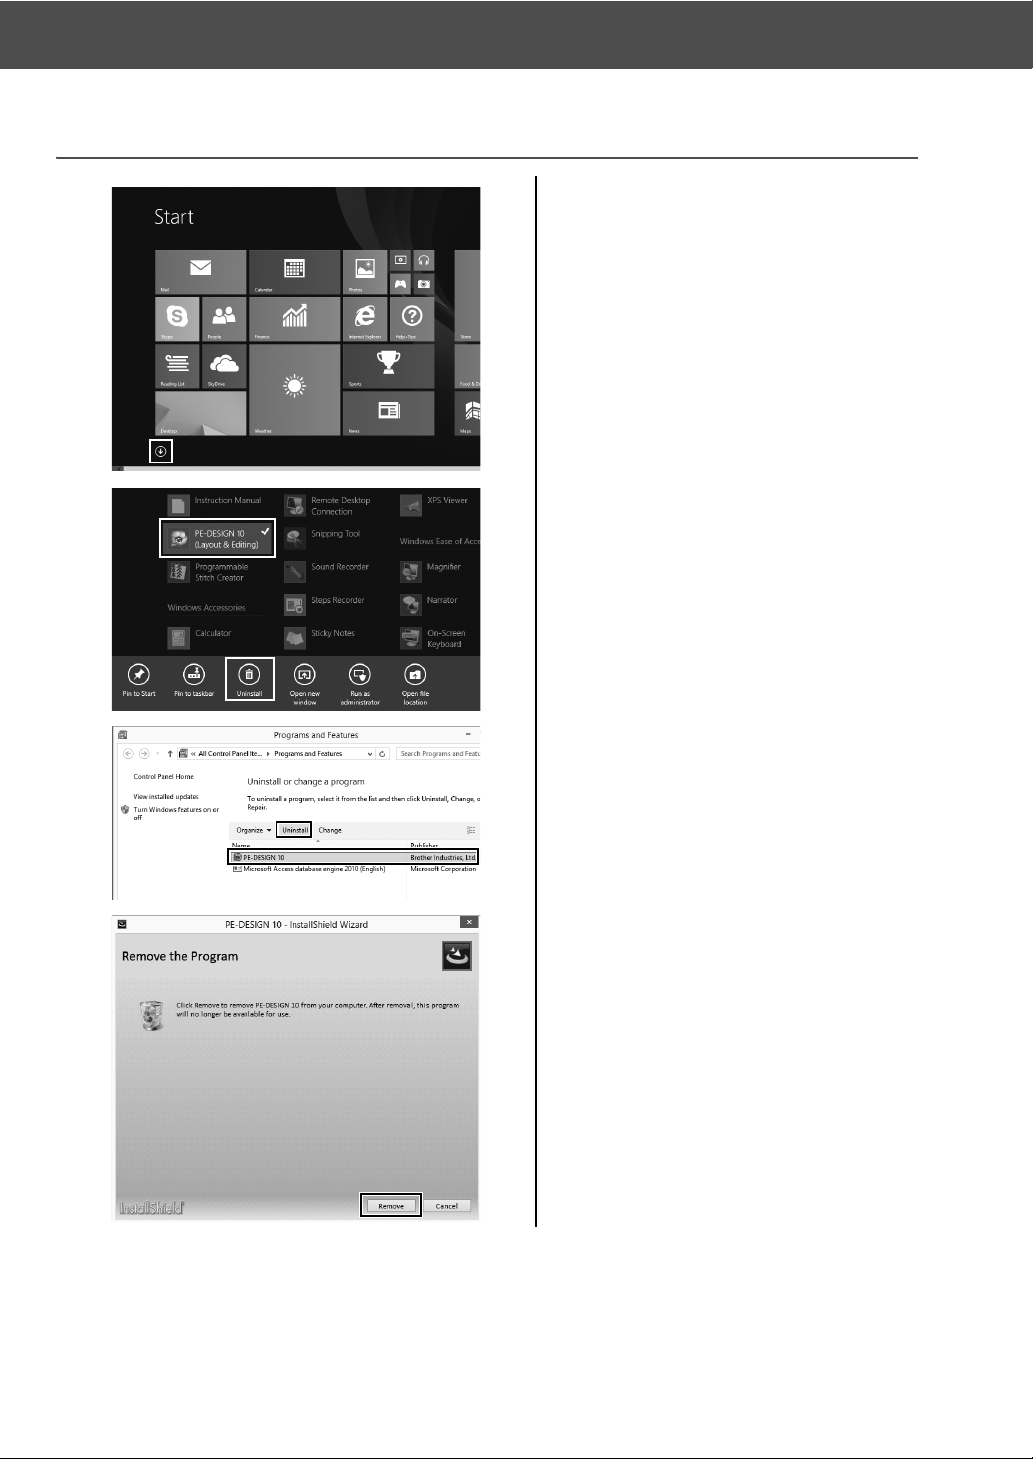
Uninstalling the Software
1 Position the mouse pointer in the
[Start] screen to display the down
arrow in the lower-left corner of the
screen, and click it.
→ The list of applications appears.
2 Right-click [PE-DESIGN 10 (Layout &
Editing)], which appears under the
title [PE-DESIGN 10].
→ The taskbar appears at the bottom
of the screen.
3 Click [Uninstall] in the taskbar to run
the application as an administrator.
→ The [Programs and Features]
window appears.
4 In the [Programs and Features]
window, select [PE-DESIGN 10] and
click [Uninstall].
→ A dialog box appears.
5 Click [Remove] to uninstall the
application.
→ The following message appears
shortly after uninstallation begins.
13
Page 23
Installation
Getting Started
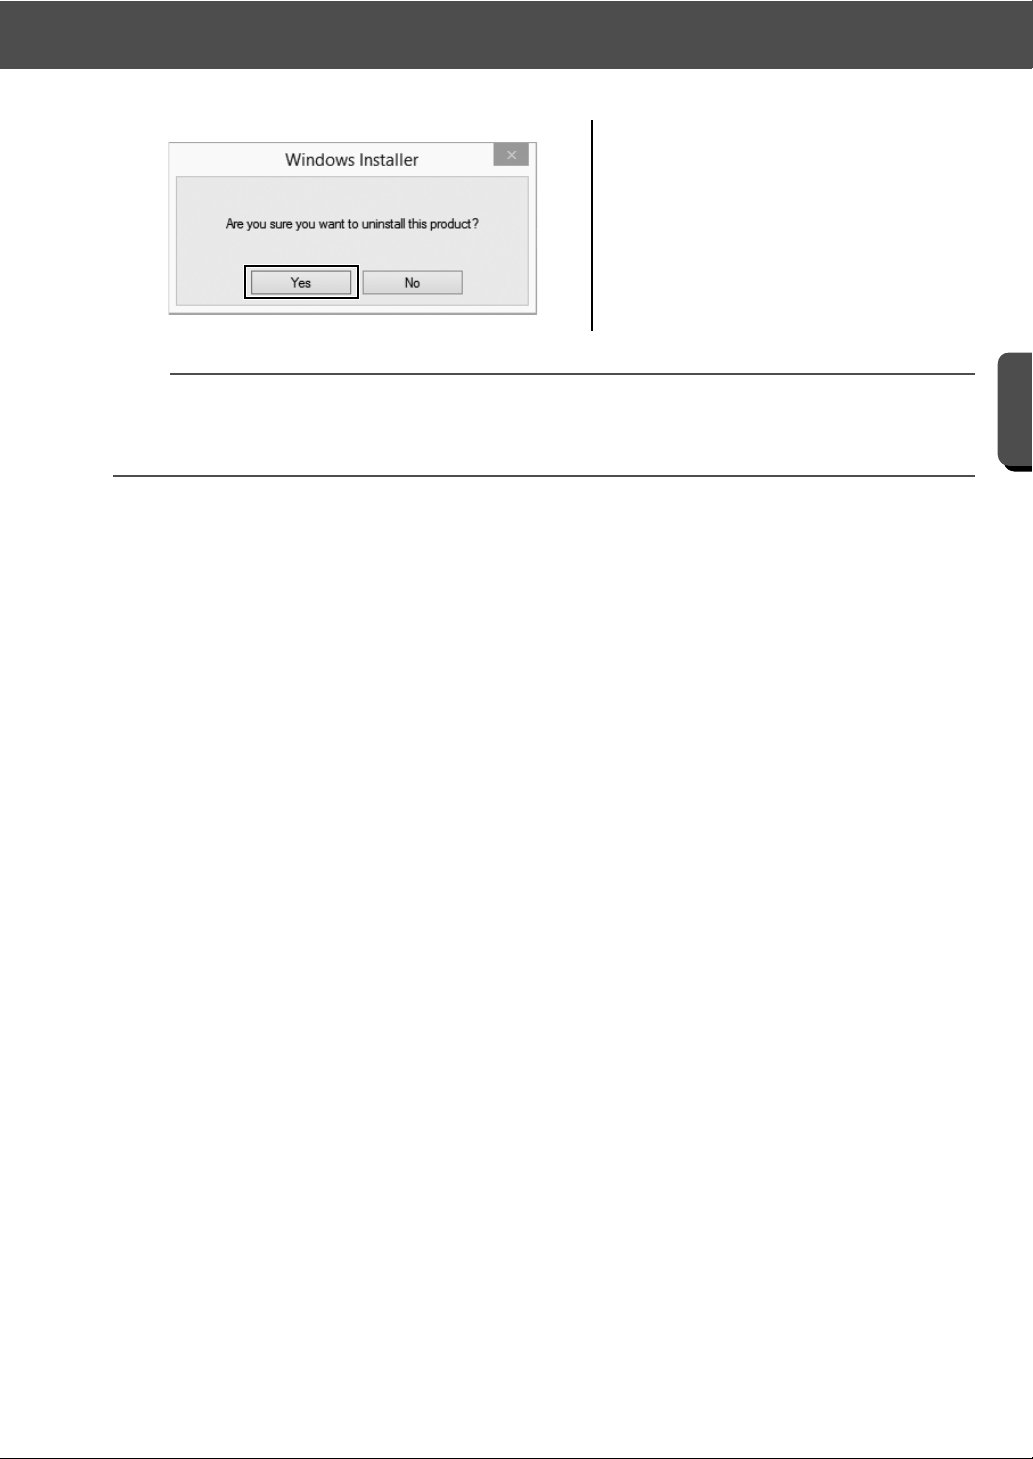
6 Click [Yes].
→ If the software has been
successfully uninstalled, a dialog
box appears.
7 Click [Finish].
b
• The uninstallation procedure is described for Windows® 8.1.
• For Windows Vista® and Windows® 7, click the [Start] button, then [Control Panel]. Select [Programs
and Features] in the [Control Panel] window. Select this software, and then click [Uninstall].
14
Page 24

Technical Support/Service
Technical Support/Service
Technical Support
If a problem occurs, click or [Help] in the screen and select [Customer Support] to visit the "Brother
Solutions Center" at (http://support.brother.com/), where you can find causes and solutions to problems,
answers to frequently asked questions and information for software updates.
Contact technical support if the problems are not addressed. Please check the company web site (http://
www.brother.com/) to find the technical support in your area.
a
Before contacting web site:
1) Have your Windows® operating system updated to the most current version.
2) Find the make and model number of the computer that you are using as well as the Windows
operating system version.
3) Obtain information about any error messages that appear. This information will help expedite the
processing of your inquiries.
4) Check and update the software to the latest version.
®
Online Registration
If you wish to be contacted about upgrades and provided with important information such as future product
developments and improvements, you can register your product online by following a simple registration
procedure.
Click [Online Registration] on the menu of [Layout & Editing] to start up the installed Web browser
and open the online registration page on our Web site.
http://www.brother.com/registration/
a
Online registration may not be available in some areas.
15
Page 25

Checking for the Latest Version of the Program
Getting Started
Checking for the Latest Version of the
Program
1 Click in [Layout & Editing], then
[Check for Updates].
→ The software is checked to
determine whether or not it is the
latest version.
2 If the message shown on the left
appears, click [OK].
The latest version of the software is
being used.
3 If the message shown on the left
appears, click [Yes] to start
downloading the latest version of
the software from the Web site.
a
• This feature cannot be used if the computer is not connected to the Internet.
• It may not be possible to check for the latest version if a firewall is turned on. Turn off the firewall, and
then try performing the operation again.
• Administrator privileges are required.
b
If the [Always check for most recent version at startup] check box is selected, the software is checked
at startup to determine whether or not it is the latest version.
16
Page 26

Creating the Desired Embroidery
to embroider an
image file that I
have.
→ page 55
to see various
sample patterns.
→ page 22
a sample project
that I can follow.
→ page 29
to use a photo
or illustration.
→ page 55
to enter text.
→ page 34
a design template.
→ page 40
to enjoy arranging
patterns.
→ page 29
to rotate patterns.
→ page 23
to enlarge/reduce
patterns.
→ page 23
to move patterns.
→ page 23
Pattern
Key Features of Successful Embroidery
Design
In order to complete your embroidery project, it is necessary to become proficient in performing operations
using the following key features. PE-DESIGN is loaded with tools and functions to assist you in these "key"
steps. These enable you to achieve your project goals.
I want …
Visualizing the
finished project
Creating patterns
I want …
I want …
Arranging patterns
17
Page 27

Creating the Desired Embroidery Pattern
Adding colors
to simulate color
schemes.
→ page 24
to change color
combination.
→ page 36
to make the pattern
more expressive.
→ page 42
→ page 50
to change the sew
types for patterns.
→ page 25
to choose the
sewing order.
→ page 26
→ page 67
to preview the
finished embroidery.
→ page 26
to know what I can
do with the data.
→ page 26
to manage
embroidery data I
create.
→ page 27
to save my
favorite designs.
→ page 28
to embroider with
my embroidery
machine.
→ page 27
Key Features of Successful Embroidery Design
I want …
I want …
Enhancing with
sewing attributes
I want …
Creating embroidery
data
I want …
Embroidering
18
Page 28

Turning Your Ideas Into
Embroidery
Let's look at the basic sequence using each key feature of embroidery design in order to
create an embroidery project.
Starting Applications
PE-DESIGN provides five applications helpful with embroidery design. First, let's start up [Layout & Editing],
which assists you in all "key" processes for creating an embroidery project from importing pattern, shape,
image and text elements to checking the created/edited embroidery data.
Layout & Editing:
Provides all function necessary to create
embroidery
Design Center:
Creates embroidery data from an image
Design Database:
Manages created/edited embroidery data
Programmable Stitch Creator:
Allows different stitch patterns to be created
Font Creator:
Creates original fonts
Practical Exercise a
Starting up Layout & Editing
1 Plug the "PE-DESIGN Software Key"
into the computer.
Close the [AutoPlay] dialog box that
appears.
2 Click the down arrow in the lower-
left corner of the [Start] screen.
→ A list of all applications appears.
3 Click [PE-DESIGN 10 (Layout &
Editing)], which appears under the
title [PE-DESIGN 10].
→ [Layout & Editing] starts up, and
the startup wizard appears.
b
For Windows® 7 users, click → [All Programs] → [PE-DESIGN 10] → [PE-DESIGN 10 (Layout &
Editing)].
19
Page 29

Using the Startup Wizard
Turning Your Ideas Into Embroidery
Easily creates embroidery
patterns by using wizards
Provides tips for display,
hoop, and fabric settings
Allows built-in patterns and
text to be used
Displays detailed information for
operations
Easily recalls previously
used patterns
Manages embroidery data
Using the Startup Wizard
The startup wizard allows you to access the desired functions and files with a single click.
Practical Exercise b
Using preset settings
1 Click [Set Hoop Size and Fabric] in
the startup wizard window.
→ [Design Settings] dialog appears.
2 Click the [Design Page] tab, and
then specify the display settings.
For this example, set the [Design
Page] size to a [Hoop Size] of "130 ×
180 mm", and then click [OK].
→ The [Fabric Selector] dialog box
appears.
3 Click [OK].
20
Page 30

Understanding the Layout & Editing Window
Menus and tools
Viewing
sewing order
Select the desired commands or tools
grouped by functionality in the ribbon.
Check the actual sewing order of each
embroidered part of the pattern.
Importing attribute
settings and patterns
Checking
embroidery data
View patterns to be imported, or
detailed settings for colors, sew types
and text.
View an embroidering simulation of
the created/edited pattern.
Understanding the Layout & Editing
Window
On closing the startup wizard, the main (Layout & Editing) window appears. From this window, all functions
and tools necessary to finish your embroidery project are available.
Practical Exercise c
Displaying the [Import] pane
21
1 Click the [Import] tab on the right
side of the window.
→ A thumbnail list of patterns that can
be imported appears.
2 Or, click the [Home] tab on the
upper-left of the window. Click
[Import Patterns] in the [Import]
group, and then click [from Design
Library] in the menu.
Page 31

Importing Patterns
Turning Your Ideas Into Embroidery
Following instructions
Using the Photo Stitch wizard
By using the image-importing wizards available from the [Image]
tab, your photos can be easily converted into embroidery data.
Dragging
From the
Import pane
Shapes, text, design templates and
more can be reused simply by
dragging them from the pane.
Using
path tools
Using the Text and
Shapes tools
Enhance your designs by using
input tools to intuitively draw
shapes and lines.
Importing Patterns
Begin creating embroidery patterns by first importing the various elements of the design into the editing area.
Patterns, shapes and text can easily be imported, and your favorite photo can be converted to embroidery
data by using the "Image to Stitch" functions and tools available in the [Image] tab.
Practical Exercise d
Importing outline shapes
1 Select [Outline Shapes] from the
[From] selector of the [Import] pane.
2 Select [OL_leaf06.pes] from the
[Leaves] category, and drag it into
the [Design Page].
3 Select [OL_flower01.pes] from the
[Floral] category, and drag it into the
[Design Page] so that it overlaps the
first pattern slightly.
22
Page 32

Laying Out Patterns
Resizing pattern
Rotating pattern
Moving pattern
Laying Out Patterns
After importing the patterns, consider how you would move them around to customize the layout. The
patterns can be not only rearranged, but also enlarged/reduced or rotated simply by dragging them. The
more advanced functions to customize the arrangement are also available in the application.
Practical Exercise e
Arranging outline shapes
1 Drag the pointer to draw a selection
frame around the two patterns to be
selected.
2 Click [Duplicate] in the [Clipboard]
group.
→ The duplicate appears, overlapping
the original pattern and offset down
and to the right.
3 Select the duplicate pattern, and
drag it into the desired position.
4 Drag the red dot at the top of the
pattern to the right.
→ The duplicate pattern is rotated
clockwise.
23
Page 33

Adding Colors to Patterns
Turning Your Ideas Into Embroidery
Changing colors
Using the [Color] pane, you can
simulate and create a customized color
scheme simply by selecting the desired
color from the color palette.
Adding Colors to Patterns
Change the color of each pattern part as desired. In order to beautifully finish an embroidery design, the color
scheme of the pattern must be considered.
Practical Exercise f
Changing colors
1 Click the [Home] tab, and then select
.
2 Hold down the <Ctrl> key and click
each of the two floral patterns.
3 Click the [Color] tab, and then click
[To list mode] at the bottom of the
pane.
The [Color] pane in thread list
mode appears.
4 Select [YELLOW] from the list as the
region color.
Both the line color and region color for
shape patterns can be specified.
The color of the floral shapes
changes to yellow.
24
Page 34

Specifying Pattern Sew Types
Selecting from various sew types
Sew types can be specified depending the types of
patterns. Apply the desired type to the outlines and
regions for changing the appearance of the pattern.
Specifying Pattern Sew Types
Over twenty sew types can be applied to the lines and regions of a pattern, improving the look of the project.
By adding detailed settings to the various stitching patterns, there is no limit to the range of ideas.
Practical Exercise g
Changing the sew type
1 Hold down the <Ctrl> key and click
the two floral patterns.
2 Select the [Shapes] tab.
3 Select [Concentric Circle Stitch]
from the [Region sew type] selector
in the [Sew] group.
→ The stitching pattern for the inside
regions of the shapes is changed.
25
Page 35

Viewing a Pattern as Embroidery Data
Turning Your Ideas Into Embroidery
Previewing finished embroidery
The pattern can be previewed in three modes. Use [Stitch View] to check
the stitching or [Realistic View] to see how the sewn pattern will appear.
Solid View
Optimizing the sewing order
View the sewing order in the [Sewing Order]
pane, and adjust the order to reduce the
number of thread color changes and jump.
Viewing stitching in simulator
How the pattern will be sewn by the
embroidery machine can be reproduced.
Check the movement of stitching.
Stitch View Realistic View
Viewing a Pattern as Embroidery Data
View the pattern as embroidery data when you near completion of a project that you have visualized, for
example, to check how it will appear when sewn by the machine or what is the best sewing order.
Practical Exercise h
Changing the sewing order
1 Hold down the <Ctrl> key and click
the duplicate leaf pattern (frame 5
and 6) in the [Sewing Order] pane.
2 Drag the selected frames between
frames 2 and 3.
3 Click at the bottom-right of the
screen to begin the stitching
simulation.
26
Page 36

Sewing the Pattern
Transferring to embroidery
machine
The data transfer method can be
selected from a menu available in the
[Home] tab. Select the method
suitable for your operating
environment.
USB media
USB cable
Managing data
The create/edited embroidery pattern
can be saved as data and recalled at
any time. The pattern can also be
output in a variety of formats.
Save
Export
Print
Sewing the Pattern
After checking the embroidery data you have designed, transfer it to the embroidery machine to sew. Select
the method appropriate for the operating environment of your embroidery machine.
Practical Exercise i
Transferring to an embroidery machine using USB media
1 Plug the commercially available USB
media into the computer.
2 Click [Send] in the [Sew] group of
the [Home] tab, select [Send to USB
Media] and then click the
appropriate drive.
→ When the patterns have been
copied to the USB media, the
message appears.
media.
port on the embroidery machine,
and then import the data.
For details on importing data onto the
embroidery machine, refer to the
manuals supplied with it.
27
3 Click [OK], and then unplug the USB
4 Insert the USB media into the USB
Page 37

Exiting the Application
Turning Your Ideas Into Embroidery
Saving/Opening/Printing pattern data file
1 Click in the upper-left corner of
the window.
→ The [File] menu appears.
2 Select the desired command from
the menu.
A list of the most recently used files,
starting from the top, appears under
[Most Recently Used Files].
Exiting the Application
Practical Exercise j
Exiting Layout & Editing
1 Click in the upper-left corner of
the window.
→ The [File] menu appears.
2 Click [Exit] in the lower-right corner
of the menu window.
The application can also be closed by
clicking in the upper-right corner
of the [Layout & Editing] window.
28
Page 38

Creating Various Embroidery
Importing and rotating a pattern
Step 1
Duplicating a pattern
Step 2
Flipping a pattern
Step 3
Arranging patterns
Step 4
Designs
This section will take a project introduced in the beginning of this guide as an example to describe the
functions, tools and operations for creating a well-designed embroidery pattern. Learn practical skills
and expand your range of ideas.
Practical Application a
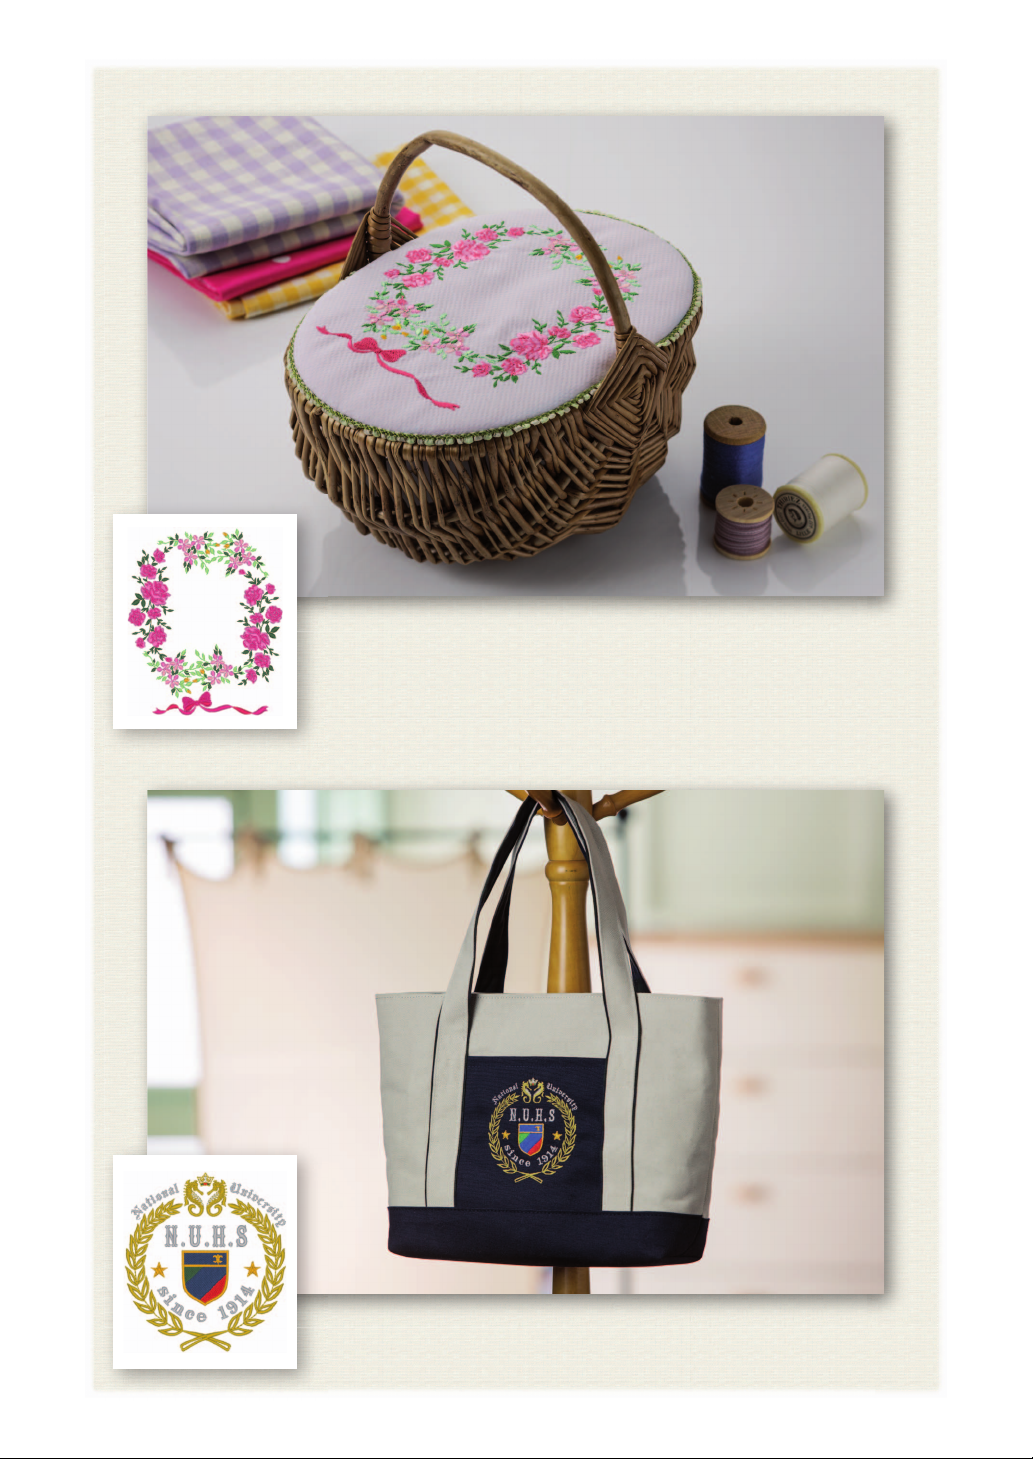
Floral wreath – Arranging stitch patterns –
About stitch patterns
We recommend using a built-in stitch pattern in its original size, or resizing
it only slightly.
Stitch patterns contain a collection of information including needle drop
points and thread color order. Upon being resized, the stitching becomes
more dense or light while maintaining the unchanged needle drop point
pattern. These changes may have an influence on the quality of your
embroidery project.
Setting the Design Page size
Click and select [Design Settings] in the command list. In the dialog box that appears, change [Design
Page] size to "130 × 180" mm. (c page 20)
29
Page 39

Floral wreath – Arranging stitch patterns –
Creating Various Embroidery Designs
a
Step 1
Importing and rotating a pattern
Practical Application a
1 In the [Import] pane, select [Design
Library] from the [From] selector,
then [Floral2] from the [Category]
selector.
2 Select [33100110.pes] from the list of
patterns displayed in the pane, and
then drag it into the [Design Page].
3 While holding down the <Shift> key,
drag the red dot at the top of the
pattern to the right to rotate the
pattern 90° clockwise (a).
Holding down the <Shift> key while
dragging the red dot rotates the pattern
in 15° increments.
30
Page 40

Practical Application a
b
Floral wreath – Arranging stitch patterns –
Step 2
Duplicating a pattern
1 As in "Step 1", import pattern
[33103503a.pes] from the [Floral2]
category in the [Import] pane.
2 After selecting the pattern, click
[Duplicate] in the [Clipboard] group
to duplicate the pattern.
The [Duplicate] command can also be
selected from the menu that appears
after right-clicking the selected pattern.
→ The duplicate appears, overlapping
the original pattern and offset down
and to the right.
31
\
3 Rotate the original pattern 60°
counterclockwise (b).
Page 41

Creating Various Embroidery Designs
Step 3
c
Flipping a pattern
Practical Application a
Floral wreath – Arranging stitch patterns –
1 After selecting the duplicate pattern,
click [Arrange] in the [Edit] group,
select [Flip], and then click [Flip
Horizontally].
The [Flip] command can also be
selected from the menu that appears
after right-clicking the selected pattern.
→ The selected pattern is flipped
horizontally.
2 Rotate the flipped pattern 90°
clockwise (c).
32
Page 42

Practical Application a
a
b
c
a’
c’
b’
Floral wreath – Arranging stitch patterns –
Step 4
Arranging patterns
1 Arrange the imported patterns to
create a circle as shown in the figure
(left), using the [Duplicate], [Rotate]
and other [Arrange] commands.
2 Select [no77_2.pes] in the [Lace &
Ribbon] category of the [Import]
pane, and then drag it below the
flower patterns.
33
Page 43

Practical Application b
Creating Various Embroidery Designs
Entering text
Step 1
Changing text color and sew type
Step 2
Importing transformed text
Step 3
Aligning patterns
Step 4
Team Jersey numbers – Combining text –
Practical Application b
Team Jersey numbers – Combining text –
About text patterns
130 built-in fonts are available in text pattern. Most of them can be divided
into blocks according to the shape of the character, and the sewing
direction is different for each block. This allows the patterns to appear
more like three-dimensional and manual embroidery. Their shape consist
of a line (outline) and a region (inside area), each of which can be set to a
different sew type and color.
34
Page 44

Practical Application b
Team Jersey numbers – Combining text –
Step 1
Entering text
1 In the [Import] pane, select [Text]
from the [From] selector, then [Serif
Fonts] from the [Category] selector.
2 Select [TN_001.pes] (Serif 01), and
then drag it into the [Design Page].
3 Click the [Text Attributes] tab.
4 After clicking in the text field to enter
input mode, delete the text "TEXT",
type in "10", and then press the
<Enter> key.
5 After selecting the text "10", click
the [Text] ribbon tab.
6 Click the down arrow to the right of
the [Text Size] selector in the [Font]
group, and then select "30.0" from
the list.
35
Page 45

Team Jersey numbers – Combining text –
Creating Various Embroidery Designs
Step 2
Changing text color and sew type
1 Click the [Text Outline Sew Type]
2 Click the [Color] tab, select the
Practical Application b
selector in the [Sew] group, and then
click [Zigzag Stitch] in the list.
[Line] check circle, and then click
[To list mode] at the bottom of the
pane.
The [Color] pane in thread list
mode appears.
36
Page 46

Practical Application b
Team Jersey numbers – Combining text –
3 Select [ULTRAMARINE] from the list.
4 Select the [Region] check circle in
the [Color] pane, and then select
[RED] in the color palette.
37
Page 47

Team Jersey numbers – Combining text –
Creating Various Embroidery Designs
Step 3
Importing transformed text
Practical Application b
1 In the [Import] pane, select
[Transformed] from the [Category]
selector.
2 Select [TT_001.pes] (arched text),
and then drag it into the [Design
Page].
3 Click the [Text Attributes] tab.
4 After clicking in the text field to enter
input mode, retype in "TEAM" and
then press the <Enter> key.
5 After selecting the text "TEAM",
click the [Text] ribbon tab.
6 As in "Step 2", select [Triple Stitch]
from the [Text Outline Sew Type]
selector in the [Sew] group and
[RED] as the line color.
7 Select [ULTRAMARINE] as the
region color.
8 After selecting the text "TEAM" with
the [Select] tool, hold down the
<Shift> key and drag a black dot in a
corner of the pattern to enlarge the
pattern to the desired size.
38
Page 48

Practical Application b
Team Jersey numbers – Combining text –
Step 4
Aligning patterns
9 Drag to adjust the radius of the
circle that the text is formed on.
1 Drag the pointer to draw a selection
frame around the patterns "TEAM"
and "10" to be selected.
2 Click the [Home] tab.
3 Click [Arrange] in the [Edit] group,
select [Layout], and then click
[Center] under [Horizontal].
39
Page 49

Practical Application c
Creating Various Embroidery Designs
Starting the wizard
Step 1
Editing the text
Step 2
Outputting the design data
Step 3
Emblem – Using the Template wizard –
Practical Application c
Emblem – Using the Template wizard –
Using the wizard
Wizards for importing photos and using design templates can be started
from the startup wizard that appears after the application is started, and
wizards for creating appliqués and patches can be started from the
[Home] tab in the main window of [Layout & Editing]. By following the
application instructions to enter the necessary information, even a
beginner can create a high-quality finished project.
Step 1
Starting the wizard
1 In the [Import] pane, select
[Template] from the [From] selector,
then [Sample] from the [Category]
selector.
→ Thumbnails of the templates in the
selected category appear.
2 Select the thumbnail
[TP_emblem01.pes], and then click
[Template Wizard].
→ The [Template Wizard] starts up.
40
Page 50

Practical Application c
Emblem – Using the Template wizard –
Step 2
Editing the text
1 Click "SUMS" in the text edit box,
and then click [Edit Text].
→ The text "SUMS" is highlighted and
can be edited.
2 Use the keyboard to type "N.U.H.S",
and then press the <Enter> key.
→ The text "since 1831" in the second
row is highlighted and can be
edited.
Step 3
Outputting the design data
3 Use the keyboard to type "since
1914", and then press the <Enter>
key.
→ The new text appears in the
preview on the left side of the dialog
box.
4 Click [Next].
→ The [Output] dialog box appears.
1 Click the [Send to] selector to select
where to output the data, and then
click [USB Media] in the appropriate
drive.
2 Click [Send].
→ The data for the template design is
copied to the selected USB media,
and then the message "Finished
outputting data." appears.
41
3 Click [OK].
Transfer the data to an embroidery
machine to sew your project.
Page 51

Practical Application d
Creating Various Embroidery Designs
Drawing base circles
Step 1
Drawing floral pattern (basic mode)
Step 2
Drawing floral pattern (detailed mode)
Step 3
Drawing using offset lines
Step 4
Floral patterns – Creating a floral pattern from a shape –
Practical Application d
Floral patterns – Creating a floral pattern
from a shape –
About line sew types
Shapes and text patterns consist of lines (outlines) and regions (areas
within the outline), each of which can be set to a different sew type and
color. In addition to the many line sew types available with the application,
greater variation is possible by using the motif stitch, which can be
customized.
Step 1
Drawing base circles
1 Click , and then select [Design
Settings] from application button
menu.
→ The [Design Settings] dialog box
appears.
2 Select the [Rotate 90 Degrees] check
box under the [Hoop Size] setting,
and then click [OK].
→ The [Design Page] orientation is
changed to landscape.
42
Page 52

Practical Application d
Floral patterns – Creating a floral pattern from a shape –
3 In the [Import] pane, select [Outline
Shapes] from the [From] selector
and [Basic Shapes] from the
[Category] selector, and then import
[BS_shapes01.pes] (circle shape).
4 Select the shape, and then click the
[Home] tab.
5 Click [Arrange] in the [Edit] group,
and then click [Size] in the menu.
→ The [Size] dialog box appears.
6 Set [Width] to "50.0" mm, and then
click [OK].
When the [Maintain aspect ratio]
check box is selected, the height-towidth proportion of the shape is
maintained.
→ The diameter of the circle pattern is
set to 50 mm.
7 Select the shape, and then click the
[Shapes] tab.
8 Click the [Region sew type] selector
in the [Sew] group, and then click
[Not Sewn (Region)] in the list.
→ Region sewing is turned off, and
only the outline of the circle
appears.
9 Create two copies of the circle
pattern, and arrange all the three in a
row.
43
Page 53

Floral patterns – Creating a floral pattern from a shape –
Creating Various Embroidery Designs
Step 2
Drawing floral pattern (basic mode)
1 Select the leftmost base circle
2 Click [Create Floral Pattern] in the
3 Click the pattern in the upper-left
4 After selecting the base circle
Practical Application d
pattern created in "Step 1", and then
click the [Shapes] tab.
[Edit] group.
The [Floral Pattern] (basic mode)
dialog box appears.
corner, drag the slider to set
[Density] to "4", and then click [OK].
The floral pattern is created
according to the specified settings.
pattern, click the [Shapes] tab.
5 Click the [Line sew type] selector in
the [Sew] group, and then click
[Candlewicking Stitch] in the list.
The selected stitch type is applied
to the outline of the circle pattern.
6 Click the [Color] tab, and then
switch the pane to thread list mode.
7 Select [ULTRAMARINE] from the list.
8 Click the [Sewing Attributes] tab,
and then click [To Expert mode] at
the bottom of the pane.
9 Specify the following settings.
Density Medium
Size 3.0 mm
Spacing 1.0 mm
Start/End Type Feed
44
Page 54

Practical Application d
Floral patterns – Creating a floral pattern from a shape –
10 After selecting the floral pattern,
hold down the <Shift> key and drag
a black dot in a corner of the pattern
to reduce its size so that the floral
pattern fits into the circle outline.
11 After selecting the floral pattern,
specify the line sew type, color and
following sewing settings by
repeating steps 4 through 9.
Line sew type Triple Stitch
Color SKY BLUE
Run pitch 2.0 mm
12 In the [Sewing Order] pane, drag
frame 4 (floral pattern) to the top
(above the circle outline).
45
Page 55

Floral patterns – Creating a floral pattern from a shape –
Creating Various Embroidery Designs
Step 3
Drawing floral pattern (detailed mode)
1 Select the rightmost base circle
pattern created in "Step 1", and then
click [Create Floral Pattern] in the
[Shapes] tab.
2 Click [To detailed mode] in the
lower-left corner of the dialog box to
switch to detailed mode.
3 Drag the sliders to set [Density] to
"10" and [Pattern] to "85", and then
click [OK].
Practical Application d
4 Select the base circle pattern, and
then set the [Line sew type] to
[Chain Stitch].
5 Click the [Color] tab, and then click
[VERMILLION] in the color thread
list.
6 Click the [Sewing Attributes] tab,
and specify the following settings.
Stitch Type
Size 3.5 mm
Time 5 times
Arrange
Start/End Type Feed
7 Select the floral pattern, and then
reduce it so that the floral pattern
fits into the circle outline.
8 After selecting the floral pattern,
specify the line sew type, color and
following sewing settings by
repeating steps 4 through 9 in
"Step 2".
Line sew type Triple Stitch
Color TANGERINE
Run pitch 2.0 mm
46
Page 56

Practical Application d
Floral patterns – Creating a floral pattern from a shape –
9 In the [Sewing Order] pane, drag
frame 5 (floral pattern) between
frames 3 and 4.
Step 4
Drawing using offset lines
1 Select the center base circle pattern
created in "Step 1", and then click
the [Shapes] tab.
2 Click [Create Offset Lines] in the
[Edit] group.
→ The [Offset Line Settings] dialog
box appears.
3 In the dialog box, set [Offset
Direction] to [Inward], [Spacing] to
"5.0" mm, and [Offset Line Count] to
"2", and then click [OK].
→ Two concentric circles are created
at 5-mm intervals inside the base
circle pattern.
47
Page 57

Practical Application d
Creating Various Embroidery Designs
Floral patterns – Creating a floral pattern from a shape –
4 Select the base circle pattern
(outermost).
5 Click the [Shapes] tab.
6 Select [Motif Stitch] from the [Line
sew type] selector in the [Sew]
group.
7 Click the [Color] tab, and then click
[MOSS GREEN] in the color thread
list.
8 Click the [Sewing Attributes] tab,
and then click .
→ The dialog box appears.
9 Select the desired motif stitch
pattern from the thumbnails in the
[Browse] dialog box, and then click
[OK].
For this example, select [motif001].
10 Specify the following settings for the
motif pattern.
Motif height 4.0 mm
Motif width 5.0 mm
H-Arrange
V-Arrange
Offset 0.0 mm
Spacing -0.5 mm
Run pitch 5.0 mm
Start/End Type Feed
11 Specify settings for motif patterns
for the two inner circle patterns by
repeating steps
5 through 10.
48
Page 58

Practical Application d
Floral patterns – Creating a floral pattern from a shape –
■ Second circle pattern from the
outside
Line color LEAF GREEN
Motif pattern
Motif height 5.0 mm
Motif width 5.0 mm
H-Arrange
V-Arrange
Offset 0.0 mm
Spacing 0.0 mm
Run pitch 5.0 mm
Start/End Type Feed
■ Innermost circle pattern
Line color MINT GREEN
Motif pattern
Motif height 6.0 mm
Motif width 6.0 mm
H-Arrange
V-Arrange
Offset 0.0 mm
Spacing -1.0 mm
Run pitch 4.5 mm
Start/End Type Feed
motif011
motif010
49
12 In the [Sewing Order] pane, drag
frames 6 and 7 (inner circle patterns)
between frames 3 and 4.
Page 59

Practical Application e
Creating Various Embroidery Designs
Importing an outline shape
Step 1
Applying patterned stitches to a shape
Step 2
Applying programmable stitches to a shape
Step 3
Applying motif stitches to a shape
Step 4
Heart pattern – Changing the stitching for each shape pattern –
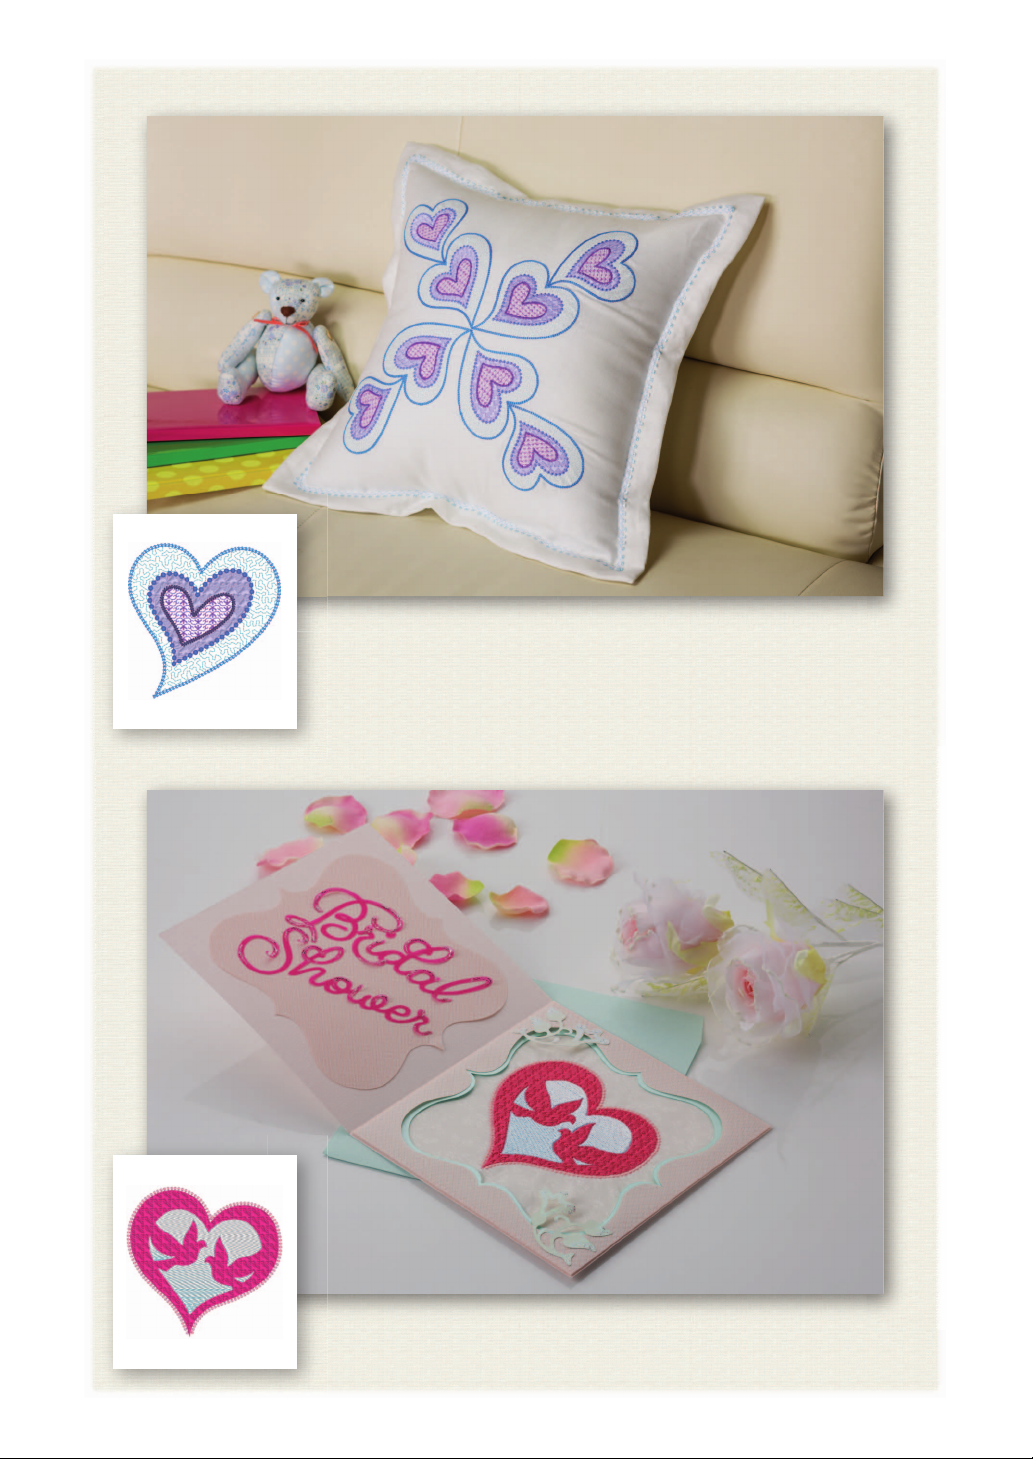
Practical Application e
Heart pattern – Changing the stitching for
each shape pattern –
About region sew types
The sew type for areas within closed outlines of text patterns or shapes
can be specified. You can create both gorgeous and simple projects just by
selecting the desired sew type from a list. The application includes
patterned and motif stitches that can be customized using the
[Programmable Stitch Creator].
Step 1
Importing an outline shape
1 In the [Import] pane, select [Outline
Shapes] from the [From] selector,
then [Events] from the [Category]
selector.
2 Select pattern [OL_heart01.pes], and
then drag it into the [Design Page].
50
Page 60

Practical Application e
Heart pattern – Changing the stitching for each shape pattern –
Step 2
Applying patterned stitches to a shape
1 While holding down the <Ctrl> key,
click the line (frame 2) and region
(frame 1) of the largest heart pattern
arranged in the [Sewing Order] pane.
2 Click at the top of the [Sewing
Order] pane.
3 Click the [Shapes] ribbon tab.
4 Click the [Region sew type] selector
in the [Sew] group, and then select
[Stippling Stitch] in the list.
51
5 Click the [Line sew type] selector in
the [Sew] group, and then select
[Chain Stitch] in the list.
6 Click the [Color] tab, and then
switch the pane to thread list mode.
7 Select the [Line] check circle, and
then click [SKY BLUE] in the list.
Page 61

Creating Various Embroidery Designs
Step 3
Practical Application e
Heart pattern – Changing the stitching for each shape pattern –
8 Click the [Sewing Attributes] tab.
Switch the pane to expert mode, and
then specify the following settings.
■ Line sew
Stitch Type
Size 3.0 mm
Time 5 times
Arrange
Start/End Type Feed
■ Region sew
Run pitch 1.8 mm
Spacing 2.0 mm
Use Motif Off
Applying programmable stitches to a shape
1 Select the second-largest heart
pattern (frames 3 and 4) in the
[Sewing Order] pane.
2 Set a color and sew type for each
shape as follows.
Line sew type
Line color
Region sew type Prog. Fill Stitch
Candlewicking
Stitch
CORN FLOWER
BLUE
52
Page 62

Practical Application e
Heart pattern – Changing the stitching for each shape pattern –
3 Click the [Sewing Attributes] tab,
and then specify the following
settings.
■ Line sew
Density Medium
Size 3.0 mm
Spacing 1.0 mm
Start/End Type Feed
■ Region sew
Under sewing
Density 4.5 line/mm
Direction
Running Stitch
Path
Pull compensation 0.0 mm
Programmable fill
Click , select the desired
pattern in the [Browse] dialog box,
and then click [OK]. For this
example, select [stamp1].
, Medium
Manual,
135 degrees
Fill stitch pattern
Pattern height 7.5 mm
Pattern width 7.5 mm
Direction 0 degree
Offset row, 0 %
stamp1
53
Page 63

Heart pattern – Changing the stitching for each shape pattern –
Creating Various Embroidery Designs
Step 4
Applying motif stitches to a shape
1 Select the smallest heart pattern
Practical Application e
(frames 5 and 6) in the [Sewing
Order] pane.
2 Click the [Shapes] tab.
Line sew type Stem Stitch
Line color PURPLE
Region sew type Motif Stitch
3 Click the [Sewing Attributes] tab,
and then specify the following
settings.
■ Line sew
Width 2.0 mm
Spacing 1.5 mm
Angle 45 degrees
Stitch Type (Triple)
Start/End Type Feed
■ Region sew
Motif pattern
Motif Pattern1 only
Motif height 10.0 mm
Motif width 9.5 mm
H-Arrange
motif074
V-Arrange
H-Offset 0.0 mm
V-Offset 1.0 mm
H-Spacing 0.0 mm
V-Spacing -6.0 mm
54
Page 64

Practical Application f
Importing vector images (SVG files)
Step 1
Displaying hidden objects
Step 2
Decorating the outer heart shape
Step 3
Applying gradation
Step 4
Bird of peace – Applying gradation to a vector image –
Practical Application f
Bird of peace – Applying gradation to a
vector image –
Creating embroidery patterns using images
An embroidery pattern can be created from an image, such as photo or
illustration. Use the [Import from Vector Image] command for converting
WMF, EMF and SVG image files to embroidery patterns. The various
[Stitch Wizard] functions are also available to create embroidery patterns
from BMP, JPG and PNG image files.
Step 1
Importing vector images (SVG files)
1 Click the [Home] tab.
2 Click [Import Patterns] in the
[Import] group, and then select [from
Vector Image] in the menu.
→ The [Open a vector file] dialog box
appears.
55
Page 65

Practical Application f
Creating Various Embroidery Designs
Bird of peace – Applying gradation to a vector image –
3 Select the file to be imported, and
then click [Open].
For this example, we will import
[svg_heart.svg].
→ The image appears in the [Design
Page] as a shape pattern.
Step 2
Displaying hidden objects
1 Click in the toolbar at the top of
the [Sewing Order] pane, and then
click [Hide Objects Not Stitched] in
the menu.
→ Hidden objects that are not to be
stitched appear in the pane.
56
Page 66

Practical Application f
Bird of peace – Applying gradation to a vector image –
Step 3
Decorating the outer heart shape
1 Select the colored area of the heart
shape, and then click [Shapes] tab.
2 Specify a color and sew type for
each shape as follows.
Line sew type Motif Stitch
Line color
Region sew type
Region color DEEP ROSE
3 Click the [Sewing Attributes] tab.
Switch the pane to expert mode, and
then specify the following settings.
■ Line sew
SALMON
PINK
Prog. Fill
Stitch
Motif pattern
Motif height 4.5 mm
Motif width 4.5 mm
H-Arrange
V-Arrange
Offset 0.0 mm
Spacing 0.0 mm
Run pitch 5.0 mm
Start/End Type Feed
■ Region sew
Under sewing
Density 4.8 line/mm
Direction
Running Stitch Path
Pull compensation 0.0 mm
Programmable fill
Pattern
motif063
,
Medium
Manual, 45
degrees
pat13
57
Pattern height 6.0 mm
Pattern width 6.0 mm
Direction 0 degree
Offset row, 0 %
Page 67

Bird of peace – Applying gradation to a vector image –
Creating Various Embroidery Designs
Step 4
Applying gradation
Practical Application f
1 Move the pointer into the [Sewing
Order] pane and drag it to draw a
selection frame around all the inner
patterns, and then click at the
top of the pane.
2 Specify a color and sew type for
each shape as follows.
Region sew type Fill Stitch
Region color LIGHT BLUE
3 Select the [Gradation] check box,
and then click [Pattern].
→ The [Gradation Pattern Setting]
dialog box appears.
4 Select the [Blend] check box on the
right side of the dialog, and then
click (top).
→ The thread color list appears.
58
Page 68

Practical Application f
Bird of peace – Applying gradation to a vector image –
5 Select the color to be used in the
two-color gradation, and then click
[OK].
For this example, select [WHITE].
6 Specify the following settings using
the right side of the [Gradation
Pattern Setting] dialog box.
Density 4.8 line/mm
Direction 0 degrees
7 Select for gradation pattern,
and then click [OK].
8 In the [Sewing Order] pane, drag
frame 2 (heart shape outline) to the
top (above the outer heart shape).
59
Page 69

Practical Application g
Creating Various Embroidery Designs
Splitting patterns
Step 1
Setting a sewing direction
Step 2
Optimizing the sewing order
Step 3
Grouping pattern parts
Step 4
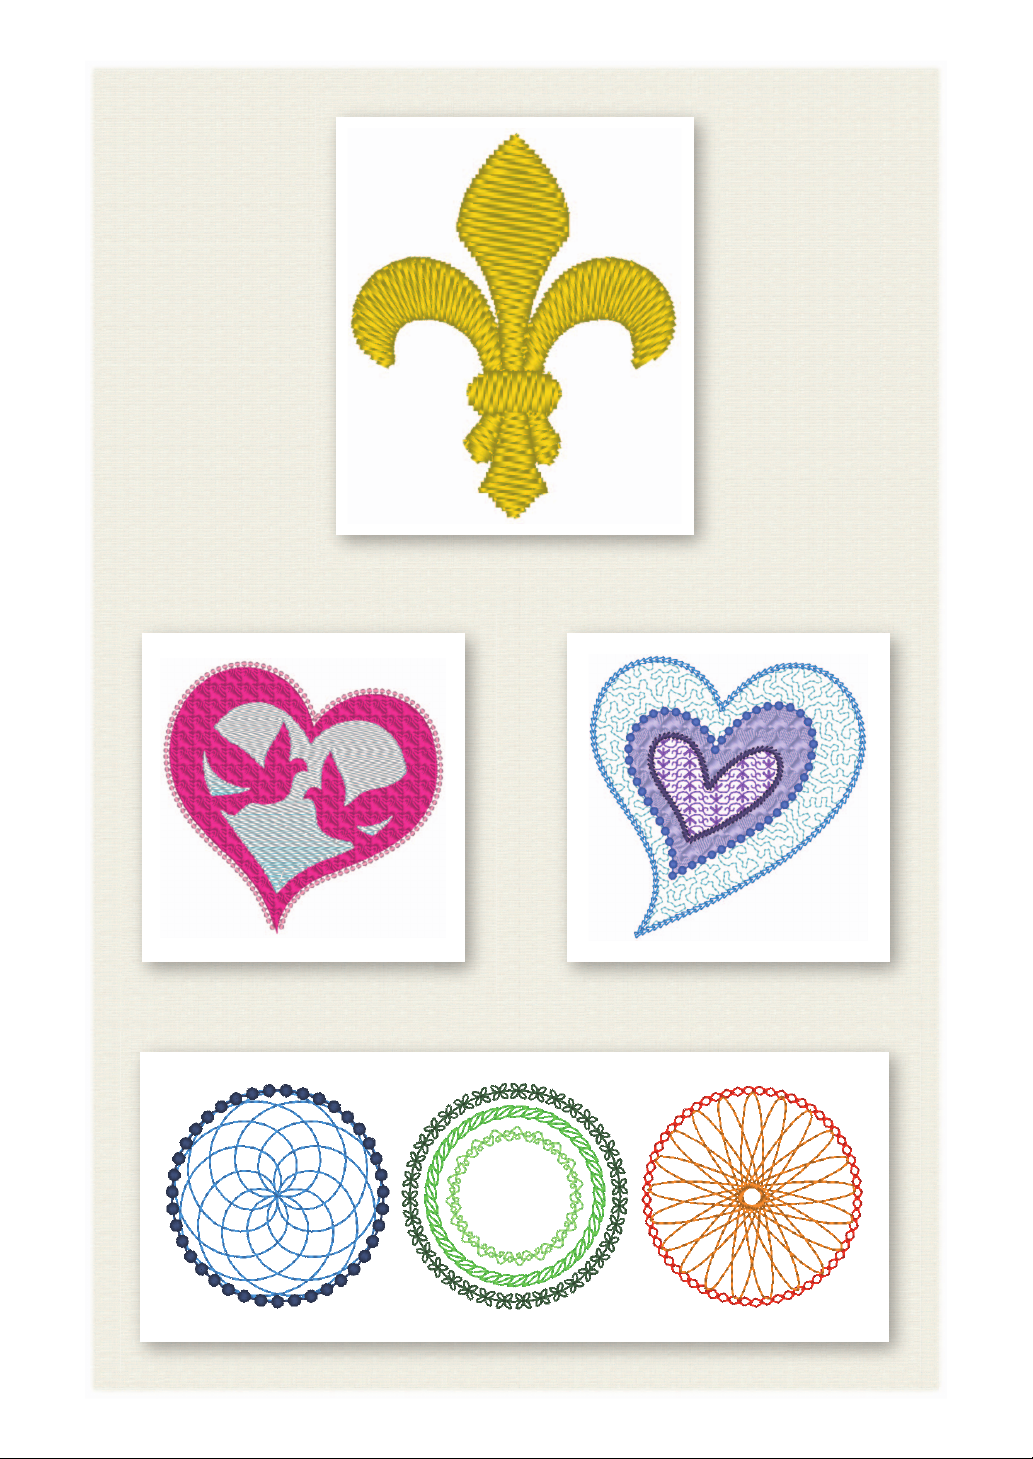
Symbol – Specifying the sewing direction for each separate shape –
Practical Application g
Symbol – Specifying the sewing direction
for each separate shape –
Changing sewing direction
When closed regions are created using [Shapes] tools, a uniform sewing
direction, indicated by a sewing direction line (red arrow), is applied to the
entire region. The direction line can be edited by moving the end points, or
new sewing direction lines can be added. Since the direction can be set
intuitively by dragging it, try various sewing directions to find the optimum
direction for the pattern shape.
Step 1
Splitting patterns
1 Click at the bottom-right of the
screen to switch to the [Stitch View]
mode.
60
Page 70

Practical Application g
a
b
Symbol – Specifying the sewing direction for each separate shape –
2 Click the [View] tab, and then select
the [Reference Window] check box
in the [Show/Hide] group.
→ The [Reference Window] appears.
3 In the [Import] pane, select [Outline
Shapes] from the [From] selector,
then [Emblems] from the [Category]
selector.
4 Select pattern
[OL_fleur_de_lys01.pes], and then
drag it into the [Design Page].
→ If necessary, enlarge or reduce the
pattern to an easy-to-edit size.
61
5 Select the pattern using the [Select]
tool, and then click the [Shapes] tab.
6 Click the [Line sew type] selector in
the [Sew] group, and then click [Not
Sewn (Line)] in the list.
→ The outline is removed.
7 Click in the [Reference Window].
8 Drag the pointer in the window to
draw a display area frame around
the desired part of the pattern to
zoom to.
→ The selected display area is
enlarged in the [Design Page].
Page 71

Practical Application g
Creating Various Embroidery Designs
a
f
b
d
c
e
Symbol – Specifying the sewing direction for each separate shape –
9 Select the pattern, and then click
[Split Outline] in the [Tools] group of
the [Shapes] tab.
→ The mode for specifying splitting is
entered. In this mode, a section of
the pattern can be split off by
enclosing it in a polygon.
10 Click in the [Design Page] to create a
polygon that encloses the area of
the pattern to be split off.
The polygon will appear with the first
clicked point as the beginning of the
polygon and subsequent clicked points
as vertices. For this example, we will
enclose the middle section of the
pattern with a polygon in order to split it
off.
b
• A section of pattern cannot be split off and an error message appears, if a polygon has intersecting lines.
• Right-click to cancel the previous point that was clicked.
• By displaying the pattern enlarged, the area to be split off can be selected more accurately.
11 Double-click on the final vertex (f)
of a polygon to confirm the
displayed polygon as the area to be
split off.
→ The single shape is split into three
parts, which appear in the [Sewing
Order] pane.
62
Page 72

Practical Application g
fg
he
di
cj
bk
a
a
gb
fc
ed
Symbol – Specifying the sewing direction for each separate shape –
12 After selecting the upper section
from the three pattern parts, repeat
steps
8 through 11 to split off the
center section.
13 After selecting the lower section
from the five pattern parts, repeat
steps
8 through 11 to split off the
center section.
Step 2
Setting a sewing direction
63
1 Click [Select] in the [Select] group,
and then click (Select Point).
Page 73

Practical Application g
Creating Various Embroidery Designs
Symbol – Specifying the sewing direction for each separate shape –
2 Select the middle section of the
pattern that was first split off.
→ The selected pattern is displayed in
shape editing mode, and the points
forming the shape as well as the
sewing direction line (arrow)
appear.
3 Click the [Sewing Attributes] tab.
Select [Manual] under [Direction],
and then type "90" in the input box
to set the sewing angle.
4 Using , select the upper-right
section of the pattern.
5 Drag the end (red square) of the
direction line (arrow) to specify the
sewing direction for the right side of
the pattern part.
The sewing direction is specified from
the end to the point of the direction line.
64
Page 74

Practical Application g
b
a
c
d
Symbol – Specifying the sewing direction for each separate shape –
6 Click the [Shapes] tab, and then
click [Add Direction Line] in the
[Sewing Direction Line] group.
A direction line (arrow) for specifying
the sewing direction can be added.
7 Click below and toward the center of
the selection, move the pointer
across the pattern part, and then
click again above of the selection.
→ The second direction line appears
between the two clicked points.
8 Repeat step 7 to set additional
direction lines.
65
Page 75

Practical Application g
Creating Various Embroidery Designs
Symbol – Specifying the sewing direction for each separate shape –
9 Repeat steps 4 through 8 to specify
the sewing directions for the upperleft section of the pattern.
10 Repeat steps 4 through 8 to specify
the sewing directions for the lowerleft section of the pattern.
11 Repeat steps 4 through 8 to specify
the sewing directions for the lowerright section of the pattern.
66
Page 76

Practical Application g
a
g
b
f
c
e
d
Symbol – Specifying the sewing direction for each separate shape –
Step 3
Optimizing the sewing order
1 In the [Sewing Order] pane, change
the sewing order by dragging the
frames to the desired positions.
For this example, change the order as
shown in the figure left.
2 In the [Sewing Order] pane, drag the
pointer to draw a selection frame
around all the pattern parts.
3 Click at the top of the [Sewing
Order] pane to automatically
optimize the sewing order.
b
Find the most efficient sewing order by viewing the pattern in the [Design Page] in [Stitch View] mode to
check the stitching or by previewing the stitching with the [Stitch Simulator].
Step 4
Grouping pattern parts
1 Select , and then drag the pointer
in the [Design Page] to draw a
selection frame around the entire
pattern.
2 Click [Group] in the [Edit] group, and
then click [Group] in the menu.
By grouping multiple patterns, they can
be enlarged/reduced or rotated
together in a single operation.
67
Page 77

Page 78

Page 79

Page 80

Please visit us at http://support.brother.com/ where you can get
product support and answers to frequently asked questions (FAQs).
English
Printed in Taiwan
XG0083-001
 Loading...