

Page 1
Added Features of Version 10.2
Compatibility with ScanNCut (Brother cutting machine)
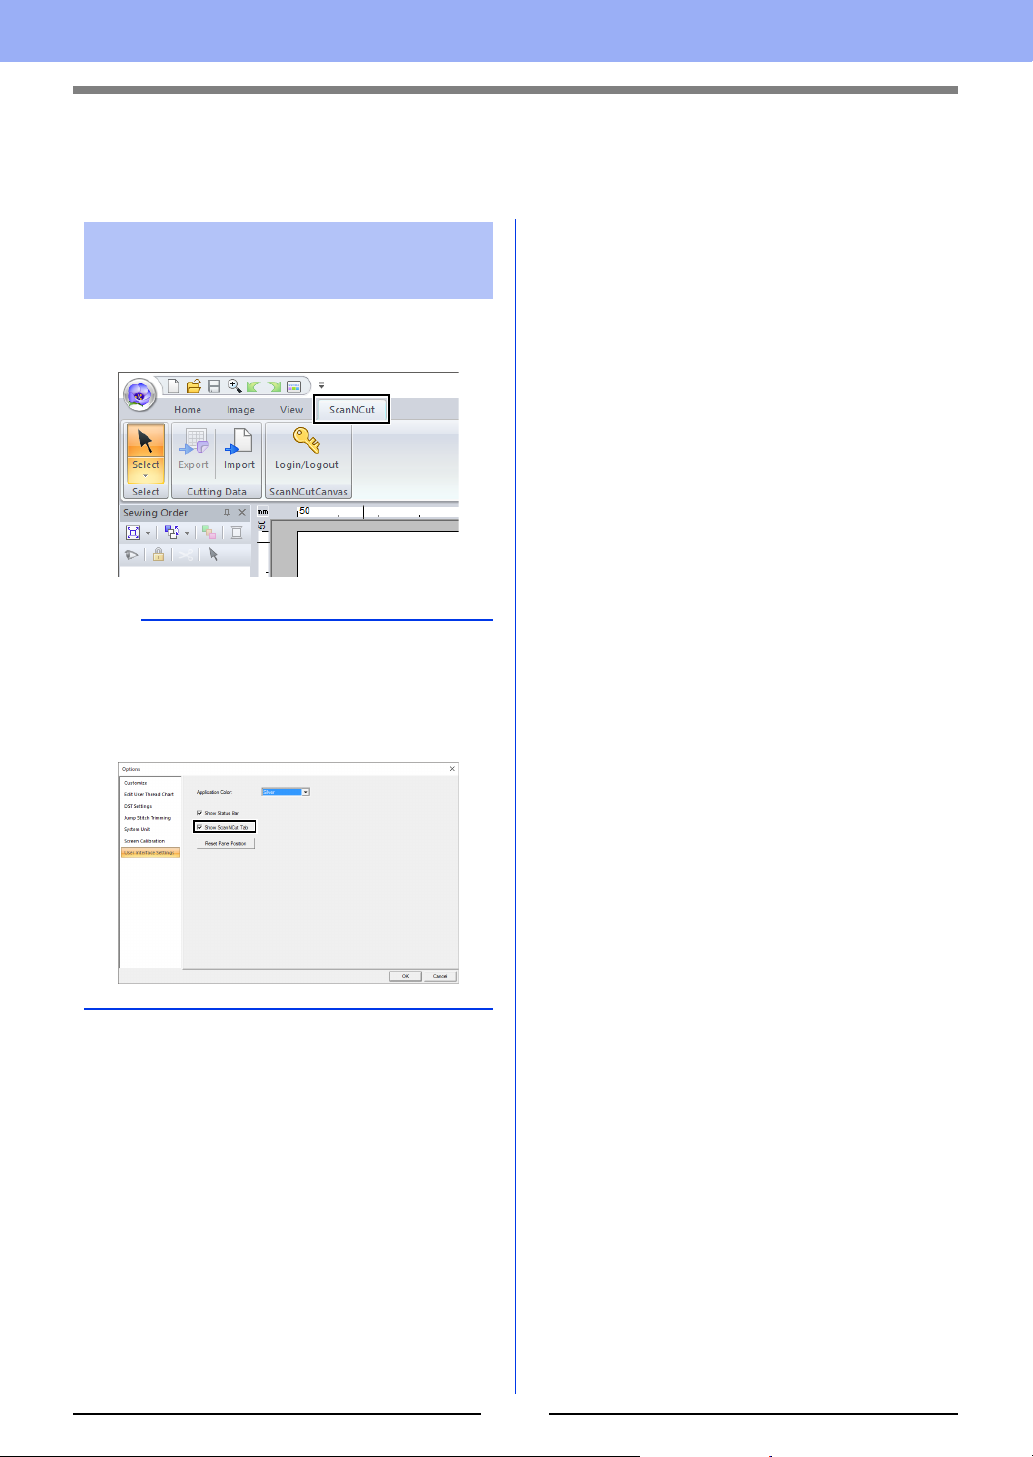
About the [ScanNCut] tab
(Layout & Editing)
ScanNCut (Brother cutting machine) can be
compatible with PE-DESIGN by this tab.
b
If the [ScanNCut] tab is no longer needed, click
[Options] in the [Option] menu in the upper-right
corner of the window, click [User Interface
Settings], and then clear the [Show ScanNCut
tab] check box.
1
Page 2
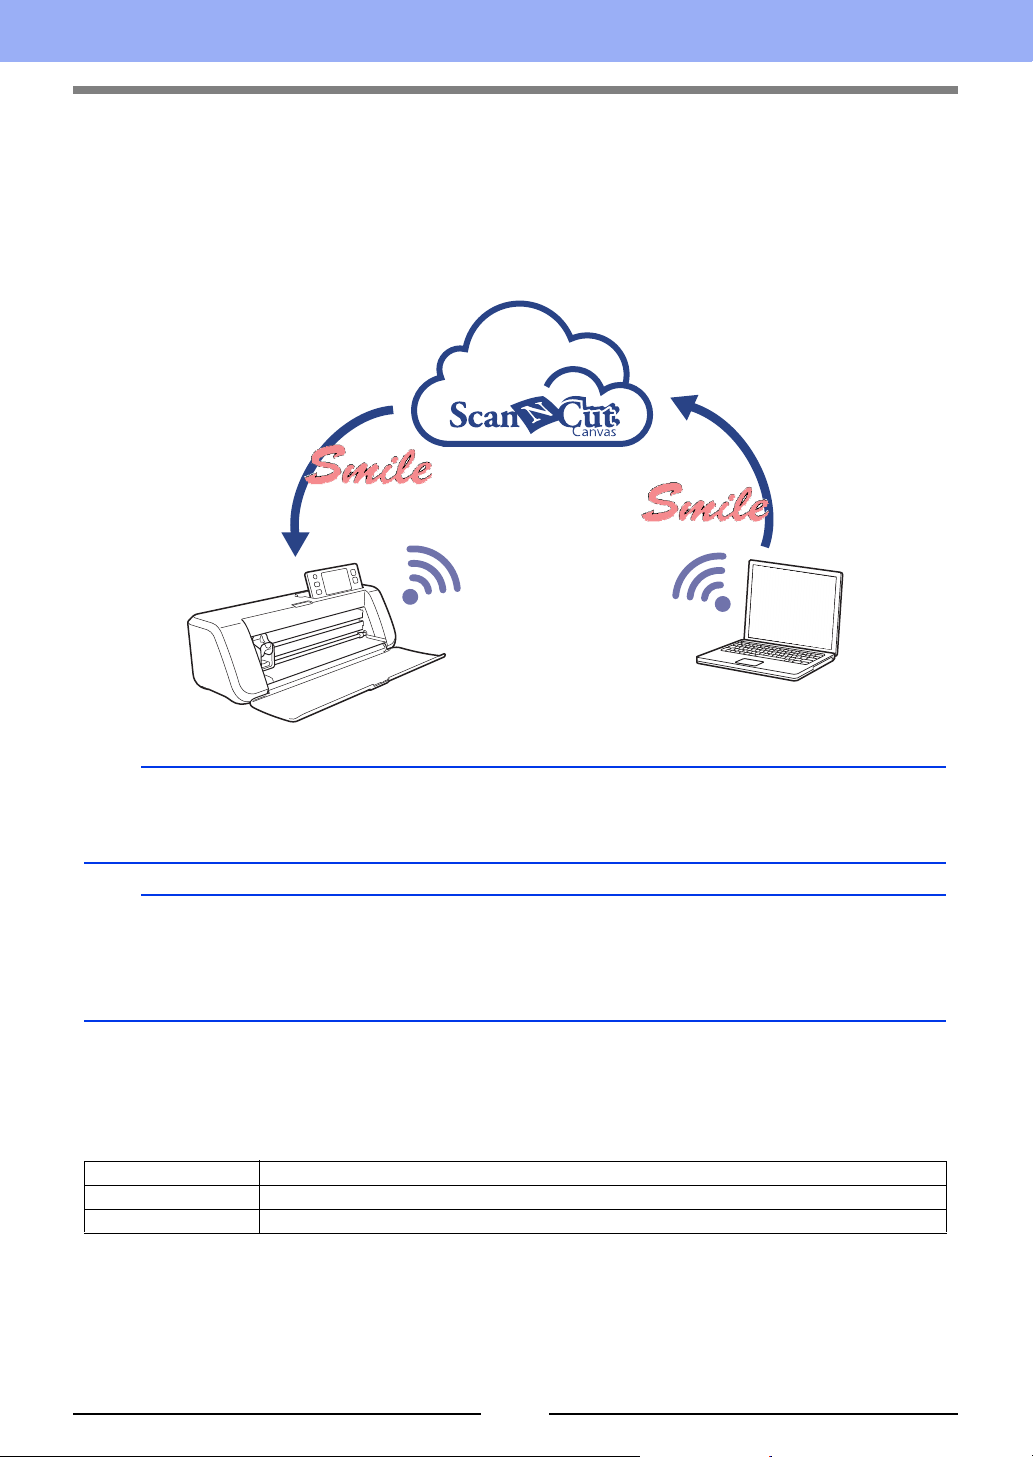
Tutorial: Sending an FCM File to ScanNCutCanvas
From this software, patterns can be sent to ScanNCutCanvas (online service for Brother cutting machines). In
addition, patterns can be sent from ScanNCutCanvas to your ScanNCut machine (wireless network models
only).
b
• ScanNCutCanvas is a pattern-editing application for Brother cutting machines. In order to use this function,
create your free account from the following link.
https://scanncutcanvas.brother.com
a
• Embroidered fabric cannot be cut with the ScanNCut machine.
• There are limitations on the thickness of fabric that can be cut by the ScanNCut machine.
• For details, refer to the Operation Manual for ScanNCut (Brother cutting machine).
• This function cannot be used if a pattern containing text with the [Name Drop] attribute applied is selected.
The sample file for this tutorial is located at
Documents (My documents)¥PE-DESIGN 10¥Tutorial¥TutorialSNC_1.
Step 1 Logging in to ScanNCutCanvas
Step 2 Selecting a pattern
Step 3 Sending a pattern to ScanNCutCanvas
2
Page 3
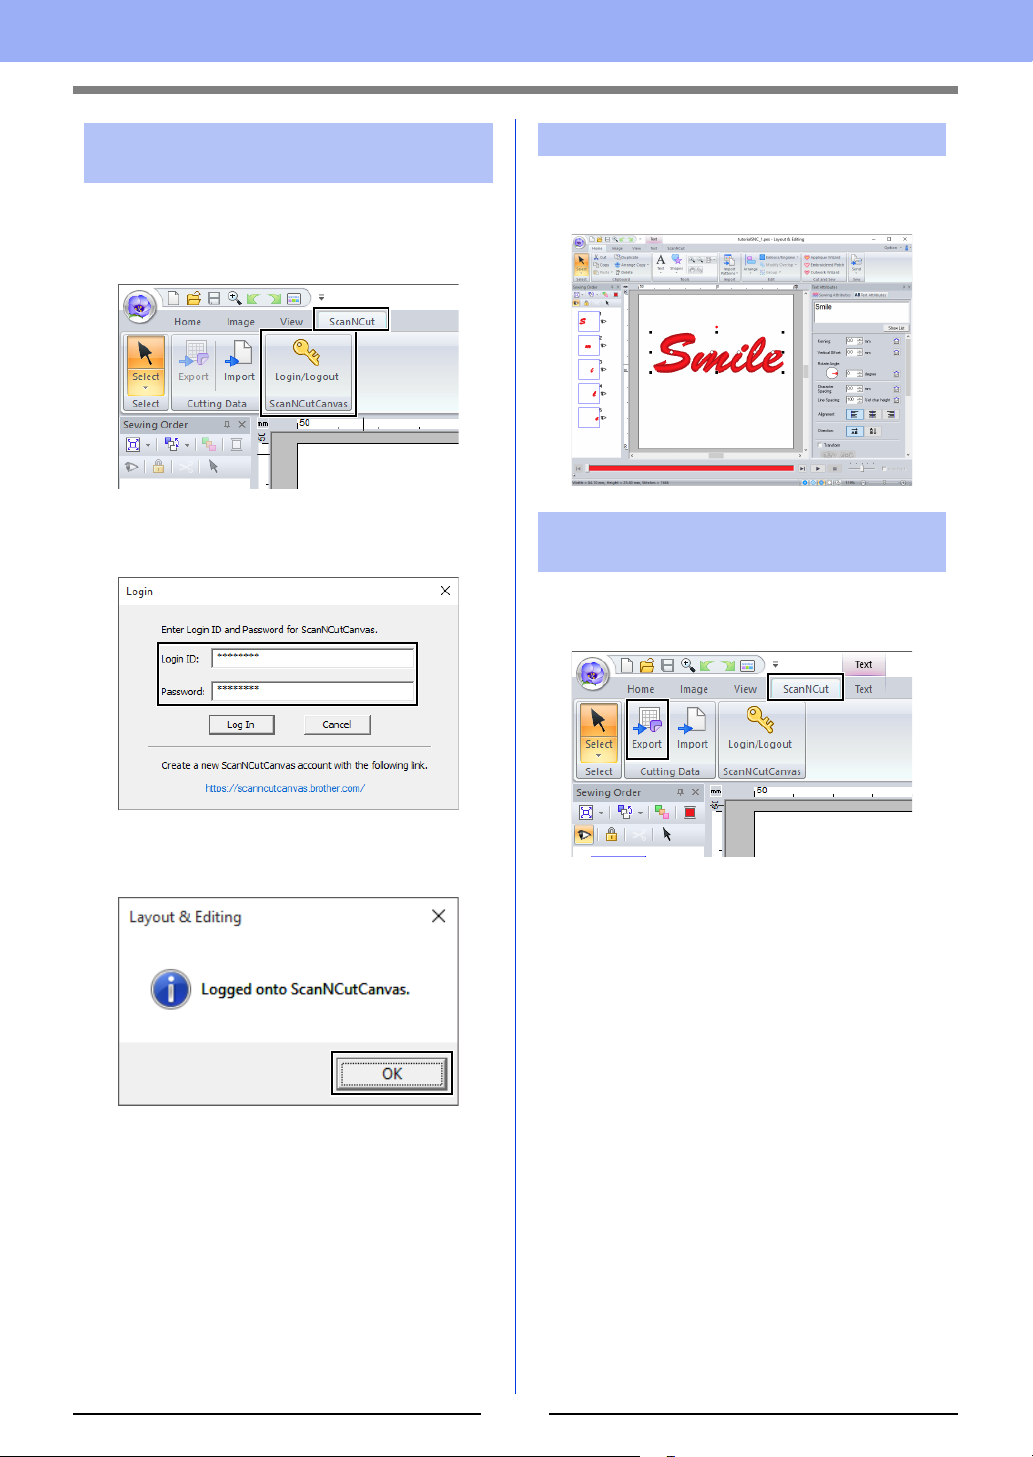
Step 1 Logging in to
ScanNCutCanvas
1 Click the [ScanNCut] tab, and then click
[Login/Logout] in the [ScanNCutCanvas]
group.
Step 2 Selecting a pattern
1 Select the [Text] tool, and then type in
“Smile”.
2 In the [Login] dialog box, type the login ID and
password for ScanNCutCanvas.
3 When login is finished, the following message
appears. Click [OK].
Step 3 Sending a pattern to
ScanNCutCanvas
1 Click the [ScanNCut] tab, and then click
[Export] in the [Cutting Data] group.
3
Page 4

2 Specify the settings for the cutting line.
a
b
c
d
f
e
g
f Display Template
Select this check box to display a faint
image of the original pattern.
g Close
Click this button to close the dialog box.
b
• If patters overlap, they will be merged.
a Offset Spacing
Set the [Offset Spacing] to specify the
distance from the outline of the pattern to
the cutting line.
For this example, set it to [0.0] mm.
• If [Offset Spacing] is set to 0.0 mm,
the outline of the pattern will become
the cutting line.
• If [Offset Spacing] is set to any setting
other than 0.0 mm and the cutting lines
overlap, they will be merged.
b Select this check box to draw the cutting
line only around the outer edge of the
pattern. Clear this check box to also draw
cutting lines inside the pattern.
For this example, clear this check box.
ON OFF
c Save as FCM File
Click this button to display the [Save as
FCM File] dialog box, where the
destination for saving the file can be
specified.
d Send to ScanNCutCanvas
Click this button to send the FCM file to
ScanNCutCanvas.
e Cutting Data Size
Displays the size of the cutting data.
However, if [Offset Spacing] is set to 0.0 mm,
the overlapped pattern may not be merged.
• Extremely small data will not be exported.
• The maximum size for cutting data fits within a
12 × 12 inch (305 × 305 mm) mat. If this
maximum is exceeded, an error message
appears.
• If more than 300 cutting data are contained in a
embroidery design, the FCM file cannot be
saved. If this maximum is exceeded, an error
message appears.
3 Click the [Send to ScanNCutCanvas] button.
b
• The password input dialog box will appear if you
have not logged into ScanNCutCanvas in
Step 1. Type in the login ID and password to log
in.
4
Page 5

4 When the transfer is finished, the following
message appears. Click [OK].
b
• If you have registered your ScanNCut machine
(wireless network models only) with your
ScanNCutCanvas account, the following
message appears.
5 The sent pattern appears in the “My
Projects” screen of ScanNCutCanvas.
• The pattern is named as
“fromPED_yyyymmddhhmm”
automatically.
• To also send the pattern to your ScanNCut
machine, click [Yes], and then click [OK] again
when the following message appears.
Then, touch the Transfer button on ScanNCut to
import the sent pattern.
• To not send the pattern to your ScanNCut
machine, click [No].
5
Page 6

Exporting/Importing an FCM File
1
2
A created embroidery pattern can be exported/ imported as data in the .fcm format so that it can be cut out
using ScanNCut (Brother cutting machine), or edit using PE-DESIGN.
Exporting an FCM File Importing an FCM File
1 Select the pattern(s), and then click the
[ScanNCut] tab.
2 Click [Export] in the [Cutting Data] group.
3 After the cutting line settings have been
specified, click the [Save as FCM File] button.
An FCM file can be imported into PE-DESIGN as an
embroidery pattern.
1 Click the [ScanNCut] tab.
2 Click [Import] in the [Cutting Data] group
3 Click .
4 Select the drive and the folder, and then type
in the file name.
5 Click [Save] to save the data.
1 Indicates the path to the currently selected
folder.
2 Displays the size of the cutting data.
6
Page 7

4 Select a folder, and then click [OK].
5 Select a thumbnail, and then click [Import].
6 The imported embroidery pattern appears in
the Design Page.
English
Version 0
7
 Loading...