

Page 1

NETWORK
USER’S GUIDE
Store Print Log
to Network
Version 0
ENG
Page 2

Definitions of notes
We use the following icon throughout this User’s Guide:
Notes tell you how you should respond to a situation that may arise or give tips about how the
operation works with other features.
Trademarks
The Brother logo is a registered trademark of Brother Industries, Ltd.
Brother is a registered trademark of Brother Industries, Ltd.
All other trademarks are the property of their respective owners.
Each company whose software title is mentioned in this manual has a Software License Agreement specific
to its proprietary programs.
Compilation and publication notice
Under the supervision of Brother Industries Ltd., this manual has been compiled and published, covering the
latest product’s descriptions and specifications.
The contents of this manual and the specifications of this product are subject to change without notice.
Brother reserves the right to make changes without notice in the specifications and materials contained
herein and shall not be responsible for any damages (including consequential) caused by reliance on the
materials presented, including but not limited to typographical and other errors relating to the publication.
©2009 Brother Industries Ltd.
i
Page 3

1
Store Print Log to Network 1
Overview 1
The Store Print Log to Network feature allows you to save the print log file from your Brother machine to a
1
network server using CIFS
number of printed pages and color pages
Management (web browser).
1
CIFS is the Common Internet File System protocol that runs over TCP/IP allowing computers on a network to share files over an intranet or the
Internet.
2
Supported models only.
The following print functions are recorded in the print log:
Print jobs from your computer
USB Direct Print (Supported models only)
Copy
Received Fax (Supported models only)
Note
• Print report and lists are not stored to the server.
. You can record the ID, type of print job, job name, user name, date, time, the
2
for every print job. You can configure this setting using Web Based
1
• The Store Print Log to Network feature supports Kerberos Authentication and NTLMv2 Authentication.
• You can set the file type to Text or CSV when storing a file to the server.
1
Page 4

Store Print Log to Network
How to configure the Store Print Log to Network settings using Web Based Management 1
To use Web Based Management, type http://xxx.xxx.xxx.xxx (where xxx.xxx.xxx.xxx is the IP address of your
machine) into your browser, and then you can configure or change the settings in
Store Print Log to Network in Administrator Settings.
(1)
(2)
(3)
(4)
(5)
(6)
(7)
1
a Choose On from Print Log (1).
b You can configure the following settings using a web browser.
Host Address (2)
The Host Address is the Host name of the CIFS server. Enter the Host Address (for example:
example.com) (up to 64 characters) or the IP address (for example: 192.168.56.189).
Store Directory (3)
Enter the destination folder where your log will be stored on the CIFS server (for example:
brother/abc) (up to 60 characters).
(8)
(9)
(10)
File Name (4)
Enter the file name you want to use for the print log up to 15 characters.
File Type (5)
Choose the file type for the print log Text or CSV.
2
Page 5

Store Print Log to Network
Auth. Method (6)
Choose the authentication method required for access to the CIFS server Auto, Kerberos
2
NTLMv2
1
Kerberos is an authentication protocol which allows devices or individuals to securely prove their identity to network servers using a
single sign-on.
2
NTLMv2 is the default authentication method used by Windows to log into servers.
.
For Kerberos and NTLMv2 Authentication you must also configure the SNTP protocol (network time
server). See page 7 for information on how to configure the SNTP protocol.
• Auto: If you choose Auto, the machine will initially search for a Kerberos server. If the Kerberos
server is not detected, NTLMv2 will be used for the authentication method.
• Kerberos: Choose Kerberos, to use Kerberos authentication only.
• NTLMv2: Choose NTLMv2, to use NTLMv2 authentication only.
Username (7)
Enter the Username for the authentication up to 96 characters.
Note
If the user name is part of a domain, please input the username in one of the following styles:
user@domain or domain\user.
Password (8)
1
or
1
Enter the password for the authentication up to 32 characters.
Kerberos Server Address (if needed) (9)
Enter the KDC Host Address (for example: ftp.example.com) (up to 64 characters) or the IP address
(for example: 192.168.56.189).
c In the Connection Status (10), you can confirm the last log status. For more information, see
Understanding Error Messages on page 5.
d Click Submit to apply your settings.
3
Page 6

Store Print Log to Network
Error Detection Setting 1
You can choose what action is taken when the print log cannot be stored to the server due to a network error.
a Choose Ignore Log & Print or Cancel Print in the Error Detection Setting of
Store Print Log to Network.
Ignore Log & Print
If you choose Ignore Log & Print, the machine prints the document even if the print log cannot be
stored to the server.
When the store print log function has recovered, the print log is recorded as follows:
• If the log cannot be stored at the end of printing, the print log except the number of printed pages
and color pages will be recorded. (1)
• If the Print Log cannot be stored at the beginning and the end of printing, the print log of the job
will not be recorded. When the function has recovered, the occurrence of an error is shown in the
log. (2)
Example of the print log:
(1)
1
Note
The order of the items are different depending on the countries.
Cancel Print
If you choose Cancel Print, the print jobs are canceled when the print log cannot be stored to the
server.
Note
Even if you choose Cancel Print, your machine will automatically print a copy of the stored fax.
b Click Submit to apply your settings.
(2)
4
Page 7

Store Print Log to Network
Understanding Error Messages 1
You can confirm the error status on the LCD of your machine or Connection Status in Web Based
Management.
Server Timeout
This message will appear when you cannot connect to the server.
Make sure that:
• Your server address is correct.
• Your server is connected to the network.
• The machine is connected to the network.
Authentication Error
The message will appear when your Authentication Setting are not correct.
Make sure that:
1
•Username
1
If the user name is part of domain, please input the username in one of the following styles: user@domain or domain\user.
• Confirm the SNTP time server protocol is configured correctly so the time matches the time used for
authentication by Kerberos or NTLMv2.
and Password in Authentication Setting is correct.
1
File Access Error
This message will appear when you cannot access the destination folder.
Make sure that:
• Directory name is correct.
• Directory is write-enabled.
• File is not locked.
Note
If you choose the Cancel Print option in Web Based Management the Log Access Error message will
remain on the LCD for about 1 minute.
5
Page 8

Store Print Log to Network
Using Store Print Log to Network with Secure Function Lock 2.0 1
When Secure Function Lockv2 is active the names of the registered users for printing, copy, Fax RX and USB
Direct Printing (if available) functions will be recorded in the Store Print Log to Network report.
1
Example of the print Log with Secure Function Lock 2.0 users:
6
Page 9
Store Print Log to Network
How to configure the SNTP protocol using Web Based Management 1
SNTP is the protocol used to synchronize the time used by the machine for Authentication with the SNTP
time server (this time is not the time displayed on the LCD of the machine). You can configure this setting
using Web Based Management (web browser).
To use Web Based Management, type http//xxx.xxx.xxx.xxx (where xxx.xxx.xxx.xxx is the IP address of your
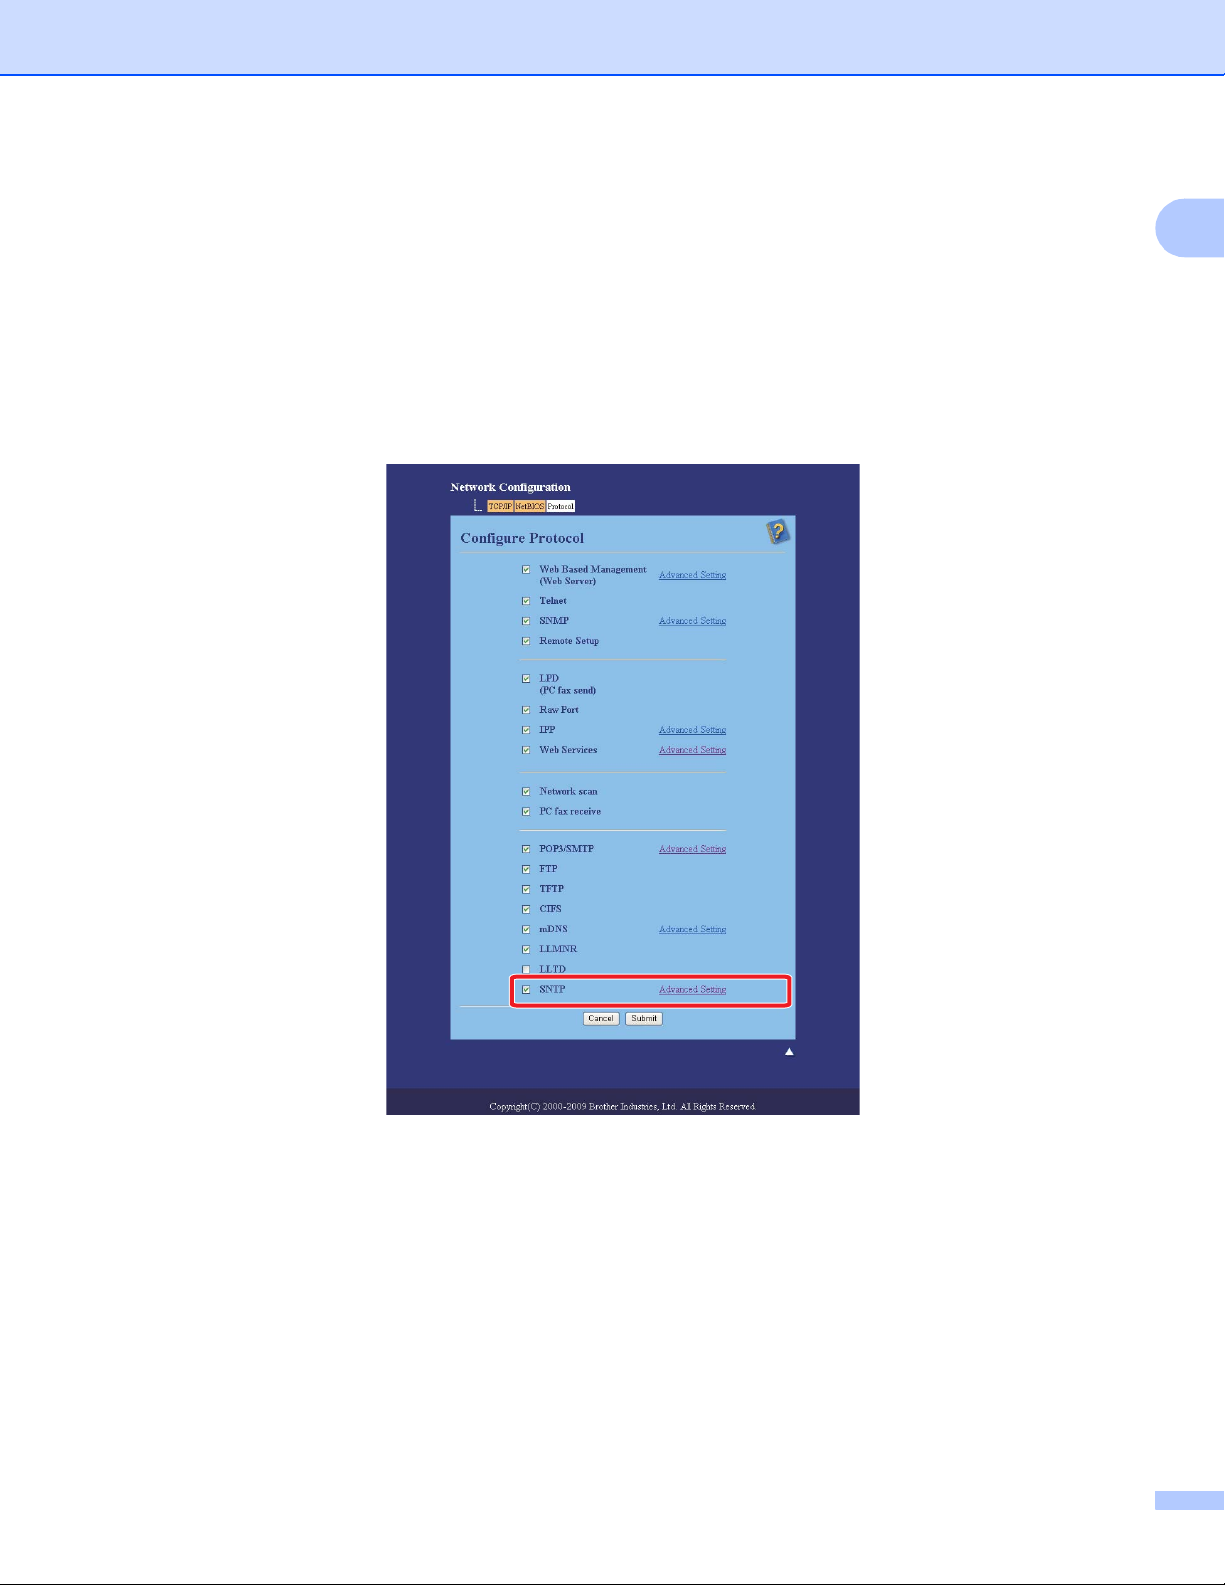
machine) into your browser, and then you can configure the settings of SNTP in Configure Protocol in
Network Configuration.
1
a Select the SNTP check box to activate the setting.
7
Page 10

Store Print Log to Network
b Click Advanced Setting.
1
(1)
(2)
(3)
(4)
(5)
(6)
(7)
(8)
Status (1)
Displays whether the SNTP server settings are enabled or disabled.
SNTP Server Method (2)
Choose AUTO or STATIC.
• AUTO
If you have a DHCP server in your network, the SNTP server will automatically obtain the address
from that server.
• STATIC
Enter the address you want to use.
Primary SNTP Server Address (3), Secondary SNTP Server Address (5)
Enter the server address (up to 64 characters).
Primary SNTP Server Port (4), Secondary SNTP Server Port (6)
Enter the Port number (1 to 65535).
Synchronizing Interval (7)
Enter the interval of hours which you want to synchronize to the server (1 to 168 hours).
Synchronization Status (8)
You can confirm the latest synchronization status.
c Click Submit to apply the settings.
8
 Loading...