

Page 1
Content A-Z
OwnersManuals2.com
OWNER'S MANUAL.
BMW iX.
Online Edition for Part no. 01405A7AFE4 - II/23
Page 2

OwnersManuals2.com
Page 3

WELCOME TO BMW.
OwnersManuals2.com
Owner's Manual.
Thank you for choosing a BMW.
The more familiar you are with the vehicle, the better control you will have
on the road. We therefore strongly suggest the following:
Read this Owner's Manual before starting off in your new BMW. Also
use the Integrated Owner's Manual in the vehicle. It contains important
notes on vehicle operation that will help you make full use of the technical
features available in your BMW. The manual also contains information designed to enhance operating reliability and traffic safety, and to contribute
to maintaining the value of your BMW.
At the time of production at the plant, the printed Owner's Manual is the
most current resource. After a vehicle software update – such as a Remote Software Upgrade – the Integrated Owner's Manual for the vehicle
will contain the latest information.
You can find supplementary information in the additional brochures in the
onboard literature.
We wish you a safe and enjoyable ride.
Online Edition for Part no. 01405A7AFE4 - II/23
3
Page 4

TABLE OF CONTENTS
OwnersManuals2.com
After a vehicle software update – such as a Remote Software Upgrade
– the Integrated Owner's Manual for the vehicle will contain the latest
information.
NOTES
Information ........................................................................................................... 6
Safety of the high-voltage system .................................................................. 16
QUICK REFERENCE
Getting in ............................................................................................................. 18
Set-up and use ................................................................................................... 22
On the road ......................................................................................................... 25
CONTROLS
Dashboard .......................................................................................................... 32
Sensors of the vehicle ....................................................................................... 37
Operating condition of the vehicle .................................................................. 42
BMW iDrive ......................................................................................................... 46
BMW Remote Software Upgrade ................................................................... 64
Personal settings .............................................................................................. 68
Opening and closing ......................................................................................... 75
Seats, mirrors and steering wheel ................................................................ 100
Transporting children safely ............................................................................ 111
Driving ................................................................................................................. 117
Displays ............................................................................................................. 136
Lights .................................................................................................................. 157
Safety ................................................................................................................. 166
Driving stability control systems ................................................................... 200
Driver assistance systems ............................................................................. 204
Parking .............................................................................................................. 230
Driving comfort ................................................................................................ 258
Climate control ................................................................................................. 260
4
Online Edition for Part no. 01405A7AFE4 - II/23
Page 5

Interior equipment ........................................................................................... 272
OwnersManuals2.com
Storage compartments ................................................................................... 281
Cargo area ....................................................................................................... 284
DRIVING TIPS
Things to remember when driving ............................................................... 292
Increasing range .............................................................................................. 297
MOBILITY
Charging the vehicle ....................................................................................... 302
Wheels and tires ............................................................................................... 315
Hood ................................................................................................................... 341
Operating materials ........................................................................................ 342
Maintenance .................................................................................................... 344
Replacing components .................................................................................. 346
Breakdown Assistance .................................................................................. 350
Vehicle Care ...................................................................................................... 357
REFERENCE
Technical data ................................................................................................. 362
Appendix .......................................................................................................... 364
Everything from A to Z ................................................................................... 366
© 2023 Bayerische Motoren Werke
Aktiengesellschaft
Munich, Germany
Reprinting, including excerpts, only with the written consent of BMW AG, Munich.
US English ID8 II/23, Printed on environmentally friendly paper, bleached without chlorine, suitable for recycling.
Online Edition for Part no. 01405A7AFE4 - II/23
5
Page 6

NOTES
OwnersManuals2.com
Information
Information
Using this Owner's Manual
Orientation
The fastest way to find information on a particular topic is by using the index.
For an overview of the vehicle, we recommend
reading the quick reference guide in the owner’s manual.
Validity of the Owner's Manual
Production of the vehicle
At the time of production at the plant, the
printed Owner's Manual is the most current
resource. Due to updates after the editorial
deadline, differences may exist between the
printed Owner's Manual and the Integrated
Owner's Manual in the vehicle.
Notes on updates can be found in the appendix of the printed Owner's Manual for the vehicle.
After a software update in the vehicle
After a vehicle software update, such as via
Remote Software Upgrade, the Integrated
Owner's Manual for the vehicle will contain the
latest information.
Owner's Manual for Navigation,
Entertainment, Communication
The Owner's Manual for Navigation, Entertainment, and Communication is available as a
printed book from an authorized service center.
The topics are also discussed in the Integrated
Owner's Manual in the vehicle.
Media at a glance
General information
The contents of the Owner's Manual are available in various media formats. The following
Owner's Manual media formats are available:
▷ Printed Owner's Manual.
▷ Integrated Owner's Manual in the vehicle.
Printed Owner's Manual
The printed Owner's Manual shows all standard, country-specific and optional equipment
that is currently available, or may become
available in the future, for specific models.
Integrated Owner's Manual in the
vehicle
Principle
The Integrated Owner's Manual shows all
standard, country-specific and optional equipment that is currently available, or may become available in the future, for specific models. The Integrated Owner's Manual can be
displayed on the control display.
Selecting the Owner's Manual
1.
Apps menu
2. "All apps"
3. "Owner's Manual"
4. Select the desired method of accessing the
contents.
Scrolling through the Owner's Manual
Swipe up or down until the next or previous
contents are displayed.
6
Online Edition for Part no. 01405A7AFE4 - II/23
Page 7
Information
OwnersManuals2.com
NOTES
Context help
General information
The Integrated Owner's Manual can be accessed from any menu. Depending on the
selected function, either the associated description or the main menu of the Integrated
Owner's Manual will be displayed.
Selecting context help from a menu
1. Press and hold the desired menu item.
2. "General help"
Selecting context help from a Check Control
message
Directly from the Check Control message on
the control display:
"Owner's Manual"
Supplementary Owner's Manuals
Also follow the Supplementary Owner's Manuals, which are included in addition to the onboard literature.
available in the future, for specific models. The
app can be displayed on smartphones and
tablets.
BMW Driver’s Guide Web
The BMW Driver's Guide website shows all
standard, country-specific, and optional equipment that is currently available, or may become available in the future, for specific models. The BMW Driver’s Guide Web can be
displayed in any current browser.
Icons and displays
Icons in the Owner's Manual
Icon Meaning
Precautions that must be followed in
order to avoid the possibility of injury
to yourself and to others as well as
serious damage to the vehicle.
Measures that can be taken to help
protect the environment.
Additional sources of information
Service center
An authorized service center, e.g., a BMW
dealer or BMW service center, will be happy
to answer your questions at any time.
Internet
Vehicle information and general information on
BMW, such as on technology, are available on
the Internet: www.bmwusa.com.
BMW Driver’s Guide app
The BMW Driver's Guide app shows all standard, country-specific, and optional equipment
that is currently available, or may become
Online Edition for Part no. 01405A7AFE4 - II/23
"..." Texts in vehicle used to select
individual functions.
›...‹ Verbal instructions to use with the
voice activation system.
››...‹‹ Responses generated by the voice
activation system.
Action steps
Action steps to be carried out are presented as
a numbered list. These steps must be carried
out in the order shown.
1.
First action step.
2. Second action step.
Bulletpoint lists
Items or actions without strict order or alternative options are shown as a bulletpoint list.
7
Page 8
NOTES
OwnersManuals2.com
Information
▷ First possibility.
▷ Second possibility.
Icons on vehicle parts
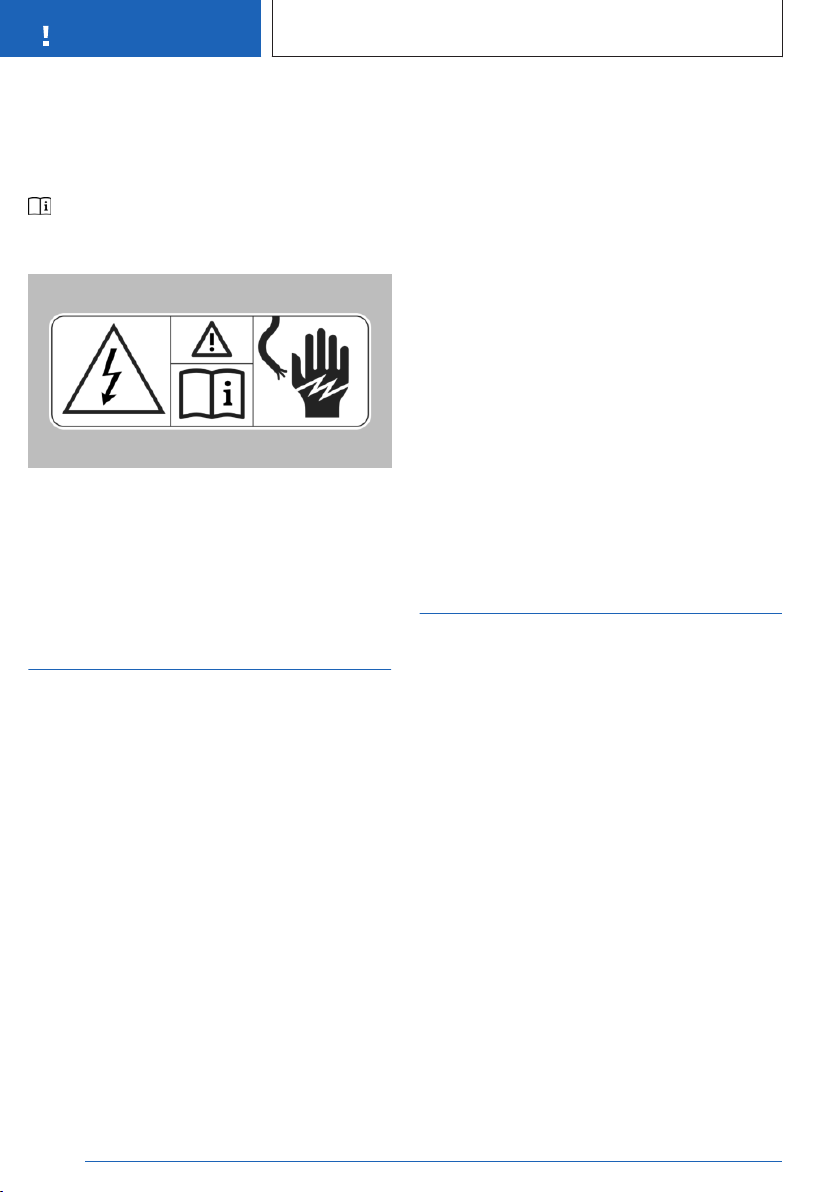
This symbol on a vehicle component
indicates that further information on the
component is available in the Owner's Manual.
These icons found on parts of the vehicle indicate that incorrect use of high-voltage technology or of orange-colored high-voltage components poses a risk of life-threatening injury by
electric shock.
Vehicle features and options
This Owner's Manual shows all standard,
country-specific, and optional equipment that
is currently available, or may become available
in the future, for specific models, i.e., model
series. Therefore, this Owner's Manual also
describes and illustrates equipment, systems
and functions that are not available in a vehicle, for example due to the following situations:
Selected optional equipment
▷
▷ National-market version or national-market
equipment
▷ Options for later release and software up-
date
This also applies to safety-related functions
and systems.
Before starting a journey, verify whether the
described equipment or function is available
in the vehicle. For information on whether a
function is currently available in the vehicle or
when the function can be installed in the vehicle, contact an authorized service center or
other qualified service center.
A claim for the availability of equipment, a system or a function in the vehicle cannot be derived based on the description in the Owner's
Manual.
When using these functions and systems, the
applicable laws and regulations must be observed.
For any equipment and models not described
in this Owner's Manual, refer to the Supplementary Owner's Manuals.
An authorized service center is happy to answer any questions that you may have about
the features and options applicable to the vehicle.
Status of the Owner's Manual
Basic information
The manufacturer of the vehicle pursues a policy of constant development to ensure that our
vehicles continue to embody the highest quality and safety standards. In rare cases, therefore, the features described in this Owner's
Manual may deviate from those in the vehicle.
Validity of the Owner's Manual
Production of the vehicle
At the time of production at the plant, the
printed Owner's Manual is the most current
resource. Due to updates after the editorial
deadline, differences may exist between the
printed Owner's Manual and the Integrated
Owner's Manual in the vehicle.
Notes on updates can be found in the appendix of the printed Owner's Manual for the vehicle.
8
Online Edition for Part no. 01405A7AFE4 - II/23
Page 9

Information
OwnersManuals2.com
NOTES
After a software update in the vehicle
After a vehicle software update, such as via
Remote Software Upgrade, the Integrated
Owner's Manual for the vehicle will contain the
latest information.
For Your Own Safety
Intended use
Heed the following when using the vehicle:
▷ Owner's Manual.
▷ Information on the vehicle. Do not remove
stickers.
▷ Technical vehicle data.
▷ The traffic, speed, and safety laws where
the vehicle is driven.
▷ Vehicle documents and statutory docu-
ments.
Warranty
The vehicle is technically configured for the
operating conditions and registration requirements applicable in the country of first delivery,
also known as homologation. If the vehicle is
to be operated in a different country it might
be necessary to adapt the vehicle to potentially
differing operating conditions and registration
requirements. Noncompliance with homologation requirements in a certain country may
affect warranty coverage. Please consult the
New Vehicle Limited Warranty Booklet for further information on warranty matters.
Maintenance and repairs
Advanced technology, for instance the use of
modern materials and high-performance electronics, requires suitable maintenance and repair work.
The vehicle manufacturer therefore recommends having necessary work performed by
an authorized service center, e.g., a BMW
dealer or service center. If a different repair
shop is selected, BMW recommends selecting a workshop that performs the appropriate
work such as maintenance and repair according to BMW specifications with properly trained
personnel. In the Owner's Manual, such works
are referred to as "another qualified authorized
service center or repair shop".
If work is not carried out properly, for instance
maintenance and repair, there is a risk of subsequent damages and related safety risks.
Improperly performed work on the vehicle
paintwork can lead to a failure or fault of components, e.g., the radar sensors, and thereby
result in a safety hazard.
Parts and accessories
BMW recommends the use of parts and accessory products approved by BMW.
Approved parts and accessories, and advice
on their use and installation are available from
an authorized service center.
BMW parts and accessories have been tested
by BMW for their safety and suitability in BMW
vehicles.
BMW warrants genuine BMW parts and accessories.
BMW does not evaluate whether each individual product from another manufacturer can be
used with BMW vehicles without presenting a
safety hazard, even if a country-specific official
approval was issued. BMW does not evaluate
whether these products are suitable for BMW
vehicles under all usage conditions.
California Proposition 65 Warning
For vehicles sold in California, the law requires
vehicle manufacturers to provide the following
warning:
Online Edition for Part no. 01405A7AFE4 - II/23
9
Page 10

NOTES
OwnersManuals2.com
Warning
Engine exhaust and a wide variety of Automobile components and parts, including
components found in the interior furnishings
in a vehicle, contain or emit chemicals known
to the State of California to cause cancer
and birth defects and reproductive harm. In
addition, certain fluids contained in vehicles
and certain products of component wear contain or emit chemicals known to the State
of California to cause cancer and birth defects or other reproductive harm. Battery
posts, terminals and related accessories contain lead and lead compounds. Batteries also
contain other chemicals known to the State
of California to cause cancer. Wash your
hands after handling. Used engine oil contains chemicals that have caused cancer in
laboratory animals. Always protect your skin
by washing thoroughly with soap and water.
For more information go to www.P65Warnings.ca.gov/passenger-vehicle.
Warning
Operating, servicing and maintaining a passenger vehicle or off-highway motor vehicle
can expose you to chemicals including engine exhaust, carbon monoxide, phthalates,
and lead, which are known to the State of
California to cause cancer and birth defects
or other reproductive harm. To minimize exposure, avoid breathing exhaust, do not idle
the engine except as necessary, service the
vehicle in a well-ventilated area and wear
gloves or wash your hands frequently when
servicing the vehicle. For more information
go to www.P65Warnings.ca.gov/passengervehicle.
Information
Service and warranty
We recommend that you read this publication
thoroughly. The vehicle is covered by the following warranties:
▷ New Vehicle Limited Warranty.
▷ Rust Perforation Limited Warranty.
▷ Federal Emissions System Defect War-
ranty.
▷ Federal Emissions Performance Warranty.
▷ California Emission Control System Limited
Warranty.
Detailed information about these warranties
is listed in the New Vehicle Limited Warranty
Booklet.
The vehicle has been specifically adapted and
designed to meet the particular operating conditions and homologation requirements in your
country and continental region in order to deliver the full driving pleasure while the vehicle
is operated under those conditions. If you wish
to operate the vehicle in another country or
region, you may be required to adapt the vehicle to meet different prevailing operating conditions and homologation requirements. You
should also be aware of any applicable warranty limitations or exclusions for such country
or region. In such case, please contact Customer Relations for further information.
Maintenance
Maintain the vehicle regularly to sustain the
road safety, operational reliability and the New
Vehicle Limited Warranty.
Specifications for maintenance measures:
BMW maintenance system.
▷
Maintenance, refer to page 344.
▷ Maintenance Booklet, available online and
accessible via a QR code in the New Vehicle Limited Warranty Booklet.
▷ Warranty and Service Guide Booklet for
Canadian models.
10
Online Edition for Part no. 01405A7AFE4 - II/23
Page 11

Information
OwnersManuals2.com
NOTES
If the vehicle is not maintained or is improperly
maintained, this could result in serious damage to the vehicle.
A failure to maintain the vehicle or improper
maintenance may affect your warranty coverage. Please consult the New Vehicle Limited
Warranty Booklet for further information on
warranty matters.
Refer to section on engine oil change regarding recommended service intervals for oil
changes.
Data memory
General information
Electronic control devices are installed in the
vehicle. Electronic control units process data
they receive from vehicle sensors, self-generate or exchange with each other. Some control units are necessary for the vehicle to function safely or provide assistance during driving,
for instance driver assistance systems. Furthermore, control units facilitate comfort or infotainment functions.
Information about stored or exchanged data
can be requested from the manufacturer of the
vehicle, in a separate booklet, for example.
Personal reference
Each vehicle is marked with a unique vehicle
identification number. Depending on the country, the vehicle owner can be identified with the
vehicle identification number, license plate and
corresponding authorities. In addition, there
are other options to track data collected in the
vehicle to the driver or vehicle owner, such as
via the ConnectedDrive account that is used.
Operating data in the vehicle
Control units process data to operate the vehicle.
For example, this includes:
Status messages for the vehicle and its
▷
individual components, e.g., wheel RPM,
wheel speed, deceleration, lateral acceleration, engaged seat belt indicator.
▷ Ambient conditions, e.g., temperature, rain
sensor signals.
The processed data is only processed in the
vehicle itself while the vehicle is being operated. Data is not stored beyond the operating
time.
Electronic components, e.g. control units and
vehicle keys, contain components for storing
technical information. Information about the
vehicle condition, component usage, maintenance recommendations, events or faults can
be stored temporarily or permanently.
This information generally documents the
state of a component, a module, a system, or
the surrounding area, for instance:
▷ Operating states of system components,
such as fill levels, tire pressure, battery status.
▷ Malfunctions and faults in important sys-
tem components, for instance lights and
brakes.
▷ Responses by the vehicle to special driving
situations such as airbag deployment or
engagement of the driving stability control
systems.
▷ Information on vehicle-damaging events.
The data is required to perform the control unit
functions. Furthermore, it also serves to detect
and correct malfunctions, and helps the vehicle
manufacturer to optimize vehicle functions.
The majority of this data is stored temporarily
and is only processed within the vehicle itself.
In some circumstances the vehicle may store
some data for an additional but limited period
of time.
When servicing, for instance during repairs,
service processes, warranty cases, and quality
assurance measures, this technical informa-
Online Edition for Part no. 01405A7AFE4 - II/23
11
Page 12

NOTES
OwnersManuals2.com
Information
tion can be read out from the vehicle together
with the vehicle identification number.
An authorized service center or another qualified service center or repair shop can read
out the information. The diagnostic socket required by law in the vehicle is used to read out
data.
The data is collected, processed, and used
by the relevant organizations in the service
network. The data documents technical conditions of the vehicle, which can be used to determine vehicle maintenance status, and facilitate quality improvement.
Vehicle fault and event memories can be reset by an authorized service center or another
qualified service center or repair shop when
performing repair or servicing work.
Data entry and data transfer into
the vehicle
General information
Depending on the vehicle equipment, comfort
and individual settings can be stored in the
vehicle and modified or reset at any time.
For example, this includes:
Settings for the seat and steering wheel
▷
positions.
▷ Chassis and climate control settings.
If necessary, data can be transferred to the entertainment and communication system of the
vehicle, for instance via smartphone.
This includes the following depending on the
respective equipment:
Multimedia data such as music, films or
▷
photos for playback in an integrated multimedia system.
▷ Address book data for use in conjunction
with an integrated hands-free system or an
integrated navigation system.
▷ Entered navigation destinations.
▷ Data on the use of Internet services.
This data can be stored locally in the vehicle or
is found on a device that has been connected
to the vehicle, e.g., a smartphone, USB stick or
MP3 player. If this data is stored in the vehicle,
it can be deleted at any time.
This data is only transmitted to third parties
upon personal request as part of the use of online services. The transmission depends on the
selected settings for the use of the services.
Incorporation of mobile devices
Depending on the vehicle equipment, mobile
devices connected to the vehicle, for instance
smartphones, can be controlled via the vehicle
control elements.
The sound and picture from the mobile devices can be played back and displayed through
the multimedia system. Certain information is
transferred to the mobile devices at the same
time. Depending on the type of incorporation,
this includes, for instance, position data and
other general vehicle information. This optimizes the way in which selected apps, for instance navigation or music playback, work.
There is no further interaction between the
mobile device and the vehicle, such as active
access to vehicle data.
How the data will be processed further is determined by the provider of the particular app
being used. The extent of the possible settings
depends on the respective app and the operating system of the mobile device.
Services
General information
If the vehicle has a wireless network connection, it will enable data to be exchanged between the vehicle and other systems. The
wireless network connection is realized via an
in-vehicle transmitter and receiver unit or via
personal mobile devices brought into the vehicle, for instance smartphones. This wireless
network connection enables 'online functions'
12
Online Edition for Part no. 01405A7AFE4 - II/23
Page 13

Information
OwnersManuals2.com
NOTES
to be used. These include online services and
apps supplied by the vehicle manufacturer or
by other providers.
Services from the vehicle manufacturer
Where online services from the vehicle manufacturer are concerned, the corresponding
functions are described in the appropriate
place, for instance the Owner's Manual or
manufacturer's web page. The relevant legal
information pertaining to data protection may
also be found on the manufacturer’s website.
Personal data may be used to perform online
services. Data is exchanged over a secure connection, for instance with the IT systems of the
vehicle manufacturer intended for this purpose.
Any collection, processing, and use of personal
data above and beyond that needed to provide the services must always be based on a
legal permission, contractual arrangement or
consent. It is also possible to activate or deactivate the data connection as a whole. This excludes functions and services required by law
such as Assist systems.
Services from other providers
When using online services from other providers, these services are the responsibility of the
relevant provider and subject to their data privacy conditions and terms of use. The vehicle
manufacturer has no influence on the content
exchanged during this process. Information on
the way in which personal data is collected and
used in relation to services from third parties,
the scope of such data, and its purpose, can
be obtained from the relevant service provider.
Event Data Recorder (EDR)
sist in understanding how a vehicle’s systems
performed. The EDR is designed to record
data related to vehicle dynamics and safety
systems for a short period of time, typically
30 seconds or less.
The EDR in this vehicle is designed to record
such data as:
▷ How various systems in the vehicle were
operating.
▷ Whether or not the driver and passenger
seat belts were fastened.
▷ How far, if at all, the driver was depressing
the accelerator and/or brake pedal.
▷ How fast the vehicle was traveling.
This data can help provide a better understanding of the circumstances in which
crashes and injuries occur.
EDR data is recorded by the vehicle only if a
nontrivial crash situation occurs; no data is recorded by the EDR under normal driving conditions and no personal data, for instance name,
gender, age, and crash location, are recorded.
However, other parties, such as law enforcement, could combine the EDR data with the
type of personally identifying data routinely acquired during a crash investigation.
To read data recorded by an EDR, special
equipment is required, and access to the vehicle or the EDR is needed. In addition to the vehicle manufacturer, other parties, such as law
enforcement, that have the special equipment,
can read the information if they have access to
the vehicle or the EDR.
Vehicle identification number
This vehicle is equipped with an event data
recorder (EDR). The main purpose of an EDR
is to record, in certain crash or near crashlike situations, such as an air bag deployment
or hitting a road obstacle, data that will as-
Online Edition for Part no. 01405A7AFE4 - II/23
General information
Depending on the national-market equipment,
the vehicle identification number is located in
different positions in the vehicle. This chapter
describes all possible positions for the series.
13
Page 14
NOTES
OwnersManuals2.com
Information
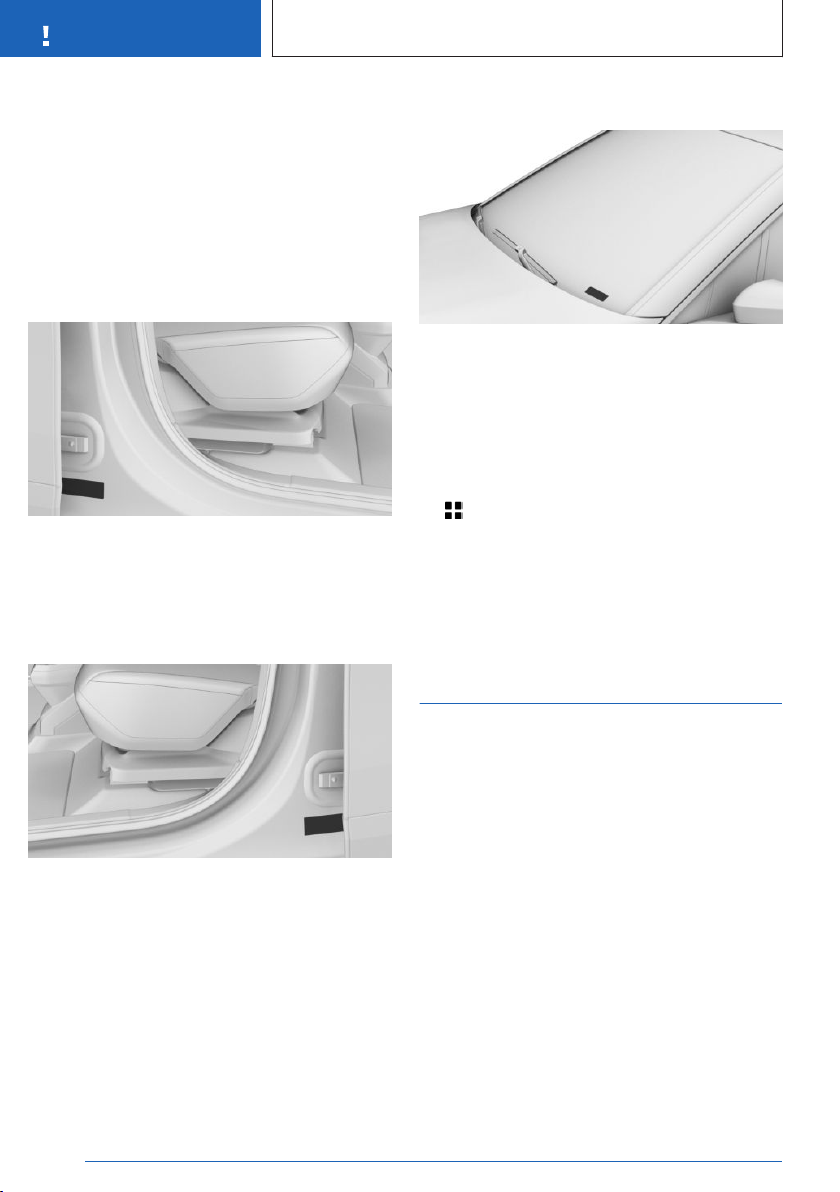
Under the hood
The engraved vehicle identification number
can be found under the hood on the right-hand
side of the vehicle.
Have the hood opened only by an authorized
service center or another qualified service center or repair shop.
Right nameplate
The vehicle identification number can be found
on the nameplate, on the right-hand side of
the vehicle.
Left nameplate
Windshield
The vehicle identification number can also be
found behind the windshield.
iDrive
It is also possible to display the vehicle identification number via iDrive.
Apps menu
1.
2. "All apps"
3. "Mobile devices"
4. "Settings"
5. "Vehicle ID (VIN):"
The vehicle identification number can be found
on the nameplate, on the left-hand side of the
vehicle.
14
Online Edition for Part no. 01405A7AFE4 - II/23
Reporting safety defects
For US customers
The following only applies to vehicles owned
and operated in the US.
If you believe that the vehicle has a defect
which could cause a crash or could cause injury or death, you should immediately inform
the National Highway Traffic Safety Administration (NHTSA), in addition to notifying BMW
of North America, LLC, P.O. Box 1227, Westwood, New Jersey 07675-1227, Telephone
1-800-831-1117.
If NHTSA receives similar complaints, it may
open an investigation, and if it finds that a
safety defect exists in a group of vehicles, it
may order a recall and remedy campaign.
Page 15

However, NHTSA cannot become involved in
OwnersManuals2.com
individual problems between you, your dealer,
or BMW of North America, LLC.
To contact NHTSA, you may call
the Vehicle Safety Hotline toll-free at
1-888-327-4236 (TTY: 1-800-424-9153); go to
http://www.safercar.gov; or write to: Administrator, NHTSA, 1200 New Jersey Avenue, SE.,
Washington, DC 20590. You can also obtain
other information about motor vehicle safety
from http://www.safercar.gov.
For Canadian customers
Canadian customers who wish to report a
safety-related defect to Transport Canada, Defect Investigations and Recalls, may call the
toll-free hotline 1-800-333-0510. You can also
obtain other information about motor vehicle
safety from http://www.tc.gc.ca/roadsafety.
Information
NOTES
Online Edition for Part no. 01405A7AFE4 - II/23
15
Page 16

NOTES
OwnersManuals2.com
Safety of the high-voltage system
Safety of the high-voltage system
Water in the footwell, for instance after a
Vehicle features and options
This chapter describes model-specific equipment, systems, and functions that are currently
available, or may become available in the future, even if they are not present in the vehicle.
Additional information:
Vehicle equipment, refer to page 8.
Working on the vehicle
▷
rainstorm when the window was kept open.
▷ The vehicle is in water up to the allowed
height.
General driving instructions, driving through
water, refer to page 293.
▷ Fluid escapes in the cargo area.
Monitoring of the highvoltage battery
General information
The manufacturer of the vehicle recommends
that no changes be made to the vehicle, for
instance installation of retrofitting accessories,
that will have an effect on the vehicle’s highvoltage system.
Safety information
Warning
Improperly performed work, in particular
maintenance and repair on the high-voltage
system, can lead to electric shock. There is a
risk of injury, fire and danger to life.
Have work on the vehicle, in particular maintenance and repair, performed by an authorized service center or another qualified service center or repair shop.
Contact with water
The high-voltage system is typically safe even
in the following example situations:
Principle
The temperature in the high-voltage battery is
monitored.
Any unusually high temperature in the highvoltage battery is indicated.
Safety information
Warning
An unusually high temperature of the highvoltage battery can cause a formation of gas
and smoke. There is a risk of injury or danger to life. In case of noticeable unusual odor
or smoke formation, refer to the notes for actions in the event of a message.
High temperature message
While driving
A Check Control message is displayed.
During charging or when parked
Depending on the national-market version: the
vehicle sounds the horn and, if applicable, the
vehicle lighting is flashing.
16
Online Edition for Part no. 01405A7AFE4 - II/23
Page 17

Safety of the high-voltage system
OwnersManuals2.com
Actions in the event of a message
While driving
1. Stop immediately.
2. Park the vehicle in a safe place.
3. Exit the vehicle.
4. Establish and keep a sufficient distance to
the vehicle.
5. Alert emergency personnel.
During and shortly after charging
If necessary, exit the vehicle.
1.
2. Establish and keep a sufficient distance to
the vehicle.
3. Alert emergency personnel.
Automatic deactivation
If an accident occurs, the high-voltage system
is switched off automatically to prevent risk of
danger to occupants and other road users.
Additional information:
What to do after an accident, refer to page 353.
NOTES
Online Edition for Part no. 01405A7AFE4 - II/23
17
Page 18
QUICK REFERENCE
OwnersManuals2.com
Getting in
Getting in
Opening and closing
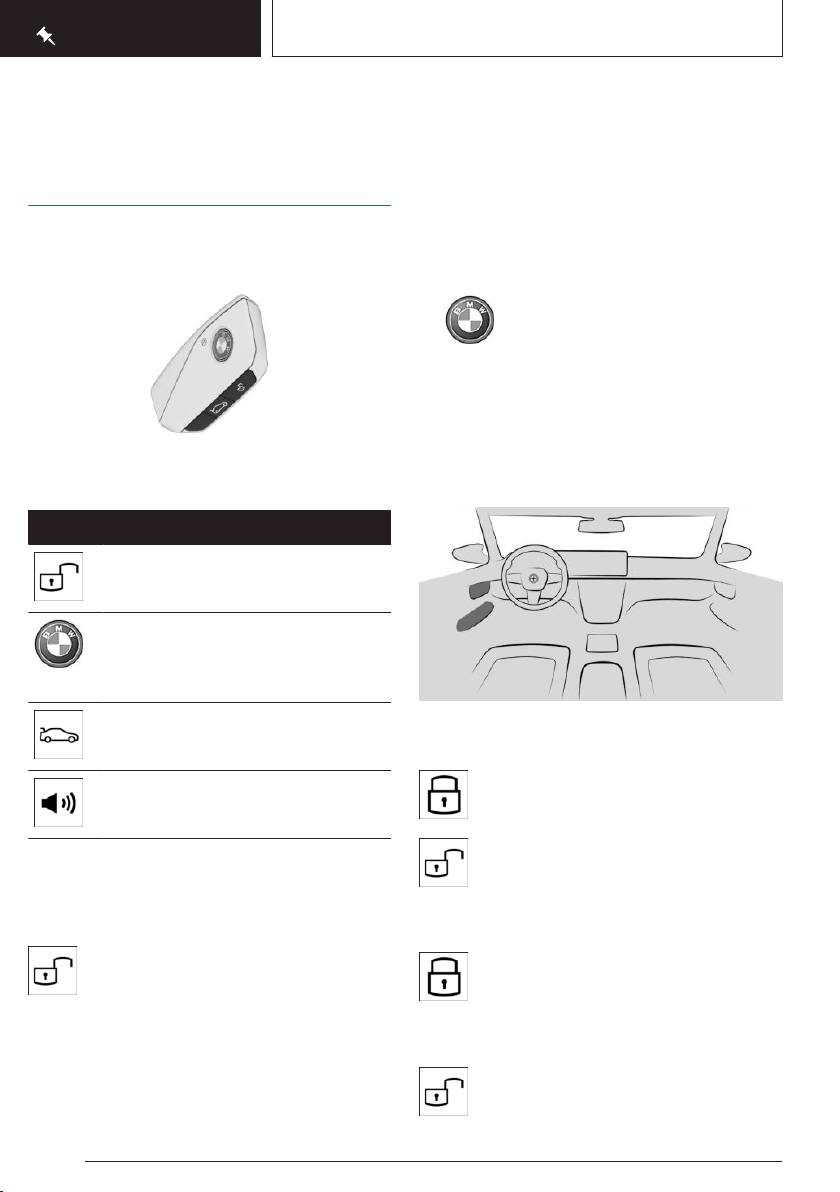
Vehicle key
Buttons on the vehicle key.
Icon Meaning
Unlock.
Lock.
Stationary climate control.
Display the charging screen.
Open the cargo area.
Panic mode.
Pathway lighting.
Access to vehicle interior
After opening one of the front doors, the vehicle is ready for operation.
Locking with the vehicle key
1. Close the driver's door.
2. Press the button on the vehicle key.
All vehicle access points are locked.
Buttons for the central locking
system
Overview
The central locking buttons are located on the
front door.
Lock.
Unlock.
Unlocking with the vehicle key
Press the button on the vehicle key.
If only the driver's door and fuel filler flap have
been unlocked due to the settings in place,
press the button on the vehicle key again to
unlock the other vehicle access points.
18
Online Edition for Part no. 01405A7AFE4 - II/23
Locking the vehicle
Press the button with the front doors
closed.
Unlocking the vehicle
Press the button.
Page 19
Getting in
OwnersManuals2.com
QUICK REFERENCE
Opening the door
Press the button.
The door is unlocked and slightly open.
Push the door outward.
Panic mode
You can trigger the alarm system if you find
yourself in a dangerous situation.
▷ Press the button on the vehicle key
and hold for at least 3 seconds.
▷ Briefly press the button on the vehi-
cle key three times in succession.
To switch off the alarm: press any button.
Access to the cargo area
Opening the cargo area
Closing the cargo area
Press the button on the inside of the cargo
area.
Displays, control elements
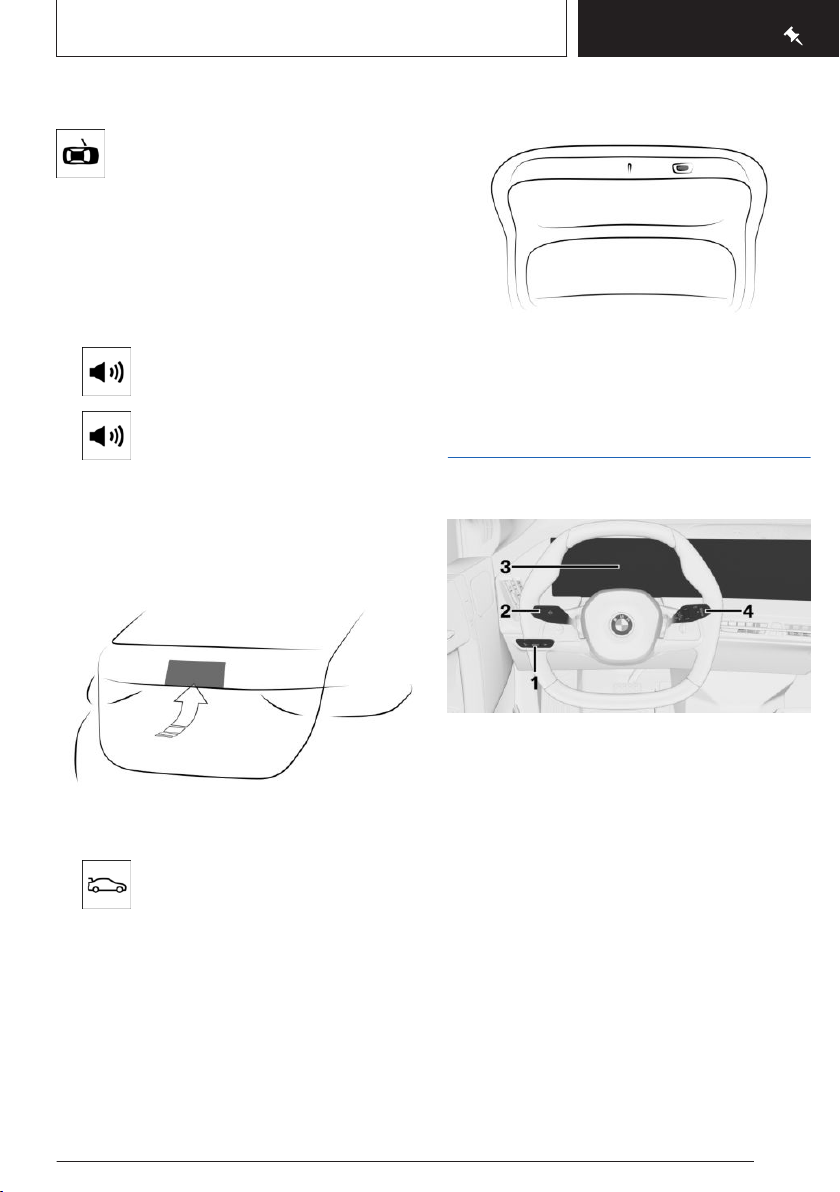
In the vicinity of the steering wheel
▷ Unlock the vehicle and then press the but-
ton on the trunk.
▷ Press and hold the button on the
vehicle key for approx. 1 second.
Depending on the setting, the doors
may be unlocked.
Online Edition for Part no. 01405A7AFE4 - II/23
1 Light switch
2 Turn signal indicator, high beams
3 Instrument cluster
4 Wipers
Indicator/warning lights
The indicator/warning lights can illuminate in a
variety of combinations and colors.
Several of the lights are checked for proper
functioning and illuminate temporarily when
drive-ready state is turned on.
19
Page 20
QUICK REFERENCE
OwnersManuals2.com
Getting in
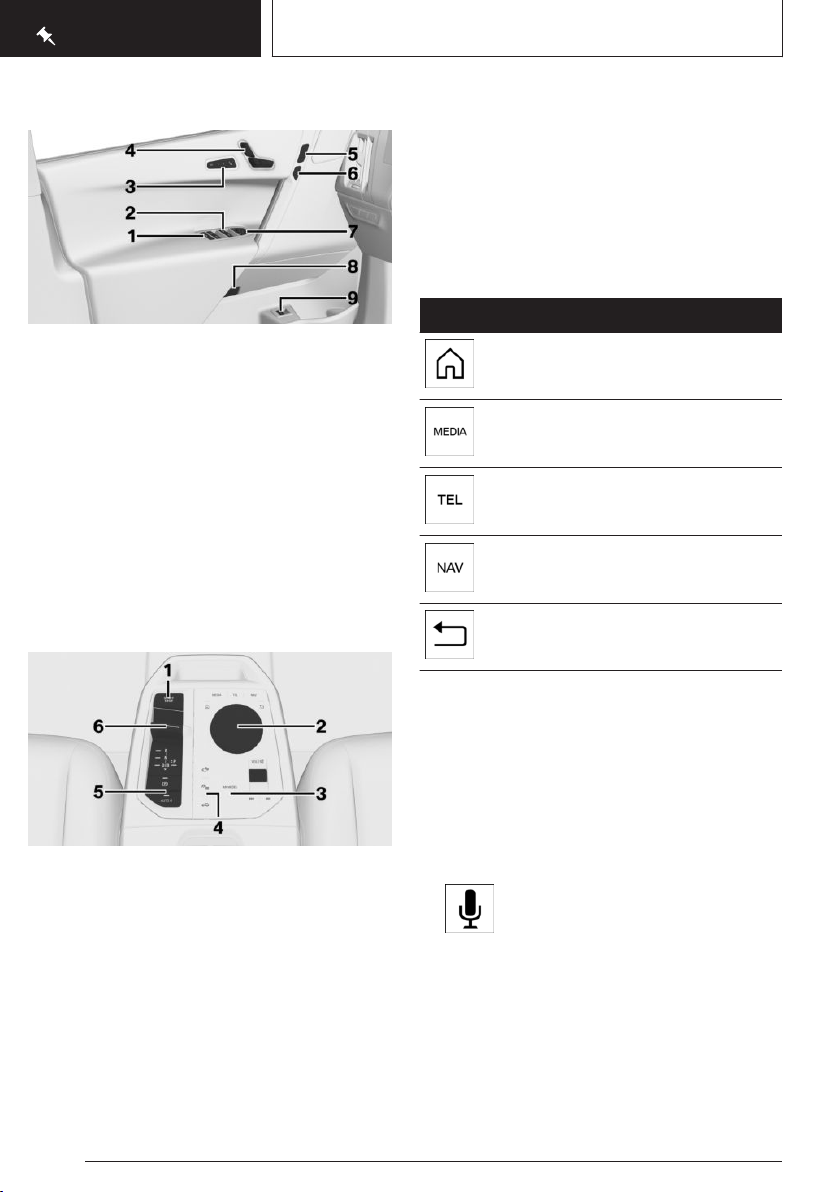
Driver's door
1 Safety switch
2 Power windows
3 Seating comfort features
4 Seat setting
5 Central locking system
6 Opening the door
7 Exterior mirror adjustment button
8 Door emergency unlocking
9 Cargo area
Switch console
BMW iDrive
Principle
BMW iDrive is the vehicle’s display and operating concept and includes a wide range of
functions.
Buttons on the Controller
Button Function
Call up the main menu.
Go to Media menu.
Go to Phone menu.
Go to Navigation menu.
Go to previous menu.
Start/Stop button
1
2 Controller
3 My Modes
4 Assistance systems
5 Parking brake, Automatic Hold
6 Selector lever
20
Online Edition for Part no. 01405A7AFE4 - II/23
BMW Intelligent Personal Assistant
Principle
The BMW Intelligent Personal Assistant is a
personal assistant that enables natural voice
operation of various vehicle functions.
Activating the voice control system
1.
2. Say the command.
Press the button on the steering
wheel briefly.
Page 21

Canceling voice control
OwnersManuals2.com
▷ Press the button on the steering
wheel again.
▷ ›Cancel‹
▷ Slide the Controller to the right or left.
▷ Press the Controller.
Getting in
QUICK REFERENCE
Online Edition for Part no. 01405A7AFE4 - II/23
21
Page 22
QUICK REFERENCE
OwnersManuals2.com
Set-up and use
Set-up and use
Seats, mirrors and steering wheel
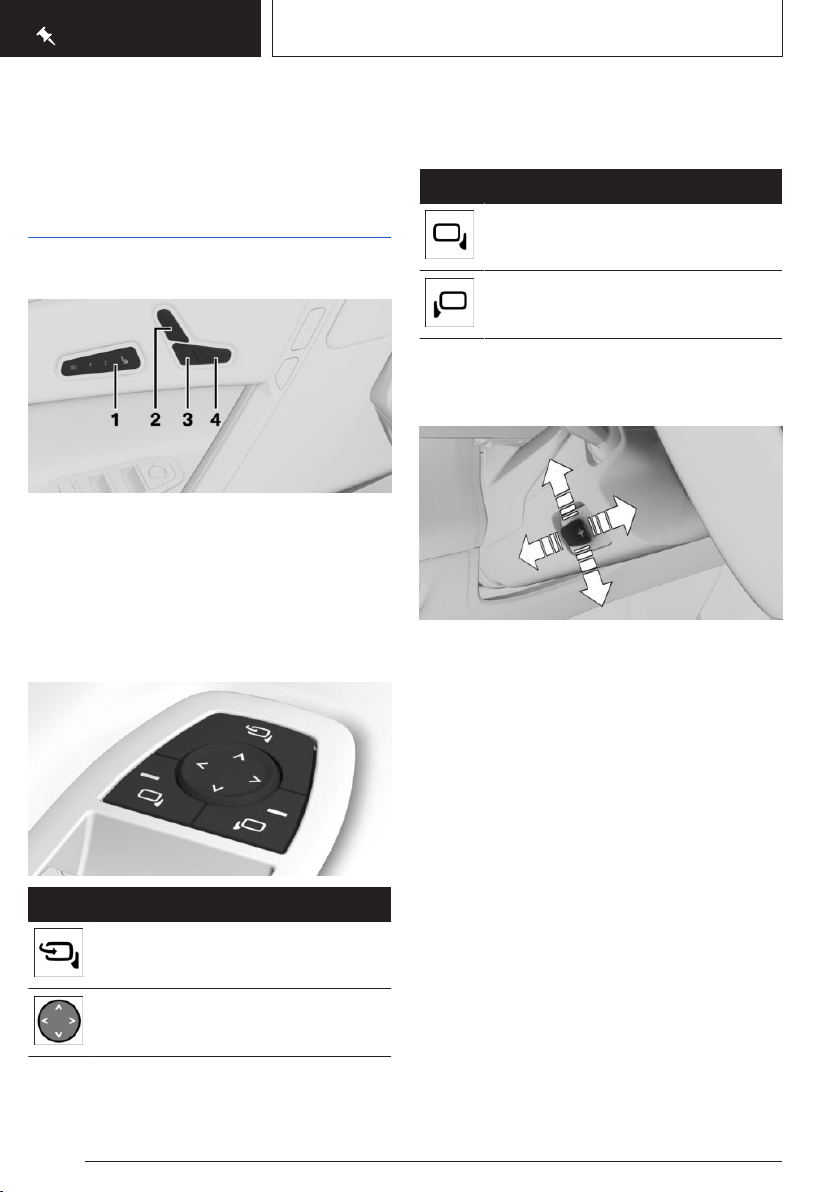
Adjusting the seat
1 Seat settings menu
2 Backrest tilt
3 Height/longitudinal direction
4 Seat tilt
Adjusting the exterior mirrors
Icon Meaning
Select left exterior mirror.
Select right exterior mirror.
Adjusting the steering wheel
position
Press the switch to adjust the steering wheel
forward/back position and height to the seat
position.
Memory function
Icon Meaning
Fold the exterior mirror in and out.
Adjust the exterior mirrors.
22
Principle
The following settings can be stored and, if
necessary, retrieved using the memory function:
Seat position.
▷
▷ Exterior mirror adjustment.
▷ Steering wheel position.
▷ Height of the Head-up display.
Online Edition for Part no. 01405A7AFE4 - II/23
Page 23
Set-up and use
OwnersManuals2.com
QUICK REFERENCE
Overview
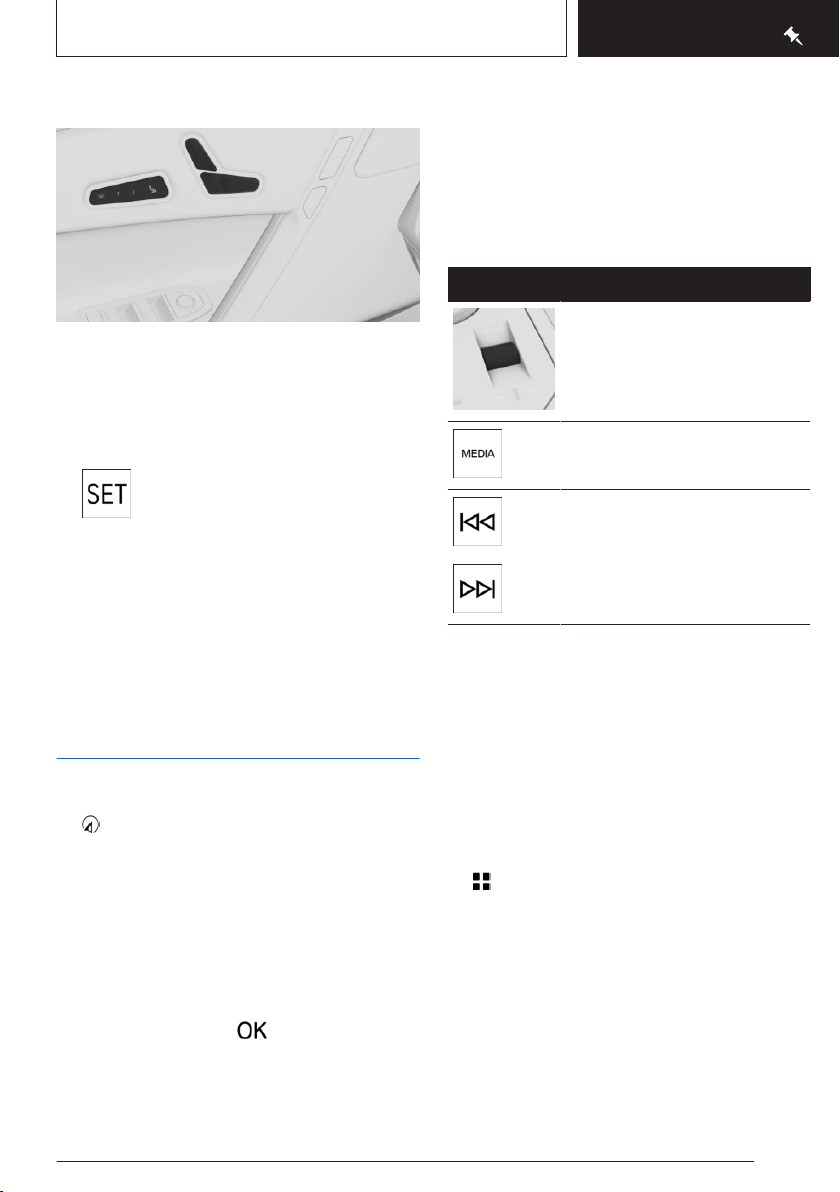
The memory buttons are located on the front
doors.
Storing settings
Set the desired position.
1.
2. Press the button. The LED illumi-
nates.
3. Press the desired memory button 1 or 2
while the LED is illuminated. A signal
sounds.
Calling up settings
Press the desired memory button 1 or 2.
Infotainment
Navigation destination input
1.
Navigation menu
2. "Destination input"
A search box and entered information such
as the search history are displayed.
3. Select the desired entry or the search box.
4. When selecting the search box, enter char-
acters or choose one of the POI categories
displayed.
If necessary, select to display more
information, e.g. to preview a map.
Apply the suggested search keywords as
necessary
5. Select the desired entry.
6. "Start guidance"
Entertainment
Depending on vehicle equipment and nationalmarket version, the center console has the following buttons.
Button Function
Turning the thumbwheel: adjusts the volume.
Pressing the thumbwheel:
turns sound output on/off.
Change the entertainment
source.
Press once: changes the station/track.
Press and hold: fast forward/rewind the track.
Using the mobile phone
General information
After the mobile phone is connected once to
the vehicle, the mobile phone can be operated
using iDrive and the steering wheel buttons.
Activate Bluetooth® on the mobile phone.
Connecting via Bluetooth®
1.
Apps menu
2. "All apps"
3. "Mobile devices"
4. "Connect new device"
Mobile phones in range are displayed on
the control display.
5. Select the desired mobile phone.
6. Compare the control number displayed on
the control display with the control number
Online Edition for Part no. 01405A7AFE4 - II/23
23
Page 24

QUICK REFERENCE
OwnersManuals2.com
in the display of the mobile phone, and confirm that they match.
7. If necessary, select the connection mode:
"Use Bluetooth"
The device is connected and displayed in the
device list.
Set-up and use
Accepting a call
Depending on the equipment, incoming calls
can be answered in several ways.
▷ Via iDrive:
"Accept"
▷
Press the button on the steering wheel.
▷ Use the thumbwheel on the steering wheel
to select from the list in the instrument cluster: "Accept"
Dialing a number
Communication menu
1.
2. "More"
3. "Dial number"
4. Enter the numbers.
5. Select the icon. The connection is es-
tablished via the mobile phone to which this
function has been assigned.
24
Online Edition for Part no. 01405A7AFE4 - II/23
Page 25
On the road
OwnersManuals2.com
On the road
QUICK REFERENCE
Driving
Drive-ready state
General information
Activated drive-ready state is the equivalent of
a running engine in conventional vehicles.
Turning on the drive-ready state
1. Close the driver's door.
2. Depress the brake pedal.
3. Press the Start/Stop button.
A signal tone sounds. Drive-ready state is
switched on.
Display in the instrument cluster
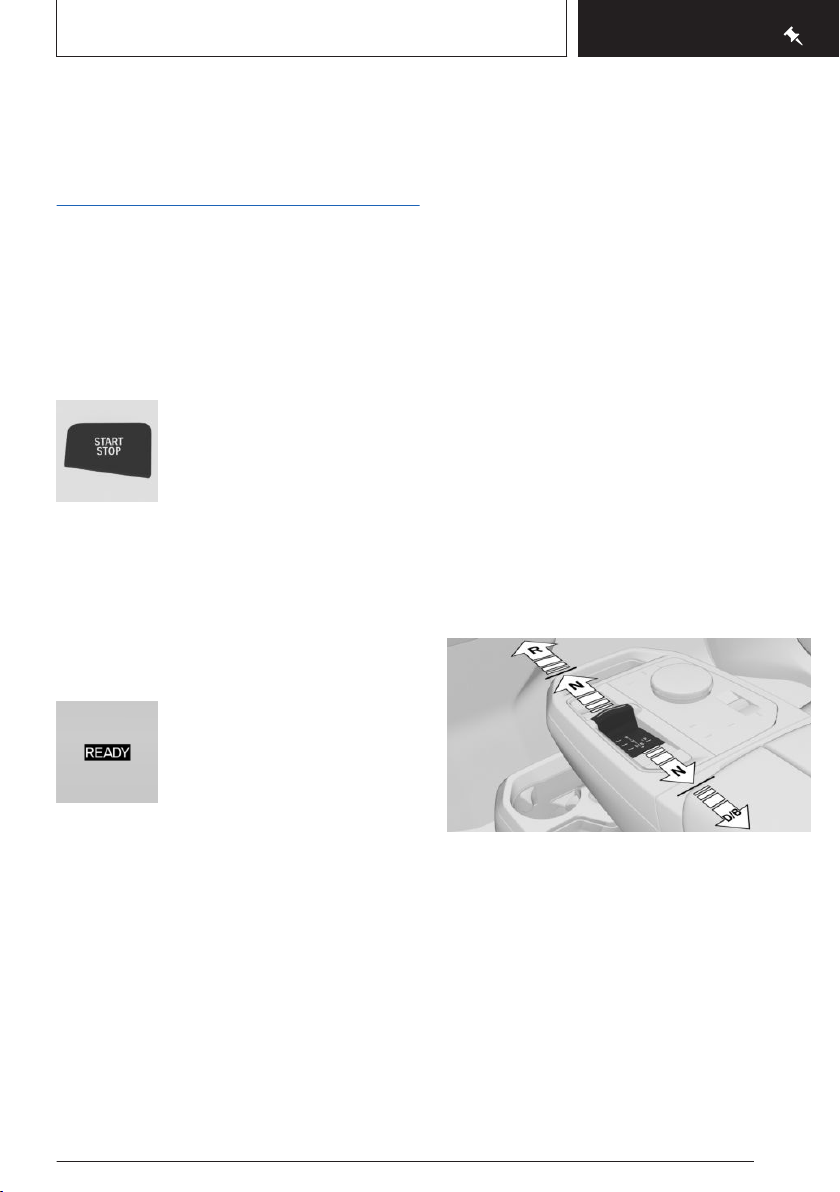
The READY display indicates
that the vehicle is ready for driving.
Drive-ready state in detail
Functional requirements
Driving is possible when the following prerequisites are met:
▷ The state of high-voltage battery charge is
sufficient.
▷ The driver's door is closed.
▷ Charging cable is detached.
Driving
1. Turn on drive-ready state.
2. Depress the brake pedal.
3. Engage selector lever position D, B or R.
4. Depress the accelerator pedal to drive.
Engaging selector lever position R, N,
D, B
Turning off drive-ready state
After stopping the vehicle:
1.
Apply brake and engage the parking brake.
2. Press the Start/Stop button.
The READY indicator goes out and a signal
tone sounds.
Online Edition for Part no. 01405A7AFE4 - II/23
▷ Reverse R.
▷ Neutral N.
▷ Gear position D.
▷ B gear position with high energy recovery.
To prevent the vehicle from creeping after
you select a gear position or reverse, maintain pressure on the brake pedal until you are
ready to drive off.
Engage selector lever position R only when the
vehicle is stationary.
25
Page 26
QUICK REFERENCE
OwnersManuals2.com
On the road
In selector lever position B, the vehicle will decelerate more than in selector lever position D
when rolling to a stop.
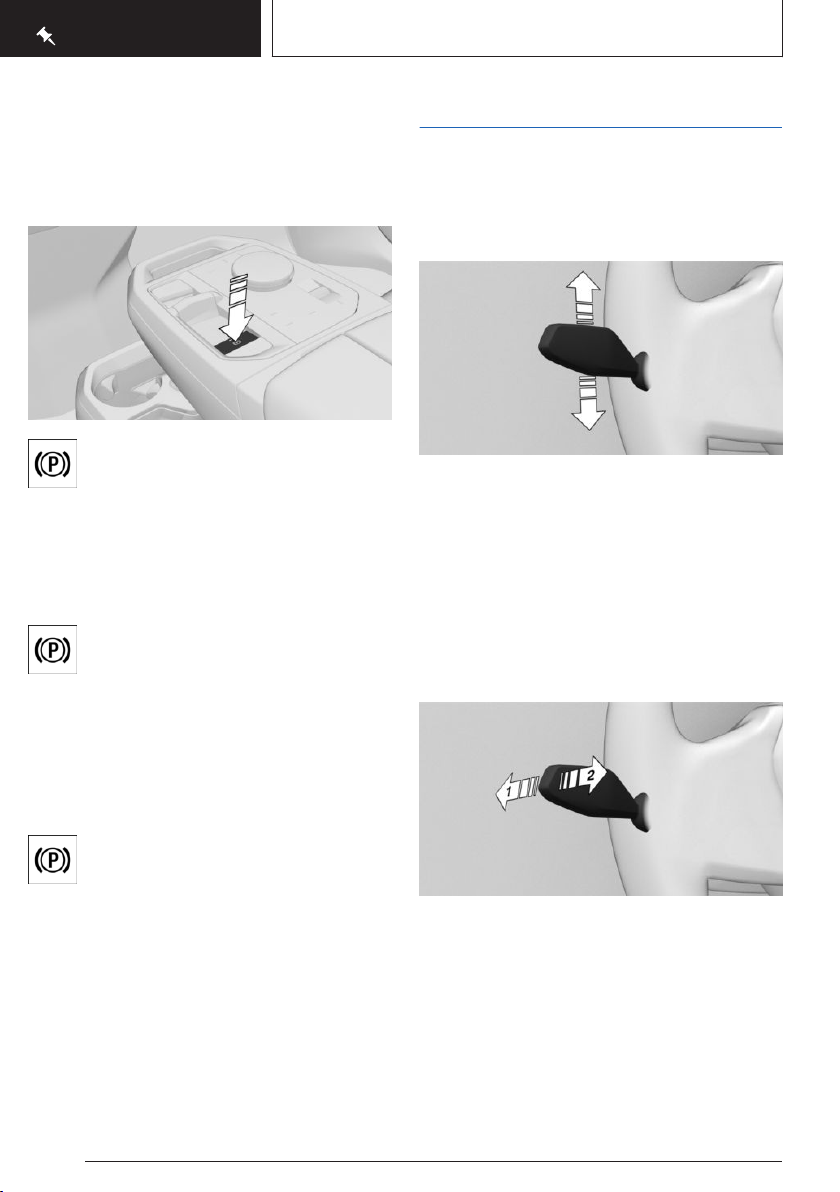
Engaging selector lever position P
Press the button.
The transmission lock is engaged and
the parking brake is engaged.
Parking brake
Setting the parking brake
Press the button.
The LED on the button and the indicator light in the instrument cluster are
illuminated.
The parking brake is engaged and transmission lock is engaged.
Light and view
Turn signal, high beams, headlight
flasher
Turn signal
▷ Flashing: press the lever past the resist-
ance point.
▷ Triple turn signal activation: lightly tap the
lever up or down.
▷ Brief flashing: press the lever to the resist-
ance point and hold it there for as long as
you want the turn signal to flashing.
High beams, headlight flasher
Releasing the parking brake
With the brake pedal pressed and
drive-ready state switched on, press
the button.
The LED and the indicator light go out.
The parking brake is released.
Parking
Make sure the parking brake is engaged.
26
Online Edition for Part no. 01405A7AFE4 - II/23
Press the lever forward or pull it backward.
High beams on, arrow 1.
▷
The high beams illuminate when the low
beams are switched on.
▷ High beams off/headlight flasher, arrow 2.
Page 27
On the road
OwnersManuals2.com
QUICK REFERENCE
Lights and lighting
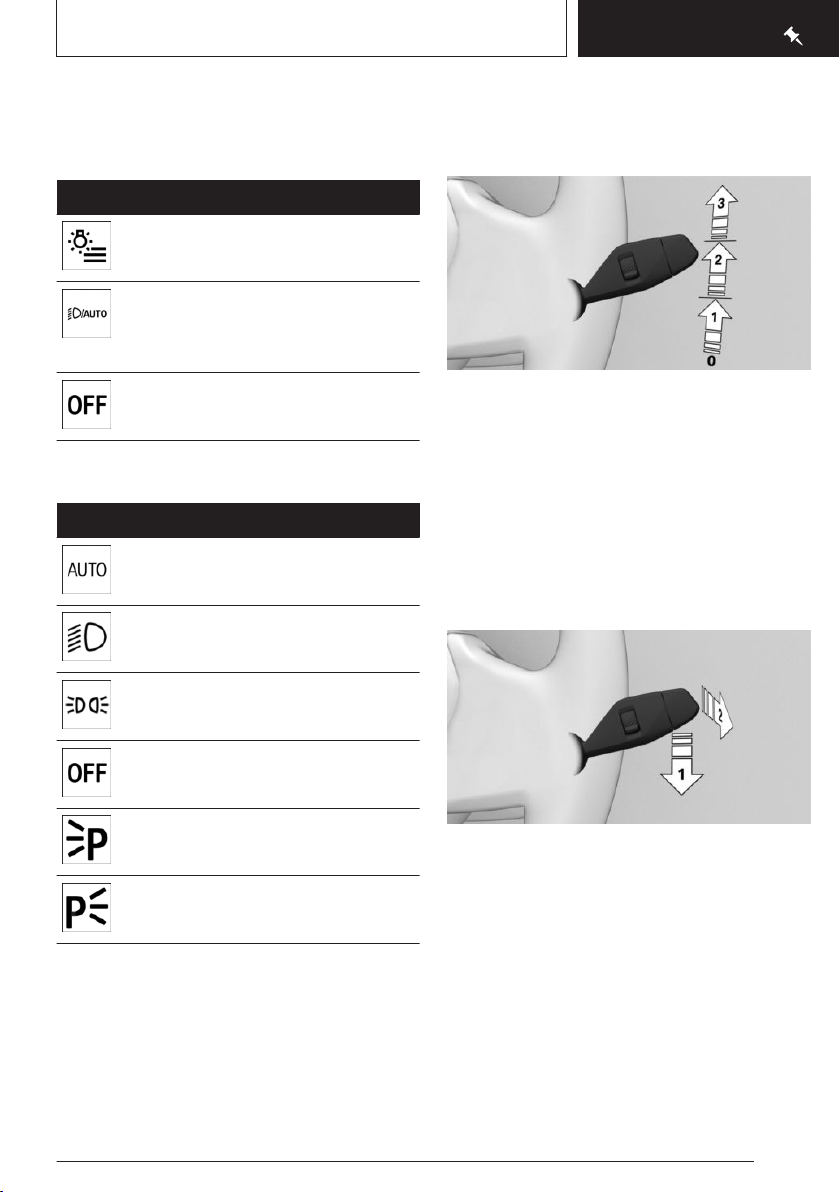
Buttons in the vehicle
Icon Function
Exterior lighting menu.
Automatic headlight control.
Low beams.
Exterior lighting off.
Exterior lighting off.
Functions via iDrive
Icon Function
Automatic headlight control.
Low beams.
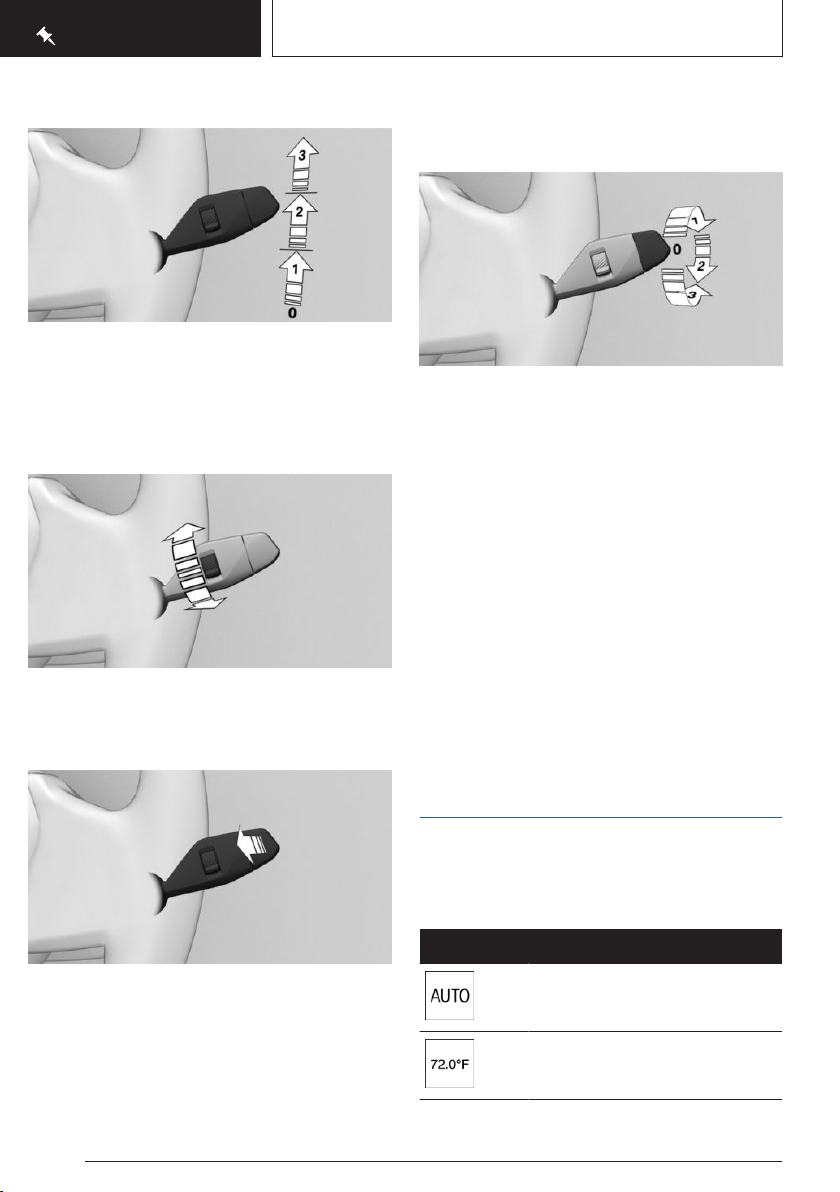
Window wiper system
Turning on window wiper system
Press the lever up until the desired position is
reached.
▷ Resting position of the wipers, position 0.
▷ Rain sensor, position 1.
▷ Normal wiper speed, position 2.
▷ Fast wiper speed, position 3.
Turning off the window wiper system
and flick wipe
Parking lights.
Exterior lighting off.
Left roadside parking light.
Right roadside parking light.
Online Edition for Part no. 01405A7AFE4 - II/23
Press the lever down or forward.
Turning off: press the lever down, arrow 1,
▷
until it reaches the 0 position.
▷ Flick wipe: press the lever down from the
0 position, arrow 1, and press the lever in
position 0 or position 1 forward, arrow 2.
The lever automatically returns to its 0 position when released.
27
Page 28
QUICK REFERENCE
OwnersManuals2.com
On the road
Activating/deactivating rain sensor
Enable: press lever up once from the 0 position, arrow 1.
Disable: press lever back into the 0 position.
Adjusting the rain sensor sensitivity
Turn the thumbwheel on the wiper lever.
Cleaning the windshield
Rear wiper
Switching on the rear wiper
Turn the outer switch upward.
▷ Resting position of wiper, position 0.
▷ Intermittent operation, arrow 1. When re-
verse gear is engaged, the system switches
to continuous operation.
Clean the rear window
Turn the outer switch in the desired direction.
▷ In rest position: Turn the switch downward,
arrow 3. The switch returns to its rest position when released.
▷ In intermittent operation: turn the switch
further, arrow 2. The switch automatically
returns to its interval position when released.
Pull the lever.
28
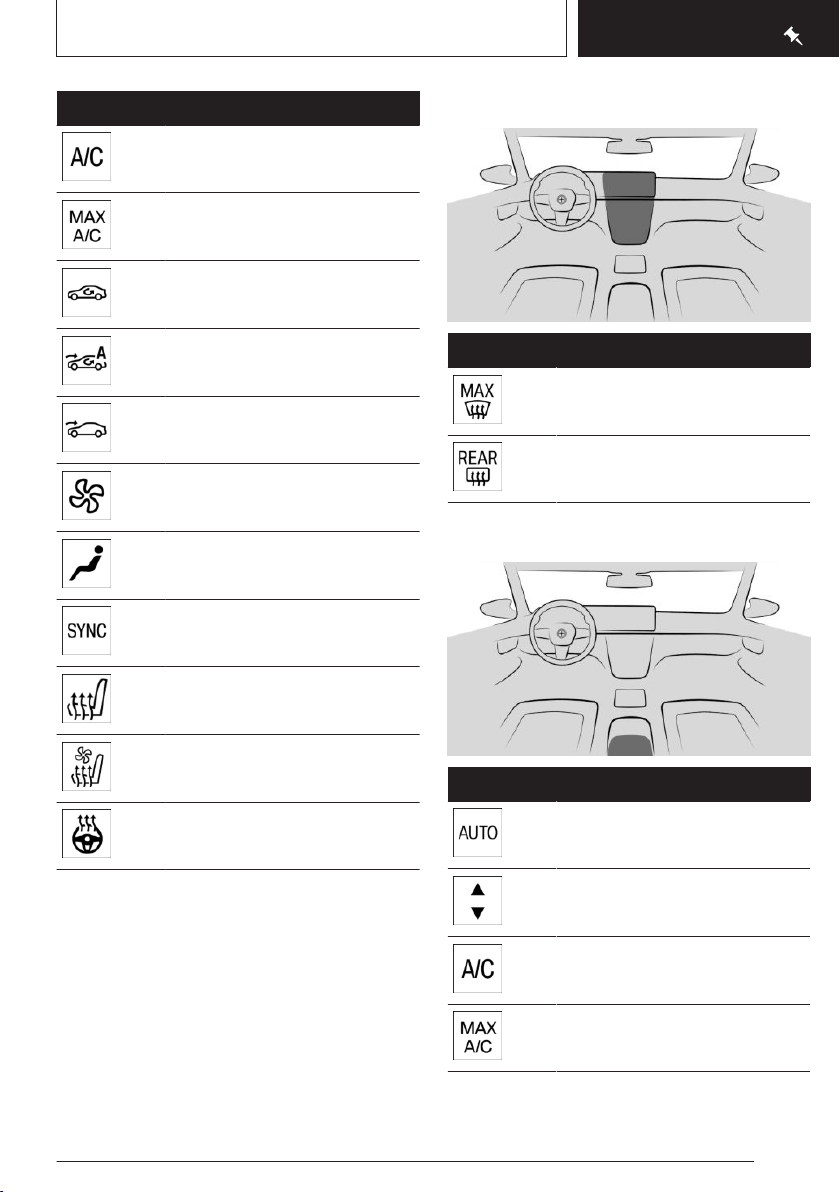
Climate control
Climate control functions
Functions in the Climate menu
Icon
Online Edition for Part no. 01405A7AFE4 - II/23
Function
Automatic program.
Temperature.
Page 29
On the road
OwnersManuals2.com
QUICK REFERENCE
Icon Function
Air conditioning.
Maximum cooling.
Air recirculation mode.
Automatic recirculated-air control.
Fresh air.
Air flow.
Air distribution.
SYNC program.
Buttons, automatic climate control
Icon Function
Defrost function.
Rear window defroster.
Buttons, rear automatic climate control
Seat heating.
Panel heating.
Active seat ventilation.
Steering wheel heating
Online Edition for Part no. 01405A7AFE4 - II/23
Icon Function
Automatic program.
Temperature.
Air conditioning.
Maximum cooling.
29
Page 30
QUICK REFERENCE
OwnersManuals2.com
On the road
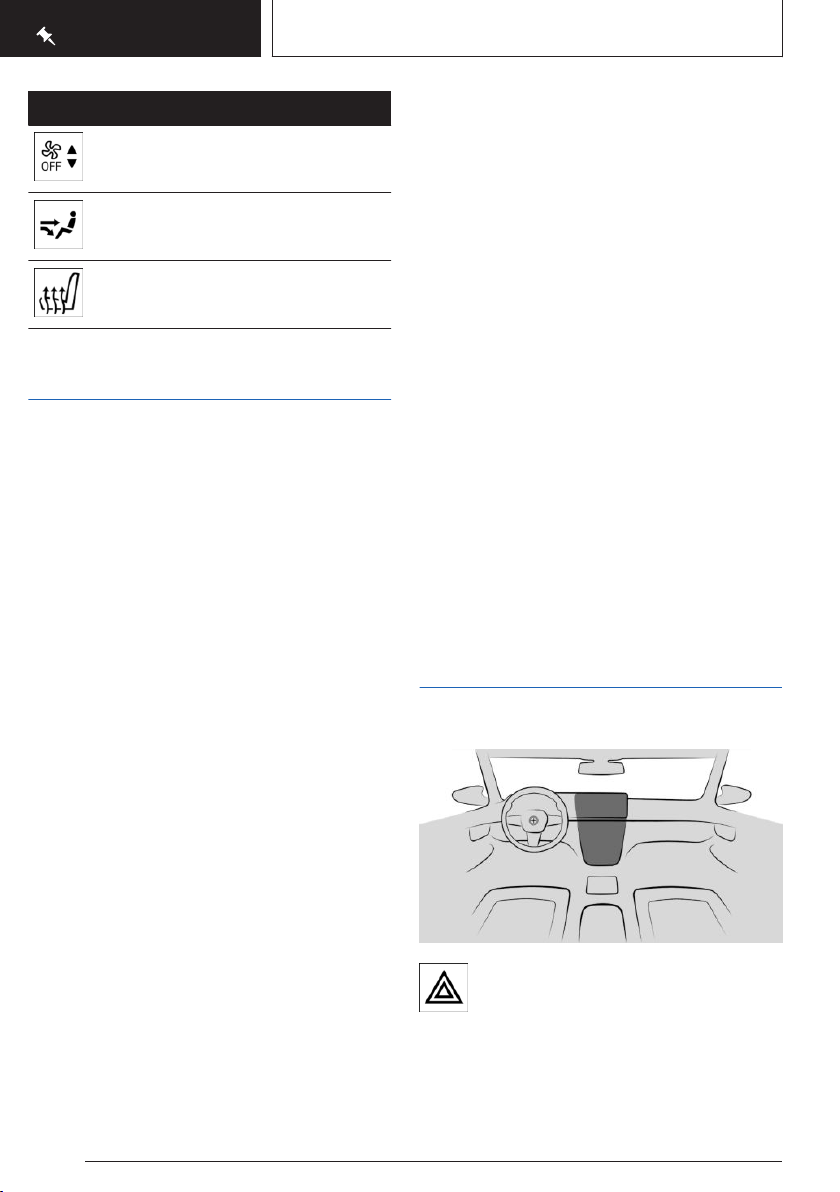
Icon Function
Air flow.
Air distribution.
Seat and panel heating.
Intermediate stop
Charging the vehicle
Depending on national-market version, use a
mode 2 charging cable, fast charging cable
(mode 3), or the permanently installed cable
of a charging station to charge the vehicle.
The charging cable can be stowed in the cargo
area, for instance under the cargo floor panel
or in a bag.
Before disconnecting and connecting a charging cable, clean the area between the charging
connector socket and charging socket and the
charging cable plug as necessary, for instance
remove snow.
If necessary, unlock the charging cable before
removing.
The charging status is indicated on the indicator light on the charging socket.
Keep the charging socket cover closed when
the charging socket is not used.
After correcting the tire pressure
If equipped with a Tire Pressure Monitor, the
corrected tire pressures are applied automatically. Make sure that the correct tire settings
have been made. With tires that cannot be
found in the tire pressure values on the control
display, reset the Tire Pressure Monitor (TPM).
If equipped with a flat tire monitor, reinitialize
the flat tire monitor.
Checking the tire pressure
Regularly check the tire inflation pressure and
correct it as needed:
▷ At least twice a month.
▷ Before embarking on an extended trip.
Cleaning the wheels
The friction during hard braking may produce
brake dust and make the rims dirty. Brake dust
can be removed by cleaning the rims. BMW
recommends using vehicle care and cleaning
agents from BMW.
Providing assistance
Hazard warning system
Wheels and tires
Tire pressure specifications
The tire inflation pressure specifications can be
found in the tire inflation pressure table in the
printed Owner's Manual.
30
Online Edition for Part no. 01405A7AFE4 - II/23
Hazard warning system button
Page 31

ConnectedDrive
OwnersManuals2.com
BMW Assistance
Contact BMW Assistance for information and
support for all aspects of the vehicle.
1. Apps menu
2. "All apps"
3. "BMW Assistance"
4. Select the desired service.
Follow the displays on the control display.
A voice connection is established.
BMW Teleservices
Teleservices are services that help to maintain
vehicle mobility.
Teleservices can comprise the following services:
▷ BMW Roadside Assistance.
▷ BMW Accident Assistance.
▷ Teleservice Call.
▷ Your authorized service center.
On the road
QUICK REFERENCE
Online Edition for Part no. 01405A7AFE4 - II/23
31
Page 32
CONTROLS
OwnersManuals2.com
Dashboard
Dashboard
Vehicle features and options
This chapter describes model-specific equipment, systems, and functions that are currently
available, or may become available in the future, even if they are not present in the vehicle.
Additional information:
Vehicle equipment, refer to page 8.
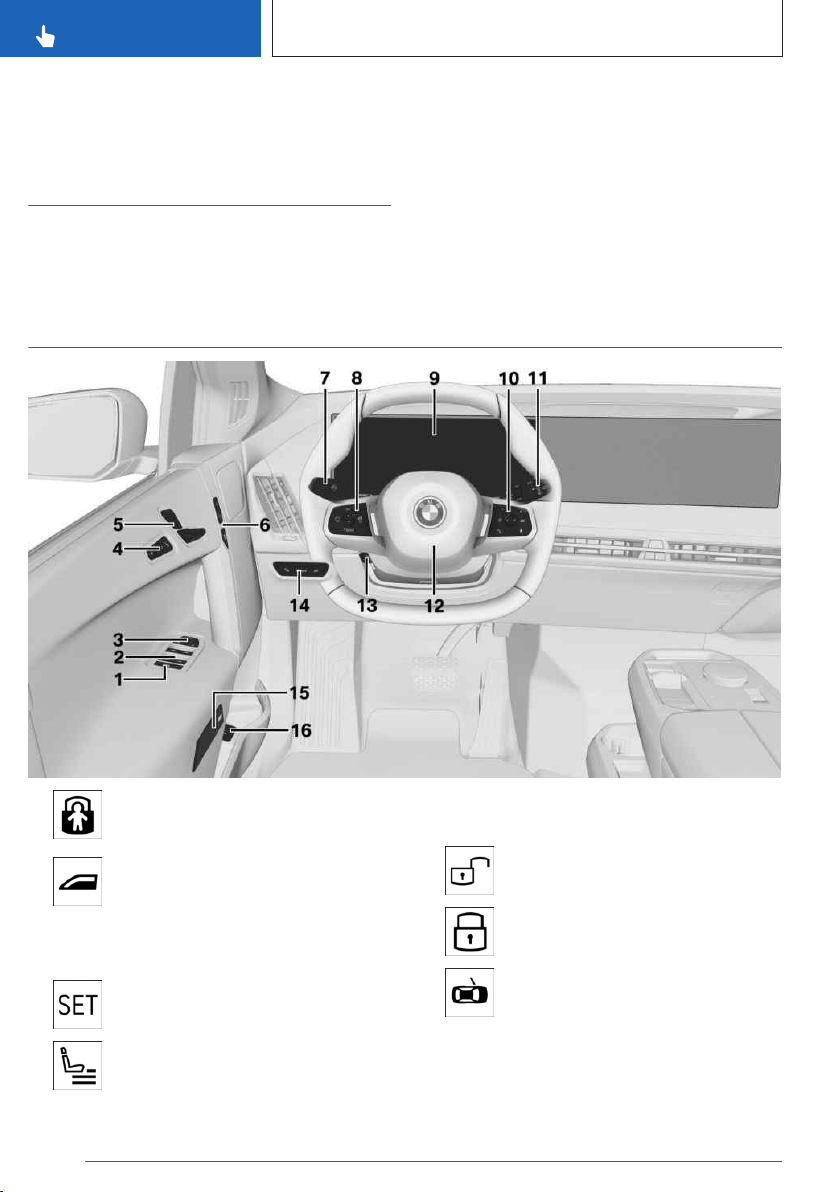
In the vicinity of the steering wheel
1 Safety switch 98
2 Power windows 96
3 Exterior mirror adjustment button 107
4 Seating comfort features
Memory function 109
Seat settings menu 100
32
Online Edition for Part no. 01405A7AFE4 - II/23
5 Seat setting 100
6 Buttons for central locking system 91
Unlocking
Locking
Opening the door
7 Pitman arm, left
Page 33
Dashboard
OwnersManuals2.com
CONTROLS
Turn signal 131
High beams, headlight flasher
131
8 Steering wheel buttons, left
Turn speed control systems on/off
206
Select speed control system 206
Store speed 206
Enabling/disabling the warning
for exceeding the permitted maximum speed 204
Set speed 206
9 Instrument cluster 136
10 Steering wheel buttons, right
Settings, instrument cluster 136
Settings, Head-up display 138
Volume, see Owner's Manual for
Navigation, Entertainment and
Communication 6
Audio, see Owner's Manual for
Navigation, Entertainment, Communication 6
Voice control, BMW Intelligent
Personal Assistant 55
Telephone, see Owner's Manual
for Navigation, Entertainment and
Communication 6
Selection of configuration menus
for instrument cluster and Headup display 136
Using selection lists 146
Accessing and resetting trip data
150
Resetting the G-Meter values
152
11 Pitman arm, right
Wipers 132
Rain sensor 133
Cleaning the windshield 134
Rear wiper in Canadian models
134
Rear wiper 134
Clean the rear window 134
12 Horn, entire surface
13 Adjusting the steering wheel 108
14 Lights
Online Edition for Part no. 01405A7AFE4 - II/23
33
Page 34
CONTROLS
OwnersManuals2.com
Dashboard
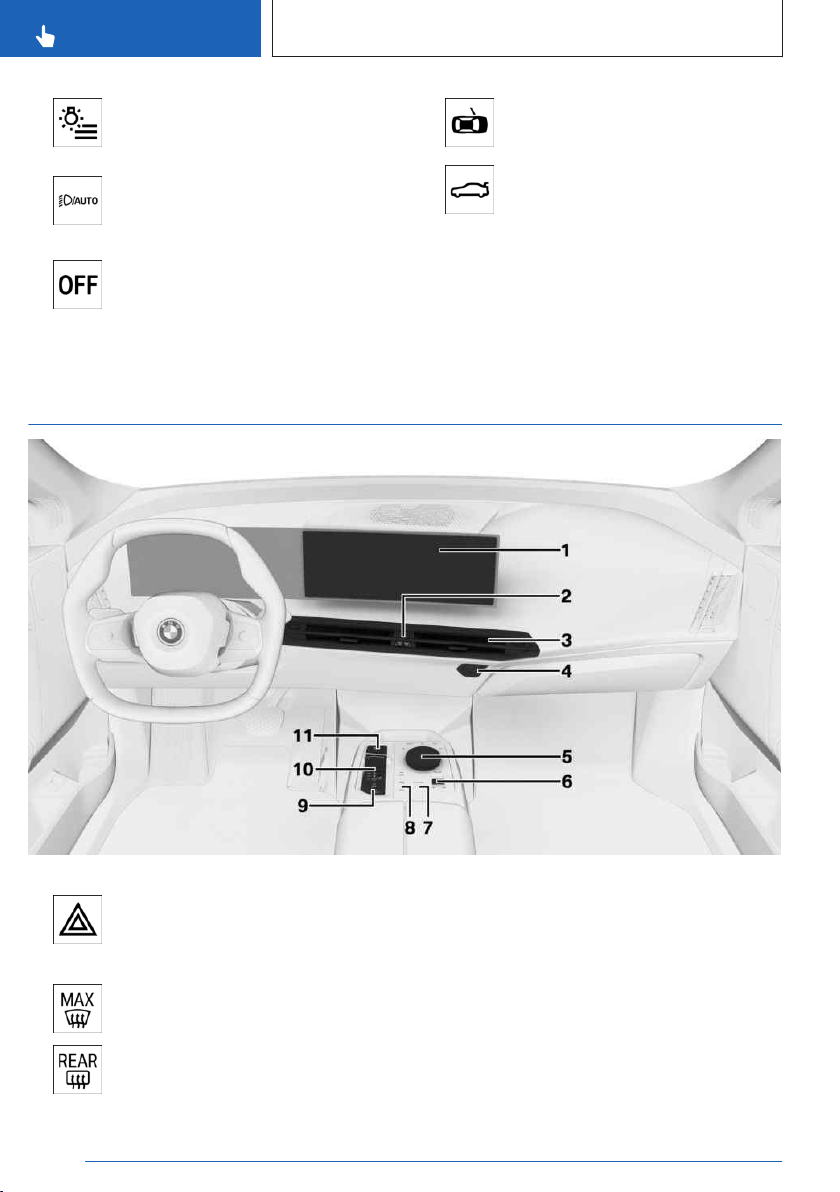
Exterior lighting menu 157
Automatic High Beam Assistant
161
Driving lights automatic 157
Low beams 158
Adaptive lighting functions 160
Exterior lighting off 158
15 Door emergency unlocking 91
16 Opening and closing cargo area
In the vicinity of the center console
83
1 Control display 50
2 Hazard warning system 350
Climate control 260
Defrost function 266
Rear window defroster 267
34
Online Edition for Part no. 01405A7AFE4 - II/23
3 Ventilation 268
4 Button for glove compartment 281
5 Controller with buttons 52
6 Operating elements for entertainment sys-
tem, see Owner's Manual for Navigation,
Entertainment, Communication 6
Page 35
Dashboard
OwnersManuals2.com
CONTROLS
Adjusting the volume
Station/title forward
Station/title back
7 My Modes 126
8 Parking assistance systems 230
Vehicle settings menu 49
Two-axle ride level control 258
9 Automatic Hold 129
Parking brake 127
10 Selector lever 120
11 Turning drive-ready state on/off
119
Online Edition for Part no. 01405A7AFE4 - II/23
35
Page 36
CONTROLS
OwnersManuals2.com
Dashboard
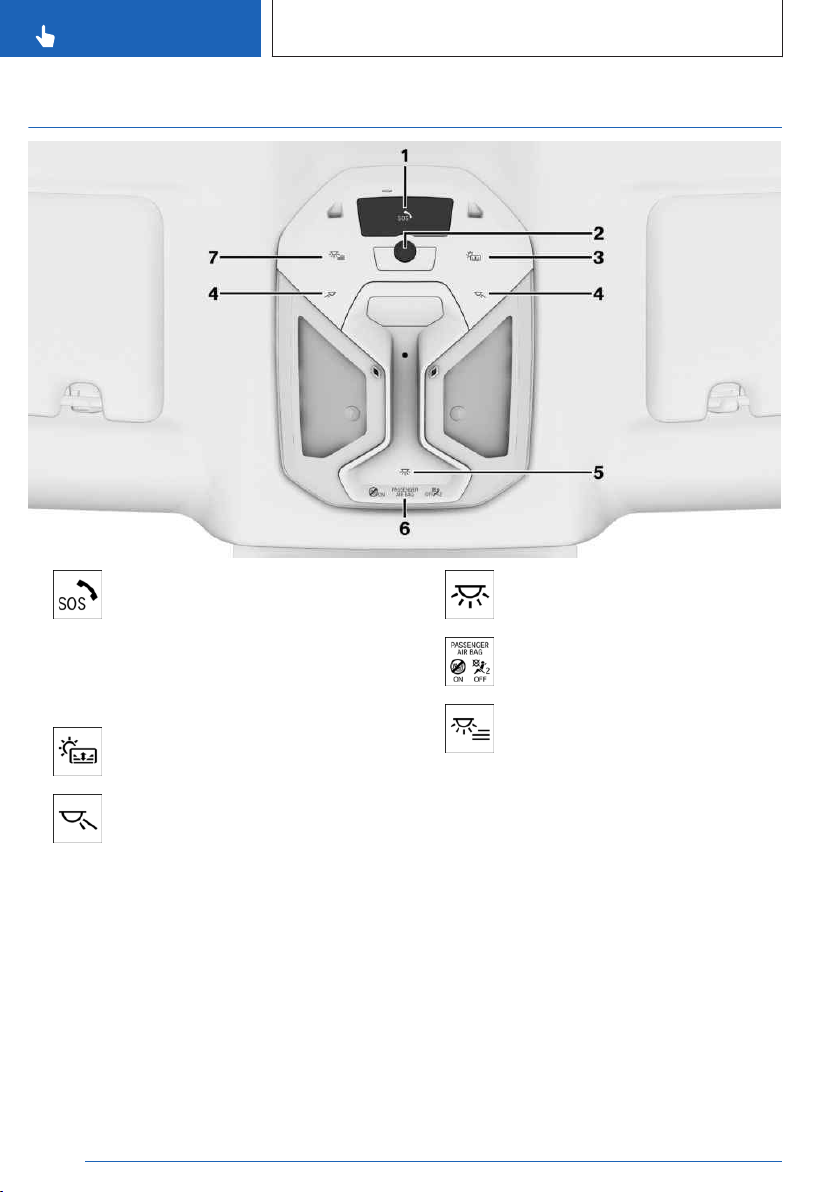
In the vicinity of the headliner
1 Emergency Call, SOS 352
2 Camera
Gesture control 60.
Interior camera 277
3 Glass sunroof 99
4 Reading lights 164
36
Online Edition for Part no. 01405A7AFE4 - II/23
5 Interior lights 163
6 Indicator light, front passenger
airbag 168
7 Interior lighting menu 49
Page 37
Sensors of the vehicle
OwnersManuals2.com
Sensors of the vehicle
CONTROLS
Vehicle features and options
This chapter describes model-specific equipment, systems, and functions that are currently
available, or may become available in the future, even if they are not present in the vehicle.
Additional information:
Vehicle equipment, refer to page 8.
Overview
Depending on the equipment, the following
cameras and sensors are installed in the vehicle:
▷ Front camera.
▷ Camera behind the windshield.
▷ Top view cameras.
▷ Rearview camera.
▷ Front radar sensor.
▷ Radar sensors, side, front.
▷ Radar sensors, side, rear.
▷ Ultrasonic sensors in the front/rear bump-
ers.
▷ Ultrasonic sensors, side.
Cameras
Front camera
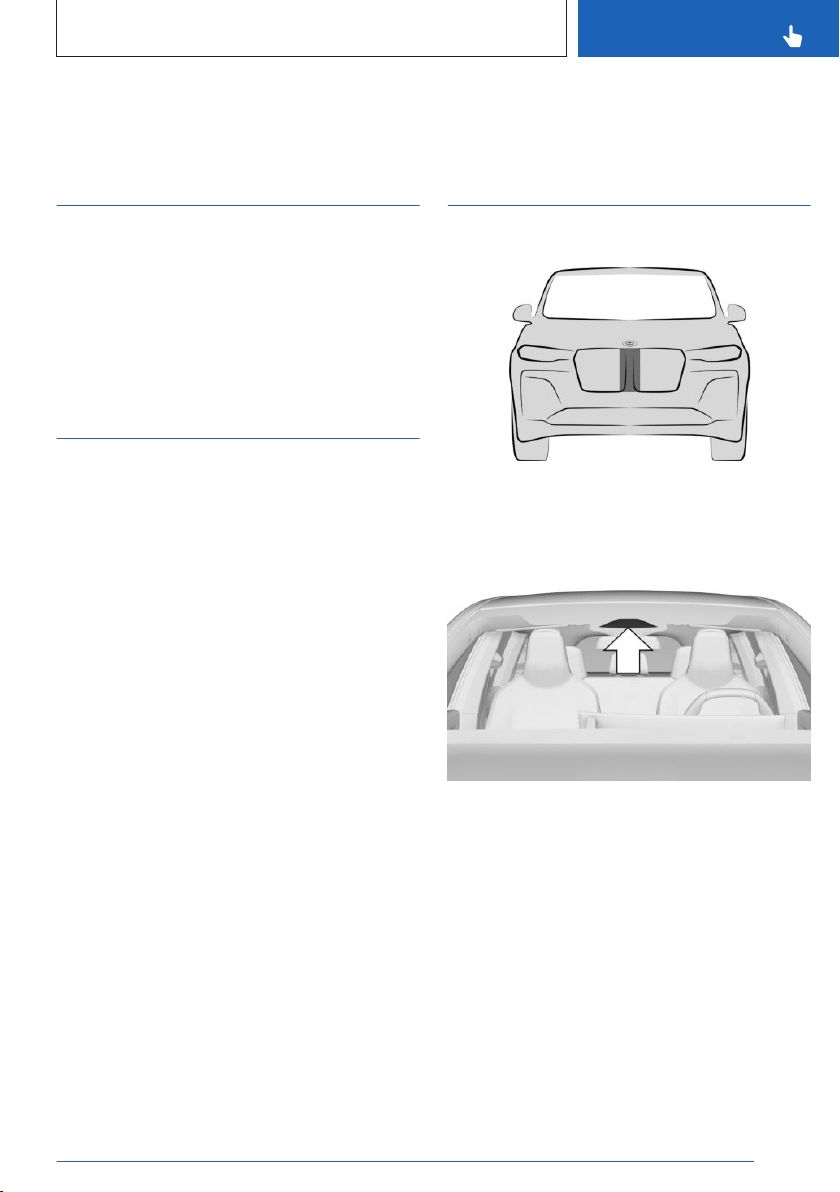
The front camera is located in the radiator
grille.
Camera behind the windshield
The camera behind the windshield is located
near the interior mirror.
Online Edition for Part no. 01405A7AFE4 - II/23
37
Page 38
CONTROLS
OwnersManuals2.com
Sensors of the vehicle
Top view cameras
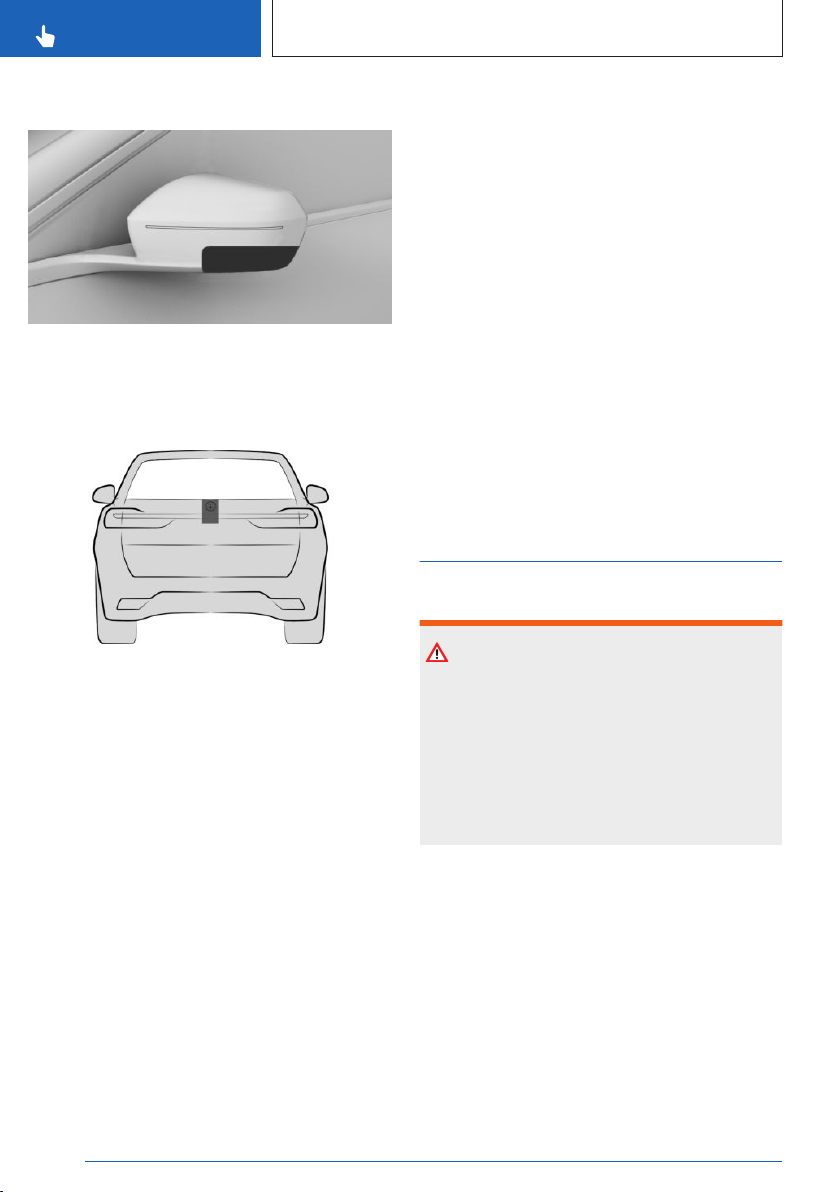
One exterior mirror camera is located at the
bottom of each exterior mirror housing.
Rearview camera
The rearview camera is located in the emblem
on the rear end.
Functional requirement of the
cameras
The areas of the cameras are clean and clear.
Additional information:
Washing the vehicle, refer to page 357.
▷
▷ Vehicle care, refer to page 359.
▷ When the camera field of view is covered,
for instance by a fogged up windshield or
labels.
▷ If the camera lens is dirty or damaged.
▷ With exterior mirrors folded in.
▷ With open doors or open cargo area.
▷ When driving toward bright lights or strong
reflections, e.g., because of a setting sun.
▷ When it is dark outside.
▷ The camera has overheated due to exces-
sive temperatures and temporarily turned
off.
▷ During calibration of the camera immedi-
ately after vehicle delivery.
If applicable, a Check Control message will be
displayed when the system limits are reached.
Radar sensors
Safety information
Warning
The vehicle radar sensors and thus also the
driver assistance systems can be impaired by
external influences, e.g., interference. There
is a risk of accident. Watch the surrounding
traffic situation closely, be ready to take over
steering and braking at any time, and actively
intervene where appropriate.
System limits of the cameras
The function of the cameras can be limited or
may indicate something wrong, for instance in
the following situations:
In heavy fog, wet conditions, or snowfall.
▷
▷ On steep hills, in steep depressions or in
tight curves.
38
Online Edition for Part no. 01405A7AFE4 - II/23
Page 39
Sensors of the vehicle
OwnersManuals2.com
CONTROLS
Front radar sensor
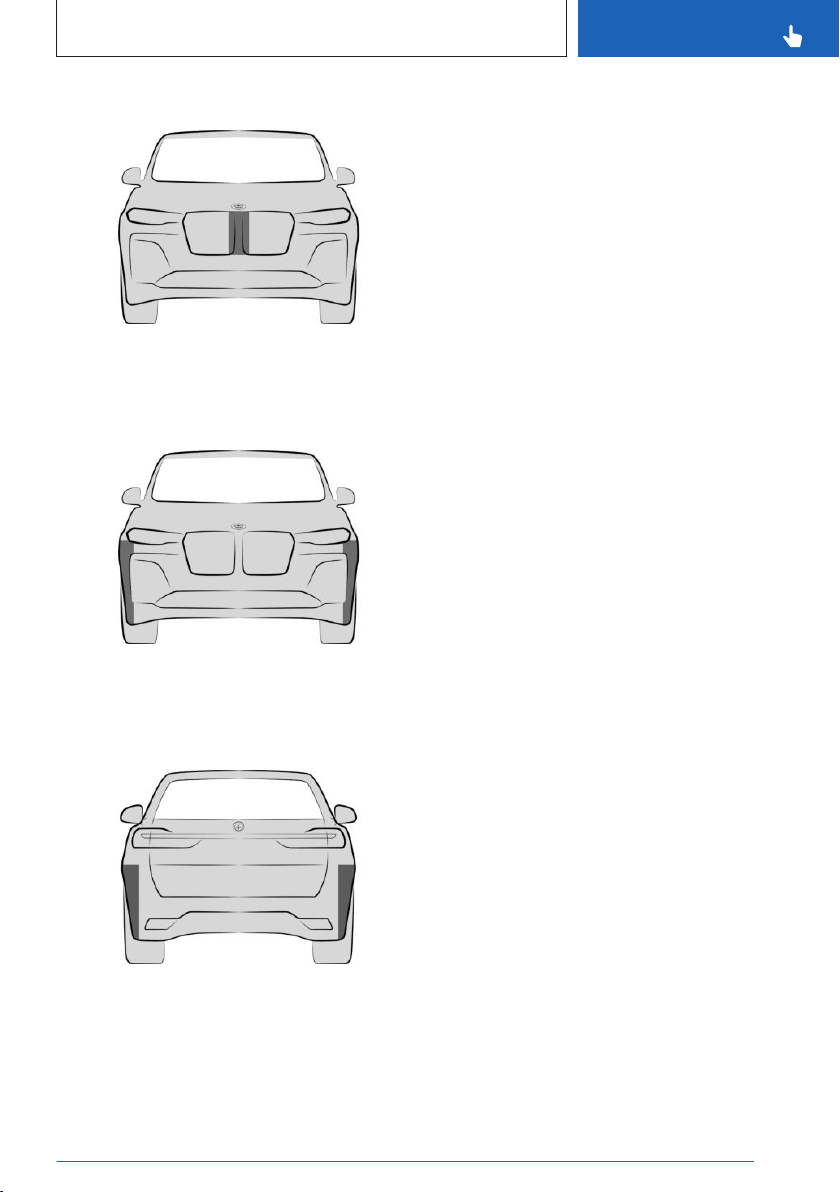
The front radar sensor is located in the radiator
grille.
Radar sensors, side, front
The radar sensors are located to the side in
the front bumper.
Radar sensors, side, rear
Functional requirement of the radar
sensors
The areas of the radar sensors are clean and
clear.
Additional information:
▷ Washing the vehicle, refer to page 357.
▷ Vehicle care, refer to page 359.
System limits of the radar sensors
The function of the radar sensors can be limited or not available, for instance in the following situations:
▷ In case of dirty sensors.
▷ In case of iced-up sensors.
▷ If sensors are covered, such as by labels,
films or a license-plate carrier.
▷ If the sensor is not aligned correctly, for in-
stance due to parking damage.
▷ If the radiation range of the sensors is cov-
ered, e.g., by protruding cargo.
▷ When the field of view of the sensors is cov-
ered, e.g., by garage walls, hedges, snow
hills, vehicles or trailers.
▷ After improper paint work on the vehicle in
the area of the sensors.
▷ On steep hilltops or in sharp dips in the
road.
If applicable, a Check Control message will be
displayed when the system limits are reached.
The radar sensors are located on the side in
the rear bumper.
Online Edition for Part no. 01405A7AFE4 - II/23
39
Page 40
CONTROLS
OwnersManuals2.com
Sensors of the vehicle
Ultrasonic sensors
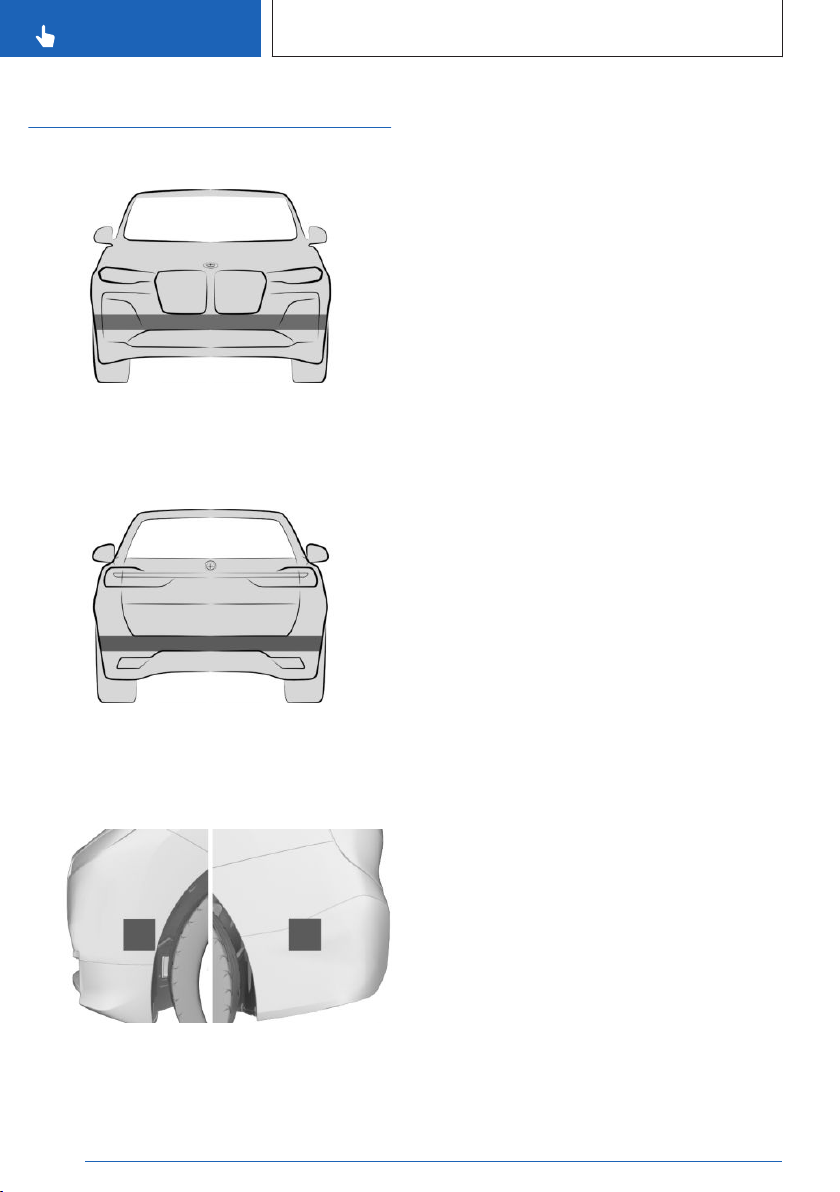
Ultrasonic sensors, front
The ultrasonic sensors of the parking assistance systems are located in the front bumper.
Ultrasonic sensors, rear
The ultrasonic sensors of the parking assistance systems are located in the rear bumper.
Ultrasonic sensors, side
The ultrasonic sensors of the parking assistance systems are located on the side in the
front and rear bumpers.
Functional requirement of the
ultrasonic sensors
The areas of the ultrasonic sensors are clean
and clear.
Additional information:
▷ Washing the vehicle, refer to page 357.
▷ Vehicle care, refer to page 359.
System limits of the ultrasonic
sensors
The detection of objects with ultrasonic measurements can run into physical limits, e.g., in
the following situations:
▷ If the sensors are dirty or covered, e.g., by
stickers.
▷ If the sensor is not aligned correctly, for in-
stance due to parking damage.
▷ After improper paint work on the vehicle in
the area of the sensors.
▷ For small children and animals.
▷ For persons with certain clothing, for in-
stance jacket.
▷ With obstacles and persons at the edge of
the lane.
▷ In case of external interference with the
ultrasonics, for instance from passing vehicles, loud machines or other ultrasonic
sources.
▷ Under certain weather conditions, e.g., high
moisture, wet conditions, snowfall, cold, extreme heat, or strong wind.
▷ With tow bars and trailer hitches of other
vehicles.
▷ With thin or wedge-shaped objects.
▷ With moving objects.
▷ With elevated, protruding objects such as
ledges.
▷ With objects with corners, edges, and
smooth surfaces.
40
Online Edition for Part no. 01405A7AFE4 - II/23
Page 41

Sensors of the vehicle
OwnersManuals2.com
▷ For objects with a fine surface or objects
such as wire mesh fences.
▷ For objects with porous surfaces.
▷ With small and low objects, for instance
boxes.
▷ Low objects already displayed, for instance
curbs, can be outside of the detection
ranges of the sensors.
▷ With soft obstacles or obstacles covered in
foam material.
▷ With plants and bushes.
▷ In automatic car washes.
▷ In the event of uneven floors, e.g. speed
bumps.
▷ Due to heavy exhaust.
▷ Cargo that extends beyond the perimeter of
the vehicle is not taken into account by the
ultrasonic sensors.
If applicable, a Check Control message will be
displayed when the system limits are reached.
CONTROLS
Online Edition for Part no. 01405A7AFE4 - II/23
41
Page 42

CONTROLS
OwnersManuals2.com
Operating condition of the vehicle
Operating condition of the vehicle
Set the parking brake.
Vehicle features and options
This chapter describes model-specific equipment, systems, and functions that are currently
available, or may become available in the future, even if they are not present in the vehicle.
Additional information:
Vehicle equipment, refer to page 8.
General information
Depending on the situation, the vehicle is in
one of the three states:
▷ Idle state.
▷ Standby state.
▷ Drive-ready state.
Idle state
Principle
When the vehicle is in idle state, it is switched
off.
▷
▷ On uphill grades or on downhill slopes,
turn the front wheels in the direction of
the curb.
▷ On uphill grades or on downhill slopes,
also secure the vehicle, for instance with
a wheel chock.
Warning
Unattended children or animals in the vehicle
can cause the vehicle to move and endanger
themselves and traffic, for instance due to the
following actions:
▷ Pressing the Start/Stop button.
▷ Releasing the parking brake.
▷ Opening and closing the doors or win-
dows.
▷ Engaging selector lever position N.
▷ Using vehicle equipment.
There is a risk of accidents or injuries. Do not
leave children or animals unattended in the
vehicle. Take the vehicle key with you when
exiting and lock the vehicle.
General information
The vehicle is in idle state prior to opening
from the outside and after exiting and locking.
Safety information
Warning
An unsecured vehicle can begin to move and
possibly roll away. There is a risk of accident.
Before leaving the vehicle, secure the vehicle
against rolling away.
In order to ensure that the vehicle is secured
against rolling away, follow the following:
42
Online Edition for Part no. 01405A7AFE4 - II/23
Establishing the sleep mode
automatically
The sleep mode is established automatically,
such as in the following situations:
After several minutes, if no operation takes
▷
place on the vehicle.
▷ If the charge state of the vehicle battery is
low.
▷ Depending on the configuration via iDrive:
one or both front doors will be opened after
driving when exiting the vehicle.
Page 43
Operating condition of the vehicle
OwnersManuals2.com
CONTROLS
In some situations, the idle state is not set automatically, for instance during a phone call or
when the low beams are switched on.
Establishing idle state when
opening the front doors
After a trip, the sleep mode can be established
by opening the front doors. For this purpose,
all passengers must exit the vehicle.
1. Apps menu
2. "Vehicle apps"
3. "Doors and windows"
4. "Lock/unlock"
5. "Turn off after opening door"
Establishing the sleep mode
manually
To establish idle state in the vehicle after completion of trip:
Press and hold the thumbwheel
in the center console until the
OFF indicator in the instrument
cluster goes out.
Manually setting to standby
General information
Standby can be switched back on after the vehicle is automatically set to idle state.
Via thumbwheel
Press thumbwheel in the center
console. The control display and
the instrument cluster illuminate.
Via start/stop button
Press the Start/Stop button. The
control display and the instrument cluster illuminate.
Display in the instrument cluster
OFF is displayed in the instrument cluster. The drivetrain is
switched off and standby state
switched on.
Standby state
Principle
When standby state is switched on, most functions can be used while the vehicle is stationary. Desired settings can be adjusted.
General information
The vehicle is in the standby state after the
front doors are opened from the outside.
To preserve the vehicle battery, use standby
and the activated power consumers only as
long as absolutely necessary.
Online Edition for Part no. 01405A7AFE4 - II/23
Drive-ready state
General information
Drive-ready state is turned on or
off with the Start/Stop button.
Activated drive-ready state is the equivalent of
a running engine in conventional vehicles.
Deactivated drive-ready state is equivalent to
switching the engine off.
43
Page 44

CONTROLS
OwnersManuals2.com
Operating condition of the vehicle
If the drive-ready state is turned on, the vehicle
ready to drive and READY is displayed in the
instrument cluster.
All vehicle systems are ready for operation.
To preserve the vehicle battery, switch off
drive-ready state and any unnecessary power
consumers when parked.
Safety information
Warning
When driving in electric mode, pedestrians
and other road users might pay less attention
to the vehicle due to the lack of engine noise.
There is a risk of accident. Adjust driving style
to traffic conditions. Watch surrounding traffic
closely and actively intervene where appropriate.
Warning
An unsecured vehicle can begin to move and
possibly roll away. There is a risk of accident.
Before leaving the vehicle, secure the vehicle
against rolling away.
In order to ensure that the vehicle is secured
against rolling away, follow the following:
Set the parking brake.
▷
▷ On uphill grades or on downhill slopes,
turn the front wheels in the direction of
the curb.
▷ On uphill grades or on downhill slopes,
also secure the vehicle, for instance with
a wheel chock.
Warning
Unattended children or animals in the vehicle
can cause the vehicle to move and endanger
themselves and traffic, for instance due to the
following actions:
Pressing the Start/Stop button.
▷
▷ Releasing the parking brake.
▷ Opening and closing the doors or win-
dows.
▷ Engaging selector lever position N.
▷ Using vehicle equipment.
There is a risk of accidents or injuries. Do not
leave children or animals unattended in the
vehicle. Take the vehicle key with you when
exiting and lock the vehicle.
NOTICE
Selector lever position P is automatically engaged when standby state is switched off.
The wheels are blocked. There is a risk
of damage to property. Do not switch off
standby if the vehicle is meant to coast, e.g.,
in a car wash.
Turning on the drive-ready state
Close the driver's door.
1.
2. Depress the brake pedal.
3. Press the Start/Stop button.
Most of the indicator/warning lights in the
instrument cluster illuminate for a varied
length of time.
READY is displayed in the instrument cluster and a signal tone sounds.
Drive-ready state is switched on.
Display in the instrument cluster
When the drive-ready state
is switched on, READY is displayed in the instrument cluster.
44
Online Edition for Part no. 01405A7AFE4 - II/23
Page 45

Operating condition of the vehicle
OwnersManuals2.com
Turning off drive-ready state
1. While the vehicle is stationary, depress the
brake and apply the parking brake.
2. Press the Start/Stop button.
The READY indicator goes out and a signal
tone sounds.
The drive-ready state is switched off automatically if the driver's seat belt is not buckled
when the driver's door is opened.
CONTROLS
Online Edition for Part no. 01405A7AFE4 - II/23
45
Page 46
CONTROLS
OwnersManuals2.com
BMW iDrive
BMW iDrive
Vehicle features and options
This chapter describes model-specific equipment, systems, and functions that are currently
available, or may become available in the future, even if they are not present in the vehicle.
Additional information:
Vehicle equipment, refer to page 8.
Display and operating concept
Principle
BMW iDrive is the vehicle’s display and operating concept and includes a wide range of
functions.
General information
Depending on vehicle equipment, the functions
can be operated as follows:
▷ Via the control display.
▷ Via the Controller.
▷ Via the touchpad.
▷ Via the BMW Intelligent Personal Assistant.
▷ Via the gesture control.
▷ Via the operating elements on the steering
wheel.
Additional information:
Instrument cluster, refer to page 136.
Safety information
Warning
Operating the integrated information systems
and communication devices while driving can
distract from surrounding traffic. It is possible to lose control of the vehicle. There is
a risk of accident. Only use the systems or
devices when the traffic situation allows. As
warranted, stop and use the systems and devices while the vehicle is stationary.
Main menu
General information
The main menu is divided into different areas.
Overview
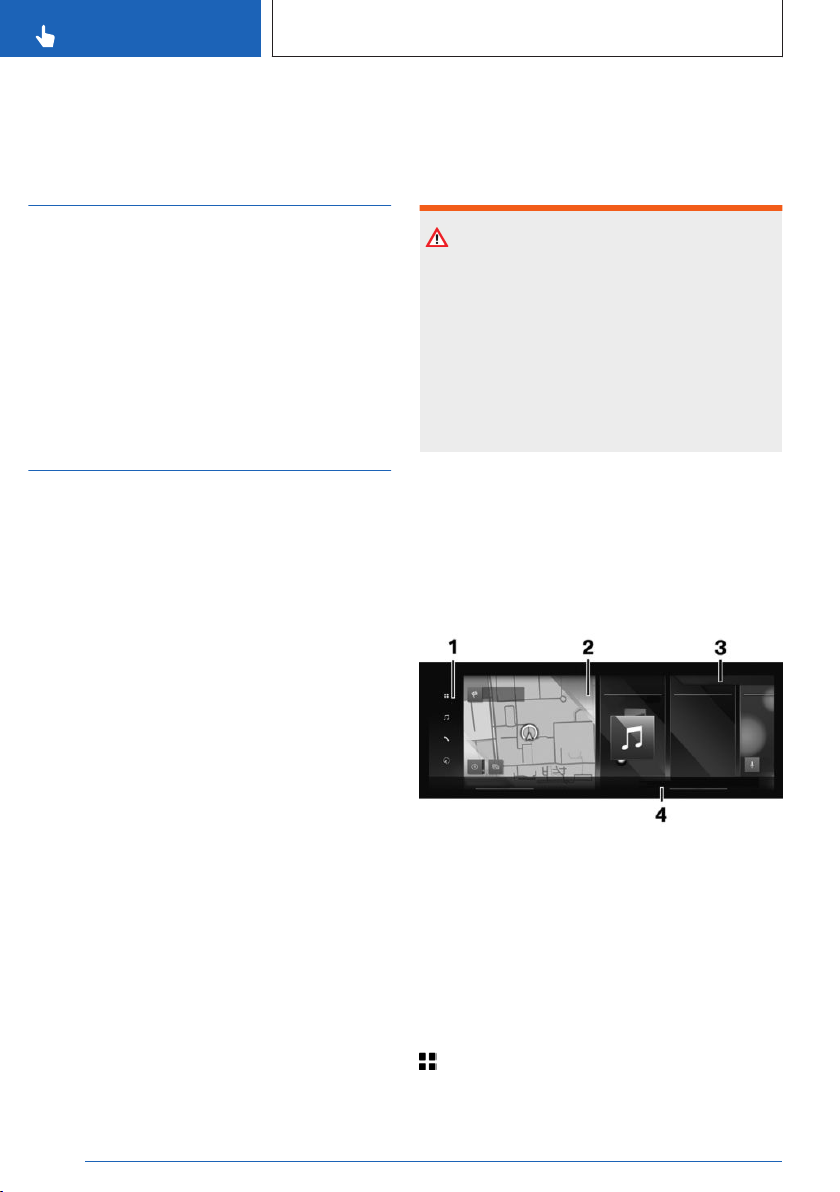
1 Menu bar
2 Widgets
3 Status information
4 Climate bar, climate 260
46
Menu bar
Menu Apps
Access to apps and vehicle functions. A
filter can be selected. The last selected filter
Online Edition for Part no. 01405A7AFE4 - II/23
Page 47
BMW iDrive
OwnersManuals2.com
CONTROLS
is stored. If necessary, change the filter to see
the apps you want.
▷ "All apps": All apps and functions are dis-
played.
▷ "Infotainment apps": Only infotainment
apps are displayed.
▷ "Vehicle apps": Only vehicle adjustment
functions are displayed.
Media menu
Access to entertainment system functions,
e.g., radio stations or external device pairing.
Communication menu
Access to telephone and message function
as well as pairing and management of mobile
devices, e.g., smartphones.
Navigation menu
Access to navigation system, destination
entry, and traffic information. Configurable
map views and other functions, such as points
of interest.
Apple CarPlay© menu
Depending on national-market version with
associated function: Access to Apple CarPlay.
Apple CarPlay enables the secure use of certain functions of a compatible Apple iPhone via
iDrive.
Android Auto© menu
Depending on national-market version with
associated function: Access to Android Auto.
Android Auto enables the secure use of certain
functions of a compatible Android smartphone
via iDrive.
Widgets
Widgets show real-time information and dynamic content such as the navigation map.
The widgets also serve as buttons and allow
jumping to the relevant menu.
Status information
General information
The status field can be found in the upper area
of the control display. Status information is displayed in the form of icons. Depending on the
equipment and national-market version, different icons are available.
Telephone status information
Icon Meaning
Active call.
Signal strength.
SIM card missing.
Entertainment status information
Icon Meaning
USB audio.
Bluetooth audio.
Smartphone audio.
Connected Music with Spotify.
Time shift.
Wi-Fi.
Apple CarPlay.
Android Auto.
Satellite radio is switched on.
Status information for notifications
Meaning
Icon
Number of notifications.
Check Control message.
Suppress private information.
Online Edition for Part no. 01405A7AFE4 - II/23
47
Page 48
CONTROLS
OwnersManuals2.com
BMW iDrive
Icon Meaning
Do not disturb.
Notification.
Additional information:
Owner's Manual for Navigation, Entertainment, and Communication, refer to page 6.
Other status information
Icon Meaning
Sound output active.
Sound output deactivated.
Activation word active.
BMW ID or driver profile.
Destination guidance active.
Go to quick access.
Wireless charging active.
Park Distance Control: sound active.
Park Distance Control: sound deacti-
vated.
Input and display
Icon Function
Confirm entry.
Shift the input area to the left
or right.
Entry comparison
When entering data from a database such as
contacts, the selection is gradually narrowed
down for each character entered, with characters being added as necessary.
Activating/deactivating the functions
Some menu items are preceded by an icon.
Selecting the menu item enables or disables
the function.
Icon Meaning
Function is activated.
Function is deactivated.
Enabling/disabling audible feedback
1.
Apps menu
2. "Vehicle apps"
3. "System settings"
4. "Sound"
5. Select the desired setting.
Letters and numbers
Letters and numbers can be entered using the
controller, touchpad, control display, or voice
control, depending on vehicle equipment.
Icon
Enter a blank space.
Switching between languages.
Use voice control.
Function
Change between capital and
lower-case letters.
48
Online Edition for Part no. 01405A7AFE4 - II/23
Quick access
The quick link provides access to shortcuts,
certain settings, and app recommendations.
Page 49
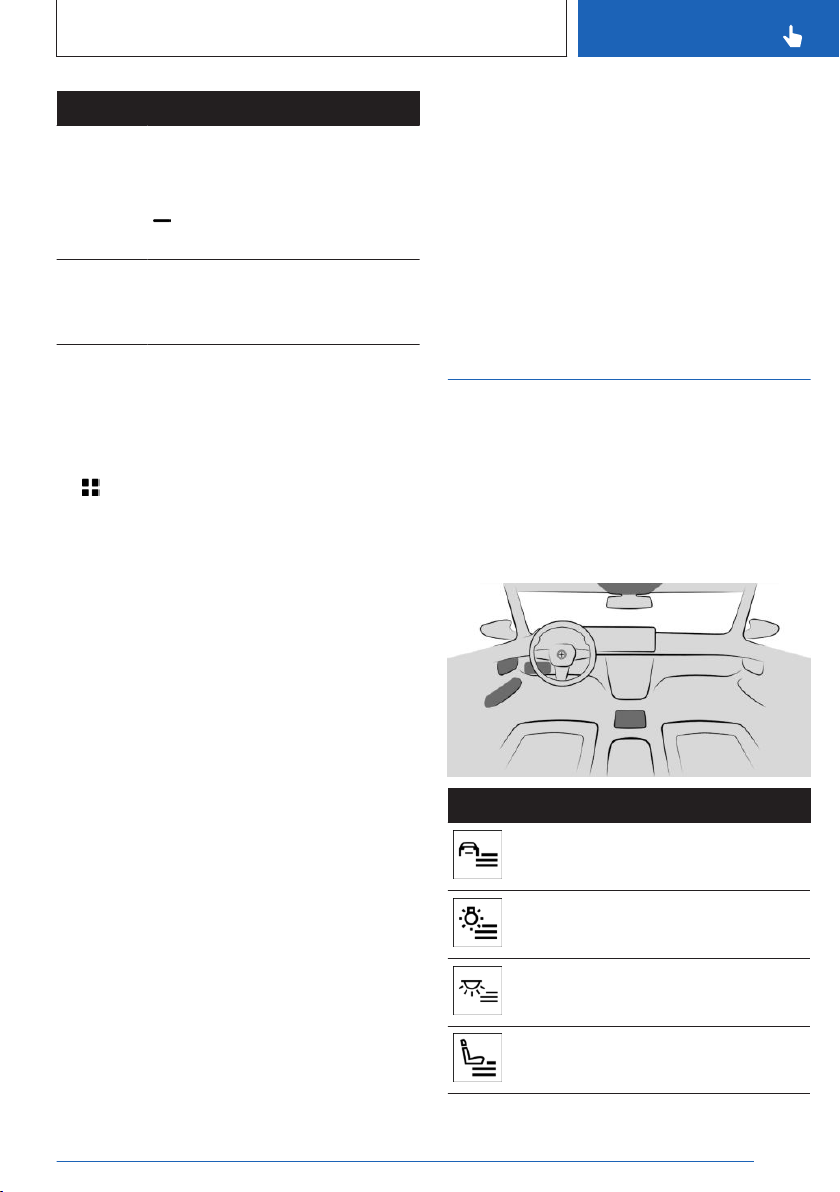
BMW iDrive
OwnersManuals2.com
CONTROLS
Input Operation
Show
quick link.
Hide
quick link.
Swipe from top to bottom on the
control display.
Slide the controller up.
Tap the icon on the status
bar.
Swipe from the bottom up on the
control display.
Slide the controller down.
Activating/deactivating pop-ups
For some functions, pop-ups are displayed
automatically on the control display. Some of
these pop-ups can be activated or deactivated.
Apps menu
1.
2. "Vehicle apps"
3. "System settings"
4. "Pop-ups"
5. Select the desired setting.
Shortcuts
The function will work immediately. This
means for instance that the connection is established when a phone number is selected.
Deleting shortcuts
1. Swipe from top to bottom on the control
display.
2. Press and hold the desired shortcut.
3. "Delete shortcut"
Direct access
General information
The vehicle has buttons that can be used to
access menus for the respective function directly on the control display. Then continue the
operation via iDrive.
Overview
General information
The iDrive functions can be stored on the
shortcuts and called up directly, for instance
radio stations, navigation destinations, phone
numbers and menu entries.
Storing a function
1.
Select the desired function.
2. Press and hold the desired function.
3. "Add to shortcuts"
Shortcuts can only be created with an active
BMW ID or a driver profile.
Executing a function
1.
Swipe from top to bottom on the control
display.
2. Tap the desired shortcut.
Online Edition for Part no. 01405A7AFE4 - II/23
Button Function
Go to the Driving Settings menu.
Go to the Exterior Lighting menu.
Go to the Interior Lighting menu.
Go to the Seat Settings menu.
49
Page 50
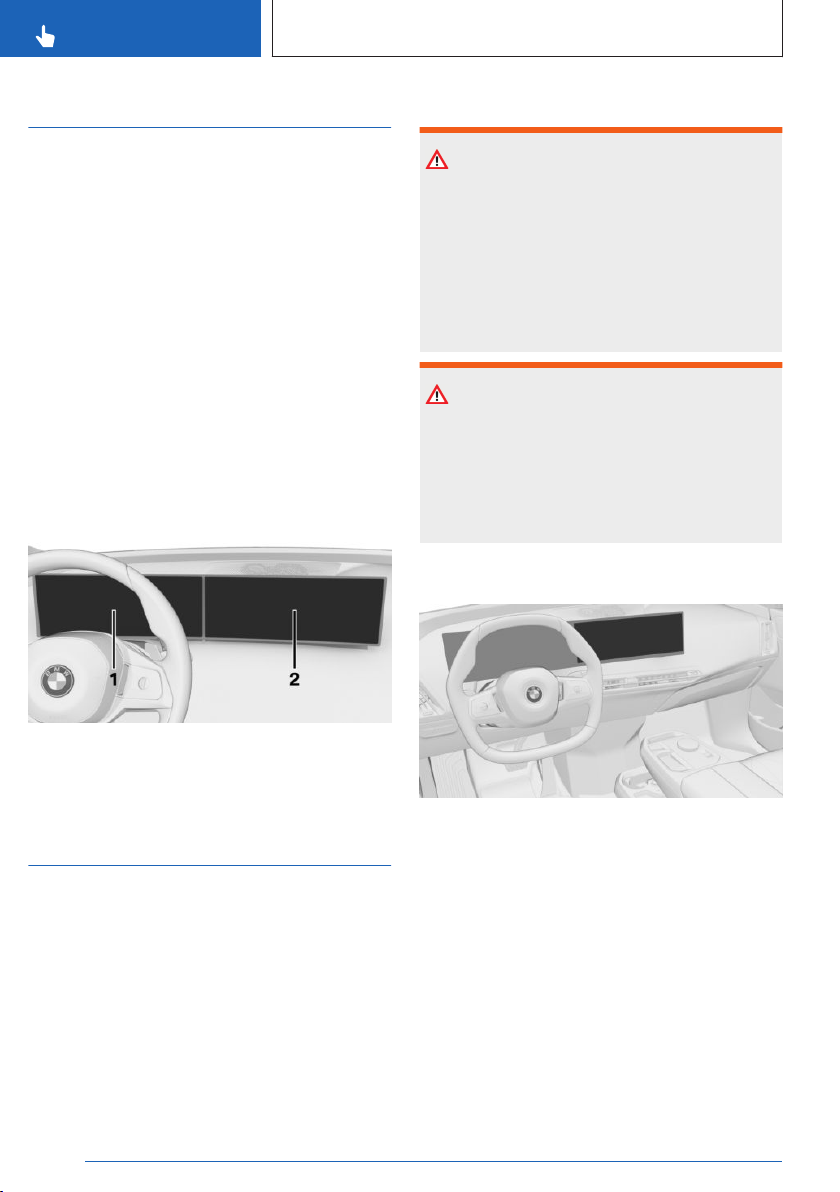
CONTROLS
OwnersManuals2.com
BMW iDrive
BMW Curved Display
Principle
The BMW Curved Display is a single-screen
display in the vehicle that is curved towards
the driver. The BMW Curved Display comprises
the instrument cluster on the driver’s side and
the control display on the center console.
General information
Follow instructions for cleaning the BMW
Curved Display in the Care chapter.
Additional information:
Caring for special components, refer to
page 360.
Overview
Safety information
Warning
Devices connected to the vehicle via a cable,
such as mobile phones or loose objects, can
be thrown through the vehicle interior while
driving, such as in the event of an accident,
braking or evasive maneuver. There is a risk
of injury. Secure loose objects or devices that
are connected to the vehicle via a cable.
Warning
Objects in the area in the front of the control
display can slip and damage the control display. There is a risk of injury or risk of damage to property. Do not place objects in the
area in front of the control display.
Overview
1 Instrument cluster 136
2 Control display 50
Control display
Principle
The iDrive functions are displayed on the control display.
50
Online Edition for Part no. 01405A7AFE4 - II/23
Control display
Switching the control display on/off
automatically
The control display is turned on automatically
when the vehicle is unlocked or as soon as the
control display is needed for operation.
In certain situations, the control display is
switched off automatically, for instance if no
operation is performed on the vehicle for several minutes.
Page 51
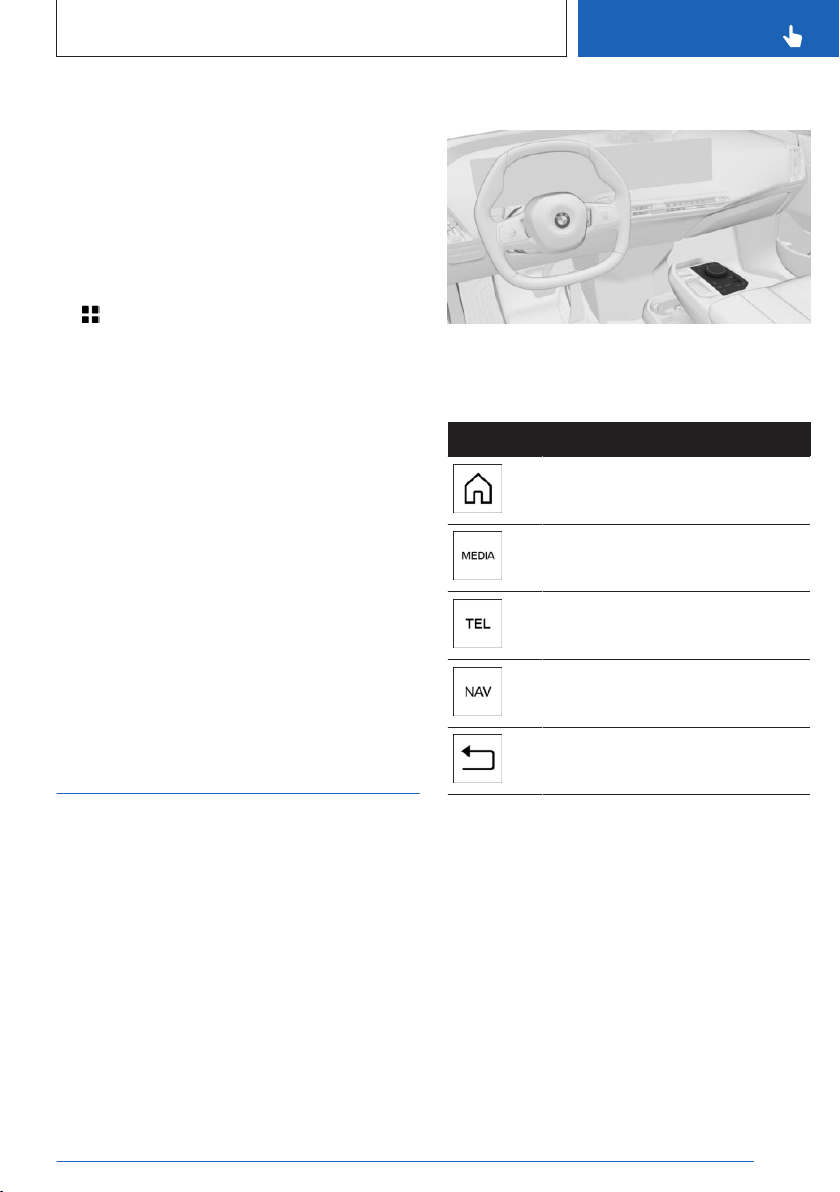
BMW iDrive
OwnersManuals2.com
CONTROLS
Switching the control display on/off
manually
1. Swipe from top to bottom on the control
display.
2. "Screen off"
Tap the control display to turn it on again.
Setting the brightness
1. Apps menu
2. "Vehicle apps"
3. "Displays"
4. "Control display"
5. "Brightness at night"
6. Make the desired setting.
Depending on the light conditions, the brightness control may not be clearly visible.
System limits
In the case of very high temperatures on the
control display, for instance due to intense solar radiation, the brightness may be reduced
down to complete deactivation. Once the
temperature is reduced, for instance through
shade or air conditioning system, the normal
functions are restored.
Controller
Overview
Controller
Buttons on the Controller
Button Function
Call up the main menu.
Go to Media menu.
Go to Phone menu.
Go to Navigation menu.
Go to previous menu.
General information
The buttons can be used to open the menus
directly.
Online Edition for Part no. 01405A7AFE4 - II/23
Operation
Turn to switch between menu items, for ex-
▷
ample.
51
Page 52
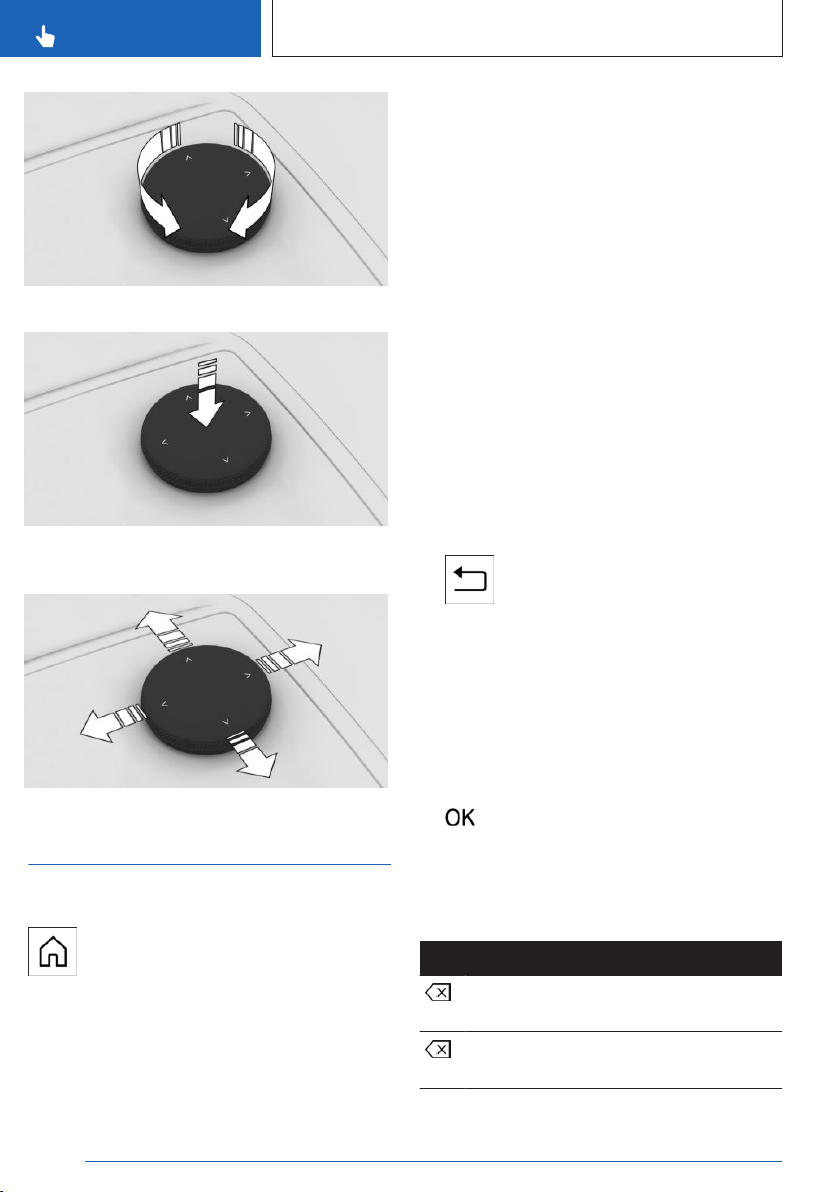
CONTROLS
OwnersManuals2.com
▷ Press to select a menu item, for example.
▷ Slide in four directions to switch between
menus, for example.
BMW iDrive
Selecting menu items
1. Turn the Controller until the desired menu
item is highlighted.
2. Press the Controller.
Selecting a widget
1. Slide the Controller in the main menu to the
right.
2. Turn the Controller until the desired widget
is selected.
3. Press the Controller.
Switching between menus
A new display opens after a menu item is selected.
▷ Slide the Controller to the left.
The current menu closes and the previous
menu is displayed.
▷ Press the button.
The current menu closes and the previous
menu is displayed.
Operating via the Controller
Opening the main menu
Press the button.
The main menu is displayed.
52
Online Edition for Part no. 01405A7AFE4 - II/23
Entering letters and numbers
Input
1.
Turn the Controller: select letters or numbers.
2. : confirm entry.
Setting the system language, refer to
page 57.
Deleting an entry
Function
Icon
Press Controller: delete a letter or num-
ber.
Hold the Controller down: delete all let-
ters or numbers.
Page 53

BMW iDrive
OwnersManuals2.com
CONTROLS
Using alphabetical lists
For alphabetical lists with more than 30 entries, the letters for which an entry exists can
be displayed in a text box.
1. Turn the Controller to the left or right
quickly.
2. Select the first letter of the desired entry.
The first entry of the selected letter is displayed in the list.
Operation via touchpad
General information
Depending on vehicle equipment, some iDrive
functions can be operated with the controller
touchpad.
Selecting functions
Apps menu
1.
2. "Vehicle apps"
3. "System settings"
4. "Touchpad"
5. Select the desired setting.
Entering special characters
Function Operation
Delete a character.
Enter a blank
space.
Enter a hyphen. Swipe to the right in the
Enter an underscore.
Swipe to the left on the
touchpad.
Swipe to the right in the
center of the touchpad.
upper area of the touchpad.
Swipe to the right in the
lower area of the touchpad.
Using the map
The map in the navigation system can be
moved via the touchpad.
Tap the map on the control display and then
continue operation using the touchpad.
Function Operation
Move map. Swipe in the appropriate di-
rection.
Display menu. Tap once.
Entering letters and numbers
Enter characters as they are displayed on
▷
the control display.
▷ Always enter associated characters, such
as accents or periods, so that the letter can
be clearly recognized.
▷ The set language determines what input
is possible. Where necessary, enter special
characters via the Controller.
Setting the system language, refer to
page 57.
Online Edition for Part no. 01405A7AFE4 - II/23
Using alphabetical lists
Alphabetical lists with more than 30 entries
permit a direct jump to letters for which an entry exists.
Enter the first letter on the touchpad.
The first entry of the entered letter is displayed
in the list.
Operation via control display
General information
Depending on the equipment version, the control display is equipped with a touchscreen.
53
Page 54
CONTROLS
OwnersManuals2.com
BMW iDrive
You can tap on menu items and widgets.
Touch the control display with your fingers. Do
not use any objects.
Opening the main menu
Tap on the icon.
The main menu is displayed.
Adjusting widgets
The widgets can be adjusted in the main
menu. The adjustments can only be performed
when the vehicle is stationary.
If necessary, tap the icon.
1.
2. Press and hold the widget.
3. Make the desired adjustment:
▷ Tap on the icon.
A new widget can be selected.
▷ Tap on the icon.
The widget is deleted.
▷ Press and hold the widget and drag to
the left or right.
The widget is moved to the desired position.
Sorting apps
To resort the app icons, press and hold the desired icon and move it to the desired location.
The menu consists of various areas, for instance:
▷ "General help": Go to the Integrated Own-
er's Manual.
▷ "Add to shortcuts": define menu item as
shortcut.
Entering letters and numbers
Input
1. If necessary, tap the icon or control
display.
2. Enter desired letters and numbers.
Deleting an entry
Icon Function
Tap icon: delete a letter or a number.
Press and hold the icon: delete all let-
ters or numbers.
Using the map
The navigation map can be moved on the control display.
Function
Move map. Swipe in the appropriate
Operation
direction.
Switching between menus
A new display opens after a menu item is selected.
Swipe from left to right on the control display.
The current menu closes and the previous
menu is displayed.
Calling up the context menu
Depending on the menu item, a context menu
with additional options can be displayed.
Press and hold the desired menu item.
54
Online Edition for Part no. 01405A7AFE4 - II/23
Enlarge/shrink
map.
Display menu. Tap once.
Drag in or out with the fingers.
Using alphabetical lists
For alphabetical lists with more than 30 entries, the letters for which an entry exists can
be displayed in a text box.
1.
Tap the letter in front of the list.
A letter box is displayed.
2. Tap the first letter of the desired entry.
Page 55
BMW iDrive
OwnersManuals2.com
CONTROLS
The first entry of the selected letter is displayed in the list.
BMW Intelligent Personal Assistant
Principle
The BMW Intelligent Personal Assistant is a
personal assistant that enables natural voice
operation of various vehicle functions. The
Personal Assistant makes it easier to operate
the vehicle by providing proactive suggestions
and automating habits.
General information
▷ BMW Intelligent Personal Assistant is avail-
able depending on national-market version.
▷ The system includes special microphones
on the driver side and the front passenger
side.
▷ Say commands at a normal volume.
Speaking directly into the microphone does
not improve voice recognition.
▷ Say the commands and numbers fluently
as well as with normal volume, emphasis,
and speed.
▷ ›...‹ identifies commands that can be spo-
ken.
Functional requirements
A language that is supported by the Per-
▷
sonal Assistant must be set via iDrive.
Setting the system language, refer to
page 57.
▷ Always say commands in the configured
system language.
For the full range of functions, the following
functions should be activated, set or booked:
Online speech processing, refer to
▷
page 58.
▷ For all settings under
Data protection, refer to page 68.
▷ Activation word, refer to page 55.
▷ BMW ID or a driver profile.
▷ Relevant ConnectedDrive services from the
ConnectedDrive Store.
▷ Get suggestions, refer to page 58.
Activating the voice control system
General information
There are various methods for activating the
voice control feature:
▷ Press the button on the steering
wheel briefly.
The microphone on the driver's side is active.
▷ Speaking the activation word.
The microphones on the driver's or front
passenger's side are active with the following voice control, depending on where the
activation word was spoken.
Then say the command. The activation word
and the command can be spoken without
pause in one sentence.
Microphone button on steering wheel
1.
2. Say the command.
Activation word
General information
Saying the activation word will start the Personal Assistant. The Personal Assistant listens.
Press button briefly.
Online Edition for Part no. 01405A7AFE4 - II/23
55
Page 56
CONTROLS
OwnersManuals2.com
BMW iDrive
Preset activation word
›Hello BMW‹: The default activation word can
be activated and deactivated.
1. Apps menu
2. "Vehicle apps"
3. "System settings"
4. "Voice control"
5. "Personal Assistant (BMW)"
6. "Wake word"
7. ""Hello BMW""
Personal activation word
In addition to the preset activation word, a
personal activation word can be set up with
an active BMW ID or a driver profile. The personal activation word can also be changed or
deleted.
The activation word should consist of multiple
syllables to ensure good recognition.
›Hello‹: The additional phrase is not necessary
for the activation word and does not need to
be spoken.
1.
Apps menu
2. "Vehicle apps"
3. "System settings"
4. "Voice control"
5. "Personal Assistant (BMW)"
6. "Wake word"
7. "Personal wake word"
8. "Set"
9. "Start recording"
Activation word from third-party providers
Depending on the national-market version,
some third-party providers provide digital voice
assistants such as Siri or Amazon Alexa.
To use Siri, the smartphone must be connected via Apple CarPlay.
Supported voice assistants can be used with a
connected smartphone in the vehicle.
The activation word from connected thirdparty providers can be used in addition to your
preset or personal activation word from BMW.
1. Apps menu
2. "Vehicle apps"
3. "System settings"
4. "Voice control"
5. "Additional speech assistants"
6. Select the desired setting.
Canceling voice control
▷ Press the button on the steering
wheel again.
▷ ›Cancel‹
▷ Slide the Controller to the right or left.
▷ Press the Controller.
Possible commands
General information
Commands can be used to give instructions
or ask questions, with the Personal Assistant
providing assistance.
For example, you can call contacts, navigate
to an address, apply settings, or ask questions
about a vehicle function.
Most content on the control display can be
spoken as commands, e.g., menu items or list
entries.
Help for voice control
›Voice commands‹: have possible example
▷
commands suggested.
▷ ›General information on voice control‹: have
information on the operating principle of the
voice control announced.
56
Online Edition for Part no. 01405A7AFE4 - II/23
Page 57

BMW iDrive
OwnersManuals2.com
CONTROLS
▷ ›Help‹: have tips and example commands
for voice control announced.
▷ Additional example commands for the cur-
rent context are displayed in the widget of
the BMW Intelligent Personal Assistant.
Sample commands
▷ ›Call John Smith‹
▷ ›Drive me to JFK airport‹
▷ ›Play a classical music station‹
▷ ›Is my tire pressure still OK?‹
▷ ›Activate the climate control‹
▷ ›Increase the ACC distance‹
▷ ›Sport mode‹
Additional example commands can be displayed on the control display.
Apps menu
1.
2. "All apps"
3. "Personal assistant"
4. "Help"
5. "Example commands"
Sample commands for the current context are
displayed in the BMW Intelligent Personal Assistant widget.
Additional information:
Adjust widgets, refer to page 53.
Menu items
The Personal Assistant can bring up menu
items directly. Say the menu items as they are
displayed on the control display. You do not
have to follow the order of the menu items
when speaking them out loud.
1.
Activate the voice control system.
2. ›Media‹
3. ›Presets‹
The stored stations are displayed on the
control display.
Owner's Manual via voice operation
You can ask simple questions about vehicle
functions and the operation of the vehicle.
The voice activation system and the feedback it provides do not replace the printed
or Integrated Owner's Manual. The function
is available depending on the national-market
version. The speech recognition and quality of
the feedback may vary.
Example command: ›How can the passenger
airbag be deactivated?‹
The Personal Assistant returns feedback.
When stationary, the section of the integrated
Owner's Manual is displayed on the control
display.
Settings
Setting the system language
Apps menu
1.
2. "Vehicle apps"
3. "System settings"
4. "Language"
5. Select the desired setting.
Setting the response length
You can set the Personal Assistant to use
standard dialog or a short version. In case of
the short version, the announcements by the
Personal Assistant are played back in an abbreviated version.
1.
Apps menu
2. "Vehicle apps"
3. "System settings"
4. "Voice control"
5. "Personal Assistant (BMW)"
6. "Response length"
7. Select the desired setting.
Online Edition for Part no. 01405A7AFE4 - II/23
57
Page 58

CONTROLS
OwnersManuals2.com
BMW iDrive
Speaking during voice output
It is possible to answer during inquiries of the
Personal Assistant. The function can be disabled if requests are often canceled unintentionally, for instance due to background noise
or conversations in the vehicle.
1. Apps menu
2. "Vehicle apps"
3. "System settings"
4. "Voice control"
5. "Personal Assistant (BMW)"
6. "Speaking during voice output"
Suggestions
General information
The Personal Assistant helps with individual
suggestions.
Activating/deactivating suggestions
Apps menu
1.
2. "Vehicle apps"
3. "System settings"
4. "Voice control"
5. "Personal Assistant (BMW)"
6. "Receive suggestions"
Adapting suggestions
Suggestions can be adapted, for example, by
category or to output a signal tone.
1.
Apps menu
2. "Vehicle apps"
3. "System settings"
4. "Voice control"
5. "Personal Assistant (BMW)"
6. Select the desired setting.
Online speech processing
Online speech processing improves the quality
of the speech recognition and search results
for points of interest. To use the functions,
data is transmitted to a service provider via an
encrypted connection and stored locally there.
An active ConnectedDrive contract is required
for online voice processing. ConnectedDrive is
available depending on the national-market
version. Online speech processing is not available in all languages.
1. Apps menu
2. "Vehicle apps"
3. "System settings"
4. "Voice control"
5. "Personal Assistant (BMW)"
6. "Online speech processing"
Voice control from third-party
providers
Depending on vehicle equipment, third-party
voice control can be enabled by pressing and
holding the microphone button on the steering
wheel.
Apps menu
1.
2. "Vehicle apps"
3. "System settings"
4. "Voice control"
5. "Long press"
6. Select the desired setting.
Adjusting the volume
Turn the volume button during the voice guidance until the desired volume is set.
The volume remains constant even if the volume of other audio sources is changed.
Using the voice activation of the
smartphone
Depending on the device, a smartphone connected to the vehicle can be used via voice
control.
58
Online Edition for Part no. 01405A7AFE4 - II/23
Page 59
BMW iDrive
OwnersManuals2.com
CONTROLS
The device must be connected via Apple CarPlay or Android Auto.
1. Press and hold the button on the
steering wheel for approx. 3 seconds.
The voice activation of the smartphone is
activated.
If activation is successful, a confirmation
appears on the control display.
2. Press and hold the button on the
steering wheel to cancel voice control of the
smartphone.
Amazon Alexa Car Integration
Principle
Amazon Alexa Car Integration is available depending on vehicle equipment and nationalmarket version. Alexa is a digital assistant
from Amazon. With Amazon Alexa Car Integration, Alexa can be used in the vehicle. For
safety reasons, some Alexa functions may not
be fully available in the vehicle when driving.
Functional requirement
A BMW ID or driver profile is activated.
▷
▷ An active Amazon account must exist.
Activating Amazon Alexa Car
Integration
Amazon Alexa Car Integration is activated in
the vehicle and My BMW app if necessary.
Follow the instructions from the Amazon Alexa
app to set it up in the vehicle.
1.
Apps menu
2. "Amazon Alexa"
After setting it up, use Amazon Alexa in the
vehicle as follows:
Say the activation word "Alexa" and the desired command.
Information about the active function is displayed on the control display. If the function
is restricted, reconnect Bluetooth and Wi-Fi as
necessary.
Automating routines
General information
The Personal Assistant can automate routines,
for instance the automatic opening of windows
in the same place. Rules are created for this
purpose, which can be activated and deactivated at any time.
Activating/deactivating routines
Apps menu
1.
2. "All apps"
3. "Automate habits"
4. Select the desired setting.
System limits
▷ The Personal Assistant provides informa-
tion about vehicle functions that may not be
installed in the vehicle.
This also applies to safety-related functions
and systems.
▷ Certain noises can be detected and may
lead to problems. Keep the doors and windows closed.
▷ Noises from the front passenger or occu-
pants can impair the system. Avoid making
other noise in the vehicle while speaking.
▷ Major language dialects can cause prob-
lems with the speech recognition feature.
▷ A poor data connection influences the re-
sponse time of the Personal Assistant and
the Search.
Online Edition for Part no. 01405A7AFE4 - II/23
59
Page 60
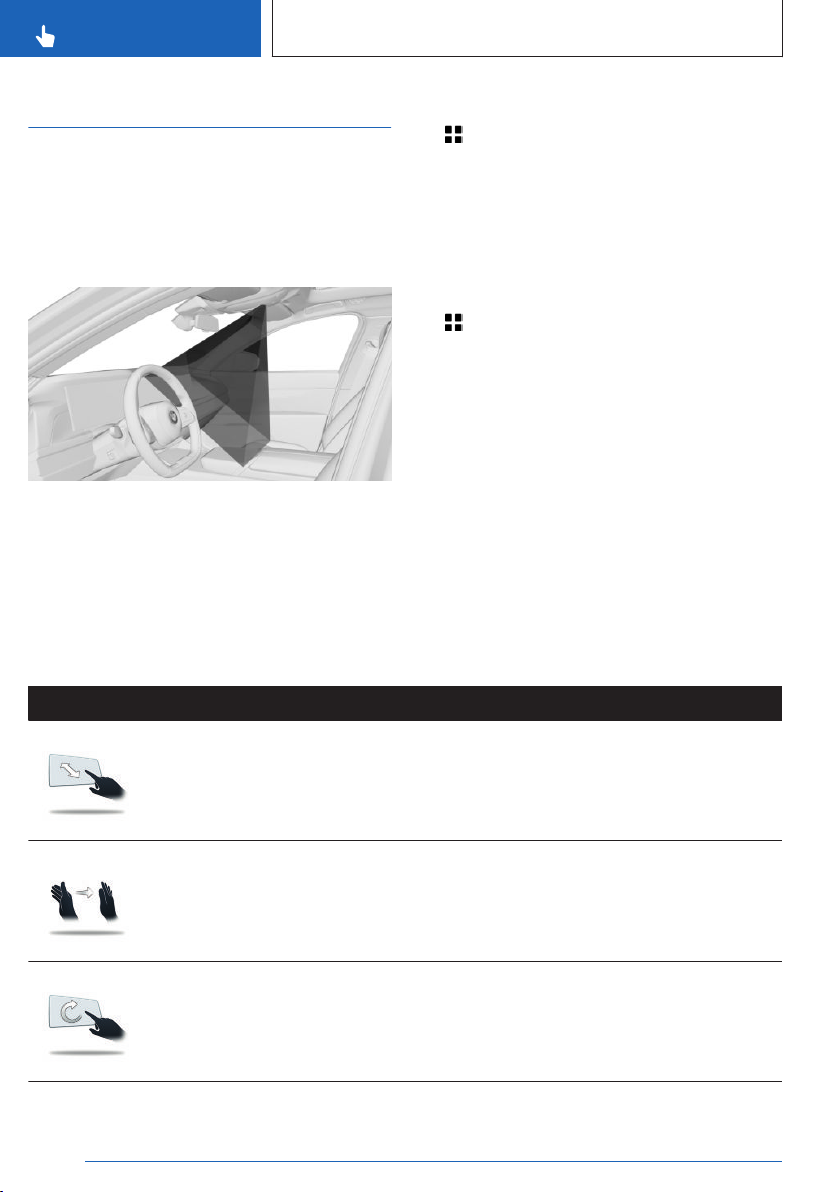
CONTROLS
OwnersManuals2.com
BMW iDrive
BMW Gesture Control
Principle
Several iDrive functions can be operated by
hand motion using BMW Gesture Control.
Overview
The camera in the headliner detects gestures
that are carried out in the area of the center
console at the height of the control display.
The camera of the gesture control uses an invisible Class 1 laser.
Possible gestures
Activate/deactivate gesture control
1. Apps menu
2. "Vehicle apps"
3. "System settings"
4. "Gesture control"
5. "Gesture control"
Settings
1. Apps menu
2. "Vehicle apps"
3. "System settings"
4. "Gesture control"
5. Select the desired setting.
Carrying out gestures
▷ Perform gestures underneath the interior
mirror and next to the steering wheel.
▷ Execute gestures clearly.
▷ The gestures can also be executed from
the front-passenger side.
Gesture Operation Function
Move extended index finger forward and
backward in the direction of the control
display.
Swipe the hand in front of the control
display in the direction of the passenger
seat.
Move extended index finger slowly in a
clockwise circular movement.
Gesture is detected after one circular
movement.
Accept call.
Select a highlighted entry in a
list during voice control.
Confirm pop-up.
Reject call.
Close pop-up.
End voice control.
Increase the volume.
60
Online Edition for Part no. 01405A7AFE4 - II/23
Page 61
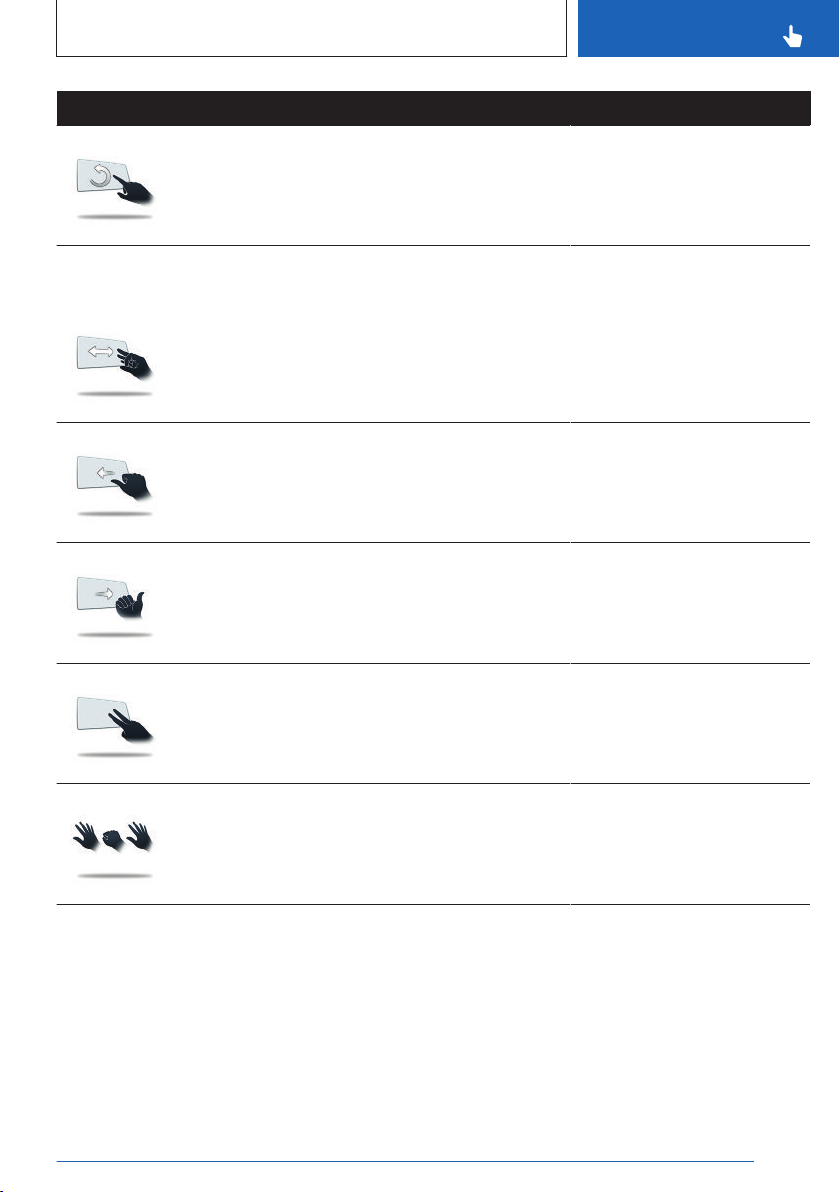
BMW iDrive
OwnersManuals2.com
Gesture Operation Function
CONTROLS
Depending on the
equipment:
Move the extended index finger counterclockwise in a circular movement.
Gesture is detected after one circular
movement.
Bring thumb and index finger together
and move the hand to the right or left.
Move fist with thumb extended to the left
back and forth.
Move fist with thumb extended to right
left back and forth.
With the index and middle fingers extended, point into the direction of the
control display.
Reduce the volume.
Turn vehicle in the Live Vehicle view.
3D view: rotate camera view.
This gesture can only be executed while the vehicle is stationary.
Reverse Skip function.
The previous title is played.
Forward Skip function.
The next title is played.
Perform individually assignable gesture.
Stretch out five fingers, form a fist and
stretch five fingers out again.
Assigning gesture individually
General information
Two gestures can be assigned individually and
can be configured as shortcut for certain functions, such as:
Online Edition for Part no. 01405A7AFE4 - II/23
Perform individually assignable gesture.
▷ Destination guidance to home address.
▷ Mute/Playback
▷ Control display on/off
Gesture shortcuts can only be created with an
active BMW ID or a driver profile.
61
Page 62

CONTROLS
OwnersManuals2.com
BMW iDrive
Configure gesture shortcut
The desired function can be selected directly in
every menu and configured as shortcut.
1. Press and hold the desired menu item.
2. "Add to gesture shortcuts"
3. Select the desired gesture.
Select function
Some defined functions can be selected directly in the menu for gesture control.
1. Apps menu
2. "Vehicle apps"
3. "System settings"
4. "Gesture control"
5. "Point two fingers at display" or "Show five-
o-five fingers"
6. Select the desired setting.
System limits
Gesture recognition by the camera in the
headliner can be disturbed by the following circumstances:
The camera lens is covered.
▷
▷ Objects are located on the interior mirror.
▷ The camera lens is dirty, clean camera
lens.
Sensors and camera lenses, refer to
page 359.
▷ The gesture is executed outside of the de-
tection range.
▷ Wearing of gloves or jewelry.
▷ Smoking in the car's interior.
▷ When taking a snapshot with the interior
camera.
Interior camera, refer to page 277.
Connecting mobile devices to the vehicle
Principle
Various connection types are available for using mobile devices in the vehicle. The connection type to select depends on the mobile device and the desired function.
General information
Detailed information on the functions and connection types can be found in the following
media in the Owner's Manual under the specified keyword:
▷ Integrated Owner's Manual in the vehicle.
▷ Printed Owner’s Manual for navigation,
communication and entertainment.
The following information sources can also be
used:
▷ Driver’s Guide app.
▷ Driver’s Guide Web.
Safety information
Warning
Operating the integrated information systems
and communication devices while driving can
distract from surrounding traffic. It is possible to lose control of the vehicle. There is
a risk of accident. Only use the systems or
devices when the traffic situation allows. As
warranted, stop and use the systems and devices while the vehicle is stationary.
Overview
The following overview shows possible functions and the suitable connection types for
them. The range of functions depends on the
vehicle equipment and the mobile device.
62
Online Edition for Part no. 01405A7AFE4 - II/23
Page 63
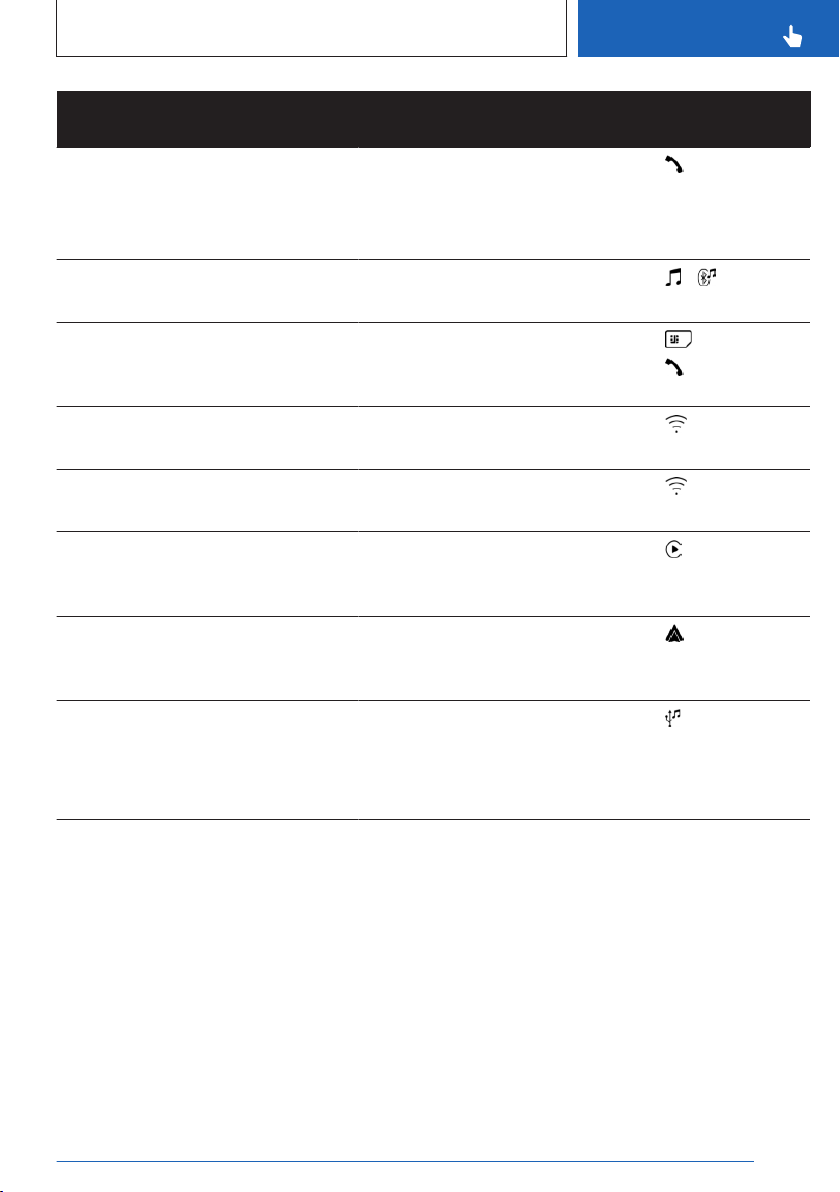
BMW iDrive
OwnersManuals2.com
CONTROLS
Function Connection type Icon on the con-
trol display
Making calls via the hands-free system.
Using phone functions via iDrive.
Keyword: calling via Bluetooth.
Playing music from a mobile device.
Keyword: audio.
Calling without a mobile phone.
Keyword: calling with the Personal
eSIM.
Data exchange between mobile device and vehicle.
Use Internet access via the personal
hotspot.
Using Apple CarPlay via iDrive and
via voice control.
Keyword: Apple CarPlay preparation.
Using Android Auto via iDrive and via
voice control.
Keyword: Android Auto preparation.
Playing music from a USB device.
Keyword: audio.
Bluetooth.
Keyword: Bluetooth connection.
Bluetooth audio.
Keyword: Bluetooth connection.
Personal eSIM.
Keyword: Personal eSIM.
Wi-Fi.
Keyword: vehicle WLAN.
Wi-Fi via personal hotspot.
Keyword: personal hotspot.
Bluetooth and Wi-Fi.
Keyword: Bluetooth connection and
vehicle Wi-Fi.
Bluetooth and Wi-Fi.
Keyword: Bluetooth connection and
vehicle Wi-Fi.
USB.
Keyword: USB connection.
Additional information:
USB port, refer to page 275.
Online Edition for Part no. 01405A7AFE4 - II/23
63
Page 64

CONTROLS
OwnersManuals2.com
BMW Remote Software Upgrade
BMW Remote Software Upgrade
Vehicle features and options
This chapter describes model-specific equipment, systems, and functions that are currently
available, or may become available in the future, even if they are not present in the vehicle.
Additional information:
Vehicle equipment, refer to page 8.
BMW Remote Software
Upgrade
Principle
Remote Software Upgrade can be used to update the entire software of the vehicle. This
makes new functions, functional enhancements or quality improvements available.
General information
BMW recommends performing the Remote
Software Upgrade as soon as it becomes
available.
Safety information
There is a risk of accidents or injuries. Do not
leave children or animals unattended in the
vehicle. Take the vehicle key with you when
exiting and lock the vehicle.
Functional requirements
▷ Active ConnectedDrive contract.
▷ The integrated SIM card in the vehicle has
been activated.
▷ Cellular network reception.
▷ Consent to transmit the corresponding data
was given in the Data Protection menu.
Additional information:
Data protection, refer to page 68.
Search for an upgrade
Functional requirement
Standby must be turned on to search for a
Remote Software Upgrade.
Automatic search
The vehicle regularly searches for updates in
the background.
Warning
Unattended children or animals in the vehicle
can cause the vehicle to move and endanger
themselves and traffic, for instance due to the
following actions:
Pressing the Start/Stop button.
▷
▷ Releasing the parking brake.
▷ Opening and closing the doors or win-
dows.
▷ Engaging selector lever position N.
▷ Using vehicle equipment.
64
Online Edition for Part no. 01405A7AFE4 - II/23
Manual search
1.
Apps menu
2. "All apps"
3. "System settings"
4. "Remote Software Upgrade"
5. "Search for upgrades"
6. Follow the instructions on the control dis-
play.
Page 65

BMW Remote Software Upgrade
OwnersManuals2.com
CONTROLS
Download of an upgrade
Automatic download
If available, the data for a Remote Software
Upgrade is automatically downloaded to the
vehicle. No download consent is required.
Via BMW app
If an upgrade is available, information about
the new software version is displayed in the
BMW app.
The data for the upgrade can then be downloaded to a mobile device, for instance via an
existing WLAN connection.
The data can then be transmitted from the
mobile device to the vehicle.
This transmission method accelerates the
download of the data, for instance in areas
with limited mobile network availability.
Download the upgrade in the BMW app to
1.
the smartphone.
2. Follow the instructions in the BMW app.
3. Establish connection to the vehicle.
▷ iOS: Connect Bluetooth audio and Wi-Fi.
▷ Android: Connect Bluetooth audio and
Wi-Fi.
The data transfer of the upgrade from the
mobile device to the vehicle occurs in the
background only while driving.
4. Follow the instructions on the control dis-
play.
Additional information:
Connecting mobile devices to the vehicle,
see Owner’s Manual for Navigation, Entertainment, Communication.
Information about the version
General information
The information about the version contains a
description of the updates included in the Re-
mote Software Upgrade. During the download
and after the installation has been successfully
completed, the information about the version
can be displayed on the control display.
This information is also available in the ConnectedDrive customer portal.
Displaying information
Display in the vehicle:
1. Apps menu
2. "All apps"
3. "System settings"
4. "Remote Software Upgrade"
5.
▷ Display currently installed version:
"Installed version:"
▷ Display new available version:
"Information on version"
6. Follow the instructions on the control dis-
play.
Display in the ConnectedDrive customer portal:
www.bmw-connecteddrive.com.
Installing the upgrade
General information
Installation of the Remote Software Up-
▷
grade may result in the deletion of software
changes, e.g., performance increases not
made by the manufacturer of the vehicle.
▷ Modifications to the electrical system of the
vehicle, for instance to control units, that
have not been made by the vehicle manufacturer can lead to an interruption of the
installation.
▷ The installation does not occur until the
consent was given.
▷ The installation may take around 20 to
30 minutes.
▷ The installation cannot be terminated.
Online Edition for Part no. 01405A7AFE4 - II/23
65
Page 66

CONTROLS
OwnersManuals2.com
BMW Remote Software Upgrade
▷ The vehicle cannot be used during the in-
stallation.
▷ The vehicle can be exited during the instal-
lation.
▷ Charging the vehicle is interrupted due to
the installation.
▷ Following the successful installation, charg-
ing the vehicle may not continue automatically.
Prerequisites for the installation
▷ The state of charge of the vehicle battery is
sufficient.
▷ The outside temperature is above
14 ℉/-10 ℃.
▷ The vehicle is parked in a horizontal posi-
tion.
▷ The hazard warning system is turned off.
▷ The selector lever position P is engaged.
▷ Drive-ready state is switched off.
If applicable, follow the notes for further prerequisites on the control display.
If the prerequisites are not met, such as a sufficient vehicle battery charge state, the upgrade
will not be offered for installation.
Pay attention to an offer for installation, e.g.,
after charging the battery for a longer period of
time.
Preparing the vehicle
Park the vehicle safely away from the public
▷
road.
▷ Cellular network reception must be ensured
so that a fault message can be sent to the
vehicle manufacturer, for instance if the installation is terminated.
▷ Close the windows.
▷ Close the trunk.
▷ Remove energy consuming devices, such
as a mobile phone.
▷ The vehicle key must be located in the vehi-
cle for the consent for installation.
▷ Switch off the exterior lighting.
▷ Remove the devices connected to the diag-
nostic socket.
Installing immediately
The upgrade can be installed immediately
when all prerequisites have been met.
1. Apps menu
2. "All apps"
3. "System settings"
4. "Remote Software Upgrade"
5. "Start upgrade now"
6. Follow the instructions on the control dis-
play.
Installing with timer
When the trip is completed, a timer can be
used to install the upgrade automatically at
a configured time, such as during the night.
A later installation may make sense to meet
functional requirements, e.g., a sufficiently
charged vehicle battery.
1.
Apps menu
2. "All apps"
3. "System settings"
4. "Remote Software Upgrade"
5. Select the desired settings.
The installation starts automatically when:
All prerequisites for the installation have
▷
been established correctly.
▷ All prerequisites continue to be met at the
time of installation.
The timer is turned off when the drive-ready
state is turned on.
Functional limitations
During the upgrade, the majority of functions is
temporarily unavailable, for instance:
66
Online Edition for Part no. 01405A7AFE4 - II/23
Page 67

BMW Remote Software Upgrade
OwnersManuals2.com
CONTROLS
▷ Hazard warning system.
▷ Central locking system and, if necessary,
Comfort Access.
▷ Parking lights.
▷ Horn.
▷ Alarm system.
▷ Emergency call.
▷ Power windows.
▷ Operate the tailgate or trunk lid.
▷ Lock the tailgate.
▷ Exit warning if needed.
In vehicles with frameless doors, the window
may no longer close completely.
The driver's door can be locked and unlocked
from the outside using the integrated key.
In vehicles with an electrical lock, the lock may
temporarily not work. In this case, the vehicle
can be exited by unlocking the driver's door
manually.
Additional information:
Buttons for central locking system, refer to
page 91.
Validity of the Owner's Manual
Production of the vehicle
At the time of production at the plant, the
printed Owner's Manual is the most current
resource.
After a software update in the vehicle
After a vehicle software update, such as via
Remote Software Upgrade, the Integrated
Owner's Manual for the vehicle will contain the
latest information.
After successful upgrade
The vehicle can be used again immediately.
Booked services such as. Advanced Real Time
Traffic Information or Remote Services are automatically reactivated during the next trip.
After a longer stationary period, recharge the
vehicle battery with the charging cable as necessary.
Malfunction
In the event of a malfunction, follow the instructions on the control display or in the BMW
app.
If the malfunction cannot be corrected, contact
an authorized service center or another qualified service center or repair shop.
Online Edition for Part no. 01405A7AFE4 - II/23
67
Page 68

CONTROLS
OwnersManuals2.com
Personal settings
Personal settings
Vehicle features and options
This chapter describes model-specific equipment, systems, and functions that are currently
available, or may become available in the future, even if they are not present in the vehicle.
Additional information:
Vehicle equipment, refer to page 8.
Data protection
Data transfer
Principle
The vehicle offers different services, whose
use requires a data transfer to BMW or a service provider.
General information
The data transfer can be deactivated for some
services. When the data transfer is deactivated, the respective service cannot be used.
Settings
The data transfer can be configured in different
stages or individually for separate services.
1.
Apps menu
2. "Vehicle apps"
3. "System settings"
4. "Data privacy"
5. Select the desired setting.
This personal data can be permanently deleted using iDrive.
General information
Depending on the equipment, the following
data is deleted:
▷ BMW IDs or driver profiles.
▷ Stored radio stations.
▷ Stored shortcuts.
▷ Navigation, for instance stored destina-
tions.
▷ Phone book.
▷ Online data, for instance Favorites, cookies.
▷ Office data, for instance voice memos.
▷ Login accounts.
▷ Digital key.
Altogether, the deletion of the data can take
up to 15 minutes. In addition, the vehicle is removed from the My BMW App and ConnectedDrive customer portal so that remote functions
can no longer be used.
Functional requirements
Data can only be deleted while stationary.
▷
▷ The vehicle key must be in the vehicle.
Deleting data
The personal data in the vehicle will be deleted
when the vehicle is reset to the factory settings.
Additional information:
Resetting vehicle data, refer to page 68.
Deleting personal data in the vehicle
Principle
Depending on the usage, the vehicle stores
personal data, such as stored radio stations.
68
Online Edition for Part no. 01405A7AFE4 - II/23
Reset vehicle data
All individual settings can be reset to the factory settings when the drive-ready state is
Page 69

Personal settings
OwnersManuals2.com
CONTROLS
switched off. Data can only be deleted while
stationary. The vehicle key must be in the vehicle.
1. Apps menu
2. "Vehicle apps"
3. "System settings"
4. "Reset vehicle data"
5. "Reset vehicle data"
If setting synchronization has been activated
for a BMW ID in the vehicle, personal settings
are kept in the BMW Cloud.
BMW ID/driver profiles
Principle
In ConnectedDrive countries, the BMW ID is
the personal login for all relevant offers for the
BMW brand. The BMW ID can be used in the
vehicle to store and activate personal vehicle
settings.
In non-ConnectedDrive countries, the personal
vehicle settings can be stored in driver profiles.
General information
The BMW ID must be registered once. A BMW
ID can be registered via the BMW app, in the
ConnectedDrive Portal, or with an authorized
service center.
A driver profile is created in the vehicle.
If a vehicle is used by several people, each
person can create their own BMW ID or driver
profile in order to save their personal settings.
If a BMW ID or driver profile is activated, the
settings stored for it are applied in the vehicle.
Many of the settings that are stored for a BMW
ID in the vehicle can be synchronized with the
BMW Cloud. This makes these settings available in any vehicle where the same BMW ID is
used to log in.
The vehicle can store seven BMW IDs or seven
driver profiles.
A BMW ID or driver profile can be activated
while unlocking. For this purpose, the driver
recognition must be assigned to the BMW ID
or the driver profile via a vehicle key or a digital
key.
If no BMW ID or driver profile is activated when
the vehicle is unlocked, the vehicle loads the
guest profile.
Functional requirements
When a BMW ID or driver profile is created,
changed, deleted, or edited, the vehicle must
move no faster than at walking speed.
Logging in the vehicle with a BMW ID and
synchronization with the BMW Cloud are only
possible when the vehicle has cellular network
reception.
Welcome window
After unlocking the vehicle, a Welcome window
is shown on the control display. The type of
the welcome depends on the following prerequisites:
The vehicle does not have a stored BMW
▷
ID or driver profile:
The welcome is neutral. An option to add a
BMW ID or create a driver profile is offered.
▷ The vehicle key or the digital key has not
been assigned to a BMW ID or a driver profile:
The welcome is neutral. The stored BMW
IDs or the stored driver profiles are offered
for selection. Additionally, it is possible to
add a new BMW ID or create a new driver
profile.
▷ A BMW ID or driver profile has been as-
signed to the vehicle key or digital key:
The welcome is personalized, the stored
settings are activated. The BMW ID or the
driver profile can be changed.
As soon as the drive-ready state is turned on
or the control display is tapped outside of the
Welcome window, the welcome will be hidden.
Online Edition for Part no. 01405A7AFE4 - II/23
69
Page 70

CONTROLS
OwnersManuals2.com
Personal settings
Registering your BMW ID
To use a BMW ID, proceed as follows:
▷ Register your BMW ID.
▷ Activate the BMW ID.
▷ Add or confirm the BMW ID in the vehicle.
Registration of your BMW ID in the vehicle can
be started via the BMW app.
1. Tap the icon or personal picture in the
status bar.
2. "Add BMW ID"
3. "Register now"
4. Scan the QR code shown in the display.
The BMW ID is created on the smartphone.
Alternatively, the BMW ID can be registered by
the authorized service center and added to the
vehicle. The BMW ID must then be confirmed
on the control display in the corresponding vehicle.
Adding the BMW ID
An existing BMW ID can be added to the vehicle:
1.
Tap the icon or personal picture in the
status bar.
2. "Add BMW ID"
3.
▷ "Log in with My BMW App"
▷ "Log in with BMW ID"
4.
▷ Scan the QR code shown on the display.
The BMW ID is copied from the BMW
app.
▷ Enter the access data for the BMW ID.
5. Depending on the national-market version,
the following settings can be selected:
▷ "Synchronize BMW ID"
The settings stored in the BMW Cloud
are applied.
▷ "Transfer settings"
If the vehicle is in the guest profile, the
settings of the guest profile will be applied.
▷ "Continue"
The vehicle is added to the user’s BMW app.
Confirming a BMW ID
If the BMW ID has been created by an authorized service center and added to the vehicle,
the BMW ID must then be confirmed in the
vehicle:
1. Select the BMW ID.
2. Select the desired confirmation:
▷ Scan the displayed QR code with the
BMW app.
▷ Enter the password for the BMW ID.
BMW app
If a BMW ID has been added to a vehicle,
the vehicle is automatically added to the BMW
app. This means that BMW app functions can
be used for this vehicle. To do so, the BMW
app must be used with the same BMW ID.
Alternatively, a vehicle can be added to the
BMW app by the authorized service center. In
this case, the BMW ID must then be confirmed
on the control display in the corresponding vehicle.
In rare cases, the use of BMW app functions
for this vehicle may be restricted. More information is shown on the control display.
Creating a driver profile
1.
Tap the icon or personal picture in the
status bar.
2. "Add driver profile"
3. Enter the name for the driver profile.
4. Select the desired setting:
"Transfer settings"
If the vehicle is in the guest profile, the settings of the guest profile will be applied.
70
Online Edition for Part no. 01405A7AFE4 - II/23
Page 71

Personal settings
OwnersManuals2.com
CONTROLS
Primary user
The primary user is the person who first enters
their BMW ID into the vehicle and the vehicle
into the BMW app. Alternatively, the primary
user can be defined by an authorized service
center.
The primary user has access to the following
settings, for example:
▷ Removing BMW IDs stored in the vehicle.
▷ Transferring the primary user role to an-
other BMW ID.
▷ Change vehicle-wide data protection set-
tings.
▷ Create the main digital key.
Additional information:
BMW Digital Key, refer to page 88.
Specifying driver detection
Driver detection and a PIN can be set up for a
BMW ID or a driver profile.
The driver detection offers the following advantages:
The BMW ID or the driver profile with saved
▷
settings is activated automatically.
▷ The settings are not accessible to other
persons.
The driver detection is specified immediately
following the addition of the BMW ID or after
creating the driver profile.
Prior to the selection of the driver detection, a
PIN must be created.
"Set PIN"
▷
The PIN can be used to activate the
BMW ID or the driver profile, even if the
assigned vehicle key or the assigned digital
key is not available.
▷ "Vehicle key"
The vehicle key that is recognized in the
vehicle interior is assigned to the BMW ID
or the driver profile.
▷ "Digital Key"
The digital key that is recognized in the vehicle interior is assigned to the BMW ID or
the driver profile.
Automatic driver recognition
If driver recognition has been established, automatic activation of the BMW ID or driver profile is triggered by the following actions:
▷ By unlocking the vehicle using the button
on the assigned vehicle key.
▷ By unlocking the vehicle using an external
door handle. The assigned vehicle key or
the assigned Digital Key must be carried
with you.
▷ By automatic unlocking when approaching
the vehicle. The assigned vehicle key or the
assigned Digital Key must be carried with
you. Depending on the country, it may not
be possible to recognize the Digital Key.
If there are several vehicle keys or Digital Keys
in the vicinity of the vehicle, activation of the
BMW ID or driver profile is done according to
the following priority:
The key that unlocks the vehicle triggers
▷
the activation of the assigned BMW ID or
the assigned driver profile.
The guest profile is activated when the vehicle is unlocked using a key that is not assigned to a BMW ID or driver profile.
▷ If a vehicle key and a Digital Key are
detected at the same time, the Digital
Key triggers the activation of the assigned
BMW ID or the assigned driver profile.
▷ If another key is detected on the driver's
door after activating the BMW ID or the
driver profile, the BMW ID or the driver profile of the last key detected is activated.
If no BMW ID and no driver profile are assigned to this key, the guest profile is activated.
Online Edition for Part no. 01405A7AFE4 - II/23
71
Page 72

CONTROLS
OwnersManuals2.com
Personal settings
Setting synchronization
If synchronization is switched on, settings from
the following areas, for example, are continuously synchronized:
▷ BMW ID, e.g., profile picture.
▷ Navigation, e.g., recent destinations, home
address, or map settings.
▷ Media, e.g., favorites or saved radio sta-
tions.
▷ iDrive, e.g., main menu configuration, lan-
guage, or units.
▷ Personal Assistant, e.g., suggestions or ac-
tivation word.
▷ Exterior lighting, e.g., flashing indicator and
home lights.
Settings from the following areas are only
synchronized when you log in for the first time:
▷ Seating and climate comfort, e.g., driver’s
seat position or temperature setting.
▷ Data protection menu.
Selecting the BMW ID/driver profile
If the BMW ID or driver profile could not be
recognized when unlocking the vehicle, select
the BMW ID or driver profile on the welcome
window.
The BMW ID or driver profile can be changed
at any time via iDrive:
1.
Tap the icon or personal picture in the
status bar.
2.
▷ "Change BMW ID"
▷ "Change driver profile"
3. Select the BMW ID or driver profile.
4. If necessary, enter the PIN.
The BMW ID or the driver profile are activated,
the stored settings are loaded.
Guest profile
The guest profile can be activated and
changed by anyone.
In the following cases the guest profile is automatically active:
▷ A BMW ID has not yet been added or a
driver profile has not yet been created.
▷ No BMW ID or driver profile has been as-
signed to the vehicle key or the digital key
that was used to unlock the vehicle.
The following limitations apply to the guest
profile:
▷ Selected functions that edit personal data
are not available in the guest profile. This
includes functions of the navigation and
the saving of favorites. More information
on data processing is available in the ConnectedDrive data protection notes / service
descriptions.
▷ The guest profile cannot be renamed.
▷ It is not possible to assign a PIN to the
guest profile.
▷ It is not possible to assign driver detection
to the guest profile.
▷ In ConnectedDrive countries, the synchroni-
zation with the BMW Cloud is not possible.
The guest profile is selected on the Welcome
screen or via iDrive:
1.
Tap the icon or personal picture in the
status bar.
2.
▷ "Change BMW ID"
▷ "Change driver profile"
3. "Continue as guest"
Deleting the BMW ID/driver profile
1.
Tap the icon or personal picture in the
status bar.
2.
▷ "Change BMW ID"
▷ "Change driver profile"
3. Tap the icon of the desired BMW ID or
the desired driver profile.
Removing a BMW ID from the vehicle causes
the vehicle to be removed from the BMW app.
If the BMW ID has been synchronized with the
72
Online Edition for Part no. 01405A7AFE4 - II/23
Page 73

Personal settings
OwnersManuals2.com
CONTROLS
BMW Cloud, the data stored in the BMW Cloud
is retained after the BMW ID is deleted. If the
currently active BMW ID is removed, the guest
profile is activated.
Removing a vehicle from the BMW app removes the corresponding BMW ID from the
vehicle. If the BMW ID was synchronized with
the BMW Cloud, the BMW ID data stored in the
BMW Cloud will be retained.
If the vehicle is removed from the primary user’s BMW app, it will also be removed from
the other users’ BMW apps. The corresponding BMW IDs are removed from the vehicle.
If the vehicle is reset to factory settings, the
vehicle is removed from all users’ BMW apps
and all BMW IDs are removed from the vehicle.
Transfer of the vehicle key
A vehicle key that is assigned to a BMW ID or
a driver profile can be used to view or change
the stored personal settings.
Before a vehicle key is transferred to other persons, any assigned driver detection should be
canceled. Changes to the driver detection can
be made in the settings of the BMW ID or the
driver profile.
The BMW Digital Key provides the option to
transfer a digital key to permit other persons
the use of your own vehicle.
Additional information:
BMW Digital Key, refer to page 88.
Settings
General information
Settings added when adding a BMW ID or creating a driver profile can be changed.
1.
Tap the icon or personal picture in the
status bar.
2. "Settings"
The following settings are available for the
BMW ID:
The type of driver detection.
▷
▷ The profile picture.
▷ The synchronization with the BMW Cloud.
▷ The personal salutation.
The following settings are available for the
driver profile:
▷ The type of driver detection.
▷ The profile picture.
▷ The profile name.
Selecting a profile picture
The profile picture can be selected from the
predefined profile pictures:
Tap the icon or personal picture in the
1.
status bar.
2. "Settings"
3. "Manage profile picture"
4. "Select profile picture"
For a BMW ID, the personal profile picture can
be taken from the profile in the BMW app.
This requires that the synchronization with the
BMW Cloud is activated in the settings. After
the profile picture from the BMW app has
been applied, you can only select from the
predefined pictures if the profile picture in the
BMW app is deleted or synchronization is deactivated.
System limits
A clear driver detection via the vehicle key or
the digital key may not always be possible in
the following cases, for example:
The driver changes, but the vehicle is not
▷
locked and unlocked.
▷ When multiple vehicle keys or multiple digi-
tal keys with an assigned BMW ID or driver
profile are located in the outer area on the
driver's side of the vehicle.
▷ When the vehicle was unlocked from the
BMW app.
Online Edition for Part no. 01405A7AFE4 - II/23
73
Page 74

CONTROLS
OwnersManuals2.com
Personal settings
The use of personal settings that are stored for
a BMW ID in other vehicles is subject to technical limitations. For example, settings may be
stored for a system that is not available, or
available in a non-compatible version, in other
vehicles.
74
Online Edition for Part no. 01405A7AFE4 - II/23
Page 75
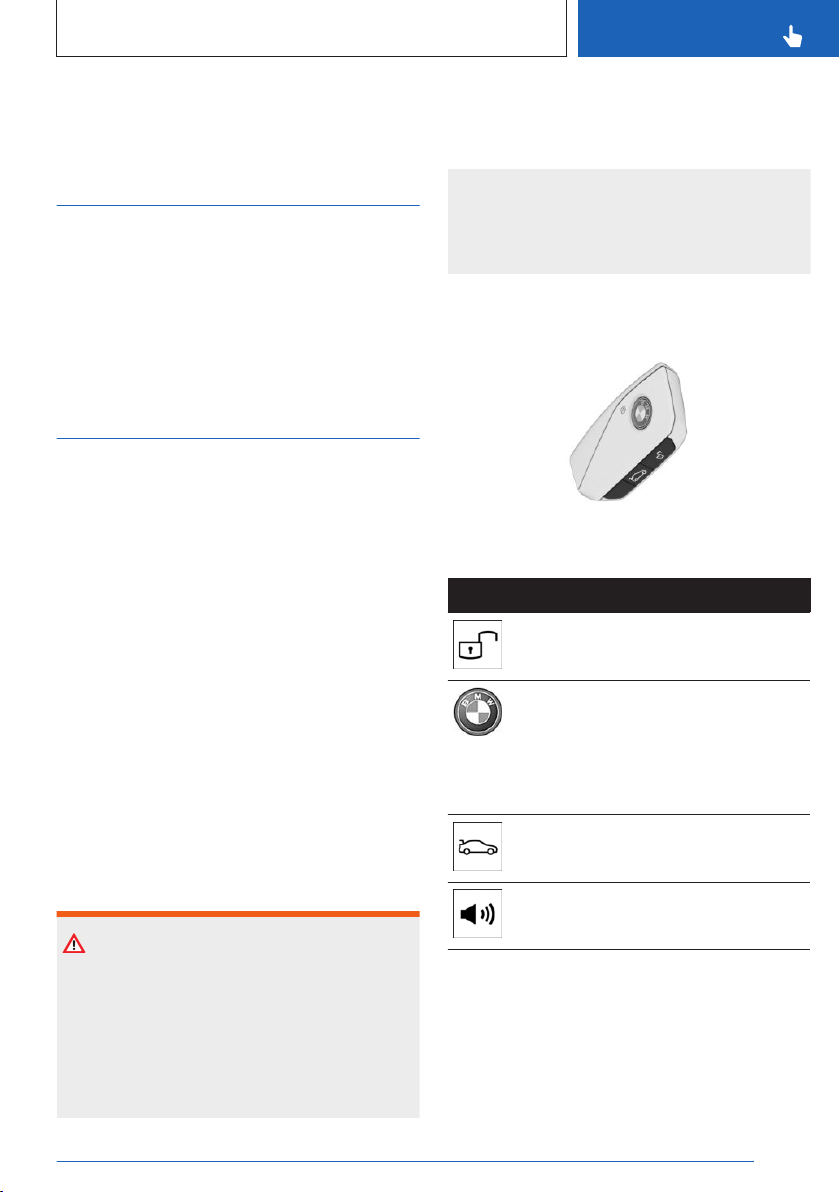
Opening and closing
OwnersManuals2.com
Opening and closing
CONTROLS
Vehicle features and options
This chapter describes model-specific equipment, systems, and functions that are currently
available, or may become available in the future, even if they are not present in the vehicle.
Additional information:
Vehicle equipment, refer to page 8.
Vehicle key
General information
Two vehicle keys are included in the scope of
delivery, each containing an integrated key.
Each vehicle key contains a replaceable battery.
Depending on the equipment and nationalmarket version, various settings are possible
for the button functions.
A BMW ID or a driver profile with personal settings can be assigned to a vehicle key.
To provide information on maintenance recommendations, the service data is stored in
the vehicle key.
To prevent possible locking in of the vehicle
key, take the vehicle key with you when exiting
the vehicle.
diately seek medical help if there is any suspicion that a battery or button cell battery has
been swallowed or is located in any part of
the body.
Overview
Buttons on the vehicle key.
Icon Meaning
Unlock.
Lock.
Stationary climate control, refer to
page 269.
Displaying the charging screen, refer
to page 149.
Open the cargo area.
Safety information
Warning
The vehicle key has a button cell battery.
Batteries or button cell batteries can be swallowed and lead to serious or fatal injuries
within two hours, for example due to internal
burns or chemical burns. There is a risk of
injury or danger to life. Keep the vehicle key
and batteries out of reach of children. Imme-
Online Edition for Part no. 01405A7AFE4 - II/23
Panic mode.
Pathway lighting, refer to page 159.
Additional vehicle keys
Additional vehicle keys are available from an
authorized service center or another qualified
service center or repair shop.
75
Page 76
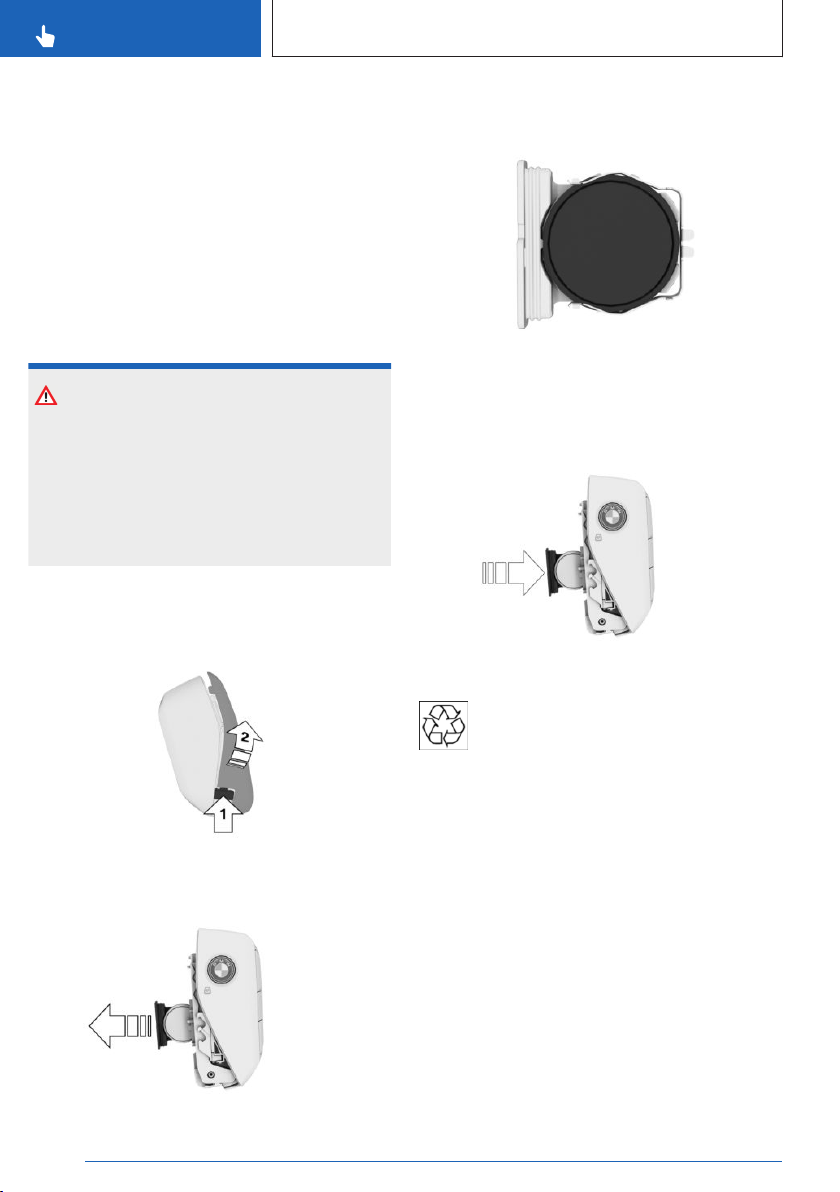
CONTROLS
OwnersManuals2.com
Opening and closing
Loss of vehicle keys
A lost vehicle key can be disabled and replaced by an authorized service center or another qualified service center or repair shop.
If the lost vehicle key has an assigned BMW ID
or driver profile, the connection to this vehicle
key must be deleted. A new vehicle key can
then be assigned to the BMW ID or driver profile.
Replacing the battery
NOTICE
Improper batteries in a battery-operated device can damage the device. There is a risk
of damage to property. Always replace the
discharged battery with a battery with the
same voltage, the same size and the same
specification.
Press and hold the button, arrow 1, and
1.
push the cover, arrow 2, forward and remove it from the side.
3. Remove the battery from the battery hous-
ing.
4. Insert a CR2032 3V battery with the posi-
tive side facing down.
5. Insert the battery housing into the vehicle
key.
6. Insert the cover into the vehicle key.
Have old batteries disposed of by an
authorized service center or another
qualified service center or repair shop,
or take them to a collection point.
2. Remove the battery housing from the vehi-
cle key to the side.
76
Online Edition for Part no. 01405A7AFE4 - II/23
Integrated key
General information
The vehicle can be locked and unlocked without the vehicle key using the integrated key.
Depending on the national-market version, the
integrated key will fit in the glove compartment.
Page 77
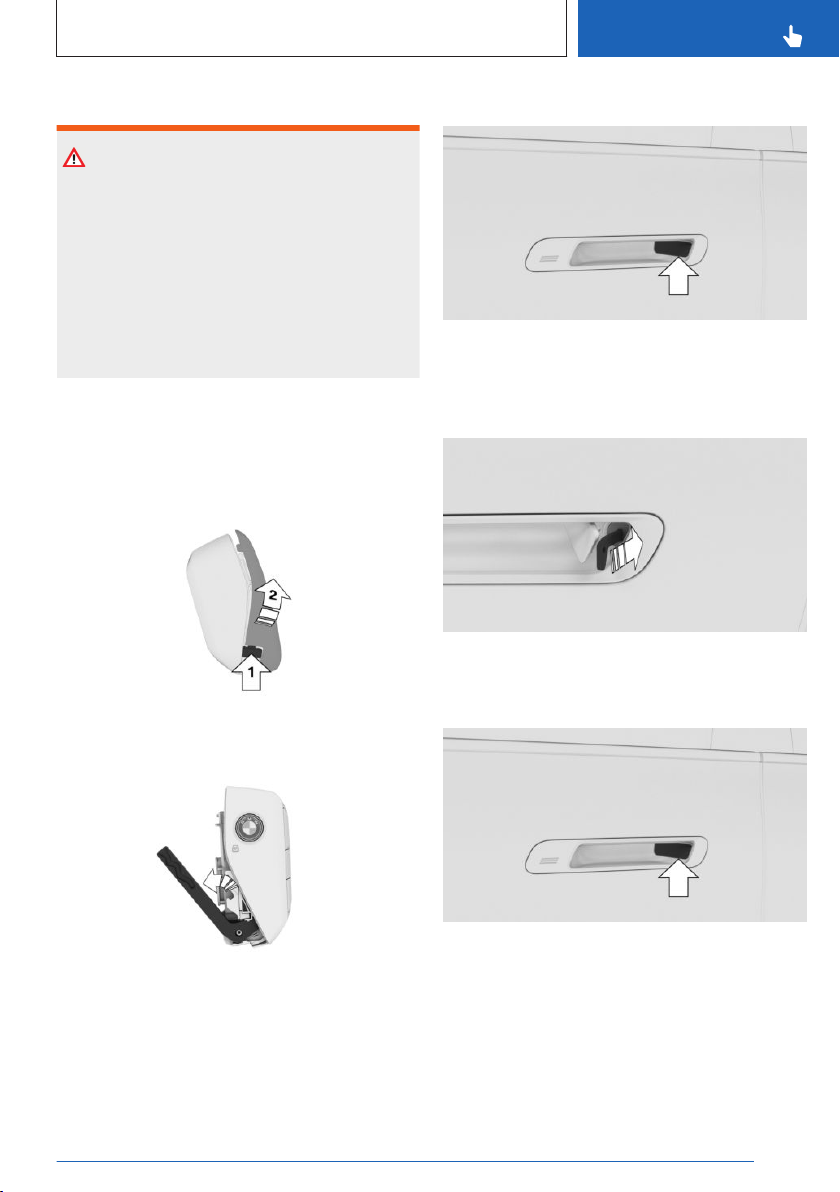
Opening and closing
OwnersManuals2.com
CONTROLS
Safety information
Warning
For some national-market versions, unlocking from the inside is only possible with particular knowledge.
If persons spend a lengthy time in the vehicle
and are thereby exposed to extreme temperatures, there is a risk of injury or danger to
life. Do not lock the vehicle from the outside
when there are people in it.
Removing the integrated key
Press and hold the button, arrow 1, and
1.
push the cover, arrow 2, forward and remove it from the side.
2. Slide out the integrated key at the open
side of the vehicle key.
The cover cap is slightly opened.
2. Pull the cover cap to the side so that the
door lock is clearly visible.
3. Unlock the door lock with the integrated
key.
4. Remove the integrated key from the door
lock.
5. Press the cover cap in to close it.
3. Remove the integrated key from the vehicle
key.
Unlocking via the door lock
1.
Press the cover cap in.
Online Edition for Part no. 01405A7AFE4 - II/23
77
Page 78
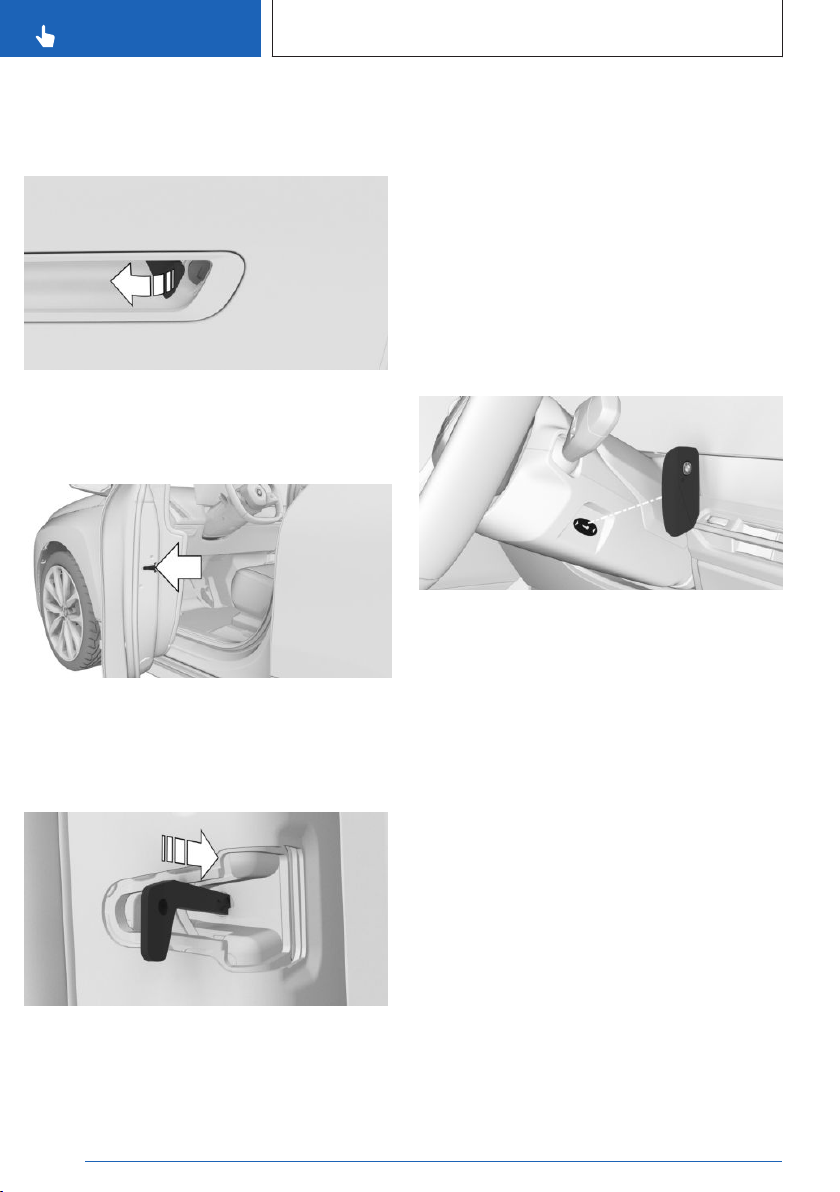
CONTROLS
OwnersManuals2.com
Opening and closing
6. Press the cover cap in again to open it
slightly.
7. Pull on the cover cap until the door opens.
The other doors must be unlocked from the
inside.
Locking via the side door lock
Side door lock in the driver's door.
1.
Slightly open the driver's door.
2. Lock the side door lock with the integrated
key.
Alarm system
If the vehicle is unlocked with the integrated
key via the door lock, the activated alarm system will be triggered when the door is opened.
In this case, use the vehicle key emergency
detection to switch off the alarm.
If the vehicle is locked with the integrated key
via the door lock, the alarm system will not be
activated.
Emergency detection of the vehicle
key
It is not possible to switch on the drive-ready
state if the vehicle key has not been detected.
Proceed as follows in this case:
1.
Hold the rear of the vehicle key against the
mark on the steering column. Pay attention
to the display in the instrument cluster.
2.
▷ If the vehicle key is detected:
Turn on drive-ready state within 10 seconds.
▷ If the vehicle key is not detected:
Slightly change the position of the vehicle key and repeat the procedure.
3. Close the driver's door.
If necessary, lock the other doors from the respective side door lock as well.
78
Online Edition for Part no. 01405A7AFE4 - II/23
Malfunction
A Check Control message is displayed where
applicable.
Vehicle key detection by the vehicle may malfunction under the following circumstances:
Page 79

Opening and closing
OwnersManuals2.com
▷ The battery of the vehicle key is discharged.
▷ Fault of the radio link from transmission
towers or other equipment with high transmitting power.
▷ Shielding of the vehicle key due to metal
objects.
Do not transport the vehicle key together
with metal objects.
▷ Fault of the radio link from mobile phones
or other electronic devices in direct proximity to the vehicle key.
Do not carry the vehicle key in close proximity to other electronic devices.
▷ Fault of radio transmission by a charging
process of mobile devices, for instance
charging of a mobile phone.
▷ The vehicle key is located in direct proximity
of the wireless charging tray.
Place the vehicle key in a different location.
▷ Fault of the radio link during charging of the
vehicle.
In the case of interference, the vehicle can also
be unlocked and locked from the outside with
the integrated key. Use the Emergency detection of the vehicle key to turn on drive-ready
state.
CONTROLS
Warning
For some national-market versions, unlocking from the inside is only possible with particular knowledge.
If persons spend a lengthy time in the vehicle
and are thereby exposed to extreme temperatures, there is a risk of injury or danger to
life. Do not lock the vehicle from the outside
when there are people in it.
Warning
Unattended children or animals in the vehicle
can cause the vehicle to move and endanger
themselves and traffic, for instance due to the
following actions:
▷ Pressing the Start/Stop button.
▷ Releasing the parking brake.
▷ Opening and closing the doors or win-
dows.
▷ Engaging selector lever position N.
▷ Using vehicle equipment.
There is a risk of accidents or injuries. Do not
leave children or animals unattended in the
vehicle. Take the vehicle key with you when
exiting and lock the vehicle.
Access to vehicle interior
Safety information
Warning
People or animals in the vehicle can lock the
doors from the inside and lock themselves in.
In this case, the vehicle cannot be opened
from the outside. There is a risk of injury.
Take the vehicle key with you so that the vehicle can be opened from the outside.
Online Edition for Part no. 01405A7AFE4 - II/23
Actions during unlocking
Depending on the settings, the following functions are performed when unlocking the vehicle:
Only the driver's door and the charging
▷
socket cover will be unlocked or all access
to the vehicle will be unlocked.
▷ The unlocking of the vehicle can be con-
firmed with a light signal or a sound signal.
▷ The welcome light can be turned on when
the vehicle is being unlocked.
In addition, the following functions are executed:
79
Page 80

CONTROLS
OwnersManuals2.com
Opening and closing
▷ If a BMW ID or a driver profile was assigned
to the vehicle key, this BMW ID or driver
profile will be activated.
▷ The interior lights are switched on, unless
they were manually switched off.
▷ Depending on vehicle equipment, folded-in
exterior mirrors are folded out.
If the exterior mirrors were folded in via the
button in the vehicle interior, they will not
be folded out during unlocking.
▷ Anti-theft protection is switched off.
▷ The alarm system is switched off.
Additional information:
▷ Settings, refer to page 93.
▷ Welcome lights, refer to page 159.
▷ BMW ID/driver profiles, refer to page 69.
Actions during locking
Depending on the settings, the following functions are performed when locking the vehicle:
▷ The locking of the vehicle can be confirmed
with a light signal or a sound signal.
▷ Depending on vehicle equipment, the exte-
rior mirrors can be folded in automatically
when locking. The exterior mirrors are not
folded in when the hazard warning flashers
are switched on.
▷ Pathway lighting can be activated during
locking.
The following functions are executed:
All doors, the tailgate, and the charging
▷
socket cover are locked.
▷ Anti-theft protection is switched on. This
prevents the doors from being unlocked using the lock button or door opener.
▷ The alarm system is switched on.
If the drive-ready state is still turned on when
you lock the vehicle, the vehicle horn will honk
twice. In this case, the drive-ready state must
be switched off by means of the Start/Stop
button.
Additional information:
Settings, refer to page 93.
With the vehicle key
Unlocking the vehicle
Press the button on the vehicle key.
If only the driver's door and charging socket
flap have been unlocked due to the settings,
press the button on the vehicle key again to
unlock the other vehicle access points.
After opening one of the front doors, the vehicle is ready for operation.
The lighting functions may depend on the ambient brightness.
Locking the vehicle
Close the driver's door.
1.
2. Press the button on the vehicle key.
All vehicle access points are locked.
On the external door handle
Principle
The vehicle can be accessed without operating
the vehicle key.
The vehicle key is automatically detected near
the vehicle.
General information
The function is available with Comfort Access.
Depending on the national-market version, the
vehicle can also be unlocked and locked at the
external door handle with compatible smartphones with a digital key.
Additional information:
BMW Digital Key, refer to page 88.
80
Online Edition for Part no. 01405A7AFE4 - II/23
Page 81
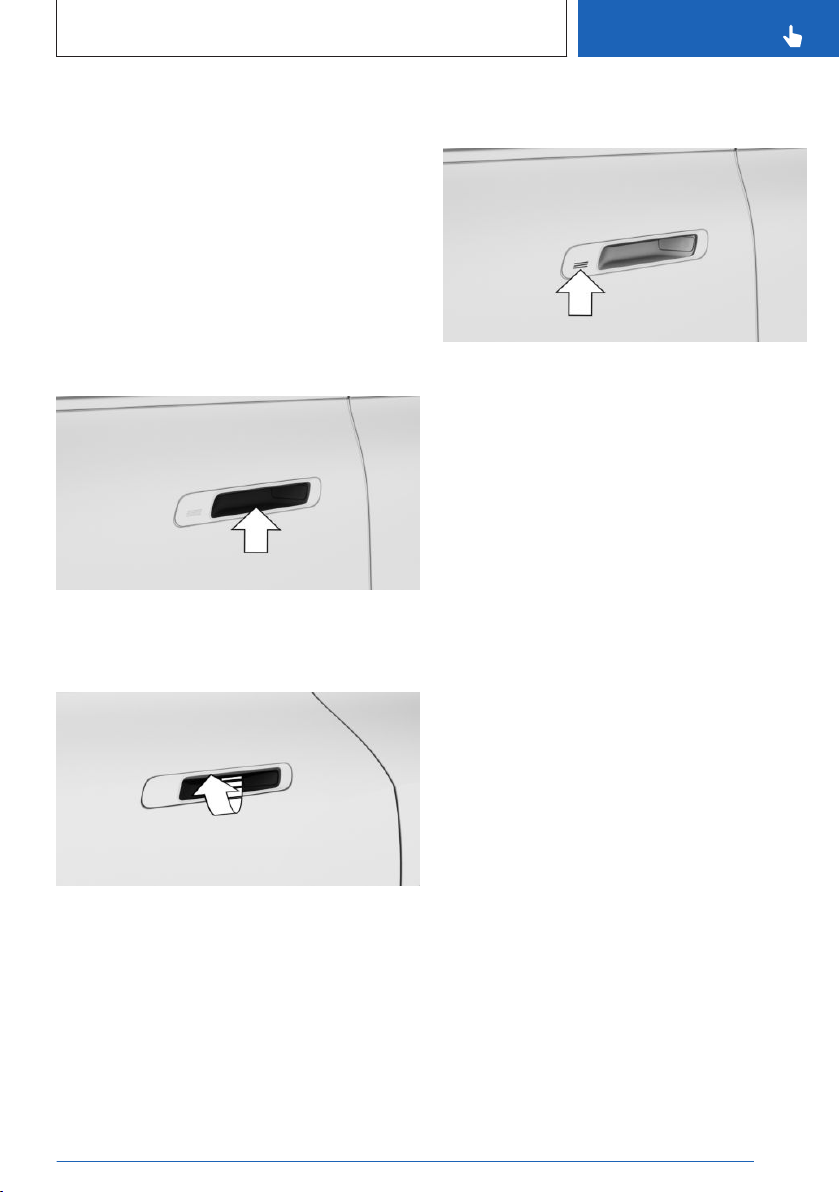
Opening and closing
OwnersManuals2.com
CONTROLS
Functional requirements
▷ Carry the vehicle key with you, e.g., in your
pants pocket.
▷ Bluetooth must be activated on the smart-
phone to unlock and lock using the Digital
Key.
▷ To lock the vehicle, the vehicle key must be
outside of the vehicle near the doors.
▷ After locking, approx. 2 seconds must
elapse before unlocking is possible.
Unlock vehicle on front door
Reach into the recessed grip of a front door.
Unlocking the vehicle at the rear door
finger for approx. 1 second without reaching
into the recessed grip.
Malfunction
Wet or snowy conditions may disrupt the locking request detection on the external door handles.
In the case of a malfunction, unlock and lock
the vehicle using the buttons of the vehicle key
or use the integrated key.
Touchless unlocking/locking of the
vehicle
Principle
When the driver approaches the locked vehicle
with the vehicle key, the vehicle is unlocked.
When the driver walks away from the unlocked
vehicle with the vehicle key, the vehicle will be
locked.
Press and hold the button in the recessed grip
to unlock the vehicle and open the rear door.
Locking the vehicle
1.
Close the driver's door.
2. Touch the grooved surface on the external
door handle of a closed front door with your
Online Edition for Part no. 01405A7AFE4 - II/23
General information
The function is available with Comfort Access.
The vehicle will be unlocked when an authorized vehicle key is detected in the unlocking
zone.
The unlocking zone is located within a radius
of approx. 5 ft/1.50 m around the vehicle.
The vehicle will be locked when the vehicle key
leaves the locking zone.
The locking zone is located within a radius of
approx. 9 ft/2 m around the vehicle.
81
Page 82
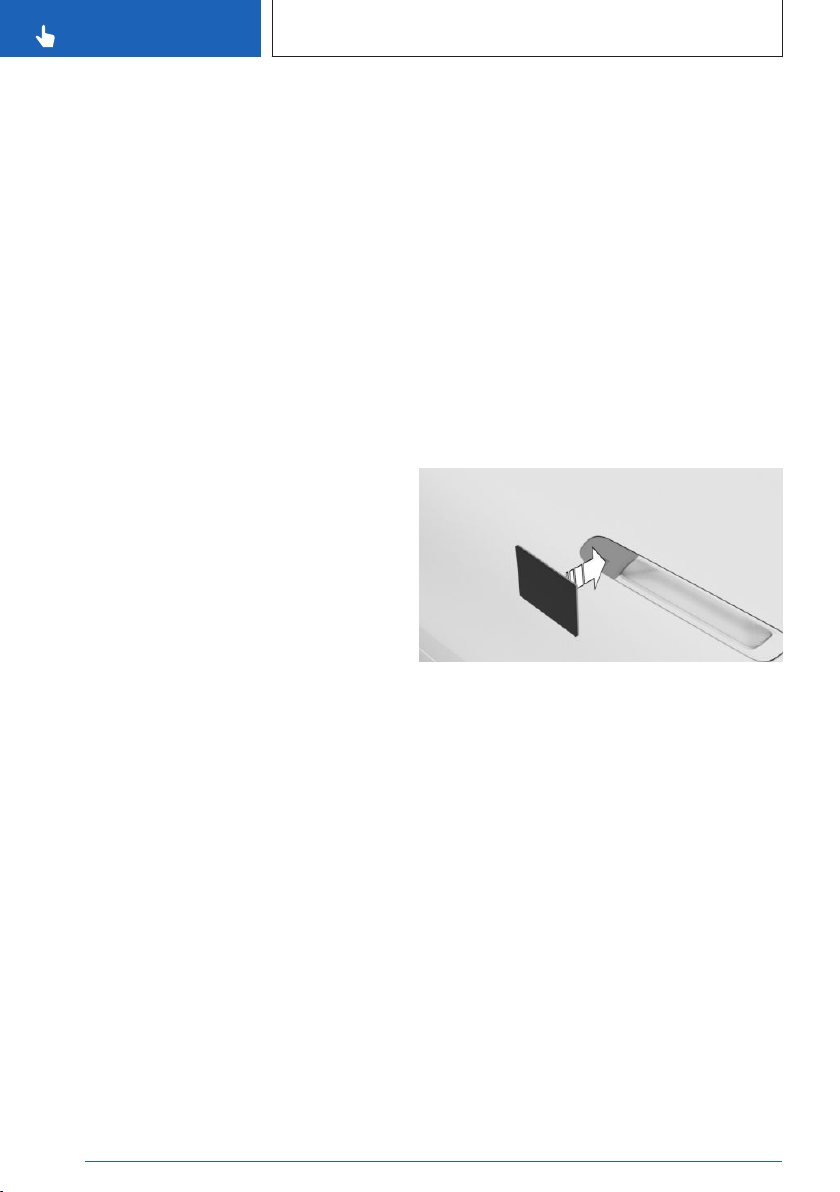
CONTROLS
OwnersManuals2.com
Opening and closing
Depending on the national-market version,
touchless unlocking and locking is also possible for compatible smartphones with a digital
key. Enable Bluetooth on your smartphone to
do so.
If the vehicle key is located in the unlocking
zone for an extended period of time without
movement, the vehicle will be locked automatically.
If someone is detected on a seat while locking
the vehicle, the following restrictions apply:
▷ The vehicle will be locked but not secured
against theft.
▷ The charging socket cover remains un-
locked.
Additional information:
BMW Digital Key, refer to page 88.
Actions during unlocking
If the settings specify that only the driver's
door and the charging socket cover will be unlocked, note the following:
The driver's door and the charging socket
cover will only be unlocked when the driver approaches the vehicle on the driver's side.
Additional information:
Settings, refer to page 93.
Functional requirements
Carry the vehicle key with you, e.g., in your
▷
pants pocket.
▷ Bluetooth must be activated on the smart-
phone for contactless unlocking and locking
using the Digital Key.
▷ Automatic unlocking and locking must be
activated in the settings.
▷ The drive-ready state must be turned off.
▷ If the vehicle has been in the idle state for
several days, contactless unlocking/locking
will only be available after the vehicle has
been driven.
Additional information:
Settings, refer to page
93.
With the Key Card
Principle
The Key Card is a chip card on which the digital key is installed. The Key Card can be used
to unlock and lock the vehicle.
Additional information:
Key Card, refer to page 87.
General information
The Key Card is available with Comfort Access.
Locking/unlocking the vehicle
Hold activated Key Card directly on the center
of the external door handle of the driver's door.
When locking the vehicle with the Key Card,
make sure that all doors and the trunk are
closed.
If the Key Card is not detected, slightly change
the position of the Key Card and repeat the
procedure.
With the BMW Digital Key
Principle
Depending on vehicle equipment and nationalmarket version, a digital key can be installed
on a compatible smartphone and used to unlock and lock the vehicle.
Additional information:
BMW Digital Key, refer to page 88.
82
Online Edition for Part no. 01405A7AFE4 - II/23
Page 83
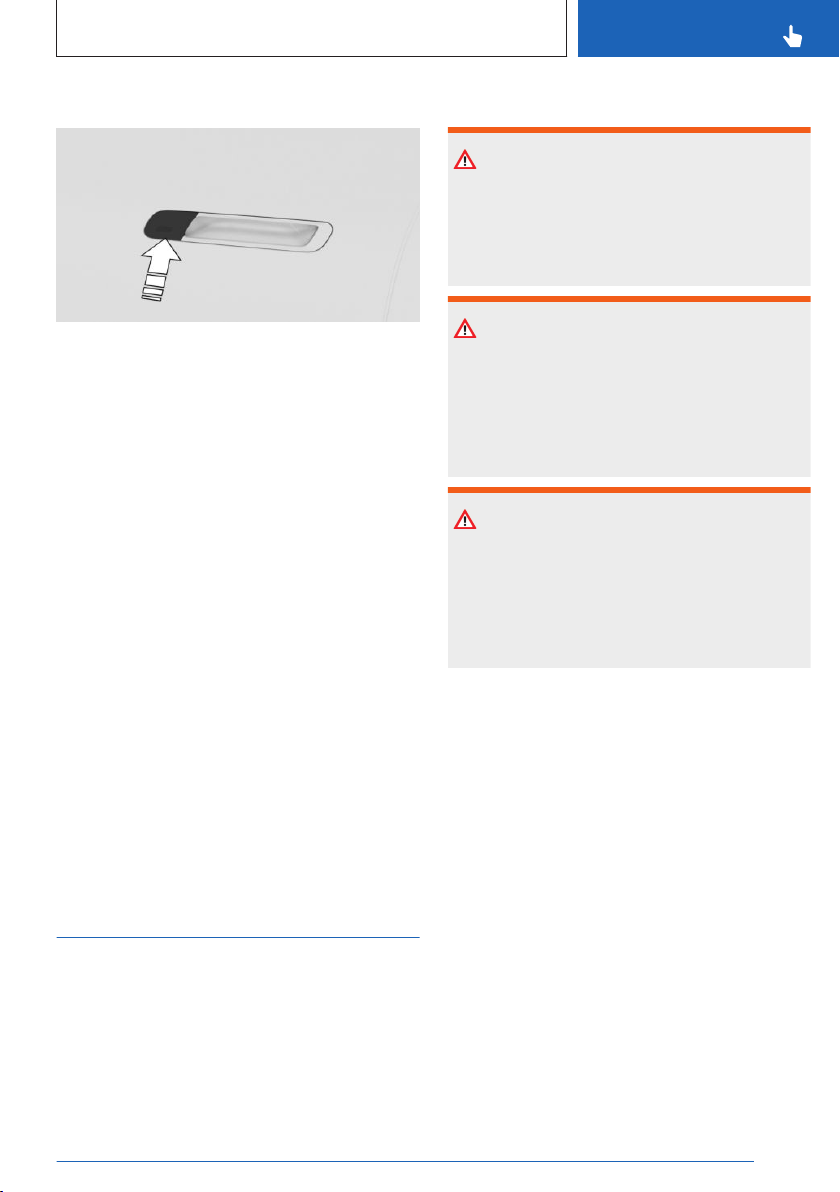
Opening and closing
OwnersManuals2.com
CONTROLS
Locking/unlocking the vehicle
Hold the near field communication antenna of
the smartphone directly and centered on the
external door handle of the driver's door. The
position of the near field communication antenna depends on the smartphone model.
When locking the vehicle with the smartphone,
make sure that all doors and the trunk are
closed.
Frequently Asked Questions
What precautions can be taken to be able to
open a vehicle, despite accidentally locking in
the vehicle key?
The app’s remote services offer the option
▷
to lock and unlock a vehicle.
This requires an active BMW ConnectedDrive contract, and the app must be installed on a smartphone.
▷ Unlocking the vehicle can be requested via
the BMW ConnectedDrive Call Center.
An active BMW ConnectedDrive contract is
required.
Access to the cargo area
General information
The cargo area will be opened to the configured opening height.
Safety information
Warning
Body parts can be jammed when operating
the tailgate. There is a risk of injury. Make
sure that the travel path of the tailgate is
clear during opening and closing.
Warning
The tailgate swings back and up when it
opens. There is a risk of injury or risk of damage to property. Make sure that the travel
path of the tailgate is clear during opening
and closing.
Warning
Sharp-edged or pointed objects can hit the
windows and heating elements while driving.
There is a risk of injury or risk of damage to
property. Cover the edges and ensure that
pointed objects do not hit the windows.
With the vehicle key
General information
To avoid locking the vehicle key in the vehicle,
do not place the vehicle key in the cargo area.
Depending on vehicle equipment and nationalmarket version, the following settings can be
changed:
Unlocking the cargo area with the vehicle
▷
key also unlocks the doors.
▷ Before unlocking the cargo area with the
vehicle key, first unlock the vehicle.
Functional requirements
Selector lever position P must be engaged to
open the cargo area with the vehicle key.
Online Edition for Part no. 01405A7AFE4 - II/23
83
Page 84
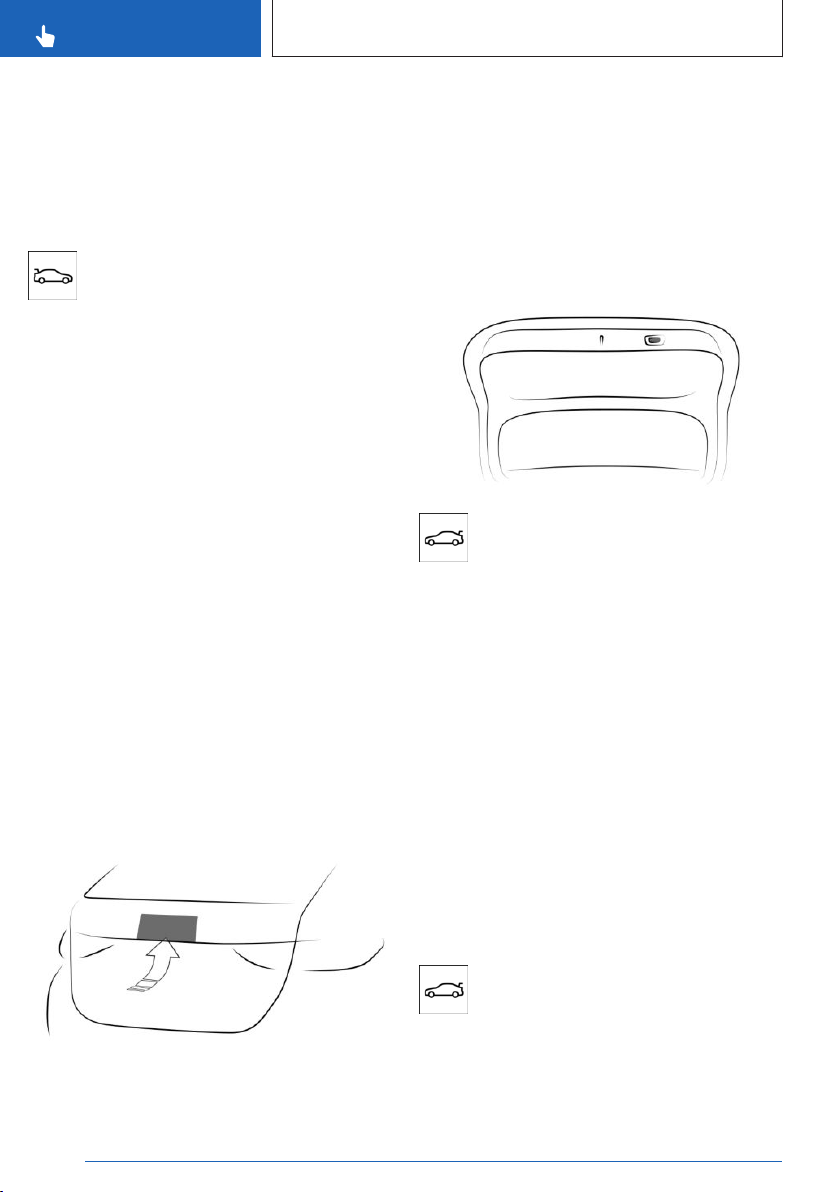
CONTROLS
OwnersManuals2.com
Opening and closing
You must enable the setting for opening with
the vehicle key.
Additional information:
Settings, refer to page 93.
Opening the trunk
Press and hold the button on the vehicle key for approx. 1 second.
On the trunk
General information
With Comfort Access, the cargo area can be
accessed without activating the vehicle key.
The key is automatically detected near the vehicle.
Depending on the national-market version,
compatible smartphones with a digital key are
also detected automatically. In this case, the
cargo area can be opened with a smartphone.
Additional information:
BMW Digital Key, refer to page 88.
Functional prerequisites
Carry the vehicle key with you, e.g., in your
▷
pants pocket.
▷ Bluetooth must be activated on the smart-
phone to detect the Digital Key.
Opening the trunk
Unlock the vehicle and then press the but-
▷
ton on the trunk.
▷ With Comfort Access: carry the vehicle key
with you and press the button on the trunk.
Locked doors are not unlocked.
Closing the cargo area
Closing the cargo area using button:
Press the button on the trunk.
Closing the cargo area without using button:
Pull the tailgate down slightly. The tailgate
closes automatically.
In the interior
Functional prerequisites
The vehicle key or digital key must be located
inside the vehicle in order to close the cargo
area using the button in the vehicle interior.
When the vehicle is locked, selector lever position P must be engaged before the trunk lid
can be opened using the button in the vehicle
interior.
84
Opening the trunk
Press the button in the driver's door.
Online Edition for Part no. 01405A7AFE4 - II/23
Page 85

Opening and closing
OwnersManuals2.com
CONTROLS
Closing the cargo area
Press the button in the driver's door.
An acoustic signal sounds before the trunk is
closed.
Interruption of the opening
procedure
The opening procedure is interrupted in the
following situations:
▷ When the vehicle starts moving.
▷ By pressing the button on the outside of
the cargo area. Pressing it again closes the
cargo area again.
▷ By pressing the button on the inside of the
cargo area. Pressing it again closes the
cargo area again.
▷ By pressing the button on the vehicle key.
Pressing the button again continues the
opening process.
▷ By pressing or pulling the button in the
driver's door. Pressing again continues the
opening procedure.
Interruption of the closing procedure
The closing procedure is interrupted in the following situations:
If the vehicle drives off with a jerky move-
▷
ment.
▷ By pressing the button on the outside of
the cargo area. Pressing it again opens the
cargo area again.
▷ By pressing the button on the inside of
the cargo area. Pressing it again opens the
cargo area again.
▷ By releasing the button in the driver's door.
Pulling again and holding continues the
closing motion.
Opening and closing the cargo area
contactlessly
Principle
Touchless opening and closing of the cargo
area is possible when carrying the vehicle key
on your person.
Two sensors detect a forward-directed foot
movement in the central rear area and the
cargo area is opened and closed.
General information
Function availability depends on vehicle equipment and national-market version.
If the vehicle key is within the sensor range, the
cargo area may open or close inadvertently if
you unintentionally move your foot or if a foot
movement is detected.
The sensor has an approximate range of
5 ft/1.50 m extending from the rear area.
If contactless opening is used for the cargo
area, the locked doors will not be unlocked.
Depending on national-market version, contactless opening of the cargo area is also possible for compatible smartphones with a Digital
Key.
Additional information:
BMW Digital Key, refer to page 88.
Safety information
Warning
Body parts can be jammed when operating
the tailgate. There is a risk of injury. Make
sure that the travel path of the tailgate is
clear during opening and closing.
Online Edition for Part no. 01405A7AFE4 - II/23
85
Page 86
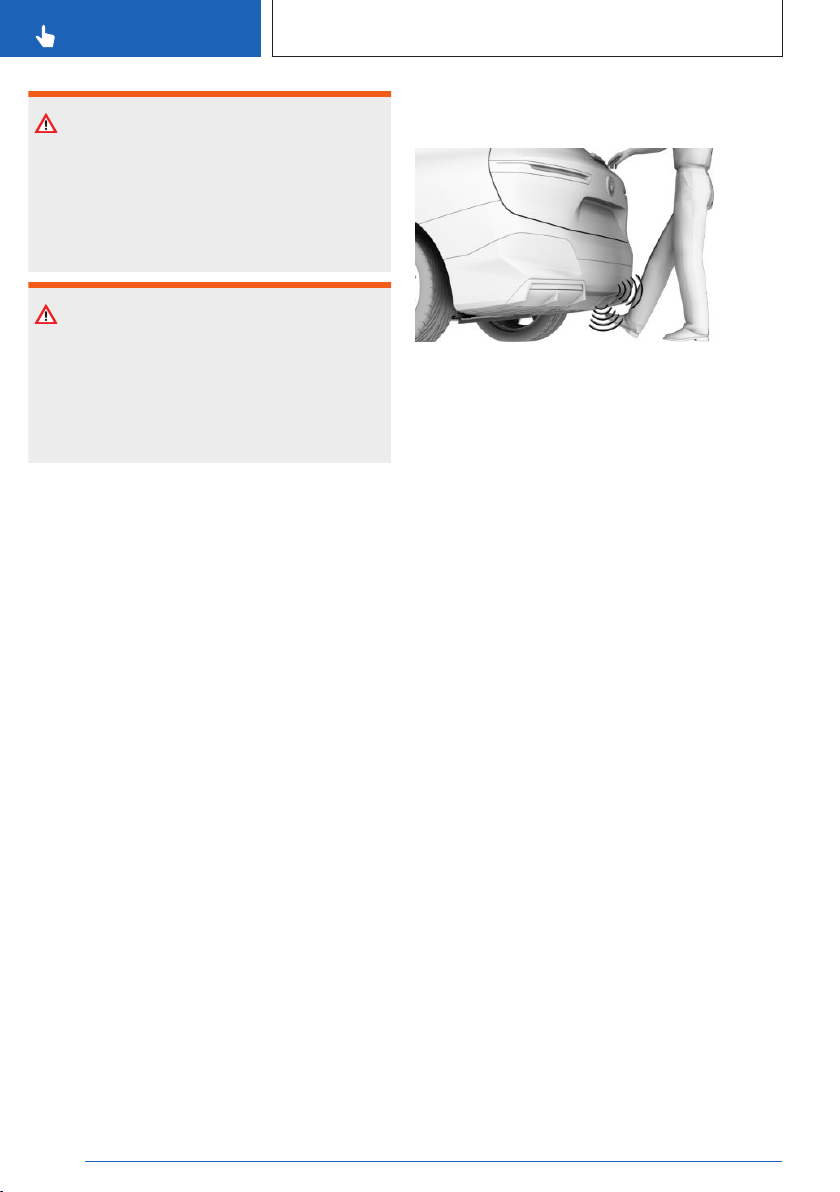
CONTROLS
OwnersManuals2.com
Warning
The tailgate swings back and up when it
opens. There is a risk of injury or risk of damage to property. Make sure that the travel
path of the tailgate is clear during opening
and closing.
Warning
Sharp-edged or pointed objects can hit the
windows and heating elements while driving.
There is a risk of injury or risk of damage to
property. Cover the edges and ensure that
pointed objects do not hit the windows.
Opening and closing
this movement, the leg must pass through
the ranges of both sensors.
Before the cargo area opens, the hazard warning system flashes.
Moving a foot again will stop the opening proccedure. The subsequent foot movement will
close the cargo area again.
Functional requirements
▷ To open the cargo area contactlessly, se-
lector lever position P must be engaged.
▷ Contactless opening and closing of the
trunk must be activated in the settings.
▷ Bluetooth must be activated on the smart-
phone to open and close the cargo area
contactlessly using the Digital Key.
Additional information:
Settings, refer to page 93.
Opening the cargo area
1.
Stand in the middle behind the vehicle at
approx. one arm's length away from the
rear of the vehicle.
2. Wave a foot under the vehicle in the driving
direction and immediately pull it back. With
Closing the cargo area
Perform the foot movement for opening the
cargo area.
The hazard warning system flashes and an
acoustic signal sounds.
Moving a foot again will stop the closing process. The subsequent foot movement will open
the cargo area again.
System limits
The detection of the foot movement may be
limited due to the following external conditions:
Ice, snow or slush on the rear of the vehicle.
▷
▷ Dirt or road salt on the rear of the vehicle.
Movement in range of the sensors may cause
unintended opening of the cargo area, for instance due to water running down when cleaning the vehicle or with heavy rainfall. To prevent such unintended opening of the cargo
area in such cases, keep the vehicle key at a
sufficient distance from the rear of the vehicle.
Malfunction
In the event of an electrical malfunction, operate the unlocked trunk manually with a slow
and smooth motion.
86
Online Edition for Part no. 01405A7AFE4 - II/23
Page 87
Opening and closing
OwnersManuals2.com
CONTROLS
Trunk emergency unlocking
Pull the handle inside the cargo area.
The trunk is unlocked.
Key Card
Principle
The Key Card allows the vehicle to be unlocked
and locked, as well as started.
General information
Key Card availability depends on vehicle equipment and national-market version.
A digital key that has already been paired with
the vehicle is installed on the Key Card. The
digital key must be activated via iDrive.
Before leaving the vehicle, deactivate the Key
Card or take the Key Card with you because
the active Key Card can be used to start the
vehicle. Always take the vehicle key with you to
a service appointment.
Safety information
NOTICE
If the Key Card and a mobile device are in the
wireless charging tray at the same time, the
Key Card could become damaged. There is a
risk of damage to property. Do not place the
Key Card in the wireless charging tray at the
same time as a mobile device.
Activating/deactivating Key Card in
the vehicle
General information
When the BMW Digital Key is activated for the
vehicle, a digital key can be used instead of the
vehicle key.
A deactivated Key Card remains in the list of
paired digital keys.
Functional requirement
A vehicle key must be located in the vehicle to
activate and deactivate the Key Card.
Activating Key Card
Place Key Card in the center of the smart-
1.
phone tray.
2. Follow instructions on the control display.
Deactivating Key Card
1.
Apps menu
2. "Vehicle apps"
3. "Doors and windows"
4. "Digital Key"
5. "Key Card"
6. "Deactivate Key Card"
A deactivated Key Card remains in the list of
paired digital keys.
Unlocking and locking the vehicle
The vehicle can be unlocked and locked with
the activated Key Card.
Online Edition for Part no. 01405A7AFE4 - II/23
87
Page 88
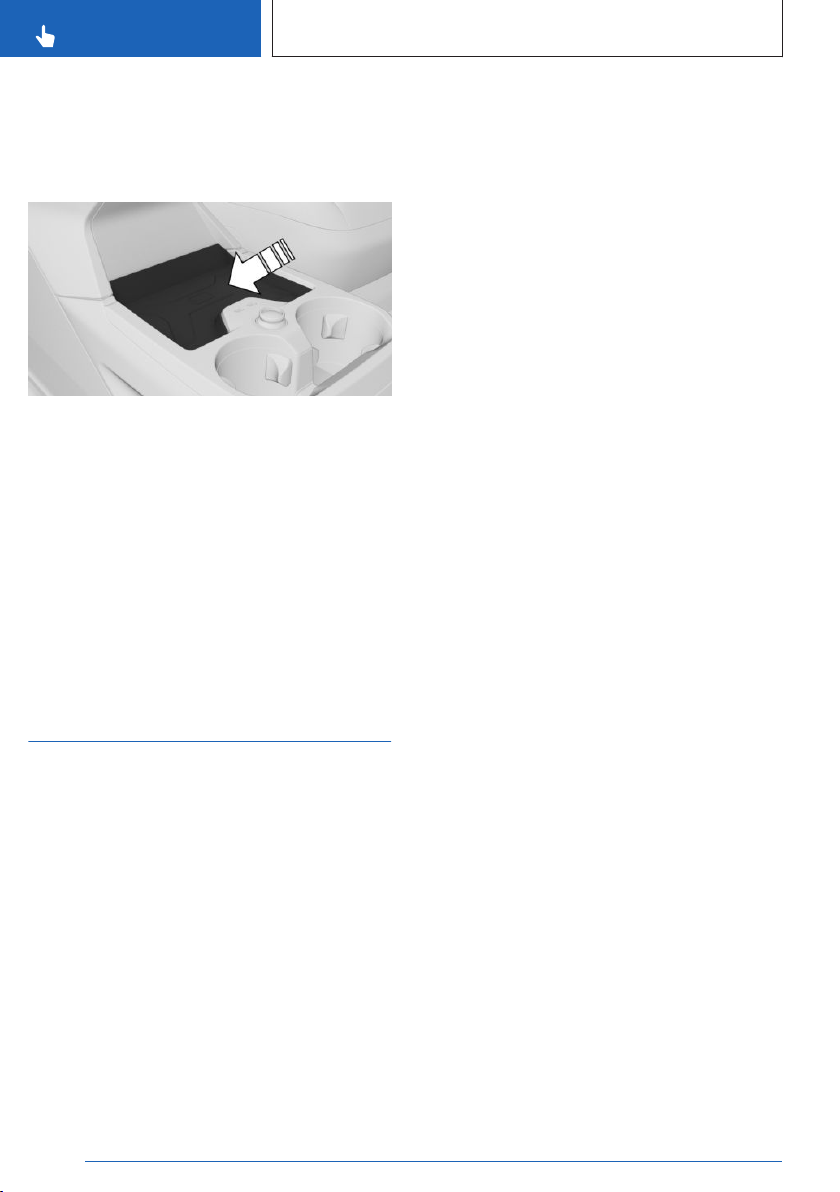
CONTROLS
OwnersManuals2.com
Opening and closing
Additional information:
Access to the vehicle interior, refer to page 79.
Turning on the drive-ready state
1. Place activated Key Card in the center of
the smartphone tray.
2. Press the Start/Stop button.
After drive-ready state is switched on, the Key
Card can be removed from the tray.
Malfunction
The detection of the Key Card by the vehicle
may be disrupted by objects between the sensors and the Key Card, such as a wallet or a
smartphone cover.
BMW Digital Key
Principle
BMW Digital Key allows the vehicle to be unlocked and locked, as well as started, with a
compatible smartphone.
General information
BMW Digital Key availability and functionality
depend on vehicle equipment and nationalmarket version.
BMW Digital Key can be used with a compatible smartphone or other compatible mobile
devices.
To unlock and start a vehicle with a compatible
smartphone, this function must be offered by
the smartphone manufacturer. The My BMW
app can be used to check if the smartphone
and vehicle are compatible and which functions are supported.
A BMW ID or a driver profile with individual
settings can be assigned to a digital key.
When using a smartphone as a digital key, it is
helpful to carry the deactivated Key Card in the
vehicle. In situations where the vehicle is to be
given to another person, they can be given the
Key Card instead of the smartphone. To do so,
the Key Card must be activated via iDrive.
Always take the vehicle key with you to a service appointment.
Additional information:
▷ BMW ID/driver profiles, refer to page 69.
▷ Key Card, refer to page 87.
▷ www.bmw.com/digitalkey
Functional requirements
▷ The smartphone is compatible with BMW
Digital Key
▷ The vehicle is linked with the Connected-
Drive account of the vehicle owner.
▷ The rechargeable battery of the smart-
phone has a sufficient charge. The necessary minimum charge of the rechargeable
battery depends on the smartphone.
Enabling the main digital key
Vehicle owner's smartphone is enabled as a
main digital key in the vehicle. The vehicle
owner must prove his authorization for the vehicle for this purpose.
You can begin the authorization process using the My BMW app or using your activation
code in the corresponding smartphone function, e.g., the Wallet app. Both vehicle keys
must be in the vehicle during activation.
Follow the activation instructions in the Digital
Key menu in the app or on the control display.
88
Online Edition for Part no. 01405A7AFE4 - II/23
Page 89

Opening and closing
OwnersManuals2.com
CONTROLS
Sharing digital keys
General information
Digital key allows the sharing of digital keys
with other people. This option is available via
the smartphone that is enabled as main digital
key. This function must be supported by the
smartphone.
Forwarding authorization
To share the digital key, select the corresponding function on the smartphone, for instance in
the Wallet app.
As soon as a digital key is shared with another
person, the person will receive an invitation.
When the invitation is accepted, the digital key
on the recipient's smartphone will be activated.
Limiting the range of functions
Certain functions of the digital key can be limited before handing it over. For instance, if the
Digital Key is passed on to a novice driver, the
switch-off for driving stability control systems
can be disabled and the engine power can
be reduced. For more information, refer to the
ConnectedDrive Portal and My BMW app.
Authentication
Depending on the recipient’s smartphone
model, an authentication may be required for
security and safety reasons.
An authorized vehicle key, the main digital key
or another method may be used for authentication. Follow the corresponding instructions
on the smartphone or the control display.
Deleting digital keys
General information
Deleted digital keys will be removed from the
list of enabled digital keys.
Deleted digital keys cannot be restored.
Deleting the main digital key
The main digital key can be deleted from the
smartphone or via iDrive.
The deletion of the main digital key is completed immediately.
Deleting a shared key
Shared keys can be deleted using the smartphone with the master Digital Key, using the
smartphone with the shared key to be deleted,
or via iDrive.
The deletion via the smartphone using the
main digital key will not be performed until the
vehicle is used with a key other than the key to
be deleted.
If the smartphone associated with a shared
key or iDrive is used to delete a shared key, it
will be deleted immediately.
Deletion via iDrive
To delete a digital key via iDrive, there must be
an authorized vehicle key in the vehicle, or the
master Digital Key must be in the smartphone
tray.
1.
Apps menu
2. "Vehicle apps"
3. "Doors and windows"
4. "Digital Key"
5. If necessary, select the digital key.
6. Delete the Digital Key.
Resetting the function
To reset the BMW Digital Key function, an authorized vehicle key must be located in the vehicle.
When resetting the BMW Digital Key function,
all digital keys including the main digital key
will be deleted. The Key Card digital key is not
deleted.
After the reset, the vehicle can no longer be
unlocked, locked or started with a digital key.
Online Edition for Part no. 01405A7AFE4 - II/23
89
Page 90
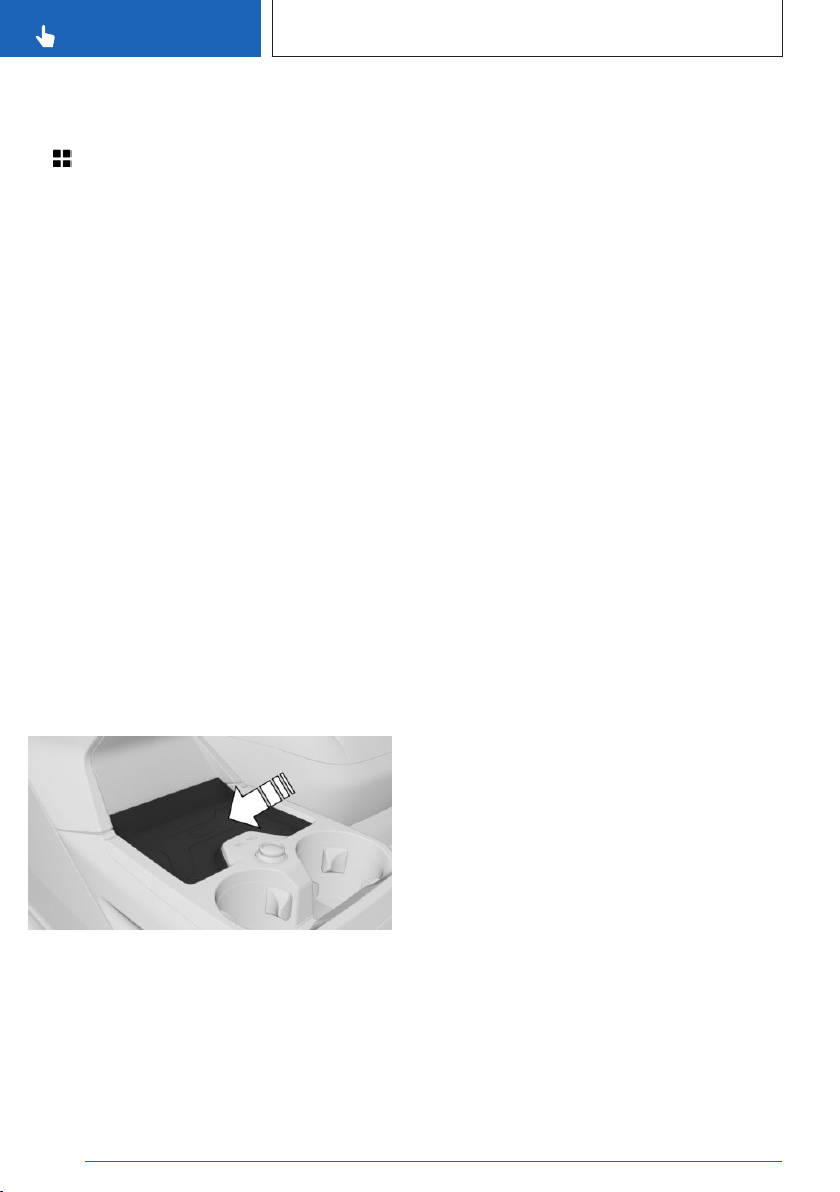
CONTROLS
OwnersManuals2.com
Opening and closing
The main digital key must be enabled again to
be able to use BMW Digital Key again.
1. Apps menu
2. "Vehicle apps"
3. "Doors and windows"
4. "Digital Key"
5. "Reset function"
Unlocking and locking the vehicle
The vehicle can be unlocked and locked as follows:
▷ Via the external door handle.
▷ With Comfort Access: depending on the na-
tional-market version, the vehicle can be
locked and unlocked with no-touch activation.
Bluetooth must be activated on the smartphone for contactless unlocking and locking
using the Digital Key.
Additional information:
Access to the vehicle interior, refer to page 79.
Turning on the drive-ready state
Using the smartphone tray
In the interior
With Comfort Access, it is sufficient, depending
on the country, for the smartphone with Bluetooth activated to be located inside the vehicle. Press the Start/Stop button to turn on the
drive-ready state.
Sale of the smartphone
Delete all digital keys on the smartphone prior
to selling the smartphone. This ensures that
the smartphone can no longer be used for the
vehicle.
Changing smartphones
To use a new smartphone as a master Digital
Key, activate the new smartphone according to
the instructions for the master Digital Key. The
previous master key is deleted when the new
smartphone is activated.
Sale of the vehicle
Prior to selling a vehicle, reset the Digital
Key function or remove the vehicle from the
ConnectedDrive account of the current vehicle
owner.
When the vehicle is removed from the ConnectedDrive account, all digital keys for the vehicle will be deleted. The Key Card digital key is
not deleted.
1.
Place smartphone in the center of the
smartphone tray.
Ensure that the display is facing up.
2. Press the Start/Stop button to turn on the
drive-ready state.
90
Online Edition for Part no. 01405A7AFE4 - II/23
System limits
The interior motion sensor and tilt alarm sensor of the alarm system cannot be switched off
with a digital key.
Additional information:
Alarm system, refer to page 94.
Malfunction
Digital key recognition by the vehicle may malfunction under the following circumstances:
Page 91
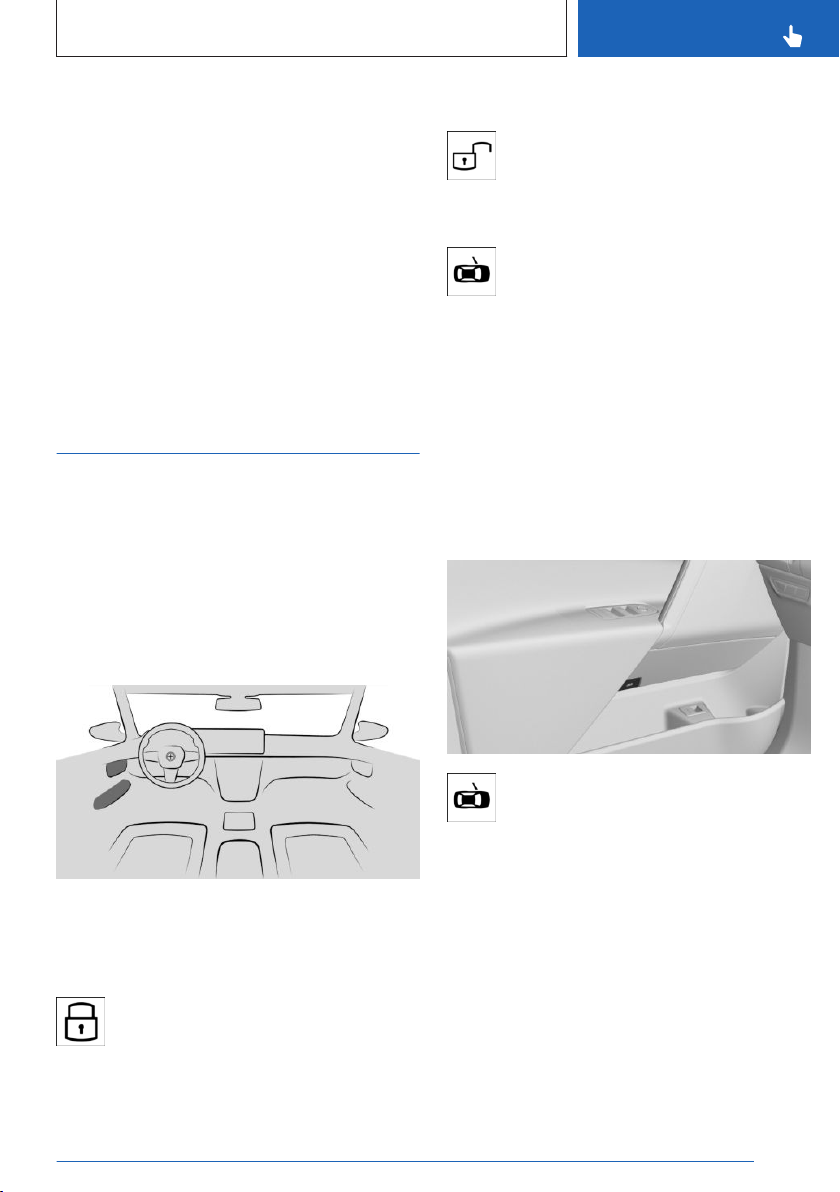
Opening and closing
OwnersManuals2.com
CONTROLS
▷ The smartphone is shielded from the sen-
sors in the vehicle by a smartphone cover
that is not suitable.
▷ Objects such as a chip card or the Key Card
are located between the smartphone and
the smartphone cover.
▷ Fault of the connection from transmission
towers or other equipment with high transmitting power.
▷ Shielding of the smartphone due to build-
ings or metal objects.
Buttons for the central locking system
General information
The vehicle is automatically locked when driving off.
In the event of a severe accident, the vehicle
is automatically unlocked. The hazard warning
system and interior lights are illuminated.
Overview
Unlocking the vehicle
Press the button.
Opening the door
Press the button.
The door is unlocked and slightly open.
Push the door outward.
Malfunction
General information
In case of a power failure, the driver's door can
be unlocked manually.
Overview
The central locking buttons are located on the
front door.
Locking the vehicle
Press the button with the front doors
closed.
The vehicle is not secured against theft when
locking.
Online Edition for Part no. 01405A7AFE4 - II/23
Lever in the driver's door.
91
Page 92

CONTROLS
OwnersManuals2.com
Opening and closing
Unlocking the driver’s door manually
Pull the lever in the driver's door to unlock the
driver's door.
Soft-close automatic function
Principle
The soft-close automatic function reduces effort and noise when closing vehicle doors.
The door can be pushed into the door lock
without effort and the door will close automatically.
Safety information
Warning
Body parts can be jammed while operating
the doors. There is a risk of injury. Make sure
that the area of movement of the doors is
clear during opening and closing.
Closing
To close the doors, push lightly.
The closing process is automatic.
Valet parking mode
Principle
In the valet parking mode, the control display is
disabled.
E.g., this mode can be used when the vehicle
is handed over for valet parking.
General information
Depending on the national-market version, the
valet parking mode may not be available.
Valet Parking mode has the following restrictions:
▷ Vehicle settings cannot be changed via
iDrive.
▷ Settings stored to a BMW ID or guest pro-
file cannot be changed.
▷ Personal data cannot be displayed.
▷ The volume of the audio system is limited.
▷ The integrated Universal Remote Control is
deactivated.
▷ The availability of certain settings of the
driving modes is limited.
Additional information:
BMW ID/driver profiles, refer to page 69.
Functional requirement
The driver has registered in the vehicle with a
BMW ID.
Activating the valet parking mode
1.
Apps menu
2. "Vehicle apps"
3. "System settings"
4. "Valet parking mode"
5. If necessary, "PIN"
If the active BMW ID does not have an assigned PIN, this PIN must be set now. The
PIN is needed to deactivate the valet parking mode.
92
Online Edition for Part no. 01405A7AFE4 - II/23
Page 93

Opening and closing
OwnersManuals2.com
CONTROLS
6. If necessary, enter the PIN.
7. "Activate valet parking mode"
Deactivating valet parking mode
1. Select the desired BMW ID on the lock
screen.
2.
▷ Enter the assigned PIN for the BMW ID.
If you have forgotten the PIN: enter the
access data for the BMW ID.
▷ If the selected BMW ID does not have
an assigned PIN: enter the access data
for the BMW ID.
Settings
General information
Depending on the equipment and nationalmarket version, various settings for opening
and closing are possible.
Unlocking and locking
Doors
1.
Apps menu
2. "Vehicle apps"
3. "Doors and windows"
4. "Lock/unlock"
5. "Unlock"
6. Select the desired setting:
▷ "Driver's door only"
Only the driver's door and the charging socket cover are unlocked. Pressing
again unlocks the entire vehicle.
▷ "All doors"
The entire vehicle is unlocked.
Touchless unlocking/locking
1.
Apps menu
2. "Vehicle apps"
3. "Doors and windows"
4. "Comfort access"
5. Select the desired setting.
Automatic unlocking
1. Apps menu
2. "Vehicle apps"
3. "Doors and windows"
4. "Lock/unlock"
5. Select the desired setting:
▷ "Unlock doors at end of trip"
▷ "Unlock doors when in P"
After drive-ready state is switched off, the
locked vehicle is unlocked automatically by
pressing the start/stop button or engaging selector lever position P.
Automatic locking
Apps menu
1.
2. "Vehicle apps"
3. "Doors and windows"
4. "Lock/unlock"
5. "Lock after a short time"
The vehicle locks automatically after a short
period of time if no door is opened after unlocking.
Confirmation signals from the vehicle
1.
Apps menu
2. "Vehicle apps"
3. "Doors and windows"
4. "Lock/unlock"
5. Select the desired setting:
▷ "Flash when unlocking"
Unlocking is confirmed by two flashes.
▷ "Flash when locking"
Locking is confirmed by one flash.
▷ With alarm system:
"Sound on lock/unlock"
Online Edition for Part no. 01405A7AFE4 - II/23
93
Page 94

CONTROLS
OwnersManuals2.com
Opening and closing
Unlocking is confirmed with two sound
signals, locking is confirmed with one
sound signal.
Folding mirrors in automatically
1. Apps menu
2. "Vehicle apps"
3. "Doors and windows"
4. "Lock/unlock"
5. "Fold mirrors on lock/unlock"
Cargo area
Cargo area and doors
Apps menu
1.
2. "Vehicle apps"
3. "Doors and windows"
4. "Tailgate"
5. Select the desired setting:
▷ "Tailgate"
Depending on the equipment, the cargo
area will be unlocked or opened.
▷ "Tailgate and door(s)"
Depending on the equipment, the trunk
will be unlocked or opened and the
doors are unlocked.
▷ "Tailgate will only open if vehicle is
already unlocked"
The vehicle must be unlocked before
the cargo area can be operated with the
vehicle key.
▷ "Lock tailgate button"
Operating the cargo area with the vehicle key is disabled.
Adjusting the opening height
You can set how far the tailgate can be
opened.
When adjusting the opening height, make sure
the clearance above the tailgate is at least
4 in/10 cm.
1. Apps menu
2. "Vehicle apps"
3. "Doors and windows"
4. "Tailgate"
5. "Opening height"
6. Monitor the tailgate and set the desired
opening height.
Opening/closing the cargo area
contactlessly
Apps menu
1.
2. "Vehicle apps"
3. "Doors and windows"
4. "Tailgate"
5. Select the desired setting.
Alarm system
Principle
The alarm system issues a visual and acoustic
signal when someone attempts to open the
locked vehicle incorrectly.
General information
When the vehicle is locked, the vehicle alarm
system reacts to the following changes:
Opening a door, the hood, or the cargo
▷
area.
▷ Movements in the interior.
▷ Changes in the vehicle inclination, such
as during attempts at stealing a wheel or
when towing the vehicle.
▷ Disconnected battery voltage.
94
Online Edition for Part no. 01405A7AFE4 - II/23
Page 95
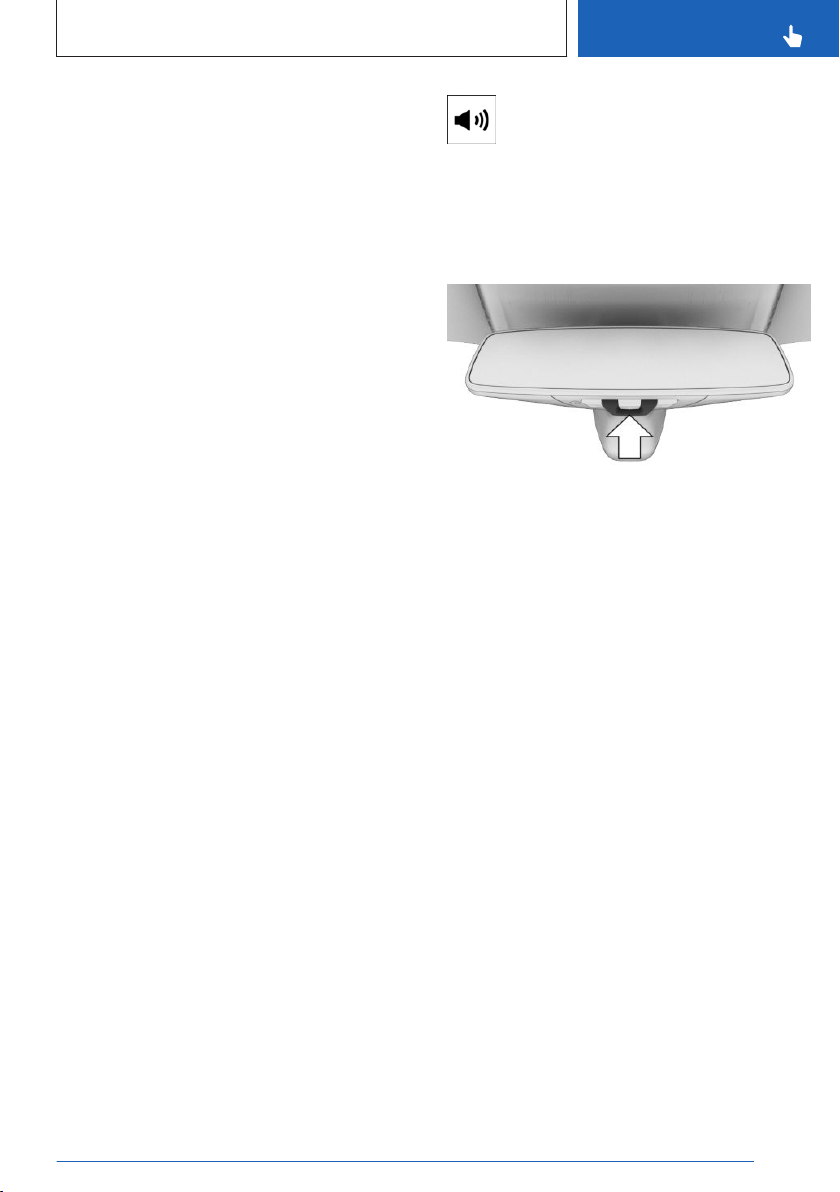
Opening and closing
OwnersManuals2.com
CONTROLS
▷ Improper use of the socket for OBD on-
board diagnostics.
▷ Locking the vehicle while a device is con-
nected to the diagnostic socket.
The alarm system signals these changes visually and acoustically:
▷ Acoustic alarm:
Depending on local regulations, the acoustic alarm may be suppressed.
▷ Optical alarm:
By flashing of the hazard warning system
and headlights, where required.
Do not modify the system to ensure function of
the alarm system.
Turning the alarm system on/off
The alarm system is activated or deactivated
as soon as the vehicle is locked or unlocked.
If the vehicle is locked remotely using the My
BMW app, the alarm system is not switched
on.
Opening the doors with the alarm
system switched on
The alarm system is triggered when a door
is opened if the door was unlocked using the
integrated key in the door lock.
Opening the cargo area with the
alarm system switched on
The cargo area can be opened even when the
alarm system is switched on.
After closing the cargo area, the cargo area will
be locked and monitored again. The hazard
warning system flashes once during closing.
Panic mode
You can trigger the alarm system if you find
yourself in a dangerous situation.
Press the button on the vehicle key
▷
and hold for at least 3 seconds.
▷ Briefly press the button on the vehi-
cle key three times in succession.
To switch off the alarm: press any button.
Indicator light on the interior mirror
▷ The indicator light flashes briefly every
2 seconds:
The alarm system is switched on.
▷ The indicator light flashes for approx.
10 seconds, then flashes briefly every
2 seconds:
Interior motion sensor and tilt alarm sensor
are not active, as doors, hood, or tailgate
are not correctly closed. Correctly closed
access points are secured.
When the remaining open access points
are closed, the interior motion sensor and
tilt alarm sensor will be turned on.
▷ The indicator light flashes even though all
access points have been closed:
Alarm system error.
▷ The indicator light goes out after unlocking:
The vehicle has not been tampered with.
▷ The indicator light flashes after unlocking
until drive-ready state is switched on, but
no longer than approx. 5 minutes:
The alarm has been triggered.
Tilt alarm sensor
The inclination of the vehicle is monitored.
Online Edition for Part no. 01405A7AFE4 - II/23
95
Page 96
CONTROLS
OwnersManuals2.com
Opening and closing
The alarm system responds in situations such
as attempts to steal a wheel or when the vehicle is towed.
Interior motion sensor
The vehicle interior is monitored.
The alarm system responds when movement
is detected in the vehicle interior.
The windows must be closed for the system to
function properly.
Avoiding unintentional alarms
General information
The tilt alarm sensor and interior motion sensor can trigger an alarm, although no unauthorized action occurred.
Possible situations for an unwanted alarm:
▷ In car washes.
▷ In duplex garages.
▷ During transport on trains carrying vehicles,
at sea or on a trailer.
▷ With animals in the vehicle.
The tilt alarm sensor and the interior motion
sensor can be switched off in such situations.
Switching off the tilt alarm sensor and
interior motion sensor
▷
▷ After turning off the standby state, an
The tilt alarm sensor and interior motion sensor are switched off until the vehicle is locked
again.
Press the button on the vehicle key
within 30 seconds as soon as the
vehicle is locked.
The indicator light illuminates for approx.
2 seconds and then continues to flash.
option to turn off the interior motion sensor
and the tilt alarm sensor will be displayed
on the control display.
Ending the alarm
Unlock the vehicle.
If the vehicle is unlocked with the integrated
key, the drive-ready state must subsequently
be turned on via the emergency detection of
the vehicle key.
Window
General information
When a window is frequently opened to the
same position, this task can be performed by
the BMW Intelligent Personal Assistant. This is
useful if you frequently use the same parking
garage, for example.
Additional information:
BMW Intelligent Personal Assistant, refer to
page 55.
Safety information
Warning
When operating the windows, body parts and
objects can be jammed. There is a risk of injury or risk of damage to property. Make sure
that the travel path of the windows is clear
during opening and closing.
With the vehicle key
Opening windows
Press and hold the button on the vehicle key after unlocking.
The windows open for as long as the button
on the vehicle key is pressed.
96
Online Edition for Part no. 01405A7AFE4 - II/23
Page 97
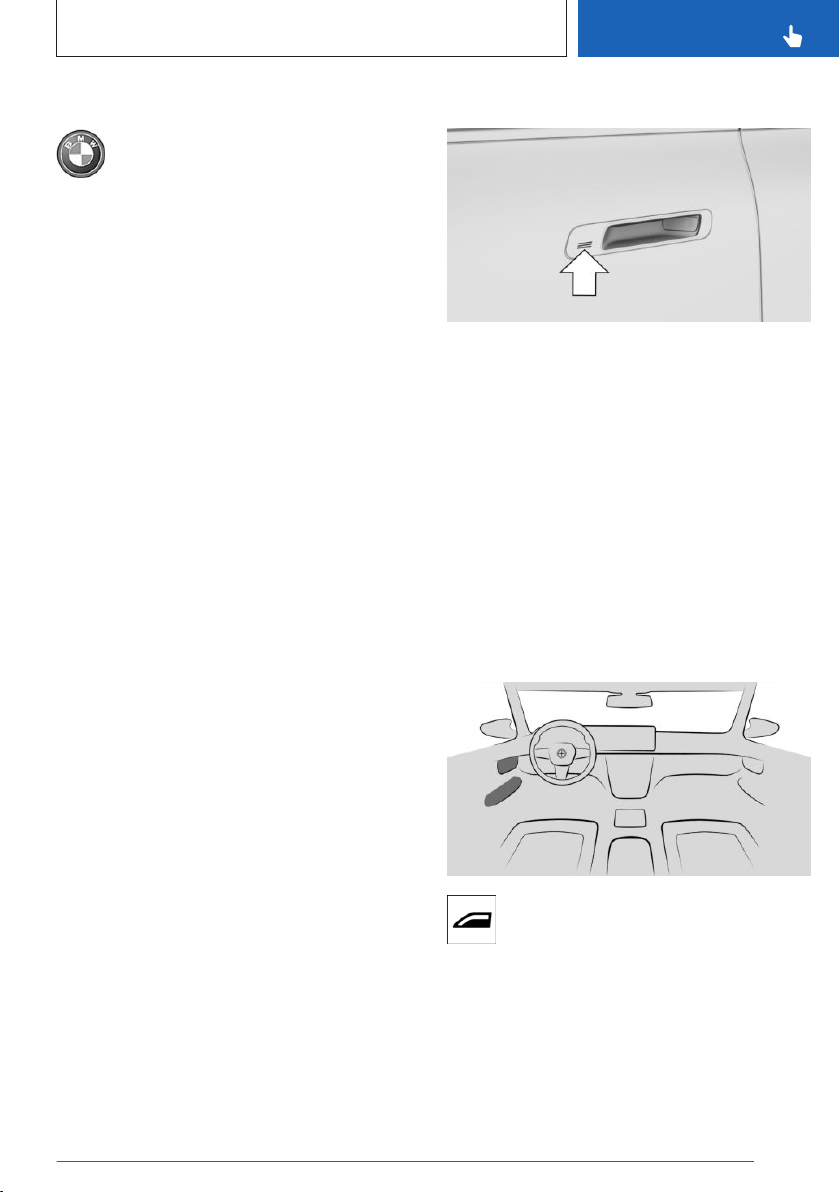
Opening and closing
OwnersManuals2.com
CONTROLS
Closing the windows
With Comfort Access: press and hold
the button on the vehicle key after locking.
The windows close for as long as the button
on the vehicle key is pressed.
Depending on the vehicle equipment, exterior
mirrors are folded in unless they were folded
in while locking. The exterior mirrors are not
folded in when the hazard warning flashers are
switched on.
On the external door handle
Principle
The windows can be closed using the external
door handle without operating the vehicle key.
The vehicle key is automatically detected near
the vehicle.
General information
The function is available with Comfort Access.
Depending on the national-market version, the
windows can also be closed at the external
door handle with compatible smartphones with
digital key.
Additional information:
BMW Digital Key, refer to page 88.
Closing the windows
Touch the grooved surface on the external
door handle of a closed front door with your
finger and hold it there without grasping the
recessed grip.
In addition to locking, the windows also closed.
Depending on the vehicle equipment, exterior
mirrors are folded in unless they were folded
in while locking. The exterior mirrors are not
folded in when the hazard warning flashers are
switched on.
In the interior
Overview
Functional prerequisites
Carry the vehicle key with you, for instance
▷
in your pants pocket.
▷ Bluetooth must be activated on the smart-
phone to close the window(s) using the digital key.
Online Edition for Part no. 01405A7AFE4 - II/23
Power windows
Functional requirements
Standby state is switched on.
▷
▷ Drive-ready state is switched on.
The vehicle key or a digital key must be inside
of the vehicle.
97
Page 98
CONTROLS
OwnersManuals2.com
Opening and closing
Opening windows
▷ Press the switch to the resistance
point.
The window opens while the switch
is being held.
▷ Press the switch beyond the resist-
ance point.
The window opens automatically.
Pressing the switch again stops the motion.
Closing the windows
▷ Pull the switch to the resistance
point.
The window closes while the switch
is being held.
▷ Pull the switch beyond the resist-
ance point.
The window closes automatically.
Pulling again stops the motion.
Jam protection system
Principle
The jam protection prevents objects or body
parts becoming jammed between the door
frame and window while a window is being
closed.
General information
If resistance or blockage is detected while a
window is being closed, the closing will be interrupted.
Safety information
Warning
Accessories on the windows such as antennas can impact jam protection. There is a
risk of injury. Do not install accessories in the
area of movement of the windows.
Closing without the jam protection
system
In case of danger from the outside or if icing
might prevent normal closing, proceed as follows:
1. Pull the switch past the resistance
point and hold it there.
The window closes with limited jam protection. If the closing force exceeds a specific
threshold, closing is interrupted.
2. Pull the switch past the resistance
point again within approx. 4 seconds and
hold it there.
The window closes without jam protection.
Safety switch
Principle
With the safety switch, it is possible to disable
particular functions in the rear. The locking of
functions is useful, for instance, when children
or animals are carried in the rear.
General information
The following functions can be disabled by
pressing the safety switch:
Opening and closing of the rear windows
▷
using the switches in the rear.
▷ Opening of rear doors by passengers in the
rear.
The rear doors can only be opened from
the outside.
98
Online Edition for Part no. 01405A7AFE4 - II/23
Page 99
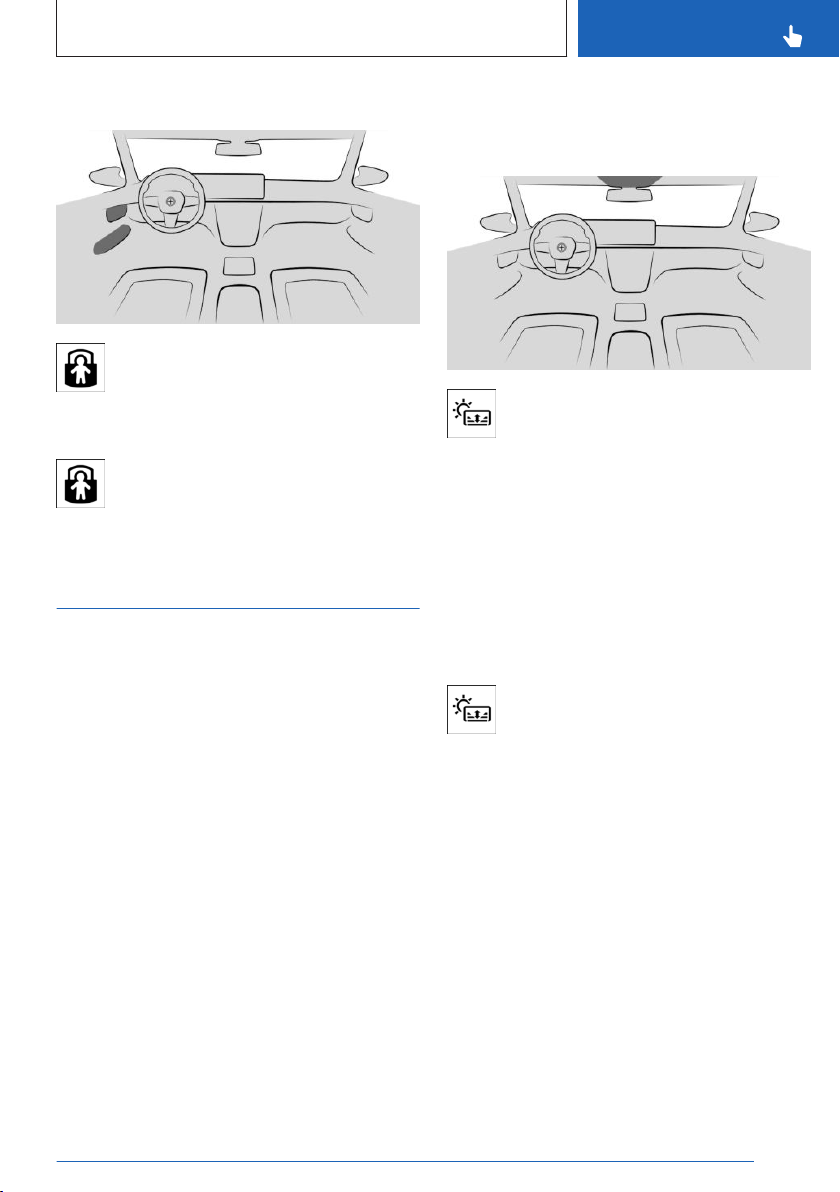
Opening and closing
OwnersManuals2.com
CONTROLS
Overview
Safety switch
Turning the safety functions on/off
Press the button.
The LED illuminates if the safety function is switched on.
Glass sunroof
Principle
The glass sunroof can be set either transparent or opaque for sun protection and screen.
Overview
Button in the vehicle
Glass sunroof
Functional requirements
The glass sunroof can be operated under the
following conditions.
▷ Standby state is switched on.
▷ Drive-ready state is switched on.
Setting the glass sunroof opaque/
transparent
Press the button.
General information
The glass sunroof is automatically set opaque
when the vehicle with a transparent glass sunroof is exited.
If the vehicle is unlocked within approx. 24
hours, the glass sunroof will automatically
switch to the transparent state.
Online Edition for Part no. 01405A7AFE4 - II/23
The opaque glass sunroof is set transpar-
▷
ent.
▷ The transparent glass sunroof is set opa-
que.
Functional limitations
The degree of transparency may vary at extreme temperatures.
99
Page 100
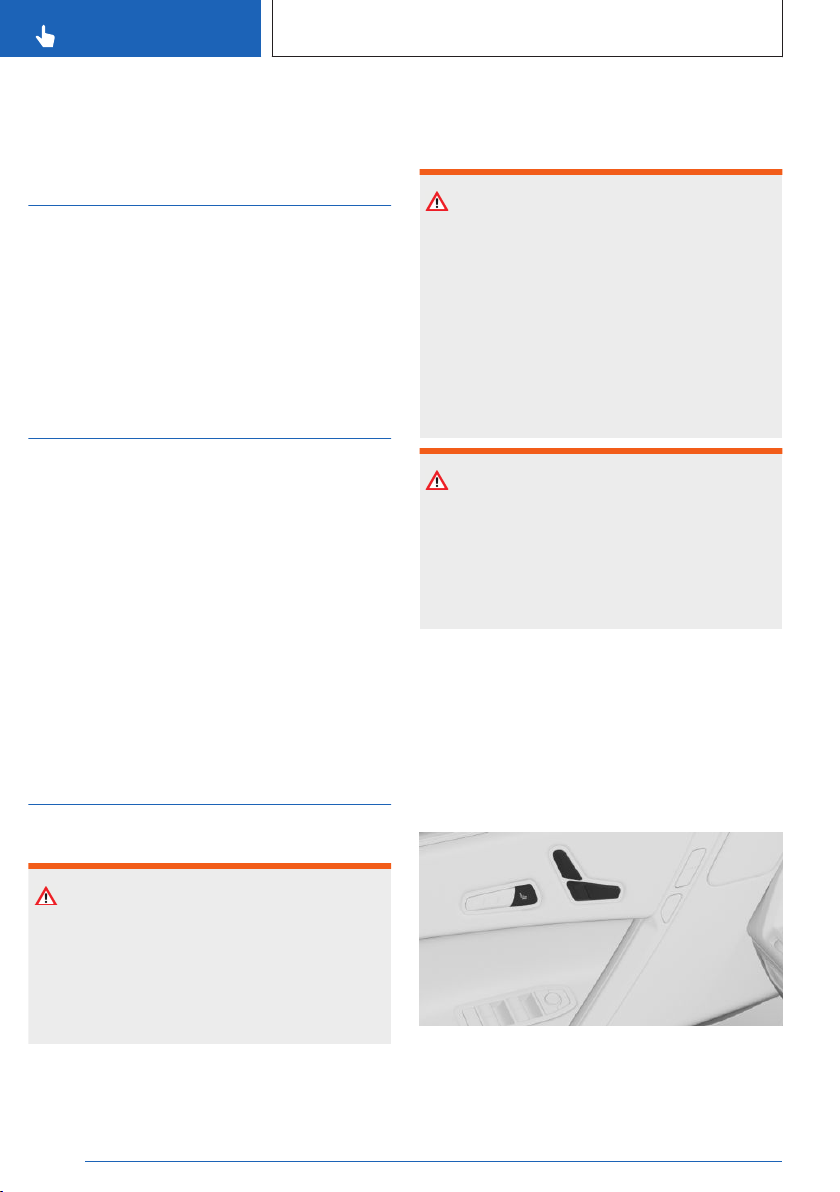
CONTROLS
OwnersManuals2.com
Seats, mirrors and steering wheel
Seats, mirrors and steering wheel
Vehicle features and options
This chapter describes model-specific equipment, systems, and functions that are currently
available, or may become available in the future, even if they are not present in the vehicle.
Additional information:
Vehicle equipment, refer to page 8.
Sitting safely
An ideal seat position that meets the needs of
the occupants can make a vital contribution to
relaxed, fatigue-free driving.
In the event of an accident, the correct seat
position plays an important role. Follow the information in the following chapters.
Additional information:
▷ Seats, refer to page 100.
▷ Seat belts, refer to page 103.
▷ Head restraints, refer to page 105.
▷ Airbags, refer to page 166.
Seats
Warning
With a backrest inclined too far to the rear,
the protective effect of the seat belt can no
longer be ensured. There is a risk of sliding
under the seat belt in an accident. There is a
risk of injury or danger to life. Adjust the seat
prior to starting the trip. Adjust the backrest
so that it is in the most upright position as
possible and do not adjust again while driving.
Warning
There is a danger of jamming when moving
the seats. There is a risk of injury or risk
of damage to property. Make sure that the
travel path of the seat is clear prior to any
adjustment.
Adjusting seats
General information
The current seat position can be stored using
the memory function.
Overview
Safety information
Warning
Seat setting while driving can lead to unexpected movements of the seat. Vehicle control could be lost. There is a risk of accident.
Only adjust the seat on the driver's side when
the vehicle is stationary.
100
Online Edition for Part no. 01405A7AFE4 - II/23
The switches for the seat settings are located
at the front doors.
 Loading...